1
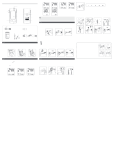
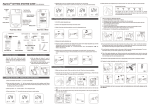
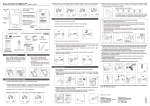
GE100 GETTING STARTED GUIDE (For self-testing and professional use)
3b
Sample Size Example
1.0µL
1.5µL
2.0µL
3.0µL
4.0µL
TEST STRIP PORT
GE100
UP BUTTON
DOWN BUTTON
5) Touch and hold the drop to the edge of the sample port until you hear a " beep " and the view window is
filled with blood. If the view window is not completely filled with blood the test will not start. Discard the test
strip and repeat the test with a new test strip.
6) The countdown mode will begin on the display window. After 5 seconds, your test result will appear. For
more information about your test results, please see your User’s Manual.
BATTERY COVER
DISPLAY WINDOW
MODEL NUMBER
NOTE
- In order to ensure proper operation, do not to use this meter close to sources of strong
electromagnetic radiation.
- Keep meter free of dust and liquids including water.
USB Port
METER SERIAL
NUMBER
(For data downloading using
authorized GE software only.
Do not perform a blood
glucose test when USB cable
is connected.)
MAIN BUTTON
3
Back View of Meter
Front View of Meter
Test strips
Clear Cap
7
Preparing the Lancing Device
GE100
View Window
1) Hold the depth adjustable cap in one hand and hold the base with the other hand. Bend the cap down.
When a gap appears between the cap and base, pull them in opposite directions.
2) Remove the depth adjustable cap.
3) Insert a new disposable lancet firmly into the lancet carrier.
Sample Entry
6
5
1
2
8
9
1
2
11
10
3
View Window
Protective cover
Depth adjustable cap
Test Strips
Release button
Lancet carrier
Test strips vial
1
Lancet
Hub
Plunger
Lancing Device
Battery Installation
1) Turn the meter over. Press and push battery cover to open.
2) Install the battery (+). Be sure to put battery in correct direction.
3) Slide the battery cover back until it snaps into place.
1
2
4) Twist off and set aside the protective cover of the disposable lancet.
5) Replace the depth adjustable cap.
6) Choose a depth of penetration by rotating the top portion of the depth adjustable cap until your desired
setting depth is visible in the window. Settings are based on skin type:
”
“ for soft or thin skin;
”
“ for average skin;
”
“ for thick or calloused skin.
Alternative site testing: palm or forearm blood sampling
7) Hold the base in one hand and pull on the plunger with the other hand. The device will be cocked. Release
the plunger and it will automatically move back to its original position near the base.
2
3
Setting Up Your Meter - Setting the Date and Time
1) Press and release main button "
" to turn on the meter.
2) Press and hold main button "
" for 7 seconds to activate the setting mode. The year will flash. (NOTE: Prior
to setting mode, the meter will turn off. Main button must remain pressed to access setting mode.)
3) Press up button or down button to change the year.
4) Press main button "
" to confirm the year and move to month setting.
4
5
6
7
1. Choose the clear cap and follow step 1 through step 2
“Performing a Test”.
2. Massage the puncture area of your palm or forearm for a
few seconds.
3. Immediately after massaging the puncture area, press and
hold the lancing device with the clear cap against your palm
or forearm.
4. Press the release button.
5. Continue holding the lancing device against your palm or
forearm and gradually increase pressure for a few seconds
until the blood sample size is sufficient.
6. Follow step 5 through 11 to discard the used disposable
lancet.
NOTE: DO NOT test on the palm or forearm if you are testing for
hypoglycemia (low blood glucose).
3a
3b
4
5
Pressing for
a few seconds
Releasing
button
4 Performing a Test
1) Wash and dry your hands. Take one strip from the vial. Close the vial cap immediately.
2) Insert the strip into the strip port on the meter with the view window facing up. Push the strip in until it clicks
and stops. The meter will automatically detect the code number.
3) When you see the flashing blood drop icon on the display window, hold the lancing device to the side of
your fingertip and press the release button.
1
2
3a
GE100
GE100
5) Repeat steps 3 and 4 to change the date, time format, hour (24 Hour or 12 Hour), minute and volume.
After pressing the main button to confirm the minute setting, your set-up is finished.
7) Remove the test strip from the meter. Please follow your local regulations to discard the used strip
properly.
8) Pull off the depth adjustable cap. Without touching the used disposable lancet, insert the lancet tip into
the protective cover.
9) Hold the release button in one hand and pull on the plunger with the other hand to safely eject the used
disposable lancet.
10) Discard the used disposable lancet into an appropriate puncture-proof or biohazard container.
11) Replace the depth adjustable cap after finishing the test.
4) A blood drop size between 1uL and 3uL is required for testing. See Sample Size Example Chart for drop
sizes. Blood drop sizes greater than 3uL may contaminate the meter. A minimum of a 1uL drop is
required for accurate results.
For more information on how to use your meter and understanding your test results, please see the User’s
Manual.
Guía de Inicio GE100 (para auto-análisis)
3b
Ejemplo del tamaño de la muestra:
1.0µL
1.5µL
2.0µL
3.0µL
4.0µL
RANURA PARA
INSERTAR LAS
TIRAS REACTIVAS
GE100
BOTONES PARA
IR HACIA ARRIBA
Y HACIA ABAJO
TAPA DE LA
BATERÍA
PANTALLA DE
VISUALIZACIÓN
Entrada USB
(Para descargar
resultados en un
software autorizado de
GE. No realize una
prueba de glucosa en
sangre mientras un
cable USB esta
conectado)
BOTÓN PRINCIPAL
Vista frontal del medidor
NOMBRE DEL
PRODUCTO
NÚMERO DE
SERIE DEL
MEDIDOR
3
1
Ventana de visión
Cubierta protectora
1
LANCETAS
Tapa con ajuste
de profundidad
Portador de
lancetas
Interruptor de Cuerpo
seguridad
Émbolo
Instalación de la batería
1) Voltee el medidor, presione y deslice la cubierta de la batería para abrirla.
2) Coloque la batería. Asegúrese de instalarla en la dirección correcta.
3) Vuelva a colocar la tapa de la batería y empújela hasta que encaje en su posición.
2
Girar
9
2
1
2
11
10
3
Botón de disparo
DISPOSITIVO DE PUNCIÓN
1
8
Tapa transparente
Test Strips
7
Preparación del dispositivo de punción
1) Con una mano, sostenga la tapa con ajuste de profundidad y con la otra, el cuerpo del dispositivo de
punción. Presione la tapa hacia abajo. Cuando pueda ver un espacio entre la tapa y el cuerpo del
dispositivo de puncíon, tire cada parte en dirreciones opuestas para desenrocar la tapa.
2) Quitar la tapa con ajuste de profundidad.
3) Insertar firmemente una nueva lanceta desechable dentro del dispositivo de punción.
Entrada de la muestra
FRASCO DE TIRAS
REACTIVAS
6
5
GE100
Vista trasera del medidor
TIRAS REACTIVAS
NOTA
- Se recomienda no usar el medidor cerca de fuentes de fuertes radiaciónes electromagneticás que
podrian interferir con el buen funcionamiento del medidor.
- Se recomienda tener el medidor libre de polvo, agua o de cualquier otro liquido.
5) Acercar la gota de sangre hasta tocar la entrada de la muestra en la parte superior de la tira reactiva y
sosténgala hasta que la ventana de visualización este totalmente llena de sangre y se escuche una señal
sonora. Si la ventana no se llena de sangre en su totalidad o si no aparece en pantalla la cuenta regresiva
indicando el inicio de la prueba, descarte la tira reactiva usada y repite las etapas anteriores con una nueva
tira.
6) Si la muestra es suficiente y correctamente aplicada, la pantalla mostrará el modo de cuenta regresiva.
Después de 5 segundos, aparecerá el resultado de la prueba. Para mas información sobre los resultados de
prueba, por favor consulte el Manual del usuario.
2
3
Configuración del medidor – configurar la hora y la fecha
1) Presione y suelte el botón principal "
" para encender el medidor.
2) Presione y mantega presionado el boton principal " " durante 7 segundos hasta que se active el modo de
configuración. Mientras presiona el botón, el medidor se apagará durante unos instantes; mantenga
presionando hasta que se encienda de nuevo. El año estará parpadeando primero.
3) Presione el botón para ir hacia ariba o el botón para ir hacia abajo para programar el formato del año.
4) Para confirmar su selección presione el botón principal "
". Ahora el mes estará parpadeando.
4) Girar la cubierta protectora de la lanceta para quitarla y guardarla.
5) Vuelva a enroscar la tapa sobre el dispositivo de punción.
6) Gire la parte superior de la tapa para ajustar el nivel de profundidad de penetración de la lanceta. La
profundidad requerida depende de su tipo de piel:
”
“ para piel delicada o delgada;
”
“ para piel promedio;
”
“ Para piel gruesa o callosa.
7) Con una mano, sostenga el cuerpo y con la otra, estire el émbolo hasta el final y suéltelo para que regrese a
su posición inicial. Su dispositivo de punción está listo.
4
5
6
7
4 Realizar una prueba
1) Lávese y séquese bien las manos. sacan una tira reactiva del frasco. Tape el recipiente de inmediato.
2) Inserte la tira reactiva dentro de la ranura prevista en la parte superior del medidor. La tira debe insertarse
horizontalmente con el símbolo de la flecha hacia abajo. Empujar la tira hacia abajo hasta que encaje bien
y se escucha un “clic”. El medidor detecterá imediatamente el número de código.
3) Espere a que aparesca el indicador de gota de sangre en la pantalla antes de insertar la muestra
(ilustración 3a). Sostenga el dispositivo de punción contra su dedo y presione el botón de disparo
(ilustración 3b).
1
2
7) Retire la tira de prueba del medidor. Favor de seguir la regulación local para desechar de forma
apropriada las tiras usadas.
8) Retire la tapa con ajuste de profundidad. Sin tocar la lanceta utilizada, fije la tapa de dicha lanceta en su
cubierta protectora.
9) Con una mano, mantenga presionado el botón de disparo y con la otra, estire el émbolo para extraer de
forma segura la lanceta utilizada.
10) Desechar la lanceta usando un recipiente a prueba de pinchazos y de riesgos biológicos.
11) Una vez finalizada la prueba, coloque de nuevo la tapa con ajuste de profundidad sobre el dispositivo de
punción.
PRUEBAS CON SANGRE OBTENIDA DE PUNTOS ALTERNATIVOS:
palma de la mano o antebrazo
1. Usar la tapa transparente y siga las etapas 1 a 5 de la sección
anterior sobre realizar una prueba.
2. Realice masajes en el área de punción de la palma o del
antebrazo durante algunos segundos.
3. Inmediatamente después de masajear el área de punción,
mantenga presionado el dispositivo de punción con la punta
transparente sobre la palma o el antebrazo.
4. Presione el botón de disparo.
5. Continúe sosteniendo el dispositivo de punción sobre la palma
o antebrazo e incremente gradualmente la presión algunos
segundos hasta que el tamaño de la muestra de sangre sea
suficiente.
6. Observar el punto 9 de la sección anterior para desechar
correctamente la lanceta.
3a
3b
4
5
Sostenga el dispositivo
unos segundos
Presione el botón
Para más información sobre cómo usar su medidor y entender los resultados de pruebas, por favor, consulte
el Manual del usuario.
3a
GE100
5) Repetir las etapas 3 y 4 para cambiar la fecha, la hora y el volumen. Los cambios confirmados estarán
guardados.
4) El medidor solo necesita una muestra pequeña de sangre. Le sugerimos que obtenga un tamaño de
muestra de sangre de alrededor de 1.0µl para cada prueba. Un tamaño de muestra por encima de 3.0µl
es demasiado y puede contaminar el medidor, mientras una muestra de menos de 1.0µl puede causar un
resultado erróneo.
is a trademark of General Electric
Company and is used under license by
Bionime Corporation, NO. 100, Sec. 2,
Daqing Dist Taichung City 40242,
Taiwan (R.O.C.)
es una marca registrada de General Electric
Company utilizada bajo licencia por
Bionime Corporation, NO. 100, Sec. 2,
Daqing Dist Taichung City 40242,
Taiwan (R.O.C.)
Manufacturer/Fabricante :
BIONIME CORPORATION
NO. 100, Sec. 2, Daqing St.,
South Dist., Taichung City 40242.
Taiwan (R.O.C.)
Made in Taiwan/Hecho en Taiwan
GE Diabetes Customer Support Center/
Centro de atención al cliente de GE Diabetes
1450 E. Spruce Street.
Bldg. B,
Ontario, CA 91761
Tel: 1-866-613-7085
101-3GM555-021
EN+ES
GE100