1
Connecting the Units
<ENGLISH>
Rear Display Connection
Setting the Antenna units
<ENGLISH>
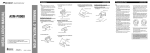
7 Example 3: Mounting on a rear side window (Fig. 3)
Mounting Location
• Apply the supplied cleaner to a clean cloth and wipe, applying a little pressure.
• When the cleaner has dried white, wipe off with a clean, damp cloth.
• Dry thoroughly with another clean cloth.
Clamps
Note:
• Output to this product’s Rear Display is always ON regardless of whether the Head Unit is ON/OFF, or the
selected source.
Also, if the Head Unit’s source is anything other than TV, channel changing and other independent operations are possible for the Rear Display.
• Output from this product’s rear audio output is monaural.
7 When connecting the External video components
This Product
RCA audio output
(White, Red)
Note:
• Mount the antenna on the inside of the car on fixed windows such as rear windows or hatchback windows.
• To assure optimum reception, it is recommended you mount the TV antenna on a rear (hatchback) windows
pointing down as shown in the Fig. 1, Fig. 2 and Fig. 3.
• Mounting the antenna near a radio antenna (particularly a booster type) will result in noise. In this case, consult your dealer concerning mounting location.
• If the antenna is mounted near a radio antenna, reception quality may be effected during simultaneous reception of TV and radio broadcasts.
• You may not be able to mount the antenna on windows of certain size. Be sure to select a window that is
large enough. (Antenna element length: 46 cm [1 ft. 6 in.])
• Before mounting the antenna, check the location of the unit you are going to connect the antenna to, and
make sure it is near enough for the antenna cable to reach. (Antenna cable length: 6 m [19 ft. 8 in.])
• If you use this product in areas where the broadcast signal is weak, the included antenna’s sensitivity may
fall, resulting in a poor picture. If this happens, you are recommended to use an AN-G3 antenna (sold separately), which features a booster.
• Never install on top of a glass antenna or heating wires.
• Secure the antenna firmly, and do not use if it comes loose. If the antenna falls down, the tips of the elements may cause injury.
• After installing, make sure children don’t play with it as it may result in unexpected injury.
7 Example 1: Mounting on a rear window (Fig. 1)
Cleaner (supplied)
Window glass
Installing the Antenna unit
3. Mounting on the main body.
Warm the window glass when the air temperature is low.
To prevent a reduction in adhesive strength, switch ON the car heater or rear defogger to warm the glass
to a temperature of 20˚C or more.
Clamps
Main body
• Do not install with the antenna elements together as this reduces reception sensitivity.
1. Decide on the location for the main body.
Display with RCA
input jacks
RCA cables
(sold separately)
Remove the protective
paper and stick on.
Note:
To audio inputs
RCA video output (Yellow)
2. Remove dirt and oil from the window with the supplied cleaner.
When sticking on the main body, make sure there is a space of 20 mm [3/4 in.] or more
between the edge of the window and the antenna elements.
Main body
Decide on a suitable location for mounting
before removing the protective paper
To video input
20 mm (3/4 in.)
7 Example 2: Mounting on a hatchback window (Fig. 2)
4. Sticking antenna elements to a window.
20 mm (3/4 in.)
Stick on the holder near the main body, and then the antenna tops.
Antenna elements
Clamps
When mounting on a hatchback window,
use clamps where necessary to assure the
cable is not stretched or does not cause an
obstruction when the hatch is opened or
closed.