1
 INSTALLATION MANUAL
EN
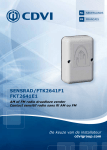
SENSRAD/FTK2641F1 - FTK2641E1
Keyfree transmitter
1] PRESENTATION DU PRODUIT
The Keyfree transmitter is a special radio transmitter operating at 433,92 MHz in FM/FSK
modulation. It’s mainly composed by a capacitive touch sensitive circuit and by a radio transmitter.
It can be used to operate gates or garage doors or any device with the corresponding compatible
433 MHz receiver.The security protocol is a rolling code type. Each product is already factory
programmed with a different security code.
Carrier frequency: 433,92 MHz,
Sound feedback,
Modulation: FM/FSK (Ref: SENSRAD/FTK2641F1)
or AM (Ref: FTK2641E1),
Frequency deviation: ±30 KHz,
N° channels: 1,
E.r.p. 1 mW,
Operating voltage: battery CR123A - 3 Vdc,
Current consumption:
- 12-15 μA stand-by,
- 40mA (SENSRAD/FTK2641F1),
- 20mA (FTK2641E1)
Battery life: 12 months,
Security protocol: Keeloq® Hopping Code,
Code combinations: 2exp64,
Range in open space: 150m,
Weight: 93gr.
The product fully complies to the requirements
of the European Directives 73/23/CEE, 89/336/CEE, 99/05/CE.
2] NOTES AND RECOMMENDATIONS
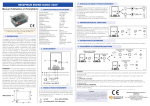
3] OPERATE
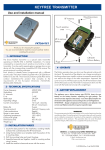
The appliance uses a lithium battery type CR123A.
Insert the new battery on the battery location,
respecting the right polarity. The removal and the
disposal of the battery must have effected before
the elimination of the appliance and according to the
current Regulations.
Attention: Danger of explosion if the battery is not
replaced in the correct way! Replace only with an
equal or equivalent type.
The Button operates when you skim over the
external surface with the hand. The sensitivity of
the detector can change according to the fixing
surface type: metallic surfaces increase the sensitivity
but can reduce the range of the radio transmission.
Approach the cover or touch it until the buzzer
sounds.The RF transmissions lasts all time the
buzzer sounds. Normally it’s necessary to skim over the
cover with the hand and not only with a single finger.
60
90
WEEE & RoHS
CE Certification
IP55
-20°C to 80°C
25
4] MOUNTING
1
Locate the best position for the
installation, avoiding metallic surfaces
that could decrease the RF transmission.
2 Using the box bottom as a template mark the position of the 4 mounting holes.
3
Drill the mounting holes and insert the plugs.
4
Assemble base and seal together, install to mounting surface using
4 screws.
5
2
Install the module to base and secure
with the screws.
cdvigroup.com
TCB eco-syn
M3-15 Screw
Front box Wood screw Battery
housing
3.5x32
CR123A
Back box
housing
Joint
Anchor
S5