1
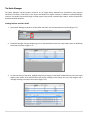
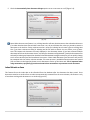
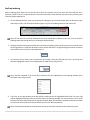
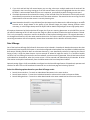
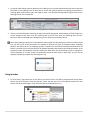
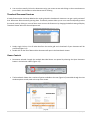
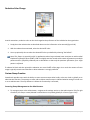
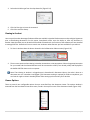
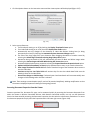
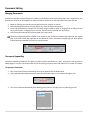
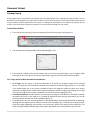
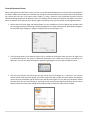
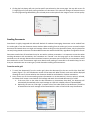
SMARTSEARCH USER GUIDE SmartSearch Admin User Guide Version 3.8 ©2014 Square 9® Softworks – All rights Reserved The copyright for all material provided herein is held by Square 9® Softworks. None of the material may be copied, reproduced, distributed, republished, downloaded, displayed, posted or transmitted in any form or by any means, including, but not limited to, electronic, mechanical, photocopying, recording, or otherwise, without the express written permission of Square 9® Softworks. Table of Contents WELCOME ................................................................................................................................................................................... 3 THE BATCH MANAGER .......................................................................................................................................................................... 4 INDEXING DOCUMENTS............................................................................................................................................................... 7 INDEXING FROM AN INBOX ..................................................................................................................................................................... 7 INDEX REFRESH ON SAVE ....................................................................................................................................................................... 8 INDEXING DIRECTLY TO AN ARCHIVE ......................................................................................................................................................... 9 AUTOMATIC POPULATION OF EMAIL INDEX FIELDS .................................................................................................................................... 11 KEYFREE INDEXING ............................................................................................................................................................................. 12 DATA XCHANGE ................................................................................................................................................................................. 13 USING SEARCHES................................................................................................................................................................................ 14 SEARCH REFRESH SHORTCUT ................................................................................................................................................................ 16 TABBED DOCUMENT VIEWS.................................................................................................................................................................. 16 SEARCH EXPLORER INTERFACE ............................................................................................................................................................... 16 THE DOCUMENT VIEWER ........................................................................................................................................................... 18 VIEWING DOCUMENTS FROM THE RESULTS GRID ...................................................................................................................................... 18 THUMBNAIL DOCUMENT PREVIEWS ....................................................................................................................................................... 19 VIEWER CONTROLS ............................................................................................................................................................................. 19 ANNOTATIONS ................................................................................................................................................................................... 21 ANNOTATION FORMATTING.................................................................................................................................................................. 23 REDACTION COLOR CHANGE ................................................................................................................................................................. 24 CUSTOM STAMP CREATION .................................................................................................................................................................. 24 VIEWING IN ACROBAT ......................................................................................................................................................................... 26 VIEWER OPTIONS ............................................................................................................................................................................... 26 DOCUMENT EDITING ................................................................................................................................................................. 28 MERGING DOCUMENTS ....................................................................................................................................................................... 28 DOCUMENT APPENDING ...................................................................................................................................................................... 28 DOCUMENT BURSTING ........................................................................................................................................................................ 29 REPLACING PAGES FROM THE THUMBNAIL VIEW ...................................................................................................................................... 30 DOCUMENT OUTPUT ................................................................................................................................................................. 31 PRINTING/ FAXING ............................................................................................................................................................................. 31 EMAILING DOCUMENTS ....................................................................................................................................................................... 33 EXPORTING DATA ............................................................................................................................................................................... 34 EXPORTING DOCUMENTS ..................................................................................................................................................................... 34 Welcome Congratulations on your purchase of the SmartSearch Enterprise Content Management suite and welcome to the world of office automation. From small businesses to Fortune 500 companies, organizations like yours are relying on SmartSearch to manage documents electronically and streamline their workflows as they eliminate inefficient paper based filing systems. The team at Square 9® Softworks would like to thank you for purchasing SmartSearch and emphasize our commitment to helping you achieve your paperless office objective. Our team works tirelessly to develop innovation in our product while asking the same two questions every day; “how will this feature help improve the way our user community works” and “how can we make it easier?” These two questions have helped us to create a product that truly changes the way you do business; by increasing your organizational efficiency without adding complexity to your routine. We sincerely hope that you recognized the unique nature of SmartSearch prior to your purchase, but if not, we believe you will soon enough. In addition to our distinctive product design, we also strive to set ourselves apart as a different type of Software Company. Square 9® Softworks is an intensely customer focused organization that strives to be highly responsive both in our development and in our customer service. We welcome your feedback in all areas; if we are getting it right than please let us know. But even more important is letting us know when you feel we’ve got it wrong. We look at our relationship with our customers and our resellers as a true partnership and believe that effective communication is the only way for us all to reach common goals. To help facilitate better communication with the user community we offer a Support & Developer’s Forum which can be found at forum.square-9.com. Not only is our forum a great place to get quick answers to support questions, it is also a means for exchanging ideas and information. We encourage you to visit the forum regularly for news on product updates or to share ideas on how to use SmartSearch more effectively. Once again, we appreciate your business and the confidence you placed in our products. We look forward to hearing from you in the near future and wish you the very best. Sincerely, Stephen Young President/CEO SmartSearch Admin User Guide 3|P a g e The Batch Manager The Batch Manager monitors quality assurance on all images being imported into SmartSearch using Capture Workflow, File Import, Email Import, Scan Import and Web Form Import activities. In addition, the Batch Manager monitors any batches imported through our XML Import Utility which includes Kofax Capture, PsiGen, PlanetPress, docALpha and NSi Autostore. Viewing Batches and their Detail 1. Select Batch Manager located on the Workflow tab within the main SmartSearch interface (Figure 1.1). (Fig. 1.1) 2. The Batch Manager will open displaying a list of recorded batches with their import date, batch ID, Workflow Description and Status (Figure 1.2). (Fig. 1.2) 3. To view the history of the batch, highlight a batch by clicking on it and select the Batch History tab in the lower display pane. Details of the batch process will display including a time stamp, the step, step category and a message detailing each step of the process (Figure 1.3). (Fig. 1.3) SmartSearch Admin User Guide 4|P a g e Quality Assurance There are times when a document or even an entire batch will fail Quality Assurance and fail to automatically import. The Batch Manager provides an easy to access interface for monitoring batch statuses so the Administrator can take corrective action. Common reasons for import failure include: Low OCR confidence levels – when a field fails to meet the pre-set confidence requirements. Data type mismatches – i.e. attempting to import character data into a decimal field. Data Truncation – attempting to insert data which exceeds a pre-set character limit is cut off. Deleting a Batch There are times when deleting a batch is required. This is especially true during initial testing of the system. To delete a batch: 1. Select the Delete Batch button at the top left of the batch manager (Figure 1.4). (Fig. 1.4) 2. Confirm your intention to delete the batch (Figure 1.5). Note that deleted batches cannot be recovered. (Fig. 1.5) Editing Document Data Documents may be edited to correct inaccuracies in the index data which caused them to fail during the import process. This could be due to a low confidence level in the OCR results, data truncation or mismatched data types as just a few of the most common examples. To edit the index data of a document in the Batch Manager: 1. From the Batch Manager interface, click on one of the Batches displayed which requires editing. 2. Click on the Document Errors tab. A list of any document which failed to import will be displayed. 3. Double click on any record to open it in the document viewer or highlight the record and click the Edit button (Figure 1.6) on the right side of the window. (Fig. 1.6) SmartSearch Admin User Guide 5|P a g e 4. Any index fields which caused the failed import will have an error message to the right of the data (Figure 1.7). (Fig. 1.7) 5. 6. 7. 8. Correct any erroneous data or to accept the contents of a field, simply tab off of it. Save the changes or close the document if the Auto-Save option has been selected. The corrected document will be automatically removed from the Document Errors tab. Once all documents have been edited or accepted, the status of the batch will change to Manually Completed. Deleting a Document 1. 2. 3. 4. From the Batch Manager interface, click on one of the Batches displayed which contains a record to be deleted. Click on the Document Errors tab. Any document within the batch which failed to import will be displayed. Click on the record to be deleted to highlight it. Click the delete Record Button on the right side of the window (Figure 1.8). (Fig. 1.8) SmartSearch Admin User Guide 6|P a g e Indexing Documents Indexing from an Inbox 1. Any document residing in an Inbox can be indexed into an Archive. Select one or more documents from an Inbox results grid and click the Index Document button in the Documents section of the Home tab (Figure 2.1). (Fig. 2.1) 2. You will be immediately prompted to select an Archive to index the document(s) into (Figure 2.2). (Fig. 2.2) 3. The Document Viewer will open and allow for the indexing of the document based on the fields available for the selected Archive. If multiple documents are selected for indexing, as each document is indexed and saved it will be removed from the viewer Window and you will be automatically moved to the next document. Note: If the auto-save feature is turned on (it is on by default), the save button does not need to be clicked. You may use the Next Doc button on the Document section of the Viewer tab to move to the next selected document, which will auto-save the current one. 4. From the main page click on the SmartSearch logo bubble in the top left hand corner and the Options button will appear on the bottom of the menu window (Figure 2.3). (Fig. 2.3) SmartSearch Admin User Guide 7|P a g e 5. Check the Automatically Save Document Changes option to turn auto-save on or off (Figure 2.4). (Fig. 2.4) Note: When the auto-save feature is on, clicking Next Doc will save the document to the selected archive even if no index data has been entered. When auto-save is on, do not click Next Doc unless you intend to commit a document to the Archive. Closing a document that is setup for indexing has the same effect as clicking Next Doc. If you have a document setup for indexing and do not wish to commit it to an Archive, turn off autosave. This impacts the document currently displayed in the document viewer. If you have selected multiple documents and close the document viewer, only that first document will be indexed. If multiple documents were selected for indexing and a particular document should be indexed to a different Archive, you can quickly change to the correct Archive from the SmartSearch Icon menu. Choose Index Document from the menu and you will be prompted with the Archive selection window. This same process is available when documents are opened from an Inbox via the Open Doc button on the Documents section of the Home tab. This is important when using annotations, specifically if you do not intend to have annotations as permanent on the document. Index Refresh on Save This feature forces the index data to be refreshed from the database after the document has been saved. Since documents saved to an Archive from an Inbox are automatically removed from the current viewer, this feature is only of use when working with documents in an Archive (Figure 2.5). (Fig. 2.5) SmartSearch Admin User Guide 8|P a g e By forcing the data to be refreshed from the database, the feature allows customers to have database side validation triggers that can be used enforce data integrity. In an accounts payable application, a user could key in an invoice number and save the document. An "On Update" trigger can be written to validate that invoice number against an ERP solution's invoice master table. If a match is found, additional data will be returned to SmartSearch and loaded into the Document Viewer (Vendor Name, Invoice Amount). This process allows the user to visually ensure the invoice number keyed is valid, and happens with a single click of the same button. Square 9's Professional Services group can assist with writing database scripts if the Partner/Customer does not have experience in this area. Contact your Square 9 Regional Sales Director for details on pricing. Indexing Directly to an Archive In addition to importing documents or drag & dropping documents into an Inbox to be indexed into an Archive, you can also do the same operation directly to an Archive. Using Import Documents feature in conjunction with the indexing of documents directly to an Archive comes in handy when you are importing multiple scanned documents that will have several of the same index values. Example: Invoices from the same vendor, same student record information to be filed in an Archive. 1. Select the Archive where the document is going to permanently reside by clicking on the Archive in the archive list window (Figure 2.6). (Fig. 2.6) 2. Select by Import Documents in the Capture ribbon window. You will be prompted with Import Documents window which indicates the Archive as to where those documents will be imported (Figure 2.7). (Fig. 2.7) SmartSearch Admin User Guide 9|P a g e 3. Clicking on the Add button (Figure 2.7) will allow you to browse out to the directory and select the folder that contains the documents you want to import. Select the documents by either highlighting individually using the mouse button and Control (Ctrl) key or select all by depressing the Shift key. Select Open and these documents will be listed for import in the Import Documents screen (Fig. 2.8). (Fig. 2.8) 4. Once the documents are listed you have the option of deleting the original documents in the directory folder by clicking on the box provided in the bottom right hand corner (Figure 2.9) of the Import Document window. By selecting this feature once the documents are imported to the SmartSearch Archive, they will automatically be deleted and no longer be available in that directory folder. (Fig. 2.9) 5. Before submitting the selected documents to the SmartSearch Archive, key index values can be added prior to import by selecting the Data tab in the upper left hand corner next to Documents (Figure 2.10). Selecting this tab will provide a screen of the index values associated with the document in that particular Archive. Just type in the similar values that will be used for all the imported documents in the line provided. When all have been key in select OK and the documents will be imported and placed in the Archive. Note: You will still need to open the documents in the SmartSearch viewer and add the other index values not imported using this feature. (Fig. 2.10) SmartSearch Admin User Guide 10 | P a g e 6. Dragging & dropping of documents from a SmartSearch Inbox or a directory folder directly to an Archive will also bring the Import Documents window forward. In this case just follow the above instructions to add the similar index values to the documents. Automatic Population of Email Index Fields SmartSearch can be easily configured so that Outlook Email message (*.msg, *.eml) files will automatically populate specifically named Archive Fields with the respective information from the file itself. Once configured, emails which are either imported or drag-and-dropped into SmartSearch will be handled in the same manner. Starting in version 3.8.0.0 SmartSearch will now capture the sender’s email address as well as their name. A new field must be added to the archive with the label “FROM ADDRESS:” to capture this information. To set up the auto population of email index data: 1. Create the email property fields you wish to capture within the field library. A list of available fields is presented below: TO: FROM: FROM ADDRESS: CC: SUBJECT: ATTACHMENTS: DATE CAPTURED: DESCRIPTION: Note: The names of the email fields are case sensitive, and the colon is essential. 2. Create an Archive using the email property fields you wish to capture. Non-email property fields can be used in tandem allowing the user to have some fields auto populate from the properties and some indexed manually or through other SmartSearch utilities. 3. Emails dragged and dropped or imported to this Archive will now automatically capture data from the selected email properties. It is important to note that: a. If only one file is being imported, the information will be displayed in the Data tab of the Import Document Form (Figure 2.11). b. If more than one file is being imported, the information for each file will be displayed in the main form. c. Any information placed in the Import Document Form will be used instead to index the file(s). (Fig. 2.11) SmartSearch Admin User Guide 11 | P a g e KeyFree Indexing KeyFree Indexing (KFI) allows for key-less data entry with an extremely easy-to-use point and click interface. KFI is especially useful in low to moderate volume unstructured document environments like sales order processing and accounts payable applications. 1. To start indexing with KFI, open any document for indexing as you normally would. With the document open and ready to index, click the KeyFree button (Figure 2.15) on the Indexing section of the Viewer tab. (Fig. 2.15) Note: KFI can also be used with documents that have already been indexed. In this case, you can skip the indexing setup steps and go directly to clicking the KeyFree button. 2. The KeyFree button will prepare the document for KeyFree Indexing. After a brief setup cycle, the mouse cursor will change when it is inside the document viewer. Notice that there is a flag bound (Figure 2.16) to the mouse cursor with the text of the first index field within it. (Fig. 2.16) 3. As the mouse cursor hovers over text elements on the page, notice that the text the cursor is hovering over becomes highlighted and the cursor flag expands to show the text (Figure 2.17). (Fig. 2.17) Note: The field indicated in the cursor flag is bound to the field highlighted in the indexing window of the document viewer (Figure 2.18). (Fig. 2.18) 4. If you click on the desired word, that data will be transferred into the highlighted index field. The cursor flag and the highlighted field will move to the next field in the indexing window. You may continue to click words to fill the rest of the index fields with the appropriate data. When the last field is indexed, the document viewer will come out of KFI mode and standard viewer functions will become available. Note: Clicking the Pan button in the Orientation section of the Viewer tab will exit KFI mode at any time. SmartSearch Admin User Guide 12 | P a g e 5. If you click and hold the left mouse button you can drag a box over multiple words and all words will be displayed in the Cursor flag. Letting go of the left mouse button will send all highlighted data into the active KFI field. To select multiple words that are not in sequence, use the Shift key while clicking on each word. 6. If multiple documents were selected for viewing, as the last field of the first document is filled via KFI you will automatically be moved to the next document in the viewer selection. The text within the cursor flag is an OCR representation of the text the mouse is currently hovering over. Note: Remember that KFI is using OCR data from the image to pull its data results. OCR technology is not 100% accurate and is largely based on the quality of the scanned image. Use image cleanup functions where necessary, or utilize image cleanup tools like Kofax's VRS or Kodak's PerfectPage to ensure high quality scans. KFI requires documents be black and white tiff images, but if you are scanning documents as color PDF files you can still take full advantage of KFI. KFI will convert the image to a black and white tiff when the KeyFree button is clicked. This is only a temporary conversion used for the duration of the KeyFree Indexing process. The original document is not changed and remains in full color when saved to the Archive. For similar reasons, KFI cannot work with documents containing annotations. KFI will temporarily remove those annotations for the duration of the KFI process. Data XChange Out of the box Data XChange (DX) allows for documents to be indexed in SmartSearch based on document data that has previously been keyed into the system. It can also be configured to look up data from any ODBC or OLEDB compliant data source including. While DX does not eliminate data entry, it can dramatically reduce it by requiring the manual keying of only a single key data element. A prime example of where DX might be used is in an Accounts Payable scenario. Prior to receiving an invoice for services rendered, a purchase order is generated. If the PO has been scanned and indexed into SmartSearch, when the invoice arrives it can be scanned and indexed only by PO Number. All other information can be pulled automatically from the PO Document that has already been indexed. Optional settings (Figure 2.19) are available to configure how the Data XChange feature of SmartSearch operates and searches for data. Click on the SmartSearch interactive icon on the home page and selecting “Options”. Select the following options based on your Data XChange needs: Search Current Archive – To search on Index data of documents in the same Archive. Search Parent Archive – To search on index data located in Archives which reside in the parent folder. Search Sibling Archives – To search on index data located at the same nested level as the current Archive. (Fig. 2.19) SmartSearch Admin User Guide 13 | P a g e 1. To execute a DX lookup, open any document for indexing as you normally would and key data into at least one field. Refer to the Indexing from an Inbox section of the user guide for details on preparing a document for indexing. With the document open and ready to index, click the Data XChange button (Figure 2.20) on the Indexing section of the Viewer tab. (Fig. 2.20) 2. If there is a similar document matching the index information being used, Data XChange will fill all fields in the current document with data from the matching data record. If more than one matching data record is found, you will be prompted with a dialog asking you to select the correct data record. Note: When indexing a document in SmartSearch and using DX, the data lookups are based on all data keyed into any field of the current document. For example, an Archive has fields for Employee Name, Employee Number, and Date of Hire. If an employee number is keyed to the new document being indexed and the DX button is pressed, the current document will be updated with data that matches the employee number. If the employee number and employee name are keyed, then both fields must be matched in order to update the current document. If no other records are found that match the data keyed in both fields, an error will be displayed indicating no match was found (Figure 2.21). (Fig. 2.21) Using Searches 1. To use a search, right mouse click on the Archive you wish to search. You will be presented with a drop down options list which includes a label for Searches, select searches and a list of pre-defined searches for that Archive will be provided (Figure 2.22). Select the search you would like to run. (Fig. 2.22) SmartSearch Admin User Guide 14 | P a g e 2. The search box will appear in the middle of the search results screen, prompting the user for data specific to what they are looking to find. The user can supply one key field of data and have a broad search of the Archive, or can enter multiple fields of data and narrow the search base on the information provided (Figure 2.23). (Fig. 2.23) Note: If one of the fields was created to be a type ahead pick list that function carries over to the search when it is created. To use this feature, type the first letter of the data you are looking to provide in that field and the user will be presented with a pick list. An example would be Document Type (Figure 2.24). (Fig. 2.24) 3. Either way, the documents found that match the provided data will be returned to the results screen in a list format for selection (Figure 2.25). (Fig. 2.25) The Search Results Screen The Search Results Screen provides a list view of all documents retrieved with a search. In the results screen you can be Select, Open, Move and Index any of the documents in the results viewer. Users may also adjust the order of the columns by clicking on the data header and dragging it to the preferred position. The column width can also be adjusted to individual preferences by dragging and dropping the dividing line between columns as desired. SmartSearch Admin User Guide 15 | P a g e Note: All changes to the result grid are based on individual user preferences and do not affect the global settings. To change the column order for all users, the administrator must use the modify Archive function. The user has the option to check all documents in the results screen list to be open in the view, or only the documents that were highlighted using the Ctrl button on the keyboard and a single click of the mouse button. They can also deselect documents at the touch of a single mouse button as will. Once the documents are opened in the Viewer the user has a variety of options in the SmartSearch ribbon document controls at the top of the viewer including page navigation, orientation, scaling, output, enhancing and indexing. Note: If the Archive in which the search was performed has nested Archives the Search Results Screen will return the results in tabbed format equal to the number of nested Archive folders. In addition to the name of the nested folder in the Tab, the number of documents found in that nested Archive folder will be presented. Clicking on the Tab will reveal the documents in that tab. Search Refresh Shortcut In the event a user runs a search and would then like to re-run the same search from the Results Grid, this can now be accomplished by pressing the F5 key. Tabbed Document Views The Document Views feature in SmartSearch automatically sub-categorizes the contents of an Archive based on a predetermined field value (i.e. status) to provide reporting for business intelligence. These fully customizable views deliver a quick “snapshot” of document activity and can be easily exported to Excel for reporting purposes. These views have been extended so that the tabs appear also in the results grid after running a Search (Figure 2.26). (Fig. 2.26) Search Explorer Interface SmartSearch introduces a Search Explorer on the Home Page as an optional method for locating documents. The Search Explorer presents a treed view of the archives on the left with their associated Stored Searches on the right for convenient access without the need to right click on an archive. The Search Explorer icon remains in the system tray once a search has been initiated providing users with a convenient means for performing searches even when the SmartSearch application has minimized. To Open the Search Explorer: 1. Click the Searches button from within the Home tab. 2. Click the Archive (left panel) which contains the Search you want to run. 3. Available Searches will be presented on the right panel. SmartSearch Admin User Guide 16 | P a g e 4. Double click the Search you wish to run to be presented with the search prompts (Figure 2.27). (Fig. 2.27) Note: The Search Explorer supports searching for document across the entire database by presenting root level searches created from the Archives folder. Accessing the Search Explorer from the System Tray Once a search has been run, users can access the Search Explorer from the system tray even when SmartSearch has been minimized. This is a convenient means for accessing your stored searches within SmartSearch while working in other applications. 1. Double click the SmartSearch Search Explorer icon in the Window System Tray (Figure 2.28). 2. The Search Explorer will open allowing you to select a Search from the Explorer interface. (Fig. 2.28) SmartSearch Admin User Guide 17 | P a g e The Document Viewer Viewing Documents from the Results Grid Results of documents found using a search are returned to the results screen in the Home tab of the main screen of SmartSearch, listed in descending order of date entered into the system. The key field indexes for the searched Archive appear in the search results screen as header column names. If the header columns are not in an order useful to the user, they can click and hold the mouse button down on any of the column header names and drag that column to the right or left, releasing the column in the order that is more conducive to their needs. Once the user leaves this Archive screen, that order will be preserved as part of their user profile and will be retained when they return to that Archive. (Fig. 3.1) When the result of the search is provided, you can choose the document you wish to view in several ways. 1. Double Click anywhere on a line of data within the grid to view a single document. 2. Select Check All (Figure 3.1) in the Selection ribbon control at the top of the Home tab will place a check in all the checkbox of the documents returned for viewing. Then click open. (Fig. 3.2) 3. Depress the Control (Ctrl) button on the keyboard and select random documents from the results list or move your mouse arrow and highlight documents by clicking the mouse button. After selection has been completed, select the option in the Selection ribbon for Check Selected and check marks will be automatically place in the checkbox of your selected documents (Figure 3.3). (Fig. 3.3) SmartSearch Admin User Guide 18 | P a g e 4. You can also manually click on the documents using your mouse arrow and clicking on the mouse button to put a check in the checkbox to select documents for viewing. Thumbnail Document Previews A handy feature option has been added to the results grid within SmartSearch. Now users can get a quick preview of their documents without actually opening them. Thumbnail previews allow you to run a search and quickly preview the search result by clicking on a row of data. Users can turn this feature on by changing the default setting of Display Thumbnail Viewer within the General Options tab. (Fig. 3.4) 1. Simply single click on a line of index data from the results grid and a thumbnail of your document will be presented (Figure 3.4). 2. Double click on the line of data and the document will open in the SmartSearch viewer. Viewer Controls Documents selected through the methods described above are opened by selecting the Open Document button in the Selection ribbon (Figure 3.5). (Fig. 3.5) The SmartSearch Viewer has a number of options available to the user (Figure 3.6) accessible through the view window options control panel at the top of the viewer. (Fig. 3.6) SmartSearch Admin User Guide 19 | P a g e Images with multiple pages are displayed in the Thumbnails window located on the left hand side of the SmartSearch Viewer. Pages can be displayed by selecting the advance or back arrows in the first section (Figure 3.7) of the main ribbon control of the viewer. Moving to pages in larger documents can be accomplished by using the Jump To feature by typing the page number to jump to and the view will bring up that page of the document for viewing. (Fig. 3.7) The orientation of the document being viewed can be controlled using a multitude of features available in the Orientation (Figure 3.8) ribbon control, including: Rotate Left, Rotate Right, Rotate 180 degrees and Panning the document up or down. To Pan the document, select Pan and place the mouse arrow on the document, depress the left mouse button and slide the document either up or down with the mouse. (Fig. 3.8) Scaling the document is managed through the Scaling ribbon with features like: Fit to Page, Fit to Width, Zoom In/ Out and Zoom Select. Zooming In or Out of the document is accomplished by placing the mouse arrow and either hitting the right mouse button to zoom in or the right mouse button to zoom out (Figure 3.9). The Zoom Select feature will allow the user to draw a box around the area on the document they want to zoom in on. The viewer will scale the selected area to the full viewing screen. This feature allows key operators to zero in on the area of a document that contains the index values needed to be used as key field indexes. (Fig. 3.9) The output feature is located in the Output ribbon control (Figure 3.10). Here the documents can be printed using any printer device and available features. The document can be emailed out as an attachment to an MS Outlook message. The Launch feature will launch images that have been saved in the text based application formats such as Word, Excel or Outlook messages into their native applications, where changes can be made and saved back into the SmartSearch database. (Fig. 3.10) SmartSearch Admin User Guide 20 | P a g e Navigation between multiple documents selected is done by using the Next Doc and Previous Doc arrows (Figure 3.11). A label below the arrows indicates what document is being viewed in the sequence selected. (Fig. 3.11) Controls to correct documents that were brought into SmartSearch are available in the Enhancements ribbon (Figure 3.12). Features like De-Skew Page, De-Speckle Page and Crop Page to straighten, remove random bits and remove poor quality edges around a document if necessary. Note: These enhancements are only available with B&W TIF images. (Fig. 3.12) The last panel in the controls window handles options for indexing documents like KeyFree indexing and Data XChange (refer to section on Indexing Documents). Duplicate document assists in indexing multiple copies of documents that may have similar index values except for 1 or 2 key field indexes where multiple copies need to be placed in the SmartSearch database (Figure 3.13). Indexing the first copy either by hand keying or KeyFree then hitting the Duplicate Document feature will place a copy of the document with the current key field values into the database and retain the image on the view screen to indexed with the different key fields if necessary. (Fig. 3.13) Annotations SmartSearch offers a number of annotation capabilities for marking up and commenting on documents in an Inbox or an Archive. Annotation abilities include: Highlighting Redaction "Post-It" Style Sticky Notes Signature Any document in SmartSearch can be annotated, including non-image based formats. To access the annotation options, select the Annotations tab (Figure 3.14). (Fig. 3.14) SmartSearch Admin User Guide 21 | P a g e Highlighting – Use the document highlighter to draw attention to a particular area of a page. 1. 2. 3. 4. Click the Highlight button and “click and hold” the left mouse button down in the document viewer. With the left mouse button still depressed, drag the mouse cursor on the page to the desired location. As you are dragging you will see the highlighter annotation being drawn on the page. Release the mouse button when the annotation is in the desired position. Redaction – Use the redaction tool to “black out” a particular area of a page from general view. 1. 2. 3. 4. Click the Redact button and “click and hold” the left mouse button down in the document viewer. With the left mouse button still depressed, drag the mouse cursor on the page to the desired location. As you are dragging you will see the black redaction being drawn on the page. Release the mouse button when the annotation is in the desired position. Notes – Use the notes tool to add notes and messages to a particular document page. 1. Draw the note annotation on a page in the same manner you would draw a highlight annotation or redaction. 2. Once the annotation is drawn to size, release the left mouse button. 3. Begin free form typing your text in the Notes field. Note: Sticky notes can also be based on a template. This means if you want a note to contain the same basic information every time it is placed on a document, you can create a template file on the C-Drive of the workstation. Create the file in c:\getsmart\note_template.txt. Anything in this text file will be the default text for any note annotation place on a document using the current workstation. Signature – SmartSearch offers a unique signature feature for embedding images into other documents. 1. 2. 3. 4. After clicking the Sign button, the user will be prompted to select an image. Select the image file of the signature you wish to insert. The signature may be sized accordingly by double clicking the image to activate it and stretching its handles. The signature can be made permanen by right clicking on an activated signature and selecting “Burn”. Note: While this feature is most commonly used for embedding an electronic copy of a user's signature, any image may be embedded within another image using this annotation type. Choose the image and click on the current document page where you would like the signature or other image to be placed. Stamps – A variety of electronic business stamps are provided for use in the SmartSearch viewer. 1. Stamps are accessible by selecting the Stamp feature on the annotation toolbar. 2. This will provide a drop down of the available stamps. 3. The following standard sets of stamps are included with the core product (Figure 3.15) but may be edited. (Fig. 3.15) SmartSearch Admin User Guide 22 | P a g e General Annotation Features – By hovering the mouse cursor over an annotation and double clicking with the left mouse button, you can select a given annotation. Once selected, you will notice 8 selection boxes surrounding the annotation. While an annotation is selected, you can: Move the annotation – Click and hold the annotation with the left mouse button to move the annotation around on the page. Resize the annotation – Click and hold on any one of the 8 selection boxes to resize the annotation. Delete the annotation – Click the annotation with the right mouse button and a context menu will be displayed, allowing the user to delete the select annotation (Figure 3.16). (Fig. 3.16) Burn the annotation – When using the signature annotation, the context menu is extended with a “Burn” item. If the user chooses to “Burn” the annotation, that annotation will become a permanent part of the image itself. Annotation Formatting You may customize your annotations including custom stamp creation, the color of the highlighter and color of a note along with its font type, color and border. These preferences are easily configured through the “Styles” menu on the Annotation toolbar ribbon. 1. To adjust the annotation style, simple apply an annotation by selecting either the Highlighter or Note from the Annotation Types section and draw it onto the document by holding down your left mouse button and dragging rectangle box to the size required. 2. With the annotation activated by double clicking on the annotation, select the preferred style such as: a. Font Style (Figure 3.17) b. Font Color c. Font Size d. Fill Color e. Border (On Y/N) (Fig. 3.17) 3. You may optionally elect to make the selected style your default for that annotation by selecting “Set Default”. SmartSearch Admin User Guide 23 | P a g e Redaction Color Change (Fig. 3.18) As with annotations, redaction color can also be changed to the preference of the individual or the organization. 1. Simply draw the redaction box as described above over the information to be secured (Figure 3.18). 2. With the redacted area activated, select the desired fill color. 3. You may optionally elect to make the selected fill color your default by selecting “Set Default”. Note: This feature is especially useful in applications where large redacted areas are drawn as with medical Explanation of Benefits forms (EOB’s). EOB’s are highly sensitive records which contain information on multiple patients and are frequently redacted prior to distribution so that only the pertinent information for a single patient is reflected. If redacted in black and then printed the redaction can cover 60-80% of the pages. As a result the amount of toner usage is typically excessive and therefore a white redaction is strongly preferred. Custom Stamp Creation SmartSearch provides users with the ability to create custom stamps either locally at the user level or globally as an administrative function. The process to create, edit or delete custom stamps is identical whether acting as a local user or as an administrator. The only difference is where the functionality is accessed; Accessing Stamp Management as the Administrator 1. To manage stamps as the administrator, navigate to the settings section on the Administration Tab (far right of toolbar). All stamps created, deleted or edited here are impacted globally for all users (Figure 3.19). (Fig. 3.19) SmartSearch Admin User Guide 24 | P a g e Accessing Stamp Management as a User 1. To manage stamps as an end user navigate to the styles section on the Annotations Tab. All stamps created, deleted or edited here will only impact the user who made these changes (Figure 3.20). (Fig. 3.20) 2. After clicking on the manage stamps icon, a window will appear which contains a list of the currently available stamps (Figure 3.21). To the right are three buttons: to add a stamp, edit a stamp or delete a stamp. (Fig. 3.21) Adding a stamp 1. To add a stamp, select the Add Stamp button. 2. The Edit Stamp Value Screen (Figure 3.22) will appear allowing to create custom text for your stamp. 3. Click OK to save the custom stamp. (Fig. 3.22) Inserting Variable Stamp Data As an option, variable data can be inserted into the custom stamp text (Figure 3.23). Options include the Users Name, Today’s Data, Today’s Time or Today’s date and time. (Fig. 3.23) 1. Begin by entering your custom Stamp Text. 2. Place the cursor where you would like the variable data inserted. SmartSearch Admin User Guide 25 | P a g e 3. Select the Variable type from the drop down list (Figure 3.24). (Fig. 3.24) 4. Click the Plus sign to insert the command. 5. Click OK to save the Stamp. Viewing in Acrobat Users may wish to take advantage of advanced features available in Acrobat like document markup or digital signatures prior to distributing documents. For this reason, SmartSearch offers users the ability to view any document in Acrobat. Note that what you can do with a PDF outside of SmartSearch is a function of the software you have installed to manage PDF files. SmartSearch has no control over Acrobat or what features you have available to you within it. 1. To View in Acrobat select the button located in the Collaboration ribbon section (Figure 3.25). (Fig. 3.25) 2. There are two options when viewing in Acrobat: Annotations or No Annotations. Select the appropriate option for your needs and the selected document will be converted to a PDF (if not already a PDF) and displayed in the default PDF file viewer on the computer. Note: That Viewing in Acrobat is a logged event in SmartSearch's Document History, but what is done to a document once it is in Acrobat is not logged. If full document tracking is required for audits or compliance, you can limit the rights to View in Acrobat feature when setting up the securities for an Archive. Viewer Options There are several user configurable options that are controlled from the document viewer. The options window is accessed from the SmartSearch interactive menu, found in the top left corner of the document viewer (Figure 3.26). (Fig. 3.26) SmartSearch Admin User Guide 26 | P a g e 1. Click the Options button on the interactive menu and the viewer options will be displayed (Figure 3.27). (Fig. 3.27) 2. Select your preferences: a. Turn thumbnail viewing on or off by checking the Display Thumbnail Viewer option. b. Turn index field viewing on or off by check the Display Index Fields option. c. Automatically save any changes to the document or index data without clicking Save (or being prompted upon close) by checking the Automatically Save Document Changes option. d. Cut rather than Copy pages from your document when dragging thumbnails to another record by selecting the Delete Pages from Source during Drag & Drop Burst option. e. Documents being converted to PDF will automatically be saved as Black and White images when selecting the Convert Pages to Black & White during PDF Conversion option. f. Automatically display document properties selecting the Expand Document Properties Panel option. g. Update Index Data Immediately on Save displays updated data as soon as you save the document. h. Show Image Thumbnail in Result Grid will show a thumbnail image of the document when mouse is over the index data. i. Continue to Key Free into Table Fields will continue key free into the tabular data fields once the indexing is done in the index fields. j. Do not save changes to CAD drawings if selected upon close SmartSearch will not automatically save changes to CAD drawings when this box is selected. Note: These settings are workstation specific, and will be retained indefinitely. Making modifications to how the viewer is displayed impacts all viewing sessions going forward. Accessing Document Properties from the Viewer Common questions like, document file type, can be answered quickly by accessing the Document Properties from within the Viewer in Revision Controlled Archives. With Revision Controlled records, not only can the Document Version be determined by accessing the Document Properties, but also who has a document checked out. To access the document properties simply select the Properties tab in the lower right corner (Figure 3.28). (Fig. 3.28) SmartSearch Admin User Guide 27 | P a g e Document Editing Merging Documents SmartSearch provides a unique feature in its ability to take multiple records and merge them into a single file for easy distribution. Records can be merged from either an Inbox or Archive from the Home tab of the main interface. 1. Begin by selecting the records to be merged from either an Inbox or Archive. 2. Select the Merge Documents Function (Figure 4.1) from the Home tab interface. 3. You will be prompted for a location for the newly merged record to reside. If merging from an Inbox, this will be any other Inbox. If merging from an Archive, the record can be placed into any Archive. 4. Click OK and the selected files will be merged into a new record. Note: The original files will be retained in the system. A new file will be created which represents the original files in the order which they appeared in the document viewer. Documents merged from the Inbox will be indexed with the metadata from the first record selected. (Fig. 4.1) Document Appending Document Appending introduces the ability to update multiple documents at a time, along with a bulk process for adding pages to a record. This feature takes a time consuming common process and reduces it to a matter of seconds. To Append a Document: 1. Run a search and select the documents you wish to append from the Results Grid. 2. Select Append under Merge Documents from the Documents section on the Home tab (Figure 4.2). (Fig. 4.2) 3. The Insert Document window will open allowing you to select a record(s) from any Inbox (Figure 4.3). (Fig. 4.3) SmartSearch Admin User Guide 28 | P a g e 4. Select OK and the designated document will be inserted at the beginning of each of the selected records. 5. During the append process a SmartSearch icon will appear in the system tray notifying the user of the status (Figure 4.4). If selected with a right mouse click, users can select to view the progress or exit append. (Fig. 4.4) Document Bursting Document Bursting supports either the copying or cutting of a pages or pages from a source document through a simple drag & drop process. As one or more pages are pulled from the thumbnail viewer via a drag and drop operation, those pages will be removed from the source document. A user setting within the Viewer Window tab of the Application Settings screen (Figure 4.5) determines whether pages will be copied or cut from the source. Check the “Delete pages from source during Drag & Drop Burst” checkbox to tell SmartSearch that pages should be deleted by default during a burst operation. (Fig. 4.5) To Burst a Document: 1. Select the page(s) from the source document by highlighting the appropriate thumbnails. 2. Drag the thumbnails to either an Inbox or Archive. 3. The Import Documents dialog will open allowing you to name the file (Inbox) or index the document (Archive). Note: The Import Documents window now has an additional check box to let the user determine whether pages should be deleted from the source file or not (Figure 4.6). The checkbox for deleting pages within the import window will default as checked only if the user setting from above (Figure 4.5) has been selected. (Fig. 4.6) SmartSearch Admin User Guide 29 | P a g e Replacing Pages from the Thumbnail View The replace pages feature collapses the Add Page/ Delete Page commands into a single process and includes the ability to replace a page(s) with records coming from the Inbox, TWAIN scanner or from a network directory folder directly. To Replace a Page: 1. 2. 3. 4. Select the thumbnail of the page you wish to replace. Right mouse click the highlighted thumbnail and select Replace (Figure 4.7). Slide right to select the origin of the replacement page; select File (network directory), Inbox or Scan. Based on the origin of the new file, you will be prompted to select the replacement page. (Fig. 4.7) SmartSearch Admin User Guide 30 | P a g e Document Output Printing/ Faxing Printing documents in SmartSearch can be done from the results grid or from a document viewer window. To fax a document from SmartSearch, you must use a Fax Server. All Fax Server solutions on the market today employ the use of a print driver to deliver documents to the server, so faxing from SmartSearch is as simple as printing to the fax printer. If you do not have a Fax Server, Square 9® can recommend a solution for your needs. From the Results Grid: 1. To print from the results grid, check your document(s) and click the printer icon (Figure 5.1). (Fig. 5.1) 2. The Print Documents dialog window will be displayed (Figure 5.2). (Fig. 5.2) 3. Your computer's default printer will be listed in the Print To box. Printing All Pages is the only option when printing from the results grid. From the document viewer, page level printing options will be enabled. Fit To Page and Print With Annotations Checkboxes: Fit To Page: Use this option to shrink the document to fit within the printable margins of the selected printer. This feature is most commonly used when the documents scanned are larger than 8.5” x 11” and that is the default paper size in your printer. Examples of where this might be needed are when your original documents are legal sized or wide format images like blueprints and other engineering drawings. Fit To Page will scale the image to fit on a page, regardless of the size of the source image (Figure 5.2). Print With Annotations: Use this option to turn annotation printing on or off. When this checkbox is checked, annotations will print on the image as it is printed. Be aware that when printing annotations, you may be covering relevant data that will not be viewable (Figure 5.2). To change the printer, click the Settings button. A standard Windows printer dialog window will be displayed, allowing you to change the printer selection. Use this area to configure any custom printer settings like holepunching, stapling, duplexing, color printing, or any other print options your specific printer might offer. This dialog may appear different depending on the version of Windows you are using and the type of printer. SmartSearch Admin User Guide 31 | P a g e From the Document Viewer: When printing from the document viewer, only the current document displayed can be printed. When printing from the viewer, additional print options are available. By clicking Print Document button in the Output section of the Viewer tab, clicking the print icon in the Quick Access Toolbar, or using a Control P (Ctrl+P) keyboard shortcut, the Print Documents dialog window will be displayed. From this window you will have all the options described in the section above, in addition to the ability to print specific pages of the document (if you are viewing a multi-page document). 1. Notice that the Current Page and Range options are now available on the Print Documents window. With Current Page selected, only the page currently displayed in the viewer will be printed. With Range, all pages in the specified range of pages (i.e. pages 2 through 5) will be printed (Figure 5.3). (Fig. 5.3) 2. A final printing option, Print Selection (Figure 5.4), is available by clicking the down arrow on the right of the Print Document button. This option is commonly used when a user needs to print only a small portion of a document, as is the case when working with engineering drawings or certain types of medical records. (Fig. 5.4) 3. Click the Print Selection sub-menu item and the mouse cursor will change to a “cross-hairs” icon. Use the mouse to draw a box around a specific area of the image. Click and hold the left mouse button and drag the mouse cursor to the bottom right of the area you wish to select (Figure 5.5). You will see a box drawn around the area which can be resized as long as you keep the left mouse button depressed. Release the left mouse button and the Print Documents dialog will be displayed and the Selection option will be enabled. (Fig. 5.5) SmartSearch Admin User Guide 32 | P a g e 4. Clicking the Print button will print just the specific area selected on the current page. You may wish to turn Fit To Page (Figure 5.6) off when printing selections of a document. This option will enlarge the selected area to fit to the page settings defaulted by your selected printer and may distort the image or cause it to lose quality. (Fig. 5.6) Emailing Documents SmartSearch is tightly integrated with Microsoft Outlook for outbound messaging. Documents can be emailed from the results grid or from the document viewer window. When emailing from the results grid, a user can email multiple documents and attach them to a single mail message. When emailing from the document viewer, only the document currently being viewed can be sent. All outbound documents are attached as PDF files, regardless of original file format. Documents emailed out of SmartSearch may be sent with or without annotations. It is important to note that when emailing documents with annotations, the annotations are "burned" into the image prior to the document being attached to a mail message. Because the annotations become a permanent part of email files, the annotations cannot be moved and in certain circumstances might cover data thereby making it inaccessible in the emailed copy. Be sure that your annotations are not covering any critical data when emailing with annotations. From the results grid: 1. To email the document(s) from the results grid, select the document(s) to be sent and click the Email PDF button (Figure 5.7) in the Collaboration section of the Home tab. When clicked, a sub-menu will be displayed allowing the user to choose whether the document should be emailed with or without annotations. 2. Next, choose one of the two emailing options (Annotations or No Annotations). Once an option is selected, SmartSearch will create a new Outlook mail message and attach the selected document(s) as a PDF. a. If the user clicks on the either the No Annotations or Annotations drop down, the document will automatically be attached to the email message as a PDF with a default name of “Square9 0000”. b. Optionally, the user can “slide right” to expose a list of the index fields for that document. The PDF to be attached to the email message will be named with the value of that field for easy identification. (Fig. 5.7) SmartSearch Admin User Guide 33 | P a g e From the Document Viewer: To email from the document viewer, the process is virtually identical to that of emailing from the results grid. Remember, when emailing from the viewer, only the document currently in view can be attached to a mail message. Click the Email Doc button (Figure 5.8) in the Output section of the Viewer tab and choose whether the document should be attached with our without annotations. A new mail message will be opened with the document attached as PDF. From the viewer, users also have the option of emailing All Pages, the Current Page or a Range of pages. This is accessed by selecting Email Pages when the Email Doc options are presented. (Fig. 5.8) Exporting Data For users that want to perform complex analysis on data in SmartSearch or for those who need more complex sorting and grouping capabilities on the data, SmartSearch offers a fast and efficient means for exporting results into Microsoft Excel. Only the active tab will export, and only items that have been checked will be included in the data file. To Export Record Data: 1. Choose the Archive that contains the index data you would like to output. 2. Select the items by placing a check in the box next to the item to be exported. 3. Click the Export Data to Excel button (Figure 5.9), located in the Collaboration section of the Home tab. (Fig. 5.9) 4. You will be prompted to specify a file name and location as to where the CSV (Comma Separated Value) file will be created. Exporting Documents SmartSearch users can easily export documents from the system back into its native format with or without the associated index data as well as automated conversion to PDF on output (with or without annotations) and naming the exported file by a specified field value. This is consistent with Square 9® Softworks’ philosophy towards open architecture and the belief that the data and documents belong to the customer. SmartSearch Admin User Guide 34 | P a g e To Export Documents: 1. Select the documents you would like to export from either the Archive or Search Results view and click the Export Documents button from the Home page. 2. To select the export path where the document will be placed, browse out to a local or network directory. 3. Select whether you want to export the documents only or with a CSV data file of the index values and the archive path. 4. Select your file export options (Figure 5.10); a. Select whether the documents will be converted to PDF format. b. By selecting PDF export, an additional option for embedding any annotations will also be presented. c. If exporting documents only, the user has the option to name the file using a field value from the drop down box available on the right. (Fig. 5.10) 5. In addition, exporting with a CSV data file is an option. A user can select this option choose a name for the CSV file and choose the delimiters that will appear in the CSV file. The defaults are a quote (“) for String Delimiter and a comma (,) for Field Delimiter (Figure 5.11). (Fig. 5.11) 6. Once the options are selected, click OK to begin the export. SmartSearch Admin User Guide 35 | P a g e