1
Installing the Stove (continued)
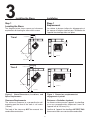
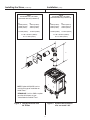
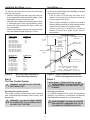
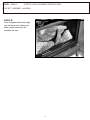
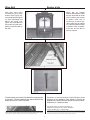
1. Apply the stove cement.
Installation (suite)
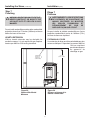
ST ARTING COLLA R
(COLLIE R D E DÉP ART )
1. Mettre du ciment réfractaire.
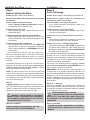
2.Line up the internal beads
and rotate the pipe sections
clockwise until locked.
3. Lock the vent components
into place.
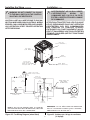
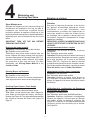
ST OVE SEALANT BEAD 3/8"
(FILE T D E C IMENT
RÉFRACT AIRE 9,5 mm)
2. Aligner
les
filets
intérieurs et tourner
les sections de conduit
dans le sens horaire
jusqu’à ce qu’elles se
bloquent.
3. Verrouiller les sections
en place.
FIRST VENT
COMPONENT
(PREMIÈRE SECTIO N
DU CONDUI T
DE VENTILA TION)
1 INCH (25.4 mm)
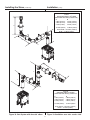
Figure 11.
Attaching the First
Vent Component to the
Starting Collars
!
WARNING: A 3/8 INCH (9.5 mm) BEAD
OF STOVE CEMENT MUST BE PLACED
AROUND THE STOVE STARTING COLLAR
BEFORE ATTACHING THE FIRST VENT
COMPONENT. FAILURE TO SEAL THIS
JOINT MAY CAUSE THE STOVE TO OPERATE
IMPROPERLY. SEE THE DIAGRAM.
Figure 11.
Pose de la première
section sur les colliers
de départ
!
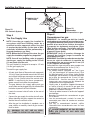
2. Continue Adding Vent Components
AVERTISSEMENT: METTRE UN FILET DE
9,5 MM (3/8 IN.) DE CIMENT RÉFRACTAIRE
AUTOUR DU COLLIER DE DÉPART AVANT
DE POSER LA PREMIÈRE SECTION POUR
GARANTIR L’ÉTANCHÉITÉ DE CE JOINT
ET ASSURER LE BON FONCTIONNE-MENT
DE L’APPAREIL DE CHAUFFAGE (VOIR LE
SCHÉMA).
2. Ajout de sections
To continue adding vent components in accordance
with the pre-planned vent system configuration:
Pour ajouter des sections selon la configuration
prévue:
• Ensure that each succeeding vent component
is securely fitted and locked into the preceding
component in the vent system.
• Veiller à ce que chaque section soit étroitement
ajustée et verrouillée sur la précédente.
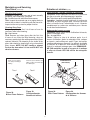
90° elbows may be installed and rotated to any point
around the preceding component’s vertical axis. If
an elbow does not end up in a locked position with
the preceding component, attach with a minimum of
three (3) sheet metal screws.
Les coudes à 90° peuvent être posés et pivotés dans
n’importe quelle position dans l’axe vertical de la
section précédente. Si un coude ne se verrouille pas
sur la section précédente, le bloquer avec au moins
trois (3) vis à tôle.
21