Download SPD SPD
Transcript
Flush Mount Installation Instructions
Flush Mount Installation Instructions
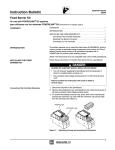
1. Select the location where the SPD4Home and SPD4Flush will be mounted. Aesthetics
may have to be sacrificed in order to achieve maximum surge protection.
2. Place the SPD4Flush plate where it will be mounted and trace the center hole and
mounting holes. Cut this shape into the mounting surface and mount the SPD4Flush
panel to the mounting surface (see Figure 3).
3. BE CAREFUL TO NOT DROP THE SPD4HOME INTO THE WALL.
4. Install the SPD4Home to the back side of the SPD4Flush plate using the four 8/32 x
5/8” thread cutting screws provided with the SPD4Flush.
1. Select the location where the SPD4Home and SPD4Flush will be mounted. Aesthetics
may have to be sacrificed in order to achieve maximum surge protection.
2. Place the SPD4Flush plate where it will be mounted and trace the center hole and
mounting holes. Cut this shape into the mounting surface and mount the SPD4Flush
panel to the mounting surface (see Figure 3).
3. BE CAREFUL TO NOT DROP THE SPD4HOME INTO THE WALL.
4. Install the SPD4Home to the back side of the SPD4Flush plate using the four 8/32 x
5/8” thread cutting screws provided with the SPD4Flush.
Figure 3
Typical Flush Mount SPD4Home Installation
Figure 3
Typical Flush Mount SPD4Home Installation
Thread Cutting Screws
Thread Cutting Screws
Top View
Top View
SPD
Side View
SPD
Note: Panelboard Cover Trim drawing based 2”. Adjust Male Conduit fitting length appropriately.
*Drawing reflects additional hardware not provided
Side View
Note: Panelboard Cover Trim drawing based 2”. Adjust Male Conduit fitting length appropriately.
*Drawing reflects additional hardware not provided
8268
8268
Manuel d’installation pour montage encastré
Manuel d’installation pour montage encastré
1. Choisir l’endroit où le SPD4Home et SPD4Flush seront installés. Il est possible de
devoir sacrifier l’esthétique afin d ‘assurer la meilleure protection possible.
2. Placer la plaque du SPD4Flush ou il sera installé et marquer le trou du milieu ainsi que
les trous des vis de montage. Découper la forme tracée afin d’installer le panneau
du SPD4Flush au mur (voir Figure 3).
3. FAIRE ATTENTION DE NE PAS FAIRE TOMBER LE SPD4HOME DANS LE MUR.
4. Installer le SPD4Home derrière la plaque pour montage encastré en utilisant les
quatre vis de 8/32X5/8 ‘’ fournies avec le SPD4Flush.
1. Choisir l’endroit où le SPD4Home et SPD4Flush seront installés. Il est possible de
devoir sacrifier l’esthétique afin d ‘assurer la meilleure protection possible.
2. Placer la plaque du SPD4Flush ou il sera installé et marquer le trou du milieu ainsi que
les trous des vis de montage. Découper la forme tracée afin d’installer le panneau
du SPD4Flush au mur (voir Figure 3).
3. FAIRE ATTENTION DE NE PAS FAIRE TOMBER LE SPD4HOME DANS LE MUR.
4. Installer le SPD4Home derrière la plaque pour montage encastré en utilisant les
quatre vis de 8/32X5/8 ‘’ fournies avec le SPD4Flush.
Figure 3
Installation typique du SPD4Home en montage encastré
Figure 3
Installation typique du SPD4Home en montage encastré
Thread Cutting Screws
Thread Cutting Screws
Top View
Top View
SPD
Note: Panelboard Cover Trim drawing based 2”. Adjust Male Conduit fitting length appropriately.
*Drawing reflects additional hardware not provided
Side View
SPD
Note: Panelboard Cover Trim drawing based 2”. Adjust Male Conduit fitting length appropriately.
*Drawing reflects additional hardware not provided
Side View


