1
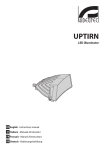
IRBD
Infrared LED illuminators
EN English - Instructions manual
IT Italiano - Manuale di istruzioni
FR Francais - Manuel d'instructions
DE Deutsch - Bedienungslanleitung
IRBD
Infrared LED illuminators
EN English - Instructions manual
Contents
EN - English - Instructions manual
ENGLISH
1 About this manual......................................................................................................... 3
1.1 Typographical conventions................................................................................................................................. 3
2 Notes on copyright and information on trademarks................................................. 3
3 Safety rules.................................................................................................................... 3
4 Identification................................................................................................................. 4
4.1 Product description and type designation.................................................................................................... 4
4.1.1 Constant Light™....................................................................................................................................................................... 4
4.1.2 Black Diamond™ technology.............................................................................................................................................. 4
4.1.3 12Vdc/24Vac Power-On-Board™........................................................................................................................................ 4
4.1.4 High power SMT LEDs........................................................................................................................................................... 4
4.1.5 Day/Night camera switching.............................................................................................................................................. 4
4.1.6 Pressure equalisation............................................................................................................................................................. 4
4.2 Product markings.................................................................................................................................................... 4
5 Declaration of conformity to product standards........................................................ 4
6 Preparing the product for use...................................................................................... 4
6.1 Contents and unpacking...................................................................................................................................... 4
6.2 Safely disposing of packaging material.......................................................................................................... 4
7 Installing and assembling............................................................................................. 5
7.1 Assembly.................................................................................................................................................................... 5
7.1.1 Lens/beam pattern................................................................................................................................................................. 5
7.2 Installation................................................................................................................................................................. 5
7.2.1 Connections......................................................................................................................................... 5
7.2.2 Photocell sensitivity............................................................................................................................................................... 6
7.2.3 Disabling the photocell........................................................................................................................................................ 6
7.2.4 Photocell.................................................................................................................................................................................... 6
7.2.5 IR power adjust........................................................................................................................................................................ 6
7.2.6 Remote switching................................................................................................................................................................... 6
7.2.7 Achievable distances............................................................................................................................................................. 6
8 Disposal of waste materials.......................................................................................... 7
9 Troubleshooting............................................................................................................ 7
9.1 Check power supply............................................................................................................................................... 7
9.2 Check photocell functions................................................................................................................................... 7
10 Technical data.............................................................................................................. 7
10.1 General..................................................................................................................................................................... 7
10.2 Mechanical.............................................................................................................................................................. 7
10.3 Electrical................................................................................................................................................................... 7
10.4 Environment........................................................................................................................................................... 7
10.5 Compliance to........................................................................................................................................................ 7
11 Technical drawings...................................................................................................... 8
2
3 Safety rules
Before installing and using this unit,
please read this manual carefully. Be sure
to keep it handy for later reference.
hh
1.1 Typographical conventions
DANGER!
High level hazard.
Risk of electric shock. Disconnect the
power supply before proceeding with any
operation, unless indicated otherwise.
gg
DANGER!
Hot surface.
Avoid contact. Surfaces are hot and
may cause personal injury if touched.
ll
WARNING!
Medium level hazard.
This operation is very important for
the system to function properly. Please
read the procedure described very
carefully and carry it out as instructed.
hh
INFO
Description of system specifications.
We recommend reading this part
carefully in order to understand
the subsequent stages.
jj
2 Notes on copyright and
information on trademarks
The manufacturer declines all responsibility
for any damage caused by an improper use
of the appliances mentioned in this manual.
Furthermore, the manufacturer reserves
the right to modify its contents without
any prior notice. The documentation
contained in this manual has been
collected with great care, the manufacturer,
however, cannot take any liability for
its use. The same thing can be said for
any person or company involved in the
creation and production of this manual.
• The device must be installed only and
exclusively by qualified technical personnel.
• Before any technical work on the appliance,
disconnect the power supply.
• Do not use power supply cables
that seem worn or old.
• Never, under any circumstances, make any
changes or connections that are not shown in
this handbook: improper use of the appliance
can cause serious hazards, risking the safety
of personnel and of the installation.
• Use only original spare parts. Not original
spare parts could cause fire, electrical
discharge or other hazards.
• Before proceeding with installation check the
supplied material to make sure it corresponds
to the order specification by examining the
identification labels ("4.2 Product markings", page 4).
The quoted names of products or companies
are trademarks or registered trademarks.
3
EN - English - Instructions manual
1 About this manual
EN - English - Instructions manual
4 Identification
4.1 Product description
and type designation
IRBD is the world’s first intelligent-IR illuminator.
Incorporating latest technology and installer
friendly design features IRBD provides absolute
performance in low light and no light conditions.
4.1.1 Constant Light™
Constant Light™ (patent pending) technology
compensates for LED degradation, a common
problem with all LED based IR illuminators to
guarantee a constant level of lighting performance
for the life of the illuminator. Constant Light
technology ensures repeatable performance
at varying temperatures, from device to device
and over the lifetime of the product.
4.1.2 Black Diamond™ technology
Black Diamond™ technology gives increased
distance performance especially at wide
angles and also ensures even illumination
throughout the depth of view.
4.1.3 12Vdc/24Vac Power-On-Board™
IRBD incorporates power in the head technology
which means the unit can be directly powered from
the industry standard 12Vdc to 24Vac supply.
4.1.4 High power SMT LEDs
IRBD uses high power surface mount LEDs
for longer life and high reliability.
4.1.5 Day/Night camera switching
Integration with day night cameras is accomodated
with relay contacts COM/NC/NO that indicate
when the photocell has activated the IR lamp.
4.1.6 Pressure equalisation
For greater reliability and longer product
lifetime IRBD range uses a pressure equalisation
valve that removes thermal expansion and
pressure cycling within the lamp head.
4.2 Product markings
See the label attached to the outside of the package.
4
5 Declaration of conformity
to product standards
This product complies with 89/336/EEC, 73/23/
EEC Low Voltage Directive meeting the following:
CE Standards
EN 60742/1/1990, EN 60598/2/5
Electromagnetic Compatibility Directive
meeting the following standards:
EN 50081/1, EN 50130-4
6 Preparing the
product for use
Any change that is not expressly
approved by the manufacturer
will invalidate the guarantee.
hh
6.1 Contents and unpacking
When the product is delivered, make sure that
the package is intact and that there are no
signs that it has been dropped or scratched.
If there are obvious signs of damage,
contact the supplier immediately.
Keep the packaging in case you need
to send the product for repairs.
Check the contents to make sure they correspond
with the list of materials as below:
• IRBD IR illuminator and bracket
• Power cable (5m)
• Instructions manual
6.2 Safely disposing of
packaging material
The packaging material can all be recycled.
The installer technician will be responsible for
separating the material for disposal, and in
any case for compliance with the legislation
in force where the device is to be used.
Bear in mind that if the material has to be returned
due to a fault, using the original packaging
for its transport is strongly recommended.
7 Installing and assembling
ll
Attach the illuminator bracket to the pan and tilt
unit,wall bracket or camera housing as required.
Only specialised personnel should be
allowed to install and assemble the device.
Connect the lamp to 12-40Vdc or 24Vac.
hh
Do not stare directly into the lamp
at a distance of less than 1.7m.
Adjust the pan of the illuminator to
match the camera field of view.
7.1 Assembly
Adjust the vertical alignment by loosening
the side bolts (one on each side of the
main body) to maximise the results.
hh
7.1.1 Lens/beam pattern
The lamp must be matched to the scene and to
the camera lens focal length. Before installation
ensure that the illuminator has been correctly
specified to support the CCTV system. The system
planning must take into account the product
achievable distances, lens/beam pattern and filter.
7.2 Installation
Commission the mains supply, camera
and monitoring control equipment.
Tilt the lamp downwards until the near part
of required field of view is saturated with
Infra-Red light, as viewed on the monitor.
Slowly and gradually tilt the lamp upwards
until the far part of the required field of view is
illuminated correctly on the monitor screen.
7.2.1 Connections
Pressure
equalisation
vent
Photocell
The illuminator is low voltage
12-40Vdc/24Vac.
hh
Day/Night
camera
switching
Telemetry
Furthest
object
EN - English - Instructions manual
When the lamp is running it is hot
to touch. Before touching switch off
the illuminator and allow to cool for
a minimum period of 10 minutes.
Setting up is critical to obtaining the best
performance from your IR lamp. Optimum
results are achieved by setting up at night
and viewing the results on a monitor.
hh
IR power
adjustments
Power input
12Vdc/24Vac
Photocell
sensitivity
adjustments
Fig. 02
AC/DC
power IN
Nearest
point
White
Brown
Black
Blue
Telemetry
Brown
Blue
Volt free
Day/Night
switching
Brown
Blue
COM
N/O
Fig. 01
Tilt the lamp slowly until the top of the lamp
is directed at the top of the furthest object.
1
3
2
4
1
3
2
4
1
3
2
4
N/C
Black
Fig. 03
5
EN - English - Instructions manual
7.2.2 Photocell sensitivity
7.2.5 IR power adjust
Lo
Hi
Fig. 05
Fig. 04
To adjust photocell sensitivity, first remove the
sealing cap. Then adjust the potentiometer to
turn the lamp on when the lighting conditions
are lighter or darker. Adjust further clockwise
to make the lamp turn on when it’s lighter
and counter clockwise when it’s darker.
To adjust the IR power, first unscrew the sealing
cap. Then adjust the power potentiometer
clockwise to increase the power and counter
clockwise to turn the IR power down.
Once all adjustments have been
carried out, make sure that the plugs
are properly closed so as to ensure
the hermetic seal of the product.
hh
7.2.3 Disabling the photocell
To disable the photocell adjust the sensitivity fully
clockwise. This should make the lamp turn on all the
time unless the telemetry input is closed circuit.
7.2.4 Photocell
The photocell is designed to automatically switch
the lamps ON at dusk and turn OFF at dawn. A high
degree of hysterisis is incorporated to avoid on/
off switching in marginal light conditions. The unit
is factory set at approximately 20 lux ON and 70
lux OFF, but can be adjusted using the photocell.
7.2.6 Remote switching
The lamp may be activated remotely by a volt-free
contact latched across the telemetry connector.
7.2.7 Achievable distances
Illumination distance achievable depend on the InfraRed characteristics of the CCD camera and lens used.
Product
code
Beam
angle
Achievable
distance
HOV
IR10BD
10°
220m/720ft
40m/125ft
IR30BD
30°
110m/360ft
60m/196ft
IR60BD
60°
70m/230ft
80m/265ft
Tab. 01
6
Achievable distance with CCD ½“ B/W high sensitive
cameras for night vision, ratio S/N greater than
20dB and minimum F1.4 lens aperture. The typical
distance of the subject to illuminate is in function of
the reflection coefficient of the illuminated scene.
8 Disposal of waste
materials
nn
Your product is designed and manufactured
with high quality materials and components
which can be recycled and reused.
This symbol means that electrical and electronic
equipment, at their end-of-life, should be disposed
of separately from your household waste.
Please dispose of this equipment at your local
Community waste collection or Recycling centre.
In the European Union there are separate collection
systems for used electrical and electronic products.
Dimensions (WxHxL): 152x188x115mm (6.0x7.4x4.5in)
Unit weight: 1.15kg / 2.5lb
10.3 Electrical
Input Voltage: 12-40Vdc or 24Vac +/-30%
Consumption: from 26 to 45W
Power supply in weatherproof box
Dimensions: 193x242x82mm (7.6x9.5x3.2in)
Consumption: 100W (powering two spots on maximum
power)
Built-in photocell for automatic ON/OFF operation
Day/Night (STATUS) output: energised control 30Vdc
-10mA (high when on)
Optional photocell input: clean NO contact (on when
closed)
Cable sizes: AWG 16 - 30 (0.5mm2 - 1.5mm2 –
0.02x0.06in2)
9 Troubleshooting
Operating temperature: -20°C / +50°C (-4°F / +122°F)
9.1 Check power supply
10.4 Environment
Check that the unit is connected to a voltage
between 12–40Vdc or 24Vac +/- 30%.
Indoor / Outdoor
9.2 Check photocell functions
Check the photocell functions by covering
with black tape and having the telemetry
link closed. The photocell operation has
an in-built delay of up to 5 seconds.
10 Technical data
10.1 General
Robust aluminium construction anodised white, with
black acrylic front fascia
EN - English - Instructions manual
This symbol mark and recycle system
are applied only to EU countries
and not applied to the countries
in the other area of the world.
10.2 Mechanical
IP66 according to EN 60529
Operating temperature: -50°C/+50°C (-58°F/+122°F) max
on full power
(up to +60° (140°F) with lamps off )
10.5 Compliance to
This product complies with 89/336/EEC, 72/23/EEC Low
Voltage Directive meeting the following CE Standards EN
60742/1/1990, EN 60598/2/5
Electromagnetic Compatibility Directive meeting the
following standards EN 61000-6-3, EN 61000-3-3, EN
61000-3-2, EN50130-4, EN 60950-1
IP67
18 high efficiency LED array with current limited integral
power circuit
Beam patterns: 10°, 30°, 60°
Infrared beam wavelength: 850nm
Supplied with instruction manual, wall mount U-bracket,
IP67 power connector and 5m (16ft) of connecting lead
Beam patterns and achievable distance*
IR10BD
10°, 850nm, 220m (720ft)
IR30BD
30°, 850nm, 110m (360ft)
IR60BD
60°, 850nm, 70m (230ft)
* Achievable distance with CCD ½“ B/W high sensitive cameras for night
vision, ratio S/N greater than 20dB and minimum F1.4 lens aperture.
The typical distance of the subject to illuminate is in function of the
reflection coefficient of the illuminated scene.
7
11 Technical drawings
34
138.7
4.2
118.5
152
20
140
52
R 5.2
152
Fig. 06
VIDEOTEC S.p.A.
www.videotec.com
Printed in Italy
MNVCIRBD_0923_EN
IRBD
Fari infrarosso a LED
IT Italiano - Manuale di istruzioni
Sommario
ITALIANO
1 Informazioni sul presente manuale............................................................................. 3
IT - Italiano - Manuale di istruzioni
1.1 Convenzioni tipografiche..................................................................................................................................... 3
2 Note sul copyright e informazioni sui marchi commerciali....................................... 3
3 Norme di sicurezza........................................................................................................ 3
4 Identificazione............................................................................................................... 4
4.1 Descrizione e designazione del prodotto...................................................................................................... 4
4.1.1 Constant Light™....................................................................................................................................................................... 4
4.1.2 Tecnologia Black Diamond™............................................................................................................................................... 4
4.1.3 12Vdc/24Vac Power-On-Board™........................................................................................................................................ 4
4.1.4 LED SMT ad alta potenza...................................................................................................................................................... 4
4.1.5 Dispositivo di commutazione Day/Night per la telecamera................................................................................... 4
4.1.6 Equalizzazione della pressione.......................................................................................................................................... 4
4.2 Marcatura del prodotto......................................................................................................................................... 4
5 Dichiarazione di conformità alle norme di prodotto.................................................. 4
6 Preparazione del prodotto per l'utilizzo..................................................................... 4
6.1 Contenuto e disimballaggio................................................................................................................................ 4
6.2 Smaltimento in sicurezza dei materiali di imballaggio.............................................................................. 4
7 Installazione e assemblaggio....................................................................................... 5
7.1 Assemblaggio........................................................................................................................................................... 5
7.1.1 Obiettivo/modello del fascio luminoso.......................................................................................................................... 5
7.2 Installazione.............................................................................................................................................................. 5
7.2.1 Collegamenti............................................................................................................................................................................ 5
7.2.2 Sensibilità della fotocellula.................................................................................................................................................. 6
7.2.3 Disabilitazione della fotocellula......................................................................................................................................... 6
7.2.4 Fotocellula................................................................................................................................................................................. 6
7.2.5 Regolazione della potenza degli infrarossi.................................................................................................................... 6
7.2.6 Controllo remoto..................................................................................................................................................................... 6
7.2.7 Distanze raggiungibili........................................................................................................................................................... 6
8 Smaltimento dei rifiuti.................................................................................................. 7
9 Troubleshooting............................................................................................................ 7
9.1 Controllo dell’alimentazione elettrica............................................................................................................. 7
9.2 Controllo delle funzioni della fotocellula....................................................................................................... 7
10 Dati tecnici................................................................................................................... 7
10.1 Generale................................................................................................................................................................... 7
10.2 Meccanica................................................................................................................................................................ 7
10.3 Elettrico.................................................................................................................................................................... 7
10.4 Ambiente................................................................................................................................................................. 7
10.5 Conformità.............................................................................................................................................................. 7
11 Disegni tecnici............................................................................................................. 8
2
1 Informazioni sul
presente manuale
1.1 Convenzioni tipografiche
PERICOLO!
Pericolosità elevata.
Rischio di scosse elettriche. Togliere
l'alimentazione prima di procedere con
le operazioni, salvo diversa indicazione.
gg
PERICOLO!
Superficie calda.
Evitare il contatto. Le superfici sono
calde e potrebbero causare danni
alla persona in caso di contatto.
ll
ATTENZIONE!
Pericolosità media.
L'operazione è molto importante per
il corretto funzionamento del sistema.
Si prega di leggere attentamente
la procedura indicata e di eseguirla
secondo le modalità previste.
hh
INFO
Descrizione delle caratteristiche del
sistema.
Si consiglia di leggere attentamente
per comprendere le fasi successive.
jj
2 Note sul copyright
e informazioni sui
marchi commerciali
Il produttore declina ogni responsabilità
per eventuali danni derivanti da un
uso improprio delle apparecchiature
menzionate in questo manuale. Si
riserva inoltre il diritto di modificarne il
contenuto senza preavviso. Ogni cura è
stata posta nella raccolta e nella verifica
della documentazione contenuta in
questo manuale, tuttavia il produttore
non può assumersi alcuna responsabilità
derivante dall'utilizzo della stessa.
Lo stesso dicasi per ogni persona o
società coinvolta nella creazione e
nella produzione di questo manuale.
hh
IT - Italiano - Manuale di istruzioni
Prima di installare e utilizzare questa unità, leggere
attentamente questo manuale. Conservare questo
manuale a portata di mano come riferimento futuro.
3 Norme di sicurezza
• L'installazione e la manutenzione del
dispositivo deve essere eseguita solo
da personale tecnico qualificato.
• Prima di effettuare interventi tecnici
sull'apparecchio togliere l'alimentazione elettrica.
• Non utilizzare cavi di alimentazione con
segni di usura o invecchiamento.
• Non effettuare per nessun motivo
alterazioni o collegamenti non previsti in
questo manuale: l'uso di apparecchi non
idonei può portare a gravi pericoli per la
sicurezza del personale e dell'impianto.
• Utilizzare solo parti di ricambio originali. Pezzi
di ricambio non originali potrebbero causare
incendi, scariche elettriche o altri pericoli.
• Prima di procedere con l'installazione controllare
che il materiale fornito corrisponda alle specifiche
richieste esaminando le etichette di marcatura
("4.2 Marcatura del prodotto", pagina 4).
I nomi di prodotto o di aziende citati sono
marchi commerciali o marchi commerciali
registrati appartenenti alle rispettive società.
3
4 Identificazione
IT - Italiano - Manuale di istruzioni
4.1 Descrizione e
designazione del prodotto
IRBD è il primo dispositivo di illuminazione
intelligente a raggi infrarossi al mondo.
L’incorporazione della più recente tecnologia
e le caratteristiche di facile installazione di
IRBD garantiscono prestazioni eccellenti in
condizioni di luminosità scarsa o assente.
4.1.1 Constant Light™
La tecnologia Constant Light™ (in attesa di brevetto)
compensa l’usura del LED, un problema comune
a tutti i dispositivi d’illuminazione LED a infrarossi,
per garantire un livello costante nelle prestazioni
d’illuminazione per tutta la durata del dispositivo.
La tecnologia Constant Light assicura prestazioni
ripetibili col variare della temperatura, da dispositivo
a dispositivo e per tutta la durata del prodotto.
4.1.2 Tecnologia Black Diamond™
La tecnologia Black Diamond™ migliora la
performance a distanze elevate, soprattutto da ampie
angolazioni ed inoltre garantisce l'illuminazione
per tutta la profondità del campo visivo.
4.1.3 12Vdc/24Vac Power-On-Board™
IRBD incorpora l’alimentazione nella
tecnologia head, e ciò significa che l'unità
può essere alimentata direttamente con gli
standard industriali di 12Vdc fino a 24Vac.
4.1.4 LED SMT ad alta potenza
IRBD usa LED ad alta potenza montati
superficialmente per una maggiore
durata e un'affidabilità elevata.
4.1.5 Dispositivo di commutazione
Day/Night per la telecamera
L’integrazione delle videocamere giorno/
notte viene ottenuta con contatti a relé COM/
NC/NA che indicano quando la fotocellula
ha attivato la lampada a infrarossi.
4.1.6 Equalizzazione della pressione
Per ottenere una maggiore affidabilità e una
maggiore durata del prodotto, la gamma
IRBD usa una valvola di equalizzazione della
pressione che elimina la dilatazione termica e
i cicli di pressione sulla testa della lampada.
4.2 Marcatura del prodotto
Vedere l’etichetta posta sull’esterno dell’imballo.
4
5 Dichiarazione
di conformità alle
norme di prodotto
Il prodotto è conforme alle direttive bassa tensione
89/336/EEC, 73/23/EEC, e alle seguenti:
CE Standards
EN 60742/1/1990, EN 60598/2/5
Direttiva sulla Compatibilità
Elettromagnetica, e seguenti norme:
EN 50081/1, EN 50130-4
6 Preparazione del
prodotto per l'utilizzo
Qualsiasi cambiamento non
espressamente approvato dal
costruttore fa decadere la garanzia.
hh
6.1 Contenuto e disimballaggio
Alla consegna del prodotto verificare che
l'imballo sia integro e non abbia segni
evidenti di cadute o abrasioni.
In caso di evidenti segni di danno all'imballo
contattare immediatamente il fornitore.
Conservare l'imballo nel caso sia necessario
inviare il prodotto in riparazione.
Controllare che il contenuto sia rispondente
alla lista del materiale sotto indicata:
• Faro IR IRBD e staffa
• Cavo di alimentazione (5m)
• Manuale di istruzioni
6.2 Smaltimento in sicurezza
dei materiali di imballaggio
I materiali d'imballo sono costituiti interamente
da materiale riciclabile. Sarà cura del tecnico
installatore smaltirli secondo le modalità di
raccolta differenziata o comunque secondo
le norme vigenti nel Paese di utilizzo.
Si ricorda comunque che in caso di ritorno di
materiale con malfunzionamenti è consigliato
l'imballaggio originale per il trasporto.
7 Installazione e
assemblaggio
La messa a punto è critica per ottenere
le migliori prestazioni della lampada
a infrarossi. Vengono ottenuti ottimi
risultati regolandola di notte e
controllando i risultati su un monitor.
hh
L'installazione e l'assemblaggio vanno
eseguiti solo da personale specializzato.
hh
Non guardare direttamente la lampada
quando ci si trova a meno di 1,7m.
hh
Agganciare la staffa del dispositivo d’illuminazione
all'unità di brandeggio; si richiedono una staffa da
parete o un alloggiamento per la telecamera.
Collegare la lampada a una
tensione da 12Vdc a 24Vac.
Mettere in servizio la rete d'alimentazione, la
telecamera e l'attrezzatura per il controllo da monitor.
7.1 Assemblaggio
Regolare la panoramica del dispositivo
d'illuminazione in modo da adattarla
al campo visivo della telecamera.
7.1.1 Obiettivo/modello
del fascio luminoso
Regolare l’allineamento verticale allentando i
bulloni laterali (uno in ciascun lato del corpo
principale) per ottenere i massimi risultati.
La lampadina dovrà essere scelta a seconda
dell’ambiente e della lunghezza focale dell'obiettivo
della telecamera. Prima dell’istallazione, verificare
che le specifiche del dispositivo d’illuminazione
siano compatibili con l’impianto televisivo a circuito
chiuso. La pianificazione dell’impianto dovrà tenere in
considerazione la distanza raggiungibile dal prodotto,
l’obiettivo/modello del fascio luminoso e il filtro.
7.2 Installazione
Inclinare la lampada verso il basso finché la
parte vicina al campo visivo richiesto si saturi
di raggi infrarossi, come si vede nel monitor.
Lentamente e gradualmente inclinare la lampada verso
l’alto finché la parte distante del campo visivo richiesto
si illumini correttamente sullo schermo del monitor.
7.2.1 Collegamenti
Apertura per la
regolazione
della pressione
Fotocellula
Il dispositivo d'illuminazione funziona
a bassa tensione, tra 12Vdc e 24Vac.
hh
Commutatore
telecamera
Day/Night
Telemetria
Oggetto
più lontano
Regolazione
potenza IR
Alimentazione
in entrata
12Vdc/24Vac
Regolazione
sensibilità
fotocellula
Fig. 02
Alimentatore
AC/DC IN
Punto
più vicino
Bianco
Marrone
Fig. 01
Nero
Blu
1
Inclinare piano la lampada finché la parte superiore
si trova in linea con l’oggetto più lontano.
3
2
4
Telemetria
Marrone
Blu
1
3
2
4
Interruttore
Volt free
Day/Night
Marrone
Blu
COM
N/O
1
3
2
4
N/C
Nero
Fig. 03
5
IT - Italiano - Manuale di istruzioni
Quando la lampada sta funzionando
scotta. Prima di toccarla, spegnere il
dispositivo d’illuminazione e lasciarlo
raffreddare per almeno 10 minuti.
ll
IT - Italiano - Manuale di istruzioni
7.2.2 Sensibilità della fotocellula
7.2.5 Regolazione della
potenza degli infrarossi
Lo
Hi
Fig. 04
Fig. 05
Per regolare la sensibilità della fotocellula,
per prima cosa rimuovere il tappo di chiusura
ermetica. Quindi regolare il potenziometro per
accendere la lampada quando le condizioni di
luminosità sono più chiare o più scure. Regolare
ulteriormente in senso orario affinché la lampada
si accenda quando è più chiaro, e in senso
antiorario per accenderla quando è più scuro.
Per regolare la potenza degli infrarossi, per
prima cosa svitare il tappo di chiusura ermetica.
Quindi regolare il potenziometro in senso
orario per aumentare la potenza degli infrarossi
e in senso antiorario per diminuirla.
Al termine delle regolazioni
accertarsi che i tappi di chiusura siano
adeguatamente serrati per garantire
la tenuta ermetica del prodotto.
hh
7.2.3 Disabilitazione della fotocellula
Per disabilitare la fotocellula, regolare la sensibilità
totalmente in senso orario. Ciò dovrebbe far
accendere la lampada sempre a meno che
l’ingresso della telemetria sia un circuito chiuso.
7.2.4 Fotocellula
La fotocellula è stata progettata affinché la lampada
si accenda automaticamente al crepuscolo e si
spenga all'alba. È stato stabilito un alto livello di
isteresi per evitare la commutazione on/off in
condizioni di luce limite. L’unità viene configurata in
fabbrica per accendersi a circa 20 lux e spegnersi a
circa 70 lux, ma si può regolare usando la fotocellula.
7.2.6 Controllo remoto
La lampada può essere attivata a distanza
attraverso un contatto pulito collegato
al connettore della telemetria.
7.2.7 Distanze raggiungibili
Le distanze d’illuminazione raggiungibili
dipendono dalle caratteristiche Infrarosse
della telecamera CCD e dall’obiettivo usato.
Codice
prodotto
Angolo
fascio
Distanza
raggiungibile
HOV
IR10BD
10°
220m
40m
IR30BD
30°
110m
60m
IR60BD
60°
70m
80m
Tab. 01
6
Distanze raggiungibili con telecamere ad alta
sensibilità per la visione notturna CCD ½“ B/W,
rapporto S/N superiore a 20dB ed apertura
minima dell’obiettivo pari a F1.4. La distanza
tipica del soggetto da illuminare é in funzione del
coefficiente di riflessione della scena illuminata.
8 Smaltimento dei rifiuti
Questo simbolo e il sistema di
riciclaggio sono validi solo nei paesi
dell'EU e non trovano applicazione
in altri paesi del mondo.
nn
Prodotti elettrici ed elettronici che portano
questo simbolo alla fine dell'uso devono essere
smaltiti separatamente dai rifiuti casalinghi.
Vi preghiamo di smaltire questo apparecchio
in un Centro di raccolta o in un'Ecostazione.
Nell'Unione Europea esistono sistemi di raccolta
differenziata per prodotti elettrici ed elettronici.
9 Troubleshooting
9.1 Controllo
dell’alimentazione elettrica
Controllare che l’unità sia collegata a una tensione
compresa tra 12 e 40Vdc o a 24Vac +/- 30%.
9.2 Controllo delle funzioni
della fotocellula
Controllare le funzioni della fotocellula tappandola
con un nastro nero e lasciando chiuso il collegamento
della telemetria. Il funzionamento della fotocellula
ha un ritardo preimpostato di 5 secondi.
10 Dati tecnici
10.1 Generale
Dimensioni (WxHxL): 152x188x115mm
Peso unitario: 1.15kg
10.3 Elettrico
Alimentazione: 12-40Vdc o 24Vac +/-30%
IT - Italiano - Manuale di istruzioni
Il vostro prodotto è stato costruito da
materiali e componenti di alta qualità,
che sono riutilizzabili o riciclabili.
10.2 Meccanica
Consumo: da 26 a 45W
Alimentatore in scatola stagna
Dimensioni: 193x242x82mm
Consumo: 100W (alimentando due fari alla massima
potenza)
Fotocellula integrata per accensione e spegnimento
automatico
Uscita Day/Night (STATUS): comando in tensione 30Vdc
-10mA (alto quando attivo)
Ingresso fotocellula opzionale: contatto pulito NA (attiva
se chiusa)
Dimensioni cavi: AWG 16 - 30 (0.5mm2 - 1.5mm2)
Temperatura d’esercizio: -20°C / +50°C
IP66 in accordo con EN 60529
10.4 Ambiente
Interno / Esterno
Temperature d’esercizio: -50°C/+50°C limite a massima
potenza
(fino a +60°C con lampade spente)
10.5 Conformità
In accordo con 89/336/EEC, 72/23/EEC Low Voltage
Directive secondo CE Standards EN 60742/1/1990, EN
60598/2/5
Electromagnetic Compatibility Directive in accordo con
EN 61000-6-3, EN 61000-3-3, EN 61000-3-2, EN50130-4,
EN 60950-1
IP67
Corpo in alluminio anodizzato bianco e frontale in
acrilico nero
18 LED ad alta efficienza con circuito di alimentazione
integrato a corrente limitata
Angolo di diffusione: 10°, 30°, 60°
Lunghezza d’onda: 850nm
Fornito con manuale istruzione, supporto parete,
connettori IP67 e 5m di cavo
Angolo di diffusione e distanze*
IR10BD
10°, 850nm, 220m
IR30BD
30°, 850nm, 110m
IR60BD
60°, 850nm, 70m
* Distanze raggiungibili con telecamere ad alta sensibilità per la visione
notturna CCD ½“ B/W, rapporto S/N superiore a 20dB ed apertura minima
dell’obiettivo pari a F1.4. La distanza tipica del soggetto da illuminare é in
funzione del coefficiente di riflessione della scena illuminata.
7
11 Disegni tecnici
34
138.7
4.2
118.5
152
20
140
52
R 5.2
152
Fig. 06
VIDEOTEC S.p.A.
www.videotec.com
Printed in Italy
MNVCIRBD_0923_IT
IRBD
Projecteurs infrarouge a LED
FR Français - Manuel d'instructions
Sommaire
FRANÇAIS
1 À propos de ce mode d’emploi..................................................................................... 3
FR - Francais - Manuel d'instructions
1.1 Conventions typographiques............................................................................................................................. 3
2 Notes sur le copyright et informations sur les marques de commerce..................... 3
3 Normes de securité........................................................................................................ 3
4 Identification................................................................................................................. 4
4.1 Description et désignation du produit............................................................................................................ 4
4.1.1 Constant Light ™...................................................................................................................................................................... 4
4.1.2 Technologie Black Diamond ™............................................................................................................................................ 4
4.1.3 Power-On-Board ™ 12Vdc/24Vac....................................................................................................................................... 4
4.1.4 LED SMT haute puissance.................................................................................................................................................... 4
4.1.5 Dispositif de commutation Day/Night pour la caméra............................................................................................. 4
4.1.6 Égalisation de la pression..................................................................................................................................................... 4
4.2 Marquage du produit............................................................................................................................................ 4
5 Déclaration de conformité aux normes du produit.................................................... 4
6 Préparation du produit en vue de l’utilisation............................................................ 4
6.1 Contenu et déballage............................................................................................................................................ 4
6.2 Élimination sans danger des matériaux d’emballage................................................................................ 4
7 Installation et assemblage............................................................................................ 5
7.1 Assemblage............................................................................................................................................................... 5
7.1.1 Objectif/modèle du faisceau lumineux........................................................................................................................... 5
7.2 Installation................................................................................................................................................................. 5
7.2.1 Connexions................................................................................................................................................................................ 5
7.2.2 Sensibilité de la photocellule.............................................................................................................................................. 6
7.2.3 Désactivation de la photocellule....................................................................................................................................... 6
7.2.4 Photocellule.............................................................................................................................................................................. 6
7.2.5 Réglage de la puissance des infrarouges....................................................................................................................... 6
7.2.6 Commutation à distance...................................................................................................................................................... 6
7.2.7 Distances possibles................................................................................................................................................................ 6
8 Élimination des déchets................................................................................................ 7
9 Troubleshooting............................................................................................................ 7
9.1 Contrôle de l’alimentation électrique.............................................................................................................. 7
9.2 Contrôle des fonctions de la photocellule..................................................................................................... 7
10 Données techniques................................................................................................... 7
10.1 Généralités.............................................................................................................................................................. 7
10.2 Mécanique............................................................................................................................................................... 7
10.3 Électrique................................................................................................................................................................. 7
10.4 Environnement...................................................................................................................................................... 7
10.5 En conformité avec............................................................................................................................................... 7
11 Dessins techniques...................................................................................................... 8
2
1 À propos de ce
mode d’emploi
Avant d’installer et d’utiliser cet appareil,
veuillez lire attentivement ce mode d’emploi.
Conservez-le à portée de main pour pouvoir
vous y reporter en cas de besoin.
DANGER!
Risque élevé.
Risque de choc électrique. Sauf indication
contraire, sectionner l’alimentation
avant de procéder à toute opération.
gg
DANGER!
Surface à température élevée.
Evitez le contact. La température des
surfaces est élevée et leur contact peut
provoquer des blessures corporelles.
ll
ATTENTION!
Risque moyen.
Opération extrêmement importante
en vue d’un fonctionnement correct du
système; lire avec attention les opérations
indiquées et s’y conformer rigoureusement.
hh
REMARQUE
Description des caractéristiques du
système.
Il est conseillé de procéder à une
lecture attentive pour une meilleure
compréhension des phases suivantes.
jj
Le producteur décline toute responsabilité
pour les dommages éventuels dus à une
utilisation non appropriée des appareils
mentionnés dans ce manuel. On réserve
en outre le droit d’en modifier le contenu
sans préavis. La documentation contenue
dans ce manuel a été rassemblée et vérifiée
avec le plus grand soin, cependant, le
producteur ne peut pas s’assumer aucune
responsabilité dérivante de l’emploi de
celle là. La même chose vaut pour chaque
personne ou société impliquées dans la
création et la production de ce manuel.
hh
• L’installation et l’entretien du dispositif
doivent être exclusivement être effectués
par un personnel technique qualifié.
• Sectionner l’alimentation électrique avant
toute intervention technique sur l’appareil.
• Ne pas utiliser de câbles d’alimentation
usés ou endommagés.
• Ne procéder sous aucun prétexte à des
modifications ou des connexions non prévues
dans ce manuel: l’utilisation d’appareils non
adéquats peut comporter des dangers graves
pour la sécurité du personnel et de l’installation.
• Utiliser uniquement des pièces de rechange
d’origine. Les pièces non d’origine peuvent être
source d’incendies, de choc électrique ou autres.
• Avant de procéder à l’installation, contrôler que
le matériel fourni correspond à la commande
et examiner les étiquettes de marquage
("1.1 Conventions typographiques", page 3).
2 Notes sur le copyright
et informations sur les
marques de commerce
Les noms de produit ou de sociétés cités
sont des marques de commerce ou des
marques de commerce enregistrées.
3
FR - Francais - Manuel d'instructions
1.1 Conventions typographiques
3 Normes de securité
4 Identification
FR - Francais - Manuel d'instructions
4.1 Description et
désignation du produit
IRBD est le premier dispositif d’illumination
intelligent à rayons infrarouge. L’incorporation
de la toute dernière technologie et les
caractéristiques d’installation simplifiée du
IRBD garantissent des performances optimales
en cas de luminosité faible ou inexistante.
4.1.1 Constant Light ™
La technologie Constant Light™ (en attente de brevet)
compense l’usure de la LED, un problème commun à
tous les dispositifs d’illumination LED à infrarouges,
afin de garantir une qualité d’illumination constante
pour toute la durée du dispositif. La technologie
Constant Light garantit des prestations répétables en
cas de variation de la température, entre les différents
dispositifs et pour toute la durée du produit.
4.1.2 Technologie Black Diamond ™
La technologie Black Diamond améliore les
performances sur les grandes distances, en particulier
à partir d’angles ouverts, et garantit également
l'illumination de toute la profondeur du champ visuel.
4.1.3 Power-On-Board ™ 12Vdc/24Vac
IRBD incorpore l’alimentation à la technologie
head, ce qui signifie que l’unité peut être
directement alimentée par la fourniture
standard industrielle 12Vdc jusqu’à 24Vac.
4.1.4 LED SMT haute puissance
IRBD utilise des LED à haute puissance
montées en surface en vue d’une durée
et d’une fiabilité supérieures.
4.1.5 Dispositif de commutation
Day/Night pour la caméra
L’intégration des caméras jour/nuit s'effectue au
moyen de contacts à relais COM/NC/NA qui indiquent
quand la photocellule a activé la lampe infrarouges.
4.1.6 Égalisation de la pression
En vue d’une plus grande fiabilité et durée du
produit, la gamme IRBD utilise un clapet d’égalisation
de la pression qui élimine la dilatation thermique
et les cycles de pression sur la tête de la lampe.
4.2 Marquage du produit
Voir l’étiquette sur l’extérieur de l’emballage.
4
5 Déclaration de
conformité aux
normes du produit
Le produit est conforme aux directives basse tension
89/336/EEC, 73/23/EEC, et aux normes suivantes:
CE Standards
EN 60742/1/1990, EN 60598/2/5
Directive sur la compatibilité
électromagnétique et normes suivantes:
EN 50081/1, EN 50130-4
6 Préparation du produit
en vue de l’utilisation
Toute modification non approuvée
expressément par le fabricant entraînera
l’annulation de la garantie.
hh
6.1 Contenu et déballage
Lors de la livraison du produit, vérifier que
l’emballage est en bon état et l’absence de
tout signe évident de chute ou d’abrasion.
En cas de dommages évidents, contacter
immédiatement le fournisseur.
Conserver l’emballage en cas de nécessité
d’expédition du produit pour réparation.
Contrôler que le contenu correspond à la
liste matériel indiquée ci-dessous:
• Dispositif d’illumination IRBD à infrarouges et étrier
• Câble d’alimentation (5m)
• Manuel d'instructions
6.2 Élimination sans danger
des matériaux d’emballage
Le matériel d’emballage est entièrement composé
de matériaux recyclables. Le technicien chargé de
l’installation est tenu de l’éliminer conformément aux
dispositions en matière de collecte sélective et selon
les normes en vigueur dans le pays d’utilisation.
En cas de dysfonctionnement et de retour
de matériel , il est conseillé d’utiliser
l’emballage original pour le transport.
7 Installation et
assemblage
La mise au point est fondamentale afin
d’obtenir des performances optimales
de la lampe à infrarouges. En vue de
résultats optimaux, la régler de nuit et
contrôler les résultats sur un moniteur.
hh
La lampe chauffe fortement durant
le fonctionnement. Avant de la
toucher, éteindre le dispositif
d’illumination et le laisser refroidir
durant 10 minutes minimum.
ll
Fixer l’étrier du dispositif d'illumination à l’unité
tourelle ; il est nécessaire de disposer d’un étrier
mural ou d’un logement pour la caméra.
hh
Ne pas regarder directement la lampe
à une distance inférieure à 1.7m.
hh
Mettre en service le réseau d’alimentation, la caméra
et l’équipement pour le contrôle par moniteur.
Régler la visibilité panoramique du
dispositif d’illumination pour l’adapter
au champ visuel de la caméra.
7.1 Assemblage
Régler l’alignement vertical en desserrant les
boulons latéraux (un sur chaque côté de la structure
principale) en vue de résultats optimaux.
7.1.1 Objectif/modèle du
faisceau lumineux
Incliner la lampe vers le bas jusqu’à ce que la
partie proche du champ visuel soit saturée de
rayons infrarouges, comme sur le moniteur.
La lampe devra être choisie en fonction de
l’environnement et de la longueur focale de
l’objectif de la caméra. Avant l’installation,
vérifier que les spécifications du dispositif
d’illumination sont compatibles avec l’installation
de télévision à circuit fermé. La planification de
l’installation devra tenir compte de la distance
pouvant être atteinte par le produit, de l’objectif/
modèle du faisceau lumineux et du filtre.
Incliner lentement et graduellement la lampe
vers le haut, jusqu’à ce que la partie éloignée
du champ visuel requis soit correctement
illuminée sur l’écran du moniteur.
7.2.1 Connexions
Ouverture pour
le réglage
de la pression
Photocellule
7.2 Installation
Le dispositif d’illumination fonctionne
à basse tension entre 12Vdc et 24Vac.
hh
Commutateur
Day/Night
pour la caméra
Télémétrie
Réglage
puissance IR
Objet plus
éloigné
FR - Francais - Manuel d'instructions
Brancher la lampe à une tension de 12Vdc à 24Vac.
L’installation et l’assemblage
doivent exclusivement être effectués
par un personnel spécialisé.
Alimentation
en entrée
12Vdc/24Vac
Réglages
sensibilité
photocellule
Fig. 02
Alimentation
AC/DC IN
Blanc
Marron
Point le
plus proche
Noir
Bleu
1
3
2
Fig. 01
4
Télémétrie
Marron
Bleu
1
3
2
4
Interrupteur
Volt free
Day/Night
Marron
Bleu
COM
N/O
1
3
2
4
N/C
Incliner lentement la lampe jusqu’à aligner sa
partie supérieure avec l’objet le plus éloigné.
Noir
Fig. 03
5
FR - Francais - Manuel d'instructions
7.2.2 Sensibilité de la photocellule
7.2.5 Réglage de la puissance
des infrarouges
Lo
Hi
Fig. 04
Fig. 05
Pour régler la sensibilité de la photocellule, retirer
tout d’abord le bouchon de fermeture hermétique.
Régler ensuite le potentiomètre pour allumer la
lampe en fonction des conditions de luminosité
(plus claires ou plus sombres). Régler à nouveau
dans le sens des aiguilles d’une montre pour
que la lampe s’allume lorsqu’il fait plus clair, et
dans le sens inverse des aiguilles d’une montre
pour l’allumer lorsqu’il fait plus sombre.
Pour régler la puissance des infrarouges, dévisser
tout d’abord le bouchon de fermeture hermétique.
Régler ensuite le potentiomètre dans le sens
des aiguilles d’une montre pour augmenter la
puissance des infrarouges et dans le sens inverse
des aiguilles d’une montre pour la diminuer.
À la fin des réglages, contrôler que
les bouchons de fermeture sont
correctement serrés en vue de garantir
la tenue hermétique du produit.
hh
7.2.3 Désactivation de la photocellule
Pour désactiver la photocellule, régler la
sensibilité à fond dans le sens des aiguilles
d’une montre. La lampe doit s’allumer, sauf si
l’entrée de télémétrie est en circuit fermé.
7.2.4 Photocellule
La photocellule a été projetée afin que la lampe
s’allume automatiquement au crépuscule et s’éteigne
à l’aube. Un niveau élevé d’hystérésis a été défini afin
d’éviter toute commutation on/off en cas de lumière
limite. L’unité est configurée en usine pour s’allumer
à environ 20 lux et s’éteindre à environ 70 lux, mais
elle peut être réglée au moyen de la photocellule.
7.2.6 Commutation à distance
La lampe peut être activée à distance au moyen d’un
contact sec branché au connecteur de la télémétrie.
7.2.7 Distances possibles
Les distances d’illuminations possibles
dépendent des caractéristiques infrarouges
de la caméra CCD et de l’objectif utilisé.
Code
produit
Angle
Distance
faisceau prévue
HOV
IR10BD
10°
220m
40m
IR30BD
30°
110m
60m
IR60BD
60°
70m
80m
Tab. 01
6
Distances maximum avec des caméras haute sensibilité
de vision nocturne CCD ½“ B/W, rapport S/N supérieur
à 20dB et ouverture min. de l’objectif de F1.4. La
distance indicative du sujet à éclairer est en fonction
du coefficient de réflexion de la scène illuminée.
8 Élimination des déchets
Ce symbole et le système de recyclage
ne sont appliqués que dans les pays UE
et non dans les autres pays du monde.
nn
10.2 Mécanique
Dimensions (WxHxL): 152x188x115mm
Poids net: 1.15kg
10.3 Électrique
Votre produit est conçu et fabriqué avec des
matèriels et des composants de qualité supérieure
qui peuvent être recyclés et réutilisés.
Alimentation: 12-40Vdc ou 24Vac +/-30%
Ce symbole signifie que les équipements électriques
et électroniques en fin de vie doivent être
éliminés séparément des ordures ménagères.
Dimensions : 193x242x82mm
Nous vous prions donc de confier cet équipement
à votre Centre local de collecte ou Recyclage.
Photocellule integrée pour allumage/coupure
automatique
Dans l’Union Européenne, il existe des
systèmes sélectifs de collecte pour les produits
électriques et électroniques usagés.
Sortie Day/Night (STATUS) : commande tension 30Vdc
-10mA (haut si activé)
9.1 Contrôle de
l’alimentation électrique
Contrôler que l’unité est branchée à une tension
comprise entre 12 et 40Vdc ou à 24Vac +/- 30%.
9.2 Contrôle des fonctions
de la photocellule
Contrôler les fonctions de la photocellule en
l’obscurcissant avec un ruban adhésif noir et
en fermant la connexion de la télémétrie. Le
fonctionnement de la photocellule comporte
un retard prédéfini de 5 secondes.
10 Données techniques
Alimentation en bôite étanche
Consommation : 100W (alimentation de deux phares à la
puissance max.)
Entrée photocellule en option : contact sec NO (activée
si fermée)
Dimensions câbles : AWG 16 - 30 (0.5mm2 - 1.5mm2)
Température d’exercice: -20°C / + 50°C
IP66 selon EN 60529
10.4 Environnement
Intérieur / Extérieur
Température d’exercice: -50°C/+50°C limite à puissance
maximum
(jusq’à +60° avec lampes éteintes)
10.5 En conformité avec
89/336/EEC, 72/23/EEC Low Voltage Directive selon CE
Standards EN 60742/1/1990, EN 60598/2/5
Electromagnetic Compatibility Directive selon EN 610006-3, EN 61000-3-3, EN 61000-3-2, EN50130-4, EN 60950-1
IP67
10.1 Généralités
Corps en aluminium anodize blanc et façe avant en
acrylique noir
18 LED à haute efficacité avec circuit integral à courant
limitée
Angle de diffusion: 10°, 30°, 60°
Longueur d’onde: 850nm
Livré avec manuel d’instructions, support mural,
connecteurs IP67 et câble de 5m
Angle de diffusion et distances*
IR10BD
10°, 850nm, 220m
IR30BD
30°, 850nm, 110m
IR60BD
60°, 850nm, 70m
* Distances maximum avec des caméras haute sensibilité de vision nocturne
CCD ½“ B/W, rapport S/N supérieur à 20dB et ouverture min. de l’objectif de
F1.4. La distance indicative du sujet à éclairer est en fonction du coefficient
de réflexion de la scène illuminée.
7
FR - Francais - Manuel d'instructions
9 Troubleshooting
Consommation: de 26 à 45W
11 Dessins techniques
34
138.7
4.2
118.5
152
20
140
52
R 5.2
152
Fig. 06
VIDEOTEC S.p.A.
www.videotec.com
Printed in Italy
MNVCIRBD_0923_FR
IRBD
Infrarot- LED- Scheinwerfer
DE Deutsch - Bedienungslanleitung
Inhaltsverzeichnis
DEUTSCH
1 Allgemeines................................................................................................................... 3
1.1 Schreibweisen.......................................................................................................................................................... 3
2 Anmerkungen zum Copyright und Informationen zu den Handelsmarken............. 3
3 Sichereitsnormen.......................................................................................................... 3
4 Identifizierung............................................................................................................... 4
DE - Deutsch - Bedienungslanleitung
4.1 Beschreibung und Bezeichnung des Produktes.......................................................................................... 4
4.1.1 Constant Light ™...................................................................................................................................................................... 4
4.1.2 Black Diamond ™ Technology............................................................................................................................................. 4
4.1.3 Power-On-Board ™ 12Vdc/24Vac....................................................................................................................................... 4
4.1.4 Hochleistungsleuchtdioden SMT...................................................................................................................................... 4
4.1.5 Day/Night-Kameraumschaltung....................................................................................................................................... 4
4.1.6 Druckausgleich........................................................................................................................................................................ 4
4.2 Kennzeichnung des Produkts............................................................................................................................. 4
5 Erklärung zur Übereinstimmung mit den Produktnormen....................................... 4
6 Vorbereitung des Produktes auf den Gebrauch......................................................... 4
6.1 Inhalt und Entfernen der Verpackung............................................................................................................. 4
6.2 Sichere Entsorgung der Verpackungsmaterialien....................................................................................... 4
7 Installation und Zusammenbau................................................................................... 5
7.1 Zusammenbau......................................................................................................................................................... 5
7.1.1 Objektiv/Lichtstrahlenmuster............................................................................................................................................ 5
7.2 Installation................................................................................................................................................................. 5
7.2.1 Verbindungen........................................................................................................................................................................... 5
7.2.2 Empfindlichkeit der Fotozelle............................................................................................................................................. 6
7.2.3 Ausschalten der Fotozelle.................................................................................................................................................... 6
7.2.4 Fotozelle..................................................................................................................................................................................... 6
7.2.5 Einstellung der Infrarotstrahlenleistung......................................................................................................................... 6
7.2.6 Ferne Bedienung..................................................................................................................................................................... 6
7.2.7 Überbrückbare Entfernungen............................................................................................................................................ 6
8 Müllentsorgungsstellen................................................................................................ 7
9 Troubleshooting............................................................................................................ 7
9.1 Kontrolle der Stromversorgung......................................................................................................................... 7
9.2 Kontrolle der Fotozellenfunktione.................................................................................................................... 7
10 Technische Daten......................................................................................................... 7
10.1 Allgemeines............................................................................................................................................................ 7
10.2 Mechanik................................................................................................................................................................. 7
10.3 Elektrik...................................................................................................................................................................... 7
10.4 Umgebung.............................................................................................................................................................. 7
10.5 Zertifizierungen..................................................................................................................................................... 7
11 Technische Zeichnungen............................................................................................ 8
2
1 Allgemeines
3 Sichereitsnormen
Lesen Sie bitte vor dem Installieren und
dem Verwenden dieses Gerätes die
Bedienungsanleitung sorgfältig durch. Bewahren
Sie sie zum späteren Nachschlagen auf.
hh
1.1 Schreibweisen
GEFAHR!
Heiße Oberfläche.
Nicht berühren. Die Oberflächen
sind heiß und können bei Berührung
zu Verbrennungen führen.
ll
ACHTUNG!
Mittlere Gefährdung.
Der genannte Vorgang hat große
Bedeutung für den einwandfreien
Betrieb des Systems: es wird
gebeten, sich die Verfahrensweise
anzulesen und zu befolgen.
hh
ANMERKUNG
Beschreibung der Systemmerkmale.
Eine sorgfältige Lektüre wird
empfohlen, um das Verständnis der
folgenden Phasen zu gewährleisten.
jj
2 Anmerkungen
zum Copyright und
Informationen zu den
Handelsmarken
• Die Installation und Wartung der Vorrichtung
ist technischen Fachleuten vorbehalten.
• Vor technischen Eingriffen am Gerät muss die
Stromversorgung unterbrochen werden.
• Es dürfen keine Versorgungskabel mit Verschleißoder Alterungsspuren verwendet werden.
• Unter keinen Umständen dürfen Veränderungen
oder Anschlüsse vorgenommen werden, die
in diesem Handbuch nicht genannt sind: Der
Gebrauch ungeeigneten Geräts kann die Sicherheit
des Personals und der Anlage schwer gefährden.
• Es dürfen nur Original-Ersatzteile verwendet
werden. Nicht originale Ersatzteile können
zu Bränden, elektrischen Entladungen
oder anderen Gefahren führen.
• Vor der Installation ist anhand des
Kennzeichnungsschildes nachzuprüfen, ob das
gelieferte Material die gewünschten Eigenschaften
aufweist ("4.2 Kennzeichnung des Produkts", Seite 4).
Die angeführten Produkt- oder Firmennamen sind
Handelsmarken oder eingetragene Handelsmarken.
3
DE - Deutsch - Bedienungslanleitung
GEFAHR!
Erhöhte Gefährdung.
Stromschlaggefahr. Falls nichts anderes
angegeben, unterbrechen Sie die
Stromversorgung, bevor die beschriebenen
Arbeiten durchgeführt werden.
gg
Der Hersteller lehnt jede Haftung für
eventuelle Schäden ab, die aufgrund
unsachgemäßer Anwendung der in diesem
Handbuch erwähnten Geräte entstanden
ist. Ferner behält er sich das Recht vor, den
Inhalt ohne Vorkündigung abzuändern.
Die Dokumentation in diesem Handbuch
wurde sorgfältig ausgeführt und überprüft,
dennoch kann der Hersteller keine Haftung
für die Verwendung übernehmen. Dasselbe
gilt für jede Person oder Gesellschaft, die
bei der Schaffung oder Produktion von
diesem Handbuch miteinbezogen ist.
4 Identifizierung
4.1 Beschreibung und
Bezeichnung des Produktes
DE - Deutsch - Bedienungslanleitung
IRBD ist weltweit die erste intelligente InfrarotAusleuchtungseinrichtung, dem führenden
Unternehmen bei aktiven IR-Lösungen. Modernste
IRBD Technik und einfache Installation bürgen
bei für exzellente Leistungen bei schlechten
Lichtverhältnissen oder bei Dunkelheit.
4.1.1 Constant Light ™
Die Technik Constant Light™ (zum Patent angemeldet)
gleicht die Alterung der Leuchtdioden aus, ein
Problem, das allen mit Leuchtdioden arbeitenden
Infrarot-Ausleuchtungseinrichtungen gemein ist.
So ist eine gleichbleibende Beleuchtungsleistung
über die gesamte Lebensdauer der Einrichtung
sichergestellt. Constant Light sichert geräteunabhängig
bei verschiedenen Temperaturen und für die gesamte
Lebensdauer des Produktes wiederholbare Leistungen.
4.1.2 Black Diamond ™ Technology
Die Black Diamond-Technik sorgt auf große
Entfernung - vor allem bei weiten Erfassungswinkeln
- für bessere Leistung, zudem wird die gesamte
Tiefe des Sichtfeldes ausgeleuchtet.
4.1.3 Power-On-Board ™ 12Vdc/24Vac
Die Stromspeisung von IRBD ist in der “HeadTechnik” enthalten, das heißt, die Einheit kann direkt
an die Netzversorgung des Industriestandards
12Vdc bis 24Vac angeschlossen werden.
4.1.4 Hochleistungsleuchtdioden SMT
IRBD arbeitet mit hocheffizienten Leuchtdioden,
die im Hinblick auf höhere Lebensdauer und
Zuverlässigkeit oberflächlich montiert sind.
4.1.5 Day/Night-Kameraumschaltung
Videokameras für die Tag- und Nachtüberwachung
werden mit Relaiskontakten COM/NC/NA
integriert. Diese Kontakte zeigen an, wann
die Fotozelle die IR-Lampe aktiviert hat.
4.1.6 Druckausgleich
Um die Zuverlässigkeit und Lebensdauer des
Produktes zu erhöhen, arbeitet die Baureihe
IRBD mit einem Druckausgleichsventil, das
Wärmeausdehnung und zyklisch auftretenden
Druck auf den Lampenkopf beseitigt.
4.2 Kennzeichnung des Produkts
Siehe das Schild außen auf der Verpackung.
4
5 Erklärung zur
Übereinstimmung mit
den Produktnormen
Das Produkt genügt den Richtlinien zur
Niederspannung 89/336/EWG, 73/23/
EWG und den nachfolgenden Normen:
CE Standards
EN 60742/1/1990, EN 60598/2/5
Ebenso der Richtlinie zur elektromagnetischen
Verträglichkeiten und den folgenden Normen:
EN 50081/1, EN 50130-4
6 Vorbereitung
des Produktes auf
den Gebrauch
Jede vom Hersteller nicht ausdrücklich
genehmigte Veränderung führt zum
Verfall der Gewährleistungsrechte.
hh
6.1 Inhalt und Entfernen
der Verpackung
Bei der Lieferung des Produktes ist zu prüfen, ob
die Verpackung intakt ist oder offensichtliche
Anzeichen von Stürzen oder Abrieb aufweist.
Bei offensichtlichen Schadensspuren an der Verpackung
muss umgehend der Lieferant verständigt werden.
Bewahren Sie die Verpackung auf für den Fall, dass das
Produkt zur Reparatur eingesendet werden muss.
Prüfen Sie, ob der Inhalt mit der nachstehenden
Materialliste übereinstimmt:
• Infrarot-Ausleuchtungseinrichtung mit Bügel IRBD
• Versorgungskabel (5m)
• Bedienungslanleitungen
6.2 Sichere Entsorgung der
Verpackungsmaterialien
Die Verpackungsmaterialien sind vollständig
wiederverwertbar. Es ist Sache des Installationstechnikers,
sie getrennt, auf jeden Fall aber nach den geltenden
Vorschriften des Anwendungslandes zu entsorgen.
Es wird nochmals empfohlen, mit
Fehlfunktionen behaftetes Material in der
Originalverpackung zurückzusenden.
7 Installation und
Zusammenbau
Die Infrarotlampe erbringt nur dann
ihre Höchstleistung, wenn sie richtig
eingestellt ist. Es hat sich bewährt, sie
bei Nacht zu justieren und die Resultate
auf einem Monitor zu kontrollieren.
hh
Installation und Zusammenbau
sind Fachleuten vorbehalten.
hh
hh
Sehen Sie aus weniger als 1,7m
Entfernung nicht direkt in die Lampe.
Den Bügel der Ausleuchtungseinrichtung mit der
Schwenk-Neige-Einheit verbinden; erforderlich
ist ein Wandbügel oder eine Kameraaufnahme.
Die Lampe an eine Spannungsversorgung
von 12Vdc bis 24Vac anschließen.
Das Versorgungsnetz, die Kamera und die Ausrüstung
für die Monitorkontrolle in Betrieb nehmen.
hh
Den Schwenk der Ausleuchtungseinrichtung
an das Sichtfeld der Kamera anpassen.
7.1 Zusammenbau
Die seitlich gelegenen Bolzen (einer auf jeder
Seite des Hauptkorpus) lockern, dann die
Einrichtung so in der Vertikalen ausrichten,
dass die besten Ergebnisse erzielt werden.
7.1.1 Objektiv/Lichtstrahlenmuster
Die Leuchte ist nach der Umgebung und der
Brennweite des Kameraobjektives auszuwählen.
Vor der Installation bitte prüfen, ob die technischen
Eigenschaften der Ausleuchtungseinrichtung
mit denen der Videoüberwachungsanlage
kompatibel sind. Bei der Anlagenplanung
müssen die vom Produkt überbrückbare
Entfernung, das Objektiv / Lichtstrahlenmuster
und der Filter berücksichtigt werden.
7.2 Installation
Die Lampe nach unten neigen, bis der nahe gelegene
Teil des gewünschten Sichtfeldes mit Infrarotstrahlen
gesättigt ist. Das ist auf dem Monitor zu erkennen.
Ganz Langsam die Lampe nach oben neigen, bis
der entfernte Teil des gewünschten Sichtfeldes auf
dem Monitorbildschirm einwandfrei beleuchtet ist.
7.2.1 Verbindungen
Öffnung
für
Druckeinstellung
Fotozelle
Die Ausleuchtungseinrichtung arbeitet mit
einer Niederspannung von 12Vdc bis 24Vac.
hh
Day/NightUmschaltung
Camera
Telemetrie
Am weitesten
entferntes Objekt
Einstellung
IR-Leistung
Eingangsspeisung
12Vdc/24Vac
Empfindlichkeitseinstellung
der Fotozelle
Fig. 02
AC/DC
power IN
Weiß
Braun
Schwarz
Blau
Telemetrie
Braun
Blau
Am nächsten
liegender Punkt
Fig. 01
Volt free
Day/Night
Umschalter
Braun
Blau
COM
1
3
2
Die Lampe langsam neigen, bis sich der obere Teil auf
einer Linie mit dem entferntesten Objekt befindet.
4
1
3
2
4
N/O
1
3
2
4
N/C
Schwarz
Fig. 03
5
DE - Deutsch - Bedienungslanleitung
Die Lampe wird sehr heiß. Bevor
man sie berührt, muss deshalb
die Ausleuchtungseinrichtung
abgeschaltet werden und mindestens
10 Minuten lang abkühlen.
7.2.2 Empfindlichkeit der Fotozelle
7.2.5 Einstellung der
Infrarotstrahlenleistung
DE - Deutsch - Bedienungslanleitung
Lo
Hi
Fig. 04
Fig. 05
Um die Ansprechschwelle der Fotozelle zu regeln,
muss zunächst der abdichtende Verschluss
entfernt werden. Nun das Potenziometer so regeln,
dass die Lampe bei besseren oder schlechteren
Lichtverhältnissen aufleuchtet. Wird er im
Uhrzeigersinn gedreht, schaltet sich die Lampe
bereits an, wenn es noch relativ hell ist, wird das
Potenziometer gegen den Uhrzeigersinn gedreht,
geht die Lampe erst bei größerer Dunkelheit an.
Um die Infrarotstrahlenleistung zu regeln, muss
zunächst der abdichtende Verschluss abgeschraubt
werden. Dann das Potenziometer im Uhrzeigersinn
drehen, um die Infrarotleistung zu erhöhen oder
entgegen dem Uhrzeigersinn, um sie zu verringern.
Zum Abschluss der Einstellungen
überzeugen Sie sich bitte, dass die
Verschlusskappen fest geschlossen
sind, um die Dichtigkeit des
Produktes sicherzustellen.
hh
7.2.3 Ausschalten der Fotozelle
Zum Ausschalten des Fotozellenbetriebes das
Potenziometer für die Empfindlichkeit ganz im
Uhrzeigersinn drehen. In diesem Zustand müsste
die Lampe durchgehend brennen, es sei denn, der
Telemetrieeingang bildet einen geschlossenen Kreis.
7.2.4 Fotozelle
Die Fotozelle ist so konzipiert, dass die Lampe
automatisch in der Abenddämmerung angeht
und in der Morgendämmerung erlischt. Gewählt
wurde ein hoher Hysteresepegel, um unter
grenzwertigen Lichtbedingungen ein ständiges
Ein- und Ausschalten zu vermeiden. Die Einheit
wird werkseitig so eingestellt, dass sie bei etwa 20
Lux angeht und bei etwa 70 Lux ausgeht. Sie kann
aber mithilfe der Fotozelle gesteuert werden.
7.2.6 Ferne Bedienung
Die Lampe kann mit einem potenzialfreien, an
den Telemetrie-Steckverbinder angeschlossenen
Kontakt von Ferne aktiviert werden.
7.2.7 Überbrückbare Entfernungen
Die erreichbaren Ausleuchtungsdistanzen
hängen von den Infrarotmerkmalen der CCDKamera und vom benutzten Objektiv ab.
ProduktStreuBezeichnung winkel
Höchstentfernung
HOV
IR10BD
10°
220m
40m
IR30BD
30°
110m
60m
IR60BD
60°
70m
80m
Tab. 01
6
Überbrückbare Entfernungen mit
hochempfindlichen Nachtsichtkameras CCD ½“ B/W,
Geräuschabstand über 20dB und Objektivöffnung
mindestens F1.4. Die Werte hängen von dem
Reflexionskoeffizient der beleuchteten Szene ab.
8 Müllentsorgungsstellen
Dieses Symbol und das entsprechende
Recycling-System gelten nur für
EULänder und finden in den anderen
Ländern der Welt keine Anwendung.
nn
Ihr Produkt wurde entworfen und hergestellt mit
qualitativ hochwertigen Materialien und Komponenten,
die recycelt und wiederverwendet werden können.
Bitte entsorgen Sie dieses Gerät bei Ihrer örtlichen
Sammelstelle oder im Recycling Centre.
Abmessungen (WxHxL): 152x188x115mm
Einheitsgewicht: 1.15kg
10.3 Elektrik
Netzteil: 12-40Vdc oder 24Vac +/-30%
Aufnahme: von 26 bis 45W
Netzteil in wasserfestem Anschlusskasten
Abmessungen: 193x242x82mm
Verbrauch: 100W (Speisung von zwei Scheinwerfer mit
Höchstleistung)
Integrierte Fotozelle für automatik Ein- und Ausschalten
Ausgang Day/Night (STATUS): Steuerspannung 30Vdc
-10mA (hoher Wert bei Aktivierung)
In der Europäischen Union gibt es unterschiedliche
Sammelsysteme für Elektrik- und Elektronikgeräte.
Eingang Zusatzfotozelle: Potenzialfreier Schließerkontakt
(Bei Kontaktherstellung Aktivierung der Fotozelle)
9 Troubleshooting
Kabelmaße: AWG 16 - 30 (0.5mm2 - 1.5mm2)
9.1 Kontrolle der
Stromversorgung
IP66 gemäß EN 60529
Prüfen Sie, ob die Einheit an eine Spannung zwischen
12 und 40Vdc oder 24Vac +/- 30% angeschlossen ist.
Für innere / Äußere Installationen
9.2 Kontrolle der
Fotozellenfunktione
Betriebstemperatur: -20°C / +50°C
10.4 Umgebung
Betriebstemperatur: -50°C/+50°C Grenze mit max.
Leistung
(bis zu +60°C mit Lampen zu)
10.5 Zertifizierungen
Prüfen Sie die Funktionen der Fotozelle,
indem Sie diese mit einem schwarzen Band
verdunkeln und den Telemetrieanschluss
geschlossen lassen. Die Verzögerungsdauer der
Fotozelle ist auf 5 Sekunden voreingestellt.
89/336/EEC, 72/23/EEC Low Voltage Directive gemäß CE
Standards EN 60742/1/1990, EN 60598/2/5
10 Technische Daten
IP67
Electromagnetic Compatibility Directive gemäß EN
61000-6-3, EN 61000-3-3, EN 61000-3-2, EN50130-4, EN
60950-1
10.1 Allgemeines
Korpus aus schwarzem Eloxalaluminium und weißer
Acrylstirnseite
18 LED- Einheiten für Hochwirkungsgrad mit
integriertem Versorgungskreis mit Grenzstrom
Winkelausstrahlung: 10°, 30°, 60°
Wellenlänge: 850nm
Im Lieferumfang enthalten Betriebsanleitungen,
Wandhalterung, IP67-Verbindung und Kabel von 5 Meter
Öffnungswinkel und Abstände*
IR10BD
10°, 850nm, 220m
IR30BD
30°, 850nm, 110m
IR60BD
60°, 850nm, 70m
Überbrückbare Entfernungen mit hochempfindlichen Nachtsichtkameras
CCD ½“ B/W, Geräuschabstand über 20dB und Objektivöffnung mindestens
F1.4. Die Werte hängen von dem Reflexionskoeffizient der beleuchteten
Szene ab.
7
DE - Deutsch - Bedienungslanleitung
Dieses Symbol bedeutet, daß elektrische und
elektronische Geräte am Ende ihrer Nutzungsdauer
von Hausmüll getrennt entsorgt werden sollen.
10.2 Mechanik
11 Technische Zeichnungen
34
138.7
4.2
118.5
152
20
140
52
R 5.2
152
Fig. 06
VIDEOTEC S.p.A.
www.videotec.com
Printed in Italy
MNVCIRBD_0923_DE
VIDEOTEC S.p.A.
www.videotec.com
Printed in Italy
MNVCIRBD_0923