1
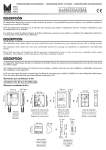
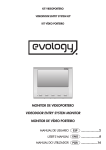
VIDEOPORTERO 2 HILOS
2-WIRE VIDEODOOR ENTRY SYSTEMS
VIDÉOPORTIER 2 FILS
MONITOR DE VIDEOPORTERO CON MEMORIA
VIDEODOOR ENTRY SYSTEM MONITOR WITH MEMORY
MONITEUR POUR VIDÉOPORTIER AVEC MÉMOIRE
MANUAL DE USUARIO
.....................2
USER’S MANUAL
...................10
MANUEL D’UTILISATION
...................18
ESP - 2
MONITOR DE VIDEOPORTERO
INSTRUCCIONES DE SEGURIDAD
No exponga el equipo a goteo o proyecciones de agua. No sitúe objetos llenos de líquido,
como vasos, sobre el equipo. No sitúe fuentes de llama desnuda, tales como velas encendidas,
sobre el equipo. No cubra las aberturas de ventilación del equipo con objetos, tales como
periódicos, cortinas, etc. Instale el equipo dejando un espacio libre alrededor para disponer
de una ventilación suficiente. Instale el equipo de modo que la clavija de red de alimentación
o el conector del equipo sean fácilmente accesibles.
CARACTERÍSTICAS GENERALES
El sistema de videoportero de ALCAD le va a permitir controlar el acceso de personas externas
a su propiedad, permitiéndole además identificar a la persona que realiza la llamada. El
sistema de autoencendido le permite visualizar la imagen captada por la telecámara de la
placa de calle sin necesidad de recibir llamada. El monitor es de tipo “manos libres” con
pantalla panorámica de 7 pulgadas, permitiendo una utilización más cómoda y una estética
más depurada.
Como función adicional, el monitor incorpora un registro de captura automática de imágenes
de llamadas no atendidas. Cuando una llamada no ha sido atendida, el monitor almacena
automáticamente la imagen o la grabación de vídeo de la persona que ha realizado dicha
llamada.
DESCRIPCIÓN DEL MONITOR
1. Pantalla de visualización de imagen
*
2. Botón visualización imágenes
• Visualización de las grabaciones.
• Activación de la función auxiliar 1.
3. Botón menú *
• Visualización del menú
de configuración.
• Activación de la función auxiliar 2.
*
4. Botón de apertura de puerta
*
5. Botón autoencendido
Permite activar la función de
autoencendido.
6. Botón de comunicación
Permite establecer la comunicación al
recibir la llamada y cortar la comunicación
al final de la misma.
7. Indicador de llamada deshabilitada
Con indicador encendido, el volumen de
llamada (9) se encuentra al mínimo y la
llamada no sonará.
8. Control de volumen de audio
9. Control de volumen de llamada
* Botón multifunción
1
2
3
4
5
6
7
8
9
Los monitores que muestran este
símbolo están equipados con
sistema de bucle magnético, el cual
permite la recepción de la señal de
audio desde un audífono, en
posición T.
MONITOR DE VIDEOPORTERO
ESP - 3
BOTONES MULTIFUNCIÓN
Algunos de los botones del monitor pueden tener varias funciones. Cuando alguna de las
funciones de los botones es diferente a la indicada en el icono del monitor, dicha función se
indica en la parte baja de la pantalla.
Indicadores multifunción
de los botones
Iconos
OPCIONES DE AJUSTE
AJUSTE DEL VOLUMEN DE AUDIO
para regular el volumen con el que oirá a la
Mueva el control de volumen de audio
persona que se encuentre en la placa de calle.
AJUSTE DEL VOLUMEN DE LLAMADA
Puede ajustar en el propio monitor el volumen del tono de llamada. Para realizarlo, mueva el
del monitor. Dispone de tres posiciones: alto ||, bajo | y silencio .
control
Cuando el volumen de llamada se sitúa en la posición silencio , el indicador de llamada
deshabilitada se encenderá y la llamada no sonará.
Indicador de llamada
deshabilitada
ESP - 4
MONITOR DE VIDEOPORTERO
FUNCIONAMIENTO DEL SISTEMA
SISTEMA OCUPADO
En este estado su monitor no puede realizar ninguna función, o si tiene alimentación
y entrar en el menú de
independiente, tan solo puede consultar las grabaciones
configuración . Si pulsa cualquier botón, el monitor emite tonos de ocupado y parpadea el
hasta que el sistema pase al estado de reposo.
botón de autoencendido
SISTEMA EN REPOSO. MONITOR EN REPOSO
Si el monitor no recibe llamada, las funciones de apertura de puerta y de comunicación con
o
placa de calle están inhabilitadas. En este estado es posible activar el autoencendido
.
acceder a los menús de configuración y de consulta de grabaciones
RECEPCIÓN DE LLAMADAS. MONITOR ACTIVADO
Al recibir una llamada desde la placa de calle, el monitor emite un aviso sonoro y en su
pantalla se visualiza la persona que ha llamado. Dispone de 30 segundos para descolgar.
, establece comunicación con la persona que ha llamado.
Al pulsar el botón de descolgar
Dispone de 60 segundos de tiempo de conversación.
Unos segundos antes de finalizar el tiempo de conversación, oirá una señal sonora. Puede
prolongar el tiempo de conversación desde su propia vivienda, pulsando dos veces el botón
, o desde la placa de calle, indicándole a la persona que vuelva a
de comunicación
llamar. La conversación finaliza bien pulsando el botón de comunicación una vez, o bien
cuando el tiempo de conversación se agote, volviendo el sistema al estado de reposo.
para abrir la puerta de la calle y permitir el acceso a la
Pulse el botón de abrepuertas
propiedad.
Tiempo de
contestación
30 seg.
Llamar a la
vivienda
desde la
placa de calle
Tiempo de
conversación
60 seg.
Tono de
llamada
Descolgar
Prolongación del tiempo
de conversación
+
Fin de conversación
Apertura de la puerta
MONITOR DE VIDEOPORTERO
ESP - 5
Durante los tiempos de contestación y conversación, el sistema no permite que otro monitor
realice autoencendido, pero sí permite que otro monitor que disponga de alimentación
o entrar en el menú de configuración .
independiente pueda consultar la memoria
VARIOS MONITORES EN SU VIVIENDA
La llamada suena en todos los monitores. El primero en responder establece comunicación
con el visitante. Sólo se enciende la pantalla del monitor principal pero al descolgar un
secundario, se enciende la pantalla del secundario y se apaga la del principal. Antes de
para visualizar al
descolgar un secundario, puede pulsar su botón de autoencendido
visitante y descolgar si le interesa. Si prefiere que se enciendan todos los monitores con la
llamada, es necesario añadir un alimentador; consulte a su instalador.
La llamada suena en todos los monitores
Llamar a la
vivienda
desde la
placa de calle
El primero en responder establece comunicación con el visitante
APERTURA AUTOMÁTICA DE PUERTA
Con la función activada, la puerta se abre de inmediato al llamar a la vivienda. Es de gran
utilidad en consultas abiertas al público como abogados y dentistas, pues se evita que el
profesional tenga que desatender a sus clientes. Para su habilitación, consulte al instalador.
Para activar esta función, con el monitor en estado de reposo, pulse el botón de autoencendido
durante 2 segundos. El botón de abrepuertas parpadea durante todo el tiempo que
permanece activada la función.
Monitor
en reposo
Pulsación larga
> 2 seg.
Parpadeo botón
abrepuertas
Para desactivar, con el monitor en estado de reposo, vuelva a pulsar el botón de autoencendido
durante 2 segundos. El botón de abrepuertas deja de parpadear.
ESP - 6
MONITOR DE VIDEOPORTERO
LLAMADA DE RELLANO
Mediante esta función se puede evitar el timbre o carillón. Consulte a su instalador. Cuando
el pulsador de llamada del rellano de la escalera está conectado al monitor, éste realiza la
función del timbre. El tono de llamada suena diferente para saber cuándo le llaman desde la
calle o desde el rellano de la escalera.
LLAMADA A CONSERJERÍA (Edificios con conserjería)
. Si se escuchan tonos
Con el monitor en estado de reposo, pulse el botón de abrepuertas
intermitentes, el sistema está ocupado. Espere unos instantes y vuelva a intentarlo.
Si se escuchan tonos de llamada, la conserjería está recibiendo la llamada, disponiéndose de
un máximo de 30 segundos para que el conserje descuelgue.
Entable conversación con el conserje. Dispone de un máximo de 60 segundos en conversación.
Poco antes del final, el monitor emite una señal sonora de aviso. Puede recargar el tiempo
o diciendo a la persona que vuelva a llamar
pulsando 2 veces en el botón de descolgar
a la vivienda.
SEÑALIZACIÓN DE PUERTA MAL CERRADA
En instalaciones preparadas para ofrecer esta función, el botón de abrepuertas parpadea
cuando la puerta del edificio permanece abierta por un tiempo superior al configurado por
el sistema (2 minutos aproximadamente). Consulte a su instalador.
Parpadeo botón
abrepuertas
2 minutos
aproximadamente
FUNCIONES AUXILIARES
El monitor permite activar 2 mecanismos auxiliares como puertas de garaje y alumbrados.
Consulte a su instalador. Puede activarlas cuando el monitor se encuentra en estado activado,
es decir, al recibir una llamada o tras realizar un autoencendido.
. Para activar la función
Para activar la función auxiliar 1 pulse brevemente el botón
auxiliar 2 pulse brevemente el botón .
Función auxiliar
1
AUX1
AUX2
2
MEN
AUX1
AUX2
MENU
AUX1
AUX2
MENU
Función auxiliar
2
AUX1
AUX2
MENU
3
MONITOR DE VIDEOPORTERO
ESP - 7
CÓMO ACTIVAR EL SISTEMA DE AUTOENCENDIDO EN ANILLO
. Podrá visualizar la imagen captada por
Pulse brevemente el botón de autoencendido
la telecámara, abrir la puerta de la calle y establecer comunicación con la placa de calle.
Si algún monitor se encuentra activado no podrá realizar el autoencendido. En tal caso,
espere hasta que el sistema se desocupe.
Tiempo de
autoencendido
duración máxima:
30 segundos
Tiempo de
conversación
60 segundos
Autoencendido
Descolgar
Las llamadas de placa de calle tienen prioridad sobre el sistema de autoencendido. Si
durante el tiempo de autoencendido se realiza una llamada a otro monitor desde la placa de
calle, el vídeo de su monitor se desconectará, pasando automáticamente al estado de reposo
y manteniendo de esta manera la privacidad de la llamada.
durante
En edificios con varios accesos, mantenga pulsado el botón de autoencendido
2 segundos cada vez que quiera conmutar el video en anillo entre una placa y la siguiente.
Pulsación corta
< 1 seg.
5
Placa principal
Pulsación larga
> 2 seg.
Pulsación larga
> 2 seg.
5
5
Placa
secundaria 2
Placa
secundaria 1
Pulsación larga
> 2 seg.
5
ESP - 8
MONITOR DE VIDEOPORTERO
GRABACIÓN DE IMÁGENES Y VIDEOS
El monitor dispone de memoria para almacenar hasta 30 imágenes y 10 videos. El monitor
grabará una imagen o un video según la opción elegida en el menú de configuración, vea el
capítulo OPCIONES DE CONFIGURACIÓN DEL MONITOR.
Grabación manual de una imagen o video
Cuando tenga en pantalla la imagen que quiere grabar, pulse sobre el botón MENÚ (Botón
), y a continuación pulse sobre OK (Botón multifunción ). Se realizará
multifunción
entonces la grabación, que quedará archivada con la fecha y hora a la que fue tomada.
Grabación automática de llamadas perdidas
En el momento de recibir una llamada el monitor realiza una captura de imagen o video de
forma automática. Si la llamada no es atendida una vez finalizado el tiempo para contestar,
la captura queda grabada en la memoria del monitor con la fecha y hora a la que fue
tomada.
.
El monitor le avisa que hay grabaciones sin consultar con el parpadeo del botón
Consultar las grabaciones almacenadas
. Se mostrará la
Estando el monitor en reposo, pulse el botón de visualización de imágenes
última grabación. La pantalla visualiza un mensaje si no existen grabaciones almacenadas.
Para visualizar las grabaciones anteriores o posteriores pulse los botones BAJAR o SUBIR
y
).
(Botones multifunción
Nota: Cuando se está reproduciendo un video, la primera pulsación detiene el video, y la
segunda realiza la función asignada al botón.
Borrar las grabaciones almacenadas
El monitor elimina automáticamente las grabaciones más antiguas cuando la memoria se
llena, dejando espacio para nuevas capturas. Sin embargo, es posible eliminar manualmente
las grabaciones que se desee mientras las está visualizando. Para ello, pulse sobre el botón
BORRAR (Botón multifunción ) y seleccione entre las opciones que aparecen en pantalla.
MONITOR DE VIDEOPORTERO
ESP - 9
OPCIONES DE CONFIGURACIÓN DEL MONITOR
MENÚ PRINCIPAL
El monitor dispone de un menú de configuración principal que le permite ajustar el equipo a
sus necesidades. Para acceder a dicho menú, estando el monitor en reposo, pulse el botón
menú . Muévase por los elementos del menú mediante los botones ABAJO y ARRIBA
y
). Seleccione una opción pulsando sobre el botón OK (Botón
(Botones multifunción
)
multifunción ) o salga del menú pulsando el botón SALIR (Botón multifunción
Ajuste de la pantalla (Brillo, contraste y saturación de color)
Seleccione la opción PANTALLA del menú. Podrá ajustar los niveles de brillo, contraste y
saturación de color de la pantalla.
Ajuste de la fecha y la hora
Seleccione la opción FECHA/HORA del menú. Ajuste entonces el día, mes, año, hora y
minutos.
Ajuste del idioma de los menús del monitor
Seleccione la opción IDIOMA del menú. Seleccione entonces el Idioma deseado pulsando
dos veces sobre el botón OK (Botón multifunción ).
Nota: La opción IDIOMA puede aparecer en otros idiomas como: LANGUAGE, LANGUE,
IDIOMA, LINGUA, DIL o JAZYK.
Configure si desea grabación de imágenes o grabación de videos
Seleccione la opción GRABAR: del menú para alternar entre las opciones GRABAR: FOTO
y GRABAR: VIDEO.
Restablecer a los ajustes de fábrica
Seleccione la opción BORRAR AJUST. Quedan borradas todas las grabaciones almacenadas,
y todos los ajustes volverán a los valores de fábrica.
MENÚ SECUNDARIO
El monitor dispone un menú de configuración secundario con menos opciones que el
principal. Es accesible cuando el monitor se encuentra en estado activo mediante la pulsación
). Muévase por los elementos del
de la opción de pantalla MENÚ (botón multifunción
y
). Seleccione
menú mediante los botones ABAJO y ARRIBA (Botones multifunción
una opción pulsando sobre el botón OK (Botón multifunción ) o salga del menú pulsando el
)
botón SALIR (Botón multifunción
Grabación manual de una imagen o video
Cuando tenga en pantalla la imagen que quiere grabar, pulse sobre el botón MENÚ
). Aparece preseleccionada en pantalla la opción GRABAR: FOTO
(Botón multifunción
o GRABAR: VIDEO (según la configuración del menú principal). Pulse sobre OK (Botón
multifunción ). La grabación manual se realiza con la fecha y hora actuales.
Ajuste de la pantalla (Brillo, contraste y saturación de color)
Seleccione la opción PANTALLA del menú. Podrá ajustar los niveles de brillo, contraste y
saturación de color de la pantalla.
ENG - 10
VIDEODOOR ENTRY SYSTEM MONITOR
SAFETY INSTRUCTIONS
Do not place the equipment where water can drip or splash onto it. Do not place objects
containing liquid, such as glasses, on the equipment. Do not place sources of naked flame,
such as burning candles, on the equipment. Do not block the ventilation slots of the equipment
with objects such as newspapers, curtains, etc. When installing the equipment, leave some
free space around it to provide adequate ventilation. Install the equipment in such a way that
the mains supply plug or the connector of the equipment can be easily reached.
GENERAL FEATURES
The ALCAD video entry system gives you full control over the access of visitors to your property
and, in addition, it allows you to identify the person who calls. The automatic switch-on system
makes it possible to see the image captured by the entrance panel camera without having first
to receive a call. The hands-free monitor and 7 inch widescreen ensure ease of use combined
with a streamlined, aesthetically satisfying appearance.
As an additional feature, the monitor keeps an automatic visual record of visitors whose calls
are unanswered. When a call has not been answered, the monitor automatically stores the
image or video recording of the person who made the call.
MONITOR DESCRIPTION
1. Monitor screen
2. View images button
*
• Shows the stored recordings.
• Auxiliary 1 function activation.
1
3. Menu button *
• Shows the main menu.
• Auxiliary 2 function activation.
4. Button to open the street door
*
5. Automatic switch-on button
*
This activates the automatic switch-on
feature.
6. Communication button
This button makes it possible to establish
communication when a call is received and
to cut off communication at the end of the
call.
7. Disabled call indicator
When the indicator is on, the call volume (9)
is set to its lowest level. The call will not ring.
8. Volume control
9. Call volume control
* Multifunction button
2
3
4
5
6
7
8
9
Monitors displaying this symbol are
equipped with a magnetic loop
system. This makes it possible to
receive the audio signal on a
hearing aid switched to the “T”
position.
VIDEODOOR ENTRY SYSTEM MONITOR
ENG - 11
MULTIFUNCTION BUTTONS
Some of the buttons of the monitor can have several functions. When one of the functions of
the buttons is different from that shown in the icon of the monitor, this function is shown in the
lower part of the screen.
DISPLAY
TIME
LANGUAGE
RECORD:VIDEO
DEFAULT MODE
DOWN
UP
OK
QUIT
Multifunction indicators
of the buttons
Icons
ADJUSTMENT OPTIONS
ADJUSTING THE VOLUME
Move the volume control to regulate the volume which will be heard by the person at the
entrance panel.
ADJUSTING THE VOLUME OF THE CALL
You can adjust the volume of the call tone on the monitor itself. To do so, move the control
on the monitor. The volume can be set to one of three possible positions: high ||, low | and
sound off .
When the call volume is set to the mute position , the disabled call indicator will light up
and the call will not ring.
Disabled call
indicator
ENG - 12
VIDEODOOR ENTRY SYSTEM MONITOR
OPERATION OF THE SYSTEM
SYSTEM ON STAND-BY
In this status the monitor can’t perform any function, or if it is powered independently, you
and enter the configuration menu . If you press any of
can only consult the recordings
the buttons, the monitor beeps busy ringtones and the autoswitch-on button blinks
until
the system changes to stand-by mode.
NO CALL. MONITOR ON STAND-BY
If the monitor does not receive a call the functions of door opening and of communication
with the street entrance panel are disabled. In this state, it is possible to activate the automatic
or to access the configuration menu and recordings menu
.
switch-on feature
RECEIVING A CALL. MONITOR ACTIVATED
An audio signal from the monitor will be heard when a call is received from the entrance
panel. Following the screen will switch on and show the image of the person who has called.
You have 30 seconds to answer.
, is pressed, communication is established with the
When the communication button
person who is calling. Conversation time is limited to 60 seconds.
A few seconds before the conversation time elapses, you will hear a series of beeps. You can
prolong the conversation time from your own dwelling by pressing the conversation button
twice, or, from the entrance panel, by having the visitor call again. The conversation will
end when the communication button is pressed once, or when the conversation time runs out.
The system will then revert to being on standby.
and allow the person access to the property.
Push the lock release button to open the door
Time limit to
answer the call
30 seg.
Time limit for
conversation
60 seg.
Ring tone
Panel Call
made to flat
Picking-up
Extending the time limit
for conversation
+
Fin de conversación
Opening the door
VIDEODOOR ENTRY SYSTEM MONITOR
ENG - 13
During the time periods for answering the call or for conversation, the system does not permit
any other monitor to use the auto switch-on function, but it does allow a monitor equipped
or to open the menu .
with an independent power supply to consult the memory
SEVERAL MONITORS IN YOUR HOUSE
The call rings on all the monitors. The first to answer establishes communication with the visitor.
Only the screen of the main monitor is switched on but when answering from a secondary
one, the secondary screen switches on and the main switches off. Before answering a
to visualize the visitor and answer
secondary, you can push its auto switch-on pushbutton
if you want. If you would prefer that all the monitors were switched-on with the call, it would
be necessary to add a power supply; please consult your installer.
The call rings on all the monitors
Panel Call
made to flat
The first person to answer establishes communication with the visitor.
AUTOMATIC DOOR OPENING
When this function is enabled, the door opens immediately the dwelling is called. This is
particularly useful in the case of services open to the public, such as lawyers or dentists. Please
consult your installer to enable this function.
To activate this function: while the monitor is on stand-by, press the automatic switch-on button
for 2 seconds. The door-opening button will blink continuously as long as this function
remains enabled.
Monitor in
stand-by
Long push
> 2 seg.
Door opening
button blinking
To disable this function: while the monitor is on stand-by, again press the automatic switch-on
for 2 seconds. The door-opening button will stop blinking.
button
ENG - 14
VIDEODOOR ENTRY SYSTEM MONITOR
CALL FROM LANDING
Using this feature, it is possible to avoid the ringing or chimes of doorbells. When the landingcall pushbutton on the stairway is connected to the monitor, the latter performs the function
of the doorbell. The tone has a different sound so that the user can know whether the call is
being made from the street or from the landing.
CALL TO CONCIERGE UNIT (in buildings with a caretaker or concierge)
. If you hear beeping
While the monitor is on stand-by, press the door-opening button
tones, the system is engaged. Wait several moments and try again. If you hear call tones, the
concierge unit is receiving the call; the concierge or caretaker has 30 seconds maximum to
pick up the receiver.
Establish conversation with the concierge. You are allowed a maximum of 60 seconds for
conversation. Shortly before this period expires, the monitor will emit a warning sound. You
or
can, if so desired, extend the conversation period by twice pressing the pick-up button
by asking the caller to call the dwelling again.
SIGNAL THAT DOOR IS NOT PROPERLY CLOSED
In installations equipped to offer this function, the door-opening button blinks when the
door of the building remains open for a period longer than that configured by the system
(approximately 2 minutes). For details, consult your installer.
Door opening
button blinking
2 minutes
aproximately
AUXILIARY FUNCTIONS
The monitor allows you to activate 2 auxiliary mechanisms, such as those controlling garage
doors or lighting systems. Consult your installer. You can enable these functions when the
monitor is in the active state, i.e. when a call is received or following an automatic switch-on.
button. To enable the auxiliary 2
To enable the auxiliary 1 function, briefly press the
function, briefly press the button.
Auxiliary function
1
AUX1
AUX2
2
MEN
AUX1
AUX2
MENU
AUX1
AUX2
MENU
Auxiliary function
2
AUX1
AUX2
MENU
3
VIDEODOOR ENTRY SYSTEM MONITOR
ENG - 15
TURNING ON THE AUTO SWITCH-ON SYSTEM IN A LOOP
. You will be able to see the image captured by the camera,
Push the auto switch-on button
open the street door, and establish communication with the entrance panel.
If any monitor is active, you will not be able to use automatic switch-on. In such a case, wait
until the system is free again.
Time of
auto switch-on
Maximum time limit:
30 seconds
Time of
conversation
60 seconds
Autoswitch-on
Picking-up
The calls from the entrance panel have priority over the auto switch-on system. If a call is
made from the entrance panel during the time of auto switch-on, the video of your monitor
will switch off, and the monitor will change to stand by status automatically, ensuring the
privacy of the call.
for 2
For buildings with several points of entry, hold down the automatic switch-on button
seconds each time you wish to cycle through the videos from one entrance panel to the next.
Short push
< 1 sec.
5
Main panel
Long push
> 2 seg.
Long push
> 2 seg.
5
5
Secondary
panel 2
Secondary
panel 1
Long push
> 2 seg.
5
ENG - 16
VIDEODOOR ENTRY SYSTEM MONITOR
RECORDING IMAGES AND VIDEOS
The memory of the monitor can store up to 30 images or 10 videos. The monitor will record
either an image or a video, depending on the option selected in the configuration menu (see
the chapter entitled MONITOR CONFIGURATION OPTIONS).
Recording an image or video manually
When the image that you wish to record is shown on the screen, press the MENU button
), then press the OK button (multifunction button ). The image will
(multifunction button
then be recorded and stored along with the date and time of the recording.
Automatic recording of an image or video of calls received but unanswered
When a call is received, the monitor automatically takes a screenshot or records a video. If the
call is not answered, once the time allowed for answering the call has elapsed, the screenshot
or video is stored in the memory of the monitor along with the date and time of the recording.
.
The monitor advise that there are unanswered stored recordings by blinking the button
Consulting images or videos stored in the memory of the monitor
. The last image or video will
With the monitor on standby, press the View Images button
be displayed. If there are no stored images, a message to this effect will appear. To view
and
).
other images or videos, press the DOWN or UP buttons (multifunction buttons
Note: When a video is playing, pressing once stops the video; pressing a second time
performs the function assigned to the button.
Deleting images or videos stored in the memory of the monitor
The monitor will delete the oldest images or videos automatically, thereby leaving space for
new recordings. However, it is also possible to delete unwanted images or videos manually
while they are being viewed. To do this, press the DEL button (multifunction button ) and
select the desired option when it appears on the screen.
VIDEODOOR ENTRY SYSTEM MONITOR
ENG - 17
MONITOR CONFIGURATION MENU OPTIONS
MAIN MENU
The monitor has a configuration menu which you can use to adjust the settings of the
while the
equipment to your requirements. To open this menu, press the menu button
monitor is on standby. Use the DOWN and UP buttons to move through the menu items
and
). Select an option by pressing the OK button (multifunction
(multifunction buttons
).
button ) or exit from the menu by pressing the QUIT button (multifunction button
Adjusting the screen setting (brightness, contrast and colour saturation)
Select the option DISPLAY from the menu. You will be able to adjust the brightness, contrast
and colour saturation levels of the screen.
Adjusting the date and time
Select the option TIME from the menu. Next set the month, day, year, hour and minute.
Set the language of the monitor menus
Select the option LANGUAGE from the menu. Next select the desired language by twice
pressing the OK button (multifunction button ).
Note: The option LANGUAGE may be displayed in other languages, such as: IDIOMA,
LANGUE, LINGUA, DIL or JAZYK.
Configure recording of images or of videos as desired
Select the option RECORD: from the menu to toggle between the options RECORD: IMAGE
and RECORD: VIDEO.
Reset to factory default values
Select the option DEFAULT MODE from the menu. All the settings will revert to their default
values and any images or videos will be deleted.
SECONDARY MENU
The monitor has a secondary configuration menu with less options than the main menu. It is
accessible when the monitor is on activated mode by pressing the on-screen option MENU
). Use the DOWN and UP buttons to move through the menu items
(multifunction button
and
). Select an option by pressing the OK button (multifunction
(multifunction buttons
).
button ) or exit from the menu by pressing the QUIT button (multifunction button
Recording an image or video manually
When the image that you wish to record is shown on the screen, press the MENU button
). The screen shows the option RECORD: IMAGE or RECORD:
(multifunction button
VIDEO (depending on the main menu configuration). Press OK (multifunction button ). The
image will then be recorded and stored along with the date and time of the recording.
Adjusting the screen setting (brightness, contrast and colour saturation)
Select the option DISPLAY from the menu. You will be able to adjust the brightness, contrast
and colour saturation levels of the screen.
FRA - 18
MONITEUR POUR VIDEOPORTIER
CONSIGNES DE SÉCURITÉ
N’exposez pas l’équipement à des projections ou gouttes d’eau. Ne posez pas d’objets
contenant du liquide, tels que des verres, sur l’équipement. Ne mettez pas de source de
flamme, comme des bougies, sur l’équipement. Ne bouchez pas les ouvertures de ventilation
de l’équipement avec des objets comme des journaux, des rideaux, etc. Installez l’équipement
en laissant un espace libre tout autour de lui afin de permettre une ventilation suffisante.
Installez l’équipement de telle sorte que la prise d’alimentation d’électricité ou le connecteur
de l’équipement soit facilement accessible.
CARACTÉRISTIQUES GÉNÉRALES
Le système de vidéo portier ALCAD va vous permettre de contrôler l’accès à toutes personnes
extérieures à votre propriété, et d’identifier la personne qui vous appelle. Le système d’autoallumage vous permet de voir l’image capturée par la caméra de la plaque d’entrée sans
avoir reçu un appel. Le moniteur est de type «mains-libres» avec une écran panoramique de
7 pouces, permettant une utilisation plus aisée et une esthétique plus épurée.
En tant que fonction additionnelle, le moniteur incorpore un registre de capture automatique
des images des visiteurs dont les appels restent sans réponse. Lorsqu’on ne répond pas à un
appel, le moniteur stocke automatiquement l’image ou l’enregistrement vidéo de la personne
qui a passé l’appel.
DESCRIPTION DU MONITEUR VIDEOPORTIER
1. Écran de visualisation de l’image
*
2. Bouton de visualisation des images
• Visualisation des enregistrements.
• Activation de la fonction auxiliaire 1.
3. Bouton menu *
• Visualisation du menu de configuration
2
• Activation de la fonction auxiliaire 2.
*
4. Bouton d’ouverture de porte
4
*
5. Bouton d’auto-allumage
6
Permet d’activer la fonction d’allumage
7
automatique.
6. Bouton de communication
Ce bouton permet d’établir la
communication lorsqu’un appel est
reçu et de couper la communication
à la fin de celui-ci.
7. Indicateur d’appel désactivé
Quand l’indicateur est allumé, le volume
d’appel (9) se trouve au minimum. L’appel ne
sonnera pas.
8. Contrôle de volume
9. Contrôle du volume d’appel
* Bouton multifonction.
1
3
5
8
9
Les moniteurs qui montrent ce
symbole sont équipés d’un système
de boucle magnétique qui permet
la réception du signal audio sur une
audioprothèse réglée en position
"T".
MONITEUR POUR VIDEOPORTIER
FRA - 19
BOUTONS MULTIFONCTION
Certains boutons du moniteur peuvent avoir plusieurs fonctions. Quand une des fonctions
des boutons est différente de celle qui apparaît dans l’icône du moniteur, cette fonction est
indiquée dans la partie inférieure de l’écran.
ECRAN
DATE/HEURE
LANGUE
ENREG:VIDEO
MODE D’USINE
BAS
HAUT
OK
SORTIR
Indicateurs multifonction
des boutons
Icônes
OPTIONS DE RÉGLAGE
RÉGLAGE DU VOLUME
Déplacez le contrôle de volume
devant la plaque d’entrée.
pour régler le volume qui sera entendu par la personne
RÉGLAGE DU VOLUME D’APPEL
Vous pouvez ajuster le volume du son d’appel sur le moniteur même. Pour ce faire, déplacez
du moniteur. Vous disposez de trois positions: haut ||, bas | et inaudible .
le contrôle
Quand le volume d’appel est mis en position « muet » , l’indicateur d’appel désactivé
s’allumera et l’appel ne sonnera pas.
Indicateur d’appel
désactivé
FRA - 20
MONITEUR POUR VIDEOPORTIER
FONCTIONNEMENT DU SYSTÈME
SYSTÈME OCCUPÉ
Dans cet état le moniteur ne peut pas réaliser aucune fonction, mais s’il est équipé d’une
et entrer dans le
alimentation indépendante, vous pouvez consulter les enregistrements
menu de configuration . Si vous appuyez sur un des boutons, le moniteur émet des bip
clignote jusqu’à ce que le système passe à l’état de repos.
intermittents et le bouton
SYSTÈME EN REPOS. MONITEUR EN REPOS
Si le moniteur ne reçoit pas d’appel, les fonctions d’ouverture de porte et de communication
avec la plaque de rue sont inhibées. Dans cet état il est possible d’activer le système d’autoou d’accéder aux menus de configuration et de consultation d’images
.
allumage
RÉCEPTION D’APPELS. MONITEUR ACTIVÉ
Une sonnerie vous préviendra lors de la réception d’appels et à l’écran vous verrez l’image de
la personne qui réalise cet appel. Vous disposerez de 30 secondes pour répondre à l’appel.
, la communication est établie avec la
Lorsqu’on appuie sur le bouton de communication
personne qui appelle. Le temps de conversation est limité à 60 secondes.
Quelques secondes avant la fin du temps de conversation, vous entendrez une série de
signaux sonores. Vous pouvez prolonger le temps de conversation depuis votre logement
, ou, depuis la plaque d’entrée, en
en appuyant deux fois sur le bouton de conversation
indiquant au visiteur d’appeler à nouveau. La conversation finira lorsqu’on appuiera une fois
sur le bouton de communication, ou bien lorsque le temps de conversation se sera écoulé. Le
système se remettra alors en état de veille.
qui permettra l’accès à votre propriété.
Appuyez sur le bouton d’ouverture de porte
Temps de
réponse à l'appel
30 secondes
Plaque appel
du logement
Temps de
conversation
60 secondes
Tonalité
d’appel
Décrocher
Prolongation du temps
de conversation
+
Fin de conversation
Ouverture de porte
MONITEUR POUR VIDEOPORTIER
FRA - 21
Pendant les temps de réponse et de conversation, le système ne permet pas l’autoallumage d’un autre moniteur, mais il permet qu’un autre moniteur disposant d’alimentation
ou entrer dans le menu de configuration .
indépendante puisse consulter la mémoire
AVEC PLUSIEURS MONITEURS DANS VOTRE INTÉRIEUR
L’appel sonne sur tous les moniteurs. Le premier à répondre établit la communication avec
le visiteur. Seulement l’écran du moniteur principal s’allume mais en répondant depuis un
secondaire, l’écran du secondaire s’allume et celle du principal s’éteint. Avant de répondre
pour
depuis un secondaire, vous pouvez appuyer sur son bouton d’auto-allumage
visualiser le visiteur et répondre si ça vous intéresse. Si vous préférez que tous les moniteurs
soient allumés suite à un appel, il faut ajouter une alimentation; consultez votre installateur.
L'appel sonne sur tous les moniteurs
Plaque appel
du logement
La première personne à répondre établit la communication avec le visiteur
OUVERTURE DE PORTE AUTOMATIQUE
Quand cette fonction est activée, la porte s’ouvre immédiatement dès qu’on appelle le
logement. Ceci est particulièrement utile dans le cas des services ouverts au public, tels
qu’avocats ou dentistes. Consultez votre installateur pour habiliter la fonction.
pendant 2
Pour activer cette fonction, il faut appuyer sur le bouton d’auto-allumage
secondes tandis que le moniteur est en veille. Le bouton d’ouverture de porte clignotera sans
interruption tant que cette fonction est activée.
Moniteur
en repos
Appui long
> 2 seg.
Clignotement
bouton gâche
Pour désactiver cette fonction, tandis que le moniteur est en veille, appuyez sur le bouton
pendant 2 sec. Le bouton d’ouverture de porte cessera de clignoter.
d’auto-allumage
FRA - 22
MONITEUR POUR VIDEOPORTIER
APPEL DU PALIER
Grâce à cette fonction, il est possible d’éviter timbre, carillon ou sonnette. Quand le boutonpoussoir d’appel du palier est connecté au moniteur, ce dernier remplit la fonction de la
sonnette. La tonalité a un bruit différent afin que l’utilisateur puisse savoir si l’appel provient
de la rue ou du palier.
APPEL À LA CONCIERGERIE (immeubles avec concierge)
. Si vous
Avec le moniteur en état de veille, appuyez sur le bouton d’ouverture de porte
entendez des tonalités intermittentes, le système est occupé. Attendez et réessayez.
Si vous entendez des tonalités d’appel, la conciergerie reçoit l’appel ; le concierge dispose de
30 secondes maximum pour décrocher.
Engagez la conversation avec le concierge. Vous disposez d’un maximum de 60 secondes
pour la conversation. Peu avant l’expiration de cette période, le moniteur émet un signal
sonore d’avertissement. Vous pouvez prolonger la période de conversation en appuyant deux
ou en demandant au visiteur d’appeler encore une fois le logement.
fois sur le bouton
SIGNALISATION DE PORTE MAL FERMÉE
Dans les installations équipées pour offrir cette fonction, le bouton d’ouverture de porte
clignote quand la porte de l’immeuble reste ouverte pour un temps supérieur à celui configuré
par le système (environ 2 minutes). Veuillez consulter votre installateur
Clignotement
bouton gâche
2 minutes environ
FONCTIONS AUXILIAIRES
Le moniteur permet d’activer 2 mécanismes auxiliaires, comme les portes du garage ou les
systèmes d’éclairage. Veuillez consulter votre installateur. Vous pouvez activer ces fonctions
quand le moniteur est en état actif, c.-à-d. suite à un appel ou à un auto-allumage.
. Pour activer la
Pour activer la fonction auxiliaire 1, appuyez brièvement sur le bouton
fonction auxiliaire 2, appuyez brièvement sur le bouton .
Fonction auxiliaire
1
AUX1
AUX2
2
MEN
AUX1
AUX2
MENU
AUX1
AUX2
MENU
Fonction auxiliaire
2
AUX1
AUX2
MENU
3
MONITEUR POUR VIDEOPORTIER
FRA - 23
COMMENT ACTIVER LE SYSTÈME D’AUTO-ALLUMAGE EN BOUCLE
. Vous pourrez voir l’image saisie par la caméra,
Appuyer sur le bouton d’auto allumage
ouvrir la porte de la rue, et établir la communication avec la plaque d’entrée.
Si un des moniteurs est activé, vous ne pourrez pas vous servir du système d’auto-allumage.
Dans ce cas, attendez jusqu’à ce que le système ne soit plus occupé.
Temps
d’auto-allumage
Durée maximale:
30 secondes
Temps
de conversation
60 secondes
Auto allumage
Décrocher
Les appels qui proviennent de la plaque de rue sont prioritaires au système d’auto-allumage.
Si pendant le temps d’auto-allumage, un appel de l’extérieur se produit, la vidéo se
déconnectera et passera automatiquement à l’état de repos, de cette façon la confidentialité
de l’appel est assuré.
Dans les immeubles avec plusieurs accès, appuyez sur le bouton d’auto-allumage
pendant 2 secondes pour vous déplacer en boucle d’une plaque d’entrée à la suivante.
Appui court
< 1 second
5
Plaque principale
Appui long
> 2 sec.
Appui long
> 2 sec.
5
5
Plaque
secondaire 2
Plaque
secondaire 1
Appui long
> 2 sec.
5
FRA - 24
MONITEUR POUR VIDEOPORTIER
ENREGISTREMENT D’IMAGES ET DE VIDÉOS
La mémoire du moniteur pour stocker jusqu’à 30 images ou 10 vidéos. Le moniteur
enregistrera une image ou une vidéo, selon l’option choisie dans le menu de configuration,
voir le chapitre OPTIONS DE CONFIGURATION DU MONITEUR.
Enregistrement manuel d’une image ou d’une vidéo
Quand l’image que vous souhaitez enregistrer apparaît sur l’écran, appuyez sur le bouton
), et ensuite appuyez sur le bouton OK (bouton multifonction
MENU (bouton multifonction
). L’image sera alors enregistrée et stockée avec la date et l’heure de l’enregistrement.
Enregistrement automatique d’une image ou d’une vidéo des appels reçus mais manqués
Quand un appel est reçu, le moniteur prend automatiquement une capture d’écran ou
enregistre une vidéo. Si on ne répond pas à l’appel, à l’expiration du temps de réponse,
la capture d’écran sera stockée dans la mémoire du moniteur avec la date et l’heure de
l’enregistrement
Le moniteur vous avertit qu’il y a des enregistrements sans consulter avec le clignotement du
.
bouton
Consulter les images ou vidéos stockées dans la mémoire du moniteur
Avec le moniteur en état de veille, appuyez sur le bouton de visualisation d’images
. La dernière image ou vidéo apparaîtra. S’il n’y a aucune image stockée, un message
l’indiquera. Pour regarder d’autres images ou vidéos, appuyez sur les boutons DESCENDRE
y
).
et MONTER (boutons multifonctionnels
Note: Lorsqu’on regarde une vidéo, appuyer une fois arrête la vidéo ; appuyer une deuxième
fois exécute la fonction assignée au bouton.
Supprimant des images ou vidéos stockées dans la mémoire du moniteur
Le moniteur supprimera automatiquement les images ou les vidéos les plus anciennes, laissant
ainsi de l’espace pour de nouveaux enregistrements. Cependant, il est également possible de
supprimer manuellement des images ou des vidéos non désirées pendant qu’on les regarde.
Pour faire ceci, appuyez sur le bouton SUPPRIMER (bouton multifonction ) et sélectionnez
l’option désirée qui apparaît sur l’écran.
MONITEUR POUR VIDEOPORTIER
FRA - 25
OPTIONS DE CONFIGURATION DU MONITEUR
MENU PRINCIPAL
Le moniteur dispose d’un menu de configuration qui vous permettra de régler l’équipement
selon vos souhaits. Pour ouvrir ce menu, lorsque le moniteur est en veille, appuyez sur le
y
) pour
bouton menu . Utilisez les boutons BAS et HAUT (boutons multifonction
naviguer à l’intérieur du menu. Sélectionnez une option en appuyant sur le bouton OK
(bouton multifonction ) et sortez du menu en appuyant sur le bouton SORTIR (bouton
)
multifonction
Réglage de l’écran (luminosité, contraste, saturation des couleurs)
Sélectionnez l’option ÉCRAN du menu. Vous pouvez régler les niveaux de luminosité, de
contraste et de saturation des couleurs de l’écran.
Réglage de la date et de l’heure
Sélectionnez l’option DATE/HEURE du menu. Ensuite réglez le jour, le mois, l’année, l’heure
et la minute.
Réglage de la langue des menus du moniteur
Sélectionnez l’option LANGUE du menu. Sélectionnez ensuite la langue désirée en appuyant
deux fois sur le bouton OK (bouton multifonction ).
Note: L’option LANGUE peut s’afficher dans d’autres langues, par exemple : IDIOMA,
LANGUAGE, LINGUA, DIL ou JAZYK.
Configurez l’enregistrement des images ou celui des vidéos
Sélectionnez l’option ENREG. du menu pour alterner entre ENREG. : IMAGE et ENREG.:
VIDEO.
Remettre aux valeurs d’usine
Sélectionnez l’options MODE D’USINE du menu. Tous les réglages se remettront aux valeurs
par défaut, et les images et les vidéos seront supprimées.
MENU SECONDAIRE
Le moniteur dispose d’un menu de configuration secondaire avec moins d’options que le
menu principal. Il est accessible quand le moniteur est en état actif à travers de la pulsation
). Utilisez les boutons BAS et HAUT
de l’option MENU sur l’écran (bouton multifonction
y
) pour naviguer à l’intérieur du menu. Sélectionnez une option
(boutons multifonction
en appuyant sur le bouton OK (bouton multifonction ) et sortez du menu en appuyant sur le
)
bouton SORTIR (bouton multifonction
Enregistrement manuel d’une image ou d’une vidéo
Quand l’image que vous souhaitez enregistrer apparaît sur l’écran, appuyez sur le bouton
). Sur l’écran apparaît présélectionnée l’option ENREG.:
MENU (bouton multifonction
IMAGE ou ENREG.: VIDEO (selon la configuration du menu principal). Appuyez sur OK
(Bouton multifonction ). L’enregistrement manuel est réalisé avec la date et l’heure actuels.
Réglage de l’écran (luminosité, contraste, saturation des couleurs)
Sélectionnez l’option ÉCRAN du menu. Vous pouvez régler les niveaux de luminosité, de
contraste et de saturation des couleurs de l’écran.
FRA - 26
MONITEUR POUR VIDEOPORTIER
MONITEUR POUR VIDEOPORTIER
FRA - 27
DEMO MONITOR
MONITOR DEMO
Las imágenes de éste documento son puramente referenciales y pueden no coincidir con el producto.
The illustrations in this document are for reference only and may not correspond to the product in every detail.
Les images dans ce document sont pour référence uniquement et peuvent ne pas correspondre au produit.
ALCAD
ALCAD, S.L.
Tel. 943 63 96 60
Fax 943 63 92 66
Int. Tel. +34 - 943 63 96 60
[email protected]
Apdo. 455 - Pol. Ind. Arreche-Ugalde, 1
20305 IRUN - Spain
www.alcad.net
FRANCE - Hendaye
Tel. 00 34 - 943 63 96 60
CZECH REPUBLIC - Ostrovačice
Tel. 546 427 059
TURKEY - Istanbul
Tel. 212 295 97 00
UNITED ARAB EMIRATES - Dubai
Tel. 971 4 214 61 40
Cod. 2637310 - Rev. 03
DEMO MONITEUR