1
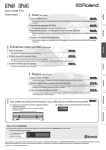
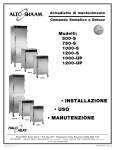
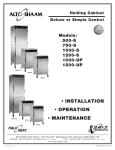
DPW 400
Piano droit numérique
Guide de l’utilisateur
PRÉCAUTIONS D’USAGE
Afin d’apprécier pleinement les impressionnantes possibilités du piano numérique Eagletone DPW 400,
veuillez prendre quelques minutes pour lire ces quelques pages de recommandations importantes.
RISQUE DE CHOC ÉLECTRIQUE
NE PAS OUVRIR
Attention ! Afin de réduire les risques de choc électrique, ne pas ouvrir l’instrument.
Aucune pièce à l’intérieur ne peut être réparée par l’utilisateur.
Faites appel à un technicien qualifié en cas de panne.
INSTRUCTIONS CONCERNANT LES RISQUES D’INCENDIE,
DE CHOC ELECTRIQUE OU DE BLESSURE
Le symbole de l’éclair à l’intérieur d’un triangle sert à avertir l’utilisateur de la présence d’une tension électrique non isolée ou d’une « tension dangereuse » dans l’enceinte du produit pouvant être suffisamment
élevée pour constituer un risque d’électrocution.
Le point d’exclamation à l’intérieur d’un triangle est utilisé pour avertir l’utilisateur de la présence d’instructions de fonctionnement, d’entretien ou de réparation importantes.
ATTENTION !
Tout changement ou toute modification apporté à ce produit et qui ne serait pas expressément approuvé
ou autorisé par le service en charge de la conformité peut mener à l’annulation du droit d’utilisation du
produit.
AVERTISSEMENT
Lors de toute utilisation d’un appareil électrique, quelques précautions de base doivent être observées,
dont celles énumérées ci-dessous :
SÉCURITÉ
Alimentation électrique : le produit doit être toujours connecté à une alimentation conforme au type
décrit dans le manuel d’utilisation ou à celle indiquée sur le produit.
Périodes de non-utilisation : le cordon d’alimentation doit être débranché de la prise électrique lorsque
le produit n’est pas utilisé pendant une période prolongée.
RÉPARATIONS ET MODIFICATIONS
Ce produit doit être réparé par un technicien qualifié lorsque :
• Le cordon d’alimentation ou la prise ont été endommagés ;
• Du liquide s’est infiltré dans l’instrument ou que ce dernier a été exposé à la pluie ;
• Le produit ne semble pas fonctionner correctement ou qu’il montre un changement notoire dans ses
performances ;
2
• Le produit est tombé ou la caisse a été endommagée ;
• Ne jamais tenter d’ouvrir le piano ou de procéder à des modifications des circuits ou d’autres pièces de
ce produit.
MANIEMENT ET TRANSPORT
• Ne jamais exercer une force trop importante sur les boutons de contrôle, les connexions ou toute autre
partie de l’instrument.
• Débrancher toujours les câbles en tenant fermement la prise et non en tirant sur le cordon.
• Débrancher tous les câbles avant de déplacer l’instrument.
• Les chocs physiques provoqués par une chute, un heurt ou le dépôt d’objets lourds sur l’instrument
peuvent provoquer des éraflures et/ou des dommages plus importants.
• Veiller à vérifier attentivement le contrôle du volume général avant de jouer du piano. Un volume excessif peut provoquer une perte auditive permanente.
NETTOYAGE
• Nettoyer la caisse et le panneau de commande avec un linge doux, non-abrasif et sec. Ne jamais utiliser
de diluants de peinture ou de produits d’entretien telles que cires ou produits à polir de base pétrochimique.
• Afin d’entretenir le lustre des touches et des boutons, les nettoyer avec un linge propre légèrement
humide, puis les essuyer avec un linge doux et sec.
EMPLACEMENT
Afin d’éviter toute déformation, décoloration ou tout autre dommage plus important, veillez à ne pas exposer l’instrument à l’un des points suivants :
• Lumière directe du soleil (près d’une fenêtre)
• Fortes températures (près d’une source de chaleur, en extérieur ou près d’une fenêtre)
• Humidité excessive
• Local trop poussiéreux
• Fortes vibrations
• Laissez assez de place autour du piano pour qu’il se ventile correctement.
• Cet instrument renferme des circuits électroniques qui peuvent causer des interférences si le piano est
placé trop près de récepteurs radio ou de télévision. Si des interférences se produisent, éloignez l’instrument des équipements affectés.
• Éviter de placer des objets en vinyle sur l’instrument : le vinyle peut y adhérer et décolorer la surface.
ALIMENTATION ÉLECTRIQUE
• Éteindre le piano à l’aide de l’interrupteur ON/OFF lorsqu’il n’est pas utilisé.
• Pour éviter d’endommager l’instrument ainsi que tout autre appareil auquel il serait connecté, veiller à
tous les éteindre avant de brancher ou de débrancher des câbles MIDI.
• Éteindre le piano si le câble d’alimentation principal est endommagé ou si un liquide a été renversé sur
l’instrument.
• Ne pas allumer et éteindre rapidement l’unité de manière répétitive, cela fait subir une surcharge électrique aux composants électroniques.
• Débrancher le cordon d’alimentation CA pendant un orage.
• Éviter de brancher le cordon d’alimentation CA dans la même prise que d’autres appareils énergivores,
tels que radiateurs électriques ou réfrigérateurs.
3
TABLE DES MATIÈRES
ASSEMBLAGE. . . . . . . . . . . . . . . . . . . . . . . . . . . . . . . . . . . . . . . . . . . . . . . . . . . . . . . . . . . 5
PANNEAU DE COMMANDES ET PEDALIER. . . . . . . . . . . . . . . . . . . . . . . . . . . . . . . . . . . . . . . . . 7
PREPARATION AU JEU . . . . . . . . . . . . . . . . . . . . . . . . . . . . . . . . . . . . . . . . . . . . . . . . . . . . . 8
PIÈCES MUSICALES DE DÉMONSTRATION. . . . . . . . . . . . . . . . . . . . . . . . . . . . . . . . . . . . . . . . . 9
LES VOIX. . . . . . . . . . . . . . . . . . . . . . . . . . . . . . . . . . . . . . . . . . . . . . . . . . . . . . . . . . . . . . 9
TRANSPOSITION. . . . . . . . . . . . . . . . . . . . . . . . . . . . . . . . . . . . . . . . . . . . . . . . . . . . . . . . . 10
MODES DU CLAVIER . . . . . . . . . . . . . . . . . . . . . . . . . . . . . . . . . . . . . . . . . . . . . . . . . . . . . . 11
EFFETS . . . . . . . . . . . . . . . . . . . . . . . . . . . . . . . . . . . . . . . . . . . . . . . . . . . . . . . . . . . . . . . 12
MÉTRONOME. . . . . . . . . . . . . . . . . . . . . . . . . . . . . . . . . . . . . . . . . . . . . . . . . . . . . . . . . . . 12
TEMPO. . . . . . . . . . . . . . . . . . . . . . . . . . . . . . . . . . . . . . . . . . . . . . . . . . . . . . . . . . . . . . . 13
ENREGISTREMENT. . . . . . . . . . . . . . . . . . . . . . . . . . . . . . . . . . . . . . . . . . . . . . . . . . . . . . . . 13
MORCEAUX D’ACCOMPAGNEMENT. . . . . . . . . . . . . . . . . . . . . . . . . . . . . . . . . . . . . . . . . . . . . 15
MODE DES FONCTIONS . . . . . . . . . . . . . . . . . . . . . . . . . . . . . . . . . . . . . . . . . . . . . . . . . . . . 17
RÉINITIALISATION DOUCE. . . . . . . . . . . . . . . . . . . . . . . . . . . . . . . . . . . . . . . . . . . . . . . . . . . 19
MIDI . . . . . . . . . . . . . . . . . . . . . . . . . . . . . . . . . . . . . . . . . . . . . . . . . . . . . . . . . . . . . . . . 20
ANNEXE : TABLEAU D’IMPLANTATION MIDI. . . . . . . . . . . . . . . . . . . . . . . . . . . . . . . . . . . . . . . . 21
ANNEXE : CARACTÉRISTIQUES TECHNIQUES . . . . . . . . . . . . . . . . . . . . . . . . . . . . . . . . . . . . . . . 22
4
ASSEMBLAGE
Vous trouverez les vis suivantes pour l’assemblage des différentes parties dans le sachet d’accessoires :
1.
2.
3.
4.
5.
vis M6X20 (8)
vis 4X16 (4)
vis M4X15 (2)
vis 4X12 (2)
porte-casque
Étape 1 : fixer le pédalier aux panneaux latéraux avec les vis 1.
1
1
Étape 2 : fixer le panneau arrière aux panneaux latéraux à l’aide des vis 2 et 3 pour compléter l’assemblage
du support.
3
3
2
étape 3 : fixer le support au corps du piano avec les vis 1.
1
1
5
Étape 4 : fixer le porte-casque 5 au piano avec les vis 4.
5
4
5
4
Étape 5 : brancher le câble du pédalier à la prise correspondante située sous le piano.
Étape 6 : mettre le piano à l’emplacement définitif que vous avez choisi chez vous. Une fois à cet endroit,
procéder au réglage de la mollette de soutien située sous la barre du pédalier, au centre. Tournez-la pour la
faire descendre et qu’elle soit fermement en contact avec le sol (il ne faut plus qu’il y ait de jeu entre le sol
et le pédalier).
5
4
Étape 7 : brancher le câble d’alimentation dans la prise située sur le dessous du piano. Brancher ensuite le
câble d’alimentation CA dans une prise électrique.
REMARQUE : débrancher le piano lors d’orages ou lors de longues périodes de non-utilisation. Évitez de
brancher l’adaptateur CA sur la même prise de courant que d’autres appareils énergivores, tels que radiateur électrique ou four.
6
PANNEAU DE COMMANDE ET PEDALIER
PANNEAU DE COMMANDE
Reportez-vous aux chapitres suivants pour obtenir une description détaillée des boutons de contrôle.
INTERRUPTEUR DE MISE EN MARCHE : l’interrupteur de mise en marche est situé à gauche du clavier.
Appuyez sur cet interrupteur pour allumer ou éteindre l’instrument. L’indicateur de tension rouge sur la
gauche s’allume lorsque le piano est sous tension.
REMARQUE : lorsque vous éteignez l’instrument, ne le rallumez pas immédiatement. Attendez au moins
cinq secondes afin que les circuits électroniques se réinitialisent correctement.
PANNEAU DU DESSOUS
Le panneau de branchement est situé sous l’instrument, vers l’avant et sur la gauche.
Le panneau de branchement des prises casque est situé sur le dessous, à l’avant et sur la gauche.
Reportez-vous à la description détaillée du panneau dans le chapitre « Préparation au jeu ».
PÉDALIER
1. PÉDALE DOUCE – lorsque cette pédale est actionnée, le volume du piano est diminué et le timbre des
notes jouées est légèrement modifié.
2. PÉDALE DE SOURDINE – sa fonction est similaire à la pédale de sustain. Si la pédale est actionnée pendant que des notes sont jouées, les notes seront tenues. L’effet de sustain ne s’applique pas aux notes jouées
après que la pédale ait été actionnée, même si la pédale est maintenue enfoncée.
3. PÉDALE DE SUSTAIN – lorsque la pédale de droite est actionnée, les notes de piano sont tenues tout en
étant jouées. De ce fait, les notes de piano vont diminuer en intensité graduellement comme si vous conti-
7
nuiez d’appuyer sur les touches du clavier.
SE PRÉPARER À JOUER
VOLUME PRINCIPAL
Faites glisser cette commande vers la droite pour augmenter le volume général du piano, et vers la gauche
pour le diminuer. Faites glisser ce bouton jusqu’au milieu avant de mettre le piano sous tension.
Quelques équipements pour le confort de votre utilisation personnelle :
PUPITRE
Lorsque vous désirez utiliser le pupitre, remontez-le et dépliez l’équerre située au dos afin de le mettre en
appui dessus.
CASQUE STÉRÉO
Le piano possède deux sorties jack pour deux casques stéréo situées sous l’instrument, à gauche vers
l’avant. Cela vous permet de jouer en silence, sans déranger les autres personnes qui se trouvent dans la
pièce, tout simplement en branchant un casque dans l’une des prises jack prévues à cet effet. Lorsqu’un
casque est branché dans l’une des deux prises jack, les haut-parleurs cessent de fonctionner. Deux casques
peuvent être branchés simultanément.
LINE IN (ENTRÉE LIGNE)
Ces entrées jack audio stéréo amplifient le signal qui y est envoyé grâce au système interne de restitution
de son. Vous pouvez raccorder des appareils tels qu’un lecteur CD, MP3 ou cassette.
LINE OUT (SORTIE LIGNE)
Ces sorties jack audio stéréo permettent de faire sortir le signal émis par le piano et de le relier à un système
d’amplification externe, tels qu’une chaîne Hi-Fi, un système de sonorisation externe ou tout autre type
d’amplification autonome.
MIDI IN/OUT (ENTRÉE/SORTIE MIDI)
Ce piano est pourvu de ports d’entrée et de sortie MIDI. Des câbles MIDI permettent la communication
entre plusieurs appareils munis d’interfaces MIDI. Veuillez vous reporter à la section « MIDI » de ce manuel
pour de plus amples détails.
USB
Le connecteur USB vous permet de connecter ce piano directement au port USB de votre ordinateur. Veuillez vous reporter à la section « MIDI » de ce manuel pour de plus amples détails.
8
PIÈCES MUSICALES DE DÉMONSTRATION
Il y a deux types de morceaux de démonstration compris dans le piano.
Le piano possède dix pièces musicales de démonstration d’orchestre pour votre plaisir.
La démonstration de voix présente pour chaque voix sélectionnée un court morceau d’illustration.
DÉMONSTRATION DE VOIX
Appuyez et maintenez enfoncé un bouton de sélection de Voix (VOICE) puis appuyez sur le bouton DEMO.
Vous entendrez alors un morceau de musique joué avec la voix sélectionnée. Utilisez les boutons de sélection de voix (VOICE), le bouton de VARIATION ou les boutons ▲/▼ pour changer la voix de démonstration.
L’affichage sur l’écran indique le numéro de la voix. Appuyez de nouveau sur le bouton DEMO pour arrêter
la démonstration.
DÉMONSTRATION D’ORCHESTRE
Il y a dix démonstrations. Appuyez sur le bouton DEMO. Son témoin s’illumine. Vous allez entendre toutes
les pièces de démonstration en commençant par la pièce n°1, jouées en boucle. L’affichage sur l’écran indique le numéro du morceau de démonstration précédé du préfixe « d- ». Appuyez sur les boutons ▲/▼
pour sélectionner le morceau de démonstration désiré. Appuyez de nouveau sur le bouton DEMO pour
arrêter la démonstration.
LES VOIX
Lorsque le piano est allumé, l’écran DEL indique le numéro de la voix. Par défaut, la voix est « 01 Grand
Piano ».
SÉLECTIONNER UN SON
Il y a quinze voix, numérotées de 1 à 15, sélectionnables par les boutons de sélection rapide des voix et le
bouton VARIATION. Chaque bouton de sélection de voix se réfère à une catégorie de voix d’instrument.
Appuyez sur le bouton VARIATION pour choisir une voix dans chaque catégorie. Le témoin lumineux du
bouton VARIATION a deux couleurs. Lorsque la voix change dans une catégorie donnée,- la couleur du témoin du bouton VARIATION change aussi et le numéro correspondant s’affiche -sur l’écran. Les boutons
▲/▼ peuvent aussi servir à choisir les voix en mode ‘sélection de voix’ ; les témoins de voix correspondants
s’illumineront.
9
9
-
REMARQUE : si seulement 15 voix peuvent être sélectionnées par le biais des boutons, le piano dispose
en revanche de 128 voix MIDI et d’un kit de percussions. Ils sont à disposition pour jouer de la musique en
mode MIDI en passant par les connexions MIDI/USB.
9
9
LISTE DES VOIX
GROUPE
PIANO
E. PIANO
HARPSICHORD
(clavecin)
ORGAN
(Orgue)
STRINGS (cordes)
N°
VOIX
N°MIDI
01
Grand Piano
0
02
Grand Piano 2
1
03
Honky Tonk
3
04
E. Piano 1
4
05
E. Piano 2
5
06
Vibraphone
11
07
Harpsichord
6
08
Clavinet
7
09
Nylon Guitar
24
10
Church Organ (orgue d’église)
19
11
Jazz Organ (orgue Jazz)
16
12
Rock Organ (orgue Rock)
18
13
Strings Ensemble
48
14
Slow Strings
49
15
Synth strings
50
LAYER VOICE (SUPERPOSITION DE VOIX)
Avec le mode de superposition, vous pouvez superposer (ou mixer) deux sons d’instrument ensemble.
Appuyer sur le bouton LAYER et le témoin s’illumine pour montrer que le mode de double voix est activé.
L’écran indique le numéro de la voix principale (la voix superposée par défaut est STRINGS [cordes]). Si vous
appuyez simultanément sur le bouton LAYER et un bouton de sélection de voix, le mode de superposition
est activé et le témoin du bouton LAYER clignote. Ensuite, à l’aide des boutons de sélection de voix, du
bouton VARIATION ou des boutons ▲/▼, vous pouvez sélectionner la deuxième voix de la superposition.
Appuyez sur n’importe quel bouton sauf ▲/▼ et les boutons de sélection de voix ou lorsque vous avez
fini de choisir la deuxième voix ne touchez plus à aucun bouton pendant trois secondes. L’écran retourne
au mode de sélection de voix et affiche la voix principale sélectionnée. Cependant, le témoin lumineux du
bouton LAYER reste allumé.
Appuyez de nouveau sur le bouton LAYER pour désactiver le mode de superposition de voix. Le témoin du
bouton LAYER s’éteint.
Le volume entre la voix principale et la voix superposée peut être ajusté. Référez-vous au chapitre « MODES
DES FONCTIONS » pour de plus amples précisions.
TRANSPOSE (Transposition)
La fonction TRANSPOSE sert à augmenter ou à réduire la tonalité du piano par incréments d’un demi-ton.
Appuyez sur le bouton TRANSPOSE. Le témoin lumineux du bouton clignote. L’écran indique la valeur actuelle de la transposition (0 par défaut) précédée du préfixe « t ». Utilisez les boutons ▲/▼ pour régler la
10
valeur de la transposition désirée. Elle va de –6 à 6. Par exemple : t-5. Appuyez sur n’importe quel bouton
sauf ▲/▼ ou lorsque vous avez fini de paramétrer la transposition ne touchez plus à aucune commande
pendant trois secondes. L’écran revient alors au mode de sélection de voix et affiche à nouveau la voix
sélectionnée.
Lorsque la valeur de transposition n’est pas zéro, le témoin lumineux du bouton reste allumé. Appuyez sur
le bouton TRANSPOSE de nouveau pour désactiver la fonction de transposition.
LES MODES DU CLAVIER
Le clavier peut être utilisé de deux manières différentes : vous pouvez soit jouer sur l’intégralité du clavier
avec une voix, soit sur le clavier scindé en deux (DUET).
CLAVIER ENTIER
C’est le mode par défaut. Les notes sont arrangées ainsi :
CLAVIER SCINDÉ
Le clavier est scindé en deux parties : de A2 (la2) jusqu’à E6 (mi6) et de F2 (fa2) jusqu’à C6 (do6). Les deux
sections jouent la même voix (la voix principale) au même volume.
Dans ce mode, la pédale de droite devient la pédale de sustain pour le clavier de droite, et la pédale de
gauche devient la pédale de sustain pour le clavier de gauche.
La pédale du milieu (sourdine) est désactivée.
Appuyez sur le bouton DUET et le témoin lumineux du bouton s’allume pour indiquer que le mode est
actionné. L’écran indique le numéro de voix. Le paramètre par défaut est la voix principale.
Appuyez de nouveau sur le bouton DUET pour quitter le mode de scission du clavier. Le témoin lumineux
s’éteint.
11
EFFETS
REVERB (RÉVERBÉRATION)
L’effet REVERB sert à créer l’illusion que le piano est joué dans une vaste pièce ou un grand hall. Il donne
l’impression que le son se réverbère sur les murs et les plafonds.
Appuyez sur le bouton REVERB pour activer cet effet et son témoin s’allume.
Si vous appuyez simultanément sur le bouton REVERB et les boutons ▲/▼, l’effet est activé mais le témoin
lumineux du bouton REVERB clignote et l’écran indique le volume actuel de réverbération précédé de la
lettre « r », par exemple : r08. Utilisez ensuite les boutons ▲/▼pour ajuster le volume d’effet désiré. Le
volume est gradué de 0 à 16.
Appuyez sur n’importe quel bouton sauf▲/▼ ou lorsque vous avez fini l’opération ne touchez plus à aucune commande pendant trois secondes et ainsi l’écran indiquera à nouveau la voix principale et reviendra
au mode de sélection de voix. Le témoin du bouton REVERB reste allumé.
CHORUS (CHŒUR)
L’effet CHORUS (chœur) ajoute de la profondeur et de l’espace à la voix de clavier sélectionnée.
Appuyez sur le bouton CHORUS pour activer l’effet ; le témoin du bouton s’allume.
Si vous appuyez simultanément sur le bouton CHORUS et les boutons▲/▼, l’effet est activé mais le témoin
lumineux du bouton CHORUS clignote et l’écran indique le volume actuel du chorus précédé de la lettre
« c », par exemple : c08. Utilisez ensuite les boutons ▲/▼pour ajuster le volume d’effet désiré. Le volume est
gradué de 0 à 16.
Appuyez sur n’importe quel bouton sauf ▲/▼ ou lorsque vous avez fini l’opération ne touchez plus à aucune commande pendant trois secondes et ainsi l’écran indiquera à nouveau la voix principale et reviendra
au mode de sélection de voix. Le témoin du bouton CHORUS reste allumé.
Chaque voix possède un réglage d’effet de réverbération et de chorus par défaut. Le réglage du volume de
chaque effet s’applique aux deux voix dans les modes de voix double et de clavier scindé.
MÉTRONOME
Déclenchez le métronome interne du piano en appuyant sur le bouton METRONOME. Il va se mettre alors
à jouer selon les réglages de tempo et de type de mesure définis. Si vous appuyez simultanément sur le
bouton METRONOME et le bouton ▲ ou ▼, le métronome se met en route mais l’écran indique le type de
mesure qui est en train d’être joué (le type de mesure joué par défaut est 4/4). Un point sépare le nombre
de temps par mesure et le nombre de notes par mesure. Par exemple, le schéma ci-dessous représente une
mesure en 3/4. Utilisez les boutons ▲/▼ pour modifier le type de mesure, selon la séquence suivante : 1/4,
2/4, 3/4, 4/4, 5/4, 6/4, 6/8 et 12/8. Lorsque le métronome est activé, les témoins lumineux situés au-dessus
du bouton METRONOME clignotent en fonction du type de mesure sélectionné.
12
Appuyez sur n’importe quel bouton sauf ▲/▼ ou lorsque vous avez fini l’opération ne touchez plus à aucune commande pendant trois secondes et ainsi l’écran indiquera à nouveau la voix principale et reviendra
au mode de sélection de voix. Le témoin du bouton METRONOME reste allumé.
Appuyez de nouveau sur le bouton METRONOME pour l’arrêter.
Remarque : les effets de réverbération (REVERB) et de chœur (CHORUS) ne s’appliquent pas au battement
du métronome.
TEMPO
Appuyez sur le bouton TEMPO pour entrer dans le menu de paramétrage du tempo. Le témoin du bouton
clignote. L’écran indique la valeur du tempo joué (la valeur par défaut est 120), suivie d’un point. Utilisez les
boutons▲et▼ pour augmenter ou diminuer le tempo. Les valeurs sont comprises entre 40 et 240. Appuyez
simultanément sur les boutons ▲ et▼ pour revenir à la valeur par défaut (120). Si vous appuyez et maintenez enfoncé le bouton ▲ ou▼, le tempo va se modifier de manière régulière et continue jusqu’à ce que
vous relâchiez le bouton. Appuyez sur n’importe quel bouton sauf ▲/▼ou lorsque vous avez fini l’opération
ne touchez plus à aucune commande pendant trois secondes et ainsi l’écran indiquera à nouveau la voix
principale et reviendra au mode de sélection de voix.
ENREGISTREMENT
Le piano numérique DPW 400 comprend un enregistreur deux pistes qui vous permet de vous enregistrer
et d’écouter ce que vous avez joué. Deux pistes, cela signifie que vous pouvez réenregistrer une partie pardessus une autre, en utilisant une voix différente si vous le souhaitez.
La fonction d’enregistrement est un complément très utile dans tout type de programme d’étude de clavier étant donné qu’il vous permet d’entendre exactement la façon dont vous jouez, du point de vue de
l’auditeur. Mais vous pouvez tout aussi bien utiliser cette fonction pour votre seul plaisir. Les données enregistrées ne s’effacent pas et vous pouvez donc réécouter vos morceaux, même si le piano a été éteint
entretemps. Les deux pistes peuvent être écoutées séparément ou simultanément en tant que morceau
complet. La fonction « enregistrement » enregistre fidèlement tous les paramètres tels que vous les avez
sélectionnés et joués.
S’ENREGISTRER
1. Préparation : Préparez l’enregistrement en paramétrant la voix que vous désirez, le tempo, le niveau de
réverbération et tout autre paramètre selon votre désir.
2. Sélectionner une piste : Deux pistes sont disponibles pour vous enregistrer. Les pistes sont assignées
en appuyant sur les boutons TRACK 1 et TRACK 2 (PISTE 1 et PISTE 2).
3. Appuyez et maintenez enfoncé le bouton REC (Enregistrement), puis appuyez sur le bouton de la piste
sur laquelle vous voulez vous enregistrer. Les témoins lumineux de piste et REC (enregistrement) se mettent
à clignoter et les quatre témoins lumineux de battement clignotent en fonction du tempo sélectionné pour
indiquer que l’enregistreur est en attente.
REMARQUE 1 : les données contenues sur une piste seront effacées dès que vous sélectionnerez cette piste pour
un nouvel enregistrement.
13
REMARQUE 2 : si vous avez déjà enregistré quelque chose sur l’autre piste, le témoin de la piste sera allumé et
la musique enregistrée sera jouée comme point de référence pendant que vous enregistrerez sur l’autre piste. Si
vous ne souhaitez pas que l’autre piste soit jouée pendant que vous enregistrez, appuyez sur le bouton de piste
correspondant pour désactiver la lecture. Son témoin lumineux s’éteindra.
1. Métronome : Si vous désirez l’aide du métronome pendant que vous enregistrez, appuyez sur le bouton METRONOME pour activer cette fonction. Les quatre témoins de battement clignotent, le métronome
fait entendre le tempo sans indiquer de type de mesure particulier. Vous pouvez paramétrer le tempo et
le type de mesure que jouera le métronome avant de commencer l’enregistrement. Cependant, vous ne
pourrez plus les modifier pendant la phase d’enregistrement.
Remarque 1 : le son du métronome ne sera pas enregistré.
Remarque 2 : si une piste contient déjà un enregistrement, les réglages de type de mesure et de tempo
seront repris comme paramètres de base lorsque vous enregistrerez sur la deuxième piste. Si vous
décidez de modifier le tempo entre les deux enregistrements, le nouveau tempo sera appliqué aux deux
pistes. Vous ne pouvez pas modifier le type de mesure.
2. Enregistrer : Si les boutons TRACK 1 ou TRACK 2 sont sélectionnés et en train de clignoter, l’enregistrement se mettra en route dès que vous appuierez sur une touche du clavier ou le bouton PLAY/STOP
(Lecture/Arrêt).
3. Pendant l’enregistrement, le témoin de la piste sélectionnée clignote et le témoin du bouton REC est
allumé en continu.
4. Arrêter l’enregistrement : Appuyez sur le bouton PLAY/STOP, le bouton REC ou le bouton de la piste
sur laquelle a lieu l’enregistrement pour arrêter ce dernier. Le témoin du bouton REC s’éteint et le témoin
de la piste sur laquelle l’enregistrement a eu lieu est à présent allumé en continu afin de montrer que des
données y sont inscrites.
REMARQUE : lorsque la mémoire est pleine, l’enregistrement s’arrête automatiquement et le mot « FUL » apparaît sur l’écran DEL.
ÉCOUTER
1. Les diodes des pistes vont vous indiquer quelle(s) piste(s) contient/tiennent des données enregistrées.
Si vous ne souhaitez pas écouter le contenu d’une piste en particulier, il vous suffit d’appuyer sur le bouton
TRACK (Piste) correspondant pour en annuler la lecture.
2. Appuyez sur le bouton PLAY/STOP pour écouter la/les piste(s) enregistrée(s). Le témoin du bouton PLAY
s’allume et les témoins de rythme clignotent en fonction du tempo et du type de mesure qui ont servi lors
de l’enregistrement.
Vous pouvez modifier le tempo de la piste enregistrée en appuyant sur le bouton TEMPO lors de l’écoute
de l’enregistrement.
Vous pouvez aussi accompagner l’enregistrement en jouant simultanément sur le clavier.
Remarque : si le métronome est actif avant que vous ayez appuyé sur le bouton PLAY/STOP pour écouter l’enregistrement, le métronome jouera selon le tempo et le type de mesure qui ont servi à l’enregistrement. Lorsque
l’écoute s’arrête, le métronome revient tout seul à ses paramètres initiaux.
14
3. Appuyez sur le bouton PLAY/STOP pour arrêter l’écoute.
L’écoute s’arrête aussi d’elle-même lorsque l’enregistrement arrive à sa fin.
EFFACER LES PISTES
Pour effacer la musique enregistrée sur les pistes :
1. Appuyez et maintenez enfoncé le bouton REC.
2. Appuyez sur le bouton de la piste que vous souhaitez effacer tout en continuant de maintenir enfoncé
le bouton REC. Cela va immédiatement effacer toutes les données de votre enregistrement de façon définitive.
3. Relâchez le bouton REC (les témoins de piste et REC clignotent)
4. Appuyez sur le bouton de piste de nouveau (les témoins s’éteignent)
5. Répétez les étapes 1 à 4 jusqu’à ce que les pistes désirées soient effacées.
MORCEAUX D’ACCOMPAGNEMENT
La banque des morceaux d’apprentissage contient 58 titres pour votre plus grand plaisir. Les jeux des mains
gauche et droite sont séparés et peuvent être activés ou désactivés selon votre bon vouloir, vous laissant
ainsi la possibilité de pratiquer la partie que vous voulez sur le clavier.
CHOISIR UN MORCEAU
Appuyez sur le bouton SONG (chanson). Le témoin du bouton va s’illuminer et le numéro du morceau va
apparaître sur l’écran DEL. Les deux témoins lumineux LEFT (gauche) et RIGHT (droite) sont éteints. Utilisez
les boutons ▲/▼ pour choisir un morceau.
Si vous désirez jouer le morceau sélectionné à une vitesse inférieure ou supérieure à celle d’origine, appuyez
sur le bouton TEMPO et servez-vous des boutons▲/▼ pour modifier le tempo selon un coefficient basé sur
le tempo initial du morceau. Le coefficient va de 50% à 150%. Appuyez simultanément sur les boutons▲/▼
pour revenir au tempo par défaut du morceau choisi. Après trois secondes, l’affichage de l’écran revient au
numéro du morceau.
ÉCOUTER LE MORCEAU EN ENTIER
1. Appuyez sur le bouton PLAY/STOP pour écouter les deux mains jouer le morceau en entier.
2. Appuyez de nouveau sur PLAY/STOP pour arrêter l’écoute. Autrement, l’écoute s’arrêtera d’elle-même à
la fin du morceau.
15
PRATIQUER LA MAIN DROITE DU MORCEAU SÉLECTIONNÉ
1. Appuyez sur le bouton RIGHT (droite) pour désactiver la partie jouée par la main droite. Le témoin du
bouton RIGHT s’allume.
2. Appuyez sur le bouton DEMO pour entendre seulement la partie de la main droite avant de vous exercer à la jouer. Appuyez de nouveau sur le bouton DEMO pour l’arrêter.
3. Appuyez sur le bouton PLAY/STOP. Son témoin s’allume et vous allez entendre le métronome « battre la
mesure » du morceau. Vous allez ensuite entendre la partie jouée par la main gauche.
4. Le métronome est activé par défaut (ON). Appuyez sur le bouton METRONOME si vous voulez le désactiver en mode main Gauche/Droite. Cependant, lorsque les deux mains sont jouées simultanément, vous
ne pouvez pas le désactiver.
5. Jouez la partie de la main droite du morceau que vous avez sélectionné pendant que la partie de la main
gauche est jouée.
6. Appuyez de nouveau sur le bouton PLAY/STOP pour arrêter l’écoute. La lecture s’arrêtera autrement
d’elle-même à la fin du morceau.
PRATIQUER LA MAIN GAUCHE DU MORCEAU SÉLECTIONNÉ
Suivez les étapes 1 à 5 sus-indiquées en remplaçant chaque mention du « bouton RIGHT (droite) » par « bouton LEFT (gauche) ».
Vous entendrez alors la partie de la main droite du morceau que vous avez sélectionné. Jouez la partie de la
main gauche pendant que la partie de la main droite est jouée.
PRATIQUER LES DEUX MAINS DU MORCEAU SÉLECTIONNÉ
1. Appuyez sur les boutons RIGHT (droite) et LEFT (gauche) simultanément. Les témoins des boutons s’allument tous les deux.
2. Appuyez sur le bouton PLAY/STOP. Son témoin s’allume et vous allez entendre le métronome « battre la
mesure » du morceau.
3. Jouez les parties des mains gauche et droite du morceau que vous avez sélectionné. Le métronome
continuera de battre la mesure pour vous aider à garder le rythme.
4. Appuyez sur le bouton PLAY/STOP une nouvelle fois pour arrêter la lecture. La lecture s’arrêtera autrement d’elle-même à la fin du morceau.
16
LE MODE DES FONCTIONS
Le Mode des Fonctions vous donne accès aux autres possibilités de votre piano.
Appuyez sur le bouton SETUP pour accéder au menu de paramétrage des fonctionnalités. Appuyez de
manière répétitive sur le bouton SETUP pour accéder à la fonctionnalité que vous souhaitez paramétrer.
Appuyez sur les boutons ▲/▼ pour sélectionner une option ou définir une valeur pour cette fonctionnalité. Lorsque vous accédez à la fonctionnalité suivante en appuyant de nouveau sur le bouton SETUP, les
paramètres que vous avez définis sont automatiquement sauvegardés. Appuyez sur n’importe quel bouton
hormis les boutons ▲/▼ et SETUP pour sortir du mode des Fonctions et retourner au mode de sélection
de voix.
Les fonctionnalités suivantes peuvent être sélectionnées et paramétrées dans le Mode des Fonctions :
SÉLECTIONNER UN TYPE DE SENSIBILITÉ AU TOUCHER
Le piano possède un clavier sensible à la vélocité de la frappe des touches qui répond à la force avec laquelle
vous frappez une touche en modifiant le volume de la note jouée.
Lorsque vous entrez dans ce mode via le bouton SETUP, l’écran indique « tch ».
Il y a quatre types de sensibilité au toucher :
Standard – Le paramètre par défaut qui se rapproche le plus d’un piano acoustique. Il est indiqué sur
l’écran par les lettres « Std ».
Doux (Soft) – Pour obtenir le volume maximal, il n’est pas nécessaire de frapper les touches aussi fortement. Il est indiqué sur l’écran par les lettres « SFt ».
Dur (Hard) – Pour obtenir le volume maximal, il faut une frappe plus forte. Il est indiqué sur l’écran par les
lettres « Hrd ».
Pas de sensibilité (Fixed) – Le clavier n’est pas sensible à la vélocité de la frappe. Le volume est fixé pour
certains instruments tels que l’orgue ou le clavecin ou pour jouer certains morceaux de musique contemporaine. Il est indiqué sur l’écran par le mot « no ».
Utilisez les boutons ▲/▼ pour choisir le type de sensibilité qui vous convient.
ACCORDAGE PRINCIPAL
Cette fonction vous permet de régler l’accordage général du piano pour être dans la même tonalité qu’un
enregistrement donné ou que d’autres instruments dans un ensemble.
Lorsque vous entrez dans ce mode en appuyant sur le bouton SETUP, l’écran indique « tun ». Utilisez les
boutons ▲/▼ pour régler la valeur d’accordage désirée, allant de –64 à 64. Appuyez simultanément sur les
boutons ▲ et ▼ pour revenir à la valeur par défaut (0).
17
CHANGEMENT D’OCTAVE
La fonction de changement d’octave vous permet de transposer l’intégralité du piano d’une octave plus
grave ou plus aiguë.
Lorsque vous entrez dans ce mode par le bouton SETUP, l’écran indique « Oct ». Utilisez les boutons ▲/▼pour
régler le changement d’octave désiré, allant de –2 à 2. La valeur par défaut est 0.
BALANCE DES VOLUMES
Le mode de balance des volumes permet de faire la balance entre la voix principale et la voix secondaire
dans le mode de clavier double.
Lorsque vous entrez dans ce mode via le bouton SETUP, l’écran indique « bLn ». La balance de volume se
comprend ainsi : « volume de la voix secondaire – volume de la voix principale ». Chaque paramètre va de 1
à 9 ; 1 étant le volume minimal et 9 le volume maximal.
La balance du volume par défaut est « 5 – 5 ».
Utilisez le bouton ▼ pour diminuer le volume de la voix secondaire et augmenter le volume de la voix principale, par exemple : 4 – 6, 3 – 7… 1 – 9.
Utilisez le bouton ▲ pour augmenter le volume de la voix secondaire et diminuer le volume de la voix principale, par exemple : 6 – 4, 7 – 3… 9 – 1.
Appuyez simultanément sur les boutons▲ et ▼pour revenir à la valeur par défaut de 5 – 5.
LOCAL OFF
« LOCAL OFF » est un mode spécial de jeu du piano dans lequel le piano est connecté à une autre machine
MIDI ou à un ordinateur. Lorsque « Local » est en position « ON » (activé), ce qui est joué sur le piano sortira
sur les enceintes du piano et les signaux MIDI seront également transmis à l’autre appareil par la sortie MIDI
(MIDI Out).
Lorsque « Local » est en position « OFF » (désactivé), ce qui est joué sur le piano ne sort pas sur les enceintes
du piano, mais les messages du jeu sont transmis par la sortie MIDI (MIDI Out). Cette fonctionnalité est utile
lorsqu’on veut se servir du piano en tant que clavier et que le son sorte sur un autre instrument MIDI.
Lorsque vous entrez dans ce mode via le bouton SETUP, l’écran indique « Loc ».
Utilisez le bouton ▼pour désactiver le « Local » (OFF) et le bouton ▲ pour l’activer (ON). Le réglage par
défaut est « ON ».
REMARQUE : lorsque « Local » est en position « OFF », le métronome fonctionne normalement et est
audible.
STORE (MÉMOIRE)
Normalement, lorsque vous allumez le piano, ce sont les réglages par défaut qui sont initialisés ; les réglages
définis ou modifiés précédemment par l’utilisateur ne sont pas sauvegardés. Si la fonction « STORE » est
activée, lorsque vous allumez le piano, les derniers réglages effectués par l’utilisateur sont mémorisés et
initialisés. Ces réglages incluent : mode LAYER (superposition) et DUET (mode double clavier), balance du
18
volume, mode de sensibilité du clavier, numéro de morceau, paramètres d’effets sonores, etc.
Lorsque vous entrez dans ce mode via le bouton SETUP, l’écran indique « Sto ».
Utilisez le bouton ▼ pour désactiver la fonction de mémorisation et le bouton ▲ pour l’activer. Le réglage
par défaut est « OFF » (désactivé).
REMARQUE : le contenu des enregistrements est toujours sauvegardé.
BRIGHTNESS (BRILLANCE)
Cette fonction vous permet de régler la brillance du son.
Lorsque vous entrez dans ce mode via le bouton SETUP, l’écran indique « brt ». Utilisez les boutons ▲/▼
pour régler le degré de brillance désiré, allant de 1 à 16. Appuyez simultanément sur les boutons ▲ et ▼
pour revenir à la valeur par défaut de 04.
SETUP
SETUP
SETUP
RÉINITIALISATION DOUCE (SOFT RESET)
La musique enregistrée, la voix superposée, le mode de sensibilité au toucher et le numéro de morceau
sont toujours sauvegardés. Lorsque vous allumez le piano, les paramètres sus-mentionnés sont automatiquement rappelés. Si vous souhaitez revenir au paramétrage par défaut (paramètres d’usine), appuyez et
maintenez enfoncés les deux boutons ▲ et ▼ lorsque vous mettez le piano sous tension. Veuillez prendre
note que toute musique enregistrée sera effacée par cette opération.
19
19
19
MIDI
Le mode MIDI (de l’anglais « Musical Instrument Digital Interface ») est un standard mondial qui permet
aux instruments de musique électronique et aux ordinateurs de communiquer entre eux, de s’échanger
des instructions et des données. Cela permet de créer un ensemble d’instruments et de machines MIDI
interconnecté qui offre un éventail de possibilités et de paramètres contrôlables plus vaste qu’avec des
instruments utilisés isolément.
MIDI In (entrée MIDI) : cette prise permet de recevoir des signaux et des données MIDI provenant d’une
autre machine MIDI.
MIDI Out (sortie MIDI) : cette prise envoie des signaux MIDI à un autre appareil MIDI. Les données transmises comprennent la hauteur de ton (note) ainsi que la vélocité du toucher produite lors du jeu sur le
clavier, et les changements de voix.
Le système MIDI du piano comprend 16 canaux numérotés de 0 à 15. Chacun est assigné à une voix d’instrument. Lorsque le piano DPW 400 reçoit des signaux de contrôle provenant d’une autre machine MIDI, le
canal actif est déterminé par les paramètres MIDI du piano ou le signal de contrôle reçu.
EXEMPLES DE CONNEXION
Sortie MIDI vers un générateur de son externe :
Reliez la prise MIDI Out du piano à la prise MIDI In d’un appareil externe (clavier, synthétiseur, générateur de
son…). L’appareil externe répondra à ce que vous jouez sur le piano DPW 400. De cette façon, vous pouvez
jouer deux instruments à la fois ou jouer sur votre instrument et ne faire sonner que l’autre instrument MIDI.
Sortie MIDI d’un autre instrument vers l’entrée MIDI du DPW 400 :
Reliez la prise MIDI In du piano à la prise MIDI Out d’un instrument externe. Les données et signaux générés
sur l’autre machine piloteront votre piano.
Connexion à un ordinateur :
Vous pouvez transférer votre jeu sur un ordinateur afin de bénéficier des capacités et des paramétrages
d’enregistrement, de composition et d’édition avancés disponibles dans les logiciels de votre ordinateur. La
musique MIDI stockée dans votre ordinateur peut aussi être envoyée à votre piano pour qu’il la joue.
USB : la prise USB vous permet de relier le piano DPW 400 directement à l’un des ports USB de votre ordinateur. Les caractéristiques de l’interface USB sont les mêmes que celles des prises MIDI, à la différence que la
prise USB permet le transit des données des prises MIDI In et Out par le même port et le même câble USB.
L’interface USB est compatible avec Windows XP/Vista et MAC.
20
20
20
TABLEAU D’IMPLANTATION MIDI
FONCTION
Basic Channel
Channel changed
Default mode
Note number
Velocity Note On
Note Off
Pitch Bender
Control Change
TRANSMIS
1 CH
1 – 16 CH
X
11 – 118
9nV, V=0–127
8nV, V=0–127
X
RECONNU
1 – 16 CH
1 – 16 CH
3
0 – 127
9nV, V=0–127
8nV, V=0–127
√
COMMENTAIRES
1
X
√
Modulation
5
X
√
Portamento value
7
X
√
Volume
10
X
√
Pan
11
X
√
Expression
64
√
√
Sustain
66
√
√
Sostenuto
67
√
√
Soft pedal
65
X
√
Portamento yes/no
80
√
√
Reverb program
81
√
√
chorus program
91
√
√
Reverb send level
92
√
√
chorus send level
98
X
√
NRPNL
99
X
√
NRPNH
100
X
X
RPNL
101
X
X
RPNH
121
X
√
Reset all controllers
123
√
√
All notes off
Program change
System exclusive
Sys. Common: Song select
Song position
System: Clock
Real time: Commands
Mode 1: OMNI ON, POLY
Mode 3: OMNI OFF, POLY
0 – 127 *
0 – 127
X
X
X
X
X
X
X
X
X
X
Mode 2: OMNI ON, MONO
Mode 4: OMNI OFF, MONO
* Dépend de la voix qui peut être sélectionnée dans le piano. Se référer à la liste des voix disponibles.
21
CARACTÉRISTIQUES TECHNIQUES
CLAVIER
88 touches, clavier sensible au toucher
VOIX
15 Voix, 5 boutons de sélection + un bouton de variation
MODE DE VOIX
Upper (principale), Layer (superposée), duet (double)
EFFETS
Reverb (Réverbération) et Chorus (chœur)
BOUTONS DE CONTRÔLE
PARAMÉTRAGE/FONCTIONS
DÉMONSTRATION
Transpose (transposition), Tempo, Setup (paramétrage/fonctions), Metronome, Demo, +/Tuning (accordage), Octave (changement d’octave), Touch response (réglage de la sensibilité au toucher), Volume balance
(balance du volume)
10 morceaux d’orchestre; un morceau de démonstration pour
chacune des voix
APPRENTISSAGE
58 morceaux d’apprentissage avec entraînement main droite/
gauche
ENREGISTREMENT
2 pistes
AFFICHAGE
Écran DEL à 3 X 7 segments
CONNEXIONS AUXILIAIRES
Prise casque stéréo x 2, Line Out (Sortie), Line in (Entrée), MIDI
In/Out (entrée/sortie MIDI), prise USB
PÉDALIER
Pédales sustain, sourdine et douce
AMPLIFICATEUR
2 x 10W
DIMENSIONS
1377mm x 510mm x 862mm
22
DPW 400
Digital Piano
User’s Manual
SAFETY PRECAUTIONS
In order to fully appreciate all the impressive features of the Eagletone DPW 400 digital piano, please take a
few minutes to read the instructions gathered in the following pages.
RISK OF ELECTRIC SHOCK
DO NOT OPEN
ACaution: To reduce the risk of electric shock, do not open this instrument
or remove its cover or its back.
No user-serviceable parts inside.
Refer servicing to qualified service personnel.
INSTRUCTIONS PERTAINING TO RISKS OF FIRE, ELECTRIC SHOCK OR INJURY
The flash of lightning inside an equilateral triangle symbol is intended to alert the user to the presence of
un-insulated or «dangerous» voltage within the product’s enclosure that may be of sufficient magnitude to
constitute a risk of electric shock to people.
The exclamation point inside a triangle symbol is intended to alert the user to the presence of important
operation and maintenance or servicing instructions.
CAUTION !
Any changes or modifications in construction of this device which are not expressly approved by the party
responsible for compliance could void the user’s authority to operate the equipment.
WARNING
When using electrical products, basic safety precautions should always be followed, including the following::
SAFETY
Power Source : The product should always be connected to a supply only of the type described in the
operating instructions or as marked on the product.
Periods of nonuse : The product’s power supply cord should be unplugged from the outlet when left
unused for a long period of time.
SERVICE AND MODIFICATIONS
This product should be serviced by qualified personnel when:
• the power cord or the plug has been damaged;
• liquid has been spattered into the unit or it has been exposed to rain;
• the instrument does not appear to operate normally or exhibits a marked change in performance;
• the instrument has been dropped or the cabinet has been damaged.
2
• Do not attempt to open the piano or make any change in the circuits or parts of the unit.
HANDLING AND TRANSPORT
• Never apply excessive force to the controls, connectors or other parts of the instrument.
• Always unplug cables by gripping the plug firmly and not by pulling on the cable.
• Disconnect all cables before moving the instrument.
• Physical shocks caused by dropping, bumping or placing heavy objects on the instrument can result in
scratches and/or more serious damage.
• Check carefully the amplifier’s volume control before starting to play. Excessive volume can cause permanent hearing loss.
CLEANING
• Clean the cabinet and panel with a soft nonabrasive dry cloth. Do not use any paint thinner or petrochemical-based polishes.
• To maintain the luster on the keys and buttons, wipe with a clean, slightly damp cloth, and then polish
with a soft dry cloth
LOCATION
Do not expose the instrument to the following conditions to avoid deformation, discoloration or more
serious damage :
• direct sunlight (near a window);
• high temperatures (near a heat source, outside or near a window);
• excessive humidity;
• excessive dust;
• strong vibration.
• Leave enough space around the piano for it to be properly ventilated.
• This instrument contains digital circuitry and may cause interference if placed too close to radio or television receivers. If interference occurs, move the instrument further away from the affected equipment.
• Avoid placing vinyl objects on top of the instrument, vinyl can stick to and discolor the surface.
POWER
• Turn the power switch off when the instrument is not in use.
• To avoid damage to the instrument and other devices to which it is connected, turn the power switches
of all related devices off prior to connection or disconnection of MIDI cables.
• Turn the power off if the main cable is damaged or the instrument is spattered with liquid.
• Do not switch the unit on and off in quick succession, this places an undue load on the electronic components.
• Unplug the AC power cord during an electrical storm.
• Avoid plugging the AC power cord into the same AC outlet as appliances with high power consumption,
such as electric heaters or refrigerators
3
CONTENTS TABLE
INSTALLATION . . . . . . . . . . . . . . . . . . . . . . . . . . . . . . . . . . . . . . . . . . . . . . . . . . . . . . . . . . 5
CONTROL PANEL AND PEDALS. . . . . . . . . . . . . . . . . . . . . . . . . . . . . . . . . . . . . . . . . . . . . . . . 7
GETTING PREPARED TO PLAY. . . . . . . . . . . . . . . . . . . . . . . . . . . . . . . . . . . . . . . . . . . . . . . . . 8
DEMO SONGS . . . . . . . . . . . . . . . . . . . . . . . . . . . . . . . . . . . . . . . . . . . . . . . . . . . . . . . . . . 9
VOICE. . . . . . . . . . . . . . . . . . . . . . . . . . . . . . . . . . . . . . . . . . . . . . . . . . . . . . . . . . . . . . . 9
TRANSPOSE. . . . . . . . . . . . . . . . . . . . . . . . . . . . . . . . . . . . . . . . . . . . . . . . . . . . . . . . . . . . 10
KEYBOARD MODES. . . . . . . . . . . . . . . . . . . . . . . . . . . . . . . . . . . . . . . . . . . . . . . . . . . . . . . 11
SOUND EFFECTS . . . . . . . . . . . . . . . . . . . . . . . . . . . . . . . . . . . . . . . . . . . . . . . . . . . . . . . . 12
METRONOME. . . . . . . . . . . . . . . . . . . . . . . . . . . . . . . . . . . . . . . . . . . . . . . . . . . . . . . . . . . 12
TEMPO. . . . . . . . . . . . . . . . . . . . . . . . . . . . . . . . . . . . . . . . . . . . . . . . . . . . . . . . . . . . . . . 13
RECORDING. . . . . . . . . . . . . . . . . . . . . . . . . . . . . . . . . . . . . . . . . . . . . . . . . . . . . . . . . . . . 13
PLAY-ALONG SONGS. . . . . . . . . . . . . . . . . . . . . . . . . . . . . . . . . . . . . . . . . . . . . . . . . . . . . . 15
FUNCTION MODE . . . . . . . . . . . . . . . . . . . . . . . . . . . . . . . . . . . . . . . . . . . . . . . . . . . . . . . . 17
SOFT RESET. . . . . . . . . . . . . . . . . . . . . . . . . . . . . . . . . . . . . . . . . . . . . . . . . . . . . . . . . . . . 19
MIDI . . . . . . . . . . . . . . . . . . . . . . . . . . . . . . . . . . . . . . . . . . . . . . . . . . . . . . . . . . . . . . . . 20
APPENDIX: MIDI APPLICATION CHART . . . . . . . . . . . . . . . . . . . . . . . . . . . . . . . . . . . . . . . . . . . 21
APPENDIX: SPECIFICATIONS. . . . . . . . . . . . . . . . . . . . . . . . . . . . . . . . . . . . . . . . . . . . . . . . . . 22
4
INSTALLATION
The following items are provided for assembly in the accessory satchel :
1.
2.
3.
4.
5.
Screw M6X20 (8)
Tape screw 4X16 (4)
Screw M4X15 (2)
Tape screw 4X12 (2)
Headphone holder
Step 1 : Attach the pedal cross bar to the side boards with the screws 1.
1
1
Step 2 : Fasten the back board to the side boards with the screws 2 and 3 to complete the stand assembly.
3
3
2
Step 3 : Mount the piano body onto the stand assembly and fasten with the screws 1.
1
1
Step 4 : Append the headphone holder 5 to the piano with the screws 4.
5
5
4
5
4
Step 5 : Plug the pedal cable in the socket located on the bottom of the piano.
Step 6 : Place the piano in its final position. On the bottom of the pedal board, there is an adjusting knob.
Turn it downward so that it firmly touches the floor
5
4
Step 7 : Locate the power cord and plug it into the socket on the bottom of the piano. Plug the power cord
into an appropriate wall socket.
NOTE : Unplug the piano during a lightning storm or when unused for long periods of time. Avoid plugging the AC adaptor into an AC outlet to which appliances with high power consumption, such as heaters
or ovens, are already plugged in.
6
CONTROL PANEL AND PEDALS
FRONT CONTROL PANEL
Master Volume
Voice select
Setup, Demo, Metro, Trans, Tempo
Display
Record
Song
Reverb, Chorus, Layer, Duet
See detailed description of the control panel in the following chapters.
POWER SWITCH : The power switch is located on the left of the keyboard. Press the button to turn the
power on and off. The red power indicator located on the left of the front cross bar lights up when the
power is on.
NOTE : lorsque vous éteignez l’instrument, ne le rallumez pas immédiatement. Attendez au moins cinq
secondes afin que les circuits électroniques se réinitialisent correctement.
BOTTOM PANEL
The socket board is located on the front-left section of the bottom.
The headphones jack board is located on the front and on the left of the bottom.
See detailed description of the panel in the GETTING PREPARED TO PLAY chapter
PEDALS
1. SOFT PEDAL – When the left pedal is engaged the piano volume is reduced and the timbre is slightly
altered on the notes that are played.
2. SOSTENUTO PEDAL – The function of this pedal is similar to the sustain pedal. When notes are played
while the middle pedal is engaged, the notes are sustained. The sustain effect does not apply to the notes
played after the pressing of the pedal, even though the pedal is kept engaged.
3. SUSTAIN PEDAL – When the right pedal is engaged, the piano keys will continue to sustain as they are
played. Thereby the piano notes will decay gradually as if you were continuing to hold down the piano keys.
7
GETTING PREPARED TO PLAY
MASTER VOLUME
Slide this control to the right to increase the overall volume of the piano and to the left to decrease it. Slide
the knob to the middle position before turning the power on.
The following facilities can be set up for your application :
MUSIC STAND
If you wish to use the music stand, raise it and prop it up with the folded bracket.
HEADPHONES
The piano has two headphone jack sockets on the front-left of the bottom. You can play in total silence, without disturbing others in the room, by plugging a set of headphones into one of the appropriate sockets.
When headphones are plugged in the jack sockets, the speakers will automatically be disabled. Two sets of
headphones may be used simultaneously.
LINE IN
These stereo audio input jacks will amplify the supplied signal through the internal sound delivery system.
They can be used to hook up items such as CD, MP3 or cassette players.
LINE OUT
These stereo audio output jacks supply the piano’s output signal to external amplification systems, such as
a home stereo, a PA system or any other type of stand alone amplifiers.
MIDI IN/OUT
This piano features MIDI In and MIDI out ports. MIDI jacks allow communication with other products equipped with MIDI interfaces. Please see the MIDI section of this manual for further details.
USB
The USB connector allows you to connect the piano directly to your computer’s USB port. Please see the
MIDI section of this manual for further details.
DEMO SONGS
There are two types of demonstration songs built in the piano.
The piano (PIANO key) features 10 Orchestra demonstration songs for your listening enjoyment.
The voice demo presents the selected voice with a short piece of music.
8
VOICE DEMONSTRATION
Press and hold down a voice selection button, then press the DEMO button. A piece of music will play with
the selected voice.
Use the VOICE select buttons, the VARIATION button or the ▲/▼ buttons to change the voice used for
demonstration.
The display shows the voice number. Press the DEMO button again to stop the voice demo playing
.
ORCHESTRATION DEMONSTRATION
There are 10 demos. Press the DEMO button, its indicator lights up. All demos will play back from No. 1 in
loop. The display shows the demo song number with the «d-» prefix in front. Press the ▲/▼ buttons to
select a demo song. Press the DEMO button again to stop it.
VOICE
When the piano is turned on, the LED display shows the voice number. The default voice setting is 01 Grand
Piano.
SELECT A SOUND
There are 15 voices numbered from 1 to 15. You can select them via the voice quick selection buttons
and the VARIATION button. Each VOICE selection button refers to a category of instrument voice.
Press the VARIATION button to select a voice inside a category. The VARIATION button indicator
has two colors. When the voice changes inside a category, the color of the VARIATION button indicator also changes and the corresponding voice number is indicated in the display.
You can also use
the▲/▼ buttons to select voices in the voice selection mode and the corresponding indicator
will light up.
9
9
-
NOTE : Though only 15 voices can be selected by key, 128 MIDI voices and a percussion sound kit are built
in the piano. These are available for playing complete MIDI music through MIDI/USB connection.
9
9
VOICE LIST
GROUP
PIANO
E. PIANO
HARPSICHORD
ORGAN
STRINGS
N°
VOICE
MIDI No
01
Grand Piano
0
02
Grand Piano 2
1
03
Honky Tonk
3
04
E. Piano 1
4
05
E. Piano 2
5
06
Vibraphone
11
07
Harpsichord
6
08
Clavinet
7
09
Nylon Guitar
24
10
Church Organ
19
11
Jazz Organ
16
12
Rock Organ
18
13
Strings Ensemble
48
14
Slow Strings
49
15
Synth strings
50
LAYER VOICE
With the layer mode, you can layer (or mix) two instrument sounds together.
Press the LAYER button to engage the dual voice mode; its indicator lights up. The display shows the
layered voice number (the default layered voice is Strings). If the LAYER button and a voice selection
button are pressed simultaneously, the layer voice mode is also engaged, but the LAYER indicator
flashes. Then, use the voice selection button, the VARIATION or the ▲/▼ buttons to select the layer
voice.
If you press any button except ▲/▼ and the voice selection buttons, or if there is no manipulation for 3
seconds once the selection is over, the display returns to the voice selection mode and shows the master
voice. The LAYER indicator stays lit.
Press the LAYER button again to exit the layer voice mode; its indicator turns off.
The volume balance between the layer voice and the master voice can be adjusted. Please refer to the
FUNCTION chapter for details.
TRANSPOSE
The TRANSPOSE feature can shift the pitch of the piano up or down in semitone intervals.
Press the TRANSPOSE button to engage the Transpose feature. Its indicator blinks. The display
shows the current transpose value (the default value is 0) with the prefix «t» in front. Use the ▲/▼
buttons to set the Transpose value, ranging from -6 to 6, e.g. t-5. If you press any button except ▲/▼ or if
10
there is no manipulation for 3 seconds once the setting up is finished, the display returns to the voice selection mode and shows the master voice.
When the Transpose value is not zero, its indicator stays lit. Press the TRANSPOSE button again to disable
this feature
KEYBOARD MODES
Two keyboard modes are available: full keyboard and duet keyboard.
FULL KEYBOARD
The full keyboard is the standard mode, as shown below:
DUET KEYBOARD
The keyboard is split in two sections: from A2 to E6 and from F2 to C6. Both sections have the same voice
(master voice) and volume.
In this mode, the right pedal becomes the sustain pedal for the right section of the keyboard, and the left
pedal becomes the sustain pedal for the left section of the keyboard
The middle pedal (Sostenuto) is disabled.
Press the DUET button and its indicator lights up to indicate that this mode is engaged. The display shows
the voice number. The default setting for it is the same as the master voice.
Press the DUET button again to exit the duet keyboard mode and the indicator turns off.
11
SOUND EFFECTS
REVERB
The reverb simulates the effect of playing in a big room or hall where the sound reverberates off the walls
and ceilings.
Press the REVERB button to engage the effect; its indicator lights up.
If you press the REVERB button and the ▲ or ▼, lbutton simultaneously, the reverb effect is also engaged, but the REVERB indicator blinks and the display shows the current reverb level with the prefix «r» in
front, e.g. r08. Use the ▲/▼ buttons to change the reverb level, ranging from 0 to 16.
If you press any button except ▲/▼ or if there is no manipulation for 3 seconds once this operation is
finished, the display returns to the voice selection mode and shows the master voice. The REVERB indicator
stays lit.
CHORUS
The Chorus effect adds depth and spaciousness to the selected keyboard voice.
Press the CHORUS to engage this effect; its indicator lights up.
If you press the CHORUS button and the ▲ or ▼ button simultaneously, the Chorus effect is also engaged,
but the CHORUS indicator blinks and the display shows the current chorus level with the prefix «c» in front,
e.g. c08. Use the ▲/▼ buttons to change the reverb level, ranging from 0 to 16.
If you press any button except ▲/▼ or if there is no manipulation for 3 seconds once this operation is
finished, the display returns to the voice selection mode and shows the master voice. The CHORUS indicator
stays lit.
Each voice has its own reverb and chorus default setting. The sound effects adjustment applies to both
voices in the dual voice and duet keyboard modes.
METRONOME
Press the METRONOME button, the built-in metronome will start to play with the current tempo and beat
pattern. If you press the METRONOME button and the ▲ or ▼ button simultaneously, the metronome
is also engaged, but the display shows the current beat pattern (the default setting is 4/4). There is a dot
between the number of beat per measure and the note definition. The picture below refers for example to
a 3/4 beat pattern. Use the ▲/▼ buttons to change the beat pattern in the following sequence: 1/4, 2/4, 3/4,
4/4, 5/4, 6/4, 6/8 and 12/8. When the metronome is playing, the beat indicator flashes in accordance with
the beat pattern.
If you press any button except ▲/▼ or if there is no manipulation for 3 seconds once this operation is
finished, the display returns to the voice selection mode and shows the master voice. The metronome indicator stays on.
Press the METRONOME button again to stop it.
12
Note : Reverb and chorus sound effects are not applied to the metronome sound.
TEMPO
Press the TEMPO button to enter the tempo setting mode; its indicator blinks. The display shows the current
tempo value (120 by default) followed by a dot mark. Use the ▲ and ▼ buttons to change the tempo value,
ranging from 40 to 240. Press simultaneously the ▲ and ▼ buttons to recall the default tempo (120). If you
press and hold down the ▲ or ▼, button, the tempo will change continuously until the button is released.
If you press any button except ▲/▼ or if there is no manipulation for 3 seconds once the setting up is
finished, the display returns to the voice selection mode and shows the master voice..
RECORDING
The DPW 400 digital piano Overture features a two track recorder that enables you to record what you play
on the keyboard and then play it back. Two tracks mean that you can «overdub» one part on top of another,
using a different voice if you like.
The recorder feature is a useful addition to any keyboard study program since it allows you to hear exactly
how you sound from the listener’s perspective. It can also be just plain fun. This recorded information is
nonvolatile and therefore will not be lost when the power is turned off. The 2 tracks can play back separately or together as a complete song. The record function records all settings exactly as you selected and
performed them.
STEPS FOR RECORDING
1. Get prepared : Get ready to record by setting the voice, tempo, reverb level or other parameters as
desired
2. Select a track : There are two tracks available for recording. The tracks are assigned by engaging the
TRACK 1 and TRACK 2 buttons
3. Press and hold down the REC button, then press the track button that you want to record in. The corresponding track indicator and the REC indicator will blink and the four dots of the beat indicator will blink in
accordance with the current tempo selection to show that the recorder is on standby.
NOTE 1 : The contents of a track will be erased as soon as you select that track for recording.
NOTE 2 : sIf you have already recorded on the other track, its track indicator will also be lit and the recorded
music will play as a reference for you while you record the new track. If you do not wish for the previously recorded
track to play while you are recording, press the corresponding track button to turn the indicator light off.
1. Metronome : Press the METRONOME button to enable the metronome as a reference, if so desired. The
four beat indicators flash, the metronome sounds without any beat pattern, only giving the tempo. You
13
can adjust the metronome’s beat pattern and tempo as usual before recording. However, these cannot be
changed during recording.
Note 1 : The metronome sound will not be recorded
Note 2 : If one track has been recorded, when recording another track, its tempo and beat pattern will
follow the setting of the first track recorded. If you change the tempo at this point, the new tempo will
be applied to both tracks. The beat pattern cannot be changed.
2. Record : If the TRACK 1 or TRACK 2 buttons are selected and blinking, the recording will begin as soon
as you play on the keyboard or press the PLAY/STOP button.
3. While recording, the recording track indicator keeps blinking and the REC indicator is lit solid.
4. Stop recording : Press on the PLAY/STOP button, the REC button or the recording track button to stop
recording. The REC indicator turns off and the recorded track indicator is lit solid to show the track now
contains data.
NOTE : When the record memory is full, recording will stop automatically and «FUL» will appear on the LED
display.
PLAYBACK
1. LThe Track LED indicators will show which tracks contain recorded data. If you do not wish to hear one
of the two tracks, press the corresponding TRACK button to turn that track off. Its LED indicator will turn off
2. Press the PLAY/STOP button to listen to the recorded track(s). The PLAY indicator lights up and the beat
indicators will flash per the beat pattern and tempo.
You can change the tempo of your recorded track by pressing the TEMPO button while the recording is
being played back.
You may also accompany the recorded tracks on the keyboard while the recording is playing back.
Note : sIf the metronome is turned on before pressing the PLAY/STOP button to play back the recorded music,
the metronome will sound with proper tempo and beat pattern used during your recording. When the playback
stops, the metronome will return to its original setting.
Press the PLAY/STOP button to stop the playback.
Playback will also stop automatically when the recording reaches its end.
ERASING TRACKS
To erase the music recorded on the tracks :
1. Press and hold the REC button down.
2. Press the track button that you wish to erase while you continue to hold down the REC button. This will
immediately erase the existing data from your previous recording.
3. Relâchez le bouton REC (les témoins de piste et REC clignotent)
4. Press the track button again (the indicators will go off ).
5. Repeat steps 1 through 4 until all the desired tracks are erased.
14
PLAY-ALONG SONGS
58 songs are built into the DPW digital piano Overture for your musical enjoyment. These songs have separate left-hand and right-hand parts that can be turned on and off as required so you can practice the corresponding part on the keyboard.
SELECTING A SONG
Press the SONG button. The song indicator will turn on and the song number will appear on the LED display.
Both RIGHT and LEFT indicators are OFF. Use the ▲/▼ buttons to select a song.
If you want to play slower or faster than the preset tempo, press the TEMPO button and use the ▲/▼ buttons to set the tempo adjustment coefficient based on the original tempo of the song. The range goes from
50 % to 150 %. Press simultaneously the ▲ and the ▼ buttons to recall the default rate for the selected
song. After 3 seconds, the display will return to the song number.
LISTENING TO THE ENTIRE SONG
1. Press the PLAY/STOP button to hear both hand parts playing the entire song.
2. Press the PLAY/STOP button to stop the playback. Otherwise, the playback will stop automatically at the
end of the song.
PRACTICING THE RIGHT HAND OF THE SELECTED SONG
1. Press the RIGHT button to mute the right hand part. The right indicator lights up.
2. Press the DEMO button if you want to hear only the right-hand part before practicing it. Press the DEMO
button again to stop the playback.
3. Press the PLAY/STOP button. Its indicator lights up and you will hear the metronome beat the song’s
time. You will then hear the left-hand part.
4. The default status for the metronome is ON. Press the METRONOME button if you want to disable the
metronome sound in the right/left hand mode. However, in both hands mode, it cannot be disabled.
5. Play the right-hand part of your selected song while the left-hand part is playing
15
6. Press the PLAY/STOP button again to stop. Otherwise, the playback will stop automatically at the end
of the song.
PRACTICING THE LEFT-HAND PART OF THE SELECTED SONG
Follow steps 1-6 listed above, substituting the RIGHT button with the LEFT one whenever the RIGHT button
is mentioned.
You will hear the right-hand part of your selected song. Play the left-hand part of your selected song while
the right-hand part is playing.
PRACTICING BOTH HANDS OF THE SELECTED SONG
1. Press the RIGHT and LEFT buttons simultaneously. The Right and Left indicators will both turn on.
2. Press the PLAY/STOP button. Its indicator lights up and you will hear the metronome beat the song’s
time.
3. Play the left-hand and right-hand parts of your selected song. The metronome will continue to play in
order to assist you in keeping time.
4. Press the PLAY/STOP button again to stop. Otherwise, the playback will stop automatically at the end
of the song
16
FUNCTION MODE
The Function Mode gives you access to other features on your piano.
Press the SETUP button to enter the functionality setup mode. Press the SETUP button repeatedly to access
the items you wish to set.
Press the ▲/▼ buttons to select options or set values for the items. When you enter the next item by pressing the SETUP button another time, the setting for the previous item will be saved. Press any button except
▲/▼ and SETUP to exit the Function Mode and return to the voice selection mode. The following functions
can be selected in the Function Mode:
KEYBOARD TOUCH SENSITIVITY MODE
The piano’s keyboard is sensitive to the velocity at which you hit the keys and correlates it to the output
volume of the note being played.
When entering this mode by pressing the SETUP button, the display shows «tch».
Four types of touch sensitivity are available:
Standard – That is the standard setting which is the most similar to an acoustic piano and therefore it is the
default setting. It is displayed as «Std»..
Soft – Generates the same volume by softer touch. It is the most sensitive touch mode. It is displayed as
«SFt».
Hard – Generates the same volume by harder touch. It is the least sensitive touch mode. It is displayed as
«Hrd».
Fixed – Non-touch-sensitive keyboard. The volume is fixed for instruments such as organs or harpsichords
and for playing some contemporary music. It is displayed as «no».
Use the ▲/▼ buttons to select the desired type.
MASTER TUNING
This function allows you to adjust the piano’s pitch to match recordings or other instruments in an ensemble.
When you enter this mode by pressing the SETUP button, the display shows «tun». Use the ▲/▼ buttons
to set the desired tuning value ranged from - 64 to 64. Press the ▲ and ▼ buttons simultaneously to recall
the default setting 0.
OCTAVE
The octave shift function will transpose the entire piano one octave down or up.
When you enter this mode by pressing the SETUP button, the display shows «Oct». Use the ▲/▼ buttons to
set the desired octave shift, ranged from - 2 to 2. The default setting is 0.
17
VOLUME BALANCE
The Volume Balance function will set volume balance between the master and second voice in the dual
voice mode.
When you enter this mode by pressing the SETUP button, the display shows «bLn». The format of the setting
is «The second volume – The master volume», each parameter ranging from 1 to 9, 1 referring to the minimum volume and 9 to the maximum volume.
The default setting of the volume is balanced as 5 – 5.
Use the ▼ button to reduce the second volume and increase the master volume, for example 4 – 6, 3 – 7
down to 1 – 9.
Use the ▲ button to increase the second volume and reduce the master volume, for example 6 – 4, 7 – 3
up to 9 – 1.
Press the ▲ and ▼buttons simultaneously to recall the default setting of 5 – 5.
LOCAL OFF
«LOCAL OFF» is a special mode of piano performance in which the piano is connected with another MIDI
device or computer. When «Local is «ON», the performance on the piano will sound via the built-in speakers
while the performance message will be transmitted via MIDI out.
When «Local» is «OFF», the performance on the piano will not sound via the built-in speakers but the performance message is transmitted via MIDI out. This feature is useful in case you wish to use the piano as a
keyboard and have the sound produced by another MIDI device.
When you enter this mode by pressing the SETUP button, the display shows «Loc».
Use the ▼button to turn «Local» off and the ▲ button to turn it on. The default setting is «On».
NOTE : When Local is off, the metronome will sound as normal.
STORE
Normally, when you turn the power on, all settings are default and user-settings are volatile. If the «STORE»
feature is engaged, when you turn the power on, the latest user customized settings will be recalled. These
include: LAYER and DUET voices, volume balance, touch mode, song number, sound effects settings, etc.
When you enter this mode by pressing the SETUP button, the display shows «Sto».
Use the ▼ button to set the store feature off and use the ▲ button to set it on. The default value is Off.
NOTE : The record contents are always nonvolatile.
18
BRIGHTNESS (BRILLANCE)
This function allows you to adjust the sound brightness.
When you enter this mode by pressing the SETUP button, the display shows «brt». Use the ▲/▼ buttons
to set the desired level of brightness, ranging from 1 to 16. Press the ▲ and ▼ buttons when you turn the
power on. Please note that the recorded contents will be erased.
SETUP
SOFT RESET
The recorded music, layer voice, touch mode, song number are nonvolatile. When you turn the power on,
the above settings will be recalled automatically. If you want to recover the default settings, press and hold
down both ▲ and ▼ buttons when you turn the power on. Please note that the recorded contents will be
erased.
SETUP
19
19
MIDI
MIDI (Musical Instrument Digital Interface) is a world-wide standard interface that enables electronic musical instruments and computers to communicate with each other so that instructions and other data can
pass between them. This makes it possible to create a system of MIDI instruments and devices that offer far
greater versatility and control than otherwise available with isolated instruments.
MIDI In : This terminal receives data from an external MIDI device.
MIDI Out : This terminal transmits data from the instrument to another MIDI device. The transmitted data
include the note and touch velocity produced while playing on the piano as well as voice changes.
The MIDI system in the unit has 16 channels numbered from 0 to 15. Each of them is responsible for an instrument voice. When the piano receives control from an external device, the active channel is determined
by the MIDI setting of the piano or control message.
CONNECTION EXAMPLES
Output to an external sound generator :
Connect the MIDI Out terminal of the piano to the MIDI In terminal of an external device (keyboard, synthesizer or sound module). The external device will respond to your playing. In this way, you can play two instruments at the same time or play on your instrument to sound on another MIDI device
Output from an external MIDI device :
Connect the MIDI In terminal of the piano to the MIDI Out terminal of an external device. Data generated on
another device can sound on your piano.
Connection to a computer :
You can transmit your performance to a computer to utilize advanced recording, composing and editing
available from software on the computer. MIDI music stored on the computer can be played back through
your instrument
USB : The USB connector allows you to connect the DPW 400 piano directly to your computer’s USB port.
The features of the USB interface are the same as MIDI, but both MIDI In and MIDI Out data run in the same
USB port and cable. The USB interface is compatible with Windows XP / Vista and MAC.
20
20
20
TABLEAU D’IMPLANTATION MIDI
FONCTION
Basic Channel
Channel changed
Default mode
Note number
Velocity Note On
Note Off
Pitch Bender
Control Change
TRANSMITTED
1 CH
1 – 16 CH
X
11 – 118
9nV, V=0–127
8nV, V=0–127
X
RECOGNIZED
1 – 16 CH
1 – 16 CH
3
0 – 127
9nV, V=0–127
8nV, V=0–127
√
REMARK
1
X
√
Modulation
5
X
√
Portamento value
7
X
√
Volume
10
X
√
Pan
11
X
√
Expression
64
√
√
Sustain
66
√
√
Sostenuto
67
√
√
Soft pedal
65
X
√
Portamento yes/no
80
√
√
Reverb program
81
√
√
chorus program
91
√
√
Reverb send level
92
√
√
chorus send level
98
X
√
NRPNL
99
X
√
NRPNH
100
X
X
RPNL
101
X
X
RPNH
121
X
√
Reset all controllers
123
√
√
All notes off
Program change
System exclusive
Sys. Common: Song select
Song position
System: Clock
Real time: Commands
Mode 1: OMNI ON, POLY
Mode 3: OMNI OFF, POLY
0 – 127 *
0 – 127
X
X
X
X
X
X
X
X
X
X
Mode 2: OMNI ON, MONO
Mode 4: OMNI OFF, MONO
* Depends on the voice that can be selected in the piano, refer to the Voice List.
21
SPECIFICATIONS
KEYBOARD
88 notes, Hammer-Action keyboard
VOICES
15 Voices, 5 buttons + 1 variation button
VOICE MODE
Upper, Layer, duet
EFFETS
Reverb and Chorus
SOUND EFFECTS
Transpose, Tempo, Setup, Metronome, Demo, +/-
CONTROL BUTTONS
Tuning, Octave, Touch response, Volume balance
DEMONSTRATION
10 orchestra songs; each voice has a demo music piece
TEACHING
58 Lesson songs, right/left-hand training
RECORDING
2 tracks
DISPLAY
3 X 7-segment LCD display
AUXILIARY JACKS
Headphones x 2, Line Out, Line in, MIDI In/Out, USB
PEDALS
Sustain Pedal, Sostenuto Pedal, Soft Pedal
AMPLIFIER
10W x 2
DIMENSIONS
1377mm x 510mm x 862mm
22