1
Tables des matières
Merlin ®-W60
Introduction
Page 3
Chapitre 1
Page 4
Présentation générale du Merlin ®-W60
Chapitre 2
Page 5
Remplacement du fusible
Chapitre 3
Page 6
FONCTIONNEMENT DU Merlin ®-W60
Affichage LED
Assignation DMX – Réglages – Tests
Mode de fonctionnement
Chapitre 4
Page 11
Entretien du Merlin ®-W60
Chapitre 5
Page 12
Dépannage du Merlin ®-W60
MANUEL D’UTILISATION
2
Introduction
Vous trouverez- ci dessous la liste des composants inclus dans votre Merlin ®-W60
Vous venez d'acquérir un tout nouvel appareil Merlin ®-W60 de la marque Toplite et nous nous en
1.
1 x Merlin ®-W60
remercions. Dans ce manuel d’utilisation, il vous sera très facile de trouver toutes les informations
2.
1 cordon d'alimentation de 1.5 mètres
concernant la mise en place, le fonctionnement, l'entretien ainsi que le dépannage de votre
3.
2 x supports de fixation
appareil.
Conditionnement
Après avoir retiré votre Merlin ®-W60 de son emballage, nous vous recommandons de garder
Chapitre 1
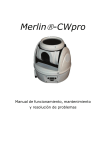
Présentation générale du Merlin ®-W60
toutes les parties du carton d'emballage et de les conserver dans un endroit sec pour une
utilisation ultérieure, au cas où vous devriez rapporter l'appareil chez votre revendeur le plus
• Couleur : RGB
proche par exemple. Afin de vous garantir une prise en charge total de votre appareil si des
• Strobe : dimmer variable (0-100%), strobe variable
réparations éventuelles seraient à envisager, nous vous conseillons de ne pas jeter l'emballage
• Mode musical, mode autonome, Master / Slave, 12 canaux DMX, Inversion Pan / Tilt
intérieur et extérieur.
• Pan: 520° Tilt: 245°
• Ajustement Automatique du Pan/Tilt. Réglable : mode 8 ou 16 bit.
• Programmes pré-enregistrés sous configuration master/slave
• Programmes pré-enregistrés en mode musical sous configuration master/slave
• Sélection du mode de fonctionnement
• Sélection du mode PAN/TILT
• Lampe: LED RGB 60W
• Dimensions en : 270 x 250 x 250 mm
•Poids : 4.9 kg
Votre Merlin ®-W60 a été conçu pour une utilisation en intérieur seulement. Toute utilisation
contraire à celle indiquée précédemment pourrait entraîner des dommages sur l'appareil. De plus,
une mauvaise utilisation de l'appareil pourrait être à l'origine de la perte de garantie. Conditions
idéales de fonctionnement : Température entre -20 et +45 °C.
Avant de brancher et d'utiliser votre Merlin ®-W60, vous devez avoir fait toutes les installations
préliminaires. Nous vous conseillons de vous référer au chapitre 1 afin de vous familiariser avec
Schéma 1. Vu de côté
toutes les parties qui composent votre appareil.
3
4
Chapitre 3
Installation du Merlin ®-W60
Schéma 2. Supports de fixation, poignées et
Schéma 3. Retrait du capot d'accès à la base pour le
points d'attaches pour le câble de sécurité
nettoyage et la vérification de la courroie de l'axe X
Chapitre 2
Remplacement du fusible
Schéma 6. Affichage LED
Votre Merlin ®-W60 est muni d’un fusible 2A déjà installé dans le porte fusible. Vous trouverez
AFFICHAGE LED
Ce panneau vous permet de régler, de contrôler, de faire fonctionner et de tester votre appareil de
également un fusible de rechange correctement situé à l'intérieur du porte fusible.
plusieurs façons différentes. Par exemple, vous pouvez assigner une adresse DMX, activer
1. Pour changer les fusibles, assurez-vous que le commutateur soit sur OFF ou que l'appareil soit
plusieurs modes différents, tester différentes fonctions.
débranché.
Comprendre comment l'appareil fonctionne et découvrir tout ce qu'il peut faire est une expérience
2. Puis, retirez le porte fusible à l'aide d'un couteau si nécessaire. Retirez le fusible usagé et
facile à faire. Vous allez pouvoir être rapidement capable d'utiliser votre Merlin ®-W60 au
remplacez-le avec le nouveau fusible. (Voir les schémas 4&5). Remettre le porte fusible en place.
maximum de son potentiel !
3. Vous pouvez rallumer l'appareil. Si le nouveau fusible grille à l'instant même où vous rallumez
votre Merlin ®-W60, ceci implique un problème plus important. Nous vous conseillons de contacter
EN MARCHE DE L’APPAREIL et FOCUS
votre revendeur pour des réparations par du personnel qualifié.
La 1
ère
fois que vous allumez votre Merlin ®-W60, il va automatiquement se mettre sur la position
de départ : la lampe s'allume et le mode adresse DMX est sélectionné par défaut.
Pendant la phase de mise en route, l'affichage indique ““TOPLILTE”. Ensuite, l'affichage indique:
Ceci signifie que l'adresse à été assignée sur le canal 1.
Si l’assignation DMX est correcte, la LED violet UV du signal DMX s’allume.
Pour régler le focus de votre Merlin ®-W60 pour la 1
les boutons
Schéma 5. Porte fusible
Schéma 4.Vue rapprochée de l'alimentation
Appuyez sur
et
fois, appuyez sur le bouton
pour faire défiler les fonctions du menu jusqu'à ce que
et faites défiler les modes à l'aide des boutons
s'affiche. Appuyez sur
5
ère
et
.
6
” et utilisez
”s'affiche.
jusqu'à ce que
ASSIGNATION DMX
Après avoir réglé le focus de votre Merlin ®-W60, vous aller pouvoir le relier à un contrôleur DMX
en utilisant les touches
et lui assigner une adresse. Tout d'abord, vous devez vous rappeler que l'appareil possède 12
bouton
et
jusqu'à ce que s'affiche le mode de votre choix. Appuyez sur le
pour valider.
er
canaux DMX par adresse. Ceci signifie que chaque appareil a 12 canaux de contrôle. Le 1 Merlin
®-W60 aura l'adresse DMX de départ
, le deuxième aura l'adresse DMX de départ
Vous trouverez ci-après le détail des modes disponibles:
Le mode MASTER ou DMX s’affiche : “
. Pour enregistrer l'adresse DMX de votre Merlin ®-W60, appuyez sur le bouton
“
naviguez dans le menu à l'aide des touches
et
jusqu'à ce que
” / Le mode MASTER désactivé s’affiche
et
s’affiche. Appuyez
” Ce mode vous permet d'utiliser le contrôle DMX. Après avoir sélectionné ce mode, vous
devez assigner votre Merlin ®-W60 (voir chapitre assignation DMX). C'est aussi dans ce mode
que l'appareil MASTER va être le maître, contrôlant la chaine d'appareils appelés SLAVE
sur le bouton
. Puis, avec les touches
et
, augmentez ou baissez la valeur de
l'adresse jusqu'à ce que vous trouvez le chiffre correct. Enfin, appuyez sur le bouton
pour
(esclaves). Ces appareils SLAVE vont faire la même chose que l'appareil MASTER.
valider.
Le mode SLAVE s’affiche
En mode SLAVE, l’appareil défini en tant que SLAVE va faire la même chose que l’appareil placé
Chaque canal DMX est pourvu de 255 valeurs :
devant lui dans la chaine si celui-ci est défini en tant que MASTER et a une adresse DMX. Par
Channel 1: Actionne l’axe X de votre Merlin ®-W60
exemple, le 1 Merlin ®-W60 est considéré comme MASTER et son adresse DMX est 001. Puis
Canal 2 : Axe X : 16 bit
vous placez 2 autres appareils et les considérés en tant que SLAVE et sans adresse DMX. Ces
Canal 3 : Actionne l’axe Y de votre Merlin ®-W60
derniers vont être contrôlés par le 1 appareil.
Canal 4 : Axe Y : 16 bit
Puis si vous placez 1 autre Merlin ®-W60 après les 2 appareils SLAVE et le considérez en tant
Canal 5 : La vitesse de l’axe X et Y est normale si la valeur est 0. Plus la valeur se rapproche de
que MASTER et avec une adresse DMX de 008, tous les autres appareils SLAVE qui suivent vont
255, plus la vitesse de votre Merlin ®-W60 sera lente. 255 est la valeur où la vitesse de l'appareil
être contrôlés par CET appareil MASTER (008)
sera la plus lente possible.
Le mode AUTO s’affiche
er
er
Canal 6: Strobe, 0-131(Lent -Rapide), 132-254(Strobe aléatoire), 255(Ouverture)
Mode par défaut (1
ère
” / Le mode AUTO désactivé s’affiche “
”
utilisation): pas de programme auto
Canal 7: Dimmer 0-2 (Fermé) 3-255 (0 à 100 ouverture dimmer)
Activation du mode AUTO s’affiche “
Canal 8: Dimmer rouge 0-255 (Fermé-Ouvert)
Le Merlin ®-W60 est muni d'un programme pas à pas. Sans aucun contrôle extérieur, votre Merlin
Canal 9: Dimmer vert 0-255 (Fermé-Ouvert)
®-W60 va basculer entre les programmes Mouvement, Couleur; Gobo et Shutter à plusieurs
Canal10 : Dimmer Bleu 0-255( Fermé-Ouvert)
reprises. Cette fonction n'est pas reprogrammable et ne peut pas être modifiée par l'utilisateur.
Canal 11: Couleurs Macros, 0-128(mélange de couleurs), 129-255(Couleurs Macros rapide-lent)
Le mode musical s’affiche
ère
” Le mode musical désactivé s’affiche
1-255(Canal 7 : n’a pas de fonction)
Mode par défaut (1
utilisation): pas d’activation du son
Canal 12: Reset/Position départ : 0-199 (rien). 200-210 (reset) 211-255 (rien).
Activation du mode MUSICAL s’affiche “
Chaque appareil est équipé d'un micro très sensible pouvant réagir aux sons. Chaque appareil va
MODE DE FONCTIONNEMENT
agir différemment, ainsi, vous n'aurez pas de lyres bougeant de la même façon.
Cette partie vous permet de faire fonctionner votre Merlin ®-W60 de multiples façons différentes.
Les mode PAN/TILT inversés
Cette fonction est très pratique quand votre appareil est installé à l'envers (ex : accroché au
Pour entrer dans le menu, appuyez sur le bouton
jusqu'à ce que
et faîtes défiler, à l'aide touches
s'affiche. Appuyez sur le bouton
et
,
plafond)
puis faîtes défiler les différents modes
7
8
PAN INVERSE
Appuyez de nouveau sur le bouton
Pour entrer dans le mode PAN, appuyez sur le bouton
pour valider.
-Le mode normal (réglage par défaut) s’affiche : “
et faîtes défiler avec les touches
- Le mode inversé s’affiche “
et
jusqu'à ce que
s'affiche. Appuyez sur le bouton
”
” : L’affichage s’éteint au bout de 6 secondes
puis faites défiler avec les
Le mode CONTROLE DE COULEURS
boutons “
”
et
afin de sélectionner le mode de votre choix. Appuyez de nouveau sur le
bouton
pour valider.
-Le mode normal (réglage par défaut) s’affiche : “
- Le mode inversé s’affiche “
Pour entrer dans le mode CONTROLE des COULEURS, appuyez sur le bouton
défiler avec les touches
”
et
puis faîtes
jusqu'à ce que
” : Le mouvement du PAN (axe X) sera inversé. (La gauche
-
sera à droite et inversement)
s’affiche. Appuyez de nouveau sur le bouton
pour valider. Utilisez les touches
TILT INVERSE
Pour entrer dans le mode TILT, appuyez sur le bouton
s'affiche. Appuyez sur le bouton
jusqu'à ce que
et
et faîtes défiler avec les touches
boutons “
”
bouton
pour valider.
“
et
puis faites défiler avec les
- Le mode inversé s’affiche “
“
”
-
”
et
jusqu’à ce que
et
jusqu’à ce que
”
et
jusqu’à ce que
sur le bouton
jusqu'à ce que
et
s'affiche. Appuyez sur le bouton
puis faites défiler
afin de sélectionner le mode de votre choix. Appuyez de nouveau
pour valider.
- Le mode inversé s’affiche “
”
ou
s’affichent.
et faîtes défiler à l'aide des touches
s'affiche. Appuyez sur le bouton
Reset" s’affiche “
”ou “
et
jusqu' à ce que
.
” : L’appareil va automatiquement faire un RESET de tous les
paramètres (même l'adresse DMX).
satisfaction avec les autres tests. Si vous souhaitez simplement tester ou faire un RESET d'une
” : l’affichage sera inversé afin de vous faciliter la lecture
quand l’appareil est suspendu à l’envers
jusqu'à ce que
puis faites défiler avec les boutons “
fonction particulière, nous vous recommandons d'utiliser le test par fonction séparée comme
expliqué auparavant. Il est aussi possible d'utiliser la fonction RESET dans le canal DMX 12.
Si vous souhaitez activer le mode sans affichage, appuyez sur le bouton
et
pour valider. Utilisez les touches
Cette fonction n'est à utiliser qu'en dernier recours si votre appareil ne vous a pas donné entière
-Le mode normal (réglage par défaut) s’affiche : “
défiler avec les touches
s’affichent.
et faîtes défiler avec les
Appuyez sur le bouton
”
pour valider. Utilisez les touches
Le mode RESET
Pour entrer dans le mode AFFICHAGE, appuyez sur le bouton
avec les boutons “
ou
s’affiche. Appuyez de nouveau sur le bouton
“
Le mode AFFICHAGE INVERSE
et
s’affichent.
” : Le mouvement du TILT (axe Y) sera inversé. (La gauche
sera à droite et inversement)
touches
ou
s’affiche. Appuyez de nouveau sur le bouton
-
afin de sélectionner le mode de votre choix. Appuyez de nouveau sur le
-Le mode normal (réglage par défaut) s’affiche : “
”
”
et
et faîtes
s'affiche. Appuyez sur le bouton
afin de sélectionner le mode de votre choix.
9
10
Chapitre 4
Entretien du Merlin ®-W60
Chapitre 5
Dépannage du Merlin ®-W60
Nous nous efforçons à ce que l'entretien de votre appareil soit le plus facile possible. Nous vous
Votre appareil a été conçu avec des matériaux de haute qualité. Chaque unité a été testée avant
recommandons de suivre les quelques conseils ci-après afin de garantir un entretien optimal de
toute expédition hors de l'usine. Tous les appareils ont passé les conditions de tests avec succès.
votre appareil :
Si les problèmes persistent, contactez votre revendeur afin de vous assurez que toutes les
réparations seront faîtes par du personnel qualifié.
1. La poussière ou la saleté
Il est essentiel que votre appareil soit toujours propre. Nettoyez les lentilles avec un chiffon sec et
1. L'appareil de répond pas, ne reste pas allumé
doux. Nettoyez l'extérieur de l'appareil avec un chiffon humide. Ne pas utiliser de solvants ou
Vous pouvez lancer un test pour le PAN et le TILT
autres nettoyants qui pourraient endommager l'appareil.
Si le test fonctionne, il est probable que ce soit plus un problème de données : la câble est
Tous les autres composants sont scellés, il n'est donc pas nécessaire de les nettoyer ou de les
endommagé, un appareil n'envoie pas les données via le câble ou au contraire, un appareil ne
graisser. Toutes les 2 ou 3 semaines, utilisez une bombe à air sec pour nettoyer les parties à
reçoit pas les données via le câble.
l'intérieur de l'appareil en ouvrant le capot d'accès à la base, le capot couvrant l'axe Y, le support
Pour vérifier vos données, vérifiez si l'indicateur du signal DMX est allumé. La LED ne doit pas
de lampe, et les capots latéraux. Assurez-vous également que les ventilateurs soient propres.
clignoter. Si elle clignote, ceci signifie que les données ne sont pas correctement transmises à
Attention à ne pas appuyez trop fort sur les cartes électroniques, les roues de gobos et couleurs
cause d'un câble en mauvais état. Un autre moyen de vérifier que le câble est la source du
ou la lampe pour ne pas les endommager. IL EST INTERDIT D'UTILISER UN COMPRESSEUR D'AIR.
problème est que chaque appareil se situant après l'appareil en panne va fonctionner bizarrement.
Cependant, si vous pensez que le câble est bon, il est possible que l'appareil se situant devant
2. L'eau
l'appareil en panne ne transmette pas l'information. Ceci pourrait signifier que la panne se situe
Ne jamais exposer votre appareil à l'humidité ou à la pluie afin de ne pas déclencher de court
avec cet appareil ci. Afin de le vérifier, reconfigurer les données. Vérifiez également si la prise du
circuit qui pourrait endommager les autres composants électroniques. Ne jamais utiliser votre
dernier appareil est bien branchée.
appareil en extérieur. Cet appareil n’a pas été conçu pour une installation en extérieur.
Si ce n'est pas la courroie, le câble, la prise or la transmission de données, c'est peut être le circuit
sur la carte électronique de votre appareil. Contactez votre revendeur.
3. La chaleur
Si la température est trop importante à l'intérieur de votre appareil, ceci entraîne des dommages
2. Les roues (Couleurs et Gobos) tournent en continu
irréversibles. C'est pourquoi il est essentiel de ne pas laisser la poussière et la saleté s'accumuler
A l'intérieur de l'appareil, des capteurs de position sont intégrés : un aimant permet d'indiquer à
et de ne JAMAIS utiliser votre appareil en extérieur. De plus, il est possible d'avoir de la
l'appareil la position des roues. Cependant, il est possible que ceux-ci s'abiment suite à une
condensation de part la rosée, la pluie ou un changement rapide de température. Attention, votre
mauvaise manipulation de l'appareil et ne reconnaissent plus le champ magnétique, ainsi, les
MERLIN n'a pas été conçu pour fonctionner dans de telles conditions. Ne jamais utiliser l'appareil
roues ne sont pas capables de trouver une position stable.
si la température est supérieure à 45°C.
1. Eteignez votre appareil et débranchez le.
A l'exception du capot de la lampe et la lampe elle-même, vous pouvez toucher l'appareil sans
2. Ouvrir les capots latéraux et faîtes tourner la roue de Gobos et la roue de couleurs jusqu'à ce
aucun risque même après l'avoir utilisé pendant des heures.
que vous voyez le petit aimant sur le côté. Vérifiez que celui-ci ne soit pas abimé.
3. Si le problème persiste, il est possible que les roues se soient desserrées ou ait glissé de leur
axe. Il se peut qu'elles se soient déformées et frottent contre le capteur ou soient au contraire trop
éloignée de celui-ci.
11
12
Attention, ne pas utiliser l'appareil avant que celui-ci soit réparé. Ceci pourrait définitivement
endommager le capteur.
3. Il n'y a pas d'alimentation
1. Vérifiez le cordon d'alimentation. Assurez-vous qu'il ne soit pas endommagé et qu'il soit
correctement branché des deux côtés.
2. Vérifiez le fusible si celui-ci a besoin d'être changé.
3. Vérifiez le commutateur on/off : il doit être sur la position ON pour fonctionner.
4. Vérifiez le disjoncteur pour vous assurez que tout fonctionne et que votre installation n'a pas
MY FUTURE IS ALWAYS COLOR!
○,R
Merlin -W60
disjoncté.
Operation Manual, Maintenance & Troubleshooting
○,C2009 TopLite
All rights reserved. No part of this manual may be reproduced, in any form, or by
any means, without permission in writing from TopLite International.
13
14
Table of Contents
Introduction
Thank You for Purchasing the TopLite International products.
Introduction
Page 2
In this manual, you will find everything you need to set up, operate, maintain and troubleshoot
your Light. If you have any further questions, stop by our website at: www.toplt.com for contact
Section One
Page 3
Overview and Nomenclature: Exploring Your Merlin○,R-W60
information, frequently asked questions and larger-scale product support.
About Your goods Shipping Box
After removing your Lights from its shipping box, DO NOT discard the box or the packing pieces
Section Two
Page 10
inside! Place the foam inserts and plastic bags back inside the box and store them in a cool, dry
place. They may well come in handy and save you some money later in the unlikely event that you
Un-Packing - Setting up
should have to ship or return your Merlin for service or should any warranty issues arise.
Fuses & Testing Your Unit
Section Three
Page 11
L.E.D. Display (Reading and Functions)
DMX Addressing - Setting Up - Testing Operation
Choosing An Operating Mode
Section Four
Page 16
Care & Maintenance – Belts – Vents – Fans – Fuse
Cleaning - Operational Temperature Ranges
Section Five
Page 17
Troubleshooting Your Merlin-W60
15
16
Shipping your Lights in anything other than the original, intact factory shipping box and packing
1
materials or a professional, custom-built flight/road case will void all warranties! We will NOT
accept Merlin’s at our factory or at any authorized Dealers in any other type of container, crate or
Section One
box. The unit will be shipped back immediately, un-opened, at the sender’s expense. NO
EXCEPTIONS!
○,
Overview And Nomenclature Of Your Merlin -W60
In fewer words: Keep the box and the packing materials!
R
WARNING!
The lights is for INDOOR use only!
Any other use could void the warranty and/or damage your unit!
Recommended Operating Temperature Range: -20 to +45 Degrees Celsius
:
* Strobe:Variable electronic dimmer (0 – 100%) and Variable electronic strobe
* Color RGB color mixing
* Sound-Active, Stand-Alone, Master / Slave, 12 DMX Channels, Pan / Tilt Invert
Before plugging in and using your Lights, it must first be prepped and lamped. Please make
yourself acquainted with the Goods nomenclature and all of its parts and features on the following
pages (Section One) before you begin.
* Pan: 520° Tilt: 245°
* Automatic Pan/Tilt position correction. Switchable 8 to 16bit mode.
Built-in automated programs via master/slave (fast and slow)
Built-in sound activated programs via master/slave
User-selectable basic or advanced operating modes
User-selectable pan/tilt ranges
* Lamp: High Power RGB LED 60watt Lamp
R
Inventory of Your Merlin○, -W60 Box
* Size (mm): 270 x 250 x 250
* Weight: 4.9 kg
Inside this box you will find:
4. A 96-270volt 50-60Hz Merlin-W60 pro Moving Light
5. A 1.5 meter UL/CE-listed a/c power cord
6. 2X Clamp Mounts
17
18
2
Section Two
The Fuse Holder and Replacing Fuses
Your Merlin is shipped with 84-270 volt, 2 amp, fast-blow fuse already installed in the holder. We
have also included a spare fuse, conveniently located right inside the holder! Should you need to
replace a fuse, we recommend you quickly replace the extra fuse for next time! Then you will
never be caught without one! To swap fuses, first make sure the power switch is in the “off”
position or that the Merlin is unplugged. Then, simply pull out the holder by pulling it free with a
fingernail, small knife or flat-head screwdriver; remove the old fuse, discard and then snap in the
fresh fuse. (See figures 4 & 5) Push the holder back into the Merlin and you are ready to power the
unit up! If the new fuse should blow upon powering up the Merlin, there is a bigger problem and
you should have the unit serviced by a qualified Toplite technician.
Figure 1. Display-Side View
Figure 4.
Close-up of Power/Data Side
Figure 5. Fuse Holder Assembly
Figure 3.
Removing the Y-Axis Covers for Cleaning
Figure 2.
Clamp Mounts, Carrying Handle and Safety
Anchor
19
20
3
Section Three
scroll through the test modes using the “
“
” or “
” keys until the display reads: “
”. Press
”.
DMX Addressing/Address Mode
Display Functions and Operation
After focusing your Merlin-W60, you may wish to cable it up to a DMX controller and address it.
To do that, you must first understand that your Merlin-W60 uses 12 channels of DMX per
“Address”. That is to say that each Merlin has 12 channels of control and so the first Merlin-W60 in
your system will have the starting DMX address of “
”, and so on.
address of “
To set the DMX address of your Merlin-W60, press the “
using the “
”, the second will have the starting
” or “
” keys until the display reads: “
” key and scroll through the menu
”. Press the “
or lower the “address” value (or starting channel number) using the “
” key and then raise
” or “
” keys until you
Figure 6. The LED Display Section
have found the correct number. Press the “
THE LED DISPLAY
”. key and your Merlin-W60 is now addressed.
This Panel allows you to “talk” to your Merlin-W60; set it up, control it, operate it and even test it in
many diverse ways. For example: You can assign it a DMX address, set it to run in many different
Each DMX channel or “handle” coming from a controller has 255 “increments” of power within
“modes” or test its different functions, Understanding how it works and what it can do will make
that “handle”. That channels function and the things triggered by the ascending increments within
your experience with, and ability to utilize the Merlin-W60 to its fullest potential.
that channel for your Merlin-W60 are listed here:
Power Up & First Focus
Channel 1: Moves The Merlin-W60’s X-Axis
The first time you power up your Merlin-W60, it will automatically home itself, strike the lamp and
go into a factory default “DMX Address” mode. While it powers up, the display will read:
Channel 2: X-AXIS 16 bit.
“TOPLILTE”. After it is homed and the lamp is struck, the display will read: “
Channel 3: Moves The Merlin-W60’s Y-Axis
”. Meaning it has
been addressed at channel one at the factory. If receiving a good DMX signal, the purple/UV LED
Channel 4: Y-AXIS 16 bit.
DMX signal indicator will be lit.
Channel 5: Y and X-Axis Speed 0 is normal or “fast” and the Merlin-W60 will scan slower as you
In order to focus your Merlin-W60 for the first time, press the “
” key and scroll through the
increase the value towards 255, with 255 being the slowest scan rate possible.
menu using the “
” or “
” keys until the display reads “
”. Press the “
21
” key and then
Channel 6: Strobe,0-131(Slow-fast),132-254(Free Strobe),255(Open)
22
Channel 7: Dimmer Paddle 0-2 (Closed) 3-255 (0 to 100 open dimming)
,
008 (a different address from the first “Master”). If you set the next unit (or units) in the cable run to
“Slave”, they will copy that (number 013) master unit’s movements exactly and so on down the
Channel 8: Red Dimmer 0-255(Closed-Open)
cable run.
Channel 9: Green Dimmer 0-255(Closed-Open)
“Auto Mode” Display reads: “
”
Channel 10: Blue Dimmer 0-255(Closed-Open)
Channel 11: Color Macros, 0-128(Color Mixing) 129-255(Color Macros Fast-slow) And
“Standard” Display reads: “
”
This is the factory default setting, no Auto program.
1-255(Channel 7 don’t working)
“Inverted” Display reads: “
Channel 12: Reset/Home,
”
We have programmed a small, multi-stepped program into each Merlin-W60. Without any outside
control, your Merlin-W60 unit will go through all of its ranges of Motion, Color, Gobo and Shutter
0-199 (nothing). 200-210 (reset) 211-255 (nothing).
repeatedly. At this time, and on this model, this function is not re-programmable and cannot be
Operating Mode
This section of the menu allows you to operate your Merlin in many diverse ways. To enter the
changed by the end user.
“Sound-Activated Mode” Display reads: “
operating mode section of your Merlin-W60, press the “
” key and scroll through the menu
“Standard” Display reads: “
using the “
” or “
” keys until the display reads: “
”. Press the “
” key and then
” or “
” keys until you have found the mode you
”
This is the factory default setting, no sound-activated.
“Inverted” Display reads: “
scroll through the different modes using the “
”
”
This is the sound-activated, “Stand-alone” mode. Each Merlin-W60 is equipped with a
highly-sensitive microphone (See Figure 6.) It will react to deep bass or loud sounds by going
wish to use. Press the “
” key when you have found the mode you wish to use. The modes,
through all its different abilities. Each Merlin-W60 will act differently, so you won’t have a bunch of
heads doing the exact same thing. This mode is useful if you just want to have some fun with your
what they do and the LED displays for each mode are as follows:
Merlin-W60 and don’t want to set up a controller and miles of cable. Or if, for some reason, your
“Master” or “DMX” Mode Display reads: “
“Standard” Display reads: “
control console has gone down, you can still have a “moving” light show to get you through the
”
night.
”
Pan/Tilt Inversion Modes
This is the mode for using DMX control. After selecting this mode, you must also “address” your
Merlin-W60 accordingly (See Page 12). This is also the “Master Mode” in which this particular unit
will be the “Master” of a chain of “Slave” units all doing the same thing. (See Below)
“Slave Mode” Display reads: “
”
Selecting this mode will render this unit a “Slave”. It will now do exactly what the unit in front of it
in the DMX cable data stream is doing as long as the first unit is set up as a “Master” and has a
This section of the menu allows you to “invert” the pan and tilt function of your Merlin-W60. This is
handy when trying to program or operate a unit that has been hung ”upside-down” from a pipe or
truss.
Pan Inversion Mode
To enter the “pan” mode section of your Merlin-W60, press the “
” key and scroll through the
DMX address. For example: The first Merlin-W60 in your cable run is set to “Master” and given a
DMX address of 001, then you set the next two heads down the cable run to “Slave”, with no DMX
address. They will do exactly what the “Master” is being told to do by the console. You can then
menu using the “
” or “
” keys until the display reads: “
”. Press the “
place another Merlin-W60 in the cable run after those “slaves”, set it to “Master” and address it as
23
24
” key and
then scroll through the two choices using the “
” or “
you wish to use and press the “
” to choose it:
“Standard” Display reads: “
”
” keys until you have found the mode
wish to use and press the “
“Standard” Display reads: “
” to choose it:
”
This is the factory default setting, the display reads normally.
“Inverted” Display reads: “
This is the factory default setting, the unit responds normally.
“Inverted” Display reads: “
”
This will invert the display for easier reading/operation when the unit is hung upside-down
”
Movement on the Pan or “X”-axis will be reversed to any control inputs (Left is right, right is left,
To enter the “NO Display” mode section of your Merlin-W60, press the “
” key and scroll
” keys until the display reads: “
”. Press the
etc.)
through the menu using the “
.
” or “
Tilt Inversion Mode
“
To enter the “tilt invert” mode section of your Merlin-W60, press the “
” key and then
” key and scroll through
scroll through the two choices using the “
the menu using the “
” or “
” keys until the display reads: “
.” Press the “
you wish to use and press the “
” or “
” keys until you have found the mode you
” key and
wish to use and press the “
then scroll through the two choices using the “
” or “
” to choose it:
” keys until you have found the mode
“Standard” Display reads: “
” to choose it:
”
This is the factory default setting, the display reads normally.
“Inverted” Display reads: “
“Standard” Display reads: “
”
”
This will close the display for after six second before you press any key.
This is the factory default setting, the unit responds normally.
“Inverted” Display reads: “
Colors Controll Mode
”
Movement on the Tilt or “Y”-axis will be reversed to any control inputs (Left is right, right is left, etc.)
To enter the “Manual Reset” mode section of your Merlin-W60, press the “
” key and scroll
” keys until the display reads: “
”. Press the
Display Inversion Mode
through the menu using the “
To enter the “Display” mode section of your Merlin-W60, press the “
“
the menu using the “
” or “
” keys until the display reads: “
”. Press the “
” to choose it:
” key and
“Red” Scroll through the menu using the “
then
scroll through the two choices using the “
” or “
” key and scroll through
” or “
” keys until you have found the mode you
25
“
” or “
” keys until the display reads: “
”.
26
”or
To enter the “Manual Reset” mode section of your Merlin-W60, press the “
through the menu using the “
” keys until the display reads: “
” or “
” key and scroll
”. Press the
4
Section Four
Care and Maintenance of your Merlin-W60
“
” to choose it:
We have strived in engineering to make your Merlin-W60 as maintenance free as possible. If you
remember only a few things, it will be very easy to maintain and should give you many, many years
“Green” Scroll through the menu using the “
” or “
” keys until the display reads: “
”or
of faithful service.
The Merlin-W60 pro has three enemies:
“
”.
Dirt: You must keep your Merlin-W60 clean! Clean the lenses with a dry optics cloth available at
any sunglasses store. Clean the outside with a damp cloth. Do not use solvents or cleaners on
To enter the “Manual Reset” mode section of your Merlin-W60, press the “
” key and scroll
” keys until the display reads: “
”. Press the
either as this may damage, discolor or otherwise hurt the finish of both. All of the bearings inside
your Merlin-W60 are sealed, so they cannot get dirty and you never have to oil them!
through the menu using the “
” or “
Purchase a can of “Dry Air” or other Air-in-a-can type electrical component air blaster and a small,
“
” to choose it:
fine horse hair paint brush from the hardware store or an art supply shop. Once every two or three
weeks, open the Side Plates, the Base Access Covers, the Y-axis Covers and the Lamp Plate.
“Blue” Scroll through the menu using the “
” or “
” keys until the display reads: “
”or
Using your brush and your can of air, gently blow-out and clean the inside of your unit, making sure
that you clear any ports, vents or holes that help your Merlin-W60 get fresh, cool air. Take a good
“
”.
look at the fans and make sure that they are especially clean. Take care not to bump any of the
circuit cards too hard or damage your lamp as you do this. For the details on the care and cleaning
of position sensors, please go to www.toplt.com
Manual Reset Mode
To enter the “Manual Reset” mode section of your Merlin-W60, press the “
” key and scroll
DO NOT use an air compressor to do this job! First of all, most compressors are much too
powerful and you may well damage a number of components inside your Merlin-W60. Secondly,
through the menu using the “
” or “
” keys until the display reads: “
”. Press the “
”
to choose it:
most air compressors have far too much moisture in them due to condensation and you could end
up getting the inside of your unit WET!
This leads us to another enemy:
Water: If you get the inside of your Merlin-W60 wet, you could likely do more damage than you
”or “
”
“Reset” Display reads: “
This is the factory default reset setting, the unit will automatically Home/Reset all of its
want to pay for. A shorted circuit card could cause other electrical components to overheat or go
parameters (including its DMX address) .
bad as well. Never use your Merlin-W60 outdoors unless you are under some sort of cover or are
This is an “end-all” function for an instrument that has failed to respond to all other tests. If you
simply wish to test or reset a particular function on the unit, use the test function mode or use the
reset in the DMX channel number 12.
absolutely sure that there is no chance of rain or horse-play involving liquids! Outside installs are
an absolute NO-NO!
The last enemy, and probably the one you will encounter the most is:
Heat: If you get the inside of your Merlin-W60 too hot, you will cause irreversible damage. This is
27
28
why you must keep it dust and dirt free. It is also why you must not use the Merlin-W60 outside.
5
Besides bug infestation, you can also get condensation from dew, rain or rapid temperature
change and the Merlin-W60 was not designed for use in these conditions. NEVER operate your
Section Five
Merlin-W60 when the ambient temperature is at or exceeds: 45 degrees Celsius. Your Merlin-W60
was engineered to run VERY cool. You will notice that with the exception of the Lamp-Plate, you
Troubleshooting Your Merlin-W60
can touch the unit anywhere, even after it has been running for hours! Keep it clean and it will
We have worked tirelessly to engineer your Merlin-W60 for years of trouble-free service. We built
always run cool!
it as good as it could be built with the highest quality materials available. Each unit is exhaustively
tested at the factory before it ever goes into its shipping box. Before we released the Merlin-W60 to
We have included an extra belt for each axis on your Merlin-W60; a large one for the X-axis and a
the public we tested units in every condition imaginable (and a few that aren’t!). We banged on
thinner one for the Y-axis. Eventually, these belts will wear out and either begin to jump off their
them, we shook them, we spun them, we heated them and we cooled them … While they were
gears or break altogether. We didn’t want you to have to wait for the part, so we gave you the first
running! We even left units running for over five days straight without stopping! We don’t
ones for free! For instructions on replacing one of these belts, please go to our website:
recommend that you do any of these things to your Merlin-W60, but believe us, this is one tough
www.toplt.com
instrument.
Belts/Movement/Un-Responsive Heads
(Head won’t respond, does things on its own, won’t stay lit)
As with anything that moves or has moving parts, you will eventually have parts wear out. This is
par for the course, so to speak. The first and most obvious things to wear are belts.
If one of your Belts should start to jump the gear or fail/break completely, please see our website
for complete instructions on swapping them out. Or, you can call any Factory-authorized TopLite
Dealer. If the instrument will not move on one or both axis, (and it is not a belt) then the problem is
one of two things: either your DMX data is corrupt or you have a problem on a circuit card inside
your Merlin-W60.
To begin troubleshooting this problem, first, run both a pan and tilt test (see “Test Mode” in section
three), if it works, then the problem is most likely data. This can be one of several things: A bad
cable, a unit not sending data down the cable run or a unit not reading the data as it arrives.
To check your data, first look to see if the Purple/UV LED DMX Signal Indicator is lit (see figure
13.) The light should be on solid and not blinking or “stuttering”. If it is, then the data may be bad
due to a bad cable. A sure sign of this is that every head beyond the first “bad” head is also acting
strangely. However, if the cable is good, there may be a chance that the Merlin-W60 in the cable
run before your bad head is actually not transmitting data. That would mean your trouble is actually
with that unit and that the rest are fine. This unit will need to be serviced by a trained technician.
29
30
To test for this, reconfigure/experiment with your cable run to look for clear data and to find the
point where the data goes corrupt. You may also wish to check that your Terminator plug in the last
unit is snug in its socket. If the problem is not a belt, cable, terminator plug or the transmitted data,
then you have a bad circuit card inside your Merlin-W60 and it must be serviced by a trained
technician.
End will not power up
Check the Power cord (make sure it is not damaged and that it is plugged in on both ends!), check
the fuse (if it is bad, swap it out), check the On/Off Switch (make sure it is in the “on” position) and
check the Circuit Breaker of your buildings power supply (Make sure that it is on and that it wasn’t
somehow tripped). If it is not one of these problems, then the unit most likely needs to be serviced
by a trained technician. Remove it from your system and have it serviced.
31