1
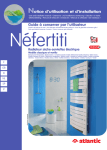
Notice d’installation et d’utilisation
À conserver par l’utilisateur
User and
installation manual
To be retained by the user
Kit Fil Pilote
Interface et Chronopass
Pilot Wire Kit
Interface and Chronopass Timer
F
GB
SP
D
RU
Chronopas
s
Fil Pilote
Courant Porteur X2D
Courant Porteur TDM
Pilot Wire Kit
Mains borne signalling X2D
Mains borne signalling TDM
Compatible : appareils Pass Program
Atlantic, Pack Énergie
Compatibility : Programming radiators and panel heaters,
Centralised Energy Pack
28-80-0500-A
11/06/04
16:10
CONDICIONES
Page 2
DE GARANTIA
Documento a conservar por el usuario
a presentar únicamente en caso de reclamación.
La duración de la garantía es de 2 años a partir de la fecha de instalación
o de compra y podrá exceder 30 meses a partir de la fecha de fabricación
en ausencia de justificativo.
La garantía asegura el cambio o el suministro de las piezas reconocidas
como defectuosas, excluyen do todos los daños e intereses.
Los gastos de maniobra, de desplazamiento y de transporte corren a cargo
del usuario.
Los deterioros resultantes de una instalación no conforme, de una red de
alimentación que no respete la norma NF EN 50160, de un uso anormal o
del no respeto de las prescripciones de dicha instrucción no están cubiertas por la garantía.
Las disposiciones de las presentes condiciones y garantías no son exclusivas del beneficio, a favor del comprador, de la garantía legal por defectos y
vicios ocultos que, en cualquier caso, se aplica en las condiciones de los
artículos 1641 y siguientes del código civil.
Presentar el certificado únicamente en caso de reclamación al distribuidor
o a su instalador, adjunto su factura de compra.
Selo del instalador
Servicio de Asistencia Técnica (SAT)
C/Orense,20,1° Of.8
28020 MADRID
Tel: 902 45 45 66
Fax: 91 555 78 07
L’appareil que vous venez d’acquérir a été soumis à de nombreux tests
et contrôles afin d’en assurer la qualité. Nous vous remercions de ce
choix et de votre confiance. Nous espérons qu’il vous apportera une
entière satisfaction.
Quelques conseils:
Lisez la notice avant de commencer l’installation du programmateur.
Conservez la notice, même après l’installation de l’appareil.
Avant toute opération, retirez le film de protection de l’écran.
DESCRIPTION
Vous disposez,ci-contre, d’un schéma vous permettant de préparer
votre programmation.
Mode
Exemple de programmation
CONFORT
Nous sommes Samedi et il est 20h30.
Mode
ECO
Réglage du jour et de l'heure
Lundi, Mardi, Jeudi
et Vendredi, je suis en
CONFORT de 6h00
à 9h00, et de 17h00
à 23h00.
Mercredi, je suis en
CONFORT de 6h00
à 9h00 et de 12h00
à 23h00.
Program
Samedi et Dimanche,
je suis en CONFORT
de 7h00 à 0h00.
OK
Programme
Jours
Navigateur permettant le déplacement dans l’afficheur par
mouvement vers le haut ou le bas.
Bouton permettant de modifier la programmation,le jour et l’horloge.
Bouton permettant la validation.
28-80-0500-A
11/06/04
16:10
Page 3
UTILISATION
Activation du programmateur
Un appui sur n'importe quelle touche ou le retrait de son support
fait apparaître l'écran, sauf si le programmateur a été mis en sécurité enfant (voir paragraphe Sécurité enfant).
Réglage de l’horloge
Actionnez le navigateur vers le bas pour faire clignoter la zone
de l’horloge.
Un appui sur le bouton
vous permet d’accéder au mode de
réglage du jour. Par mouvement vers le haut ou le bas du navigateur , vous pouvez ainsi faire défiler les jours. Validez le jour par
un appui sur le bouton et procédez de la même façon pour le
réglage de l’heure et des minutes.
Un appui sur le bouton
valide le réglage de l'horloge (toute
l'horloge clignote).
Vous pouvez actionner le navigateur
pour vous déplacer vers
une autre zone, ou figer l’écran par un appui sur le bouton
.
Programmation ECO
CONFORT
Actionnez le navigateur dans le sens haut ou bas pour aller sélectionner le cadran horaire à modifier (tout le cadran clignote).
Un appui sur le bouton
vous permet d’accéder au cadran
horaire sélectionné (le premier créneau horaire clignote).
Le navigateur permet de se déplacer dans le cadran. A chaque
déplacement, l'élément sélectionné clignote et le choix
ECO/CONFORT peut être modifié par appui sur le bouton .
Un appui sur le bouton
valide la programmation (tout le cadran horaire clignote).
Vous pouvez actionner le navigateur pour vous déplacer vers une
autre zone, ou figer l’écran par un nouvel appui sur le bouton .
Affectation des jours à la programmation.
Actionnez le navigateur dans le sens haut ou bas pour aller
sélectionner la zone des jours à modifier.
Un appui sur le bouton
vous permet d’accéder à la zone
des jours à sélectionner (le premier jour clignote).
Le navigateur permet de se déplacer sur les jours, à chaque
déplacement l'élément sélectionné clignote. La sélection du jour
peut être modifiée par appui sur le bouton . (dans l’exemple,
=> jeudi sélectionné).
Un appui sur le bouton
valide les jours.
Vous pouvez actionner le navigateur pour vous déplacer vers une
autre zone, ou figer l’écran par un nouvel appui sur le bouton .
INSTALACION
CON INTERFAZ CORRIENTE PORTADORA
Remítase a la instrucción específica suministrada con la interfaz
corriente portadora.
INTALACION
EN SECA TOALLAS
Para los seca toallas programables, el
programador se integra en la parte de
atrás de la caja de mando.
MANTENIMIENTO
El cambio de la pila se debe efectuar cuando se visualiza el símbolo de la pila (pila botón CR 2032).
ADVERTENCIA
No introduzca objetos extraños en la interfaz sin programador.
28-80-0500-A
11/06/04
16:10
Page 4
2- Fusible de seguridad
En caso de instalación no conforme o de graves perturbaciones
eléctricas, la interfaz Cable Piloto está protegida por un fusible. En
caso de corte del fusible, el programador no transmite ninguna
programación y los aparatos conectados funcionan “Confort”.
Después de corregir la instalación, reemplace el fusible procediendo como sigue:
a- Retire el soporte y su fusible (a mano).
Mise en veille
L’afficheur du programmateur se met en veille automatiquement
après 4 minutes sans action sur les touches.
Sécurité enfant
Maintenez un appui sur le bouton
puis appuyez sur le bouton
pour mettre le programmateur en sécurité enfant (les touches sont alors inactives).
Procédez de la même façon pour réactiver le programmateur.
Configuration de l’affichage
Maintenez un appui sur les boutons
et
et faites un appui
bref sur le bouton RESET situé à l’arrière du programmateur à
l’aide d’un objet pointu (stylo). Le jour clignote. Un appui sur
le bouton
vous permet de changer l’affichage.
Validez par un appui sur le bouton .
b- Cambie el fusible (100 mA) por el fusible de recambio.
INSTALLATION AVEC
INTERFACE FIL PILOTE
FIG. 1
Pion de verrouillage
Fusible
Vis
c- Vuelva a poner el soporte + el fusible dentro de su alo
jamiento.
3- Función antirrobo
Para evitar toda extracción, la interfaz cuenta con un pasador
(FIG 1) que permite bloquear el programador en posición de funcionamiento.
Quelques précautions et conseils d’utilisation.
Avant d’installer l’interface, vérifiez que le fil pilote de l’appareil
(conducteur noir) est raccordé sur un domino vide ou à un
réseau pilote comprenant uniquement des appareils à régulation
électronique (schéma 1 et 2).
En aucun cas, le fil pilote de l’appareil équipé de l’interface ne
peut être:
Raccordé à un conducteur phase (schéma 3).
Raccordé à une autre horloge de programmation (schéma 3).
Raccordé à un conducteur neutre (schéma 4).
L’appareil, équipé d’un programmateur, pourra piloter au maximum 15 appareils à régulation électronique.
11/06/04
16:10
Page 6
a- Su vivienda está equipada con un cable piloto
El aparato equipado con su interfaz y con el programador “dirigirá” todos aparatos que le están conectados.
15 máx
PROGRAMADOR
APARATO
ESCLAVO 2
APPAREIL
MAÎTRE
INTERFACE
APPAREIL
ESCLAVE 1
APPAREIL
ESCLAVE 2
APPAREIL
ESCLAVE 3
FIL PILOTE
CABLE PILOTO
N
N
P
P
Como la ocupación de las habitaciones es diferente de día y de
noche, se debe crear una zona día (por ejemplo, el aparato maestro estará en el salón y dirigirá los aparatos esclavos en el comedor, la cocina y la entrada) y una zona noche (por ejemplo, el
aparato maestro estará en la habitación de los padres y dirigirá
los aparatos esclavos en la habitación de los niños).
Por lo tanto, todos los aparatos esclavos conectados al “maestro”
recibirán la misma programación y constituyen una zona de programación.
ATENCION:
No hay que instalar dos interfaces en la misma zona de programación.
Hay que respetar obligatoriamente las polaridades de conexión
fase, neutro para todos los aparatos de una zona (azul=neutro,
marrón=fase).
b- Su vivienda no está equipada con un cable piloto
Puede realizar una programación aparato por aparato equipando
cada aparato con su interfaz y programador en cada una de las
habitaciones concernidas: cada aparato es autónomo.
P N
INTERFAZ
OK
FASE
Cable piloto=Negro
Conexión recomendada para la seguridad
ATTENTION:
Il ne faut pas installer deux interfaces sur la même zone de programmation.
Il faut impérativement respecter les polarités de raccordement
phase, neutre pour tous les appareils d’une zone (bleu=neutre,
marron=phase).
b- Votre logement n’est pas équipé d’un fil pilote
Vous pouvez réaliser une programmation appareil par appareil en
équipant chaque appareil de ses interface et programmateur dans
chacune des pièces concernées: chaque appareil est autonome.
ATTENTION:
Même si votre logement
n’est pas équipé de fil
pilote, votre appareil, lui,
en a un. Dans ce type
d’installation, il faut le
raccorder sur un domino vide.
P N
INTERFACE
OK
NEUTRO
L’occupation des pièces étant différente le jour et la nuit, on est
amené à créér une zone jour (par exemple, l’appareil maître sera
dans le séjour et pilotera les appareils esclaves dans la salle à
manger, la cuisine et l’entrée) et une zone nuit (par exemple, l’appareil maître sera dans la chambre des parents et pilotera les
appareils esclaves dans la chambre des enfants).
Tous les appareils esclaves reliés au “maître” recevront donc la
même programmation et constituent une zone de programmation.
APPAREIL
Neutre=bleu
Phase=marron
Program
Neutr=azul
Fase=marron
PROGRAMADOR
ALIMENTACION
APARATO
Program
ATENCION:
Incluso si su vivienda no está
equipada con un cable piloto,
su aparato tiene uno. En este
tipo de instalación, hay que
conectarlo a un dominó
vacío.
15 maxi
PROGRAMMATEUR
APARATO
ESCLAVO 3
OK
OK
Program
APARATO
ESCLAVO 1
Program
INTERFAZ
APARATO
MAESTRO
a- Votre logement est équipé d’un fil pilote
L’appareil équipé de votre interface et du programmateur
“pilotera” l’ensemble des appareils qui lui sont reliés.
PROGRAMMATEUR
NEUTRE
PHASE
Fil pilote=Noir
Branchement recommandé pour la sécurité
ALIMENTATION
28-80-0500-A
28-80-0500-A
11/06/04
16:10
Page 7
c- Comment installer l’interface sur votre appareil ?
1) Retirez l’appareil des fixations murales (après avoir mis l’installation électrique Hors tension).
2) Retirez le cache de protection transparent à l’aide d’un tournevis.
SI
NEUTRO
Neutro=azul
Fase=marrón
FASE
ALIMENTACION
Cable piloto=Negro
Conexión
recomendada
para la seguridad CAJA DE CONEXION
ESQUEMA 1
SI
NEUTRO
Neutro=azul
Ne pas déformer les lames de contact.
3) Positionnez l’interface dans le logement du boitier de l’appareil.
Fase=marrón
FASE
Cable piloto=Negro
ALIMENTACION
CABLE PILOTO Aparato de
regulación
electrónica
CAJA DE CONEXION
ESQUEMA 2
NO
NEUTRO
Neutro=azul
Fase=marrón
4) Fixez l’interface à l’aide des 2 vis fournies (ne pas utiliser un
autre type de vis).Vissez fermement.
FASE
Cable piloto=Negro
FASE
CAJA DE CONEXION
ALIMENTACION
Reloj de
programación
ESQUEMA 3
NO
VIS
NEUTRO
Neutro=azul
Fase=marrón
FASE
5) Remettez l’appareil sur son support. Mettez l’appareil sous tension.
6) Insérez le programmateur dans l’interface.
Connecteur vers le bas
Face arrière vers le mur
le voyant doit
clignoter 5 fois
consécutivement
(validation de
la bonne connexion du programmateur).
Engager à fond
ALIMENTACION
NEUTRO
Cable piloto=Negro
CAJA DE CONEXION
EN QUE APARATOS
ESQUEMA 4
INSTALAR LA INTERFAZ
?
1- Instalación con o sin cable piloto ?
La cantidad de interfaces y su adición a los aparatos no equipados
depende de la existencia o no de un cable piloto en su instalación
eléctrica.
El cable piloto es un cable eléctrico que transmite las órdenes del
programador (niveles de temperatura Confort o Eco) a los
aparatos conectados al día y a la hora deseada.
Antes de cualquier intervención en la programación de su aparato, ponga su instalación fuera
de tensión.
28-80-0500-A
11/06/04
16:10
Page 5
c- Cómo instalar la interfaz en su aparato?
1) Retire el aparato de las fijaciones murales (después de haber
puesto la instalación eléctrica fuera de tensión).
2) Retire la tapa de protección transparente con un destornillador.
OUI
NEUTRE
Neutre=bleu
Phase=marron
PHASE
ALIMENTATION
Fil pilote=Noir
Branchement
recommandé
pour la sécurité
Schéma 1
BOITE DE RACCORDEMENT
OUI
NEUTRE
Neutre=bleu
Phase=marron
PHASE
Fil pilote=Noir
FIL PILOTE
BOITE DE RACCORDEMENT
ALIMENTATION
Appareil à régulation
électronique
No deformar las láminas de contacto.
3) Coloque el interfaz en el alojamiento de la caja del aparato.
Schéma 2
NON
NEUTRE
Neutre=bleu
Phase=marron
PHASE
Fil pilote=Noir
PHASE
BOITE DE RACCORDEMENT
ALIMENTATION
4) Fije la interfaz con los 2 tornillos suministrados (no utilizar
otro tipo de tornillo). Atornille firmemente.
Horloge de
programmation
Schéma 3
NON
Neutre=bleu
Phase=marron
Fil pilote=Noir
NEUTRE
PHASE
BOITE DE RACCORDEMENT
SUR
TORNILLO
ALIMENTATION
NEUTRE
Schéma 4
QUELS APPAREILS INSTALLER L’INTERFACE
?
1- Installation avec ou sans fil pilote ?
Le nombre d’interface et leur adjonction aux appareils non
équipés dépend de l’existence ou non d’un fil pilote dans votre
installation électrique.
Le fil pilote est un câble électrique qui transmet les ordres du
programmateur (niveaux de température Confort ou Eco) aux
appareils reliés, au jour et à l’heure voulu.
5)Vuelva a poner el aparato sobre su soporte.Ponga el aparato bajo tensión.
6) Inserte el programador en la interfaz.
Conector hacia abajo.
Avant toute intervention sur la programmation
de votre appareil, mettez votre installation hors
tension.
Introducir a fondo
Superficie superior hacia la pared
El indicador luminoso
debe centellear
5 veces consecutivamente (validación de la
buena conexión del programador).
28-80-0500-A
11/06/04
16:10
Page 8
Puesta en espera
El visualizador del programador se pone en espera automáticamente después de 4 minutos sin accionar les teclas.
Seguridad niño
Mantenga pulsado el botón
y pulse el botón
para poner el
programador en seguridad niño (entonces las teclas son inactivas).
Proceda de la misma forma para reactivar el programador.
Configuración de la visualización
Mantenga pulsados los les botones
y
y pulse brevemente
el botón RESET situado detrás del programador con un objeto
puntiagudo (boli). El día centellea. Una pulsación del botón le
permite cambiar la visualización.
Validez pulsando el botón .
INSTALACION
2- Fusible de sécurité
En cas d’installation non conforme ou de graves perturbations
électriques, l’interface Fil Pilote est protégée par un fusible. En cas
de coupure du fusible, aucune programmation n’est transmise par
le programmateur et les appareils reliés fonctionnent en mode
“Confort”.
Après correction de l’installation, remplacez le fusible en procédant comme suit:
a- Retirez le support et son fusible (à la main).
b- Changez le fusible (100mA) par le fusible de rechange.
CON INTERFAZ CABLE PILOTO
FIG. 1
Pasador de bloqueo
Fusible
Tornillo
Algunas precauciones y consejos de utilización.
Antes de instalar el interfaz, verifique que el cable piloto del
aparato (conductor negro) está conectado a un dominó vacío o
a una red piloto que comprende únicamente aparatos de regulación electrónica (esquema 1 y 2).
En ningún caso, el cable piloto del aparato equipado con interfaz
se puede:
Conectar a un conductor fase (esquema 3).
Conectar a otro reloj de programación (esquema 3).
Conectar a un conductor neutro (esquema 4).
El aparato, equipado de un programador, podrá pilotar como
máximo 15 aparatos con regulación electrónica.
c- Remettez le support + le fusible dans son logement.
3- Fonction anti-vol
Afin d’éviter toute extraction, l’interface est munie d’un pion
(FIG 1) permettant de verrouiller le programmateur en position
de fonctionnement.
28-80-0500-A
11/06/04
INSTALLATION AVEC
16:10
Page 9
INTERFACE COURANT PORTEUR
Veuillez vous reporter à la notice spécifique livrée avec l’interface
Courant porteur.
INSTALLATION
SUR SECHE-SERVIETTES
Pour les sèche-serviettes programmables, le programmateur s’intègre à l’arrière du boitier de commande.
ENTRETIEN
Le changement de la pile doit s’effectuer lorsque le symbole de la
pile s’affiche (pile bouton CR 2032).
MISE
EN GARDE
Veillez à ne pas introduire d’objets étrangers dans l’interface sans programmateur.
UTILIZACION
Activación del programador
Una pulsación de cualquier tecla o la retirada de su soporte hace
aparecer la pantalla, salvo si el programador se ha puesto en seguridad niño (ver párrafo Seguridad niño).
Ajuste del reloj
hacia abajo para hacer centellear la zona
Accione el navegador
del reloj.
Una pulsación del botón le permite acceder al modo de ajuste
del día. Por movimiento hacia arriba o hacia abajo del navegador
, puede hacer desfilar los les días. Validez el día pulsando el
botón y proceda de la misma forma para el ajuste de la hora y
de los minutos.
Una pulsación del botón valida el ajuste del reloj (toda el reloj
centellea).
Puede accionar el navegador
para desplazarse a otra zona o
fijar la pantalla pulsando el botón
Programación ECO
CONFORT
Accione el navegador
hacia arriba o abajo para seleccionar la
esfera horaria a modificar (toda la esfera centellea).
Una pulsación del botón
le permite acceder a la esfera horaria
seleccionada (el primer segmento horario centellea).
El navegador
permite desplazarse por la esfera. Con cada
desplazamiento, el elemento seleccionado centellea y se puede
modificar la elección ECO/CONFORT pulsando el botón .
Una pulsación del botón
valida la programación (toda la esfera
horaria centellea).
para desplazarse hacia otra zona o
Puede accionar el navegador
fijar la pantalla por una nueva pulsación del botón
Asignación de los días a la programación.
Accione el navegador
hacia arriba o abajo para seleccionar
la zona de los días a modificar.
Una pulsación del botón
le permite acceder a la zona de
los días a seleccionar (el primer día centellea).
El navegador
permite desplazarse en los días, en cada
desplazamiento el elemento seleccionado centellea. La selección
del día se puede modificar pulsando el botón
(en l ejemplo,
=> jueves seleccionado).
Una pulsación del botón
valida los días.
para desplazarse hacia una otra
Puede accionar el navegador
zona o fijar la pantalla por una nueva pulsación del botón .
28-80-0500-A
11/06/04
16:10
Page 10
El aparato que usted acaba de adquirir se ha sometido a numerosas
pruebas y controles para garantizar su la calidad. Le agradecemos su
elección y su confianza. Esperamos que le aportará total satisfacción.
Algunos consejos:
Lea la instrucción antes de comenzar la instalación del programador.
Conserve la instrucción, incluso después de instalar el aparato.
Antes de cualquier operación, retire la película de protección de
la pantalla.
DESCRIPCION
Al lado dispone de un esquema que le permite preparar su programación.
Modo
CONFORT
Modo
ECO
The appliance you have just purchased has undergone many checks
and test to ensure its quality.We thank you for your confidence in our
product and hope that you will be completely satisfied with your choice.
Some advice:
Please read these instructions before starting to install the programmer.
Keep these instructions in a safe place, even after you have installed the unit.
Before operating it, remove the protective film from the screen.
DESCRIPTION
A diagram is provided opposite to assist you in programming.
COMFORT
Mode
Ejemplo de programación
Estamos a Sábado y son las 20h30.
Ajuste del día y de la hora
Lunes, Martes, Jueves
y Viernes, estoy en
CONFORT de 6h00 a
9h00, y de 17h00 a 23h00..
ECO
Mode
Programming example
It is 20.30 on Saturday.
Setting for the day and the time
Monday, Tuesday, Thursday
and Friday: COMFORT mode
from 06:00 to 09:00, and
from 17:00 to 23:00.
Miércoles, estoy en
CONFORT de 6h00 a
9h00 y de 12h00 a 23h00..
Program
Sábado y Domingo,
estoy en CONFORT
de 7h00 a 0h00.
OK
Programa
Días
Navegador que permite el desplazamiento en el visualizador
por movimiento hacia arriba o hacia abajo.
Botón que permite modificar la programación, el día y el reloj.
Botón que permite la validación.
Wednesday: COMFORT
mode from 06:00 to 09:00
and from 12:00 to 23:00.
Program
Saturday and Sunday:
COMFORT mode from
07:00 to 00:00.
OK
Programme Days
Navigation bar enabling you to move around in the display by
moving the bar up or down.
Button for modifying the programming, the day and the clock.
Confirm button.
28-80-0500-A
11/06/04
16:10
Page 11
USE
GARANTIEBEDINGUNGEN
Activating the programmer
Pressing any button or removing it from its bracket makes the
screen appear unless the programmer has been set to Child
Safety mode (see the “Child Safety” section).
DIESES DOKUMENT IST VOM BENUTZER AUFZUBEWAHREN
(Diesen Schein nur im Fall einer Beanstandung vorlegen)
Setting the clock
downwards to make the clock zone
Move the navigation bar
flash.
Pressing button
enables you to access Day Setting mode.You
can then scroll through the days by moving the navigation bar
up or down. Confirm the day by pressing button
and proceed
in the same way to set the hour and the minutes.
Pressing button
confirms the clock setting (the whole clock
flashes).
to move to another zone
You can then use the navigation bar
or hold the screen details by pressing button
Programming ECO
COMFORT
up or down to select the time periMove the navigation bar
od to be changed (the whole period flashes).
Pressing button
enables you to access the time period selected (the first time setting flashes).
You can move within the time period using the navigation bar .
Every time you move, the selected element flashes and the choice
of Eco or COMFORT can be changed by pressing button .
Pressing button
confirms the programme (the whole time
period flashes).
You can then use the navigation bar
to move to another zone
or hold the screen details by pressing button .
Programming days for the programme.
up or down to select the zone for
Move the navigation bar
the days to be changed.
Pressing button
enables you to access the days to be
selected (the first day flashes).
You can move around the days using the navigation bar .
Every time you move, the selected element flashes.
The day selected can be modified by pressing button
(in the
example,
Thursday is selected).
Pressing button
confirms the days.
You can then use the navigation bar
to move to another zone
or hold the screen details by pressing button .
Die garantiedauer betrâgt zwei Jahre ab dem Installations- oder
Kaufdatum. Falls kein Beleg vorgezeigt werden kann, gilt die
Garantie für 30 Monate ab dem Herstellerdatum.
ATLANTIC garantiert den Ersatz oder die Lieferung der als fehlerhaft anerkannten Teile, jegliche
Schadenshaftpflicht ist ausgesclossen.
Die Lohn-, Fahrt- und Transportkosten werden vom Benutzer
übernommen.
Schäden, die auf eine nicht konforme Installation, eine falsche
Verwendung oder der Nichteinhaltung der Vorschriften der
entsprechenden Anleitung beruhen, werden nicht durch die
garantie gedeckt.
Diesen Garantieschein gemeinsam mit der entsprechenden
Rechnung dem Händler oder Ihrem
Installateur nur im fall einer Beanstandung vorlegen.
Die Bestimmungen der vorliegenden Garantiebedingungen
schliessen nicht das Recht des Käufers auf die legale garantie
für verborgene Konstruktionsfzhler aus, die auf jeden Fall in den
Bestimmungen der Atikel 1641 ff des Bürgerlichen
Gesetzbuches angewandt werden.
STEMPEL DES INSTALLATEURS
ATLANTIC INTERNATIONAL
Tél: 00 33 146638000
SCHWEIZ
ATLANTIC SUISSE AG
Heiz und Industriekessel
Wolhuserstrasse 31/33
6017 RUSWIL
Tel: 41 49 63 323
Fax: 41 49 69 353
28-80-0500-A
11/06/04
INSTALLATION
16:10
Page 12
MIT TRÄGERSTROMSCHNITTSTELLE
Bitte
sehen
Sie
in
der
spezifischen, mit
der
Trägerstromschnittstelle gelieferten Bedienungsanleitung nach.
INSTALLATION AUF
HEIZENDEM HANDUCHHALTER
Bei programmierbaren heizenden
Handtuchhaltern
wird
der
Programmierer auf der Rückseite des
Steuergehäuses eingefügt.
Sleep mode
The programmer’s display automatically goes into Sleep mode if
the buttons are not used for 4 minutes.
Child safety
Hold down button
and then press button
to set the programmer to Child Safety mode (the buttons are then disabled).
Repeat the procedure to reactivate the programmer.
Configuring the display
Hold down buttons and and briefly press the RESET button on the back of the programmer using a pointed object (a
pen).The day flashes.You can then change the display by pressing button .
Confirm by pressing button .
INSTALLATION
INSTANDHALTUNG
Die Batterie muss ersetzt werden, wenn das Batteriesymbol auf
dem Display erscheint (Knopfbatterie CR 2032).
USING A PILOT WIRE INTERFACE
FIG. 1
Locking pin
Fuse
Screw
Some precautions and advice on use.
Before installing the interface, check that the programmer’s pilot
wire (black conductor) is connected to a spare connection block
or to a pilot circuit only containing electronic control units
(Drawings 1 & 2).
WARNUNG
Keine Fremdkörper in
Programmierer stecken!
eine
Schnittstelle
ohne
Under no circumstances may the pilot wire for a unit fitted with
an interface be:
Connected to a Live conductor (Drawing 3).
Connected to another timer (Drawing 3).
Connected to a Neutral conductor (Drawing 4).
An appliance fitted with a programmer can handle a maximum of
15 electronic control units.
28-80-0500-A
11/06/04
16:10
Page 14
c- Installieren der Schnittstelle auf dem Gerät
1) Das Gerät von seiner Wandbefestigung entfernen (natürlich
erst nach dem Abschalten der Stromversorgung)..
2) Die durchsichtige Abdeckung mit einem Schraubendreher entfernen.
a- Your dwelling has a pilot wire
The appliance fitted with your interface and the programmer will
“control” all the units connected to it.
Maximum 15 units
PROGRAMMER
INTERFACE
OK
Program
MASTER
UNIT
SLAVE
UNIT 1
SLAVE
UNIT 2
SLAVE
UNIT 3
PILOT WIRE
N
L
4) Die Schnittstelle mit den 2 mitgelieferten Schrauben befestigen
(keine anderen Schrauben verwenden). Gut festziehen.
SCHRAUBE
5) Das Gerät wieder in seine Halterung geben. Die Stromversorgung
des Geräts wieder einschalten.
6) Den Programmierer in die Schnittstelle einfügen.
b- Your dwelling does not have a pilot wire
You can programme unit by unit by fitting each unit in each of the
rooms concerned with an interface and a programmer: each unit
is then autonomous.
WARNING:
Even if your dwelling
does not have a pilot
wire, your appliance has
one. In this type of
installation, you must
connect the pilot wire
to a spare connection
block.
L N
INTERFACE
OK
Ganz hineindrücken
Rückseite zur Wand
D
e
r
Leuchtmelder
muss 5 Mal
hintereinander
blinken
(Bestätigung für
den korrek ten Anschluss
des Programmierers).
WARNING:
Two interfaces must not be installed in the same programming
zone.
You must comply with the polarities for connecting the Live and
the Neutral on all the units in a zone (Blue=Neutral,Brown=Live).
UNIT
Neutral=blue
Live=brown
Program
Stecker nach unten
Since rooms are occupied in different ways day and night, you
should create a day zone (for example, the master unit will be in
the Lounge and control the slave units in the Dining room, the
Kitchen and the entrance hall) and a night zone (for example, the
master unit will be in the master bedroom and will control the
slave units in the children’s bedroom).
All the units linked to the “Master” unit will therefore receive the
same programming instructions and therefore constitute a single
programming zone.
PROGRAMMAER
NEUTRAL
LIVE
Pilot wire=black
Connection recommended for safety
SUPPLY
Die Kontaktklingen nicht verbiegen.
3) Die Schnittstelle in die Aufnahme des Gehäuses des Geräts geben.
28-80-0500-A
11/06/04
16:10
Page 15
c- How to install the interface on your appliance?
1) Remove the appliance from the wall (after switching off the
power supply).
2) Remove the transparent protective cover with a screwdriver.
a-Ihre Wohnung verfügt über einen Pilotleiter
Das mit Ihrer Schnittstelle und dem Programmierer ausgestattete
Gerät „steuert“ alle anderen angeschlossenen Geräte.
max. 15
PROGRAMMIERER
SCHNITTSTELLE
OK
Program
HAUPTGERÄT
NEBENGERÄT 1 NEBENGERÄT 2 NEBENGERÄT 3
PILOTLEITER
N
P
4) Fasten the interface in place using the 2 screws provided (do
not use any other type of screw). Screw it in tightly.
SCREW
5) Refit the appliance on its brackets and switch it ON.
6) Insert the programmer in the interface.
The indicator
light should flash
five times in succession (to confirm that the
programmer is correctly connected).
Press it in fully
ACHTUNG:
Auch wenn Ihre Wohnung
keinen Pilotleiter hat, hat
das Gerät immer einen.
Bei dieser Art von
Installation muss es an
eine leere Lüsterklemme
angeschlossen werden.
P N
SCHNITTSTELLE
GERÄT
Nullleiter = blau
Phase = braun
OK
Rear side facing the wall
b- Ihre Wohnung hat keinen Pilotleiter
Sie können eine gerätweise Programmierung vornehmen, indem
Sie jedes Gerät mit seiner Schnittstelle und dem Programmierer
in allen betroffenen Räumen ausstatten: jedes Gerät ist autonom.
Program
Connector facing downwards
ACHTUNG:
In einer gleichen Programmierzone dürfen nicht zwei
Schnittstellen installiert werden.
Die Polungen der Anschlüsse Phase, Nulleiter müssen zwingend
für alle Geräte einer Zone eingehalten werden (blau = Nullleiter,
braun = Phase).
PROGRAMMIERER
NULLLEITER
PHASE
Pilotleiter = schwarz
Für Sicherheit empfohlener Anschluss
STROMVERSORGUNG
Do not bend the contact lugs.
3) Place the interface in the housing for it in the appliance’s casing.
Wenn die Räume tagsüber und nachts unterschiedlich belegt sind,
schafft man eine Tagzone (zum Beispiel schaltet sich das Gerät im
Wohnzimmer ein und steuert die Nebengeräte im Esszimmer, in
der Küche und in der Diele) und eine Nachtzone (zum Beispiel
befindet sich das Hauptgerät im Schlafzimmer der Eltern und
steuert die Nebengeräte im Kinderzimmer).
Alle Nebengeräte, die an das Hauptgerät angeschlossen sind,
erhalten daher die gleiche Programmierung und bilden eine
Programmierzone.
28-80-0500-A
11/06/04
16:10
Page 13
YES
Neutral=Blue
NEUTRAL
Live=Brown
LIVE
SUPPLY
pilot wire=Black
Connection
recommended
for safety
CONNECTION BOX
Drawing 1
YES
NEUTRAL
Neutral=Blue
Live=Brown
LIVE
2- Sicherung
Für den Fall einer nicht normgerechten Installation oder bei
schweren elektrischen Störungen, ist die Pilotleiterschnittstelle
mit einer Sicherung geschützt. Beim Durchbrennen dieser
Sicherung überträgt der Programmierer keine Programmierung
mehr, die Geräte funktionieren im KOMFORT-Betrieb.
Nach der Reparatur der Anlage wird die Sicherung wie folgt
ersetzt:
a- Die Sicherung aus ihrer Halterung nehmen (mit der Hand).
SUPPLY
PILOT WIRE Electronically
controlled unit
pilot wire=Black
CONNECTION BOX
Drawing 2
NO
Neutral=Blue
NEUTRAL
Live=Brown
LIVE
pilot wire=Black
LIVE
b- Die Sicherung (100 mA) durch eine neue ersetzen.
SUPPLY
Timer
CONNECTION BOX
Drawing 3
NO
NEUTRAL
Neutral=Blue
Live=Brown
LIVE
CONNECTION BOX
ON WHICH TYPE
SUPPLY
c- Den Träger + Sicherung wieder in die Aufnahme geben.
NEUTRAL
pilot wire=Black
Drawing 4
OF UNITS SHOULD THE INTERFACE BE
INSTALLED?
1- Installation with or without a pilot wire?
The number of interfaces and their addition to units not so
equipped depends on whether there is a pilot wire in your electrical system.
A pilot wire is an electric cable that transmits orders from the
programmer (Comfort or Eco temperature level) to the connected appliances at the desired date and time.
Before doing any programming work on your
appliance, switch the installation OFF.
3- Diebstahlschutzfunktion
Um ein Herausnehmen zu vermeiden, ist die Schnittstelle mit
einem Stift (Abb. 1) versehen, der es erlaubt, den Programmierer
in Betriebsstellung zu verriegeln.
28-80-0500-A
11/06/04
16:10
Page 16
JA
NULLLEITER
Nullleiter = blau
Phase = braun
STROMVERSORGUNG
PHASE
Pilotleiter = schwarz
Für Sicherheit
empfohlener
Skizze 1
ANSCHLUSSKASTEN
2- Safety fuse
The pilot wire interface is fitted with a fuse to protect against
inappropriate installation or serious fluctuation sin the electrical
supply. If the fuse blows, the programmer sends no programming
instructions and the connected units operate in “Comfort” mode.
After correcting the installation, proceed as follows to replace the
fuse:
a- Remove the fuse holder and its fuse (manually)
JA
NULLLEITER
Nullleiter = blau
Phase = braun
STROMVERSORGUNG
PHASE
Pilotleiter = schwarz
PILOTLEITER Gerät mit elektronischer
Regelung
Skizze 2
ANSCHLUSSKASTEN
NEIN
b- Replace the fuse (100mA) with the replacement fuse.
NULLLEITER
Nullleiter = blau
Phase = braun
PHASE
STROMVERSORGUNG
Pilotleiter = schwarz
PHASE
Programmieruhr
ANSCHLUSSKASTEN
Skizze 3
NEIN
Nullleiter = blau
Phase = braun
Pilotleiter = schwarz
NULLLEITER
STROMVERSORGUNG
PHASE
ANSCHLUSSKASTEN
AN WELCHEN
c- Refit the fuse holder and fuse in its housing.
NULLLEITER
Skizze 4
GERÄTENWIRD DIE SCHNITTSTELLE
INSTALLIERT
?
1- Installation mit oder ohne Pilotleiter?
Die Anzahl der Schnittstellen und ihr Zuordnen zu den nicht ausgestatteten Geräten hängt davon ab, ob Ihre Elektroanlage einen
Pilotleiter hat oder nicht.
Der Pilotleiter ist eine elektrische Verkabelung, die am gewünschten Tag und zur gewünschten Zeit Befehle des
Programmierers (Temperaturniveau KOMFORT oder ÖKO) an
die angeschlossenen Geräte überträgt.
Bevor Sie an der Programmierung Ihres Geräts
eingreifen, müssen Sie den Strom vom Gerät
abschalten.
3- Anti-theft function
To avoid removal, the interface is fitted with a pin (FIG 1) to lock
the programmer in its operating position.
28-80-0500-A
11/06/04
16:10
INSTALLATION WITH A CARRIER
Page 17
CURRENT INTERFACE
Please refer to the specific instructions supplied with the carrier
current interface.
INSTALLATION
ON TOWEL DRYERS
For programmable towel dryers, the
programmer is fitted in the rear of the
control box.
Umschalten auf Standby
Das Display des Programmierers stellt sich nach 4 Minuten ohne
Betätigung einer Taste automatisch auf Standby.
Kinderabsicherung
Halten Sie die Taste nieder und drücken Sie gleichzeitig auf die
Taste , um den Programmierer kindersicher zu machen (die
Tasten können nicht mehr betätigt werden).
Um den Programmierer wieder zu aktivieren, wird die gleiche
Vorgehensweise angewandt.
Konfigurieren des Displays
Halten Sie die Tasten
und
nieder und drücken Sie kurz
mit einem feinen spitzen Gegenstand (Kugelschreiber oder
dgl.) auf die Taste RESET, die sich auf der Rückseite des Geräts
befindet. Der Tag blinkt. Ein Druck auf die Taste erlaubt das
Wechseln der Anzeige.
Mit einem Druck auf die Taste
bestätigen.
INSTALLATION
MIT VERDRAHTETER
PILOTSCHNITTSTELLE
MAINTENANCE
The battery must be changed when the battery symbol is displayed (CR 2032 button-type battery).
WARNING
Ensure that no foreign bodies fall into the interface when
it is without a programmer.
FIG. 1
Verriegelungsstift
Sicherung
Schraube
Einige Vorsichtsmaßnahmen und Tipps für die
Verwendung
Vor dem Installieren der Schnittfläche muss geprüft werden, ob
der Pilotleiter des Geräts (der schwarze Leiter) auf einer
Lüsterklemme angeschlossen ist, die sonst leer ist, oder ob er an
ein Pilotnetz angeschlossen ist, das nur elektronische Regelgeräte
umfasst (Skizzen 1 und 2).
Der Pilotleiter des Geräts, das mit der Schnittstelle ausgestattet
ist, darf auf keinen Fall:
an einen Phasenleiter angeschlossen werden (Skizze 3)
an eine andere Programmieruhr angeschlossen werden
(Skizze 3)
an einen Nullleiter angeschlossen werden (Skizze 4).
Das mit dem Programmierer ausgestattete Gerät kann maximal
15 Geräte mit elektronischer Regelung steuern.