1
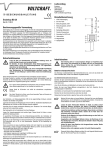
Scope of delivery VOLTCRAFT OPERATING INSTRUCTIONS Borescope BS-10 ® ° Borescope Magnetic top Software and driver CD Case and operating instructions Description of the Parts Version 04/09 Order no. 12 02 55 Prescribed Use The borescope is in connection with a computer a visual means for optical error diagnostics and inspection on dead plants and appliances. The borescope is connected via a USB interface. By means of the flexible gooseneck, the colour camera, situated on the top of the device, can even be moved to inaccessible positions and areas. Two white LEDs allow you to take photos also in total darkness. The gooseneck and the camera head are water-proof and are suited for application in aqueus liquids (no acids or bases). The immersion depth is max. 66 cm. The handle must not get wet or be immersed. Voltage supply is via the USB interface. Operation in explosive areas or the application on persons or animals is prohibited. Uses other than those described above are prohibited. They can cause damage to the product and personal injuries. No part of the product must be modified or rebuilt! Observe the safety instructions in their entirety! Safety Instructions Please read all of the operating instructions before using the product for the first time; they contain important information about its correct use. The warranty will be void in the event of damage caused by failure to observe these safety instructions! We do not assume any liability for any resulting damage! We do not assume any liability for material and personal damage caused by improper use or non-compliance with the safety instructions! The warranty will be void in such cases. This device left the manufacture’s factory in a safe and perfect condition. We kindly request the user to observe the safety instructions and warnings contained in these operating instructions to preserve this condition and to ensure safe operation. Please pay attention to the following symbols: An exclamation mark in a triangle shows important information in this user’s manual that has to be observed. ° This device conforms to CE and meets the necessary European regulations. ☞ The “hand” symbol indicates special information and advice on operation of the device. 1 Magnetic top 2 Gooseneck 3 Brightness control for LED light 4 Handle 5 USB plug 6 Snapshot key 7 Camera head with LED light System requirements Pentium® III 200 MHz or higher at least 32 MB RAM 40 MB free hard disc memory CD or DVD drive Operating system at least Windows® 98 Initial operation Software Installation First install the software before connecting the borescope to a computer for the first time. - Make sure the borescope is not connected. Switch on the computer and start the operating system. Insert the CD supplied in your CD or DVD drive. Select the drive under the folder “My computer” and start the file “Telescope DRIVER” with a double-click. The installation starts. - Confirm the „Windows Logo Test“ by clicking on “Continue installation”. This test only indicates that Windows® does not recognise the software. - Follow the instructions on the screen until the installation is completed (Complete). - Restart the computer, if necessary Hardware Installation The unauthorized conversion and/or modification of the product is prohibited for reasons of safety and approval (CE). If not in use, store the borescope in the case. Sensitive surfaces (furniture polish, etc.) might cause chemical reactions with the housing. Avoid strong mechanical strains or vibrations. The minimum bending radius must not be below 6cm. Keep the unit out of the reach of children. It is not a toy. Do not leave packaging material unattended. These may become dangerous playing materials for children. On industrial sites, the accident prevention regulations of the association of the industrial workers’ societies for electrical equipment and utilities must be followed. Only immerse the head and gooseneck of the camera in liquids with no voltage! Do not immerse the device more than 66 cm. If there is any reason to believe that safe operation has become impossible, turn the device off and secure it against any unintentional operation. It can be assumed that safe operation is no longer possible if: • the device shows visible damage, • the device no longer functions and • after being stored under unfavourable conditions for a long period of time or • it has been subjected to considerable stress in transit You should also take heed of the additional safety instructions in each chapter of the operating instructions of the connected devices. Never switch the device on immediately after it has been taken from a cold to a warm environment. Condensation that forms might destroy your device. Allow the device to reach room temperature before switching it on. First install the software before connecting the borescope to a computer for the first time. - Switch on the computer and start the operating system. - Connect the USB plug of the borescope (5) to a free USB port of your computer. A new device is recognised and the installation assistant starts automatically. - Follow the instructions on the screen and select “Install software automatically”. Follow the instructions on the screen. - Confirm the „Windows Logo Test“ by clicking on “Continue installation”. This test only indicates that Windows® does not recognise the software. - Follow the instructions on the screen until the installation is completed (Complete). Start-up The application program „AMCAP“ is a universal program for different devices. All menu points not described in this operating manual are not included in the functional range of the borescope. The borescope must only be used for inspections on de-energised equipments. The camera head is made of metal and may lead to short-circuits. For safety reasons, de-energise all plant components prior to each inspection. - Switch on the computer and start the operating system. - Connect the borescope with the computer. - Start the program „AMCAP“. You can find this program on the desktop or via the button “Start, All Programs” under the folder “AIT Telescope Driver”. - If another USB camera is already installed, this can lead to error messages during the program start-up. In this case, select the driver “Telescope driver” under the menu point “Devices” in the main menu. All installed devices are displayed under this menu point.