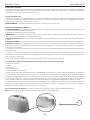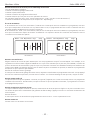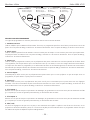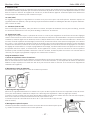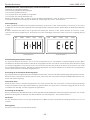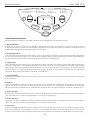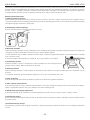
1
www.sinbo.com.tr
SBM 4705
Ekmek Yapma Makinası
Kullanım Kılavuzu
BREAD MAKER
Instruction Manual
MACHINE À PAIN
Mode d’emploi
BROTBACKAUTOMAT
Gebrauchsanweisung
PEKAČ KRUHA
Upute za Uporabu
(TR) Türkçe / Ekmek Yapma Makinası
Sinbo SBM 4705
De¤erli Müflterimiz,
Ürün seçiminde S‹NBO'yu tercih etti¤iniz için teflekkür ederiz.
Uzun ve verimli bir kullan›m için cihaz› kullanmadan önce bu k›lavuzu özellikle güvenlik talimatlar›na dikkat
ederek okuman›z› ve devaml› suretle saklaman›z› tavsiye ederiz.
Sayg›lar›m›zla,
Sinbo Küçük Ev Aletleri
SINBO SBM 4705 EKMEK YAPMA MAK‹NASI
KULLANIM KILAVUZU
ÖZELL‹KLER‹
• Somun büyüklü¤ü seçimi (750-900g)
• 12 Dijital programl› (h›zl› programlama tuflu)
• 13 saate programlanabilir zamanlay›c›
• 60 dakika s›cak tutma fonksiyonu
• Ayarlanabilir kabuk kontrolü: yumuflak, orta, koyu
• Makinada y›kanabilir, yap›flmaz kap
• So¤uk kalan d›fl yüzey
• Kaymaz ayaklar
• Ölçme kab› ve kafl›¤›
• AC230V, 50Hz, 600W
D‹KKAT!!
Ürünün üzerinde bulunan iflaretlemelerde veya ürünle verilen di¤er bas›l› dökümanlarda beyan edilen de¤erler, ilgili standartlara
göre laboratuar ortam›nda elde edilen de¤erlerdir.Bu de¤erler, ürünün kullan›m ve ortam flartlar›na göre de¤iflebilir.
Children being supervised not to play with the appliance.
This appliance is not intended for use by persons (including children) with reduced physical, sensory or mental capabilities, or lack of
experience and knowledge, unless they have been given supervision or instruction concerning use of the appliances by a person responsible
for their safety. Children should be supervised to ensure that they do not play with the appliance.
This device can only be used by children older than 8 years old or physically disabled or hearing-impaired or people with lessen mental
faculties or the inexperienced or ignorant people after providing sufficient information for secure utilization and by informing about the
possible hazards or under supervision. Children should not play with this device. The cleaning and maintenance activities carried by children
should be under supervision.
ATTENTION: Charcoal and other similar flammable fuels should not be used!
Cihazla oynamamalarını güvenceye almak için çocuklar gözetim altında tutulmalıdır.
Bu ürün (çocuklar dahil ) fiziksel hassasiyeti az, zihinsel olarak yetersiz, deneyimsiz ve yeterli bilgiye sahip olmadan yada kendilerinin
güvenli¤inden sorumlu olan kifliler tarafından bu ürünü kullanmak için gerekli talimatlar verilmemifl kiflilerin kullanımına uygun de¤ildir.
Bu cihaz, denetim sa¤lanması veya cihazın güvenli bir flekilde kullanılması ve karflılaflılan tehlikelerin anlaflılması ile ilgili bilgi verilmesi
durumunda, yaflları 8 ile üzeri olan çocuklar ve fiziksel, iflitsel veya aki yetenekleri azalmıfl veya tecrübe ve bilgi eksikli¤i olan kifliler
tarafından kullanılabilir. Çocuklar cihaz ile oynamamalıdır. Temizleme ve kullanıcı bakımı çocuklar tarafından gözetimsiz olarak yapılmamalıdır.
D‹KKAT! Bu cihazda, odun kömürü ve benzeri tutuflabilir yakıtlar kullanılmamalıdır!
-1-
Ekmek Yapma Makinası
Sinbo SBM 4705
• Bakım, Onarım ve Kullanımda Uyulması Gereken Kurallar
Cihaz›n›z› kullan›rken afla¤›daki temel güvenlik önlemlerini mutlaka göz önünde bulundurman›z gerekmektedir.
Herhangi bir elektrikli alet gibi, bu makine de genel güvenlik kurallar›n›n uygulanmas›n› gerektirir. Kiflisel yaralanma
tehlikesinin yan› s›ra, cihaza ve cihaz›n özelliklerine zarar verme tehlikesi de söz konusu olabilir. Bu iki konu afla¤›daki
ifadelerle belirtilmektedir:
UYARI: Kiflisel yaralanma tehlikesi
ÖNEML‹: Cihaza zarar verme tehlikesi
Ek olarak, afla¤›daki güvenlik tavsiyeleri de göz önünde tutulmal›d›r.
Cihaz›n Konumu
• Cihaz›n›z›, mutfak tezgâh›n›n kenarlar›nda bulundurmay›n.
• Cihaz›n›z› düz ve sa¤lam yüzeyler üzerinde kullan›n.
• D›fl mekânlarda kullanmay›n.
Kablolar
• Kablo, prizden makineye kadar, ba¤lant› noktalar›n› zorlamadan ulaflmal›d›r.
• Cihaz kablosunu, mutfak tezgâh›n›n kenar›na, çocuklar›n uzanabilece¤i flekilde sark›k halde b›rakmay›n.
• Kabloyu, priz ile aç›k bir yüzey aras›nda gerili tutmay›n (örne¤in, alçak bir yerdeki priz ile masa aras›nda).
• Kabloyu, zarar görebilece¤i s›cak yüzeyler üzerinde bulundurmay›n.
Güvenli¤iniz için;
UYARI: S›cak yüzeylere dokunmay›n›z! S›cak ekmek tavas›n› kald›rmak için f›r›n eldivenleri kullan›n. Buhar tahliye
deliklerini, ne olursa olsun kapatmay›n.
UYARI: Hareketli parçalara temas etmekten kaç›n›n›z!
• Elektrik flokuna maruz kalmamak için, kordonu ve fifli su ya da di¤er s›v› maddeler içerisine bat›rmay›n.
• ‹çerisinde s›cak nesneler bulunan cihazlar›n tafl›nmas› esnas›nda azami derecede dikkatli olunmal›d›r.
• Ekmek yapma makinesini, içerisine baz› aletleri yerlefltirip saklamak için kullanmay›n; herhangi bir yang›n veya elektrik
flokuna maruz kalmamak için cihaz›n içine mutfak eflyas› koymay›n.
• Cihaz› ›slak ya da nemli elle kullanmay›n.
Çocuklar
Çocuklara, makineyi kullanmalar› konusunda kesinlikle izin vermeyiniz. Çocuklar, özellikle cihazlar çal›fl›rken ve piflirme
ifllemleri gerçekleflirken denetim alt›nda bulunmad›klar›nda, tehlikelere maruz kalabilmektedirler.
Çocuklar›, mutfaktaki tehlikelere karfl› dikkatli olmalar› için e¤itim ve tam olarak göremedikleri yerlere eriflmemeleri
konusunda uyar›n.
D‹⁄ER GÜVENL‹K HUSUSLARI
• E¤er, herhangi bir sebepten dolay›, cihaz›n kablosu zarar görmüflse, cihaz› kullanmay›n. Kablonun orijinal yedek parças›
ile de¤ifltirilmesi için en yak›n teknik servisimize baflvurun.
• Cihaza zarar verebilece¤inden, makine üzerinde aksesuar türünden eklemeler yapmay›n.
• Gazl›/elektrikli bir oca¤›n ya da f›r›n›n üzerine/yak›n›na koymay›n.
• Cihaz›n zarar görmemesi için, piflirme tavas› ya da baflka bir nesneyi cihaz›n üzerine koymay›n.
• Afl›nd›r›c› pedler ile temizlemeyin. Piflirme tavas›n›, yo¤urma b›ça¤›n›, ölçüm kab›n› veya kafl›¤›n› bulafl›k makinesinde
y›kamay›n.
• Cihaz› ve kablolar›n› ›s›, direkt günefl ›fl›¤›, nem, keskin cisimler vb. etmenlerden koruyun.
• Makineyi çal›flt›rmadan önce, ekmek piflirme tavas›n› düzgün bir flekilde yerlefltirin.
• Cihaz çal›flm›yorken, içerisindeki parçalar› yerlefltirirken, temizlerken ya da herhangi bir sorun ç›kt›¤›nda, fifli prizden
ç›kart›n. Ç›kart›rken kabloyu de¤il, fifli çekin.
-2-
Ekmek Yapma Makinası
Sinbo SBM 4705
S‹NBO EKMEK YAPMA MAK‹NES‹N‹ TANIYALIM
S‹NBO ekmek yapma makineleri ile damak tad›n›za uygun, hijyenik ve sa¤l›kl› ekmekler yapabilirsiniz. Ekmek piflirme
konusunda büyük bir çaba göstermeniz gerekmeyecektir; çünkü bilgisayar destekli cihaz›n›z, sizin yerinize pek çok ifli
kendisi yapacakt›r.
Ekmek yap›m ifllemi afla¤›daki üç aflama kadar kolayd›r:
1. Malzemeleri koyunuz.
2. Menüden program› seçip bafllama butonuna bas›n›z.
3. Ekme¤in haz›rlanmas›n› bekleyiniz.
Not: Piflirme ifllemi esnas›nda cihaz›n çal›flmas›n› durdurmay›n. Kepekli ekme¤in yan› s›ra pek çok ekmek çeflidini
yapabilen bu cihaz; sandviçleriniz ve pizzalar›n›z için hamur yapar, kek ve reçel haz›rlaman›za imkân verir. Her fley çok
kolay ve ev yap›m› tad›ndad›r.
‹lk Kullan›mdan Önce Bilmeniz Gerekenler
Kullanmaya bafllamadan önce, elinizdeki kullan›m k›lavuzunu okumak için birkaç dakikan›z› ay›r›n ve ileride referans
olmas› için uygun bir yerde saklay›n. Güvenlik talimatlar›na uymak için de gerekli dikkati gösteriniz.
1. Ekmek yapma makinesini dikkatli bir flekilde aç›n ve bütün paketleme materyallerini ortadan kald›r›n.
2. Paketleme s›ras›nda biriken tozlar› temizleyin.
3. Piflirici tavay›, yo¤urma b›ça¤›n› ve ekmek yapma makinesinin d›fl yüzeyini temiz ve nemli bezle silin. Piflirici tava
yap›flmay› önleyici bir yüzey ile kapl›d›r. Ekmek yapma cihaz›n›n hiçbir taraf›nda afl›nd›r›c› pedler ve yap›flkanl› herhangi
bir madde kullanmay›n.
4. ‹lk kullan›mda s›v›ya¤, tereya¤› ya da margarin kullanarak ekmek tavas›n› ya¤lay›n.
5. Bir kez daha temizleyin.
6. Yo¤urma b›ça¤›n›, piflirme tavas›ndaki aks üzerine yerlefltirin.
Not: Cihaz›n üretilmesi esnas›nda baz› bileflenleri, koruma amac›yla ya¤lanmaktad›r. Bu yüzden, cihaz ilk kez çal›flt›r›ld›¤›nda
bulundu¤u ortama, bir tak›m yabanc› buharlar ç›kabilir; bu durum gayet normaldir.
ÖZELL‹KLER
Zamanlay›c›n›n kullan›lmas›
Ekme¤in ileriki bir zaman, ya da sabah için haz›r olmas› isteniyorsa; zamanlay›c› ayarlar› kullan›l›r. Zamanlay›c› süresi
maksimum 13 saattir. Bu ayarlar›n hangi programlar için yap›labilir oldu¤u “Piflirme döngü süreleri” bölümünde
görülebilir. Bu ayarlar yumurta, taze süt, ekfli krema ya da peynir gibi çabuk bozulan malzemelerle haz›rlanan tarifler
uygulan›rken kullan›lmamal›d›r.
1. Ekme¤in ne zaman haz›r olmas›n› istedi¤inize karar verdikten sonra; flimdiki saat ile hedefledi¤iniz saat aras›ndaki
zaman fark›n› hesaplay›n. Örne¤in, sabah saat 08.00’de haz›r olmas› isteniyorsa ve flu anki saat 19.30 ise; aradaki zaman
fark› 12 saat 30 dakikad›r. O halde, bilgi ekran›nda 12:30 de¤erine ulafl›lana kadar zamanlay›c› butonlar kullan›lacakt›r.
2. Zaman› artt›rma ve azaltma butonlar› kullan›larak bu süre girilir. Zaman butonlar›, 10’ar dakikal›k dilimler halinde
sürenin artt›r›p azalt›lmas›n› sa¤lar. “Bafllat” butonuna bas›ld›¤›nda, “:” simgesi yan›p sönmeye bafllayacakt›r.
3. E¤er yanl›fl bir süre belirlemiflseniz, “durdur” butonuna 2 saniye kadar bas›n. Zamanlay›c› iptal edilecek ve normal
programa geri dönülecektir. Süreyi yeniden belirlemek için 1 ve 2 ad›mlar› tekrarlanmal›d›r.
4. Zamanlay›c› ayar› maksimum 13 saatlik süre ayar› yapabilir. Bu süre; ekme¤in piflirilme iflleminin bitip haz›r hale
gelmesine kadar olan aral›¤› da kapsamaktad›r.
Uyar›c› sinyal sesi
Uyar›c› sinyaller afla¤›daki durumlarda duyulur:
• Herhangi bir butona bas›ld›¤›nda
• ‹kinci yo¤urma evresi öncesinde tah›l, meyve, kuruyemifl vb. Katk›lar›n hamura eklenmesi zaman› geldi¤inde makinenin
kapa¤›n› açarak ilaveleri yap›n ve kapa¤› kapat›n.
• Program bitti¤inde
• Il›k tutma süresi bitti¤i zaman.
Elektrik kesilmeleri
K›sa bir elektrik kesintisinden sonra:
• E¤er program kabarma 1 aflamas›na henüz ulaflmam›flsa, “bafllat” butonuna bas›l›r; bu sayede cihaz otomatik tekrar
fonksiyonunu kullanmaya devam eder.
• E¤er elektrik mayalanma aflamas›nda kesilmiflse, hamurun mayalanmas› ve kabarmas› beklenir, daha sonra f›r›n
program› seçilerek mayalanan hamur piflirilerek devam ettirilir. Böylece hamurunuz bozulmam›fl olur.
-3-
Ekmek Yapma Makinası
Sinbo SBM 4705
Ortam s›cakl›¤›
Ekmek yapma makinesi de¤iflik s›cakl›klardaki ortamlarda çal›flabilir; ancak, s›cak bir odada ya da so¤uk bir odada
piflirilen ekmeklerin boyutlar› farkl› olabilir. Ortam s›cakl›¤›n›n 15-34˚C aral›¤›nda olmas› tavsiye edilmektedir.
Elektrik Gereksinimi
Cihaz üzerinde bulunan voltaj de¤erinin, A.C. (de¤iflken ak›m) fleklindeki ev elektrik de¤eri ile ayn› olup olmad›¤›n› kontrol
edin. Evinizdeki prizler ile cihaz›n fifli birbirine uymuyorsa, mevcudunun yerine priz ile uyumlu bir fifl tak›labilir.
UYARI: Bu cihaz kesinlikle toprakl› prizle kullan›lmal›d›r.
Buhar Tahliye Çekmecesi: Cihaz›n ön k›sm›nda, afla¤›daki bofllu¤a tak›l›r.
Çubuk: Kar›flt›r›c› b›çak ekme¤in içinde kald›¤› zaman, ç›karmak için kullan›l›r.
Kontrol Paneli Butonlar›, Bilgi Ekran› ve Fonksiyonlar
Genel olarak bilgi ekran›;
• Seçilen k›zarma seviyesini gösterir.
• Seçilen a¤›rl›¤› gösterir.
• Seçilen program numaras›n› gösterir.
• Piflirme iflleminin bitmesi için kalan süreyi gösterir
Örne¤in; (3:20 “3 saat 20 dakika kald›”; 0:20 “20 dakika kald›” anlam›na gelmektedir).
• Is› uyar›s›n› gösterir (“Sorun Giderme” bölümüne bak›n›z).
Uyar› ekran›
1. Program bafllat›ld›ktan sonra ekranda “H:HH” (bkz. fiekil 1) ibaresi görüntüleniyorsa, içerideki s›cakl›k çok yüksektir.
Bu durumda, program durdurulmal›d›r. Kapak aç›larak, makinenin 10-20 dakika boyunca so¤umas› sa¤lanmal›d›r.
2. Program bafllat›ld›ktan sonra ekranda “E:EE” (bkz. fiekil 2) ibaresi görüntüleniyorsa, s›cakl›k sensör ba¤lant›s›
ayr›lm›flt›r. Yetkili bir teknisyen gözetiminde sensörler dikkatlice kontrol edilmelidir.
Açık Orta
Koyu
700gr
900gr
Açık Orta
fiekil 1
Koyu
700gr
900gr
fiekil 2
Zamanlay›c› butonlar
Ekme¤in yap›m zaman›n› düzenler. “H›zl› piflirme” haricindeki tüm programlar için geçerlidir. Örne¤in; akflam saat
20.30’da malzemeler cihaza koyulmuflsa ve ekme¤in sabah saat 07.00’de haz›r olmas› isteniyorsa; aradaki zaman fark›
10:30 oldu¤u için,10:30 de¤erine ulaflana kadar zamanlama butonlar›na bas›l›r ve makine çal›flt›r›l›r. Söz konusu andan
itibaren makine, ekmek saat 07.00’de haz›r olacak flekilde programlanm›flt›r.
K›zarma seviyesi butonu
‹lgili programlarda aç›k, orta ve koyu renkteki k›zar›kl›k seçimi için kullan›l›r. Söz konusu butona ard› s›ra bas›ld›¤›nda,
seçilen seviye bilgi ekran›nda aç›k, orta ve koyu olmak üzere görüntülenmektedir.
-4-
Ekmek Yapma Makinası
Sinbo SBM 4705
Bafllat/Durdur butonu
Butona 1 saniye kadar bas›ld›¤›nda, bip sesinin ard›ndan (:) iflareti ekrana gelir ve program çal›flmaya bafllar. Benzer
flekilde, butona 2 saniye kadar bas›ld›¤›nda, bip sesi ile birlikte program sonland›r›l›r.
Somun ebad› butonu
Ekmek yapma makinesi çal›flt›r›ld›¤›nda, somun boyutu gevrek ekmek için ayarl›d›r. Normal piflmifl somunlar için (700
ve 900 gr. büyüklüklerinde) somun ebad› butonuna bir kez bas›n›z.
Menü butonu
Ekran panosunda 1-12 aras› farkl› piflirme programlar›ndan birinin seçilmesi için kullan›l›r.
Açma Butonu
Kapa¤›n aç›l›p kapanmas›n› sa¤lar.
1. Normal Ekmek
2. Frans›z Ekme¤i
3. Kepekli Ekmek
4. H›zl› Piflirme
5. Tatl› Ekmek
6. Çok H›zl› -1
7. Çok H›zl› -2
8. Hamur
9. Reçel
AÇIK ORTA KOYU 700gr 900gr
Bafllat
10. Kek
11. Sandviç
12. F›r›nlama
SÜRE
Durdur
SÜRE
MEN
Ü
SOMUN
BOYUTU
a
arm
Kız iyesi
Sev
AÇMA
PROGRAM TANIMLARI
Menü butonu ile afla¤›daki program türleri seçilebilir:
1. Normal Beyaz Ekmek
(3:00 ve 2:53) Beyaz ekmek yap›m› içindir. Ayr›ca di¤er çeflit ekmekler içinde bu program kullan›labilir. 700 gr ekmekler
için süre 2 saat 53 dakika.900 gr ekmekler için süre 3 saattir.
2. Frans›z Ekme¤i
(3:50 ve 3:40) Özelli¤i daha uzun zamanda yo¤urmas› ve piflirmesidir. Beyaz ekmekten daha aç›k bir renge sahiptir. Daha
yumuflak bir ekmek elde edilir. 700 gr ekmekler için süre 3 saat 40 dakika. 900 gr ekmekler için süre 3 saat 50 dakikad›r.
3. Kepekli Ekmek
(3:40 ve 3:32) Belirli miktarlarda kepek içeren ekmeklerin yap›m› için bu program kullan›l›r. Bu programda, kepe¤in suyu
emmesini ve genleflmesini sa¤lamak için, uzun bir mayalama süresi vard›r. Bu programda iken, verimsiz sonuçlar
verebilece¤inden, zamanlay›c› butonlar› ile zamanlama yap›lmas› tavsiye edilmez. 700 gr ekmekler için süre 3 saat 32
dakika.900 gr ekmekler için süre 3 saat 40 dakikad›r.
4. H›zl› Piflirme
(Çabuk Ekmek) (1:40) K›sa zamanda yap›lmak istenen beyaz ekmekler için kullan›l›r. Bu programda, yo¤un k›vaml› ve
küçük bir ekmek elde edilir.
5. Tatl› Ekmek
(2:55 ve 2:50) Normal ayarlarla yap›lanlardan daha gevrek tatl› ekmekler piflirmek için kullan›l›r. Gevrek ekmek kabu¤u,
flekerin yanmas› ile oluflur. 700 gr ekmekler için süre 2 saat 50 dakika.900 gr ekmekler için süre 2 saat 55 dakikad›r.
6. Çok H›zl›-1
700 gr boyutundaki ekme¤in yo¤urma, kabartma ve piflirme ifllemlerini çok k›sa bir sürede gerçeklefltirir. Ç›kan ekmekler
fazla kabaramaz, yumuflak ve beyaz renkte olur.
7. Çok H›zl›-2
900 gr. boyutundaki ekme¤in yo¤urma, kabartma ve piflirme ifllemlerini çok k›sa bir sürede gerçeklefltirir. Ç›kan ekmekler
fazla kabaramaz, yumuflak ve beyaz renkte olur.
8. Hamur (1:30)
Bu ayarlama seçene¤i ekme¤i piflirmez, sadece hamur yapar. Hamur, haznesinden ç›kart›l›r ve sandviç, pizza vb. flekillerde
haz›rlan›r. Bu program ile, her türlü hamur elde edilebilir. Hamur katk›lar›n›n 900 gram› aflmamas›na dikkat edilmelidir.
-5-
Ekmek Yapma Makinası
Sinbo SBM 4705
9. Reçel (1:20)
Meyve çeflitlerinden elde edilecek reçellerin haz›rlanmas›nda bu program kullan›l›r. Katk› malzemelerinin miktar›n›
artt›rmay›n; reçelin piflirme tavas›nda kaynay›p, kenarlardan taflarak cihaz›n iç haznesine dökülmesine engel olun. Böyle
bir fley olursa, öncelikle cihaz› durdurun. Tavay› dikkatli bir flekilde kald›r›n, biraz so¤umas›n› bekledikten sonra da
temizleyin.
10.Kek (2:50)
Bu ayar, malzemeleri kar›flt›racak ve sonras›nda belli bir süre için piflirecektir. Malzemelerin, makineye eklenmesinin
öncesinde; iki grup katk› malzemesinin farkl› kaplarda kar›flt›r›lmas› gerekmektedir (kek tariflerine bak›n›z).
11. Sandviç (3:00 ve 2:55)
Hafif k›vamda, ancak daha yumuflak ve sandviç ekme¤i lezzetinde piflirir. 700 gr ekmekler için süre 2 saat 55 dakika.900
gr ekmekler için süre 3 saattir.
12. F›r›nlama (1:00)
Bu ayar, sadece piflirme ifllemi için olup, seçilen ayarlardaki piflirme süresini artt›rmak için kullan›l›r. Bu fonksiyon,
reçelleri ve marmelatlar› k›vama sokma ifllemleri için de oldukça yararl›d›r. Çal›flmaya bafllad›¤›nda, ayarl› süre minimum
1 saattir (1:00) ve 1’ er dakikal›k aral›klarla afla¤›ya do¤ru düfler.
F›r›nlama (ekstra piflirme) ifllemini tamamlad›ktan sonra, bu fonksiyonu “durdur” butonuna basarak kapatmal›s›n›z.
Piflen ekme¤i ya da reçeli, ilk 10 dakikan›n sonras›nda ve daha sonraki 10’ar dakikal›k aral›klarda kontrol etmeniz önerilir.
Zamanlay›c› ayar butonuna bas›larak, piflirme süresi 10’ar dakikal›k birimler fleklinde artt›r›labilir. F›r›nlama program›,
baflka bir program›n bitiflinin ard›ndan dinlendirilmeden hemen seçildi¤inde, ekranda “H:HH” ibaresi görünüyorsa; kapa¤›
aç›p tavay› ç›kar›n ve 10 dakika boyunca so¤umas›n› sa¤lay›n. So¤uduktan sonra, piflirme tavas›n› ve içeri¤ini hazneye
yerlefltirip program› ayarlay›n ve “bafllat” butonuna bas›n.
C‹HAZIN KULLANIMI
• Ba¤lantı veya Montajın Nasıl Yapılaca¤ını Gösterir fiema ile Ba¤lantı veya Montajın Kimin Tarafından Yapılaca¤ına
(tüketici, yetkili servis) iliflkin bilgiler
Cihaz›n›zla birlikte gelen aksesuarları kolayl›kla kendiniz tak›p ç›kartabilirsiniz.
Olası bir arıza durumunda cihazın içini açmayınız. En yak›n yetkili servise baflvurunuz.
1) Piflirme tavas›n›n d›flar› ç›kar›lmas›
Cihaz›n kapa¤›n› açt›ktan sonra, piflirme tavas›n› kulpundan tutup saat yönünün tersine çevirerek ç›kart›n ve çal›flaca¤›n›z
yüzeye b›rak›n (Katk› malzemelerinin tava d›flar›dayken konulmas›, cihaz›n ›s›t›c› ekipmanlar›n›n bulundu¤u hazneye
dökülmemesi aç›s›ndan önemlidir).
2) Yo¤urma b›ça¤›n›n tak›lmas›
Yo¤urma b›ça¤›n› iterek dönme aks› üzerine yerlefltirin.
3) Malzemelerin ölçülmesi
Gereken malzemeleri ölçün ve listedeki s›ras›na uyarak piflirme tavas›n›n içerisine birer birer ekleyin (Ayr›nt›l› bilgi için
ilerleyen sayfalardaki “Malzemelerin ölçülmesi” bölümünü inceleyin).
• Tavaya ekledi¤iniz mayan›n, su ya da di¤er s›v›lar ile temas etmemesine dikkat edin; aksi takdirde maya hemen aktif
hale gelmeye bafllayacakt›r.
• 21-28 ˚C civar›nda ›l›k su kullan›n (yaz›n so¤uk, k›fl›n ›l›k su).
4) Tavan›n yerine tak›lmas›
Tavay› makinenin içerisine yerlefltirin ve saat yönünde çevirerek oturmas›n› sa¤lay›n.
Bu ifllemin ard›ndan kapa¤›n› kapat›n.
5) Fiflin tak›lmas›
Fifli prize takt›¤›n›zda, cihaz otomatik olarak normal ekmek yapma menüsüne ve normal süreye ayarlanacakt›r.
• Cihaz üzerindeki herhangi bir butona bas›ld›¤›nda, butonun çal›flt›¤›na dair bir “bip” sesi duyulur.
-6-
Ekmek Yapma Makinası
Sinbo SBM 4705
6) Program›n seçilmesi
Menü butonuna bas›larak cihaz üzerindeki 12 farkl› programdan biri seçilir.
7) Somun büyüklü¤ünün seçilmesi
Somun ebad› butonuna bas›ld›¤›nda gevrek ile 700 gr ve 900 gr ebatlar aras›nda seçim yap›l›r. Makine her çal›flt›r›ld›¤›nda,
kendisini, gevrek ekmek ç›karacak flekilde ayarlar.
8) Renk (k›zarma) seviyesinin belirlenmesi
“Renk” butonuna bas›larak, ekme¤in kabu¤unun k›zarma derecesi ayarlan›r. Aç›k, orta ve koyu ayar olarak ayarlanabilir.
9) Zamanlay›c›n›n ayarlanmas›
Makinenin çal›flmaya hemen bafllamas›n› istemiyorsak, ya da ekme¤in belirli bir zamanda haz›r olmas›n› istiyorsak;
zamanlay›c› program› kullanabiliriz.
10) Piflirme iflleminin bafllat›lmas›
Makineyi çal›flt›rmak için “Bafllat/Durdur” butonuna bas›l›r. Kalan süre, birer dakikal›k zaman dilimlerinde düflerek,
ekranda görülür.
11) Çal›flmas›
Ekmek yapma makinesindeki ifllemler, “Piflirme döngü süreleri” bölümündeki program aflamalar› do¤rultusunda otomatik
olarak gerçeklefltirilir. Cihaz›n›z iki kademeli bir yo¤urma ifllemine göre ayarl› ise, bip sinyali vererek, meyve/yemifl gibi
katk› malzemelerinin eklenmesi zaman›n›n geldi¤i konusunda kullan›c›y› uyar›r.
• Piflme ifllemi boyunca cihaz üzerindeki aral›klardan buhar ç›k›fl› olabilir; bu durum gayet normaldir.
12) Piflirme iflleminin sona ermesi
Program tamamlanm›fl ve ekmek piflmiflse; ekranda 0:00 ibaresi görülür ve “bip” sinyali ile kullan›c› uyar›l›r.
13) Il›k tutma ifllemi
Il›k tutma fonksiyonu ile, cihaz içerisindeki s›cak hava, ilave 60 dakika boyunca makine içerisinde dolaflt›r›l›r (bkz. “Piflirme
döngü süreleri” bölümü). ‹yi bir sonuç elde etmek için, piflirme tavas›n› ›l›k tutma süresi içerisinde ya da bafllang›çtaki
piflirme program› bitti¤inde makinenin içerisinden ç›kar›lmal›d›r. Il›k tutma süresi sona erdi¤inde, bip sinyali 10 kez
duyulacakt›r.
14) Tavan›n makineden ç›kar›lmas›
“Durdur” butonuna bas›l›r ve kapak aç›l›r.
UYARI: Oldukça s›cak durumda bulunan piflirme tavas›n› kald›rmak için koruyucu eldiven kullan›lmal›d›r.
15) Ekme¤in tavadan ayr›lmas›
Tava içerisindeki ekme¤in 15 dakika kadar so¤umas›n› bekleyin ve sonras›nda tavay› ters çevirerek taban›na birkaç kez
vurun. Ç›kan ekme¤i, alttan hava alabilece¤i ›zgaral› bir yere koyun. Tavan›n içerisine ›l›k su dökerek, yo¤urma b›ça¤›n›n
dönme flaft›na yap›flmas›n› önleyin.
• Bazen, yo¤urma b›ça¤› ekmek somununun içerisinde kal›r. Bu durumda somunun so¤umas›n› bekledikten sonra cihaz›n
içinden ç›kan çubukla çizmeden ç›kar›n veya yap›flmaz yüzeyinin çizilmemesi için, ahflap ya da plastik bir mutfak gereci
kullan›n.
NOT: Cihaz›n kapa¤›, piflirme ifllemi esnas›nda aç›lmamal›d›r. Bu durum hem ekme¤in kalitesini, hem de kabarma
seviyesini etkiler. Kapa¤› sadece, program›n gerektirdi¤i katk› malzemelerinin eklenmesi s›ras›nda aç›n›z.
UYARI: Kullan›lmad›¤› zamanlarda cihaz›n fiflini prizden çekiniz.
Malzemelerin ölçülmesi
Ekmek yapma makinesini kullan›lmas›ndaki en önemli aflama, kat›lacak olan içeri¤in tam ve do¤ru flekilde ölçülmesidir;
aksi takdirde hofl olmayan piflirme sonuçlar› elde edilebilir. Malzemeler, her bir tarifte belirtildi¤i miktar ve flekilde,
piflirme tavas›na eklenmelidir. S›v› ve kuru malzeme ölçüleri afla¤›daki gibi verilmifltir:
-7-
Ekmek Yapma Makinası
Sinbo SBM 4705
S›v› ölçümleri
Makineyle birlikte verilen kab› kullan›n. Ölçüm kab› düz bir zemine b›rak›lmal› ve s›v›n›n seviye çizgisi ölçüm çizgisine
getirilmelidir. Tariflerin kritik ölçülerini aflabilece¤inden, miktarlar tahmini olarak belirlenmemelidir.
1. S›v›lar (Su, ya¤, süt) 2. Kuru (Un, fleker, tuz) Maya hariç 3. Maya
Kuru malzeme ölçümleri
Kuru malzemelerin ölçümleri; verilen ölçü kab› ve kafl›¤›yla yap›lmal›d›r. Kuru malzemelerin ölçümü, malzemenin, kafl›k
yard›m›yla ölçü kab›na doldurulmas›yla gerçeklefltirilir ve doldu¤unda üzerindeki fazlal›klar b›çakla s›yr›l›r. Eklenecek
olan ekstradan içerik, tarifin ayar›n› bozabilir. Ayr›ca belirtilmedikçe, unu elemeyin. Küçük miktarlardaki muhteviyat›n
(maya, fleker, tuz, süt tozu, bal, pekmez vb.) ölçülmesi s›ras›nda da, verilen ölçüm kafl›¤› kullan›lmal›d›r. Ölçümler
belirtilen seviyelerde olmak zorundad›r,
zira küçük farklar bile tarifin ayar›n› etkileyecektir. Cihazla beraber verilen iki hazneli plastik ölçe¤in büyük olan taraf›
yemek kafl›¤› (tablespoon); küçük taraf› ise tatl› kafl›¤› (teaspoon) olarak hacimlendirilmifltir.
NOT: DENEME VE TECRÜBELER‹N‹ZLE EN ‹Y‹S‹N‹ YAPAB‹L‹RS‹N‹Z.
KULLANIM HATALARINA ‹L‹fiK‹N B‹LG‹LER
Cihazınızı, beyan edilen voltaj ile çal›flt›r›n›z.Bulundu¤unuz yerin voltaj›n›n uygun olup olmad›¤›n› kontrol ediniz.
Güç kablosunun ar›zalanmas› durumunda tehlikelerin önlenmesi için kablo üretici, servis
merkezi ya da benzer bir ehliyetli kifli taraf›ndan de¤ifltirilmelidir. Ar›za durumunda cihaz› kendiniz sökmeye kalk›flmay›n›z,
bak›m merkezimiz ya da sat›fl sonras› hizmet merkezimiz ile ba¤lant›ya geçiniz.
Cihaz› kendiniz onarmaya kalk›flmay›n›z. Meydana gelebilecek ar›zalardan firmam›z kesinlikle sorumlu de¤ildir, ve
cihaz›n›z garanti kapsam› d›fl›nda ifllem görecektir.
TAfiIMA ESNASINDA
• Ürünü düflürmeyiniz,
• Darbelere maruz kalmamas›n› sa¤lay›n›z,
• S›k›flmamas›n›, ezilmemesini sa¤lay›n›z,
• Ambalaj üzerindeki iflaretlemelere uyunuz.
• Orjinal ambalajıyla taflımaya özen gösteriniz.
ÇEVRE VE ‹NSAN SA⁄LI⁄I
Çevre korumas›na siz de katk›da bulunabilirsiniz!
Lütfen yerel düzenlemelere uymay› unutmay›n: Çal›flmayan elektrikli cihazlar›, uygun elden ç›karma merkezlerine
götürün Kullanım sırasında insan ve çevre sa¤lı¤ına tehlikeli veya zararlı olabilecek bir durum söz konusu de¤ildir.
TEM‹ZL‹K VE BAKIM
• Tüketicinin Kendi Yapabilece¤i Bakım, Onarım veya Ürünün Temizli¤ine ‹liflkin Bilgiler
1. UYARI: Elektrik flokuna maruz kalmamak için, temizlik iflleminden önce cihaz›n fiflini prizden çekin.
2. Ekmek yapma makinesinin so¤umas›n› bekleyin.
ÖNEML‹: Elektrik floku oluflabilece¤inden ya da cihaz zarar görebilece¤inden, cihaz›n tümünü veya kapa¤›n› her ne flekilde
olursa olsun herhangi bir s›v›ya dald›rmay›n.
3. D›fl temizlik: Cihaz›n kapa¤›n› ve d›fl yüzeyini nemli ya da hafifçe ›slat›lm›fl bir bezle silin.
4. ‹ç temizlik: Cihaz›n iç k›s›mlar›n› silmek için nemli bir bez ya da sünger kullan›n.
-8-
Ekmek Yapma Makinası
Sinbo SBM 4705
5. Piflirme tavas›: Piflirme tavas›n› ›l›k su ile y›kay›n; sabun kullan›lmas› flart de¤ildir. Yap›flmaz yüzeyin çizilmemesine
özen gösterilmelidir. Piflirme tavas›n›n, cihaz›n iç haznesine yerlefltirilmeden önce, kurumas› beklenilmelidir.
• Piflirme tavas›, ölçüm kab› ve kafl›¤› ile yo¤urma b›ça¤› bulafl›k makinesinde y›kanmamal›d›r.
• Alt ekseni ile çal›flma uyumu bozulabilece¤inden, piflirme tavas› uzun süreler su içerisinde b›rak›lmamal›d›r. Özellikle
tavan›n d›fltan alt k›sm› suya de¤memelidir.
• Tamamen so¤udu¤una emin olduktan sonra, cihaz› kald›rabilirsiniz.
Temizleme ifllemi esnas›nda afla¤›daki malzemeler kullan›lmamal›d›r:
• Boya tineri
• Benzin
• Çelik yünü ped
• Parlat›c› toz
• Kimyasal toz bezi
Yap›flmaz yüzey için ihtimam gösteriniz. Kaplamaya zarar vermekten kaç›n›n; ›spatula, çatal ya da b›çak gibi metal
ekipmanlar kullanmay›n. Uzun süre kullan›ld›¤›nda tavan›n kaplama rengi de¤iflebilir; bu durum sadece nem ve buhardan
kaynaklanmakta olup, cihaz›n performans› ile ekmeklerin kalitesini etkilemez. Yo¤urma b›ça¤›ndaki delik temizlenmeli;
sonras›nda bir damla piflirme ya¤› eklenerek tava içerisindeki dönme aks›na geri tak›lmal›d›r. Bu ifllem, b›ça¤›n yap›flmas›n›
önleyecektir.
• Cihaz üzerindeki delik ve aç›kl›klar›n toz ile dolmas›n› engelleyiniz. Cihaz›n saklanmas› Üzerindeki gözetleme penceresi
dahil tüm parçalar›n kurumufl oldu¤una emin olduktan sonra, cihaz› kald›rabilirsiniz. Kapa¤›n üzerine de herhangi bir
fley konulmamal›d›r.
BAKIM
• Periyodik Bakım Gerektirmesi Durumunda, Periyodik Bakımın Yapılaca¤ı Zaman Aralıkları ile Kimin Tarafından
Yapılması Gerekti¤ine ‹liflkin Bilgiler
Cihaz periyodik bak›m gerektirmez.
Her kullan›mdan sonra temizli¤inin düzenli olarak yap›lmas›nda fayda vard›r.
MERAK ED‹LEN SORU VE CEVAPLAR
SORU 1: Ekme¤in flekli ve yüksekli¤i de¤iflik olabilir mi?
CEVAP1: Evet olabilir. Bu durum oda s›cakl›¤›na ba¤l› olarak de¤iflir. Afl›r› s›cak ve so¤uk ortamlarda ekmek fazla
kabarabilir yada istenilen kabarma olmayabilir. Ayr›ca ekmek içine kat›lan meyve, ceviz, hububat vs. malzemeler ölçüler
d›fl›nda fazla miktarda kat›l›rsa buda ekme¤in görünüfl ve yüksekli¤ini etkiler. Kulland›¤›n›z malzemeleri hassas olarak
ölçün ve taze olmas›na dikkat edin. Kepekli ekmekler hep daha küçük oluyor.Neden? Kepekli ekmeklerin normal
ekmeklere nazaran daha küçük ve yo¤un olmalar› gayet normaldir. Kepekli unlar beyaz ekmek unlar›na göre daha a¤›r
olduklar› için, ekmek yap›m süreci esnas›nda di¤erleri kadar kabarmazlar.
SORU 2: Ekmek niye kabarm›yor?
CEVAP2: Maya koymay› unutursan›z veya kar›flt›rma kancas›n› yerine takmadan ekmek yaparsan›z ekmek kabarmaz.
Maya yetersiz ve bayatsa ekmek kabarmaz ve küçük kal›r. Özellikle mayan›n cinsine, miktar›na ve taze olmas›na dikkat
ediniz. Son kullanma tarihi geçen ve paketi uzun süre aç›k kalan mayay› kullanmay›n›z.
SORU 3: Ekmek neden kötü kokuyor?
CEVAP 3 : Çok fazla maya veya bayat malzemeler kullan›ld›¤›nda ekmekte kokuya neden olur. Özellikle h›zl› ekmek
program›nda fazla maya kullan›ld›¤› için koku oluflabilir.
SORU 4: Ekme¤in ortas›nda neden boflluk oluflabilir?
CEVAP 4: Yo¤urma esnas›nda burada hava birikmifltir. Mayalanma esnas›nda bu gaz ç›kmam›flsa ekmek bu hava ile
beraber piflmifltir.
SORU 5: Kar›flt›rma kancas› ekmekle beraber d›flar› ç›kabilir mi?
CEVAP 5: Bu normaldir. Kancay›, plastik veya çizmeyen bir nesne kullanarak ekme¤in içinden ç›karabilirsiniz.
SORU 6: Neden saat ayar› yaln›z 4 saatten 13 saate kadar ayarlan›yor?
CEVAP 6: Bütün ifllem en az 3:00 saattir. Saat ayar› 13 saatten fazla oldu¤unda herhangi bir malzeme bozulabilir.
SORU 7: Tarifteki miktarlar›n yar›s› veya bir misli fazlas› uygulanabilir mi?
CEVAP 7: Hay›r. Tarifteki miktarlar›n aynen uygulanmas›na ve malzemelerin hassas bir flekilde ölçülmesine dikkat ediniz.
-9-
Ekmek Yapma Makinası
Sinbo SBM 4705
SORU 8: Saat ayar› kullan›nca geceleyin ses ç›kar m›?
CEVAP 8: Evet. Gece hamuru yo¤ururken motorun sesini duyabilirsiniz.
SORU 9: Ekmek yap›m› bittikten sonra tekrar çal›flt›rmak istedi¤imizde çal›flm›yor ve sürekli sinyal sesi duyulup ekranda
HHH harfi ç›k›yorsa ne yap›labilir?
CEVAP 9: Cihaz s›cak oldu¤u için çal›flmaz. Önce bafllatma/durdurma tufluna bas›n ve cihaz› kapat›n, makinenin kapa¤›n›
aç›p ekmek kal›b›n› d›flar›ya ç›kart›n ve so¤umas›n› bekleyin.
SORU 10: Bafllatma tufluna bas›ld›¤›nda göstergede LLL harfi ç›k›yor ve sinyal sesi duyuluyorsa ne yapmal›y›z?
CEVAP10: Ortam s›cakl›¤› makinenin çal›flmas› için yeterli olmay›p cihaz çal›flmamaktad›r. Bafllatma/durdurma tufluna
basarak cihaz› kapat›n. Bulundu¤u yerden daha s›cak bir ortamda bekletin.
‹deal ortam s›cakl›¤› (15 ˚C-25 ˚C) aras›d›r.
SORU 11: Bafllatma tufluna bas›ld›¤›nda göstergede EEE harfi ç›k›yor ve sinyal sesi duyuluyorsa ne yapmal›y›z?
CEVAP11: Oda s›cakl›¤› çok yüksek oldu¤u için cihaz çal›flmaz. Bafllatma/durdurma tufluna basarak cihaz› kapat›n.
Bulundu¤u yerden daha serin bir ortamda bekletin.
SORU 12: Ekme¤in d›fl yüzeyi ve alt k›sm› neden nemli olabilir?
CEVAP12: Ekmek beklemesi gereken sürenin d›fl›nda çok fazla cihaz içinde kapal› bir flekilde beklemiflse içerdeki buhar
d›flar› ç›kamad›¤› için ekme¤in nemli olmas›na neden olmufltur. Ekme¤i ç›kar›p bir ›zgara üzerinde bekletirseniz normal
halini alacakt›r.
SORU 13: Ekmek bittikten sonra göstergede (0:00) gösterip sinyal sesi duyuluyorsa ne yapmal›y›m?
CEVAP13: Bu sinyal sesi ekme¤in bitti¤ini ve s›cak tutma program›n›n devreye girdi¤ini gösterir. ‹sterseniz cihaz› kapat›p
ekme¤inizi ç›karabilirsiniz.
SORU 14: Piflirme esnas›nda hafif bir yan›k kokusu ve duman ç›k›yorsa ne yap›labilir?
CEVAP14: Kal›p makine içindeyken malzeme konursa, cihaz›n ve rezistans›n üzerine dökülen kal›nt›lar piflirme esnas›nda
duman oluflmas›na ve kokuya neden olur. Malzemeleri ekmek kal›b›n› d›flar›ya ç›kartt›ktan sonra s›rayla koyunuz.
SORU 15: Ekme¤in d›fl yüzeyi bazen unlu kalabiliyor, bu neden kaynaklan›r?
CEVAP15: Bazen un yetersiz kondu¤unda hamur kal›ba yap›fl›r bu durumda un ilavesi gerekir. Daha sonradan ilave edilen
unu kal›b› çizmeyen nesnelerle destekleyebilirsiniz. Böylece kal›p kenarlar›nda un kalmaz.E¤er ilave edilen unu
desteklemeyi unutursan›z, ekme¤in d›fl yüzeyinde oluflan unlu k›sm› keskin bir b›çak yard›m›yla kesebilirsiniz.
SORU 16: Ekme¤i pifltikten sonra nas›l muhafaza edebilirim?
CEVAP16: Ekme¤in piflme ifllemi bitince bir ›zgara üzerinde so¤umas›n› bekleyin. S›cakken ekme¤i keserseniz fleklinin
bozulmas›na ve hamurlaflmas›na neden olursunuz. Ayr›ca kesme ifllemini keskin bir b›çak veya elektrikli b›çakla
yapabilirsiniz. Ekmekleri ister bir bütün istenirse dilimlenmifl olarak hava almayacak bir konumda bekletiniz. Buzdolab›nda
muhafaza edebilirsiniz. makinenin f›r›n program›n› kullanarak ekme¤inizi 15-20 dakika ›s›t›p tüketebilirsiniz.
SORU 17: Elektrik kesildi¤inde ne yapmal›y›m?
CEVAP 17: Uzun süreli elektrik kesintilerinde, yo¤urma esnas›nda ise program› tekrar çal›flt›r›n. Mayalanma bafllang›c›nda
ise tekrar çal›flt›rmay›n ve mayalanmas›n› bekleyin, mayalanm›fl hamuru program seçimi tuflundan f›r›n› seçerek piflirin.
Piflme esnas›nda ise tekrar f›r›n› çal›flt›r›n ve piflmesi gereken zaman kadar piflirin.
SORU 18: Hamur kar›flm›yor, motordan pürüzlü sesler geliyor!
CEVAP 18: Yo¤urma b›ça¤› veya piflirme tavas› düzgün bir flekilde yerlefltirilmemifl olabilir. Tavan›n, cihaz›n iç hazne
taban›na nizami flekilde temas etti¤inden emin olun ve yerine oturarak “klik” sesinin gelmesini sa¤lay›n.
SORU 19: Taze süt ile piflirmelerde zamanlay›c› fonksiyonunu niçin kullanmamal›y›m?
CEVAP 19: E¤er makinedeki bekleme süresi çok uzunsa, süt bozulacakt›r. Süt ve yumurta gibi h›zl› tüketim malzemelerinin
oldu¤u tariflerde uzun süreli zamanlama fonksiyonlar› kullan›lmamal›d›r.
SORU 20: Malzemeleri, piflirici tavaya neden belirli bir s›rada eklemeliyim?
CEVAP 20: Bu durumda ekmek yapma makinesi, içerikleri en etkili flekilde kar›flt›rabilme imkan› bulur. Bu ayn› zamanda,
yo¤urma ifllemi öncesinde (bilhassa uzun süreli zamanlay›c› ayarlar›nda) maya ile s›v›lar›n temas etmelerini önler.
- 10 -
Ekmek Yapma Makinası
Sinbo SBM 4705
SORU 21: Piflirme tavas›nda s›k›flan yo¤urma b›ça¤›n› d›flar› nas›l ç›karabilirim?
CEVAP 21: Yo¤urma b›ça¤›, piflirme iflleminden sonra yerine yap›flabilir. Il›k veya s›cak suyu b›ça¤›n üzerinde dökerseniz,
b›çak ç›kar›lmaya müsait hale gelecektir. E¤er hâlâ yerinden ç›km›yorsa, 30 dakika boyunca s›cak suda bekletiniz.
SORU 22: Piflirme tavas›n› bulafl›k makinesinde y›kayabilir miyim?
CEVAP 22: Hay›r. Piflirme tavas› ve yo¤urma b›ça¤›n› elde y›kamal›s›n›z.
SORU 23: Üzüm, kuruyemifl vb. çeflnileri ekme¤e ne zaman kataca¤›m› nereden bilece¤im?
CEVAP 23: ‹kinci yo¤urma döngüsüne girilirken, üzüm, kuruyemifl vb. malzemeleri ekleyebilece¤iniz konusunda uyaran
ve 10 kez öten bir bip sinyali verilir. Bu esnada katabilirsiniz.
SORU 24: Ekmek kabard›ktan bir süre sonra, ortas› çökebiliyor ya da tamam› sönüyor. Neden?
CEVAP 24: Ekmek çok fazla kabarm›fl olabilir. Kabarma oran›n› düflürmek için maya miktar›n› azalt›n. Yada hamurun
k›vam› c›v›ksa(yani su oran› fazla kat›lm›flsa) ekmek çökebilir,malzemeleri belirtilen oranlarda kullan›n›z.
SORU 25: Piflirme tavas›na at›lacak olan malzemelerin oda s›cakl›¤›nda olmalar› önemli midir?
CEVAP 25: Malzemeler ne çok s›cak, ne de çok so¤uk; k›sacas› oda s›cakl›¤›nda olmal›d›r. 21-28 ˚C s›cakl›¤›nda su
kullan›lmal›d›r.
SORU 26: Maya ile suyu daha önceden kar›flt›rabilir miyim?
CEVAP 26: Kesinlikle hay›r. Maya, kuru tutulmal› ve unun hemen üzerine dökülmek suretiyle piflirme tavas›na en son
kat›lan malzeme olmal›d›r. Bilhassa, zamanlay›c› fonksiyonu ile piflirmenin ertelenece¤i durumlarda bu konunun önemi
daha da artar.
SORU 27: Ekmeklerimin içine yulaf ezmesi, kabak çekirde¤i, f›st›k vb. çeflniler ekledim; ama ekme¤im çok kuru oldu.
Neden?
CEVAP 27: Ekmek hamuruna ekleyece¤iniz kuru malzemeleri, 1 saat öncesinden suda ›slat›n ve nemlenmelerini sa¤lay›n.
Bu metodu uygulamazsan›z, ekleyece¤iniz çeflniler, hamurun suyunu çekerler ve bu da kuru, susuz bir hamura ve kötü
ekmeklere sebep olur. Ayr›ca, kullan›m k›lavuzunun ilgili bölümlerinde de belirtildi¤i gibi, bu tür malzemeleri hamura
ikinci yo¤urma evresinde eklemelisiniz.
SORU 28: Ekme¤in içi çok yo¤un; içerisinde hiç gözenek ya da boflluk yok. Ekme¤e bast›r›nca, içi yap›fl›yor. Neden?
CEVAP 28: Ekme¤in içinde de¤iflik hacimlerde gözenekler olmal›d›r; ama bu, una ve ekme¤in cinsine göre de¤iflecektir.
Ekme¤e bast›rd›¤›n›zda, ekmek yap›flmamal›, eski haline geri dönmelidir. Yap›fl›k kal›yorsa, hamur muhtemelen yeterince
kar›flt›r›lmam›fl, piflirilmemifl veya mayalanmas› için gerekti¤i kadar bekletilmemifltir. Kulland›¤›n›z ekmek yapma
makinesinde -normal flartlarda- böyle durumlarla karfl›laflmazs›n›z; sorun muhtemelen, malzeme ve miktarlar›n›n iyi
ayarlanmamas›ndan kaynaklanmaktad›r.
SORU 29: Yapt›¤›m ekme¤in içi, f›r›ndan ald›¤›m ekmekler gibi beyaz de¤il; sar›ms› bir renkte.
CEVAP 29: Ekme¤in iç rengi aç›k sar›ms› olmal›d›r; bunun için, kimyevi maddelerle beyazlat›lmam›fl sar›ms› beyaz bu¤day
ekmek unu kullan›lmas› idealdir. Ekmek içi gözenekleri mat de¤il, parlak olmal›d›r.
- 11 -
(EN) English / Bread Maker
Sinbo SBM 4705
SINBO SBM 4705 BREAD MAKER
INSTRUCTIONS MANUAL
IMPORTANT SAFETY INSTRUCTIONS
General safety measures shall be followed while operating this machine as well as all electrical appliances. In addition
to personal injury there is a risk of damaging the device and impairing the features of the devices. These two issues are
specified with the following phrases:
CAUTION: Risk of personal injury
IMPORTANT: Risk of damaging the device
Also, the following safety recommendations shall be observed.
Position of the Appliance
• Do not place the device on the edge of worktops.
• Operate the device on level and stable surfaces.
• Do not use the appliance outdoors.
Cables
• The cable shall reach to the device from the socket without tensioning the connection points.
• Do not let the mains cable hang over the edge of worktops and keep it out of children's reach.
• Do not keep the cable stretched between the socket and an open surface (for instance, between a socket located at a
low level and table).
• Do not place the cable on hot surfaces which can damage it.
Safety measures;
CAUTION: Do not touch hot surfaces! Use oven gloves to lift the hot cooking pan. Do not cover the steam vents.
CAUTION: Avoid contacting moving parts!
• Do not immerse the appliance, cable and plug in water or other liquids.
• Pay utmost attention when carrying appliances which have hot content in them.
• Do not use the bread maker to store utensils; do not keep kitchen utensils inside the appliance to avoid any risk of fire
or electric shock.
• Do not operate the appliance with wet or moist hands.
Children
Never allow children to use this appliance. When left unattended while appliances are running and cooking process is
being carried out, children can be exposed to risks.
Teach the children about the risks contained in kitchen and warn them not to attempt to reach areas which they cannot
see properly.
OTHER SAFETY ISSUES
• Do not operate the appliance if the power cable is damaged for any reason. Refer to the nearest technical service center
to replace the cable with the original spare one.
• Do not use accessories with the appliance since they may damage the appliance.
• Do not place the appliance on or near gas/electric burners or hot ovens.
• Do not place the cooking pan or any other item on the appliance to avoid damaging the appliance.
• Do not use scouring pads for cleaning. Do not wash cooking pan, kneading blade, scale cup or spoon in the dishwasher.
• Protect the appliance and cable against heat, direct sunlight, humidity, sharp objects etc.
• Place the cooking pan properly before operating the appliance.
• Always remove the plug from the socket whenever the device is not in use, when attaching accessories to the device,
cleaning the device or whenever a trouble occurs. To unplug the appliance hold the plug and do not pull the cable.
KNOWING YOUR S‹NBO BREAD MAKER
You can cook tasty, hygienic and healthy breads with S‹NBO bread makers. Cooking bread will not be a hassle since this
computer assisted appliance will do most of the work for you.
Bread Maker is as easy as the following three steps:
1. Add the ingredients.
2. Choose the suitable program from the menu and press start button.
3. Wait until the bread is ready.
- 12 -
Bread Maker
Sinbo SBM 4705
Note: Do not stop the appliance while cooking process is going on. Capable of cooking varieties of bread in addition to
wholemeal bread, this appliance enables you to prepare dough for your sandwiches and pizzas and to cook cakes and
jams. Everything is easy and as tasty as a homemade dish.
Things that you should know prior to the first use
Take a few minutes to read this manual before operating the appliance and keep the manual in a safe place for future
reference. Pay duly attention to observe the safety instructions.
1. Unpack the bread maker carefully and remove all packaging material.
2. Clean off the dust which may have occurred during packaging.
3. Wipe the cooking pan, kneading blade and outer surface of the bread maker with a clean and damp cloth. Surface of
the cooking pan is coated with a non-stick material. Never apply scouring pads or any adhesive material on any part of
the bread maker.
4. Lubricate the cooking pan with oil, butter or margarine before using it for the first time.
5. Clean it once more.
6. Fix the kneading blade on the shaft of the cooking pan.
Note: Some of the components of the device are lubricated during manufacturing. Therefore, it is normal that small
amount of smoke is produced when the device is operated for the first time.
FEATURES
Operating the timer
The bread is preferred to be ready at a later hour timer settings can be used. Maximum timer setting is 13 hours.
Availability of these settings according to the problems are referred in “Cooking cycle times” section. These settings
shall not be used while applying recipes which include ingredients that can spoil easily such as eggs, fresh milk, sour
cream or cheese.
1. Upon deciding the time to have the bread ready, calculate the time difference between the current time and target
time. For instance, if you like to have the bread ready at 08:00 in the morning and the current time is 19:30; the time
difference in between is 12 hours and 30 minutes. Therefore, timer buttons will be used until 12:30 digits appear on the
information display.
2. The time is entered by time digit increase and decrease buttons. Timer buttons enable you to increase and decrease
the value in 10 minute periods. When “Start” button is pressed “:” symbol will start to flash.
3. If the time information you have entered is incorrect keep “stop” button pressed for 2 seconds. Timer setting will be
cancelled and normal program will be restored. Repeat steps 1 and 2 to specify the time again.
4. Timer setting can be adjusted up to 13 hours. This time includes the period from the completion of the cooking process
of the bread and being ready to eat.
Warning signal tone
Warning signals are heard in the following conditions:
• When a button is pressed.
• When ingredients such as wheat, fruit, nuts etc. are required to be added to the dough prior to the second kneading
phase. Open the lid of the appliance to add the ingredients and close the lid again.
• When the program is completed
• When keep warm time has elapsed.
Power cut offs
After a short power cut off:
• Press “start” button in the case that the program has not entered the rising stage yet; this way, the appliance continues
to run the automatic repeat function again.
• In the case that the power failure occurs during rising stage, the dough is left for fermentation and rising; then the
baking program is selected to resume baking the risen dough. This way the dough does not spoil.
Ambient temperature
Bread maker can operate in environments with different temperature levels; however, sizes of breads cooked in a warm
room and a cold room can vary. Recommended ambient temperature is at the range of 15-34°C.
Power Requirement
Ensure that the voltage rating printed on the appliance corresponds to the AC (alternative current) mains supply at your
house. In the case that the sockets in your house are not compatible with the plug of the device, the plug can be replaced
with the compatible one.
CAUTION: This appliance shall only be used with an earthed socket.
- 13 -
Bread Maker
Sinbo SBM 4705
Cleaning and Maintenance of the Appliance
1. CAUTION: Unplug the appliance before cleaning in order to avoid electric shock hazard.
2. Let the bread maker to cool down.
IMPORTANT: Never immerse the device or its lid in any liquid to avoid electric shocks and damage to the appliance.
3. Exterior cleaning: Wipe the lid and external surface of the appliance with a damp or slightly wet cloth.
4. Interior cleaning: Use a damp cloth or sponge to wipe the interior of the appliance.
5. Cooking pan: Wash the cooking pan with lukewarm water; it is not obligatory to use soap for cleaning. Take care not
to scratch the non-stick surface. Let the cooking pan to dry before inserting it inside the housing of the appliance.
• Cooking pan, measuring scale and spoon and kneading blade shall not be cleaned in dishwasher.
• Cooking pan shall not be immersed in water for extended periods since operating problems may occur with the bottom
axis. Especially, the outer bottom part of the pan shall not contact with water.
• You can store the appliance after it has completely cooled down.
Do not use following chemicals for cleaning:
• Painting thinner
• Gasoline
• Steel wool pad
• Buffing powder
• Chemical dust cloth
Be careful when cleaning the non-stick surface. Avoid damaging the coating and do not use metal utensils such as
scraper, fork or knife. Color of the coating of the pan may change upon long term use, however, this is only caused by
humidity and steam and does not impair the performance of the appliance or the quality of the bread. The opening on
the kneading blade shall be cleaned and attached to the rotating axle in the pan upon lubricating with a drop of edible
oil. This process prevents the blade from sticking.
• Avoid the holes and openings of the appliance to be clogged with dust.
Storing the appliance
You can store the appliance after all parts including the viewing window are completely dry. Do not place anything on
the lid.
Steam Discharge Rack: It is inserted in the bottom slot on the front part of the device.
Bar: It is used to remove the blade from the bread in case it is stuck into it.
Control Panel Buttons, Information Display and Functions
Information display overview;
• Indicates the selected crust color level.
• Indicates the selected weight.
• Indicates the selected program number.
• Indicates the remaining time of the cooking process.
For instance (3:20 means “3 hours 20 minutes left”; 0:20 means “20 minutes left”).
• Indicates the temperature warning (See “Troubleshooting” section).
Warning display
1. In the case that “H: HH” is displayed on the screen (See Figure 1) upon starting the program, interior temperature is
very high. In this case the program shall be stopped. The lid shall be opened and the appliance shall be left to cool down
for 10-20 minutes.
2. In the case that In the case that “E: EE” is displayed on the screen (See Figure 2) upon starting the program, there is
temperature sensor connection failure. Sensors shall be checked carefully by an authorized service technician.
- 14 -
Bread Maker
Sinbo SBM 4705
Light Medium Dark
700gr
900gr
Light Medium Dark
Figure 1
700gr
900gr
Figure 2
Timer buttons
They adjust the bread cooking time. It is available for all programs except for “Fast cooking”. For instance; in the case
that ingredients are placed in the appliance at 20:30 in the evening and the bread is required to be ready at 07:00 in the
morning; timer buttons are pressed until the value of 10:30 is achieved since the time difference in between is 10:30 and
the appliance is operated. The appliance is programmed to make the bread ready at 07:00 following that hour.
Crust color button
It is used for selecting light, medium and dark crust options in the concerning programs. When the button is pressed
repeatedly the selected level is displayed on the information screen as light, medium and dark.
Start/Stop button
When the button is pressed for 1 second (:) symbol is displayed on the screen after beep sound and the program starts
to operate. Similarly, when the button is pressed for 2 seconds the program is terminated with beep sound.
Loaf size button
When the bread maker is operated the loaf size is adjusted for crispy bread. For regularly baked loafs (700 and 900 g.
sizes) press loaf size button for once.
Menu button
It is used to select one of the different cooking programs ranging 1-12.
Opening Button
Used to open and close the lid.
1. Basic
2. French
3. Whole wheat
4. Quick
5. Sweet
6. Ultra Fast -I
START
7. Ultra Fast -II
8. Dough
9. Jam
LIGHT MEDIUM DARK 700gr 900gr
10. Cake
11. Sandwich
12. Bake
TIME
STOP
TIME
ME N
U
LOAF
SIZE
OR
COL
UNLOCK
Program Definitions
Following program types can be selected using the menu button.
1. Basic
(3:00 and 2:53) is used for baking regular white bread. This program can also be used for other types of breads. Cooking
time is 2 hours and 53 minutes for 700 g loaf and 3 hours for 900 g loaf.
- 15 -
Bread Maker
Sinbo SBM 4705
2. French
(3:50 and 3:40) Its specialty is longer kneading and cooking time. It has a lighter color compared to white bread. Has a
softer texture. Cooking time is 3 hours and 40 minutes for 700 g loaf. Cooking time is 3 hours and 50 minutes for 900 g
loaf.
3. Whole Wheat
(3:40 and 3:32) This program is used to cook breads which contain specific amount of wheat skin. This program employs
a longer rising period to soak wheat skin with water and expand it. Timing adjustments are not recommended using
timer buttons in this program since the results will be unfavorable. Cooking time is 3 hours and 32 minutes for 700 g
loaf and 3 hours and 40 minutes for 900 g loaf.
4. Quick
(Quick Bread (1:40) Used for cooking white bread in a short time. This program is used to cook denser and smaller bread.
5. Sweet
(2:55 and 2:50) Used for cooking bread that is crispier and sweeter compared to the ones cooked with normal settings.
Caramelized sugar gives a crispy crust to the bread. Cooking time is 2 hours and 50 minutes for 700 g loaf and 2 hours
and 55 minutes for 900 g loaf.
6. Ultra Fast -I
Kneading, rising and baking processes for a 700 g loaf are completed in a short time. Cooked bread does not rise too
much, becomes soft and white.
7. Ultra Fast -II
Kneading, rising and baking processes for a 900 g loaf are completed in a short time. Cooked bread does not rise too
much, becomes soft and white.
8. Dough (1:30)
This setting option is only used for kneading dough and not used for cooking bread. The dough is removed from the pan
and shaped into sandwiches, pizza etc. All types of dough can be obtained using this program. Quantity of ingredients
shall not exceed 900 grams.
9. Jam (1:20)
This program is used to prepare jam using fruit. Do not exceed the maximum amount of ingredients and avoid the jam
to boil in the bread pan and to leak in the housing of the device due to overflowing. Stop the device in such case. Lift the
pan carefully and clean it when it cools down to a certain extent.
10.Cake (2:50)
This setting mixes the ingredients and cooks them for a certain while. Before adding the ingredients to the appliance
two different groups of ingredients shall be mixed in different containers (refer to your recipe).
11. Sandwich (3:00 and 2:55)
It cooks softer loafs with a lighter texture having the taste of sandwich bread. Cooking time is 2 hours and 55 minutes
for 799 g loaf and 3 hours for 900 g loaf.
12. Bake (1:00)
This setting is only intended for cooking process and used to increase the cooking time on the selected setting. This
function is very useful to increase consistency of jams and marmalades. Set time is 1 hour (1:00) when the operation
commences and it counts down in 1 minute intervals.
Upon completion of baking (additional cooking) process you shall turn off this function by pressing “stop” button. It is
recommended to check the cooked bread or jam after the first 10 minutes and following 10 minute intervals. Cooking
time can be increased in 10 minute intervals by pressing timer setting button. In the case that the baking program is
selected right after completion of another program and “H:HH” is displayed on the screen; open the lid and remove the
pan and let it cool down for 10 minutes. Upon cooling, place the cooking pan and the content in the pan, set the program
and press “start” button.
- 16 -
Bread Maker
Sinbo SBM 4705
Using the Bread Maker
1) Removing the cooking pan
Upon opening the lid of the device, remove the cooking pan by holding it from the handle and rotating it counterclockwise
and leave it on the bench (Adding the ingredients while the pan is outside the device is important to avoid the ingredients
to spill in the housing where heating elements are located).
2) Installing the kneading blade
Fix the kneading blade on the rotating shaft by pushing it down.
3) Measuring the ingredients
Measure the ingredients and add them one by one in the cooking pan according to the sequence in the list (Refer to
“Measuring the ingredients” section on the following pages for further information).
• Ensure that the yeast you have added in the pan does not contact with water or othher ingredients; otherwise, the yeast
will be activated instantly.
• Use lukewarm water at the temperature of approximately 21-28 ˚C (cold water in summer, lukewarm water in winter).
4) Installing the pan
Place the pan inside the appliance and fix it in its place by rotating it clockwise. Close
the lid upon this process.
5) Inserting the plug
When you insert the plug in the socket the appliance will be automatically set to normal
Bread Maker menu and normal period.
• When pressing any button on the device a "beep" sound is heard indicating that the button is operated.
6) Selecting program
You can select one of the 12 different programs of the appliance by pressing the menu button.
7) Loaf size selection
When loaf size button is pressed selection is made between crispy and 700 g and 900 g. When the appliance is operated
every time it is adjusted for crispy bread.
8) Selecting crust color level
Color of the crust is adjusted by pressing “Color” button. It can be adjusted as light, medium or dark.
9) Adjusting the timer
If you don’t want the machine to operate immediately or require the bread to be ready at a specific time you can use the
timer program.
10) Staring the cooking process
Press “Start/Stop” button to operate the appliance. Remaining time is displayed on the screen by counting down in one
minute intervals.
11) Operation
Processes carried out with the bread maker are operated according to the program phases indicated in “Cooking cycle
times” section, automatically. In the case that the appliance is set to two stage kneading process, it warns the user with
a beep sound when the time for adding other ingredients such as fruit/nuts comes.
• Steam may come out of the openings on the device during cooking process and this is a normal condition.
- 17 -
Bread Maker
Sinbo SBM 4705
12) Completion of the cooking process
In the case that the program is completed and the bread is cooked 0:00 is displayed on the screen and the user is warned
with beep sound.
13) Keep warm operation
Using the keep warm function how air inside the device is circulated in the machine for an additional period of 60 minutes
(see ”Cooking cycle times” section). To ensure a good cooking result cooking pan shall be removed from the appliance
during warm keeping process or upon completion of the cooking program. When keep warm time has elapsed beep
sound is signaled for 10 times.
14) Removing the pan from the appliance
Press “Stop” button and open the lid.
CAUTION: Use protective gloves to lift the bread pan if it is too hot.
15) Removing the bread from the pan
Let the bread cool down in the pan for 15 minutes and tip the pan over and hit its bottom a couple of times. Place the
bread on a corrugated surface which provides ventilation from the bottom. Pour lukewarm water inside the pan to avoid
the kneading blade stick to the rotating shaft.
• Sometimes the blade sticks to the bread loaf. In this case let the loaf to cool down and remove is using the bar supplied
with the appliance without scratching the surface or use a wooden or plastic kitchen utensil to avoid scratching the nonstick surface.
NOTE: Lid of the device shall not be opened during cooking process. This affects the quality and rising level of the bread
badly. Open the lid only when the selected program requires addition of other ingredients.
CAUTION: Unplug the appliance when not in use.
Measuring the ingredients
The most important phase in using the bread maker is precise and accurate measurement of the ingredients; otherwise
the cooking results will not be favorable. Ingredients shall be added in the cooking pan in quantities and using the method
specified in the recipes. Measurement of liquid and dry ingredients are as follows:
Measuring liquids
Use the supplied measuring cup. Measuring cup shall be placed on a level surface and the level of the liquid shall be
brought to the measuring mark. Quantities shall not be measured approximately since this may exceed the critical levels
specified in the recipes.
Measuring spoon
Measuring cup
1. Liquids (Water, oil, milk) 2. Dry (Flour, sugar, salt) except for yeast 3. Yeast
Measuring dry ingredients
Dry ingredients shall be measured with the supplied measuring cup and spoon. Dry ingredients shall be measured by
filling the measuring cup with the ingredient using spoon and leveling off the excess using a knife. Additional ingredients
may impair the proportions of the recipe. Do not add additional flour unless specified. Use the measuring spoon to
measure small quantity ingredients (yeast, sugar, salt, milk powder, honey, molasses). Measurements shall be made
accurately.
Otherwise, small variances will effect the obtained result. Plastic measuring spoon supplied with the appliance is sized
as tablespoon for larger end and teaspoon for the smaller end.
NOTE: PRACTICE AND EXPERIENCE MAKES BETTER.
- 18 -
Bread Maker
Sinbo SBM 4705
QUESTIONS AND ANSWERS
QUESTION 1: Can the shape and height of the bread vary?
ANSWER 1: Yes it can. This can change depending on the ambient temperature. The bread may rise excessively or may
not rise well in extremely hot and cold environments. Also, in the case that ingredients such as fruit, nuts, grains etc.
added to the bread is in excessive quantities unlike specified in the recipe, the appearance and height of the bread is
affected. Measure the ingredients you use precisely and ensure that they are fresh. Why are wholemeal breads always
small? It is normal that wholemeal breads are smaller and denser compared to regular bread types. Since whole wheat
flour is heavier than white bread flour, it does not rise as much during Bread Maker process.
QUESTION 2: Why does not the bread rise?
ANSWER 2: If you fail to add yeast or prepare the bread without installing the mixing hook the bread will not rise. In the
case that the yeast is not enough or fresh the bread does not rise and remains small. Pay particular attention to the type,
quantity and freshness of the yeast. Do not use yeasts which are expired or unpacked for a long time.
QUESTION 3: Why does the bread smell bad?
ANSWER 3: Excessive amount of yeast and stale ingredients cause bad odor. Odor may occur in fast bread program
particularly, since large quantity of yeast is used.
QUESTION 4: Why is the middle part of the bread hollow?
ANSWER 4: Air may collect here during kneading. In the case that this gas is not discharged during fermentation the
bread cooks with that air.
QUESTION 5: Can the mixing hook come out with the bread?
ANSWER 5: This is a normal condition. You can remove the hook from the bread using a plastic or non-abrasive utensil.
QUESTION 6: What is the reason for timer settings to be within the range of 4 and 13 hours?
ANSWER 6: The entire process takes at last 3:00 hours. In the case that time is set to more than 13 hours the ingredients
may spoil.
QUESTION 7: Is it possible to multiply or divide the quantities of ingredients specified in the recipes?
ANSWER 7: No. Ensure that the quantities specified in the recipe are observed and the ingredients are measured
accurately.
QUESTION 8: Can noise be heard during night when using time setting?
ANSWER 8: Yes. You can hear the motor operating at night when the appliance kneads the dough.
QUESTION 9: What shall be done when the appliance does not work upon completion of Bread Maker process, and sound
alarm is heard continuously and HHH is displayed on the screen?
ANSWER 9: The appliance will not operate since it is hot. Press start/stop button at first and turn off the appliance, open
the lid of the appliance and remove the cooking pan outside and let it to cool down.
QUESTION 10: What shall I do if LLL is displayed on the screen and signal sound is heard when start button is pressed?
ANSWER 10: The appliance will not operate since the ambient temperature is too low. Turn off the device by pressing
start/stop button. Leave it in a warmer environment.
Optimal ambient temperature is within the range of (15 ˚C-25 ˚C).
QUESTION 11: What shall I do if EEE is displayed on the screen and signal sound is heard when start button is pressed?
ANSWER 11: The appliance will not operate since the ambient temperature is too high. Turn off the device by pressing
start/stop button. Leave it in a cooler environment.
QUESTION 12: Why is the outer surface and bottom of the loaf humid?
ANSWER 12: In the case that the loaf is left in the appliance for extended periods longer than the required time the loaf
becomes humid since the steam inside cannot be discharged. It will turn into normal if you remove the bread and keep
it on a grill.
QUESTION 13: What shall I do if (0:00) is displayed on the screen upon completion of the Bread Maker process?
ANSWER 13: This signal sound indicates that the Bread Maker process is completed and warm keeping program is being
executed. You can turn off the appliance and remove the bread if you like.
- 19 -
Bread Maker
Sinbo SBM 4705
QUESTION 14: What shall I do if I smell a slight burning odor and see smoke coming out?
ANSWER 14: If ingredients are placed in the pan while it was in the appliance, residues getting in the appliance and on
the resistor causes smoke and odor during cooking process. Place the ingredients in an order while the pan is outside
of the appliance.
QUESTION 15: Sometimes, there is flour on the outer surface of the loaf, what is its reason?
ANSWER 15: Sometimes the dough sticks to the pan if the flour quantity is not sufficient, in this case extra flour shall
be added. You can add extra flour in the pan using utensils that do not scratch the surface. This way you can avoid flour
residues on the pan edges. If you forget to mix in the extra flour you have added in, you can cut the section with flour
residue on the outer surface of the bread using a sharp knife.
QUESTION 16: How can I preserve the bread upon cooking?
ANSWER 16: Let the bread to cool down on a corrugated surface upon completion of the cooking process. If you slice
the bread while it is still hot you will cause deformation and the texture will loose its good quality. You can carry out
cutting process using a sharp knife or electric powered knife. Keep bread loafs in whole or in slices in an airtight envelope.
You can keep bread in refrigerator and heat it up for 15-20 minutes using the baking function of the appliance before
serving.
QUESTION 17: What shall I do in case of power failures?
ANSWER 17: In the case of extended power failures restart the program if the power failure has occurred during kneading.
In the case that power failure has occurred in the beginning of the rising process do not operate the appliance and wait
until it rises, bake the risen dough using the baking function using the program selection button. In the case that the
power failure has occurred during cooking process run the baking function again and cook for the specified length.
QUESTION 18: Why does the dough not mix and strange noises come from the motor?
ANSWER 18: Kneading blade or cooking pan is not installed correctly. Ensure that the pan contacts to the bottom of the
interior of the appliance housing and ensure that it clicks in to its position.
QUESTION 19: Why shall I not use timer function to cook bread with fresh milk?
ANSWER 19: If the waiting time set on the appliance is too long the milk will spoil. Extended timing functions shall not
be used with recipes which contain ingredients which are easily spoiled such as milk and eggs.
QUESTION 20: Why shall I add the ingredients in the cooking pan in a specific order?
ANSWER 20: This enables the bread maker to mix the ingredients in the most effective way. This also ensures that yeast
and liquids do not contact with each other prior to kneading process (especially with extended timer settings).
QUESTION 21: How can I remove the kneading blade that is stuck with the cooking pan?
ANSWER 21: Kneading blade can stick to its position upon cooking process. If you pour warm or hot water on the knife
it will be easily removed. If you still cannot remove it let it rest for 30 minutes in hot water.
QUESTION 22: Can I wash the cooking pan in dishwasher?
ANSWER 22: No. You shall wash cooking pan and kneading blade manually.
QUESTION 23: When shall I add ingredients such as raisins, nuts etc. in the dough?
ANSWER 23: While entering the second kneading cycle beep sound is heard for 10 times to alert you that you shall add
the auxiliary ingredients such as raisins, nuts etc. You shall add them at this time.
QUESTION 24: The bread shrinks in the middle part or shrinks completely after a while upon swelling. Why?
ANSWER 24: The bread may have swollen too much. Reduce the amount of yeast to reduce the rate of swelling. The
bread may shrink if the consistency of the bread is low (too much water content), use ingredients in specified quantities.
QUESTION 25: Is it important that the ingredients to be added in the cooking pan to be at room temperature?
ANSWER 25: Ingredients shall be neither too hot nor too cold; in brief, they shall be at room temperature. Water
temperature shall be at 21-28 ˚C.
QUESTION 26: Can I mix yeast and water beforehand?
ANSWER 26: Absolutely not. The yeast shall be kept dry and shall be mixed in the mixture at the last step by adding it
on right top of the flour pile while filling the pan. Importance of this issue becomes more significant especially in cases
that cooking will be delayed using timer function.
- 20 -
Bread Maker
Sinbo SBM 4705
QUESTION 27: I mixed in mashed oatmeal, pumpkin seed, nuts etc. ingredients in the bread and the bread comes out
very dry. Why?
ANSWER 27: Soak the dry ingredients you are going to add in the bread dough 1 hour before hand in water and let them
become absorbed. If you don’t apply this method, ingredients you add absorb the water of the dough and this results in
a dry dough and low quality breads. Also, as specified in the concerning sections of the operating manual, you shall add
these ingredients in the dough in the further steps.
QUESTION 28: Inside of the bread is too dense and there is no pore or bubble. Inside of the bread becomes sticky when
I press on it. Why?
ANSWER 28: The bread shall contain different sizes of pores, however, this depends on the type of flour and bread. The
bread shall not be sticky and restore its form when released. If it remains stuck this means that the dough is not thoroughly
mixed, cooked or not enough time is given for the fermentation process. You won’t generally experience such problems
with the bread maker you are using in normal conditions; the problem possibly results from the failure to measure the
ingredient quantities correctly.
QUESTION 29: Inside of the bread I have cooked is not white as bought from bakery shops and it is yellowish.
ANSWER 29: Inside of the bread shall be in light yellowish color, therefore, it is ideal to use yellowish white wheat bread
flour which is not whitened with chemicals. Pores in the bread shall be bright and not matt.
SPECIFICATION
• Loaf sizes selection : 750-900 g
• With 12 digital programs and speed button for fast program
• 13 hours programmable delay timer
• 60 minutes keep warm function
• Adjustable crust control: light, medium or dark
• Dishwasher safe, non-stick bread pan & kneading blade
• Removable bread pan for easy cleaning
• Cool-touch walls
• Non-slip feet
• Includes measuring cup & spoon
• AC230V, 50Hz, 600W
- 21 -
(FR) Français / Machine à Pain
Sinbo SBM 4705
SINBO SBM 4705 MACHINE À PAIN
MODE D’EMPLOI
CONSIGNES DE SÉCURITÉ IMPORTANTES
Comme tout appareil électrique, cette machine aussi nécessite de respecter les règles générales de sécurité. En dehors
du danger de blessure, il s’agit aussi de tout dommage pouvant arriver à l’appareil et aux fonctions de l’appareil. Ces
deux sujets sont décrits tels que ci-dessous:
AVERTISSEMENT: Danger de blessure personnelle
IMPORTANT: Danger de dommage d’appareil
En supplément, les conseils de sécurité ci-dessous doivent aussi être pris en considération.
La position de l’appareil
• Ne placez pas votre appareil aux bords de l’établi de la cuisine.
• Utilisez votre appareil sur des surfaces plates et solides.
• N’utilisez pas dans des milieux extérieurs.
Cordons
• Le cordon doit joindre de la prise jusqu’à la machine sans forcer les points de connexion.
• Afin d’éviter que les enfants puissent joindre, veuillez ne pas permettre que le cordon de l’appareil pende du bord de
l’établi de la cuisine.
• Ne tenez pas le cordon de façon tendue entre la prise et une surface ouverte (par ex. entre une prise qui se trouve en
basse position et la table).
• Ne tenez pas le cordon sur des surfaces chaudes ou il peut subir du dommage.
Pour votre sécurité ;
AVERTISSEMENT: Ne touchez pas aux surfaces chaudes! Servez-vous des gants de four pour soulever la poêle de pain
chaude. Ne couvrez en aucun cas les trous d’évacuation de vapeur.
AVERTISSEMENT: Évitez d’être en contact avec les pièces mobiles!
• Afin d’éviter de subir un choc électrique, veuillez ne pas plonger le cordon ou la fiche électrique dans l’eau ou dans
tout autre liquide.
• Il convient d’être extrêmement prudent en portant des appareils qui contiennent des objets chauds.
• N’utilisez pas la machine à pain pour y mettre des outils et pour les conserver dedans; pour éviter toute incendie ou
tout choc électrique, ne mettez pas d’ustensile de cuisine dans l’appareil.
• N’utilisez pas l’appareil avec les mains mouillées ou humides.
Les enfants
Ne permettez jamais les enfants utiliser la machine. Les enfants peuvent subir des dangers s’ils ne sont pas surveillés
notamment lorsque les appareils sont en marche et que les opérations de cuisson sont en cours.
Veuillez prévenir les enfants au sujet du fait qu’ils doivent être prudents contre les dangers dans la cuisine et qu’ils ne
doivent pas joindre les endroits dont ils ne sont pas capables de voir totalement.
AUTRES ÉLÉMENTS DE SÉCURITÉ
• Si le cordon de l’appareil est détérioré d’une raison ou d’une autre, n’utilisez pas l’appareil. Consultez notre service
technique le plus proche pour faire remplacer avec la pièce de rechange originale.
• Ne faites pas de rajouts dans le genre d’accessoires sur la machine étant donné que cela peut endommager l’appareil.
• N’apposez pas au-dessus ou à proximité d’une chauffe à gaz/électrique ou un four.
• Pour empêcher que l’appareil ne subisse de dommage, ne posez pas la poêle de cuisson ou autre objet sur l’appareil.
•Ne nettoyez pas avec des éponges abrasives. Ne lavez pas la poêle de cuisson, la lame de malaxage, le récipient de
mesurage ou la cuillère dans le lave-vaisselle.
• Protégez l’appareil et ses cordons contre les facteurs de chaleurs, des rayons directs du soleil, de l’humidité, des
objets coupants, etc.
• Installez correctement la poêle de cuisson avant de mettre la machine en marche.
• Débranchez la fiche électrique de la prise de courant pendant que l’appareil n’est pas en marche, pendant que vous y
installez des pièces à l’intérieur, pendant que vous nettoyez ou en cas de problème quelconque. En débranchant, ne tirez
pas sur le cordon mais tirez en tenant par la fiche.
PRENONS CONNAISSANCE DE LA MACHINE À PAIN S‹NBO
Avec les machines à pain S‹NBO, vous pouvez faire des pains à vos goûts, hygiéniques et sains. Vous n’aurez pas besoin
de faire de grands efforts pour faire cuire des pains; car vote appareil assisté par ordinateur va faire la plupart du travail
à votre place.
- 22 -
Machine à Pain
Sinbo SBM 4705
Faire du pain est aussi facile que les trois étapes ci-dessous :
1. Mettez les ingrédients.
2. Sélectionnez le programme sur le menu et appuyez sur le bouton de Marche.
3. Attendez que le pain se prépare.
Remarque:N’arrêtez pas le fonctionnement de l’appareil lors de la cuisson. Cet appareil qui est capable de faire beaucoup
de sortes de pains en plus du pain complet; peut aussi faire de la pâte pour vos sandwichs et vos pizzas, vous donnera
la possibilité de préparer des cakes et de la confiture. Tout est très facile et au goût du « fait maison ».
Ceux à savoir avant la première utilisation
Avant de commencer à utiliser, attribuez quelques minutes pour lire le mode d’emploi que vous avez dans la main et
conservez ceci dans un endroit convenable pour vous y référer ultérieurement en cas de besoin.Prêtez l’attention
nécessaire aussi pour respecter aux consignes de sécurité.
1. Déballez la machine à pain avec attention et supprimez tous les matériels d’emballage.
2. Nettoyez les poussières ayant pu s’accumuler lors de l’empaquetage.
3. Essuyez la surface extérieure de la poêle cuiseuse, de la lame de malaxage et de la machine à pain avec un chiffon
humide. La poêle cuiseuse est revêtue d’une surface antiadhésive. N’utilisez aucune éponge abrasive ou aucun matériel
collant sur aucune des surfaces de la machine à pain.
4. À la première utilisation, huilez la poêle de pain en utilisant de l’huile, du beurre ou de la margarine.
5. Nettoyez encore une fois.
6. Installez la lame de malaxage sur l’essieu de la poêle de cuisson.
Remarque: Lors de la fabrication de l’appareil, certains composants sont lubrifiés pour but de protection. De ce fait, lors
de la première mise en marche, des vapeurs allogènes peuvent se dégager dans le milieu où se trouve l’appareil; cette
situation est tout à fait normale.
CARACTÉRISTIQUES
Usage du Chronomètre
Dans le cas où vous souhaitez que le pain soit prêt plus tard, ou prêt pour le matin ; les réglages de chronomètre peuvent
être utilisés. La durée maximum du chronomètre est de 13 heures. Pour voir pour quels programmes ces réglages sont
applicables, référez-vous au chapitre de « durées de cycles de cuisson ». Ces réglages ne doivent pas être utilisés en
appliquant des recettes qui se préparent avec des ingrédients pouvant se dépérir rapidement tels que les œufs, le lait
frais, la crème aigre ou le fromage.
1. Une fois vous être décidé sur le moment où vous souhaitez que le pain soit prêt ; calculez maintenant la différence
d’heures entre l’heure actuelle et l’heure que vous avez visée. Par exemple, si vous souhaitez qu’il soit prêt à 8h00 le
matin et que l’heure actuelle est 19h30; la différence d’heures entre ces deux temps est de 12 heures 30 minutes. Donc,
vous allez vous servir des boutons du chronomètre jusqu’à ce que la valeur de 12:30 soit parvenue sur l’écran d’affichage.
2. Cette durée est saisie en utilisant les boutons d’augmentation et de diminution de temps. Les boutons de temps
permettent d’augmenter et de diminuer les durées en sections de 10 minutes chacune. Lorsque le bouton de “Marche”
sera pressé, le symbole de “:” commencera à clignoter.
3. Si vous avez déterminé une durée incorrecte, appuyez sur le bouton de « arrêt » pendant 2 secondes. Le chronomètre
sera annulé et vous retournerez au programme normal. Pour déterminer la durée à nouveau vous devez répéter les pas
1 et 2.
4. Le réglage du chronomètre peut faire un réglage de maximum 13 heures. Cette durée comprend aussi l’intervalle
jusqu’à laquelle l’opération de cuisson du pain se termine et qu’il devient prêt.
Son de signal avertisseur
Les sons avertisseurs sont entendus dans les cas suivants :
• Lorsqu’un bouton quelconque est pressé
• Avant la deuxième étape de malaxage, lorsqu’il est temps de rajouter les additifs dans la pâte tels que les céréales,
les fruits, les fruits secs etc., faites les rajouts nécessaires en ouvrant le couvercle de la machine et fermez à nouveau
le couvercle.
• Lorsque le programme est terminé.
• Lorsque la durée de maintien tiède est terminée.
Coupures d’Électricité
Suite à une courte coupure d’électricité :
• Si le programme n’est pas encore arrive à l’étape de gonflement 1, il faut appuyer sur le bouton de « marche »; ainsi
l’appareil continuera à utiliser la fonction de répétition automatique.
• Si l’électricité avait été coupée lors de l’étape de la fermentation, il faut attendre que la pâte se fermente et gonfle,
ensuite vous pouvez continuer à faire cuire la pâte fermentée en choisissant le programme de four. Ainsi, votre pâte ne
sera pas dépérie.
- 23 -
Machine à Pain
Sinbo SBM 4705
Température ambiante
La machine à pain peut fonctionner dans des milieux de différentes températures; seulement, les dimensions des pains
cuits dans une pièce chaude et ceux cuits dans une pièce froide peuvent être différentes. La température ambiante
conseillée est celle dans l’intervalle de 15-34˚C.
Nécessité d’Électricité
Contrôlez si la valeur de voltage indiquée sur l’appareil est identique à celle de la valeur électrique de votre résidence
de forme de A.C. (courant variable). Si les prises de votre résidence et la fiche de l’appareil ne s’adaptent pas, une fiche
adéquate peut s’y brancher au lieu de la présente.
AVERTISSEMENT: Cet appareil doit absolument être utilisé sur une prise de terre.
Entretien et Nettoyage de la Machine
1. AVERTISSEMENT: Pour ne pas subir de choc électrique, débranchez la fiche électrique de la prise de courant avant
de commencer à l’opération de nettoyage.
2. Attendez que la machine à pain refroidisse.
IMPORTANT:N’immergez pas l’appareil entier ou le couvercle dans un liquide quelconque étant donné que cela peut
causer un choc électrique ou un dommage d’appareil.
3. Nettoyage extérieur: Essuyez le couvercle de l’appareil et la surface extérieure avec un chiffon humide ou légèrement
mouillé.
4. Nettoyage intérieur: Servez-vous d’un chiffon ou d’une éponge humide pour essuyer les parties intérieures de l’appareil.
5. Poêle de cuisson: Lavez la poêle de cuisson à l’eau tiède, il n’est pas impératif d’utiliser du savon. Prenez soin pour
ne pas rayer la surface antiadhésive. Vous devez attendre que la poêle de cuisson soit asséchée avant de l’installer dans
le réservoir de l’appareil.
• La poêle de cuisson, le récipient et la cuillère de mesurage puis la lame de malaxage ne doivent pas être lavés dans
le lave-vaisselle.
• La poêle de cuisson ne doit pas être laissé dans l’eau pendant très longtemps étant donné que l’axe inférieur et la
concordance de fonctionnement peuvent se délabrer. Notamment la partie inférieure ne doit pas être mise en contact
avec de l’eau par l’extérieur.
• Vous pouvez ranger l’appareil une fois que vous êtes sûr qu’il a complètement refroidi.
Les matériels ci-dessous ne doivent pas être utilisés lors de l’opération de nettoyage:
• Diluant de Peinture
• Benzine
• Paille de fer
• Poudre polissante
• Chiffon chimique à poussière
Prenez soin de la surface antiadhésive. Évitez d’endommager le revêtement ; n’utilisez pas d’équipements en métal tels
que les spatules, les fourchettes ou les couteaux. La couleur du revêtement peut changer lorsque la poêle est utilisée
longtemps; cela découle seulement de l’humidité et de la vapeur et n’a aucun effet négatif sur la performance de l’appareil
ni sur la qualité des pains. Le trou sur la lame de malaxage soit être nettoyée; ensuite une goutte d’huile de cuisson doit
y être ajoutée et doit être montée à nouveau sur l’axe de rotation. Cette opération empêchera la lame de se coller.
• Empêchez que les trous et ouvertures qui sont sur l’appareil soient remplis de poussières. Conservation de l’appareil ;
vous pouvez ranger l’appareil après vous être assuré que toutes les pièces sur l’appareil sont asséchés, y compris la
fenêtre d’observation. Veuillez ne rien mettre sur le couvercle.
Tiroir d’Évacuation de Vapeur: Se monte à l’espace vide ci-dessous, sur la partie frontale de l’appareil.
Bâton: S’utilise pour retirer le couteau de mixage lorsqu’il est resté dans le pain.
- 24 -
Machine à Pain
Sinbo SBM 4705
Boutons de Panneau de Contrôle, Écran d’Affichage et Fonctions
L’Écran d’affichage en général;
• Affiche le niveau de grillage sélectionné.
• Affiche le poids sélectionné.
• Affiche le numéro de programme sélectionné.
• Affiche la durée qui reste pour la fin de l’opération de cuisson.
Par exemple; (3:20 veut dire il reste “3 heures 20 minutes ”; 0:20 “ veut dire il reste 20 minutes”).
• Affiche la sommation de température (voir chapitre de “Dépannage”).
Écran de Sommation
1. Si la mention de “H:HH” (voir Illustration 1) s’affiche sur l’écran après avoir fait commencer le programme, cela veut
dire que la température à l’intérieur est trop haute. Dans ce cas, le programme doit être arrêté. La machine doit être
refroidie pendant 10-20minutes en ouvrant le couvercle.
2. Si la mention de “ E:EE” (voir Illustration 2) s’affiche sur l’écran après avoir fait commencer le programme, cela veut
dire que la connexion de capteur de chaleur est détachée. Les capteurs doivent être contrôlés avec attention sous la
surveillance d’un technicien qualifié.
Marche
Clair MoyenFoncé 700gr
900gr
Marche
Illustration 1
Clair MoyenFoncé 700gr
900gr
Illustration 2
Boutons chronométreurs
Régule la durée de cuisson du pain. Valable pour tous les programmes excepté “Cuisson Rapide”. Par exemple; si les
ingrédients ont été mis dans l’appareil à 20h30 le soir et que vous souhaitez que le pain soit prêt à 07h00, il convient de
presser les boutons de chronomètre jusqu’à ce que l’on parvienne à la valeur de 10:30 étant donné que la différence de
temps est de 10h30 et la machine doit être mis en marche. A partir du moment en question, la machine est programmée
de façon à ce que le pain soit prêt à 07h00.
Bouton de niveau de couleur (grillage)
S’utilise pour la sélection de grillage de couleur claire, moyenne ou foncée dans les programmes concernés. Lorsqu’appuyé
de suite sur le bouton en question, le niveau choisi s’affiche sur l’écran d’affichage en tant que clair, moyen ou foncé.
Bouton de Marche/Arrêt
Lorsque le bouton est pressé pendant 1 seconde, le signe de (:) apparait sur l’écran suite au bip sonore et le programme
commence à fonctionner. Similairement, lorsque le bouton est pressé pendant 2 secondes, le programme se termine
accompagné du bip sonore.
Bouton de dimension de miche de pain
Lorsque la machine à pain est mise en marche, la dimension de miche de pain est réglée sur le pain croustillant. Pour
les miches de pain cuites normalement (de grandeur de 700 et 900 gr.) appuyez une fois sur le bouton de dimension de
miche de pain.
Bouton de Menu
S’utilise pour choisir un des différents programmes de cuisson entre 1-12 sur le panneau d’écran.
Bouton de Marche
Permet d’ouvrir et de fermer le couvercle.
- 25 -
Machine à Pain
Sinbo SBM 4705
1. Pain Normal
2. Pain Français
3. Pain Complet
4. Cuisson Rapide
5. Pain sucré
6. Très Rapide -1
7. Très Rapide -2
8. Pâte
9. Confiture
MARCHE CLAIR MOYENFONCÉ 700gr 900gr
MARCHE
10. Cake
11. Sandwich
12. Enfournage
DUREE
ARRÊT
DUREE
MEN
U
DIMENSION
DE PAIN
L
COU
EUR
MARCHE
DESCRIPTIONS DES PROGRAMMES
Les types de programmes ci-dessous peuvent être choisis avec le bouton de Menu:
1. Pain Blanc Normal
(3:00 et 2:53) Est pour la Machine à Pain blanc. En outre, ce programme peut être utilisé aussi pour d’autres sortes de
pains. Pour les pains de 700 gr, la durée est de 2 heures 53 minutes. Pour les pains de 900 gr, la durée est de 3 heures.
2. Pain Français
(3:50 et 3:40) Sa spécialité est de malaxer et de cuire dans plus de temps. Il a une couleur plus claire que le pain blanc.
Un pain plus doux est obtenu. Pour les pains de 700 gr, la durée est de 3 heures 40 minutes. Pour les pains de 900 gr,
la durée est de 3 heures 50 minutes.
3. Pain de son
(3:40 et 3:32) Ce programme s’utilise pour la préparation des pains contenant une certaine quantité de céréales. Dans
ce programme, afin de permettre que le son absorbe l’eau qu’il se dilate, il existe une longue durée de fermentation.
Lorsque vous êtes dans ce programme, il est déconseillé de faire un chronométrage avec les boutons de chronomètre
étant donné que cela peut donner des résultats infructueux.Pour les pains de 700 gr, la durée est de 3 heures 32 minutes.
Pour les pains de 900 gr, la durée est de 3 heures 40 minutes.
4. Cuisson Rapide
(Pain Rapide) (1:40) S’utilise pour la préparation des pains blanc que l’on veut préparer en peu de temps. Avec ce
programme, on peut obtenir un pain petit et consistant.
5. Pain Sucré
(2:55 et 2:50) S’utilise pour la préparation des pains sucrés plus croustillants que les pains faits avec les réglages
normaux. La croûte croustillante du pain se forme avec la brûlure du sucre. Pour les pains de 700 gr, la durée est de 2
heures 50 minutes. Pour les pains de 900 gr, la durée est de 2 heures 55 minutes.
6. Très Rapide-1
Réalise en très peu de temps les opérations de malaxage, de gonflement et de cuisson d’un pain de dimension de 700
gr. Les pains qui sortent ne gonflent pas beaucoup, ils deviennent doux et blanc.
7. Très Rapide -2
Réalise en très peu de temps les opérations de malaxage, de gonflement et de cuisson d’un pain de dimension de 900
gr. Les pains qui sortent ne gonflent pas beaucoup, ils deviennent doux et blanc.
8. Pâte (1:30)
Ce choix de réglage ne fait pas cuire le pain, il fait seulement de la pâte. La pâte est retirée de son réservoir et est
préparée en forme de sandwich, pizza, etc. Toute sorte de pâte peut être obtenue avec ce programme. Veillez à ce que
les additifs de la pâte ne dépassent pas les 900 grammes.
- 26 -
Machine à Pain
Sinbo SBM 4705
9. Confiture (1:20)
Ce programme s’utilise pour la préparation des confitures à obtenir des variétés de fruits. N’augmentez pas la quantité
des matériels additifs; empêchez que la confiture bouille dans la poêle de cuisson et qu’elle dépasse des bords et coule
dans le réservoir intérieur de l’appareil.Si cela arrive, arrêtez d’abord l’appareil. Soulevezla poêle avec attention et
nettoyez après avoir attendu qu’elle refroidisse un peu.
10. Cake (2:50)
Ce réglage va mélanger les ingrédients et va faire cuire par la suite pour une durée précise. Avant de rajouter les
ingrédients dans la machine, il faut que deux groupes de matériels additifs se mélangent dans des récipients différents.
(Voir recettes de cake).
11. Sandwich (3:00 et 2:55)
Fait cuire à légère consistance, mais plus doux et la saveur d’un pain de sandwich. Pour les pains de 700 gr, la durée
est de 2 heures 55 minutes. Pour les pains de 900 gr, la durée est de 3 heures.
12. Enfournage (1:00)
Ce réglage est uniquement pour l’opération de cuisson et s’utilise pour augmenter la durée de cuisson des réglages
choisis. Cette fonction sert aussi très bien à rendre consistant les confitures et les marmelades. Lorsque le fonctionnement
commence, la durée réglée est au minimum 1 heure (1:00) et diminue vers le bas avec des intervalles de 1 minute. Une
fois avoir terminé l’opération d’enfournage (cuisson extra), vous devez arrêter cette fonction en appuyant sur le bouton
de « arrêt ». Il est conseillé de contrôler le pain ou la confiture qui cuit suite à la première 10 minutes, et aux intervalles
suivantes de 10 minutes.La durée de cuisson peut être augmentée par unité de 10 minutes en appuyant sur le bouton
de réglage de chronométreur. Lorsque le programme d’enfournage, est sélectionné tout de suite après la fin d’un autre
programme sans être reposé, si la mention de “H:HH” apparait sur l’écran ; ouvrez le couvercle et retirez la poêle et
attendez qu’elle refroidisse pendant 10 minutes. Une fois refroidie, installez la poêle de cuisson et le contenu dans le
réservoir puis réglez le programme et appuyez sur le bouton de « marche ».
Usage de la Machine à Pain
1) Sortie de la poêle de cuisson à l’extérieur
Après avoir ouvert le couvercle de l’appareil, tenez la poêle de cuisson par le manche et faites-la sortir en faisant tourner
dans le sens antihoraire et laissez-la sur la surface où vous allez travailler. (Il est important de mettre les matériels
additifs lorsque la poêle est à l’extérieur afin de ne pas renverser dans le réservoir où se trouvent les équipements
chauffants de l’appareil).
2) Montage de la lame de malaxage
Installez la lame de malaxage sur l’axe de rotation en poussant.
3) Mesurage des ingrédients
Mesurez les ingrédientsnécessaires et mettez-les un par un dans la poêle à cuisson en respectant l’ordre de la liste.
(Pour plus d’information, examinez le chapitre de « Mesurage des Ingrédients » dans les pages qui suivent).
• Veillez à ce que le levain que vous avez rajouté dans la poêle de soi pas en contact avec de l’eau tout autre liquide ;
dans le cas contraire le levain commencera tout de suite à devenir actif.
• Veuillez utiliser de l’eau tiède environ de 21-28 ˚C (de l’eau froide en été, de l’eau
tiède en hivers).
4) Montage de la poêle à sa place
Installez la poêle dans la machine et faites-la tourner dans le sens horaire pour qu’elle
s’y installe. Fermez le couvercle suite à cette opération.
- 27 -
Machine à Pain
Sinbo SBM 4705
5) Branchement de la Fiche
Lorsque vous brancherez la fiche électrique à la prise de courant, l’appareil sera automatiquement réglé au menu de
Machine à Pain normal et à la durée normale.
• Lorsqu’un bouton quelconque est pressé sur l’appareil, un son de « bip » retentira pour indiquer que le bouton marche.
6) Sélection de programme
Un des 12 programmes différents sur l’appareil se choisit en pressant le bouton de Menu.
7) Sélection de la grandeur de la miche de pain
Lorsque le bouton de dimension de miche de pain est pressé, un choix se fait entre croustillant, 700 gr et 900 gr. à chaque
fois qu’elle est mise en marche, la machine se régule de façon à fournir du pain croustillant.
8) Détermination de niveau de couleur (grillage)
Le degré de grillage de la croûte du pain est régulé en pressant le bouton de “Couleur”. Il peut se régler en tant que
clair, moyen ou foncé.
9) Réglage du chronométreur
Si l’on ne veut pas que la machine commence à fonctionner tout de suite, ou si l’on veut que le pain soit prêt à un temps
précis; nous pouvons nous servir du programme de chronométreur.
10) Lancement de l’opération de cuisson
Le bouton de « Marche/Arrêt » est pressé pour mettre la machine en marche. La durée restante sera affichée sur l’écran
en descendant d’une minute à chaque fois.
11) Fonctionnement
Les opérations de la machine à pain, sont réalisées automatiquement suivant les étapes de programmes dans la division
de “Durées de Cuisson”. Si votre appareil est réglé selon l’opération d’un malaxage à deux échelons, il prévient l’utilisateur
en donnant un bip sonore qu’il est temps de rajouter les ingrédients additifs tels que les fruits.
• Pendant l’opération de cuisson, une sortie de vapeur peut avoir lieu par les intermèdes qui sont sur l’appareil, cette
situation est tout à fait normale.
12) Terminaison de l’opération de cuisson
Si le programme est terminé et le pain est cuit ; la mention de 0:00 apparait sur l’écran et l’utilisateur est averti par un
bip sonore.
13) Opération de maintien tiède
Avec la fonction de maintien tiède, l’air chaud qui est à l’intérieur de l’appareil est circulé dans la machine pendant 60
minutes de plus. (Voir chapitre de “Durées de cycle de cuisson”). Pour obtenir un bon résultat, la poêle de cuisson doit
être sorti de la machine lors de la durée de maintien tiède ou lorsque le programme de cuisson initial est achevé. Lorsque
la durée de maintien tiède est terminée, le bip sonore retentira 10 fois.
14) Sortie de la poêle de la machine
Appuyer sur le bouton de “Arrêt” et ouvrir le couvercle.
AVERTISSEMENT: Il convient d’utiliser un gant de four protecteur pour soulever la poêle de cuisson qui est assez chaude.
15) Détachement du pain de la poêle
Attendez que le pain dans la poêle refroidisse pendant 15 minutes tournez ensuite la poêle à l’envers et frappez plusieurs
fois sur la semelle. Mettez le pain qui en sort sur un endroit à gril qui prend de l’air par le bas. Empêchez que la lame
de malaxage se colle à l’axe de rotation en versant de l’eau tiède dans la poêle.
• Par fois, la lame de malaxage reste à l’intérieur de la miche de pain. En cas pareil, après avoir attendu que la miche
de pain ait refroidi, enlevez avec le bâton fourni avec la machine sans rayer ou utilisez un ustensile de cuisine en bois
ou en plastique afin d’éviter que la surface antiadhésive ne se raye.
REMARQUE: Le couvercle de l’appareil ne doit pas s’ouvrir lors de l’opération de cuisson. Non seulement cela influencera
la qualité de la pâte mais aussi le niveau du gonflement du pain. Ouvrez le couvercle uniquement lors du rajout des
ingrédients additifs que le programme nécessite.
AVERTISSEMENT: Débranchez la fiche électrique de la prise de courant lorsque vous ne faites pas usage de l’appareil.
- 28 -
Machine à Pain
Sinbo SBM 4705
Mesurage des ingrédients
L’étape la plus importante lors de l’utilisation de la machine à pain est le mesurage complet et correct des ingrédients
à ajouter ; dans le cas contraire il est possible d’obtenir des résultats de cuissons désagréables. Les ingrédients doivent
être ajoutés dans la poêle de cuissontelle qu’indiqué dans chaque recette à la bonne quantité. Les mesures d’ingrédients
liquides et secs sont indiqués tels que ci-dessous :
Mesurages des liquides
Utilisez le récipient fourni avec la machine. Le récipient de mesurage doit être laissé sur une surface plate et la ligne
du niveau du liquide doit être amenée sur le trait du mesurage. Les quantités ne doivent pas être déterminées par
estimation étant donné qu’elles peuvent dépasser les mesures critiques des recettes.
Une tasse à mesurer
Cuillère à mesurer
1.Liquides (Eau, huile, lait) 2.Secs (Farine, sucre, sel) Levain excepté3.Levain
Mesurage des ingrédients secs
Les mesurages des ingrédients secs doit se faire avec le récipient de mesurage et sa cuillère. Le mesurage des ingrédients
secs se réalise avec le remplissage de l’ingrédient dans le récipient de mesurage à l’aide de la cuillère, et une fois
remplie les surplus au-dessus sont récupérés avec le couteau. Tout ingrédient ajouté en extra peut être mauvais pour
le résultat de la recette. D’autre part, ne tamisez pas la farine tant que cela n’est pas précisé. Lors du mesurage des
contenus de petite quantité aussi (levain, sucre, sel, poudre de lait, miel, moût de raisin,etc.) la cuillère fournie doit être
utilisée. Les mesures sont obligées d’être aux quantités indiquées, car même les petites différences peuvent avoir des
effets négatifs sur la recette. L’échelle en plastique à deux réservoirs fournie avec l’appareil, la partie grande a le volume
d’une cuillère à soupe (tablespoon) ; quant à la partie petite, elle a le volume d’une cuillère à dessert(teaspoon).
REMARQUE: AVEC VOS ESSAIS ET VOS EXPÉRIENCES VOUS PUVEZ FAIRE LE MEILLEUR.
QUESTIONS FRÉQUEMMENT POSÉES ET RÉPONSES
QUESTION 1: Est-ce que la forme et la hauteur du pain peuvent être différentes?
RÉPONSE 1: Oui. Cela varie en fonction de la température ambiante. Dans les milieux trop chauds ou trop froids, le pain
peut gonfler beaucoup ou encore le gonflement souhaité peut ne pas avoir lieu. Par ailleurs, si les ingrédients qui
s’ajoutent dans le pain tels que les fruits, les noix, grains, etc. sont mis de trop en dehors des mesures indiquées, cela
peut aussi influencer l’apparence et la hauteur du pain. Mesurez avec sensibilité les ingrédients que vous utilisez et
veillez à ce qu’ils soient frais.
Les pains complets sont toujours plus petits. Pourquoi ?
Il est tout à fait normal que les pains complets soient plus petits et plus consistants comparés aux pains normaux. Étant
donné que les farines de sonsont plus lourdes que les farines de pains blancs, elles ne gonflent pas autant que les autres
lors du processus de la Machine à Pain.
QUESTION 2: Pourquoi le pain ne gonfle-t-il pas?
RÉPONSE2: Si vous oubliez de mettre du levain ou si vous faites du pain sans monter le crochet de mélange à sa place,
le pain ne gonflera pas. Si le levain est insuffisant ou rassis le pain ne gonflera pas et restera petit. Faites notamment
attention au genre, à la quantité et à la fraicheur du levain. N’utilisez pas le levain dont la date d’expiration est passée
ou dont l’emballage est resté ouvert depuis longtemps.
QUESTION 3: Pourquoi le pain sent-il mauvais?
RÉPONSE 3 : Si vous utilisez trop de levain ou d’ingrédients rassis, cela causera une mauvaise odeur de pain. Notamment
au programme de pain rapide, une odeur peut se produire car beaucoup de levain y est utilisé.
- 29 -
Machine à Pain
Sinbo SBM 4705
QUESTION 4: Pourquoi une espace peut se produire au milieu du pain?
RÉPONSE 4:De l’air a dû s’accumuler lors du malaxage. Si ce gaz ne s’est pas échappé lors de la fermentation, le pain
a dû cuire avec cet air.
QUESTION 5: Le crochet de mélange, peut-il sortir dehors avec le pain?
RÉPONSE 5:Cela est normal. Vous pouvez retirer le crochet du pain en vous servant d’un objet en plastique ou d’un
ustensile qui ne raie pas.
QUESTION 6: Pourquoi le réglage de l’heure se règle seulement de 4 heures jusqu’à 13 heures?
RÉPONSE 6:L’opération entière est de 3:00 heures au minimum. Un matériel quelconque peut se dépérir lorsque le
réglage d’heure est plus de 13 heures.
QUESTION 7: Est-il possible d’appliquer la moitié ou le double des quantités de la recette?
RÉPONSE 7:Non. Faites attention à appliquer les quantités exactement telles que dans la recette et à mesurer avec
sensibilité les ingrédients.
QUESTION 8: Est-ce qu’il y aura un bruit durant la nuit si le réglage d’heure est utilisé?
RÉPONSE 8: Oui. Vous pouvez entendre le bruit du moteur la nuit lorsqu’il malaxe la pâte.
QUESTION 9: Lorsque la préparation du pain est terminée et que l’on veut refaire marcher la machine, elle ne marche
pas et on entend constamment le son d’avertissement avec les lettres de HHH sur l’écran? Que doit-on faire donc ?
RÉPONSE 9: Étant donné que l’appareil est chaud, il ne marchera pas. Appuyez d’abord sur le bouton de Marche/Arrêt
et arrêtez l’appareil, ouvrez le couvercle de la machine et faites sortir lemoule de pain dehors et attendez qu’elle
refroidisse.
QUESTION 10: lorsque le bouton de « Marche » est pressé, les lettres LLL apparaissent sur l’indicateur et un son
d’avertissement retentit. Que doit-on faire donc ?
RÉPONSE10: La température ambiante n’est pas suffisante pour le fonctionnement de l’appareil.Arrêtez l’appareil en
appuyant sur le bouton de « Marche/Arrêt ». Faites-le attendre dans un milieu plus chaud que là où il se trouve. La
température ambiante idéale est entre (15 ˚C-25 ˚C).
QUESTION 11: Que doit-on faire si les lettres EEE apparaissent sur l’indicateur lorsque la touche de « Marche » est
pressé et que le son d’avertissement retentit ?
RÉPONSE11: Étant donné que la température ambiante est trop haute, l’appareil ne marchera pas. Arrêtez l’appareil
en appuyant sur le bouton de « Marche/Arrêt ». Faites-le attendre dans un milieu plus frais que là où il se trouve.
QUESTION 12: Pourquoi est-ce que la surface extérieure du pain et la partie inférieure sont humides?
RÉPONSE12: Si le pain a attendu au-delà de la durée qu’il devait attendre d’une façon fermée, cela a dû rendre le pain
humide puisque la vapeur à l’intérieur n’a pas pu sortir dehors. Si vous faites sortir et vous faites attendre le pain sur
un gril, il prendra son état normal.
QUESTION 13: Que dois-je faire si l’indicateur affiche (0:00) à la fin de la cuisson du pain et que l’on entend un son
d’avertissement?
RÉPONSE13: Ce son d’avertissement indique que le pain est prêt et que le programme de maintien au chaud s’est activé.
Vous pouvez arrêter l’appareil et faire sortir le pain si vous le désirez.
QUESTION 14: Que pouvons-nous faire si une odeur légère de brûlé et de la fumée se dégage?
RÉPONSE14: Si des ingrédients se mettent pendant que lemoule est à l’intérieur de la machine, les restes qui coulent
dans l’appareil et sur la résistance causeront une formation de fumée et d’odeur lors de la cuisson. Mettez les ingrédients
dans l’ordredans lemoule de pain après avoir sorti le moule à l’extérieur.
QUESTION 15: Par fois la surface extérieure du pain reste farineuse. De quoi cela provient-il ?
RÉPONSE15: Des fois lorsque la farine qui est mise est insuffisante, la pâte se colle aumoule, dans ce cas il y a besoin
de rajout de farine. Plus tard, vous pouvez supporter la farine ajoutée avec des objets qui ne raient pas lemoule.Ainsi,
il ne restera plus de farine sur les bords dumoule. Si vous oubliez de supporter la farine ajoutée, vous pouvez couper à
l’aide d’un couteau la partie farineuse se formant sur la partie extérieure du pain.
- 30 -
Machine à Pain
Sinbo SBM 4705
QUESTION 16: Comment puis-je préserver le pain une fois qu’il est cuit?
RÉPONSE16: Une fois que l’opération de cuisson du pain est terminée, attendez qu’il refroidisse sur un gril. Si vous
coupez le pain lorsqu’il est chaud, vous le déformerez et le pain deviendra pâteux. Par ailleurs, vous pouvez réaliser
l’opération de coupure avec un couteau coupant ou un couteau électrique. Faites attendre les pains de façon entière ou
en tranches, comme vous le souhaitez, sans les faire prendre de l’air.Vous pouvez conserver dans le réfrigérateur. Vous
pouvez utiliser le programme de four de votre machine pour le consommer après l’avoir réchauffé 15-20 minutes.
QUESTION 17: Que dois-je faire en cas de coupure d’électricité ?
RÉPONSE 17: En cas de longues coupures d’électricité, si la machine est en étape de malaxage, faites marcher le
programme à nouveau. Si elle est à l’étape de fermentation, ne faites pas marcher à nouveau et attendez que la pâte
se fermente, faites cuire la pâte fermentée en choisissant le four par la sélection de programme. Si elle est à l’étape
de cuisson, faites marcher le four à nouveau et faites cuire pendant autant de temps qu’il le faut.
QUESTION 18: La pâte ne se mixe pas, le moteur fait des bruits rugueux!
RÉPONSE 18: Il se peut que la lame de malaxage ou que la poêle de cuisson ne soit pas montée correctement. Assurezvous que la poêle est en contact de façon régulièreavec la semelle du réservoir intérieur de l’appareil et assurez-vous
qu’elle s’installe à sa place avec le son de « clique »
QUESTION 19: Ne dois-je jamais utiliser la fonction de chronométreur lors des cuissons avec du lait frais ?
RÉPONSE 19: Si la durée d’attente à la machine est très longue, le lait se dépérira. Pour les recettes où se trouvent des
ingrédients à consommer rapidement tels que le lait ou les œufs, il convient de ne pas utiliser les fonctions de
chronométreur de longue durée.
QUESTION 20: Pourquoi dois-je mettre les ingrédients dans la poêle cuiseuse dans un ordre précis ?
RÉPONSE 20: Ainsi, la machine à pain retrouve la possibilité de mélanger les ingrédients de la façon la plus efficace.
Avant l’opération de malaxage (notamment aux réglages de chronométreurs de longues durées) cela empêche à la fois
que le levain et les liquides ne se contactent.
QUESTION 21: Comment puis-je retirer la lame de malaxage qui est bloquée dans la poêle de cuisson?
RÉPONSE 21: La lame de malaxage peut se coller à sa place suite à l’opération de cuisson. Si vous versez de l’eau tiède
ou chaude sur la lame, elle pourra être retirée facilement. Si elle est toujourscollée, faites attendre dans l’eau chaude
pendant 30 minutes.
QUESTION 22: Puis-je laver la poêle de cuisson dans le lave-vaisselle ?
RÉPONSE 22: Non. Vous devez laver la poêle de cuisson et la lame de malaxage à la main.
QUESTION 23: Comment je peux savoir quand est-ce que je dois mettre les des variétés de saveur telles que les raisins,
les fruits secs, etc. dans le pain?
RÉPONSE 23: Il existe un bip sonore qui retentit 10 fois et qui vous avertit que vous pouvez ajouter les ingrédients tels
que les grains, les fruits secs, etc. pendant qu’on entre au cycle du deuxième malaxage. Vous pouvez faire ce rajout à
ce moment-là.
QUESTION 24: Un peu après que le pain ait gonflé, il arrive que le milieu s’affaisse ou que la totalité s’affaisse. Pourquoi?
RÉPONSE 24: Il se peut que le pain ait trop gonflé. Pour diminuer le taux de gonflement, diminuez la quantité du levain.
Ou si la pâte est molle (c’est-à-dire si le taux d’eau a été trop mis) le pain peut s’affaisser. Utilisez les ingrédients dans
les taux indiqués.
QUESTION 25: Est-il important que les ingrédients à mettre dans la poêle de cuisson soient à une température ambiante ?
RÉPONSE 25: Les ingrédients doivent être ni trop chauds, ni trop froids, ils doivent être à la température ambiante. L’eau
à utiliser doit être à une température de 21-28 ˚C.
QUESTION 26: Puis-je mélanger le levain et l’eau à l’avance?
RÉPONSE 26: Absolument non. Le levain doit être maintenu sec et il doit être le dernier ingrédient à ajouter dans la
poêle de cuisson en étant versé juste sur la farine.Ce sujet est encore plus important notamment dans les cas où la
cuisson va être ajournée avec la fonction de chronométreur.
- 31 -
Machine à Pain
Sinbo SBM 4705
QUESTION 27: J’ai rajouté des variétés de saveur telles que des flocons d’avoine, des graines de citrouille, des cacahouètes,
etc. dans mes pains, mais mon pain est devenu très sec. Pourquoi?
RÉPONSE 27: Mouillez 1 heure à l’avance les ingrédients secs que vous allez ajouter dans la pâte du pain et permettezles d’être humidifiés.Si vous n’appliquez pas cette méthode, ces variétés que vous allez ajouter vont absorber l’eau de
la pâte, et ceci donnera lieu à une pâte sèche, sans eau et des pains mauvais. Par ailleurs, tel qu’indiqué aussi dans les
chapitres concernés du mode d’emploi, ce genre d’ingrédients doivent être ajoutés dans la pâte au cycle du deuxième
malaxage.
QUESTION 28: L’intérieur du pain est très consistant ;il n’y a aucunporeou d’espace à l’intérieur. Lorsqu’on appui sur
le pain, l’intérieur se colle. Pourquoi ?
RÉPONSE 28: Dans le pain, il doit se trouver des pores de différents volumes; mais cela variera selon le genre de la
farine et du pain.Lorsque vous appuyiez sur le pain, il ne doit pas se coller, elle doit retourner à son cas précédent. S’il
reste collé, la pâte est probablement pas assez mélangée, pas assez ou elle n’a pas assez attendu pour être fermentée.
Avec la machine à pain que vous utilisez – normalement- vous ne confronterez pas ce genre de situations; le problème
découle probablement d’avoir mal régulé les ingrédients et les quantités.
QUESTION 29: L’intérieur du pain que j’ai fait n’est pas blanc comme les pains que j’achète des fours, mais d’une couleur
jaunâtre.
RÉPONSE 29: La couleur intérieure du pain doit être jaunâtre claire; de ce fait, il est idéal d’utilise de la farine de blé
jaunâtre pour pain n’étant pas blanchie avec des produits chimiques. Les pores de l’intérieur du pain ne doivent pas être
mats mais brillants.
CARACTÉRISTIQUES
• 2 Tailles de pain: 750-900g
• 12 Programmes numérique et programme rapide
• Cuisson différée 13 heures
• Fonction tenir chaud 60 minutes
• Croute réglable: clair, moyen et foncé
• Cuve et malaxeur antiadhésif et résisistant au lave-vaiselle
• Cuve amovible pour nettoyage facile
• Parois froides
• Pieds antiglisse
• Inclusivement doseur gradué & cuiller
• AC230V, 50Hz, 600W
- 32 -
(DE) Deutsch / Brotbackautomat
Sinbo SBM 4705
SINBO SBM 4705 BROTBACKAUTOMAT
GEBRAUCHSANWEISUNG
WICHTIGE SICHERHEITSHINWEISE
Wie alle weitere elektrische Geräte, bedürft auch dieses Gerät eine strenge Anhaltung der allgemeinen Sicherheitsregeln.
Eine Nichteinhaltung der Sicherheitsregeln kann neben Personenverletzungen auch zur Schaden des Gerätes oder
dessen Eigenschaften führen. Diese beiden Themen sind unter unten angegebenen Aussagen kalzifiziert worden.
WARNUNG: Personenschadengefahr
WICHTIG: Gefahr der Beschädigung des Gerätes
Darüber hinaus sollten auch die folgenden Sicherheitshinweise berücksichtigt werden.
Lage des Gerätes
• Stellen Sie das Gerät nicht am Rand der Küchenarbeitsplatte.
• Stellen Sie das Gerät nur auf flachen und stabilen Flächen.
• Nicht im Freien verwenden.
Kabeln
• Der Kabel muss vom Netzstecker bis zum Gerät, an die Anschlussstelle frei erreichbar sein.
• Das Kabel des Gerätes nicht von der Küchenarbeitsplatte unterhängende Weise lassen. Es muss von Kindern unerreichbar
sein.
• Das Kabel nicht zwischen Netzstecker und einen freien Fläche gestreckt halten (Beispiel; zwischen einen niedrig
liegenden Netzstecker und Tisch).
• Das Kabel nicht über Heizflächen stellen, wovon es beschädigt werden kann.
Für Ihre Sicherheit;
WARNUNG: Nicht an heizen Flächen berühren! Um den heizen Backform herauszunehmen immer Ofenhandschuhe
tragen. Die Belüftungsschlitze nie verstopfen.
WARNUNG: Bewegliche Teile des Gerätes nicht berühren!
• Um einen Elektroschock zu hindern, den Kabel oder Stecker nicht ins Wasser oder andere Flüssigkeiten tauchen.
• Beim Transport des Gerätes, das mit heizen Gegenstande gefüllt ist äußerst vorsichtig sein.
• Das Brotbackmaschine nicht zum Aufbewahren von einigen Werkzeugen verwenden; um hindern eines Brandes oder
Elektroschock in das Gerat keine Kücheninstrumente reinlegen.
• Das Gerät nie mit nassem oder feuchten Händen verwenden.
Kinder
Den Kindern niemals erlauben, das Gerät zu benutzen. Die Kinder sollten vor allem während des Betriebs des Gerätes
und während der Backverfahren unter Aufsicht gehalten halten, um mögliche Gefahren zu hindern.
Die Kinder gegen die vorhandenen Gefahren in Küchen belehren und warnen, damit sich nicht versuchen an die Stellen
ranzukommen, die sie nicht sehen können.
Weitere Sicherheitspunkte
• Falls wegen irgendeinen Grund der Kabel des Gerätes beschädigt ist, das Gerat auf keinen Fall verwenden. Wenden
Sie sich an dem nahste Technischen Service, um das Kabel mit einem Originalen Ersatzteil auszutauschen.
• Weil es das Gerat beschädigen kann, an das Gerat keine weitere Zubehöre zufügen.
• Nicht auf oder in die Nähe von Gasherden/Elektroherden hinstellen.
• Um zu vermeiden, dass das Gerät beschädigt wird, auf das Gerät keine Bratpfanne oder weitere ähnliche Gegenstände
abstellen.
• Nicht mit abnutzenden Tücher reinigen. Den Backform, Knethaken, Messbecher oder Löffel nicht im Spülmaschine
waschen.
• Das Gerät oder den Kabel des Gerätes vor direkten Sonnenstrahlen, Feuchtigkeit, scharfen Gegenständen u.s.w.
schonen.
• Vor Inbetriebnahme des Gerätes das Backform richtig einsetzen.
• Während das Gerät nicht im Betrieb ist oder beim einsetzen der Zubehörteile oder beim Reinigen des Gerätes, immer
den Kabel vom Stromanschluss trennen. Beim Trennen der Stromanschluss nicht vom Kabel abziehen, sondern immer
vom Stecker abziehen.
MACHEN SIE SICH MIT IHREN SINBO BROTBACKAUTOMAT VERTRAUT
Mit der S‹NBO Brotbackautomat können Sie ihren Geschmack eigenes, hygienisches und gesundes Brot backen. Um
einen Brot zu backen, brauchen Sie sich keine große Mühe zu geben. Denn Ihr Computerunterstütztes Gerät wird fast
alles für Sie erledigen.
- 33 -
Brotbackautomat
Sinbo SBM 4705
Das Brotbackverfahren ist so leicht, wie die folgenden drei Schritte:
1. Die Zutaten reinlegen.
2. Von dem Menü einen Programm auswählen und an die Taste drücken.
3. Jett abwarten bis das Brot fertig ist.
Bemerkung: Während der Backprozess das Gerät nicht ausschalten. Dieses Geräts das neben Vollkornbrot auch sehr
verschiedene Brotsorten backen. Zudem kann das Gerät für Ihre Sandwiches und Pizzas das erforderliche Teig zubereiten
oder Kuchen backen und Marmeladen zubereiten. Alles ist sehr leicht und in hausgemachtes Geschmack.
Alles was Sie vor dem ersten Gebrauch wissen sollten
Schenken Sie vor dem Gebrauch des Gerätes paar Minuten, um den mitgelieferten Gebrauchsanweisung aufmerksam
durchzulesen. Bewahren Sie es auf, um es später wieder zu gebrauchen. Zeigen Sie die erforderliche Aufmerksamkeit,
um sich an die Sicherheitsregeln anzupassen.
1. Das Brotbackautomat sorgfältig auspacken und das Verpackungsmaterial abschaffen.
2. Während der Verpackung verursachten Staub reinigen.
3. Das Backform, Knethaken und die äußerliche Fläche der Brotbackautomat mit einem sauberen und feuchten Tuch
reinigen. Der Backform ist mit einer Antihaft-Fläche bedeckt. Deshalb beim reinigen der gesamten Brotbackautomat
auf keinen Fall abnutzende oder klebrige Mitteln verwenden.
4. Bei dem ersten Gebrauch die Brotpfanne mit Öl, Butter oder Margarine einfetten.
5. Danach noch einmal gründlich reinigen.
6. Das Knethaken an die Achse der Bratpfanne aufsetzen.
Bemerkung: Während der Produktion des Gerätes werden einige Komponente mit der Zwecke es zu schützen mit Öl
geschmiert. Deshalb können beim ersten Gebrauch des Gerätes einige Fremddämpfe austreten, was ganz normal ist.
MERKMALE
Gebrauch der Zeiteinsteller (Timer)
Wenn es gewünscht wird, dass das Brot für einen späteren Zeitpunkt oder am frühen Morgen fertiggebackt wird, können
Sie die Timer-Funktionen verwenden. Der Timer-Funktion besteht maximal aus 13 Stunden. Für welche Programme
diese Einstellungen möglich sind, können sie in der Abteilung „Backzyklus-Zeiten“ nachsehen. Die Einstellungen sollten
nicht für Rezepte mit folgenden schnell verderblichen Zutaten verwendet werden: Eier, frische Milch, Joghurt oder Käse.
1. Nachdem Sie sich entscheiden, wann das Brot fertiggebackt soll, müssen Sie die Zeitunterschied zwischen dem
aktuellen Uhrzeit und dem gezielten Fertigbackzeit rechnen. Beispiel: Wenn Sie sich wünschen, dass das Brot am
Morgen 08.00 Uhr fertiggebackt werden soll, und der aktuelle Zeitpunkt 19.30 Uhr ist, so besteht eine Zeitpunktunterschied
von 12 Stunden und 30 Minuten. Deshalb sollten sie am Auskunftsanzeiger an die Timer-Taste solange drücken, bis sie
die Uhrzeit 12:30 erreichen.
2. Unter Verwendung der Zeiterhöhungs- und verringerungstasten können sie diesen Zeit eingeben. Die Uhrzeittasten
sorgen dafür, dass der Zeit in Abschnitten von je 10 Minuten erhöht oder verringert wird. Beim Drücken auf das „Start“
Taste wird das Symbol “:” blinken.
3. Wenn Sie versehentlich eine falsche Zeit festgestellt haben, auf die „Stopp-Taste“ Taste ca. 2 Sekunden lang drücken.
Die eingestellte Zeit wird abgebrochen. Sie kehren zurück an das normale Programm. Um die Zeit erneut anzugeben
die 1. und 2. Schritte wiederholen.
4. Der Timer kann maximal für 13 Stunden voraus programmiert werden. Diese Zeitdauer beinhaltet auch die Backzeit
des Brotes.
Warnsignalton
Das Warnsignal ertönt bei folgenden Situationen:
• Beim Drücken auf irgendeine Taste
• Vor dem zweiten Knetphase, um Getreide, getrocknete Früchte, Nüsse und ähnliche Zutaten in das Teig dazuzugeben.
Beim Erreichen der Zeitpunkt den Deckel öffnen und die entsprechende Zutaten dazugeben.
• Bei Beendigung der Programm
• Nach Beendigung der Warmhaltezeit.
Stromausfall
Nach einer kurzen Stromausfall:
• Falls der Programm die 1.Schwellungsphase noch nicht erreicht hat, die „Start“ Taste drücken. Auf diese Weise wird
das Gerät die automatische Wiederholungsfunktion weiterbenutzen.
• Falls der Strom während der Vergärungsphase ausfällt, wird es abgewartet, bis der Teig vergärt und aufschwellt.
Danach wird das Ofen-Programm gewählt. Auf diese Weise wird Ihr Teig nicht verderbt.
- 34 -
Brotbackautomat
Sinbo SBM 4705
Umgebungstemperatur
Der Brotbackautomat kann in unterschiedlichen Umgebungstemperaturen betrieben werden. Jedoch kann bei warmen
Raumtemperaturen oder kalten Raumtemperaturen der gebackener Brot unterschiedlich groß sein. Eine Raumtemperatur
von 15-34˚C wird empfohlen.
Strombedarf
Überprüfen Sie, ob die Gerätspannungswert A.A. (variables Strom), welches auf dem Gerät angegeben ist, mit der
Netzspannung Ihrer Wohnung übereinstimmend ist. Falls die Steckdosen Ihrer Wohnung mit dem Stecker des Gerätes
nicht übereinstimmend ist, können Sie die vorhandenen Stecker mit einen übereinstimmenden Stecker austauschen
lassen. .
WARNUNG: Dieses Gerät darf nur mit geerdeten Steckdosen verwendet werden.
Reinigung und Pflege des Gerätes
1. WARNUNG: Um Stromanschläge zu vermeiden, vor der Reinigung des Gerätes den Kabel des Gerätes vom Steckdose
abziehen.
2. Den Brotbackautomat abkühlen lassen.
WICHTIG: Weil das Gefahr einer Stromanschlag besteht oder das Gerät geschädigt werden kann, das ganze Gerät oder
den Deckel des Gerätes auf keinen Fall in irgendeinen Flüssigkeit eintauchen.
3. Äußere Reinigung: Den Deckel des Gerätes mit einem feuchten oder sehr leicht genässten Tuch abwichen.
4. Innere Reinigung: Zum Reinigen der inneren Teil des Gerätes ein feuchtes Tuch oder einen Schwamm verwenden.
5. Backpfanne (Backform): Die Backpfanne mit lauwarmen Wasser auswaschen. Die Verwendung von Reinigungsmittel
ist nicht zwinghaft. Achten Sie darauf, dass der Antihaft-Fläche nicht abgekratzt wird. Bevor der Backpfanne in das innere
Gehäuse des Gerätes wieder eingesetzt wird, muss es abgetrocknet sein.
• Die Backpfanne, Messbecher, Löffel und der Knethaken darf nicht im Spülmaschine gewaschen werden.
• Weil der Betriebsanklang mit der unteren Achse geschädigt werden kann, darf der Backpfanne nicht längere Zeit im
Wasser gelassen werden. Vor allem darf der Backpfanne von außen nicht mit Wasser ins Berührung kommen.
• Nachdem Sie sich sicher sind, dass es vollkommen abgekühlt ist, können Sie das Gerät aufheben.
Bei der Reinigungsprozess des Gerätes, sollten folgende Materialien nicht verwendet werden:
• Farbverdünner
• Benzin
• Stahlwollkissen
• Glanzpulver
• Chemisches Staubtuch
Die Antihaft-Fläche des Gerätes sorgfältig behandeln. Keine metallischen Ausrüstungen wie Spatel, Gabel oder Messer
verwenden. Nach einer langen Gebrauchsdauer kann die Farbe die Beschlagfarbe der Pfanne sich ändern. Das ist nur
eine Ursache der Feuchtigkeit und der Dampf und es hat keinen Einfluss auf die Performanz des Gerätes. Das Loch der
Knethaken muss auch gereinigt werden. Danach ein Tropfen Öl auf das Knethaken tropfen und es wieder an die Drehachse
der Pfanne einsetzen. Dieser Prozess wird das Verkleben der Messer verhindern.
• Verhindern Sie, dass die Öffnungen und Löcher des Gerätes verstaubt werden. Seien Sie sich beim Aufheben des
Gerätes sicher, dass inklusiv der Sichtfenster, alle Teile des Gerätes abgetrocknet sind. Erst dann können Sie das Gerät
um Aufbewahren aufheben. Auf den Deckel des Gerätes darf keine Gegenstände abgestellt werden.
Dampfablassfach: Wir auf die fordere Seite des Gerätes, an die unter vorhandene Leerstelle angebracht.
Stab: Der Mischstab wird zum rausnehmen des Brotes verwendet, wenn der Brot angehaftet ist.
- 35 -
Brotbackautomat
Sinbo SBM 4705
Kontrollpaneltasten, Information Display und dessen Funktionen
Allgemein um Information Display;
• Es zeigt das gewählte Bräunungsgrad.
• Es zeigt das gewählte Gewicht.
• Es zeigt den Ziffer der gewählten Programm.
• Es zeigt die noch übrige Backdauerzeit.
Beispiel; (Es bedeutet: 3:20 “Es dauert noch 3 Stunden und 20 Minuten”; 0:20 “Es dauert noch 20 Minuten”).
• Zeigt die Temperaturwarnung (An die Abteilung “Behebungen der Fehler” nachschauen).
Warnungsdisplay
1. Wenn nachdem Einschalten der Programm am Display der Zeichen “H:HH” (Siehe Zeichen 1) erscheint, ist der innere
Temperatur viel zu hoch. Das Programm muss gestoppt werden. Das Deckel öffnen und das Gerät 10-20 Minuten abkühlen
lassen.
2. Wenn nachdem Einschalten der Programm am Display der Zeichen “E:EE” (Siehe Zeichen 2) erscheint, ist der
Heizsensoranschluss abgebrochen. Unter Aufsicht einen zuständigen Techniker sollte der Sensor sorgfältig geprüft
werden.
Hell
Mittel
Dunkel
700gr
900gr
Hell
Siehe Zeichen 1
Mittel
Dunkel
700gr
900gr
Siehe Zeichen 2
Zeiteinstellungstasten (Timer-Tasten)
Es regelt das Backzeit des Brotes. Für ist für alle Programme ausser “Schnellback” Programm gültig. Bespiel: Wenn
am Abend um 20.30 Und die Zutaten in das Gerät rein gegeben worden sind und Sie sich wünschen, dass das Brot morgen
um 07.00 fertiggebackt wird, müssen sie bis zum Erreichen der Zeit vom 10.30 an die Timer-Taste drücken, weil 10.30
das vorhandene Zeitdifferenz ist. Danach wird das Gerät gestartet. Von diesem Moment an ist das Gerät so programmiert
worden, dass das Brot um 07.00 fertiggebackt wird.
Einstellung der Krustenfarbe (Bräunungsgrad)
Mit entsprechenden Programmen kann eine Wahl zwischen helle, mittlere und dunkle Bräunungsgraden gemacht werden.
Wenn auf diese Taste hintereinander gedrückt wird, werden auf dem Informationsdisplay die Wahlmöglichkeiten hell,
mittel und dunkel angezeigt.
Start/Stopp Taste
Wenn auf diese Taste 1 Sekunde lang gedrückt wird, wird nach der Bip-Ton der Zeichen (:) auf dem Display angezeigt
und das Programm wird eingeschaltet. Wenn auf gleiche Weise auf diese Taste 2 Sekunden lang gedrückt wird, wird
zusammen mit dem Bip-Ton das Programm ausgeschaltet.
Einstellung der Brotgröße
Beim einschalten der Brotbackautomat ist die Brotgröße standardmäßig auf Knusperbrotgröße eingestellt. Für normal
gebackene Brotgrößen (in Gewicht von 700 und 900 Gr.) auf die Brotgröße – Taste einmal drücken.
Menütaste
Mit der Menütaste können sie von der Displaytafel eine Wahl zwischen vorhandenen Backprogrammen von 1 bis 12
machen.
Öffnungstaste
Mit dieser Taste können Sie den Deckel öffnen.
- 36 -
Brotbackautomat
Sinbo SBM 4705
1. Normales Brot
4. Schnell-Backen 7. Super Schnell -2 10. Kuchen
2. Französisches Brot 5. Süßes Brot
8. Teig
11. Sandwich
3. Vollkornbrot
6. Super Schnell -1 9. Marmelade
12. Backen
START
HELL MITTEL DUNKEL 700gr 900gr
DAUER
STOP
DAUER
MEN
Ü
Brotgröße
BE
FAR
ÖFFNEN
PROGRAMMBEZEICHNUNGEN
Mit der Menütaste, können Sie eine Wahl zwischen unten angegebenen Programmen machen:
1. Normal Weißbrot
(3:00 und 2:53) Es ist zum backen von Weißbrot. Außerdem kann auch zum backen von weiteren Brotsorten dieses
Programm verwendet werden. Für 700 Gramm wiegenden Brots beträgt der Backzeit 2 Stunden und 53 Minuten. Für
900 Gramm wiegenden Brots beträgt der Backzeit 3 Stunden. .
2. Französisches Brot
(3:50 und 3:40) Der Eigenschaft besteht daraus, dass es länger knetet und backt. Es hat eine hellere Farbe als Weißbrot.
Es wird ein weicheres Brot gezielt. Für 700 Gramm wiegenden Brots beträgt der Backzeit 3 Stunden und 40 Minuten.
Für 900 Gramm wiegenden Brots beträgt der Backzeit 3 Stunden und 50 Minuten.
3. Vollkornbrot
(3:40 und 3:32) Dieses Programm wird zum Backen von Brot verwendet, die Vollkorn in bestimmte Menge beinhalten.
Bei diesem Programm ist eine lange Vergärungszeit vorhanden, damit der Vollkorn das Wasser aufnehmen und aufgehen
kann. Weil bei diesem Programm erfolglose Ergebnisse auftreten kann, wird es nicht empfohlen mit Timer-Tasten die
Zeit einzustellen. Für 700 Gramm wiegenden Brots beträgt der Backzeit 3 Stunden und 32 Minuten. Für 900 Gramm
wiegenden Brots beträgt der Backzeit 3 Stunden und 40 Minuten.
4. Schnell-Backen
(Schnellbrot) (1:40) Wird zum backen von Brot in kürzeren Zeit verwendet. Bei diesem Programm wird dichte und kleine
Brots gebacken.
5. Süßbrot
(2:55 und 2:50) Wird zum backen von Brots verwendet, die in Vergleich zum normalen Brots knuspriger und süßer sind.
Knuspriges Brotkruste wird durch Verbrennung der Zucker erreicht. Für 700 Gramm wiegenden Brots beträgt der
Backzeit 2 Stunden und 50 Minuten. Für 900 Gramm wiegenden Brots beträgt der Backzeit 2 Stunden und 55 Minuten.
6. Super Schnell-1
Das Kneten, Schwellen und Backen von Brot in Gewicht von 700 Gramm werden in einen sehr kurzen Zeitraum durchgeführt.
Das erzielte Brot wird nicht stark aufgegangen. Sie ist weich und hallfarbig.
7. Super Schnell-2
Das Kneten, Schwellen und Backen von Brot in Gewicht von 900 Gramm werden in einen sehr kurzen Zeitraum durchgeführt.
Das erzielte Brot wird nicht stark aufgegangen. Sie ist weich und hallfarbig.
8. Teig (1:30)
Diese Einstellungswahl backt kein Brot. Sie bereitet nur den Teig vor. Das Teig wird von der Gehäuse rausgenommen
und wird zum backen von Sandwiches, Pizzas u.s.w. verwendet. Mit diesem Programm kann jeder Teig vorbereitet
werden. Es muss jedoch darauf geachtet werden, dass die Teigzutaten ein Gewicht von 900 Gramm nicht übersteigen.
- 37 -
Brotbackautomat
Sinbo SBM 4705
9. Marmelade (1:20)
Zum vorbereiten von Marmeladen, die aus Fruchtsorten beschaffen werden, wird dieses Programm verwendet. Die
Menge der Zutaten nicht erhöhen. Verhindern Sie, dass der Marmelade in der Kochpfanne aufkocht und in die innere
Gehäuse des Gerätes ausfließt. Bei einem solchen Fall das Gerät sofort ausschalten. Die Pfanne vorsichtig rausnehmen,
etwas auskühlen lassen und danach reinigen.
10.Kuchen (2:50)
Dieses Programm wird die Zutaten zusammenmischen und danach in einer bestimmten Zeitdauer das Kuchen backen.
Bevor die Zutaten in das Backautomat zugefügt werden, müssen die Zutaten der zwei verschiedenen Gruppen in zwei
verschiedene Behälter gerührt werden (Siehe Kuchenrezepte).
11. Sandwich (3:00 und 2:55)
Wird in schwachen Konsitenz, jedoch in weicheren und in Sandwichgeschmack gebacken. Für 700 Gramm wiegenden
Brots beträgt der Backzeit 2 Stunden und 55 Minuten. Für 900 Gramm wiegenden Brots beträgt der Backzeit 3 Stunden.
12. Backen (1:00)
Dieses Programm ist nur zum backen vorgesehen und wird verwendet, um die Backdauer der bereits gewählten Programm
zu verlängern. Dieser Funktion wird verwendet, um die Marmeladen und Konfitüren in die richtige Konsitenz zu bringen.
Nach aktivieren dieser Funktion beträgt der minimale Laufzeit 1 Stunde (1:00) und wird mit 1 Minuten-Abstand nach
unten abgezählt.
Nachdem der Backprozess (Extra-Backen) vollendet wird, müssen Sie diesen Prozess durch Drücken an die „Stopp“
Taste deaktivieren. Es wird empfohlen das kochende/backende Marmelade oder Brot nach der ersten 10 Minuten zu
kontrollieren und danach je in Abstände von 10 Minuten u kontrollieren. Durch Drücken der Zeiteinstellungstasten
(Timertasten) kann der Backzeit/Kochzeit je in Abstände von 10 Minuten verlängert werden. Falls der Backprogramm
am Ende irgendeines Programms ohne abzuwarten gewählt wird und dabei an der Display des Zeichen “H:HH” angezeigt
wird, den Deckel öffnen und die Pfanne rausnehmen und 10 Minuten lang abkühlen lassen. Nachdem es abgekühlt wird,
die Kochpfanne und dessen Inhalt wieder an die Gehäuse aufsetzen, dass Programm einstellen und an die Taste “Start”
drücken.
Bedienung der Brotbackautomat
1) Das Rausnehmen der Backpfanne
Den Deckel des Gerätes öffnen. Die Brotbackform am Griff nehmen und entgegen dem Uhrzeigersinn drehen und auf
die Arbeitsplatte legen. (Es ist wichtig, dass die Zutaten in die Backform außerhalb der Pfanne eingegeben werden, damit
sie nicht an die Heizrüstung des Gerätes tropfen).
2) Installation des Knetmessers
Die Knetmesser durch Verschieben auf die Drehachse aufsetzen.
3) Zutatenmessung
Die erforderlichen Zutaten messen und laut der in Liste angegebenen Reihenfolge in die Backform geben. (Für detaillierte
Auskunft in folgenden Seiten die Abteilung “Zutatenmessung” nachsehen).
• Achten Sie darauf, dass in die Pfanne eingegebene Hefe nicht mit Wasser und weiteren Flüssigkeiten in Berührung
kommt. Ansonsten wird die Hefe sofort aktiviert.
• Verwenden Sie warmes Wasser zwischen 21-28 ˚C (im Sommer kaltes und im Winter
warmes Wasser).
4) Aufsetzen der Pfanne
Die Pfanne in das Gerät aufsetzen und im Uhrzeigersinn drehen. Danach den Deckel
zuschließen.
- 38 -
Brotbackautomat
Sinbo SBM 4705
5) Anschließen der Stecker
Nachdem Sie die Stecker in die Steckdose eingesteckt haben, wird das Gerät automatisch in normales Brotbackmenü
und in normaler Zeitdauer eingestellt.
• Wenn Sie irgendeinen Taste des Gerätes drücken, ertönt ein Bip-Ton, welches zeigt, dass das Gerät in Betrieb ist.
6) Programmwahl
Mit Drücken auf die Menütaste wird eine Wahl zwischen 12 unterschiedlichen Programms gemacht.
7) Wahl der Brotgröße
Durch Drücken an die Brotgröße wird ein Wahl zwischen Knusprig oder Gewicht von 700 Gramm und 900 Gramm gemacht.
Beim jeden Einschalten des Gerätes wird sie sich das Gerät auf knuspriges Modus einstellen.
8) Feststellung der Krustenfarbe (Bräunungsfarbe)
Durch Drücken auf die “Farbe” Taste, kann die Bräunungsgrad des Brotes eingestellt werden. Es kann zwischen der
Bräunungsgrade hell, mittel und dunkel ausgewählt werden.
9) Einstellung der Timer (Zeiteinstellung)
Wenn Sie nicht möchten, dass das Gerät sofort in Betrieb gesetzt wird oder das Brot in einem bestimmten Zeitpunkt
fertiggebackt haben möchten, können sie die Zeiteinstellung verwenden.
10) Starten des Backprozess
Um das Gerät in Betrieb zu setzen an die “Start/Stopp” Taste drücken. Die verbleibende Zeit wird im Display angezeigt,
in dem immer nach Ablauf jeder Minuten je-1 Minute abfällt.
11) Betrieb
Die Prozesse der Brotbackmaschine werden im Rahmen der im „Backzyklusdauern“ Abteilung angegebenen
Programmschritten automatisch durchgeführt. Falls Ihre Gerät entsprechend einer zweistufigen Knetprozess eingestellt
ist, wird das Gerät durch ertönen eines Bip-Tons die Benutzer warnen, damit die Früchte/Nüsse und ähnliche Zutaten
eingegeben werden kann.
• Während der Backprozess kann durch den Leerstellen/Löchern des Gerätes Dampf austreten, was ganz normal ist.
12) Vollendung der Backdauer
Falls das Programm vollendet und das Brot fertiggebacken ist, wird am Display das „0:00“ Zeichen angezeigt und mit
einem Bip-Ton wird der Benutzer gewarnt.
13) Warmhalteprozess
In Warmhaltefunktion wird der Warmluft innerhalb des Gerätes extra 60 Minuten lang beibehalten (Siehe “Backzyklusdauer”
Abteilung). Um einen guten Ergebnis zu erzielen, muss der Backpfanne innerhalb der Warmhaltedauer oder nach
Vollendung der Warmhaltedauer aus dem Gerät rausgenommen werden. Nach Beendigung der Warmhaltedauer wird
der Bip-Ton 10 mal ertönen.
14) Die Pfanne vom Gerat rausnehmen aus des Gerät
Die “Stopp” Taste drücken und den Deckel öffnen.
WARNUNG: Um das heize Pfanne vom Gerät rauszunehmen unbedingt einen Ofenhandschuh tragen. .
15) Das Trennen des Brotes von Pfanne
Das Brot im Pfanne ca. 15 Minuten lang abkühlen lassen und danach die Pfanne rückwärts umdrehen und an die
Pfannenboden paarmal mit den Händen tippen. Das Brot wird von der Pfanne rauskommen. Das Brot auf einen gitterartigen
Gegenstand legen. In die Pfanne warmes Wasser füllen, um die Anhaftung der Knetmesser an die Umdrehungswelle
zu vermeiden.
• Manchmal bleibt der Knetmesser im Brot. Bei einem solchen Fall können Sie das Knetmesser, nach dem der Bort
abgekühlt ist, mit Hilfe der mitgelieferten Stab ohne einen Kratzer auf dem Knetmesser zu verursachen herausnehmen
oder um zu vermeiden, dass der Antifhaft-Fläche gekratzt wird, es mit Hilfe einer hölzernen oder plastischen
Küchenwerkzeug herausnehmen.
BEMERKUNG: Während der Backprozess darf der Deckel des Gerätes nicht geöffnet werden. Dies wird sowohl den
Qualität, als auch den Aufgehgrad des Brotes beeinflussen. Den Deckel nur öffnen, um entsprechend dem Programm
die erforderlichen Zutaten beifügen zu können.
WARNUNG: Wenn das Gerät nicht benutzt wird, den Steckkabel der Gerätes vom Steckdose trennen.
- 39 -
Brotbackautomat
Sinbo SBM 4705
Messen der Zutaten
Die wichtigste Phase bei der Benutzung der Brotbackautomat ist die genaue und richtige Messung der erforderlichen
Zutaten, da ansonsten erfolglose Ergebnisse erzielt werden können. Die Zutaten müssen je nach dem Rezept, genau in
angegebene Menge und Art in die Backpfanne zugefügt werden. Die Massen der flüssigen und trockenen Zutaten, sind
wie folgt angegeben:
Messung der Flüssigkeiten
Benutzen Sie dafür den Behälter, die zusammen mit dem Gerät mitgeliefert worden ist. Den Messbecher auf eine ebene
Fläche legen und darauf beachten, dass der Flüssigkeitsstand auf den entsprechende Messlinie ankommt. Weil sie die
kritischen Massen der Rezepte überschreiten können, sollten die Mengen nicht durch Schätzung bestimmt werden.
Messlöffel
Messbecher
1. Flüssigkeiten (Wasser, Öl, Milch) 2. Trockene Zutaten (Mehl, Zucker, Salz) exklusiv Hefe 3. Hefe
Messen der trockenen Zutaten
Die trockenen Zutaten sind mit Hilfe der mitgelieferten Messbecher und Messlöffel abzumessen. Die trockenen Zutaten
werden gemessen, indem der entsprechende Zutat mit Hilfe einer Löffel ins Messbecher aufgefüllt wird. Nachdem der
Messbecher entsprechend voll ist, ist der überflüssige Anteil mit Hilfe einer Messer wegzunehmen. Eine extra beizufügende
Zutat, kann das Rezept verderben. Bei der Messung der kleinen Zutaten (Hefe, Zucker, Salz, Milchpulver, Honig, Sirup)
sollte der mitgelieferte Messlöffel verwendet werden. Die Zutaten sollten immer den angegebenen Mengen entsprechen.
Denn auch sehr kleine Unterschiede können die Backergebnisse beeinträchtigen. Zusammen mit dem Gerät mitgelieferte
doppelseitige Messlöffel besitzt auf einer Seite dass Esslöffelmass (tablespoon) und auf der anderen Seite das Teelöffelmass
(teaspoon).
BEMERKUNG: DURCH VERSUCHE UND ERFAHRUNG KÖNNEN SIE DAS BESTE HERSTELLEN
Häufig gestellte Fragen und dessen Antworte
FRAGE 1: Kann die Form und die Höhe des Brotes unterschiedlich sein?
ANTWORT1: Ja, es kann sein. Das ändert sich je nach der Raumtemperatur. In sehr warmen oder kühlen Raumtemperaturen
kann das Brot sehr viel ausgehen oder ungenügend ausgehen. Auch wenn die beigefügte Zutaten wie Früchte, Nüsse
und Getreide außerhalb der angegebenen Mengen hinzugefügt werden, kann es einen Einfluss auf das Form und Höhe
des Brotes machen. Alle Zutaten sorgfältig abmessen/abwiegen und beachten Sie darauf, dass die Zutaten frisch sind.
Vollkornbrots werden immer kleiner als die anderen Brotsorten. Warum? Es ist sehr normal, dass das Vollkornbrot
immer kleiner, als die anderen Brotsorten erhalten werden. Vollkornmehle sind schwerer im Vergleich zur WeißbrotMehle, deshalb gehen sie beim Backen eines Brotes nicht so viel auf, wie die anderen Mehle.
FRAGE 2: Warum geht das Brot nicht aus?
ANTWORT2: Falls Sie beim Backen eines Brotes vergessen die Hefe beizugeben oder die Knethaken aufzusetzen, wird
das Brot nicht aufgehen. Falls der Hefe ungenügend oder nicht frisch ist, wird das Brot ebenfalls nicht aufgehen und
wird sehr klein erzielt. Beachten Sie vor allem die Sorte, Menge und die Frische der Hefe. Das Verfalldatum abgelaufene
oder vor einem langen Zeit geöffnete Hefen nicht benutzen.
FRAGE 3: Warum riecht das Brot schlecht?
ANTWORT 3 : Falls zu viel Hefe oder nichtfrische Zutaten verwendet werden, wird das Brot einen schlechten Geruch
aufweisen. Vor allem wird bei Verwendung von überflüssiger Hefe im Programm „Schnell Brot“ ein Geruch entstehen.
- 40 -
Brotbackautomat
Sinbo SBM 4705
FRAGE 4: Warum kann in der Mitte des Brotes ein Leerstelle entstehen?
ANTWORT 4: Während der Knetphase ist dort Luft abgelagert worden. Falls während der Gärung diese Luft nicht
ausgegangen ist, wird das Brot zusammen mit diesem Luft gebacken.
FRAGE 5: Kann der Mischhaken zusammen mit dem Brot rauskommen?
ANTWORT 5: Das ist ganz normal. Sie können das Haken mit einer plastischen Gegenstand oder mit einem nicht
kratzenden Gegenstand vom Brot rausnehmen.
FRAGE 6: Warum kann der Uhrzeit nur zwischen 4 Stunden und 13 Stunden eingestellt werden?
ANTWORT 6: Die gesamte Backphase beträgt minimal 3:00 Stunden. Wenn es über 13 Stunden eingestellt würde, könnten
manche Zutaten faulen.
FRAGE 7: Können die im Rezept angegebene Mengen, in halbe oder doppelte Menge durchgeführt werden?
ANTWORT 7: Nein. Beachten Sie immer darauf, die im Rezept angegebene Mengen vollkommen gleich verwendet werden
und die Zutaten genau und korrekt abgemessen/abgewogen werden.
FRAGE 8: Wird bei Verwendung der Zeiteinstellung in der Nacht der Geräusche verursacht?
ANTWORT 8: Ja. Beim kneten in der Nacht können sie das Motorgeräusch hören.
FRAGE 9: Was ist zu machen, falls Sie nach dem Backen das Brotes das Brotbackautomat noch einmal einschalten
möchten, aber das nicht gelingt und andauernd eine Signalton ertönt und am Display die Buchstaben „HHH „ erscheint?
ANTWORT 9: Es wird nicht ins Betrieb gesetzt, weil das Gerät noch heiz ist. Zuerst auf die Start/Stopp-Taste drücken
und das Gerät ausschalten, den Deckel des Gerätes öffnen und das Brotform rausnehmen und abwarten bis es kühlt.
FRAGE 10: Was müssen wir machen, falls beim Drücken auf das Starttaste an der Anzeiger die Buchstaben “LLL“
erscheinen und ein Signalton ertönt wird?
ANTWORT10: Der Raumtemperatur ist zum betreiben des Gerätes nicht ausreichend, deshalb wird das Gerät nicht aktiv.
Durch Drücken auf das Start/Stopp-Taste das Gerät ausschalten. Von der befindlichen Raum entfernen und es in einen
wärmeren Raum etwas abwarten lassen.
Der ideale Raumtemperatur liegt zwischen (15 ˚C-25 ˚C).
FRAGE 11: Was müssen wir machen, falls beim Drücken auf das Starttaste an der Anzeiger die Buchstaben „EEE“
erscheinen und ein Signalton ertönt wird?
ANTWORT11: Der Raumtemperatur ist zum betreiben des Gerätes viel zu hoch, deshalb wird das Gerät nicht aktiv. Durch
Drücken auf das Start/Stopp-Taste das Gerät ausschalten. Von der befindlichen Raum entfernen und es in einen kühleren
Raum etwas abwarten lassen.
FRAGE 12: Warum ist die untere und obere Fläche des Brotes feucht?
ANTWORT 12: Falls das Brot mehr als die erforderliche Wartezeit im Gerät auf eine geschlossene Weise gehalten
worden ist, wird das Brot feucht sein, weil der vorhandene Dampf nicht raustreten konnte. Wenn Sie das Brot rausnehmen
und es auf einem Gitter etwas abwarten lassen, wird es seinen normalen Zustand wiederbekommen.
FRAGE 13: Was soll gemacht werden, wenn nachdem der Brot fertiggebacken wurde, auf der Anzeiger das Zeichen
„(0:00)“ angezeigt und zugleich auch ein Bip-Ton ertönt wird?
ANTWORT13: Dieser Signalton zeigt, dass das Brot fertiggebacken ist und nun der Warmhaltefunktion aktiv ist. Wenn
Sie wollen, können Sie das Gerät ausschalten und das Brot rausnehmen.
FRAGE 14: Was soll gemacht werden, wenn bei der Backphase ein leichtes Brandgeruch zu riechen ist und auch etwas
Rauch rauskommt?
ANTWORT4: Falls die Zutaten innerhalb der Maschine in das Backform zugefügt werden, können die Anteile der Zutaten,
die auf das Gerät oder Heizausstattung versehentlich geschüttet wurden, während der Backphase einen Rauch und
Geruch verursachen. Deshalb sollten sie die Zutaten, nachdem sie die Brotbackform aus dem Gerät entfernt haben nach
der Reihenfolge zugeben.
FRAGE 15: Manchmal bleibt Mehl an der Außenseite des Brotes. Was ist der Ursache?
ANTWORT15: Wenn manchmal die zugegebene Mehl unzureichend ist, haftet der Teig an das Backform. Es muss noch
etwas Mehl zugegeben werden. Sie können das extra zugefügte Mehl mit einem Gegenstand unterstützen, die die
Backform nicht zerkratzen wird. So wird an den Randseiten der Backform kein Mehl bleiben. Falls Sie vergessen, dass
- 41 -
Brotbackautomat
Sinbo SBM 4705
extra zugefügte Mehl beim rühren zu unterstützen, können Sie an der Außenseite des Brotes gebliebenes Mehl mit Hilfe
eines Messers abschneiden.
FRAGE 16: Wie kann ich das Brot aufbewahren, nachdem es fertiggebacken ist?
ANTWORT16: Nachdem der Backprozess des Brotes vollendet ist, es auf einem Gitter abkühlen lassen. Falls Sie das
Brot ohne es abzukühlen lassen schneiden versuchen, wird das Brot sich verformen und wird teigig. Sie können das Brot
mit einem scharfen oder elektronischen Messer schneiden. Das Brot danach als ein ganzes Brot oder in Scheiben
geschnittene Weise so aufbewahren, dass von draußen kein Luft eindringt. Sie können es auch im Kühlschrank aufbewahren.
Sie können später unter Verwendung das Back-Programm der Backautomat Ihr Brot 15-20 Minuten lang aufwärmend
konsumieren.
FRAGE 17: Was soll ich bei Stromausfall machen?
ANTWORT 17: Wenn bei langdauernden Stromausfall, der Prozess im Knetphase ist, können Sie das Programm erneut
aktivieren. Wenn es am Anfang der Gärungsphase ist, sollte das Programm nicht erneut aktiviert werden. In diesem Fall
unter Benutzung der Programmwahltaste das „Backen“-Menü wählen und den Teig fertigbacken. Falls der Stromausfall
während der Backphase zustande kommt, dass Ofen wieder aktivieren und im dauer der restlichen Zeit das Brot
fertigbacken.
FRAGE 18: Der Teig wird nicht gerührt und vom Motor kommen Geräusche!
ANTWORT 18: Der Knetmesser oder Backform ist nicht korrekt aufgesetzt worden. Seien Sie sich sicher, dass die Pfanne
an das Boden der innere Gehäuse des Gerätes in Berührung kommt, richtig aufgesetzt ist und ein Klick-Ton zu hören
war.
FRAGE 19: Warum soll ich beim Backen mit frischem Milch die Zeiteinstellungsfunktion nicht benutzen?
ANTWORT 19: Falls der Wartezeit innerhalb der Brotbackautomat zu lang ist, wird das Milch sich verderben. Bei Rezepten,
die einen schnellen Verbrauch erfordernde Zutaten, wie Milch und Eier beinhalten, sollte die langzeitige
Zeiteinstellungsfunktion nicht verwendet werden.
FRAGE 20: Warum soll ich die Zutaten in das Backform in einer bestimmten Reihenfolge eingeben?
ANTWORT 20: Auf diese Weise kann der Brotbackautomat die Zutaten auf eine effiziente Weise mischen. Außerdem wird
auf diese Weise vermieden, dass vor Beginn der Backphase die Hefe (vor allem bei langzeitigen Zeiteinstellungen) mit
dem Flüssigkeiten in Berührung kommt.
FRAGE 21: Wie kann ich die Knethaken entfernen, die an die Pfanne verklemmt ist?
ANTWORT21: Der Knethaken kann nach der Knetphase angehaftet bleiben. Gießen Sie auf das Messer etwas warme
oder heize Wasser, so können sie das Messer einfach entfernen. Aber wenn es trotzdem nicht entfernt werden kann,
es 30 Minuten lang in heize Wasser warten lassen..
FRAGE 22: Kann ich die Backpfanne in Spülmaschine abwaschen?
ANTWORT 22: Nein. Sie müssen die Backpfanne und Knetmesser in Hand waschen.
FRAGE 23: Woher soll ich wissen, wann ich die Nüsse und ähnliche Zutaten in das Brot zufügen muss?
ANTWORT 23: Bei Eintritt in die zweite Knetzyklusphase, wird ein Signal 10 mal ertönt, die Sie dazu warnt, die Trauben,
Nüsse und weitere ähnliche Zutaten zuzufügen. Dann können sie diese Zutaten zufügen.
FRAGE 24: Nachdem der Brot aufgeht, fällt manchmal die Mitte des Brotes zusammen. Warum?
ANTWORT 24: Es kann sein, dass der Brot zu stark aufgegangen ist. Um das Aufgehen des Brotes etwas zu vermindern,
können Sie die zugefügte Menge der Hefe etwas vermindern. Falls der Teikonsistenz zu flüssig ist (also wenn der
Wassermenge zu viel ist) , kann der Brot nach aufgehen, zusammen fallen. Verwenden Sie deshalb die angegebenen
Zutaten immer in genau angegebenen Mengen.
FRAGE 25: Ist es wichtig, dass in die Backform zuzufügende Zutaten immer in Raumtemperatur sein müssen?
ANTWORT 25: Die Zutaten sollen weder zu warm, noch zu kalt sein. Kurz gesagt, müssen die Zutaten immer in
Raumtemperatur sein. Die Raumtemperatur sollte zwischen 21-28 ˚C sein.
FRAGE 26: Kann ich die Hefe vorher mit Wasser mischen?
ANTWORT 26: Nein, auf keinen Fall. Die Hefe muss trocken gehalten werden. Es soll immer nach der Mehl in die
Backpfanne als letzte zuzufügende Zutat sein. Vor allem bei dem Backprozess, in dem der Zeiteinstellungsfunktion in
Gebrauch genommen wird, ist es viel wichtiger.
- 42 -
Brotbackautomat
Sinbo SBM 4705
FRAGE 27: Ich habe in mein Brot Haferflocken, Kürbiskerne, Erdnüsse und ähnliche Zutaten zugefügt. Aber mein Brot
ist zu trocken geworden. Warum?
ANTWORT 27: Alle in das Brotteig zuzufügende trockene Zutaten, vor einer Stunde ins Wasser zum einweichen legen
und sie feuchten lassen. Wenn Sie diese Methode nicht durchführen, werden die zugefügte trockene Zutaten, den Wasser
des Teiges in sich einziehen und deshalb werden Sie einen wasserarmen und trockenen Teig haben, was zu einen
schlechten Brotergebnis führen wird. Darüber hinaus sollten Sie solche Zutaten in die Teig am Ende der zweiten
Knetzyklusphase zufügen.
FRAGE 28: Das Brot ist sehr dicht, es beinhaltet keine Porenraum oder Leerstellen. Beim zusammendrücken des Brotes
klebt das Brot zusammen. Warum?
ANTWORT 28: Dos Brot sollte Poren in unterschiedlichen Volumen beinhalten. Dies wird sich je nach der verwendeten
Mehl und der Brotsorte ändern. Beim zusammendrücken sollte der Brot nicht zusammenkleben und zur ursprünglichen
Zustand zurückkehren. Wenn es zusammenklebt ist der Teig wahrscheinlich nicht ausreichend gerührt, gebacken oder
zum gären nicht ausreichend warten gelassen. Bei Ihrem Brotbackautomat kann –in normalen Voraussetzungen- ein
solches Problem nicht entstehen. Das Problem liegt wahrscheinlich bei dem verwendeten Zutaten und der Mengenverhältnis.
FRAGE 29: Das Innenseite des Brotes ist nicht so weiß, wie die Brote, die ich von Bäckerei kaufe. Es weist mehr eine
gelbe Farbe auf.
ANTWORT 29: Die Innenseite des Brotes soll auch etwas gelb sein. Dafür sollte leicht gelbes Mehl verwendet werden,
die nicht mit chemischen Substanzen gebleicht worden sind. Die Poren im Innenseite des Brotes sollten nicht trüb,
sondern glänzend sein.
TECHNISCHE DATEN
• Brot Grösse Wahl: 750-900 g
• Mit 12 digitale Programmas und Schnellbackfunktion
• 13 Stunden programmierbarer Timer
• 60 Minuten warmhalten Funktion
• Einstellbarer Braünungsgrad: hell, medium, dunkel
• Geschirrspüller geeignete Knetbehälter & Knethaken mit Antihaftbeschichtung
• Knetbehälter leich herausnehmbar für leichte Reinigung
• Wärme-isolierendes Gehäuse
• Antirutschfüsse
• Inklusive Messbecher und Messlöffel
• AC230V, 50Hz, 600W
- 43 -
No: 1-4705-27062011
- 55 -
- 56 -
(HR) Hrvatski / Pekač Kruha
Sinbo SBM 4705
SINBO SBM 4705 PEKAČ KRUHA
UPUTSTVO ZA UPORABU
BITNE SIGURNOSNE UPUTE
Kod uporabe bilo kog električnog ured̄aja potrebno se pridržavati temeljnih sigurnosnih naputaka. Osim osobnih ozljeda
postoji opasnost i od oštećenja aparata i njegovih funkcija. Ove dvije teme su iskazane sljedećim izrazima.
UPOZORENJE: Opasnost od osobne ozljede
BITNO: Opasnost od oštećenja aparata
Osim toga treba uzeti u obzir i sljedeće sigurnosne savjete.
Postavljanje aparata
• Aparat ne stavljajte u blizini ruba radne površine u kuhinji.
• Aparat stavite na ravnu i stabilnu površinu.
• Ne koristite na vanjskim površinama.
Kablovi
• Kabel bez ikakvih teškoća treba da doseže od utičnice do aparata.
• Kabel aparata ne treba da visi preko rubova radne površine i držite ga van dječijeg dohvata.
• Kabel ne treba da bude napet izmed̄u utičnice i slobodnog prostora(npr. izmed̄u niske utičnice i stola)
• Kabel zaštite od kontakta s vrućim površinama.
Za vašu sigurnost;
UPOZORENJE: Ne dodirujte vruće površine! Za podizanje vruće posude za kruh koristite rukavicu za pećnicu. Nipošto ne
prekrivajte otvore za izlaz pare.
UPOZORENJE: Izbjegavajte kontakt s dijelovima u pokretu!
• Za izbjegavanje rizika od strujnog udara, kabel i utikač ne uranjajte u vodu ili neke druge tekućine.
• Budite maksimalno oprezni kada prenosite aparat s vrućim dijelovima.
• Pekač kruha ne koristite za čuvanje nekih alata. Za izbjegavanje rizika od strujnog udara ili požara u unutrašnjost
aparata ne stavljajte kuhinjski pribor.
• Aparat ne koristite vlažnom ili mokrom rukom.
Djeca
Nipošto ne dozvolite djeci da koriste aparat za kruh. Dok aparat radi djecu obavezno držite pod brižnim nadzorom, u
suptonom djeca mogu biti izložena opasnosti.
Podučite djecu da budu oprezna prema opasnostima u kuhinji i upozorite da ne pokušavaju dohvatiti mjesta koja upotpunosti
ne vide.
DRUGA SIGURNOSNA UPOZORENJA
• Nipošto ne koristite aparat s oštećenim kabelom za napajanje. Za popravku ili zamjenu kabela kontaktirajte najbliži
ovlašteni servisni centar.
• Ne dodajite nikakav pribor na aparat jer to može nanijeti štetu aparatu.
• Pekač kruha ne stavljte u blizini ili na plinski ili električni štednjak ili pećnicu.
• Da ne bi došlo do oštećenja aparata na njegovu površinu ne stavljajte posudu za pečenje ili neki drugi objekat.
• Ne koristite abrazivna sredstva za čišćenje. Posudu za pečenje, nož za miješanje, posudu ili žlicu za mjeru ne perite u
stroju za pranje sud̄a.
• Aparat i kabel zaštite od toplote, izravnih sunčevih zraka, vlage, oštrih predmeta i sl.faktora.
• Prije uključenja aparata pravilno postavite posudu za pečenje.
• Kada aparat ne radi, kada postavljate dijelove unutar aparata, u vrijeme čišćenja ili pojave bilo kakvog problema izvucite
utikač iz utičnice. Kada isključujete aparat iz utičnice uhvatite za glavu utikača.
UPOZNAJMO SINBO PEKAČ KRUHA
Sa SINBO pekačem kruha možete pripremiti razne vrste higijenskih i zdravih kruhova prema osobnom okusu. Za pripremu
kruha ne treba vam mnogo truda jer vaš aparat s računarskom podrškom umjesto vas obavlja mnoge poslove.
Pekaˇc Kruha je jednostavna i to kroz sljedeće tri etape:
1. Ubacite sastojke.
2. Odaberite program u izborniku i pritisnite na gumb za početak rada.
3. Sačekajte da kruh bude spreman.
- 57 -
Pekač Kruha
Sinbo SBM 4705
Napomena: U vrijeme pečenja kruha ne zaustavljajte aparat. Osim kruha od cjelovitog pšeničnog zrna u aparatu možete
pripremiti razne vrste kruhova, tijesto za sendviče i picu a isto tako i kolač i džem. Sve je tako jednostavno i domaćeg
okusa.
Ono što trebate znati prije prve uporabe
Prije početka uporabe izdvojite nekoliko minuta za čitanje uputstva za uporabu i sačuvajte ga za buduće potrebe. Molimo
vas da obratite pažnju na sigurnosne upute navedene u ovom uputstvu za uporabu.
1. Pažljivo otvorite pekač kruha i uklonite sav ambalažni materijal.
2. Pekač kruha očistite od prašine nakupljene prilikom pakovanja.
3. Posudu za pečenje, nož za miješanje i vanjsku površinu pekača kruha očistite čistom i vlažnom krpom. Posuda pekača
je obložena non-stick materijalom. Za čišćenje pekača za kruh ne koristite abrazivna sredstva za čišćenje i bilo kakav
ljepljiv materijal.
4. Kod prve uporabe podmažite posudu za kruh uljem, puterom ili margarinom.
5. Očistite još jedanput.
6. Nož za miješanje stavite na osovinu posude za pečenje.
Napomena: Prilikom proizvodnje aparata neke komponente su podmazane u cilju zaštite. Zbog toga kod prve uporabe
iz aparata može izaći strana para što je sasvim normalno.
KARAKTERISTIKE
Uporaba timera
Ako želite da kruh bude spreman u narednom vremenu ili ujutro koristite postavku timera. Maksimalno vrijeme za
podešavanje timera je 13 sati. U poglavlju “ Vremenski ciklus pečenja” možete vidjeti za koje programe se mogu koristiti
ove postavke. Ove postavke ne treba koristiti za recepte koji se pripremaju s brzo kvarljivim sastojcima kao što su jaja,
svježe mlijeko, kiselo vrnje ili sir.
1. Nakon što odredite u koje vrijeme želite da kruh bude spreman izračunajte vremensku razliku izmed̄u sadašnjeg i
ciljanog vremena. Na primjer ako želite da kruh bude spreman ujutro u 08.00 sati a sada je 19.30, vremenska razlika je
12 sati 30 minuta. U tom slučaju koristite tipke timera sve dok se na informacijskom zaslonu ne pojavi vrijednost 12:30.
2. Uporabom tipki možete povećati ili smanjiti vrijeme. Tipke za vrijeme omogućavaju povećanje odnosno smanjenje
vremena za 10 minuta. Pritiskom na tipku “Start” počeće da trepti ikona “:” .
3. Ako ste podesili pogrešno vrijeme tipku “Stop” držite pritisnutu 2 sekunde. Biće poništeno podešeno vrijeme i timer
će se vratiti u normalan program. Za ponovno podešavanje vremena slijedite korake 1 i 2.
4. Maksimalno vrijeme koje možete podesiti timerom je 13 sati. Ovo vrijeme obuhvata i vremenski raspon od završetka
funkcije pečenja kruha do spremnosti.
Upozoravajući signal
Upozoravajući signali se oglašava u sljedećim slučajevima:
• Pritiskom na bilo koju tipku.
• Prije druge faze miješanja i dodavanja žitarica, voća, orašastih plodova i sl. u tijesto. Kada za to dod̄e vrijeme podignite
poklopac pekača i dodajte sastojke i zatvorite poklopac.
• Po završetku programa
• Po isteku vremena održavanja topline.
Prekid električne energije
Nakon kraćeg prekida električne energije:
• Ako program još uvijek nije stigao do faze narastanja tijesta pritiskom na tipku “start” aparat automatski nastavlja s
korištenjem funkcije ponavljanja.
• Ako je u vrijeme fermentacije tijesta došlo do prekida struje, treba sačekati da se završi fermentacija i tijesto naraste
a nakon toga odaberite program pečenja i nastavite sa pečenjem naraslog tijesta. Na taj način se vaše tijesto neće
pokvariti.
Temperatura sredine
Pekač kruha može da radi u sredinama s različitom temperaturom; med̄utim postoji razlika u veličini izmed̄u kruha
ispečenog u toploj ili hladnoj sredini. Preporučljiva temperatura prostorije u kojoj koristite pekač kruha je izmed̄u 1534˚C.
Električni Zahtjevi
Provjerite da li vrijednost napona naznačena na aparatu, odgovara električnim vrijednostima u vašoj strujnoj mreži u vidu
A.C. (promjenjiva struja). Ako utikač aparata ne odgovara utičnici u vašem domu moguće je zamjeniti utikač s novim koji
odgovara postojećoj utičnici.
- 58 -
Pekač Kruha
Sinbo SBM 4705
UPOZORENJE: Ovaj aparat obavezno priključite na utičnicu s uzemljenjem.
Čišćenje i Održavanje Stroja
1. UPOZORENJE: Za izbjegavanje rizika od strujnog udara, prije čišćenja izvucite utikač iz utičnice.
2. Sačekajte da se pekač kruha ohladi.
BITNO: Da ne bi došlo do strujnog udara ili oštećenja aparata, cijeli aparat ili poklopac aparata nipošto ne uranjajte u
vodu ili neke druge tekućine.
3. Vanjsko čišćenje: Poklopac i vanjsku površinu aparata očistite mokrom ili blago vlažnom krpom.
4. Unutrašnje čišćenje: Za čišćenje unutrašnjosti aparata koristite mokru krpu ili spužvu.
5. Posuda za pečenje: Posudu za pečenje kruha operite mlakom vodom; uporaba deterdženta nije obavezna. Obratite
pažnju na neljepljivu površinu posude. Pazite da ne dod̄e do njenog grebanja. Prije umetanja posude za pečenje u aparat
sačekajte da se ona upotpunosti osuši.
• Posudu za pečenje, posudu i žlicu za mjerenje i nož za miješanje ne perite u stroju za pranje sud̄a.
• Zbog toga što može doći do oštećenja sukladnosti rada donje osovine, posudu za pečenje ne držite dugo u vodi. Posebno
povedite računa da donji vanjski dio posude ne dod̄e u kontakt s vodom.
• Aparat možete odložiti tek nakon što se uvjerite da se upotpunosti ohladio.
Za čišćenje aparata ne treba koristiti sljedeća sredstva:
• Razrjed¯ivač za boje
• Benzin
• Spužvu od čelične vune
• Sredstvo za glačanje u prahu
• Kemijsku krpu za prašinu
Povedite računa o neljepljivoj površini posude. Izbjegavajte nanošenje štete non-stick materijalu i ne koristite metalni
kuhinjski pribor poput spatule, vilice ili noža. Kod dugotrajne uporabe pekača može doći do promjene boje navlake gornjeg
dijela posude ali uzrok toga su samo vlaga i para i to ne utječe na promjenu performanse aparata i kvalitet kruha. Potrebno
je očistiti rupu na nožu za miješanje tijesta i nakon toga dodati jednu kap jestivog ulja i zatim postaviti na okretnu osovinu
unutar aparata. Zahvaljujući tome spriječiće se ljepljenje noža.
• Spriječite nakupljanje prašine u rupe i otvore na površini aparata. Uvjerite se da su svi dijelovi, uključujući i prozorčić
za nadgledanje pečanja osušeni i tek nakon toga odložite aparat. Ne stavljajte nikakve objekte na poklopac aparata.
Ladica za ispuštanje pare: Postavlja se s prednje strane aparata u donju prazninu.
Šipka: Služi za izvlačenje noža za miješanje kruha.
Tipke kontrolne ploče, Informacijski zaslon i Funkcije
Informacijski zaslon općenito;
• Pokazuje odabranu razinu zapečenosti;
• Pokazuje odabranu težinu;
• Pokazuje broj odabranog programa;
• Pokazuje preostalo vrijeme pečenja kruha;
Na primjer; (3:20 “ostalo su još 3 sata 20 minuta”; 0:20 “ ostalo je još 20 minuta).
• Pokazuje toplotno upozorenje (Pogledaj u dio “Rješavanje Problema”).
Zaslon upozorenja
1. Ako se nakon početka programa na zaslonu pojavi poruka “H:HH” (vidi Sliku) to znači da je unutrašnja temperatura
previsoka. U tom slučaju treba zaustaviti program. Podignite poklopac i sačekajte da se aparat ohladi 15-20 minuta.
2. Ako se nakon početka programa na zaslonu pojavi poruka “E:EE” (vidi Sliku 2) to znači da je temperatura izgubila
kontakt sa senzorom. U tom slučaju potrebna je pažljiva kontrola senzora od strane ovlaštenog tehničara.
- 59 -
Pekač Kruha
Svijetlo
Sinbo SBM 4705
Srednje Tamno
700gr
900gr
Svijetlo
Srednje Tamno
Sliku 1
700gr
900gr
Sliku 2
Gumbovi za Vrijeme(Timer)
Regulira vrijeme izrade kruha. Mogu se koristiti za sve programe izuzev programa “Brzo pečenje” Na primjer ako su
sastojci stavljeni u aparat uveče u 20:30 sati s tim da kruh bude sprema ujutro u 07:00 sati, vremenski raspon izmed̄u
podešenog i ciljanog vremena je 10:30. Prema tome treba pritiskati na gumbove sve dok se na zaslonu ne pojavi vrijednost
10: 30 i aparat se nakon toga uključi. Nakon spomenutog podešavanja aparat je programiran da kruh bude spreman
ujutro u 07:00 sati.
Gumb za razinu zapečenosti (boje kruha)
U datim programima moguće je izvršiti odabir izmed̄u svijetlog, srednje pečenog i tamnog kruha. Pritiskom na spomenut
gumb zaredom na informacijskom zaslonu se pojavljuju opcije: svijetlo, srednje, tamno. Za svaki program moguće je
izabrati željenu razinu pečenosti kruha odnosnu boju kruha izmed̄u svijetle, srednje i tamne.
Gumb Start/Stop
Pritiskom na gumb u trajanju od 1 sekunde,a nakon oglašavanja zvuka bip na zaslonu se pojavljuje ikonica (:) i program
počinje s radom. Na sličan način pritiskom na gumb u trajanju od 2 sekunde s oglašavanjem zvuka bip dolazi do završetka
programa.
Gumb za veličinu somuna/vekne
Kada se pekač kruha uključi veličina somuna/vekne je podešena za hrskav kruh. Za normalno pečeni kruh (veličine 700
i 900 gr) još jedanput pritisnite na gumb za veličinu somuna/vekne.
Gumb za Izbornik
Koristi se za odabir jednog od 12 različitih programa na ploči zaslona.
Gumb za uključiti
Služi za otvaranje i zatvaranje poklopca.
1. Normalan Kruh
2. Francuski Kruh
3. Kruh od mekinja
4. Brzo Pečenje
5. Slatki Kruh
6. Jako Brzo-1
START
7. Jako Brzo-2
8. Tijesto
9. Džem
10. Kolač
11. Sendvič
12. Pečenje
SVIJETLO SREDNJE TAMNO 700gr 900gr
VRIJEME
STOP
VRIJEME
IZBO
RN
IK
Veličina
vekne
OTVORITI
- 60 -
A
BOJ
Pekač Kruha
Sinbo SBM 4705
OPIS PROGRAMA
Pritiskom na gumb izbornika možete odabrati sljedeće vrste programa:
1. Normalni Bijeli Kruh
(3:00 i 2:53) Za pripremu bijelog kruha. Osim toga ovaj program se može koristiti i za pripremu drugih raznih vrsta kruha.
Za pripremu kruha od 700 gr potrebna su 2 sata 53 minute. Za pripremu kruha od 900 gr potrebna su 3 sata.
2. Francuski Kruh
(3:50 i 3:40) Karakteristika ove vrste kruha je duže miješanje i pečenje. Mnogo je svijetlije boje od bijelog kruha. Dobija
se mnogo mekši kruh. Za pripremu kruha od 700 gr potrebna su 3 sata 40 minuta. Za pripremu kruha od 900 gr potrebna
su 3 sata 50 minuta.
3. Kruh od mekinja
(3:40 i 3:32) Ovaj program se koristi za pripremu kruhova koji sadrže odred̄enu količinu mekinja. Za ovaj program potrebno
je duže vrijeme kako bi mekinje upile vodu i nabubrile a isto tako je potreban duži period za narastanje tijesta. Kod ovog
programa se ne preporučuje podešavanje vremena uporabom gumbova timera jer to može dati neučinkovite rezultate.
Za pripremu kruha od 700 gr potrebna su 3 sata 32 minute. Za pripremu kruha od 900 gr potrebna su 3 sata i 40 minuta.
4. Brzo Pečenje
(Brzi Kruh) (1:40) Koristi se za pripremu nekih kruhova za koje je potrebno kratko vrijeme. Ovim programom se dobija
mali kruh guste smjese.
5. Slatki Kruh
(2:55 i 2:50) Ovaj program služi za pripremu slatkog kruha koji je hrskaviji od kruha pripremljenog u normalnom programu.
Hrskava kora kruha formira se gorenjem šećera. Za kruh od 700 gr potrebna su 2 sata i 50 minuta. Za kruh od 900 gr
potrebna su 2 sata i 55 minuta.
6. Jako Brzo-1
Za jako kratko vrijeme se vrši miješanje, narastanje i pečenje kruha od 700 gr. Kruh pečen u ovom programu je mekan
kruh bijele boje koji nije mnogo narastao.
7. Jako Brzo-2
Za jako kratko vrijeme se vrši miješanje, narastanje i pečenje kruha od 900 gr. Kruh pečen u ovom programu je mekan
kruh, bijele boje koji nije mnogo narastao.
8. Tijesto (1:30)
U ovoj postavci kruh se ne peče samo se priprema tijesto. Tijesto izvadite iz spremnika i od njega pripremite oblike za
sendviče, picu i sl. Ovaj program služi za pripremu svake vrste tijesta. Pazite da količina tijesta ne bude veća od 900 gr.
9. Džem (1:20)
Ovaj program se koristi za pripremu džemova od raznog vrsta voća. Ne povećavajte količinu dodatnih sastojaka; prokuhajte
džem u posudi za pečenje i pazite da džem ne iscuri i prodre u unutrašnji spremnik. Ukoliko se tako nešto dogodi odmah
zaustavite aparat. Pažljivo podignite posudu i sačekajte da se ohladi a nakon toga je očistite.
10.Kolač (2:50)
Ova postavka služi za miješanje sastojaka i pečenje kolača. Prije dodavanja sastojaka u aparat prvo dvije vrste sastojaka
izmješajte u različitim posudama (pogledaj u recepte za kolače). Ova postavka će izmiješati sastojke i nakon toga u
odred̄enom vremenu ispeći kolač.
11. Sendvič (3:00 i 2:55)
Ovaj program služi za pečenje mekanog kruha s okusom kruha za sendviče. Za pripremu kruha od 700 gr potrebna su 2
sata 55 minuta. Za pripremu kruha od 900 gr potrebna su 3 sata.
12. Pečenje(1:00)
Ova postavka služi za pečenje kruha ali isto tako se može koristiti i za povećanje vremena pečenja. Ova funkcija je jako
korisna za postizanje idealne gustine džema i marmelada. Nakon početka rada podešeno vrijeme je najmanje 1 sat (1:00)
i ono se smanjuje za po jednu minutu. Nakon završetka funkcije pečenje(ekstra pečenje) ovu funkciju zaustavite pritiskom
na gumb “stop”. Preporučujemo vam da pečeni kruh ili skuhani džem kontrolišite nakon prvih 10 minuta i kasnije svakih
- 61 -
Pekač Kruha
Sinbo SBM 4705
10 minuta. Pritiskom na gumb za podešavanje timera vrijeme pečenja je moguće povećati za po 10 minuta. Ukoliko funkciju
pečenja odaberete odmah nakon završetka nekog drugog programa, bez odmaranja aparata, a na zaslonu se pojaviti
poruka “H:HH” ; podignite poklopac i izvadite posudu za pečenje i sačekajte da se aparat ohladi 10 minuta. Nakon što
se aparat ohladi umetnite posudu za pečenje sa sastojcima u njoj i pritisnite na gumb “start”.
Rukovanje Pekačem Kruha
1) Vad̄enje posude za pečenje
Nakon podizanja poklopca posudu za pečenje uhvatite za ručku i okrenite u smjeru suprotnom smjeru kazaljke na satu
i spustite na radnu površinu (Umetanje sastojaka u posudu van aparata je jako bitno jer se na taj način spriječava prosipanje
sastojaka na grijaći elemenat u spremniku).
2) Postavljanje noža za miješanje
Gurnite nož za miješanje i postavite na okretnu osovinu.
3) Mjerenje sastojaka
Izmjerite potrebne sastojke i prema redosljedu na listi dodajte jedan po jedan u posudu za pečenje (Proučite dio “Mjerenje
sastojaka” na jednoj od narednih stranica u kom se nalaze detaljni podaci).
• Pazite da kvasac koji ste dodali u posudu ne dod̄e u dodir s vodom ili drugim tekućinama; u suprotnom kvasac će odmah
preći u aktivno stanje.
• Koristite mlaku vodu temperature izmed̄u 21-28 ˚C (Ljeti hladnu, zimi mlaku).
4) Postavljanje posude
Umetnite posudu u aparat i okretanjem u smjeru kazaljke na satu omogućite da se
uklopi na svoje mjesto. Nakon toga zatvorite oklopac.
5) Umetanje utikača
Nakon umetanja utikača u utičnicu aparat će automatski biti podešen za izradu normalnog kruha i normalno vrijeme
pečenja.
• Pritiskom na bilo koji gumb na aparatu oglasiće se zvuk “bip” što označava da on radi.
6) Izbor programa
Pritiskom na gumb izbornik/menu odaberite jedan od 12 različitih programa na aparatu.
7) Izbor veličine vekne/somuna
Pritiskom na gumb za veličinu vekne/somuna možete izvršiti izbor izmed̄u hrskavog kruha ili kruha veličine od 700 gr i
900 gr. Uvijek kada uključite stroj on je podešen za izradu hrskavog kruha.
8) Odred̄ ivanje boje/stupnja zapečenosti
Pritiskom na gumb “Boja” podešava se stupanj zapečenosti kruha. Postoje tri opcije svijetlo, srednje i tamno.
9) Podešavanje timera
Ako ne želite da aparat odmah počne da radi ili pak želite da vaš kruh bude spreman u odred̄eno vrijeme možete koristiti
program timera.
10) Početak funkcije pečenja
Za uključenje stroja pritisnite na gumb “Start/Stop”. Ostatak vremena je prikazan na zaslonu i on se smanjuje za po jednu
minutu.
- 62 -
Pekač Kruha
Sinbo SBM 4705
11) Rad pekača
Funkcije pekača kruha se automatski ostvaruju prema etapama programa opisanim u djelu “ Vremenski ciklus pečenja”
. Ako je aparat podešen u funkciju miješanja u dva stupnja, oglašavanjem zvuka “bip” korisnik se upozorava da je vrijeme
za dodavanje voća/oraha isl. dodataka.
• Tijekom funkcije pečenja kruha iz otvora na aparatu povremeno može izlaziti para, to je normalno stanje.
12) Završetak funkcije pečenja
Ako je program završen i kruh ispečen na zaslonu aparata pojaviće se poruka 0:00 a korisnik će biti upozoren oglašavanjem
zvuka “bip”.
13) Funkcija održavanja u toplom stanju
Funkcijom održavanja topline, topli zrak unutar aparata dodatno kruži još 60 minuta(vidi dio “vremenski ciklus pečenja”).
Za dobijanje dobrih rezultata po završetku programa pečenja ili za vrijeme prvog vremena održavanja topline posudu
treba izvaditi iz aparata. Po završetku prvog vremena održavanja u toplom stanju zvuk bip će se oglasiti 10 puta.
14) Vad̄enje posude iz aparata
Prisnite na gumb “Stop” i otvorite poklopac.
UPOZORENJE: Za podizanje posude za pečenje koja je jako topla koristite zaštitnu rukavicu.
15) Odvajanje kruha od posude
Sačekajte da se kruh ohladi u posudi 15 minuta i nakon toga posudu okrenite naopako udarivši nekoliko puta po donjoj
strani posude. Kruh izvadite na rešetku kako bi i odozdo mogao uzimati zraka. U posudu za pečenje uspite mlaku vodu i
tako spriječite da se nož za miješanje zalijepi za okretnu osovinu.
• Ponekad nož za miješanje ostaje unutar kruha. U tom slučaju sačekajte da se kruh malo ohladi a zatim uz pomoć
priložene šipke pažljivo izvucite nož za miješanje. Možete koristiti drveni ili plastični kuhinjski pribor koji neće oštetiti
non-stick površinu posude.
NAPOMENA: Poklopac aparat ne treba podizati u vrijeme pečenja. To će uticati i na smanjenje kvalitete kruha i na
narastanje kruha. Poklopac aparata se otvara samo kada koristite program u kojem se nakon odred¯enogh vremena
kruhu dodaju potrebni dodaci(voće, orasi isl.)
UPOZORENJE: Kada ne koristite pekač za kruh obavezno izvucite utikač iz utičnice.
Mjerenje sastojaka
Najbitnija etapa u pripremi kruha u pekaču za kruh je pravilno mjerenje sastojaka od kojih će kruh biti pripremljen. U
suprotnom nećete dobiti željeni kruh. Sastojci se dodaju u posudu za pečene u količini i na način koji je opisan u receptu.
Dolje su date mjere za sastojke u suhom i tekućem stanju.
Mjerenje tekućina
Koristite posudu za mjerenje priloženu s aparatom. Posudu za mjerenje treba staviti na ravnu površinu i i razina tekućine
bi trebala da bude do označene linije na posudi. Količinu tekućine ne treba odred¯ivati nasumice jer na taj način mogu
da se pred̄u kritične mjere navedene u receptu.
Mjerenje žlica
Mjerenje cup
1. Tekućine(Voda, ulje, mlijeko) 2. Suhi sastojci bez kvasca(Brašno, šećer, sol) 3. Kvasac
- 63 -
Pekač Kruha
Sinbo SBM 4705
Mjere za suhe sastojke
Za mjerenje suhih sastojaka koristite priloženu posudu i žlicu za mjerenje. Mjerenje suhih sastojaka ostvaruje se
dodavanjem sastojaka mjernom žlicom u mjernu posudu. Nakon punjenja višak sastojaka se uklonja uz pomoć noža.
Sastojci koji se ekstra trebaju dodati mogu poremetiti recept. Osim toga brašno ne treba prosijati ako to nije navedeno.
Za dodavanje sastojaka u manjim količinama(kvasac, šećer, sol, mlijeko u prahu, med, pekmez i sl.) koristite mjernu
žlicu. Potrebno se pridržavati naznačenih mjera jer čak i manje razlike mogu negativno utjecati na recept. Sa aparatom
je priložena plastična mjerilica s dvije posude, veća posuda je veličine velike žlice( tablespoon); a manja posuda je veličine
žlice za kavu (teaspoon).
NAPOMENA: PROBAVANJEM I ISKUSTVOM MOŽETE POSTIĆI NAJBOLJE REZULTATE.
NAJČEŠĆA PITANJA I ODGOVORI
PITANJE 1: Da li kruh može biti različitog oblika i visine?
ODGOVOR 1: Da može. Ovo stanje zavisi od sobne temeprature. U previše toploj ili previše hladnoj prostoriji kruh može
ili narasti više od potrebnog ili jako slabo narasti. Osim toga ukoliko se kruhu doda veća količina dodataka poput voća,
oraha, žitarica i sl. sastojaka i to može utjecati na izgled i veličinu kruha. Sastojke koje koristite pažljivo izmjerite i pazite
da oni budu u svježem stanju. Kruh s mekinjama je uvijek manji. Zbog čega? Sasvim je normalno da kruh sa mekinjama
bude manji i gušći od normalnog kruha. Kako je brašno sa mekinjama teže od bijelog brašna u vrijeme pečenja kruha
ne može da naraste koliko i kruh od bijelog brašna.
PITANJE 2: Zbog čega kruh ne narasta?
ODGOVOR 2: Ne zaboravite dodati kvasac ili ako kruh pripremite prije nego što u aparat umetnete nož za miješanje vaš
kruh neće narasti. Ako ste dodali nedovoljnu količinu kvasca ili bajat kvasac vaš kruh neće narasti. Posebno obratite
pažnju na količinu, vrstu i svježinu kvasca. Ne koristite kvasac kom je istekao rok za uporabu ili kvasac čiji je paket bio
dugo vremena otvoren.
PITANJE 3: Zbog čega kruh ima neprijatan miris?
ODGOVOR 3: Uporaba prevelike količine kvasca ili bajatog kvasca može biti razlog da vaš kruh ima neprijatan miris.
Pogotovo uporaba velike količine kvasca za program brzog pečenja može usloviti pojavu neprijatnog mirisa kruha.
PITANJE 4: Zbog čega se formira šupljina u sredini kruha?
ODGOVOR 4: U vrijeme miješanja na tom je mjestu došlo do nakupljanja zraka. Ako tijekom narastanja kruha ovaj gas
nije izašao kod pečenog kruha će postojati šupljina.
PITANJE 5: Da li kuka za miješanje može biti izvad̄ena skupa sa kruhom?
ODGOVOR5: To je normalno. Kuku iz kruha možete izvaditi uz pomoć plastičnog ili drvenog objekta koji neće nanijeti štetu
površini posude.
PITANJE 6: Zbog čega je postavku sata moguće podesiti samo od 4 do 13 sati?
ODGOVOR 6: Sve funkcije traju najmanje 3 sata. Ako bi postavka sata bila veća od 13 sati moglo bi doći do kvara pojedinih
sastojaka.
PITANJE 7: Da li je moguće koristiti polovinu ili malo više sastojaka nezavisno od recepta?
ODGOVOR 7: Ne. Pazite da se pridržavate količine date u receptu i molimo vas da precizno izmjerite sve sastojke.
PITANJE 8: Da li se kod uporabe postavke sata zvuk stroja čuje i noću?
ODGOVOR 8: Da. Ako aparat noću miješa tijesto čuje se zvuk motora.
PITANJE 9: Što je potrebno uraditi ako po završetku pripreme kruha aparat ne radi i ako ga vi ponovno želite uključiti i
stalno se oglašava signal bip a na zaslonu se pojavljuje poruka HHH?
ODGOVOR 9: Aparat ne radi zato što je vruć. Prvo pritisnite na gumb Start/Stop i isključite aparat. Podignite poklopac
aparata, izvadite posudu sa kruhom i sačekajte da se ohladi.
PITANJE 10: Što je potrebno uraditi ako se pritiskom na tipku start na zaslonu pojavljuje poruka LLL i oglašava signal?
ODGOVOR 10: Sobna temperatura nije dovoljna za rad aparata i aparat zbog toga ne može da radi. Pritisnite na gumb
Start/Stop i isključite aparat. Aparat prenesite iz sredine u kojoj se nalazi u neku topliju sredinu. Idealna sobna temperatura
za rad aparata je izmed̄u 15 ˚C-25 ˚C.
PITANJE 11: Što je potrebno uraditi ako se pritiskom na tipku Start na zaslonu pojavljuje poruka EEE i oglašava signal?
ODGOVOR11: Aparat ne može da radi zato što je sobna temperatura previsoka. Pritisnite na gumb Start/Stop i isključite
aparat. Aparat prenesite iz prostorije na neko hladnije mjesto.
- 64 -
Pekač Kruha
Sinbo SBM 4705
PITANJE 12: Zbog čega su površina i donja strana kruha vlažne?
ODGOVOR12: Ako je kruh ostao duže u pekaču negop što treba, unutarnja para koja nije mogla izaći vani uslovila je
vlaženje kruha. Ako kruh izvadite iz pekača i stavite na rešetku on će se vratiti u normalno stanje.
PITANJE 13: Što je potrebno uraditi ako se po završetku pečenja kruha na zaslonu pojavljuje poruka (0:00) i oglašava
signal?
ODGOVOR 13: Ovaj zvuk signala ukazuje da je pečenje kruha završeno i da je aparat ušao u opciju održavanja topline. Ako
želite možete zaustaviti aparat i izvaditi kruh.
PITANJE 14: Što je potrebno uraditi ako tijekom pečenja kruha iz aparata izlazi slabi miris zagorelosti i dim?
ODGOVOR 14: Ukoliko sastojke dodajete u kalup koji se nalazi u aparatu može doći do izlijevanja sastojaka na aparat i
grijač tako da u vrijeme pečenja kruha dolazi do formiranja dima i neprijatnog mirisa. Sastojke uvijek dodajite u posudu
koju ste izvadili iz aparata.
PITANJE 15: Ponekad površina kruha može ostati brašnjava, što je razlog toga?
ODGOVOR15: Ako ste u posudu stavili nedovoljnu količinu brašna i tijesto se lijepi za kalup znači da je potrebno dodati
još brašna. Brašno koje ste kasnije dodali možete izmješati nekim predmetom koji neće oštetiti površinu posude. Ako
ste to zaboravili učiniti onda nabrašnjenu površinu kruha odrežite oštrim nožem.
PITANJE 16: Kako mogu čuvati pečeni kruh?
ODGOVOR16: Pečeni krih izvadite iz aparata i stavite na rešetku da se ohladi. Kruh ne treba rezati u vrućem stanju jer
će se pokvariti oblik kruha i doći će zbijanja sredine kruha. Rezanje kruha vršite oštrim ili električnim nožem. Izrezani
ili kruh u cijelom komadu odložite tako da ne uzima zrak. Možete ga čuvati u hladnjaku. Uporabom funkcije pečenje kruh
možete podgrijati 15-20 minuta i trošiti u vrućem stanju.
PITANJE 17: Što treba uraditi kod nestanka struje?
ODGOVOR 17: Kod dužeg prekida električne struje, ako je aparat vršio funkciju miješanja tijesta ponovno uključite program.
Ako se aparat nalazi na početku nadolaženja tijesta nije potrebno ponovno uključivati program. Sačekajte da dod̄e do
narastanja tijesta. Tijesto koje je naraslo ispecite odabirom programa “pečenje”. Ako se prekid struje desio u vrijeme
pečenja ponovno uključite pećnicu i kruh pecite onoliko koliko je potrebno.
PITANJE 18: Tijesto se ne miješa, iz motora dolazi grubi zvuk!
ODGOVOR 18: Nož za miješanje ili posuda za pečenje nisu pravilno postavljeni. Uvjerite se da posuda ima odgovarajući
kontakt s bazom unutarnjeg spremnika aparata i uklopite na svoje mjesto sve dok se ne oglasi zvuk “klik”.
PITANJE 19: Zbog čega ne treba koristiti funkciju timera za pečenje kruha s dodatkom svježeg mlijeka?
ODGOVOR 19: Ako je vrijeme čekanja u stroju dugo mlijeko će se pokvariti. Ne koristite funkciju dugog podešavanja
vremena za lako kvarljive sastojke poput mlijeka i jaja.
PITANJE 20: Zbog čega je potrebno sastojke dodavati po odred̄enom redu?
ODGOVOR 20: U ovom slučaju pekač kruha će na najbolji i najefikasniji način izmiješati sastojke. To u isto vrijeme spriječava
kontakt kvasca i vode prije funkcije miješanja (posebno kod duže postavke timera).
PITANJE 21: Kako možemo izvaditi nož za miješanje zaglavljen u posudi za pečenja?
ODGOVOR 21: Nož za miješanje se nakon pečenja može zalijepiti na svom mjestu. Nož je moguće izvaditi iz posude ako
na njega naspate mlaku ili toplu vodu. Ako još uvijek ne može da se izvadi ostavite da odstoji 30 minuta u toploj vodi.
PITANJE 22: Da li posuda za pečenje može da se pere u perilici za sud̄e?
ODGOVOR 22: Ne. Posudu za pečenje i nož za mijašanje perite ručno.
PITANJE 23: Kako da znam kada kruhu trebam dodati grožd̄ice, orahe i sl. sastojke?
ODGOVOR 23: Kada aparat dod̄e u fazu drugog ciklusa miješanja oglasiće se upozoravajući signal za dodavanje grožd¯ica,
oraha i sl. sastojaka i on će se oglasiti deset puta. Tada možete dodati ovu vrstu dodataka.
PITANJE 24: Nakon što kruh naraste njegova sredina ili cijeli kruh se može slijepiti? Zašto?
ODGOVOR 24: Kruh je previše narastao. Za smanjenje količine narastanja kruha smanjite količinu kvasca. Ili ako je tijesto
žitko( to jest dodali ste previše vode) kruh može nakon narastanja da se slijepi Koristite naznačenu količinu sastojaka.
- 65 -
Pekač Kruha
Sinbo SBM 4705
PITANJE 25: Da li je bitno da sastojci koji se stavljaju u pekač budu na sobnoj temperaturi?
ODGOVOR 25: Sastojci ne treba da budu ni previše topli ni previše hladni, ukratko rečeno treba da budu na sobnoj
temperaturi. Temperatura vode koju koristite treba da bude izmed̄u 21-28 ˚C.
PITANJE 26: Da li kvasac i vodu možemo ranije pomješati?
ODGOVOR 26: Nipošto. Kvasac mora biti u suhom stanju i sastojak koji se zadnji dodaje u posudu za pečenje. Kvasac mora
biti na površini brašna. Pogotovo je ovo jako bitno za funkcije odlaganja pečenja kruha.
PITANJE 27: Kruhu sam dodao zobene pahuljice, sjemenke bundeve, kikiriki i sl. ali kruh je jako suh. Zbog čega?
ODGOVOR 27: Sastojke koje želite dodati tijestu kruha sat vremena prije dodavanja potopite u vodi i omogućite da se
navlaže. Ako ne primjenite taj postupak dodaci će povući vodu iz tijesta i to će usloviti da vaš kruh bude suh i lošeg okusa.
Osim toga kao što je navedeno u priručniku za uporabu, ovu vrstu sastojaka dodajte u drugom ciklusa miješanja tijesta.
PITANJE 28: Sredina kruha je jako zbijena; kruh nema rupica i pora. Pritiskom na kruh on se slijepi. Zašto?
ODGOVOR 28: Kruh mora imati pore, rupice raznih veličina, ali to zavisi od vrste brašna i kruha. Kada pritisnite na kruh
on se ne smije lijepiti već se mora vratiti u prvobitno stanje. Ako se sredina kruha lijepi znači da tijesto nije dovoljno
izmiješano, ispečeno ili nije dovoljno naraslo. Ako pekač kruha koristite u normalnim uvjetima, nećete se susretati sa
ovom vrstom problema. Vjerovatno je razlog ovog problema uporaba pogrešnih sastojaka ili pogrešne količine sastojaka.
PITANJE 29: Sredina kruha nije bijela kao kod kruha koji kupujem u pekari već je žućkaste boje.
ODGOVOR 29: Sredina kruka ispečenog u pekaču kruha treba da bude svijetlo žute boje. Najidealnije brašno za kruh koji
pripremate u aparatu je žućkasto pšenično brašno koje nije izbijeljeno kemijskim tvarima. Rupice u kruhu trebaju da
budu sjajne a ne mat.
TEHNIČKE SPECIFIKACIJE
• Izbor veličine mase(750-900g)
• 12 Digitalnih programa (tipke za brzo programiranje)
• Timer sa mogućnošću programiranja za 13 sati
• Funkcija održavanja topline 60 minuta
• Podesiva tvrdoća kore:meka,srednja, tvrda
• Non-Stick posuda periva u stroju za sud̄e
• Hladna vanjska površina
• Neklizeće nogice
• Posuda i mjerna žalica
• AC230V, 50Hz, 600W
- 66 -
Sinbo SBM 4705
/
- 67 -
(AR)
Sinbo SBM 4705
/
- 68 -
(AR)
Sinbo SBM 4705
Svijetlo
/
Srednje Tamno
700gr
900gr
700gr
- 69 -
900gr
(AR)
Sinbo SBM 4705
/
- 70 -
(AR)
Sinbo SBM 4705
/
- 71 -
(AR)
Sinbo SBM 4705
/
- 72 -
(AR)
Sinbo SBM 4705
/
- 73 -
(AR)
Müsteri Hizmetleri
Sinbo SBM 4705
De¤erli Müflterimiz,
En uygun fiyata en iyi ürünü vermenin yan› s›ra; en iyi hizmeti vermenin de
önemli oldu¤una inan›yoruz. Bu nedenle siz bilinçli tüketicilere daha yak›n
olabilmek için, internet adresimizdeki eriflim formlar›n›n yan› s›ra, tüketici
dan›flma hattımızı da hizmetinize açm›fl durumday›z.
TÜKET‹C‹
DANIfiMA HATTI
444 66 86
MERKEZ
TEKN‹K SERV‹S
(0212) 422 94 94
www.sinbo.com.tr
0800 211 50 21
Tüketici Dan›flma Hattımızı,
- Hafta içi her gün 08.00-18.00 saatleri aras›nda arayabilir; istek, öneri ve
flikayetlerinizi firmam›za iletebilirsiniz.
Tüketicinin Dikkatine:
Ürünlerimizle ilgili hizmetleri tam olarak alabilmek için afla¤›daki önerilere
uyman›z› rica ederiz:
1. Ürünü ald›¤›n›zda Garanti Belgesini mutlaka yetkili sat›c›n›za onaylatt›r›n›z.
2. Ürünü kullanma k›lavuzunda belirtilen hususlara göre kullan›n›z.
3. Ürününüzle ilgili hizmet talebiniz oldu¤unda yukar›daki telefon
numaralar›ndan, Tüketici Danıflma Hattına baflvurunuz.
4. Ürünü promosyon arac›l›¤› ile edinmiflseniz, ürüne ait garanti belgesini en
yak›n yetkili servisimize giderek onaylatt›r›n›z.
5. Teknik servisteki ifliniz bitti¤inde "Yetkili Servis Hizmet Fifli" almay›
unutmay›n›z. Alaca¤›n›z bu Hizmet Fifli, ileride ürününüzde meydana
gelebilecek herhangi bir sorunda size yarar sa¤layacakt›r.
KAPIDAN KAPIYA
7 GÜNDE
TESL‹MAT
GARANT‹S‹
ÜCRETS‹Z
S E R V ‹ S
(*)
Kap›dan Kap›ya Ücretsiz Servis Kampanyam›z dâhilinde Yurtiçi Kargo Firmas› ile iflbirli¤i içerindeyiz. Tüketicimiz
taraf›ndan sat›n al›nan ürünün fiyat› ne olursa olsun, Tüketicimiz ürün ile ilgili garanti kapsam›na giren herhangi
bir problem yaflad›¤›nda, 444 66 86 numaral› Tüketici Danıflma Hattımızı aramas› ve kay›t b›rakmas› yeterlidir.
Bu süreçten sonra Tüketicimizin ürünü ücretsiz olarak Yurtiçi Kargo taraf›ndan Tüketicimizin bulundu¤u adresten
al›n›p, 7* ifl günü içerisinde ürün çal›fl›r bir vaziyette, yine Tüketicimize Yurtiçi Kargo arac›l›¤› ile adresine teslim
edilmektedir. 7 ifl günü içerisinde sorunu çözülemeyen ürünler ise, yenisi ve/veya bir üst modeli ile de¤ifltirilmektedir.
Tüm bu süreçte Tüketicilerimizden hiçbir ücret talep edilmemektedir.
(*Ürünün servis garanti süresi, Yurtiçi Kargo ürünü Sinbo Fabrikas›’na teslim ettikten sonra bafllar.)
- 74 -
GARANT‹ fiARTLARI
1) Garanti süresi,mal›n teslim tarihinden itibaren bafllar ve 2 y›ld›r.
2) Mal›n bütün parçalar› dahil olmak üzere tamam› Firmam›z›n garanti kapsam›ndad›r.
3) Mal›n garanti süresi içerisinde ar›zalanmas› durumunda, tamirde geçen süre garanti
süresine eklenir. Mal›n tamir süresi, 20 iflgününü geçemez. Bu süre mala iliflkin
ar›zan›n servis istasyonuna, servis istasyonunun olmamas› durumunda, mal›n sat›c›s›,
bayii, acentesi, temsilcili¤i, ithalatç›s› veya imalatç›s›-üreticisinden birine bildirim
tarihinden itibaren bafllar. Tüketicinin ar›za bildirimini; telefon, faks, e-posta, iadeli
taahhütlü mektup veya benzeri bir yolla yapmas› mümkündür. Ancak, uyuflmazl›k
halinde ispat yükümlülü¤ü tüketiciye aittir. Mal›n ar›zas›n›n 10 ifl günü içerisinde
giderilememesi halinde, imalatç›-üretici veya ithalatç›; mal›n tamiri tamamlan›ncaya
kadar, benzer özelliklere sahip baflka bir mal› tüketicinin kullan›m›na tahsis etmek
zorundad›r.
4) Mal›n garanti süresi içerisinde gerek malzeme ve iflçilik, gerekse montaj hatalar›ndan
dolay› ar›zalanmas› halinde, iflçilik masraf›, de¤ifltirilen parça bedeli ya da baflka
herhangi bir ad alt›nda hiçbir ücret talep etmeksizin tamiri yap›lacakt›r.
5) Tüketicinin onar›m hakk›n› kullanmas›na ra¤men mal›n;
• Tüketiciye teslim edildi¤i tarihten itibaren, garanti süresi içinde kalmak kayd›yla, bir
y›l içerisinde en az dört defa veya imalatç›-üretici ve/veya ithalatç› taraf›ndan belirlenen
garanti süresi içerisinde alt› defa ar›zalanmas›n›n yan› s›ra, bu ar›zalar›n maldan
yararlanamamay› sürekli k›lmas›,
• Tamiri için gereken azami süresinin afl›lmas› ,
• Firman›n servis istasyonunun, servis istasyonunun mevcut olmamas› halinde s›rayla
sat›c›s›, bayii, acentesi temsilcili¤i ithalatç›s› veya imalatç›-üreticisinden birisinin
düzenleyece¤i raporla ar›zan›n tamirini mümkün bulunmad›¤›n›n belirlenmesi,
durumlar›nda tüketici mal›n ücretsiz de¤ifltirilmesini, bedel iadesi veya ay›p oranda
bedel indirimi talep edebilir.
6 ) Mal›n kullanma k›lavuzunda yer alan hususlara ayk›r› kullan›lmas›ndan kaynaklanan
ar›zalar garanti kapsam› d›fl›ndad›r.
7 ) Garanti Belgesi ile ilgili olarak ç›kabilecek sorunlar için Gümrük ve Ticaret Bakanl›¤›
Tüketicinin Korunmas› ve Piyasa Gözetimi Genel Müdürlü¤ü’ne baflvurabilir.
‹THALATÇI F‹RMA
DE‹MA ELEKTROMEKAN‹K ÜRÜNLER ‹NfiAAT SPOR MALZEMELER‹ ‹MALAT SAN. VE T‹C. A.fi.
Cihangir Mh. Güvercin Cd. No:4 Haramidere Mevkii Avcılar - ‹stanbul - Türkiye
Tel : (0212) 422 94 94 & Fax : (0212) 422 03 49
www.sinbo.com.tr - [email protected]
- 75 -
- SBM 4705 EKMEK YAPMA MAK‹NASI -GARANT‹ BELGES‹ Garanti Belge No : 78518
SSHY Belge No
: 35274
Garanti Belge Onay Tarihi
Garanti Belge Vize Tarihi
SSHY Belge Onay Tarihi
‹THALATÇI F‹RMA
: 04/02/2010
: 18/01/2012
: 04/04/2012
Ünvanı
: DE‹MA ELEKTROMEKAN‹K ÜRÜNLER‹ ‹Nfi. SPOR MALZ. ‹MALAT SAN. ve T‹C.
Adresi
: Cihangir Mah. Güvercin Cad. No:4 Haramidere Mevkii Avc›lar / ‹STANBUL
Tel.
: 0212 422 94 94 & Fax: 0212 422 03 49
Yetkili Kifli
:
A.fi.
Yönetim Kurulu Baflkan›
Ürünün Cinsi
: EKMEK YAPMA MAK‹NASI
Markası
: S‹NBO
Modeli
: SBM 4705
Alt Modeli
: -
Bandrol ve Seri No
:
Teslim Tarihi ve Yeri :
Garanti Süresi
: 2 Yıldır
Azami Tamir Süresi
: 20 ‹fl Günü
Kullanım Ömrü
: Bakanl›kça belirlenen ve ilan edilen kullan›m ömrü 7 y›ld›r.
(Ürünün fonksiyonlar›n› yerine getirebilmesi için gereken yedek parça temin süresi)
SATICI F‹RMA
Ünvanı
:
Adresi
:
Tel.Fax
:
Fatura Tarihi ve No
:
Teslim Tarihi ve Yeri :
‹mza ve Kafle
:
Bu bölüm, ürünü sat›n ald›¤›n›z Yetkili Sat›c› taraf›ndan imzalanacak ve kaflelenecektir.
Bu belgenin kullan›lmas›na; 4077 say›l› Tüketicinin Korunması Hakkında Kanun ve bu Kanun’a dayan›larak yürürlü¤e konulan Garanti Belgesi
Uygulama Esaslar›na Dair Yönetmelik uyar›nca, TC Gümrük ve Ticaret Bakanlı¤ı, Tüketicinin Korunması ve Piyasa Gözetimi Genel Müdürlü¤ü
tarafından izin verilmifltir.
- 76 -
- TEDAR‹KÇ‹ F‹RMA / EXPORTER United Favour Development Limited
Unit B, 10/F Lee May Building 788-790
Nathan Road, Mongkok, Kowloon, HK.
- UYGUNLUK BEYANI / CE CONFORMITY Intertek Testing Services Shenzhen Ltd.
Guangzhou Branch
Block E, No.7-2, Guangdong Software
Science Park, Caipin Road, Guangzhou
Science City, GETDD, Guangzhou, China
JGZ0208025-R7
EEE Yönetmeli¤ine uygundur.
Made in P.R.C.
‹mal Y›l› : 2013