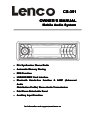
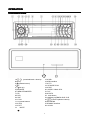
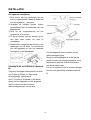
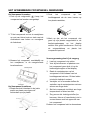
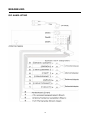
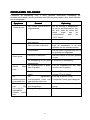
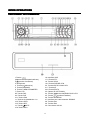
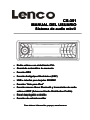
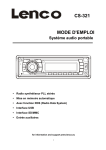
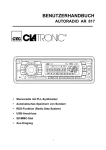
1
51 CS-3 CS-35 MODE D'EMPLOI Syst ème audio portable Systè -------------------------------------------------1-20 � English English---------------------------------------------------------------------------------------------------1 � -----------------------------------------------21 German German-----------------------------------------------------------------------------------------------21 21--45 � Dutch --------------------------------------------------46 Dutch-----------------------------------------------------------------------------------------------------46 46--67 � ------------------------------------------------68 French French-------------------------------------------------------------------------------------------------68 68--89 � ----------------------------------------------90 Spanish Spanish---------------------------------------------------------------------------------------------90 90--110 CS-351 OWNER OWNER’’S MANUAL Mobile Audio System � PLL Synthesizer Stereo Radio � Automatic Memory Storing � RDS Function &SD/MMC Card Interface � USB USB&SD/MMC � Bluetooth Hands-free function & A2DP (Advanced Audio Distribution Profile) Stereo Audio Transmission � Fold Down Detachable Panel � Auxiliary Input Function for information and support,www.lenco.eu CONTENTS n.................................................... 3 Installatio Installation ............... 6 Using the detachable front panel panel............... Selecting directory up/down................ 13 Selecting tracks..................................... 13 Display ID3 information........................ 14 .. ................................ 15 SD/MMC operation operation.. .................................. ................................15 ................................... IPOD OPERATION OPERATION................................... ...................................115 ................................ 16 ................................16 Bluetooth operation operation................................ ....................................... 7 Wiring Connection Connection....................................... .......................................7 Preparing for operation.........................16 ISO connection.......................................... 7 ....................................... 9 Basic operation operation....................................... Switching on/off the unit........................... 9 Pairing..................................................... 16 Connect...................................................17 T-menu.................................................... 17 Making an outgoing call....................... 18 Faceplate release......................................9 Transfer the call between mobile phone Sound adjustment..................................... 9 and the unit.............................................18 Loudness.................................................... 9 BT reset.................................................. 18 Display........................................................ 9 Bluetooth audio (A2DP function)........ 18 ............................................. 19 .............................................19 Specification Specification............................................. ..................................... 20 Trouble shooting shooting..................................... DIN Front-Mount (Method A)................... 3 Installing the unit................................... 3 Removing the unit................................. 4 DIN Rear-Mount (Method B)................... 5 ...................................... 8 Location of keys keys...................................... ......................................8 Equalization............................................…9 Reset function............................................ 9 Mode selection...........................................9 System setting........................................... 9 Auxiliary input.............................................10 ....................................... 10 Radio operation operation....................................... Selecting the frequency band..............10 Selecting a station.................................10 Automatic memory storing & program scanning..................................................10 Scan........................................................ 10 Station storing........................................ 10 RDS (radio data system) operation.... 10 ................................. 13 USB play operation operation................................. .................................13 Switching to USB mode....................... 13 Selecting files.........................................13 Pausing playing..................................... 13 Previewing all files.................................13 Repeating the same file....................... 13 Playing all files in random.................... 13 2 INSTALLATION Notes: � Choose the mounting location where the unit will not interfere with the normal driving function of the driver. � Before finally installing the unit, connect the wiring temporarily and make sure it is all connected up properly and the unit and the system work properly. � Use only the parts included with the unit to ensure proper installation. The use of unauthorized parts can cause malfunctions. � Consult with your nearest dealer if installation requires the drilling of holes or other modifications of the vehicle. � Install the unit where it does not get in the drivers way and cannot injure the passenger if there is a sudden stop, like an emergency stop. � If installation angel exceeds 30 ° from horizontal, the unit might not give its optimum performance. Take out screw before installation. DIN FRONT-MOUNT (Method A) Installation Opening This unit can be installed in any dashboard having an opening as shown below: 53mm 182mm Installing the unit Be sure you test all connections first, and then follow these steps to install the unit. 1. Make sure the ignition is turned off, and then disconnect the cable from the vehicle battery’s negative (-) terminal. 2. Disconnect the wire harness and the antenna. 3. Press the release button on the front panel and remove the control panel (see the steps of “removing the front panel”). 4. Lift the top of the outer trim ring then pull it out to remove it. 5. The two supplied keys release tabs inside the units sleeve so you can remove it. Insert the keys as far as 30 � Avoid installing the unit where it would be subject to high temperature, such as from direct sunlight, or from hot air, from the heater, or where it would be subject to dust, dirt or excessive vibration. DIN FRONT/REAR-MOUNT This unit can be properly installed either from “Front” (conventional DIN Front-mount) or “Rear” (DIN Rear-mount installation, utilizing threaded screw holes at the sides of the unit chassis). For details, refer to the following illustrated installation methods. 3 INSTALLATION back of the unit in place. Use the supplied hardware (Hex Nut (M5mm) and Spring Washer) to attach one end of the strap to the mounting bolt on the back of the unit. If necessary, bend the metal strap to fit your vehicles mounting area. Then use the supplied hardware (Tapping Screw (5x25mm) and Plain Washer) to attach the other end of metal strap to a solid metal part of the vehicle under the dashboard. This strap also helps ensure proper electrical grounding of the unit. Note to install the short threading terminal of the mounting bolt to the back of the unit and the other long threading terminal to the dashboard. they will go (with the notches facing up) into the appropriate slots at the middle left and right sides of the unit. Then slide the sleeve off the back of the unit. Sleeve L Key Outer Trim Ring Front Panel R Key 6. Mount the sleeve by inserting the sleeve into the opening of the dashboard and bend open the tabs located around the sleeve with a screwdriver. Not all tabs will be able to make contact, so examine which ones will be most effective. Bending open the appropriate tabs behind the dashboard to secure the sleeve in place. Spring Washer Hex Nut Metal Strap Mounting Bolt Plain Washer Tapping Screw Dashboard Tabs 10. Reconnect the cable to the vehicle batterys negative (-) terminal. Then replace the outer trim ring and install the units front panel (see the steps of installing the front panel). Screwdriver Sleeve 7. Reconnect the wire harness and the antenna and be careful not to pinch any wires or cables. 8. Slide the unit into the sleeve until it locks into place. 9. To further secure the unit, use the supplied metal strap to secure the Removing the unit 1. Make sure the ignition is turned off, then disconnect the cable from the vehicle batterys negative (-) terminal. 2. Remove the metal strap attached the back of the unit (if attached). 3. Press the release button to remove the front panel. 4 INSTALLATION To fasten the unit to the factory radio mounting brackets. Align the screw holes on the bracket with the screw holes on the unit, and then tighten the screws (5x5mm) on each side. Note: the outer trim ring, sleeve and the metal strap are not used for method B installation. 4. Lift the top of the outer trim ring then pull it out to remove it. 5. Insert both of the supplied keys into the slots at the middle left and right sides of the unit, then pull the unit out of the dashboard. DIN REAR-MOUNT (Method B) If your vehicle is a Nissan, Toyota, follow these mounting instructions. Use the screw holes marked T (Toyota), N (Nissan) located on both sides of the unit to fasten the unit to the factory radio mounting brackets supplied with your vehicle. Side View showing Screw Holes marked T, N Screw Factory Radio Mounting Bracket Screw Dashboard or Console 5 USING THE DETACHABLE FRONT PANEL To Detach the Front Panel 2. When the two sides fixed into place, push the front panel into main unit. 1. Press the release ( ) button, then the front panel will be folded down. OPEN 3. Note that if the front panel fails to lock in position properly, pressing control button may not function and the display may be missing some segments. Press the release button and then reinstall the front panel again. 2. To remove the front panel, lift it up at a little angle from horizontal position, then first pull out the right side and then pull out the left side. Precautions when handling 1. Do not drop the front panel. 2. Do not put pressure on the display or control buttons when detaching or re-installing the front panel. 3. Do not touch the contacts on the front panel or on the main unit body. It may result in poor electrical contact. 4. If any dirt or foreign substances adhered on the contacts, they can be removed with a clean and dry cloth. 5. Do not expose the front panel to high temperatures or direct sunlight in anywhere. 6. Keep away any volatile agents (e.g. benzene, thinner, or insecticides) from touching the surface of the front panel 7. Do not attempt to disassemble the front panel. The right side Front Panel 3. For safekeeping, store the front panel in the supplied protective case immediately after being removed. To Install the Front Panel 1. To install the front panel, first insert the left side into proper position then insert the right side into place. The left side The right side Front Panel 6 WIRING CONNECTION ISO CONNECTION 7 OPERATION LOCATION OF KEYS 23 15.6 DIR+ 16.USB interface 17.9 PTY 18. SCAN/RE-CON 19.0 DSP 20. AS/PS/*/+/Navi-SCH 21.7 AF 22.8 EQ/TA 23. .reset button 24. (hang up)/BND/LOUD /CLR 25. / (volume up/down buttons) 26.SEL/MENU 27.SD/MMC interface 28. AUX IN 1. / (tune/seek/track down/up buttons) 2. (release button) 3. Mic 4. (pick up) 5.PAIR/MOD 6.T-MENU/TRANSFER 7.LCD 8.5 DIR9.4 SHF 10.1 PAU 11.1-6 preset buttons 12.2 SCN 13.3 RPT 14. /MUTE 8 OPERATION RESET FUNCTION RESET button (23) must be activated with either a ballpoint pen or thin metal object. The RESET button is to be activated for the following reasons: - Initial installation of the unit when all wiring is completed. - All the function buttons do not operate. - Error symbol on the display. Note: if press RESET button (23), the unit can’t work yet, please use a cotton swab soaked in isopropyl alcohol to clean the socket on the front panel. BASIC OPERATION SWITCHING ON/OFF THE UNIT Press button (14) to turn on the unit. When the unit is on, press and hold button (14) to turn the unit off. FACEPLATE RELEASE Press button (2) to detach the removable faceplate. SOUND ADJUSTMENT /MENU button (26) to Shortly press SEL SEL/MENU enter AUDIO SETTING mode, use /MENU button (26) or SEL SEL/MENU / (1) to select the desired adjustment mode. The adjustment mode will change in the following order: Bass/Treble/Balance/Fader/Sub-woof/ON/ OF(Exit) Shortly press / (25) to adjust the sound quality up or down step by step, press and hold / (25) will change the sound quality continuously. Shortly press MUTE button (14) will mute the sound, press it again will resume the sound. MODE SELECTION Shortly press MOD button (5) to change the mode among: Radio, CD, USB, CARD, IPOD (optional), AUX and BT Audio. SYSTEM SETTING Press and hold MENU button (26) on the front panel to enter SYSTEM SETTING mode. There are below items for you to adjust. BEEP / P-VOL / AREA / HOUR 24H / PCLK Use SEL button (26) or / (1) to select the item you want to change, and use / (25) to change the corresponding setting. 1) BEEP: ON/OFF To turn the beep sound on/off when pressing the buttons on the front panel 2) P-VOL Select P-VOL: The max volume value when you turn on the unit. Such as when you set the P-VOL to 40. If the volume value is small than 40 when you turn off the unit. Next time you turn on the unit. The volume will keep the last volume value. But if the volume value is large than 40 when you turn off the unit. Then next time you turn on the unit. The volume value will back to 40. 3) Area: Use / (25) button. You can LOUDNESS UD button (24) for several Press LO LOUD seconds to switch loudness function on, and “LOUD” will appear on the LCD. Press it for several seconds again to release this function, and “LOUD” will disappear. DISPLAY Press DSP button (19) to change display mode. EQUALIZATION Press EQ button (22) shortly to turn on equalization function and to select desired audio mode. There are five kinds of mode as below: FLAT→CLAS→POP M→ROCK→DSP OFF 9 OPERATION set the radio frequency to Europe frequency or USA frequency. 4) HOUR 24/12 You can select time format to 12 hour or 24 hour format. (In AREA item. When you change the radio frequency to the EUR. The time format will be changed to 24 HOUR format automatically. When you change the radio frequency to the USA. The time format will be change to 12 HOUR format automatically.) 5) PCLK ON/OFF: no function. strength until one cycle search is finished. And then 6 strongest stations are stored into the corresponding preset number button. - Program scanning Press AS/PS button (20) shortly to scan preset station. And the corresponding station number P1~P6 will flash on LCD. SCAN Press SCAN button (18) to enter scan mode, the unit will scan to higher frequency station and keep on each station for several seconds (the corresponding frequency will flash 5 times on LCD). AUXILIARY INPUT The unit can be connected to a portable audio player through the AUX IN jack (30) on the front panel. After finishing the connection, you can press MOD button (5) on the front panel to switch the mode to AUX IN mode. RADIO OPERATION SELECTING THE FREQUENCY BAND At radio mode, press BND button (24) shortly to select the desired band. The reception band will change in the following order: FM1 / FM2 / FM3 / AM STATION STORING Searched a station press preset button (1-6) for several seconds (until 2’nd beeps come out), current station is stored into the number button. RDS (RADIO DATA SYSTEM) OPERATION - Setting RDS mode Press AF button (21) and release immediately to switch on or off RDS mode. Whenever RDS is switch on, “RDS” will flash on LCD. SELECTING STATION Shortly press / buttons (1) to activate automatic seek function. Press for several seconds until “MANUAL……” appears on the display, the manual tuning mode is selected. If both buttons have not been pressed for several seconds, they will return to seek tuning mode and “AUTO……” appears on the display. - AUTOMATIC MEMORY STORING & PROGRAM SCANNING - Automatic memory storing Press AS/PS button (20) for several seconds “SEARCH” will appear on LCD. the radio will search from the current frequency and checks the signal 10 Y BUTTON (17) USE PT PTY 1) Shortly press PTY button (17) will enter PTY SELECT mode, the program name will be displayed on the LCD, you can use / (25) to select the items and press / buttons (1) to begin search the corresponding program. 2) Press and hold PTY button (17) will enter RDS MENU, in the menu, use / (25) to select the items and press / buttons (1) to adjust corresponding item. There are below items for you to adjusting: OPERATION TA / PI / RETURN / MASK / EONTA / TAVOL / REG TA: SEEK/ALARM a) TA SEEK mode: When newly tuned station does not receive TP information for 5 seconds, the radio retunes to next station which has not the same station (PI) as the last station, but has the TP information. When TP information gets lost at the current station for retune time which is set by RETUNE SHORT or RETUNE LONG, the radio start to retune to next same PI station. When PI station does not catch in one cyclic search, the radio retunes to next station with TP information. Note: In TA SEEK mode, the current station can be changed to the completely different station because the unit searches TP station when the field (signal) strength of the current station is very weak, or the current station has no “TP” signal. (The higher priority is TP rather than PI.) b) TA ALARM mode When this mode is selected, any automatic retune mode is not activated. Only double beep sound (ALARM) is output. So, in this mode, the unit keeps the current station anyhow. (The PI priority is higher than TP.) When newly tuned station doesn’t have TP information for 5 seconds, beeps come out. When TP information gets lost at the current station for retune time, the beep sound is output. When newly tuned station has not RDS signal, “PI SEEK” is suppressed somewhat. PI: SOUND/MUTE: While AF switching is implemented in C201 station, AF can switch to 100 MHz, which is non genuine AF (where, different PI with same AF) in short “DIP”. If a car cruises that critical area back and forth, an oscillation phenomenon can be occurred, because the different PI code can be received from 100 MHz with “XXX” PI. The car radio has special procedure to reduce even this kind of unavoidable situation however there is a limit to be escaped from this serious case perfectly. In that serious case, 2 mode is selectable as follows: 98 100 90 PI: C201 100 PI: XXX - PI SOUND mode: When above different PI sound (DIP) is heard once in a while, the DIP’s sound will be heard for a short time. - PI MUTE mode: Under above same situation, a mute sound will be heard for a short time. RETUNE: LONG/SHORT When PI information gets lost at the current station for retune time which is set by RETUNE SHORT (30 sec.) or RETUNE LONG (90 sec.), the radio start to retune to next same PI station. MASK: DPI/ALL MASK DPI mode: masked only the AF which has Different PI (DPI). MASK ALL mode: masked the AF which has Different PI and NO RDS signal with high field strength. 11 OPERATION EONTA: DX/LO (DISTANCE/LOCAL): The purpose of this key is to reduce unwanted EON TA switching, which EON TA information was received from current station and the radio switched to that EON linked station, but no information could not be received because the EON linked station is located too far from that area. So the radio is switched back to current station again. In above operation, a customer listens to a wrong program or mute sound for a while. EON TA LOCAL mode When the filed strength level of EON linked is less than threshold level, the radio does not switch that station, and a customer can hardly listen to any disturbances. When EON TA LOCAL mode is selected, “EON TA LO” on numeric display is indicated for a few seconds. EON TA DISTANCE mode EON TA switch is tried to implemented by the information of current station. When EON TA DISTANCE mode is selected, “EON TA DX” on numeric display is indicated for a few seconds seconds, it is engaging whether TA mode on or off. When TA mode, is on and a traffic announcement is transmitted: When the unit was in CD (MP3) mode or AUX IN mode or IPOD mode, it will switch temporarily to radio mode. Temporary switch over to an EON linked station when EON detects a traffic announcement on that other program. If the volume level was under the threshold point it will be raised to the threshold point. But the user changed the volume level, which was more than the threshold point (min. TA volume level), it will be set to the last level. When TA mode is on, TA of individual segment is turned on. When a TP station is received, TP of individual segment is turned on. TA interruption function The current traffic announcement is cancelled by pressing this key. But the TA mode will not be off. The RDS data used are the PI, PS, AF, TP, TA, EON and PTY data. PI: Program Identification code Code for identifying programs PS: Program Service Name Broadcast station name data expressed in alphanumerically characters AF: Alternative Frequencies Frequency list of broadcasting stations transmitting the same program TP: Traffic Program Identification Identification data for traffic information-broadcasting station TA: Traffic Announcement Identification Identification data showing traffic information is being transmitted or not TA-VOLUME: Volume 30 (the default TA volume value is 30, you can adjust it from 0 to 100). REG (REGION):: OFF/ON REGION ON mode: AF switching or PI SEEK is implemented to the station which have all PI codes are the same as current station. REGION OFF mode: The regional code in the format of PI code is ignored when AF switching or PI SEEK is implemented. - Listening to Traffic Announcement TA button (22) is operated as follows: When pressed and held for several 12 OPERATION EON: Enhanced Other Networks Information Broadcasting information on PI, AF, TP, TA, etc, relating to networks other than the network used for current reception PTY: Program Type Code Contents of programs such as news, light music, sports etc. current folder, and “D-SCN” will appear, press it again will exit this mode. ING THE SAME TRACK REPEAT REPEATING Press RPT button (13) to continuously repeat the same file, and “S-RPT” will appear on LCD. Press it again to stop repeat, and “S-RPT” will disappear. Press and hold RPT button (13) will repeat all the files in the current folder. And “D-RPT” will appear on LCD. Press it again will exit this mode. USB PLAY OPERATION YING ALL TRACKS IN RANDOM PLA PLAYING Press SHF button (9) to play all files on CD in random order, and “S-SHF” will appear on LCD. Press again to cancel the function, and “S-SHF” will disappear. Press and hold SHF button (9) for 2 seconds will play all files (in the current folder) in random order. And “S-SHF” will appear on LCD. Press it again will exit this mode. SWITCH TO USB MODE In the front panel of the unit, there is an USB interface (16). You can connect an USB driver through this interface (16). When you connect an USB driver through the interface, the unit will search the MP3 files or WMA files in the USB driver and start to play MP3 files or WMA files automatically. If in other mode, you can also press MOD button (5) to select USB mode. ING TRACKS SELECT SELECTING Press / (1) will skip to previous/next file. File number will showed on display. Press and hold / (1) will reverse/forward. File play starts when release the button. SELECTING DIRECTORY UP/DOWN Press DIR- button (8) or DIR+ button (15) to select directory downward or upward. If the USB driver does not contain any directory, there is no function of pressing DIR- button (8) or DIR+ button (15). the be fast you ING TRACKS SELECT SELECTING � PAUSING PLAYING Press PAU button (10) to pause, and “Pause” will appear on LCD. Press it again to resume play, and “Pause” will disappear. ING ALL TRACKS PREVIEW PREVIEWING Press SCN button (12) to play first several seconds of each file, and “Scan” will appear on LCD. Press again to stop intro and listen to file, “Scan” will disappear. Press and hold SCN button (12) will play first several seconds of each file in the 13 Searching Track Directly Press AS/PS (Navi-SCH) button (20) for one time. It enters into “Searching track directly” mode. The unit searches the track selected by following direct numeric buttons: M1-M6, MOD (5), TUNE/SEEK/TRACK DOWN (8), TUNE/SEEK/TRACK UP (9), DSP(0). If selected three digits, the unit searches the tract at once. If selected one or two /ENT digits, the unit wait for BND/LOU BND/LOU/ENT button for seconds. The unit searches the track after few seconds, even if the OPERATION enter button is not pressed. � selected title is again a directory. Searching Directory or File Name Press AS/PS (Navi-SCH) button (20) for two times. It enters into “Searching Directory or File Name” mode. The unit searches files and directories that have the same character which is inputted by the user pressing the corresponding buttons listed on the Table below. AS/PS Mode Select BND/LOU ENTER M1 A, B, C, 1 M2 D, E, F, 2 M3 G, H, I, 3 M4 J, K, L, 4 M6 M, N, O, 5/Directory DOWN P, Q, R, 6/Directory UP MOD S, T, U, 7 M5 TUNE/SEEK/TRACK V, W, X, 8 DOWN TUNE/SEEK/TRACK Y, Z, SPACE, 9 UP CHARACTER SHIFT PUSH SEL RIGHT DSP _,-,+,0 Explain as follows: - Use the corresponding buttons to select the characters A to Z, blank, 0 to 9, _, -, +. - Press SEL button (26) to confirm entry of each characters. - Press BND/LOU ND/LOU//ENT button (24) to start the title search. In case the selected title is a directory name, display will show (‘ ‘), then - Use the TUNE/SEEK/TRACK UP/DOWN buttons to list all songs under this directory and select the title. - Press BND/LOU ND/LOU//ENT button to confirm and start the play. - Repeat the above steps if the newly � Searching From Root Directory Press AS/PS (Navi-SCH) button (20) for three times. The unit searches file or directory from root by TUNE/SEEK/TRACK UP/DOWN buttons. (D-DIR icon turns on if the name is directory). Display will list all available directories and songs. Select the desired directory / songs by using TUNE/SEEK/TRACK UP/DOWN buttons and BND/LOU/ENT button to confirm. If the selected title is a song, it starts to play. If the selected title is a directory name, display will show (‘ ‘), then TUNE/SEEK/TRACK - Use the UP/DOWN buttons to list all songs under this directory and select the title. - Press BND/LOU ND/LOU//ENT button to confirm and start the play. - Repeat the above steps if the newly selected title is again a directory. � Searching From Current Directory Press AS/PS (Navi-SCH) button for four times. The unit searches file or directory from current directory by TUNE/SEEK/TRACK UP/DOWN buttons. (D-DIR icon turns on if the name is directory). The current directory name is displayed for a second and the currently playing file name is displayed (selected). The user can select the directory or file in the directory by TUNE/SEEK/TRACK UP/DOWN buttons. The selected file can be played by pressing BND BND//LOU LOU// (ENT ENT)) button. DISPLAY ID3 INFORMATION Press ID3 button (20) to show the ID3 TAG (title, artist and album) 14 OPERATION assumes no responsibility for this. SUPPORT MP3/WMA DECODING MODE The main unit supports MP3/WMA (Windows Media Audio) decoding modes as below. Standard MPEG1 Audio Layer 3 (44.1kHz) Windows Media Audio (44.1kHz) Bit Rate (kbps) 32,48,64,96, 128,192,256, 320 64,96,128,192 SD/MMC OPERATION (OPTIONAL) According to the customer’s need, the unit will add a SD/MMC interface. See below, the SD/MMC interface is on the housing of the unit. Supports Mode Stereo Stereo The USB solution can support: 1. Folder: 500 max. 2. File: 999 max. 3. Depth of folder: 8 layers 4. Size: 2 GB When you insert a SD/MMC card in the SD/MMC interface, the unit will search the MP3 files or WMA files in the card and start to play MP3 files or WMA files automatically. The operation is the same with the MP3 operation described above. If in other mode, you can also press MOD button (5) to select SD/MMC mode. When there are important files in the SD/MMC card, do not connect it to the main unit to play. Note ote: � The main unit can only support the standard USB-memory disc which is approved by Microsoft. � USB MP3 player is not a standard which means different brand name or different models have their own standard. So our product cannot support every MP3 player. � When connecting an MP3 player and there has normal battery in the player (non rechargeable battery), you should remove the battery from the MP3 player then connect it to the USB interface. Otherwise, it may cause battery burst. � When in USB play mode, be sure not to remove the USB driver from the USB interface. IPOD operation Select Category When IPOD is playing, Press BND button (24) the category will appear on the display, Press / (25) to change the category among PLAY LIST / ARTIST / ALBUM / GENRE / SONG / COMPOSER, then press SEL button (26) to confirm the selected category. CAUTION When there are important files in the USB device. Do not connect it to the main unit to play. Because any wrong operation may cause files loss. And our company Select Song Press BND button (24), the display will show the current catalog (stored in the IPOD). Press / (25) to change the song title to the next song or the previous 15 OPERATION song. Then press SEL (26) button to play the selected song. (i) When use Bluetooth, please make sure the mobile phone supports Bluetooth function. PAU (Pause) When playing a song, press PAU button (10) will pause the playing. Press it again will resume playing. (ii) For the different kind of mobile phone, Bluetooth emissive power has some difference. To get the best conversation quality, it is commended that the distance between the mobile phone and the unit is within 3m. And please don’t put any metal object or any obstacle between the path of the mobile phone and the unit. RPT (Repeat) When playing a song, press RPT button (12) shortly will repeat the current song, and “S-RPT” will appear on the display. Press it again to exit this mode. Press it for about 2 seconds to repeat Album, and “D-RPT” will appear on the display. Press it again to exit this mode. � 1) In any mode, press and hold PAIR(MOD) button (5) on the front panel, “PAIRING” will appear on the LCD. SHF (Shuffle) When playing a song, press SHF button (8) shortly, after the current song play to the end, It will play the song in current category in random order, and “SHF” will appear on the display. Press it again to exit this mode. Press it for 2 seconds to play all songs in the album and “D-SHF” will appear on the display Press it again to exit this mode. 2) On the mobile phone, select the Bluetooth set up. (Please refer to the instruction manual of your mobile phone on how to operate Bluetooth.) 3) “CARBT” should appear in the list on your mobile phone, please select “CARBT” and then input password “0000”. TUNE/TRACK UP/DOWN When playing a song, press / button (1) will play the previous/next track in the current category, but you can not enter to the next category. When playing a song more than 3 second, press will play the song from the start position. When playing a song less than 3 second, press will play the previous track. When playing a song, press ad hold / button (1) for several seconds will fast reverse/ forward of the playing. And the display will show the playing time (e.g. 1’20). 4) When successful paired, “CONN OK!” will be displayed on LCD. 5) When pairing failed, “PAIR END” will be displayed on LCD. You can press and hold PAIR button (5) again to try the pairing again. 6) Note: During Pairing, MODE key will no functional during pairing mode. When pairing, you can press and hold PAIR button (5) to terminate the pairing. BLUETOOTH OPERATION � PREPAIR FOR OPERATION PAIRING BLUETOOTH 16 OPERATION � CONNECT The details please see the following instruction. This unit is built-in auto-reconnection function. Every time when you short press button (4), the unit will auto reconnect with the mobile phone (note: the mobile phone must have been paired with the unit before.). In the following conditions you can reconnect manually by pressing RECON button (18) for several seconds, when reconnect is successful “Conn OK!” will be displayed. 1) PRE NUM: You can save 10 phone-call to the phonebook. In PRE NUM mode. Press / button (25) to select the NUMBER. Then press SEL button, and enter the phone number. Then press SEL button again to save it to phonebook. 2) RECELVED: Display the last call you have received. 3) DIALED: Display the last dialed number. 1) If the mobile phone is out of range, the connection will be lost, when you come back to the unit, reconnection is necessary. 4) MISSED: Display the call you have missed. 5) MANU ANS(manual answer) 2) When the mobile phone is out of range from the unit, and there is an incoming call, when you come back to the unit, and you want to transfer the audio to the unit, you need to reconnection. You can set Answer mode to manual answer (MANU ANS) mode or Auto Answer (AUTO ANS) mode. In auto answer mode, when a call coming the Phone Number will appear on LCD. The unit will answer the call automatically. In MANU ANS mode, When a call coming, the Phone Number will appear on LCD. you can press button (4) to answer the call, or press button (24) to reject the incoming call. 3) When you press button (2) to release the front panel, the connection will be break off. When you install the front panel, you need to reconnection. 4) If you turn off the mobile phone that has paired with the unit, when you turn on the mobile phone, you need to reconnection. � 6) TALK (00~20) You can set the bluetooth volume in TALK item. If it is 00, When a call coming. The main volume will be set to 60 automatically. If you set the TALK volume to 20. The main volume will be set to 100 automatically when a call coming. T-MENU When successful paired, shortly press T-MENU button (6) on the front panel will enter the telephone menu, keep pressing this button or press / button (1) to change the items in this menu. The items will be displayed in the following sequence: PRE NUM / RECELVED / DIALED / MISSED / MANUANS / TALK. 17 OPERATION Example: TALK volume MAIN volume 00 = 60 01 = 62 02 = 64 …………………….. 20 = 100 � 2) When making an outgoing call, it’s not possible to transfer if the call is not being answered yet. BT reset reset: :In BT AUDIO mode. Press and hold BND/LOU/ key for several seconds. Some of the bluetooth information will be reseted (The RECELVED / DIALED / MLSSED information will be lost). � BLUETOOTH FUNCITON) MAKING AN OUTGOING CALL 1) Making an outgoing call from SPEED DIAL, RECEIVED LIST, DIALED LIST, MISSED LIST, PHONE BOOK(Mobile Phone) and PHONE 2) Making an outgoing call by inputting the phone number manually. (A2DP M1, M2, button on the front panel of the unit serves as PAUSE/PLAY and STOP control button. (It is up to the mobile phone, the different mobile phone has the different define.) Press button (4) on the front panel “CALL_” will appear on LCD. Use 0~9, *, # buttons to enter the phone number you want to dial. (Note: shortly press * button will input “*” character, press and hold it will input “+” character). Then press (4) again will call the number. AUDIO The unit supports Bluetooth audio function. If your mobile phone can play stereo audio, when the pairing is ok, you can choose the unit you have paired to play the stereo music. BOOK (SIM Card) please refer to the T-MENU section. Use / button (1) on the front panel of the unit to choose the previous/next track. (It is up to the mobile phone, the different mobile phone has the different define) button Note: if you input the wrong number shortly press CLR button (24) to clear it. Press and hold CLR button (24) will clear all numeric. � � TRANSFER THE CALL BETWEEN MOBILE PHONE AND THE UNIT During the talking mode, you can press and hold TRANSFER TRANSFER( T-MENU) button (6) to transfer the phone call between the mobile phone and the unit. Note: 1) If you transfer the call to mobile phone, the mute of the present mode will be released at the same time. 18 SPECIFICATION GENERAL Power Supply Requirements Chassis Dimensions Tone Controls - Bass (at 100 Hz) - Treble (at 10 kHz) Maximum Output Power - Version Y/Y1/Y2 Current Drain - Version Y/Y1/Y2 Version) : DC 12 Volts, Negative Ground : 178 (W) x 160 (D) x 50 (H) : ±10 dB : ±10 dB : 4x40 watts/4X45watts/4X50watts : 15 Ampere (max.) (For High Power CD PLAYER Signal to Noise Ratio Channel Separation Frequency Response : More than 55 dB : More than 50 dB : 40Hz – 18 kHz RADIO Frequency Coverage IF Sensitivity (S/N=30dB) Stereo Separation For 2 Bands Europe) FM 87.5 to 108 MHz 10.7 MHz 4μV >25dB Frequency Coverage IF Sensitivity (S/N=20dB) MW 522 to 1620 KHz 450 KHz 36dBuV 19 TROUBLE SHOOTING Before going through the checklist, check wiring connection. If any of the problems persist after checklist has been made, consult your nearest service dealer. Symptom No power. No sound. Cause Solution The car ignition switch is not on. If the power supply is connected to the car accessory circuits, but the engine is not moving, switch the ignition key to “ACC”. The fuse is blown. Replace the fuse. Temperature inside the car is too high. Cool off or until the ambient temperature return to normal. Condensation. Leave the player off for an hour or so, then try again. Volume is in minimum Adjust volume to a desired level. Wiring is connected. Check wiring connection. not properly The installation angle is more than 30 degree. Adjust the installation angle less than 30 degree. The disc is extremely dirty or defective disc. Clean the compact disc, then try to play a new one. The operation keys do not work. The built-in microcomputer is not operating properly due to noise. Press the RESET button. Front panel is not properly fix into its place. The radio does not Work. The radio station automatic selection does not work. The antenna cable is not connected. Insert the antenna cable firmly. The signals are too weak. Select a station manually. Sound skips. 20 CS-351 BENUTZERHANDBUCH Mobiles Audiosystem � Stereoradio mit PLL-Synthesizer � Automatisches Speichern von Sendern � RDS-Funktion ütterungsschutz (ESP) � Elektronischer Ersch Erschü � USB-Port & SD/MMC-Kartenslot ützung � IPOD-Unterst IPOD-Unterstü � Bluetooth-Freisprechfunktion & A2DP-Stereo übertragung A2DP-Stereoü � Faltbare, abnehmbare Bedientafel � Aux-Eingang ützung, www.lenco.eu Zur Information und Unterst Unterstü INHALT 23 Einbau Einbau........................................................... .........................................................2 Herauschrauben der Schrauben vor dem Einbau......................................................... 23 DIN-Vordereinbau (Methode A)...............23 ...................................... 39 SD/MMC-Betrieb SD/MMC-Betrieb...................................... IPOD-Betrieb ............................................. 40 IPOD-Betrieb............................................. .............................................40 Bluetooth-Betrieb .................................. 40 ..................................40 Vorbereitung........................................... 40 ........................................... 29 Kabelanschluss........................................... Kabelanschluss Pairing..................................................... 41 Verbindungsaufbau............................... 41 T-Menü.................................................... 42 Anruf entgegennehmen MANU ANSI.42 Anruf tätigen........................................... 42 ISO-Anschluss........................................... 29 Zwischen Mobiltelefon und Gerät ........................... 30 Anordnung der Tasten Tasten........................... ...........................30 umherschalten....................................... 42 ..................... 30 .....................30 Bedienung..................... Grundlegende Bedienung Ein-/Ausschalten des Geräts .................31 Bluetooth-Audio (A2DP-Funktion)...... 43 Technische Daten....................................44 Entfernen der Bedientafel........................ 31 Fehlerbehebung ...................................... 45 Fehlerbehebung...................................... Einbau des Geräts................................ 24 Entfernen des Geräts........................... 25 DIN-Rückseiteneinbau (Methode B)...... 26 Benutzung der abnehmbaren Bedientafel Bedientafel.. 27 Einstellen des Sounds.............................. 31 Loudness.................................................... 31 Anzeige....................................................... 31 Equalizer.....................................................31 Infrarot-Sensor (optional)......................... 31 Resetfunktion............................................. 31 Betriebsartauswahl................................... 31 Systemeinstellungen.................................31 Aux-Eingang...............................................32 Radiobetrieb............................................. 32 Auswahl des Frequenzbands.............. 32 Sendersuche.......................................... 32 Speichern von Sendern........................33 RDS-Funktion (Radio Data System).. 33 USB-Wiedergabe..................................... 36 Umschalten in den USB-Betrieb......... 36 Dateiauswahl......................................... 36 Wiedergabepause................................. 36 Vorschau aller vorhandenen Dateien ................................................................. 36 Wiederholung der gleichen Datei....... 36 Zufallswiedergabe................................. 36 ESP-Funktion ....................................... 36 EINBAU DIN-VORDER-/RÜCKSEITENEINBAU Dieses Gerät kann sowohl von vorne (normaler DIN-Vordereinbau) oder von hinten (DIN-Rückseiteneinbau mit Flachgewindeschraubenfassungen an den Seiten des Gerätegehäuses) eingebaut werden. Für genauere Informationen, lesen Sie bitte die folgende bebilderte Einbauanleitung. Anmerkungen: Montieren Sie das Gerät an einen geeigneten Ort, an dem es nicht die normalen Fahrfunktionen des Fahrers beeinflussen kann. Bevor Sie das Gerät einbauen, verbinden Sie die Kabel vorübergehend mit dem Gerät, um sicher zu gehen, dass das System richtig funktioniert. Nur die Benutzung der mitgelieferten Teile kann einen vollfunktionsfähigen Einbau gewährleisten. Die Benutzung nicht autorisierter Teile kann zu Funktionsstörungen führen. Wenden Sie sich an Ihren Händler, wenn der Einbau Bohrungen oder andere Modifikationen im Wagen erzwingt. Bauen Sie das Gerät an einer Stelle ein an der es den Fahrer nicht behindert und Mitfahrer nicht verletzen kann, wenn der Wagen plötzlich gebremst wird. Wenn der Einbauwinkel 30° über der Horizontalen liegt, kann es sein, dass das Gerät nicht seine optimale Leistung erbringen kann. HERAUSNEHMEN DER SCHRAUBEN VOR DEM EINBAU Vor dem Einbau müssen folgende zwei Schrauben entfernt werden. DIN-VORDEREINBAU (Methode A) Einbauöffnung Dieses Gerät kann unter jedem Armaturenbrett mit einer Einbauöffnung der folgenden Größe eingebaut werden: 30 53mm Vermeiden Sie es das Gerät an Stellen zu montieren, an denen es besonders hohen Temperaturen ausgesetzt ist. Dies kann u.a. direktes Sonnenlicht oder Warmluft von der Autoheizung sein. Vermeiden Sie außerdem Staub, Schmutz und übermäßige Vibrationen. 182mm 23 EINBAU Einbau des Geräts Vergewissern Sie sich, dass Sie die Anschlüsse vorher getestet haben. Benutzen Sie danach die folgenden Schritte zum Einbau des Geräts. 1. Vergewissern Sie sich, dass die Zündung ausgestellt ist und trennen Sie das Kabel am Minuspol (-) der Autobatterie ab. 2. Trennen Sie das Kabelgeschirr und die Antenne ab. 3. Betätigen Sie den Entriegelungsknopf an der Gerätevorderseite und nehmen Sie die Bedientafel (siehe „Bedientafel vom Gerät abnehmen”). 4. Heben Sie die Oberseite des Außenrings hoch und ziehen den Ring herunter. 5. Schieben Sie die beiden mitgelieferten Montageschlüssel in den Einbaurahmen, um diesen zu entfernen. Stecken Sie die Schlüssel so weit es geht (mit den Kerben nach oben zeigend) in die entsprechenden Schlitzen an der rechten und linken Seitenmitte. Ziehen Sie dann den Einbaurahmen vom Gerät herunter. 24 EINBAU Metallstreifens unter dem Armaturenbrett an einem festen Metallteil des Wagens zu befestigen. Der Metallstreifen dient außerdem dazu das Gerät sachgemäß zu erden. Hinweis: Befestigen Sie das kurze Teil des Metallstreifens an der Befestigungsschraube auf der Rückseite des Geräts und das lange Teil am Armaturenbrett. 6. Bauen Sie den Einbaurahmen in das Armaturenbrett ein und drücken Sie die Blechlaschen im Einbaurahmen mit einem Schraubenzieher ein. Nicht alle Blechlaschen sorgen für Kontakt. Überprüfen Sie deshalb welche am effektivsten sind. Biegen Sie die entsprechenden Blechlaschen hinter dem Armaturenbrett auf, um den Einbaurahmen zu fixieren. Spring Washer Hex Nut Metal Strap Dashboard Mounting Bolt Tabs Plain Washer Tapping Screw Screwdriver Sleeve 10. Schließen Sie das Stromkabel wieder am Minuspol (-) der Autobatterie an. Setzen Sie dann den Außenring zurück auf das Gerät und befestigen Sie die Bedientafel an der Vorderseite (siehe Anleitung in Abschnitt „Anbringen der Bedientafel“). 7. Schließen Sie das Kabelgeschirr und die Antennen wieder an. Achten Sie dabei darauf, dass keine Drähte oder Kabel beschädigt werden. 8. Schieben Sie das Gerät in den Einbaurahmen, bis es einrastet. 9. Zur zusätzlichen Befestigung an der Rückseite des Geräts dient der mitgelieferte Metallstreifen. Benutzen Sie die mitgelieferten Metallteile (5 mm Sechskantmutter und Federscheibe), um das eine Ende des Metallstreifens an der Schraube auf der Rückseite des Geräts zu befestigen. Falls notwendig können Sie den Metallstreifen biegen, damit er in Ihrem Wagen befestigt werden kann. Benutzen Sie dann die mitgelieferten Metallteile (5 x 25 mm Blechschraube und Unterlegscheibe), um das andere Ende des Entfernen des Geräts 1.Vergewissern Sie sich, dass die Zündung ausgestellt ist und trennen Sie das Kabel am Minuspol (-) der Autobatterie ab. 2.Entfernen Sie den Metallstreifen an der Rückseite des Geräts (falls vorhanden). 3. Betätigen Sie den Entriegelungsknopf an der Gerätevorderseite, um die Bedientafel zu entfernen. 25 EINBAU 4.Heben Sie die Oberseite des Außenrings hoch und ziehen den Ring herunter. 5.Stecken Sie die mitgelieferten Einbauschlüssel in die Schlitzen an der rechten und linken Seitenmitte des Geräts und ziehen Sie das Gerät aus dem Armaturenbrett heraus. Befestigung des Geräts an den Einbauschienen. Richten Sie die Schraublöcher in den Einbauschienen auf die Schraublöcher am Gerät aus und schrauben Sie die Schienen mit den Schrauben (5 x 5 mm) fest. Hinweis: Der Außenring, der Einbaurahmen und der Metallstreifen werden bei der Einbaumethode B nicht benötigt. DIN RÜCKSEITENEINBAU (Methode B) Wenn Sie einen Nissan oder Toyota besitzen, verwenden Sie die folgenden Einbauanweisungen. Benutzen Sie die mit T (für Toyota) oder N (für Nissan) markierten Schraubbohrungen an beiden Seiten des Geräts, um das Gerät an den mitgelieferten Einbauschienen zu befestigen. Side View showing Screw Holes marked T, N Screw Factory Radio Mounting Bracket Screw Dashboard or Console 26 BENUTZUNG DER ABNEHMBAREN BEDIENTAFEL Entfernen der Bedientafel 1. Betätigen Sie den Entriegelungsknopf The left side ( ) und die Bedientafel klappt nach unten. The right side Front Panel 2. Wenn beide Seite in der richtigen Position sind, drücken Sie die Bedientafel in das Gerät. OPEN 2. Um die Bedientafel zu entfernen, heben Sie sie in einem leichten Winkel zur Horizontalen an und ziehen Sie sie zuerst auf der rechten und dann auf der linken Seite heraus. 3. Beachten Sie, dass die Tasten nicht benutzt werden können und die Anzeige nicht richtig funktioniert, wenn die Bedientafel bei der Befestigung nicht richtig einrastet. Betätigen Sie in diesem Fall den Entriegelungsknopf auf der Bedientafel und befestigen Sie sie erneut. The right side Front Panel 3. Um Beschädigungen zu vermeiden, sollte die Bedientafel sofort nach dem Entfernen in der mitgelieferten Schutzhülle aufbewahrt werden. Handhabung der Bedientafel 1. Lassen Sie die Bedientafel nicht fallen. 2. Üben Sie keinen Druck auf die Anzeige oder die Funktionstasten aus, wenn Sie die Bedientafel abnehmen oder befestigen. 3. Berühren Sie keine der Kontakte auf der Bedientafel oder dem Hauptgerät. Dies kann dazu führen, dass der elektrische Kontakt verschlechtert wird. 4. Wenn Schmutz oder Fremdgegenstände an den Kontakte haften, können Sie mit einem sauberen, trockenen Tuch entfernt werden. Anbringen der Bedientafel 1. Um die Bedientafel wieder am Gerät zu befesitigen, setzen Sie zunächst die linke Seite in die richtige Position und dann die rechte Seite. 27 BENUTZUNG DER ABNEHMBAREN BEDIENTAFEL 7. 5. Setzen Sie die Bedientafel niemals hohen Temperaturen oder direktem Sonnenlicht aus. 6. Halten Sie die Bedientafel fern von leicht flüchtigen Substanzen ( z. B. Benzin, Verdünnungsmittel oder Insektizide). 7. Versuchen Sie niemals die Bedientafel auseinander zu bauen. 28 KABELANSCHLUSS ISO-Anschluss 29 BEDIENUNG ANORDNUNG DER BEDIENELEMENTE 1. / (Frequenz/Titel vor / zurück,16. USB-Port Suchen) 17. 9 PTY 2. (Entriegelung) 18. SCAN 3. Mikrofon 19. 0 DSP/RE-CCN 4. (Abnehmen) 20. AS/PS/*/+/Navi-SCH 5. PAIRING/MOD 21. 7 AF 6. T-MENU/TRANSFER 22. 8 EQ/TA 7. LCD 23. IR (OPTIONAL) 8. 5 DIR24. (Auflegen)/BND/LOUD/CLR 9. 4 SHF 25. / (Lautstärketasten) 10. 1 PAU 26. SEL/MENU 11. 1-6 Sendertasten 27. SD/MMC-Kartenslot 12. 2 SCN 28. Auswurftaste 13. 3 RPT 29. Reset 14. /MUTE 30. AUX-Eingang 15. 6 DIR+ 30 BEDIENUNG EQUALIZER Benutzen Sie die EQ EQ-Taste (22), um die Equalizer-Funktion einzuschalten und den gewünschten Audiomodus auszuwählen. Es stehen fünf verschiedene EQ-Arten zur Verfügung (siehe unten): GRUNDLEGENDE BEDIENUNG ÄTS EIN-/AUSSCHALTEN DES GER GERÄ Betätigen Sie die Taste (14) auf dem Gerät, um es einzuschalten. Wenn das Gerät eingeschaltet ist, können Sie es durch Betätigung der Taste (14) wieder ausschalten. →NORM→KLAS→POP M→ROCK→DSP AUS ENTFERNEN DER BEDIENTAFEL Betätigen Sie den Entriegelungsknopf (2), um die Bedientafel zu entfernen. INFRAROT-SENSOR (OPTIONAL) Richten Sie die Fernbedienung auf den Infrarot-Sensor IR (23). Benutzen Sie die Funktionstasten auf der Fernbedienung zur Steuerung des Systems. EINSTELLEN DES SOUNDS Betätigen Sie die SEL/MENU SEL/MENU-Taste (26), um in den Audioeinstellungsmodus zu gelangen. Benutzen Sie die dann die SEL/MENU SEL/MENU-Taste (26) oder / (1) zur Auswahl der gewünschten Einstellungsoption. Die Einstellungsoption wechselt in der folgenden Reihenfolge: Bass/Treble/Balance/Fader/Sub-woof/ON/ OF(Verlassen) Betätigen Sie _/_ (25) zum schrittweisen Einstellen der Tonqualität oder halten Sie _/_ (25) gedrückt, um die Tonqualität kontinuierlich zu verändern. Betätigen Sie die MUTE MUTE-Taste (14), um den Ton vorübergehend auszuschalten. Betätigen Sie die Taste erneut, um den Ton wieder anzuschalten. FUNKTION RESETRESET-FUNKTION Die RESET RESET-Taste (29) muss mit einem spitzen Gegenstand, wie z. B. einem Kugelschreiber oder einem dünnen Metallgegenstand, betätigt werden. Benutzen Sie die RESET RESET-Taste unter folgenden Umständen: - Bei der Inbetriebnahme, nachdem alle Anschlüsse getätigt wurden. - Keine der Funktionstasten funktioniert. - Eine Fehlermeldung erscheint in der Anzeige. Hinweis: Wenn Sie die RESET RESET-Taste (29) betätigen und das Gerät danach immer noch nicht funktioniert, verwenden Sie ein mit etwas Isopropylalkohol getränktes Wattestäbchen zur Reinigung der Bedientafelkontakte. LOUDNESS Halten Sie die LOUD LOUD-Taste (24) für mehrere Sekunden gedrückt, um die Loudness-Funktion zu aktivieren. Als Bestätigung erscheint in der Anzeige „LOUD“. Halten Sie die Taste erneut für mehrere Sekunden gedrückt, um diese Funktion wieder auszuschalten. Entsprechend verschwindet „LOUD“ wieder von der Anzeige. BETRIEBSARTAUSWAHL Benutzen Sie die MOD MOD-Taste (5) zur Auswahl einer der folgenden Betriebsarten: Radio, CD, USB, CARD, IPOD (optional), AUX und BT Audio. ANZEIGE Betätigen Sie die DSP DSP-Taste (19), um den Anzeigemodus zu wechseln. SYSTEMEINSTELLUNGEN Halten Sie die MENU MENU-Taste (26) auf der Bedientafel gedrückt, um in den 31 BEDIENUNG Einstellungsmodus zu gehen. Es stehen die folgenden Einstellungsmöglichkeiten für Sie zur Verfügung. BEEP / P-VOL / AREA / HOUR 24H / PCLK Benutzen Sie die SEL SEL-Taste (26) oder / (1) zur Auswahl der Option, die Sie verändern wollen. Benutzen Sie dann / (25), um die entsprechende Einstellung zu verändern. 1) SIGNALTON: EIN/AUS Zum Ein- oder Ausschalten des Signaltons, der bei Tastenbetätigung aktiviert wird. 2) Einschaltlautstärke P-VOL: Der maximale Lautstärkenwert beim Einschalten des Geräts.Wie zum Beispiel, wenn Sie die P-VOL-Lautstärke auf 40 stellen. Wenn die Lautstärke dann kleiner als 40 ist, wenn Sie das Gerät ausschalten, wird das nächste Mal, wenn Sie das Gerät einschalten, die Lautstärke wird auf den zuletzt benutzten Wert eingestellt. Wenn aber die Lautstärke größer als 40 ist und Sie dann das Gerät ausschalten, wird die Lautstärke das nächste Mal, wenn das Gerät einschalten, zurück auf den Wert 40 gestellt. 3) Empfangsbereich: Verwenden Sie / (25) zumEinstellen die Tasten des Empfangsbereichs auf Europa oder USA. 4) Zeitformat (HOUR 24/12) Sie können das Zeitformat auf 12 Stunden oder 24 Stunden stellen. (Wenn Sie in der AREA-Option den Empfangsbereich auf EUR stellen, wird das Zeitformat automatisch auf das 24-Stunden-Format gestellt. Wenn Sie den Empfangsbereich auf USA stellen, wird das Zeitformat automatisch auf das 12-Stunden-Format gestellt.) 5) PCLK ON/OFF: keine Funktion. AUX-EINGANG Das Gerät kann über den AUX-Eingang AUX IN - 30) an einen externen (AUX Audio-Player angeschlossen werden. Wenn Sie die Geräte miteinander verbunden haben, betätigen Sie die MOD MOD-Taste (5) , um zum AUX-IN-Modus zu schalten. RADIOBETRIEB AUSWAHL DES FREQUENZBANDS Im Radiomodus können Sie durch Betätigung der BND BND-Taste (24) das gewünschte Frequenzband auswählen. Das Frequenzband wechselt in der folgenden Reihenfolge: FM1 / FM2 / FM3 / AM SENDERAUSWAHL Benutzen Sie die Tasten _/_ (1), um die automatische Suchfunktion zu aktivieren. Halten Sie die Taste für mehrere Sekunden gedrückt, bis in der Anzeige „MANUAL……“ erscheint. Damit wird dann die manuelle Sendersuche aktiviert. Wenn die Tasten nicht für mehrere Sekunden betätigt werden, geht das Gerät wieder zurück in den automatischen Suchmodus und „AUTO……“ erscheint in der Anzeige. AUTOMATISCHE SPEICHERUNG & PROGRAMMSUCHE - Automatisches Speichern von Sendern Halten Sie die AS/PS AS/PS-Taste (20) für mehrere Sekunden gedrückt und in der Anzeige erscheint „SEARCH“. Das Radio sucht dann von der momentanen Frequenz ausgehend bis die Suche beendet ist. Die jeweils 6 stärksten Sender werden dann unter den entsprechenden Speichernummern 32 BEDIENUNG gespeichert. einer Option benutzen. Benutzen Sie 3) dann die Tasten / (1) zum Einstellen. Es stehen die folgenden Einstellungsmöglichkeiten für Sie zur Verfügung: TA / PI / RETURN / MASK / EONTA / TAVOL / REG TA: SUCHEN/ALARM a) TA-SEEK-Modus: Wenn ein neu eingestellte Sender für mehr als 5 Sekunden keine TP-Informationen bekommt, geht das Radio zum nächsten Sender (PI) der über TP-Informationen verfügt. Wenn TP-Informationen beim aktuellen Sender verloren gehen, die durch RETUNE SHORT oder RETUNE LONG, startet das Radio den nächsten, gleichen PI-Sender zu finden. Wenn der ein PI-Sender nicht nach der ersten Suche gefunden wird, such das Radio nach dem nächsten Sender mit TP-Informationen. Hinweis: Im TA-SEEK-Modus wird der momentane Sender durch einen vollkommen anderen Sender ersetzt, da das Gerät nach einen TP-Sender sucht, wenn die Signalstärke des momentanen Senders sehr schwach ist oder der momentane Sender über kein TP-Signal verfügt. (Dabei hat TP im Normalfall eine höhere Priorität als PI.) b) TA-ALARM-Modus Wenn dieser Modus aktiviert, ist die automatische Sendersuche ausgestellt. Nur ein doppeltes Alarmsignal wird ausgegeben. In diesem Modus wird der momentane Sender immer beibehalten. (Dabei hat PI im Normalfall eine höhere Priorität als TP.) - Programmsuche Betätigung der AS/PS AS/PS-Taste (20) zur Suche nach gespeicherten Sendern. Die entsprechende Speichernummer P1~P6 blinkt dann in der Anzeige auf. SENDER SUCHEN Betätigen Sie die SCAN SCAN-Taste (18), um den Suchmodus zu aktivieren. Das Gerät sucht dann im Frequenzband nach Sendern und wartet jedesmal wenn ein Sender gefunden wurde für ein paar Sekunden (die entsprechende Frequenz blinkt 5 Mal in der Anzeige auf). SPEICHERN VON SENDERN Halten Sie nach der Suche die gewüschten Sendertaste (1-6) für mehrere Sekunden gedrückt (bis Sie den zweiten Signalton hören) und der momentane Sender wird unter der entsprechenden Taste gespeichert. FUNKTION (RADIO DATA SYSTEM RDSRDS-FUNKTION SYSTEM)) - Einstellen des RDS-Modus Betätigen Sie die AF AF-Taste (21) zum Einschalten oder Ausschalten des RDS-Modus. Wenn der RDS-Modus aktiviert ist, blinkt in der Anzeige „RDS“. - BENUTZUNG DER PTY PTY-TASTE (17) 1) Betätigen Sie die PTY PTY-Taste (17), um den PTY-AUSWAHL-Modus zu aktivieren. Der Programmname erscheint in der Anzeige und Sie können die Tasten / (25) zur Auswahl der Optionen benutzen. Benutzen Sie dann die Tasten / (1), um nach dem gewünschten Programm zu suchen. 2) Halten Sie die PTY PTY-Taste (17) gedrückt, um in das RDS-Menü zu gelangen. In dem Menü können Sie die Tasten / (25) zur Auswahl 33 BEDIENUNG Wenn ein neu eingestellter Sender für mehr als 5 Sekunden keine TP-Informationen angibt, wird ein Alarmsignal ausgegeben. Wenn die TP-Informationen beim aktuellen Sender verloren gehen, wird ein Alarmsignal ausgegeben. Wenn ein neu gefundener über kein RDS-Signal verfügt, wird PI SEEK etwas beeinträchtigt. PI: SOUND/MUTE: Wenn die AF-Umschaltung im In gleichen Situation wird ein MUTE-Ton für kurze Zeit gehört. RETUNE: LONG/SHORT Wenn PI-Informationen beim aktuellen Sender verloren gehen, die durch RETUNE SHORT (30 Sekunden) oder RETUNE LONG (90 Sekunden), startet das Radio den nächsten, gleichen PI-Sender zu finden. MASK: DPI/ALL MASK-DPI-Modus: Maskiert nur den AF mit unterschiedlichem PI (DPI). MASK-ALL-Modus: Maskiert den AF, der unterschiedliche PI- und NO RDS-Signale mit hoher Sendekraft besitzt. EONTA: DX/LO (FERN / LOKAL): Der Zweck dieser Option ist es C201-Sender eingeschaltet ist, kann das AF-Signal auf 100 MHz geschaltet werden. Dies ist kein echtet AF-Signal (mit einem unterschiedlichem PI bei gleichem AF) mit kurzem "DIP". Wenn ein Auto in bestimmten Gebieten fährt, kann es sein, dass eine Oszillation eintritt, weil verschiedene PI-Codes bei 100 MHz mit PI „XXX“ empfangen werden können. Das Autoradio benutzt eine spezielle Methode, um solche unvermeidbaren Situationen einzuschränken. Dies ist allerdings nur begrenzt möglich. Wenn es nicht möglich ist, sind zwei verschiedene Betriebsarten auswählbar: unerwünschte EON-TA-Wechsel zu vermeiden, wenn EON-TA-Informationen von aktuellen Sender empfangen werden und das Radio auf den EON-Sender gestellt wurde, aber keine Informationen empfangen werden können, weil der EON-Sender zu weit von de, entsprechenden Bereich entfernt ist. Das Radio schaltet deshalb in diesem Fall wieder zum ursprünglichen Sender zurück.Wenn dies passiert, kann es sein dass für mehrere Sekunden der Ton aus ist oder Sie das falsche Programm hören. EON TA LOCAL-Modus Wenn die Signalstärke des EON-Netzsenders unter dem Minimum liegt, schaltet das Radio nicht um und 98 100 90 PI: C201 100 PI: XXX - PI SOUND-Modus: Wenn verschiedene PI-Töne (DIP) in bestimmten Abständen gehört werden, so werden diese nur in kurzen Abständen gehört. - PI MUTE-Modus: Sie werden so gut wie keine Störung 34 BEDIENUNG wenn EON auf anderen Verkehrsnachrichten erkennt. Wenn die Lautstärke unter dem hörbaren liegt, wird sie durch diese Funktion auf ein hörbares Niveau gestellt. Wenn die Lautstärke auf ein höheres Niveau gestellt wird (über dem TA-Lautstärkeniveau), wird das letzte Lautstärkeniveau benutzt. Wenn der TA TA-Modus aktiviert wurde, wird der TA eines individuellen Segments eingeschaltet. Wenn ein TP-Sender empfangen wird, wird der TP eines individuellen Segments eingeschaltet. TA TA-Unterbrechungsfunktion Die momentanen Verkehrsnachrichten können durch Betätigung dieser Taste unterbrochen werden. Der TA TA-Modus wird dadurch aber nicht abgebrochen. erleben. Wenn der EON TA LOCAL-Modus aktiviert wurde, wird EON TA LO in der Anzeige für ein paar Sekunden angezeigt. EON TA DISTANCE-Modus Der EON TA-Umschaltmodus versucht sich an die Informationen des momentanen Senders anzupassen. Wenn der EON TA DISTANCE-Modus aktiviert wurde, wird EON TA DX in der Anzeige für ein paar Sekunden angezeigt. TA-LAUTST ÄRKE: Lautstärke 30 (die TA-LAUTSTÄ Standard-TA-Lautstärke ist 30. Sie können einen Wert von 0 bis 100 einstellen). Die verwendeten RDS-Daten sind PI-, PS-, AF-, TP-, TA-, EON- und PTY-Daten. REGION: AUS/EIN REGION-EIN-Modus: AF-Umschaltung oder PI SEEK werden vom Sender gehandhabt, bei dem alle PI-Codes mit dem momentanen Sender übereinstimmen. REGION-AUS-Modus: Der Regionscode im PI-Format wird außer Acht gelassen, wenn AF-Umschaltung oder PI SEEK aktiviert werden. - PI: Programmindetifikationscode Indentifikationscode für Programme PS: Programmservicename Sendername in alphanumerischen Zeichen AF: Alternative Frequenzen Frequenzliste von Sendern, die das gleiche Programm ausstrahlen TP: Verkehrsprogramm-Identifikation Indentifikationsdaten für Verkehrsnachrichtensender TA: Verkehrsankündigungs-Identifikation Identifikationsdaten, die zeigen ob Verkehrsinformationen gesendet werden oder nicht EON: Informationen zu weiteren Netzwerken mit erweiterten Funktionen Senderinformationen auf PI, AF, TP, Verkehrsansagen Benutzung der TA TA-Taste (22): Halten Sie diese Taste zum Ein- bzw. Ausschalten des TA TA-Modus für mehrere Sekunden gedrückt. Im TA TA-Modus werden Ihnen dann Verkehrsinformationen vermittelt: Wenn das Gerät sich im CD(MP3)-, AUX- oder IPOD-Betrieb befindet, geht es kurz in den Radiomodus. Das Gerät schaltet vorübergehend zu einem anderen Sender im EON-Netz, 35 BEDIENUNG TA, etc., die zu Netzwerken gehören, die nicht momentan empfangen werden PTY: Programmart-Code Programminhalt, wie z. Nachrichten, Musik, Sport etc. erneut, um die Intro-Wiedergabe zu stoppen und den jeweiligen Titel wiederzugeben. Die Scan-Anzeige verschwindet wieder. Sie können ebenfalls die SCN SCN-Taste (12) gedrückt halten, um jeweils die ersten 10 Sekunden jedes Musiktitels im momentanen Verzeichnis anzuhören. „D-SCN“ erscheint daraufhin in der Anzeige. Betätigen Sie die Taste erneut, um diesen Modus wieder zu deaktiveren. B. USB-WIEDERGABE An der Gerätevorderseite des Geräts befindet sich eine USB-Schnittstelle (16). Sie können ein USB-Laufwerk an dieser Schnittstelle (16) anschließen. Wenn Sie ein USB-Laufwerk am Gerät anschließen, sucht das Gerät automatisch nach MP3- und WMA-Dateien und startet die Wiedergabe. Sie können ebenfalls die MOD MOD-Taste (5) zur Auswahl des USB-Modus benutzen, wenn sich das Gerät in einem anderen Modus befindet. WIEDERHOLUNG DES GLEICHEN TITELS Betätigen Sie die RPT RPT-Taste (13) zur Wiederholung des aktuellen Titels. „S-RPT“ erscheint in der Anzeige. Betätigen Sie die Taste erneut, um die Wiederholung zu stoppen und die S-RPT-Anzeige verschwindet wieder. Sie können ebenfalls die RPT RPT-Taste (13) gedrückt halten, um alle Titel im aktuellen Verzeichnis wiederholen. „D-RPT“ erscheint daraufhin in der Anzeige. Betätigen Sie die Taste erneut, um diese Funktion wieder zu deaktivieren. MUSIKTITELAUSWAHL Benutzen Sie die Tasten / (1), um zur vorigen bzw. nächsten Datei zu wechseln. Die Dateinummer erscheint dann in der Anzeige. Halten Sie die Taste oder (1) ZUFALLSWIEDERGABE Betätigen Sie die SHF SHF-Taste (9) zur Wiedergabe aller Titel in zufälliger Reihenfolge. „S-SHF“ erscheint in der Anzeige. Betätigen Sie die Taste erneut, um die Zufallswiedergabe abzubrechen und die S-SHF-Anzeige verschwindet wieder. Sie können ebenfalls die SHF SHF-Taste (9) für 2 Sekunden gedrückt halten, um alle Titel im aktuellen Verzeichnis in zufälliger Reihenfolge wiederzugeben. „D-SHF“ erscheint daraufhin in der Anzeige. Betätigen Sie die Taste erneut, um diese Funktion wieder zu deaktivieren. gedrückt, um den Schnellsuchlauf zu aktivieren. Die Wiedergabe beginnt an dem Punkt, an dem Sie die Taste loslassen. WIEDERGABEPAUSE Betätigen Sie die PAU PAU-Taste (10), um die CD-Wiedergabe vorübergehend anzuhalten. „Pause“ erscheint danach in der Anzeige. Betätigen Sie die Taste erneut, um mit der Wiedergabe fortzufahren. Die Pause-Anzeige verschwindet wieder. VORSCHAU ALLER VORHANDENEN MUSIKTITEL Betätigen Sie die SCN SCN-Taste (12), nur jeweils die ersten 10 Sekunden jedes Musiktitels anzuhören. „Scan“ erscheint in der Anzeige. Betätigen Sie die Taste FUNKTION ESPESP-FUNKTION Dieses Gerät kann MP3/WMA-Dateien für ca. 70 Sekunden erschütterungsfrei 36 BEDIENUNG wiedergeben. M3 G, H, I, 3 VERZEICHNISAUSWAHL Benutzen Sie die Taste DIR- (8) und die DIR+ (15) zur Auswahl des nächsten bzw. vorigen Verzeichnisses. Wenn Ihr USB-Laufwerk über keine Verzeichnisse verfügt, haben die Tasten DIR- (8) und DIR+ (15) keine Funktion. M4 J, K, L, 4 M, N, O, 5 / Verzeichnis Zurück P, Q, R, 6 / Verzeichnis vor M5 M6 MOD S, T, U, 7 TUNE/SEEK/TRACK DOWN TUNE/SEEK/TRACK UP MUSIKTITELAUSWAHL Direkte Titelsuche Betätigen Sie die AS/PS (Navi-SCH Navi-SCH))-Taste (20). Sie kommen dann in den Direktsuchmodus. Das Gerät sucht nach dem gewählten Titel mit den folgenden Zifferntasten: M1-M6, MOD (5), TUNE/SEEK/TRACK DOWN (8), TUNE/SEEK/TRACK UP (9), DSP(0). Wenn drei Ziffern eingegeben werden, sucht das Gerät direkt nach dem jeweiligen Titel. Wenn eine oder zwei Ziffern eingegeben werden, wartet das Gerät für ein paar Sekunden auf die Betätigung der BND/LOU/ENT-Taste. Nach ein paar Sekunden startet das Gerät die Suche, selbst wenn die ENT-Taste nicht betätigt wird. V, W, X, 8 Y, Z, Leerzeichen, 9 PUSH SEL ZEICHEN UMSCHALTEN RECHTS DSP _, -, +, 0 Erklärung: - Benutzen Sie die entsprechenden Tasten zur Auswahl der Zeichen A bis Z, Leerzeichen, 0 bis 9, _, -, +. - Betätigen Sie die SEL SEL-Taste (26) zur Bestätigung des jeweiligen Zeichens. - Betätigen Sie die BND/LOU/ENT BND/LOU/ENT-Taste (24) zum Starten der Suche. Wenn des entsprechende Titel ein Verzeichnisname ist, wird im Display (‘ ’) zur Anzeige benutz Suche nach Verzeichnis- oder Dateinamen AS/PS Betätigen Sie die (Navi-SCH Navi-SCH))-Taste (20) zweimal. Sie starten damit die Verzeichnis- und Dateinamensuche. Das Gerät sucht nach Dateien und Verzeichnissen, die mit dem gleichen Zeichen anfangen, wie die vom Benutzer angegebenen Zeichen, die durch die in der untenstehenden Tabelle aufgelisteten Tasten eingegeben wurden. AS/PS Modusauswahl BND/LOU EINGABE M1 A, B, C, 1 M2 D, E, F, 2 Benutzen Sie die Tasten TUNE/SEEK/TRACK UP/DOWN zum Auflisten aller Musiktitel in diesem Verzeichnis und wählen Sie einen Titel aus. - Betätigen Sie die BND/LOU/ENT-Taste zur Bestätigung und zum Starten der Wiedergabe. - Wiederholen Sie die oben beschriebenen Schritte, wenn Ihre Auswahl erneut ein Verzeichnis ist. Suche vom Hauptverzeichnis aus Betätigen Sie die AS/PS (Navi-SCH Navi-SCH))-Taste (20) dreimal. Benutzen Sie zur Suche einer Datei � 37 BEDIENUNG oder einem Verzeichnis im Hauptverzeichnis die Tasten TUNE/SEEK/TRACK UP/DOWN. (Das D-DIR-Symbol zeigt an, dass es sich um ein Verzeichnis handelt.) Im Display werden alle verfügbaren Verzeichnisse und Musiktitel angezeigt. Benutzen Sie die Tasten TUNE/SEEK/TRACK UP/DOWN zur Auswahl des gewünschten Verzeichnisses oder Musiktitels und bestätigen Sie Ihre Auswahl mit der BND/LOU/ENT-Taste. Wenn die Auswahl auf einem Musiktitel ist, startet die Wiedergabe. Wenn es sich um ein Verzeichnis handelt, wird im Display (‘ ’) zur Anzeige benutzt. Danach können Sie... - Benutzen Sie die Tasten TUNE/SEEK/TRACK UP/DOWN zum Auflisten aller Musiktitel in diesem Verzeichnis und wählen Sie einen Titel aus. - Betätigen Sie die BND/LOU/ENT-Taste zur Bestätigung und zum Starten der Wiedergabe. - Wiederholen Sie die oben beschriebenen Schritte, wenn Ihre Auswahl erneut ein Verzeichnis ist. TUNE/SEEK/TRACK UP/DOWN. Betätigen Sie dann zum Starten der Wiedergabe die BND/LOU/ENT-Taste. ANZEIGE VON ID3-INFORMATIONEN Betätigen Sie die ID3 ID3-Taste (20) auf die ID3-Tags (Titel, Interpret und Album) anzuzeigen. ÜTZTE MP3UNTERST UNTERSTÜ WMA-FORMATE Das Hauptgerät unterstützt MP3/WMA (Windows Audio)-Audioformate: Normal Bitrate (kbps) MPEG1 Audio Layer 3 (44,1kHz) Windows Media Audio (44,1kHz) 32,48,64,96, 128,192,256, 320 64,96,128,192 UND folgende Media ütz Unterst Unterstü ter Modus Stereo Stereo Die USB-Funktion unterstützt: 1. Verzeichnisse: max. 500 2. Dateien: max. 999 3. Verzeichnistiefe: bis zu 8 Stufen 4. Größe: 2 GB Hinweis Hinweis: � Das Gerät unterstützt nur Standard-USB-Laufwerke, die von Microsoft anerkannt werden. � USB-MP3-Player folgen keinem Standard, was bedeutet, dass verschiedene Marken und Modelle ihre eigenen Standards benutzen. Dieses Produkt kann deshalb nicht alle MP3-Player unterstützen. � Wenn Sie einen MP3-Player anschließen und sich eine normale Batterie im Player befindet, (kein Akku), sollten Sie diese aus dem Player herausnehmen, bevor Sie ihn an das Gerät anschließen. Anderfalls kann die Suche vom momentanen Verzeichnis aus Betätigen Sie die AS/PS (Navi-SCH Navi-SCH))-Taste viermal. Benutzen Sie zur Suche einer Datei oder einem Verzeichnis im momentanen Verzeichnis die Tasten TUNE/SEEK/TRACK UP/DOWN. (Das D-DIR-Symbol zeigt an, dass es sich um ein Verzeichnis handelt.) Der momentane Verzeichnisname wird für eine Sekunde angezeigt und die momentane Wiedergabedatei wird angezeigt (markiert). Benutzen Sie zur Suche einer Datei oder einem Verzeichnis im momentanen Verzeichnis die Tasten 38 BEDIENUNG Batterie explodieren. � Im USB-Modus sollten Sie das USB-Laufwerk nicht aus dem USB-Anschluss entfernen. IPOD-Betrieb Nach dem Anschluss eines iPods am Gerät, geht es automatisch in den IPOD-Betrieb und in der Anzeige erscheint „IPOD“. Sie können ebenfalls die MOD MOD-Taste (5) zur Auswahl des IPOD-Modus benutzen, wenn sich das Gerät in einem anderen Modus befindet. ACHTUNG Wenn sich auf dem USB-Gerät wichtige Daten befinden, schließen Sie es nicht zur Wiedergabe an das Gerät an. Dies ist deshalb wichtig, da fehlerhafte Bedienung zum Datenverlust führen kann. Der Hersteller übernimmt dafür keine Haftung. Auswahl einer Kategorie Während der IPOD-Wiedergabe, können Sie die BND BND-Taste (24) zur Anzeige der Kategorie benutzen. Benutzen Sie dann die Tasten / (25) zum Verändern der Kategorie (PLAY LIST/ARTIST/ALBUM/GENRE/SONG/CO MPOSER) und betätigen Sie die SEL SEL-Taste (26) zur Bestätigung der gewählten Kategorie. SD/MMC-BETRIEB (OPTIONAL) Bei Bedarf kann dem Gerät ein SD/MMC-Kartenleser hinzugefügt werden. Es befindet sich dann eine SD/MMC-Schnittstelle an der Gerätevorderseite. Auswahl von Musikdateien Betätigen Sie duie BND BND-Taste (24) zur Anzeige des aktuellen Katalogs (auf Ihrem / (25) iPod). Betätigen Sie die Tasten zur Wiedergabe des vorigen bzw. nächsten Titels. Betätigen Sie zur Bestätigung und Wiedergabe dann die SEL SEL-Taste (26). Pause (PAU) Betätigen Sie die während der Wiedergabe PAU PAU-Taste (10), um die Wiedergabe vorübergehend anzuhalten. Betätigen Sie die Taste erneut, um mit der Wiedergabe fortzufahren. Wenn Sie ein SD/MMC-Karte am an der SD/MMC-Schnittstelle anschließen, sucht das Gerät automatisch nach MP3- und WMA-Dateien auf der Karte und startet die Wiedergabe. Die Wiedergabebedienung ist identisch mit der oben beschriebenen MP3-Wiedergabe. Sie können ebenfalls die MOD MOD-Taste (5) zur Auswahl des SD/MMC-Modus benutzen, wenn sich das Gerät in einem anderen Modus befindet. Wenn sich auf der SD/MMC-Karte wichtige Daten befinden, stecken Sie es nicht zur Wiedergabe in den Kartenslot des Geräts. Wiederholung (RPT) Betätigen Sie die RPT-Taste (12) während der Wiedergabe zur Wiederholung des aktuellen Titels. „S-RPT“ erscheint in der Anzeige. Betätigen Sie die Taste erneut, um diese Funktion wieder zu deaktivieren. Halten Sie die Taste für ca. 2 Sekunden gedrückt, um das Album zu wiederholen und „D-RPT“ erscheint in der Anzeige. 39 BEDIENUNG benutzen, vergewissern Sie sich bitte, dass Ihr Mobiltelefon Bluetooth unterstützt. Betätigen Sie die Taste erneut, um diese Funktion wieder zu deaktivieren. Zufallswiedergabe (SHF) Betätigen Sie die SHF-Taste (8) während der Wiedergabe, damit die folgenden Titel der aktuellen Kategorie in zufälliger Reihenfolge wiedergeben werden. Zur gleichen Zeit erscheint in der Anzeige „Shuffle“. Betätigen Sie die Taste erneut, um diese Funktion wieder zu deaktivieren. Halten Sie die Taste für 2 Sekunden gedrückt, um alle Titel auf dem Album abzuspielen und "D-SHF" erscheint in der Anzeige. Betätigen Sie die Taste erneut, um diesen Modus zu verlassen. (ii) Bedenken Sie bitte auch, dass unterschiedliche Mobiltelefonmodelle eine unterschiedliche Bluetooth-Sendeleistung besitzen. Um eine optimale Übertragungsqualität zu gewährleisten, wird empfohlen die Entfernung zwischen Mobiltelefon und Gerät innerhalb von 3 m zu halten. Achten Sie bitte darauf keine Metallgegenstände zwischen das Mobiltelefon und das Gerät zu legen. TUNE/TRACK UP/DOWN � Wenn Sie während der Wiedergabe die / (1) betätigen, wird der vorige Tasten bzw. der nächste Titel in der momentanen Kategorie gestartet (ohne dabei zur nächsten Kategorie zu gehen). Wenn die Wiedergabe eines Titel bereits vor mehr als drei Sekunden gestartet wurde, hat die Betätigung der Taste den Effekt, dass der Titel erneut von Anfang an abgespielt wird. Wenn die Wiedergabe des Titels gerade gestartet (weniger als drei Sekunden) wurde und Sie die Taste betätigen, startet die Wiedergabe des vorigen Titels. Wenn Sie während der Wiedergabe die / (1) für mehrere Sekunden Tasten gedrückt halten, wird der Schnellrücklauf bzw. -vorlauf gestartet. In der Anzeige erscheint die Wiedergabezeit (z. B. 1’20). 1) Halten Sie in einem beliebigen Betriebsmodus die PAIR(MOD) PAIR(MOD)-Taste (5) auf der Bedientafel gedrückt und in der Anzeige erscheint „PAIRING“. 2) Gehen Sie in das Bluetooth-Einstellungsmenü Ihres Mobiltelefons. (Die genaue Bedienung ist abhängig von Ihrem Mobiltelefonmodell. Lesen Sie dazu entsprechen die Bedienungsanleitung Ihres Mobiltelefons.) 3) In der angezeigten Liste Ihres Mobiltelefons sollte dann „CARBT“ erscheinten. Wählen Sie CARBT und geben Sie den Passcode „0000“ ein. 4) Bei erscheint Anzeige. BLUETOOTH-BENUTZUNG � PAIRING VORBEREITUNG erfolgreichem „CONN OK!“ Pairing in der 5) Wenn der Pairing-Vorgang fehlgeschlagen ist, erscheint „PAIR END“ in der Anzeige. Sie können dann erneut versuchen die (i) Wenn Sie die Bluetooth-Funktion 40 BEDIENUNG Verbindung unterbrochen. Wenn Sie die Bedientafel wieder befestigen, müssen Sie die Verbindung wiederherstellen. 1) PAIR-Taste (5) zu betätigen, um den Vorgang nochmal zu starten. 2) Hinweis: 4) Wenn Sie ein Mobiltelefon ausschalten, das mit dem Gerät verbunden war und es dann wieder einschalten, müssen Sie die Verbindung erneut aufbauen. Während des Pairings verfügt die MODE-Taste über keine spezielle Funktion. Beim Pairing können Sie die PAIR PAIR-Taste (5) betätigen, um das Pairing abzubrechen. � � VERBINDUNGSAUFBAU T-MENU Nach einem erfolgreichen Pairing, können Sie die T-MENU T-MENU-Taste (6) auf der Bedientafel betätigen, um das Telefonmenü aufzurufen. Halten Sie die Taste gedrückt oder betätigen Sie die Tasten / (1) zur Auswahl einer Option im Menü. Die Optionen werden in folgender Reihenfolge angezeigt: PRE NUM/ RECELVED / DIALED / MISSED / MANUANS / TALK. Dieses Gerät verfügt über eine eingebaute Funktion für den automatischen Verbindungsaufbau. Jedes Mal, wenn Sie die Taste (4) betätigen, führt das Gerät einen automatischen Verbindungsaufbau mit Ihrem Mobiltelefon aus (Hinweis: es muss zuvor ein Pairing mit Ihrem Mobiltelefon durchgeführt worden sein.). MANUANS / TALK OO. Unter den folgenden Umständen, können Sie durch Betätigung der RECON-Taste (19) für mehrere RECON Sekunden, die Verbindung wieder aufbauen. Bei erfolgreichem Verbindungsaufbau erscheint dann „Conn OK!“ in der Anzeige. Für nähere Informationen lesen Sie bitte die folgenden Anweisungen. Hinweis: 1) RRE NUM: Sie können bis zu 10 Telefonnummern im Telefonbuch speichern. Gehen Sie in den PRE-NUM-Modus und benutzen Sie die Tasten / (25) zur Auswahl einer Nummer. Betätigen Sie dann die SEL-Taste und geben Sie eine Telefonnummer ein. Betätigen Sie die SEL-Taste erneut, um die Telefonnummer zu speichern. 1) Wenn das Mobiltelefon außer Reichweite ist, wird die Verbindung unterbrochen. Sobald Sie wieder in Reichweite sind, ist ein erneuter Verbindungsaufbau nötig. 2) Wenn das Mobiltelefon sich außer Reichweite befindet und ein eingehender Anruf angenommen wird, können Sie die Audioausgabe an das Gerät weiterleiten. Dazu ist ein erneuter Verbindungsaufbau nötig. 2) RECEIVED: In der Anzeige erscheint der zuletzt eingegangene Anruf. 3) DIALED: In der Anzeige erscheint die zuletzt gewählte Telefonnummer. (2) auf 3) Wenn Sie die Taste der Bedientafel betätigen, um die Bedientafel zu entfernen, wird die 4) 41 MISSED: In der Anzeige BEDIENUNG � erscheint der letzte nicht ANRUF TÄTIGEN 1) Um einen Anruf zu tätigen, haben Sie verschiedene Möglichkeiten. Sie können dies über die Schnellwahltasten, Eingangsliste, Wahlliste, Telefonbuch (Mobiltelefon oder SIM-Karte) tun. Lesen Sie dazu bitte den Abschnitt zum Telefonmenü. entgegengenommene Anruf. (ANRUF 5) MANU ANS: MANUELL ENTGEGENNEHMEN ) Sie können das Gerät auf manuelles Entgegennehmen der Anrufe (MANU ANS) oder automatisches Entgegennehmen (AUTO ANS) der Anrufe einstellen. Wenn der automatische Modus eingestellt wurde, erscheint in der Anzeige bei einem eingehenden Anruf die Telefonnummer in der Anzeige. Das Gerät nimmt den Anruf dann automatisch entgegen. Im MANU ANS-Modus erscheint ebenfalls die Telefonnummer in der Anzeige und Sie müssen die Taste (4) betätigen, um den Anruf entgegen zu nehmen. Wenn Sie den Anruf nicht entgegennehmen wollen, betätigen sie die Taste (24), um den Anruf zurückzuweisen. 2) Anrufe über manuelle Eingabe der Telefonnummer tätigen. (4) auf der Betätigen Sie die Taste Bedientafel und in der Anzeige erscheint „CALL_“. Benutzen Sie die Tasten 0~9, *, # zur Eingabe der Telefonnummer, die Sie wählen wollen. (Hinweis: betätigen Sie die Taste * zur Eingabe des Zeichens „*“. Wenn Sie die Taste gedrückthalten erscheint das Zeichen „+“.) Betätigen Sie dann 6) TALK (00~20) Sie können die Bluetooth-Lautstärke mit der TALK-Option einstellen. Wenn diese auf 00 gestellt ist und ein Anruf kommt, wird die Lautstärke automatisch auf 60 eingestellt. Wenn Sie die TALK-Lautstärke auf 20 gestellt haben. Wird die Lautstärke automatisch auf 100 gestellt, wenn ein Anruf eingeht. Beispiel: TALK-Lautstärke MAIN-Lautstärke 00 = 60 01 = 62 02 = 64 …………………….. 20 = 100 die Taste (4) erneut, um die Nummer zu wählen. Hinweis: Bei Fehleingaben können Sie die Eingabe mithilfe der Taste 21 CLR (24) wieder löschen. Wenn Sie CLR-Taste (24) gedrückt halten, die CLR werden alle Ziffern auf einmal gelöscht. � ZWISCHEN MOBILTELEFON ÄT UMHERSCHALTEN GER GERÄ UND Halten Sie während des Gesprächs die TRANSFER TRANSFER-Taste (6) gedrückt, um den Anruf vom Mobiltelefon auf das Gerät oder umgekehrt umzuleiten. Hinweis: 1) Wenn Sie einen Anruf auf Ihr 42 BEDIENUNG Mobiltelefon umleiten, wird der Ton automatisch angeschaltet, wenn er zuvor ausgeschaltet wurde. 2) Ausgehende Anrufe können nicht umgeleitet werden, wenn sie noch nicht vom Empfänger angenommen wurden. • BT-Reset BT-Reset: : Halten Sie im BT AUDIO-Modus die BND/LOU/ -Taste für mehrere Sekunden gedrückt und Teile der Bluetooth-Informationen werden zurukgesetzt (die Informationen RECEIVED / DIALED / MISSED gehen verloren). � AUDIO BLUETOOTH BLUETOOTH-AUDIO FUNKTION) (A2DP (A2DP-FUNKTION) Dieses Gerät unterstützt die Bluetooth-Audiofunktion. Wenn Sie über Ihr Mobiltelefon Audiodateien in Stereo wiedergeben und die Verbindung zwischen Gerät und Telefon steht, können Sie die Audioausgabe auf das Gerät umleiten. Benutzen Sie die Tasten M1 und M2 auf der Bedientafel zur Wiedergabesteuerung (Pause/Wiedergabe/Stopp). (Die Funktion der Tasten ist abhängig vom von Ihnen benutzen Telefonmodell.) / (1) auf Benutzen Sie die Tasten der Bedientafel zur Auswahl eines Musiktitels. (Die Funktion der Tasten ist abhängig vom von Ihnen benutzen Telefonmodell.) Hinweis: Während der Musikwiedergabe können Sie keine Anrufe tätigen. 43 TECHNISCHE DATEN ALLGEMEIN Stromversorgungsanforderungen Gehäuseabmessungen Tonausgleich - Bass (bei 100 Hz) - Treble (bei 10 kHz) : DC 12V, Negative Erdung : 178 (B) x 160 (T) x 50 (H) : ±10 dB : ±10 dB Maximale Ausgangsleistung - Version Y : 4 x 40 Watt Stromentnahme - Version Y : 15 Ampere (max.) CD-PLAYER Rauschabstand Kanaltrennung Frequenzbereich : über 55 dB : über 50 dB : 40 Hz – 18 kHz RADIO Frequenzbereich IF Empfindlichkeit (S/N = 30 dB) Stereoabstand änder Fürr 2 Frequenzb Frequenzbä Europa UKW 87,5 bis 108 MHz 10,7 MHz 4 µV >25dB Frequenzbereich IF Empfindlichkeit (S/N = 20 dB) MW 522 bis 1.620 kHz 450 kHz 36 dBu 44 FEHLERBEHEBUNG Bevor Sie durch diese Fehlerbehebungstabelle gehen, sollten Sie die Verkabelung überprüfen. Wenn das Problem danach immer noch nicht bewältigt werden kann, wenden Sie sich bitte an Ihren Händler. Symptom Gerät schaltet nicht an. Ursache Behebung Die Zündung ist nicht an. Die Sicherung durchgegangen. Wenn der Strom richtig angeschlossen ist und der Motor nicht läuft, stellen Sie den Zündschlüssel bitte auf „ACC“. ist Ersetzen Sie die Sicherung durch eine neue. Die Temperatur um Auto ist zu hoch. Warten Sie bis Umgebungstemperatur im gesunken ist. Kondensation Schalten Sie das Gerät für eine Stunde aus und versuchen Sie es dann erneut. Die Lautstärke ist auf das Minimum gestellt. Stellen Sie die Lautstärke auf das gewünschte Niveau. Die Kabel sind nicht richtig angeschlossen. Überprüfen Kabelverbindung. Der Einbauwinkel weist mehr als 30° Neigung auf. Bauen Sie das Gerät so ein, dass es eine Neigung von weniger als 30° hat. Die Disc ist besonders schmutzig oder sie ist defekt. Reinigen Sie Disc oder versuchen Sie es mit einer neuen. Sie Funktionstasten bleiben ohne Wirkung. Der eingebaute Mikrocomputer arbeitet aufgrund von Störsignalen nicht richtig. Betätigen Sie die RESET-Taste. Die Bedientafel ist nicht richtig aufgesetzt Das Radio funktioniert nicht. Die Radiofunktion geht nicht. Die automatische Suche ist auch fehlgeschlagen. Das Antennenkabel ist nicht angeschlossen. Verbinden Sie das Antennenkabel. Das Signal ist zu schwach. Stellen Sie den Sender manuell ein. Kein Ton. Tonsprünge 45 Sie die Auto die CS-351 HANDLEIDING Mobiel Audiosysteem � Stereoradio met PLL synthesizer � Automatische geheugenopslag � RDS-Functie � ESP-Functie (Elektronische Schokprotectie) � USB&SD/MMC-kaartinterface � IPOD ready functie � Bluetooth Hands-free functie & A2DP (Advanced Audio Distribution Profile) stereo audio-overdracht � Neerklapbaar afneembaar paneel � Auxiliary invoer-functie Voor informatie en ondersteuning, www.lenco.eu INHOUDSOPGAVE ...................................................... 48 Installatie Installatie...................................................... ISO aansluiting.......................................... 52 Afspelen pauzeren................................ 58 Alle bestanden previewen........................58 Hetzelfde bestand herhalen.................59 Alle bestanden willekeurig afspelen... 59 Map omhoog/omlaag selecteren........ 59 Tracks selecteren.................................. 60 ID3-informatie weergeven....................60 ............................. 61 .............................61 Gebruik van SD/MMC SD/MMC............................. ................................... 61 Gebruik van IPOD IPOD................................... ........................... 62 Gebruik van Bluetooth Bluetooth........................... ...........................62 ............................ 53 Plaatsing van toetsen toetsen............................ Voorbereiden voor gebruik Bluetooth.62 Basis bediening ....................................... 54 bediening....................................... .......................................54 Het apparaat aan-/uitzetten..................... 54 Koppelen.................................................62 Verbinden............................................... 63 T-menu.................................................... 63 Een oproep beantwoorden.................. 64 Een uitgaande oproep plaatsen..........64 DIN-Montage aan voorkant (Methode A) ..................................................................... 48 Het apparaat installeren....................... 48 Het apparaat verwijderen.....................50 DIN-montage aan achterkant (Methode B) ..................................................................... 50 ..... 51 Het afneembaar frontpaneel gebruiken gebruiken..... ................................................... 52 Bekabeling Bekabeling................................................... Voorpaneel afnemen.................................54 Geluid instellen.......................................... 54 Loudness.................................................... 54 Display........................................................ 54 Equalizer.....................................................54 Afstandssensor (Optioneel)..................... 54 Reset-functie.............................................. 54 Modus selectie...........................................54 Systeem instellen...................................... 54 Auxiliary invoer.......................................... 55 ......................... 55 Bediening van de radio radio......................... De frequentieband selecteren................. 55 Een zender selecteren............................. 55 Automatisch zenders opslaan & programma’s scannen.................. 55 Scan............................................ 55 Zenders opslaan........................55 Gebruik van RDS (radio data system)........................................... 55 ........... 58 Bediening bij gebruik van USB USB........... Schakelen naar USB-modus............... 58 Bestanden selecteren...........................13 Een oproep overschakelen tussen mobiele telefoon en het apparaat....... 64 BT-reset.................................................. 65 Bluetooth audio (A2DP-functie).......... 65 ............................................. 66 Specificaties............................................. Specificaties Problemen Oplossen ............................. 67 Oplossen............................. INSTALLATIE van het chassis). Bekijk Voor meer informatie de volgende geïllustreerde installatiemethoden. Opmerkingen: Kies een geschikte monteerpositie, waar het apparaat de bestuurder niet hindert tijdens het besturen. Sluit vóór het installeren van het apparaat tijdelijk de bedrading aan en zorg er voor dat alles juist verbonden is en dat het systeem juist werkt. Gebruik voor een goede installatie alleen onderdelen die bij het apparaat zijn meegeleverd. Het gebruik van ongeautoriseerde onderdelen kan storingen veroorzaken. Raadpleeg uw dichtstbijzijnde dealer als de installatie van het apparaat het boren van gaten of andere wijzigingen aan het voertuig vereist. Installeer het apparaat waar het de bestuurder niet in de weg zit en het geen verwonding kan veroorzaken bij passagiers als u plotseling stopt, in een noodgeval. Als de horizontale installatiehoek groter is dan 30°, dan is het mogelijk dat het apparaat niet optimaal presteert. HAAL VÓÓR INSTALLATIE DE SCHROEVEN ERUIT Verwijder de twee schroeven vóór de installatie van het apparaat. DIN-MONTAGE VOORKANT (Methode A) Installatie-opening Dit apparaat kan worden geïnstalleerd in elk dashboard dat over een onderstaande opening beschikt: 53mm 182mm 30 Het apparaat installeren Zorg ervoor dat u eerst alle aansluitingen test en volg dan deze stappen om het apparaat te installeren. 1. Zorg ervoor dat het contactslot van de auto is uitgeschakeld en maak vervolgens de kabel naar de negatieve (-) pool van de accu van de auto los. 2. Maak het draadraam en de antenne los. 3. Druk op de ontgrendelknop op het voorpaneel en verwijder het bedieningspaneel (zie de stappen “verwijderen van het voorpaneel”). 4. Til de bovenkant van de sierrand op en Vermijd installeren op plaatsen met hoge temperatuur, zoals van direct zonlicht, of van warme lucht, van de verwarming, of waar het onderworpen wordt aan stof, vuil of overmatige trillingen. DIN-MONTAGE AAN VOOR-/ACHTERKANT Het apparaat kan worden geïnstalleerd van de “Voorkant” (conventionele DIN –montage aan de voorkant) of “Achterkant” (DIN-montage aan de achterkant met behulp van de schroefgaten aan de zijkant 48 INSTALLATIE 7. Zet het draadraam en de antenne weer vast en zorg ervoor dat er dat er geen draden bekneld raken. 8. Schuif het apparaat in de huls tot hij op zijn plaats vastklikt. 9. Gebruik om de achterkant van het apparaat vast te zetten de meegeleverde metalen beugel. Gebruik de meegeleverde 5mm zeskantmoer en veerring om één uiteinde van de beugel vast te maken aan de montagebout achter op het apparaat. Buig indien nodig de metalen beugel zodat hij in de montageruimte van uw auto past. Gebruik vervolgens de 5x25m plaatschroef en vlakke sluitring om het andere uiteinde onder het dashboard aan een onderdeel van de auto vast te maken. Deze beugel zorgt ook voor aarding van het apparaat. Let op dat u het korte gedeelte van de beugel vastmaakt aan de achterzijde van het apparaat en het lange gedeelte aan het dashboard. trek hem naar buiten om hem te verwijderen. 5. De twee bijgeleverde sleutels maken de twee lipjes aan de binnenkant van de huls van het apparaat los, zodat u deze kunt verwijderen. Steek de sleutels (met de inkepingen naar boven) zo ver mogelijk in de daarvoor bestemde openingen links en rechts op het apparaat. Schuif de huls vervolgens van de achterkant van het apparaat af. 6. Zet de huls vast door hem in de opening in het dashboard te steken en de lipjes rondom de huls met een schroevendraaier naar buiten te buigen. Niet alle lipjes kunnen contact maken, dus gebruik diegene die het meest effectief zullen zijn. Buig ze achter het dashboard open om de huls stevig op zijn plaats vast te zetten. 10. Sluit de kabel weer aan op de negatieve (-) pool van de accu. Plaats de sierring weer terug en installeer het frontpaneel (zie de stappen in “het frontpaneel installeren”). 49 INSTALLATIE Het apparaat verwijderen 1. Zorg ervoor dat het contactslot van de auto is uitgeschakeld. Maak de kabel los van de negatieve (-) accupool. 2. Verwijder de metalen beugel (indien geïnstalleerd) aan de achterkant van het apparaat los. 3. Druk op de ontgrendelknop om het voorpaneel af te nemen. 4. Til de bovenkant van de sierring op en trek hem naar buiten om hem te verwijderen. 5. Steek beide meegeleverde sleutels in de openingen aan de linker- en rechterkant van het apparaat en trek het apparaat vervolgens uit het dashboard. Om het apparaat vast te maken aan de radiomontagebeugels. Breng de schroefgaatjes in de beugel op gelijke hoogte met de schroefgaatjes in het apparaat en draai de 5x5mm schroeven aan beide zijden vast. Let op: de sierrand, huls en metalen beugel worden niet gebruikt bij installatiemethode B. DIN-MONTAGE ACHTERKANT (Methode B) Volg deze montage-instructies als uw auto een Toyota of Nissan is. Gebruik de schroefgaatjes, gemarkeerd met T (Toyota) of N (Nissan), aan beide zijden van het apparaat om het apparaat vast te maken aan de voorziene radiomontagebeugel van uw auto. 50 HET AFNEEMBARE FRONPANEEL GEBRUIKEN Het Voorpaneel losmaken 1. Druk op de ontgrendel ( ) knop, het voorpaneel zal worden neergeklapt. 2. Druk het voorpaneel op het hoofdapparaat als de twee kanten op hun plaats vastzitten, OPEN 2. Til het voorpaneel om het te verwijderen op met een kleine hoek en trek eerst de rechterkant naar buiten en vervolgens de linkerkant. 3. Merk op dat, als het voorpaneel niet goed op zijn plaatst vergrendeld is, de bedieningsknoppen en het display wellicht niet goed functioneren. Druk op de ontgrendelknop en plaats het voorpaneel opnieuw. Voorzorgsmaatregelen bij de omgang 1. Laat het voorpaneel niet vallen. 2. Voer bij het afnemen of plaatsen van het voorpaneel geen druk uit op de bedieningsknoppen of het display. 3. Raak de contactpunten op het voorpaneel of het lichaam van het hoofdapparaat niet aan. Dit kan leiden tot slecht elektrisch contact. 4. Verwijder vuil of vreemde stoffen die vastzitten op de contactpunten met een schone en droge doek. 5. Stel het voorpaneel niet bloot aan hoge temperaturen of direct zonlicht. 6. Zorg ervoor dat vluchtige stoffen (bv. benzeen, thinner of insecticiden) niet in contact komen met het oppervlak van het voorpaneel. Probeer het voorpaneel niet te demonteren 3. Bewaar het voorpaneel, onmiddellijk na het verwijderen, in de meegeleverde beschermhoes. Het Voorpaneel Installeren 1. Plaats eerst de linkerkant in de juiste positie en plaats vervolgens de rechterkant op zijn plaats. 51 BEKABELING ISO AANSLUITING 52 BEDIENING LOCATIE VAN TOETSEN 16.USB-interface 17.9 PTY-knop 18. SCAN-knop 19.0 DSP/RE-CCN-knop 20. AS/PS/*/+/Navi-SCH-knop 21.7 AF-knop 22.8 EQ/TA-knop 23. IR (OPTIONEEL) 24. (ophangen)/BND/LOUD /CLR-knop 25. / (volume omhoog/omlaag knoppen) 26.SEL/MENU-knop 27.SD/MMC-interface 28. eject-knop 29.reset-knop 30.AUX IN 1. / (tune/zoek/track omlaag/omhoog knoppen) 2. (ontgrendelknop) 3. Mic 4. (opnemen) 5.PAIR/MOD-knop 6.T-MENU/TRANSFER-knop 7.LCD 8.5 DIR- knop 9.4 SHF-knop 10.1 PAU-knop 11.1-6 presetknoppen 12.2 SCN-knop 13.3 RPT-knop 14. /MUTE-knop 15.6 DIR+ knop 53 BEDIENING →FLAT→CLAS→POP M→ROCK→DSP UIT BASIS BEDIENING HET APPARAAT AAN-/UITZETTEN Druk op de knop (14) om het apparaat aan te zetten. Druk wanneer het apparaat aan staat de knop (14) in en houd deze ingedrukt om het apparaat uit te zetten. AFSTANDSSENSOR (OPTIONEEL) Richt de afstandsbediening op de afstandssensor IR (23). Druk op de functietoetsen op de afstandsbediening om het systeem te bedienen. VOORPANEEL LOSKOPPELEN Druk op de knop (2) om het afneembare voorpaneel af te nemen. RESET-FUNCTIE De RESET RESET-knop (29) moet worden ingedrukt met de een balpen of een dun metalen voorwerp. De RESET RESET-knop moet in de volgende gevallen worden ingedrukt: - Na de initiële installatie van apparaat als alle bedrading is aangesloten. - Als geen van de functieknoppen werken. - Foutmelding op het display. Opmerking: Als het apparaat na het indrukken van de RESET RESET-knop (29) nog niet werkt, reinig dan de aansluiting van het voorpaneel met een wattenstaafje dat is bevochtigd met isopropyl-alcohol. GELUID INSTELLEN /MENU Druk kort op de SEL SEL/MENU /MENU-knop (26) om de AUDIO Instelmodus te betreden, /MENU gebruik de SEL SEL/MENU /MENU-knop (26) of / (1) om de gewenste aanpassingsmodus te selecteren. De aanpassingenmodus zal in de volgende volgorde veranderen: Bass/Treble/Balance/Fader/Sub-woof/ON/ OF(Exit) . Druk kort op / (25) om de geluidskwaliteit stap voor stap omhoog of omlaag aan te passen. Druk en houd / (25) ingedrukt om de geluidskwaliteit voortdurend te veranderen. Een korte druk op de MUTE MUTE-knop (14) zal het geluid dempen. Nogmaals drukken zal het geluid doen hervatten. MODUS SELECTIE Druk kort op de MOD MOD-knop (5) om van modus te veranderen, de volgende modi zijn beschikbaar: Radio, CD, USB, CARD, IPOD (optioneel), AUX en BT Audio. LOUDNESS UD Druk enkele seconden op de LO LOUD UD-knop (24) om de loudness-functie in te schakelen, “LOUD” zal op het LCD verschijnen. Druk nogmaals enkele seconden op de knop om de functie uit te schakelen, “LOUD” zal verdwijnen. DISPLAY Druk op de DSPDSP-knop (19) displaymodus te veranderen. om SYSTEEM INSTELLEN Druk en houd de MENU MENU-knop (26) op het voorpaneel ingedrukt om de Systeem Instelmodus te betreden. Hier kunt u de volgende items instellen: BEEP / P-VOL / AREA / HOUR 24H / PCLK. Gebruik de SEL SEL-knop (26) of / (1) om het item dat u wilt veranderen te selecteren en gebruik vervolgens / (25) om de corresponderende instelling te veranderen. 1) BEEP: ON/OFF Om het piepgeluid bij het indrukken van de knoppen op het frontpaneel aan/uit te de EQUALIZER Druk kort op de EQ-knop (22) om de equalizer-functie in te schakelen en de gewenste audio-modus te selecteren. Er zijn vijf verschillende modi: 54 BEDIENING zetten 2) P-VOL Select P-VOL: Het max volume als u het apparaat inschakelt. Stel, u stelt P-VOL in op 40. Als het volume lager is dan 40 als u het apparaat uitschakelt, dan zal het volume de volgende keer als het apparaat wordt ingeschakeld datzelfde, lage volume houden. Maar als het volume hoger is ingesteld dan 40, dan zal het volume bij het inschakelen terug worden ingesteld op 40. / (25) 3) Area: Europe/USA Gebruik om de Europese of Amerikaanse radiofrequenties te selecteren. 4) HOUR 24/12 Hier kunt u kunt het tijdformaat instellen, 12 uur of 24 uur. (Als het item AREA wordt ingesteld op EUR, dan zal het tijdsformaat automatisch worden ingesteld op het 24-uursformaat. Als het item AREA wordt ingesteld op USA, dan zal het tijdsformaat automatisch worden ingesteld op het 12-uursformaat) 5) PCLK ON/OFF: geen functie. automatische zoekfunctie te activeren. Druk om de handmatige afstemmodus te selecteren enkele seconden, tot “MANUAL……” op het display verschijnt. Als beide knoppen enkele seconden niet worden ingedrukt, dan schakelt de radio automatisch terug naar de automatische zoekmodus en zal “AUTO……” op het display verschijnen. AUTOMATISCHE GEHEUGENOPSLAG & PROGRAMMA PROGRAMMA’’S SCANNEN - Automatische geheugenopslag Druk enkele seconden op de AS/PS-knop (20), er zal “SEARCH” op het LCD verschijnen. De radio zal vanaf de huidige frequentie zoeken en de sterkste signalen zoeken tot één zoekcyclus is voltooid. Daarna zullen de 6 zenders met het sterkste signaal worden opgeslagen onder de corresponderende presetnummer-knop. - Programma’s Scannen Druk kort op de AS/PS S/PS-knop (20) om op de opgeslagen zenders te zoeken, het corresponderende zendernummer ,P1~P6, zal knipperen op het LCD. AUXILIARY INVOER De speler kan met behulp van de AUX IN stekkeringang (30) op het voorpaneel worden verbonden met een draagbare audio-speler. Druk als het aansluiten voltooid is op de MOD MOD-knop (5) op het voorpaneel om naar de AUX IN-modus te schakelen. SCAN Druk op de SCAN SCAN-knop (18) om de scanmodus te betreden, het apparaat zal scannen naar zenders met een hogere frequentie en elk station enkele seconden laten horen (de corresponderende frequentie zal 5 keer knipperen op het LCD). BEDIENING VAN DE RADIO ZENDERS OPSLAAN Druk na het zoeken van een station enkele seconden op een van de presetknoppen (1-6) (tot er een tweede piep klinkt), het huidige station wordt opgeslagen onder de nummerknop. DE FREQUENTIEBAND SELECTEREN Druk in radiomodus kort op de BND BND-knop (24) om de gewenste band te selecteren. De ontvangstband zal in de volgende volgorde veranderen: FM1 / FM2 / FM3 / AM EEN ZENDER SELECTEREN Druk kort op de / knoppen (1) om de GEBRUIK VAN RDS (RADIO DATA 55 BEDIENING TP-informatie levert. Opmerking: In TA SEEK-modus kan de huidige zender worden veranderd naar een andere zender, omdat de speler naar een TP-station zoekt wanneer de signaalsterkte van een zender erg zwak is, of de huidige zender geen "TP" signaal heeft. (TP heeft een hogere prioriteit dan PI.) b) TA ALARM-modus In deze modus stemt de radio niet automatisch af op andere zenders. U hoort alleen een dubbele piep (ALARM). In deze modus zal het apparaat de zender aanhouden. (De prioriteit van PI is hoger dan TP.) Als een nieuwe zender waar u op afstemt binnen 5 seconden geen TP-informatie heeft, dan klinken er piepen. Als de zender langer dan de ingestelde tijd geen TP-informatie heeft dan zal een piep klinken. Als de nieuwe zender geen RDS-signaal verstuurt, dan wordt “PI SEEK” enigszins onderdrukt. PI: SOUND/MUTE: Als een C201-zender gebruik maakt van AF-schakelen, dan kan AF schakelen naar 100 MHz, wat geen volledige AF-functie is (zijnde een andere PI met dezelfde AF) en ook wel “DIP” wordt genoemd. Als een auto door dat overgangsgebied heen en weer blijft rijden, dan kan er soms willekeurige omschakeling optreden omdat de verschillende PI-codes kunnen worden ontvangen via 100 MHz met “XXX” PI. De autoradio probeert dit hinderlijke effect te voorkomen, maar dit zal helaas niet altijd mogelijk zijn. Als het niet mogelijk is, dan heeft u twee opties: SYSTEM) - Instellen van RDS-modus Druk op de AF AF-knop (21) en laat deze onmiddellijk los om de RDS-modus in en uit te schakelen. Er zal “RDS” op het LCD knipperen wanneer RDS is ingeschakeld. - Y-KNOP (17) GEBRUIK VAN PT PTY 1) Druk kort op de PTYPTY-knop (17) om de PTY SELECT-modus te betreden, de zendernaam zal getoond worden op het LCD, u kunt / (25) gebruiken om de items te selecteren en op de / knoppen (1) drukken om naar een corresponderend programma te zoeken. 2) Druk en houd de PTYPTY-knop (17) ingedrukt om het RDS MENU te betreden. In het menu gebruikt u / (25) om items te selecteren en de / knoppen (1) om de items aan te passen. U kunt de volgende items instellen: TA / PI / RETURN / MASK / EONTA / TAVOL / REG TA: SEEK/ALARM a) TA SEEK-modus: Als een nieuwe zender waarop u afstemt binnen 5 seconden geen TP-informatie (verkeersinformatie), dan stemt de radio af op de volgende zender met een ander programma die wel TP-informatie heeft. Als de huidige zender langer dan de ingestelde periode (RETUNE SHORT of RETUNE LONG) geen TP-informatie ontvangt, dan schakelt de radio over naar een volgende zender met dezelfde PI. Als binnen één afstemcyclus geen zender met dezelfde PI gevonden wordt, dan stemt de zender af op de volgende zender die wel 56 BEDIENING EON TA LOCAL modus Als de signaalsterkte van een EON-zender lager is dan de drempel, zal de radio niet naar dat kanaal schakelen en de gebruiker zal zelden hinder ondervinden. Als de EON TA LOCAL modus wordt geselecteerd, dan zal de melding “EON TA LO” kort op het numerieke display worden getoond. EON TA DISTANCE modus De EON TA wissel wordt geprobeerd aan de hand van de informatie van de huidige zender. Als de EON TA DISTANCE modus wordt geselecteerd, zal er kort “EON TA DX” worden getoond op het numerieke display. TA-VOLUME: Volume 30 (het standaard TA-volume is 30, u kunt dit aanpassen van 0 tot 100). RETUNE: LONG/SHORT Als de PI-informatie gedurende de retune-tijd (SHORT is 30 sec. of LONG is 90 sec.) niet (meer) ontvangen wordt, dan zoekt de radio naar de volgende zender met dezelfde PI. 98 100 90 PI: C201 100 PI: XXX - PI SOUND modus: Als het bovenstaande, alternatieve PI-geluid (DIP) hoort, zal het DIP-geluid kort klinken. - PI MUTE modus: Onder de bovenstaande omstandigheden zal er een kort geen geluid worden weergegeven. MASK: DPI/ALL MASK DPI-modus: onderdruk alleen de AF’s met een Verschillende PI (DPI). MASK ALL-modus: onderdruk de AF’s met een andere PI en krachtige GEEN RDS signalen. REG (REGIO): OFF/ON (UIT/AAN) Regionale-modus AAN: AF-schakelen of PI SEEK wordt geïmplementeerd op alle stations die dezelfde PI-code hebben als het huidige station. Regionale-modus UIT: De regionale code in het formaat van PI-code wordt genegeerd wanneer AF-schakelen of PI SEEK is geïmplementeerd. EONTA: DX/LO (DISTANCE/LOCAL): Het doel van deze toets is om ongewenste EON TA wissels te verminderen. Dit kan gebeuren als er EON TA informatie werd ontvangen van de huidige zender en de radio schakelt naar de EON-zender maar de informatie kan niet worden ontvangen omdat de EON-zender te ver weg is. In een dergelijk geval zal de radio dus weer terugschakelen naar de huidige zender. In de bovenstaande omstandigheden luistert een gebruiker naar het verkeerde programma of wordt het voor een korte periode geluid gedempt. - 57 Luisteren naar Verkeersberichten De TA TA-knop (22) wordt als volgt gebruikt: Druk en houd de knop enkele seconden ingedrukt om de TA TA-modus in- of uit te schakelen. Als TA-modus is ingeschakeld en er een verkeersbericht wordt uitgezonden: Als het apparaat in CD (MP3)-modus, AUX IN-modus of IPOD-modus is, dan zal het tijdelijk overschakelen naar radiomodus. De radio schakelt tijdelijk over naar een EON-zender als EON een verkeersbericht op de andere zender detecteert. Als het volumeniveau onder de BEDIENING drempelwaarde is, dan zal het worden opgehoogd tot de drempelwaarde. Wanneer het volumeniveau hoger is ingesteld dan de drempelwaarde (min. TA volumeniveau), dan zal het worden ingesteld op het laatst ingestelde niveau. Als TA TA-modus is ingeschakeld, dan wordt TA van het individuele segment ingeschakeld. Als een TP-station wordt ontvangen, dan wordt TP van het individuele segment ingeschakeld. TA onderbrekingsfunctie Het huidige verkeersbericht wordt geannuleerd door op deze toets te drukken, maar de TA TA-modus zal niet worden uitgeschakeld. De RDS gegevens die gebruikt worden zijn de PI, PS, AF, TP, TA, EON en PTY gegevens. huidige ontvangst PTY: Program Type Code Aanduiding van het type programma, zoals nieuws, lichte muziek, sport etc. GEBRUIK VAN USB Op het voorpaneel van het apparaat zit een USB-interface (16). U kunt met deze interface (16) een USB-schijf aansluiten. Als u een USB-schijf aansluit op de interface, dan zal het apparaat automatisch naar MP3- of WMA-bestanden op de USB-schijf zoeken. Als het apparaat in een andere modus is, dan kunt u op de MOD MOD-knop (5) drukken om de USB-modus te selecteren. TRACKS SELECTEREN Druk op / (1) om naar het vorige/volgende bestand te gaan. Het bestandsnummer zal getoond worden op het display. Druk en houd / (1) ingedrukt om snel vooruit-/terug te spoelen. Het bestand begint met afspelen wanneer u de knop loslaat. PI: Program Identification code Code voor het identificeren van het programma PS: Program Service Name De naam van de zender in alfanumerieke karakters AF: Alternative Frequencies Een frequentielijst van zenders die hetzelfde programma uitzenden TP: Traffic Program Identification Identificerende gegevens voor een zender die verkeersinformatie uitzendt TA: Traffic Announcement Identification Identificatiegegevens die aantonen of verkeersinformatie wordt verzonden EON: Enhanced Other Networks Information Uitzendinformatie over PI, AF, TP, TA, etc, op andere netwerken dan het netwerk dat wordt gebruikt voor de AFSPELEN PAUZEREN Druk op de PAU PAU-knop (10) om te pauzeren, “Pause” zal op het LCD verschijnen. Druk nogmaals om het afspelen te hervatten, “Pause” zal verdwijnen. ALLE TRACKS PREVIEWEN Druk op de SCN SCN-knop (12) om de eerste paar seconden van elk bestand af te spelen, “Scan” zal op het LCD verschijnen. Druk nogmaals om te stoppen met het beluisteren van de intro’s en naar het bestand te luisteren, “Scan” zal verdwijnen. Druk en houd de SCN SCN-knop (12) ingedrukt om de eerste paar seconden van elk bestand in de huidige map af te spelen, “D-SCN” zal verschijnen. Druk nogmaals om de modus te verlaten. 58 BEDIENING selecteert: M1-M6, MOD (5), TUNE/SEEK/TRACK OMLAAG (8), TUNE/SEEK/TRACK OMHOOG (9), DSP(0). Als u drie cijfers invoert, dan zal de speler de track direct zoeken. Als u één of twee cijfers invert, dan zal het apparaat een paar seconden wachten /ENTtot u de BND/LOU BND/LOU/ENT/ENT-knop indrukt. Het apparaat zoekt de track na een paar seconden, zelfs als u niet op de enter-knop drukt. DEZELFDE TRACK HERHALEN Druk op de RPT RPT-knop (13) om voortdurend hetzelfde bestand te herhalen, “S-RPT” zal op het LCD verschijnen. Druk nogmaals op de knop om het herhalen te stoppen, “S-RPT” zal verdwijnen. Druk en houd de RPT RPT-knop (13) ingedrukt om alle bestanden in de huidige map te herhalen, “D-RPT” zal op het LCD verschijnen. Druk nogmaals op de knop om de modus te verlaten. ALLE TRACKS IN WILLEKEURIGE VOLGORDE AFSPELEN Druk op de SHFSHF-knop (9) om alle bestanden op de CD in willekeurige volgorde af te spelen, “S-SHF” zal op het LCD verschijnen. Druk nogmaals om de functie te annuleren, “S-SHF” zal verdwijnen. Druk en houd de SHF SHF-knop (9) 2 seconden ingedrukt om alle bestanden (in de huidige map) in willekeurige volgorde af te spelen, “S-SHF” zal op het LCD verschijnen. Druk nogmaals op de knop om de modus te verlaten. � ESP-FUNCTIE Het apparaat is bij het gebruik van MP3/WMA ongeveer 70 seconden schokbestendig. MAP OMHOOG/OMLAAG SELECTEREN Druk op de DIR- knop (8) of DIR+ knop (15) om een map omlaag of omhoog te selecteren. Als de USB-schijf geen mappen bevat, dan heeft het drukken op de DIR- knop (8) of DIR+ knop (15) geen effect. AS/PS Modus selecteren BND/LOU ENTER M1 A, B, C, 1 M2 D, E, F, 2 M3 G, H, I, 3 M4 J, K, L, 4 M5 M, N, O, 5/Map omlaag M6 P, Q, R, 6/Map omhoog MOD S, T, U, 7 TUNE/SEEK/TRACK V, W, X, 8 DOWN TUNE/SEEK/TRACK Y, Z, SPATIE, 9 UP Verplaats karakter naar PUSH SEL rechts TRACKS SELECTEREN � Map- of Bestandsnaam Zoeken Druk twee keer op de AS/PS (Navi-SCH)(Navi-SCH)-knop (20). De speler gaat in “Mapof Bestandsnaam Zoeken”-modus. De speler zoekt bestanden en mappen met hetzelfde karakter als het karakter dat door de gebruiker wordt ingevoerd door op de knoppen te drukken, zoals getoond in Tabel 1 hieronder. DSP Rechtstreeks Tracks Zoeken Druk één keer op de AS/PS (Navi-SCH) (Navi-SCH)-knop (20). Het apparaat gaat “Rechtstreeks tracks zoeken” modus. De speler zoekt de track die u met een van de volgende nummerknoppen _,-,+,0 Het werkt als volgt: - Gebruik de corresponderende knoppen om de karakters A tot Z, blank, 0 tot 9, _, -, + te selecteren. -knop (26) om de Druk op de SEL-knop 59 BEDIENING - invoer van de karakters te bevestigen. ENT-knop (24) - Druk op de BND/LOU ND/LOU//ENT om te beginnen met zoeken. Als de geselecteerde titel een mapnaam is, dan zal het display (‘ ‘) tonen, daarna - Gebruik de TUNE/SEEK/TRACK OMHOOG/OMLAAG knoppen om alle liedjes in de map te tonen en selecteer de titel. - Druk op de BND/LOU ND/LOU//ENT ENT-knop om te bevestigen en te beginnen met afspelen. - Herhaal de bovenstaande stappen als de nieuw geselecteerde titel ook een map is. � Druk vier keer op de AS/PS (Navi-SCH) (Navi-SCH)-knop. Het apparaat zoekt met behulp van de TUNE/SEEK/TRACK OMHOOG/OMLAAG knoppen naar een bestand of map vanuit de huidige map. (D-DIR icoontje verschijnt als de naam een map is). De huidige mapnaam wordt voor één seconde getoond en de bestandsnaam van het bestand dat momenteel wordt afgespeeld (geselecteerd). De gebruiker kan de map of het bestand selecteren met behulp van de TUNE/SEEK/TRACK OMHOOG/OMLAAG knoppen. Het geselecteerde bestand kan worden afgespeeld door op de BND/LOU/ENT BND/LOU/ENT-knop te drukken. Zoeken Vanuit Hoofdmap Druk drie keer op de AS/PS (Navi-SCH)(Navi-SCH)-knop (20). Het apparaat zoekt met behulp van de TUNE/SEEK/TRACK OMHOOG/OMLAAG knoppen naar bestanden of mappen vanuit de hoofdmap . (Het D-DIR icoontje verschijnt als de naam een map is). Het display zal alle beschikbare mappen en liedjes tonen. Selecteer de gewenste map/liedjes met behulp van de TUNE/SEEK/TRACK OMHOOG/OMLAAG knoppen en BND/LOU/ENT BND/LOU/ENT-knop om te bevestigen. Als de geselecteerde titel een liedje is, dan start het afspelen. Als de geselecteerde titel een map is, dan zal het display (‘ ‘) tonen, daarna - Gebruik de TUNE/SEEK/TRACK OMHOOG/OMLAAG knoppen om alle liedjes in de map te tonen en een titel te selecteren. - Druk op de BND/LOU ND/LOU//ENT ENT-knop om te bevestigen en het afspelen te starten. - Herhaal de bovenstaande stappen als de nieuw geselecteerde titel opnieuw een map is. Zoeken Vanuit Huidige Map 3) ID3-INFORMATIE TONEN Druk op de ID3 ID3-knop (20) om de ID3 TAG (titel, artiest, album) te tonen. ONDERSTEUNDE CODERINGEN Het hoofdapparaat volgende MP3/WMA Audio) modi. MP3/WMA ondersteunt de (Windows Media Standaard Bitrate (kbps) MPEG1 Audio Layer 3 (44.1kHz) Windows Media Audio (44.1kHz) 32,48,64,96, 128,192,256, 320 64,96,128,192 Ondersteunde Modus Stereo Stereo De USB-oplossing ondersteunt: 1. Mappen: 500 max. 2. Bestanden: 999 max. 3. Diepte van map: 8 lagen 4. Grootte: 2 GB Opmerking Opmerking: � Het hoofdapparaat biedt alleen ondersteuning aan standaard USB-apparaten die zijn goedgekeurd door Microsoft. 60 BEDIENING Er is geen USB MP3-speler standaard, wat inhoud dat elk merk en elk model zijn eigen standaard heeft. Ons product biedt hierdoor geen ondersteuning voor elke MP3-speler. � Wanneer u een MP3-speler aansluit die gebruikt maakt van normale batterijen (niet-oplaadbare batterijen), dan moet u de batterijen uit de MP3-speler halen voor u deze verbindt met de USB-interface. Anders kan dit leiden tot het ontploffen van de batterij(en). Zorg er in USB-modus voor dat u de USB-schijf niet uit de USB-interface verwijdert. is hetzelfde als de bediening met MP3’s, die eerder beschreven is. Als de radio in een andere modus is, dan kunt u met de MOD MOD-knop (5) de SD/MMC-modus selecteren. Als er belangrijke bestanden op de SD/MMC-kaart staan, verbind deze dan niet met het hoofdapparaat om af te spelen. GEBRUIK VAN IPOD De speler zal na het verbinden van de IPOD automatisch van de IPOD afspelen en er zal “IPOD” op het display verschijnen. Als de radio in een andere modus is, dan kunt u met de MOD MOD-knop (5) de IPOD-modus selecteren. Een Categorie Selecteren Druk tijdens het afspelen van IPOD op de BND-knop (24), de categorie zal op het display verschijnen. Druk op / (25) om de categorie te veranderen naar PLAY LIST/ARTIST/ALBUM /GENRE/SONG/COMPOSER, en druk vervolgens op de SEL SEL-knop (26) om de gekozen categorie te bevestigen. LET OP Als er belangrijke bestanden op het USB-apparaat staan, sluit het niet aan op het hoofdapparaat. Verkeerd gebruik kan leiden tot bestandsverlies. Wij nemen geen verantwoordelijkheid voor het verlies van gegevens. GEBRUIK VAN (OPTIONEEL) SD/MMC Op dit apparaat zit ook een SD/MMC-interface. Hieronder is aangegeven waar de SD/MMC-interface in de behuizing zit. Een Liedje Selecteren Het display zal de huidige catalogus (opgeslagen op de IPOD) tonen wanneer u op de BND BND-knop (24) drukt. Druk op / (25) om het volgende of vorige liedje te selecteren. Druk vervolgens op de SEL (26)-knop om het geselecteerde nummer af te spelen. PAU (Pauze) Druk onder het afspelen op de PAUPAU-knop (10) om het afspelen te pauzeren. Druk nogmaals om het afspelen te hervatten. Als u een SD/MMC-kaart in de SD/MMC-interface plaatst, dan zal de speler MP3- of WMA-bestanden zoeken en RPT (Herhalen) deze automatisch afspelen . De bediening Druk tijdens het afspelen kort op de 61 BEDIENING RPT RPT-knop (12) om het huidige nummer te herhalen, er zal “S-RPT” verschijnen op het display. Druk nogmaals op de knop om het herhalen te annuleren. Druk de knop ongeveer 2 seconden in om het Album te herhalen, er zal “D-RPT” verschijnen op het display. Druk nogmaals op de knop om de herhaalmodus te verlaten. GEBRUIK VAN BLUETOOTH � VOORBEREIDEN VOOR GEBRUIK VAN BLUETOOTH (i) Zorg ervoor dat uw mobiele telefoon Bluetooth ondersteunt wanneer u gebruik maakt van de Bluetooth-functie. SHF (Willekeurig afspelen) Druk tijdens het afspelen kort op de SHF SHF-knop (8) om na het afspelen van het huidige nummer de nummers in de huidige categorie in willekeurige volgorde af te spelen, er zal “SHF” op het display verschijnen. Druk nogmaals op de knop om het willekeurig afspelen te beëindigen. Druk de knop ongeveer 2 seconden in om alle nummers van het album in willekeurige volgorde af te spelen, er zal “D-SHF” op het display verschijnen. Druk de knop nogmaals in om de shuttlemodus te verlaten. (ii) Het zendbereik van Bluetooth verschilt per mobiele telefoon. Voor de beste gesprekskwaliteit wordt aangeraden dan de afstand tussen de mobiele telefoon en de speler maximaal 3m is. Plaats geen metalen voorwerpen of obstakels tussen de mobiele telefoon en de speler. � KOPPELEN 1) Druk en houd, in elke modus, de PAIR(MOD) PAIR(MOD)-knop (5) op het voorpaneel ingedrukt, er zal “PAIRING” verschijnen op het LCD. 2) Stel de Bluetooth-functie in op de mobiele telefoon. (Raadpleeg de handleiding van uw mobiele telefoon en kijk bij het gebruik van Bluetooth.) TUNE/TRACK OMHOOG/OMLAAG Druk tijdens het afspelen van een nummer op de / knop. (1) het volgende/vorige nummer in de huidige categorie zal worden afgespeeld, maar u kunt niet naar nummers in de volgende categorie gaan. Druk, wanneer u een nummer voor meer dan 3 seconden afspeelt, op om het nummer opnieuw vanaf het begin af te spelen. Wanneer het nummer minder dan 3 seconden heeft afgespeeld, dan zal u met een druk op naar het vorige nummer gaan. Druk en houd de / knop (1) voor enkele seconden ingedrukt onder het afspelen om vooruit- of terug te spoelen. Het display toont de speeltijd (bijv. 1’20). 3) De lijst van uw mobiele telefoon moet “CARBT” tonen. Selecteer “CARBT” en voer het wachtwoord “0000” in. 4) Het LCD zal “CONN OK!” tonen als er succesvol gekoppeld is. 5) Als het koppelen mislukt, dan zal het display “PAIR END” tonen. U kunt de PAIR-knop (5) indrukken en ingedrukt houden om het nogmaals te proberen. 6) Opmerking: Als de apparaten zijn gekoppeld, zal de toets MODE geen functie hebben en zijn uitgeschakeld. Houd als de apparaten zijn gekoppeld op de PAIRPAIR-knop (5) ingedrukt om het 62 BEDIENING koppelen te beëindigen. � menu-item veranderen. De volgende items kunnen worden getoond in de volgende volgorde: PRE NUM/ RECEIVED / DIALED / MISSED / VERBINDEN De speler beschikt over een ingebouwde auto-reconnection functie. Bij elke korte druk op de knop (4), zal het apparaat automatisch opnieuw verbinden met de mobiele telefoon (opmerking: de mobiele telefoon moet eerder gekoppeld zijn met de radio). MANUANS / TALK. Raadpleeg voor details de volgende instructies. Opmerking: 1)PRE NUM: U kunt 10 telefoonnummers in het telefoonboek opslaan. Druk in PRE NUM-modus op de / knop(25) om het nummer te selecteren. Druk vervolgens op de SEL-knop en voer het nummer in. Druk vervolgens normaals op de SEL-knop om op te slaan in het telefoonboek. U kunt onder de volgende omstandigheden handmatig opnieuw verbinden door enkele seconden op de RECON RECON-knop (19) te drukken. Als het opnieuw verbinden succesvol is dan zal “Conn OK!” worden getoond op het display. 1) Als de mobiele telefoon buiten bereik is, dan zal de verbinding verloren gaan. Wanneer u terug binnen bereik komt is het nodig opnieuw te verbinden. 2) de laatst 3) DIALED: Toon de laatst gemaakte oproep. 2) Als de mobiele telefoon buiten bereik van de radio is en er een oproep binnenkomt, dan moet u als u weer binnen bereik bent opnieuw verbinden om de audio naar de radio over te schakelen. 4) MISSED: Toon de gemiste oproep. 5) MANU beantwoorden) ANS ( handmatig U kunt de beantwoordmodus instellen op handmatig antwoorden (MANU ANS) of automatisch beantwoorden (AUTO ANS). Als u kiest voor automatisch beantwoorden, zal het telefoonnummer bij een inkomende oproep worden getoond op het LCD. Het apparaat zal de oproep automatisch accepteren. Als u kiest voor handmatig beantwoorden beantwoorden, zal het telefoonnummer op het LCD verschijnen. U kunt vervolgens op de knop (4) drukken om de oproep te accepteren of op de knop 3) De verbinding zal worden verbroken wanneer u op de knop (2) drukt om het voorpaneel te ontgrendelen. U moet opnieuw verbinden wanneer u het voorpaneel opnieuw installeert. 4) Als u de mobiele telefoon die gekoppeld is uitschakelt, dan moet deze na opnieuw ingeschakeld te zijn opnieuw worden verbonden. � RECEIVED: Toon ontvangen oproep. T-MENU Druk, als het koppelen succesvol is, kort op de T-MENU T-MENU-knop (6) op het voorpaneel om het telefoon menu te openen. Blijf op deze knop drukken of druk op de / knop (1) om van 63 BEDIENING PLAATSEN (24)om de oproep te weigeren. 6) TALK (00~20) U kunt het bluetooth-volume instellen bij het item TALK. Als het volume wordt ingesteld op 00, dan zal het bij een binnenkomende oproep automatisch op 60 worden ingesteld. Als u het TALK-volume instelt op 20, zal het hoofdvolume automatisch worden ingesteld op 100 als er een oproep binnenkomt. Voorbeeld: TALK-volume Hoofdvolume 00 = 60 01 = 62 02 = 64 …………………….. 20 = 100 1) Een uitgaande oproep plaatsen uit SPEED DIAL, RECEIVED LIST, DIALED LIST, MISSED LIST, PHONE BOOK(Mobile Phone) en PHONE BOOK(SIM Card). Raadpleeg de T-MENU sectie. 2) Een uitgaande oproep plaatsen door het telefoonnummer handmatig in te voeren. Druk op de knop (4) op het voorpaneel, er zal “CALL_” op het LCD verschijnen. Gebruik de 0~9, *, # knoppen om het gewenste telefoonnummer in te voeren. (Opmerking: druk kort op de * om het “*” karakter in te voeren, houd de knop ingedrukt om het “+” karakter in te voeren). Druk vervolgens nogmaals op 。 EEN OPROEP BEANTWOORDEN U kunt de antwoordmodus instellen op MANU ANS (Handmatig antwoorden) of Auto Answer (Automatisch antwoorden). In de automatische antwoordmodus zal bij een inkomende oproep “ANSWER?+ Telefoonnummer” op het LCD verschijnen. Het apparaat zal de oproep automatisch beantwoorden. In de handmatige antwoordmodus MANU ANS (MANU ANS) zal bij een inkomende oproep “ANSWER?+ Telefoonnummer” op het LCD verschijnen. U kunt op de knop (4) drukken om de oproep te beantwoorden of op de knop (24) om de inkomende oproep te weigeren. � de bellen. knop (4) om het nummer te Opmerking: Als u het verkeerde nummer invoert, druk dan kort op de 21 CLRCLR-knop (24) om het te wissen. Druk en houd de CLR CLR-knop (24) ingedrukt om alle nummers te wissen. � DE OPROEP OVERSCHAKELEN TUSSEN MOBIELE TELEFOON EN HET APPARAAT Druk en houd de TRANSFER TRANSFER( T-MENU) T-MENU)-knop (6) in de gespreksmodus ingedrukt om het telefoongesprek over te schalen tussen de mobiele telefoon en de radio. Opmerking: 1) Als u de oproep naar de mobiele telefoon overschakelt, dan zal het dempen van de huidige modus tegelijkertijd vrijgegeven worden. EEN UITGAANDE OPROEP 64 BEDIENING 2) Het is bij het plaatsen van een uitgaande oproep niet mogelijk om over te schakelen voordat de oproep is beantwoord. � BT reset reset: : Houd in de BT AUDIO-modus de knop BND/LOU/ voor enkele seconden ingedrukt. Bepaalde Bluetooth-informatie zal worden gereset (De informatie RECEIVED / DIALED / MISSED zal worden gewist). � BLUETOOTH (A2DP-FUNCTIE) AUDIO De speler ondersteunt de Bluetooth audio-functie. Als uw mobiele telefoon stereo-audio kan afspelen en het koppelen is gelukt, dan kunt u het apparaat waar u mee heeft gekoppeld de audio laten afspelen. De knoppen M1 en M2 op het voorpaneel dienen als de knoppen PAUSE/PLAY en STOP. (Dit verschilt per mobiele telefoon.) Gebruik de / knop (1) op het voorpaneel van het apparaat om de vorige/volgende track te selecteren. (Dit verschilt per mobiele telefoon.) Opmerking: tijdens het afspelen van muziek kunt u geen oproep plaatsen. Bij een inkomende oproep kunt u kiezen om de oproep te beantwoorden of niet te beantwoorden. 65 SPECIFICATIES ALGEMEEN Voeding Chassis Afmetingen Toonregeling - Bass (op 100 Hz) - Treble (op 10 kHz) : DC 12 Volt, Negatieve Aarding : 178 (B) x 160 (D) x 50 (H) : ±10 dB : ±10 dB Maximaal vermogen - Versie Y : 4x40 watt Stroomverbruik - Versie Y : 15 Ampere (max.) CD-SPELER Signaal/ Ruisverhouding Kanaalscheiding Frequentierespons : Meer dan 55 dB : Meer dan 50 dB : 40Hz – 18 kHz RADIO Frequentiebereik IF Gevoeligheid (S/N=30dB) Stereoscheiding Frequentiebereik IF Gevoeligheid (S/N=20dB) Voor 2 Banden Europa) FM 87.5 tot 108 MHz 10.7 MHz 4μV >25dB MW 522 tot 1620 KHz 450 kHz 36 dBu 66 PROBLEMEN OPLOSSEN Controleer de bekabeling vóór u deze checklist doorneemt. Raadpleeg uw dichtstbijzijnde dealer als een probleem zich blijft voordoen nadat u door deze checklist bent heengegaan. Symptoom Geen stroom. Oorzaak Oplossing Het contact van de auto is uitgeschakeld. Als de voeding is aangesloten op de het accessoirecircuit van de auto, maar de motor niet draait, draai dan de contactsleutel naar de “ACC”-stand. De zekering doorgebrand. Vervang de zekering. is Het is te warm in de auto. Laat de temperatuur in de auto afkoelen tot een normaal niveau. Condensatie. Zet de speler ongeveer één uur uit en probeer het nogmaals. Volume is in minimum Stel het volume af op een gewenst niveau. De bekabeling is niet goed aangesloten. Controleer de bekabeling. De installatiehoek is groter dan 30 graden. Pas de installatiehoek aan naar minder dan 30 graden. De disk is extreem vuil of kapot. Maak de CD schoon of probeer een nieuwe CD af te spelen. De bedieningstoets en werken niet. De ingebouwde microcomputer werkt niet naar behoren door ruis. Druk op de RESET-knop. Voorpaneel is niet goed vastgezet. De radio werkt niet. De automatische radiostation selectie werkt niet. De kabel van de antenne is niet aangesloten. Verbind de kabel van de antenne stevig. De signalen zijn te zwak. Selecteer de zender handmatig. Geen geluid. Geluid over. slaat 67 � CS-351 MANUEL D’UTILISATION ème audio mobile Syst Systè étiseur radio st éréo PLL � Synth Synthé sté � Mémorisation automatique � Fonction RDS � Fonction de protection contre les chocs électroniques (ESP) � Interface USB et SD/MMC � Fonction IPOD Ready � Fonction Bluetooth mains libres et transmission audio éréo A2DP (Advanced Audio Distribution Profile) st sté � Panneau détachable ée auxiliaire � Fonction d’entr entré Pour information & support technique, www.lenco.eu SOMMAIRE .................................................... 70 Installation Installation.................................................... Aperçu de tous les fichiers...................81 Répétition d’un fichier........................... 81 Lecture aléatoire de tous les fichiers. 81 Sélection du répertoire précédent/suivant…...........................81 Sélection d’une piste..........................82 Affichage des balises ID3…...............83 Mode op ératoire cartes mémoire opé ..................................................... 83 SD/MMC SD/MMC..................................................... Mode op ératoire IPOD ......................... 84 opé ................... ératoire Bluetooth 85 ...................85 Mode op opé Bluetooth................... Montage avant DIN (Méthode A)............ 70 Installation de l’unité............................. 70 Retrait de l’unité.....................................71 Montage arrière DIN (Méthode B).......... 72 Fonctionnement du panneau avant amovible ......................................................... 73 éma de raccordement .......................... 74 Sch Sché raccordement.......................... ..........................7 Connecteur ISO.........................................75 ........... 75 Emplacement des commandes commandes........... ératoire basique ...................... 76 Mode op opé basique...................... Mise en marche/arrêt de l’unité...............76 Préparation.............................................85 Pairage....................................................85 Connexion.............................................. 85 Menu T.................................................... 86 Passer un appel.....................................87 Détacher le panneau avant..................... 76 Réglage du volume................................... 76 Haut-parleur............................................... 76 Ecran......................................................... 76 Transfert d’appels entre le téléphone Egaliseurs...................................................76 portable et l’unité................................... 87 Télécommande (optionnelle)...................76 Réinitialisation BT…...........................87 Fonction Reset...........................................76 Audio Bluetooth (fonction A2DP)........ 87 écifications .......................................... 88 Sp Spé cifications.......................................... ................................................ 89 Dépannage pannage................................................ ................................................89 Sélection du mode.................................... 76 Configuration système..............................76 Entrée auxiliaire.........................................77 ératoire de la Radio ................ 77 Mode op opé Radio................ ................77 Sélection d’une bande de fréquences 77 Sélection d’une station radio…..........77 Mémorisation automatique de stations radio…................................................77 Recherche...............................................77 Mémorisation de stations radio............78 Mode opératoire RDS (radio data system) .................................................................. 78 ératoire USB ............................. 80 Mode op opé USB............................. .............................80 Activation du mode USB...................... 80 Sélection de fichiers..............................81 Mise en pause de la lecture.................81 69 INSTALLATION Remarques : Installez l’appareil à un endroit où il ne gênera pas la conduite. Avant d’installer définitivement l’unité, connectez les câbles temporairement et assurez-vous que tout soit bien connecté et que le système fonctionne correctement. N’utilisez que les pièces fournies avec l’unité pour vous assurer une correcte installation. L’utilisation de pièces non agréées peut causer des dysfonctionnements. Consultez vos revendeurs si l’installation nécessite le perçage de trous ou nécessite d’autres modifications du véhicule. Installez l’unité de manière à ne pas gêner le conducteur et ne pas blesser les passagers en cas d’arrêt soudain tel qu’un arrêt d’urgence. Si l’angle d’installation excède 30° à l’horizontale, l’unité peut ne pas offrir des performances optimales. RETIREZ LES VIS AVANT L’INSTALLATION Avant d’installer l’unité, veuillez retirer les deux vis. MONTAGE AVANT DIN (Méthode A) Ouverture d’installation nécessaire Cette unité peut être installée sur n’importe quel tableau de bord ayant une ouverture comme illustrée ci-dessous : 53mm 182mm Installation de l’unité Assurez-vous d’avoir tout d’abord testé toutes les connexions, puis suivre les étapes suivantes pour installer l’unité. 1. Assurez-vous que le contact est désactivé et que le câble est déconnecté du terminal négatif (-) de la batterie du véhicule. 2. Déconnectez le harnais du fil et l’antenne. 3. Appuyez sur le bouton de relâchement sur le panneau avant et retirez le panneau de contrôle (voir les étapes de “détacher le panneau avant”). 4. Soulevez le dessus de l’anneau de finition extérieur, puis retirez le panneau. 5. Les deux clés fournies relâchent les languettes du boîtier à l’intérieur de l’unité afin de pouvoir la retirer. Insérez 30 Evitez d’installer l’unité où celle-ci est exposée à de hautes températures telles que les rayons du soleil, de l’air chaud provenant d’un chauffage ou un endroit où l’unité serait exposée à la poussière, la saleté ou à des vibrations excessives. MONTAGE AVANT/ARRIERE DIN Cette unité peut être correctement installée à l’“Avant” (Montage conventionnel avant DIN) ou “Arrière” (pour l’installation à l’arrière DIN, utilisez les orifices des têtes de vis sur les côtés du châssis de l’unité.). Pour plus de détails, veuillez vous référer aux illustrations des méthodes d’installation suivantes. 70 INSTALLATION les clés au maximum (avec les encoches vers le haut) dans les fentes prévues au milieu des côtés gauche et droit de l’unité. Puis faites glisser le boîtier au dos de l’unité courroie en métal fournie pour fixer le dos de l’unité. Utilisez le matériel fourni (Boulon de fixation (M5mm) et joint ressort) pour attacher l’une des extrémités de la courroie au boulon de montage au dos de l’unité. Si nécessaire, pliez la courroie en métal pour qu’elle convienne à la zone de montage du véhicule. Puis utilisez le matériel (vis de connexion (5x25mm) et le joint simple) pour attacher l’autre extrémité sous le tableau de bord. Cette courroie vous permet également d’assurer la mise à la terre électrique de l’unité. 6. Montez le boîtier en l’insérant dans les ouvertures du tableau de bord et ouvrez les languettes situées autour du boîtier avec un tournevis. Toutes les languettes ne seront pas capables d’entrer en contact, examinez donc celles qui seraient le plus efficaces. Ouvrez les languettes appropriées derrière le tableau de bord pour fixer le boîtier en place. 10. Reconnectez le câble au terminal négatif (-) de la batterie du véhicule. Puis replacez l’anneau de finition extérieur et installer le panneau avant de l’unité. (Voir les étapes dans “installer le panneau avant”). Retrait de l’unité 1. Assurez vous que le contact soit éteint puis déconnectez le câble du terminal négatif (-) de la batterie du véhicule. 2. Retirez la courroie en métal attachée au dos de l’unité (si attaché). 3. Appuyez sur le bouton de relâchement sur le panneau avant. 7. Reconnectez le harnais du câble et l’antenne, faites attention à ne pas pincer de fils ou de câbles. 8. Faites glisser l’unité dans le boîtier jusqu’à ce qu’il se fixe en place. 9. Pour mieux fixer l’unité, utilisez la 71 INSTALLATION 4. Soulevez le dessus de l’anneau de finition extérieur puis retirez-le. 5. Insérez les deux clés fournies dans les fentes au milieu des côté gauche et droit de l’unité, puis tirez l’unité hors du tableau de bord. Pour attacher l’unité aux crochets usine de montage de radio. Alignez les trous de vis sur le crochet avec les trous de vis de l’unité, puis serrez les vis (5x5mm) de chaque côté. Remarque: l’anneau de finition extérieure, le boîtier et la courroie en métal ne sont pas utilisés dans la méthode d’installation B. MONTAGE ARRIERE DIN (Méthode B) Si votre véhicule est une Nissan, Toyota, suivre les instructions de montage suivantes. Utilisez les trous de vis marqués T (Toyota), N (Nissan) situés sur les deux côtés de l’unité pour attacher l’unité aux crochets de montage de l’unité fournis avec votre véhicule. 72 FONCTIONNEMENT DU PANNEAU AVA Pour détacher le panneau avant 1. Appuyez sur le bouton de relâchement ( 2. Une fois les deux côtés correctement insérés, appuyez sur le panneau avant. ), le panneau se détache. 2. Pour détacher le panneau avant, levez-le légèrement horizontalement, sortez le côté droit puis le côté gauche. 3. Pour protéger le panneau avant, rangez-le dans le boîtier de protection fourni immédiatement après être déconnecté. Installation du panneau avant 1. Pour installer le panneau avant, insérez tout d’abord le côté gauche puis le côté droit. 3. Remarque que lorsque le panneau avant n’est pas correctement verrouillé, appuyer sur les touches n’a aucun effet, l’écran peut afficher un message d’erreur. Appuyez sur la touche d’ouverture puis réinstallez le panneau avant. Précautions liées à la manipulation du panneau avant 1. Ne pas laisser tomber le panneau avant. 2. Ne pas exercer de pression sur l’écran ou sur les boutons de commandes lorsque vous retirez ou installez le panneau avant. 3. Ne pas toucher les contacts sur le panneau avant ou sur le corps de l’unité principale. Cela peut résulter en des contacts électriques. 4. Si de la saleté ou des substances étrangères adhèrent au contact, ils peuvent être nettoyés avec un tissu propre et sec. 5. Ne pas exposer le panneau avant à de hautes températures ou à la lumière directe du soleil. 6. Ne pas laisser d’agents volatiles (par ex. benzène, diluant ou insecticides) toucher la surface du panneau avant. 7. Ne pas essayer de désassembler le panneau avant. 73 SCHEMA DE RACCORDEMENTS RACCORDEMENT ISO 74 MODE OPERATOIRE EMPLACEMENT DES COMMANDES 1.Touche / (régler/rechercher/piste bas/haut) 2. (touche d’ouverture) 3. Microphone (décrocher) 4. Touche 5. Touche PAIR/MOD 6. Touche T-MENU/TRANSFER 7. Ecran LCD 8.5 Touche DIR9.4 Touche SHF 10.1 Touche PAU 11. Touches de présélection 1-6 12.2 Touche SCN 13.3 Touche RPT 14. Touche /MUTE 15.6 Touche DIR+ 16. Interface USB 17.9 Touche PTY 18. Touche SCAN 19.0 Touche DSP/RE-CCN 20. Touche AS/PS/*/+/Navi-SCH 21.7 Touche AF 22.8 Touche EQ/TA 23. Capteur IR (OPTIONAL) (raccrocher)/BND/LOUD /CLR 24. Touche 25. Touche / (volume haut/bas) 26. Touche SEL/MENU 27. Interface pour carte mémoire SD/MMC 28. Touche eject 29. Touche reset 30. Connecteur AUX IN 75 MODE OPERATOIRE Appuyez sur la touche EQ (22) pour activer un égaliseur et sélectionner l’égaliseur de votre choix. 5 égaliseurs sont disponibles : MODE OPERATOIRE BASIQUE MISE EN MARCHE/ARRET DE L’UNITE Appuyez sur la touche (14) pour mettre en marche l’unité. Lorsque l’unité est en marche, pressez et maintenez enfoncée la touche (14) pour éteindre l’unité. çade Détacher la fa faç Appuyez sur la touche détacher le panneau amovible. →FLAT→CLAS→POP M→ROCK→DSP OFF RECEPTEUR (OPTIONNEL) Pointez la télécommande vers le récepteur IR (23). Appuyez sur les touches de fonction de la télécommande pour contrôler le système. (2) pour Réglage du volume Appuyez brièvement sur la touche /MENU (26) pour accéder au mode SEL SEL/MENU CONFIGURATION AUDIO, utilisez la /MENU (26) ou touche SEL SEL/MENU / (1) pour sélectionner le mode d’ajustement souhaité. Le mode d’ajustement changera dans l’ordre suivant: Basses/Aigus/Balance/Fader/Caisson de basses/ACTIVE/DESACTIVE (Quitter) Appuyez brièvement sur la touche / (25) pour régler la qualité sonore pas par pas, pressez et maintenez enfoncée la touche / (25) pour modifier la qualité sonore continuellement. Appuyez brièvement sur la touche MUTE (14) pour couper le son, appuyer à nouveau sur cette touche permet de restaurer le son. Fonction Reset La touche RESET (29) doit être pressée l’aide d’un stylo bille ou tout autre objet en métal fin. La touche RESET doit être pressée dans les cas suivants : - L’installation initiale de l’unité est terminée, les raccordements ont été effectués. - Les commandes ne répondent pas. - Un message d’erreur s’affiche. Remarque : lorsque vous appuyez sur la touche RESET (29) et que l’unité ne fonctionne toujours pas, utilisez un coton-tige imprégné d’alcool isopropylique pour nettoyer le connecteur du panneau avant. HAUT-PARLEUR UD (24) pendant Appuyez sur la touche LO LOUD quelques secondes pour activer le haut-parleur, “LOUD” s’affiche. Appuyez sur la touche pendant quelques secondes à nouveau pour désactiver cette fonction, “LOUD” disparaît. SELECTION DU MODE Appuyez brièvement sur la touche MOD (5) pour modifier le mode : Radio, CD, USB, CARD, IPOD (optionnel), AUX et BT Audio. CONFIGURATION SYSTEME Pressez et maintenez enfoncée la touche MENU (26) du panneau avant pour accéder au mode CONFIGURATION SYSTEME. Les options suivantes sont disponibles. BIP/VOL P/ZONE/24H/PCLK. Utilisez la touche SEL (26) ou / (1) pour sélectionner l’option à modifier, et AFFICHAGE Appuyez sur la touche DSP (19) pour modifier le mode d’affichage. EGALISEURS 76 MODE OPERATOIRE / (25) pour modifier utilisez la touche l’option correspondante. 1) BIP : ACTIVE/DESACTIVE Permet d’activer/désactiver le bip de pression des touches du panneau avant. 2) Sélection P-VOL P-VOL : il s’agit du niveau de volume de mise en marche de l’unité. Lorsque celui-ci est défini sur 40, celui-ci sera automatiquement activé à la prochaine mise en marche lorsque le niveau de volume a été diminué à une valeur inférieure à 40. Si le niveau de volume a été défini sur une valeur supérieure à 40, le niveau de volume de 40 sera automatiquement rétabli. / (25) 3) Zone : utilisez les touches pour sélectionner la bande de fréquence européenne ou américaine. 4) 12/24 HEURES Les formats d’horloge 12 et 24 heurs sont disponibles. (Sous l’option ZONE, lorsque vous sélectionnez la bande de fréquences européenne, le format d’horloge 24 heures sera automatiquement sélectionné. Lorsque vous sélectionnez la bande de fréquences américaine, le format d’horloge 12 heures sera automatiquement sélectionné). 5) PCLK ACTIVEE /DESACTIVEE : aucune fonction. BND (24) brièvement pour sélectionner la bande de fréquences radio désirée. La bande de fréquences radio change dans l’ordre suivant : FM1 / FM2 / FM3 / AM SELECTION DE STATIONS Appuyez brièvement sur la touche / (1) pour activer la fonction de recherche automatique. Appuyez sur la touche pendant quelques secondes jusqu’à ce que “MANUAL……” s’affiche, le mode de recherche manuelle est sélectionné. Au bout de quelques secondes d’inactivité, le mode de recherche automatique est réactivé et “AUTO……” s’affiche. MEMORISATION AUTOMATIQUE ET RECHERCHE DE PROGRAMMES - Mémorisation automatique des stations radio Appuyez sur la touche AS/PS (20) pendant quelques secondes, “SEARCH” s’affiche. La radio effectue une recherche sur la fréquence sélectionnée et vérifie la puissance de signal jusqu’à la fin du cycle. Les six stations ayant le signal le plus puissant sont mémorisées sur les numéros de présélection correspondants. - Recherche de programmes Appuyez brièvement sur la touche AS/PS (20) pour rechercher les présélections. Le numéro de station correspondante P1~P6 clignote. ENTREE AUXILIAIRE L’unité peut être raccordée à un lecteur audio portable via le connecteur AUX IN (30) du panneau avant. Une fois les raccordements terminés, vous pouvez appuyer sur la touche MOD (5) du panneau avant pour sélectionner le mode AUX IN. RECHERCHE Appuyez sur la touche SCAN (18) pour accéder au mode Recherche, l’unité recherche vers les stations à des fréquences supérieures et maintient la diffusion des stations pendant quelques secondes (la fréquence correspondante clignote 5 fois à l’écran). RADIO MODE OPERATOIRE D’UNE SELECTION BANDE DE FREQUENCES RADIO En mode Radio, appuyez sur la touche 77 MODE OPERATOIRE plus reçues sur la station sélectionnée, l’autoradio démarrera la recherche d’une station de programmation similaire, au bout de 30 secondes si est sélectionné, ou au bout de 90 secondes si LONG REGLAGE est sélectionné. Si aucune station PI similaire n’est trouvée au bout d’un cycle de recherche, la radio recherchera la station suivante émettant les informations routières. Remarque: en Mode de recherche TA, la station radio sélectionnée peut être modifiée à une station radio entièrement différente, car l’unité recherche la station TP lorsque la puissance du champ (signal) de la station est très faible, ou la station sélectionnée ne possède pas de signal “TP”. (La priorité la plus élevée est TP, et non PI.) b) Mode ALARME TA Lorsque ce mode est sélectionné, le mode de réglage automatique n’est pas activé. Seul un double bip est émis (ALARME). Ce qui signifie que sous ce mode, l’unité maintient la station sélectionnée e, employant tous els moyens. (La priorité PI est supérieure à TP.) Lorsque la nouvelle station sélectionnée ne diffuse pas d’informations TP pendant un délai de 5 secondes, le bip retentit. Lorsque les informations TP information sont perdues lors du réglage de la station sélectionnée, le bip retentit. Lorsque la nouvelle station sélectionnée ne possède pas de signal RDS, “PI SEEK” est alors supprimé. PI : SON/MUET Lorsque la commutation FA est MEMORISATION DE STATIONS Une fois la station sélectionnée, appuyez sur une touche de présélection (1-6) pendant quelques secondes (jusqu’à ce que le second bip retentisse), la station sélectionnée est mémorisée sur la touche de présélection. MODE OPERATOIRE RDS (RADIO DATA SYSTEM) - Réglage du mode RDS Appuyez sur la touche AF (21) puis relâchez-la immédiatement pour activer/désactiver le mode RDS. Lorsque le mode RDS est activé, “RDS” clignote. - FONCTIONNEMENT DE LA TOUCHE Y (17) PT PTY 1) Appuyez brièvement sur la touche PTY (17) pour accéder au mode PTY SELECT, le nom du programme s’affiche, vous pouvez utiliser la touche / (25) pour sélectionner un élément et appuyez sur la touche / (1) pour démarrer la recherche du programme correspondant. 2) Pressez et maintenez enfoncée la touche PTY (17) pour accéder au MENU RDS, dans le menu, utilisez la touche / (25) pour sélectionner un élément et appuyez sur la touche / (1) pour régler l’option correspondante. Les options suivantes sont disponibles : TA / PI / RETOUR / MASQUER / EONTA / TAVOL / REG. TA : RECHERCHE/ALARME a) Mode de recherche TA : Lorsqu’une nouvelle station ne reçoit pas les informations TP pendant plusieurs secondes, la radio recherchera la prochaine station avec une identification différente, mais les mêmes informations TP. Lorsque les informations TP ne sont 78 MODE OPERATOIRE implémentée dans la station C201, la FA peut basculer à 100 MHz, ce qui ne représente pas une réelle FA (où un différent PI avec la même FA) dans le court DIP. Si vous traversez plusieurs fois cette zone, un phénomène d’oscillation peut se produire, car le code PI différent peut être reçu depuis 100 MHz avec un PI « XXX ». L’autoradio dispose d’un moyen spécial pour réduire ce genre de situations indésirables lorsqu’une limite est présente pour échapper à ce cas séreux. Dans ce cas sérieux, 2 modes sont disponibles : 98 100 90 PI: C201 - - sur cette station radio EON liée, mais aucun information n’a pu être reçue car la station liée EON es située trop loin de cette zone. La station radio sélectionnée est activée à nouveau. Dans l’opération ci-dessus, un client écoute un programme erroné ou un son de coupure une fois par longue période. Mode LOCAL TA EON Lorsque le niveau de puissance enregistré EON lié est inférieur au niveau du seuil, la radio ne sélectionne pas cette station radio, un client peut difficilement entendre les perturbations. Lorsque LOCAL TA EON est activé, « EON TA LO » s’affiche sur l’écran numérique pendant quelques secondes. Mode DISTANCE TA EON Le commutateur TA EON permet d’implémenter les informations de la station sélectionnée. Lorsque le mode DISTANCE TA EON est sélectionné, « EON TA DX » s’affiche à l’écran pendant quelques secondes. 100 PI: XXX Mode PI SON : Lorsque le son PI ci-dessus (DIP) différent est entendu une fois pendant une longue période, le son du DIP sera entendu pendant une courte période. Mode PI MUET : Sous la même situation, un son de coupure sera émis une fois par courte période. TA-VOLUME : Volume 30 (la valeur de volume TA par défaut est 30, vous pouvez régler cette valeur de 0 à 100). MASQUE : DPI/ALL Mode DPI masque : pour masquer seulement les AF possédant un PI différent (DPI). Mode TOUT MASQUER : pour masquer les AF possédant un PI différent et aucun signal RDS avec un champ élevé. (REGION) : REG ACTIVE/DESACTIVE Mode région activé : changement AF ou RECHERCHE PI est ajouté à la station ayant tous les codes PI et identiques à la station sélectionnée. Mode Région désactivé : le code régional au format de code PI est ignoré en cours de changement PI ou la recherche AF est ajoutée. RETUNE: LONG/COURT Lorsque les informations PI de la station sélectionnée sont perdues lors du réglage EONTA : DX/LO (DISTANCE/LOCAL) L’objectif de cette touche est de réduire les commutations TA EON indésirables, dont les informations TA EON ont été reçues depuis la station radio actuelle et la station radio définie 79 MODE OPERATOIRE PI: Code d’identification de programme Code permettant d’identifier les programmes PS: Nom de service du programme défini par REGLAGE COURT (30 sec.) ou REGLAGE LONG (90 sec.), la radio sélectionne automatiquement la prochaine station PI identique. - Diffuse le nom de la station sélectionnée avec des caractères alphanumériques AF: Fréquences alternatives Liste de fréquences des stations en cours de diffusion transmettant le même programme TP: Identification du programme de circulation Identification des données d’informations routières de la station en cours de diffusion TA: Annonce de la circulation Les données d’identification montrant les informations de circulation est ou non en cours de transmission. EON: Améliore les informations des autres réseaux L’information radiotélévisée sur PI, AF, TP, TA, etc. relative aux réseaux autres que le réseau utilisé pour l’actuelle réception. PTY: Code Type Programme Contenus des programmes tels que les actualités, musique légère, sports etc. ères Ecouter les informations routi routiè La touche TA (22) fonctionne de la manière suivante : Lorsque vous appuyez sur la touche et la maintenez enfoncée pendant quelques secondes, le mode TA s’active/se désactive. Lorsque le mode TA est actif et que les informations routières sont transmises : Lorsque l’unité est en mode CD (MP3) ou AUX IN ou IPOD, le mode Radio est activé. La radio sélectionne une station EON lorsque EON détecte une diffusion d’informations routières sur cet autre programme. Lorsque le niveau de volume est défini en dessous du seuil, celui-ci est augmenté jusqu’au seuil. L’utilisateur peut cependant modifier le volume, qui est supérieur au seuil (niveau de volume TA minimum), celui-ci sera défini au dernier niveau de volume sélectionné. Lorsque le mode TA est activé, les informations TA du segment sont activées. En cours de réception d’une station TP, les informations TP du segment sont activées. Fonction d’interruption TA Les informations routières actuellement diffusées peuvent être annulées via cette touche. Le mode TA n’est cependant pas désactivé. Les données RDS utilisées sont PI, PS, AF, TP, TA, EON et PTY. MODE OPERATOIRE USB Sur le panneau avant de l’unité, une interface USB (16) est présente. Vous pouvez brancher une clé USB via cette interface (16). Lorsque vous raccordez une clé USB à l’interface, l’unité recherche les fichiers MP3 et WMA dans l’équipement USB et lance la lecture des fichiers MP3 ou WMA automatiquement. 80 MODE OPERATOIRE Sous un autre mode, vous pouvez également appuyer sur la touche MOD (5) pour sélectionner le mode USB. tous les fichiers du CD dans l’ordre aléatoire, “S-SHF” s’affiche. Appuyez sur la touche à nouveau pour annuler la fonction, “S-SHF” disparaît. Pressez et maintenez enfoncée la touche SHF (9) pendant 2 secondes pour lire tous les fichiers (du répertoire sélectionné) dans l’ordre aléatoire. “S-SHF” s’affiche. Appuyez sur la touche à nouveau pour quitter ce mode. SELECTION DE PISTES Appuyez sur la touche / (1) pour accéder au fichier précédent/suivant. Le numéro de fichier s’affiche. Pressez et maintenez enfoncée la touche / (1) pour effectuer une avance rapide/rembobinage. La lecture du fichier démarre lorsque vous relâchez la touche. FONCTION ESP L’unité offre une protection contre les chocs pour une période de lecture de fichiers MP3 /WMA de 70 secondes. MISE EN PAUSE DE LA LECTURE Appuyez sur la touche PAU (10) pour mettre la lecture en pause, “Pause” s’affiche. Appuyez sur la touche à nouveau pour reprendre la lecture, “Pause” disparaît. SELECTION DU REPERTOIRE Appuyez sur la touche DIR- (8) ou DIR+ (15) pour sélectionner le répertoire précédent ou suivant. Lorsque le disque USB ne contient aucun répertoire, appuyer sur la touche DIR- (8) ou DIR+ (15) n’a aucun effet. APERCU DES PISTES Appuyez sur la touche SCN (12) pour lire les premières secondes de chaque fichier, “Recherche” s’affiche. Appuyez sur la touche à nouveau pour arrêter le mode Intro et écouter un fichier, “ Recherche ” disparaît. Pressez et maintenez enfoncée la touche SCN (12) pour lire les premières secondes de chaque fichier dans le répertoire sélectionné, et “D-SCN” s’affiche, appuyez à nouveau sur cette touche pour quitter ce mode. SELECTION DE PISTES REPETITION D’UNE PISTE Appuyez sur la touche RPT (13) pour activer la répétition du même fichier, “S-RPT” s’affiche. Appuyez sur la touche à nouveau pour arrêter la répétition, “S-RPT” disparaît. Pressez et maintenez enfoncée la touche RPT (13) pour répéter tous les fichiers du répertoire sélectionné. “D-RPT” s’affiche. Appuyez sur la touche à nouveau pour quitter ce mode. LECTURE ALEATOIRE DES PISTES Appuyez sur la touche SHF (9) pour lire 81 � Recherche directe de pistes Appuyez une fois sur la touche AS/PS (Navi-SCH) (20) pour accéder au mode “Recherche directe de pistes”. L’unité recherche la piste sélectionnée par les touches numériques : M1-M6, MOD (5), TUNE/SEEK/TRACK BAS (8), TUNE/SEEK/TRACK UP (9), DSP(0). Lorsque vous sélectionnez trois chiffres, l’unité recherche la première piste. Si vous sélectionnez un ou deux chiffres, l’unité attend la pression de la touche /ENT BND/LOU BND/LOU/ENT pendant quelques secondes. L’unité recherche la piste au bout de quelques secondes, même si vous n’appuyez pas sur la touche Enter. � Recherche de noms de répertoire ou de fichiers Appuyez deux fois sur la touche AS/PS (D-AUD) (Navi-SCH) (20) pour accéder MODE OPERATOIRE au mode “Recherche de nom de fichier ou de répertoire”. L’unité recherche les fichiers et répertoires possédant les caractères identiques saisis par l’utilisateur, appuyez sur les touches correspondantes listées dans le tableau 1 ci-dessous. AS/PS Sélection du mode BND/LOU ENTREE M1 A, B, C, 1 M2 D, E, F, 2 M3 G, H, I, 3 M4 J, K, L, 4 M5 M6 - - � Recherche à partir du répertoire racine Appuyez trois fois sur la touche AS/PS (D-AUD) (Navi-SCH) (20). Recherchez les fichiers et répertoires à partir du répertoire racine via les touches HAUT/BAS. TUNE/SEEK/TRACK HAUT/BAS (l’indicateur D-DIR s’active lorsque le nom est un nom de répertoire). L’écran liste tous les répertoires et musiques disponibles. Sélectionnez les répertoires/musiques désirés en utilisant les touches TUNE/SEEK/TRACK HAUT/BAS et BND/LOU/ENT pour confirmer. Lorsque le titre sélectionné est une musique, la lecture démarre. Lorsque le titre sélectionné est un nom de répertoire, l’écran affiche (‘ ‘), puis - Utilisez la touche TUNE/SEEK/TRACK HAUT/BAS pour lister la totalité des musiques de ce répertoire et sélectionner le titre. - Appuyez sur la touche BND/LOU ND/LOU//ENT pour confirmer et lancer la lecture. - Répétez les étapes précédentes lorsque le titre sélectionné est à nouveau un répertoire. � Recherche à partir du répertoire é sélectionn lectionné Appuyez quatre fois sur la touche AS/PS (Navi-SCH). Recherchez les fichiers ou répertoires depuis le répertoire sélectionné via les touches TUNE/SEEK/TRACK HAUT/BAS HAUT/BAS. (L’indicateur D-DIR s’active lorsque le nom est un nom de répertoire). Le nom M, N, O, 5/répertoire suivant P, Q, R, 6/répertoire précédent MOD S, T, U, 7 REGLAGE/RECHER CHE/PISTE V, W, X, 8 SUIVANTE REGLAGE/RECHER CHE/PISTE Y, Z, ESPACE, 9 PRECEDENTE SELECTION DU APPUYER SEL CARACTERE DROITE DSP _,-,+,0 Le mode opératoire est le suivant : - Utilisez la touche correspondante pour sélectionner un caractère de A à Z, espace, 0 à 9, _, -, +. - Appuyez sur la touche SEL (26) pour confirmer la saisie des caractères. - Appuyez sur la touche BND/LOU ND/LOU//ENT (24) pour lancer la recherche de titre. Lorsque le titre sélectionné est un nom de répertoire, l’écran affiche (‘ ‘), puis - Utilisez la touche TUNE/SEEK/TRACK HAUT/BAS pour lister la totalité des musiques de ce répertoire et sélectionnez le 82 titre. Appuyez sur la touche BND/LOU ND/LOU//ENT pour confirmer et démarrer la lecture. Répétez les étapes précédentes lorsque le titre sélectionné est à nouveau un répertoire. MODE OPERATOIRE du répertoire sélectionné s’affiche pendant une seconde et le nom du fichier en cours de lecture s’affiche (sélectionné). L’utilisateur peut sélectionner le répertoire ou fichier dans le répertoire via les touches TUNE/SEEK/TRACK HAUT/BAS HAUT/BAS. Le fichier sélectionné peut être lu via la touche BND/LOU (ENT) (ENT). standard qui signifie que différentes marques commerciales ou différents modèles possèdent leur propre standard. Aussi notre produit ne peut accepter la totalité des lecteurs MP3. Lorsque vous raccordez un lecteur MP3 et que des piles standards sont installées dans le lecteur (piles non rechargeables), vous devez retirer les piles du lecteur MP3 puis le connecter à l’interface USB. Sinon, les piles risquent d’exploser. � En mode lecture USB, assurez-vous de ne pas enlever la clé USB de l’interface USB. 3) AFFICHAGE DE BALISES ID3 Appuyez sur la touche ID3 (20) pour afficher les balises ID3 (titre, artiste et album). Appuyez sur la touche ID3 (20) pour afficher les balises ID3 (lorsque disponible: titre de la musique, nom du répertoire, nom de l’artiste, autres contenus…) (les balises ID3 sont seulement disponibles avec les fichiers MP3 offrant des informations ID3). ATTENTION Lorsque la clé USB contient d’importants fichiers, ne la connectez pas à l’unité. Des erreurs peuvent causer une perte de fichiers. Notre société ne sera nullement tenue responsable des problèmes résultants du non-respect de cet avertissement. COMPATIBILITE DES CODECS MP3/WMA L’unité prend en charge les modes de codage suivants MP3/WMA (Windows Media Audio) suivants. Standard Débit (kbps) MPEG1 Audio Layer 3 (44.1kHz) Windows Media Audio (44.1kHz) 32,48,64,96, 128,192,256, 320 64,96,128,192 Mode MODE OPERATOIRE POUR LA LECTURE DE CARTES MEMOIRE SD/MMC (OPTIONNEL) Stéréo Stéréo Afin de satisfaire les besoins de l’utilisateur, l’unité dispose désormais d’une interface SD/MMC. Voir le schéma ci-dessous, l’interface SD/MMC est présente sur l’unité. Le mode USB supporte : 1. Un nombre maximal de 500 répertoires. 2. Un nombre maximal de 999 fichiers. 3. 8 niveaux de sous-répertoires 4. Une taille d’espace disque de 2 Go maximale Remarque Remarque: � L’appareil principal n’accepte que les disques standards USB agréé par Microsoft. Le lecteur USB MP3 n’est pas en soi un Lorsque vous insérez une carte SD/MMC 83 MODE OPERATOIRE dans l’interface SD/MMC, l’unité recherche les fichiers MP3 ou les fichiers WMA dans la carte mémoire et démarre automatiquement la lecture des fichiers MP3 ou des fichiers WMA. Le mode opératoire est identique à celui des fichiers MP3 décrit ci-dessus. Vous pouvez aussi appuyer sur la touche MOD (5) pour sélectionner le mode SD/MMC. Lorsque la carte SD/MMC contient beaucoup de fichiers, ne la connectez pas à l’unité. appuyez sur la touche PAU (10) pour mettre en pause la lecture. Appuyez sur la touche à nouveau pour reprendre la lecture. épétition) RPT (R (Ré En cours de lecture d’une musique, appuyez sur la touche REPETITION (12) pour répéter la musique sélectionnée, la répétition de la musique sera effectuée, « S-RPT » s’affiche,. Appuyez à nouveau sur cette touche pour quitter ce mode. Pressez et maintenez enfoncée la touche pendant 2 secondes pour répéter l’album, « D-RPT » s’affiche. Appuyez à nouveau sue cette touche pour quitter ce mode. MODE OPERATOIRE IPOD Après avoir raccordé l’IPOD à l’unité, l’unité démarre automatiquement la lecture du contenu IPOD, “IPOD” s’affiche. Sous un autre mode, vous pouvez également appuyer sur la touche MOD (5) pour sélectionner le mode IPOD. SHF (Shuffle) En cours de lecture d’une musique, appuyez sur la touche SHF (8) brièvement, une fois la lecture de la musique sélectionnée terminée, les musiques de la catégorie sélectionnée sont lues dans l’ordre aléatoire, “SHF” s’affiche. Appuyez à nouveau sur cette touche pour quitter ce mode. Appuyez sur la touche pendant environ 2 secondes pour lire toutes les musiques de l’album, “D SHF” s’affiche. Appuyez sur la touche à nouveau pour quitter le mode Shuffle. égories caté Sélection de cat Lorsque le contenu de l’iPod est en cours de lecture, appuyez sur la touche BND (24) la catégorie s’affiche, appuyez sur la touche / (25) pour modifier la catégorie parmi LISTE DE LECTURE/ARTISTE/ALBUM /GENRE/MUSIQUE/COMPOSITEUR, appuyez ensuite sur la touche SEL (26) pour confirmer la catégorie sélectionnée. Sélection de musiques Appuyez sur la touche BND (24), l’écran affiche le catalogue sélectionné (stocké dans l’iPod). Appuyez sur la touche / (25) pour modifier le titre de la musique de la musique suivante ou la musique précédente. Appuyez ensuite sur la touche SEL (26) pour lire la musique sélectionnée. REGLAGE/PISTE HAUT/BAS En cours de lecture d’une musique, appuyez sur la touche / (1) pour lire la piste suivante/précédente de la catégorie sélectionnée, vous ne pouvez cependant pas accéder à la catégorie suivante. En cours de lecture d’une musique d’une durée supérieure à 3 secondes, appuyez sur la touche pour lire la musique PAU (Pause) En cours de lecture d’une musique, 84 MODE OPERATOIRE depuis la position de départ. En cours de lecture d’une musique d’une durée inférieure à 3 secondes, appuyez sur pour lire la piste précédente. la touche En cours de lecture d’une musique, pressez et maintenez enfoncée la touche / (1) pendant plusieurs secondes pour effectuer une avance rapide/rembobinage sur la lecture. L’écran affiche la durée de lecture (ex. 1’20). 4) Lorsque le pairage est réussi, “CONN OK!” s’affiche à l’écran. 5) En cas d’échec du pairage, “PAIR END” s’affiche à l’écran. Vous pouvez presser et maintenir enfoncée la touche PAIR (5) à nouveau pour tenter le pairage à nouveau. 6) Remarque: durant le pairage, la touche MODE n’a aucune fonction durant le pairage. Durant le pairage, vous pouvez maintenir enfoncée la touche PAIR (5) pour terminer le pairage. MODE OPERATOIRE BLUETOOTH � PREPARATION BLUETOOTH AU PAIRAGE (i) Lors de l’utilisation de la fonction Bluetooth, veuillez vous assurer que le téléphone portable supporte la fonction Bluetooth. En cours de pairage, seule la touche (2), / (volume haut/bas) (25) et MUTE (14) sont actives, les autres touches sont désactivées durant le mode de pairage. (ii) La portée d’utilisation Bluetooth varie selon le téléphone portable utilisé. Pour une qualité de conversation optimale, il est recommandé de maintenir une distance maximale de 3 m entre le téléphone portable et l’unité. Ne placez aucun obstacle ou objet en métal entre le téléphone portable et l’unité. � En cours de pairage, vous pouvez appuyer sur la touche PAIR (5) pour terminer le pairage. � CONNEXION Cette unité dispose d’une fonction de reconnexion intégrée. A chaque courte pression de la touche (4), l’unité se reconnecte automatiquement au téléphone portable (remarque : le téléphone portable doit avoir été lié à l’unité.). PAIRAGE 1) Sous tous les modes, pressez et maintenez enfoncée la touche PAIR(MOD) (5) du panneau avant, « Pairage » s’affiche. Dans les conditions suivantes, vous pouvez effectuer une reconnexion manuelle via la touche RECON (19) pendant quelques secondes, lorsque la reconnexion a été effectuée avec succès, “Conn OK !” s’affiche. 2) Sur le téléphone portable, sélectionnez Paramètres Bluetooth. (Veuillez vous référer au manuel d’utilisation de votre téléphone portable sur le fonctionnement du mode Bluetooth.) 1) Lorsque le téléphone portable hors de portée, la connexion perdue, lorsque vous mettez marche l’unité, la reconnexion nécessaire. 3) “CARBT” s’affiche dans la liste de votre téléphone portable, veuillez sélectionner “CARBT” et saisissez ensuite le mot de passe “0000”. 2) Lorsque le téléphone portable est 85 est est en est MODE OPERATOIRE reçus. trop éloigné de l’unité, et qu’un appel entrant est reçu, la liaison à l’unité est nécessaire lorsque vous souhaitez transférer le son vers l’unité. 3) COMPOSES : Affiche les derniers numéros composés. 4) EN ABSENCE : Affiche les appels en absence. 3) Lorsque vous appuyez sur la touche (2) pour détacher le panneau avant, la connexion est coupée. Lorsque vous installez le panneau avant, vous devez effectuer une reconnexion. 5) REPONSE MANUELLE (réponse manuelle) Vous pouvez définir le mode de réponse sur le mode manuel (REPONSE MANUELLE) ou sur le mode Automatique (REPONSE AUTO). 4) Lorsque vous éteignez le téléphone portable lorsque celui-ci est lié à l’unité, lors de la nouvelle mise en marche du téléphone portable, vous devez effectuer une reconnexion. � En mode de réponse automatique, lorsqu’un appel en cours de réception, le numéro de téléphone s’affiche. L’appel est automatiquement répondu. MENU T Une fois le pairage réussi, brièvement appuyez sur la touche T-MENU (6) du panneau avant pour accéder au menu du téléphone, maintenez enfoncée cette touche ou appuyez sur la touche / (1) pour modifier un élément de ce menu. Les options s’affichent dans l’ordre suivant : PRE NUM/ RECUS / COMPOSES / EN ABSENCE / REPONSE CONVERSATION. MANUELLE En mode REPONSE MANUELLE, Lors d’un appel entrant, le numéro de telephone s’affiche. Vous pouvez appuyer sur la touche (4) pour répondre à l’appel, vous pouvez également appuyer sur la touche (24) pour rejecter l’appel entrant. / 6) CONVERSATION (00~20) Vous pouvez définir l’option bluetooth volume sur CONVERSATION. Si 00 est sélectionné, lors d'un appel entrant. Le niveau de volume principal sera automatiquement défini sur 60. Si vous définissez le volume CONVERSATION sur 20. Le niveau de volume principal sera automatiquement défini sur 100 lors de la réeption d’un appel entrant. Exemple : Volume CONVERSATION Volume principal 00 = 60 Consultez les instructions suivantes pour davantage de détails. Remarque: 1)PRE NUM : Vous pouvez mémoriser 10 numéros de téléphone dans le répertoire. En mode PRE NUM, (25) pour appuyez sur la touche / sélectionner le numéro. Appuyez ensuite sur la touche SEL, saisissez le numéro de téléphone. Appuyez ensuite sur la touche SEL à nouveau pour mémoriser vers le répertoire téléphonique. 2) RECUS : Affiche les derniers appels 86 MODE OPERATOIRE 01 = 62 02 = 64 …………………….. 20 = 100 � téléphone portable et l’unité. Remarque: 1) Lorsque vous transférez l’appel vers le téléphone portable, le mode Muet est activé. PASSER UN APPEL 1) Effectuer un appel sortant depuis NUMEROTATION RAPIDE, LISTE DES APPELS RECUS, LISTE DES NUMEROS COMPOSES, LISTE DES APPELS EN ABSENCE, REPERTOIRE (téléphone portable) et REPERTOIRE (carte SIM) veuillez vous référer à la section T-MENU T-MENU. � 2) Effectuer un appel sortant via saisie manuelle du numéro de téléphone. � Appuyez sur la touche (4) du panneau avant, “APPEL_” s’affiche. Utilisez les touches 0~9, *, # pour saisir le numéro de téléphone que vous souhaitez composer. (Remarque : appuyez brièvement sur AUDIO A2DP) BLUETOOTH (FONCTION L’unité supporte la fonction Audio Bluetooth. Lorsque votre téléphone portable prend en charge le mode audio stéréo et que le pairage est réussi, vous pouvez sélectionner l’équipement lié pour écouter de la musique en stéréo. la touche * pour saisir le caractère “*” , pressez et maintenez enfoncée la touche pour saisir le caractère “+”). Appuyez ensuite sur la touche (4) à nouveau pour appeler le numéro. Remarque : en cas d’erreur de saisie, appuyez brièvement sur la touche 21 CLR (24) pour effacer. Pressez et maintenez enfoncée la touche CLR (24) pour effacer tous les chiffres. � 2) Lors d’un appel sortant, il est impossible de transférer l’appel lorsque le correspondant n’a pas encore décroché. Réinitialisation BT : en mode BT AUDIO. Pressez et maintenez enfoncée la touche BANDE/VOLUME/ pendant plusieurs secondes. Certaines informations bluetooth seront réinitialisées (Les informations RECUS / COMPOSES / EN ABSENCE seront perdues). TRANSFERTS D’APPEL ENTRE LE TELEPHONE PORTABLE ET L’UNITE Lors du mode conversation, vous pouvez appuyer et maintenir enfoncée T-MENU) (6) la touche TRANSFER TRANSFER(T-MENU) pour transférer l’appel entre le 87 Les touches M1, M2 du panneau avant de l’unité fonctionnent comme les touches PAUSE/PLAY et STOP. (Dépend du téléphone portable choisi, chaque téléphone portable possède un mode opératoire différent.) Utilisez la touche / (1) du panneau avant de l’unité pour choisir la piste suivante/précédente. (Dépend du téléphone portable choisi, chaque téléphone portable possède un mode opératoire différent). Remarque : en cours de lecture d’une musique, il est impossible de passer un appel. En cas d’appel entrant, vous pouvez choisir d’y répondre ou non. SPECIFICATIONS GENERAL Alimentation Dimensions du châssis Commandes de réglage du son - Basses (à 100 Hz) - Aigus (à 10 kHz) : CC 12 Volts, mise à la terre : 178 (L) x 160 (l) x 50 (H) : ±10 dB : ±10 dB Puissance de sortie maximale - Version Y : 4x40 watts Intensité - Version Y : 15 Ampères (max.) LECTEUR CD Rapport signal/bruit Séparation des canaux Réponse en fréquence : Supérieur à 55 dB : Supérieure à 50 dB : 40Hz – 18 KHz RADIO Gamme de fréquences IF Sensitivité (S/B=30dB) Séparation stéréo For 2 Bands Europe) FM 87.5 à 108 MHz 10.7 MHz 4μV >25dB Gamme de fréquences IF Sensitivité (S/B=20dB) MW 522 à 1620 KHz 450 kHz 36 dBu 88 DEPANNAGE Avant de lire cette liste, vérifiez les raccordements des câbles. Si le problème persiste une fois que vous avez vérifié la liste suivante, consulter un centre de réparation. ème Probl Problè Impossible de mettre en marche le système. Cause Solution Le contact de la voiture n’est pas démarré. Si l’alimentation électrique est connectée aux circuits accessoires de la voiture, mais que le moteur ne bouge pas, placez la clé de contact sur “ACC”. Le fusible est brûlé. Remplacez le fusible. Température dans voiture trop élevée. Pas de son. Des sauts de lecture intempestifs sont présents. la Laissez refroidir jusqu’à ce que la température ambiante revienne à la normale. Condensation. Eteignez le lecteur pendant une heure environ, puis réessayez. Le volume est au minimum Ajustez le souhaité. Les câbles ne sont pas correctement connectés. Vérifiez les raccordements. L’angle d’installation supérieur à 30 degrés. Ajustez l’angle d’installation afin que celui-ci soit inférieur à 30 degrés. est volume au niveau Le CD est extrêmement sale ou est défectueux. Nettoyez le disque ou essayez d’en lire un autre. Les touches de commandes ne fonctionnent pas. Le microprocesseur intégré ne fonctionne pas correctement dû au bruit. Appuyez sur la touche RESET. Le panneau avant n’est pas correctement fixé. La radio ne fonctionne pas. La sélection automatique de stations radio ne fonctionne pas. Le câble d’antenne n’est pas connecté. Insérez le fermement. Le signal est trop faible. Sélectionnez manuellement. 89 câble une d’antenne station � CS-351 MANUAL DEL USUARIO Sistema de audio móvil éreo con sintetizador PLL esté � Radio est ático de memoria � Guardado autom automá ón RDS � Funci Funció ón Antigolpes Electr ónico (ESP) � Funci Funció Electró � USB e interfaz para tarjetas SD/MMC ón “listo para iPod � Funci Funció iPod”” ón manos libres Bluetooth y transmisi ón de audio � Funci Funció transmisió éreo A2DP (Advanced Audio Distribution Profile) est esté � Panel desplegable extra extraííble ón de entrada auxiliar � Funci Funció ón y apoyo Para obtener informaci informació apoyo,, www.lenco.eu ÍNDICE ón................................................. 92 Instalaci Instalació .................................................92 Montaje frontal DIN (Método A).............. 92 Instalar la unidad................................... 92 Quitar la unidad..................................... 93 Montaje trasero DIN (Método B).............94 .................... 95 Uso del panel frontal extra extraííble ble.................... éctricas ................................. 96 elé ctricas................................. .................................96 Conexiones el Conexión ISO.............................................96 ón de teclas ................................ 97 Ubicaci Ubicació teclas................................ ............................. 98 sicas............................. Operaciones básicas Encendido/apagado de la unidad........... 98 Liberar la carátula..................................... 98 Ajustar el sonido........................................ 98 Sonoridad................................................... 98 Visualización.............................................. 98 Ecualización............................................... 98 Sensor del mando (opcional).................. 98 Función de reinicio.................................... 98 Selección de modo................................... 98 Ajustes de sistema.................................... 98 Entrada auxiliar..........................................99 ......................................... 99 .........................................99 Uso de la radio radio......................................... Seleccionar la banda de frecuencias..................................... 99 Seleccionar una estación.........99 Almacenamiento automático en memoria y búsqueda de programas ......................................................... 99 Búsqueda................................... 99 Guardar estaciones...................99 Uso RDS (Sist. de Datos por Radio)..............................................99 ón USB ................................. 102 Reproducci Reproducció USB................................. Cambiar al modo USB..........................102 Selección de archivos...........................102 Pausar la reproducción........................ 102 Preoír todos los archivos..................... 102 Repetir el mismo archivo..................... 102 Reproducción aleatoria de archivos...102 Seleccionar directorio arriba/abajo.....102 Seleccionar pistas................................. 102 Mostrar información ID3.......................104 ............................................. 105 Uso SD/MMC SD/MMC............................................. .............................................1 USO IPOD .................................................. 105 IPOD.................................................. ..................................................1 .......................................... 106 Uso Bluetooth Bluetooth.......................................... Preparativos para el uso...................... 106 Emparejamiento.................................... 106 Conexión.................................................107 T-menu.................................................... 107 Realizar una llamada............................ 107 Transferir la llamada entre el móvil y la unidad......................................................108 Reinicio BT............................................. 108 Audio Bluetooth (función A2DP)......... 108 ..................................... 109 Especificaciones Especificaciones..................................... ........................ 110 Problemas y soluciones soluciones........................ ........................1 INSTALACIÓN Notas: Elija la ubicación de montaje donde la unidad no interfiera con la conducción del vehículo. Antes de instalar la unidad, conecte los cables temporalmente y asegúrese de que todo esté bien conectado y que la unidad y el sistema funcionen correctamente. Use únicamente las piezas incluidas con la unidad para garantizar una instalación adecuada. El uso de piezas no autorizada podría ocasionar fallos. Consulte con el distribuidor más cercano si la instalación requiere taladrar orificios u otras modificaciones al vehículo. Instale la unidad donde no moleste al conductor y no pueda lastimar al pasajero en caso de una parada repentina, como una parada de emergencia. Si el ángulo de instalación supera 30º horizontales, la unidad podría no ofrecer su rendimiento óptimo. ilustrados a continuación. QUITAR TORNILLOS ANTES DE INSTALAR Antes de instalar la unidad, por favor quite los dos tornillos. MONTAJE FRONTAL DIN (Método A) Abertura de instalación Esta unidad puede instalarse en cualquier salpicadero con una abertura como la siguiente: 53mm 182mm Instalar la unidad Asegúrese de probar todas las conexiones primero, y después realice los siguientes pasos para instalar la unidad. 1. Asegúrese de que esté el vehículo esté apagado, y después desconecte el cable del borne negativo (-) de la batería del vehículo. 2. Desconecte el arnés de los cables y la antena. 3. Pulse el botón liberador del panel frontal y quite el panel de control (véanse los pasos de “Quitar el panel frontal”). 4. Levante la parte superior del anillo exterior y jálelo para sacarlo. 5. Las dos llaves incluidas liberan las salientes de la funda de la unidad para poder sacarla. Inserte las llaves lo más 30 Evite instalar la unidad donde vaya a estar sujeta a temperaturas elevadas, como bajo la luz directa del sol, cerca de aire caliente del calefactor o donde pueda estar sujeta a polvo, suciedad o vibraciones. MONTAJE FRONTAL/TRASERO DIN Esta unidad puede instalarse adecuadamente ya sea de forma frontal (montaje frontal DIN convencional) o de forma trasera (montaje trasero DIN, usando orificios para tornillos roscados en ambos lados de la carcasa de la unidad). Para los detalles, véanse los métodos de instalación 92 INSTALACIÓN parte trasera de la unidad en su lugar. Use los materiales provistos (tuerca hexagonal M5mm y arandela elástica) para unir un extremo de la tira al perno de sujeción de la parte trasera de la unidad. De ser necesario, doble la tira metálica para que quepa en el área de montaje de su vehículo. Entonces use los materiales provistos (tornillo roscador 5x25mm y arandela normal) para unir el otro extremo de la tira metálica a una pieza metálica firme del vehículo debajo del salpicadero. Esta tira también ayuda a garantizar la toma de tierra adecuada de la unidad. Nota: Instale el extremo roscado corto del perno de sujeción en la parte trasera de la unidad y el extremo roscado largo en el salpicadero. posible (con las muescas hacia arriba) en las ranuras adecuadas del medio de los lados izquierdo y derecho de la unidad. Entonces saque la funda deslizándola fuera de la unidad. 6. Monte la funda insertándola en la abertura del salpicadero y despliegue las salientes localizadas en la funda con un destornillador. No todas las salientes podrán hacer contacto, de modo que revise cuáles serán las más efectivas. Despliegue las salientes adecuadas detrás del salpicadero para asegurar la funda en su lugar. 10. Vuelva a conectar el cable al borne negativo (-) de la batería del vehículo. Entonces vuelva a colocar el anillo exterior e instale el panel frontal de la unidad (véanse los pasos de “Instalar el panel frontal”). 7. Vuelva a conectar el arnés de cables y la antena y tenga cuidado de no pinchar cables ni alambres. 8. Deslice la unidad en la funda hasta quedar fija en su lugar. 9. Para asegurar la unidad aún más, use la tira metálica incluida para asegurar la Quitar la unidad 1. Asegúrese de que el vehículo esté apagado, y después desconecte el cable del borne negativo (-) de la batería del vehículo. 2. Quite la tira metálica unida a la parte trasera de la unidad (si está unida). 93 INSTALACIÓN 3. Pulse el botón liberador para quitar el panel frontal. 4. Levante la parte superior del anillo exterior y después jálelo para sacarlo. 5. Inserte ambas llaves incluidas en las ranuras del medio de los lados izquierdo y derecho de la unidad, y después jale la unidad para sacarla del salpicadero. lados. Nota: El anillo exterior, la funda y la tira metálica no se utilizan en el método de instalación B. MONTAJE TRASERO DIN (Método B) Si su vehículo es un Nissan o un Toyota, siga estas instrucciones de montaje. Use los orificios para tornillos marcados T (Toyota) y N (Nissan) ubicados a ambos lados de la unidad para asegurar la unidad a los soportes de montaje para radio de fábrica incluidos con su vehículo. Para asegurar la unidad a los soportes de montaje para radio de fábrica. Alinee los orificios para tornillos del soporte con los orificios para tornillos de la unidad, y apriete los tornillos (5x5mm) en ambos 94 USO DEL PANEL FRONTAL EXTRAÍBLE 2. Cuando los dos lados quede fijos en sus lugares, empuje el panel frontal en la unidad principal. Para extraer el panel frontal 1. Pulse el botón liberador ( ) y el panel frontal se plegará hacia abajo. 3. Nota: Si el panel frontal no queda fijo correctamente, los botones de control podrían no responder al pulsarlos y la pantalla podría no mostrar algunos segmentos. Pulse el botón liberador y vuelva a instalar el panel. 2. Para quitar el panel frontal, levántelo con un ligero ángulo horizontal, y después saque primero el lado derecho seguido del lado izquierdo. Precauciones en el manejo 1. No deje caer el panel frontal. 2. No aplique presión en la pantalla o los botones de control cuando quite o instale el panel frontal. 3. No toque los contactos del panel frontal ni del cuerpo de la unidad principal. Podría resultar en un contacto eléctrico deficiente. 4. Si hay cualquier suciedad o sustancias externas en los contactos, podrán eliminarse con un paño seco y limpio. 5. No exponga el panel frontal a temperaturas altas ni luz solar directa en ningún sitio. 6. Mantenga todo agente volátil (p. ej. benceno, disolventes, insecticidas) alejado de la superficie del panel frontal. 7. No intente montar ni desmontar el panel frontal. 3. Por su cuidado, guarde el panel frontal en la caja de protección incluida inmediatamente después de sacarlo. Para instalar el panel frontal 1. Para instalar el panel frontal, primero inserte el lado izquierdo en la posición correcta y después inserte el lado derecho en su lugar. 95 CONEXIONES ELÉCTRICAS CONEXIÓN ISO 96 FUNCIONAMIENTO ÓN DE TECLAS UBICACI UBICACIÓ 1. / (Botones Sintonizar/Buscar/Pista siguiente/anterior) 2. (botón liberador) 3. Mic 4. (contestar) 5.PAIR/MOD 6.T-MENU/TRANSFER 7.LCD 8. 5 DIR9. 4 SHF 10. 1 PAU 11. Botones de preprogramación 1-6 12. 2 SCN 13. 3 RPT 14. /MUTE 15.6 DIR+ 16. Interfaz USB 17. 9 PTY 18. SCAN 19. 0 DSP/RE-CCN 20. AS/PS/*/+/Navi-SCH 21. 7 AF 22. 8 EQ/TA 23. IR (OPCIONAL) 24. (colgar)/BND/LOUD /CLR 25. / (Botones Subir/Bajar volumen) 26. SEL/MENU 27. Interfaz SD/MMC 28. Botón Eject 29. Botón Reset 30. AUX IN 97 FUNCIONAMIENTO disponibles para seleccionar: OPERACIONES BÁSICAS ENCENDER/APAGAR LA UNIDAD Pulse el botón (14) para encender la unidad. Cuando la unidad esté encendida, pulse y sostenga el botón (14) para apagar la unidad. →FLAT→CLAS→POP M→ROCK→DSP OFF SENSOR DEL MANDO (OPCIONAL) Apunte el mando a distancia al sensor del mando IR (23). Pulse los botones de la unidad de mando para controlar el sistema. ÁTULA LIBERAR LA CAR CARÁ Pulse el botón (2) para separar la carátula extraíble. ÓN DE REINICIO FUNCI FUNCIÓ El botón RESET (29) debe activarse ya sea con un bolígrafo o un objeto metálico delgado. El botón RESET deberá activarse por los siguientes motivos: - Instalación inicial de la unidad una vez completadas todas las conexiones eléctricas. - No sirve ningún botón funcional. - Símbolo de error en la pantalla. Nota: Si pulsa el botón RESET (29), la unidad aún no podrá funcionar, por favor use un bastoncillo de algodón humedecido con alcohol de isopropilo para limpiar la toma del panel frontal. AJUSTAR EL SONIDO /MENU (26) Pulse brevemente el botón SEL SEL/MENU para entrar al modo de ajuste de audio, use /MENU (26) ó el botón SEL SEL/MENU / (1) para seleccionar el modo de ajuste deseado. El modo de ajuste cambiaré en el siguiente orden: Bass/Treble/Balance/Fader/Sub-woof/ON/ OFF(Salir) Pulse brevemente el botón / (25) para ajustar la calidad de sonido hacia arriba o abajo paso a paso, pulsar y sostener el botón / (25) cambiará el sonido rápidamente. Pulse brevemente el botón MUTE (14) para silenciar el audio; púlselo de nuevo para restaurarlo. ÓN DE MODO SELECCI SELECCIÓ Pulse brevemente el botón MOD (5) para cambiar el modo entre: Radio, CD, USB, CARD, IPOD (opcional), AUX y BT Audio. SONORIDAD UD (24) varios segundos Pulse el botón LO LOUD para activar la función de sonoridad; “LOUD” aparecerá en la pantalla LCD. Púlselo varios segundos de nuevo para liberar esta función, despareciendo “LOUD” de la pantalla. AJUSTES DE SISTEMA Pulse y sostenga el botón MENU (26) del panel frontal para entrar al modo de ajustes de sistema. Podrá ajustar las opciones siguientes: BEEP / P-VOL / AREA / HOUR 24H / PCLK Use el botón SEL (26) ó / (1) para seleccionar la opción que quiera cambiar, y use / (25) para cambiar el ajuste correspondiente. 1) BEEP: ON/OFF Para activar/desactivar el pitido al pulsar ÓN VISUALIZACI VISUALIZACIÓ Pulse el botón DSP (19) para cambiar el modo de visualización. ÓN ECUALIZACI ECUALIZACIÓ Pulse el botón EQ (22) brevemente para activar la función de ecualización y seleccionar el modo de audio deseado. Los cinco modos siguientes están 98 FUNCIONAMIENTO ÓN SELECCIONAR UNA ESTACI ESTACIÓ Pulse brevemente los botones / (1) para activar la función de búsqueda automática. Pulse el botón varios segundos hasta que aparezca “MANUAL……” en la pantalla para seleccionar el modo de sintonización manual. Si no se pulsa alguno de los botones en varios segundos, estos volverán al modo de búsqueda rápida mostrándose “AUTO……” en la pantalla. los botones del panel frontal. 2) P-VOL Select P-VOL: El volumen máximo cuando encienda la unidad. Por ejemplo si fija P-VOL en 40 y el valor de volumen es menor de 40 cuando apague la unidad, la próxima vez que encienda la unidad el volumen se mantendrá en el último nivel. Pero si el valor del volumen es mayor de 40 cuando apague la unidad, la próxima vez que encienda la unidad el volumen volverá a 40. / (25). Podrá 3) Area: Use el botón fijar las frecuencias en las frecuencias de Europa o de EE. UU. 4) HOUR 24/12 Podrá seleccionar el formato de hora entre 12 y 24 horas. (En la opción AREA, cuando fije las frecuencias en EUR el formato de la hora cambiará al formato 24 HOUR automáticamente. Cuando cambie las frecuencias de radio a USA, el formato de la hora cambiará a 12 HOUR automáticamente). 5) PCLK ON/OFF: Sin función. ÁTICO EN LA GUARDADO AUTOM AUTOMÁ ÓN DE MEMORIA Y SINTONIZACI SINTONIZACIÓ PREPROGRAMACIONES - Guardado automático en la memoria Pulse el botón AS/PS (20) varios segundos y “SEARCH” aparecerá en el LCD. La radio buscará desde la frecuencia actual revisando la fuerza de señal hasta completarse un ciclo de búsqueda. Entonces las 6 estaciones más fuertes se guardarán en los números de preprogramación correspondientes. - Sintonización de preprogramaciones Pulse el botón AS/PS (20) brevemente para sintonizar una preprogramación. La estación correspondiente número P1~P6 parpadeará en la pantalla LCD. ENTRADA AUXILIAR La unidad puede conectarse con un reproductor de audio portátil usando la toma de entrada AUX IN (30) del panel frontal. Tras realizar la conexión, podrá pulsar el botón MOD (5) del panel frontal para cambiar al modo de entrada AUX IN. BÚSQUEDA Pulse el botón SCAN (18) para entrar al modo de búsqueda; la unidad buscará una estación de frecuencia más alta, permaneciendo en cada estación varios segundos (la frecuencia correspondiente parpadeará 5 veces en el LCD). USO DE LA RADIO SELECCI ÓN SELECCIÓ DE LA BANDA DE FRECUENCIAS En el modo radio, pulse el botón BND (24) brevemente para seleccionar la banda deseada. La banda de recepción cambiaré en el siguiente orden: FM1 / FM2 / FM3 / AM GUARDAR ESTACIONES Tras sintonizar una estación pulse un botón de preprogramación (1-6) varios segundos (hasta oírse un segundo pitido) y la estación actual se guardará en esa posición. USO RDS (SISTEMA DE DATOS POR RADIO) - Fijar el modo RDS 99 FUNCIONAMIENTO Pulse el botón AF (21) y suéltelo inmediatamente para activar y desactivar el modo RDS. Cuando el RDS esté activado, “RDS” parpadeará en la pantalla. - una estación TP cuando la fuerza de campo (señal) de la estación actual sea muy débil, o la estación actual no tenga señal “TP”. (TP tendrá prioridad sobre PI.) b) Modo TA ALARM Cuando se seleccione este modo no podrá activarse ningún modo de resintonización automática. Solo se emitirá el sonido de timbre doble (ALARMA). Por lo tanto, en este modo, la unidad mantiene la estación actual en toda circunstancia. (PI tendrá prioridad sobre TP.) Cuando una estación recién sintonizada no tenga información TP en 5 segundos, se emitirá un pitido. Cuando la información TP se pierda en la estación actual en el tiempo de resintonización, se emitirá el pitido. Cuando la estación recién sintonizada no tenga señal RDS, “PI SEEK” se eliminará un tanto. PI: SOUND/MUTE: Cuando se lleve a cabo el cambio AF en la estación C201, AF puede cambiar 100 MHz, que es el AF no auténtico (donde, distinto PI con mismo AF), es decir “DIP”. Si un coche se mueve adelante y atrás por un área crítica, un fenómeno oscilatorio podría ocurrir debido a que los diferentes códigos PI pueden recibirse del 100 MHz con PI “XXX”. La radio del coche tiene un procedimiento especial para reducir incluso este tipo de situación inevitable. Sin embargo, hay un límite que puede escaparse de este caso serio perfectamente. En ese caso serio, se pueden seleccionar los 2 modos así: Y (17) USO DEL BOTÓN PT PTY 1) Pulsar brevemente el botón PTY (17) hará que se entre al modo PTY SELECT; el nombre del programa se mostrará en el LCD y podrá usar los botones / (25) para seleccionar las opciones y pulsar los botones / (1) para empezar a buscar el programa correspondiente. 2) Pulse y sostenga el botón PTY (17) para entrar al menú RDS; en el menú / (25) para seleccionar las use opciones y pulse los botones / (1) para ajustar las opciones. Tendrá las opciones de ajuste siguientes: TA / PI / RETURN / MASK / EONTA / TAVOL / REG TA TA:: SEEK/ALARM a) Modo TA SEEK: Cuando una estación recién sintonizada no recibe información TP en 5 segundos, la radio sintonizará la siguiente estación que no tenga la misma estación (PI) que la estación anterior, pero que tenga información TP. Cuando la información TP se pierda en la estación actual, transcurrido el tiempo fijado como RETUNE SHORT o RETUNE LONG, la radio iniciará la sintonización de la siguiente estación igual PI. Cuando no se obtenga la estación PI en un ciclo de búsqueda, la radio sintonizará la siguiente estación con información TP. Nota: En el modo TA SEEK, la estación actual puede cambiarse a una estación completamente diferente porque la unidad busca 100 FUNCIONAMIENTO 98 100 90 PI: C201 100 PI: XXX - Modo PI SOUND: Cuando se escuche de vez en cuando el sonido PI distinto (DIP), el sonido DIP se oirá poco tiempo. - Modo PI MUTE: En la misma situación de arriba, un sonido silenciado se escuchará poco tiempo. MASK: DPI/ALL MASK DPI: ocultará Modo únicamente las AF que tenga PI Diferente (DPI). Modo MASK ALL: ocultará las AF que tengan PI Diferente y las señales SIN RDS con fuerza de campo elevada. EONTA: DX/LO (DISTANTE/LOCAL): El propósito de esta tecla es reducir el cambio EON TA no deseado, en donde se recibió información EON TA de la estación actual y la radio cambió a esa estación vinculada EON, pero no pudo recibirse información porque la estación EON vinculado está demasiado lejos de esa área. De modo que la radio se cambia de nuevo a la estación actual. En la operación anterior, el cliente oirá un programa incorrecto o un sonido silenciado un tiempo. Modo EON TA LOCAL Cuando la fuerza de señal de la EON vinculada sea menor del nivel del umbral, la radio no cambiará a esa estación y el cliente apenas podrá oír interferencias. Cuando se seleccione el modo EON TA LOCA, en la pantalla aparecerá “EON TA LO” unos segundos. MODO EON TA DISTANTE El cambio EON TA intenta realizarse por la información de la estación actual. Cuando el modo EON TA DISTANTE se seleccione, “EON TA DX” se mostrará en la pantalla numérica unos segundos. REG (REGIÓN):: OFF/ON Modo REGION ON: Se aplicará cambio AF o PI SEEK en las estaciones que tengan los códigos PI iguales a los de la estación actual. Modo REGION OFF: El código regional en el formato del código PI se ignorará cuando haya cambio AF o PI SEEK. TA-VOLUME: Volumen 30 (el volumen TA predeterminado es 30, podrá ajustarlo de 0 a 100). RETUNE: LONG/SHORT Cuando se pierda la información PI en la estación actual dentro del tiempo de resintonización fijado por RETUNE SHORT (30 seg.) o RETUNE LONG (90 seg.), la radio empezará a resintonizar la siguiente estación PI igual. - áfico Oír anuncios de tr trá El botón TA (22) se usa como sigue: Cuando se pulsa y sostiene varios segundos, alternará entre activar y desactivar el modo TA TA. Cuando el modo TA esté encendido y se transmita un reporte de tráfico: Cuando la unidad esté en el modo CD (MP3), AUX IN o IPOD, cambiará temporalmente al modo de radio. Se cambiará temporalmente a una estación con vínculo EON cuando EON detecte un anuncio de tráfico en ese otro programa. Si el nivel de volumen estaba debajo del umbral, se elevará hasta el umbral. Pero cuando se cambie el nivel de volumen, mayor que el umbral (nivel mínimo de volumen TA TA), se pondrá al último nivel. Cuando el modo TA esté encendido, se encenderá el TA del segmento 101 FUNCIONAMIENTO individual. Cuando se reciba una estación TP, se encenderá el TP del segmento individual. Función de interrupción TA El anuncio de tráfico actual se cancela pulsando esta tecla. Pero el modo TA no se desactivará. Los datos RDS utilizados son PI, PS, AF, TP, TA, EON y PTY. PI: Código de Identificación de Programa El código para identificar programas. PS: Nombre de Servicio de Programa La información del nombre de la estación de transmisión en caracteres alfanuméricos. AF: Frecuencias Alternativas Lista de frecuencias de estaciones que están transmitiendo el mismo programa. TP: Identificación Programa de Tráfico Datos de identificación de una estación que esté transmitiendo información de tráfico. TA: Identificación Anuncio de Tráfico Datos de identificación que muestran si se está o no transmitiendo información de tráfico. EON: Información Mejorada de Otras Redes Información de transmisión en PI, AF, TP, TA, etc., relacionada con redes diferentes de la red usada para la recepción actual. PTY: Código de Tipo de Programa El contenido del programa, como noticias, música ligera, deportes, etc. Uso USB En el panel frontal de la unidad, hay una interfaz USB (16). Podrá conectar una memoria USB usando esta interfaz (16). Cuando conecte una memoria USB usando la interfaz, la unidad buscará los archivos MP3 y WMA de la memoria USB y empezará a reproducir archivos MP3 y WMA automáticamente. Si está en otro modo, también podrá pulsar el botón MOD (5) para seleccionar el modo USB. ÓN DE PISTAS SELECCI SELECCIÓ Pulse el botón / (1) para ir al archivo anterior/siguiente. El número de archivo se mostrará en pantalla. Pulse y sostenga el botón / (1) para retroceder/adelantar rápidamente. La reproducción empezará desde donde suelte el botón. ÓN PAUSAR LA REPRODUCCI REPRODUCCIÓ Pulse el botón PAU (10) para pausar, mostrándose “Pause” en la pantalla LCD. Pulse el botón de nuevo para reanudar la reproducción, desapareciendo “Pause”. PREO PREOÍÍR TODAS LAS PISTAS Pulse el botón SCN (12) para reproducir los primeros segundos de cada archivo, mostrándose “Scan” en la LCD. Pulse el botón de nuevo para detener la introducción y escuchar el archivo, desapareciendo “Scan”. Pulse y sostenga el botón SCN (12) para reproducir los primeros segundos de cada archivo de la carpeta actual, mostrándose “D-SCN”; pulse el botón de nuevo para salir de este modo. REPETIR LA MISMA PISTA Pulse el botón RPT (13) para repetir continuamente el mismo archivo, apareciendo “S-RPT” en el LCD. Púlselo de nuevo para detener la repetición, desapareciendo “S-RPT”. Pulse y sostenga el botón RPT (13) para repetir todos los archivos de la carpeta actual. “D-RPT” aparecerá en el LCD. 102 FUNCIONAMIENTO Púlselo de nuevo para salir de este modo. ÓN REPRODUCCIÓ ALEATORIA DE REPRODUCCI TODAS LAS PISTAS Pulse el botón SHF (9) para reproducir todos los archivos del CD en orden aleatorio, apareciendo “S-SHF” en el LCD. Pulse el botón de nuevo para cancelar la función, desapareciendo “S-SHF”. Pulse y sostenga el botón SHF (9) durante 2 segundos para reproducir todos los archivos (de la carpeta actual) en orden aleatorio. “S-SHF” aparecerá en el LCD. Pulse el botón de nuevo para salir de este modo. no se pulsa el botón Enter. � ÓN ESP FUNCI FUNCIÓ La unidad tiene una función antigolpes de aproximadamente 70 segundos para MP3/WMA. Búsqueda por nombre de directorio o archivo Pulse el botón AS/PS (Navi-SCH Navi-SCH)) (20) dos veces. Entrará al modo de búsqueda por nombre de directorio o archivo. La unidad buscará los archivos y directorios que tengan el mismo carácter introducido por el usuario con los botones correspondientes señalados en la tabla debajo. AS/PS Selección de modo BND/LOU ENTER M1 A, B, C, 1 M2 D, E, F, 2 M3 G, H, I, 3 M4 J, K, L, 4 M, N, O, 5/directorio ABAJO P, Q, R, 6/directorio ARRIBA S, T, U, 7 M5 SELECCIONAR DIRECTORIO ARRIBA/ABAJO Pulse el botón DIR- (8) ó DIR+ (15) para seleccionar el directorio hacia abajo o arriba. Si la memoria USB no tiene ningún directorio, no pasará nada al pulsar el botón DIR- (8) ó DIR+ (15). M6 MOD TUNE/SEEK/TRACK V, W, X, 8 DOWN TUNE/SEEK/TRACK Y, Z, ESPACIO, 9 UP MOVER CARACTERES PUSH SEL A LA DERECHA SELECCIONAR PISTAS � DSP Búsqueda directa de pistas Pulse el botón AS/PS (Navi-SCH Navi-SCH)) (20) una vez. Entrará al modo de búsqueda directa de pistas. La unidad buscará la pista seleccionada por los siguientes botones numéricos directos: M1-M6, MOD (5), TUNE/SEEK/TRACK DOWN (8), TUNE/SEEK/TRACK UP (9), DSP(0). Si selecciona tres dígitos, la unidad inicia la búsqueda inmediatamente. Si selecciona uno o dos dígitos, la unidad /ENT unos esperará el botón BND/LOU BND/LOU/ENT segundos. La unidad buscará la pista después de unos segundos, incluso si _,-,+,0 La explicación a continuación: - Use los botones correspondientes para seleccionar los caracteres A a Z, espacio, 0 a 9, _, -, +. - Pulse el botón SEL (26) para confirmar la introducción de cada carácter. - Pulse el botón BND/LOU ND/LOU//ENT (24) para iniciar la búsqueda por título. En caso de que el título seleccionado sea el nombre de un directorio, la pantalla mostrará (‘ ‘), y después - Use los botones TUNE/SEEK/TRACK UP/DOWN 103 FUNCIONAMIENTO - � � para mostrar todas las canciones de ese directorio y elegir el título. Pulse el botón BND/LOU ND/LOU//ENT para confirmar e iniciar la reproducción. Repita los pasos anteriores si el título recientemente seleccionado es de nuevo un directorio. Búsqueda desde el directorio ra raííz AS/PS ( Navi-SCH Pulse el botón Navi-SCH)) (20) tres veces. La unidad buscará el archivo o directorio desde la raíz con los botones TUNE/SEEK/TRACK UP/DOWN UP/DOWN. (El icono D-DIR se encenderá si el nombre es de un directorio). La pantalla mostrará todos los directorios y canciones disponibles. Seleccione el directorio/canción deseado usando los botones TUNE/SEEK/TRACK UP/DOWN y el botón BND/LOU/ENT para confirmar. Si el título seleccionado es una canción, empezará a reproducirla. Si el título seleccionado es un directorio, la pantalla mostrará (‘ ‘), y entonces - Use los botones TUNE/SEEK/TRACK UP/DOWN para mostrar todas las canciones de ese directorio y elegir el título. - Pulse el botón BND/LOU ND/LOU//ENT para confirmar e iniciar la reproducción. - Repita los pasos anteriores si el título recién seleccionado es de nuevo un directorio. Búsqueda desde el directorio actual Pulse el botón AS/PS (Navi-SCH Navi-SCH)) cuatro veces. La unidad buscará el archivo o directorio desde el directorio actual con los botones TUNE/SEEK/TRACK UP/DOWN UP/DOWN. (El icono D-DIR se encenderá si el nombre es de un directorio). El nombre del directorio actual se mostrará un segundo y el nombre del archivo reproducido actualmente se mostrará (seleccionado). El usuario podrá seleccionar el directorio o archivo en el directorio con los botones TUNE/SEEK/TRACK UP/DOWN UP/DOWN. El archivo seleccionado puede reproducirse pulsando el botón BND/LOU (ENT) (ENT). MOSTRAR INFORMACI ÓN ID3 INFORMACIÓ Pulse el botón ID3 (20) para mostrar la etiqueta ID3 (título, intérprete y álbum). DESCODIFICACI ÓN MODOS DE DESCODIFICACIÓ MP3/WMA ADMITIDOS La unidad principal admite los modos de descodificación MP3/WMA (Windows Media Audio) siguientes: ándar Est Está MPEG1 Audio Layer 3 (44.1kHz) Windows Media Audio (44.1kHz) Velocidad (kbps) 32,48,64,96, 128,192,256, 320 64,96,128,192 Modos admitidos Estéreo Estéreo La interfaz USB admite: 1. Carpetas: 500 máx. 2. Archivos: 999 máx. 3. Profundidad de carpetas: 8 capas 4. Tamaño: 2 GB Nota: � La unidad principal solo puede admitir el estándar USB-disco de memoria admitido por Microsoft. � Reproductor MP3 USB no son estándares que significan que las distintas marcas o modelos tienen su propio estándar. De modo que nuestro producto no admite todos los reproductores MP3. � Cuando conecte un reproductor MP3 y el reproductor tenga una batería normal (no recargable), deberá sacar la batería del reproductor MP3 y después conectarlo al USB en la interfaz USB. De lo contrario podría ocasionar que la batería reviente. 104 FUNCIONAMIENTO � Cuando esté en el modo de reproducción USB, asegúrese de no sacar la memoria USB de la interfaz USB. ÓN PRECAUCIÓ PRECAUCI Cuando el dispositivo USB tenga archivos importantes. No lo conecte a la unidad principal para reproducirlo porque cualquier operación incorrecta podría causar una pérdida de archivos. Y nuestra empresa no se responsabiliza por esto. USO SD/MMC (OPCIONAL) Pos las necesidades del cliente, la unidad tiene añadida una interfaz SD/MMC. Véase abajo, la interfaz SD/MMC está en la carcasa de la unidad. SD/MMC…=Interfaz SD/MMC Cuando inserte una tarjeta SD/MMC en la interfaz SD/MMC, la unidad buscará los archivos MP3 o WMA de la tarjeta y empezará a reproducirlos automáticamente. Las operaciones son iguales que las del funcionamiento MP3 descritas antes. Si está en otro modo, también podrá pulsar el botón MOD (5) para seleccionar el modo SD/MMC. Cuando haya archivos importantes en la tarjeta SD/MMC, no la conecte a la unidad principal para reproducirla. USO IPOD Después de conectar un IPOD a la unidad, la unidad reproducirá el IPOD automáticamente, apareciendo “IPOD” en la pantalla. Si está en otro modo, podrá pulsar el botón MOD (5) para seleccionar el modo IPOD. Seleccionar categor categoríía Cuando se reproduzca un IPOD, pulse el botón BND (24) y la categoría aparecerá en la pantalla. Pulse el botón / (25) para cambiar de categoría entre PLAY LIST/ARTIST/ALBUM /GENRE/SONG/COMPOSER, y después pulse el botón SEL (26) para confirmar la categoría seleccionada. ón Seleccionar canci canció Pulse el botón BND (24), la pantalla mostrará el catálogo actual (guardado en el IPOD). Pulse el botón / (25) para cambiar el título de canción a la siguiente canción o a la anterior. Después pulse el botón SEL (26) para reproducir la canción seleccionada. PAU (pausa pausa)) Cuando reproduzca una canción, pulse el botón PAU (10) para pausar la reproducción. Púlselo de nuevo para reanudar la reproducción. RPT (repetir repetir)) Cuando reproduzca una canción, pulse el botón RPT (12) brevemente para repetir la canción actual, apareciendo “S-RPT” en la pantalla. Púlselo de nuevo para salir de este modo. Pulse el botón alrededor de 2 segundos para repetir el álbum, apareciendo “D-RPT” en la pantalla. Pulse el botón RPT de nuevo para salir del modo de repetición. SHF (barajar) Cuando reproduzca una canción, pulse el botón SHF (8) brevemente y después de 105 FUNCIONAMIENTO reproducir la canción actual hasta el final, las canciones del directorio actual se reproducirán en orden aleatorio, apareciendo “SHF” en la pantalla. Púlselo de nuevo para salir de este modo. Pulse el botón alrededor de 2 segundos para reproducir todas las canciones del álbum, apareciendo “D-SHF” en la pantalla. Púlselo de nuevo para salir del modo aleatorio. unidad. � 1) En cualquier modo, pulse y sostenga el botón PAIR(MOD) (5) del panel frontal y aparecerá “PAIRING” en la LCD. 2) En el teléfono móvil, seleccione el ajuste Bluetooth. (Por favor revise el instructivo del teléfono móvil para saber cómo utilizar Bluetooth.) 3) “CARBT” deberá aparecer en la lista de su teléfono móvil, por favor seleccione “CARBT” y después introduzca la contraseña “0000”. SINTONIZAR/PISTA ARRIBA/ABAJO Cuando reproduzca una canción, pulse el / (1) para reproducir la pista botón anterior/siguiente del directorio actual, pero sin poder entrar a la categoría siguiente. Cuando reproduzca una canción más de 1 segundo, pulsar el botón reproducirá la canción desde el inicio. Cuando reproduzca una canción menos de reproducirá 1 segundo, pulsar el botón la pista anterior. Cuando reproduzca una canción, pulsar y sostener el botón / (1) varios segundos retrocederá/adelantará rápidamente la reproducción. Y la pantalla mostrará el tiempo de reproducción (p. ej. 1’20). 4) Cuando se hayan emparejado con éxito, “CONN OK!” se mostrará en la LCD. 5) Cuando el emparejamiento haya fallado, “PAIR END” se mostrará en la LCD. Podrá pulsar y sostener el botón PAIR (5) de nuevo para volver a intentar el emparejamiento. 6) Nota: Durante el emparejamiento, la tecla MODE no funcionará. Cuando esté emparejando, podrá pulsar y sostener el botón PAIR (5) para cancelar el emparejamiento. USO BLUETOOTH � PREPARATIVOS BLUETOOTH PARA EL USO EMPAREJAMIENTO � RECONECTAR Esta unidad tiene una función integrada de autoreconexión. Cada vez que pulse el botón (4), la unidad se autoreconectará con el teléfono móvil (Nota: El teléfono móvil debe haberse emparejado con la unidad anteriormente). (i) Cuando use Bluetooth, por favor asegúrese de que ambos móviles admitan la función Bluetooth. (ii) La fuerza de emisión Bluetooth varía de acuerdo a los teléfonos móviles. Para obtener la mejor calidad de conversación, se recomienda que la distancia entre el móvil y la unidad no supere 3 m. Y por favor no coloque ningún objeto metálico ni otros obstáculos entre el teléfono móvil y la En las siguientes condiciones podrá reconectar manualmente pulsando el botón RECON (19) varios segundos; cuando la reconexión tenga éxito se mostrará “Conn OK!”. 106 FUNCIONAMIENTO directorio. 1) Si el teléfono móvil está fuera de alcance, la conexión se perderá, cuando vuelva a la unidad, la reconexión será necesaria. 2) RECELVED: Muestra la última llamada recibida. 3) DIALED: Muestra el último número marcado. 2) Cuando el teléfono móvil esté fuera del alcance de la unidad, y haya una llamada entrante, cuando vuelva a la unidad y quiera transferir el audio a la unidad, tendrá que realizar una reconexión. (2) para 3) Cuando pulse el botón liberar el panel frontal, la conexión se interrumpirá. Cuando instale el panel frontal tendrá que realizar una reconexión. 4) Si apaga el móvil que se emparejó con la unidad, cuando encienda el móvil tendrá que realizar una reconexión. � T-MENU Cuando el emparejamiento haya tenido éxito, pulse brevemente el botón T-MENU (6) del panel frontal para entrar al menú de teléfono, siga pulsando este botón o pulse el botón / (1) para cambiar de opción en este menú. Las opciones se mostrarán en la siguiente secuencia: PRE NUM/ RECELVED / DIALED / MISSED / MANUANS / TALK. Para los detalles por favor véanse las siguientes instrucciones. Nota: 1) PRE NUM: Podrá guardar hasta 10 números en el directorio telefónico. En el modo PRE NUM, pulse el botón / (25) para seleccionar NUMBER. Después pulse el botón SEL e introduzca el número telefónico. Después vuelva a pulsar el botón SEL para guardarlo en el 4) MISSED: Muestra las llamadas perdidas. 5) MANU manuales) ANS (contestaciones Podrá fijar el modo de contestación al modo manual (MANU ANS) o automático (AUTO ANS). En el modo de contestación automática, cuando entre una llamada el número telefónico aparecerá en el LCD. La unidad contestará la llamada automáticamente. En el modo MANU ANS cuando entre una llamada el número telefónico aparecerá en la pantalla. Podrá pulsar el botón (4) para contestar la llamada, o pulsar el botón (24) para rechazar la llamada entrante. 6) TALK (00-20) Podrá fijar el volumen Bluetooth en la opción TALK. Si está en 00, cuando entre una llamada el volumen principal se fijará automáticamente en 60. Si fija el volumen TALK en 20, el volumen principal se fijará en 100 automáticamente cuando entre una llamada. Ejemplo: Volumen TALK Volumen princ. 00 = 60 01 = 62 02 = 64 ………………………… 20 = 100 107 FUNCIONAMIENTO � REALIZAR UNA LLAMADA 1) Para realizar una llamada desde SPEED DIAL, RECEIVED LIST, DIALED LIST, MISSED LIST, PHONE BOOK (Mobile Phone) y PHONE BOOK (SIM Card) por favor véase la sección T-MENU T-MENU. • Reinicio BT: En el modo BT AUDIO, pulse y sostenga la tecla BND/LOU/ varios segundos. Alguna información Bluetooth se reiniciará (la información de llamadas recibidas, marcadas y perdidas se perderá). � AUDIO A2DP) 2) Realizar una llamada introduciendo manualmente el número telefónico. Los botones M1 y M2 del panel frontal de la unidad sirven como botones PAUSA/REPRODUCIR y DETENER. (Depende del teléfono móvil, teléfonos móviles diferentes tienen distintas características.) pulsar y sostener el botón introducirá el carácter “+”). Entonces pulse el botón (4) de nuevo para marcar el número. � TRANSFERIR LA LLAMADA ENTRE ÉFONO MÓVIL Y LA UNIDAD EL TEL TELÉ Durante el modo de llamada, podrá pulsar y sostener el botón TRANSFER TRANSFER( T-MENU) (6) para transferir la llamada entre el teléfono móvil y la unidad. ÓN (FUNCI (FUNCIÓ La unidad admite la función de audio Bluetooth. Si su teléfono móvil puede reproducir audio estéreo, cuando el emparejamiento se haya realizado, podrá elegir la unidad emparejada para reproducir música estéreo. Pulse el botón (4) del panel frontal, “CALL_” aparecerá en el LCD. Use los botones 0~9, *, # para introducir el número que quiera marcar. (Nota: pulse brevemente el botón * introducirá el carácter “*”, Nota: Si introduce un número incorrecto, pulsar brevemente el botón CLR (24) lo borrará. Pulsar y sostener el botón CLR (24) borrará todos los números. BLUETOOTH Use el botón / (1) del panel frontal de la unidad para elegir la pista anterior/siguiente. (Depende del teléfono móvil, teléfonos móviles diferentes tienen distintas características.) Nota: Cuando reproduzca música, no podrá realizar ninguna llamada. Cuando haya una llamada entrante podrá elegir contestarla o rechazarla. Nota: 1) Si transfiere la llamada al teléfono móvil, el silenciamiento del modo actual será liberado al mismo tiempo. 2) Cuando realice una llamada, no será posible transferirla si la llamada aún no se ha contestado. 108 ESPECIFICACIONES GENERAL Requisitos de suministro eléctrico Dimensiones de la carcasa Controles de tono - Graves (a 100 Hz) - Agudos (a 10 kHz) : DC de 12 voltios, tierra negativa : 178 (An.) x 160 (F.) x 50 (Al.) : ±10 dB : ±10 dB Potencia máxima de salida - Versión Y : 4x40 vatios Drenaje de corriente - Versión Y : 15 amperios (máx.) REPRODUCTOR CD Relación señal/ruido Separación de canales Respuesta en frecuencia : Más de 55 dB : Más de 50 dB : 40Hz – 18 kHz RADIO Gama de frecuencias IF Sensibilidad (S/N=30dB) Separación estéreo Para 2 bandas Europa) FM 87.5 a 108 MHz 10.7 MHz 4μV >25dB Gama de frecuencias IF Sensibilidad (S/N=20dB) MW 522 a 1620 kHz 450 kHz 36 dBu 109 PROBLEMAS Y SOLUCIONES Antes de revisar el cuadro, revise las conexiones de los cables. Si alguno de los problemas persiste después de revisar el cuadro, consulte a su distribuidor de servicio más cercano. Síntoma Causa Soluci ón Solució El coche está apagado. Si el suministro eléctrico está conectado a los circuitos accesorios del coche, pero el motor no está andando, mueva la llave de contacto a “ACC”. El fusible se fundió. Cambie el fusible. La temperatura interior del coche está demasiado alta. Enfríe o espere hasta que la temperatura ambiente vuelva a la normal. Condensación. Deje el reproductor apagado alrededor de una hora, y vuelva a intentarlo. Volumen mínimo. Ajuste el volumen al nivel deseado. Las conexiones no están bien hechas. Revise las conexiones cables. El ángulo de instalación excede 30 grados. Ajuste el ángulo de inclinación a menos de 30 grados. El disco está extremadamente sucio o está defectuoso. Limpie el disco compacto y después intente reproducir uno nuevo. Las teclas de funcionamiento no sirven. El microordenador integrado no está funcionando correctamente debido a ruido. Pulse el botón RESET. El panel frontal no está bien insertado. La radio funciona. selección automática estaciones radio funciona. El cable de la antena no está conectado. Inserte bien el cable de la antena. Las señales demasiado débiles. Seleccione manualmente. No enciende. No hay sonido. El brinca. sonido no La de de no están 110 una de los estación