1
5
4
6
English
3
Deutsch
2
1
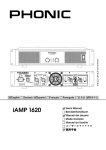
Congratulations on your purchase of another great Phonic product.
The iAMP1620 and iAMP3020 were carefully designed so as to
provide phenomenal power in a low-weight, easily-manageable
construction that is rack-mountable. Phonic combines its revolutionary D-class amplifier technology with stable, reliable power
supplies for fantastic amplification even under the most rigorous
of conditions.
1.
Gain Controls
These controls adjust the incoming level received by the respective channel 1 and channel 2 input jacks on the rear of the iAMP.
It is idea to set these controls to the right-most position to allow
optimal use of the incoming signal whenever possible.
Various operation modes are available on each channel, providing users with an easy way to use the iAMP with subwoofers or
mid-high frequency speakers without additional gear. Combination inputs were included allowing for more versatile input, while
professional-standard speakon output connectors are included for
connection to speakers. The iAMP further offers ¼” thru jacks to
daisy-chain the input signal into further amplifiers.
FEATURES
• Innovative class D amplification circuitry
• Independent fourth-order Linkwitz-Riley crossover
• Convenient combo jacks accepting ¼” and XLR inputs
4.
Clip LED
The Clip LED will light up just prior to the clipping of the output
signal, giving users a clear way to know whether to lower the
Gain controls to reduce the outgoing signal. A steady flashing or
constant illumination will require attention by the user, whereas an
occasional flash doesn’t necessarily indicate immediate issues.
5.
Power LED
This LED will light up when the iAMP is turned on.
6.
Power Switch
This switch is used to activate and deactivate the iAMP. Be sure
to power on all input devices, including mixers and/or signal processors before turning the iAMP on, and ensure the iAMP is the
first device you turn off.
• Detented front panel input gain controls
日本語
• Each channel runs 1600 or 3000 Watts of power into 2 ohms
3.
Level LEDs
These LEDs will illuminate when the output level of the iAMP
reaches the levels indicated, -20 and -10 dB. For best results, set
the Gain controls to a level that lets the -20 indicator flash steadily.
Português
We know how eager you are to get started – getting the amp out
and hooking all your gear up is probably your number one priority right now – but before you do, we strongly urge you to take
a look through this manual. Inside, you will find important facts
and figures on the set up, use and applications of your brand
new iAMP. Remember that safe operation of an amplifier is of the
utmost importance, so we strongly recommend that users heed
all warnings and instructions listed in this manual.
2.
Signal LED
These LED indicators will light up whenever the iAMP produces a
signal through the corresponding input channels, equal to about
4 volts RMS.
Français
FRONT PANEL
Español
INTRODUCTION
• Independent ¼” thru jacks for expanded operation
简体中文
• 4 pole professional speaker twist lock outputs
• Full range of safety circuits for full protection
iAMP1620 / iAMP3020
1