Transcript
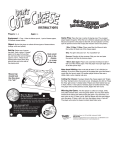
ACD-102 User manual
OPERATING
INSTRUCTIONS
BATTERIES CHECK:
For good safety practice, it is recommended to check the
batteries regularly before any testing to be taken.
To test the batteries:
1.) Just press the Sensor button.
2.) Observe the LED indicator.
3.) If the green LED indicator is on brightly, the batteries in the
unit are sufficient for testing
4.) Replace batteries when LED shows a weak indication
TESTING THE A.C VOLTAGE:
To use; bring the sensor with the sensing tip in contact with any
section of insulated AC wire or cord as close as possible or
inserting the sensing tip to wall outlet slots. If the GREEN LED
lights brightly and the buzzer sounds along with the RED LED
flashing. This indicates "there is a hot AC line".
MODE
D'EMPLOI
PILES VERIFIENT:
Pratiquez pour bonne sécurité, iI est recommande vérifier les
piles régulièrement auparavant de I'essai est pris
Tester les piles:
1.) Seulement presse la sonde boutonne.
2.) Observe les DEL indicateurs.
3.) Si Ie vert à DEL indicateurs sont allumée, les piles dans
I'unité sont suffisant pour I'essai.
4.) Replacez des piles quand DEL montre une indication faible.
ESSAI LE VOLTAGE ALTERNATIF COURANT
Utilise; Apporte la sonde avec la pointe du sent dans contact
avec toute section d'étanche alteme le fil du courant ou corde
mince aussi proche que possible ou insère la pointe du sent
murer entailles du débouche. Si la VERT DEL des lumières
brillamment et I'interphone sonne avec le ROUGE DEL le
clignotement. Celui-ci indique "Il y a unfil vivant".
CHECK FOR DEFECTIVE UNIT:
To check; bring the sensor with the sensing tip in contact with
any section of insulated AC wire or inserting the sensing tip to
wall outlet slots which is known having LIVE AC . The unit is not
working properly if the GREEN LED lights brightly, the RED LED
is on but buzzer is not sounding or the RED LED does not flash
but the buzzer is sounding.
VERIFIER POUR UNITE DU DEFECTION
CHANGING BATTERIES:
PILES CHANGEANTES :
1.) Unscrew three (3) screws carefully from the bottom of the
unit by suitable “Phillip” head screwdriver.
2.) Place the unit in upright position.
3.) Insert two (2) "AAA" size batteries into the battery
compartment with the proper polarity as shown.
4) Carefully place the bottom case onto the unit, insert the
screws and tighten them.
1.) Devissez trois vis du fond de I'unité par utiliser un tournevis
de la tête du ”Phillip” convenable.
2.) Endroit I'unité dans place droite
3.) Encart deux “AAA” piles de la dimension dans le
compartiment de la pile avec la polarité adéquate comme
montre
4.) Avec soin endroit le cas du font sur I'unité, encart les vis et
serre.
NE SERREZ PAS TROP DE !
DO NOT OVERTIGHTEN!
PERFORMANCE NOTES:
1.) Static electricity may generate by nibbling the sensor thus
cause false reading (indication).
2.) Use only low AC lines (95 VAC to 600 VAC).
3.) The unit can not detect AC voltage in a highly insulated cord
or any line shielded by metal armor, conduit or braid.
4.) The unit does not detect Ground line in 120 VAC or 220 VAC
circuit.
Vérifier; Apporte la sonde avec la pointe du sent dans contact
avec toute section de fil étanche ou insère la pointe du sent
dans le débouche du mur taille une fente qui est su a CA vivant.
L'unité ne travaille pas correctement si le VERT DEL des
lumières brillamment, le ROUGE DEL est sur mais interphone
ne sonne pas ou le ROUGE DEL amené ne jette pas des
éclairés mais I'interphone sonne.
NOTES DELA PERFORMANCE:
1.) Electricite statique peut produire par frotter la sonde, donc
cause une lecture fausse (indication).
2.) Utilise seules lignes du CA basses (95 Vc.a. à 600 Vc.a.).
3.) L'unité ne peut pas détecter le voltage du CA dans une
corde mince très étanche ou toute ligne a protége par armure
de métal, conduit ou tresse
4.) L'unité ne détecte pas la ligne de la terre dans 120 V c.a. or
220 Vc.a. circuit.
MOUPIC TELECOM INC.
Unit 112, 3070 Norland Avenue
Bumaby, B.C., V5B 3A6
Made in Canada / Fabrique au Canada
http://www.moupic.com