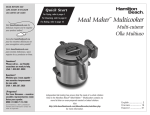
1
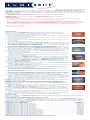
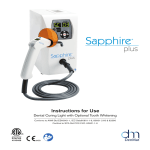
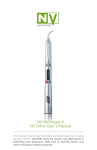
LUMIBRITE Chairside Whitening is designed to comfortably and quickly whiten patients’ teeth. The combination of
LUMIBRITE desensitizing enhancer and LUMIBRITE whitening gel reduces chairtime required for effective whitening
compared to traditional chairside bleaching treatments. This kit contains enough material to whiten both the upper and lower
arches of one patient.
The LUMIBRITE Chairside Whitening kit is for in-office use only.
STORAGE: Store the LUMIBRITE whitening gel syringe in the refrigerator.
WARNINGS:
• Product contains both strong oxidizing and alkaline agents and can cause chemical burns. Wear protective gloves and
eyewear during preparation and application.
• Avoid contacting soft gingival tissue with both the desensitizing enhancer and whitening gel. Using the Paint-On
Dental Dam included in the kit will shield gingival tissue from these materials. Vacuum LUMIBRITE whitening gel off
teeth as instructed before rinsing with water to prevent splattering. Should gel come in contact with soft tissues, rinse
thoroughly to dilute.
• Material is not for injection.
• Keep out of the reach of children.
INSTRUCTIONS FOR USE:
Remove the LUMIBRITE whitening gel syringe from the refrigerator and allow it to come to room
temperature for about 30 minutes before it is used.
1.
Prophy teeth to remove calculus and extrinsic stains before beginning the whitening treatment.
2.
Take “before” photographs and record tooth color using a shade guide arranged in bleaching order.
3.
Insert cheek retractors. Have the patient bite down and rest tongue on a tongue block.
4.
Air-dry the gingival tissue and teeth.
5.
Using the dispensing tip, apply Paint-On Dental Dam to the gingiva to isolate gums around the
selected teeth. Overlap the dental dam onto the gingival tissue of adjacent teeth (about 0.5 mm) and
light-cure for 1–2 seconds per tip width with a Sapphire® Plus Plasma Arc Curing (PAC) light.
6.
Once the Paint-On Dental Dam is cured, apply Lip Moisturizer provided in the kit to the lips and
mucosa, applying well beyond the vermillion border.
7.
Remove the tip from the end of the LUMIBRITE desensitizing enhancer recappable syringe and
dispense a portion of the LUMIBRITE desensitizing enhancer into a dappen dish. Apply in a very thin
(about 0.2 mm) layer on the labial surface of the teeth using the brush applicator provided in the kit and
allow to sit for one minute. Wipe off any excess. Firmly recap the LUMIBRITE desensitizing
enhancer syringe.
8.
STEP 2
STEP 5
Prepare the auto-mix syringe.
- Align the wedge-shaped key on edge of the static mixer housing with the opening in the syringe flange.
- Push the static mixing tip onto the syringe and turn 90° clockwise until it stops.
9.
STEP 7
Dispense a portion of the LUMIBRITE whitening gel into separate dappen dish. Use the brush
applicator to apply a 1–1.5 mm layer onto the labial surface of the teeth. Distribute the gel evenly over
the teeth treated in Step 7 with the LUMIBRITE desensitizing enhancer. Agitate to mix LUMIBRITE
desensitizer and LUMIBRITE whitening gel.
10. Install a sanitized Sapphire Whitening Crystal in place of the curing tip on the end of the Sapphire
Plus PAC light pistol.
11. Position the Sapphire Whitening Crystal close to and directly in front of the teeth, using a
combination of the articulating arm and chair adjustments.
STEP 9
Center the Sapphire Whitening Crystal 1/4 to 1/2 inch from the teeth within the cheek retractor
with the outer edges touching (if possible).
12. Press the Optional button on the Sapphire Plus PAC light keypad, then press 2 to select
bleaching mode.
The letters bL (bleach) will appear in the Program window, the number 60 will appear in the seconds
window and 60 minutes will appear on the pistol handle.
13. Press the Start or pistol activator button to start the bleaching process.
STEP 10
The number 60 (minutes) appears in the Program window and seconds begin to count down in the
Seconds window. When the Sapphire light beeps, fifteen (15) minutes have elapsed. Check on the
comfort of the patient. After the second beep, 30 minutes have elapsed.
14. Move the Sapphire Whitening Crystal away from the teeth. Leave the Paint-On Dental Dam in place
and vacuum gel from the teeth. Wipe with gauze and rinse the teeth while suctioning. Avoid splatter.
Some patients with heavy discoloration or areas of unseen hypocalcification may need another
30-minute session to achieve desired whitening results. Evaluate the results with the patient,
if possible.
Note: In some cases you may have attained acceptable whitening in the first 30-minute session. If so, a
second session is not indicated.
Note: In some cases, it may be necessary to peel away the Paint-On Dental Dam to make a shade
determination. If the Paint-On Dental Dam is removed and another 30-minute application is indicated,
remember to reapply the Paint-On Dental Dam to protect the gingival tissue.
15. If another 30-minute session is desired, reapply both desensitizing enhancer and whitening gel
following instructions beginning with Step 7.
Note: Be sure to inspect the Paint-On Dental Dam for any cracking or lifting before re-applying the
desensitizing enhancer and whitening gel. If the seal has broken from the tissue, it is recommended to
remove and replace the Paint-On Dental Dam and begin with Step 4.
STEP 12
STEP 15
16. At the end of the second 30-minute session, vacuum gel from the teeth, wipe away with gauze and
rinse the teeth while suctioning. Avoid splatter.
17. Use a shade guide arranged in bleaching order to compare the color of the whitened teeth to the
original shade recorded in Step 2 and take “after” photographs.
STEP 16
STORAGE
Store the LUMIBRITE whitening gel syringes under refrigeration. Bring to room temperature before use.
BLEACHING WITHOUT THE SAPPHIRE® PLUS PAC LIGHT
Whitening will also occur, to a lesser extent, if a Sapphire Plus PAC light is not used. Follow instructions above, disregarding use
of the Sapphire Whitening Crystal; maintain gel on teeth as indicated, for the periods described. However, for maximum results, use
of the Sapphire PAC light with Whitening Crystal is recommended.
SUPPLEMENTAL PRODUCTS
ITEM NUMBER
LUMIBRITE Take-Home Whitening Kit 16% Fruit . . . . . . . . . . . . . . . . . . . . . . . . . . . . . . . . . . . . . . . . . . . . . . . . . . . . . . . . 034369145
LUMIBRITE Take-Home Whitening Kit 16% Mint . . . . . . . . . . . . . . . . . . . . . . . . . . . . . . . . . . . . . . . . . . . . . . . . . . . . . . . . 034359145
LUMIBRITE Take-Home Whitening Kit 22% Fruit . . . . . . . . . . . . . . . . . . . . . . . . . . . . . . . . . . . . . . . . . . . . . . . . . . . . . . . . 034349145
LUMIBRITE Take-Home Whitening Kit 22% Mint . . . . . . . . . . . . . . . . . . . . . . . . . . . . . . . . . . . . . . . . . . . . . . . . . . . . . . . . 034339145
LUMIBRITE Take-Home Whitening Kit 32% Fruit . . . . . . . . . . . . . . . . . . . . . . . . . . . . . . . . . . . . . . . . . . . . . . . . . . . . . . . . 034239145
LUMIBRITE Take-Home Whitening Kit 32% Mint . . . . . . . . . . . . . . . . . . . . . . . . . . . . . . . . . . . . . . . . . . . . . . . . . . . . . . . . 034139145
LUMIBRITE Take-Home Whitening Kit 16% Fruit Refill . . . . . . . . . . . . . . . . . . . . . . . . . . . . . . . . . . . . . . . . . . . . . . . . . . . . 034368725
LUMIBRITE Take-Home Whitening Kit 16% Mint Refill . . . . . . . . . . . . . . . . . . . . . . . . . . . . . . . . . . . . . . . . . . . . . . . . . . . . 034358725
LUMIBRITE Take-Home Whitening Kit 22% Fruit Refill . . . . . . . . . . . . . . . . . . . . . . . . . . . . . . . . . . . . . . . . . . . . . . . . . . . . 034348725
LUMIBRITE Take-Home Whitening Kit 22% Mint Refill . . . . . . . . . . . . . . . . . . . . . . . . . . . . . . . . . . . . . . . . . . . . . . . . . . . . 034338725
LUMIBRITE Take-Home Whitening Kit 32% Fruit Refill . . . . . . . . . . . . . . . . . . . . . . . . . . . . . . . . . . . . . . . . . . . . . . . . . . . . 034238725
LUMIBRITE Take-Home Whitening Kit 32% Mint Refill . . . . . . . . . . . . . . . . . . . . . . . . . . . . . . . . . . . . . . . . . . . . . . . . . . . . 034138725
MSDS SHEETS ARE AVAILABLE AT www.denmat.com
©2012 DenMat Holdings, LLC • Lompoc, CA 93436 USA 752391560 10/12DO
blanchiment au fauteuil
Le système de blanchiment au fauteuil LUMIBRITE Chairside Whitening est conçu pour permettre un blanchiment
confortable et rapide des dents des patients. L’utilisation combinée de LUMIBRITE desensitizing enhancer et de
LUMIBRITE whitening gel assure un blanchiment efficace nécessitant moins de temps de traitement au fauteuil que les
traitements classiques. Ce kit contient suffisamment de produit pour permettre le blanchiment des dents supérieures et
inférieures d’un patient.
Le LUMIBRITE Chairside Whitening Kit doit être exclusivement utilisé en cabinet dentaire.
ENTREPOSAGE : Conserver la seringue de LUMIBRITE whitening gel au réfrigérateur.
AVERTISSEMENTS :
• Ce produit contient des agents oxydants et alcalins puissants susceptibles de provoquer des brûlures chimiques.
Porter des gants et des lunettes de protection lors de la préparation et de l’application.
• Éviter tout contact entre le tissu gingival mou et les produits Desensitizing enhancer et whitening gel. L’utilisation de
la digue Paint-On Dental Dam comprise dans le kit protège le tissu gingival contre le contact avec ces produits.
En procédant de la manière indiquée, aspirez le LUMIBRITE whitening gel des dents avant de rincer à l’eau pour
éviter les éclaboussures. Si du gel entre en contact avec des tissus mous, rincez abondamment afin de diluer.
• Ne pas injecter ce produit.
• Garder hors de portée des enfants.
MODE D’EMPLOI :
Sortez la seringue de LUMIBRITE whitening gel du réfrigérateur et attendez qu’elle passe à la
température ambiante (une quinzaine de minutes) avant de l’utiliser. Une fois sorties du réfrigérateur,
ces seringues doivent être utilisées dans les deux heures qui suivent.
1. Faites un nettoyage prophylactique des dents pour enlever les calculs et les taches extrinsèques avant
de commencer le traitement blanchissant.
2. Prenez des photos « avant traitement » et notez la couleur des dents en utilisant un guide de teintes
classé par ordre de blanchiment.
3. Insérez des rétracteurs de joue. Demandez au patient de mordre et de laisser sa langue reposer sur
un bloque-langue.
4. Séchez à l’air le tissu gingival et les dents.
5. À l’aide de l’embout applicateur, appliquez du Paint-On Dental Dam sur les gencives afin de les isoler
autour des dents sélectionnées. Faites chevaucher la digue d’environ 0,5 mm sur le tissu gingival des
dents adjacentes et photopolymérisez pendant 1 à 2 secondes par largeur d’embout à l’aide d’une
lampe Sapphire® Plus Plasma Arc Curing (PAC) light.
6. Lorsque le Paint-On Dental Dam est polymérisé, appliquez du Lip Moisturizer (compris dans le kit)
sur les lèvres et muqueuses, en dépassant nettement la limite du vermillon.
7. Enlevez l’embout de la seringue rebouchable LUMIBRITE desensitizing enhancer et faites couler une
partie du produit dans un godet Dappen. Appliquez une très mince couche (0,2 mm environ) sur la
surface labiale des dents à l’aide du pinceau-applicateur compris dans le kit et attendez une minute.
Essuyez tout excédent. Rebouchez bien la seringue de LUMIBRITE desensitizing enhancer.
8. Préparez la seringue automélangeuse.
- Alignez la clavette biseautée du bord du logement du mélangeur statique par rapport à l'ouverture
du rebord de la seringue.
- Fixez l’embout de mélange statique en l'appuyant sur la seringue et en le tournant d’un quart de
tour dans le sens des aiguilles d’une montre.
9. Placez une portion de LUMIBRITE whitening gel dans un autre godet Dappen. Servez-vous du
pinceau-applicateur pour appliquer une couche de 1 à 1,5 mm sur la surface labiale des dents.
Appliquez uniformément le gel sur les dents traitées au LUMIBRITE desensitizing enhancer lors de
l’étape 7. Mélangez le LUMIBRITE desensitizer et le LUMIBRITE whitening gel en agitant.
10. Montez un Sapphire Whitening Crystal désinfecté à la place de l’embout de polymérisation sur le bout
du pistolet Sapphire Plus PAC light.
11. En combinant des réglages du bras d’articulation et du fauteuil, positionnez le Sapphire Whitening
Crystal près des dents, directement en face de celles-ci.
Centrez le Sapphire Whitening Crystal à 0,65 à 1,25 cm des dents à l’intérieur du rétracteur de joues
en faisant toucher les bords extérieurs (si possible).
12. Appuyez sur le bouton Optional (Facultatif) du clavier de la lampe Sapphire Plus PAC light, puis sur
2 pour sélectionner le mode de blanchiment.
Les lettres bL (blanchiment) s’affichent dans la fenêtre Program (Programme), la fenêtre Seconds
(Secondes) indique 60 et la poignée du pistolet indique 60 minutes.
13. Appuyez sur le bouton Start (Démarrer) ou sur le bouton d’actionnement du pistolet pour lancer le
processus de blanchiment.
La fenêtre Program indique 60 (minutes) et le compte à rebours des secondes commence dans la
fenêtre Seconds. La lampe Sapphire light émet un signal sonore au bout de 15 minutes. Vérifiez le
confort du patient. Le deuxième signal sonore indique que 30 minutes se sont écoulées.
14. Éloignez le Sapphire Whitening Crystal des dents. Laissez le Paint-On Dental Dam en place et
aspirez le gel des dents. Essuyez avec de la gaze et rincez les dents tout en aspirant. Évitez
d’éclabousser. Dans le cas de certains patients dont les dents sont très décolorées ou qui présentent
des zones d’hypocalcification dissimulées, une autre session de 30 minutes peut être nécessaire pour
obtenir le blanchiment désiré. Si possible, évaluez les résultats avec le patient.
Remarque : Dans certains cas, la première séance de 30 minutes produit un blanchiment adéquat. Une
deuxième session est alors inutile.
Remarque : Il peut être nécessaire dans certains cas d’enlever le Paint-On Dental Dam pour
déterminer la teinte. Si vous avez enlevé le Paint-On Dental Dam et qu’une seconde application de
30 minutes s’avère souhaitable, n’oubliez pas d’appliquer à nouveau du Paint-On Dental Dam afin de
protéger le tissu gingival.
15. Quand une autre séance de 30 minutes est désirée, appliquez à nouveau les produits desensitizing
enhancer et whitening gel en suivant les consignes données à partir de l’étape 7.
Remarque : Vérifiez que le Paint-On Dental Dam ne s’est pas fissuré ou décollé avant de réappliquer
les produits desensitizing enhancer et whitening gel. Si la digue ne forme plus un joint protégeant le
tissu, il est recommandé d’enlever et de remplacer le Paint-On Dental Dam et de recommencer à partir
de l’étape 4.
16. Au terme de la deuxième séance de 30 minutes, aspirez le gel des dents, essuyez avec de la gaze et
rincez les dents tout en aspirant. Évitez d’éclabousser.
17. Utilisez un guide de teintes classé par ordre de blanchiment pour comparer la couleur des dents
blanchies à la teinte initiale notée à l’étape 2 et prenez des photos « après traitement ».
ÉTAPE 2
ÉTAPE 5
ÉTAPE 7
ÉTAPE 9
ÉTAPE 10
ÉTAPE 12
ÉTAPE 15
ÉTAPE 16
ENTREPOSAGE
Conserver les seringues de LUMIBRITE whitening gel au réfrigérateur. Laisser le produit atteindre la température ambiante de la
salle avant de l’utiliser.
BLANCHIMENT SANS LAMPE SAPPHIRE® PLUS PAC LIGHT
Un blanchiment peut également s'obtenir, dans une moindre mesure, sans utiliser la lampe Sapphire Plus PAC light. Suivez les
consignes en omettant l’emploi du Sapphire Whitening Crystal ; laissez le gel sur les dents de la manière prescrite pendant les
temps indiqués. Afin d’obtenir les meilleurs résultats possibles, il est cependant recommandé de se servir de la lampe Sapphire
Plus PAC light munie du Whitening Crystal.
PRODUITS COMPLÉMENTAIRES
RÉFÉRENCE
LUMIBRITE Take-Home Whitening Kit 16% Fruit . . . . . . . . . . . . . . . . . . . . . . . . . . . . . . . . . . . . . . . . . . . . . . . . . . . . . . . 034369145
LUMIBRITE Take-Home Whitening Kit 16% Menthe . . . . . . . . . . . . . . . . . . . . . . . . . . . . . . . . . . . . . . . . . . . . . . . . . . . . . . 034359145
LUMIBRITE Take-Home Whitening Kit 22% Fruit . . . . . . . . . . . . . . . . . . . . . . . . . . . . . . . . . . . . . . . . . . . . . . . . . . . . . . . 034349145
LUMIBRITE Take-Home Whitening Kit 22% Menthe . . . . . . . . . . . . . . . . . . . . . . . . . . . . . . . . . . . . . . . . . . . . . . . . . . . . . . 034339145
LUMIBRITE Take-Home Whitening Kit 32% Fruit . . . . . . . . . . . . . . . . . . . . . . . . . . . . . . . . . . . . . . . . . . . . . . . . . . . . . . . 034239145
LUMIBRITE Take-Home Whitening Kit 32% Menthe . . . . . . . . . . . . . . . . . . . . . . . . . . . . . . . . . . . . . . . . . . . . . . . . . . . . . . 034139145
LUMIBRITE Take-Home Whitening Kit 16% Fruit (recharge). . . . . . . . . . . . . . . . . . . . . . . . . . . . . . . . . . . . . . . . . . . . . . . . 034368725
LUMIBRITE Take-Home Whitening Kit 16% Menthe (recharge) . . . . . . . . . . . . . . . . . . . . . . . . . . . . . . . . . . . . . . . . . . . . . 034358725
LUMIBRITE Take-Home Whitening Kit 22% Fruit (recharge). . . . . . . . . . . . . . . . . . . . . . . . . . . . . . . . . . . . . . . . . . . . . . . . 034348725
LUMIBRITE Take-Home Whitening Kit 22% Menthe (recharge) . . . . . . . . . . . . . . . . . . . . . . . . . . . . . . . . . . . . . . . . . . . . . 034338725
LUMIBRITE Take-Home Whitening Kit 32% Fruit (recharge). . . . . . . . . . . . . . . . . . . . . . . . . . . . . . . . . . . . . . . . . . . . . . . . 034238725
LUMIBRITE Take-Home Whitening Kit 32% Menthe (recharge) . . . . . . . . . . . . . . . . . . . . . . . . . . . . . . . . . . . . . . . . . . . . . 034138725
LES FICHES MSDS PEUVENT ÊTRE CONSULTÉES À www.denmat.com