1
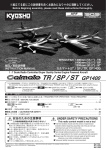
※ご使用前にこの説明書を良くお読みになり充分に理解してください。
Before use, please carefully read the explanations!
R
THE FINEST RADIO CONTROL MODELS
組立/取扱説明書
INSTRUCTION MANUAL
LENGTH : 630mm (25")
RADIO CONTROLLED ELECTRIC POWERED CRUISER
アトランティオ 600
目 次 INDEX
2
●キットの他にそろえる物
REQUIRED FOR OPERATION
●組立て前の注意
BEFORE YOU BEGIN
●プロポの準備
RADIO PREPARATION
●本体の組立て
ASSEMBLY
●ニカドバッテリーの取扱いの注意
PRECAUTIONS WHEN USING A NI-CD BATTERY
●電動ボートの取扱い
HOW TO HANDLE ELECTRIC POWERED BOATS
●スペアパーツ・オプションパーツリスト
SPARE PARTS & OPTIONAL PARTS
安全のための注意事項
この無線操縦模型は玩具ではありません!
●この商品は高い性能を発揮するように設計されていますので組立てに不慣れな方
は、模型を良く知っている人にアドバイスを受け確実に組立ててください。
●組立て作業は、幼児の手のとどかない所で行ってください。
●動かして楽しむ場所は万一の事故を考えて、安全を確認してから責任をもってお楽
しみください。
●組立てた後も説明書がいつでも見られるように大切に保管してください。
Ni-Cd
2∼3
3
4∼21
22
23∼24
24
SAFETY PRECAUTIONS
This radio control model is not a toy.
● First-time builders should seek the advice of experienced modellers before
commencing assembly and if they do not fully understand any part of the
construction.
● Assemble this kit only in places out of children's reach!
● Take enough safety precautions prior to operating this model. You are responsible
for this model's assembly and safe operation!
● Always keep this instruction manual ready at hand for quick reference, even after
completing the assembly.
¥不要になったニカド電池は、貴重な資源を守るために廃棄しないでリサイクル協力店へお持ち下さい。
¥The product you have purchased is powered by a rechargeable battery. The battery is recyclable. At the end of its useful life, under
various national / state and local laws, it may be illegal to dispose of this battery into the municipal waste stream. Check with your local
solid waste officials for details in your area for recycling options or proper disposal.
※製品改良のため、予告なく仕様を変更する場合があります。*SPECIFICATIONS ARE SUBJECT TO CHANGE WITHOUT NOTICE.
© 1999 KYOSHO/禁無断転載複製
No. 40881
REQUIRED FOR OPERATION
キットの他にそろえる物
2チャンネル 2サーボ無線操縦機(プロポ)と電池ボックス
標準以外のプロポを使用する場合
●このキットでは、フタバ製プロポを ベースに説明しています。
Explanations on the radio are based on the FUTABA radio.
●お手持ちのプロポを使用される場合は、下記の<使用できる
サーボ・サイズ>を確認してください。
If using a radio you are in possession of, check the dimensions
of its servos against the diagram below.
2 channel & 2 servo radio for R/C models, and battery box.
With a standard radio
■スティックタイプ2チャンネルプロポ
Stick-type 2 channel radio
<使用できるサーボサイズ>
< Suitable servo dimensions >
約30mm
approx. 30mm
約40mm
approx. 40mm
■電池ボックス
Battery Box
●プロポセットに付いている
ときは必要ありません。
If already supplied with the radio,
there is no need to purchase a
battery box separately.
■7.2Vニカドバッテリー
7.2V Ni-Cd Battery
No.71701
KYOSHO CORPORATION
7.2V充電式ニカドバッテリー
(受信機用)…4
AA-size Batteries
(For Receiver) … 4 pcs.
■充電器
CHARGER
AA
7.5
FUSE
AA
7.5A
WARNING HOT
AA
MADE IN JAPAN
R
WARNING HOT
■単3乾電池(送信機用)…8
AA-size Batteries
(For Transmitter) … 8 pcs.
約20mm
approx. 20mm
DELTA PEAK AUTO-CUTOFF
CH
AR
GE
Ni-Cd BATTERY
*プロポの取扱い方は、プロポに付属の説明書を参考にしてください。
For proper radio handling, refer to its manual.
STA
TOOLS REQUIRED
組立てに必要な工具
■+ドライバー(大、中、小)
■ラジオペンチ
Phillips Screw Driver (L.M.S)
■ハサミ
Needle Nose Pliers
キットに入っている工具
Scissors
TOOLS INCLUDED
■六角レンチ
Hex Wrench
■ボックスドライバー(8mm)
Box Driver (8mm)
■ニッパー
Wire Cutters
■カッターナイフ
Sharp Hobby Knife
RT
■瞬間接着剤
■エポキシ接着剤
Instant Glue
Epoxy Glue
1.5mm
2mm
■十字レンチ
Cross Wrench
Epoxy A
■キリ
Epoxy B
Awl
組立て前の注意(1)
BEFORE YOU BEGIN (1)
1
組立てる前に説明書を良く読んで、おおよその
構造を理解してから組立てに入ってください。
Read through the manual before you begin, so
you will have an overall idea of what to do.
3
説明書に使われているマーク
Symbols used throughout the instruction manual, comprise:
をカットする。
Cut off shaded portion.
2mm
2
x2
2
セットの内容をお確かめください。万一不良、不足があ
りましたら、お買い求めの販売店にご相談いただくか、
当社「ユーザー相談室」までご連絡ください。
Check all parts. If you find any defective or missing parts,
contact your local dealer or our Kyosho Distributor.
2セット組立てる(例)。
Assemble as many times as specified
(here: twice).
グリスを塗る。
Apply grease.
左右同じように組立てる。
Assemble left and right sides the
same way.
番号の順に組立てる。
Assemble in the specified order.
余分をカットする。
Cut off excess.
瞬間接着剤で接着する。
Apply instant glue (CA glue, super glue).
禁止事項(してはいけないこと)。
Do not do that!
2mmの穴をあける(例)。
Drill holes with the specified diameter
(here: 2mm).
エポキシ接着剤で接着する。
Apply epoxy glue.
注意して組立てる所。
Pay close attention here!
仮止め。
Tentatively tighten.
別購入品
Must be purchased separately!
可動するように組立てる。
Ensure smooth non-binding movement
while assembling.
●重要な注意事項があ
るマークです。
必ずお読みください。
Do not overlook this
symbol!
Warning!
BEFORE YOU BEGIN (2)
組立て前の注意(2)
このキットには、形のちがうビスや長さがちがうビス
が多く入っています。原寸図で確かめてから組立てて
ください。ビス類は多めに入っているものがあります
ので、予備としてお使いください。
This kit contains many screws in and other hardware
different metric sizes and shapes. For your reference,
the figures in the manual show actual sizes. (Some
screws are extras.)
4
5
●ビスの種類 Types of screws:
ビス Screw
TPビス
Self-tapping (TP) Screw
セットビス
Set Screw
TPビスは、部品にネジを切りながらしめつけるビス
です。しめこみが固い場合がありますが、部品が確実
に固定されるまでしめこんでください。ただし、しめ
すぎるとネジがきかなくなりますので、部品が変形す
るまでしめないでください。
Self-tapping (TP) screws cut threads into the parts
when being tightened.
Excessive force may
permanently damage parts when tightening TP
screws. It is recommended to stop tightening when
the part is securely attached or when some resistance
is felt after the threaded portion enters the plastic.
●サイズ例 How size of screw is given:
しめすぎ
Overtightened.
3mm
3x12mm ビス
Screw
12mm
RADIO PREPARATION
プロポの準備
ハンドル
Handle
アンテナ
Antenna
スピードコントロール
スティック
Speed Control Stick
CH-2
CH-1
BATT.
スピードコントロール
トリム
Speed Control Trim
スピードコントロール
スティック
電源スイッチ
Speed Control Stick
Switch
●前進、停止の操作は
ラダースティック このスティックでお
Rudder Stick こないます。
For forward movement & stop.
ラダートリム
Rudder Trim
CH-2
2
単3乾電池をセットする。
Install the AA-size batteries.
4
5
CH-1
左
右
BATT.
ラダートリム
スピードコントロールトリム
Rudder Trim
Speed Control Trim
●船がまっすぐ走るように
●船が走り出さないように
このトリムで調整します。 このトリムで調整します。
For adjusting straightline
Adjust so boat will not
running.
speed off at once.
コネクター
Connector
Set up a radio control system as indicated below.
各コネクターを接続する。
Plug in connectors.
CH-2
前
進
BATT.
●プロポを下の順番にしたがってセットします。
1
ラダースティック
Rudder Stick
●左右へ曲がるときの操
作はこのスティックで
おこないます。
For steering (left and
right bends).
CH-1
バッテリーカバー
Battery Cover
3
ビスがきかない
The threads are stripped.
スピードコントロールサーボ
Speed Control Servo
受信機
Receiver
CH.2
CH.1
送信機のアンテナを最後まで引き出す。
縮めて使用すると電波の到達距離が短く
なるので注意する。
Extend the transmitter antenna. If not, the
range of the transmitter will not be sufficient!
受信機のアンテナをほどく。
縮めて使用すると電波の到達距離が短く
なるので注意する。
Undo the receiver antenna. If not, the
range of the receiver will not be sufficient!
送信機の各トリムレバーを中央にする。
Center all trims. (Transmitter)
アンテナ
Antenna
BATT
スイッチ
Switch
コネクター
Connector
6
送信機のスイッチを入れる。
Switch on. (Transmitter)
7
受信機のスイッチを入れる。
Switch on. (Receiver)
9
受信機のスイッチを切る。
Switch off. (Receiver)
8
送信機のスティックを操作しサーボが
作動するか確認する。
Check that the servos move according
to your inputs. (Transmitter)
10
送信機のスイッチを切る。
Switch off. (Transmitter)
11
送信機のアンテナを縮める。
Retract the antenna. (Transmitter)
ラダーサーボ
Rudder Servo
電池ボックス
Battery Box
プロポセットに付属している取扱説明書も
あわせてお読みください。
In addition to this page, read the instruc-tion
manual supplied with your radio as well.
3
ランナー付プラパーツ配置図 / ARRANGEMENT OF PLASTIC PARTS ON RUNNERS
Die Kunststoffteile an den Spritzlingen / Nomenclature des grappes de pièces plastique
Cパーツ
C Parts
C-6
Aパーツ
A Parts
C-4
A-4
A-1
A-1
A-1
C-5
C-1
A-2
C-7
C-8
C-3
A-4
A-3
C-2
D-5
Dパーツ
D Parts
D-3
D-1
D-2
D-4
Bパーツ
B Parts
B-6
B-5
B-6
B-6
B-4
B-4
B-4
B-4
B-4
B-4
B-3
B-3
B-7
B-7
B-2
B-1
部分の部品は、使用しません。
Shaded Parts are not used.
4
A-1
A-5
1
船台
Stand
模様の有る面。
Patterned side.
1
3
2
2
2
船体
Hull
5
4
バリをとる。
Remove the flashing.
3
船体
Hull
2mm x18
バリをとる。
Remove the flashing.
1.5mm
3mm
1.5mm
< 上面
>
< Upper side >
1.5mm
2mm
1.5mm
2.5mm
3mm
< 下面
>
< Lower side >
3mm
1.5mm 2mm
瞬間接着剤で接着する。
Apply instant glue (CA glue, super glue).
左右同じように組立てる。
Assemble left and right sides the same way.
をカットする。
Cut off shaded portion.
2mmの穴をあける(例)。
2mm Drill holes with the specified diameter (here: 2mm).
5
4
キャビン
Cabin
1.5mm
< 上面
>
< Upper side >
2mm
1.5mm
1.5mm
2mm
< 下面
>
< Lower side >
2mm
5
船体
Hull
6
6
すき間が無い様に
接着剤を流す。
Close gaps with
CA adhesive.
5
6
船体
Hull
周囲にすき間が無い様に接着剤を流し込む。
Close gaps with CA adhesive.
C-1
傾かない様
注意する。
Position the
part correctly.
as shown.
瞬間接着剤で接着する。
Apply instant glue (CA glue, super glue).
6
斜線部をカットする。
2mmの穴をあける(例)。
Cut off shaded portion. 2mm Drill holes with the specified diameter (here: 2mm).
エポキシ接着剤で接着する。
Apply epoxy glue.
禁止事項(してはいけないこと)。
Do not do that!
7
塗装
Painting
注意
中性洗剤で油分や汚れを落とし、良く乾
かしてから塗装する。
Clean the hull with mild detergent be fure
painting.
スプレーカラーを使用する場合、缶の説明を良く読んでください。
CAUTION: Before using Kyosho Spray Colors, always read the
explanations!
新聞等を下にしく。
Protect your work area with old newspapers.
空箱等にのせ、安定させる。
Use an empty box to hold the hull steady while you paint.
8
メカボックス
Radio Box
3 x 8mm TPビス
TP Screw
5
コードを出しておく。
Route the servo connector
up and out of the
radio box.
3x8mm
3x8mm
スピードコントロールサーボ
Speed Control Servo
8
3x8mm
7
9
メカボックス
Radio Box
3 x 8mm TPビス
TP Screw
ラダーサーボ
Rudder Control Servo
4
3x8mm
3x8mm
コードを出しておく。
Route the servo connector
up and out of the radio box.
別購入品。
Must be purchased separately!
7
10
メカボックス
Radio Box
9 キャップ
Cap
4
10
10 コードブーツ
Cord Boots
2
9
11 アンテナグロメット
Antenna Grommet
9
1
11
11
メカボックス
Radio Box
9 キャップ
Cap
1
12
12 フレキシブルブーツ(L)
Flexible Boots (L)
12
1
9
9
12
メカボックス
Radio Box
2
15
14
瞬間接着剤で接着する。
Apply instant glue (CA glue, super glue).
8
3 x 16mm TPビス
TP Screw
3x16mm
13
13
プロポの説明書を参考にコネクターを接続する。
Connect refer to radio instruction manual.
スイッチ
Switch
メカボックス
Radio Box
電池ボックス
Battery Box
スイッチ
Switch
はずす。
Remove
受信機
Receiver
アンテナコードを通す。
Thread antenna cord through.
14
メカボックス
Radio Box
17 Oリング P2
O-ring P2
19 Oリング P5
O-ring P5
1
17
1
19
18
スイッチ
Switch
20
ON
OFF
16
ON・OFFの向きを合わせる。
Note the direction.
15
スイッチに付属のビス。
Supplied with the switch.
< オンの場合
>
< ON >
メカボックス
Radio Box
ストッパーでロックさせる。
Lock the switch on using
the stopper.
21
向きに注意。
Note the direction.
22
< オフの場合 >
< OFF >
ストッパー
Stopper
22
注意して組立てる所。
Pay close attention here!
別購入品。
Must be purchased separately!
番号の順に組立てる。
Assemble in the specified order.
9
16
メカボックス
Radio Box
スピードコントロールスティック 中立
With the speed control stick in neutral.
オフ OFF
0.5mm
スピードコントロールスティック 前進
With the speed control stick pushed up.
オン ON
0.5mmのすき間が出来るようにする。
Ensure a gap of 0.5mm.
サーボ付属
Supplied with
the servo.
15mm
17
メカボックス
Radio Box
23 ロッド
Rod
1
サーボ付属
Supplied with the servo.
23
2mm
この穴を使う。
Use this hole.
11mm
90û
23
18
メカボックス
Radio Box
24
24
24
コードの出口にすき間が無い様に
先端付近をしばる。
Fasten the tie wraps securely. Leave no
openings for water to enter the radio box.
をカットする。
Cut off shaded portion.
10
2mmの穴をあける(例)。
2mm Drill holes with the specified diameter (here: 2mm).
別購入品。
Must be purchased separately!
余分をカットする。
Cut off excess.
19
メカボックス
Radio Box
25 スポンジテープ(粗目)
Sponge Tape (Coarse type)
すき間が無い様に貼る。
Apply sponge tape around the
entire rim, leaving no gaps.
20
メカボックス
Radio Box
3 x 8mm TPビス
TP Screw
2
3x8mm
26
26
閉まる。
Close.
3x8mm
21
メカボックス
Radio Box
開く。
Open.
28 2 x 86mm シャフト
Shaft
2
x2
向きに注意。
Note the direction.
27
29
28
可動するように組立てる。
Ensure smooth non-binding movement while assembling.
注意して組立てる所。
Pay close attention here!
x2
2セット組立てる(例)。
Assemble as many times as specified.
11
22
30 8 x 3 x 3.5mm カラー
Collar
メカボックス
Radio Box
上から5番目の目盛に
合わせる。
Aligh with the fifth mark
from the top.
4
3 x 8mm TPビス
TP Screw
4
上から4番目の目盛に合わせる。
Aligh with the fourth mark
from the top.
30
3x8mm
3x8mm
30
23
船体
Hull
31 6mm 防水リング
Waterproofing Ring
30mm
1
1
32
船台の上で作業する。
Work with model mounted on stand.
33
3
31
2
24
モーター
Motor
六角レンチ(1.5mm)
Hex Wrench (1.5mm)
3 x 3mm セットビス
Set Screw
3 x 6mm ビス
Screw
1
2
3x6mm
3x3mm
3x3mm
35
平らな面にセットビスを
固定する。
Firmly tighten the set screw
onto the flat spot.
36
3x6mm
34
矢印の方向に 34 を押しながら固定する。
Push 34 in the direction shown by the arrow. Tighten the screws to hold it in place.
瞬間接着剤で接着する。
Apply instant glue (CA glue, super glue).
12
番号の順に組立てる。
Assemble in the specified order.
グリスを塗る。
Apply grease.
0.5mmすき間をあける。
Ensure a gap of 0.5mm.
左右同じように組立てる。
Assemble left and right sides the same way.
25
モーター
Motor
4 x 4mm セットビス
Set Screw
1
3 x 8mm TPビス
TP Screw
2
六角レンチ(2.0mm)
Hex Wrench (2.0mm)
4x4mm
2
1
3x8mm
4x4mm
2
平らな面にセットビス
を固定する。
Firmly tighten the set
screw onto the flat spot.
26
ラダー
Rudder
3x8mm
38 Oリング P8
O-ring P8
40 Oリング P3
O-ring P3
1
1
39 をラジオペンチではさみ、ねじ込む。
Tighten 39 with needle nose pliers.
40
38
39
37
37
27
ラダー
Rudder
3 x 3mm セットビス
Set Screw
1
4 x 4mm セットビス
Set Screw
2mm
1
ナイロンナット
Nylon Nut
3x3mm
42
41
1
41 リンケージストッパー
Linkage Stopper
2mm
1
使用する袋詰。
Part bags used.
仮止め。
Tentatively tighten.
4x4mm
可動するように組立てる。
Ensure smooth non-binding movement while assembling.
番号の順に組立てる。
Assemble in the specified order.
13
28
ラダー
Rudder
43 スペーサー
Spacer
1
平らな面にセット
ビスを固定する。
Firmly tighten the set
screw onto the flat spot.
43
44
43
29
船体
Hull
2 x 6mm TPビス
TP Screw
A-4
向きに注意。
Note the direction.
4
2.6 x 12mm ビス
Screw
上
Up
下
Down
44
2
2.6mm ナット
Nut
2.6x12mm
2
A-5
2.6x12mm
2.6mm
2x6mm
A-4
十字レンチ
Cross Wrench
2x6mm
30
船体
Hull
2 x 6mm TPビス
TP Screw
B-3
2x6mm
B-4
B-2
2x6mm
B-4
B-2
2x6mm
2x6mm
B-1
印に合わせる。
Aligh with the mark and attach using CA adhesive.
注意して組立てる所。
Pay close attention here!
14
瞬間接着剤で接着する。
Apply instant glue (CA glue, super glue).
6
31
船体
Hull
46 3mm グロメット
Grommet
1
45
B-3
45
1
2
3
47
穴がふさがる様に接着剤を流し込む。
Insert the pulpit, beginning at the stem, or front.
Secure ti in place using CA adhesive.
B-4
B-4
印に合わせる。
Aligh with the mark and
attach using CA adhesive.
32
船体
Hull
印に合わせる。
Aligh with the mark and
attach using CA adhesive.
3 x 10mm TPサラビス
TP F/H Screw
4
40 Oリング P3
O-ring P3
4
1
40
3
3
40
1
2
アンテナコードを通す。
Thread antenna cord through.
4 3x10mm
4 3x10mm
40
番号の順に組立てる。
Assemble in the specified order.
4
瞬間接着剤で接着する。
Apply instant glue (CA glue, super glue).
4
40
5
左右同じように組立てる。
Assemble left and right sides the same way.
同色のコードどうしをつなぐ。
Connect cords of the same
color with each other.
禁止事項(してはいけないこと)。
Do not do that!
15
33
ラダー
Rudder
44
プロポのスイッチを入れ、ラダーサーボ
がニュートラルの時 44 がまっすぐにな
る様に合わせ、セットビスを締め込む。
Switch on the radio. When the rudder
servo is at neutral, 44 should be straight.
Secure it in place with the set screw.
セットビス
Set Screw
34
船体
Hull
C-2を穴に合わせ、デカール 18 を貼った後、
C-2のまわりのデカール 18 をカットする。
Place decal 18 on C-2. Aligh it with the holes,
and cut around C-2.
デカール 18
Decal 18
C-2
この部分のデカールを切り取る。
Drill the holes on the decal.
35
ラダーハッチ
Rudder Hatch
C-3
2.6 x 12mm TPビス
TP Screw
47
C-2
C-4
C-4
C-2
47
C-3
2.6x12mm
2.6x12mm
瞬間接着剤で接着する。
Apply instant glue (CA glue, super glue).
16
2
36
バッテリーホルダー
Battery Holder
カットする。
Cut the double - sided tape.
49 両面テープ
Double-sided Tape
53 スポンジテープ(細目)
Sponge Tape (Fine type)
49
48
49
37
50
38
50 を通してから 48 をこの部分に
合わせて固定する。
Through the band 50 .
Then, place 48 as shown.
バッテリーホルダー
Battery Holder
48
バッテリー
Battery
走行時のみコネクターをつなぐ。
Connect when using the model.
ニカドバッテリー
Ni-Cd Battery
注意して組立てる所。
Pay close attention here!
別購入品。
Must be purchased separately!
17
39
センターハッチ
Center Hatch
3 x 8mm TPビス
TP Screw
3x8mm
51
A-2
A-3
3x8mm
A-1
A-1
40
3x8mm
センターハッチ
Center Hatch
閉じる。
Close.
開ける。
Open.
41
スクリュー
Propeller
3 x 3mm セットビス
Set Screw
1
六角レンチ(1.5mm)
Hex Wrench (1.5mm)
52
3x3mm
3x3mm
平らな面にセットビスを固定する。
Firmly tighten the set screw onto the flat spot.
18
3
42
キャビン
Cabin
2.6 x 12mm TPビス
TP Screw
53 スポンジテープ(細目)
Sponge Tape (Fine type)
すき間が無い様に貼る。
Attach sponge tape without gaps.
2
2.6x12mm
A-1
A-1
4
43
2.6x12mm
キャビン
Cabin
2 x 6mm TPビス
TP Screw
2 x 10mm TPビス
TP Screw
デカール 11
Decal 11
1
デカール 17
Decal 17
デカール 8
Decal 8
B-6
3
2mm
2x6mm
C-5
5mm
2x10mm
デカール 17 を貼り、穴をあける。
Apply decal 17 . Then, drill out the
holes as shown.
44
キャビン
Cabin
C-6
C-8
C-7
瞬間接着剤で接着する。
Apply instant glue (CA glue, super glue).
2mmの穴をあける(例)。
2mm Drill holes with the specified diameter (here: 2mm).
19
45
キャビン
Cabin
2mm
54
2mm
46
キャビン
Cabin
2 x 6mm TPビス
TP Screw
2x6mm
47
キャビン
Cabin
2mm 止め輪
Stopper Ring
1
2x6mm
2 x 6mm TPビス
TP Screw
2
2.6 x 12mm TPビス
TP Screw
B-5
2mm
D-4
D-2
D-3
D-5
2.6x12mm
斜線部をカットする。
Cut off shaded portion.
20
2mmの穴をあける(例)。
2mm Drill holes with the specified diameter (here: 2mm).
4
左右同じように組立てる。
Assemble left and right sides the same way.
2x6mm
2
48
キャビン
Cabin
2.6 x 12mm TPビス
TP Screw
4
2.6x12mm
B-7
2.6x12mm
49
キャビン
Cabin
56 ボディピン
Body Pin
56
2
1
3
1
56
55
曲げる。
Bend
50
カッコの中は反対側用のデカールナンバーです。
The decal numbers between brackets are only for the opposite side.
デカール
Decals
6
ナンバーのついていないデカールは好きな位置に貼る。
Decals with no number apply any place.
7
10
9
10
6
13 ( 14 )
12 ( 15 )
19
2( 1)
5
2( 1)
4( 3)
16
番号の順に組立てる。
Assemble in the specified order.
4( 3)
瞬間接着剤で接着する。
Apply instant glue (CA glue, super glue).
左右同じように組立てる。
Assemble left and right sides the same way.
21
取扱いの注意 OPERATING YOUR MODEL SAFELY
事故やケガ等の危険防止のため、次のことを必ずお守りください。
In order to avoid accidents and personal injury, be sure to observe the following:
●ケガの恐れがあるので回転部分に
手や物を入れないよう充分注意し
てください。
Do not put your hands or any
objects into rotating parts, as this
could result in serious accidents!
●走航直後はモーターやニカ
ドバッテリーなど熱くなっ
ているのでしばらくさわら
ない。また、連続走航はさ
せない。
The motor and Ni-Cd
battery get hot from run-ning. Do not touch them
for a while after running.
●充電中は、ニカドバッテ
リー、充電器ともに発熱
するので燃えやすい物の
上での充電は火災等、事
故の恐れがありますので
おやめください。
Never put the charger and Ni-Cd battery
near flam-mable material while charging as
this may cause fires!
E
TT
BA
●R/Cボートは、湖や河川などの水辺で楽しむものです。
操縦する方や同行の方が思わぬ事故に合わないように
注意し、必ず安全な場所で走航させてください。
With R/C boats, discover a new world of pleasure.
Wheth-er you run your boat on lakes, rivers or elsewhere, take precautionary measures to avoid accidents.
.2
N
iC
7 d
V Ba
tt
e
ry
RY
●次のような場合ショートの原因となり火災等事故の恐れがあり非常に危険です。
Under the following circumstances, short circuits may oc-cur and result in fires or other accidents:
■ニカドバッテリーの分解、改造は絶対にしない。 when disassembling or modifying Ni-Cd batteries.Never do that!
■ニカドバッテリーは有害重金属が使用されています。火中に
投げ入れて破裂すると非常に危険ですので、絶対にしない。
Never dispose of Ni-Cd batteries into a fire, as these can explode
or emit noxious gases from heavy met-als used in Ni-Cd batteries !
POWE
R 1400
7.
2V
破裂危険
EXPLOSIVE
atte
dB
Ni-C7.2V
ry
※不要になったニカドバッテリーは捨てずに販売店にお戻しください。
破裂危険
EXPLOSIVE
Do not dispose of Ni-Cd batteries! Return them to the retail shop!
●次のような時や、次のような場所では絶対に走航させないでください。思わぬ事故やケガの原因となります。
For accident prevention, do not run your model under the following circumstances:
01
人が多い場所。
チェック!
Check!
in places where many people gather!
河川が増水しているとき、また流れが速いとき。
when rivers are swollen or their current is strong!
同じバンドの無線操縦模型がそばにいるとき。
Also make sure that nobody is using the same
frequency as you do at the same time!
プロポの電池残量が少ないとき。
with weak radio batteries!
CH-2
CH-1
05
BATT.
?
?? ?
?
船の動きがおかしい???とき。
when the boat behaves or operates strangely!
走行前のチェック PRE-RUN CHECKLIST
ゆるんでいるビスはありませんか。
プロポの電池はありますか。
ニカドバッテリーの充電はしていますか。
ラダーの動きはプロポの動きとあってますか。
スピードコントローラーの動きはプロポの動き
とあってますか。
走航場所は安全な所ですか。
近くで同じバンドで無線操縦模型をしている人は
いませんか。
ニカドバッテリーは確実に固定されていますか。
スクリューのとりつけは確実ですか。
回転部分にはグリスが塗ってありますか。
可動部分に当たる物はありませんか。
22
Are all screws securely tightened?
Are the radio batteries fully charged?
Is the Ni-Cd battery fully charged?
Does the rudder operate according to your inputs
on the transmitter?
Does the speed controller operate according to your
inputs on the transmitter?
Is the Ni-Cd battery securely attached?
Is the running area safe?
Is nobody on your frequency when running at the
same time in the same area?
Is the propeller securely attached?
Are all rotating parts greased?
Can all moving parts move freely, without binding?
走航手順 PROPER OPERATING PROCEDURES
1
走航用のバッテリーを充電。
Fully charge the Ni-Cd battery.
2
送信機のアンテナをのばす。
Extend the transmitter antenna
3
送信機のスイッチを入れる。
Switch on the transmitter.
CH-2
CH-1
ON
-2
CH
BATT.
BA
.
TT
-1
CH
OFF
4
5
送信機の電池をチェック。
Check the transmitter batteries
CH-2
受信機のスイッチを入れる。
Switch on the receiver
7
6
9
スピードコントローラーがプロポの
スティックの動きとあっているか確認。
Make sure the speed controller operates
according to your inputs on the transmitter.
ON
CH-1
BATT.
ニカドバッテリーのコネクターをつなぐ。
Connect the Ni-Cd battery.
8
ラダーがプロポのスティックの
動きとあっているか確認。
Make sure the rudder operates according
to your inputs on the transmitter.
左
CH-2
CH-1
右
前
進
BATT.
ON
スピードコントローラーがオフである
ことを確認。
Ensure that the speed control servo is in
off position.
CH-2
CH-1
BATT.
走行が終わったら AFTER RUNNING . . .
1
船を回収する。
After finishing running,
collect your boat.
2
受信機のスイッチを切る。
Switch off the receiver.
ニカドバッテリーのコネクター
をはずす。
Disconnect the Ni-Cd battery.
5
船体の汚れ水分をきれいにとる。
Remove dirt from
the hull.
OFF
送信機のスイッチを切る。
Switch off the transmitter.
CH-2
OFF
4
3
CH-1
BATT.
OFF
ON
●走航させない時は、必ず電源スイッチを『OFF』
にし、安全のため必ずニカドバッテリーのコネク
ターを抜き、本体より外しておく。
発熱、発火の原因になります。
When NOT using the model, always
switch off the receiver and transmitter!
Furthermore, disconnect the Ni-Cd
battery and remove it from the model!
This may lead to overheat and fires!
確認する
CHECK
故障かなと思う前に TROUBLESHOOTING
症状 PROBLEM
スピードコントロールサーボが
動かない。
モーターがまわらない。
モーターはまわるが走らない。
スクリューを手でまわすと重い
またはまわらない。
スピードコントロールスティ
ックをはなしても船がとまら
ない。
Speed control servo does
not operate.
Motor does not rotate.
Motor rotates but boat will not run.
When rotating by hand, propeller
feels heavy or does not rotate.
Even when releasing speed
control, boat will not stop.
原因 CAUSE
対策 REMEDY
送、受信機のスイッチがはいっていない。
送信機の電池がない。
配線をまちがえている。
ニカドバッテリーの容量不足。
配線をまちがえている。
コネクターの接触不良。
モーターの故障。
ジョイントがついていない。
または、ビスがゆるんでいる。
回転部分にゴミやホコリがつまっている。
送、受信機のスイッチを入れる。
新しいものに交換する。
プロポの説明書をよく読んでコネクターを
接続する。
ニカドバッテリーを充電する。
説明書をよく読んで配線する。
コネクターのはめこみをきつくする。
モーターを交換する。
ジョイントを止めているビスを
しめる。
ゴミやホコリを取り除きグリスを塗っておく。
リンケージの調整不良。
プロポのトリムで調整する。
このとき、全開に入らないようなら説明書
を読んでリンケージをもう一度調整する。
Switch on.
Replace with new batteries.
Correct as per radio instruction
manual.
Recharge Ni-Cd battery.
Correct as per instruction manual.
Make connectors tighter (e.g. with
minus screwdriver).
Replace with new motor.
Tighten screws holding joint.
Transmitter and/or receiver is not switched on.
Transmitter batteries are weak.
Improper radio installation.
Ni-Cd battery capacity is insufficient.
Improper radio installation.
Loose connectors.
Motor trouble.
Joint is not installed.
Or, screws are loose.
Dirt entered rotating parts.
Improper linkage adjustment.
Clean and regrease.
Adjust speed control trim on transmitter.
Should speed controller not return to
neutral, readjust linkages as per instruction manual.
23
日常の整備
EVERYDAY MAINTENANCE
Make sure screws and nuts are securely tightened
and other parts are not worn.
Grease all rotating parts.
Repair the wiring should cords be damaged or drag
into rotating parts.
Should servo cords and the receiver antenna be
damaged, return them to the manufacturer for repair.
Make sure all parts are neither worn nor damaged.
Remove dirt from the hull.
Draw out water from inside the hull.
ねじ、ナットのゆるみ、老化をチェック。
回転部分にはグリスを塗っておく。
コードが可動部分にこすれたりして破損している
ときは修理する。
サーボのコードや受信機のアンテナ線が破損して
いるときは、使用しているプロポメーカーに修理を
依頼する。
部品が摩耗または破損していないかチェック。
船体の汚れをとる。
船体に入っている水をぬき、よく乾かす。
SPARE PARTS
スペアパーツ
品番
パーツ名
No.
Part Names
AL-1
AL-2
AL-3
AL-4
AL-5
AL-6
AL-7
AL-8
AL-9
AL-10
AL-11
AL-12
AL-13
WF-6
1704
1705
1889
92637
96441
船体
Hull
キャビン
Cabin
ウインド
Windshield
バッテリーホルダー
Battery Holder
プラパーツ
(A)
Plastic Parts (A)
プラパーツ
(B)
Plastic Parts (B)
プラパーツ
(C)
Plastic Parts (C)
プラパーツ
(D)
Plastic Parts (D)
船台
Stand
ラダー
Rudder
ロッドセット
Rod Set
パルピット
Pulpit
デカール
Decal
モーターコード
Motor Cord
ニカドストラップ
Ni-Cd Strap
カラーアンテナ
Color Antenna
ボディピン
Body Pin
Oリング
(P8)
O-ring (P8)
スポンジテープ
(1mm)
Sponge Tape (1mm)
内容(キーNo.と入数) *定価
Description
(Key No. & Qty.)
★FOR JAPANESE MARKET ONLY.
*送料
No.
Part Names
x1
3500
TEL
94450
4
x1
2000
TEL
94722
54 x1
300
130
94731
800
190
94851
Ax1
250
130
94852
Bx1
500
130
94855
Cx1
300
130
94871
Dx1
300
130
94872
700
270
94873
500
130
94874
200
90
94881
2000
130
6
1
48
3
51
x1
x1
2
x2
37 38 39 40 42 43 44
x1
23 41 x1
45
x2
デカール x1
one set
1500
400
130
x6
400
90
55
x6
500
130
x1
56
x5
100
90
38
x5
200
90
49
x12
300
90
防水スポンジテープ
Waterproof Sponge Tape
モーターマウント
Motor Mount
スクリュー
(D34xP0.8)
Propeller (D34xP0.8)
アンテナグロメット
Antenna Grommet
防水フレキシブルブーツ(L)
Waterproof Flexible Boots (L)
3mmグロメット
3mm Grommet
シリコンOリング
(P2)赤
Silicone O-ring (P2) Red
シリコンOリング
(P3)赤
Silicone O-ring (P3) Red
シリコンOリング
(P5)赤
Silicone O-ring (P5) Red
Oリング P30
O-ring P30
防水スイッチホルダー
Waterproof Switch Holder
防水メカボックス
Waterproof Radio Box
94891
*定価
アクアスピードマリンモディファイドモーター ベアリング入高出力ボート専用モーター17T
94891-1 サイドプレート
Side Plate
94891-2 コードブーツ, キャップ
Cord Boots, Cap
94895 6mm防水リング
6mm Waterproof Ring
94898 テフロンコートスタンチューブセット
Teflon coating stern tube
96551S モータースイッチ(S)
Motor Switch (S)
*送料
5000 TEL
アクアスピードマリンストックモーター
70815 Aqua Speed Marine Stock Motor
フラップセット
94301 Trim Tab Flap Set
金属3枚スクリュー
94732 Metal Propeller
2000
270
800
130
1500
x2
200
130
34
x1
300
130
52
x2
500
130
11
x5
200
90
12
x2
250
130
46
x5
200
90
17
x10
200
90
40
x10
200
90
19
x5
200
90
47
x1
200
90
650
130
2500
270
26 27 28 29 x2
8 x1 30 x4
500
130
9
x10
500
130
31
x5
17 18 19 20 21 22
8
11 16 17
18 19 20 21 22
25 26 27 28 29
x1
x1
x2
10
x4
32 33 35 x1
15
x1
200
90
1000
130
900
130
Some of the parts included are not available as spare parts.
Purchase optional parts instead.
70811 Aqua Speed Marine Modified Motor high performance motor
ボート専用ストックモーター18T
high performance motor
走行姿勢調整用
for adjusting boat position
52 と交換 ディスプレイ用1ヶ入
Instead of 52 , for display 1pcs.
25
10 12 30 x4
9 24 x8
OPTIONAL PARTS
内容
Description
内容(キーNo.と入数) ★定価 ★送料
Description
(Key No. & Qty.)
7
270
50
13 14
オプションパーツ
パーツ名
Part Names
パーツ名
5
キットの部品の一部にはスペアパーツとして販売してないものがあります。
京商ではオプションパーツを販売していますのでお買い求めください。
品番
No.
品番
★FOR JAPANESE MARKET ONLY.
品番
No.
パーツ名
Part Names
★定価 ★送料
内容
Description
ウォータージャケットセット モーター水冷用パーツ
for water-cooled motor specifications
モーターブラシクーラー 94741とセットで使用。オプションモーターの水冷用
94801 Motor Brush Cooler
for water-cooled motor specifications
モーターブラシクーラーセット 94801に吸・排水パーツをセット
94802 Motor Brush Cooler Set
for water-cooled motor specifications
94741 Water Jacket Set
2000
130
2800
130
3600
130
TELマ−クは、地域によって送料が異なりますので、
『ユーザー相談室』宛、電話にてお問い合わせください。
130
パ−ツは、キットに使用しているパ−ツをセットして、品番単位で発売しております。 【お急ぎの方は】『ユーザー相談室』宛に現金書留でお申し込みください。
必要なパ−ツを確認して、そのキーNo.が含まれているセット品番、セットパ−ツ名
※電話でのご注文は、お受けできませんのでご了承ください。
及び数量をご記入の上、郵便振込(送金手数料が安くてすむ)にてお申し込みください。
《注文方法》
※
(電話番号 - - )
裏面の注意事項をお読みください。(郵政省)
00210 4
振込連絡まで
約 10日間
右詰めにご記入ください
47271
※
※
京商株式会社
きた!
千 百 十 万 千 百 十 円
1565
※
※
(3)
(消費税込み)
円
特殊取扱
安全にR/Cを楽しみましょう。
(5)
※
料 金
(3)
受付局日附印
払込人住所氏名
(郵便番号 )
払込人住所氏名
(例)
記載事項を訂正した場合は その箇所に訂正印を押してください
通 信 欄
(4)
品番 部品名 数量
1901 ベアリング 2
1,400
送料
90
消費税(部品+送料合計金額 x 5%)
75
合計
1,565
切り取らないで郵便局にお出しください
※
■パーツ入手について
パーツの入手難を解決するのが「パーツ直送便」システ
ムです。必要なパーツがお店で品切れの時は、そのシス
テムを扱っている販売店に注文いただくと、京商より直
接パーツが入手できます。代金はお店で、パーツは直接
京商からお届けします。パーツによっては取り扱いされ
ていない物もありますので、詳しくは左記の看板のある
販売店にお問い合わせください。
メーカー指定の純正部品を使用して
1565
口 座 番 号 加入者名 金 額
京 商 株 式 会 社
千 百 十 万 千 百 十 円
※
殊 扱
特 取
47271
金 額 料 金
00210 4
※
払込票兼受領証
(2)
払 込 取 扱 票
口座番号 (右詰めにご記入ください)
各票の※印欄は 払込人において記載してください
京商のパーツなら
すぐ揃う
(2)
00
※
加入者名
(1)郵便局へ行き、そなえつけの払込用紙に
次の(2)∼(5)を記入してください。
(2)口座番号/00210-4-47271 加入者名/京
商株式会社と記入します。
(3)あなたの 1.郵便番号 2.住所 3.氏名 4.
電話番号を必ず記入してください。(住所・
氏名には必ずフリガナをふってください。)
(4)注文したい、1.品番 2.パ−ツ名 3.注文
数を必ず記入してください。
(5)代金は、1.パ−ツ価格×数量 2.送料(2
個以上お求めの場合は、1個分の送料で一
番高い送料だけで結構です)1+2の合計
金額に消費税をプラスしてください。
(1円未満は四捨五入)
(6)郵便局の窓口へ手数料(60∼110円)をそ
えてお申し込みください。
3 ∼ 4日間
受付局日附印
パ−ツの価格には、消費税は含まれておりません。
また、定価、送料、消費税は平成 11 年 3 月 1
日現在のもので、法規改正、運賃改定、諸事情な
どにともない変更になりますのでご了承ください。
R
THE FINEST RADIO CONTROL MODELS
京商株式会社
〒243-0034 神奈川県厚木市船子153
●ユ−ザ−相談室直通 TEL.0462(29)4115
お問い合わせは:月曜∼金曜(祝祭日を除く) 10:00∼18:00
61929903-1
PRINTED IN JAPAN