1
ENGLISH
COMPONENTS { 1 }
SIZING
BEFORE USING THIS DEVICE, PLEASE READ THE ENTIRE INSTRUCTION MANUAL. CORRECT APPLICATION AND CARE IS VITAL TO THE PROPER FUNCTIONING
OF THIS DEVICE.
INDICATIONS
H
L/XL
X
11 in
28 cm
Y
8.25 in
21 cm
Patient Circumference
F
X
1
58 - 60 in 147 - 152 cm
2
55 - 58 in 140 - 147 cm
3
52 - 55 in 132 - 140 cm
4
49 - 52 in 125 - 132 cm
Y
Acute and chronic low back pain; post-operative support; activity related low back pain; disc herniation.
CONTRAINDICATIONS
Pregnancy and circulation; pulmonary; cardiovascular or skeletal conditions which have risk to be made worse as a result of
compression and/or pressure.
WARNINGS AND PRECAUTIONS
If you experience any pain, swelling, sensation changes, excessive discoloration, irritation to the skin or any unusual reaction
while using this product, consult your medical professional. If any distortion of the support panels, fraying or deterioration of
lace cables is noticed, discontinue use. Do NOT expose to heat over 130°F (55°C).
COMPONE NTS {1}
A. BELT WINGS
1. Donning Mitt Section
2. Anterior (Front) Panel Section
B.
C.
D.
E.
BOA® CLOSURE SYSTEM
POSTERIOR (REAR) PANEL SECTION
LORDOTIC INSERTS
RIGID ANTERIOR (FRONT) PANEL (FOR USE WITH MODEL 200627)
B O A® C L O S U R E I N S T R U C T I O N S
TO LOOSEN BRACE
❶
❷
A
B
C
D
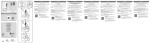
ff Lift Boa® Knob up to release Boa® Lace (Figure F) and pull Rear Panel Section in opposite directions. (Figure O)
E
G
S/M
I
K
J
9.5 in
24 cm
Y
7.25 in
18 cm
Patient Circumference
X
FITTING { 2 }
X
Y
L
M
1
44 - 49 in 111 - 125 cm
2
38 - 44 in
96 -111 cm
3
32 - 38 in
81 - 96 cm
4
28 - 32 in
71 - 81 cm
5
25 - 28 in
63 - 71 cm
TO TIGHTEN BRACE
ff Push Boa® Knob down and turn Boa® Knob clockwise to tighten the brace (Figure G)
ff NOTE: The left Boa® Knob controls the top half of the brace. The right Boa® Knob controls the bottom half.
SIZING {H}
ff Begin by taking a circumferential measurement of the patient at the waist and the iliac crest. Use the larger measurement when
selecting your brace size.
ff NOTE: It is not uncommon for the patient to experience post-surgical swelling, followed by weight loss (10-20+ lbs/4.5-9.1 kg). The
626/627 brace is designed with two (2) detachable Belt Wings which can be easily repositioned to achieve optimal fit. (Figure R)
ff Match the patient’s size to the Patient Sizing Chart (Figure H).
FITTING {2}
ff Secure the Belt Wings to the Posterior (Rear) Section at the desired length using the Patient Sizing Chart (Figure I). An approximation
of fit can be achieved by matching the tip of the hook attachment on the Posterior (Rear) Section to the desired sizing indicator on the
Belt Wings (Figure I).
B E LT W I N G T R I M M I N G I N S T R U C T I O N S ( O P T I O N A L )
ff Once proper fit is confirmed, the excess material on the Belt Wings (that secures the Belt Wings to the Posterior (Rear) Section) may
be trimmed. (Figure K)
ff NOTE: Add-on components may require factoring more Belt Wing length. Do NOT trim excess material on the Belt Wings until
proper fit has been confirmed.
INSERTING/REMOVING LORDOTIC INSERTS
ff Models 200626 and 200627 come preassembled with a pair of reformable Lordotic Inserts that are preset with an 11°
lordotic curve.
ff NOTE: The Lordotic Inserts should not be used and should be removed when stepping up from the 626/627 configuration (Models
200626, 200627) to a 631/637 configuration (Models 200631, 200637).
N
REMOVING LORDOTIC INSERTS
ff To remove, open the hook and loop pocket on the patient facing side of the Posterior (Rear) Section.
ff Remove the Lordotic Inserts from the hook and loop pocket. (Figure J)
INSERTING LORDOTIC INSERTS
ff To insert, open the hook and loop pocket on the patient facing side of the Posterior (Rear) Section.
ff Slide the Lordotic Inserts inside the hook and loop pocket, making sure the arrow shaped hole point toward the midline of the
Posterior (Back) Section and the orange side is facing the patient. (Figure J)
SECURING/REMOVING ANTERIOR (FRONT) PANEL (INCLUDED WITH MODELS 200631, 200637, 200627)
ff Hold the Anterior (Front) Panel on the patient at the desired location. (Figure L)
ff Wrap the Belt Wings over the Anterior (Front) Panel, making sure the loop strip (inward facing) on the Belt Wing attaches to the hook
strip (outward facing) on the Anterior (Front) Panel (Figure M & Figure N)
ff REMINDER: The Exos™ logo on the Anterior (Front) Panel should be facing upright and away from the patient.
A P P L I C AT I O N I N S T R U C T I O N S { 3}
ff
ff
ff
ff
ff
ff
APPLICATION { 3 }
ff
O
P
Q
R
BRACE APPLICATION
Loosen brace.
Prior to each application of the brace make sure the brace is fully extended by lifting the Boa® Knobs and pulling the Posterior (Rear)
Section apart (Figure O).
Apply the brace to the patient by centering the Posterior (Rear) Section (Figure P) around the patient (on the back), then wrapping the
Belt Wings around the waist (toward the front) (Figure Q). Secure the hook and loop attachment on the front.
NOTE: When reapplying the brace, it is easiest for the patient to guide the belt by inserting a hand in the donning mit pocket. (Figure Q)
NOTE: The Belt Wings may be secured to the Posterior (Rear) Section at an angle to accommodate a size differential between the
waist and hips (Figure R).
Before tightening the brace make sure the Posterior (Rear) Section is positioned evenly on both sides of the patient. In order to
achieve optimal comfort and fit, it may be necessary to readjust and reposition the two (2) Belt Wings to the Posterior (Rear) Section.
Push Boa® Knob down and turn Boa® Knob clockwise to tighten the brace (Figure G) to the desired level of compression.
USE AN D C AR E: (CLE AN ING & STO R AG E INSTRUC TIO NS)
Hand wash in cold water, less than 86°F (30°C), using mild soap. Air dry.
NOTE: If not rinsed thoroughly, residual soap may cause irritation and deteriorate material.
130˚F (55˚C)
Do NOT iron.
Do NOT tumble dry.
Do NOT bleach.
Do NOT expose to heat
over 130°F (55°C).
M AT E R I A L C O N T E N T S
Polyester, Nylon, Polyethylene, Terpolymer, Polycarbonate, Elastic, Steel, Zinc, Antimicrobial
FOR FIT TING TIPS ON THIS E XOS™ DEVICE:
Visit the Exos™ Provider Center at: http://exosmedical.com/provider/formLO or Scan the QR image with your smartphone
WA R R A N T Y:
DJO, LLC will repair or replace all or part of the unit and its accessories for material or workmanship defects for a period of
six months from the date of sale.
INTENDED FOR USE ON A SINGLE PATIENT.