1
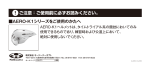
2011年08月版
MS-2・取扱説明書
保存用
ご使用になる前に
この取扱説明書は、ご使用になる前に必ずお読みください。
また、お読みの後は、保管してくださいますようお願いいたします。
このたびは、弊社製品をお買い上げいただき、誠にありがとうございます。
この取扱説明書は、ヘルメットの正しい取扱方法について説明しております。
ご使用前には必ず最後までこの説明書をお読みいただき、お読みの後は、当説明書
を大切に保管していただきますよう、お願いいたします。
ヘルメットは、いかなる事故にも絶対という訳ではなく、万一の際に危険の度合いを
減らす装備の一つで、安全の一要素としてご理解のうえご使用ください。
安全快適なバイシクルライフを楽しむためにも、以下の注意事項をよくご理解いた
だきますようお願いいたします。
警告
●このヘルメットは「自転車専用」ですのでそれ以外には絶対に使用しない
でください。
●国で定められている交通規則に必ず従ってください。
瞬間消臭素材「MOFF」について
当製品のあごひも本体およびインナーパッドの一部メッシュ部分には、ナノテク技術を利用した
従来とは全く異なる新しい消臭方法を採用した素材「MOFF」を使用しています。
「MOFF」は瞬間消臭効果・安全性に加え、環境への影響もない次世代の消臭繊維です。
[MOFF素材のお手入れについて]
汗などで汚れた場合のお手入れは、水もしくはぬるま湯(35℃以下)のみで軽くすすいで汚れを
落とし、
しっかり水気を拭き取ってから、陰干しするとMOFF本来の効果が持続できます。
なお洗浄剤を使用する場合は、中性の洗たく用洗剤を使用してください。
(アルカリ性洗剤はMOFFの効果が減少しますので使用しないでください)
部位名称ともくじ
シェル
FRONT
REAR
シェル
ライナー
XF-3アジャスター
アジャストロック
ストラップ
ストラップホルダー
1 ストラップホルダーの取扱方法
2 ストラップおよびアジャストロックの調整
3 XF-3アジャスターの調整
4 A.Iネットおよびインナーパッドの交換方法
5 正しい位置でヘルメットを装着する
1
ストラップホルダーの取扱方法
ストラップホルダーは、あなたの頭にしっかりヘルメットを固定するための、重要な装置です。
ストラップの両先端に付いている
「ストラップホルダー」を確実にとめましょう。
ストラップホルダーの留め方
警告
ストラップをとめるときは、お肌を挟ま
ないようご注意ください。
顔などケガをするおそれがあります。
ストラップホルダー
ストラップホルダーの外し方:リリースボタンを押すと、
ストラップホルダーが外れます。
リリースボタンを押す
リリースボタンを押す
ストラップホルダー
外れる
警 告:
●ストラップは正しくしっかり締めてください。
締めないままの走行は、万一転倒した際に大変危険ですので、絶対におやめください。
●ストラップホルダーは、必ずホルダーの最後まで(カチッと音がするまで)きっちり押し込んでくださ
い。押し込みが不完全ですと、万一転倒した際にストラップホルダーが外れてしまい、大変危険です。
2
ストラップおよびアジャストロックの調整
ご使用前に必ず試着しましょう!
ストラップの長さなど、あなたの頭にぴったりフィットするよう必ず調整しましょう。スト
ラップの長さは、ストラップホルダーを締めたとき、指が2∼3本入る程度が一般的です。
ご使用前に必ず試着を行い、
「ストラップ」の長さや「アジャストロック」のロック位置、もしくは、
「XF-3アジャスター」の締め具合を適度に調整し、あなたの頭にぴったりフィットするようにして
ください。
※「XF-3アジャスター」の調整については「 3XF-3アジャスターの調整」を参照。
ストラップの長さ調整
警 告:
ストラップを横からみた図
短くする
長くする
リリースボタン
ストラップホルダー
ストラップ
ストラップホルダー
(差し込む側)の
向きにご注意ください。
最後にストラップをゴムバンドでとめてください。
●ストラップは、左記以外の通し方をすると、ストラ
ップ自体が滑り固定できずに抜けてしまい、ヘル
メットが脱げてしまうおそれがありますので、正
確に通してください。
●ストラップホルダー(差し込む側<赤い方>)の表
裏を間違えると、ストラップがゆるんで固定が出来
なくなりますので、もしストラップホルダーを完全
にストラップより取り外した場合は、取り付ける際、
ストラップホルダーの方向にご注意ください。
アジャストロックの調整
ストラップホルダーをとめ、
しっかり顔の側面に合うように
「アジャストロック」を調整します。ヘル
メットを被り、ストラップのAの部分がすっきり納まっているか確認し、耳の部分が緩いまたは、
キツい場合、
「アジャストロック」を移動させて高さを調整します。
●調整方法
ストラップ
アジャストロック
カバー
ストラップ
アジャストロック
正しいストラップ
の状態
①ストラップのV字になっている部分の左
右を互いに前後へ引っ張るとアジャスト
ロックのカバーが開きます。
②カバーを開いたまま、ア
ジャストロックを上ある
いは下へ移動させて、位
置を調整してください。
③アジャストロックの位置が決まったら、開いたカバーを元に戻して完了です。
ご注意:アジャストロックを調整後は、必ずしっかりロックをしてください。ロックされてい
ないまま使用すると、
ストラップの位置が正しく保てない場合があります。
3
「XF-3アジャスター」の調整
「XF-3アジャスター」は、ヘルメットのズレやブレを抑えるために、ヘルメット後頭部に装備されたロック
機構の事です。あなたの頭にピッタリフィットさせ、
しっかりホールドするように、XF-3アジャスターを
調整しましょう。
はじめにXF-3アジャスターのアジャスターダイヤルを適度に緩めてからヘルメットをかぶり、
ヘルメットの前部を押さえながら、
アジャスターダイヤルを適度に締めてください。
(下図参照)
XF-3アジャスター・アジャスターダイヤルの調整方法
前を押さえながらダイヤルを回す
アジャスターダイヤル
緩めるとき
アジャスターダイヤルを左へ回す
アジャスターが広がる
締めるとき
アジャスターダイヤルを右へ回す
アジャスターが締まる
ヘルメット前部を押さえながら、XF-3
アジャスターのアジャスターダイヤル
を回して適度に締めます。
ご注意:●XF-3アジャスターを調整するときは、必ずアジャスターダイヤルを使用して
ください。ベルト部分を直接引っぱるとアジャスターの部品が破損しますので
絶対に引っぱらないでください。
●XF-3アジャスターをご使用の際は、長髪の方などは特にアジャスターに毛髪
が引っかからないようご注意のうえ、調整してください。
「XF-3アジャスター」の角度調整
「XF-3アジャスター」は、4段階でお好みの角度での取付が可能ですので、
従来よりさらにジャストフィットさせることが出来ます。
XF-3アジャスター
ロックピン
(手前に引くと外れます)
<XF-3アジャスターの角度を変える>
XF-3アジャスターを本体の取付穴
より外し、XF-3アジャスターにある
「ロックピン」の取り付け位置を変
えて角度を調整します。そして最後
にXF-3アジャスターを元の本体取
付穴に差し込み完了です。
本体取付穴
角度調整穴
この位置が標準の角度
ですが、ロックピンを取
り付 け る 位 置 に より、
XF-3アジャスターの角
度を変えて取り付ける
事ができます。
ロックピン
※この際、ロックピンを取り付けるXF-3
アジャスターの「角度調整穴」の位置
は、左右同じ位置にしてください。
ご注意:アジャスターの取付位置を調整する際は、無理に動かすとア
ジャスターやその他部品が破損する場合がありますので、必
ずロックピンを一度外してから角度を調整してください。
「別売・XF-3アジャスター」、
「別売・アジャスター用ロックピン」について
「XF-3アジャスター」および「アジャスター用ロックピン」は、補修用
としてもご用意しております。
補修用・XF-3アジャスター(ロックピン×2本入)
補修用・ロックピンセット
(ロックピン×4本入)
別売・XF-3アジャスター
¥1,890
(本体価格:¥1,800)
¥105
(本体価格:¥100)
ご注意:「XF-3アジャスター」をはじめ、KABUTOのアジャス
ター各種は、各モデルの専用設計となっております。補
修用をお買い求めの際には、ご使用のヘルメットに適合
した、
「アジャスター」をお買い求めください。
別売・ロックピンセット
メッシュスウェットパッドの脱着
XF-3アジャスターのメッシュスウェットパッドは、汚れた時に取り外して
洗う事ができます。図のように脱着してください。
マジックテープ
メッシュスウェットパッド
(1個入)
XF-3アジャスター
メッシュスウェットパッド
¥105(本体価格:¥100)
XF-3アジャスターを使用する際は、必ずメッシュスウェット
警 告:パッ
ドを取り付けてください。アジャスターダイヤルの操作時
に頭髪等、巻き込むおそれがあります。
4
A.Iネット(Anti Insect Net)およびインナーパッドの交換方法
◆このヘルメットは、用途やフィッティングで使い分けられる内装が2種類付属されています。
お好みによりいずれかのパッドを付けてください。※標準は「A.Iネット」が装着されています。
A.Iネットの取付位置
●エアインテークからの虫の侵入防止に。
●フィッティング重視を求めるかたに。
●エア導入効果を抑えたい冬場などに。
前
A.Iネット
ストラップ
※S/Mサイズの場合は、
前側の差し込み穴に
「XF-3アジャスター」の
突起を差し込む
XF-3アジャスター
左図のように、A.Iネット本体をヘ
ルメット内部にあるマジックテー
プに押しつけて貼り付けます。
なお、XF-3アジャスターの前側
の突起は、A.Iネットを取り付けて
から、A.Iネットにある差し込み穴
と本体の差し込み穴を合わせ、そ
こに確実に押し込んでください。
※L、XL/XXLサイズの場合は、
後側の差し込み穴に
「XF-3アジャスター」の
XF-3アジャスター
突起を差し込む
ご注意:
A.Iネットを取り付ける際、正確に取り付けてください。装着感が悪くなるおそれがあります。
MS-2・インナーパッドは、2種類
の厚みのパッドを付属していま
す。フィッティングに合わせて、厚
みを変更してください。
インナーパッドセットの取付位置
●エア導入効果をさらに求めるかたに。
インナーパッド
(フロント用)
ストラップ
インナーパッド
(トップ用)
ご注意:
前
ストラップ
厚み:5mm/10mm
左 図 のように、そ れぞ れのイン
ナーパッドをヘルメット内部にあ
るマジックテープに押しつけて貼
り付けます。
パッドを取り付ける際、通気孔を塞いでしまうと、エアの流入が悪くなるおそれがあります。
取り付ける際は、通気孔を避けて取り付けてください。
(別売)
「MS-2・補修用パッド」について
インナーパッドは消耗品です!
つね日ごろより使用されているヘルメット内部のインナーパッ
ドは、消耗品です。傷んだインナーパッドをそのまま、使い続
けると破れてしまい、
フィット感などに悪影響をおよぼしかねません。
古くなったインナーパッドは、早期に交換される事をお薦めします。
MS-2専用 A.Iネット(全サイズ共通)
¥1,890
(本体価格:¥1,800)
(セット内容)●A.Iネット本体×1個
MS-2専用 インナーパッドセット(5mm厚・全サイズ共通)
¥1,575
(本体価格:¥1,500)
(セット内容)●フロントパッド×1個 ●トップパッド
(左右)
×1set
MS-2専用 インナーパッドセット(10mm厚・全サイズ共通)
¥1,575
(本体価格:¥1,500)
(セット内容)●フロントパッド×1個 ●トップパッド
(左右)
×1set
ご注意:別売のインナーパッドセットをお買い求めの際は、お使いのヘルメットのモデル
をよくご確認のうえ、販売店などへご注文ください。
5
正しい位置でヘルメットを装着する
ヘルメットを前から後にかけて水平になるように着用してください。このときにヘルメットの先端
がまゆ毛のすぐ上にない場合は、正しく装着できていません。
(装着の際は鏡を見ながら調整し
てください)
また、あごひもの長さやアジャストロックの調整もヘルメットを正しくかぶるうえで
大変重要な部分です。当説明書の該当項目をよくお読みのうえ、正しくかぶってください。
ヘルメットの正しいかぶり方
正しいかぶり方の例
ヘルメットの先が
眉毛のすぐ上にある
前から後ろにかけて水平になるように
かぶります。
誤ったかぶり方の例
ヘルメットの先
が上を向き、前
頭 部が見えて
いる
ご注意:ヘルメットは正しい位置で正しくかぶり、ストラップを正確に締める事で、はじめてヘルメッ
ト本来の安全性能を発揮します。ヘルメットは走行前にしっかり正しく装着しましょう。
警 告:下記の文章は必ずお読みください。
「ストラップは必ずしっかり締めてください。」
ストラップを締めなかったり、締め方がゆるいと、万一転倒した時などに脱げてしまい、頭を守るこ
とができず非常に危険です。また、ヘルメットの下に、帽子・フード・バイザー・ヘッドフォン等を着用
しないでください。ヘルメットがずれたり、落ちるおそれがあります。
「大きな衝撃を受けたヘルメットは外観上に損傷がなくても、ご使用にならないでください。」
ヘルメットはシェル及び衝撃吸収ライナーが潰れることで、衝撃エネルギーを吸収します。大きな
衝撃を受けたヘルメットは、既にライナーが潰れていることが多く、そのまま使用すると、再度衝
撃吸収エネルギーを吸収できず非常に危険です。外観にキズがなくても、使用しないでください。
「ヘルメットの改造および分解は絶対にしないでください。」
ヘルメットに穴を開けたり、内部の衝撃吸収材を削ったり、また、ストラップなどは絶対に改造しな
いでください。ヘルメット本来の性能が発揮できなくなり非常に危険です。
「ヘルメットのお手入れは薄めた中性洗剤でふき取るようにしてください。」
ガソリン・シンナー・ベンジン・熱湯(50℃以上)や、塩水等は絶対に使用しないでください。
「ヘルメットのペイントは絶対にしないでください。」
衝撃吸収ライナーは、塗料や熱の影響により材質が侵され衝撃吸収力が低下する場合があります
ので、ペイントは絶対におやめください。
「ヘルメットは大切に取り扱ってください。」
ヘルメットは丈夫だからといって、床等に放り投げたり、上に座ったりしないでください。その度に
衝撃を吸収するため、衝撃吸収力が低下します。万一のために大切に取り扱ってください。
また、乗車時での頭を保護する以外の目的には使用しないでください。
「ヘルメットの保管について」
ヘルメットは直射日光の当たる場所への長時間の放置や、車の中および、暖房機のそばなど、高
温(50℃以上)の場所に長時間放置しないでください。
ヘルメットに使われている材質等が変質して、性能が低下します。
ご注意:
「長期間の日光照射によるシェルの変色について」
ヘルメットのカラーによっては、長期間日光を浴びることにより、シェル表面の色調が薄く変色す
る場合があります。
「マット
(つや消し)カラーについて」
マットカラーは表面処理の都合上、あらかじめ貼付されているステッカーをはがすと、表面のマッ
ト
(つや消し)処理がはがれる事がありますので、ステッカーは絶対にはがさないでください。また
お客様がご購入後にご自身で貼付したステッカーを再度はがし取る場合も、同様のことが考えら
れますので、ステッカーを貼付される際は十分にご注意ください。
株式会社 オージーケーカブト
〒577-0016 大阪府東大阪市長田西6丁目3-4 TEL: 06-6747-8031 FAX: 06-6747-8023
検索
ホームページ: KABUTO
No.JMS-2-2011-EJ/ST
MS-2
INSTRUCTION MANUAL
NOTES BEFORE USE:
BE SURE TO READ THIS MANUAL BEFORE USING THE HELMET.
KEEP THE MANUAL IN A SAFE PLACE FOR FUTURE REFERENCE.
Thank you for purchasing an KABUTO helmet. This manual explains
how to use your KABUTO helmet correctly. Please take time to read
this instruction manual before using the helmet, and keep the manual in
a safe place for future reference. No helmet can protect the user 100%
in any case of accidents, but it can reduce the risk of injury. Please
make sure you understand the following cautions and enjoy riding your
bicycle safely.
CAUTION!
●This helmet is for bicycle use only.
Do not use this helmet for motorcycle riding or any other activities.
●Please obey all traffic rules.
■ MOFF instant deodorizing fiber
The MS-2’s strap uses a new deodorant fiber called MOFF, developed with
nanotechnology, which employs a new odor elimination method never done before.
MOFF is the next-generation deodorizing fiber with an environment-friendly nature
as well as instant odor elimination and safety characteristics.
[How to clean the strap]
To keep the effectiveness of MOFF material, gently wash the chin strap with cool or
warm water (below 35°C, 95°
F.) Towel dry and place it in a shaded and ventilated area.
When using a cleanser, use mild soap. (Do not use alkaline or similar detergent.)
Part Names
Shell
SIDE
REAR
Shell
Liner
XF-3 Adjuster
Adjustment lock
Strap
Strap buckle
1 Fastening the strap buckle 2 Adjusting the strap and adjustment locks
3 Adjusting the XF-3 juster
5 Wearing the helmet properly
4 To change the A.I.Net and inner pads
1
Fastening the strap buckle
The strap buckle is important for fitting the helmet to your head securely.
Make sure to fasten the strap buckle firmly.
How to fasten the strap buckle
WARNING!
Be careful not to pinch your
skin when fastening the strap
buckle.
Strap buckle
How to release the strap buckle: Push the release button
Push
Release
button
Push
Strap buckle
Release
CAUTION!
●Make sure to fasten the strap firmly. It is dangerous to ride a bicycle without
fastening the strap.
●If the strap buckle is not fastened (ie, you don't hear it click), or if it is fastened
loosely, the helmet may come off in an accident, leading to death or serious injury.
2
Adjusting the strap and adjustment locks
Try on the helmet before use
Adjust the strap to fit your head. It generally should be just long enough to leave
space for 2 to 3 fingers horizontally when fastening the strap.
Try on your helmet before riding, and adjust the length of the strap, the position of the
adjustment locks and the fit of the XF-3 Adjuster to fit the helmet to your head.
See: 3 Adjusting the XF-3 Adjuster for how to adjust the XF-3 Adjuster
Attention! The length of the left side buckle of the user is not changeable.
Adjusting the length of the strap
Side view
Shorten
Lengthen
Release button
CAUTION!
●Make sure to follow these instructions for
adjusting the strap. Otherwise, the strap may
become loose and the helmet may come off.
Strap buckle
Strap
Make sure the strap
buckle is facing the
correct direction.
Bind the strap with the rubber band at the end.
●If the strap buckle is inserted upside
down, the strap will be loose and the
helmet will not fit your head firmly. If the
strap buckle is removed from the strap
completely, make sure to place it back in
the correct direction.
How to adjust the adjustment locks
Put on the helmet, fasten the strap buckle and adjust the adjustment locks so they can be
placed firmly on the side of your face.
Check that the
part is placed correctly. If the strap
A
around your ears is loose or tight, change the position of the adjustment lock.
How to change the position of the Adjust-lock
Strap
Adjust-lock
Cover
Strap
①Hold each strap of the V part and
pull them outward horizontally to
open the cover.
Adjust-lock
Correct
positions of the
straps
②Move the
Adjust-lock up or
down to change the
position of the
cover.
③Close the cover when the Adjust-lock is placed properly.
Attention! Lock the cover securely after changing the position of the adjustment
locks. If the helmet is used without locking the cover securely, the
strap will be loose and the helmet may come off.
3
Adjusting the XF-3 Adjuster
XF-3 Adjuster is a mechanism at the rear of the helmet to keep the helmet from moving. Adjust
the XF-3 Adjuster so it keeps the helmet on your head securely.
First, loosen the XF-3 Adjuster dial, and then put on the helmet. Then, hold the front side of the
helmet against your head and tighten the adjuster dial. (See below)
How to adjust the XF-3 Adjuster/the adjuster dial
Adjuster dial
Loosen
Turn the dial to the left
Tighten
Turn the dial to the right
Hold the front part and turn the dial.
Hold the front side of the helmet
and tighten the XF-3 Adjuster using
the adjuster dial.
Attention! Be careful with your hair, especially long hair, so it does not get
tangled in the XF-3 Adjuster.
To adjust the angle of the XF-3
You can change the angle of the XF-3 at 4 levels and feel
comfortable to fit on your head.
#Please set the lock pins of the
XF-3 in the holes of the helmet
before use.
To adjust the position of
the XF-3
Lock pin
(Pull this to remove)
XF-3
Lock pin hole
Remove the XF-3 from the
helmet and reset the lock
pins in other holes of the
XF-3 to change the angle.
Set the XF-3 with the pins
in the holes of the helmet.
Adjusting angle
hole:
This hole is the
average position but
you can choose your
own angle!
Lock pin
#When changing the angle of
the XF-3, make sure to set the
lock pins in each hole
horizontally.
Attention!
Do not apply extreme pressure to the XF-3 as this will cause
damage. Please remove Cranium-Lock pins before changing the
position of it.
Replacement XF-3/ Cranium-Lock Pin
XF-3 and Cranium-Lock pins are available as replacement.
Replacement/XF-3 (incl. Lock pin X 2)
Replacement/ Lock Pin Set (Lock pin X 4)
Replacement/ XF-3
Attention!
Each KABUTO adjuster including XF-3 is designed for each specific
model. Please make sure to purchase the proper adjuster for your
helmet as replacement.
Replacement/ Cranium-Lock Pin Set
How to remove XF-3 Sweat Pad
XF-3 Sweat Pad is removable and washable.
Please see the figure (left).
Hook-and-loop fastener
XF-3
Sweat Pad
WARNING!
XF-3 Sweat Pad
Make sure to attach the Sweat Pad when using XF-3.
Your hair may be tangled when turning the Adjuster dial.
4
To change the A.I.Net (Anti Insect Net) and inner pads
2 types of interior are packaged as standard accessory. Choose your own style!
#A.I.Net is attached at shipment.
●Protection for insects from Air -intake
●Extreme Fitting
●Reducing air introduction in the winter
Make sure the front and the rear
The position of A.I.Net
Front
A.I. Net
Strap
Set the XF-3 in the front
halls for S/M size
helmets.
XF-3
Stick the A.I.Net on the
hook-and-loop fasteners
inside the helmet. Please
set the pins of XF-3 in the
front holes securely after
attaching the A.I.Net.
Set the XF-3 in the
rear halls for L size
helmets.
XF-3 Adjuster
Attention!
Make sure to attach the A.I. Net firmly, otherwise it might lead discomfort.
●Best Air Introduction
How to attach inner pad set
Front
Inner Pad
(Front)
Strap
Strap
Inner Pad
(Top)
2 types of inner pads are
packaged as standard
accessory.
Get your comfort!
Thickness: 5mm/ 10mm
Stick the inner pad on the
hook-and-loop fasteners
properly.
Attention!
If air vents are covered by inner pads, air flow might be reduced.
Therefore, attach inner pads on the helmet with avoiding vents.
Cleaning the linings (A.I.Net, inner pads)
Linings are removable and washable. Keep linings clean by washing them periodically. Use
warm water (35°C or cooler) with small amount of hair shampoo or ph-neutral detergent.
Hand wash them gently and rinse thoroughly. Dry linings with a dry cloth after washing, and
leave them in a shaded and well-ventilated place. Avoid direct sunlight.
Replacement MS-2 linings
Remember!
Linings wear out over time!
Linings used every day will wear out over time. Continuing to
use worn linings may lead to them breaking and causing poor
fit. Old linings should be replaced at an early stage.
MS-2 A.I.Net (for XS/S, S/M and for L, XL/XXL)
Includes: One A.I.Net
MS-2 Inner Pad Set (Thickness: 5mm)
MS-2 Inner Pad Set (Thickness: 10mm)
(One size fits all)
Includes: One front pad and one pair of top pads (left/right)
Attention! Please check the model of your helmet before purchasing a lining set.
5
Wearing the helmet properly
Wear the helmet so it is level from front to back. Make sure the front of the helmet is just
above your eyebrows (check with a mirror).
It is important that the length of the chin strap and adjustable lock be adjusted for correct fitting.
Please make sure to read these instructions thoroughly before use.
Wearing your helmet properly
RIGHT
WRONG
Wear it from the front to the rear
horizontally.
Attention! Your helmet is only effective as protection in case of an accident if it is
positioned correctly on your head and the strap is fastened correctly.
Be sure you are wearing the helmet correctly before riding.
WARNING:
Be sure to read these instructions.
● This helmet is designed for bicycle use only. Never use the helmet for purposes or
activities other than bicycle riding.
● The helmet should be worn in a way that it protects your forehead, with the edge just
above your eyebrows, and never pushed far over the back of your head.
Wear the helmet so it is level from front to back.
● No helmet can protect the wearer against all injuries or foreseeable impacts.
● Before riding a bicycle, make sure to adjust the helmet so it fits your head correctly.
The
strap should be positioned not to cover the ears, the buckle positioned away from the
jawbone, and the strap and buckle adjusted to be both comfortable and secure.
● Your helmet is effective as protection only when it is worn properly. You should try
different sizes to choose the size which feels secure and comfortable on your head at
time of purchase.
● Please handle the helmet with care. The helmet is designed to absorb shock by
partial destruction of the liner and its damage may not be visible. DO NOT sit on it,
drop it on the floor or otherwise cause impact.
● If subjected to a severe impact, the helmet should be discarded and destroyed.
● Wipe the helmet with common ph-neutral detergent diluted with clear water.
Never use any petroleum, thinner, benzine, hot water above 50°C or saline water.
● Do not leave the helmet in the direct sunlight or where the temperature may surpass
50°C, e.g. in a car or near a heater.
Doing so will affect the materials and the performance of the helmet will diminish.
● Do not paint the helmet. Paints may reduce the original protective performance of the
helmet considerably.
● Do not modify the helmet. In order to fully maintain the performance of the helmet, do
not attempt to take it apart or change it in any manner that involves making holes in it
or cutting it (or any of its parts) other than as recommended by the manufacturer.
● This helmet should not be used by children while climbing or doing other activities
when there is a risk of strangulation/hanging if the child gets trapped with the helmet.
THE EFFECTS OF THE DIRECT SUNLIGHT
Do not leave the helmet in the direct sun. The outer color of the shell may
be changed.
CAUTION FOR MATTE COLOR PRODUCT
Matte processing on the surface of this product could be peeled off if the
attached sticker is removed from the surface. To prevent this, never remove the
sticker. The same problem may occur also when other stickers are attached
and removed. If you attach stickers on the product, please be aware of the risk.
Products of OGK KABUTO CO., LTD.
6-3-4, NAGATANISHI, HIGASHIOSAKA, OSAKA, 577-0016, JAPAN. TEL:+81-6-6748-7806