Download Plug Assy 47P Extraction Tool 1.
Transcript
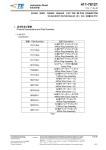
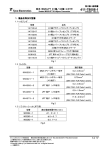
411-78257 取扱説明書 Plug Assy 47P Extraction Tool 16JAN07 プラグアッセンブリ 47P 冶具 Rev.A Instruction Sheet This instruction Sheet is about Plug Assembly 47Position Extraction tool. Please See 411-5967 about Plug Assembly 47Position. 本説明書はプラグアッセンブリ 47P 抜き冶具の取扱説明書です。プラグアッセンブリ 47P の取扱 説明書は 411-5967 をご覧下さい。 1. Product Descriptions and Part Numbers 製品名称及び型番 1.1 Connectors コネクタ 型番 Part Numbers 1376600 1376601 1.2 Contact 品名 Description Plug Housing Assy 47 Position 47 極 プラグハウジング アッシイ Lever Assy レバーアッシイ Fig.1 コンタクト Part Numbers 型番 900293 1.3 Rubber Plug Description 品名 Sealed 1.6 Contact 防水 1.6 端子 Applicable Wire 適応電線 Description 品名 Rubber Plug for 1.6 Contact 1.6 端子用ラバープラグ Rubber Plug for 1.6 Contact 1.6 端子用ラバープラグ Cavity Plug for 1.6 Contact 1.6 端子用埋め栓 Applicable Wire 適応電線 0.3―0.85mm 2 Fig.2 ラバープラグ Part Numbers 型番 316867 967067 1473234 0.3―0.5mm 2 0.85mm 2 Fig.3 タイコ エレクトロニクス アンプ株式会社 神奈川県川崎市高津区久本 3-5-8 TEL.044-844-8079 FAX.044-812-3203 この書類は当社により変更管理されており、必要に応じ変更されます。 最新の改定については当社本支店にお問い合わせ下さい。 Copyright 2006 by Tyco Electronics AMP K.K. All Rights Reserved. * は商標です。 1 of 9 Plug Assy 47P Tool 411-78257 プラグアッセンブリ 47P 冶具 1.4 Extraction tool 抜き冶具 型番 Part Numbers 1981056 1981058 1981059 品名 Description Lance Release Housing ランス解除ハウジング Cavity Plug Extraction Tool キャビティプラグ抜き冶具 Retainer Lock Tool リテーナーロック冶具 Fig.4 1.5 製品の構成 Female connector 47P 47 極 メスコネクタ Lance Release Housing ランス解除ハウジング Retainer Lock Tool リテーナーロック冶具 Cavity Plug Extraction Tool キャビティプラグ抜き冶具 Fig.5 2 of 9 Rev.A Plug Assy 47P Tool 411-78257 プラグアッセンブリ 47P 冶具 2. CUSTOMER RECEIVING INSPECTION 顧客の受入検査 Tyco conducts inspections according to their quality control regulations to maintain an over all lot control. In addition, the customers should conduct receiving inspections based on the specific customer drawings. AMP 品質管理規定により検査を行い、出荷に際しては完全なロット管理を行っていますが、受入検 査として少なくとも該当製品の顧客用図面の内容について、検査をすることが望まれます。 3. STORAGE AND CARRYNG 保管および運搬時の取扱いについて (1)Avoid storing the contact reel in a moist or dusty place. Stock the reel in a comparatively dry and clean place (5~35℃,45~85%RH) away from direct sunlight. 直射日光にあたらない乾燥した清潔な屋内で、かつ常温常湿(5~35℃,45~85%RH)の環境 下に保管して下さい。 (2) Avoid leaving or carrying the housing in an open area without wrapping it in proper material. 露出状態での運搬や、長時間放置することは避けて下さい。 (3) Do not drop or shock the housing when carrying it. 運搬の際は、落下・衝撃を避けて下さい。 3 of 9 Rev.A Plug Assy 47P Tool 411-78257 プラグアッセンブリ 47P 冶具 4. HOW TO USE THE EXTRACTION TOOL 冶具の使用方法 NOTE The product can be set 4 type combinations between plug assembly and lever assembly. The set type refer to 411-5967 (5.5.6. Insertion lever assemble to Plug housing) The following figure is a combination of Plug Housing Assembly (PN:1376600-3) and Lever Assembly (PN:1376601-1). Made 注意 本製品はプラグアッシィとレバーアッシイの組み合わせが 4 パターン設定されています。 組み合わせは 411-5967(5.5.6 レバーアッシィの取付)を参照下さい。 下記図はプラグアッシィ(PN:1376600-3)とレバーアッシイ(PN:1376601-1)の組み合 わせです。 4.1 Female Contact Extraction メス端子の引き抜き方法 (1) Release female connector 47 positions from male Housing. Please refer to 411-5967 (6. Mating and Unmating of connector) for the unmating procedure. 47P コネクタ の嵌合を外して下さい。作業方法は 411-5967(6.コネクタの嵌合及び引抜き作業)を 参照下さい。 Direction of lever rotation レバー回転方向 Female connector 47P 47 極 メスコネクタ Unmating state 嵌合解除状態 Male connector 47P 47 極 オスコネクタ Fig.6 4 of 9 Rev.A Plug Assy 47P Tool 411-78257 プラグアッセンブリ 47P 冶具 (2) Insert Lance Release Housing straight in female connector. It is at connector pre-lock condition when the female connector cannot be inserted further more. Please confirm the direction of the housing when you cannot insert it. Operate (rotate) lever until it make a clicking sound and the lever cannot be rotated further more. メスコネクタにランス解除ハウジングを真っ直ぐ挿入して下さい。それ以上押し込むことが出来なけ れば仮係止位置です。挿入できないときはハウジングの向きを確認して下さい。 その後レバーを回転させ、「パチン」と音がしてそれ以上押込むことが出来なくなるまで回転させて 下さい。 NOTE 1. At the inserting operation, no Kojiri (apply force except insertion direction) must be made 2. Must not apply too much force against harness or female housing. 3. In case of any unexpected feeling such as double action or unsmooth insertion during the operation, lever must be adjusted to initial condition. Operation must be restarted. And then return to (2) operation. 注意 1. 挿入時は絶対にコネクタをこじらない(挿入方向以外に力を加えない)よう注意して 下さい。 2. ハーネス、プラグコネクタに無理な力を与えないで下さい。 3. レバー操作中に引っ掛かり感があったり、スムーズに操作出来ない場合は、レバーを 初期位置に戻して、仮係止状態(奥まで押し当てた状態)として、再度作業し直して下 さい。 Direction of lever rotation レバー回転方向 Mating direction 挿入方向 Connector pre-lock condition 仮係止状態 Mating 嵌合 Connector at mating complete position 嵌合終了位置 5 of 9 Rev.A Plug Assy 47P Tool 411-78257 プラグアッセンブリ 47P 冶具 Fig.7 (3) Please insert extraction tool (Recommended: watchmaker’s screwdriver 3.0mm) in the position after mated connector is confirmed, then remove lever assembly. 嵌合を確認後、所定の位置に冶具を(推奨:3.0mm 精密ドライバー)挿入し、レバーアッシイを外し て下さい。 Direction of released lever assembly released レバーアッシィ解除方向 Position of inserting extraction tool 冶具挿入位置 Fig.8 (4) Extract contact of circuit number 35 by pulling the crimped wire. Circuit number refers to drawing (PN: 1376600). Work while pressing the female connector and the Lance release housing when you pull out the contact See Fig.9 回路番号 35 番の端子を抜いてください。回路番号は PN:1376600 の図面を参照下さい。 端子を引く抜く際は、メスコネクタとランス解除ハウジングを押し付けながら作業して下さい。Fig.9 参照 Work while pressing the female connector and the Lance release housing コネクタと冶具を押し付けながら作業する。 Fig.9 6 of 9 Rev.A Plug Assy 47P Tool 411-78257 プラグアッセンブリ 47P 冶具 (5)Then please insert Cavity Plug Extraction Tool in the position and remove cavity plug. 次にキャビティプラグ用抜き冶具を所定の位置から挿入し、キャビティプラグを取り外して下さい。 Position of inserting Cavity Plug extraction tool キャビティプラグ用抜き冶具挿入位置 Cavity Plug キャビティプラグ Direction of inserting tool 冶具の挿入方向 Fig.10 4.2 Building in sub-harness サブハーネスの組み込み (1) After it finishes extracting contact, please insert lever assembly to female connector 47 positions. Please refer to 411-5967 (5.5.6. Insertion lever assemble to Plug housing) for the insert procedure. 端子を抜き終わった 47P コネクタにレバーアッシイを取り付けて下さい。取付方法は 411-5967 (5.5.6 レバーアッシイ取付)を参照下さい。 NOTE 1. No improper Wire Cover Attach Operation is allowed. Confirm wires are inside of the Wire Cover neatly. 2. Be aware of lever position. The operation should be done the same lever position as shipping condition. See 411-5967 (5.5.6. Insertion lever assemble to Plug housing) for Lever shipping condition. 注意 1. ワイヤーハーネスがカバーからはみ出していないか、カバーに噛み込んでいないか等 を確認して下さい。 2. レバー位置に注意して下さい。弊社出荷時のレバー位置にて、取付け作業をして下さい。 レバーアッセンブリの弊社出荷形態は 411-5967(5.5.6 レバーアッシイ取付)を参照願 います。 7 of 9 Rev.A Plug Assy 47P Tool 411-78257 プラグアッセンブリ 47P 冶具 (2) After locking off lever assy, Please operate (rotate) lever and the connector is pre-lock condition. If do not rotate lever, you check lever assy lock free position. (See Fig.7) . カバーのロックを押し下げながらレバーを回転させ、コネクタを仮係止状態にして下さい。 (Fig.7 参照)レバーが回転できない場合は、無理に動かさず、レバーアッシィのロックが完全に解除 されているか確認して下さい。 (3) Please remove lever assembly and Built in sub-harness. Then, insert lever assembly again レバーアッシィを取り外し、サブハーネスを組み込んで下さい。その後、再度レバーアッシィを取り付 けて下さい。 4.3 Retainer Final lock リテーナーの本係止方法 (1) Please confirm the connector is pre-lock condition. Please mate the connector once when there isn't pre-lock condition. Then, make the connector is pre-lock condition. コネクタが仮係止状態であることを確認して下さい。コネクタが仮係止位置に無い場合は一度コネク タを嵌合させた後、コネクタを仮係止状態にして下さい。 (2)please insert Retainer Lock Tool until it makes a clicking sound. Then, the retainer is completed Final Lock condition. 仮係止状態で所定の位置にリテーナーロック冶具を「カチッ」と音がするまで挿入し下さい。リテーナ ーが本系止されます。 8 of 9 Rev.A Plug Assy 47P Tool 411-78257 プラグアッセンブリ 47P 冶具 Position of inserting Retainer Lock tool リテ-ナーロック冶具挿入位置 Retainer pre-set position リテーナー仮系止位置 Retainer final-set position リテーナー本係止位置 Direction of inserting tool 冶具の挿入方向 Fig.11 (3) Please release the Lance Release Housing from the female connector when all work ends. It becomes easy to pull out housing by a little pushing and expending the side of the female connector. 全ての作業が終了したら、メスコネクタからランス解除ハウジングを引抜いて下さい。メスコネクタの 側面を少し押し広げながら引き抜くと容易に抜くことが出来ます。 Direction of expanding and pushing 押し広げ方向 9 of 9 Rev.A


