1
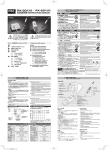
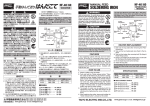
SOLDER POT プラグをアース接地された 3 芯プラグ用コンセ ントに差し込んでください。 棒はんだを約 20mm ずつ切断してツボへ入れ てください。 電源スイッチを ON にしてください。*Max. 設 定時約 10 分ではんだが溶解します。 *Min 設定時は約 10 秒後に LED ランプが点灯 します。 はんだが溶けたら補充のはんだをはんだツボい っぱいに入れてください。 はんだが完全に溶けてから、温度計で設定温度 に達していることを確認してから作業を開始して ください。 作業完了後は必ず電源スイッチを OFF にして、 プラグをコンセントから抜いてください。 Turn ON the power switch. The LED lamp will light 10 seconds after turning ON. (At maximum setting, allow about 10 minutes to melt completely). ツボは消耗品です。はんだにより腐食しますので定期的に交換してください。 SOLDER POT The pot needs to be replaced before solder corrodes the pot surface. MODEL POT- 21C, POT- 23C, POT- 28C *LED lamp will light after approx. 10 seconds at the Min. setting. *The higher the temperatures when used, the faster the pot will corrode. TAIYO will not warrant even if the solder bath is corroded shorten than suggested replacement timing . The level of the solder in the bath should always be kept at the inner lip of the bath. If the level of the solder drops, the heater will overheat, damaging it. *When pre-soldering lead wires, be sure to fill the pot with solder. If the solder level in the pot is low, the heater may be damaged. *Should the work process become difficult, remove dross from the solder bath surface with the spatula included with this unit or by similar means. Plug into a ground pin type receptacle to properly ground it. Ensure solder is completely melted and that the set temperature is reached – Check the temperature by using a thermometer. Cut the solder bar into 20mm lengths and place into pot. Turn OFF the power switch and unplug from the receptacle when finished working. * ツボは使用温度が高いほど劣化の速度が早くなります。 交換時期の目安 Suggested Replacement Timing 400 ∼ 500℃で毎日使用される場合 When the bath is used daily at temperatures between 400–500˚C(752˚F–932˚F) Solder Sn—Pb Sn—Ag—Cu Model eutectic solder lead–free solder はんだ Sn—Pb 共晶はんだ Sn—Ag—Cu 鉛フリーはんだ POT-21C 約2~3ヶ月 約 0.5 ~ 1ヶ月 POT-21C approximately 2–3 months POT-28C - 約1年 POT-28C − 型番 3)Fuse replacement procedure 底板固定ねじをゆるめて底板を取り外します。 ヒューズ交換を行います。 底板を底板固定ねじで固定して完了です。 Unscrew the bottom plate fixing screw and remove bottom plate. Replace with a new fuse. 1 ) Heater replacement procedures 底板の固定ねじをゆるめて底板を取り外します。 Unscrew bottom plate fixing screw and remove the bottom plate. Remove the connector between the heater and the PCB Assembly. はんだツボを固定してあるナットを緩めて外し、 はんだツボとヒーターを取り外します。 Unscrew the bath fixing nut and remove solder bath and heater. 交換ヒーターをはんだツボにはめ、ヒーターカ Place the new heater into the solder bath and バーに組み込み、ナットで固定します。 insert the Heater protection cover. Fasten with コネクタを接続します。 the bath fixing nut. Connect the connector between the heater and 底板を底板固定ねじで固定して完了です。 the PCB Assembly. Fasten the bottom plate with the bottom plate fixing screw. ヒーターと基板を接続しているコネクタを外します。 2)はんだツボに穴があいた場合 底板固定ねじをゆるめて底板を取り外します。 2 ) Bath replacement procedures Unscrew the bottom plate fitting screw and remove the bottom plate. はんだツボを固定してあるナットをゆるめて外し、 Loosen the bath fixing nut and remove the はんだツボだけを取り外します。ヒーター部にツ solder bath only. If solder has spilled from ボから漏れたはんだが付着している場合はヒー the bath onto the heater, the heater must be ターも交換してください。 replaced. 交換用のツボを組み込み、ナットで固定します。 Mount the new solder bath and fasten with the solder bath fixing nut. 底板を底板固定ねじで固定して完了です。 Fasten the bottom plate with the bottom plate fixing screw. 型 番 Model 名 称 Parts Name 品 番 Parts code POT-21C/POT-23C/POT-28C 用替ヒーター (100V) POT-21C/POT-23C/POT-28C Replacement Heater (110V, 120V, 130V, 220V, 240V) POT-21C POT-23C POT-28C POT-21C 用 ステンレス製替ツボ POT-21C Replacement Solder Bath POT-23C 用 セラミック製替ツボ POT-23C Ceramic Solder Bath POT-28C 用 鋳鉄製替ツボ POT-28C Cast Iron Solder Bath * 改良により仕様その他は予告なく変更する場合 があります。 TAIYO reserves the right to alter specifications and otherwise improve performance, at its own discretion. Customer service POT-23C/22 POT-23C/24 POT-28C/22 POT-28C/24 この度は goot ソルダーポットをお 買いあげいただきましてありがとう ございます。この取扱説明書は日本 語/英 語で表記されています。日 本語の説明は国内仕様を日本国内 でご使用になる場合のみ有効です。 Thank you for buying a goot solder pot . This instruction manual includes Japanese and English. The Japanese is for the domestic model sold in Japan. The English is for the export model sold overseas. Fasten the bottom plate with bottom plate fixing screw. FUSE Input Voltage 110 ‒130V AC : 250V 2A Input Voltage 220‒240V AC : 250V 1A 5.交換部品/Replacementparts POT-21CH POT-21CP INSTRUCTION MANUAL CE MODEL POT-21C/22 POT-21C/24 approximately 0.5-1 months approximately 1 year 3)ヒューズの交換 交換ヒューズ定格 125V,250V2A 4.保守/Maintenance 1)ヒーターが断線した場合 ソルダーポット 取扱説明書 注意/ CAUTION(POT-21C/28C) 3.使用方法/Operation 警告/ WARNING この製品をご使用になる前に本説明書 を必ずお読みください。警告、使用方 法に従われない場合は、けが、事故な どが発 生する場合があります。この説 明書は無くさないように大切に保管し てください。 Before using the solder pot, read the Instruction Manual carefully. Failure to follow the safety precautions and instructions in this manual could result in serious injury and property damage. Keep this manual for future reference. POT-23CP POT-28CP TAIYO ELECTRIC IND.CO.,LTD. 太洋電機産業株式会社 お客様相談窓口 東京 03(3832)1774 大阪 06(6644)3508 新潟 0256(35)5379 広島 084(951)9010 www.goot.co.jp Contact your nearest distributor or [email protected] 注 意/ CAUTION POT-21C: 鉛フリーはんだの使 用に ついて 鉛フリーはんだを使用すると、ステン レス製はんだツボの寿命が鉛入りのは んだと比べて約 1/3 に低下します。 POT-21C : NOT RECOMMENDED FOR USE WITH LEAD-FREE SOLDER Use of lead-free solder with this unit will REDUCE stainless steel bath life by up to 1/3 of the life possible with leaded solder. TAIYO ELECTRIC IND.CO.,LTD. APRIL 2012 A4170AP00 PRINTED IN JAPAN AOB 太洋電機産業株式会社