1
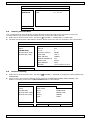
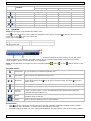
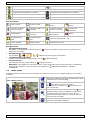
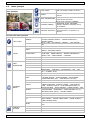
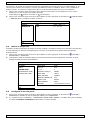
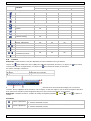
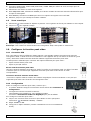
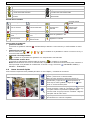
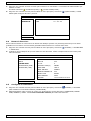
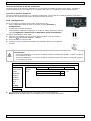
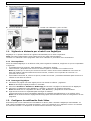
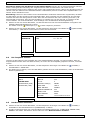
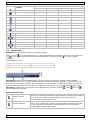
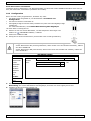
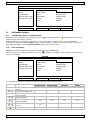
DVR4H4 DVR Status key lock key unlock overwrite on overwrite off internet disconnected internet connected local connection USB mouse connected USB flash drive/device connected no USB device connected IVS on timer recording on timer recording off PTZ mode on PTZ mode off sequence mode on sequence mode off Channel Status original size fit to screen DCCS connection OK DCCS connection failed live audio on audio off audio playback on audio playback off recording human detection event motion event alarm event record mode: Frame record mode: Field record mode: CIF virtual fence event one way pass event scene change event Icons for Recording • manual recording By default, manual recording is on ( ) when the DVR is powered on and a HDD is installed. • event recording The event icons, / / / / / , are shown on the display when their respective events occur and the related record function is on. • timer recording When timer recording is on, is displayed on the screen. • HDD overwrite By default, the HDD overwrite function is set to ON, and is displayed on the screen. Note: To disable the overwrite function, right-click to display the main menu in the live view window. Then select (ADVANCED CONFIG) > RECORD > OVERWRITE. 6.3 Quick Menu Bar Move the mouse pointer to the left of the screen to extend the quick menu bar and show the functions: Click to show the channel switch panel and select the channel you want. Quick Menu (extended) Click to display the playback control panel, and click to play the latest recorded video clip, or click to enter the search list. Switch to the channel you want first, and click to enter the zoom-in mode. In this mode, click and drag the red frame on the bottom left of the screen to move to the place you want to see. To exit this mode, click . Click to show the power off panel to either halt or reboot the system. V. 01 – 10/02/2014 6 ©Velleman nv