1
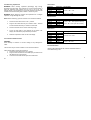
• • • • • • • • • Periodically wipe the cabinet with a damp cloth and mid detergent. Do not use abrasives or solvents. The meter is suitable for indoor use only Do not operate the meter before the cabinet has been closed and screwed safely as terminal can carry voltage. Do not store the meter in a place of explosive, inflammable substances. Do not modify the equipment in any way Opening the equipment and service – and repair work must only be performed by qualified service personnel Do not operate the equipment unattended. Do not place the equipment face-down on any table or work bench to prevent damaging at the controls on the front. Measuring instruments don’t belong to children hands. Cleaning the cabinet Clean only with a damp, soft cloth and a commercially available mild household cleanser. Ensure that no water gets inside the equipment to prevent possible shorts and damage to the equipment. 1,1. Input limits Function V DC V AC Ω mA-range AC/DC 20 A-range AC/DC Frequency Logic Rote Prüfleitung an den V/Ω-Eingang und schwarze Prüfleitung an den COM-Eingang des Gerätes anschließen. 3. SET-Taste (9) drücken um auf umzuschalten. 4. Zu messendes Bauteil bzw. zu messende Schaltung spannungslos schalten. 5. Prüfspitzen über das zu messende Bauteil bzw. die zu messende Schaltung anlegen. Bei Widerständen unter ca. 30 Ω (Bauteil durchgängig) ertönt ein akustisches Signal (Summer). 2. Betrieb des Multimeters mit einem PC unter Windows Zum Anschluss des Multimeters an einen PC wie beschrieben vorgehen: USB-Schnittstellenanschluss des Multimeters über das mitgelieferte Anschlusskabel mit der entsprechenden Schnittstelle des PC’s verbinden. 6.1. Installation der erforderlichen Software Terminal V/Ω + COM V/Ω + COM V/Ω + COM mA + COM 20 A + COM V/Ω + COM max. input limit 1000 V DC 750 V AC 250 V AC/DC 400 mA AC/DC 20 A AC/DC 250 V AC/DC V/Ω + COM V/Ω + COM 250 V AC/DC 250 V AC/DC Mit dem Multimeter wird eine Software-CD zum Betrieb des Gerätes mit einem PC geliefert. Auf der Software-CD befinden sich die hierfür erforderliche Software und USB-Treiber. 6.1.1. Installation der WINDOWS-Software Nachfolgend beschriebene Installationsvorgänge bedingen Grundkenntnisse von Microsoft-Windows, einen entsprechenden PC und eine installierte Windows 98 - Version (oder höher) und einen VGA-Monitor mit mindestens 800 x 600 Pixeln. 1. PC einschalten und Windows booten. 2. Software CD in das entsprechende CD/DVD-Laufwerk des PC’s einlegen. 3. START-Menü aufrufen und die Option „Ausführen“ anklicken. 27 20