1
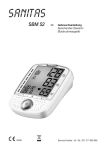
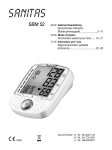
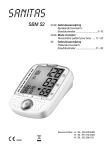
SBM 52
0483
D
Gebrauchsanleitung
Sprechendes OberarmBlutdruckmessgerät ........................2 –11
G ? Instruction for Use
Speaking upper arm
blood pressure monitor ................ 12 – 20
E
Instrucciones para el uso
Tensiómetro para brazo con voz ...21– 30
Service-Hotline: D
G
?
E
Tel.: 021 517 809 696
Tel.: 020 302 490 50
Tel.: 015 245 132
Tel.: 912 754 663
D DEUTSCH
Bitte lesen Sie diese Gebrauchsanleitung aufmerksam durch, bewahren Sie sie für späteren Gebrauch auf,
machen Sie sie anderen Benutzern zugänglich und beachten Sie die Hinweise.
1. Kennenlernen
Das Oberarm-Blutdruckmessgerät dient zur nichtinvasiven Messung und Überwachung arterieller Blutdruckwerte von erwachsenen Menschen.
Sie können damit schnell und einfach Ihren Blutdruck messen, die Messwerte abspeichern und sich den
Verlauf und Durchschnitt der Messwerte anzeigen lassen. Bei eventuell vorhandenen Herzrhythmusstörungen werden Sie gewarnt.
Die ermittelten Werte werden nach WHO-Richtlinien eingestuft und grafisch beurteilt.
Bewahren Sie diese Gebrauchsanleitung für weitere Benutzung auf und machen Sie diese auch anderen
Benutzern zugänglich.
2. Wichtige Hinweise
Hinweise zur Anwendung
• Messen Sie Ihren Blutdruck immer zu gleichen Tageszeiten, um eine Vergleichbarkeit der Werte zu
gewährleisten.
• Ruhen Sie sich vor jeder Messung ca. 5 Minuten aus!
• Zwischen zwei Messungen sollten Sie 5 Minuten warten!
• Die von Ihnen selbst ermittelten Messwerte können nur zu Ihrer Information dienen – sie ersetzen keine
ärztliche Untersuchung!
Besprechen Sie Ihre Messwerte mit dem Arzt, begründen Sie daraus auf keinen Fall eigene medizinische
Entscheidungen (z. B. Medikamente und deren Dosierungen)!
• Es kann zu Fehlmessungen bei Erkrankungen des Herz- Kreislaufsystems kommen, ebenso bei sehr
niedrigem Blutdruck, Durchblutungs- und Rhythmusstörungen sowie bei weiteren Vorerkrankungen.
• Verwenden Sie das Gerät nur bei Personen mit dem für das Gerät angegebenen Umfangbereich des
Oberarmes.
• Sie können das Blutdruckmessgerät mit Batterien oder mit einem Netzgerät betreiben. Beachten Sie,
dass eine Datenspeicherung nur möglich ist, wenn Ihr Blutdruckmessgerät Strom erhält. Sobald die Batterien verbraucht sind oder das Netzgerät vom Stromnetz getrennt wird, verliert das Blutdruckmessgerät
Datum und Uhrzeit.
• Die Abschaltautomatik schaltet das Blutdruckmessgerät zur Schonung der Batterien aus, wenn innerhalb einer Minute keine Taste betätigt wird.
Hinweise zur Aufbewahrung und Pflege
• Das Blutdruckmessgerät besteht aus Präzisions- und Elektronik-Bauteilen. Die Genauigkeit der Messwerte und Lebensdauer des Gerätes hängt ab vom sorgfältigen Umgang:
– Schützen Sie das Gerät vor Stößen, Feuchtigkeit, Schmutz, starken Temperaturschwankungen und
direkter Sonneneinstrahlung.
– Lassen Sie das Gerät nicht fallen.
– Benutzen Sie das Gerät nicht in der Nähe von starken elektromagnetischen Feldern, halten Sie es fern
von Funkanlagen oder Mobiltelefonen.
– Verwenden Sie nur die mitgelieferte oder originale Ersatz-Manschetten. Ansonsten werden falsche
Messwerte ermittelt.
• Drücken Sie nicht auf Tasten, solange die Manschette nicht angelegt ist.
• Falls das Gerät über einen längeren Zeitraum nicht benutzt wird, wird empfohlen, die Batterien zu entfernen.
2
Hinweise zu Batterien
• Batterien können bei Verschlucken lebensgefährlich sein. Bewahren Sie deshalb Batterien und Produkte
für Kleinkinder unerreichbar auf. Wurde eine Batterie verschluckt, muss sofort medizinische Hilfe in Anspruch genommen werden.
• Batterien dürfen nicht geladen oder mit anderen Mitteln reaktiviert, nicht auseinandergenommen, in Feuer geworfen oder kurzgeschlossen werden.
• Nehmen Sie die Batterien aus dem Gerät heraus, wenn diese verbraucht sind oder Sie das Gerät länger
nicht benutzen. So vermeiden Sie Schäden, die durch Auslaufen entstehen können. Ersetzen Sie immer
alle Batterien gleichzeitig.
• Benutzen Sie keine verschiedenen Batterie-Typen, Batterie-Marken oder Batterien mit unterschiedlicher
Kapazität. Verwenden Sie vorzugsweise Alkaline-Batterien.
Hinweise zu Reparatur und Entsorgung
• Batterien gehören nicht in den Hausmüll. Bitte entsorgen Sie die verbrauchten Batterien an den dafür
vorgesehenen Sammelstellen.
• Öffnen Sie nicht das Gerät. Bei Nichtbeachten erlischt die Garantie.
• Das Gerät darf nicht selbst repariert oder justiert werden. Eine einwandfreie Funktion ist in diesem Fall
nicht mehr gewährleistet.
• Reparaturen dürfen nur vom Kundenservice oder autorisierten Händlern durchgeführt werden. Prüfen
Sie jedoch vor jeder Reklamation zuerst die Batterien und tauschen Sie diese gegebenenfalls aus.
• Bitte entsorgen Sie das Gerät gemäß der Elektro- und Elektronik-Altgeräte-EG-Richtlinie
2002/96/EC – WEEE (Waste Electrical and Electronic Equipment). Bei Rückfragen wenden Sie
sich bitte an die für die Entsorgung zuständige kommunale Behörde.
3. Gerätebeschreibung
Anzeigen auf dem Display:
2
3
1
8
7
9
1
11
10
2
6
3
4
10
5
4
5
9
6
8
1. Manschette
2. Manschettenschlauch
3. Manschettenstecker
4. START/STOPP-Taste
5. Funktionstasten
6. LED WHO-Skala
7. Anschluss für Manschettenstecker
8. Display
9. Anschluss für Netzadapter (rechte Seite)
10. Speichertaste
7
1. Aufpumpen , Luft ablassen
2. Systolischer Druck
3. Speicheranzeige: Durchschnittswert (
morgens ( ), abends ( )
4. Diastolischer Druck
5. Benutzerspeicher
6. Ermittelter Pulswert
7. Symbol Herzrhythmusstörung
8. Uhrzeit und Datum
9. WHO-Einstufung
10. Nummer des Speicherplatzes
11. Symbol Batteriewechsel
3
),
4. Messung vorbereiten
Batterie einlegen
• Öffnen Sie den Deckel des Batteriefaches.
• Legen Sie vier Batterien vom Typ 1,5 V AA (Alkaline Type LR6) ein. Achten
Sie unbedingt darauf, dass die Batterien entsprechend der Kennzeichnung mit korrekter Polung eingelegt werden. Verwenden Sie keine wiederaufladbaren Akkus. Die Ansage „Das Gerät ist betriebsbereit, Sie können
mit der Messung beginnen“ wird ausgegeben.
• Schließen Sie den Batteriefachdeckel wieder sorgfältig.
• Mit eingelegten Batterien zeigt das Gerät permanent Uhrzeit und Datum an.
4 x AA (LR6) 1,5 V
Wenn die Batteriewechselanzeige
und erscheinen, ist keine Messung mehr möglich. Das Gerät
sagt an: „Batterie schwach.“ Bitte erneuern Sie alle Batterien. Sobald die Batterien aus dem Gerät entfernt
werden, müssen Datum, Uhrzeit und Sprache neu eingestellt werden.
Verbrauchte Batterien gehören nicht in den Hausmüll. Entsorgen Sie diese über Ihren Elektrofachhändler oder Ihre örtliche Wertstoff-Sammelstelle. Dazu sind Sie gesetzlich verpflichtet.
Hinweis: Diese Zeichen finden Sie auf schadstoffhaltigen Batterien: Pb: Batterie enthält Blei,
Cd: Batterie enthält Cadmium, Hg: Batterie enthält Quecksilber.
Datum, Uhrzeit und Sprache einstellen
In diesem Menü haben Sie die Möglichkeit, folgende Funktionen nacheinander einzustellen:
Datum Uhrzeit Sprache Lautstärke
Sie sollten Datum und Uhrzeit unbedingt einstellen. Nur so können Sie Ihre Messwerte korrekt mit Datum und
Uhrzeit speichern und später abrufen.
Die Uhrzeit wird im 24-Stunden-Format dargestellt.
Zudem verfügt das Gerät über 3 Sprachen. Im Auslieferungszustand ist das Gerät auf Deutsch eingestellt.
Sprache
Datum / Uhrzeit
Wenn Sie die Funktionstasten
gedrückt halten, können Sie die Werte schneller einstellen.
• Schalten Sie das Gerät mit der START/STOPP-Taste
ein.
• Halten Sie die Speichertaste 5 Sekunden gedrückt.
Im Display blinkt die Jahreszahl.
• Stellen Sie mit den Funktionstasten
das Jahr ein und bestätigen Sie mit der Speichertaste .
• Stellen Sie Monat, Tag, Stunde und Minute ein und bestätigen Sie
jeweils mit der Speichertaste .
Im Display blinkt die Anzeige der Sprache .
• Mit den Funktionstasten
können Sie folgende Sprachen auswählen:
= Deutsch
= Englisch
= Spanisch
= Sprache aus
Bestätigen Sie Ihre Wahl mit der Speichertaste
.
= Sprache aus bedeutet, dass keine Sprachausgabe und
damit keine akustische Wiedergabe erfolgt.
4
Sprachausgabe
Das Gerät ist betriebsbereit,
Sie können mit der Messung
beginnen.
Deutsch
English
Español
Lautstärke
Sprachausgabe
Im Display blinkt die Anzeige der Lautstärke Vo3.
• Mit den Funktionstasten
können Sie die Lautstärke der ausgewählten Sprache einstellen:
Vo3 = laut
Vo2 = mittel
Vo1 = leise
Bestätigen Sie Ihre Wahl mit der Speichertaste .
Betrieb mit dem Netzgerät
Sie können dieses Gerät auch mit einem Netzgerät betreiben. Dazu dürfen keine Batterien im Batteriefach
sein. Das Netzgerät ist unter der Bestellnummer 071.30 im Fachhandel oder bei der Serviceadresse erhältlich.
• Das Blutdruckmessgerät darf ausschließlich nur mit dem hier beschriebenen Netzgerät betrieben werden, um eine mögliche Beschädigung des Blutdruckmessgerätes zu verhindern.
• Stecken Sie das Netzgerät in den dafür vorgesehenen Anschluss auf der rechten Seite des Blutdruckmessgerätes. Das Netzgerät darf nur an die auf dem Typschild angegebene Netzspannung angeschlossen werden.
• Schließen Sie danach den Netzstecker des Netzgerätes an die Steckdose an.
• Nach dem Gebrauch des Blutdruckmessgerätes trennen Sie das Netzgerät zuerst von der Steckdose
und anschließend vom Blutdruckmessgerät. Sobald Sie das Netzgerät ausstecken, verliert das Blutdruckmessgerät Datum und Uhrzeit. Die gespeicherten Messwerte bleiben jedoch erhalten.
5. Blutdruck messen
Bitte bringen Sie das Gerät vor der Messung auf Raumtemperatur.
Manschette anlegen
Legen Sie die Manschette am entblößten
linken Oberarm an. Die
Durchblutung des Arms
darf nicht durch zu enge
Kleidungsstücke oder
Ähnliches eingeengt
sein.
Die Manschette ist am
Oberarm so zu platzieren, dass der untere
Rand 2 – 3 cm über der
Ellenbeuge und über
der Arterie liegt. Der
Schlauch weist zur
Handflächenmitte.
Legen Sie nun das freie
Ende der Manschette
eng, aber nicht zu
stramm um den Arm
und schließen Sie den
Klettverschluss. Die
Manschette sollte so
stramm angelegt sein,
dass noch zwei Finger
unter die Manschette
passen.
Stecken Sie nun den
Manschettenschlauch
in den Anschluss für
den Manschettenstecker.
Achtung: Das Gerät darf nur mit der Original-Manschette betrieben werden. Die Manschette ist für einen
Armumfang von 22 bis 36 cm geeignet.
5
Richtige Körperhaltung einnehmen
• Ruhen Sie sich vor jeder Messung ca.
5 Minuten aus! Ansonsten kann es zu Abweichungen kommen.
• Sie können die Messung im Sitzen oder im
Liegen durchführen. Achten Sie in jedem
Falle darauf, dass sich die Manschette in
Herzhöhe befindet.
• Um das Messergebnis nicht zu verfälschen, ist es wichtig, sich während der Messung ruhig zu verhalten
und nicht zu sprechen.
Speicher wählen
Sprachausgabe bei
eingeschalteter Sprachfunktion
Benutzerspeicher
• Schalten Sie das Gerät mit der START/STOPP-Taste
ein.
Im ausgeschalteten Zustand werden Uhrzeit und Datum permanent angezeigt.
• Wählen Sie den gewünschten Benutzerspeicher durch Drücken
der Funktionstasten .
Das Gerät ist betriebsbereit,
Sie können mit der Messung
beginnen.
Benutzerspeicher 1
Benutzerspeicher 2
Benutzerspeicher 3
Benutzerspeicher 4
Sie haben 4 Speicher á 30 Speicherplätze um die Messergebnisse
von 4 verschiedenen Personen getrennt voneinander abzuspeichern.
Blutdruckmessung durchführen
Messung
Sprachausgabe bei
eingeschalteter Sprachfunktion
• Legen Sie, wie zuvor beschrieben, die Manschette an und nehmen
Sie die Haltung ein, in der Sie die Messung durchführen wollen.
Das Gerät ist betriebsbereit,
• Schalten Sie das Gerät mit der START/STOPP-Taste
ein.
• Das Display wird geprüft, indem alle Display-Segmente aufleuchten. Sie können mit der Messung
beginnen.
• Starten Sie das Gerät mit der START/STOPP-Taste . Der zu
belegende Speicherplatz wird angezeigt.
• Die Manschette wird auf 180 mmHg aufgepumpt. Der Manschetten-Luftdruck wird langsam abgelassen. Bei einer bereits zu
erkennenden Tendenz zu hohem Blutdruck wird nochmals nachgepumpt und der Manschettendruck nochmals erhöht. Sobald ein
Puls zu erkennen ist, blinkt das Symbol .
Sie können die Messung jederzeit durch das Drücken der
START/STOPP-Taste
abbrechen.
6
Sprachausgabe bei
eingeschalteter Sprachfunktion
• Die Messergebnisse Systolischer Druck, Diastolischer Druck und
Puls werden angezeigt.
Systole ... mmHg
Diastole ... mmHg
Herzfrequenz ... Schläge pro
Minute
Messung
Nach den Richtlinien der WHO
ist Ihr Blutdruck
– optimal
– normal
– hoch normal
– leicht hyperton
– mittel hyperton
– stark hyperton
Sie können während der Ansage die Lautstärke mit den Funktionstasten
ändern.
•
erscheint, wenn die Messung nicht ordnungsgemäß durchgeführt werden konnte. Beachten Sie das Kapitel Fehlermeldung/
Fehlerbehebung in dieser Gebrauchsanleitung und wiederholen
Sie die Messung.
• Das Messergebnis wird automatisch abgespeichert.
• Das Gerät schaltet nach 1 Minute automatisch ab.
Warten Sie vor einer erneuten Messung mindestens 5 Minuten!
6. Ergebnisse beurteilen
Herzrhythmusstörungen:
Dieses Gerät kann während der Messung eventuelle Störungen des Herzrhythmus identifizieren und weist
darauf hin. Bei eingeschalteter Sprachfunktion
gegebenenfalls nach der Messung mit dem Symbol
sagt das Gerät an: „Eine mögliche Herzrhythmusstörung wurde erkannt.“ Dies kann ein Indikator für eine
Arrhythmie sein. Arrhythmie ist eine Krankheit, bei der der Herzrhythmus aufgrund von Fehlern im bioelektrischen System, das den Herzschlag steuert, anormal ist. Die Symptome (ausgelassene oder vorzeitige
Herzschläge, langsamer oder zu schneller Puls) können u.a. von Herzerkrankungen, Alter, körperlicher Veranlagung, Genussmittel im Übermaß, Stress oder Mangel an Schlaf herrühren. Arrhythmie kann nur durch
eine Untersuchung bei Ihrem Arzt festgestellt werden. Wiederholen Sie die Messung, wenn das Symbol
nach der Messung auf dem Display angezeigt wird. Bitte achten Sie darauf, dass Sie sich 5 Minuten
ausruhen und während der Messung nicht sprechen oder bewegen. Sollte das Symbol
oft erscheinen,
wenden Sie sich bitte an Ihren Arzt. Selbstdiagnose und -behandlung aufgrund der Messergebnisse können gefährlich sein. Befolgen Sie unbedingt die Anweisungen Ihres Arztes.
7
WHO-Einstufung:
Gemäß den Richtlinien/Definitionen der Weltgesundheitsorganisation (WHO) werden die Messergebnisse
gemäß nachfolgender Tabelle eingestuft und beurteilt:
Bereich der Blutdruckwerte
Stufe 3: starke Hypertonie
Stufe 2: mittlere Hypertonie
Stufe 1: leichte Hypertonie
Hoch Normal
Normal
Optimal
Systole (in mmHg)
> = 180
160 – 179
140 – 159
130 – 139
120 – 129
< 120
Diastole (in mmHg)
> = 110
100 – 109
90 – 99
85 – 89
80 – 84
< 80
Maßnahme
einen Arzt aufsuchen
einen Arzt aufsuchen
regelmäßige Kontrolle beim Arzt
regelmäßige Kontrolle beim Arzt
Selbstkontrolle
Selbstkontrolle
Quelle: WHO, 1999
Die Balkengrafik im Display und die Skala auf dem Gerät geben an, in welchem Bereich sich der ermittelte
Blutdruck befindet.
Sollte sich der Wert von Systole und Diastole in zwei unterschiedlichen WHO-Bereichen befinden (z.B.
Systole im Bereich Hoch normal und Diastole im Bereich Normal) dann zeigt Ihnen die graphische WHOEinteilung auf dem Gerät immer den höheren Bereich an, im beschriebenen Beispiel „Hoch normal“.
7. Messwerte speichern, abrufen und löschen
Sie können während der Ansage die Lautstärke mit den Funktionstasten
ändern.
Durchschnittswerte
Benutzerspeicher
Sprachausgabe bei eingeschalteter Sprachfunktion
Die Ergebnisse jeder erfolgreichen Messung werden zusammen
mit Datum und Uhrzeit abgespeichert. Bei mehr als 30 Messdaten
gehen die jeweils ältesten Messdaten verloren.
• Schalten Sie das Gerät mit der START/STOPP-Taste
ein.
• Wählen Sie den gewünschten Benutzerspeicher (
Drücken der Funktionstasten .
…
) durch
• Drücken Sie die Speichertaste . Zunächst wird der Durchschnittswert aller gespeicherten Messwerte dieses Benutzerspei.
chers angezeigt
• Durch weiteres Drücken der Speichertaste wird der Durchschnittswert der letzten 7 Tage der Morgen-Messung angezeigt
(Morgen: 5.00 Uhr – 9.00 Uhr, Anzeige ).
• Durch weiteres Drücken der Speichertaste wird der Durchschnittswert der letzten 7 Tage der Abend-Messung angezeigt
(Abend: 18.00 Uhr – 20.00 Uhr, Anzeige ).
8
Das Gerät ist betriebsbereit,
Sie können mit der Messung
beginnen.
Benutzerspeicher 1
Benutzerspeicher 2
Benutzerspeicher 3
Benutzerspeicher 4
Durchschnittswert:
Systole ... mmHg
Diastole ... mmHg
Herzfrequenz ... Schläge pro
Minute
Nach den Richtlinien der WHO
ist Ihr Blutdruck ...
Messwerte löschen
Einzelmesswerte
Sprachausgabe bei eingeschalteter Sprachfunktion
• Durch weiteres Drücken der Speichertaste werden die jeweils
letzten Einzelmesswerte mit Datum und Uhrzeit angezeigt.
Speicherplatz ...
Systole ... mmHg
Diastole ... mmHg
Herzfrequenz ... Schläge pro
Minute
Nach den Richtlinien der WHO
ist Ihr Blutdruck ...
• Sie können die Messwerte des jeweiligen Benutzerspeichers löschen, indem Sie das Gerät einschalten, den gewünschten Benutzerspeicher auswählen und nach dem Drücken der Speichertaste
, die Funktionstasten und gleichzeitig 5 Sekunden gedrückt
Alle Werte im Speicher gehalten.
löscht!
• Zum Abschalten drücken Sie die START/STOPP-Taste .
• Sollten Sie vergessen das Gerät abzuschalten, schaltet sich dieses automatisch nach 1 Minute ab.
8. Fehlermeldung/Fehlerbehebung
Bei Fehlern erscheint auf dem Display die Fehlermeldung _.
Fehlermeldungen können auftreten, wenn
1. kein Puls erfasst werden kann ( ),
2. Sie sich während der Messung bewegen oder sprechen (neben
auf dem Display angezeigt),
3. das Aufpumpen länger als 25 Sekunden dauert ( ),
4. Fehler während der Messung auftreten ( ),
5. der Aufpumpdruck höher als 300 mmHg ist ( ),
6. die Batterien fast verbraucht sind
( ).
wird auch das Herzrhythmussymbol
Wiederholen Sie in diesen Fällen die Messung. Achten Sie darauf, dass Sie sich nicht bewegen oder reden.
Setzen Sie gegebenenfalls die Batterien neu ein oder ersetzen Sie diese.
9. Gerät reinigen und aufbewahren
• Reinigen Sie Ihr Blutdruckmessgerät vorsichtig nur mit einem leicht angefeuchteten Tuch.
• Verwenden Sie keine Reinigungs- oder Lösungsmittel.
• Sie dürfen das Gerät auf keinen Fall unter Wasser halten, da sonst Flüssigkeit eindringen kann und das
Gerät beschädigt.
• Wenn Sie das Gerät aufbewahren, dürfen keine schweren Gegenstände auf dem Gerät stehen. Entnehmen Sie die Batterien. Der Manschettenschlauch darf nicht scharf abgeknickt werden.
10. Technische Angaben
Modell-Nr.
Messmethode
Messbereich
Genauigkeit
Messunsicherheit
SBM 52
Oszillometrisch, nicht invasive Blutdruckmessung am Oberarm
Druck 0 – 300 mmHg, systolisch 50 – 250 mmHg,
diastolisch 30 – 200 mmHg, Puls 30 –180 Schläge/Minute
Systolisch ± 3 mmHg /diastolisch ± 3 mmHg / Puls ± 5 % des angezeigten
Wertes
Max. zulässige Standardabweichung gemäß klinischer Prüfung:
systolisch 8 mmHg / diastolisch 8 mmHg
9
Speicher
Abmessungen
Gewicht
Manschettengröße
Zul. Betriebstemperatur
Zul. Aufbewahrungstemperatur
Stromversorgung
Batterie-Lebensdauer
Zubehör
Schutzklasse
Zeichenerklärung
4 x 30 Speicherplätze
(L) 134 x (B) 102 x (H) 53 mm
Ungefähr 287 g
22 bis 36 cm
+10 °C bis + 40 °C, 30 – 85 % relative Luftfeuchte
- 5 °C bis + 50 °C, 10 – 85 % relative Luftfeuchte
4 x 1,5 V Batterien AA (Alkaline Type LR6)
Für ca. 250 Messungen, je nach Höhe des Blutdrucks bzw. Aufpumpdruck
Aufbewahrungstasche, Bedienungsanleitung, 4 x 1,5 V Batterien AA
Interne Versorgung, IPX0, kein AP oder APG, Dauerbetrieb
Anwendungsteil Typ B
Achtung!
Gebrauchsanleitung lesen!
Hersteller
Änderungen der technischen Angaben ohne Benachrichtigung sind aus Aktualisierungsgründen vorbehalten.
• Dieses Gerät entspricht der europäischen Norm EN60601-1-2 und unterliegt besonderen Vorsichtsmaßnahmen hinsichtlich der elektromagnetischen Verträglichkeit. Bitte beachten Sie dabei, dass tragbare
und mobile HF-Kommunikationseinrichtungen dieses Gerät beeinflussen können. Genauere Angaben
können Sie unter der angegebenen Kundenservice-Adresse anfordern oder am Ende der Gebrauchsanleitung nachlesen.
• Das Gerät entspricht der EU-Richtlinie für Medizinprodukte 93/42/EC, dem Medizinproduktegesetz und
den europäischen Normen EN1060-1 (nicht invasive Blutdruckmessgeräte Teil 1: Allgemeine Anforderungen) und EN1060-3 (nicht invasive Blutdruckmessgeräte Teil 3: Ergänzende Anforderungen für elektromechanische Blutdruckmesssysteme).
Netzgerät
Modell Nr.
Eingang
Ausgang
Hersteller
Schutz
Gehäuse und Schutzabdeckungen
FW7333SM/06
100 – 240 V, 50 – 60 Hz
6 V DC, 1150 mA, nur in Verbindung mit Sanitas Blutdruckmessgeräten
Friwo Gerätebau GmbH
Das Gerät ist doppelt schutzisoliert und verfügt über eine primärseitige
Temperatursicherung, die das Gerät im Fehlerfall vom Netz trennt.
Im bestimmungsgemäßen Betrieb leuchtet die grüne LED.
Stellen Sie sicher, dass Sie die Batterien aus dem Batteriefach entnommen haben, bevor Sie den Adapter benutzen.
Schutzisoliert / Schutzklasse 2
Das Adaptergehäuse schützt vor Berührung von Teilen, die unter Strom
stehen bzw. stehen können (Finger, Nadel, Prüfhaken).
Der Anwender darf nicht gleichzeitig den Patienten und den Ausgangsstecker des AC-Adapters berühren.
• Das Netzgerät FW7333SM/06 entspricht den Vorgaben gemäß IEC 60601-1: 2005. Darüber hinaus
erfüllen alle Konfigurationen die Vorgaben für medizinische elektrische Systeme (siehe IEC 60601-1-1
bzw. § 16 der 3. Ausgabe von IEC 60601-1). Genauere Angaben können Sie unter der angegebenen
Kundenservice-Adresse anfordern.
10
11. Garantie / Service
Wir leisten 3 Jahre Garantie ab Kaufdatum für Material- und Fabrikationsfehler des Produktes.
Die Garantie gilt nicht:
• Im Falle von Schäden, die auf unsachgemäßer Bedienung beruhen.
• Für Verschleißteile.
• Für Mängel, die dem Kunden bereits bei Kauf bekannt waren.
• Bei Eigenverschulden des Kunden.
Die gesetzlichen Gewährleistungen des Kunden bleiben durch die Garantie unberührt.
Für Geltendmachung eines Garantiefalles innerhalb der Garantiezeit ist durch den Kunden der Nachweis des
Kaufes zu führen. Die Garantie ist innerhalb eines Zeitraumes von 3 Jahren ab Kaufdatum gegenüber der
Hans Dinslage GmbH,
Riedlinger Str. 28,
88524 Uttenweiler, Germany
geltend zu machen.
Der Kunde hat im Garantiefall das Recht zur Reparatur der Ware bei unseren eigenen oder bei von uns autorisierten Werkstätten. Das Gerät aus keinem Grund öffnen – im Falle von Öffnung oder Veränderung erlischt der
Garantieanspruch.
Weitergehende Rechte werden dem Kunden (aufgrund der Garantie) nicht eingeräumt.
In vielen Fällen liegt der Grund für Reklamationen in Bedienungsfehlern. Diese könnten ohne Weiteres telefonisch behoben werden. Bitte wenden sie sich an die für Sie eingerichtete Service-Hotline:
D Tel.: 021 517 809 696
11
G ? ENGLISH
Please read these instructions for use carefully and keep them for later use, be sure to make them
accessible to other users and observe the information they contain.
1. Getting to know your instrument
The upper arm blood pressure monitor is used for non-invasive measurement and monitoring of adults’
arterial blood pressure.
You can use it to measure your blood pressure quickly and easily, storing the results and displaying the
progression of readings together with the average.
A warning is issued for anyone suffering from cardiac arrhythmia.
The values determined are classified and graphically evaluated according to WHO guidelines.
Keep these instructions carefully for further use and also let other users have access to them.
2. Important information
Advice on use
• Always measure your blood pressure at the same time of day, in order to ensure that values are comparable.
• Relax for approx. 5 minutes before each measurement.
• You should wait five minutes before measuring a second time.
• The readings that you take may only be used for information purposes – they are not a substitute for a
medical examination! Discuss your results with the doctor. Never use them to make medical decisions
independently (e.g. regarding medication and dosage thereof).
• There may be incorrect measurements where there is cardiocirculatory disease, as well as with very low
blood pressure, circulatory disorders, dysrhythmia and other preexisting diseases.
• Only use the instrument on persons whose upper arm has the right circumference for the instrument.
• You can operate the blood pressure monitor with both batteries and mains. Note that it is only possible to
save data when your blood pressure monitor is receiving power. As soon as the batteries wear out or you
disconnect the mains adapter from the mains, the blood-pressure instrument loses the date and time.
• The automatic switch-off function switches off the blood pressure monitor in order to preserve the batteries, if no button is pressed within one minute.
Storage and Care
• The blood pressure monitor is made up of precision electronic components. Accuracy of readings and
the instrument’s service life depend on careful handling.
– You should protect the device from impact, moisture, dirt, major temperature fluctuations and direct
exposure to the sun’s rays.
– Never drop the device.
– Do not use near strong electromagnetic fields, i.e. keep it away from any radio systems and mobile
phones.
– Only ever use the cuffs provided with the monitor or original replacement cuffs. Otherwise erroneous
results will be recorded.
• Do not press any buttons until the cuff is in position.
• If the instrument is not used for any length of time, we recommend removing the batteries.
Advice on batteries
• Batteries can be fatal if swallowed. You should therefore store the batteries and products where they are
inaccessible to small children. If a battery has been swallowed, call a doctor immediately.
12
• Batteries should not be charged or reactivated with any other means, nor should they be taken apart,
thrown in the fire or short-circuited.
• Remove the batteries from the instrument if they are worn out or if you are not going to use the instrument for any length of time. This prevents any damage as a result of leakage. Always replace all the
batteries at the same time.
• Never use different types of battery, battery brands or batteries with different capacities. You should
preferably use alkaline batteries.
Repair and disposal
• Batteries do not belong in domestic refuse. Used batteries should be disposed of at the collection
points provided.
• Never open the instrument. If these instructions are not heeded, the warranty will be null and void.
• Never attempt to repair the instrument or adjust it yourself. We can no longer guarantee perfect functioning if you do.
• Repairs may only be performed by Customer Service or authorized dealers. However, always check the
batteries and replace them if necessary prior to making any complaint.
• The appliance should be disposed of according to Regulation 2002/96/EC – WEEE (Waste
Electrical and Electronic Equipment). In case of queries, please contact the municipal authorities
responsible for waste disposal in your area.
3. Unit description
Information on the display:
2
3
1
8
7
9
1
11
10
2
6
3
4
10
5
4
5
9
6
8
1. Cuff
2. Cuff line
3. Cuff connector
4. START/STOP button
5. function buttons
6. LED WHO scale
7. Connection for cuff connector
8. Display
9. Power socket (right side)
10. Memory button
7
1. Inflate , release air
2. Systolic pressure
3. Memory display: average value (
morning ( ), evening ( )
4. Diastolic pressure
5. User memory
6. Calculated pulse value
7. Cardiac arrhythmia symbol
8. Time and date
9. WHO classification
10. Memory space number
11. Battery replacement symbol
13
),
4. Preparing the measurement
Insert the batteries
• Open the battery compartment lid.
• Insert four 1.5 V AA (alkaline type LR6) batteries. Make sure that the batteries are inserted with the correct polarity, according to the label. Do not
use rechargeable batteries. The message “The device is ready for use.
You may start measuring.” is displayed.
• Close the battery compartment lid again carefully.
• With inserted batteries, the unit permanently displays the time and date.
4 x AA (LR6) 1,5 V
and appear, no further measurements can be
If the the low battery indicator
performed. The device will announce: “Battery weak.” Please replace all batteries. Once the batteries have
been removed from the unit, the date, time and language must be set again.
Used batteries should not be disposed of in normal household waste. Dispose of them via
your electronics retailer or your local recycling point. You are legally obligated to do so.
Note: The codes below are printed on batteries containing harmful substances:
Pb: battery contains lead, Cd: battery contains cadmium, Hg: battery contains mercury.
Set date, time and language
This menu allows you to set the following functions, one after another.
Date Time Language Volume
It is essential to set the date and time. Otherwise, you will not be able to save your measured values correctly
with a date and time and access them again later.
The time is displayed in 24-hour format.
In addition, the device has 3 language settings. The device is set to German when supplied to the customer.
Language
Date/Time
If you press and hold the function buttons
, you can set the values more quickly.
• Switch on the device with the Start/stop
button.
• Press and hold the Memory button for 5 seconds.
The year flashes on the display.
• Set the year with the function buttons
and confirm with the
Memory button .
• Set the month, day, hour and minutes and confirm each setting
with the Memory button .
The language will flash on the display .
• You can select the following languages with the function buttons
= German
= English
= Spanish
= Language off
Confirm your selection with the Memory button
.
= Language off means that there is no voice output and
therefore no acoustic playback.
14
Voice output
The device is ready for use.
You may start measuring.
:
Deutsch
English
Español
Volume
Voice output
Volume level Vo3 flashes on the display.
• You can set the volume of the selected language using the function buttons :
Vo3 = loud
Vo2 = medium
Vo1 = quiet
Confirm your selection with the Memory button .
Operation with the power supply unit
You can also operate this device with a power supply unit. When doing so, there must not be any batteries in
the battery compartment. The power supply unit can be obtained from specialist retailers or from the service
address using order number 071.30.
• To prevent possible damage to the device, the blood pressure monitor must only be used with the power supply unit described here.
• Insert the power supply unit into the connection provided for this purpose on the right-hand side of the
blood pressure monitor. The power supply unit must only be connected to the mains voltage that is specified on the type plate.
• Then insert the mains plug of the power supply unit into the mains socket.
• After using the blood pressure monitor, unplug the power supply unit from the mains socket first and
then disconnect it from the blood pressure monitor. As soon as you unplug the power supply unit, the
blood pressure monitor loses the date and time setting but the saved measured values are retained.
5. Measuring blood pressure
Please ensure the unit is at room temperature before measuring.
Attach the cuff
Place the cuff on to the
bare left upper arm. The
circulation of the arm
must not be hindered
by tight clothing or
similar.
The cuff must be placed
on the upper arm so
that the bottom edge
is positioned 2 – 3 cm
above the elbow and
over the artery. The line
points to the centre of
the palm.
Now tighten the free end
of the cuff, but make
sure that it is not too
tight around the arm
and close the Velcro
fastener. The cuff should
be fastened so that two
fingers fit under the cuff.
Now insert the cuff line
into the connection for
the cuff connector.
Caution: The unit may only be operated with the original cuff. The cuff is suitable for an arm circumference
of 22 to 36 cm.
Adopt the correct posture
• Before every measurement, relax for about
five minutes. Otherwise deviations can occur.
• You can perform the measurement while
sitting or lying. Make sure that the cuff is at
heart level.
• To avoid falsifying the measuring result, it is
important to remain still during the measurement and not to speak!
15
Selecting memory
Voice output when voice function
is active
User memory
• Switch on the device with the Start/stop
button.
When the device is switched off, the time and date are permanently displayed.
• Select the desired user memory by pressing the function buttons .
The device is ready for use.
You may start measuring.
User memory 1
User memory 2
User memory 3
User memory 4
You have 4 memories, each with 30 memory spaces to store the
measurements of 4 different people separately.
Performing the blood pressure measurement
Measurement
Voice output when voice function
is active
• As described before, attach the cuff and adopt the posture in
which you want to perform the measurement.
• Switch on the device with the Start/stop
button.
• A display check is performed, during which all display segments light up.
• Start the device with the Start/stop
button. The memory space
that will be used is displayed.
• The cuff is inflated to 180 mmHg. The cuff’s air pressure is slowly
released. If a tendency for high blood pressure is already recognised, the cuff is reinflated and the cuff’s pressure is increased
again. As soon as a pulse is detected, the
symbol flashes.
Measuring can be cancelled at any time by pressing the Start/
stop button .
• Systolic pressure, diastolic pressure and pulse measurements are
displayed.
The device is ready for use.
You may start measuring.
Systole ... mmHg
Diastole ... mmHg
Heart rate ... beats per minute
According to the WHO guidelines your blood pressure is
– optimal
– normal
– high to normal
– shows slight hypertension
– shows medium hypertension
– shows strong hypertension
Whilst the message is being displayed, the volume can be adjusted with the function buttons .
•
appears if the measurement could not be performed properly.
Observe the chapter on error messages/trouble-shooting in these
instructions for use and repeat the measurement.
• The measurement is automatically stored.
• The device switches off automatically after 1 minute.
Wait at least 5 minutes before performing another measurement!
16
6. Evaluating results
Cardiac arrhythmia:
This unit can identify potential disruption of the heart rhythm when measuring and if necessary, indicates
. If the voice function is activated, the device will anthis after the measurement with the symbol
nounce: “A possible cardiac arrhythmia was found.” This can be an indicator for arrhythmia. Arrhythmia is
an illness in which the heart rhythm is abnormal because of flaws in the bioelectrical system that regulates
the heartbeat. The symptoms (skipped or premature heart beats, pulse being slow or too fast) can be
caused by factors such as heart disease, age, physical make-up, excess stimulants, stress or lack of
sleep. Arrhythmia can only be determined through an examination by your doctor. If the symbol
is
shown on the display after the measurement has been taken, it should be repeated. Please ensure that
you rest for 5 minutes beforehand and do not speak or move during the measurement. If the symbol
appears frequently, please consult your doctor. Self-diagnosis and treatment based on the measurements
can be dangerous. Always follow your GP’s instructions.
WHO classification:
In accordance with the guidelines/definitions of the World Heath Organization, the measurements are classified and assessed according to the following table:
Blood pressure value category
Grade 3: severe hypertension
Grade 2: moderate hypertension
Grade 1: mild hypertension
High normal
Normal
Optimal
Systole (in mmHg)
> = 180
160 – 179
140 – 159
130 – 139
120 – 129
< 120
Diastole (in mmHg)
> = 110
100 – 109
90 – 99
85 – 89
80 – 84
< 80
Action
seek medical attention
seek medical attention
regular monitoring by doctor
regular monitoring by doctor
self-monitoring
self-monitoring
Source: WHO, 1999
The bar chart on the display and the scale on the unit show which category the recorded BMI values fall
into.
If the values of systole and diastole fall into two different WHO categories (e.g. systole in the ‘High normal’
category and diastole in the ‘Normal’ category), the graphical WHO classification on the unit always shows
the higher category; for the example given this would be ‘High normal’.
7. Saving, displaying and deleting measurements
Whilst the message is being displayed, the volume can be adjusted with the function buttons
.
User memory
Voice output when voice function
is active
The results of every successful measurement are stored together
with the date and time. If there are more than 30 measurements, the
oldest measurements are lost.
• Switch on the device with the Start/stop
• Select the desired user memory (
buttons .
…
button.
) by pressing the function
17
The device is ready for use.
You may start measuring.
User memory 1
User memory 2
User memory 3
User memory 4
Delete measured values Individual measured values
Average values
Voice output when voice function
is active
• Press the Memory button . The average value of all saved measured values in this user memory is displayed first
.
• If you press the Memory button again, the average value of the
morning measurements for the last 7 days will be displayed (morning: 5 a.m. – 9 a.m., display ).
• If you press the Memory button again, the average value of the
evening measurements for the last 7 days will be displayed (evening: 6 p.m. – 8 p.m., display ).
• If you continue to press the Memory button , the most recent
individual measured values are displayed in turn with the date and
time.
Average count:
Systole ... mmHg
Diastole ... mmHg
Heart rate ... beats per minute
According to the WHO guidelines your blood pressure is ...
Memory space ...
Systole ... mmHg
Diastole ... mmHg
Heart rate ... beats per minute
According to the WHO guidelines your blood pressure is ...
• The measured values in the corresponding user memory can be
deleted by switching on the device, selecting the desired user
memory, pressing the Memory button and then pressing function
buttons and simultaneously for 5 seconds .
• To switch off, press the Start/stop button .
• If you forget to switch off the unit, it will switch off automatically
after 1 minute.
All the counts in the memory
have been erased.
8. Error message/trouble shooting
In the event of errors, the error message _ appears on the display.
Error messages can occur when
1. no pulse signal can be find ( ),
2. you move or talk during the measurement (in addition to , the cardiac arrhythmia icon
the display),
3. the cuff is inflated for longer than 25 seconds ( ).
4. errors occur during measuring ( ),
5. inflation pressure is higher than 300 mmHg ( ).
6. the batteries
are almost empty ( ).
appears in
In such cases, repeat the measurement. Ensure that you do not move or speak.
If necessary, reinsert or replace the batteries.
9. Cleaning and storing the unit
• Clean your blood pressure monitor carefully using a slightly damp cloth only.
• Do not use any cleaning agents or solvents.
• Under no circumstances should you hold the unit under water, as this can cause liquid to enter and
damage the unit.
• If you store the unit, no heavy objects should be placed on top of it. Remove the batteries. The cuff line
should not be bent sharply.
18
10. Technical specifications
Model no.
Measurement method
Measurement range
SBM 52
Oscillometric, non-invasive blood pressure measurement on the upper arm
pressure 0 – 300 mmHg, systolic 50 – 250 mmHg, diastolic 30 – 200 mmHg,
pulse 30 –180 beats per minute
Accuracy
systolic ± 3 mmHg /diastolic ± 3 mmHg /pulse ± 5 % of the value shown
Measurement inaccuracy
Max. permissible standard deviation according to clinical testing:
systolic 8 mmHg /diastolic 8 mmHg
Memory
4 x 30 memory spaces
Dimensions
(L) 134 x (W) 102 x (H) 53 mm
Weight
Approximately 287 g
Cuff size
22 to 36 cm
Permissible operating temperature +10 °C to +40 °C, 30 – 85 % relative humidity
Permissible storage temperature -5 °C to +50 °C, 10 – 85 % relative humidity
Power supply
4 x 1.5 V AA batteries (alkaline type LR6)
Battery life
For approx. 250 measurements, depending on levels of blood pressure
and pump pressure
Accessories
Storage pouch, instructions, 4 x 1.5 V AA batteries
Protection class
Internal supply, IPX0, no AP or APG, continuous operation
Signs and symbols
Application part type B
Caution!
Read the instructions for use!
Manufacturer
Technical information is subject to change without notification to allow for updates.
• This unit is in line with the European Standard EN 60601-1-2 and is subject to particular precautions
with regard to electromagnetic compatibility. Please note that portable and mobile HF communication
systems may interfere with this unit. More details can be requested from the stated Customer Service
address or found at the end of the instructions for use.
• This unit is in line with the EU Medical Devices Directive 93/42/EC, the “Medizinproduktegesetz” (German
Medical Devices Act) and European Standard EN1060-1 (non-invasive sphygmomanometers, Part 1:
General requirements) and EN1060-3 (non-invasive sphygmomanometers, Part 3: Supplementary requirements for electro-mechanical blood pressure measuring systems).
Power supply unit
Model No.
Input
Output
Supplier
Protection
FW7333SM/06
100 – 240 V, 50 – 60 Hz
6 V DC, 1150 mA, only in connection with Sanitas blood pressure monitor
Friwo Gerätebau GmbH
This device is double isolated and protected against short circuit and
overload by a primary thermal fuse.
The green LED lights under normal conditions.
Make sure to take the batteries out of the compartment before using the
adapter.
double isolated / equipment class 2
19
Enclosures and Protective
Covers
Equipment enclosed to protect against contact with live parts, and with
parts which can become live (finger, pin, hook test).
The operator shall not contact the patient and the output plug of AC
adaptor simultaneously.
• The power supply unit FW7333SM/06 conforms to the specifications of IEC 60601-1: 2005. In addition,
all configurations meet the requirements for medical electrical systems (see IEC 60601-1-1 or section
16 of the 3rd edition of IEC 60601-1). For more details, please contact customer services at the address
indicated.
11. Warranty / Service centre
We provide a 3-year warranty covering faults in materials or manufacture of the product from the purchase
date.
The warranty does not cover:
• Damage resulting from improper use.
• Wear parts.
• Defects that were known to the customer at the time of purchase.
• Damage for which the customer was responsible.
This warranty does not affect the customer‘s legal rights.
The customer must provide proof of purchase in order for any warranty claims within the warranty period to
be honoured.
Claims under the warranty within a period of 3 years from the date of purchase are honoured by
Hans Dinslage GmbH,
Riedlinger Str. 28,
88524 Uttenweiler, Germany.
In the event of a warranty claim, the customer has the right to have the goods repaired by our own workshop or a workshop authorised by use. The device must not be opened for any reason. Opening or modifying the device invalidates the warranty.
This warranty does not grant any additional rights to the customer.
In many cases the reason for complaints is operating errors. They can be easily corrected by telephone.
Please contact the service hotline.
G Tel.: 020 302 490 50
? Tel.: 015 245 132
20
E ESPAÑOL
Lea detenidamente estas instrucciones de uso, consérvelas para su futura utilización, haga que estén
accesibles para otros usuarios y observe las indicaciones.
1. Introducción
El tensiómetro para brazo sirve para la medición y el control de los valores de la presión sanguínea arterial
de forma no invasiva en personas adultas.
Con él puede medirse la presión sanguínea de forma rápida y sencilla, guardar los valores de la medición
en la memoria y consultar la evolución y el promedio de los valores medidos. Además, advierte de eventuales alteraciones del ritmo cardiaco.
Los valores medidos se clasifican y evalúan de forma gráfica según las directrices de la OMS.
Conserve estas instrucciones de uso para poder seguir utilizándolas y asegúrese de que se encuentren
disponibles para otros usuarios.
2. Indicaciones importantes
Indicaciones de utilización
•
•
•
•
•
•
•
•
Tómese la tensión siempre a la misma hora del día para garantizar que los valores sean comparables.
Repose unos 5 minutos antes de cada medición.
Espere unos 5 minutos entre medición y medición.
Las mediciones realizadas por usted solo tienen carácter informativo, en ningún caso pueden reemplazar un examen médico. Consulte los valores que obtenga con su médico. Bajo ningún concepto debe
tomar usted decisiones médicas por su cuenta (p. ej. sobre medicamentos y su dosificación).
Pueden producirse errores de medición a causa de enfermedades cardiovasculares, así como en caso
de tener la presión sanguínea muy baja, problemas circulatorios, alteraciones del ritmo cardiaco, o de
haber padecido patologías previas.
Solo las personas que tengan el diámetro de brazo indicado para el aparato pueden usarlo.
Vd. puede utilizar el tonómetro con pilas o bien con la fuente de alimentación para la red. Observe que el
almacenamiento de datos es posible solamente, si su tonómetro recibe corriente. Tan pronto como se agoten las pilas o la fuente de alimentación se desconecte de la red, el tonómetro perderá la fecha y la hora.
La desconexión automática apaga el tensiómetro para conservar las pilas si no se pulsa ninguna tecla
durante un intervalo de un minuto.
Indicaciones de conservación y cuidado
• El aparato de medición está compuesto por elementos electrónicos y de precisión. Tanto la exactitud de
los valores de medición como la vida útil del aparato dependen de la correcta utilización del mismo:
– Proteja el aparato de impactos, humedad, suciedad, grandes oscilaciones térmicas y exposición directa a la luz solar.
– Evite que el aparato se caiga.
– No utilice el aparato en las inmediaciones de campos electromagnéticos de gran intensidad y manténgalo alejado de instalaciones de radio y de teléfonos móviles.
– Solo pueden utilizarse los brazaletes de repuesto o los brazaletes originales que acompañan al aparato. De lo contrario, se obtendrán valores de medición erróneos.
• No pulse ninguna tecla si no tiene el brazalete puesto.
• Si no se va a utilizar el aparato durante un periodo de tiempo prolongado, se recomienda retirar las pilas.
Indicaciones acerca de las pilas
• Las pilas pueden resultar mortales si se ingieren. Por lo tanto, las pilas y los productos deben guardarse
fuera del alcance de niños pequeños. En caso de tragarse una pila, acuda de inmediato al médico.
21
• Las pilas no pueden cargarse ni reactivarse con otros medios, no pueden desmontarse, tirarse al fuego
ni cortocircuitarse.
• Retire las pilas del aparato cuando estén gastadas o si este no va a utilizarse durante un periodo de
tiempo prolongado. De este modo se evitan los daños que podrían producirse a causa de fugas. Cambie todas las pilas a la vez.
• No utilice ni diferentes tipos o marcas de pilas, ni pilas de diferente capacidad. Utilice preferentemente
pilas alcalinas.
Indicaciones acerca de reparaciones y eliminación de residuos
• No deseche las pilas con la basura doméstica. Lleve las pilas usadas a los puntos de recogida dispuestos para tal finalidad.
• No abra el aparato. El incumplimiento de esta norma anula la garantía.
• No repare ni ajuste el aparato usted mismo. Si lo hace, no se garantiza un funcionamiento correcto.
• Las reparaciones solo deben dejarse en manos del servicio al cliente o de distribuidores autorizados.
Antes de realizar cualquier reclamación, compruebe el estado de las pilas y sustitúyalas si es necesario.
• Deseche el aparato según la Directiva europea 2002/96/CE sobre residuos de aparatos eléctricos
y electrónicos (WEEE = Waste Electrical and Electronic Equipment). Para más información, póngase en contacto con la autoridad municipal competente en materia de eliminación de residuos.
3. Descripción del aparato
Indicaciones en la pantalla:
2
3
1
8
7
9
1
11
10
2
6
3
4
10
5
4
5
9
6
8
1. Brazalete
2. Tubo flexible del brazalete
3. Conector del brazalete
4. Tecla de inicio/parada
5. Teclas de función
6. Clasificación OMS mediante LED
7. Conexión para el conector del brazalete
8. Pantalla
9. Conexión para el adaptador de red (lado derecho)
10. Tecla de memorización
22
7
1. Inflar , Desinflar
2. Presión sistólica
3. Indicaciones de la memoria:
valor promedio (
), mañana ( ),
tarde ( ),
4. Presión diastólica
5. Memoria del usuario
6. Pulso medido
7. Símbolo de alteración del ritmo
cardiaco
8. Hora y fecha
9. Clasificación OMS
10. Número de espacio en la memoria
11. Símbolo de cambio de pilas
4. Preparación de la medición
Colocación de las pilas
• Abra la tapa del compartimento para pilas.
• Coloque cuatro pilas de tipo 1,5 V AA (alcalinas tipo LR6). Compruebe
que las pilas se hayan colocado según la polaridad correcta indicada.
No utilice baterías recargables. La indicación “El aparato está preparado.”
aparece.
• Vuelva a cerrar la tapa del compartimento para pilas con cuidado.
• Una vez colocadas las pilas, el aparato indica la hora y la fecha de forma permanente.
4 x AA (LR6) 1,5 V
y , no se puede realizar ninguna
Cuando aparecen el símbolo de cambio de pilas
medición. El aparato indica: “Pila débil”. Sustituya todas las pilas. En cuanto se retiran las pilas del
aparato, se debe volver a ajustar la hora, la fecha y el idioma.
No deseche las pilas usadas con la basura doméstica. Deséchelas a través de su distribuidor
de productos electrónicos o en su punto de recogida de desechos reciclables. Está obligado
por ley.
Indicación: estos símbolos se encuentran en pilas que contienen sustancias tóxicas:
Pb: la pila contiene plomo, Cd: la pila contiene cadmio, Hg: la pila contiene mercurio.
Configurar fecha, hora e idioma
Desde este menú podrá ajustar las funciones que se mencionan a continuación:
Fecha Hora Idioma Volumen
En primer lugar, debe ajustar la fecha y la hora del aparato, ya que solo así se podrán almacenar los datos de
sus mediciones con la fecha y hora correctas para su posterior consulta.
La hora se muestra en formato de 24 horas.
El aparato se puede configurar en 3 idiomas. En el estado de suministro, el aparato está ajustado para
funcionar en alemán.
Idioma
Fecha / Hora
Si mantiene pulsadas las teclas de función
, podrá ajustar los valores con más rapidez.
• Encienda el aparato con la tecla de INICIO/PARADA .
• Mantenga pulsada la tecla de memorización durante 5 segundos.
El indicador del año parpadea en pantalla.
• Ajuste el año con las teclas de función
y confírmelo con la
tecla de memorización .
• Ajuste el mes, el día, la hora y el minuto, y confirme cada uno de
ellos con la tecla de memorización .
El indicador de idioma parpadea en pantalla.
• Con las teclas de función
puede elegir entre los siguientes
idiomas:
= Alemán
= Inglés
= Español
= Desactivar voz
Confirme la selección con la tecla de memorización
.
= Desactivar voz significa que no hay ningún idioma seleccionado y que, por lo tanto, no hay indicación acústica.
23
Función de voz
El aparato está preparado.
Deutsch
English
Español
Volumen
Función de voz
El indicador de volumen Vo3 parpadea en pantalla.
• Con las teclas de función
puede ajustar el volumen del idioma
seleccionado:
Vo3 = alto
Vo2 = medio
Vo1 = bajo
Confirme la selección con la tecla de memorización .
Funcionamiento con la fuente de alimentación
También podrá utilizar este aparato con una fuente de alimentación. Para ello no deberá haber pilas en el
compartimento para pilas. La fuente de alimentación se encuentra disponible en los comercios especializados o en el servicio de asistencia técnica con el número de pedido 071.30.
• El tensiómetro se debe utilizar exclusivamente con la fuente de alimentación descrita aquí, para evitar
posibles daños en el tensiómetro.
• Conecte la fuente de alimentación en la conexión prevista para tal efecto en el lado derecho del tensiómetro. La fuente de alimentación se puede conectar únicamente a la tensión de red indicada en la placa
indicadora de tipo.
• A continuación, conecte el enchufe de la fuente de alimentación a la toma de corriente.
• Después del uso del tensiómetro, primero desconecte la fuente de alimentación de la toma de corriente
y a continuación del tensiómetro. En cuanto desconecte la fuente de alimentación, el tensiómetro perderá la fecha y la hora. Sin embargo, los valores de medición almacenados se conservan.
5. Medición de la presión sanguínea
Asegúrese de que el aparato está a temperatura ambiente antes de realizar la medición.
Colocación del brazalete
Coloque el brazalete
El brazalete debe coloen el brazo izquierdo,
carse en el brazo de forque deberá estar desma que el borde inferior
cubierto. La circulación
quede entre 2 – 3 cm por
sanguínea en el brazo
encima de la articulano debe estar restringición del codo y sobre la
da por ropa o por algo
arteria. El tubo flexible
similar.
debe apuntar hacia la
mitad de la palma de la
mano.
Ajuste el extremo libre
del brazalete alrededor
del brazo sin que quede
demasiado tenso y cierre el velcro. El brazalete
debe quedar lo suficientemente ajustado
como para que quepan
dos dedos debajo del
mismo.
Introduzca el tubo
flexible del brazalete en
la conexión para el conector del brazalete.
Atención: el aparato solo se debe utilizar con el brazalete original. El brazalete está diseñado para un
diámetro de brazo de entre 22 y 36 cm.
24
Adopción de una postura correcta
• Repose unos 5 minutos antes de cada medición. De lo contrario, podrían producirse
variaciones.
• Puede sentarse o recostarse para realizar la
medición. Cerciórese siempre de que el brazalete se encuentra a la altura del corazón.
• Para no falsear el resultado de la medición es importante no moverse ni hablar durante la misma.
Selección del registro
Idioma con la función de voz
activada
Memoria del usuario
• Encienda el aparato con la tecla de INICIO/PARADA
.
El aparato está preparado.
Cuando el aparato está apagado, la hora y la fecha permanecen
visibles.
• Elija el registro de usuario pulsando la tecla de función .
Memoria del usuario 1
Memoria del usuario 2
Memoria del usuario 3
Memoria del usuario 4
Dispone de 4 registros con 30 puestos de almacenamiento cada
uno para almacenar por separado los resultados de las mediciones
de 4 personas diferentes.
Medición de la presión sanguínea
Medición
Idioma con la función de voz
activada
• Póngase el brazalete como se ha descrito anteriormente y colóquese en la postura en la que desea realizar la medición.
• Encienda el aparato con la tecla de INICIO/PARADA .
• La pantalla se comprueba mediante la iluminación de todos los
segmentos de la pantalla.
• Encienda el aparato con la tecla de INICIO/PARADA . Aparece
el puesto de almacenamiento que va a ocuparse.
• El brazalete se infla a 180 mmHg. La presión de aire del brazalete
disminuye lentamente. Cuando se detecta una tendencia a la
tensión alta, se vuelve a bombear aire y aumenta de nuevo la
presión del brazalete. En cuanto se detecta el pulso, parpadea el
símbolo .
El proceso de medición puede interrumpirse en cualquier momento pulsando la tecla de INICIO/PARADA .
25
El aparato está preparado.
Idioma con la función de voz
activada
• Aparecen los resultados de las mediciones de la presión sistólica,
de la presión diastólica y del pulso.
Sistólica ... mmHg
Diastólica ... mmHg
Frecuencia cardíaca ... latidos
por minuto
Medición
Según las directrices de la OMS
– optimal
– normal
– normal alta
– alta leve
– alta moderada
– alta severa
Puede cambiar el volumen con las teclas de función
el mensaje.
durante
•
aparece cuando la medición no se ha podido realizar correctamente. Consulte la sección Aviso de errores/Solución de problemas de estas instrucciones de uso y repita la medición.
• El resultado de la medición se guarda en la memoria automáticamente.
• El aparato se apaga automáticamente tras un minuto.
¡Espere al menos 5 minutos para hacer una nueva medición!
6. Evaluación de los resultados
Alteraciones del ritmo cardiaco
Este aparato es capaz de reconocer eventuales alteraciones del ritmo cardiaco durante la medición, y en
. Si la función de voz está activada,
caso de que esto ocurra, lo indica tras la medición con el símbolo
el aparato emite el mensaje: “Se ha diagnostizado un posible trastorno del ritmo cardíaco.” Estas alteraciones pueden ser un indicador de arritmia. La arritmia es una enfermedad en la que el ritmo cardiaco es
anormal a causa de la presencia de daños en el sistema bioeléctrico que controla los latidos del corazón.
Sus síntomas (palpitaciones, pulso más lento o demasiado rápido) pueden estar provocados por enfermedades cardiacas, la edad, la predisposición física, el exceso de estimulantes, el estrés o la falta de sueño,
entre otras causas. La arritmia solo puede diagnosticarse con un examen médico. Repita la medición si,
tras efectuarla, aparece en la pantalla el símbolo
. Tenga en cuenta que debe reposar durante 5 minutos y que durante la medición no puede hablar ni moverse. Si el símbolo
aparece con frecuencia, consulte a su médico. Realizar un autodiagnóstico e iniciar un tratamiento por su cuenta puede ser peligroso.
Es imprescindible seguir las indicaciones de un médico.
26
Clasificación OMS
De acuerdo con las directrices y/o definiciones de la Organización Mundial de la Salud (OMS), los resultados de las mediciones se clasifican y evalúan según la siguiente tabla:
Rango de los valores de la
presión sanguínea
Nivel 3: hipertensión elevada
Nivel 2: hipertensión media
Nivel 1: hipertensión ligera
Sístole
(en mmHg)
> = 180
160 – 179
140 – 159
Diástole
(en mmHg)
> = 110
100 – 109
90 – 99
Normal alta
130 – 139
85 – 89
Normal
Óptima
120 – 129
< 120
80 – 84
< 80
Solución
Busque atención médica
Busque atención médica
Sométase a revisiones médicas con
regularidad
Sométase a revisiones médicas con
regularidad
Haga un seguimiento por cuenta propia
Haga un seguimiento por cuenta propia
Fuente: OMS, 1999
El gráfico de barras de la pantalla y la escala en el aparato indican en qué rango se encuentra la presión
sanguínea medida.
Si los valores de sístole y de diástole se encuentran en dos rangos de la OMS diferentes (p. ej. la sístole
en el rango de tensión normal alta y la diástole en el rango normal), el gráfico de la clasificación de la OMS
del aparato indica siempre el rango más alto. En este ejemplo, se muestra „Normal alta“.
7. Almacenamiento, consulta y borrado de los valores medidos
Puede cambiar el volumen con las teclas de función
durante el mensaje.
Valores medios
Memoria del usuario
Idioma con la función de voz
activada
Los resultados de todas las mediciones correctamente realizadas
se guardan en la memoria junto con la fecha y la hora. Cuando hay
más de 30 valores de medición, los datos de medición más antiguos
se pierden.
• Encienda el aparato con la tecla de INICIO/PARADA .
El aparato está preparado.
• Elija el registro de usuario que desea (
de función .
…
) pulsando la tecla
• Pulse la tecla de memorización . En primer lugar aparecerá el
valor promedio de todas las mediciones guardadas de este registro de usuario
.
• Pulsando de nuevo la tecla de memorización , se muestra la
media de las mediciones de la mañana realizadas en los últimos 7
días (mañana: de las 5:00 a las 9:00 horas, indicador ).
• Pulsando de nuevo la tecla de memorización , se muestra la media de las mediciones de la tarde realizadas en los últimos 7 días
(tarde: de las 18:00 a las 20:00 horas, indicador ).
27
Memoria del usuario 1
Memoria del usuario 2
Memoria del usuario 3
Memoria del usuario 4
Valor medio:
Sistólica ... mmHg
Diastólica ... mmHg
Frecuencia cardíaca ... latidos
por minuto
Según las directrices de la
OMS ...
Eliminar valores
Valor de medición individual
Idioma con la función de voz
activada
• Pulsando otra vez más la tecla de memorización , cada valor de
medición individual se mostrará con su correspondiente fecha y
hora.
Espacio de memoria ...
Sístole ... mmHg
Diástole ... mmHg
Frecuencia cardíaca ... latidos
por minuto
Según las directrices de la
OMS ...
• Para eliminar los valores de cada registro de usuario, encienda el
tensiómetro, seleccione el registro de usuario y, tras pulsar la tecla
de memorización , mantenga pulsadas a la vez las teclas de
Todos los valores de la
función y durante cinco segundos.
memoria han sido borrados.
• Para apagar, pulse la tecla de INICIO/PARADA .
• Si se olvida de apagar el aparato, este se apagará automáticamente pasado 1 minuto.
8. Aviso de errores/Solución de problemas
En caso de error, aparece en pantalla el aviso de error _.
Los avisos de falla se visualizan cuando
1. cuando no se puede registrar el pulso ( ),
2. Vd. se mueve o habla durante la medición (en la pantalla aparece el símbolo de ritmo cardíaco
lado de ),
3. el inflado toma más de 25 segundos ( ),
4. cuando aparecen errores durante la medición ( ),
5. la presión de inflado supera los 300 mmHg ( ),
6. las pilas están prácticamente agotadas
( ).
al
En estos casos, repita la medición. Procure no moverse ni hablar durante la misma.
En caso necesario, vuelva a colocar las pilas o sustitúyalas.
9. Limpieza y almacenamiento del aparato
•
•
•
•
Limpie con cuidado el tensiómetro sólo con un paño ligeramente humedecido.
No use limpiadores ni disolventes.
No se puede sumergir el aparato en ningún caso, ya que puede penetrar líquido en él y dañarlo.
Cuando el aparato esté guardado, no se deben colocar objetos pesados sobre el mismo. Retire las
pilas. El tubo flexible del brazalete no debe doblarse en ángulos muy cerrados.
10. Datos técnicos
N.º de modelo
Método de medición
Rango de medición
Precisión
Inexactitud de la medición
SBM 52
Oscilométrico, medición no invasiva de la presión sanguínea en el brazo
Presión 0 – 300 mmHg, sistólica 50 – 250 mmHg, diastólica 30 – 200 mmHg,
pulso 30 –180 latidos/minuto
Sistólica ± 3 mmHg /diastólica ± 3 mmHg / pulso ± 5 % del valor indicado
La desviación estándar máxima permitida según ensayo clínico es de:
sistólica 8 mmHg / diastólica 8 mmHg
28
Memoria
Medidas
Peso
Diámetro de brazalete
Temperatura de funcionamiento
permitida
Temperatura de almacenamiento permitida
Alimentación
Vida útil de las pilas
Accesorios
Clase de protección
Explicación de los símbolos
4 x 30 espacios de almacenamiento
134 mm (largo) x 102 mm (ancho) x 53 mm (alto)
287 g aproximadamente
De 22 a 36 cm
+10 °C a + 40 °C, 30 – 85 % de humedad relativa
- 5 °C a + 50 °C, 10 – 85 % de humedad relativa
4 pilas de 1,5 V AA (alcalinas tipo LR6)
Para unas 250 mediciones, según lo elevado de la presión sanguínea y la
presión de inflado
Bolsa, instrucciones de uso, 4 pilas de 1,5 V AA
Alimentación interna, IPX0, sin categoría AP ni APG, funcionamiento
continuo
Pieza de aplicación tipo B
¡Atención!
Lea las instrucciones de uso.
Fabricante
Reservado el derecho a realizar modificaciones de los datos técnicos sin previo aviso por razones de
actualización.
• Este aparato cumple con la norma europea EN60601-1-2 y está sujeto a las medidas especiales de
precaución relativas a la compatibilidad electromagnética. Tenga en cuenta que los dispositivos de
comunicación de alta frecuencia portátiles y móviles pueden interferir con este aparato. Puede solicitar
información más precisa al servicio de atención al cliente en la dirección indicada en este documento o
leer el final de las instrucciones de uso.
• Este aparato cumple la directiva europea en lo referente a productos sanitarios 93/42/CE, las leyes
relativas a productos sanitarios y las normas europeas EN1060-1 (Esfigmomanómetros no invasivos,
Parte 1: Requisitos generales) y EN1060-3 (Esfigmomanómetros no invasivos, Parte 3: Requisitos suplementarios aplicables a los sistemas electromecánicos de medición de la presión sanguínea).
Fuente de alimentación
N.º de modelo
Entrada
Salida
Fabricante
Protección
FW7333SM/06
100 – 240 V, 50 – 60 Hz
6 V DC, 1150 mA solamente en combinación con los tensiómetros Sanitas
Friwo Gerätebau GmbH
El aparato está provisto de un doble aislamiento de protección y de un
termofusible en su cara principal, que desconecta el aparato de la red en
caso de avería.
Durante el uso previsto del aparato se enciende el LED verde.
Asegúrese de haber extraído las pilas del compartimento de las pilas
antes de utilizar el adaptador.
Aislamiento de protección / Clase de protección 2
29
Carcasa y cubierta protectora
La carcasa del adaptador actúa como protección frente a las partes
sometidas, o que pueden verse sometidas, a la corriente (dedo, agujas,
gancho de seguridad).
El usuario no debe tocar de inmediato ni el paciente ni la clavija de salida
del adaptador de CA.
• La fuente de alimentación FW7333SM/06 cumple la norma CEI 60601-1:2005. Además,
todas las configuraciones cumplen las normas para sistemas médicos eléctricos (consulte
CEI 60601-1-1 y § 16 de la tercera edición de CEI 60601-1). Puede solicitar información más
precisa al servicio de atención al cliente en la dirección indicada en este documento.
11. Garantía / Atención al cliente
Ofrecemos 3 años de garantía desde la fecha de compra por defectos de fabricación y del material del
producto.
La garantía no es válida:
• En caso de daños que resulten de un uso inapropiado.
• Para piezas de desgaste.
• Por fallas que ya se informaron al cliente al momento de la compra.
• Por fallos del cliente.
Esta garantía no altera las garantías legales del cliente. Para aprobar la aplicación de la garantía dentro
de su plazo, el cliente debe probar la compra del producto. La garantía es válida dentro de un plazo de
3 años a partir de la fecha de compra ante
Hans Dinslage GmbH,
Riedlinger Str. 28,
88524 Uttenweiler, Germany.
El cliente tiene en la aplicación de la garantía el derecho a reparación de la mercancía en nuestras oficinas
propias o autorizadas por nosotros. No abrir por ningún motivo el aparato, en caso de abrirlo o modificarlo
se anula el derecho de garantía.
No se conceden otros derechos .al cliente (debido a la garantía).
En la mayoría de los casos, el motivo de las reclamaciones es un error de manejo que puede solucionarse
fácilmente de forma telefónica. Póngase en contacto con la línea de asistencia técnica habilitada llamando
al
E Tel.: 912 754 663
30
Electromagnetic Compatibility Information
Guidance and manufacture’s declaration – electromagnetic emissions – for all EQUIPMENT and SYSTEMS
Guidance and manufacture’s declaration – electromagnetic emission
The SBM52 blood pressure monitor is intended for use in the electromagnetic environment specified below. The customer of the user of the SBM52 blood pressure monitor should assure that it is used in such and environment.
Emission test
Compliance Electromagnetic environment – guidance
RF emissions CISPR 11 Group 1
The SBM52 blood pressure monitor uses RF energy only for its internal function.
Therefore, its RF emissions are very low and are not likely to cause any interference in nearby electronic equipment.
RF emission CISPR 11 Class B
The SBM52 blood pressure monitor is suitable for use in all establishments, including domestic establishments and those directly connected to the public low-voltage power supply network that supplies buildings used for domestic purposes.
Guidance and manufacture’s declaration – electromagnetic immunity – for all EQUIPMENT and SYSTEMS
Guidance and manufacture’s declaration – electromagnetic immunity
The SBM52 blood pressure monitor is intended for use in the electromagnetic environment specified below. The customer or the user of the SBM52 blood pressure monitor should assure that it is used in such an environment.
Immunity test
IEC 60601
Compliance Electromagnetic environment – guidance
test level
level
Floors should be wood, concrete or ceramic tile. If floor
Electrostatic discharge (ESD) ± 6 kV contact ± 6 kV contact
are covered with synthetic material, the relative humiIEC 61000-4-2
± 8 kV air
± 8 kV air
dity should be at least 30%.
Power frequency (50Hz)
Power frequency magnetic fields should be at levels
magnetic field
3 A/m
3 A/m
characteristic of a typical location in a typical commerIEC 61000-4-8
cial or hospital environment.
Guidance and manufacture’s declaration – electromagnetic immunity – for EQUIPMENT and SYSTEMS that are not
LIFE-SUPPORTING
Guidance and manufacture’s declaration – electromagnetic immunity
The SBM52 blood pressure monitor is intended for use in the electromagnetic environment specified below. The customer or the user of the SBM52 blood pressure monitor should assure that it is used in such an environment.
Immunity test IEC 60601 Compliance Electromagnetic environment – guidance
test level level
Portable and mobile RF communications equipment should be used no closer to any part of the SBM52 blood pressure monitor, including cables, than
the recommended separation distance calculated from the equation applicable to the frequency of the transmitter.
Recommended separation distance:
d=
3 Vrms
Conducted RF 3 Vrms
IEC 61000-4-6 150 kHz to
80 MHz
Radiated RF
3 V/m
3 V/m
IEC 61000-4-3 80 MHz to
2.5 GHz
d=
80 MHz to 800 MHz
d=
800 MHz to 2.5 GHz
Where P is the maximum output power rating of the transmitter in watts (W)
according to the transmitter manufacturer and d is the recommended separation distance in metres (m).
Field strengths from fixed RF transmitters, as determined by an electromagnetic site survey,a should be less than the compliance level in each frequency range.b
Interference may occur in the vicinity of
equipment marked with the following symbol:
NOTE 1 At 80 MHz and 800 MHz, the higher frequency range applies.
NOTE 2 These guidelines may not apply in all situations. Electromagnetic propagation is affected by absorption and
reflection from structures, objects and people.
31
Guidance and manufacture’s declaration – electromagnetic immunity
a Field strengths from fixed transmitters, such as base stations for radio (cellular/cordless) telephones and land mobile
radios, amateur radio, AM and FM radio broadcast and TV broadcast cannot be predicted theoretically with accuracy.
To assess the electromagnetic environment due to fixed RF transmitters, an electromagnetic site survey should be considered. If the measured field strength in the location in which the SBM52 blood pressure monitor is used exceeds the
applicable RF compliance level above, the SBM52 blood pressure monitor should be observed to verify normal operation. If abnormal performance is observed, additional measures may be necessary, such as reorienting or relocating the
SBM52 blood pressure monitor.
b Over the frequency range 150 kHz to 80 MHz, field strengths should be less than 3 V/m.
752.916_1211 Irrtum und Änderungen vorbehalten
Recommended separation distances between portable and mobile RF communications equipment and the
EQUIPMENT or SYSTEM – for EQUIPMENT or SYSTEM that are not LIFE-SUPPORTING
Recommended separation distances between portable and mobile RF communications equipment and the SBM52
blood pressure monitor
The SBM52 blood pressure monitor is intended for use in an electromagnetic environment in which radiated RF disturbances are controlled. The customer or the user of the SBM52 blood pressure monitor can help prevent electromagnetic interference by maintaining a minimum distance between portable and mobile RF communications equipment
(transmitters) and the SBM52 blood pressure monitor as recommended below, according to the maximum output
power of the communications equipment.
Separation distance according to frequency of transmitter
(m)
150 kHz to 80 MHz
80 MHz to 800 MHz
800 MHz to 2.5 GHz
Rated maximum output
power of transmitter
d=
d=
d=
(W)
0.01
0.117
0.117
0.234
0.1
0.370
0.370
0.740
1
1.170
1.170
2.340
10
3.700
3.700
7.400
100
11.7
11.7
23.4
For transmitters rated at a maximum output power not listed above, the recommended separation distance d in
metres (m) can be estimated using the equation applicable to the frequency of the transmitter, where P is the maximum output power rating of the transmitter in watts (W) according to the transmitter manufacturer.
NOTE 1 At 80 MHz and 800 MHz, the separation distance for the higher frequency range applies.
NOTE 2 These guidelines may not apply in all situations. Electromagnetic propagation is affected by absorption and
reflection from structures, objects and people.
32