1
RQT9097-D_eng.fm
4 ページ
7年
月
日 木曜日 午後7時
8分
Preparations
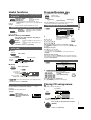
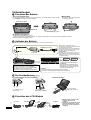
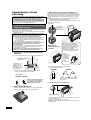
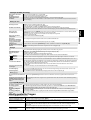
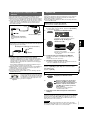
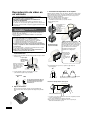
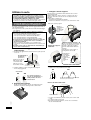
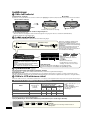
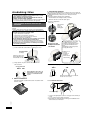
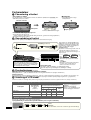
1 Attaching the battery
∫ Detaching
(When the unit is off)
The illustrations shown are of CGR-H712; however the steps for CGR-H711 (included with [DVD-LS83])
or CGR-H701 (optional) are the same.
≥ Turn the unit off before detaching the
battery pack.
Bottom side of this unit
2
RELEASE
RELEASE
DETACH
ATTACH
DETACH
Clicks into place
RELEASE
DETACH
Battery pack
ATTACH
ATTACH
1 Press and hold
Check to make sure it is securely fastened.
When not using for long periods of time
≥ Remove the battery pack (➜ above).
(Even when the unit is turned off, there is a small amount of voltage running through the unit, and this may result in a malfunction.)
≥ Recharge the battery for re-use.
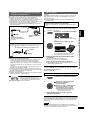
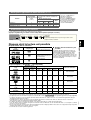
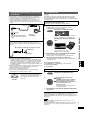
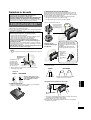
2 Recharging the battery
The battery is not charged at the time of purchase. Charge before initial use.
The unit is in the standby condition (the [Í]
indicator lights) when the AC mains lead is
connected. The primary circuit is always “live”
as long as the AC adaptor is connected to an
electrical outlet.
To conserve power
This unit consumes 0.4 W of power even
when turned off. When the unit is not going to
be used for a long time, disconnect the AC
mains lead from the household mains socket.
AC mains lead (included)
To household
mains socket
AC adaptor
(included)
DC IN
Started
≥ You can also use this unit without charging while
connecting the AC adaptor and the AC mains lead.
≥ You can also use this unit without charging while
connecting Car DC Adaptor. (➜ 15, Connecting the
included Car DC Adaptor)
CHG
Í
Recharging time:
Finished
goes out
➜ lights*
[Í]
[CHG] lights
➜ goes out
*Only when recharged with the unit off.
[Í] indicator
When the unit is connected to the AC
mains supply, this indicator lights up in
standby mode and goes out when the
unit is turned on.
➜ 5, Approximate recharging and play times (Hours)
When finished, disconnect the AC adaptor and the AC mains lead.
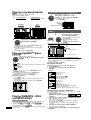
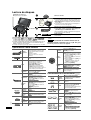
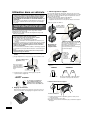
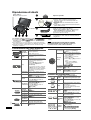
3 The remote control [DVD-LS86]
Insert the button-type battery (included)
Range of use
Bottom
While sliding (1), pull out (2).
Aim at the sensor. Maximum
range is up to 7 m.
_ facing up
Lithium battery: CR2025
RQT9097
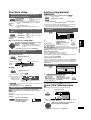
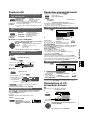
4 Adjusting the LCD angle
4
4
Open the LCD
Standard
Free
Slide
Compact
Clicks!
≥ When moving the unit : Close the
LCD. Don’t hold by the LCD.
≥ Functions operated by buttons on
the unit will not work when the LCD
is closed.