Download Bedanl. FR-20 1207.indd
Transcript
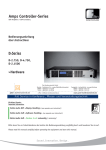
Fohhn-Net Remote Fohhn Control Network. Bedienungsanleitung User Instructions FR-20 Fohhn-Net Remote distribution switch >Installation >Configuration Bitte lesen Sie vor Inbetriebnahme des Gerätes die Bedienungsanleitung sorgfältig durch und bewahren Sie sie auf. Please read this manual carefully before operating the equipment and store this manual. Fohhn Audio AG Sound.Innovation.Design. Inhalt . . . . . . . . . . . . . . . . . . . . . . . . . . . . . . . . . . . . . . . . . . . . Seite 1. Einleitung 3 2. Sicherheit und Umwelt 2.1 Sicherheitshinweise 2.2 Beeinträchtigung der Sicherheit 2.3 Umwelt 3. Lieferumfang 3 3 3 3 3 4. Reinigung 3 5. Beschreibung 5.1 Übersichtsschaubild 4 5 6. Montage, Installation und Vorbereitungen 6.1 Kontakteingänge 6.2 Relaisausgänge 6.3 Einstellen der Netzwerkadresse - wichtiger Hinweis! 6.4 Installation der Software 6.5 Bedienelemente 6 6 6 6 6 7 7. Konfiguration der FR-20 mit Hilfe der Software 7.1 Softwarestart 7.2 Konfiguration der Eingänge 7.3 Preset laden 7.4 Lautstärkeregelung 7.4.1 Lautstärkeregelung für verschiedene Gruppen / Zonen 7.5 Relais setzen 8 8 8 9 9 10 10 8. Live Mode / Simulation der FR-20 in Software 10 9. Übertragen der Einstellungen 10 10. Anschlussbelegung 20 11. Einbindung in Mediensteuerungen 20 12. Technische Daten 20 Englische Bedienungsanleitung / User Instructions 11 2 | FR-20 1. Einleitung 2.2 Beeinträchtigung der Sicherheit Wir beglückwünschen Sie zum Kauf eines FR-20 Fohhn-Net Remote Distribution Switch. Heutzutage sind die Ansprüche an die Soundqualität und Vielseitigkeit sowie die einfache Bedienung enorm gestiegen. Aus dem Wissen um diese Anforderungen, haben wir die netzwerkfähigen Fohhn Geräte mit integrierten Fohhn Audio DSPs entwickelt und konsequent umgesetzt. Sie sollen Ihnen das Arbeiten auf Ihren Veranstaltungen oder die Inbetriebnahme einer Festinstallation so leicht wie möglich machen. Die neuen vielfältigen Bedienmöglichkeiten der Fohhn Audio DSPs bieten Ihnen viele komfortable Möglichkeiten im täglichen Betrieb. Lesen Sie die Anleitung vor Inbetriebnahme sorgfältig durch, damit Ihr Fohhn Audiosystem seine volle Leistung entfaltet und ein störungsfreier Betrieb gewährleistet ist. Bewahren Sie diese Bedienungsanleitung sorgfältig auf. Wenn das Gerät • • • • • sichtbare Beschädigungen aufweist, lose Teile enthält, nicht mehr korrekt arbeitet, längere Zeit unter ungünstigen Bedingungen gelagert wurde (z.B. im Freien oder in feuchten Räumen) oder schweren Transportbeanspruchungen ausgesetzt war (z.B. mit einer ungeeigneten Verpackung), kann die Sicherheit beeinträchtigt sein. Setzen Sie das Gerät außer Betrieb und kennzeichnen Sie es. Sichern Sie das Gerät so gegen unbeabsichtigten Betrieb, daß es nicht versehentlich von Dritten wieder in Betrieb genommen werden kann. 2.3 Umwelt 2. Sicherheit und Umwelt Wenn Sie das Gerät verschrotten, trennen Sie Gehäuse, Elektronik und Kabel und entsorgen Sie alle Komponenten gemäß den dafür geltenden Entsorgungsvorschriften. 2.1 Sicherheitshinweise 1. Dieses Gerät ist gemäß den VDE-Schutzmaßnahmen für elektronische Geräte gebaut und geprüft. Es hat das Werk in sicherheitstechnisch einwandfreiem Zustand verlassen. Um diesen Zustand zu erhalten und einen gefahrlosen Betrieb sicherzustellen, beachten Sie bitte sowohl die allgemein üblichen Sicherheitsvorkehrungen als auch die Hinweise und Warnvermerke in dieser Bedienungsanleitung. 2. Das Gerät entspricht den Bestimmungen der Schutzklasse1. In ordnungsgemäß installiertem Zustand sind alle berührbaren Metallteile fest mit dem Schutzleiter verbunden. Aus Sicherheitsgründen darf das Gerät nur an einer vorschriftsmäßigen Schutzkontaktsteckdose betrieben werden. Trennen sie niemals die Schutzkontaktverbindung auf. 3. Das Gerät entspricht den derzeit gültigen Normen des EMVGesetzes. Dies wird durch das am Gerät angebrachte CE-Zeichen bescheinigt. 4. Das Gerät enthält keine vom Anwender reparierbaren Teile. Zur Vermeidung der Gefahr von Bränden oder elektrischen Schlägen öffnen Sie das Gehäuse nicht und wenden Sie sich für Reparaturen an einen qualifizierten Techniker. 5. Hohe Schalldrücke können Gehörschäden verursachen! Halten Sie sich nie unmittelbar vor einer betriebsbereiten Box auf. Vermeiden Sie Rückkopplungen. 3. Lieferumfang Ihr FR-20 besteht aus folgenden Komponenten: 1. 2. 3. 1x FR-20 19" Distribution Switch 1x Steckernetzteil CD-Rom mit Fohhn-Net Remote Control Software und Fohhn Audio Soft Bediensoftware Kontrollieren Sie bitte, ob die Verpackung alle zum jeweiligen System gehörenden Teile enthält. Falls etwas fehlt, wenden Sie sich bitte an Ihren Fohhn-Händler. 4. Reinigung Das Geräte können Sie mit einem feuchten Tuch abstauben. Die Oberfläche der Decorplatte aus hochwertigem Aluminium reinigen Sie am besten mit einem (Industrie-)Spiritus oder einem mit Alkohol befeuchteten Tuch. FR-20 | 3 5. Beschreibung (1) (2) (3) (7) (8) (4) (5) (9) (2)(3) (12) (6) (13) (10) (11) FR-20 Fohhn-Net Remote Die 19”-Fernsteuerungseinheit, die sich ihren Wünschen anpasst. FR-20 Fohhn-Net Remote Distribution Switch. 19”-Fernsteuerungseinheit, 1HE. Die Ansteuerung erfolgt über 8 Schließkontakte oder RS-485 Protokoll. Anpassung an Kundenwünsche: An die FR-20 können Türschalter oder kundenspezifische Bedienpanels angeschlossen werden. Es stehen 8 Anschlüsse für Schließkontakte zur Verfügung. Hierdurch können in den angeschlossenen Fohhn-Geräten Presets aufgerufen werden, die Lautstärke in frei definierbaren Stufen geändert werden und beliebige Endgeräte zu Gruppen zusammengefasst werden. Einbindung in Mediensteuerungen. Über die FR-20 können alle Endgeräte mit integrierten Fohhn Audio DSPs z.B. durch AMX oder Crestron Mediensteuerungen bedient werden. Das zu implementierende Protokol ist von Fohhn erhältlich (siehe Kapitel 11). Die Ansteuerung erfolgt entweder über 8 Schließkontakte oder RS-485 Protokoll. Einfache Konfiguration mit Fohhn-Net Remote Control Software. Über die intuitive Fohhn-Net Remote Software können Sie die FR-20 per Computer einfach und schnell konfigurieren. Über eine USB Schnitstelle kann direkt ein PC angeschlossen werden. Die FR-20 verfügt zusätzliche über 8 frei konfigurierbare Output Relais-Kontakte (10). USB Anschluss (1): Nachdem die FR-20 über das USB-Kabel an den PC angeschlossen worden ist, wird sie sofort automatisch erkannt und ist nach wenigen Sekunden betriebsbereit. Es ist kein weiterer Benutzereingriff erforderlich, vorausgesetzt Fohhn Audio Soft 2.4.0 oder neuer ist auf dem PC installiert. 4 | FR-20 Integration der Fohhn Systeme in die EIB Bustechnologie "Europäische Installations Bus". Ein Gebäude, ein Konzept, ein System. Hier werden die Fohhn Systeme mit Hilfe der FR-20 Fohhn-Net Remote mit ihren 8 Schließkontakten (11) in die Bustechnologie samt allem Bedienkomfort intergriert. Die Ralaiskontakte im Verteilerschrank steuern die 8 Schließkontakte der FR-20 Fohhn-Net Remote. Auf diese Art und Weise ist die Integration auch in andere Bussysteme einfach möglich. 5.1 Übersichtsschaubild Das System: Auf intelligente und intuitive Weise vereinfachen Sie Ihren Beschallungsalltag, sichern sich erstklassige Beschallungsergebnisse und behalten stets die Kontrolle über Ihre Sound-Systeme. Fernsteuerungsmöglichkeiten, Endstufen, DSP-Technik und Lautsprecher. … Kundenspezifische Schalter oder Taster Integration der Fohhn Systeme in die EIB Bustechnologie „Europäische Installations Bus“. Ein Gebäude, ein Konzept, ein System. Einbindung in Mediensteuerungen. FR-10 Bedienpanel über 8 Eingangskontakte RS-485 oder über 8 Eingangskontakte Fohhn-Net über 8 Eingangskontakte Fohhn-Net Remote Control Software Fohhn-Net 8 Relaisausgänge RJ-45 patch cable RJ-45 patch cable FR-20 | 5 6. Montage, Installation und Vorbereitungen Die FR-20 kann in einem 19" Rack montiert werden und belegt 1HE. Die FR-20 wird mittels eines mitgelieferten Steckernetzteils mit Strom versorgt (7). Die FR-20 benötigt mindestens die Fohhn-Net Remote Control Software 1.3. 6.1 Kontakteingänge (11) Die FR-20 besitzt 8 Kontakteingänge, diese werden geschaltet indem die beiden Kontakte eines Eingangs miteinander verbunden, oder geöffnet werden. An die Kontakteingänge kann z.B. ein Taster oder ein Schalter angeschlossenen werden. Ein Taster kann durch drücken (Kontakt schließt sich) z.B. ein bestimmtes Preset laden, oder als Lautstärke Regler (z.B. Laustärke erhöhen) funktionieren. Bei einem Schalter können durch Umschalten (Kontakt schließt sich / Kontakt öffnet sich) z.B. zwei verschiedene Presets geladen werden. Die 8 Kontakteingänge können z.B. zur einfachen Überprüfung bei Inbetriebnahme mit den Tastern (4) abgerufen werden. LEDs (5) leuchten grün bei erfolgreicher Ausführung des Befehls und rot bei nicht erfolgreicher Ausführung des Befehls. 6.3 Einstellen der Netzwerkadresse - wichtiger Hinweis! Die FR-20 hat bei Auslieferung die Netzwerkadresse 1. Achten Sie darauf dass kein anderes Gerät diese Adresse hat, oder ändern Sie vorab die Netzwerkadresse der FR-20, insbesondere wenn Sie mehrere FR-20 einsetzen sollten. In diesem Fall muss die Adresse der FR-20 auf jeden Fall geändert werden, bevor Sie das Netzwerk zusammenschließen, das ansonsten keine Kommunikation möglich ist. Die Netzwerkadresse lässt sich nur über die Fohhn-Net Remote Control Software ändern. (siehe Netzwerkadresse ändern) Wenn Sie sich in dem Transfer-Fenster befinden, können Sie mit dem Button „Change ID“ die Netzwerkadresse der FR-20 verändern. 6.4 Installation der Software 6.2 Relaisausgänge (10) Für die Verwendung der Software unter Windows 2000 SP4 oder Windows XP SP2 muss das Microsoft.NET Framework 2.0 installiert werden, welches auf der CD enthalten ist. Die FR-20 besitzt 8 Ausgangsrelais. Jedes Relais ist als Umschalter ausgeführt. Die Relais können durch Ereignisse an den Eingängen geschaltet werden. Oder auch bei erfolgreicher oder nicht erfolgreicher Ausführung eines Befehls. Somit kann z.B. ein Relais zur Meldung einer Fehlfunktion genutzt werden. Eingeschaltete Relais werden auf der Vorderseite mittels den gelben LEDs (6) angezeigt. Sollte das Framework bereits installiert sein, können Sie diesen Schritt überspringen. In Windows Vista ist das Framework standardmäßig enthalten. Legen Sie die CD ein, sollte die Autostart Funktion deaktiviert sein, starten sie bitte „autorun.exe“ von der CD. Klicken Sie auf „Install Microsoft.NET Framework 2.0“ und folgen Sie den Installationshinweisen des Microsoft Installationsprograms. Klicken Sie auf „Install Fohhn Audio Soft“ um die Fohhn Audio Soft zur Konfiguration der Audio-Geräte zu installieren, sowie die Treiberdaten für den NA-1 USB Adapter (weitere Hinweise entnehmen Sie bitte der jeweiligen Bedienungsanleitung der Geräte, sowie der Bedienungsanleitung der Fohhn Audio Soft). Klicken Sie auf „Install Fohhn-Net Remote Control Software“ um die Fohhn-Net Remote Control Software zu installieren. Folgen Sie den jeweiligen Anweisungen auf dem Bildschirm. 6 | FR-20 6.5 Bedienelemente (1) USB Anschluss (7) Anschluss Steckernetzteil Über den USB Anschluss wird der FR-20 mit dem PC oder Laptop verbunden. Es ist kein zusätzlicher USB-Adapter NA-1 erforderlich! Eine Steuerung über einen NA-1 USB Adapter ist jedoch genauso möglich. (2) send LED LED zeigt an, wenn Daten vom der FR-20 gesendet werden. (3) receive LED LED zeigt Datenempfang an der FR-20 an. Anschluss (7) für das mitgelieferte Netzteil. (11) Kontakteingänge Die FR-20 besitzt 8 Kontakteingänge, diese werden geschaltet indem die beiden Kontakte eines Eingangs miteinander verbunden, oder geöffnet werden. An die Kontakteingänge kann z.B. ein Taster oder ein Schalter angeschlossenen werden. Ein Taster kann durch drücken (Kontakt schließt sich) z.B. ein bestimmtes Preset laden, oder als Lautstärke Regler (z.B. Laustärke erhöhen) funktionieren. Bei einem Schalter können durch Umschalten (Kontakt schließt sich / Kontakt öffnet sich) z.B. zwei verschiedene Presets geladen werden. Die 8 Kontakteingänge können z.B. zur einfachen Überprüfung bei Inbetriebnahme mit den Tastern (4) abgerufen werden. LEDs (5) leuchten grün bei erfolgreicher Ausführung des Befehls und rot bei nicht erfolgreicher Ausführung des Befehls. (8) Fohhn-Net Remote / RS-485 Netzwerk Anschlussbuchsen (9) Über die Fohhn-Net RJ-45 Anschlüsse (8)(9) können die Geräte direkt mit einem RJ-45 Patchkabel (Netzwerkkabel) angeschlossen werden. (siehe Anschlussdiagramm unten) (12) Fohhn-Net Remote / RS-485 Netzwerk Anschlussklemmen (13) An die beiden 4-fach Phönixklemmen (12) und (13) werden die Netzwerkleitungen angeschlossen. Es können z.B. auch FR-10 8-fach Bedienpanels an diesen Klemmen angeschlossen und mit Strom versorgt (VDC +/-) werden. Bild: FR-10 mit FR-20 (4) Eingangskontakt Taster Mit diesen Tastern (4) kann die Konfiguration der FR20 getestet werden. Das drücken einer Taste, simuliert das Schließen eines Eingangskontaktes, das Loslassen einer Taste, das Öffnen eines Kontaktes. Selbstverständlich kann die FR-20 auch direkt mit diesen Tasten bedient werden. LEDs (5) leuchten grün bei erfolgreicher Ausführung des Befehls und rot bei nicht erfolgreicher Ausführung des Befehls. (5) Status LEDs (12) (13) Type 8-pin RJ-45 GND / Shield Shield DATA+ Pin 3 + Pin 6 DATA- Pin 4 + Pin 5 Jedes dieser LEDs zeigt den Status der Befehle für den jeweiligen Eingangskontakt an. Wurden alle Befehle für den Eingang erfolgreich ausgeführt, leuchtet die LED grün, wurde ein Befehl nicht ausgeführt (z.B. Endstufe antwortet nicht da abgeschaltet), wird die LED rot. Bei Lautstärke Befehlen leuchtet die LED nur kurz auf, bei allen anderen Befehlen bleibt sie an. Das erfolgreiche oder nicht erfolgreiche Ausführen aller Befehle kann in der Software Konfiguration über die "on-error" und "on-success" Funktionen auch auf ein Ausgangsrelais gelegt werden. Somit ist eine Fehlerauswertung über die Ausgangsrelais möglich. FR-20 | 7 (10) Relaisausgänge Die FR-20 besitzt 8 Ausgangsrelais (10). Jedes Relais ist als Umschalter ausgeführt. Die Relais können durch Ereignisse an den Eingängen geschaltet werden. Oder auch bei erfolgreicher oder nicht erfolgreicher Ausführung eines Befehls. Somit kann z.B. ein Relais zur Meldung einer Fehlfunktion genutzt werden. (6) Relay on / off Diese LEDs (6) zeigen den Status des jeweiligen Ausgangsrelais an. Die LEDs leuchten gelb wenn das Relais angezogen ist. Wählen Sie als Projekt Typ FR-20 aus. Achten Sie darauf dass nur die die Fohhn-Net Remote Control Software läuft, die Fohhn Audio Soft muss zum übertragen der Einstellungen, sowie für den Live-Mode geschlossen sein. Alle Fohhn-Net Geräte (Verstärker, Aktivlautsprecher) müssen mindestens mit der Firmware Version 2.4.0 laufen. 7.2 Konfiguration der Eingänge 7. Konfiguration der FR-20 mit der FohhnNet Remote Control Software 7.1 Softwarestart Nachdem Sie die Fohhn-Net Remote Control Software gestartet haben, erscheint ein Auswahldialog mit folgenden Möglichkeiten: Sie befinden sich jetzt mit „Edit only mode“ (wird unten in der Statusleiste angezeigt) Drücken Sie auf einen Button um für diese Taste bzw. Kontakteingang eine Konfiguration zu hinterlegen. Es erscheint ein Fenster „Configuration for Input 1“, hier können Sie dem Eingang auch einen anderen Name vergeben unter „Edit name“. Create new empty project: Öffnet den Auswahldialog für ein neues Projekt. Load a project file: Lädt ein gespeichertes Projekt von der Festplatte. Read a project: Die Einstellungen werden aus einem Gerät ausgelesen und daraus ein Projekt erstellt. 8 | FR-20 Mit „Add function“ können Sie dem Eingang eine neue Funktion zuweisen wenn der Kontakt geschlossen wird (close contact). Es ist auch möglich Befehle auszuführen wenn der Kontakt geöffnet wird (open contact). Bei erfolgreicher (on success) bzw. nicht erfolgreicher (on error) Ausführung der Befehle von „close contact“ und „open contact“ können die Ausgangsrelais gesetzt werden. 7.4 Lautstärkeregelung Jede Taste kann auch als Lautstärkeregler konfiguriert werden, wählen Sie hierzu den Command „Volume“ bei „Add function“. Zusammenfassung: • close contact: diese Befehle werden ausgeführt wenn der Eingangskontakt geschlossen wird. • open contact: diese Befehle werden ausgeführt wenn der Eingangskontakt geöffnet wird. • on success: diese Befehle werden ausgeführt wenn alle Befehle in close oder open contact erfolgreich waren. • on error: diese Befehle werden ausgeführt wenn ein Befehl in close oder open contact fehlgeschlagen ist. 7.3 Preset laden Es muss jeweils ein Button als „Volume Up“ und einer als „Volume Down“ Regler konfiguriert werden. Wenn Sie später die jeweilige Taste gedrückt halten, wird dann die Lautstärke hoch- oder herruntergefahren. Wählen Sie „Load preset“ und wählen Sie die Adresse des Geräts, sowie die Presetnummer, die auf dem Gerät geladen werden soll. In diesem Beispiel Preset Nummer 22 auf Gerät 5. Danach erscheint der Preset Laden Befehl als Icon in der Liste für den Eingang 1 Kontakt schließen (close contact). Jetzt können noch weitere Befehle hinzugefügt werden, so dass ein Tastendruck auf mehreren Geräten verschiedene Presets laden kann. Wie bei den Presets können hier auch wieder mehrere Geräte gleichzeitig gesteuert werden. Konfigurieren Sie auf diese Weise weitere Eingänge, so dass jeweils eine Eingang eine bestimmte Reihe von Preset laden Befehlen ausführt. Jede Funktion eines Eingangs erhält dadurch genau eine spezifische Funktion. Eine Mehrfachbelegung einer Eingangskontakt-Funktion ist nicht möglich! (z.B. einmal Kontakt schließen an / nochmal Kontakt schließen aus, geht nicht!) FR-20 | 9 7.4.1 Lautstärkeregelung für verschiedene Gruppen / Zonen Sie können die Lautstärke auch in vorher definierbaren Gruppen/ Zonen regeln. Legen Sie dazu für jeden Bereich eine Gruppe an. (Menu -> Groups -> Configure Volume Groups) Damit die Lautstärkeregelung für die verschiedenen Bereiche funktioniert, muss auf der Lautstärke-Taste jeder Befehl in eine Gruppe gelegt werden. Beim Drücken des Lautstärkereglers werden dann nur die Befehle ausgeführt, die sich in einer vorher aktivierten Gruppe befinden. 7.5 Relais setzen Mit dem Befehl "Set Relais" können die Ausgangsrelais der FR-20 gesteuert werden. Hierzu muss angegeben werden ob das Relais Ein, Aus oder für eine bestimmte Zeit anziehen soll (Relais Click). Beispiel Jetzt können Sie Buttons als Group Select Taste definieren. 8. Live Mode / Simulation der FR-20 in Software Durch drücken auf den Knopf „Live Mode“ in der Toolbar der Software lässt sich die FR-20 in der Software simulieren. Die Software FR-20 verhält sich jetzt genauso wie ihr original. So können Sie alle Funktionen schonmal „in echt“ testen. Ausnahme: Die Relaisausgänge werden nur durch die gelben LEDs signalisiert und schalten nicht im Hardware Gerät. Voraussetzung: der PC ist mit dem Fohhn-Net z.B. über den FohhnNet USB Adapter NA-1 oder den USB Port der FR-20 verbunden. Später wird dann durch Drücken der Taste die Gruppe aktiv. Konnten alle Befehle eines Buttons erfolgreich ausgeführt werden, wird der Button danach grün. Schlug ein Befehl fehl, wird der Button rot. 9. Übertragen der Einstellungen Wenn alles richtig funktioniert, können die Einstellungen in die FR-20 übertragen werden. Gehen Sie hierzu in das Menü -> Transfer -> Send Configuration to device Nach einer Weile werden hier alle Geräte im Fohhn-Net aufgelistet, markieren Sie Ihre FR-20 und drücken Sie auf „Continue >>“ und danach auf Start. In ein paar Sekunden sind alle Einstellungen in der FR-20 fest gespeichert, Sie können jetzt alle Funktionen völlig unabhängig vom PC an der FR-20 bedienen. 10 | FR-20 Table of contents . . . . . . . . . . . . . . . . . . . . . . . . . . . . . . . . . . . . . . . . . . . . page 1. Introduction 12 2. Safety and the environment 2.1 Safety information 2.2 2.2 Potential risks 2.3 Environment 3. Unpacking 12 12 12 12 12 4. Cleaning 12 5. Description 5.1 Overview chart 13 14 6. Assembly, installation and preparations 6.1 Input switching contacts 6.2 Output relays 6.3 Configuring the network address - important note! 6.4 Software installation 6.5 Controls 15 15 15 15 15 16 7. Configuring the FR-20 using Fohhn-Net Remote Control Software 7.1 Starting the software 7.2 Configuration of the inputs 7.3 Loading presets 7.4 Volume control 7.4.1 Volume control for different groups / zones 7.5 Setting relays 17 17 17 18 18 19 19 8. Live mode / FR-20 simulation using software 19 9. Transferring settings 19 10. Pin assignement 20 11. Integration in a media control system 20 12. Specifications 20 Deutsche Bedienungsanleitung / User Instructions 2 FR-20 | 11 1. Introduction 2.2 Potential risks Congratulations on purchasing a FR-20 Fohhn-Net remote distribution switch. The demand for good sound quality, versatility and easy operation has increased significantly in recent years. With these high demands in mind, we have developed and consistently implemented network-compatible Fohhn equipment with integrated Fohhn Audio DSPs to help run your events or installation with as little effort as possible. The new versatile features of Fohhn Audio DSPs offer you many convenient options for daily operation. Read the instructions carefully before using the equipment to ensure that your Fohhn system performs to its full capacity and operates perfectly. Please keep this manual in a safe place. If the equipment 2. Safety and the environment 2.3 Environment 2.1 Safety information When you dispose of the unit, separate the housing, electronic circuit and cables and dispose of all components as per applicable disposal regulations. 1. 2. This device has been manufactured and tested in accordance with the German VDE safety guidelines for electronic equipment. It has left the factory in perfectly safe condition. In order to maintain safety and avoid risks of damage or injury, take the usual precautions and follow all safety instructions in the manual. This device conforms to the German Class 1 safety standards. When properly installed, all exposed metal parts are permanently connected to safety ground. For safety reasons, connect the equipment to a standard three-pin outlet with protective ground only. Never detach the safety ground connection. 3. This device conforms to current EMC legislation as certified by the CE mark on the device. 4. This device contains no user serviceable parts. To reduce the risk of fire or electric shock, do not open the device and refer servicing to qualified personnel. 5. Make sure to dispose of used batteries conforming to local waste disposal rules. Never throw batteries into the fire (risk of explosion). 12 | FR-20 • • • • • is visibly damaged; contains loose parts; does not operate correctly; has been stored under adverse conditions (e.g., outdoors or in a damp room) for extended periods of time; or was exposed to high transportation stress (e.g., due to inadequate packaging), operating the equipment may be unsafe. Switch power to the equipment off and mark the equipment. Make sure the equipment cannot be connected to power or switched on unintentionally by third persons. 3. Unpacking Your FR-20 comprises the following components: 1. 2. 3. 1x FR-20 19" distribution switch 1x power adapter CD-Rom with Fohhn-Net Remote Control Software and Fohhn Audio Soft operating software Please check that the package contains all components of the system you ordered. If anything is missing, please contact your Fohhn dealer immediately. 4. Cleaning You can clean the wall panel with a moistened cloth. Clean the surface of the decorative aluminium panel with an (industrial) spirit or with a cloth moistened with alcohol. 5. Description (1) (2) (3) (7) (8) (4) (5) (9) (2)(3) (12) (6) (13) (10) (11) FR-20 Fohhn-Net Remote The 19” remote control unit adapted to your requirements FR-20 Fohhn-Net Remote distribution switch. 19” remote control device, 1HE. Operated via 8 switching input contacts or RS485 protocol. Adaptation to customer requirements. Option of connecting the FR-20 to door switches or control panels provided by the customer. There are 8 available switching input contacts for accessing presets on connected Fohhn devices, changing the volume in definable increments and grouping any number of end devices into clusters. Compatible with media control systems. For example, all end devices with integrated Fohhn audio DSPs can be operated by AMX or CRESTRON media control units via the FR-20. Drivers for AMX and CRESTRON are provided by Fohhn (see chapter 11). Operation via 8 make contacts or RS-485 protocol. Configure the FR-20 quickly using intuitive Fohhn-Net Remote Control Software installed on a computer connected directly to the USB port (1) of the FR-20. Integration of Fohhn systems into EIB bus technology. One building, one concept, one system. The 8 close contacts (11) of the FR-20 Fohhn-Net Remote allow the integration of Fohhn systems in bus technology, including all operating comforts. The relay contacts in the distribution box control the 8 close contacts of the FR-20 Fohhn-Net Remote and make integration in other bus systems easier as a result. The FR-20 also has 8 configurable output relay contacts (10). USB socket (1): when the FR-20 is connected to the PC via the USB cable, it is detected automatically and ready to use almost immediately. No further actions are required by the user, provided that Fohhn Audio Soft 2.4.0 or a later version is installed on the PC. FR-20 | 13 5.1 Overview chart The system: An intuitive way of simplifying your daily sound applications, producing top-quality sound and keeping all your sound systems under control. Remote control options, amplifiers, DSP technology and speakers. … customer-specific switches Integration of Fohhn systems into EIB bus technology. One building, one concept, one system. Compatible with media control systems. FR-10 wall panel via 8 input switching contacts RS-485 or via 8 input switching contacts Fohhn-Net Laptop or PC with Fohhn-Net Remote Control Software Fohhn-Net 8 output relays RJ-45 patch cable 14 | FR-20 RJ-45 patch cable via 8 input switching contacts 6. Assembly, installation and preparations The FR-20 can be mounted in a 19" rack and occupies 1HE. The power adapter provided connects the FR-20 to the power supply (7). FR-20 works with Fohhn-Net Remote Control Software version 1.3 or later) only. 6.1 Input switching contacts (11) The FR-20 has 8 input contacts which are activated by opening both contacts from one input or connecting them with one another. Push buttons and switches can be connected to the input contacts. Button connected: the button can load a certain preset (closes contact) or control the volume (increase volume) when pressed. Switch connected: two different presets can be loaded by actuating the switch (contact closes / opens). The 8 input contacts can be activated via the buttons (4) to perform simple checks during setup, for example. LEDs (5) light up green when a command is executed successfully and red if the command is not executed successfully. 6.3 Configuring the network address - important note! The default network address of the FR-20 is 1. Make sure that this address is not assigned to another device or change the network address of the FR-20 beforehand, especially if you intend to operate several FR-20s, in which case you should change the address of the FR-20 before connecting the network otherwise communication will not be possible. The network address can only be changed using Fohhn-Net Remote software. (see Changing the network address) Pressing the “Change ID“ button in the transfer window allows you to change the network address for the FR-20. 6.4 Software installation 6.2 Output relays (10) The FR-20 is fitted with 8 output relays that function as a selector switch. The relays can be configured to report an event occurring at the inputs or indicate whether a command is executed successfully or unsuccessfully. Relays can be used to report an operating error, for example. Yellow LEDs (6) on the front of the unit indicate that the relays are activated. If you intend to use the software in a Windows 2000 SP4 or Windows XP SP2 operating system, you will have to install Microsoft. NET Framework 2.0, which is stored on the CD. This is not necessary if the relevant Framework is already installed. The Framework is already installed in Windows Vista as standard. If the autostart function is deactivated, insert the CD and start the ”autorun.exe“ file on the CD. Click on “Install Microsoft.NET Framework 2.0“ and follow the instructions from the Microsoft installation program. Click on “Install Fohhn Audio Soft” to install Fohhn Audio Soft so that you can configure your audio devices and the driver data for the NA-1 USB adapter (please refer to the operating instructions for the relevant devices and the Fohhn Audio Soft operating instructions). Click on “Install Fohhn-Net Remote Control Software” to install the Fohhn-Net remote software. Follow the instructions on the screen. FR-20 | 15 6.5 Controls (1) USB connection (7) Connection power supply The FR-20 is connected to the PC or laptop via the USB socket. An additional USB adapter NA-1 is not required, although the system can be controlled via an NA-1 USB adapter if desired. (2) send LED LED indicates that the FR-20 is sending data. (3) receive LED LED indicates that the FR-20 is receiving data. Socket (7) for the supplied adapter. (11) Input switching contacts The FR-20 has 8 input contacts which are activated by opening both contacts from one input or connecting them with one another. Buttons and switches can be connected to the input contacts. Button connected: the button can load a certain preset (closes contact) or control the volume (increase volume) when pressed. Switch connected: two different presets can be loaded by actuating the switch (contact closes / opens). The 8 input contacts can be activated via the buttons (4) to perform simple checks during setup, for example. LEDs (5) light up green when a command is executed successfully and red if the command is not executed successfully. (8) Fohhn-Net Remote / RS-485 Network connection sockets (9) Devices can be connected directly to the Fohhn-Net RJ-45 sockets (8), (9) via an RJ-45 patch cable (network cable). (see connection diagram below) (12) Fohhn-Net Remote / RS-485 Network connection terminals (13) The network cables are connected to two 4-way Phoenix terminals (12, 13). FR-10 8-way operating panels can also be connected to these terminals and are supplied with power (VDC +/-) Picture: FR-10 with FR-20 (4) Input switching buttons Press these buttons (4) to test the configuration of the FR20. Pressing a button simulates an input contact closing and releasing a button simulates a contact opening. Needless to say, the FR-20 can also be operated directly using these buttons. LEDs (5) light up green when a command is executed successfully and red if the command is not executed successfully. (5) Status LEDs (12) (13) Type 8-pin RJ-45 GND / Shield Shield DATA+ Pin 3 + Pin 6 DATA- Pin 4 + Pin 5 16 | FR-20 Each of these LEDs indicates the status of commands at the respective input contact. Once all commands have been executed successfully at the input, the LED lights up green, but if any one of the commands was not executed successfully (e.g. amplifier does not respond because switched off), the LED lights up red. The LED lights up only briefly when volume commands are executed. The LEDs remain lit for all other commands. You can monitor the successful or unsuccessful execution of all commands at an output relay using the "on-error" and "onsuccess" functions in the software configuration so that you can evaluate any errors that may occur. (10) Output Relais The FR-20 is fitted with 8 output relays (10) that function as a selector switch. The relays can be configured to report an event occurring at the inputs or indicate whether a command is executed successfully or unsuccessfully. Relays can be used to report an operating error, for example. (6) Relay on / off These LEDs (6) indicate the status of the relevant output relay and light up yellow when the relay is activated. Select FR-20 as a project type. Make sure that only the Fohhn-Net Remote Control Software is running. Fohhn Audio Soft must be closed to transfer the settings and activate live mode. All Fohhn-Net devices (amplifiers, active speakers) must operate with Firmware Version 2.4.0 or later. 7.2 Configuration of the inputs 7. Configuring the FR-20 using Fohhn-Net Remote Control Software 7.1 Starting the software A selection window containing the following options appears when you start the Fohhn-Net remote control software: You are now in “Edit only mode“ (displayed in the status bar). Press a button to store a configuration for that particular button or switching input contact. The “Configuration for button 1“ window appears, where you can rename the input under “Edit name“. Create new empty project: Opens the selection window for a new project. Load a project file: Load a project saved on the hard drive. Read a project: Settings are read from a device and used to create a project. FR-20 | 17 You can use “Add function“ to assign a new function to the input when the contact is closed or even execute commands when the contact is open. The output relays can be configured to respond if the execution of “close contact“ and “open contact“ commands is successful (on success) or unsuccessful (on error). Summary: • close contact: 7.4 Volume control Buttons can be configured as a volume control by selecting the “Volume“ command under “Add function“. these commands are executed when the input contact is closed. • open contact: these commands are executed when the input contact is opened. • on success: these commands are executed if all “close contact” or “open contact” commands are successful. • on error: these commands are executed if a “close contact” or “open contact” command is unsuccessful 7.3 Loading presets One button must be configured as a “Volume Up“ control and one as a “Volume Down” control. Once the buttons are configured, press and hold the respective button to increase or decrease the volume. Select “Load preset“ as well as the address of the device and the preset number that you wish to load to the device. In this example, preset number 22 will be loaded to device 5. The load preset command then appears as an icon in the input 1 close contact list. You can now add other commands so that different presets for several devices can be loaded at the press of a button. Configure other buttons in the same way so that one button executes a specific number of Load Preset commands. Each button is assigned a specific function as a result. Multiple button configuration is not possible (for example, system on/off on one button)! 18 | FR-20 You also have the option of controlling several devices simultaneously in the same way as the presets. 7.4.1 Volume control for different groups / zones You can also control the volume in previously defined groups / zones. Create a group for each area first of all. (Menu -> Groups -> Configure Volume Groups) All commands in a group must be assigned to the volume button for the volume control to function in the various zones. When the volume control is pressed, only the commands assigned to a previously activated group are executed. 7.5 Setting relays The output relay of an FR-20 can be controlled using the "Set relay" command. To do this specify whether the relay should be on, off or activated for a limited time (relay click). Example Then define the buttons as a Group Select button. 8. Live mode / FR-20 simulation using software Pressing the “Live Mode” button in the software toolbar allows you to simulate the FR-20 using the software. The software FR-20 now behaves in the same way as the actual wall panel so you can test all the functions. The exception is when only the yellow LEDs indicate the status of the relay outputs and there is no connection to the hardware device. Requirement: the PC must be connected with the Fohhn-Net via a Fohhn-Net USB adapter NA-1 or the USB port, for example. The group is then activated when the button is pressed. The button turns green if all commands assigned to a button can be executed successfully, whereas if a command fails, the button turns red. 9. Transferring settings Once everything is working correctly, you can transfer the settings to the FR-20. Go to Menu -> Transfer -> Send configuration to device. All devices in the Fohhn-Net are listed here after a short time. Select your FR-20 and press “Continue >>” and then Start. After a few seconds, all settings will be saved permanently in the FR20 and you can use all the functions on the FR-20 completely independently of your PC. FR-20 | 19 German quality engineered and made by Fohhn® 10. Anschlussbelegung Pin assignment 12. Technische Daten Specifications FR-20 Fohhn Net Remote Anschlussbelegung von Fohhn-Net XLR, RJ-45 und Klemmleiste Pin assignment for Fohhn-Net XLR, RJ-45 and terminal strip Gehäuse 19“ / 1HE Spannungsversorgung 9-25V DC (Steckernetzteil ist im Lieferumfang enthalten) Max. Leistungsaufnahme 5W Kontakteingänge 8 Eingangsschaltkontakte (Schließer / Öffner) Kontaktausgänge 8 Relais Umschalter max. 30V / 1A PC Anschluss USB Anschluss oder über Fohhn-Net Fohhn-Net / RS-485 Anschluss Type 2x Neutrik RJ-45 3-pin XLR (male) 8-pin RJ-45 GND / Shield Pin 1 Shield DATA+ Pin 2 Pin 3 + Pin 6 FR-20 Fohhn Net Remote DATA- Pin 3 Pin 4 + Pin 5 Housing Power supply 19“ / 1HE 9-25V DC (power supply is in score of delivery) Max. power consumption 4-pol Klemmleiste Ansicht von oben 4-pin terminal strip, viewed from above 5W Contact inputs 8 input switching contacts (make contact / opener) Contact outputs 8 relays change over switch max. 30V / 1A PC connection USB connection via Fohhn-Net Fohhn-Net / RS-485 connections 2x Neutrik RJ-45 11. Einbindung in eine Mediensteuerung Integration in a media control system Optional integration in a media control system via RS-485 (FohhnNet connections). The required protocol you have to implement in your media control system is available from Fohhn. The media control system is then able to simulate the closing of one of the 8 input contacts. The media control system only ges the status of the FR-20 (FR-20 responds to commands), not the status of the other devices. Fault indication can be made via a relay output on the FR-20. 20 | FR-20 110 051 Optionale Einbindung in eine Mediensteuerung über RS-485 (Fohhn-Net Anschlüsse). Das zu implementierende Protokoll ist von Fohhn erhältlich. Die Mediensteuerung kann dann das Schließen eines der 8 Eingangskontakte simulieren. Die Mediensteuerung erhält nur den Status der FR-20 (FR-20 antwortet auf Befehle), nicht den der weiteren Geräte. Eine Fehlerauswertung ist über einen Relaisausgang der FR-20 möglich. Fohhn Audio AG Hohes Gestade 3-5 D-72622 Nürtingen Germany Tel. +49 7022 93323-0 Fax +49 7022 93324-0 www.fohhn.com [email protected]


