1
GB
P UTTING THE STEAM GENERATOR INTO OPERATION
The following must be provided by the customer
Technical data of steam generator TYPE DJ 2,5
Electrical installation:
Electrical connections may only be carried out by an officially certified electrician.
This device is of protection class 1 and must be permanently connected to a fixed conductor.
The installation regulations of the local electricity board as well as the provisions of DIN-57100 and
VDE 0100 Part 701 must be strictly adhered to.
The incoming line (PVC-sheathed cable H05VV-F3 G1.5), must be connected through an earth leakage
circuit breaker (25A 230V~ nominal tripping current = 30 mA) and fused over all poles with an
automatic circuit-breaker.
It must also be possible to interrupt this circuit with an all-pole switch with at least 3 mm contact
gap and a pilot lamp.
Parts containing active parts, except parts supplied with a safety extra-low voltage of up to 12V, must
be inaccessible for persons in the bathroom.
The steam generator may only be opened by a person authorised by DUSAR. Provide equipotential
bonding and connect to the steam bath.
Caution: Observe protection zone. No separate moisture or steam -producing equipment may be
used in the shower.
Water capacity:
approx. 0.6 l
Working pressure:
0 bar
Output:
2.5 kW
Nominal voltage:
230 V
Frequency:
50 / 60 Hz
Power consumption:
max. 11.5 A
Line protection provided:
16 A
Steam bath temperature:
approx. 43°
Steam time:
approx. 50 min.
Heating-up time:
approx. 5 min.
h.
i.
Water connection:
-
b.
The water connection may only be established by a certified and authorised dealer
water pressure max. 4 bar
working pressure approx. 3 bar
f.
c.
g.
Before putting the steam shower into operation
d.
[Fig. A]
m
in
.6
00
1. Caution, before putting into operation check all connections and siphons for leaks.
2. The steam shower must be permanently connected to a fixed line (see electrical installation)
3. Move the steam cabin into the required position and connect up drain connections, as well
as water inflow hoses for the shower to the domestic water supply and drain connections
using flexible hoses [Fig. A].
4. The water inflow for hot and cold water should be connected using 2 shut-off valves b. c. .
5. Open the shut-off valves for hot and cold water e. .
6. Select the required function on the three-way (1) valve
e.
Putting the steam generator into operation:
The steam generator may only be put into operation after all connections have
been established!
(4)
The following order must be adhered to:
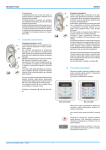
1. Turn on the master switch f. [Fig. A].
2. Switch on steam operation
(see Page 24 “STEAM OPERATION”)
3. The steam development begins after a heating-up period of approx. 5 min.
Caution: Avoid the area in the immediate vicinity of the steam outlet nozzles;
risk of scalding
4. For reasons of safety, the steam generator switches itself off after the preset
period of time, and a new rinsing programme starts. If you wish to continue
your steam bath, the pushbutton
must be pressed, depending on the
original setting. The steam generator is then ready for operation again.
5. When you have finished your steam bath or shower, we also recommend that
you close the shut-off valve for cold and hot water. e.
6. Turn off the master switch after every steam bath f. [Fig. A].
[Fig. B]
(1)
(2)
(3)
(4)
(2)
(3)
(1)
Three-way valve
Hand shower
Head shower
Massage nozzles
(5) Single-lever mixer
(5)
cold
hot
In the event of a malfunction:
-
V1 drainage valve
If a fault is detected, switch off the steam generator and the master switch.
Close the shut-off valve for cold and hot water, and have the fault rectified
by the after-sales service or an authorised dealer.
Never carry out repairs to the steam generator yourself!
Any descaling residues may be removed by turning the drainage
valve V1 as shown in [Fig. C].
[Fig.C]
V1
Drainage line
Seite
21