1
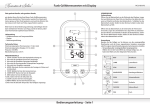
GRILL THERMOMETER BT4
art.no.70-50110
DE
GB
FR
IT
ES
RU
Bedienungsanleitung
instRuCtiOnmanual
mOded’emplOi
istRuziOnipeRl’usO
instRuCCiOnesdeusO
Руководство по
эксплуатации
Bedienungsanleitung................................. 4
INSTRUCTION mANUAL................................. 13
FR Mode d’emploi........................................... 21
IT Istruzioni per l’uso..................................29
ES Instrucciones de uso...............................38
RU Руководство по эксплуатации.............. 47
DE
GB
2
GARANTIE & SERVICE / WARRANTY & SERVICE
Garantie et Service / Garantía y servicio Garanzia e assistenza...............................56
Fig. 1
A
B
C
Fig. 2
3
Zu dieser Anleitung
Diese Bedienungsanleitung ist als Teil des Gerätes zu
betrachten. Lesen Sie vor der Benutzung des Geräts
aufmerksam die Sicherheitshinweise und die Bedienungsanleitung. Bewahren Sie diese Bedienungsanleitung für die erneute Verwendung zu einem späteren Zeitpunkt auf. Bei Verkauf oder Weitergabe des Gerätes ist die Bedienungsanleitung
an jeden nachfolgenden Besitzer/Benutzer des Produkts
weiterzugeben.
Dieses Produkt dient ausschließlich der privaten Nutzung.
Es wurde entwickelt als elektronisches Medium zur Nutzung
multimedialer Dienste.
Allgemeine Sicherheitshinweise
ERSTICKUNGSGEFAHR!
Verpackungsmaterialien (Plastiktüten, Gummibänder, etc.)
von Kindern fernhalten! Es besteht ERSTICKUNGSGEFAHR!
GEFAHR EINES STROMSCHLAGS!
Dieses Gerät beinhaltet Elektronikteile, die über eine Stromquelle (Batterien) betrieben werden. Lassen Sie Kinder beim
Umgang mit dem Gerät nie unbeaufsichtigt! Die Nutzung darf
nur, wie in der Anleitung beschrieben, erfolgen, andernfalls
besteht GEFAHR eines STROMSCHLAGS!
VERÄTZUNGSGEFAHR!
Ausgelaufene Batteriesäure kann zu Verätzungen führen!
Vermeiden Sie den Kontakt von Batteriesäure mit Haut, Augen und Schleimhäuten. Spülen Sie bei Kontakt mit der Säu4
BRAND-/EXPLOSIONSGEFAHR!
Setzen Sie das Gerät keinen hohen Temperaturen aus. Benutzen Sie nur die empfohlenen Batterien. Gerät und Batterien
nicht kurzschließen oder ins Feuer werfen! Durch übermäßige
Hitze und unsachgemäße Handhabung können Kurzschlüsse,
Brände und sogar Explosionen ausgelöst werden!
HINWEIS!
Bauen Sie das Gerät nicht auseinander! Wenden Sie sich im
Falle eines Defekts an Ihren Fachhändler. Er nimmt mit dem
Service-Center Kontakt auf und kann das Gerät ggf. zwecks
Reparatur einschicken.
Setzen Sie das Gerät keinen Erschütterungen aus!
Für Spannungsschäden in Folge falsch eingelegter Batterien
übernimmt der Hersteller keine Haftung!
Lieferumfang (Fig. 1)
Grillthermometer (A), Temperaturfühler mit 1 m Kabel (B), 2 x
AAA Batterien (C), Bedienungsanleitung
Erste Schritte
Das BRESSER Grill Thermometer BT4 ist ein neues
kabelloses Grillthermometer für Ihr Smartphone. Mit
dem eingebauten Niedrigenergie-Bluetooth-Chipsatz wird Ihr
Smartphone zum echten kabellosen Koch-Assistenten.
Laden Sie einfach die kostenlose App BRESSER BBiQ über
5
DE
GB
FR
IT
ES
RU
Garantie / Warranty
re die betroffenen Stellen sofort mit reichlich klarem Wasser
und suchen Sie einen Arzt auf.
den App Store oder Google play herunter und starten Sie
Ihr Kochexperiment. Das BRESSER Grill Thermometer BT4
kann auch eigenständig ohne App verwendet werden.
1. Batterien
Öffnen Sie das Batteriefach und entfernen Sie den kleinen
Plastikstreifen zwischen den Batterien.
HINWEIS: Ein längerer Piepton des Grillthermometers zeigt
an, dass die Batterien korrekt eingelegt wurden. Das Gerät
ist betriebsbereit.
2. Temperaturfühler
Stecken Sie den Stecker am Kabelende des Temperaturfühlers in die dafür vorgesehene Buchse auf der linken Seite
des Grillthermometers. Das LCD-Display schaltet sich ein
und das Symbol für die Bluetooth-Suche wird angezeigt.
3. Verbindung
Schalten Sie Bluetooth unter “Einstellungen” (Settings) auf
Ihrem Smartphone ein.
6
4. Grillthermometer mit der App verbinden
Halten Sie die SYNC-Taste (Rückseite des Thermometers,
Fig. 2) für etwa 2 Sekunden gedrückt, um die Smartphone-Suche zu starten.
Drücken Sie CONNECT in der App, um beide Geräte zu verbinden. Wurden App und Gerät korrekt verbunden, erscheint
das gelbe BBiQ-Icon
in der linken oberen Ecke der App.
DE
GB
FR
IT
ES
Garantie / Warranty
RU
5. Verwendung des Grillthermometers
Wir haben verschiedene Garstufen für die gängigsten
Fleischsorten programmiert, damit Sie schnell und einfach
mit dem Kochen beginnen können. Sie können aus folgenden Fleischsorten wählen oder die Garstufe/-temperatur manuell einstellen:
7
Veal / Beef
(Kalb / Rind)
Chicken
(Huhn)
Pork
(Schwein)
Lamb
(Lamm)
W.DONE
MEDIUM
M.RARE
RARE
BEEF
76
71
63
60
VEAL
76
71
71
N/A
PORK
76
71
N/A
N/A
CHICKEN
82
N/A
N/A
N/A
LAMB
76
71
63
N/A
Halten Sie die SET-Taste am Thermometer für etwa 3 Sekunden gedrückt bis das Fleisch-Symbol blinkt.
Wählen Sie eine der 5 Fleischsorten durch drücken der +
oder - Taste und drücken Sie die SET-Taste, um Ihre Wahl
zu bestätigen.
Wählen Sie die gewünschte Garstufe - Well done, Medium,
Medium Rare oder Rare – durch drücken der + oder -Taste.
Drücken Sie die SET-Taste, um Ihre Wahl zu bestätigen.
Nun blinkt die voreingestellte Zieltemperatur. Sie können
diese manuell ändern oder sie einfach durch drücken der
SET-Taste bestätigen.
Nun können Sie den Temperaturfühler ins Fleisch stecken
und mit der Zubereitung beginnen.
8
HINWEIS: Stecken Sie den Temperaturfühler immer in die
dickste Stelle des zu garenden Fleisches.
Stellen Sie sicher, dass das Kabel des Fühlers nur dort entlang geführt wird, wo es keinen Flammen oder Temperaturen
über 380˚ C (716˚ F) ausgesetzt ist.
HINWEIS: Um die Lebensdauer der Batterien zu erhöhen,
entfernen Sie stets den Temperaturfühler nach jeder Benutzung vom Thermometer. So wird das Gerät ausgeschaltet.
6. Grafik
Die Grafik stellt den Temperaturverlauf über den gesamten
Garzeitraum anschaulich dar.
9
DE
GB
FR
IT
ES
RU
Garantie / Warranty
Wenn die gewünschte Temperatur erreicht ist, ertönt das
Alarmsignal. Um den Alarm zu stoppen, drücken Sie DISCONNECT in der App oder entfernen Sie den Temperaturfühler vom Thermometer.
7. Timer (Eieruhr)
Wir haben der App eine einfache Timer-Funktion (Eieruhr)
hinzugefügt.
Stellen Sie die Alarmzeit ein.
Drücken Sie START TIMER. Der Timer startet den Countdown und löst einen ein Alarmsignal aus, wenn die Alarmzeit
abgelaufen ist.
8. Technische Daten
Stromversorgung: 2 Typ LR03 (AAA) 1.5V Batterien
Temperatur-Messbereich: 0° C bis +240° C
Maximale Hitzebeständigkeit des Kabels: 380° C
30 Meter kabellose Verbindung im offenen Gelände.
Systemvoraussetzungen
Smartphone oder Tablet-PC mit Apple iOS (Version 7 oder
höher) oder Android (Version 4.2.2 oder höher) und Bluetooth 4.0 Smart Ready
9. Reinigung und Wartung
Trennen Sie das Gerät vor der Reinigung von der Stromquelle (Batterien entfernen)!
Reinigen Sie das Gerät nur äußerlich mit einem trockenen
Tuch. Benutzen Sie keine Reinigungsflüssigkeit, um Schäden an der Elektronik zu vermeiden.
Für Spannungsschäden in Folge falsch eingelegter Batterien
übernimmt der Hersteller keine Haftung!
Benutzen Sie nur die empfohlenen Batterien. Ersetzen Sie
10
schwache oder verbrauchte Batterien immer durch einen
komplett neuen Satz Batterien mit voller Kapazität. Verwenden Sie keine Batterien unterschiedlicher Marken, Typen
oder unterschiedlich hoher Kapazität. Entfernen Sie Batterien aus dem Gerät, wenn es längere Zeit nicht benutzt wird!
DE
GB
FR
IT
Entsorgen Sie die Verpackungsmaterialien sortenrein.
Informationen zur ordnungsgemäßen Entsorgung erhalten Sie beim kommunalen Entsorgungsdienstleister oder
Umweltamt.
Werfen Sie Elektrogeräte nicht in den Hausmüll!
Gemäß der Europäischen Richtlinie 2002/96/EG über
Elektro- und Elektronik-Altgeräte und deren Umsetzung in
nationales Recht müssen verbrauchte Elektrogeräte getrennt
gesammelt und einer umweltgerechten Wiederverwertung
zugeführt werden.
Batterien und Akkus dürfen nicht im Hausmüll entsorgt
werden. Sie sind zur Rückgabe gebrauchter Batterien
und Akkus gesetzlich verpflichtet und können die Batterien
nach Gebrauch entweder in unserer Verkaufsstelle oder in
unmittelbarer Nähe (z.B. im Handel oder in kommunalen
Sammelstellen) unentgeltlich zurückgeben.
Batterien und Akkus sind mit einer durchgekreuzten Mülltonne sowie dem chemischen Symbol des Schadstoffes bezeichnet, „Cd“ steht für Cadmium, „Hg“ steht für Quecksilber
und „Pb“ steht für Blei.
11
ES
RU
Garantie / Warranty
10. Entsorgung
EG-Konformitätserklärung
Hiermit erklärt die Bresser GmbH, dass sich dieses
Gerät (Grill Thermometer BT4 / Art.Nr.: 70-50110) in
Übereinstimmung mit den grundlegenden Anforderungen
und den anderen relevanten Vorschriften der Richtlinie
1999/5/EG befindet.
12
About this Instruction Manual
These operating instructions are to be considered a
component of the device. Please read the safety
instructions and the operating instructions carefully before
use. Keep these instructions for renewed use at a later date.
When the device is sold or given to someone else, the
instruction manual must be provided to the new owner/user
of the product.
DE
GB
FR
IT
ES
RU
This product is intended only for private use. It was developed
as an electronic medium for the use of multimedia services.
RISK OF CHOKING!
Keep packaging material, like plastic bags and rubber
bands, out of the reach of children, as these materials pose
a choking hazard!
RISK OF ELECTRIC SHOCK!
This device contains electronic components that operate
via a power source (batteries). Children should only use
the device under adult supervision. Only use the device as
described in the manual; otherwise, you run the risk of an
electric shock!
RISK OF CHEMICAL BURN!
Leaking battery acid can lead to chemical burns. Avoid contact
of battery acid with skin, eyes and mucous membranes. In
13
Garantie / Warranty
General Warnings
the event of contact, rinse the affected region immediately
with a plenty of water and seek medical attention.
RISK OF FIRE/EXPLOSION!
Do not expose the device to high temperatures. Use only
the recommended batteries. Do not short-circuit the device
or batteries, or throw them into a fire. Excessive heat or
improper handling could trigger a short-circuit, a fire or an
explosion.
NOTE!
Do not disassemble the device. In the event of a defect,
please contact your dealer. The dealer will contact the
Service Centre and can send the device in to be repaired,
if necessary.
Protect the device from severe shocks!
The manufacturer is not liable for damage related to
improperly installed batteries.
Scope of delivery (Fig. 1)
Grill Thermometer (A), Temperature probe with 1m cable (B),
2 x AAA batteries (C), Instruction manual
Getting started
The BRESSER Grill Thermometer BT4 is a new
wireless cooking thermometer for your Smartphone.
With a built in Bluetooth low energy chip set, which transforms
your phone into a real time wireless cooking device.
14
Simply download the free BRESSER BBiQ app from App
Store or Google play to start your cooking experience. The
BRESSER Grill Thermometer BT4 also works as stand alone
cooking thermometer.
DE
GB
FR
IT
ES
Open the battery compartment and remove the small plastic
strip from the batteries.
NOTE: A long beep from the grill thermometer will indicate
that the batteries are correctly inserted. The device is now
ready for use.
2. Temperature probe
Plug the temperature probe into the jack on the left side of
the grill thermometer. The LCD display will switch on and the
Bluetooth search will be displayed.
3. Connecting
Switch on the Bluetooth on your Smartphone in the settings.
15
RU
Garantie / Warranty
1. Batteries
4. Connect the Grill Thermometer to the App
Hold down the SYNC button for 2 sec. (flat side of the device
/ Fig. 2) to start searching for phone.
Press CONNECT on the BBiQ App to pair the units. If the
units are paired correctly the yellow BBiQ Icon
will show
in the left top corner.
5. Start using the Grill Thermometer
We have programmed different cooking temperatures for
well-known meats. So it is easy for you to start cooking
immediately. You can choose from the following meat types
or set up the cooking temperature manually:
16
Veal / Beef
Chicken
Pork
Lamb
DE
GB
FR
IT
MEDIUM
M.RARE
RARE
76
71
63
60
W.DONE
MEDIUM
M.RARE
RARE
VEAL
76
71
71
N/A
PORK
76
71
N/A
N/A
CHICKEN
82
N/A
N/A
N/A
LAMB
76
71
63
N/A
BEEF
ES
RU
Hold down the SET Button for 3 sec, until you see the Meat
Icon flashing.
Choose one of the 5 meat types by using the +/- buttons and
press the SET button to confirm.
Choose how you want the meat cooked - Well done, Medium,
Medium rare or Rare by using the +/- buttons. Press the SET
Button to confirm.
Now the target temperature is flashing and you are able to
set the temperature manually ,if you want to change the
temperature, or just confirm by pressing SET button.
You are now ready to insert the temperature probe into your
meat and start cooking.
17
Garantie / Warranty
W.DONE
When the desired temperature is reached the alarm will start.
To stop the alarm press the DISCONNECT button or remove
the probe from the Grill thermometer device.
NOTE: Remember to insert the probe into the thickest part
of the meat.
Be sure to route the probe wire where it will not be directly
exposed to flames or temperatures exceeding 380 ˚C (716 ˚F).
NOTE: To increase battery life time, always remove the
temperature probe from the thermometer after use. This will
turn off the device.
6. Graph tool
The Graph illustrates the temperature progression over time.
7. Timer
The App features a simple timer function.
Set the alarm time. Press START TIMER. The timer will start
18
to count down and sound an alarm / notification when the
time is up.
DE
GB
8. Technical data
FR
Power supply: 2 Type LR03 (AAA) 1.5V Batteries
IT
Temperature measuring range: 0 °C to +240 °C
Maximum heat resistance for the wire: 380 °C
ES
30 meter wireless transmission range in open area.
RU
9. Cleaning and Maintenance
Before cleaning the device, disconnect it from the power
supply (remove batteries)!
Only use a dry cloth to clean the exterior of the device. To
avoid damaging the electronics, do not use any cleaning fluid.
The manufacturer is not liable for damage related to
improperly installed batteries!
Use only the recommended batteries. Always replace weak
or empty batteries with a new, complete set of batteries at full
capacity. Do not use batteries from different brands or with
different capacities. Remove the batteries from the unit if it
has not been used for a long time.
10. Disposal
Dispose of the packaging materials properly, according
to their type, such as paper or cardboard. Contact your
19
Garantie / Warranty
System requirements
Smartphone or Tablet PC with Apple iOS (version 7 or higher) or
Android (version 4.2.2 or higher) and Bluetooth 4.0 Smart Ready
local waste-disposal service or environmental authority for
information on the proper disposal.
Do not dispose of electronic devices in the household
garbage!
As per Directive 2002/96/EC of the European Parliament
on waste electrical and electronic equipment and its
adaptation into German law, used electronic devices must
be collected separately and recycled in an environmentally
friendly manner.
In accordance with the regulations concerning batteries
and rechargeable batteries, disposing of them in the
normal household waste is explicitly forbidden. Please make
sure to dispose of your used batteries as required by law — at
a local collection point or in the retail market. Disposal in
domestic waste violates the Battery Directive.
Batteries that contain toxins are marked with a sign and a
chemical symbol. “Cd” = cadmium, “Hg” = mercury, “Pb” =
lead.
EC Declaration of Conformity
Bresser GmbH declares that the device (Grill
Thermometer BT4 / Art.No.: 70-50110) is in
accordance with applicable guidelines and corresponding
standards of the 1999/5/EG directive.
20
A propos de ce manuel
Le présent mode d‘emploi doit être considéré comme
faisant partie intégrante de l’appareil.
Avant d’utiliser l’appareil, veuillez lire attentivement les
consignes de sécurité et le mode d’emploi.
Conservez celui-ci afin de pouvoir le réutiliser ultérieurement
le cas échéant. En cas de revente ou de cession de
l’appareil, le mode d’emploi doit être remis à tout propriétaire
ou utilisateur suivant du produit.
DE
GB
FR
IT
ES
RU
Consignes générales de sécurité
RISQUE D’ETOUFFEMENT !
Maintenez les enfants éloignés des matériaux d’emballage
(sacs plastiques, bandes en caoutchouc, etc.) ! RISQUE
D’ETOUFFEMENT !
RISQUE D’ELECTROCUTION !
Cet appareil contient des pièces électroniques raccordées
à une source d’alimentation électrique (batteries). Ne jamais
laisser les enfants manipuler l’appareil sans surveillance
! L’utilisation de l’appareil doit se faire exclusivement
comme décrit dans ce manuel, faute de quoi un RISQUE
d’ELECTROCUTION peut exister !
RISQUE DE BLESSURE !
L’écoulement de l‘électrolyte d’une batterie peut entraîner
21
Garantie / Warranty
Ce produit est exclusivement destiné pour un usage privé. Il
a été conçu comme un média électronique capable d’utiliser
des services multimédias.
des blessures par brûlure due à l’acidité du produit !
Evitez tout contact de l’électrolyte avec la peau, les yeux
et les muqueuses. En cas de contact avec l‘acide, rincez
abondamment et immédiatement les parties du corps
concernées en utilisant de l’eau claire et consultez un
médecin dans les meilleurs délais.
RISQUE D’EXPLOSION / D’INCENDIE !
Ne pas exposer l’appareil à des températures trop élevées.
N’utilisez que les batteries conseillées. L’appareil et les
batteries ne doivent pas être court-circuitées ou jeter dans
le feu ! Toute surchauffe ou manipulation inappropriée peut
déclencher courts-circuits, incendies voire conduire à des
explosions !
REMARQUE !
Ne pas démonter l’appareil ! En cas de défaut, veuillez vous
adresser à votre revendeur spécialisé. Celui-ci prendra
contact avec le service client pour, éventuellement, envoyer
l’appareil en réparation.
Ne pas exposer l’appareil aux chocs !
Le fabricant récuse toute responsabilité en cas de dommage
résultant d’une alimentation électrique inappropriée due à
des batteries mal insérées!
Volume de livraison (graph. 1)
Thermomètre pour BBQ (A), capteur de température avec
câble de 1 m (B), 2 piles AAA (C), mode d’emploi
22
Premières étapes
DE
GB
FR
IT
Il vous suffit de télécharger l’appli gratuite BRESSER BBiQ
à partir de l’App Store ou de Google play pour commencer
votre expérience culinaire. Le BRESSER Grill Thermometer
BT4 peut également être utilisé seul, sans appli.
ES
1. Piles
Garantie / Warranty
Le BRESSER Grill Thermometer BT4 est un nouveau
thermomètre pour BBQ sans fil pour votre smartphone.
À l’aide d’un jeu de puces basse énergie Bluetooth incorporé,
votre smartphone deviendra un véritable assistant culinaire
sans fil.
Ouvrez le compartiment des piles et retirez la petite protection
en plastique entre les piles.
REMARQUE : Si le thermomètre émet un signal sonore
prolongé, cela indique que les piles ont été insérées
correctement. L’appareil est prêt à l’emploi.
2. Capteur de température
Branchez le connecteur au bout du câble du capteur de
température dans la douille prévue à cet effet sur le côté
gauche du thermomètre de BBQ. L’écran LCD s’allume et le
symbole de recherche Bluetooth s’affiche.
3. Connexion
Allumez Bluetooth sous « Paramètres » (Settings) sur votre
smartphone.
23
RU
4. Reliez le thermomètre de BBQ à l’appli.
Appuyez pendant environ 2 sec sur la touche SYNC (arrière
du thermomètre / graph. 2) afin de démarrer la recherche
smartphone.
Appuyez sur CONNECT dans l’appli afin de connecter les
deux. Une fois l’appli et l’appareil correctement connectés,
apparait en haut à gauche sur l’appli.
l’icône jaune BBiQ
24
5. Utilisation du thermomètre de BBQ
Nous avons programmé divers niveaux de cuisson pour les
sortes de viande les plus courantes afin que vous puissiez
commencer à faire la cuisine de façon simple et rapide. Vous
pouvez faire votre choix parmi les sortes de viande suivantes
et régler manuellement le niveau/la température de cuisson.
Chicken
(Poulet)
Pork
(Porc)
W.DONE
MEDIUM
M.RARE
RARE
76
71
63
60
VEAL
76
71
71
N/A
PORK
76
71
N/A
N/A
CHICKEN
82
N/A
N/A
N/A
LAMB
76
71
63
N/A
FR
IT
ES
Lamb
(Agneau)
BEEF
GB
RU
Garantie / Warranty
Veal / Beef
(Veau / Bœuf)
DE
Appuyez pendant environ 3 secondes sur la touche SET du
thermomètre jusqu’à ce que le symbole de viande clignote.
Sélectionnez une des 5 sortes de viande en appuyant sur la
touche + ou - et en appuyant ensuite sur la touche SET afin
de confirmer votre choix.
Choisissez le niveau de cuisson que vous souhaitez - Well done,
Medium, Medium Rare ou Rare – en appuyant sur la touche +
ou -. Appuyez sur la touche SET afin de confirmer votre choix.
25
La température cible préréglée clignote à présent. Il vous est
possible de la modifier manuellement ou bien de la confirmer
tout simplement en appuyant sur la touche SET.
Vous pouvez maintenant insérer le capteur de température
dans la viande et commencer à la préparer.
Une fois la température souhaitée atteinte, un signal d’alarme
retentit. Pour arrêter cette alarme, appuyez sur DISCONNECT
dans l’appli ou bien retirez le capteur de température du
thermomètre.
REMARQUE : Insérez le capteur de température toujours dans
la partie la plus épaisse de la viande à cuire. Assurez-vous que
le câble du capteur ne se trouve pas exposé aux flammes ou à
des températures au-dessus de 380 °C (716 °F).
REMARQUE : Afin d’augmenter la durée de vie des piles,
retirez toujours le capteur de température après chaque
utilisation du thermomètre. L’appareil est ainsi éteint.
6. Graphique
Le graphique illustre de façon claire la courbe de température
sur toute la plage de cuisson.
26
7. Minuteur
Nous avons ajouté à l’appli une simple fonction de minuterie
(Minuteur).
DE
GB
Réglez l’heure d’alarme.
Appuyez sur START TIMER. Le minuteur commence le
compte à rebours et déclenche un signal d’alarme une fois
le temps écoulé.
FR
8. Données techniques
RU
IT
ES
Alimentation électrique : 2 piles de type LR03 (AAA) de 1,5 V
Liaison sans fil sur 30 mètres en terrain dégagé.
Configurations système requises
Smartphone ou tablette tactile avec Apple iOS (version 7
ou supérieure) ou Android (version 4.2.2 ou supérieure) et
Bluetooth 4.0 Smart Ready
9. Elimination
Eliminez l’emballage en triant les matériaux. Pour plus
d’informations concernant les règles applicables en
matière d’élimination de ce type des produits, veuillez vous
adresser aux services communaux en charge de la gestion
des déchets ou de l’environnement.
Ne jamais éliminer les appareils électriques avec les
ordures ménagères !
Conformément à la directive européenne 2002/96/
27
Garantie / Warranty
Plage de mesure de la température 0° C à +240° C
Résistance maximale du câble à la température : 380° C
CE sur les appareils électriques et électroniques et ses
transpositions aux plans nationaux, les appareils électriques
usés doivent être collectés séparément et être recyclés dans
le respect des réglementations en vigueur en matière de
protection de l’environnement.
En conformité avec les règlements concernant les piles
et les piles rechargeables, jeter ces produits avec les
déchets ménagers normaux est strictement interdit. Veuillez
à bien déposer vos piles usagées dans des lieux prévus à cet
effet par la Loi, comme un point de collecte locale ou dans
un magasin de détail (une élimination de ces produits avec
les déchets domestiques constituerait une violation des
directives sur les piles et batteries).
Les piles qui contiennent des toxines sont marquées avec un
signe et un symbole chimique. « Cd » = cadmium, « Hg » =
mercure, « Pb » = plomb.
Déclaration de conformité CE
Bresser GmbH déclare que l’appareil (Grill
Thermometer BT4 / Art.No.: 70-50110) répond aux
directives applicables et correspond aux standards de la
directive 1999/5/EG.
28
Informazioni sul presente manuale
Questo manuale d’uso va considerato parte integrante
dell’apparecchio.
Prima di usare l’apparecchio, leggere con attenzione le
indicazioni di sicurezza e il manuale d’uso.
Conservare il manuale d’uso per poterlo utilizzare di nuovo in
un secondo momento. Se si vende o si cede l’apparecchio,
consegnare il manuale d’uso ad ogni successivo possessore/
utilizzatore del prodotto.
DE
GB
FR
IT
ES
RU
Avvertenze generali
PERICOLO DI SOFFOCAMENTO!
Tenere i materiali di imballaggio (sacchetti di plastica,
elastici, ecc.) fuori dalla portata dei bambini! PERICOLO DI
SOFFOCAMENTO!
PERICOLO di SCOSSA ELETTRICA!
TQuesto apparecchio contiene componenti elettronici
azionati da una sorgente di corrente (batterie). Non consentire
ai bambini di utilizzare l‘apparecchio senza supervisione!
L’utilizzo deve avvenire soltanto conformemente a quanto
descritto nella guida, in caso contrario esiste il PERICOLO di
SCOSSA ELETTRICA!
RISCHIO DI CORROSIONE!
Le batterie non devono essere manipolate dai bambini! Per
29
Garantie / Warranty
Questo prodotto è destinato esclusivamente all’utilizzo
privato. È stato sviluppato come supporto elettronico per
l’utilizzo di servizi multimediali.
inserire le batterie rispettare la polarità indicata. Le batterie
scariche o danneggiate possono causare irritazioni se
vengono a contatto con la pelle. Se necessario indossare un
paio di guanti di protezione adatto.
PERICOLO DI INCENDIO/ESPLOSIONE!
Non esporre l’apparecchio a temperature elevate. Utilizzare
esclusivamente le batterie consigliate. Non cortocircuitare
o buttare nel fuoco l‘apparecchio e le batterie! Un
surriscaldamento oppure un utilizzo non conforme può
provocare cortocircuiti, incendi e persino esplosioni!
NOTA!
Non smontare l’apparecchio! In caso di guasto, rivolgersi al
proprio rivenditore specializzato. Egli provvederà a contattare
il centro di assistenza e se necessario a spedire l’apparecchio
in riparazione.
Non esporre l’apparecchio a scosse!
Il produttore declina ogni responsabilità per i danni causati
dalla tensione a seguito dell’inserimento erroneo delle
batterie.
Dotazione (Fig. 1)
Termometro per grill (A), termosonda con cavo da 1 m (B), 2
batterie tipo AAA (C), istruzioni per l'uso
Per iniziare
Il BRESSER Grill Thermometer BT4 è un nuovo
termometro per grill wireless compatibile con il Suo
30
smartphone. Con l'ausilio del chip Bluetooth a bassa energia
integrato, il Suo smartphone si trasformerà in un vero e
proprio assistente in cucina wireless.
È sufficiente scaricare l'app gratuita BRESSER BBiQ dall'App
Store o da Google Play e iniziare gli esperimenti in cucina.
Il BRESSER Grill Thermometer BT4 è utilizzabile anche da
solo, senza app.
DE
GB
FR
IT
ES
RU
Aprire il vano batterie ed estrarre la piccola striscia di plastica
tra le batterie.
NOTA: un segnale acustico prolungato del termometro per
grill indica che le batterie sono state inserite correttamente.
L'apparecchio è pronto ad entrare in funzione.
2. Termosonda
Inserire la spina posta all'estremità del cavo della termosonda
nell'apposita presa sul lato sinistro del termometro per grill. Il
display LCD si accende e viene visualizzato il simbolo per la
ricerca Bluetooth .
3. Collegamento
Attivare il Bluetooth da "Impostazioni" (Settings) nello
smartphone.
31
Garantie / Warranty
1. Batterie
4. Collegamento del termometro per grill con l'app
Tenere premuto il tasto SYNC (sul retro del termometro / Fig.
2) per circa 2 secondi per avviare la ricerca dello smartphone.
Premere CONNECT nell'app per collegare i due elementi.
Se il collegamento tra l'app e il dispositivo è stato eseguito
correttamente, nell'angolo in alto a sinistra dell'app appare
.
l'icona gialla BBiQ
32
5. Utilizzo del termometro per grill
Abbiamo programmato diversi livelli di cottura per i tipi di carne
più comuni in modo da consentirle di iniziare a cucinare in modo
facile e veloce. È possibile scegliere tra i seguenti tipi di carne o
impostare manualmente il livello/la temperatura di cottura:
DE
GB
FR
IT
Veal / Beef
(Vitello / Manzo)
Chicken
(Pollo)
Pork
(Maiale)
Lamb
(Agnello)
ES
BEEF
VEAL
W.DONE
MEDIUM
M.RARE
RARE
76
71
63
60
W.DONE
MEDIUM
M.RARE
RARE
76
71
71
N/A
PORK
76
71
N/A
N/A
CHICKEN
82
N/A
N/A
N/A
LAMB
76
71
63
N/A
Garantie / Warranty
RU
Tenere premuto il tasto SET del termometro per circa 3
secondi fino a quando il simbolo con la carne lampeggia.
Scegliere uno dei 5 tipi di carne premendo il tasto + o - e
premere il tasto SET per confermare la scelta.
Scegliere il livello di cottura desiderato - Well done, Medium,
Medium Rare oppure Rare – premendo il tasto + o -. Premere
il tasto SET per confermare la propria scelta.
33
Ora la temperatura preimpostata lampeggia. La si può
cambiare manualmente o semplicemente confermare
premendo il tasto SET.
A questo punto è possibile inserire la termosonda nella carne
e iniziare la cottura.
Una volta raggiunta la temperatura desiderata, si attiva un segnale
acustico. Per bloccare l'allarme, premere DISCONNECT
nell'app o estrarre la termosonda dal termometro.
NOTA: inserire la termosonda sempre nel punto più
spesso della carne da cuocere. Accertarsi che il cavo della
termosonda passi soltanto dove non ci sono fiamme o non
sia esposto a temperature superiori ai 380° C.
NOTA: Per aumentare la durata delle batterie, estrarre
sempre la termosonda dopo ogni utilizzo del termometro. In
questo modo il dispositivo si spegne.
6. Grafico
Il grafico rappresenta visivamente l'andamento delle
temperature per tutto il periodo dei cottura.
34
7. Timer
DE
Abbiamo aggiunto all'app una semplice funzione timer.
Impostare l'orario di allarme.
Premere START TIMER. Il timer inizia il conto alla rovescia
e attiva ein un segnale di allarme allo scadere del tempo
impostato.
GB
FR
IT
ES
8. Dati tecnici
RU
Alimentazione: 2 batterie LR03 (AAA) da 1,5V
Collegamento wireless a 30 metri in ambienti aperti.
Requisiti di sistema
Smartphone o PC tablet con Apple iOS (versione 7 o
superiore) o Android (versione 4.2.2 o superiore) e Bluetooth
4.0 Smart Ready
9. Pulizia e manutenzione
Prima di procedere con la pulizia, staccare l’apparecchio
dalla sorgente di corrente (rimuovere le batterie)!
Pulire l’apparecchio soltanto con un panno asciutto. Non
utilizzare liquidi detergenti per evitare danni ai componenti
elettronici.
Il produttore declina ogni responsabilità per i danni causati
dalla tensione a seguito dell’inserimento erroneo delle
batterie.
Utilizzare esclusivamente le batterie consigliate. Sostituire le
35
Garantie / Warranty
Campo di misurazione: da 0° C a +240° C
Resistenza massima al calore del cavo: 380° C
batterie scariche o usate sempre con una serie di batterie
nuove completamente cariche. Non utilizzare batterie di
marche, tipi o livelli di carica diversi. Togliere le batterie
dall’apparecchio nel caso non venga utilizzato per un periodo
prolungato!
10. Smaltimento
Smaltire i materiali di imballaggio in maniera differenziata.
Le informazioni su uno smaltimento conforme sono
disponibili presso il servizio di smaltimento comunale o
l’Agenzia per l’ambiente locale.
Non smaltire gli apparecchi elettronici con i rifiuti
domestici!
Secondo la Direttiva Europea 2002/96/CE riguardante gli
apparecchi elettrici ed elettronici usati e la sua applicazione
nel diritto nazionale, gli apparecchi elettronici usati devono
essere raccolti in maniera differenziata e destinati al
riciclaggio ecologico.
Le batterie normali e ricaricabili devono essere
correttamente smaltiti come sta previsto dalla legge. È
possibile tornare batterie inutilizzati presso il punto di vendita
o cedere in centri di raccolta organizzati dai comuni per la
raccolta gratuitamente.
Le batterie normali e ricaricabili sono contrassegnati con
il simbolo corrispondente disposte per lo smaltimento e il
simbolo chimico della sostanza inquinante. Per Esempio:
“CD” sta per il cadmio, il “Hg” sta per mercurio e “Pb” per
il piombo.
36
Dichiarazione di conformità CE
Per la presente Bresser GmbH, afferma che questa
unità (Grill Thermometer BT4 / Art.No.: 70-50110), è
coerente e conforme ai requisiti essenziali ed alle altre
disposizioni pertinenti della direttiva 1999/5/EG.
DE
GB
FR
IT
ES
Garantie / Warranty
RU
37
Sobre este manual
El presente manual de instrucciones se debe considerar
parte integrante del aparato.
Antes de utilizar el aparato, lea detenidamente las indicaciones
de seguridad y el manual de instrucciones.
Guarde el presente manual de instrucciones por si necesita
volver a utilizarlo más tarde. En caso de venta o entrega
a terceros del aparato, se debe entregar el manual de
instrucciones al siguiente propietario/usuario del producto.
Este producto sirve exclusivamente para el uso privado. Se
ha desarrollado como medio electrónico de uso de servicios
multimedia.
Advertencias de carácter general
¡PELIGRO DE ASFIXIA!
Mantener los materiales de embalaje (bolsas de plástico,
bandas de goma) alejadas del alcance de los niños. ¡Existe
PELIGRO DE ASFIXIA!
¡PELIGRO DE DESCARGA ELÉCTRICA!
Este aparato contiene componentes electrónicos que
funcionan mediante una fuente de electricidad (pilas). No
deje nunca que los niños utilicen el aparato sin supervisión.
El uso se deberá realizar de la forma descrita en el manual; de
lo contrario, existe PELIGRO de DESCARGA ELÉCTRICA.
¡PELIGRO DE ABRASIÓN!
Si se derrama el ácido de las pilas, este puede provocar
abrasiones Evite el contacto del ácido de las baterías con
38
¡PELIGRO DE INCENDIO/EXPLOSIÓN!
No exponga el aparato a altas temperaturas. Utilice
exclusivamente las pilas recomendadas. ¡No cortocircuitar
ni arrojar al fuego el aparato o las pilas! El calor excesivo
y el manejo inadecuado pueden provocar cortocircuitos,
incendios e incluso explosiones.
¡NOTA!
No desmonte el aparato. En caso de que exista algún
defecto, le rogamos que se ponga en contacto con su
distribuidor autorizado. Este se pondrá en contacto con el
centro de servicio técnico y, dado el caso, podrá enviarle el
aparato para su reparación.
No someta el aparato a sacudidas.
El fabricante no se hace responsable de los daños por
tensión como consecuencia de pilas mal colocadas.
Contenido de la entrega (Fig. 1)
Termómetro para la carne (A), sensor de temperatura con un
cable de 1 m (B), 2 pilas AAA (C), instrucciones de uso
Primeros pasos
El termómetro para la carne BRESSER BT4 es un
nuevo termómetro para la carne sin cables para su
39
DE
GB
FR
IT
ES
RU
Garantie / Warranty
la piel, los ojos y las mucosas. En caso de contacto con el
ácido, enjuague inmediatamente las zonas afectadas con
agua limpia abundante y visite a un médico.
smartphone. Su smartphone será su asistente personal en la
cocina gracias al uso del chip Bluetooth de bajo consumo de
energía.
Descargue el App gratuito BRESSER BBiQ de la APP STORE
o de GOOGLE PLAY y empiece sus experimentos culinarios.
El termómetro para la carne BRESSER BT4 puede usarse
también sin la necesidad de bajarse un app.
1. Pilas
Abra la tapa del compartimento de las pilas y extraiga las tiras
de plástico posicionadas entre las pilas.
ATENCIÓN: Si escucha un pitido largo del termómetro para
la carne significa que introdujo las pilas correctamente. El
dispositivo se encuentra entonces listo para funcionar.
2. Sensor de la temperatura
Introduzca el conector que se encuentra al final del cable del
sensor de la temperatura en el enchufe previsto para ello en
la parte izquierda del termómetro para la carne. Se iniciará la
pantalla LCD y se muestra el símbolo para la búsqueda de la
señal del Bluetooth .
3. Conexión
Conecte el Bluetooth bajo el menú "Configuración" (Settings)
en su smartphone.
40
DE
GB
FR
IT
ES
4. Conectar el termómetro para la carne con el App
RU
Pulse CONNECT en el App para conectar los dos
dispositivos. Si el App y el dispositivo se han conectado
en la
exitosamente, aparecerá el icono amarillo de BBiQ
esquina superior de la parte izquierda de su App.
41
Garantie / Warranty
Mantenga presionado el botón SYNC (en la parte trasera del
termómetro / Fig. 2) durante 2 segundos aproximadamente
para iniciar la búsqueda del smartphone.
5. Uso del termómetro para la carne
Hemos programado distintos niveles de cocción para los
tipos de carne más habituales para que pueda empezar fácil
y rápidamente a cocinar. Puede escoger entre los siguientes
tipos de carne o programar el nivel de temperatura y de
cocción manualmente:
Veal / Beef
(Ternera/ vacuno)
Chicken
(Pollo)
Pork
(Cerdo)
Lamb
(Cordero)
W.DONE
MEDIUM
M.RARE
RARE
BEEF
76
71
63
60
VEAL
76
71
71
N/A
PORK
76
71
N/A
N/A
CHICKEN
82
N/A
N/A
N/A
LAMB
76
71
63
N/A
Mantenga presionado el botón SET del termómetro durante
3 segundos hasta que el símbolo de la carne parpadee.
Escoja una de los cinco tipos de carne usando los botones +
o - y pulse el botón SET para aceptar su selección.
Escoja su punto de cocción deseado Well done, Medium,
Medium Rare o Rare o pulse el botón + o - para escoger
el punto de cocción. Pulse el botón SET para aceptar su
selección.
42
Ahora puede introducir el sensor de temperatura en la carne
y empezar a cocinar.
Cuando la carne alcanza la temperatura deseada, el sensor
emite una señal de alarma. Para parar la alarma, pulse
DISCONNECT en el App o extraiga el sensor de temperatura
del termómetro.
ADVERTENCIA: introduzca el sensor de temperatura siempre
en la pieza de carne más gruesa. Asegúrese de que el cable
del sensor no se encuentra cerca de lugares con llamas o
expuesto a temperaturas más altas de 380˚ C (716˚ F).
INDICACIÓN: para alargar la vida útil de sus pilas, separe el
sensor de temperatura del termómetro después de su uso.
De esta manera el dispositivo se apaga.
6. Gráficos
El gráfico muestra la evolución de la temperatura durante
todo el proceso de cocción.
43
DE
GB
FR
IT
ES
RU
Garantie / Warranty
Posteriormente parpadeará la temperatura preconfigurada.
Puede cambiar el valor de la temperatura manualmente o
aceptar el valor preconfigurada pulsando el botón SET.
7. Temporizador
Hemos programado para el App una sencilla función de
temporizador (timer).
Configurar la alarma.
Pulse el botón START TIMER. El temporizador inicia la cuenta
atrás y emite una señal de alarma una vez transcurrido el
tiempo programado.
8. Datos técnicos
Alimentación de corriente: 2 pilas tipo LR03 (AAA) 1.5V
Rango de medición de la temperatura: 0° C hasta +240° C
Resistencia al calor máxima del cable: 380° C
Conexión sin cables de 30 metros en campo abierto.
Sistemas operativos
Smartphone o tableta-PC con Apple iOS (versión 7 o
posteriores) o Android (versión 4.2.2 o posteriores) y
Bluetooth 4.0 Smart Ready
9. Limpieza y mantenimiento
Antes de limpiar el aparato, desconéctelo de la fuente de
electricidad (quite las pilas).
Limpie solamente el exterior del aparato con un paño seco.
No utilice productos de limpieza para evitar daños en el
sistema electrónico.
El fabricante no se hace responsable de los daños por
tensión como consecuencia de pilas mal colocadas.
Utilice exclusivamente las pilas recomendadas. Recambie
44
siempre las pilas agotadas o muy usadas por un juego
completo de pilas nuevas con plena capacidad. No utilice
pilas de marcas o modelos distintos ni de distinto nivel de
capacidad. ¡Hay que retirar las pilas del aparato si no se va a
usar durante un periodo prolongado!
DE
GB
FR
IT
Elimine los materiales de embalaje separados por tipos.
Obtendrá información sobre la eliminación reglamentaria
en los proveedores de servicios de eliminación municipales
o en la agencia de protección medioambiental.
¡No elimine los electrodomésticos junto con la basura
doméstica!
Conforme a la directiva europea 2002/96/UE sobre
aparatos eléctricos y electrónicos usados y a su aplicación
en la legislación nacional, los aparatos eléctricos usados se
deben recoger por separado y conducir a un reciclaje que
no perjudique al medio ambiente.
De acuerdo con la normativa en materia de pilas y baterías
recargables, está explicitamente prohibido depositarlas
en la basura normal. Por favor, preste atención a lo que la
normativa obliga cuando usted quiera deshacerse de estos
productos - sobre puntos de recogida municipal o en el
mercado minorista (disposición sobre violación de la Directiva
en materia de los residuos domésticos- pilas y baterías-).
Las pilas y baterías que contienen productos tóxicos están
marcados con un signo y un símbolo químico. “Cd”= cadmio,
“Hg”= mercurio, “Pb” = plomo
45
ES
RU
Garantie / Warranty
10. Eliminación
Declaración de conformidad de la Unión
Europea (CE)
Por la presente Bresser GmbH, declara que esta
unidad (Grill Thermometer BT4 / Art.No.: 70-50110),
se encuentra acorde y de conformidad con los requisitos
esenciales y otras disposiciones pertinentes de la Directiva
1999/5/EG.
46
Данное руководство по эксплуатации является частью
устройства. Перед использованием устройства
внимательно
прочитайте
инструкции
по
технике
безопасности и руководство по эксплуатации. Сохраните
руководство по эксплуатации для последующего
использования. При продаже или передаче устройства
руководство по эксплуатации необходимо передать
следующему владельцу (пользователю).
Данное устройство предназначено исключительно для
личного использования. Устройство представляет собой
электронную среду для использования мультимедийных
сервисов.
Общие предупреждения
опасность УДУШЕНИЯ!
Храните упаковку (пластиковые пакеты, резиновые
ленты и пр.) в недоступном для детей месте. Существует
опасность УДУШЕНИЯ!
ОПАСНОСТЬ ПОРАЖЕНИЯ ЭЛЕКТРОТОКОМ!
Данное устройство содержит электронные компоненты,
приводимые в действие от источника тока (батарейки). Не
оставляйте ребенка без присмотра. Устройство следует
использовать только так, как указано в инструкции, иначе
есть серьезный риск получить УДАР ТОКОМ.
ОПАСНОСТЬ ПОЛУЧЕНИЯ ОЖОГА!
Вытекшая из аккумуляторных батарей кислота может
47
DE
GB
FR
IT
ES
RU
Garantie / Warranty
О данном руководстве
стать причиной ожога! Не допускайте попадания кислоты
из аккумуляторных батарей на кожу, в глаза и слизистые
оболочки. В случае попадания кислоты немедленно
промойте пораженные места большим количеством
чистой воды и обратитесь к врачу.
ОПАСНОСТЬ ПОЖАРА / ВЗРЫВА
Не допускайте нагревания устройства до высокой
температуры. Используйте только рекомендованные
батарейки. Не закорачивайте устройство и батарейки, не
бросайте их в огонь! Перегрев и неправильное обращение
могут стать причиной короткого замыкания, пожара и
даже взрыва!
ВНИМАНИЕ!
Никогда не разбирайте устройство. При возникновении
неисправностей обратитесь к дилеру. Он свяжется с
нашим сервисным центром и при необходимости отправит
устройство в ремонт.
Защищайте устройство от тряски!
Производитель не несет никакой ответственности за
повреждения вследствие неправильно установленных
элементов питания!
Комплектация (Fig. 1)
Термометр (A), температурный датчик со шнуром 1 м (B),
2 батарейки класса AAA (C), руководство по эксплуатации
48
Термометр BRESSER Grill Thermometer BT4 — это
новый беспроводной кулинарный термометр для
смартфона. Встроенный чип Bluetooth с малым
потреблением энергии преобразует ваш смартфон в
настоящее беспроводное устройство для шеф-повара.
Просто скачайте бесплатное приложение BRESSER
BBiQ в App Store или Google play — и можно приступать
к приготовлению пищи. Термометр BRESSER Grill Thermometer BT4 также работает как автономный кулинарный
термометр.
1. Батарейки
Откройте батарейный отсек и уберите от батареек
маленькую пластиковую прокладку.
Примечание: Длинный гудок, который издаст термометр,
означает, что батарейки вставлены правильно. Устройство
готово к использованию.
2. Температурный датчик
Подключите температурный датчик к гнезду на левом
боку устройства BBiQ. ЖК-дисплей включится, и на нем
появится значок поиска Bluetooth .
3. Подключение
Включите Bluetooth в настройках (Settings) вашего смартфона.
49
DE
GB
FR
IT
ES
RU
Garantie / Warranty
Использование
4. Подключение термометра к приложению
Нажмите и 2 секунды удерживайте кнопку SYNC (на
плоской стороне устройства / Fig. 2), чтобы начать поиск
телефона.
Нажмите CONNECT в приложении BBiQ App, чтобы
соединить оба устройства. Если они соединились правильно,
в левом верхнем углу появится желтый значок BBiQ
.
50
5. Использование термометра
Мы
запрограммировали
разные
температуры
приготовления для основных видов мяса. Поэтому вы с
легкостью можете приступить к стряпне. Можно выбрать
один из перечисленных видов мяса или установить
нужную температуру вручную:
Chicken
(Курица)
Pork
(Свинина)
W.DONE
MEDIUM
M.RARE
RARE
76
71
63
60
VEAL
76
71
71
N/A
PORK
76
71
N/A
N/A
CHICKEN
82
N/A
N/A
N/A
LAMB
76
71
63
N/A
FR
IT
ES
Lamb
(Баранина)
BEEF
GB
RU
Garantie / Warranty
Veal / Beef
(Телятина/Говядина)
DE
Нажмите и 3 секунды удерживайте кнопку SET. Значок
мяса начнет мигать.
С помощью кнопок +/- выберите один из 5 видов мяса и
нажмите кнопку SET для подтверждения выбора.
С помощью кнопок +/- buttons выберите способ
приготовления мяса — Сильная прожарка, Средняя
прожарка, Средняя прожарка с кровью, С кровью.
Нажмите кнопку SET для подтверждения выбора.
51
Индикатор температуры начнет мигать. Нажмите
кнопку SET для подтверждения выбора или измените
температуру на нужную вам вручную.
Теперь можно вставить температурный датчик в мясо и
начать готовить.
Когда мясо нагреется до нужной температуры, прозвучит
сигнал. Чтобы выключить сигнал, нажмите кнопку DISCONNECT или выньте датчик из термометра.
ПРИМЕЧАНИЕ: Помните, что датчик нужно ставить в
самую толстую часть куска мяса. Убедитесь, что провод
датчика не попадет в область действия открытого огня или
температур свыше 380 °C (716 °F).
ПРИМЕЧАНИЕ: Чтобы продлить срок службы батареек,
всегда вынимайте температурный датчик из термометра
после использования и выключайте устройство.
6. График
На графике показано изменение
зависимости от времени.
52
температуры
в
7. Таймер
DE
В приложении есть функция простого таймера.
GB
Установите время сигнала.
Нажмите START TIMER. Таймер начнет отсчет, по
истечении времени прозвучит сигнал.
FR
8. Технические характеристики
ES
Питание: 2 батарейки LR03 (AAA) 1,5 В
RU
IT
Дальность действия беспроводного сигнала: 30 м (без
препятствий).
Требования к системе
Смартфон или планшет с Apple iOS (версия 7 или выше)
или Android (версия 4.2.2 или выше) и Bluetooth 4.0 Smart
Ready
9. Уход и обслуживание
Перед чисткой отключите устройство от источника питания
(выньте батарейки)!
Протирайте поверхности устройства сухой салфеткой. Не
используйте чистящую жидкость, она может повредить
электронные компоненты.
Производитель не несет никакой ответственности за
повреждения вследствие неправильно установленных
элементов питания!
Используйте только рекомендованные батарейки.
53
Garantie / Warranty
Диапазон измерений Температура: от 0 °C до +240 °C
Максимально допустимый нагрев для провода: 380 °C
Заменяйте
весь
комплект
разряженных
или
использованных батареек целиком. Не устанавливайте
батарейки разных марок, типов или емкостей. Если
устройство не будет использоваться в течение длительного
времени, выньте из него батарейки!
10. УТИЛИЗАЦИЯ
Утилизируйте упаковку как предписано законом. При
необходимости проконсультируйтесь с местными
властями.
Не выбрасывайте электронные детали в обычный
мусорный контейнер.
Европейская директива по утилизации электронного
и
электрического
оборудования
2002/96/EU
и
соответствующие ей законы требуют отдельного сбора и
переработки подобных устройств.
Элементы питания не являются бытовыми отходами,
поэтому в соответствии с законодательными
требованиями их необходимо сдавать в пункты приема
использованных элементов питания. Вы можете бесплатно
сдать использованные элементы питания в нашем
магазине или рядом с вами (например, в торговых точках
или в пунктах приема).
На элементах питания изображен перечеркнутый
контейнер, а также указано содержащееся ядовитое
вещество: «Cd» обозначает кадмий, «Hg» – ртуть, а «Pb»
– свинец.
54
Сертификат соответствия ЕС
Фирма Bresser GmbH подтверждает соответствие
устройства (Grill Thermometer BT4 / Art.No.: 7050110) требованиям директивы 1999/5/EG.
DE
GB
FR
IT
ES
Garantie / Warranty
RU
55
DE
GARANTIE & SERVICE
Die reguläre Garantiezeit beträgt 2 Jahre und beginnt am Tag des
Kaufs. Um von einer verlängerten, freiwilligen Garantiezeit wie auf dem
Geschenkkarton angegeben zu profitieren, ist eine Registrierung auf
unserer Website erforderlich. Die vollständigen Garantiebedingungen
sowie Informationen zu Garantiezeitverlängerung und Serviceleistungen
können Sie unter www.bresser.de/garantiebedingungen einsehen.
Sie wünschen eine ausführliche Anleitung zu diesem Produkt in
einer bestimmten Sprache? Dann besuchen Sie unsere Website
über nachfolgenden Link (QR Code) für verfügbare Versionen.
Alternativ können Sie uns auch eine E-Mail an die Adresse
[email protected] schicken oder eine Nachricht unter
+49 (0) 2872 - 8074-220* hinterlassen. Bitte geben Sie stets Ihren
Namen, Ihre genaue Adresse, eine gültige Telefonnummer und E-MailAdresse sowie die Artikelnummer und -bezeichnung an.
*Lokale Rufnummer in Deutschland (Die Höhe der Gebühren je Telefonat ist abhängig vom Tarif Ihres Telefonanbieters);
Anrufe aus dem Ausland sind mit höheren Kosten verbunden.
GB
WARRANTY & SERVICE
The regular guarantee period is 2 years and begins on the day of
purchase. To benefit from an extended voluntary guarantee period
as stated on the gift box, registration on our website is required.
You can consult the full guarantee terms as well as information
on extending the guarantee period and details of our services at
www.bresser.de/warranty_terms. Would you like detailed instructions
for this product in a particular language? Then visit our website via the
link below (QR code) for available versions. Alternatively you can also
send an email to [email protected] or leave a message on +49 (0)
28 72 – 80 74-220*. Please always state your name, precise address,
a valid phone number and email address, as well as the article number
and name.
*Number charged at local rates in Germany (the amount you will be charged per phone call will depend on the tariff of your
phone provider); calls from abroad will involve higher costs.
56
FR
Garantie et Service
**Numéro d’appel local en Allemagne (le montant des frais par appel téléphonique dépend du tarif de votre opérateur
téléphonique) ; les appels depuis l’étranger entrainent des coûts plus élevés.
NL
Garantie & Service
De reguliere garantieperiode bedraagt 2 jaar en begint op de dag
van aankoop. Om gebruik te maken van een verlengde vrijwillige
garantieperiode zoals aangegeven op de geschenkverpakking is
aangegeven dient het product op onze website geregistreerd te worden.
De volledige garantievoorwaarden en informatie over de verlenging van
de garantieperiode en servicediensten kunt u bekijken op www.bresser.
de/warranty_terms. U wenst een uitvoerige gebruikshandleiding voor dit
product in een specifieke taal? Bezoek dan onze website via deze link (QR
Code) voor alle beschikbare versies. U kunt ook een e-mail sturen naar
[email protected] of een bericht achterlaten op nummer +49 (0) 28
72 – 80 74-220*. Vermeld alstublieft altijd uw naam, uw exacte adres,
een geldig telefoonnummer en e-mailadres, evenals het artikelnummer
en het kenmerk.
*Lokaal nummer in Duitsland (het tarief voor het telefoongesprek is afhankelijk van het tarief van uw telefoonprovider).
Telefoongesprekken uit het buitenland brengen hogere kosten met zich mee.
57
Garantie / Warranty
La durée normale de la garantie est de 2 ans à compter du jour de
l’achat. Afin de pouvoir profiter d’une prolongation facultative de la
garantie, comme il est indiqué sur le carton d’emballage, vous devez
vous enregistrer sur notre site Internet. Vous pouvez consulter
l’intégralité des conditions de garantie ainsi que les informations
concernant la prolongation de la garantie et les prestations de service sur
www.bresser.de/warranty_terms. Vous souhaitez un mode d’emploi détaillé
pour ce produit dans une langue spécifique ? Alors consultez notre site
Internet à l’aide du lien suivant (code QR) pour voir les versions disponibles.
Vous pouvez également nous envoyer un e-mail à l’adresse manuals@
bresser.de ou nous laisser un message au +49 (0) 28 72 – 80 74-220*.
Indiquez toujours votre nom, votre adresse exacte, un numéro de téléphone
et une adresse e-mail valides ainsi que le numéro de l’article et sa description.
ES
Garantía y servicio
El período regular de garantía es dos anos iniciándose en el día de la
compra. Para beneficiarse de un período de garantía más largo y
voluntario tal y como se indica en la caja de regalo es necesario registrarse
en nuestra página web. Las condiciones de garantía completas así como
informaciones relativas a la ampliación de la garantía y los servicios
pueden encontrarse en www.bresser.de/warranty_terms. ¿Desearía
recibir unas instrucciones de uso completas sobre este producto en
un idioma determinado? Entonces visite nuestra página web utilizando
el siguiente enlace (código QR) para ver las versiones disponibles. O
envíenos un mensaje a la dirección de correo [email protected] o
déjenos un mensaje telefónico en el siguiente número +49 (0) 28 72 –
80 74-220*. Asegúrese de dejar su nombre, dirección, teléfono válido,
una dirección de correo electrónico así como el número del artículo y su
descripción.
*Número local de Alemania (el importe de cada llamada telefónica dependen de las tarifas de los distribuidores); Las
llamadas des del extranjero están ligadas a costes suplementarios.
IT
Garanzia e assistenza
La durata regolare della garanzia è di 2 anni e decorre dalla data
dell’acquisto. Per godere di un’estensione volontaria della garanzia
come descritto sulla confezione regalo, è necessario registrarsi nel
nostro sito Web. Le condizioni complete di garanzia e le informazioni
sull’estensione di garanzia e i servizi di assistenza sono visibili al sito
www.bresser.de/warranty_terms. Desidera ricevere informazioni esaustive
su questo prodotto in una lingua specifica? Venga a visitare il nostro sito
Web al seguente link (codice QR Code) per conoscere le versioni disponibili.
RU
Гарантия
Гарантийный период составляет 2 лет со дня покупки устройства. Сохраните
чек, подтверждающий дату покупки. При обнаружении неисправностей в
течение гарантийного срока устройство следует вернуть дилеру, у которого оно
было приобретено. Вам вернут отремонтированное устройство или его замену.
58
На сайте BRESSER размещены дополнительные материалы о данном продукте
(руководство по эксплуатации, технические характеристики и пр.), которые
можно просмотреть, пройдя по указанной ссылке или считав данный QR-код
при помощи любого мобильного устройства.
Garantie / Warranty
www.bresser.de/7050110
59
www.bresser.de/start/bresser
Bresser GmbH
Gutenbergstr. 2 · DE-46414 Rhede
Germany
www.bresser.de · [email protected]
Irrtümer und technische Änderungen vorbehalten. · Errors and technical changes reserved. · Sous réserve
d’erreurs et de modifications techniques. · Vergissingen en technische veranderingen voorbehouden. ·
Con riserva di errori e modifiche tecniche. · Queda reservada la posibilidad de incluir modificaciones o
de que el texto contenga errores. · Оставляем за собой право на ошибки и технические изменения.
ANL7050110MSP1014BRESSER