1
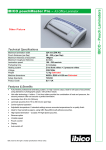
pouchMaster Pro Laminator
Operation, hot lamination
After the laminator has been turned on, the cold mode is automatically set.
“Ready” temperature setting “Cold” and speed setting “6” should be displayed
on the LCD.
1 Select either “LOW, MED or HIGH function key. The LCD will indicate the
temperature selected the speed will be “6”. “Ready” will not be indicated
until the laminator has reached the set temperature. The actual
temperature will be indicated in the lower right corner of the LCD until the
set temperature is reached and the “Ready” comes on.
2 Use the lamination guide included with the machine to select the proper
temperature and speed for the materials to be laminated.
3 Place the item to be laminated into the laminating pouch, so the document
is against the seal on the pouch and is centered left to right.
4 Insert the pouch and its contents sealed edge first straight into the
2
5 The laminated item will automatically exit the rear of the pouch laminator.
After the pouch has stopped moving, place it on a flat surface to cool.
6 If the laminated product looks hazy, then the temperature may need to be
increased or the speed decreased. If the laminated product looks wavy,
then the temperature may need to be decreased or the speed increased.
7 If finished laminating, press “Cold” key. Temperature “Cold” and speed “6”
will be displayed. Cooling down the machine before turning off the power
switch protects and extends the life of the rollers.
8 Turn off the power switch.
9 Unplug the power cord if the machine will not be used for a long period of
time.
Do not laminate an empty pouch.
machine making sure it is centered in the throat opening.
Operation, cold lamination
After the laminator has been turned on using the power switch located on the
back of the machine, the cold mode is automatically set. “Ready” speed “6”
should be displayed on the LCD. If the machine has just recently been used for
Hot Lamination, then the machine must reach a temperature no hotter than
30°C before starting Cold Lamination.
1 Select a cold pouch that is slightly larger than the document to be
laminated.
3 Carefully separate the backing release liner from the film and drape the
clear film over the top of the laminator.
4 Place the document between the separated film and backing and select
speed 1.
5 After the laminated document exits the rear of the laminator, then either
cut off the excess pouch edge for a flush – cut appearance or leave the
edge as an adhesive border for signage.
2 Run the film, film-side faced up, for about 3 – 6 mm into the laminator,
and then press “Stop”.
Mouse mat
Specifications
Ibico pouchMaster Pro
1 Select 130°C and speed “3”, and wait for the “Ready” indicator.
Electrical
220~240V AC / 50 Hz / 4.2A / 1000W
2 Start laminating.
Machine Dimensions
527mm x 280mm x 159mm
Machine Weight
9.1 kg
Maximum Pouch Width
318mm
Maximum Pouch Thickness
2.5mm
Warm-Up Time
5 minutes
3
3 When the pouch exits the rear of the laminator, carefully rub a finger
against a front corner to remove the protective carrier film.
Guarantee
Operation of this machine is guaranteed for one year from date of purchase,
subject to normal use. Within the guarantee period, GBC will at its own
discretion either repair or replace the defective machine free of charge.
Defects due to misuse or use for inappropriate purposes are not covered under
the guarantee. Proof of date of purchase will be required. Repairs or alterations
made by persons not authorised by GBC will invalidate the guarantee.
It is our aim to ensure that our products perform to the specifications stated.
This guarantee does not affect the legal rights which consumers have under
applicable national legislation governing the sale of goods.
Register this product online at www.GBCOffice.com
EDNord - Istedgade 37A - 9000 Aalborg - Telefon 96333500