1
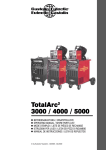
T.I.M.E. SYNERGIC
Primärgetakteter MIG/MAGSchweißgleichrichter
Primary transistor-switched
MIG/MAG welding rectifier
Redresseur de soudage
à hacheur primaire MIG/MAG
BEDIENUNGSANLEITUNG
OPERATING
INSTRUCTIONS
MODE
D´EMPLOI
ERSATZTEILLISTE
SPARE PARTS
LIST
LISTE DE PIÈCES
DE RECHANGE
42,0410,0409 012001
2
Die vorliegende Bedienungsanleitung soll Sie mit Bedienung und Wartung der T.I.M.E. Synergic vertraut machen. Es liegt in Ihrem Interesse,
die Bedienungsanleitung aufmerksam zu lesen, und die hier angegebenen Weisungen gewissenhaft zu befolgen. Sie vermeiden dadurch Störungen durch Bedienungsfehler. Das Gerät wird Ihnen dies durch stete
Einsatzbereitschaft und lange Lebensdauer lohnen.
FRONIUS INTERNATIONAL GMBH & COKG
Achtung! Die Inbetriebnahme des Gerätes darf nur durch geschultes Personal und nur im Rahmen der technischen Bestimmungen erfolgen. Vor Inbetriebnahme unbedingt das Kapitel
"Sicherheitsvorschriften" lesen.
INHALTSVERZEICHNIS
Sehr geehrter Fronius-Kunde .................................................................. 3
Schweissbrenner montieren .............................................................. 13
Kühlgerät in Betrieb nehmen ............................................................. 13
Drahtspule einsetzen ......................................................................... 13
Drahtelektrode einlaufen lassen ....................................................... 13
Vorschubrollen wechseln ................................................................... 14
Sicherheitsvorschriften ............................................................................. 4
Allgemeines ........................................................................................... 4
Bestimmungsgemässe Verwendung ................................................... 4
Verpflichtungen des Betreibers ........................................................... 4
Verpflichtungen des Personals ........................................................... 4
Persönliche Schutzausrüstung ............................................................ 4
Gefahr durch schädliche Gase und Dämpfe ..................................... 4
Gefahr durch Funkenflug ..................................................................... 4
Gefahren durch Netz- und Schweiss-Strom ...................................... 4
Besondere Gefahrenstellen ................................................................. 4
Informelle Sicherheitsmassnahmen ................................................... 5
Sicherheitsmassnahmen am Aufstellort ............................................. 5
Vagabundierende Schweisströme ...................................................... 5
Sicherheitsmassnahmen im Normalbetrieb ....................................... 5
Sicherheitstechnische Inspektion ....................................................... 5
Veränderungen am Schweissgerät ..................................................... 5
Ersatz- und Verschleissteile ................................................................ 5
Kalibrieren von Schweissgeräten ....................................................... 5
Die CE-Kennzeichnung ........................................................................ 5
Urheberrecht ......................................................................................... 5
MIG/MAG-Schweissen ........................................................................... 14
Einstellrichtlinien für den T.I.M.E.-Process ...................................... 14
Einstellwerte für Nahtart, Schweissposition und Nahtdicke .......... 15
WIG-Schweissen ..................................................................................... 15
Variante I .............................................................................................. 15
Variante II ............................................................................................ 15
Inbetriebnahme ................................................................................... 16
E-Handschweissen ................................................................................. 16
Roboterschweissen ................................................................................ 16
Das Setup-Menü ..................................................................................... 17
In das Setup-Menü einsteigen .......................................................... 17
Das Setup-Menü verlassen ............................................................... 17
Parameterbeschreibung ..................................................................... 17
Pflege und Wartung ................................................................................ 17
Allgemeines ............................................................................................... 6
Prinzip der T.I.M.E. Synergic ............................................................... 6
Verfahrensprüfung nach EN 288 / 7 ................................................... 6
Gerätekonzept ....................................................................................... 6
Fehlerdiagnose und -behebung ............................................................ 18
Fehlermeldungen an den Anzeigen .................................................. 18
Fehler an der Schweissanlage .......................................................... 18
Technische Daten ................................................................................... 22
Stromquelle T.I.M.E. Synergic ........................................................... 22
Drahtvorschub T.I.M.E. 30 ................................................................. 22
Kühlgerät FK 71 .................................................................................. 22
Bedienelemente und Anschlüsse ............................................................ 7
Stromquelle T.I.M.E. Synergic ............................................................. 7
Drahtvorschub T.I.M.E. 30 ................................................................... 9
Kühlgerät FK 71 .................................................................................. 10
Fernbedienung TR 34 T.I.M.E. .......................................................... 10
Fernbedienung TP 4 SP ..................................................................... 11
LED-Checkliste, Einstellregler und Sicherungen ................................ 23
Operating Instructions
Stromquelle in Betrieb nehmen ............................................................. 11
Bestimmungsgemässe Verwendung ................................................. 11
Aufstellbestimmungen ........................................................................ 11
Netzstecker anschliessen .................................................................. 11
Netzanschluss ..................................................................................... 11
Stromquelle zusammenbauen ........................................................... 12
Verbindungsschlauchpaket mit Stromquelle/Kühlgerät verbinden 12
Verbindungsschlauchpaket mit Drahtvorschub verbinden ............. 13
Gasflasche montieren / anschliessen .............................................. 13
Mode d´emploi
Ersatzteilliste
Fronius - Vertriebs- und Service-Niederlassungen
3
DEUTSCH
SEHR GEEHRTER FRONIUS-KUNDE
SICHERHEITSVORSCHRIFTEN
ALLGEMEINES
Befinden sich Personen in der Nähe so müssen
- diese über die Gefahren unterrichtet,
- Schutzmittel zur Verfügung gestellt bzw.
- Schutzwände bzw. -Vorhänge aufgebaut werden.
Das Schweißgerät ist nach dem Stand der Technik und den anerkannten
sicherheitstechnischen Regeln gefertigt. Dennoch drohen bei Fehlbedienung oder Mißbrauch Gefahr für
- Leib und Leben des Bedieners oder Dritten,
- das Schweißgerät und andere Sachwerte des Betreibers,
- die effiziente Arbeit mit dem Schweißgerät.
GEFAHR DURCH SCHÄDLICHE GASE UND DÄMPFE
- Entstehenden Rauch sowie schädliche Gase durch geeignete Mittel
aus dem Arbeitsbereich absaugen.
- Für ausreichende Frischluftzufuhr sorgen.
- Lösungsmitteldämpfe vom Strahlungsbereich des Lichtbogens fernhalten.
Alle Personen, die mit der Inbetriebnahme, Bedienung, Wartung und
Instandhaltung des Schweißgerätes zu tun haben, müssen
- entsprechend qualifiziert sein,
- Kenntnisse vom Schweißen haben und
- diese Bedienungsanleitung genau beachten.
GEFAHR DURCH FUNKENFLUG
Störungen, die die Sicherheit beeinträchtigen können, sind umgehend
zu beseitigen.
- Brennbare Gegenstände aus dem Arbeitsbereich entfernen.
- An Behältern in denen Gase, Treibstoffe, Mineralöle und dgl. gelagert
sind/waren, darf nicht geschweißt werden. Durch Rückstände besteht Explosionsgefahr.
- In feuer- u. explosionsgefährdeten Räumen gelten besondere Vorschriften - entsprechende nationale und internationale Bestimmungen beachten.
Es geht um Ihre Sicherheit!
BESTIMMUNGSGEMÄSSE VERWENDUNG
Das Schweißgerät ist ausschließlich für Arbeiten im Sinne der bestimmungsgemäßen Verwendung (siehe Kapitel "Schweißgerät in Betrieb
nehmen") zu benutzen.
GEFAHREN DURCH NETZ- UND SCHWEISS-STROM
Zur bestimmungsgemäßen Verwendung gehört auch
- das Beachten aller Hinweise aus der Bedienungsanleitung
- die Einhaltung der Inspektions- und Wartungsarbeiten
- Ein Elektroschock kann tödlich sein. Jeder Elektroschock ist grundsätzlich lebensgefährlich.
- Durch hohe Stromstärke erzeugte magnetische Felder können die
Funktion lebenswichtiger elektronischer Geräte (z.B. Herzschrittmacher) beeinträchtigen. Träger solcher Geräte, sollten sich durch ihren
Arzt beraten lassen, bevor sie sich in unmittelbarer Nähe des Schweißarbeitsplatzes aufhalten.
- Sämtliche Schweißkabel müssen fest, unbeschädigt und isoliert sein.
Lose Verbindungen und angeschmorte Kabel sofort erneuern.
- Netz- u. Gerätezuleitung regelmäßig von einer Elektro-Fachkraft auf
Funktionstüchtigkeit des Schutzleiters überprüfen lassen.
- Vor Öffnen des Schweißgerätes sicherstellen, daß dieses stromlos
ist. Bauteile die elektrische Ladung speichern entladen.
- Sind Arbeiten an spannungsführenden Teilen notwendig, ist eine
zweite Person hinzuzuziehen, die notfalls den Hauptschalter ausschaltet.
VERPFLICHTUNGEN DES BETREIBERS
Der Betreiber verpflichtet sich, nur Personen am Schweißgerät arbeiten
zu lassen, die
- mit den grundlegenden Vorschriften über Arbeitssicherheit und Unfallverhütung vertraut und in die Handhabung des Schweißgerätes
eingewiesen sind
- das Sicherheitskapitel und die Warnhinweise in dieser Bedienungsanleitung gelesen, verstanden und durch ihre Unterschrift bestätigt
haben
Das sicherheitsbewußte Arbeiten des Personals ist in regelmäßigen
Abständen zu überprüfen.
BESONDERE GEFAHRENSTELLEN
VERPFLICHTUNGEN DES PERSONALS
- Nicht in die rotierenden Zahnräder des Drahtantriebes greifen.
- In feuer- und explosionsgefährdeten Räumen gelten besondere Vorschriften - entsprechende nationale und internationale Bestimmungen beachten.
- Schweißgeräte für Arbeiten in Räumen mit erhöhter elektrischer
Gefährdung (z.B. Kessel) müssen mit dem Zeichen S (Safety) gekennzeichnet sein.
- Schweißverbindungen mit besonderen Sicherheitsanforderungen sind
nur von speziell ausgebildeten Schweißern durchzuführen.
- Bei Krantransport der Stromquelle Ketten bzw. Seile in einem möglichst kleinen Winkel zur Senkrechten in allen Kranösen einhängen Gasflasche und Drahtvorschubgerät entfernen.
- Bei Krantransport des Drahtvorschubes immer eine isolierende Drahtvorschubaufhängung verwenden
Alle Personen, die mit Arbeiten am Schweißgerät beauftragt sind, verpflichten sich, vor Arbeitsbeginn
- die grundlegenden Vorschriften über Arbeitssicherheit und Unfallverhütung zu beachten
- das Sicherheitskapitel und die Warnhinweise in dieser Bedienungsanleitung zu lesen und durch ihre Unterschrift zu bestätigen, daß sie
diese verstanden haben
PERSÖNLICHE SCHUTZAUSRÜSTUNG
Treffen Sie für Ihre persönliche Sicherheit folgende Vorkehrungen:
- Festes, auch bei Nässe, isolierendes Schuhwerk tragen
- Hände durch isolierende Handschuhe schützen
- Augen durch Schutzschild mit vorschriftsmäßigem Filtereinsatz vor
UV-Strahlen schützen
- Nur geeignete (schwer entflammbare) Kleidungsstücke verwenden
- Bei erhöhter Lärmbelastung Gehörschutz verwenden
4
VERÄNDERUNGEN AM SCHWEISSGERÄT
- Die Bedienungsanleitung ist ständig am Einsatzort des Schweißgerätes aufzubewahren.
- Ergänzend zur Bedienungsanleitung sind die allgemein gültigen
sowie die örtlichen Regeln zu Unfallverhütung und Umweltschutz
bereitzustellen und zu beachten.
- Alle Sicherheits- und Gefahrenhinweise am Schweißgerät sind in
lesbarem Zustand zu halten.
- Ohne Genehmigung des Herstellers keine Veränderungen, Ein- oder
Umbauten am Schweißgerät vornehmen.
- Bauteile in nicht einwandfreiem Zustand sofort austauschen.
ERSATZ- UND VERSCHLEISSTEILE
- Nur Original-Ersatz- und Verschleißteile verwenden. Bei fremdbezogenen Teilen ist nicht gewährleistet, daß sie beanspruchungs- und
sicherheitsgerecht konstruiert und gefertigt sind.
- Bei Bestellung genaue Benennung und Sach-Nummer laut Ersatzteilliste, sowie Seriennummer Ihres Gerätes angeben.
SICHERHEITSMASSNAHMEN AM AUFSTELLORT
- Das Schweißgerät muß auf ebenem und festen Untergrund standsicher aufgestellt werden. Ein umstürzendes Schweißgerät kann Lebensgefahr bedeuten!
- In feuer- und explosionsgefährdeten Räumen gelten besondere Vorschriften - entsprechende nationale und internationale Bestimmungen beachten.
- Durch innerbetriebliche Anweisungen und Kontrollen sicherstellen,
daß die Umgebung des Arbeitsplatzes stets sauber und übersichtlich
ist.
KALIBRIEREN VON SCHWEISSGERÄTEN
Aufgrund internationaler Normen ist eine regelmäßige Kalibrierung von
Schweißgeräten empfohlen. Fronius empfiehlt ein Kalibrierintervall von
12 Monaten. Setzen Sie sich für nähere Informationen mit Ihrem FroniusPartner in Verbindung!
VAGABUNDIERENDE SCHWEISSTRÖME
DIE CE-KENNZEICHNUNG
- Für eine feste Verbindung der Werkstückklemme mit dem Werkstück
sorgen
- Bei elektrisch leitfähigem Boden das Schweißgerät, wenn möglich,
isoliert aufstellen
Das Schweißgerät erfüllt die grundlegenden Anforderungen der Niederspannungs- und Elektromagnetischen Verträglichkeits-Richtlinie und ist
daher CE-gekennzeichnet.
Bei Nichtbeachtung kommt es zu vagabundierenden Schweißströmen,
die zur Zerstörung von Schutzleitern, des Schweißgerätes und anderen
elektrischen Einrichtungen führen können.
URHEBERRECHT
Das Urheberrecht an dieser Bedienungsanleitung verbleibt bei der Firma
Fronius International GmbH&Co.KG
Text und Abbildungen entsprechen dem technischen Stand bei Drucklegung. Änderungen vorbehalten. Der Inhalt der Bedienungsanleitung
begründet keinerlei Ansprüche seitens des Käufers. Für Verbesserungsvorschläge und Hinweise auf Fehler in der Bedienungsanleitung sind wir
dankbar.
SICHERHEITSMASSNAHMEN IM NORMALBETRIEB
- Schweißgerät nur betreiben, wenn alle Schutzeinrichtungen voll
funktionstüchtig sind.
- Vor Einschalten des Schweißgerätes sicherstellen, daß niemand
gefährdet werden kann.
- Mindestens einmal pro Woche das Schweißgerät auf äußerlich erkennbare Schäden und Funktionsfähigkeit der Sicherheitseinrichtungen überprüfen.
SICHERHEITSTECHNISCHE INSPEKTION
Der Betreiber ist verpflichtet, das Schweißgerät nach Veränderung, Einoder Umbauten, Reparatur, Pflege und Wartung sowie mindestens alle
zwölf Monate durch eine Elektro-Fachkraft auf ordnungsgemäßen Zustand überprüfen zu lassen.
Bei der Überprüfung sind zumindest folgende Vorschriften zu beachten:
- IEC (EN) 60 974-1 - Einrichtungen zum Lichtbogenschweißen, Teil 1:
Schweißstromquellen
- VBG 4, §5 - Elektrische Anlagen und Betriebmittel
- VBG 15, §33 / §49 - Schweißen, Schneiden und verwandte Arbeitsverfahren
- VDE 0701-1 - Instandsetzung, Änderung und Prüfung elektrischer
Geräte; allgemeine Anforderungen
- VDE 0702-1 - Wiederholungsprüfungen an elektrischen Geräten
Nähere Informationen für die Instandsetzung, Änderung und anschließende Prüfung von Schweißgeräten erhalten Sie bei Ihrer Fronius
Servicestelle, die Ihnen auf Wunsch die Arbeitanweisung „Sicherheitstechnische Überprüfung von Schweißgeräten“ (AA-PMÜ-01) zur Verfügung stellt.
5
ud_fr_st_sv_00145
012001
DEUTSCH
INFORMELLE SICHERHEITSMASSNAHMEN
ALLGEMEINES
PRINZIP DER T.I.M.E. SYNERGIC
GERÄTEKONZEPT
Der T.I.M.E. Process ist ein Hochleistungs- MAG Schweißverfahren,
welches höchste Wirtschaftlichkeit mit ausgezeichneter Schweißnahtqualität verbindet. Durch die Verarbeitung von Massivdrähten unter
höheren Drahtgeschwindigkeiten ergibt sich die höhere Abschmelzleistung, wobei durch spezielle Schutzgasgemische eine hochwertige
Schweißverbindung entsteht.
Das Baukastenprinzip stand Pate für die T.I.M.E. Synergic. Die einzelnen Steuerkomponenten sind verschraubt und lassen sich einfach und
problemlos auf ein robustes Fahrwerk montieren.
Die Gasflasche ist im Fahrwagen integriert und vertieft angebracht.
Dadurch läßt sich die Gasflasche rasch und einfach wechseln bzw.
manipulieren. Die Anlage hat zwar kleine Abmessungen, ist aber so
gebaut, daß sie auch unter härtesten Bedingungen zuverlässig arbeitet.
Pulverbeschichtete Blechgehäuse, geschützt angebrachte Bedienungselemente und Strombuchsen mit Bajonettverriegelung erlauben höchste
Anforderungen.
Aspekte wie Nahtaussehen, mechanisch-technologische Gütewerte,
Nahtübergänge, Bindefehlersicherheit und geringe Spritzerneigung sind
wesentliche Vorteile des Verfahrens. Durch die Einführung eines zweiten Gasgemisches „T.I.M.E.-II“ ist es nunmehr möglich, falls nötig,
porenfreie Schweißnähte zu erzielen. Im wesentlichen besteht der T.I.M.E.
Process aus der Verknüpfung fortschrittlichster Stromquellentechnologie, leistungsfähigen Drahtvorschubgeräten und Schweißbrennern, der
entsprechenden Gasephysik und dem Knowhow der richtigen Anwendung dieser Elemente.
Das tragbare Drahtvorschubgerät kann über den Aufnahmebolzen der
Stromquelle nach beiden Seiten drehbar aufgesetzt bzw. zur Erweiterung des Arbeitsbereiches abgenommen werden. Verschließbare Abdeckungen schützen Drahtrolle und Antriebssystem vor anfallendem
Schleifstaub.
VERFAHRENSPRÜFUNG NACH EN 288 / 7
Der isolierte Transportgriff und ein Fahrwerk mit groß dimensionierten
Rädern sowie optimal angebrachte Kranösen machen den Transport
sowohl innerbetrieblich als auch im Baustelleneinsatz mobiler und leichter.
Zukünftig wird es auf dem Gebiet der Schweißtechnik in Europa mehrere
Möglichkeiten der Anerkennung von Schweißanweisungen WPS geben.
Eine davon ist entsprechend der ÖNORM EN 288/1 die Normverfahrensprüfung nach EN 288 / 7. Durch eine derartige Normverfahrensprüfung
werden alle wesentlichen Einflußgrößen untersucht und somit ein genormtes Schweißverfahren festgelegt.
Diese Art der Anerkennung ist attraktiv, weil sie die Möglichkeit bietet,
die Kosten, die mit der Anerkennung für den einzelnen Hersteller verbunden sind, zu senken. Eine einmal durchgeführte WPS ist anerkannt,
wenn die Bereiche für alle Einflußgrößen in dem zulässigen Bereich für
das Normschweißverfahren bleiben. Dies wird unter anderem auch
durch ein programmiertes Parameterfeld in der Stromquelle gewährleistet. Für weitere Informationen verweisen wir auf die Normverfahrensprüfung.
Abb.1
Schweißanlage T.I.M.E. Synergic
6
STROMQUELLE T.I.M.E. SYNERGIC
Anzeige Manuell / No Program
- leuchtet, im MIG/MAG-Manuellbetrieb (mit Fernbedienung TR 34
T.I.M.E.) ständig, wenn am Programm-Wahlschalter eine programmierte Position ausgewählt ist
- leuchtet im E-Handschweißbetrieb ständig
- blinkt, wenn am Programm-Wahlschalter eine nicht programmierte
Position ausgewählt ist
Anzeige Übergangslichtbogen ... zwischen Kurz- und Sprühlichtbogen entsteht ein spritzerbehafteter Übergangslichtbogen. Um diesen zu Vermeiden leuchtet die Anzeige Übergangslichtbogen.
Anzeige T.I.M.E. leuchtet, wenn ein T.I.M.E. Programm angewählt
ist - es gilt die Skalierung für Drahtgeschwindigkeit 0-30 m/min
Anzeige Hold ... bei jedem Schweißende werden die aktuellen IstWerte von Schweißstrom und -spannung gespeichert - die Anzeige
Hold leuchtet
Bereichsschalter m/min - mm - V ... zur Anwahl der gewünschten
Funktion
m/min.......Drahtvorschubgeschwindigkeit
mm...........Blechdicke
V...............Leerlauf- oder Schweißspannung (Volt)
Abb.2
Anzeige m/min - mm - V
- Drahtgeschwindigkeit (m/min) ... Sollwert im MIG/MAG-Programmund Manuell-Betrieb
- Blechdicke (mm) im MIG/MAG-Programmbetrieb
- Schweißspannung (V) ... Sollwert im MIG/MAG-Programmbetrieb
- Schweißspannung (V) ... Istwert im MIG/MAG-Programm- und
Manuell- sowie E-Handschweißbetrieb
- Schweißspannung (V) ... Hold-Wert im MIG/MAG-Programm- und
Manuellbetrieb
Vorderseite Stromquelle T.I.M.E. Synergic
Hinweis! Erscheint zusätzlich zur angezeigten Blechdicke der Buchstabe H (z. B. H12), so bedeutet dies, daß sich der angezeigte Wert trotz
Erhöhung der Schweißleistung nicht mehr nach oben verändert.
Abb.3
Anzeige Schweißstrom
- Sollwert im MIG/MAG-Manuell- bzw. E-Handschweißbetrieb
- Istwert im MIG/MAG-Programm- und Manuellbetrieb
- Hold-Wert im MIG/MAG-Programmbetrieb
Rückseite Stromquelle T.I.M.E. Synergic
Hinweis! Begriffsdefinition von Soll-, Ist- und Hold-Wert:
- Sollwert ist der je nach Schweißverfahren vorwählbare, und im
Leerlauf angezeigte „gewünschte“ Wert
- Istwert ist jener während der Schweißung angezeigte „tatsächliche“
Wert
- Hold-Wert ist jener nach Ende der Schweißung angezeigte „gespeicherte“ Wert.
Netzschalter
Anzeige Betriebsbereit ... leuchtet wenn der Netzschalter auf „I“
geschaltet ist
Anzeige Übertemperatur leuchtet ...
- wenn Gerät thermisch überlastet ist
- Stecker für Kühlgerätversorgung nicht eingesteckt ist
- Kühlgerät defekt ist
- Wasserdurchfluß zu gering ist (nur mit Option Strömungswächter)
Einstellregler P-Start ... 0 - 30 m/min (T.I.M.E.) bzw. 1 - 10 (Power)
empfohlene Einstellung T.I.M.E.: 9 m/min
- Abhängig von der Anzeige T.I.M.E. gilt die Skalierung für Drahtgeschwindigkeit (0 - 30 m/min) bzw. Schweißleistung (1-10)
- P-Start beeinflußt die Stabilität des Lichtbogens in der Zündphase
(sichere Zündung des Lichtbogens) bzw. das Abbinden von
Schweißnähten
- In Betriebsart T.I.M.E. 4-Takt kann mittels P-Start die StartDrahtgeschwindigkeit eingestellt werden; der eingestellte Wert ist
absolut, d.h. der Wert ist unabhängig von der eingestellten
Schweißleistung
Anzeige Über- bzw. Unterspannung leuchtet ...
- wenn die Netzspannung außerhalb des Toleranzbereiches liegt
(Stromquelle schaltet ab)
- für 10 s., wenn Netzeinbrüche oder Überspannungsspitzen vorliegen (Stromquelle schaltet ab und sofort wieder ein)
Programm-Wahlschalter (0-99) dient zur Anwahl des gewünschten
Puls-, Standard- bzw. T.I.M.E. Schweißprogrammes in Abhängigkeit
von Schutzgas und Zusatzwerkstoff
7
DEUTSCH
BEDIENELEMENTE UND ANSCHLÜSSE
Einstellregler P-End ... 0 - 30 m/min (T.I.M.E.) bzw. 1 - 10 (Power)
empfohlene Einstellung T.I.M.E.: 5 bzw. 9 m/min
- Abhängig von der Anzeige T.I.M.E. gilt die Skalierung für Drahtgeschwindigkeit (0 - 30 m/min) bzw. Schweißleistung (1-10)
- In Betriebsart T.I.M.E. 4-Takt kann mittels P-End die End-Drahtgeschwindigkeit eingestellt werden; der eingestellte Wert ist absolut, d.h. der Wert ist unabhängig von der eingestellten
Schweißleistung
Einstellregler Slope T.I.M.E. 4-Takt ... 0,2 - 7,0 s.
empfohlene Einstellung: 1 s.
Option Push/Pull-Abgleich ... zum Drehzahlabgleich bei Verwendung eines Push-Pull Brenners.
- Strombuchse mit Bajonettverschluß ... dient zum
- Anschluß des Verbindungsschlauchpaketes beim MIG/MAG
Schweißen
- Anschluß für das Massekabel beim WIG-Schweißen
- Anschluß für Elektroden- bzw. Massekabel bei der Elektrodenhandschweißung (je nach Elektrodentype)
Einstellregler Endstrom T.I.M.E. 4-Takt ... Einstellrad nicht verstellen; Einstellrad muß in Mittelstellung stehen
Taste Drahteinfädeln ... zum gas- und stromlosen Einfädeln der
Drahtelektrode in das Brennerschlauchpaket
Programmübersichtstabelle ... gibt Aufschluß über die programmierten Puls-, Standard- und T.I.M.E.-Programme.
- [S] ... nur Standardprogramm gespeichert
- [P] ... nur Pulsprogramm gespeichert
- Strombuchse mit Bajonettverschluß ... dient zum
- Anschluß für das Massekabel beim MIG/MAG-Schweißen
- Stromanschluß des WIG-Schweißbrenners
- Anschluß für Elektroden- bzw. Massekabel bei der Elektrodenhandschweißung (je nach Elektrodentype)
Hinweis! Das Programm mit der Kennzeichnung „EN 288/7“ wurde im
Rahmen einer Verfahrensprüfung geschweißt und läßt nur Schweißparameter zu, welche in der Prüfung abgedeckt wurden.
MATERIAL
GAS %
EN 440 G2
T.I.M.E.
EN 70 S-6
EN 288/7
T.I.M.E. II
T.I.M.E.
Fe1 (SG 2/3)
CO2 100
Fe2 (SG 2/3)
CrNi 19 9
PROG. CODE
0,8
1,0
1,2
2
3
- Buchse mit Bajonettverschluß ... Verbindungsschlauchpaket
7
Anschlußbuchse Kühlgerät FK71 ... zum Anschluß des Steuerstekkers Kühlgerät
S11
S13
S14
S15
S16
Ar 82 CO2 18
17
18
19
20
Ar 97,5 CO2 2,5
21
22
23
24
CrNi 18 8
Ar 97,5 CO2 2,5
25
26
27
28
AlSi 5
Ar 100
29
30
31
32
AlMg 5
Ar 100
33
34
35
36
37
38
Al 99,5
Anschlußbuchse Steuerstecker ... Verbindungsschlauchpaket
1,6
39
40
S43
S44
Rutil
Füll-
Ar 100
Ar 82 CO2 18
Basic
Draht/
Ar 82 CO2 18
47
48
Metal
Flux
Ar 82 CO2 18
51
52
CrNi
C. Wire
Ar 82 CO2 18
55
56
Hinweis! Ist das Kühlgerät nicht eingesteckt, leuchtet die Anzeige
Übertemperatur an der Stromquelle. Es ist keine Schweißung möglich.
Option Gasvorwärm-Steckdose 230V / 80W ... zur elektrischen
Versorgung des Gasvorwärmers bei Verwendung von CO2 als Schutzgas
EPROM Nr.: C0027
Abb.4
Programmübersichtstabelle
Hintergrundparameter ... entfernen Sie die Programmübersichtstabelle um weitere für den Schweißprozeß maßgebliche Parameter einzustellen.
Einstellregler Gasvorströmzeit ... 0,1 - 3,0 s.
empfohlene Einstellung: 0,1 s. (Minimum)
Abb.5
Einstellregler Anschleichgeschwindigkeit ... Minimum bis 100%
der eingestellten Drahtgeschwindigkeit
empfohlene Einstellung: 50% (Mittel)
Einstellregler Gasnachströmzeit ... 0,5 - 4,0 s.
empfohlene Einstellung: 2 s. (Mittel)
Einstellregler Startstrom T.I.M.E. 4-Takt ... Einstellrad nicht verstellen; Einstellrad muß in Mittelstellung stehen
8
Detailansicht "Interne 4-Takt-Parameter"
DRAHTVORSCHUB T.I.M.E. 30
Einstellregler Lichtbogenlängenkorrektur ... zur stufenlosen Korrektur der eingestellten Lichtbogenlänge im Bereich von +/- 20%
(Anzeige des Spannungssollwertes nur im Standard/Programmbetrieb)
Einstellregler Nachbrennzeitkorrektur
- Standard/Manuellbetrieb ... Nachbrennzeit lt. Skala im Bereich
von 1-4 (0 - 0,4 s.) stufenlos einstellbar
- Puls- und Standard/Programmbetrieb ... vor Beginn der Schweißung ist der Einstellregler auf den Skalen-Mittelwert einzustellen;
die Parameter für die Nachbrennzeit sind im jeweiligen Schweißprogramm integriert
- Einstellregler links ... minimale Tropfenbildung am Drahtende
- Einstellregler rechts ... größere Tropfenbildung am Drahtende
Abb.6
Vorderseite Drahtvorschub T.I.M.E. 30
Taste Drahteinfädeln ... zum gas- und stromlosen Einfädeln der
Drahtelektrode in das Brennerschlauchpaket
Schalter Brenner Ein-Aus ... zum Deaktivieren der Brennertaste
(z.B. bei Krantransport)
- linke Schalterstellung ... Brennertaste deaktiviert
- rechte Schalterstellung ... Brennertaste aktiviert
Anschlußbuchse Option Zwischentrieb
Anschlußbuchse Fernbedienung ... zum Anschluß der gewünschten Fernbedienung
Anschlußbuchse Schutzgas
Abb.7
Anschlußbuchse Brennersteuerung ... zum Anschluß des Steuersteckers des Schweißbrenners
Rückseite Drahtvorschub T.I.M.E. 30
Brenner-Zentralanschluß ... zur Aufnahme des Schweißbrenners
Schalter Betriebsart ... zur Anwahl der Betriebsart
- 2-Takt Betrieb
- 4-Takt Betrieb
- T.I.M.E. 4-Takt Betrieb
- Buchse mit Bajonettverschluß ... Verbindungsschlauchpaket
Steckanschluß Wasserrücklauf ... Verbindungsschlauchpaket
2-Takt Betrieb
- Drücken und Halten der Brennertaste: Schweißbeginn
- Loslassen der Brennertaste: Schweißende
Anschlußbuchse Schutzgas ... Verbindungsschlauchpaket
4-Takt Betrieb
- Drücken und Loslassen der Brennertaste: Schweißbeginn
- Erneutes Drücken und Loslassen der Brennertaste: Schweißende
Anschlußbuchse Steuerstecker ... Verbindungsschlauchpaket
Steckanschluß Wasservorlauf ... Verbindungsschlauchpaket
Drahteinlauf
T.I.M.E. 4-Takt Betrieb ... zum Abrufen der Start-, Schweiß- und
Endstromparameter über die Brennertaste
- Drücken und Halten der Brennertaste: Schweißbeginn mit eingestelltem Startstrom (P-Start)
- Loslassen der Brennertaste: Startstrom sinkt über Slope
auf den am Schweißleistungsregler
eingestellten Schweißstrom ab
- Erneutes Drücken und Halten der Brennertaste: Schweißstrom
sinkt über Slope
auf den eingestellten Endstrom (P-End) ab
- Loslassen der Brennertaste: Schweißende
Sicherung Drahtvorschubmotor (4A träge)
Hinweis! Der Motor des Drahtvorschubes ist wassergekühlt. Um den
Motor zu kühlen muß der Drahtvorschub immer mit dem Kühlwasser des
Brenners verbunden sein.
Einstellregler Schweißleistung (Power)
- Skala 1-10 ... zum stufenlosen Einstellen der Schweißleistung
(nur wenn Anzeige T.I.M.E. nicht leuchtet)
- Skala Drahtgeschwindigkeit 0-30m/min ... zum stufenlosen Einstellen der Drahtgeschwindigkeit (nur wenn Anzeige T.I.M.E.
leuchtet)
9
DEUTSCH
Hinweis! Bei Verwenden einer nicht schweißbaren Drahtgeschwindigkeit bleibt der unterste schweißbare Wert eingestellt.
KÜHLGERÄT FK 71
FERNBEDIENUNG TR 34 T.I.M.E.
Abb.8
Abb.10
Kühlgerät FK 71
Fernbedienung TR 34 T.I.M.E.
Für die Standard/Programm-, Puls/Programm- und die Standard/Manuell -Schweißung wird die Fernbedienung TR 34 T.I.M.E. benötigt.
Hinweis! Bedienelemente an der Fernbedienung haben immer Priorität;
sie bestimmen die Funktion der Anlage.
Einstellregler Schweißleistung (Power)
Einstellregler Lichtbogenlängenkorrektur
- rote Skala ... zur stufenlosen Korrektur der eingestellten Lichtbogenlänge im Bereich von +/- 20% im Puls- und Standard/Programmbetrieb
- schwarze Skala ... zur stufenlosen Einstellung der Schweißspannung im Bereich von 0 - 50 V im Standard-/Manuellbetrieb (Anzeige No Program leuchtet)
Abb.9
Rückseite Kühlgerät FK 71
Schalter Betriebsart ... zur Vorwahl der gewünschten Betriebsart
bei der MIG/MAG-Schweißung
Stecker Kühlgerätversorgung
Einstellregler Tropfenablöse- bzw. Dynamikkorrektur
- rote Skala ... stufenlose Korrekturmöglichkeit der Tropfenablöseenergie
links ... geringere Tropfenablösekraft
neutral ... neutrale Tropfenablösekraft
rechts ... erhöhte Tropfenablösekraft
- schwarze Skala ... zur Beeinflussung der Kurzschlußdynamik im
Moment des Tropfenüberganges
links ... härterer und stabilerer Lichtbogen
neutral ... neutraler Lichtbogen
rechts ... weicher und spritzerarmer Lichtbogen
Vorrichtung Wasserablauf
Steckanschluß Wasservorlauf (blau)
Steckanschluß Wasserrücklauf (rot)
Anschlußbuchse Fernbedienkabel
10
STROMQUELLE IN BETRIEB NEHMEN
FERNBEDIENUNG TP 4 SP
BESTIMMUNGSGEMÄSSE VERWENDUNG
Das Schweißgerät ist ausschließlich zum MIG/MAG-, Elektroden- und
WIG-Schweißen bestimmt.
Eine andere oder darüber hinausgehende Benutzung gilt als nicht
bestimmungsgemäß. Für hieraus entstehende Schäden haftet der Hersteller nicht.
Zur bestimmungsgemäßen Verwendung gehört auch
- das Beachten aller Hinweise aus der Bedienungsanleitung
- die Einhaltung der Inspektions- und Wartungsarbeiten
Achtung! Das Schweißgerät nie zum Auftauen von Rohren
verwenden.
40
50
30
60
70
3-150
0
1
1
2
2
3
80
20
CEL
4
10
90
0
4
5
5
Das Schweißgerät ist nach Schutzart IP21 geprüft, das bedeutet:
- Schutz gegen Eindringen fester Fremdkörper größer Ø 12mm
- Schutz gegen senkrecht fallende Wassertropfen
100
T
Hot Start
Abb.11
AUFSTELLBESTIMMUNGEN
3
B
100-450
Fernbedienung TP 4 SP
Die Schweißanlage kann, gemäß Schutzart IP21, im Freien aufgestellt
und betrieben werden. Die eingebauten elektrischen Teile sind jedoch
vor unmittelbarer Nässeeinwirkung zu schützen.
Hinweis! Bedingt durch die Kennlinie können mit der T.I.M.E. Synergic
keine CEL-Elektroden verschweißt werden.
Achtung! Schweißanlage auf ebenem und festen Untergrund
standsicher aufstellen. Eine umstürzende Schweißanlage kann
Lebensgefahr bedeuten.
Einstellregler Schweißstrom ... zum stufenlosen Einstellen des
Schweißstromes in den Bereichen 3-150A bzw. 100-450A
Der Lüftungskanal stellt eine wesentliche Sicherheitseinrichtung dar.
Bei der Wahl des Aufstellort ist zu beachten, daß die Kühlluft ungehindert
durch die Luftschlitze an Vorder- und Rückseite ein- bzw. austreten
kann. Anfallender metallischer Staub (z.B. bei Schmirgelarbeiten) darf
nicht direkt in die Anlage gesaugt werden.
Einstellregler Hot-Start ... 0 - 100% des eingestellten Schweißstrom; nur wirksam in der Zündphase der Elektrode
Hinweis! Der maximale Hot-Start Gesamtstrom wird automatisch durch
den Kurzschlußstrom begrenzt.
NETZSTECKER ANSCHLIESSEN
Bereichsschalter ... unterteilt den Gesamtschweißbereich der Anlage in zwei sich überschneidende Einzelbereiche
Achtung! Netzstecker müssen der Netzspannung und der Stromaufnahme des Schweißgerätes entsprechen (siehe Technische
Daten)
Polumschalter ... keine Funktion
Einstellregler Dynamik ... zur Beeinflussung der Kurzschlußdynamik im Moment des Tropfenüberganges
Achtung! Die Absicherung der Netzzuleitung ist den Technischen Daten zu entnehmen.
Anschlußbuchse Fernbedienkabel
NETZANSCHLUSS
Die Schweißanlage ist für die am Leistungsschild angegebene Netzspannung ausgelegt. Die Absicherung der Netzzuleitung ist den Technischen Daten zu entnehmen.
Achtung! Die Stromquelle ist ab Werk auf 400V geschaltet!
Bedingt durch den Toleranzbereich von +/- 10% kann die Stromquelle auch am 3x380V~ Netz betrieben werden. Bei Störungen
Unter- bzw. Überspannung muß der Spannungsbereich durch
Umstecken der Steckverbindung angepaßt werden.
Bei einer Netzspannung von 3x230V~, 3x440V~ oder 3x500V~ ist ein
FRONIUS-Vorschalttrafo zu verwenden. Dieser ist jederzeit nachrüstbar
und kann zwischen Fahrwagen und Stromquelle montiert werden. Auf
Sonderwunsch kann die Stromquelle auch für 3x440V~ oder 3x500V~
ausgelegt werden.
11
DEUTSCH
Achtung! Vor Erstinbetriebnahme das Kapitel „Sicherheitsvorschriften“ lesen.
380V
-10%
+10%
400V
360V
400V
440V
-10%
+10%
415V
373V
415V
Abb.12
418V
380V
342V
-10%
456V
+10%
Toleranzbereiche der Netzspannungen 3x380V / 400V / 415V~
Das Schweißgerät kann serienmäßig mit einer Netzspannung von 3x380
V~, 3x400 V~ oder 3x415 V~ betrieben werden, sofern der Steuertrafo
auf den, für die anliegende Betriebsspannung richtigen Wert geschaltet
ist.
Steckverbindung X7 für
Netz-Umschaltung 400V~
Abb.14
Montage der Stromquelle
Abb.15
Montage der Stromquelle
Steckverbindung X6 für
Netz-Umschaltung 415V~
Steckverbindung X8 für
Netz-Umschaltung 380V~
Abb.13
Netzumschaltung 3x380V / 400V / 415V~ am Steuertrafoprint VM 34.
Achtung! Ist das Gerät für eine Sonderspannung ausgelegt,
gelten die Technischen Daten am Leistungsschild. Netzstecker,
Netzzuleitung sowie deren Absicherung sind entsprechend auszulegen.
STROMQUELLE ZUSAMMENBAUEN
- Montagebügel und von oben auf Fahrwerkrahmen so aufstekken, daß sich die Ausnehmungen
und
beider Montagebügel
links oben befinden
- Befestigungsbleche
(komplett mit montierten Käfigmuttern) wie
aus nachfolgender Abbildung ersichtlich, von rückwärts einlegen und
mittels Stahlschrauben M8 x 20, versehen mit Beilagen und Sprengringen vorerst locker verschrauben.
- Stromquelle auf Montagebügel und aufsetzen und von unten
mit 4 Stk. Stahlschrauben M8 x 16, kompl. mit Beilagen und Sprengringen festschrauben.
- Beide Montagebügel am Fahrwerkrahmen festschrauben
- Kühlgerät von vorne durch Montagebügel und einschieben
und positionieren (rückwärtige Führungslasche unterhalb einschieben).
- Die Fixierung wird, wie aus nachfolgender Abbildung ersichtlich, nur
am Punkt
vorgenommen (Stahlschraube M8 x 16 von unten, mit
Beilage und Sprengring).
VERBINDUNGSSCHLAUCHPAKET MIT
STROMQUELLE / KÜHLGERÄT VERBINDEN
- Netzschalter in Stellung „O“
- Zugentlastung des Verbindungsschlauchpaketes mittels vorhandener Schraube fixieren
- Bajonettstecker Schweißpotential des Verbindungsschlauchpaket an
- Buchse
anstecken und durch Drehen verriegeln
- 37-poligen Steuerstecker in Anschlußbuchse Steuerstecker
einstecken und Überwurfmutter festschrauben
- Schlauch Wasservor- und rücklauf des Verbindungsschlauchpaket
farbrichtig an den Steckanschlüssen und anstecken
- Stecker Kühlgerätversorgung
mit der Anschlußbuchse
der
Stromquelle verbinden.
Hinweis! Ist das Kühlgerät nicht eingesteckt, leuchtet die Anzeige
Übertemperatur an der Stromquelle. Es ist keine Schweißung möglich.
12
VERBINDUNGSSCHLAUCHPAKET MIT
DRAHTVORSCHUB VERBINDEN
- Netzschalter in Stellung „O“
- Drahtvorschub (mit eingepreßter Isolierhülse) auf den Aufnahmezapfen der Stromquelle aufsetzen
- Schelle der Zugentlastung lockern und Verbindungsschlauchpaket
seitenrichtig bis zum Metallklemmrohr des Schutzschlauches durchziehen
Achtung! Da Fronius auf Faktoren wie Qualität, Reinheit und
Füllstand der Kühlflüssigkeit keinen Einfluß hat, wird für die
Kühlmittelpumpe keine Garantie übernommen.
Außentemperatur
Hinweis! Leitungen nicht kreuzen oder knicken
- Bajonettbuchse Schweißpotential des Verbindungsschlauchpaket an
Buchse anstecken und durch Drehen verriegeln
- 37-poligen Steuerbuchse in Anschlußbuchse Steuerstecker einstecken und Überwurfmutter festschrauben
- Gasschlauch des Verbindungsschlauchpaket an Anschlußbuchse
Schutzgas anstecken und mit Überwurfmutter festziehen
Mischverhältnis Wasser : Spiritus
+ °C bis -5°C
4l:1l
-5°C bis -10°C
3,75 l : 1,25 l
-10°C bis -15°C
3,5 l : 1,5 l
-15°C bis -20°C
3,25 l : 1,75 l
Achtung! Der Wasserdurchfluß muß im Betrieb in regelmäßigen
Abständen kontrolliert werden - ein einwandfreier Rückfluß muß
ersichtlich sein.
Hinweis! Zuvor kontrollieren ob Dichtungs-O-Ringe eingelegt sind
- Schlauch Wasservor- und rücklauf des Verbindungsschlauchpaket
farbrichtig an den Steckanschlüssen
und
anstecken und mit
Überwurfmutter festziehen
- Schelle der Zugentlastung festschrauben
Bei erschwerten Bedingungen (große Schlauchpaketlängen, große Höhenunterschiede, etc.) sollten Sie das Kühlgerät FK 71 R mit einer
Kühlleistung von 2,6 kW und einem Pumpendruck von 4,4 bar verwenden.
GASFLASCHE MONTIEREN / ANSCHLIESSEN
DRAHTSPULE EINSETZEN
- Gasflasche auf Fahrwagenboden des Fahrwagens aufsetzen
- Gasflasche mit Sicherungskette fixieren
Achtung! Die Drahtspulenaufnahme dient nur zur Aufnahme
und Sicherung von genormten Schweißdrahtrollen bis max. 20
kg.
Hinweis! Optimale Fixierung nur im oberen Teil der Gasflasche (nicht
am Flaschenhals)
-
- Schutzkappe der Gasflasche entfernen
- Gasflaschenventil kurz nach links drehen um umliegenden Schmutz
zu entfernen
- Dichtung am Druckminderer überprüfen
- Druckminderer auf Gasflasche aufschrauben und festziehen
- Anschluß Schutzgas des Verbindungsschlauchpakets mittels Gasschlauch mit dem Druckminderer verbinden
Netzschalter in Stellung „O“
Drahtspulenabdeckung öffnen
Drahtspule auf Drahtspulenaufnahme seitenrichtig aufsetzen
Arretierbolzen in vorgesehene Öffnung am Spulenkörper einrasten
Bremswirkung mittels Spannschraube einstellen
Drahtspulenabdeckung wieder schließen
Hinweis! Bremse so einstellen, daß die Drahtspule nach Schweißende
nicht nachläuft - Spannschraube jedoch wegen möglicher Überlastung
des Motors nicht übermäßig festziehen.
SCHWEISSBRENNER MONTIEREN
DRAHTELEKTRODE EINLAUFEN LASSEN
- Netzschalter in Stellung „O“
- Richtig ausgerüsteten Schweißbrenner mit dem Einlaufrohr voran in
den Brenner-Zentralanschluß einschieben
- Überwurfmutter zur Fixierung von Hand festziehen
- Steuerstecker des Schweißbrenners am Anschluß Brennersteuerung einstecken und verriegeln
- Gasschlauch des Schweißbrenners in das Gasanschlußstück einstecken und verriegeln
-
Netzschalter in Stellung „O“
Drahtspulenabdeckung öffnen
Spannvorrichtungen
und
nach vorne schwenken
Druckhebel
und nach oben klappen
Drahtelektrode über das Einlaufrohr des 4-Rollenantriebes etwa 5
cm in das Einlaufrohr des Schweißbrenners
schieben
- Druckhebel
und nach unten klappen
- Spannvorrichtungen
und
in senkrechte Position schwenken
- Mittels Spannmuttern
und
Anpreßdruck einstellen
KÜHLGERÄT IN BETRIEB NEHMEN
Hinweis! Anpreßdruck so einstellen, daß die Drahtelektrode nicht deformiert wird, jedoch ein einwandfreier Drahttransport gewährleistet ist.
Hinweis! Vor jeder Inbetriebnahme des Kühlgerätes Kühlflüssigkeitsstand sowie Reinheit der Kühlflüssigkeit kontrollieren. Werkseitig ist das
Kühlgerät mit ca. 2l Kühlflüssigkeit (Mischverhältnis von 1:1) gefüllt.
-
-
Netzschalter in Stellung „O“
Schraubkappe entfernen
Kühlflüssigkeit einfüllen (Mischverhältnis lt. nachfolgender Tabelle)
Schraubkappe wieder anbringen
13
Brennerschlauchpaket möglichst geradlinig auslegen
Gasdüse am Schweißbrenner abziehen
Kontaktrohr abschrauben
Netzstecker einstecken
Netzschalter
in Stellung "I" schalten
Netzkontrolleuchte leuchtet
Programm-Wahlschalter in gewünschte Position schalten (Anzeige No Program darf nicht leuchten)
DEUTSCH
Hinweis! Nur sauberes Leitungswasser verwenden. Andere Frostschutzmittel sind wegen ihrer elektrischen Leitfähigkeit nicht zu empfehlen.
MIG/MAG-SCHWEISSEN
- Bereichsschalter für Digitalanzeigen
- Mit Einstellregler Schweißleistung
einstellen
in Stellung m/min schalten
eine Wert von ~ 5 m/min
Achtung! Vor Erstinbetriebnahme das Kapitel „Sicherheitsvorschriften“ sowie „Stromquelle in Betrieb nehmen“ lesen.
- Massekabel in Strombuchse einstecken und verriegeln
- Mit anderem Ende des Massekabels Verbindung zum Werkstück
herstellen
- Netzstecker einstecken
- Netzschalter
einschalten
- Netzkontrolleuchte leuchtet
Achtung! Während des Drahteinfädelns Schweißbrenner vom
Körper weg halten.
- Taste Drahteinfädeln
drücken bis die Drahtelektrode aus dem
Brenner herausragt
- Einfädel-Vorgang durch Loslassen der Taste Drahteinfädeln
beenden
Achtung! Wassergekühlte Anlagen: Der Wasserdurchfluß muß
im Betrieb in regelmäßigen Abständen kontrolliert werden - ein
einwandfreier Rückfluß muß ersichtlich sein.
Hinweis! Nach Loslassen der Brennertaste soll die Drahtspule nicht
nachlaufen. Gegebenenfalls Bremse nachjustieren.
-
- Schweißprogramm mit Programm-Wahlschalter
vorwählen (Anzeige No Program darf nicht aufleuchten oder blinken)
Kontaktrohr einschrauben
Gasdüse aufsetzen
Drahtspulenabdeckung schließen
Netzschalter
in Stellung „O“ schalten
Hinweis! Sämtliche Programme wurden mit einem Standardbrenner
geschweißt (außer T.I.M.E.-Programme). Bei der Schweißung von Standardprogrammen mit T.I.M.E.-Brenner kann dies daher zu Veränderung
der Schweißeigenschaften führen.
- Schalter Betriebsart
am Drahtvorschub in gewünschte Position
schalten
- Fernbedienung an Anschlußbuchse Fernbedienung anschließen
(für die Pulsschweißung die Fernbedienung TR 34 T.I.M.E. anschließen. Schalter Betriebsart an der Fernbedienung TR 34 T.I.M.E. auf
Pulsschweißung stellen)
- Einstellregler Lichtbogenlängenkorrektur
auf „0“ stellen
- Einstellregler Tropfenablösekorrektur
auf „0“ stellen
- gewünschte Stromstärke mittels Einstellregler Schweißleistung
einstellen (Sollwertanzeige an der Anzeige Stromstärke)
- Gasflaschenventil öffnen
- Gasmenge einstellen
- Brennertaste drücken und Schweißvorgang einleiten
Hinweis! In manchen Fällen ist es notwendig die Gasvorbzw.
Gasnachströmzeit
und/oder Anschleichgeschwindigkeit
zu korrigieren.
Abb.16
4-Rollenantrieb
VORSCHUBROLLEN WECHSELN
EINSTELLRICHTLINIEN FÜR DEN T.I.M.E.-PROCESS
Um eine optimale Förderung der Drahtelektrode zu gewährleisten müssen die Vorschubrollen dem zu verschweißendem Drahtdurchmesser
sowie der Drahtlegierung angepaßt sein.
Durch die Einknopf-Bedienung der T.I.M.E. Synergic ist nur die entsprechende Drahtgeschwindigkeit einzustellen; die Schweißspannung stellt
sich automatisch ein. Lediglich die Lichtbogenlänge ist entsprechend zu
korrigieren.
-
Berechnung der Abschmelzleistung
Diese Formel gilt nur für einen Drahtdurchmesser von 1,2 mm und unund niedriglegierte Stahldrähte. Spritzerverluste sind nicht berücksichtigt (typisch 1 - 2 %).
Netzschalter in Stellung „O“
Drahtspulenabdeckung öffnen
Spannvorrichtungen
und
nach vorne schwenken
Druckhebel
und nach oben klappen
Steckachsen
herausziehen
Vorschubrollen entfernen
Neue Vorschubrollen einlegen
Abschmelzleistung [kg/h] =
Hinweis! Vorschubrollen so einlegen, daß die Bezeichnung für den
Drahtdurchmesser lesbar ist.
Drahtgeschwindigkeit [m/min] x 60 x 8,9
1000
z.B. Drahtgeschwindigkeit = 20m/min
Abschmelzleistung [kg/h] =
- Steckachsen
wieder einschieben - Verdrehsicherung der
Steckachse muß einrasten
- Druckhebel
und nach unten klappen
- Spannvorrichtungen
und
in senkrechte Position schwenken
- Mittels Spannmuttern
und
Anpreßdruck einstellen
- Drahtspulenabdeckung schließen
14
20 m/min x 60 x 8,9
1000
= 10,68 kg/h
WIG-SCHWEISSEN
Schweißgeschwindigkeit [cm/min] =
Benötigt werden die Fernbedienung TP 4-SP und das WIG-Set (HandSchweißbrenner AL 22-S / AL 16-S mit Gasschlauch, Gasdruckminderer
und Ersatzteilbox).
Hinweis! Bei dieser Variante des WIG-Schweißens verursacht die Werkstückberührung einen Kurzschlußstrom, dessen Höhe dem eingestellten
Schweißstrom entspricht. Zündvorgänge ab 10 A haben durchwegs eine
Beschädigung von Werkstückoberfläche und Wolframelektrodenspitze
zur Folge und beeinträchtigen die Schweißnahtqualität durch Wolframeinschlüsse.
Drahtgeschwindigkeit [m/min] x 1,13 x 100
Nahtquerschnittsfläche [mm ]
2
z.B. Kehlnaht a 6 (Kehlnaht a 6 hat eine Nahtquerschnittsfläche von 36
mm2) und Drahtgeschwindigkeit von 20m/min
Schweißgeschwindigkeit [cm/min] =
20 m/min x 1,13 x 100
36 mm 2
= 62,8 cm/min
- Die Zündung des Schweißlichtbogens erfolgt durch Werkstückberührung der Wolframelektrode.
- Um den Schweißvorgang zu unterbrechen einfach den Schweißbrenner vom Werkstück abheben, bis der Lichtbogen erlischt. Endkraterfüllung durch Stromabsenkung bzw. Gasschutz des Endkraters sind
nicht gegeben.
Da bei Mehrlagenschweißung die Raupenquerschnitte schwierig zu
bestimmen sind, wird die Berechnung der Schweißgeschwindigkeit sehr
aufwendig. Ein Planimeter oder Millimeterpapier leistet hier wertvolle
Dienste. Einstellwerte für Nahtart, Schweißposition und Nahtdicke siehe
nachfolgend.
EINSTELLWERTE FÜR NAHTART,
SCHWEISSPOSITION UND NAHTDICKE
Stumpfnähte
Wannenlage
- Wurzelschweißung
unregelmäßige Spalten und
Spaltbreiten über 2mm: 2,5 4,5m/min
gleichmäßige Spalten von 2mm:
9m/min
- Füllagen
unterer Bereich: 12-15m/min
oberer Bereich: 15-23m/min
- Decklagen: 15-18m/min
Querposition
- Wurzelschweißung
unregelmäßige Spalten und
Spaltbreiten über 2mm: 2,5 4,5m/min
gleichmäßige Spalten von 2mm:
9m/min
- Füllagen: 12 - 18m/min
- Decklagen: 9 - 12m/min
Überkopfnaht
- Wurzelschweißung: 3 - 4m/min
- Füllagen: 9 - 11m/min
- Decklagen: 9 - 11m/min
Steignaht: 3 - 6m/min
Kehlnähte
Horizontalposition
- a3: 12 - 14m/min
- a4: 12 - 16m/min
- a5: 15 - 18m/min
- a6: 18 - 23m/min
- a7: 20 - 23m/min
- ab a8 nur mehrlagig 20 - 23m/min
- Kerbraupe mit 10 - 12m/min
Abb.17
Überkopfposition
- 9 - 11m/min für alle Nahtdicken
und ein- oder mehrlagige
Schweißnähte
WIG-Set
VARIANTE II
Benötigt werden die Fernbedienung TP 4-SP, die Fußfernbedienung TR
52-1 ein Signalverteiler sowie das WIG-Set (Handschweißbrenner AL
22-S / AL 16-S mit Gasschlauch, Gasdruckminderer und Ersatzteilbox).
Fallnaht
- 9 - 11m/min; maximal a3,5 in
einer Lage schweißen,
- dickere Nähte mehrlagig
Bei Verwenden dieser Kombination bieten sich folgende Vorteile:
- Reduktion des Schweißstromes im Moment der Werkstückberührung
mittels Fußfernbedienung
- Endkraterfüllung durch Stromabsenkung mittels Fußfernbedienung
(langsames Entlasten des Fußpedals bewirkt ein Absenken des
Schweißstromes auf ca. 10 A) möglich - optimaler Gasschutz gewährleistet
- Schweißstrombegrenzung mittels Schweißstromregler am Fernbedienung TP 4-SP - einerseits steht immer der gesamte Pedalweg für
den gewählten Bereich zur Verfügung, andererseits kann z.B. eine
dünne Wolframelektrode bei Durchtreten des Pedals bis zum Anschlag nicht überlastet werden bzw. abschmelzen.
Steignaht
- 4 - 6m/min; minimale Nahtdicke
a6
Wannenlage
- a3: 12 - 14m/min.
- a4: 12 - 14m/min.
- a5: 17 - 23m/min.
- a6: 17 - 23m/min.
- ab a7: 22 - 30m/min.
Fallnaht: 9 - 11m/min
Abb.18
15
Signalverteiler
DEUTSCH
VARIANTE I
Berechnung der Schweißgeschwindigkeit
Diese Formel gilt nur für einen Drahtdurchmesser von 1,2 mm und unund niedriglegierte Stahldrähte. Spritzerverluste (typisch 1 - 2 %) sowie
Geometrieabweichungen wie Wurzelspalte und Nahtüberhöhungen (typisch 10 - 20 % niedrigere Geschwindigkeit) sind nicht berücksichtigt.
- Schweißbrenner anheben und in Normallage schwenken - Lichtbogen zündet (siehe Abbildung c)
- Schweißung durchführen
a) Gasdüse aufsetzen
Abb.20
Abb.19
-
-
Brenneranstellung
-
Netzstecker ausstecken
Netzschalter in Stellung "O" schalten
MIG/MAG Schweißbrenner abmontieren
Schweißkabel je nach Elektrodentype in Strombuchse einstecken
und durch Drehen nach rechts verriegeln
- Fernbedienung TP 4-SP an Buchse des Vorschubgerätes T.I.M.E.
30 anschließen
- Netzstecker einstecken
Netzstecker ausstecken
Netzschalter in Stellung "0" schalten
MIG/MAG-Schweißbrenner abmontieren
Stromstecker des WIG-Schweißbrenners in
- Strombuchse einstecken und durch Drehen nach rechts verriegeln
Stromstecker des Massekabels in - Strombuchse einstecken und
durch Drehen nach rechts verriegeln
Schweißbrenner bestücken (siehe Bedienungsanleitung Schweißbrenner)
Masseverbindung mit Werkstück herstellen
Druckregler an der Schutzgasflasche befestigen
Gasschlauch mit Druckregler verbinden
Gasflaschenventil öffnen
Variante I: Fernbedienung TP 4-SP an Buchse des Drahtvorschub
T.I.M.E. 30 anschließen
Variante II: Fernbedienkombination TP 4-SP, Signalverteiler und TR
52-1 an Buchse des Drahtvorschub T.I.M.E. 30 anschließen
Achtung! Sobald der Netzschalter
in Stellung "I" geschaltet
ist, ist die Stabelektrode spannungsführend. Beachten Sie, daß
die Stabelektrode zu diesem Zeitpunkt keine elektrisch leitenden
oder geerdeten Teile wie z.B. Werkstück, Gehäuse, etc. berührt.
-
Netzschalter in Stellung "I" schalten
Anzeige Betriebsbereit
leuchtet
Schweißbereich mit Bereichsschalter
am TP 4-SP auswählen
Schweißstrom mit Einstellregler Schweißstrom am TP 4-SP auswählen
am Fernbedienung TP 4-SP
- Dynamik mit Einstellregler Dynamik
auswählen
- Hot-Start mit Einstellregler Hot-Start am Fernbedienung TP 4-SP
auswählen
- Schweißung durchführen
Achtung! Sobald der Netzschalter in Stellung "I" geschaltet ist,
ist die Wolframelektrode spannungsführend. Beachten Sie, daß
die Wolframelektrode zu diesem Zeitpunkt keine elektrisch leitenden oder geerdeten Teile wie z.B. Werkstück, Gehäuse, etc.
berührt.
-
c) Lichtbogen gezündet
E-HANDSCHWEISSEN
Fußfernbedienung TR 52-1
INBETRIEBNAHME
-
b) Zünden durch
Werkstückberührung
Netzstecker einstecken
Netzschalter in Stellung "I" schalten
Anzeige Betriebsbereit
leuchtet
Gasabsperrventil am Schweißbrenner öffnen bzw. Brennertaste drükken und am Druckregler die gewünschte Gasmenge einstellen
Einstellregler Dynamik
am Fernbedienung TP 4-SP auf Skalenwert "0" stellen
Einstellregler Hot-Start
am Fernbedienung TP 4-SP auf Skalenwert "0" stellen
Schweißbereich mit Bereichsschalter
am TP 4-SP auswählen
Schweißstrom mit Einstellregler Schweißstrom
am Fernbedienung TP 4-SP einstellen oder wie in Variante II beschrieben begrenzen
Gasdüse an der Zündstelle aufsetzen, sodaß zwischen Wolframspitze und Werkstück 2-3 mm Abstand bestehen (siehe Abbildung a)
Schweißbrenner langsam aufrichten bis die Wolframnadel das Werkstück berührt (siehe Abbildung b)
ROBOTERSCHWEISSEN
Die Stromquelle T.I.M.E. Synergic ist in Verbindung mit den Komponenten Roboterinterface TSST 153, Zwischenschlauchpaket, Kühlgerät FK71
und Robotervorschub VR 153 für die Roboterschweißung geeignet
Drahtvorschubgerät VR 153
- spezial drehzahlgeregelter Vorschubmotor gewährleistet eine exakte Drahtvorschubgeschwindigkeit
- Option Push-Pull-Brenner
- Drahteinschleich- und Gasprüftaste direkt am Drahtvorschubgerät
16
00 ... SMS-Software-Versionsanzeige
01 ... SMS-Print-Versionsanzeige
02 ... NMI-Print-Versionsanzeige
03 ... Anzeige der DIP-Schalterstellung, TPS 330 / 450
04 ... Anzeige der DIP-Schalterstellung, TPS / TS
05 ... Anzeige der DIP-Schalterstellung, DYN - KORR.
06 ... Anzeige der DIP-Schalterstellung, VR 22m / 30m
07 ... Anzeige der DIP-Schalterstellung, Kühlgerätautomatik
08 ... Eingangs-Leitspannungstest
09 ... VR - Auto-Test
12 ... Schweißkreis-Induktivitäts-/Widerstandsmessung
16 ... VR - MIN.-Justierhilfe
17 ... VR - MAX.-Justierhilfe
18 ... VR - Linearitätskontrolle bei 15m/min bzw. 11 m/min
19 ... VR - Schlupftest
20 ... VR - Motorstrom-Anzeige
21 ... Hallshunt-Test
22 ... Test der Spannungsmessung
24 ... RTC - Jahres - Einstellung
25 ... RTC - Monats - Einstellung
26 ... RTC - Datums - Einstellung
27 ... RTC - Wochentag - Einstellung
28 ... RTC - Stunden - Einstellung
29 ... RTC - Minuten - Einstellung
30 ... RTC - Sekunden - Einstellung
32 ... Auswahl der Landessprache (D/E)
33 ... Auswahl der Druckoption
34 ... Einstellung der Bauteilintervalle für Ausdruck
35 ... Einstellung der Intervallzeit: Minuten
36 ... Einstellung der Intervallzeit: Sekunden
40 ... Einstellung für Grenzwertabschaltung (Ein/Aus)
41 ... Einstellung der Zündüberwachung
42 ... Einstellung der Zünd-Timeout-Drahtlänge
43 ... Einstellung der Zündüberwach-Ausblendzeit
44 ... Einstellung der Lichtbogen-Abrißzeit
45 ... Einstellung der TR 23P - Doppelkopf-Funktionen
Verbindungsschlauchpaket
- in den Längen 4m bzw. 8m erhältlich
Kühlgerät FK71
- Schweißbetrieb ist nur bei angestecktem Kühlgerät FK71 möglich
Detailierte Hinweise entnehmen Sie bitte den entsprechenden Bedienungsanleitungen.
Stromquelle T.I.M.E. Synergic
Kühlgerät FK 71 mit Wasserwächter
Roboterinterface
Robotersteuerung
Roboter
VR 153 T.I.M.E. mit einstellbarem Gaswächter
T.I.M.E.-Maschinenbrenner
Verbindungsschlauchpaket VR153, 4/8m
Verbindungskabel Stromquelle / Roboter, 8m
Programmierfernbedienung TR 23P
Abb.21
PFLEGE UND WARTUNG
Darstellung der Standardausführung bei Roboterbetrieb
Achtung! Vor Öffnen des Schweißgerätes, Gerät abschalten,
Netzstecker ziehen und ein Warnschild gegen Wiedereinschalten anbringen - gegebenenfalls Elkos entladen.
DAS SETUP-MENÜ
Um das Schweißgerät über Jahre hinweg einsatzbereit zu halten sind
folgende Punkte zu beachten:
- Sicherheitstechnische Inspektion laut vorgegebenen Intervallen durchführen (siehe Kapitel „Sicherheitsvorschriften“)
- Je nach Aufstellort, aber mindestens zweimal jährlich, Geräteseitenteile entfernen und das Schweißgerät mit trockener, reduzierter
Druckluft sauberblasen. Elektronische Bauteile nicht aus kurzer Entfernung anblasen.
- Bei starkem Staubanfall die Kühlluftkanäle reinigen.
Hinweis! Das Setup-Menü kann nur in Stromquellen mit dem Aufdruck
"PRO" aktiviert werden.
IN DAS SETUP-MENÜ EINSTEIGEN
- Schweißdraht auskoppeln
- Schweißstromkabel von den Strombuchsen trennen
- Netzschalter in Stellung "I" schalten und innerhalb der ersten drei
Sekunden den Bereichsschalter der Digitalanzeigen
mehrmals
umschalten
- Testprogramm durch Anwahl der Programmnummer aufrufen
Bei wassergekühlten Schweißbrennern
- Brenneranschlüsse auf Dichtheit prüfen
- Wasserstand und Wasserqualität kontrollieren (stets nur saubere
Kühlflüssigkeit einfüllen)
- Wasserrückflußmenge im Kühlmittelbehälter überwachen
DAS SETUP-MENÜ VERLASSEN
- Netzschalter der Stromquelle in Stellung "O" schalten (eingestellten
Parameter werden gespeichert)
17
DEUTSCH
PARAMETERBESCHREIBUNG
Roboterinterface TS ST 153
- Einstellschraube der Ansprechgasmenge für die Gasmangelerkennung
- Einstellpotentiometer für Abbrandkorrektur
- Einstellpotentiometer für Tropfenablösekorrektur
- Anzeige des Zustandes der „Ein- und Ausgangssignale“ sowie der
Spannungsversorgungen und Sollwerte mittels Leuchtdioden.
FEHLERDIAGNOSE UND -BEHEBUNG
Achtung! Gerät darf nur von geschultem Fachpersonal geöffnet werden. Vor Öffnen des Schweißgerätes, Gerät abschalten, Netzstecker
ziehen und ein Warnschild gegen Wiedereinschalten anbringen - gegebenenfalls Elkos entladen. Müssen Sicherungen ausgetauscht werden,
sind diese durch gleiche Werte zu ersetzen. Bei Verwendung zu starker Sicherungen erlischt der Garantieanspruch nach eventuellen
Folgeschäden.
FEHLERMELDUNGEN AN DEN ANZEIGEN
Die Stromquelle ist mit einem Selbstdiagnosesystem ausgestattet! Auftretende Störungen werden erkannt und an den Anzeigen in Form eines ErrorCodes (E00 - E99) angezeigt.
Fehlermeldung
Beschreibung
E01
Interner Fehler in der T.I.M.E. Synergic Steuerung! (Fehler beim Hauptspeichertest)
E02
Interner Fehler in der T.I.M.E. Synergic Steuerung! (Fehler beim AD-/DA-Wandlerabgleich)
E03
Funktion ist nicht implementiert!
E04
VR-Autotest: Es wurde keine Motordrehbewegung festgestellt!
E05
VR-Autotest: Minimum- und Maximumdrehzahl sind fehlerhaft!
E06
VR-Autotest: Maximumdrehzahl ist fehlerhaft!
E07
VR-Autotest: Maximum konnte nicht erreicht werden! (Bis zur halben Motoraussteuerung stimmt die Motoreinstellung)
E08
VR-Autotest: Minimum und Maximum sind richtig eingestellt; Problem ist bei Drehzahl-Mitte aufgetreten! (Linearitätsfehler)
E09
VR-Autotest: Hochlaufzeit überschritten!
E19
HALLSHUNT-Verstärkungsjustierung: HALLSHUNT-Offset zu groß, um Verstärkung einzustellen!
E30
Autotest: Kein Kurzschluß im Schweißkreis
E33
Vorgang vom Benutzer abgebrochen!
E34
Falsches Eprom: Stromquelle wurde mit einem Eprom „Drehschalter“ anstatt „Programm-Wahlschalter“ ausgestattet!
E35
Falsches Eprom für Printversion: Sie haben eine alte Eprom-Version in den Steuerprint gesteckt
FEHLER AN DER SCHWEISSANLAGE
Fehler
Ursache
Behebung
Gerät hat keine Funktion
Anzeige Betriebsbereit leuchtet nicht,
Anzeige m/min - mm - V leuchtet, Anzeige
Schweißstrom leuchtet
Netzzuleitung unterbrochen
Netzzuleitung kontrollieren
Netzsicherung defekt
Netzsicherung wechseln
Versorgung der Leistungsteilsteuerung
nicht vorhanden
Sicherung 1F10 kontrollieren bzw. erneuern
Anzeige m/min - mm - V und Anzeige
Schweißstrom leuchten nicht
Steuer-Versorgungsspannung nicht vorhanden
Sicherung 2F1 und 2F12 kontrollieren und
defekte erneuern
Anzeige Betriebsbereit leuchtet, Anzeige m/
min - mm - V und Anzeige Schweißstrom
leuchten nicht
Regler-Versorgung fehlt
Sicherung 2F6 kontrollieren bzw. auswechseln
kein Schweißstrom
Anzeige Betriebsbereit leuchtet, Anzeige
Über- bzw. Unterspannung leuchtet
Phasenausfall
Netzabsicherung, Netzstecker und Netzzuleitung kontrollieren
Netzspannung zu hoch oder zu niedrig- ÜberUnterspannungsüberwachung hat abgeschaltet
Netzspannung kontrollieren
Anzeige Betriebsbereit leuchtet, Anzeige
Übertemperatur leuchtet
Thermo-Sicherheitsautomatik hat abgeschaltet (Ventilator läuft)
Abkühlphase abwarten. Gerät schaltet nach
kurzer Zeit selbständig wieder ein; ansonst:
Gerät zum Service
Gerät überlastet, Einschaltdauer überschritten
Einschaltdauer berücksichtigen
18
Anzeige Betriebsbereit leuchtet, Vorschubmotor läuft
Ursache
Behebung
Kühlluftzufuhr unzureichend
für ausreichende Luftzufuhr sorgen
Leistungsteil stark verschmutzt
Gerät öffnen und mit trockener Preßluft ausblasen
Kühlgerät FK71 läuft nicht, 5pol. Kühlgerätstecker nicht eingesteckt
Kühlgerätstecker seitenrichtig einstecken und
verriegeln
Kühlgerät FK71 läuft nicht - Sicherung 2F3
defekt
Sicherung am Steuertrafo VM34. wechseln
Sicherung 2F4 defekt - Lüfter im Kühlgerät
FK71 läuft nicht
Sicherung am Steuertrafo VM34. wechseln
Lüfter in der Stromquelle defekt
Lüfter wechseln
Sicherung 2F5 für Gerätelüfter defekt
Sicherung am Steuertrafo VM34 wechseln
Über- Unterspannungsüberwachung hat abgeschaltet
Netzspannung kontrollieren
keine Leerlaufspannung
Leerlaufspannung an Anzeige m/min - mm - V
überprüfen (ca. 51V)
Sicherung 2F8 am Steuertrafo VM34. kontrollieren bzw. wechseln
Massekabel nicht angeschlossen
Verbindung zum Werkstück herstellen
Schweißbrenner defekt
Brenner wechseln
+ Pol des Verbindungsschlauchpaketes nicht
angeschlossen
Kabel einstecken und verriegeln
Lichtbogen setzt fallweise aus
Anzeige Betriebsbereit leuchtet, Anzeige
Über- bzw. Unterspannung leuchtet ca. 10 s.
Netzseitig fehlt eine Phase
Netzzuleitung überprüfen
Kurzzeitige Netzspannungsschwankungen
Über- Unterspannungsüberwachung schaltet
fallweise ab
Netzspannung kontrollieren
keine Funktion bei Betätigen der Brennertaste
Anzeige Betriebsbereit leuchtet, kein
Schweißstrom - Vorschubmotor läuft nicht kein Schutzgas
Brenner-Steuerstecker nicht eingesteckt oder
Steckverbindung defekt
Steuerstecker einstecken und verriegeln,
Steckverbindung prüfen, notfalls wechseln
Brennertaste oder Brenner-Steuerleitung defekt
Brenner reparieren bzw. austauschen
Negative Versorgung fehlt
Sicherung 2F7 kontrollieren bzw. austauschen
Programmwahlschalter in falscher Position
Programmwahl korrigieren
falsche Fernbedienung in Verwendung
Fernbedienung TR34 T.I.M.E. od. TP4-SP
verwenden bzw. ohne Fernbedienung arbeiten
Schalter Brenner Ein-Aus in Stellung „Brennertaste deaktiviert“
Schalter Brenner Ein-Aus in Stellung „Brennertaste aktiviert“ schalten
Verbindungsschlauchpaket defekt oder nicht
angeschlossen
Schlauchpaket überprüfen
Programm-Wahlschalter in falscher Position
Programmwahl korrigieren
Standardprogramm wurde mit einem
T.I.M.E.-Brenner geschweißt
Standardbrenner verwenden bzw. auf kurzes
Stick-Out achten
Bei Programmbetrieb:Lichtbogen zu kurz oder
zu lang
Lichtbogenlänge mittels Einstellregler Lichtbogenlängenkorrektur optimieren
Bei Manuellbetrieb: Arbeitspunkt nicht optimal
eingestellt
Parameter für Schweißspannung, Drahtgeschwindigkeit und Dynamik abstimmen (siehe aufgedruckte Richtwerttabellen)
Lichtbogendynamik zu hart
Dynamik mit Fernbedienung TR34 T.I.M.E.
im Standard-Manuellbetrieb korrigieren
Anzeige Betriebsbereit leuchtet, Anzeige
Manuell / NoProgram blinkt
schlechte Schweißeigenschaft
unruhiger Lichtbogen - starke Spritzerverluste
19
DEUTSCH
Fehler
Fehler
Ursache
Behebung
Kontaktrohr zu groß oder Bohrung ausgeschliffen
Kontaktrohr erneuern
Masseverbindung schlecht
für guten Kontakt zwischen Masseklemme
und Werkstück sorgen
verschmorte Teile austauschen, - notfalls
neues Massekabel verwenden
falsche Drahtlegierung -falscher Drahtdurchmesser
eingelegte Drahtrolle kontrollieren bzw. wechseln
Schweißbarkeit des Grundwerkstoffes überprüfen
Ungleichmäßige Drahtgeschwindigkeit
Verbindungsschlauchpaket oder Massekabel
zu lange, Kabelquerschnitt zu gering
Schweißparameter korrigieren - Kabelquerschnitt vergrößern, ansonst neue Schweißprogramme erstellen
Verbindungsschlauchpaket oder Massekabel
verlegt oder falsch aufgewickelt
Schlauchpaket bzw. Kabel möglichst gerade
auslegen oder bifilar aufwickeln
Bremse zu stark angezogen
Bremse lockern
Bohrung des Kontaktrohres zu klein
Richtiges Kontaktrohr für entsprechenden
Durchmesser einschrauben
Drahtführungsseele im Brenner zu kurz, verstopft oder zu eng
je nach Brennertype Düsenstock oder Drahtdüse abschrauben und Länge der Seele prüfen
Seele mit richtigem Innendurchmesser wählen
Geknickte oder verschmutzte Seele unbedingt wechseln
Anpreßdruck der Vorschubrollen zu gering
Rändelmutter der Druckeinstellschraube so
einstellen, daß die Drahtelektrode nicht deformiert, jedoch einwandfrei gefördert wird
falsche Drahtdüse
auf eingesetzten Wert achten
Kontaktrohr zu eng
Kontaktrohr wechseln
Innendurchmesser der Drahtführungsseele zu
klein
Richtige Seele für jeweiligen Drahtdurchmesser einsetzen
Drahtführungsseele verstopft, rostig, abgeknickt oder zu kurz
Seele austauschen
Anpreßdruck der Vorschubrollen zu stark
Anpreßdruck mittels Rändelmutter verringern
falsche Antriebrollen (Nutform, Nutdurchmesser)
Motorplatte richtig ausrüsten
Schweißbrenner falsch ausgerüstet
Schweißbrenner umrüsten
Drahtvorschubmotor läuft nicht
Anzeige Betriebsbereit leuchtet, Leerlaufspannung ist vorhanden, Schutzgas strömt
nicht
Motorsicherung defekt
Motorsicherung 2F9 am Steuertrafo VM34.
austauschen
Schalter Brenner Ein-Aus am Drahtvorschub
auf "AUS"
Schalter Brenner Ein-Aus am Drahtvorschub
auf "EIN" stellen
Anzeige Betriebsbereit leuchtet, Leerlaufspannung ist vorhanden, Schutzgas strömt
Steuerversorgung zum Drahtvorschub unterbrochen
37-poligen Steuerstecker- und Verbindungsschlauchpaket von Stromquelle zum Vorschubgerät prüfen
Kohlebürsten abgenützt, Motor defekt
Spannung am Motor messen; liegt die Motorspannung an, Motor austauschen
Schweißdraht bildet zwischen Vorschubrollen und Drahteinlaufdüse eine Schleife
20
Ursache
Behebung
Drahtvorschubmotor hat immer volle
Drehzahl
Sollwert immer max.
Verbindungsschlauchpaket kontrollieren
Motorregler bekommt keinen Drehzahlistwert
37-poligen Steuerstecker- und Verbindungsschlauchpaket von Stromquelle zum Vorschubgerät überprüfen
Drahtgeschwindigkeit weicht von den
programmierten Tabellenwerten ab
V-Nut-Rollen montiert
programmierten Werte beziehen sich auf Trapez- oder Halbrundnut-Vorschubrollen. Bei
Verwendung von V-Nut-Rollen muß die Lichtbogenlänge korrigiert werden
Nach Drücken der Brennertaste im
Leerlauf zu wenig Drahtgeschwindigkeit
Drahtvorschubmotor läuft mit eingestellter Anschleichdrehzahl
Drahtgeschwindigkeit erhöht sich erst nach
Auftreffen des Schweißdrahtes am Werkstück.
Zur Ermittlung der tatsächlichen Vorschubgeschwindigkeit muß die Einschleichtaste gedrückt werden
Nach Drücken der Brennertaste erreicht
die Drahtgeschwindigkeit max. 22m/min.
falsches Eprom in der Stromquelle
Eprom kontrollieren
Dip-Schalter S6 bzw. S7 falsch eingestellt
Dip-Schalter S6 bzw. S7 kontrollieren
Gas strömt auch nach Loslassen der
Brennertaste
Gasmagnetventil defekt oder verunreinigt
Magnetventil reinigen oder austauschen
Motorreglerprint NMI4. schadhaft
Motorreglerprint NMI4. austauschen
Fernbedienung hat keine Funktion
falsche Fernbedienung
nur Fernbedienung TR34 T.I.M.E. bzw. TP4SP verwenden
Fernbedienung oder Fernbedienkabel defekt
Fernbedienkabel vom Drahtvorschub trennen und Sollwerte (m/min.) prüfen
Vorschubmotor wird nicht gebremst - Kohlebürsten abgenützt
Motorspannung messen; liegt die Motorspannung an, Motor austauschen
Motorreglerprint NMI4. defekt
Motorreglerprint NMI4. austauschen
Draht brennt nach Schweißende am
Kontaktrohr fest
Nachbrennzeit zu lange eingestellt
Nachbrennzeit mit Einstellregler Nachbrennzeitkorrektur verkürzen
Schweißstrom an der Gasdüse
Spritzeranhäufung in der Gasdüse (speziell bei
Zwangslagenschweißung)
Gasdüse abziehen, Kontaktrohr, Düsenstock
und Gasdüse reinigen - gegebenenfalls mit
Fronius-Trennmittel einsprühen
Isolierteil oder Spritzerschutz nicht montiert
bzw. defekt
wenn nötig, neuen Isolierteil einsetzen
zu wenig Kühlflüßigkeit im Kühlgerät FK71
Kühlflüßigkeit nachfüllen
Wasservor- und Wasserrücklauf vertauscht
Wasserschläuche richtig anschließen
Wasserkreislauf verstopft bzw. Wasserschläuche geknickt
Schraubkappe des Wasserbehälters öffnen
und Rücklauf kontrollieren.
Draht brennt nach Schweißende am
Schweißbad fest
Schweißbrenner wird zu heiß - Einschaltdauer ist nicht überschritten (nur wassergekühlte Anlagen)
21
DEUTSCH
Fehler
TECHNISCHE DATEN
KÜHLGERÄT FK 71
Achtung! Ist das Gerät für eine Sonderspannung ausgelegt,
gelten die Technischen Daten am Leistungsschild. Netzstecker,
Netzzuleitung sowie deren Absicherung sind entsprechend auszulegen.
Netzspannung
Stromaufnahme
Drehzahl
STROMQUELLE T.I.M.E. SYNERGIC
Netzspannung (+/-10%)
Netzabsicherung
Cos phi
40 A träge
150 A
450 A
Scheinleistung bei 60% ED
100% ED
Wirkungsgrad
0,98
0,99
Schweißstrom bei 60% ED
100% ED
Leerlaufspannung
50 V
MIG/MAG
Elektrode
0 - 50 V
0 -55 V
WIG
0 - 55 V
Schutzart
Kühlart
Isolationsklasse
Prüfzeichen
IP 21
AF
F
S, CE
DRAHTVORSCHUB T.I.M.E. 30
Netzspannung
42 V
Motor Nennstrom
4,2 A
Nennleistung
180 W
Drehmoment
21 Ncm
Drahtgeschwindigkeit
Untersetzung
Schutzart
Schutzklasse
Gewicht
3,3 bar
Gewicht (ohne Kühlmittel)
450 A
360 A
0 - 30 m/min
17,6 : 1
IP 23
III
12,5 kg
22
2420 W
Max. Pumpendruck
Maße l/b/h mm
3 - 450 A
2800 U/min (50 Hz), 3200 U/min (60 Hz)
3,64 l/min.
Schutzart
27 kVA
21 kVA
0,6 A
Max. Fördermenge
Kühlmittelinhalt
90 %
Schweißstrombereich stufenlos
Arbeitsspannung
Kühlleistung
3 x 380 / 400 / 415 V~, 50 - 60 Hz
2 x 380 - 415 V, 50 - 60 Hz
ca. 5,5 l
IP 23
575/365/265
21 kg
LED-CHECKLISTE, EINSTELLREGLER UND SICHERUNGEN
Transientenschutz
LED-Anzeige leuchtet nur bei aktivem
Überspannungsschutz
LED-Anzeige für PWM-Start
LED +5V / +15V
Muß bei eingeschaltetem Gerät immer
leuchten
LED-Anzeige leuchtet bei
Netzspannungsüberschreitungen von
mehr als 15%
Sollwert-Schweißstrom
Helligkeit der LED-Anzeige nimmt mit
steigendem Sollwert zu
LED-Anzeige leuchtet bei
Netzüberspannung von mehr als 44% oder
bei Ausfall einer Phase
LED-Anzeige leuchtet ca. 10 Sek.
bei einer Netzüber- bzw. Netzunterspannung
von +/- 10%
Abb.22
Anzeigen auf Print PWM 3
Keine Funktion
LED-Anzeige bleibt immer dunkel
Stromquelle Start
LED-Anzeige leuchtet nur bei MIG/MAG-Startsignal
Stromflußsignal
LED-Anzeige leuchtet, wenn
Schweißstrom fließt
Abb.23
Keine Funktion
LED-Anzeige bleibt immer dunkel
Anzeigen auf Print WM 34A
23
LED-Anzeige leuchtet bei einprogrammiertem
Abbrandimpuls
DEUTSCH
Achtung! Gerät darf nur von geschultem Fachpersonal geöffnet werden. Vor Öffnen des Schweißgerätes, Gerät abschalten, Netzstecker
ziehen und ein Warnschild gegen Wiedereinschalten anbringen - gegebenenfalls Elkos entladen. Müssen Sicherungen ausgetauscht werden,
sind diese durch gleiche Werte zu ersetzen. Bei Verwendung zu starker Sicherungen erlischt der Garantieanspruch nach eventuellen
Folgeschäden. Nicht bezeichnete Einstellregler dürfen nicht verstellt werden!
Abb.24
Anzeigen und Einstellregler auf Print NMI 4.
24
Stromflußsignal
LED-Anzeige leuchtet wenn
Schweißstrom fließt
Motor-Reset
LED-Anzeige leuchtet:
- nach Einschalten der
Anlage für die Zeitdauer
von 1 sec.
- nach Überstrom an den
Drahtvorschubmotoren
LED-Anzeige Gasprüfen
leuchtet bei gedrückter
Gasprüftaste
Motorbremse
LED-Anzeige leuchtet wenn
Vorschubmotor gebremst wird
LED-Anzeige -15V muß bei eingeschaltetem
Gerät immer leuchten ansonst F7 defekt
LED-Anzeige leuchtet ca. 10 Sek.:
a) bei Auftreten einer Netzüber - bzw. Netzunterspannung von +/- 10 %
b) bei einem Übertemperaturfehler des Gerätes.
LED-Anzeige leuchtet wenn
Leerlaufspannung anliegt
Sollwert-Drahtvorschub
Helligkeit der LED-Anzeige nimmt mit
steigendem Sollwert zu
LED-Anzeige +5V muß bei eingeschaltetem
Gerät immer leuchten ansonst F6 defekt
LED-Anzeige Vorschub A leuchtet bei verwendeter
Doppel-vorschubsteuerung, wenn auf Vorschub A
geschaltet ist
LED-Anzeige Einschleichen leuchtet bei
gedrückter Einschleichtaste
LED-Anzeige BRT
leuchtet bei gedrückter
Brennertaste
LED-Anzeige BRT 2
leuchtet bei gedrückter
Brennertaste 2 (zur Zeit
nicht verwendet.)
LED-Anzeige +15V muß bei eingeschaltetem
Gerät immer leuchten ansonst F6 defekt
LED-Anzeige +10V muß bei eingeschaltetem
Gerät immer leuchten
DEUTSCH
Einstellregler für HotStart-Zeit von 0,5 - 2,0 Sek.
abhängig vom eingestelltem Schweißstrom-Sollwert
Regler Out (PWM Sollwert)
Helligkeit der LED-Anzeige nimmt mit
steigendem Sollwert zu
Abb.25
Leerlaufspannung Ein
LED-Anzeige leuchtet, solange der Befehl zum
Einschalten der Leerlaufspannung anliegt
Anzeigen und Einstellregler auf Print MIG 45.
S1
Aus / Off
S1/1
450 A
330 A
S1/2
Sonderfunktion Aus
Sonderfunktion Ein
S1/3
Puls & Standard
Standard
ohne Dynamik-Korrektur
mit Dynamik-Korrektur
S1/4
Ein / ON
(nur bei Standardbetrieb)
Abb.26
S1/5
ohne Doppelkopf
mit Doppelkopf
S1/6
VR A nmax = 30 m/min
VR A nmax = 22 m/min
S1/7
VR B nmax = 30 m/min
VR B nmax = 22 m/min
S1/8
Kühlgerätabschaltung Automatik
Kühlgerätabschaltung Dauerbetrieb
Codiermöglichkeiten am Print NMI4.
25
Steckverbindung X5
Spannungsversorgung primär
Primär 0V~
F1 6,3 A träge
Kühlgerätpumpe 380V~
F3 0,63 A träge
Steckverbindung X1
für Gerätelüfter
Primär 380V~
F12 6,3 A träge
Steckverbindung X4
Spannungsversorgung für BM 45.
Steckverbindung X6 für
Netz-Umschaltung 415V
Vorschubmotor (VR152) 42V~
F9 10 A träge
Steckverbindung X7 für
Netz-Umschaltung 400V
Pull-Mig Motor 42V~
F10 2 A träge
Steckverbindung X8 für
Netz-Umschaltung 380V
Steckverbindung X3
Versorgung für Steuerelektronik
NMI 4.
Lüfter für Kühlgerät 230V~
F4 0,315 A träge
Versorgung NMI 4.
20V~ (+15V / +10V / +5V)
F6 2 A träge
Lüfter 230V~
F5 0,315 A träge
Leerlaufspannung 36V~
F8 0,315 A träge
Versorgung NMI 4.
20V~(-15V), F7 1 A träge
Steckverbindung X2 PWM
Abb.27
Nicht belegt
Sicherungen auf Print VM34B
26
ENGLISH
OPERATING INSTRUCTIONS
1
2
DEAR FRONIUS CUSTOMER
This brochure is intended to familiarise you with how to operate and
maintain your T.I.M.E. Synergic. You will find it well worthwhile to read
through the manual carefully and to follow all the instructions it contains.
This will help you to avoid operating errors - and the resultant malfunctions. Your machine will repay you by giving you constant operational readiness for many years to come.
FRONIUS INTERNATIONAL GMBH & CO KG
Warning! The machine may only be put into service by trained
personnel, and only in accordance with the technical directions.
Before you start using the machine, you must read the section
headed "Safety rules".
CONTENTS
Safety rules ................................................................................................ 4
General remarks ................................................................................... 4
Utilisation for intended purpose only .................................................. 4
Obligations of owner/operator ............................................................. 4
Obligations of personnel ...................................................................... 4
Personal protective equipment ........................................................... 4
Hazards from noxious gases and vapours ........................................ 4
Hazards from flying sparks .................................................................. 4
Hazards from mains and welding current .......................................... 4
Particular danger spots ........................................................................ 4
Informal safety precautions ................................................................. 4
Safety precautions at the installation location .................................. 5
Vagrant welding currents ..................................................................... 5
Safety precautions in normal operation ............................................. 5
Safety inspection .................................................................................. 5
Alterations to the welding machine ..................................................... 5
Spares and wearing parts .................................................................... 5
Calibration of welding machines ......................................................... 5
CE-marking ............................................................................................ 5
Copyright ............................................................................................... 5
MIG/MAG welding ................................................................................... 14
Adjustment guidelines for the T.I.M.E. Process .............................. 14
Setting-values for seam-type, welding position and seam
thickness .............................................................................................. 15
TIG welding ............................................................................................. 15
Variant I ................................................................................................ 15
Variant II ............................................................................................... 15
Start-up ................................................................................................ 16
Manual electrode welding ...................................................................... 16
Robot welding .......................................................................................... 16
The Set-up Menu .................................................................................... 17
To access the Set-up Menu ............................................................... 17
To exit the Set-up Menu ..................................................................... 17
Description of Parameters ................................................................. 17
General remarks ....................................................................................... 6
Principle of the T.I.M.E. Synergic ........................................................ 6
Welding procedure approval test to EN 288-7 .................................. 6
Machine concept ................................................................................... 6
Care and maintenance ........................................................................... 17
Troubleshooting ...................................................................................... 18
Error messages on the displays ........................................................ 18
Faults on the welding machine ......................................................... 18
Controls and connections ........................................................................ 7
T.I.M.E. Synergic power source .......................................................... 7
T.I.M.E. 30 wirefeeder .......................................................................... 9
FK 71 cooling unit ............................................................................... 10
TR 34 T.I.M.E. remote-control unit .................................................... 10
TP 4 SP remote-control unit .............................................................. 11
Technical Data ......................................................................................... 22
T.I.M.E. Synergic power source ........................................................ 22
T.I.M.E. 30 wirefeeder ........................................................................ 22
FK 71 cooling unit ............................................................................... 22
LED Checklist, dials and fuses .............................................................. 23
Starting to use the power source .......................................................... 11
Utilisation for intended purpose only ................................................ 11
Machine set-up regulations ............................................................... 11
Plug the machine into the mains ....................................................... 11
Mains connection ................................................................................ 11
Assembling the power source ........................................................... 12
Fixing the interconnecting cable to the power source and
cooling unit .......................................................................................... 12
Mounting the Interconnecting cable to the wirefeeder ................... 13
Mounting / connecting the gas cylinder ........................................... 13
Mode d´emploi
Spare parts list
Fronius - Sales and service offices
3
ENGLISH
Mounting the welding torch ............................................................... 13
Starting up the cooling unit ................................................................ 13
Mounting the wire spool ..................................................................... 13
Feeding in the wire electrode ............................................................ 13
Changing the feed rollers .................................................................. 14
Dear Fronius Customer ............................................................................ 3
SAFETY RULES
GENERAL REMARKS
Where other persons are nearby during welding, you must
- instruct them regarding the dangers,
- provide them with protective equipment and/or
- erect protective partitions or curtains.
This welding machine has been made in accordance with the state of the
art and all recognised safety rules. Nevertheless, incorrect operation or
misuse may still lead to danger for
- the life and well-being of the welder or of third parties,
- the welding machine and other tangible assets belonging to the
owner/operator,
- efficient working with the welding machine.
HAZARDS FROM NOXIOUS GASES AND VAPOURS
- Extract all fumes and gases away from the workplace, using suitable
means.
- Ensure a sufficient supply of fresh air.
- Keep all solvent vapours well away from the arc radiation.
All persons involved in any way with starting up, operating, servicing and
maintaining the welding machine must
- be suitably qualified
- know about welding and
- follow exactly the instructions given in this manual.
HAZARDS FROM FLYING SPARKS
- Move all combustible objects well away from the welding location.
- Welding must NEVER be performed on containers that have had
gases, fuels, mineral oils etc. stored in them. Even small traces of
these substances left in the containers are a major explosion hazard.
- Special regulations apply to rooms at risk from fire and/or explosion.
Observe all relevant national and international regulations.
Any malfunctions which might impair machine safety must be eliminated
immediately.
It’s your safety that’s at stake!
UTILISATION FOR INTENDED PURPOSE ONLY
HAZARDS FROM MAINS AND WELDING CURRENT
The welding machine may only be used for jobs as defined by the
“Intended purpose” (see the section headed "Starting to use the welding
machine").
- An electric shock can be fatal. Every electric shock is hazardous to
life.
- Magnetic fields generated by high amperages may impair the functioning of vital electronic devices (e.g. heart pacemakers). Users of
such devices should consult their doctors before going anywhere
near the welding workplace.
- All welding cables must be firmly attached, undamaged and properly
insulated. Replace any loose connections and scorched cables immediately.
- Have the mains and the appliance supply leads checked regularly by
a qualified electrician to ensure that the PE conductor is functioning
correctly.
- Before opening up the welding machine, make absolutely sure that
this is "dead". Discharge any components that may store an electrical
charge.
- If work needs to be performed on any live parts, there must be a
second person on hand to switch of the machine at the main switch
in an emergency.
Utilisation in accordance with the “Intended purpose” also comprises
- following all the instructions given in this manual
- performing all stipulated inspection and servicing work
OBLIGATIONS OF OWNER/OPERATOR
The owner/operator undertakes to ensure that the only persons allowed
to work with the welding machine are persons who
- are familiar with the basic regulations on workplace safety and
accident prevention and who have been instructed in how to operate
the welding machine
- have read and understood the sections on safety and the warnings
contained in this manual, and have confirmed as much with their
signatures
Regular checks must be performed to ensure that personnel are still
working in a safety-conscious manner.
PARTICULAR DANGER SPOTS
- Do not put your fingers anywhere near the rotating toothed wheels of
the wirefeed drive.
- Special regulations apply to rooms at risk from fire and/or explosion.
Observe all relevant national and international regulations.
- Welding machines for use in spaces with increased electrical danger
(e.g. boilers) must be identified by the “S” (for safety) mark.
- Welding-joins to which special safety requirements apply must only
be carried out by specially trained welders.
- When hoisting the power source by crane, always attach the chains
or ropes to the hoisting lugs at as close an angle to the vertical as
possible. Before hoisting, remove the gas cylinder and the wirefeed
unit.
- When hoisting the wirefeed unit by crane, always use an insulating
suspension arrangement.
OBLIGATIONS OF PERSONNEL
Before starting work, all persons entrusted with carrying out work on the
welding machine shall undertake
- to observe the basic regulations on workplace safety and accident
prevention
- to read the sections on safety and the warnings contained in this
manual, and to sign to confirm that they have understood these
PERSONAL PROTECTIVE EQUIPMENT
For your personal safety, take the following precautions:
- Wear stout footwear that will also insulate even in wet conditions
- Protect your hands by wearing insulating gloves
- Protect your eyes from UV rays with a safety shield containing
regulation filter glass
- Only use suitable (i.e. flame-retardant) clothing
- Where high noise levels are encountered, use ear-protectors
INFORMAL SAFETY PRECAUTIONS
- The instruction manual must be kept at the welding-machine location
at all times.
4
- In addition to the instruction manual, copies of both the generally
applicable and the local accident prevention and environmental
protection rules must be kept on hand, and of course observed in
practice.
- All the safety instructions and danger warnings on the welding
machine itself must be kept in a legible condition.
ALTERATIONS TO THE WELDING MACHINE
SAFETY PRECAUTIONS AT THE INSTALLATION
LOCATION
SPARES AND WEARING PARTS
- Do not make any alterations, installations or modifications to the
welding machine without getting permission from the manufacturer
first.
- Replace immediately any components that are not in perfect condition.
- Use only original spares and wearing parts. With parts sourced from
other suppliers, there is no certainty that these parts will have been
designed and manufactured to cope with the stressing and safety
requirements that will be made of them.
- When ordering spare parts, please state the exact designation and
the relevant part number, as given in the spare parts list. Please also
quote the serial number of your machine.
- The welding machine must be placed on an even, firm floor in such a
way that it stands firmly. A welding machine that topples over can
easily kill someone!
- Special regulations apply to rooms at risk from fire and/or explosion.
Observe all relevant national and international regulations.
- By means of internal instructions and checks, ensure that the workplace and the area around it are always kept clean and tidy.
CALIBRATION OF WELDING MACHINES
VAGRANT WELDING CURRENTS
In view of international standards, regular calibration of welding machinery is advisable. Fronius recommends a 12-month calibration interval.
For more information, please contact your Fronius partner!
- Ensure the workpiece clamp is connected tightly to the workpiece
- Set the welding machine up insulated where the floor conducts
electricity
The welding machine fulfils the fundamental requirements of the LowVoltage and Electromagnetic Compatibility Directive and is thus CEmarked.
SAFETY PRECAUTIONS IN NORMAL OPERATION
COPYRIGHT
- Only operate the welding machine if all its protective features are fully
functional.
- Before switching on the welding machine, ensures that nobody can
be endangered by your turning on the machine.
- At least once a week, check the machine for any damage that may be
visible from the outside, and check that the safety features all function
correctly.
Copyright to this instruction manual remains the property of Fronius
International GmbH&Co.KG.
Text and illustrations are all technically correct at the time of going to
print. Right to effect modifications is reserved. The contents of the
instruction manual shall not provide the basis for any claims whatever on
the part of the purchaser. If you have any suggestions for improvement,
or can point out to us any mistakes which you may have found in the
manual, we should be most grateful.
SAFETY INSPECTION
The owner/operator is obliged to have the machine checked for proper
condition by a trained electrician after any alterations, installations of
additional components, modifications, repairs, care and maintenance,
and in any case at least every twelve months.
In the course of such inspection, the following regulations must be
observed (as a minimum):
- IEC (EN) 60 974-1 - Arc welding equipment - Part 1: Welding power
sources
- VBG 4, §5 - Electrical plant and apparatus
- VBG 15, §33 / §49 - Welding, cutting and allied processes
- VDE 0701-1 - Repair, modification and inspection of electrical
appliances; general requirements
- VDE 0702-1 - Repeat tests on electrical appliances
Further information on corrective maintenance, modification and
inspection of welding machines is available from your regional or national
Fronius service centre,who will be pleased to provide you with a copy of
the Work Instruction “Safety Inspection of Welding Machinery” (AAPMÜ-01) upon request.
5
ud_fr_st_sv_00146
012001
ENGLISH
CE-MARKING
If these instructions are not followed vagrant welding currents occur,
these can destroy earthed conductor terminals and other electrical
equipment.
GENERAL REMARKS
PRINCIPLE OF THE T.I.M.E. SYNERGIC
MACHINE CONCEPT
The T.I.M.E. Process is a high-performance MAG welding process that
unites the very highest economic efficiency with outstanding weld seam
quality. Its higher deposition rate results from the use of solid wires at
higher wirefeed speeds, with special shielding gas mixtures being used
to ensure a high-grade welded join.
The modular system was the inspiration behind T.I.M.E. Synergic. The
individual control components are joined by screw-type connections and
are easy to mount on the sturdy trolley.
The gas cylinder is integrated in the trolley in a recessed, low-level
location which makes the cylinder quick and easy to change and
manipulate. The machine may have compact dimensions, but it is built to
function dependably under even the toughest operating conditions. The
machine’s powder-coated sheet-steel housing, protected controls and
bayonet-latching current sockets satisfy the most exacting user
requirements.
Among the key advantages of this process are aspects such as the weldseam appearance, mechanical-technological property values, weld
interfaces, freedom from inadequate fusion, and low tendency to spatter.
With the introduction of a second gas mixture, known as “T.I.M.E.-II”, it
is now possible to achieve pore-free weld seams where necessary.
Essentially, the T.I.M.E. Process is the interaction of state-of-the-art
power-source technology, powerful wirefeeders and welding torches,
the relevant gas physics, and the know-how needed to make the best
possible use of these factors.
The portable wirefeeder can be mounted on the location pivot on the
power source, enabling it to be swivelled to either side, or it can be
dismounted so as to extend the work zone. The wire spool and drive
system are protected from swarf by closeable covers.
WELDING PROCEDURE APPROVAL TEST TO EN 288-7
The insulated transport handle and a trolley with extra-large wheels and
optimally placed crane-hoisting lugs make the machines easier to move
around, both in the factory and out in the field.
In the field of welding engineering in Europe, there will in future be
several possible ways in which recognition can be obtained for welding
procedure specifications (WPS). One of these is the standard welding
procedure approval test to EN 288 -7, as stipulated in ÖNORM EN 2881. In a welding procedure approval test of this type, all key influential
variables are investigated, resulting in the definition of a standardised
welding process.
The attraction of this type of approval is that it offers a way of reducing
the costs that each individual manufacturer would incur in connection
with the approval. A WPS that has been carried out once is approved if
the ranges of all influencing variables remain within the permissible
range for the standard weld process in question. This is ensured by a
programmed parameter field in the power source, among other things.
For more information on this topic, please refer to the weld-procedure
approval test itself.
Fig.1
T.I.M.E. Synergic welding machine
6
CONTROLS AND CONNECTIONS
T.I.M.E. SYNERGIC POWER SOURCE
Manual / No Program indicator
- is lit up all the time in MIG/MAG manual mode (with TR 34 T.I.M.E.
remote control unit) if a programmed position is selected on the
program selector switch
- is lit up all the time in manual electrode welding
- flashes if a non-programmed position is selected on the program
selector switch
Intermediate arc indicator ... Between the dip-transfer arc and the
spray arc, a spatter-prone intermediate arc occurs. To help the welder
avoid this, the ‘Intermediate arc’ indicator lights up when such an arc
occurs.
T.I.M.E. indicator ... glows when a T.I.M.E. program is selected - the
scale for wirefeed speed 0-30 m/min applies.
Hold indicator ... every time you finish a welding operation, the
actual values for welding current and voltage are stored, and the
“Hold” indicator lights up
Fig.2
m/min - mm - V indicator
- Wirefeed speed (m/min) ... Command value in MIG/MAG program
and manual modes
- Sheet thickness (mm) in MIG/MAG program mode
- Welding voltage (V) ... Command value in MIG/MAG program
mode
- Welding voltage (V) ... Actual value in MIG/MAG program and
manual modes, and in manual-electrode mode
- Welding voltage (V) ... Hold-value in MIG/MAG program and
manual modes
Front of T.I.M.E. Synergic power source
N.B.! If the letter H appears in front of the sheet thickness in the display
(e.g. H12), this means that the value displayed cannot be increased any
further, even if the welding power is increased.
Fig.3
Welding current indicator
- Command value in MIG/MAG manual or manual-electrode mode
- Actual value in MIG/MAG program and manual modes
- Hold-value in MIG/MAG program mode
Back of T.I.M.E. Synergic power source
Mains switch
N.B.! Definition of the terms ‘command value’, ‘actual value’ and ‘hold
value’:
- The command value is the “desired” value which can be pre-selected
(depending on the welding process in question), and which is shown
when the machine is in open circuit
- The actual value is the “real” value displayed during the welding
operation
- The “hold” value is the “stored” value which is displayed at the end of
the welding operation.
“Ready” indicator ... glows when the mains switch is on “I”
Overtemperature indicator glows when ...
- the machine is thermally overloaded
- the mains plug of the cooling unit is not plugged in
- the cooling unit is out of order
- the water throughflow is insufficient (only with optional rate-of-flow
watchdog)
P-Start dial ... 0 - 30 m/min (T.I.M.E.) or 1 - 10 (Power)
Recommended setting for T.I.M.E.: 9 m/min
- Depending on the contents of the T.I.M.E. display, the scale refers
to wirefeed speed (0 - 30 m/min) or welding power (1-10)
- P-Start influences the stability of the arc in the ignition phase
(reliable arc ignition) and for the boxing of weld-seams
- In the T.I.M.E. 4-step mode, P-Start can be used to set the startup wirefeed speed; this set value is an absolute value, i.e. it is
independent of whatever value has been set for the welding power
Over / undervoltage indicator glows ...
- when the mains voltage is outside the tolerance range (power
source cuts out)
- for 10 sec in the event of supply voltage dips or overvoltage peaks
(power source switches itself off and straight back on again)
Program selector switch (0-99) for selecting the required pulsedarc, standard or T.I.M.E. welding program, depending on the shielding
gas and filler metal
7
ENGLISH
m/min - mm - V selector switch ... for selecting the desired function:
m/min.......Wirefeed speed
mm..........Sheet thickness
V.............Open-circuit voltage or welding voltage
T.I.M.E. 4-step slope dial ... 0.2 - 7.0 s.
Recommended setting: 1 s.
P-End dial ... 0 - 30 m/min (T.I.M.E.) or 1 - 10 (Power)
Recommended setting for T.I.M.E.: 5 and 9 m/min respectively
- Depending on the contents of the T.I.M.E. display, the scale refers
to wirefeed speed (0 - 30 m/min) or welding power (1-10)
- In the T.I.M.E. 4-step mode, P-End can be used to set the final
wirefeed speed; this set value is an absolute value, i.e. it is
independent of whatever value has been set for the welding power
T.I.M.E. 4-step final-current dial ... Do not adjust this dial; dial must
be in the middle position
Wire-inch button ... for feeding the wire electrode into the torch
hosepack with no flow of gas or current
Optional push/pull adjustment ... for adjusting the speed when
using a push-pull torch.
- Current socket with bayonet latch ... for
- connecting the interconnecting cable in MIG/MAG welding
- connecting the earth cable in TIG welding
- connecting electrodes or the earth cable in manual electrode
welding (depending on the type of electrode being used)
Program overview table ... gives information on the programmed
pulsed-arc, standard and T.I.M.E. programs.
- [S] ... only standard program is stored
- [P] ... only pulsed-arc program is stored
- Current socket with bayonet latch ... for
- connecting the earth cable in MIG/MAG welding
- current connection for TIG welding torch
- connecting electrodes or the earth cable in manual electrode
welding (depending on the type of electrode being used)
N.B.! The program named “EN 288/7” was welded in the context of a
weld-procedure approval test and only allows welding parameters that
have been covered in this test.
MATERIAL
GAS %
EN 440 G2
T.I.M.E.
EN 70 S-6
EN 288/7
T.I.M.E. II
T.I.M.E.
Fe1 (SG 2/3)
CO2 100
Fe2 (SG 2/3)
CrNi 19 9
PROG. CODE
0.8
1.0
1.2
2
3
- Socket with bayonet latch ... interconnecting cable
7
Connection socket for FK71 cooling unit ... for connecting the
control plug for the cooling unit
S11
S13
S14
S15
S16
Ar 82 CO2 18
17
18
19
20
Ar 97.5 CO2 2.5
21
22
23
24
CrNi 18 8
Ar 97.5 CO2 2.5
25
26
27
28
AlSi 5
Ar 100
29
30
31
32
AlMg 5
Ar 100
33
34
35
36
Al 99,5
37
38
39
40
Rutile
Flux-
Ar 100
Ar 82 CO2 18
S43
S44
Basic
cored
Ar 82 CO2 18
47
48
Metal
wire
Ar 82 CO2 18
51
52
Ar 82 CO2 18
55
56
CrNi
Torch control connection socket ... interconnecting cable
1.6
N.B.! If the cooling unit is not plugged in, the overtemperature indicator
lights up on the power source. Welding is not possible.
Optional gas pre-heating socket 230V / 80W ... for electrical supply
to gas pre-heater when CO2 shielding gas is being used
EPROM n°: C0027
Fig.4
Program overview table
Background parameters ...remove the program overview table
in order to uncover further key parameters which can be set for the
welding process.
Gas pre-flow time dial ... 0.1 - 3.0 s.
Recommended setting: 0.1 s. (minimum)
Fig.5
Soft-start speed dial ... Minimum up to 100% of the pre-set wirefeed
speed
Recommended setting: 50% (medium)
Gas post-flow time dial ... 0.5 - 4.0 s.
Recommended setting: 2 s. (medium)
T.I.M.E. 4-step starting-current dial ... Do not adjust this dial; dial
must be in the middle position
8
Close up of "Internal 4-step parameters"
T.I.M.E. 30 WIREFEEDER
N.B.! If you attempt to use a non-weldable wirefeed speed, the lowest
weldable value will be set.
Arc-length correction dial ... For continuous correction of the preset arc-length within a +/- 20% range (voltage command value is only
indicated in Standard Program mode)
Fig.6
Burn-back time correction dial
- Standard Manual mode ... Burn-back time is continuously
adjustable from 1-4 on scale (0 - 0.4 s.)
- Pulsed-Arc and Standard Program mode ... Before the start of
welding, the dial must be set to the middle value on the scale; the
parameters for the burn-back time are integrated within the welding
program in question
- Dial turned all the way to left ... minimal droplet formation on wireend
- Dial turned all the way to right ... more droplet formation on wireend
Front view of T.I.M.E. 30 wirefeeder
Wire-inching button ... for feeding the wire electrode into the torch
hosepack with no flow of gas or current
Torch On/Off switch ... for deactivating the torch trigger (e.g. when
the machine is to be hoisted by crane)
- left-hand switch position ... torch trigger deactivated
- right-hand switch position ... torch trigger activated
Remote-control connection socket ... for connecting up the required
remote-control unit
Shielding gas connection socket
Fig.7
Torch-control connection socket ... for connecting up the control
plug from the welding torch
Rear view of T.I.M.E. 30 wirefeeder
Mode switch ... for selecting the operating mode
- 2-step mode
- 4-step mode
- T.I.M.E. 4-step mode
Torch central connector ... for attaching the welding torch
- Socket with bayonet latch ... Interconnecting cable
Plug-type connection for water return flow ... Interconnecting
cable
2-step mode
- Press and hold the torch trigger: Start of welding
- Release the torch trigger: End of welding
Shielding gas connection socket ... Interconnecting cable
4-step mode
- Press and release the torch trigger: Start of welding
- Press and release the torch trigger again: End of welding
Plug-type connection for water forward flow ... Interconnecting
cable
Connection socket for control plug ... Interconnecting cable
T.I.M.E. 4-step mode ... For retrieving the start-up, welding and finalcurrent parameters via the torch trigger
- Press and hold the torch trigger: Start of welding, with the pre-set
starting current (P-Start)
- Release the torch trigger: Starting current drops via slope to the
welding current set on the welding power dial
- Press and hold the torch trigger again: Welding current drops via
slope
to the pre-set final current (P-End)
- Release the torch trigger: End of welding
Wire inlet
Fuse for wirefeeder motor (4A slow)
N.B.! The wirefeeder motor is water-cooled. The motor will only be
cooled if the wirefeeder is always connected up to the coolant circuit of
the torch.
Welding-power dial
- 1-10 scale ... For continuous setting of the welding power (only if
T.I.M.E. indicator is not lit up)
- Wirefeed speed 0-30m/min scale ... For continuous setting of the
wirefeed speed (only if T.I.M.E. indicator is lit up)
9
ENGLISH
Connection socket for optional intermediate feeder
FK 71 COOLING UNIT
TR 34 T.I.M.E. REMOTE-CONTROL UNIT
Fig.8
Fig.10
FK 71 cooling unit
TR 34 T.I.M.E. remote-control unit
For the Standard/Program, Pulsed-Arc/Program and Standard/Manual
welding modes, a TR 34 T.I.M.E. remote-control unit is needed.
N.B.! Controls on the remote-control unit always take priority over the
power source, i.e. they dictate how the machine is to function.
Welding power dial
Arc-length correction dial
- red scale ... for continuous correction of the pre-set arc-length
within a +/- 20% range, in Pulsed-Arc and Standard/Program
modes
- black scale ... for continuous adjustment of the welding voltage
within a 0 - 50 V range in Standard/Manual mode (‘No Program’
indicator lights up)
Fig.9
Rear of FK 71 cooling unit
Operating mode switch ... for pre-selecting the required operating
mode in MIG/MAG welding
Cooling-unit supply-lead plug
Droplet detachment / arc-force correction dial
- red scale ... stepless correction facility for droplet-detachment
energy
left ... decreased droplet-detachment force
neutral ... neutral droplet-detachment force
right ... increased droplet-detachment force
- black scale ... for influencing the short-circuit force at the instant
of droplet transfer
left ... harder and more stable arc
neutral ... neutral arc
right ... soft, low-spatter arc
Coolant draining device
Plug-type connection for water forward flow (blue)
Plug-type connection for water return flow (red)
Connection socket for remote-control cable
10
STARTING TO USE THE POWER
SOURCE
TP 4 SP REMOTE-CONTROL UNIT
Warning! Before starting to use for the first time, read the section
headed “Safety rules”.
UTILISATION FOR INTENDED PURPOSE ONLY
The welding machine is intended to be used SOLELY for MIG/MAG, rod
electrode and TIG welding.
Any other use, or any use going beyond the above, is deemed to be “not
for the intended purpose” and the manufacturer shall not be liable for any
damage resulting therefrom.
“Utilisation for the intended purpose” shall also be deemed to encompass:
- the observance of all instructions in the operating manual
- the carrying out of all prescribed inspection and maintenance work
Warning! Never use the welding machine for thawing frozen
pipes!
50
60
70
3-150
0
1
1
2
2
3
80
20
CEL
4
10
90
0
4
5
5
The welding machine is tested to “Degree of protection IP21”, meaning:
- Protection against penetration by solid foreign bodies with diameters
larger than 12 mm
- Protection against dripping water falling vertically
100
T
Hot Start
Fig.11
MACHINE SET-UP REGULATIONS
3
B
100-450
TP 4 SP remote-control unit
The welding machine can be set up and operated outdoors in accordance
with IP21. However, the built-in electrical components must be protected
against direct wetting.
N.B.! Owing to the characteristic, it is not possible to weld CEL electrodes
with the T.I.M.E. Synergic.
Warning! Place the welding machine on an even, firm floor in
such a way that it stands firmly. A welding machine that topples
over can easily kill someone.
Welding current dial... for continuous setting of the welding current
in the 3-150A and 100-450A ranges
Hot-Start dial ... 0 - 100% of the pre-set welding current; only
effective in the electrode ignition phase
The venting duct is a very important safety feature. When choosing the
machine location, make sure that it is possible for the cooling air to enter
and exit unhindered through the louvers on the front and back of the
machine. Any metallic dust from e.g. grinding-work must not be allowed
to get sucked into the machine.
N.B.! The maximum Hot-Start total current is automatically limited by the
short-circuit current.
Range switch ... subdivides the overall welding range of the machine
into two separate but overlapping ranges
PLUG THE MACHINE INTO THE MAINS
Warning! Mains plugs must be suitable for the mains voltage and
the current input of the welding machine (see Technical Data)
Polarity reverser ... no function
Arc-force dial ... for influencing the short-circuit force at the instant
of droplet transfer
Warning! For details of fuse protection of the mains supply lead,
please see the Technical Data.
Connection socket for remote-control cable
MAINS CONNECTION
The welding machine is designed to run on the mains voltage given on
the rating plate. For details of fuse protection of the mains supply lead,
please see the Technical Data.
Warning! The power source is factory-connected for 400 V. This
means that thanks to its +/-10% tolerance range, the power
source can also be run on the 3x380 V~ mains. In the event of
undervoltage or overvoltage errors, the voltage range must be
corrected by reconnecting the plug-type connectors (on the VM
34 auxiliary transformer board) for the correct supply voltage.
For mains voltages of 3x230V~, 3x440V~ or 3x500V~, a FRONIUS
series transformer must be used. This can be readily retrofitted, and can
be mounted between the trolley and the power source. On request, the
power source can also be designed for 3x440V~ or 3x500V~.
11
ENGLISH
40
30
380V
-10%
+10%
400V
360V
400V
440V
-10%
+10%
415V
373V
415V
Fig.12
418V
380V
342V
-10%
456V
+10%
Tolerance ranges of 3x380V / 400V / 415V~ mains voltages
The welding machine can be run as standard on a mains voltage of 3x380
V~, 3x400 V~ or 3x415 V~, provided that the auxiliary transformer is
switched to the correct value for the operating -voltage supply.
Plug connector X7 for
400V~ mains reconnection
Fig.14
Assembling the power source
Fig.15
Assembling the power source
Plug connector X6 for
415V~ mains reconnection
Plug connector X8 for
380V~ mains reconnection
Fig.13
3x380V / 400V / 415V~ mains reconnection on VM 34 auxiliary transformer
board.
Warning! If the machine is designed to run on a special voltage,
the Technical Data shown on the rating plate apply. The mains
plug and mains supply lead, and their fuse protection, must be
dimensioned accordingly.
ASSEMBLING THE POWER SOURCE
- Fit mounting brackets and down onto the trolley frame so that
the openings and in both mounting brackets are at the top left
- Insert the fastening plates (complete with pre-mounted nuts) from
the rear, as shown in Fig.14, and screw on loosely using M8 x 20 steel
screws with washers and retaining rings.
- Place the power source
onto mounting brackets
and
and
screw on from below using four M8x16 steel screws complete with
washers and retaining rings.
- Now screw both mounting brackets firmly to the trolley frame
- Working from the front, insert the cooling unit through mounting
brackets and and position it. (The guide tongue at the rear must
slot in underneath).
- As you can see in Fig. 15, the unit only needs to be fastened at Point
, using an M8x16 steel screw (inserted from below), with washer
and retaining ring.
FIXING THE INTERCONNECTING CABLE TO THE
POWER SOURCE AND COOLING UNIT
- Shift the mains switch into the “O” position
- Fix the strain-relief device of the interconnecting cable using the
screw provided
- Plug the “Welding potential” bayonet plug of the interconnecting
cable to the - socket
and turn it to latch it
- Plug the 37-pole control plug into the control-plug socket
and
fasten it tightly with the swivel nut
- Plug the water forward-flow and return-flow hoses of the interconnecting cable to the plug-on connectors
and , red-to-red and
black-to-black
- Connect the cooling-unit supply plug
to socket
on the power
source
N.B.! If the cooling unit is not plugged in, the overtemperature indicator
lights up on the power source. Welding is not possible.
12
MOUNTING THE INTERCONNECTING CABLE TO
THE WIREFEEDER
N.B.! Use clean tap water only. The electrical conductivity of all other
antifreeze agents makes them unsuitable for use here.
- Shift the mains switch to the “O” position
- Place the wirefeeder (with press-fit insulating sleeve) onto the location
pivot on the power source
- Loosen the cable grip and pull the interconnecting cable through, the
right way round, as far as the metal clamping sleeve on the protective
hose
Warning! As Fronius has no influence on factors such as the
quality, purity and filling-level of the coolant, no warranty is given
for the coolant pump.
Outside temperature
N.B. ! Do not cross over or kink any of the lines
- Plug the “Welding potential” bayonet socket of the interconnecting
cable to socket
and turn it to latch it
- Plug the 37-pole control socket into the control-plug socket and
fasten it tightly with the swivel nut
- Plug the gas hose of the interconnecting cable onto the shielding gas
socket and tighten with the swivel nut
Water-to-spirit mixing ratio
+ °C to -5°C
4l:1l
-5°C to -10°C
3.75 l : 1.25 l
-10°C to -15°C
3.5 l : 1.5 l
-15°C to -20°C
3.25 l : 1.75 l
Warning! The coolant circulation must be checked at regular
intervals while the machine is in operation - it must be possible to
see that the return-flow to the reservoir is working correctly.
N.B. ! First check whether O-ring seals have been inserted
- Plug the water forward-flow and return-flow hoses of the interconnecting cable to the plug-on connectors
and , red-to-red and
black-to-black, and tighten with the swivel nut
- Screw down the tension-relieving cable-grip
Under more difficult conditions (extra-long hosepacks, big height
differences etc.), use the FK 71 R cooling unit, with a cooling power of
2.6 kW and a pump pressure of 4.4 bar.
MOUNTING THE WIRE SPOOL
MOUNTING / CONNECTING THE GAS CYLINDER
-
N.B.! The cylinder is only fixed properly if the chains are placed around
the top part of the cylinder (but not around the neck of the cylinder)
- Take off the protective cap from the cylinder
- Give the cylinder valve a quick turn to the left so as to blow off any dirt
that may have accumulated
- Check the seal on the pressure regulator
- Screw the pressure regulator onto the gas cylinder and tighten it
- Link up the shielding-gas connector on the interconnecting cable to
the pressure regulator, by means of the gas hose
Shift the mains switch to the “O” position
Open the wire-spool cover
Mount the wire spool onto the spool holder - the right way round
Slot the locking bolt into the opening provided on the body of the spool
Adjust the braking force with the clamping screw
Replace the wire-spool cover or side panel
N.B.! The brake should always be adjusted so that the wire does not
continue unreeling after the end of welding - but without overtightening
the clamping screw, as this would cause motor overload.
FEEDING IN THE WIRE ELECTRODE
MOUNTING THE WELDING TORCH
- Shift the mains switch to the “O” position
- Check that the torch is correctly tooled up. Insert it - infeed tube first
- into the central torch connector
- Tighten the swivel nut by hand to fix the torch in place
- Plug the control plug of the welding torch onto the torch control
connection and latch it
- Plug the gas-hose of the welding torch into the gas connector and
latch it
-
Shift the mains switch to the “O” position
Open the wire-spool cover
Pivot the clamping devices and
forwards
Pull the pressure levers and upwards
Insert the wire electrode though the infeed tube of the 4-roller drive
and around 5 cm into the infeed tube of the welding torch
- Push the pressure levers and downwards
- Pivot the clamping devices and into the vertical position
- Set the contact pressure by means of the clamping nuts
and
STARTING UP THE COOLING UNIT
N.B.! Set a contact pressure that is high enough to ensure smooth wire
feed, but not so high that the wire electrode is deformed.
N.B.! Always check the volume and cleanliness of the coolant water
before starting to use the unit. The cooling unit is factory-filled with
approx. 2l of coolant (mixing ratio 1:1) before dispatch.
-
-
Shift the mains switch to the “O” position
Remove the screw cap
Top up with coolant (mixing ratio as per following table)
Screw the cap back on again
13
Arrange the hosepack in as straight a line as possible
Detach the gas nozzle from the torch
Unscrew the contact tube
Plug in the mains plug
Shift the mains switch to the “I” position
Mains control lamp lights up
Shift the program selector switch
to the required position (‘No
Program’ indicator must not light up)
ENGLISH
Warning! The wire-reel fixture is only for holding and securing
standard welding-wire reels of max. 20 kg.
- Stand the cylinder on the platform of the power-source trolley
- Fix the gas cylinder in place with both safety chains
MIG/MAG WELDING
- Shift the selector switch for digital indications
into the m/min
position
- Set a value of ~ 5 m/min on the welding power dial
Warning! Before starting up for the first time, read the sections
headed “Safety rules” and “Starting to use the power source”.
-
Warning! During the wire-infeed operation, hold the welding
torch facing away from your body.
- Press the wire-inch button until the wire electrode protrudes out of
the end of the torch
- To end the wire-infeed operation, release the wire-inch button
Warning! On water-cooled machines, the water-flow must be
checked at regular intervals while the machine is in operation you must be able to see that the coolant is flowing back properly.
N.B.! The wire spool must not continue to unreel after you release the
torch trigger. Re-adjust the brake if necessary.
-
Plug the earth cable into the current socket and latch it in firmly.
Connect the other end of the earth cable to the workpiece
Plug the machine into the mains
Switch the machine on at the mains switch
Mains control lamp lights up
- Pre-select the welding program with the program selector switch
(‘No Program’ indicator must not light up or start flashing)
Screw in the contact tube
Fit the gas nozzle
Close the wire-spool cover
Shift the mains switch to the “O” position
N.B.! All the programs were welded with a standard torch (apart from
T.I.M.E. programs). When standard programs are welded with a T.I.M.E.
torch, this may lead to changes in the welding properties.
- Shift the operating-mode switch on the wirefeeder into the desired
position
- Connect the remote-control unit to the remote-control socket (for
pulsed-arc welding, connect up the TR 34 T.I.M.E. remote-control
unit and set the operating-mode switch on the TR 34 T.I.M.E. to
‘Pulsed-arc welding’)
- Set the arc-length correction dial to “0”
- Set the droplet-detachment correction dial to “0”
- Set the required amperage on the welding power dial (command
value is shown on the amperage indicator)
- Open the gas-cylinder valve
- Set the gas-flow rate
- Press the torch trigger and start welding
N.B.! In some cases, it may be necessary to correct the gas pre-flow time
or gas post-flow time and/or the soft-start speed .
Fig.16
ADJUSTMENT GUIDELINES FOR THE T.I.M.E.
PROCESS
4-roller drive
CHANGING THE FEED ROLLERS
In order to achieve satisfactory wire travel, the feed rollers must be
suitable for the diameter and alloy of the wire to be welded.
Thanks to the single-dial operation of the T.I.M.E. Synergic, it is only
necessary to set the appropriate wirefeed speed ; the correct welding
voltage is then set automatically. Corrections are only then needed to the
arc length.
-
Calculating the deposition rate
This formula only holds good for a wire diameter of 1.2 mm and for
unalloyed and low-alloy steel wires. It takes no account of spattering
losses (typically 1 - 2 %).
Shift the mains switch to the “O” position
Open the wire-spool cover
Pivot the clamping devices
and forwards
Pull the pressure levers and
upwards
Pull out axles Remove feed rollers Insert new feed rollers
Deposition rate [kg/h] =
N.B.! Insert the feed rollers in such a way that you can still see and read
the designation for the wire diameter.
Wirefeed speed [m/min] x 60 x 8.9
1000
e.g. wirefeed speed = 20m/min
Deposition rate [kg/h] =
- Push axles - back in again - the anti-twist lock of each axle must
latch into place
- Push the pressure levers and
downwards
- Pivot the clamping devices
and into the vertical position
- Set the contact pressure by means of the clamping nuts
and
- Close the wire-spool cover
14
20 m/min x 60 x 8.9
1000
= 10.68 kg/h
TIG WELDING
VARIANT I
Calculating the welding speed
This formula only holds good for a wire diameter of 1.2 mm and for
unalloyed and low-alloy steel wires. It takes no account of spattering
losses (typically 1 - 2 %) or of geometrical deviations such as root gaps
and weld overfill (typically 10 - 20 % lower speed).
Welding speed [cm/min] =
Variant I requires the TP 4-SP remote-control unit and the TIG Set
(consisting of AL 22-S / AL 16-S hand-held welding torch with gas hose,
gas pressure regulator and spare-parts box).
N.B.! In this variant of TIG welding, the electrode touch-down on the
workpiece causes a short-circuit current of the same size as the pre-set
welding current. Ignition cycles from 10 A upwards invariably result in
damage to the surface of the workpiece and the tip of the tungsten
electrode, and impair the weld-seam quality by leaving tungsten inclusions.
Wirefeed speed [m/min] x 1.13 x 100
Weld sectional area [mm ]
2
e.g. ‘a 6’ fillet weld (‘a 6’ fillet weld has a weld sectional area of 36 mm2)
and a wirefeed speed of 20m/min
Welding speed [cm/min] =
20 m/min x 1.13 x 100
36 mm 2
= 62.8 cm/min
- Ignition of the welding arc is effected by touching down the tungsten
electrode onto the workpiece.
- To interrupt the welding operation, simply lift the torch away from the
workpiece until the arc goes out. In this case, there will be no filling
of the end-crater at reduced current, and thus no gas-shielding of the
end-crater.
As the bead cross-sections in multi-pass welding are difficult to determine,
this makes the computation of the welding speed a rather complicated
affair. A planimeter or squared graph paper will be found very helpful
here. See below for setting-values for different types of seam, welding
positions and seam thicknesses.
SETTING-VALUES FOR SEAM-TYPE, WELDING
POSITION AND SEAM THICKNESS
Gravity position
- Root welding,
irregular gaps and root
widths of over 2mm:
2.5 - 4.5m/min
Regular 2mm gaps: 9m/min
- Filler passes
lower region: 12-15m/min
upper region: 15-23m/min
- Top passes: 15-18m/min
Horizontal-vertical position
- Root welding,
irregular gaps and root
widths of over 2mm:
2.5 - 4.5m/min
Regular 2mm gaps: 9m/min
- Filler passes: 12 - 18m/min
- Top passes: 9 - 12m/min
Overhead weld
- Root welding: 3 - 4m/min
- Filler passes: 9 - 11m/min
- Top passes: 9 - 11m/min
Vertical-up welds: 3 - 6m/min
Fillet welds
Horizontal position
- a3: 12 - 14m/min
- a4: 12 - 16m/min
- a5: 15 - 18m/min
- a6: 18 - 23m/min
- a7: 20 - 23m/min
- >a8 only multi-pass 20 - 23m/min
- Notch beads at 10 - 12m/min
ENGLISH
Butt welds
Fig.17
Overhead position
- 9 - 11m/min for all seam
thicknesses and single or multipass weld seams
TIG Set
VARIANT II
Variant II requires the TP 4-SP remote-control unit, the TR 52-1 pedal
remote-control unit, a signal distributor and the TIG Set (AL 22-S / AL 16S hand-held welding torch with gas hose, gas pressure regulator and
spare-parts box).
Vertical-down welds
- 9 - 11m/min; max. a3.5: weldable
in one pass,
- thicker seams: multi-pass
Using this combination offers the following advantages:
- Reduction of the welding current at the instant of electrode touchdown, using the pedal-operated remote-control unit
- Crater-filling is possible, by lowering the current using the pedal
remote-control unit (gradually taking the pressure off the pedal
causes the welding current to drop to approx. 10 A) - optimum gas
shielding is assured
- Welding-current limitation by means of welding -current regulator on
the TP 4-SP remote-control unit: On the one hand, the entire pedal
travel is always available for the selected range, yet on the other hand
it is not possible for e.g. a thin tungsten electrode to be overloaded
and/or to melt if the pedal is pushed all the way down to the floor.
Vertical-up welds
- 4 - 6m/min; min. seam
thickness a6
Gravity position
- a3: 12 - 14m/min.
- a4: 12 - 14m/min.
- a5: 17 - 23m/min.
- a6: 17 - 23m/min.
- ab a7: 22 - 30m/min.
Vertical-down welds: 9 - 11m/min
Fig.18
15
Signal distributor
- Raise the torch and pivot it into the normal position - the arc ignites
(see Fig. 20c)
- Start welding
a) Fit gas nozzle
Fig.20
Fig.19
-
-
Torch tilt angle
-
Unplug the machine from the mains
Shift the mains switch to the “O” position
Dismount the MIG/MAG welding torch
Depending on the type of electrode, plug the welding cable into the
current socket and turn it clockwise to latch it
- Connect the TP 4-SP remote-control unit to socket on the T.I.M.E.
30 wirefeeder
- Plug the machine into the mains
Unplug the machine from the mains
Shift the mains switch to the “O” position
Dismount the MIG/MAG welding torch
Plug the current plug of the TIG welding torch into the
current
socket and turn it clockwise to latch it
Plug the current plug of the earthing cable into the current socket
and turn it clockwise to latch it
Tool up the welding torch (see welding-torch instruction manual)
Make an earthing connection to the workpiece
Attach a pressure regulator to the shielding-gas cylinder
Connect the gas-hose to the pressure regulator
Open the valve on the gas cylinder
Variant I: Connect the TP 4-SP remote-control unit to socket on the
T.I.M.E. 30 wirefeeder
Variant II: Connect the remote-control combination TP 4-SP, signal
distributor and TR 52-1 to the socket on the T.I.M.E. 30 wirefeeder
Warning! As soon as you shift the mains switch
into the "I"
position, the rod electrode becomes LIVE. Make sure that when
this happens, the rod electrode does not touch any electrically
conducting or earthed parts such as e.g. the workpiece, machine
housing etc.
-
Shift the mains switch to the “I” position
‘Ready’ indicator lights up
Select the welding range with range-switch on the TP 4-SP
Set the welding current with the welding-current dial on the TP 4SP
on the TP 4-SP remote- Set the arc force with the arc-force dial
control unit
- Set the Hot-Start with the Hot-Start dial
on the TP 4-SP remotecontrol unit
- Start welding
Warning! As soon as you shift the mains switch
into the "I"
position, the tungsten electrode becomes LIVE. Make sure that
when this happens, the tungsten electrode does not touch any
electrically conducting or earthed parts such as e.g. the workpiece,
machine housing etc.
-
c) Arc is ignited
MANUAL ELECTRODE WELDING
TR 52-1 pedal-operated remote-control unit
START-UP
-
b) Touch workpiece to
ignite arc
Plug the machine into the mains
Shift the mains switch to the “I” position
lights up
‘Ready’ indicator
Open the gas cut-off valve on the torch and/or press the torch trigger
and set the desired gas flow rate on the pressure regulator
Set the arc-force dial on the TP 4-SP remote-control unit to a scale
value of "0"
Set the Hot-Start dial on the TP 4-SP remote-control unit to a scale
value of "0"
Select the welding range with range-switch on the TP 4-SP
Set the welding current with the welding-current dial on the TP 4SP remote-control unit or set a current-limitation as described in
Variant II
Place the gas nozzle on the ignition location so that there is a gap of
2 - 3 mm between the tungsten tip and the workpiece (see Fig. 20a)
Gradually tilt up the welding torch until the tungsten tip touches the
workpiece (see Fig. 20b)
ROBOT WELDING
In conjunction with the TSST 153 robot interface, an interconnecting
cable, the FK71 cooling unit and the VR 153 robot wirefeeder, the
T.I.M.E. Synergic power source is suitable for use in robot welding.
VR 153 wirefeeder
- Special speed-controlled feed motor ensures exact wirefeed speeds
- Optional push-pull torch
- Wire-inch and gas-test button directly on the wirefeeder
16
00 ... Displays SMS software version
01 ... Displays SMS board version
02 ... Displays NMI board version
03 ... Displays position of TPS330 / 450 DIP-switch
04 ... Displays position of TPS/TS DIP-switch
05 ... Displays position of ARCF-CORR DIP-switch
06 ... Displays position of WF 22m / 30m DIP-switch
07 ... Displays pos. of DIP-switch for cooling-unit auto control
08 ... Input command-voltage test
09 ... Automatic wirefeed test
12 ... Welding circuit inductivity and resistance measurement
16 ... MIN. wirefeed adjustment aid
17 ... MAX. wirefeed adjustment aid
18 ... Wirefeed linearity check (at 15m/min or 11 m/min)
19 ... Wirefeed slippage test
20 ... Displays wirefeeder motor current
21 ... Hall-shunt test
22 ... Voltage measurement test
24 ... RTC year setting
25 ... RTC month setting
26 ... RTC date (day) setting
27 ... RTC day-of-week setting
28 ... RTC hours setting
29 ... RTC minutes setting
30 ... RTC seconds setting
32 ... Language selection (En/Gn)
33 ... Print-out options
34 ... Weldment print-out intervals
35 ... Interval time: Minutes
36 ... Interval time: Seconds
40 ... Limit-value cut-out ON/OFF
41 ... Ignition-monitoring options
42 ... Wire stickout for ignition time-out
43 ... Setting the ignition-monitoring time-lag
44 ... Arc-break time
45 ... TR 23P twin-head functions
Interconnecting cable
- available in lengths of 4m or 8m
FK71 cooling unit
- welding is only possible when the FK71 cooling unit is connected up
For more detailed information, please see the respective instruction
manuals.
T.I.M.E. Synergic power source
FK 71 cooling unit with coolant watchdog
Robot interface
Robot control unit
Robot
VR 153 T.I.M.E. with adjustable gas watchdog
T.I.M.E. machine torch
Interconnecting cable for VR153, 4m/8m
Power source / robot cable, 8m
TR 23P programming remote-control unit
Fig.21
Schematic representation of standard configuration for robot welding
CARE AND MAINTENANCE
Warning! Before opening up the welding machine, switch it off,
unplug it from the mains and put up a warning sign to stop
anybody inadvertently switching it back on again. If necessary,
discharge the electrolytic capacitors.
THE SET-UP MENU
N.B.! The set-up menu can only be activated in power sources bearing
the legend "PRO".
In order to keep your welding machine operational for years to come, you
should observe the following points:
- Carry out safety inspections at the stipulated intervals (see the
section headed “Safety rules”)
- Depending on the machine location, but no less often than twice a
year, remove the side panels from the machine and blow the inside
of the machine clean with dry, reduced-blow compressed air. Do not
aim air-jets at electronic components from too close a range.
- If a lot of dust has accumulated, clean the cooling-air ducts.
TO ACCESS THE SET-UP MENU
- Uncouple the welding wire
- Unplug the welding -current cable from the current sockets
- Shift the mains switch to the “I” position and - within the first three
seconds - switch the digital-indicator range-switch
back and
forward several times
- Call up the test program by selecting the program number
On water-cooled welding torches:
- Check that the torch connections are watertight
- Check the volume and quality of the coolant water (only top up with
clean coolant water)
- Keep an eye on the volume of coolant returning to the coolant
reservoir
TO EXIT THE SET-UP MENU
- Shift the mains switch of the power source to the “O” position (the
parameters you have just set will be stored)
17
ENGLISH
DESCRIPTION OF PARAMETERS
TS ST 153 robot interface
- Adjustment screw for setting the threshold gas-flow rate that will
trigger the ‘insufficient gas’ detection feature
- Adjustment potentiometer for burn-back correction
- Adjustment potentiometer for droplet-detachment correction
- LED status indication of “input and output signals” and of voltage
supply lines and command values
TROUBLESHOOTING
Warning! Machine may only be opened up by suitably trained and skilled personnel! Before opening up the welding machine, switch it off,
unplug it from the mains and put up a warning sign to stop anybody inadvertently switching it back on again. If necessary, discharge the
electrolytic capacitors. If fuses need replacing, they must be replaced by fuses of the same rating. No warranty claims will be accepted in
respect of damage caused by the use of too high a rating of fuse.
ERROR MESSAGES ON THE DISPLAYS
The power source is equipped with a self-diagnosis system! Any errors that occur will be recognised and indicated on the displays in the form of an
error code (E00 - E99).
Error message
Description
E01
Internal error in the T.I.M.E. Synergic control system! (Error in main-memory test)
E02
Internal error in the T.I.M.E. Synergic control system! (Error in AD/DA converter adjustment!)
E03
Function not implemented!
E04
Automatic wirefeed test: No motor rotation detected!
E05
Automatic wirefeed test: Min. and max. speeds are faulty!
E06
Automatic wirefeed test: Max. speed is faulty!
E07
Automatic wirefeed test: Max. could not be reached (motor adjustment only OK up to half-way up the motor control range)
E08
Automatic wirefeed test: Min. and max. are correctly adjusted, but problem has occurred in middle of speed range (linearity
fault)
E09
Automatic wirefeed test: Acceleration time exceeded (too slow!)
E19
HALL-SHUNT gain adjustment: HALL-SHUNT offset is too big for gain to be adjusted!
E30
Autotest: No shorting in welding circuit!
E33
Procedure aborted by user!
E34
Incorrect EPROM: Power source has been fitted with a “rotary switch” Eprom instead of a “program selector switch” one!
E35
Incorrect EPROM for this board version: You have plugged an out-of-date EPROM version into the control board
FAULTS ON THE WELDING MACHINE
Fault
Cause
Remedy
Machine does not function
‘Ready’ indicator is not lit up, ‘m/min - mm V’ indicator is lit up, welding-current indicator
is lit up
Break in mains supply lead
Check mains supply lead
Mains fuse is defective
Change mains fuse
No voltage supply to power-section control
Check / replace fuse 1F10
‘m/min - mm - V’ indicator and weldingcurrent indicator are not lit up
No control-system supply voltage
Check fuses 2F1 and 2F12 and replace if
faulty
‘Ready’ indicator is lit up, m/min - mm - V
indicator and welding- current indicator are
not lit up
No voltage supply to controller
Check / change fuse 2F6
No welding current
‘Ready’ indicator is lit up, over/undervoltage
indicator is lit up
Phase failure
Check mains fuse, mains plug and mains
supply lead
Mains voltage too high or too low - over/
undervoltage watchdog has cut out
Check mains voltage
Thermostatic cut-out system has been tripped
(fan is running)
Wait until machine automatically comes back
on after end of cooling phase - if it does not,
call After-Sales Service
Machine overloaded, duty c. has been exceeded
Do not exceed duty cycle
‘Ready’ indicator is lit up, overtemperature
indicator is lit up
18
Fault
‘Ready’ indicator is lit up, feeder motor is
running
Cause
Remedy
Insufficient flow of cooling air
Ensure an adequate flow of cooling air
Power section badly soiled
Open up the unit and blow clean with dry
compressed air
FK71 cooling unit is not running, 5-pole coolingunit plug is not plugged in
Plug in the cooling-unit plug, the right way
around, and latch it into place
FK71 cooling unit is not running - fuse 2F3 is
faulty
Change fuse on VM34 auxiliary transformer.
Fuse 2F4 is faulty - fan in FK71 cooling unit is
not running
Change fuse on VM34 auxiliary transformer.
Fan in the power source is faulty
Change fan
Fuse 2F5 for machine fan is faulty
Change fuse on VM34 auxiliary transformer
Over/undervoltage watchdog has cut out
Check mains voltage
No open-circuit voltage
Check open-circuit voltage on ‘m/min - mm V’ indicator (approx. 51V)
Earthing cable not connected
Ensure good contact to workpiece
Welding torch is faulty
Change torch
+ pole of interconnecting cable is not connected
Plug in the cable and latch it
Arc-outs occur from time to time
‘Ready’ indicator is lit up, over/undervoltage
indicator lights up for approx. 10 s.
A mains phase is missing
Check mains supply lead
Transient mains voltage fluctuations cause
over/ undervoltage watchdog to cut out
occasionally
Check mains voltage
No function when torch trigger is pressed
‘Ready’ indicator is lit up, no welding current
- feeder motor is not running - no shielding
gas
Torch control plug not plugged in or plug-in
connector is faulty
Plug in and latch the control plug, check plugin connections and change where necessary
Torch trigger or torch control lead is faulty
Repair or replace torch
No negative supply
Check or replace fuse 2F7
Program selector switch is in wrong position
Correct the program selection
Wrong remote-control unit is being used
Use a TR34 T.I.M.E. or TP4-SP remote-control
unit, or work without a remote-control unit
Torch On/Off switch is in the “torch trigger
deactivated” position
Shift the Torch On/Off switch to the “torch
trigger activated” position
Interconnecting cable is faulty or not connected
Check the interconnecting cable
Program selector switch is in wrong position
Correct the program selection
Standard program was welded using a T.I.M.E.
torch
Use a standard torch and keep the stick-out
short
In Program mode: Arc is too short or too long
Use the arc-length correction dial to optimise
the length of the arc
In Manual mode: Operating point is not set to
optimum values
Co-ordinate the parameters for welding
voltage, wirefeed speed and arc force (see
tables of guideline values printed on machine)
Arc force is too hard
Correct the arc force with the TR34 T.I.M.E.
remote-control unit in Standard-Manual mode
‘Ready’ indicator is lit up, Manual /
NoProgram indicator is flashing
Poor welding properties
Unsteady arc - heavy spatter losses
19
ENGLISH
Check / change fuse 2F8 on VM34 auxiliary
transformer.
Fault
Cause
Remedy
Contact tube is too large, or its bore is worn
Change the contact tube
Poor earth connection
Ensure good contact between earthing clamp
and workpiece
Replace any burnt/charred parts - use a new
earthing cable if necessary
Incorrect alloy and/or diameter of wire
Check / change the wire spool
Check the weldability of the base metal
Uneven wirefeed speed
Interconnecting cable or earthing cable is too
long, cross-sectional area of cable is too small
Correct the welding parameters - use a cable
with a larger cross-sectional area, otherwise
create new welding programs
Interconnecting cable or earthing cable is badly
laid out or incorrectly reeled in
Arrange the hosepack or cable as straight as
possible, or reel in in a “bifilar” pattern
Braking force is set too high
Loosen the brake
Contact-tube bore is too narrow
Screw in the right contact tube for the diameter
of wire being welded
Wire inner liner in torch is too short, blocked or
too narrow
Remove contact tip or wire nozzle, depending
on the type of torch, and check the length of
the liner
Fit an inner liner with the correct internal
diameter
Change any kinked or blocked liners (this is
essential!)
Wirefeed rollers have insufficient contact
pressure
Set the knurled nut on the pressure set-screw
so that the wire electrode is fed smoothly, yet
without being deformed
Wrong wire nozzle
Check value stamped onto nozzle
Contact tube is too narrow
Change the contact tube
Inner diameter of wire inner liner is too narrow
Insert liner of the correct size for the diameter
of wire being used
Wire inner liner blocked, rusty, kinked or too
short
Replace the inner liner
Contact pressure of feed rollers is too high
Reduce contact pressure by turning knurled
nut
Incorrect drive rollers (shape and diameter of
groove)
Set up motor base-plate correctly
Welding torch not tooled up correctly
Tool-up the welding torch correctly
Wirefeeder motor is not running
‘Ready’ indicator is lit up, open-circuit
voltage is present, no flow of shielding gas
Motor fuse is defective
Change motor fuse 2F9 on the VM34 auxiliary
transformer
Torch On/Off switch on wirefeeder is on "OFF"
Shift the torch On/Off switch on the wirefeeder
to the "ON" position
‘Ready’ indicator is lit up, open-circuit
voltage is present, shielding gas is flowing
Break in control-voltage supply to wirefeeder
Check 37-pole control plug and interconnecting cable from power source to wirefeeder
Carbon brushes worn out; motor defective
Measure voltage on motor. If motor voltage is
present, the motor must be changed.
Welding wire forms a loop between the
feed rollers and the wire inlet nozzle
20
Cause
Remedy
Wirefeeder motor always runs at full
speed
Command value is always ‘max.’
Check interconnecting cable
Motor controller receives no actual speed value
Check 37-pole control plug and interconnecting cable from power source to wirefeeder
Wirefeed speed deviates from the programmed values shown in the Table
V-groove rollers have been mounted
The programmed values are for trapezoidal
or semicircular-grooved feed rollers. If you
use V-groove rollers, you must correct the
arc-length
After the torch trigger is pressed in open
circuit, the wirefeed speed is too slow
Wirefeeder motor is running at the pre-set softstart speed
Wirefeed speed only increases once the welding wire has hit the workpiece. To determine
the actual wirefeed speed, you must press
the wire-inch button.
After the torch trigger is pressed, the
wirefeed speed reaches max. 22m/min.
Wrong EPROM in the power source
Check EPROM
DIP switch S6 or S7 is not on correct setting
Check DIP switch S6 or S7
Gas continues to flow even after the torch
trigger is released
Gas solenoid valve is defective or dirty
Clean or change the solenoid valve
Motor controller board NMI4 is defective
Change motor controller board NMI4
Remote control does not function
Wrong remote-control unit
Only use TR34 T.I.M.E. or TP4-SP remotecontrol units
Remote-control unit or r.-c. cable are faulty
Disconnect remote-control cable from wirefeeder and check command values (m/min.)
Wirefeeder motor is not being braked; carbon
brushes are worn out
Measure motor voltage. If motor voltage is
present, the motor must be changed
Motor controller board NMI4 is defective
Change motor controller board NMI4
Wire burns onto contact tube after end of
welding
Burn-back time set too long
Use the burn-back time correction dial to
shorten the burn-back time
Welding current on the gas nozzle
Accumulations of spatter in the gas nozzle
(especially in out-of-position welding)
Detach the gas nozzle and clean the contact
tube, contact tip and gas nozzle - spray with
Fronius anti-stick agent if necessary
Insulation piece or spatter guard not mounted,
or else defective
Fit a new insulation piece if necessary
Not enough coolant in FK71 cooling unit
Top up with coolant
Forward and return-flow hoses wrong way round
Connect the coolant hoses the right way round
Coolant circuit blocked or hoses kinked
Undo the screw cap of the water reservoir and
check the return flow
Wire burns onto weld pool after end of
welding
Welding torch overheats - even though
duty cycle has not been exceeded (only
applies to water-cooled machines)
21
ENGLISH
Fault
TECHNICAL DATA
FK 71 COOLING UNIT
Warning! If the machine is designed to run on a special voltage,
the Technical Data shown on the rating plate apply. The mains
plug and mains supply lead, and their fuse protection, must be
dimensioned accordingly.
Mains voltage
Power consumption
Speed
T.I.M.E. SYNERGIC POWER SOURCE
Mains voltage (+/-10%)
Mains fuse protection
Cos phi
150 A
450 A
Apparent power at 60% duty cycle
100% duty cycle
Efficiency
Max. delivery capacity
40 A slow-blow
Max. pump pressure
0.98
0.99
Coolant volume
Degree of protection
27 kVA
21 kVA
Dimensions L x W x H mm
90 %
Welding current range (continuous)
Welding current at 60% duty cycle
100% duty cycle
Open-circuit voltage
Working voltage
Cooling capacity
3 x 380 / 400 / 415 V~, 50 - 60 Hz
Weight (without coolant)
3 - 450 A
450 A
360 A
50 V
MIG/MAG
Electrode
0 - 50 V
0 - 55 V
TIG
0 - 55 V
Degree of protection
IP 21
Type of cooling
AF
Insulation class
F
Approval marks
S, CE
T.I.M.E. 30 WIREFEEDER
Mains voltage
42 V
Motor, rated current
4.2 A
Rated power
Torque
180 W
21 Ncm
Wirefeed speed
0 - 30 m/min
Reduction ratio
17.6 : 1
Degree of protection
Safety class
Weight
IP 23
III
12.5 kg
22
2 x 380 - 415 V, 50 - 60 Hz
0.6 A
2800 rpm (50 Hz), 3200 rpm (60 Hz)
2420 W
3.64 l/min.
3.3 bar
approx. 5.5 l
IP 23
575/365/265
21 kg
LED CHECKLIST, DIALS AND FUSES
Warning! Machine may only be opened up by suitably trained and skilled personnel! Before opening up the welding machine, switch it off,
unplug it from the mains and put up a warning sign to stop anybody inadvertently switching it back on again. If necessary, discharge the
electrolytic capacitors. If fuses need replacing, they must be replaced by fuses of the same rating. No warranty claims will be accepted in
respect of damage caused by the use of too high a rating of fuse. Dials not shown here must not be adjusted!
LED indicator for start of PWM
LED +5V / +15V
Must always be lit up for as long as the
machine is switched on
ENGLISH
Transient protection
LED indicator is only lit up if the overvoltage protector
is activated
Fig.22
Fig.23
LED indicator lights up if a mains
overvoltage of more than 15%
occurs
Welding-current command value
The higher the command value, the more
brightly the LED indicator glows
LED indicator lights up if a mains
overvoltage of more than 44% occurs, or if
there is a phase failure
LED indicator lights up for approx. 10 sec.
if there is a mains overvoltage or
undervoltage of +/- 10%
LED indicators on board PWM 3
Power-source start-up
LED indicator only lights up on MIG/MAG start-up signal
No function
LED indicator always stays dark
Current-flow signal
LED indicator is lit up when welding
current is flowing
LED indicator lights up to show a programmed
burn-back impulse
No function
LED indicator always stays dark
LED indicators on board WM 34A
23
Fig.24
LED indicators and dials on board NMI 4.
24
Current-flow signal
LED indicator is lit up when
welding current is flowing
Motor reset
LED indicator lights up:
- after the machine is
switched on, for a period
of 1 sec.
- after an overcurrent on
the wirefeeder motors
LED indicator lights up for approx. 10 sec.:
a) if a mains overvoltage or undervoltage of +/- 10 % occurs
b) if there is a machine overheating error.
LED indicator lights up when
open-circuit voltage is present
Wirefeed command value
The higher the command value, the
more brightly the LED indicator glows
‘Gas-test’ LED indicator
lights up when the gas-test
button is pressed
Motor brake
LED indicator lights up when the
wirefeeder motor is braked
LED indicator -15V must always be lit up as
long as machine is ON, otherwise F7 faulty
LED indicator +5V must always be lit up as
long as machine is ON, otherwise F6 faulty
‘Wirefeeder A’ LED indicator is lit up when a twinwirefeed control is being used and this is switched to
Wirefeeder A
‘Wire-inch’ LED indicator lights up when
the wire-inch button is pressed
LED indicator BRT
lights up when torch
trigger is pressed
LED indicator BRT 2
lights up when torch
trigger 2 is pressed (not
used at present)
LED indicator +15V must always be lit up as
long as machine is ON, otherwise F6 faulty
LED indicator +10V must always be lit up for
as long as the machine is ON
Controller Out (PWM command value)
The higher the command value, the more
brightly the LED indicator glows
Fig.25
Open-circuit voltage ON
LED indicator is lit up for as long as the command to
switch on the open-circuit voltage is given
LED indicators and dials on board MIG 45.
S1
OFF
S1/1
450 A
330 A
S1/2
Special function OFF
Special function ON
S1/3
Pulsed-Arc & Standard
Standard
Without arc-force correction
With arc-force correction
S1/4
ON
(only in Standard mode)
Fig.26
S1/5
Without twin-head
With twin-head
S1/6
WF A nmax = 30 m/min
WF A nmax = 22 m/min
S1/7
WF B nmax = 30 m/min
WF B nmax = 22 m/min
S1/8
Cooling-unit cut-out (automatic)
Cooling-unit cut-out (continuous operation)
Coding possibilities on board NMI4.
25
ENGLISH
Setting-dial for HotStart time, from 0.5 to 2.0 sec.
depending upon pre-set welding-current command value
Plug connector X5
primary voltage supply
Primary 0V~
F1 6.3 A slow-blow
Cooling-unit pump 380V~
F3 0.63 A slow-blow
Plug connector X1
for machine fan
Primary 380V~
F12 6.3 A slow-blow
Plug connector X4
voltage supply to BM 45.
Plug connector X6 for
415V mains reconnection
Wirefeeder motor (VR152) 42V~
F9 10 A slow-blow
Plug connector X7 for
400V mains reconnection
Pull-Mig motor 42V~
F10 2 A slow-blow
Plug connector X8 for
380V mains reconnection
Plug connector X3
Supply to NMI 4 control
electronics
Fan for cooling unit 230V~
F4 0.315 A slow-blow
Supply to NMI 4
20V~ (+15V / +10V / +5V)
F6 2 A slow-blow
Fan 230V~
F5 0.315 A slow-blow
Open-circuit voltage 36V~
F8 0.315 A slow-blow
Supply to NMI 4
20V~(-15V), F7 1 A slow-blow
Plug connector X2 PWM
Fig.27
Vacant
Fuses on board VM34B
26
FRANÇAIS
MODE D´EMPLOI
1
2
CHER CLIENT DE FRONIUS,
La présente brochure est destinée à vous familiariser avec la commande
et l‘entretien de la T.I.M.E. Synergic. Lisez attentivement le mode
d‘emploi et observez scrupuleusement les instructions. Vous éviterez
ainsi des pannes dues à de fausses manoeuvres. Vous en serez
récompensé par la fiabilité de fonctionnement et la longue durée de vie
de votre appareil.
FRONIUS SCHWEISSMASCHINEN
VERTRIEB GMBH & COKG
Attention ! Seules des personnes qualifiées sont autorisées à
effectuer la mise en service de l‘appareil et ceci uniquement dans
le cadre de la réglementation technique. Lisez attentivement le
chapitre „Consignes de sécurité“ avant de procéder à la mise en
service.
SOMMAIRE
Cher client de Fronius, ............................................................................. 3
Monter et raccorder la bouteille à gaz ............................................. 13
Monter la torche de soudage ............................................................ 13
Mise en service de l'appareil de refroidissement ............................ 13
Montage de la bobine de fil ............................................................... 13
Introduction du fil-Électrode .............................................................. 13
Changer les galets d'avance de fil ................................................... 14
Consignes de sécurité .............................................................................. 4
Généralités ............................................................................................ 4
Uilisation conforme ............................................................................... 4
Obligations de l‘exploitant ................................................................... 4
Obligations du personnel ..................................................................... 4
Equipement de protection individuel .................................................. 4
Risque provenant du dégagement de vapeurs et gaz de nocifs ..... 4
Risques provenant de la projection d‘étincelles ............................... 4
Risques provenant du courant secteur et du courant de soudage . 4
Zones particulièrement dangereuses ................................................. 4
Mesures de sécurité relatives à l‘information .................................... 5
Mesures de sécurité sur le lieu d‘installation de la soudeuse ......... 5
Courants de soudage vagabonds ....................................................... 5
Mesures de sécurité en fonctionnement normal ............................... 5
Contrôle de sécurité ............................................................................. 5
Modifications apportées à la soudeuse .............................................. 5
Pièces de rechange et pièces d‘usure ............................................... 5
Etalonnage de postes à souder .......................................................... 5
Label CE ................................................................................................ 5
Droits d‘auteur ....................................................................................... 5
Soudage MIG/MAG ................................................................................. 14
Instructions de réglage du procédé T.I.M.E. .................................... 14
Valeurs de réglage de type de courant, Type de cordon, position
de soudage et épaisseur de cordon ................................................. 15
Soudage TIG ........................................................................................... 15
Variante I .............................................................................................. 15
Variante II ............................................................................................ 15
Mise en service ................................................................................... 16
Soudage manuel à l'électrode enrobée ............................................... 16
Soudage robot ......................................................................................... 16
Le menu setup ......................................................................................... 17
Entrer dans le menu setup ................................................................ 17
Quitter le menu setup ......................................................................... 17
Description des paramètres .............................................................. 17
Généralités ................................................................................................ 6
Principe de la T.I.M.E. Synergic .......................................................... 6
Vérification de procédé suivant EN 288 / 7 ....................................... 6
Conception de l'appareil ...................................................................... 6
Soins et entretien .................................................................................... 17
Éléments de commande et connexions ................................................. 7
Source de courant T.I.M.E. Synergic .................................................. 7
Avance de fil T.I.M.E. 30 ..................................................................... 9
Appareil de refroidissement FK 71 .................................................. 10
Télécommande TR 34 T.I.M.E. .......................................................... 10
Télécommande TP 4 SP .................................................................... 11
Caractéristiques techniques .................................................................. 22
Source de courant T.I.M.E. Synergic ................................................ 22
Avance de fil T.I.M.E. 30 .................................................................... 22
Appareil de refroidissement FK 71 ................................................... 22
DEL-Check-list, Régulateurs et coupe-circuits .................................... 23
Mise en service de la source de courant ............................................. 11
Utilisation selon les prescriptions ..................................................... 11
Instructions d’installation ................................................................... 11
Brancher la fiche de réseau .............................................................. 11
Branchement sur secteur ................................................................... 11
Assemblage de la source de courant ............................................... 12
Connecter le Faisceau de câbles de connexion avec la source
de courant / l'appareil de refroidissement ....................................... 12
Raccorder le faisceau de câbles de connexion à l'avance de fil .. 13
Liste de pièces de rechange
Fronius - Bureaux de vente et bureaux de service
3
FRANÇAIS
Diagnostic de défauts et réparation ...................................................... 18
Messages de défaut sur les indications ........................................... 18
Défauts de l'installation de soudage ................................................ 18
CONSIGNES DE SÉCURITÉ
GÉNÉRALITÉS
Toutes les personnes se trouvant dans le voisinage de l‘arc électrique
doivent
- être informées des dangers
- équipées des moyens de protection adéquats ;
- si nécessaire, prévoir des cloisons ou tentures de protection.
La soudeuse répond aux derniers développements techniques et satisfait à la réglementation généralement reconnue en matière de sécurité.
En cas de fausse manoeuvre ou de mauvaise utilisation, elle présente
toutefois certains risques
- pour la santé et la vie de l‘utilisateur ou d‘un tiers,
- pour l‘appareil et pour d‘autres biens matériels de l‘exploitant,
- liés à la qualité du travail effectué avec la soudeuse.
RISQUE PROVENANT DU DÉGAGEMENT DE
VAPEURS ET GAZ DE NOCIFS
Toutes les personnes intervenant dans la mise en service, la manipulation et l‘entretien de la soudeuse doivent
- avoir la qualification requise,
- avoir des connaissances suffisantes en soudure et
- observer scrupuleusement les instructions de service.
- Prévoir un système d‘aspiration adéquat pour évacuer les fumées et
gaz nocifs de la zone de travail.
- Veiller à une ventilation suffisante.
- Eviter que les vapeurs dégagées par des solvants pénétrent dans la
zone de rayonnement de l‘arc électrique.
Tout dérangement susceptible d‘affecter la sécurité doit être réparé sans
délai.
RISQUES PROVENANT DE LA PROJECTION
D‘ÉTINCELLES
Votre sécurité est en jeu !
- Eloigner tout objet inflammable de la zone de travail.
- Il est interdit de souder sur des réservoirs contenant ou ayant contenu
des gaz, des carburants, des huiles minérales et substances analogues. Même des résidus de ces substances présentent un risque
d‘explosion.
- Dans les locaux exposés au risque d‘incendie ou d‘explosion, une
réglementation particulière est applicable. Respecter la réglementation nationale et internationale qui s‘y rapporte.
UILISATION CONFORME
La soudeuse a été conçue exclusivement pour une utilisation de le cadre
des travaux prévus (voir chapitre „Mise en service de l’appareil de
soudage“).
L‘utilisation conforme implique également l‘observation
- de toutes les consignes figurant dans les instructions de service
- des travaux d‘inspection et d‘entretien prescrits.
RISQUES PROVENANT DU COURANT SECTEUR ET
DU COURANT DE SOUDAGE
OBLIGATIONS DE L‘EXPLOITANT
- Une décharge électrique peut avoir des conséquences graves. En
principe, toute décharge peut être mortelle.
- Les champs magnétiques générés par de fortes intensités de courant
peuvent affecter le fonctionnement d‘appareils électroniques vitaux
(par exemple, stimulateurs cardiaques). Les personnes porteuses
d‘appareils de ce genre devraient consulter leur médecin avant de se
tenir à proximité immédiate d‘une zone de soudage.
- Tous les câbles de soudage doivent être bien fixés, intacts et isolés.
Remplacer immédiatement tout raccord lâche ou câble brûlé.
- Faire vérifier régulièrement par un électricien professionnel le conducteur de terre de la ligne d‘alimentation secteur et la ligne
d‘alimentation de l‘appareil.
- Avant d‘ouvrir l‘appareil à souder, s‘assurer qu‘il ne puisse pas être
accidentellement rebranché. Décharger les composants susceptibles d‘être électriquement chargés.
- Au cas où des interventions sur des éléments sous tension seraient
nécessaires, il est indispensable de faire appel à une seconde
personne qui puisse, le cas échéant, couper l‘alimentation électrique.
L‘exploitant s‘engage à n‘autoriser l‘utilisation de la soudeuse qu‘à des
personnes
- connaissant les prescriptions fondamentales concernant la sécurité
du travail et la prévention d‘accidents et familiarisées avec la manipulation de la soudeuse
- ayant lu et compris les avertissements figurant dans ces instructions
de service, et l‘ayant confirmé en apposant leur signature.
L‘exploitant est tenu de contrôler régulièrement si le personnel travaille
en respectant les prescriptions en matière de sécurité.
OBLIGATIONS DU PERSONNEL
Toutes les personnes chargées de travailler avec la soudeuse s‘engagent à
- respecter les prescriptions fondamentales en matière de sécurité du
travail et de prévention des accidents,
- à lire le chapitre concernant la sécurité ainsi que les avertissements
figurant dans les présentes instructions de service et à attester par
leur signature qu‘ils les ont compris, ceci avant d‘entamer le travail.
ZONES PARTICULIÈREMENT DANGEREUSES
- Ne jamais approcher les doigts des roues dentées du système
d‘entraînement du fil lorsqu‘il est en fonctionnement.
- Dans les locaux exposés au risque d‘incendie ou d‘explosion, une
réglementation particulière est applicable. Respecter la réglementation nationale et internationale qui s‘y rapporte.
- Les soudeuses destinées aux travaux dans des locaux à risques
électriques accrus (p. ex. chaudières) doivent être pourvus du label
S (Safety).
- Les soudures exigeant des mesures de sécurité particulières doivent
obligatoirement être réalisées par des soudeurs ayant reçu la formation adéquate.
EQUIPEMENT DE PROTECTION INDIVIDUEL
Prenez les dispositions suivantes pour préserver votre sécurité :
- portez des chaussures solides, isolantes. Ces chaussures doivent
rester isolantes même dans un environnement humide
- protégez les mains par des gants isolants
- protégez les yeux des rayons ultraviolets en utilisant un écran de
soudeur doté de verres filtrants réglementaires
- portez uniquement des vêtements appropriés (difficilement inflammables)
- en cas de production importante de bruit, portez un casque antibruit
4
- Lors du transport par grue de la source de courant, toujours accrocher
les chaînes ou les câbles dans les anneaux de levage en gardant un
angle le plus perpendiculaire possible. Retirer la bouteille de gaz et
l‘unité d‘entraînement du fil.
- Lors du transport par grue de l‘unité d‘entraînement du fil, toujours
utiliser une suspension isolante.
- VBG 4, §5 - Installations électriques et matériel électrique
- VBG 15, §33 / §49 - Soudure, découpage et opérations analogues
- VDE 0701-1 - Réparation, modification et contrôle d‘appareils électriques; exigences générales
- VDE 0702-1 - Essais de répétition sur les appareils électriques
Pour des renseignements plus précis concernant la mise en service, la
modification et l‘essai de postes de soudage, veuillez demander
l‘instruction de travail „Inspection de sécurité d‘appareils de soudage“
(AA-PMÜ-01) à votre poste de service Fronius.
MESURES DE SÉCURITÉ RELATIVES À
L‘INFORMATION
- Les instructions de service doivent être conservées en permanence
sur le lieu d‘utilisation de la soudeuse.
- En complément aux instructions de service, la réglementation généralement valable et la réglementation locale concernant la prévention d‘accidents et la protection de l‘environnement doivent à tout
moment être disponibles et respectés.
- Toutes les consignes de sécurité et les avertissements de danger
apposés sur la soudeuse doivent rester lisibles.
MODIFICATIONS APPORTÉES À LA SOUDEUSE
- Aucune modification, transformation ou montage ne peuvent être
effectués sur la soudeuse sans l‘autorisation du constructeur.
- Remplacer immédiatement tout composant présentant un défaut
quelconque.
PIÈCES DE RECHANGE ET PIÈCES D‘USURE
MESURES DE SÉCURITÉ SUR LE LIEU
D‘INSTALLATION DE LA SOUDEUSE
- N‘utiliser que des pièces de rechange ou des pièces d‘usure d‘origine.
Les pièces d‘autres fabricants n‘offrent pas les garanties de sécurité
et de fonctionnement suffisantes.
- Pour toute commande, prière d‘indiquer la dénomination et le numéro
de référence exacts, comme indiqués sur la liste des pièces de
rechange, ainsi que le numéro de série de l‘appareil.
- Le poste à souder doit être installé sur un sol ferme et plat offrant
suffisamment de stabilité. Le renversement de la soudeuse présente
un grave danger !
- Dans les locaux exposés au risque d‘incendie ou d‘explosion, une
réglementation particulière est applicable. Respecter la réglementation nationale et internationale qui s‘y rapporte.
- Assurer par des directives et des contrôles internes que l‘environnement du lieu de travail soit toujours propre et ordonné.
ETALONNAGE DE POSTES À SOUDER
Les normes internationales préconisent l‘étalonnage à intervalle régulier
des postes à souder. Fronius recommande d‘effectuer cet étalonnage
tous les 12 mois. Si vous désirez de plus amples informations à ce sujet,
n‘hésitez pas à contacter votre concessionnaire Fronius !
COURANTS DE SOUDAGE VAGABONDS
- Veiller à une liaison solide de la pince à pièces usinées avec la pièce
usinée
- Lorsque le fond est conducteur électriquement, mise en place, si
possible, de l’appareil de soudage de sorte à l’isoler
LABEL CE
La soudeuse satisfait aux exigences fondamentales de la directive en
matière de basse tension et de compatibilité électromagnétique et a
obtenu le label CE.
En cas d’inobservation, des courants de soudage vagabonds surviennent pouvant conduire à la destruction de conducteurs de protection, de
l’appareil de soudage et d’autres installations électriques.
DROITS D‘AUTEUR
La société Fronius International GmbH&Co.KG est propriétaire des
droits d‘auteurs sur ces instructions de service.
- N‘utiliser la soudeuse que si tous les dispositifs de sécurité fonctionnent.
- Avant la mise en circuit de l‘appareil, s‘assurer que personne ne peut
être mis en danger.
- Au moins une fois par semaine, vérifier si la soudeuse ne présente
aucune détérioration détectable de l‘extérieur et contrôler le
fonctionnement des dispositifs de sécurité.
Le texte et les figures correspondent à l‘état de la technique au moment
de la mise sous presse. Sous réserve de modification. Le contenu des
présentes instructions de service ne fondent aucun recours de la part de
l‘acheteur. Nous sommes reconnaissants pour toute proposition
d‘amélioration ou indication d‘erreurs figurant dans les instructions de
service.
FRANÇAIS
MESURES DE SÉCURITÉ EN FONCTIONNEMENT
NORMAL
CONTRÔLE DE SÉCURITÉ
Après toute modification, réparation, ou entretien de la soudeuse et au
moins une fois tous les douze mois, l‘exploitant est tenu de faire effectuer
un contrôle de état par un électricien professionnel.
Pour la vérification, tenir compte des prescriptions suivantes :
- IEC (EN) 60 974-1 - Matériel de soudage électrique - Partie 1:
Sources de courant pour soudage
5
ud_fr_st_sv_00147
012001
GÉNÉRALITÉS
PRINCIPE DE LA T.I.M.E. SYNERGIC
CONCEPTION DE L'APPAREIL
Le procédé T.I.M.E. est un procédé de soudage MAG de haute capacité
combinant une efficience maximale et une qualité excellente du cordon
de soudure. Le travail avec fils massifs à vitesses de fil plus élevées
donne une capacité de fusion plus élevée et une soudure de haute
qualité grâce aux mélanges spéciaux de gaz de protection.
La conception de la T.I.M.E est basée sur le principe modulaire. Les
composants individuels de commande sont vissés et peuvent être montés
facilement et sans problèmes sur un chariot robuste.
La bouteille à gaz est intégrée dans le chariot et montée en position
abaissée. Ceci permet le remplacement et la manipulation rapides et
faciles. Malgré les dimensions réduites de l'installation elle est construite
de telle manière qu'elle fonctionne de manière fiable aussi sous les
conditions les plus sévères. Le boîtier en tôle à recouvrement par
poudre, les éléments de commande installés de manière protégée et les
douilles de courant à verrouillage à baïonnette répondent aux demandes
les plus exigeantes.
Des facteurs comme l’aspect extérieur du cordon, les valeurs de qualité
mécanique-technologique, les transitions de cordons, sécurité contre
manques de fusion et peu de projections comptent parmi les avantages
essentiels de ce procédé. Grâce à l’introduction d’un deuxième mélange
de gaz "T.I.M.E.-II" on peut maintenant, si nécessaire, produire des
soudures sans soufflures ou piqûres. Le procédé T.I.M.E. principalement combine la technologie de sources de courant la plus avancée, des
torches et appareils d'avance de fil performants, la physique des gaz
correspondante et le savoir-faire de l'application appropriée de ces
éléments.
L'appareil d'avance de fil portatif peut être monté sur le boulon de fixation
de la source de courant et peut tourner des deux côtés et peut être enlevé
pour élargir le champ de travail. Des recouvrements qui peuvent être
fermés protègent la bobine de fil et le système d'entraînement contre la
poussière de meulage produite.
VÉRIFICATION DE PROCÉDÉ SUIVANT EN 288 / 7
La poignée de transport isolée et un chariot à grandes roues ainsi que
les oreilles de levage par grue localisées de manière optimale facilitent
le transport à l'intérieur de l'usine et lors de l'utilisation au chantier.
Désormais il y aura dans le domaine de technique de soudure plusieurs
possibilités de reconnaissance d'instructions de soudage WPS. Suivant
la norme ÖNORM EN 288 / 1 une possibilité est la vérification de procédé
standard suivant EN 288 / 7. Une telle vérification de procédé standard
examine toutes les valeurs importantes d'influence et ainsi définit un
procédé de soudage standardisé.
Ce type de reconnaissance est attractif, parce qu'il offre la possibilité de
réduire les frais de reconnaissance de chaque fabricant individuel. Une
fois exécutée une WPS est reconnue, si toute les valeurs d'influence
restent dans la gamme admissible du procédé de soudage standard.
Ceci est garanti entre autres aussi par les paramètres programmés dans
la source de courant. Pour plus d'informations nous vous renvoyons à
la vérification de procédé standard.
Fig.1
Installation de soudage T.I.M.E. Synergic
6
ÉLÉMENTS DE COMMANDE ET CONNEXIONS
SOURCE DE COURANT T.I.M.E. SYNERGIC
Indication Manuel / No Program
- illuminée en permanence en service manuel MIG/MAG (avec télécommande TR 34 T.I.M.E.), si le sélecteur de programme est mis sur
une position programmée
- illuminée en permanence en service de soudage manuel à l'électrode
enrobée
- clignote, si le sélecteur de programme n'est pas mis sur une position
programmée
Indication arc de transition ... entre arc court et arc avec fusion en
pluie se produit un arc de transition avec projections. Afin de l'éviter
l'indication "arc de transition" est illuminée.
Indication T.I.M.E. est illuminée, quand un programme T.I.M.E. est
sélectionné - l'échelle graduéee de vitesse de fil 0-30 m/min est
applicable.
Indication Hold ... à chaque fin de soudage les valeurs effectifs
actuelles de courant et tension de soudage sont mémorisées l'indication Hold est illuminée.
Sélecteur de gamme m/min - mm - V ... pour sélectionner la fonction
désirée m/min.......vitesse d'avance de fil
mm...........épaisseur de tôle
V...............tension de marche à vide ou de soudage (volt)
Fig.2
Face source de courant T.I.M.E. Synergic
Indication m/min - mm - V
- Vitesse de fil (m/min) ... valeur théorique en programme MIG/MAG
et en service manuel
- Épaisseur de tôle (mm) en service de programme MIG/MAG
- Tension de soudage (V) ... valeur théorique n service de programme MIG/MAG
- Tension de soudage (V) ... valeur effective en programme MIG/
MAG, manuel et manuel à l'électrode enrobée
- Tension de soudage (V) ... valeur Hold en service de programme
MIG/MAG er service manuel
Note! Si une lettre (p. ex. H 12) est indiquée en plus de l'épaisseur de
tôle, ceci signifie que la valeur indiquée malgré l'augmentation de la
puissance de soudage n'est plus augmentée.
Dos source de courant T.I.M.E. Synergic
Interrupteur de réseau
Indication "prêt á être mis en service"... illuminée quand
l'interrupteur de réseau est mis sur "I"
Note! Définition des notions de valeur théorique, valeur effective et
valeur Hold:
- La valeur théorique est la valeur "désirée" qui peut être sélectionnée
préalablement suivant le procédé de soudage et qui est indiquée en
marche à vide.
- La valeur effective est la valeur "effective" indiquée pendant le
soudage.
- La valeur Hold est la valeur "mémorisée" qui est indiquée après la fin
du soudage.
Indication température trop élevée illuminée ...
- quand l'appareil est thermiquement surchargée
- la fiche de l'alimentation d'appareils de refroidissement n'est pas
branchée
- l'appareil de refroidissement est défectueux
- le débit d'eau est insuffisant (seulement avec l'option de contrôleur de débit)
Régulateur démarrage P ... 0 - 30 m/min (T.I.M.E.) ou 1 - 10 (Power)
réglage recommandé T.I.M.E.: 9 m/min
- Suivant l'indication T.I.M.E. l'échelle graduée pour vitesse de fil (0
- 30 m/min) ou pour puissance de soudage (1-10) est applicable
- Démarrage P influence la stabilité de l'arc dans la phase
d'amorçage (amorçage sûr de l'arc) ou la termination des cordons
de soudure.
- En mode de fonctionnement T.I.M.E. 4 temps on peut régler la
vitesse de fil moyennant démarrage P, la valeur réglée est absolue, à savoir la valeur est indépendante de la puissance de
soudage réglée.
Indication tension trop élevée ou trop basse illuminé ...
- quand la tension de réseau se trouve en dehors de la gamme de
tolérance (source de courant déconnecte)
- pendant 10 s. en cas d'interruptions de réseau ou pointes de
surtension (source de courant déconnecte et reconnecte immédiatement)
Sélecteur de programme (0-99) sert à sélectionner le programme
désiré de soudage par impulsion, standard ou T.I.M.E. suivant le gaz
de protection et le matériau d'apport.
7
FRANÇAIS
Fig.3
Indication courant de soudage
- Valeur théorique en service manuel MIG/MAG ou manuel à
l'électrode enrobée
- Valeur effective en programme MIG/MAG ou en service manuel
- Valeur Hold en service de programme MIG/MAG
Régulateur Slope T.I.M.E. 4 temps ... 0,2 - 7,0 s.
réglage recommandé: 1 s.
Régulateur P-End ... 0 - 30 m/min (T.I.M.E.) ou 1 - 10 (Power)
réglage recommandé T.I.M.E.: 5 ou 9 m/min
- Suivant l'indication T.I.M.E. l'échelle graduée de vitesse de fil (0
- 30 m/min) ou de puissance de soudage (1-10) est applicable.
- En mode de service T.I.M.E. 4 temps on peut régler la vitesse
finale du fil moyennant P-fin; la valeur réglée est absolue, à savoir
la valeur est indépendante de la puissance de soudage réglée.
Régulateur courant final T.I.M.E. 4 temps ... ne pas modifier la roue
de réglage; la roue de réglage doit être en position médiane
Touche d'introduction de fil... pour l'introduction du fil-électrode
dans le faisceau de câbles sans gaz et courant
Option égalisation Push/Pull ... pour égaliser le nombre de tours
avec utilisation d'une torche Push-Pull
- Douille de courant à fermeture baïonnette... sert de
- raccord du faisceau de câbles lors du soudage MIG/MAG
- raccord du câble de mise à la masse lors du soudage TIG
- raccord du câble d'électrode ou du câble de mise à la masse lors
du soudage manuel à l'électrode enrobée (suivant type d'électrode)
Tableau synoptique de programme ... informe des programmes
programmés de soudage à impulsion, standard et T.I.M.E.
- [S] ... seulement programme standard mémorisé
- [P] ... seulement programme de soudage par impulsion mémorisée
- Douille de courant à fermeture baïonnette... sert de
- raccord du faisceau de câbles lors du soudage MIG/MAG
- raccord de courant de la torche TIG
- raccord du câble d'électrode ou du câble de mise à la masse lors
du soudage manuel à l'électrode enrobée (suivant type d'électrode)
Note! Le programme avec la désignation "EN 288/7" fut soudé dans le
cadre d'une vérification de procédé et n'admet que les paramètres de
soudage utilisés dans la vérification.
MATÉRIAU
GAZ %
EN 440 G2
T.I.M.E.
EN 70 S-6
EN 288/7
T.I.M.E. II
T.I.M.E.
Fe1 (SG 2/3)
CO2 100
Fe2 (SG 2/3)
CrNi 19 9
0,8
1,0
1,2
2
3
1,6
- Douille à fermeture baïonnette ... faisceau de câbles de
connexion
7
Douille de raccord appareil de refroidissement FK71 ... pour
brancher la fiche de commande de l'appareil de refroidissement
S11
S13
S14
S15
S16
Ar 82 CO2 18
17
18
19
20
Ar 97,5 CO2 2,5
21
22
23
24
CrNi 18 8
Ar 97,5 CO2 2,5
25
26
27
28
AlSi 5
Ar 100
29
30
31
32
AlMg 5
Ar 100
33
34
35
36
37
38
Al 99,5
Douille de raccord ... faisceau de câbles de connexion
CODE PROGRAMMÉ
39
40
S43
S44
Rutil
Fil-
Ar 100
Ar 82 CO2 18
Basic
fourré/
Ar 82 CO2 18
47
48
Metal
Flux
Ar 82 CO2 18
51
52
CrNi
C. Wire
Ar 82 CO2 18
55
56
Note! Quand l'appareil de refroidissement n'est pas branché, l'indication
de température trop élevée de la source de courant est illuminée. Le
soudage n'est pas possible.
Option prise de préchauffage de gaz 230 V / 80 W... pour
l'alimentation électrique du préchauffeur de gaz avec utilisation de
CO2 comme gaz de protection
EPROM no.: C0027
Fig.4
Tableau synoptique de programme
Paramètres de fond ... enlevez le tableau synoptique de programme pour régler d'autres paramètes importants pour le procédé
de soudage.
Régulateur prédébit de gaz ... 0,1 - 3,0 s.
réglage recommandé: 0,1 s. (minimum)
Fig.5
Régulateur vitesse d'approche ... minimum jusqu'à 100% de la
vitesse de fil réglée
réglage recommandé: 50% (moyen)
Régulateur postdébit de gaz ... 0,5 - 4,0 s.
réglage recommandé: 2 s. (moyen)
Régulateur courant de démarrage T.I.M.E. 4 temps... ne pas
changer la roue de réglage; la roue de réglage doit être en position
moyenne
8
Détail "Paramètres internes 4-temps"
AVANCE DE FIL T.I.M.E. 30
Régulateur de puissance de soudage (Power)
- Échelle graduée 1-10 ... pour le réglage continu de puissance de
soudage (seulement quand l'indication T.I.M.E. n'est pas illuminée)
- Échelle graduée vitesse de fil 0-30m/min ... pour le réglage
continu de la vitesse de fil (seulement quand l'indication T.I.M.E.
est illuminée)
Remarque! En cas d'utilisation d'une vitesse de fil non soudable la
valeur la plus basse soudable reste réglée.
Régulateur correction de longueur d'arc ... pour la correction
continue de la longueur réglée d'arc dans la gamme de +/-20%
(indication de la valeur théorique de tension seulement en mode de
fonctionnement standard/programme)
Fig.6
Régulateur correction de la période de post-combustion
- Mode de fonctionnement standard/manuel ... réglage continu de
la période de post-combustion suivant l'échelle graduée dans la
gamme de 1-4 (0 - 0,4 s.)
- Mode de fonctionnement d'impulsion et standard ... avant le début
du soudage il faut régler le régulateur sur la valeur moyenne de
l'échelle graduée; les paramètres de la période de post-combustion sont intégrés dans le programme de soudage correspondant
- Régulat. à gauche ... formation de gouttes minimale au bout de fil
- Régulat. à droite... formation de gouttes plus élevée au bout de fil
Face avance de filT.I.M.E. 30
Touche d'introduction de fil ... pour l'introduction du fil-électrode
sans gaz et courant dans le faisceau de câbles
Interrupteur torche On-OFF ... pour désactiver la gâchette du
pistolet (p. ex. lors du transport par grue)
- Position gauche de l'interrupt. ... gâchette du pistolet désactivée
- Position droite de l'interrupteur ... gâchette du pistolet activée
Dos avance de fil T.I.M.E. 30
Douille de connexion option entraînement intermédiaire
Sélécteur de mode de fonctionnement ... pour sélectionner le
mode de fonctionnement
- mode de fonctionnement à 2 temps
- mode de fonctionnement à 4 temps
- mode de fonctionnement T.I.M.E. à 4 temps
Douille de connexion télécommande ... pour raccorder la télécommande désirée
Douille de connexion gaz de protection
Mode de fonctionnement à 2 temps
- Appuyer sur la gâchette du pistolet et la maintenir appuyée: début
de soudage
- Lâcher la gâchette du pistolet: fin de soudage
Douille de connexion commande de la torche... pour raccorder la
fiche de commande de la torche de soudage
Mode de fonctionnement à 4 temps
- Appuyer sur la gâchette du pistolet et la lâcher: début de soudage
- Appuyer de nouveau sur la gâchette du pistolet et la lâcher: fin de
soudage
- Douille à fermeture à baïonnette ... faisceau de câbles de
connexion
Mode de fonctionnement T.I.M.E. à 4 temps ... pour appeler les
paramètres de démarrage, soudage et courant final moyennant la
gâchette du pistolet
- Appuyer sur la gâchette du pistolet et la maintenir appuyée: début
de soudage à courant de démarrage (démarrage P)
- Lâcher la gâchette du pistolet: Le courant de démarrage est réduit
jusqu'au courant de soudage réglé sur le régusuivant Slope
lateur de puissance de soudage
- Appuyer de nouveau sur la gâchette du pistolet et la maintenir
appuyée: le courant de soudage est réduit suivant Slope
jusqu'au courant final réglé (fin P)
- Lâcher la gâchette du pistolet: fin de soudage
Douille de connexion gaz de protection ... faisceau de câbles de
connexion
Raccord central de la torche ... pour raccorder la torche de soudage
Connexion à fiches retour d'eau ... faisceau de câbles de connex.
Connexion à fiches aller d'eau ... faisceau de câbles de connexion
Connexion à fiches fiche de commande ... faisceau de câbles de
connexion
Introduction de fil
Coupe-circuit moteur d'avance de fil (4A à action retardée)
Note! Le moteur de l'avance de fil est refroidi par l'eau. Afin de refroidir
le moteur, l'avance de fil doit toujours être connectée avec l'eau de
refroidissement de la torche.
9
FRANÇAIS
Fig.7
APPAREIL DE REFROIDISSEMENT FK 71
TÉLÉCOMMANDE TR 34 T.I.M.E.
Fig.8
Fig.10
Appareil de refroidissement FK 71
Télécommande TR 34 T.I.M.E.
Pour le soudage standard/programme, impulsion/programme et standard/manuel on a besoin de la télécommande TR 34 T.I.M.E..
Note! Les éléments de commande sur la télécommande ont toujours la
priorité; ils déterminent la fonction de l'installation.
Régulateur puissance de soudage (Power)
Régulateur correction de longueur d'arc
- échelle graduée rouge ... pour la correction continue de la longueur d'arc réglée dans la gamme de +/- 20% en mode de
fonctionnement à impulsion et standard/programme
- échelle graduée noire ... pour la correction continue de la tension
de soudage dans la gamme de 0 - 50 V en mode de fonctionnement standard/manuel (indication No Program illuminée)
Fig.9
Dos de l'appareil de refroidissement FK 71
Interrupteur mode de fonctionnement ... pour la présélection du
mode de fonctionnement lors du soudage MIG/MAG
Fiche d'alimentation de l'appareil de refroidissement
Régulateur détachement de gouttes ou correction de dynamique
- échelle graduée rouge... correction continue de l'énergie de détachement de gouttes
à gauche ... force de détachement de gouttes plus réduite
neutre ... force de détachement de gouttes neutre
à droite... force de détachement de gouttes augmentée
- échelle graduée noire ... influence sur la dynamique de courtcircuit au moment de transfert de gouttes
à gauche... arc plus dur et plus stable
neutre ... arc neutre
à droite ... arc souple avec peu de projections
Dispositif d'écoulement d'eau
Connexion à fiches d'aller d'eau (bleu)
Connexion à fiches de retour d'eau (rouge)
Douille de connexion câble de télécommande
10
MISE EN SERVICE DE LA SOURCE
DE COURANT
TÉLÉCOMMANDE TP 4 SP
Attention! Avant la première mise en service il faut lire le
chapitre "Instructions de sécurité".
UTILISATION SELON LES PRESCRIPTIONS
L’appareil de soudage est destiné uniquement au soudage MIG/MAG,
soudage d'électrodes et soudage TIG.
Toute utilisation différente ou plus générale n’est pas conforme. Le
fabricant décline toute responsabilité en cas de dommages résultant
d’une telle utilisation non conforme.
L’utilisation conforme comprend également
- l’observation de toutes les remarques des instructions de service
- l’exécution des travaux d’inspection et d’entretien
Attention! Il ne faut jamais utiliser l’appareil de soudage pour
dégeler des tuyaux.
50
60
70
3-150
1
2
3
80
20
3
B
CEL
4
10
90
0
L’appareil de soudage est vérifié suivant le type de protection IP21 ce qui
signifie:
- protection contre la pénétration de corps étrangers solides d’un
diamètre de plus de 12 mm
- protection contre des gouttes d’eau qui tombent verticalement
4
5
5
100
T
Hot Start
Fig.11
INSTRUCTIONS D’INSTALLATION
0
1
2
100-450
Télécommande TP 4 SP
Suivant type de protection IP21 l’appareil de soudage peut être installé
et opéré en plein air. Les éléments électriques installés doivent toutefois
être protégés contre l’effet immédiat de l’humidité.
Note! Dû à la caractéristique on ne peut pas souder des électrodes CEL
avec la T.I.M.E. Synergic.
Régulateur courant de soudage ... réglage continu du courant de
soudage dans les gammes de 3 - 150 A et 100 - 450 A
Attention! Installer l’appareil de soudage de manière stable sur
une base plane et solide. Une installation de soudage renversée
peut signifier un danger mortel.
Régulateur Hot-Start ... 0 - 100% du courant de soudage réglé;
seulement actif dans la phase d'amorçage de l'électrode
La canalisation d’air est un dispositif de sécurité essentiel. Lors du choix
du lieu d’installation il faut veiller à ce que l’air de refroidissement passe
librement à travers les fentes d’aération sur la face et sur le dos. La
poussière métallique produite (p. ex. lors du travail d’émerisage ne doit
pas être aspirée directement dans l’installation.
Note! Le courant maximal total Hot-Start est automatiquement limité par
le courant de court-circuit.
Sélecteur de gamme... divise la gamme totale de soudage de
l'installation en deux gammes individuelles chevauchantes
BRANCHER LA FICHE DE RÉSEAU
Commutateur de polarité... sans fonction
Attention! Les fiches de réseau doivent correspondre à la tension de réseau et à la consommation de courant de l'appareil de
soudage (voir les caractéristiques techniques)
Régulateur de dynamique ... influence sur la dynamique de courtcircuit au moment de transfert de gouttes
Attention! La protection par coupe-circuits de l'alimentation du
réseau est indiquée dans les caractéristiques techniques.
Douille de connexion câble de télécommande
BRANCHEMENT SUR SECTEUR
L’appareil de soudage est désigné pour la tension de réseau spécifiée
sur la plaque indicatrice. La protection par coupe-circuits de l’alimentation
par le réseau est indiquée dans les caractéristiques techniques.
Attention! À l'usine la source de courant est réglée sur 400 V! En
raison de la gamme de tolérance de +/- 10% la source de courant
peut aussi être opérée par le réseau de 3x380V~. En cas de
défauts de surtension ou sous-tension la gamme de tension doit
être adaptée en branchant la connexion à fiches sur un autre
raccord.
Avec une tension de réseau de 3x230V~, 3x440V~ ou 3x500V~ il faut
utiliser un transfo FRONIUS intercalé en amont. Ce transfo peut être
installé à tout moment et peut être monté entre le chariot et la source de
courant. Sur demande spéc. la source de cour. peut être désignée aussi
pour 3x440V~ ou 3x500V~.
11
FRANÇAIS
40
30
380V
-10%
+10%
400V
360V
400V
440V
-10%
+10%
415V
373V
415V
Fig.12
418V
380V
342V
-10%
456V
+10%
Gammes de tolérance des tensions de réseau 3x380V / 400V / 415V~
L'appareil de soudage peut être opéré en série par une tension de réseau
de 3x380 V~, 3x400 V~ ou 3x415 V~ pourvu que le transfo de commande
soit réglé sur la valeur correcte qui correspond à la tension de service
active.
Connexion à fiches X7 pour
commutation de réseau 400V~
Fig.14
Montage de la source de courant
Fig.15
Montage de la source de courant
Connexion à fiches X6 pour
commutation de réseau 415V~
Connexion à fiches X8 pour
commutation de réseau 380V~
Fig.13
Commutation de réseau 3x380V / 400V / 415V~ sur la plaquette à circuits
imprimés du transfo de commande VM 34.
Attention! Si l’appareil est réglé sur une tensions spéciale, les
caractéristiques techniques sont comme indiquées sur la plaque
indicatrice . La fiche de réseau, et l’alimentation par réseau ainsi
que sa protection par coupe-circuits doivent être désignées de
manière correspondante.
ASSEMBLAGE DE LA SOURCE DE COURANT
- Monter les étriers de montage et d'en haut sur le cadre du chariot
de telle manière que les trous et des deux étriers de montage
se trouvent en haut à gauche
- Insérer les tôles de fixation
(complètes avec écrous à cage
montés) de derrière comme on peut voir dans la figure suivante et les
fixer d'abord légèrement serré par les vis d'acier M8 x 20 avec
rondelles et joncs.
- Monter la source de courant sur les étriers de montage et et
les fixer d'en bas par 4 vis d'acier M8 x 16, complètes avec rondelles
et joncs.
- Serrer par vis les deux étriers de montage sur le cadre du chariot.
- Insérer l'appareil de refroidissement d'avant à travers les barres de
montage et et le positionner (insérer en dessous la barre de
guidage inférieure).
- Comme on peut voir dans la figure suivante la fixation est assurée
seulement au point (vis d'acier M8 x 16 d'en bas, avec rondelle et
jonc).
CONNECTER LE FAISCEAU DE CÂBLES DE
CONNEXION AVEC LA SOURCE DE COURANT /
L'APPAREIL DE REFROIDISSEMENT
- Interrupteur de réseau en position "O"
- Fixer la décharge de traction du faisceau de câbles de connexion par
la vis existante
- Brancher la fiche à baïonnette potentiel de soudage sur la douille
et la tourner pour la verrouiller
- Brancher la fiche de commande à 37 broches sur la douille de
connexion du raccord de commande et fixer la collerette de fixation
- Brancher le tuyau flexible d'aller et de retour d'eau du faisceau de
câbles de connexion sur les couleurs correctes des connexions à
fiches et .
- Raccorder la fiche d'alimentation de l'appareil de refroidissement
dans la douille de connexion de la source de courant.
Note! Quand l'appareil de refroidissement n'est pas branché, l'indication
de température trop élevée de la source de courant est illuminée. Le
soudage n'est pas possible.
12
RACCORDER LE FAISCEAU DE CÂBLES DE
CONNEXION À L'AVANCE DE FIL
Note! Utiliser seulement de l'eau de conduite propre. D'autres produits
antigel ne peuvent pas être recommandés en raison de leur conductivité.
- Interrupteur de réseau en position "O"
- Monter l'avance de fil (avec cosse isolante encastrée) sur le boulon
de fixation de la source de courant
- Desserrer l'agrafe de serrage de la décharge de traction et faire
passer du bon côté le faisceau de câbles de connexion jusqu'au tuyau
métallique de serrage de la gaine protectrice.
Température extérieure
Note! Ne pas croiser ou plier les lignes
+ °C à -5°C
4l:1l
-5°C à -10°C
3,75 l : 1,25 l
-10°C à -15°C
3,5 l : 1,5 l
-15°C à -20°C
3,25 l : 1,75 l
Attention! Étant donné que Fronius n'a pas d'influence sur la
qualité, pureté et le niveau du liquide de refroidissement, aucune
garantie ne peut être assumée en ce qui concerne la pompe à
réfrigérant.
- Raccorder la douille à baïonnette potentiel de soudage du faisceau
de câbles de connexion à la douille et la tourner pour verrouiller
- Brancher la douille de commande à 37 broches sur la douille de
connexion de raccord de commande et la fixer par la collerette de
fixation
- Brancher le tuyau flexible de gaz du faisceau de câbles de connexion
sur la douille de connexion de gaz de protection et le serrer par la
collerette de fixation
Rapport de mélange eau : esprit de vin
Attention! Il faut contrôler régulièrement le débit d'eau - le retour
sans perturbations doit être visible.
En cas de conditions plus sévères (grandes longueurs de faisceau de
câbles, grandes différences de niveau, etc.) vous devriez utiliser l'appareil
de refroidissement FK 71 R d' une puissance frigorifique de 2,6 kW et
une pression de refoulement de 4,4 bar.
Note! Vérifier d'abord que les joints toriques d'étanchéité sont bien mis
- Brancher les tuyaux flexibles d'aller et de retour d'eau du faisceau de
câbles de connexion sur les couleurs correctes des connexions à
fiches et et les serrer par la collerette de fixation
- Serrer par vis l'agrafe de serrage de la décharge de traction.
MONTAGE DE LA BOBINE DE FIL
Attention! Le porte-bobine sert de support et fixation de bobines
standardisées de fil de soudage jusqu'à 20 kg au maximum.
MONTER ET RACCORDER LA BOUTEILLE À GAZ
- Mettre la bouteille à gaz sur la base du chariot de la source de courant
- Fixer la bouteille à gaz moyennant la chaîne de sécurité
-
Interrupteur de réseau en position "O"
Ouvrir la couverture de la bobine de fil
Monter la bobine de fil du bon côté sur le porte-bobine
Faire encliqueter le boulon d’arrêt dans l’ouverture prévue sur le
corps de la bobine.
- Régler l’effet de freinage moyennant vis de tension
- Refermer la couverture de la bobine de fil
Note! La fixation optimale n’est assurée que sur la partie supérieure de
la bouteille à gaz (non sur le col de la bouteille)
- Enlever le capot protecteur de la bouteille à gaz
- Tourner la vanne de la bouteille à gaz brièvement à gauche pour
enlever les boues autour de la place de travail
- Vérifier le joint du détendeur de gaz
- Visser le détendeur de gaz sur la bouteille à gaz moyennant et le
serrer
- Connecter le raccord de gaz de protection au détendeur de gaz
moyennant le tuyau flexible de gaz
Note! Régler le frein de telle manière que la bobine de fil ne continue pas
à tourner après la fin du soudage - il faut toutefois éviter tout serrage
excessif de la vis de tension pour ne pas surcharger le moteur.
INTRODUCTION DU FIL-ÉLECTRODE
Interrupteur de réseau en position "O"
Ouvrir la couverture de la bobine de fil
Faire pivoter vers avant les dispositifs tendeurs et
Plier vers le haut les leviers d'appui et
Pousser le fil-électrode à travers le tube d’entrée de l'entraînement
à 4 galets environ 5 cm dans le tuyau d'entrée de la torche de soudage
- Rabattre les leviers d'appui et
- Faire pivoter les dispositifs tendeurs
et
dans une position
verticale
- Régler la pression d'appui moyennant les écrous tendeurs et .
- Interrupteur de réseau en position "O"
- Raccorder la torche de soudage correctement équipée avec le tube
d’entrée d’abord au raccord central de torche
- Serrer à main la collerette de fixation
- Brancher la fiche de commande de la torche sur le raccord de
commande de la torche et la verrouiller
- Brancher le tuyau flexible de gaz de la torche sur la pièce de raccord
de gaz et le verrouiller
MISE EN SERVICE DE L'APPAREIL DE
REFROIDISSEMENT
Note! Régler la pression d’appui de telle manière que le fil-électrode ne
soit pas déformé, mais le transport de fil soit assuré sans problèmes.
Note! Avant chaque mise en service de l'appareil de refroidissement il
faut contrôler le niveau du liquide de refroidissement ainsi que la pureté
du liquide de refroidissement. À l'usine l'appareil de refroidissement est
rempli d'environ 2l de liquide de refroidissem. (rapport de mélange 1:1).
--
- Interrupteur de réseau en position "O"
- Enlever le bouchon fileté
- Remplir le liquide de refroidissement (rapport de mélange voir la table
suivante)
- Monter de nouveau le bouchon fileté
13
Étendre le faisceau de câbles de la torche en ligne droite
Enlever la buse de gaz de la torche
Dévisser le tube-contact
Enficher la fiche de réseau
Mettre l’interrupteur de réseau dans la position "I"
Témoin lumineux de réseau illuminé
Régler le sélecteur de programme sur la position désirée (indication "No Program" ne doit pas être illuminée)
FRANÇAIS
-
MONTER LA TORCHE DE SOUDAGE
SOUDAGE MIG/MAG
- Régler le sélecteur de gamme pour indications numériques sur la
position m/min
- Régler sur le régulateur de la puissance de soudage une valeur de
~ 5 m/min
-
Attention! Pendant l’introduction de fil il faut que la torche ne soit
pas dirigée vers le corps.
-
- Appuyer sur la touche d'introduction de fil
jusqu'à ce que le filélectrode dépasse de la torche
- Terminer l'introduction en lâchant la touche d'introduction de fil .
Attention! Installations refroidies par l'eau: Le débit d'eau doit
être contrôlé régulièrement pendant l'opération - le retour sans
perturbations doit être visible.
Note!Après avoir lâché la gâchette du pistolet la bobine de fil ne devrait
plus tourner. Si nécessaire, il faut rajuster le frein.
-
Attention! Avant la première mise en service il faut lire le
chapitre “Instructions de sécurité“ et “Mise en service de la
source de courant“.
Brancher le câble de mise à la masse sur la douille de courant et le
verrouiller
L'autre bout du câble de mise à la masse doit être connecté avec la
pièce à usiner
Brancher la fiche de réseau
Connecter la fiche de réseau
Témoin de réseau illuminé
Visser le tube-contact
Monter la buse de gaz
Fermer la couverture de la bobine de fil
Mettre l'interrupteur de réseau
en position "O"
- Présélectionner le programme de soudage par le sélecteur de programme
(indication "No Program" ne doit pas être illuminée ou
clignoter)
Note! Toutes les programmes ont été soudées par une torche standard
(sauf programmes T.I.M.E.). Lors du soudage de programmes standard
par une torche T.I.M.E. ceci risque de modifier les caractéristiques de
soudage.
sur la position
- Mettre le sélecteur de mode de fonctionnement
désirée
- Brancher la télécommande sur la douille de raccord de télécommande (pour le soudage par impulsion il faut raccorder la télécommande TR 34 T.I.M.E. Régler le sélecteur de mode de fonctionnement sur
la télécommande TR 34 T.I.M.E. sur soudage par impulsion)
- Mettre le régulateur de correction de longueur de l'arc sur "0"
- Mettre le régulateur de correction de détachement de gouttes sur
"0"
- Régler l'intensité de courant désirée moyennant le régulateur de
puissance de soudage (indication de valeur théorique sur l'indication d'intensité de courant)
- Ouvrir la vanne de la bouteille à gaz
- Régler la quantité de gaz
- Appuyer sur la gâchette du pistolet et commencer le soudage
Fig.16
Entraînement à 4 galets
Note! Quelquefois il faut corriger le prédébit
et/ou la vitesse d'approche .
ou le postdébit de gaz
CHANGER LES GALETS D'AVANCE DE FIL
INSTRUCTIONS DE RÉGLAGE DU PROCÉDÉ T.I.M.E.
Afin d’assurer une avance optimale du fil-électrode les galets d’avance
de fil doivent être adaptés au diamètre et à l’alliage du fil à souder.
-
Par la commande à un seul bouton de la T.I.M.E. Synergic il faut régler
seulement la vitesse de fil correspondante; la tension de soudage se
règle automatiquement. Seulement la longueur d'arc doit être corrigée
de manière correspondante.
Interrupteur de réseau
en position "O"
Ouvrir la couverture de la bobine de fil
Faire pivoter les dispositifs tendeurs et vers l'avant
Plier les leviers d'appui et vers le haut
Retirer les essieux embrochables Enlever les galets d'avance Monter les nouveaux galets d'avance
Calcul de la puissance de fusion
Cette formule ne vaut que pour un diamètre de fil de 1,2 mm et des fils
d'acier non ou faiblement alliés. Des pertes par projection n'ont pas été
prises en considération. (typiquement 1 - 2%).
Note! Monter les galets d’avance de telle manière que la désignation du
diamètre de fil soit lisible.
Puissance de fusion[kg/h] =
- Insérer de nouveaux les essieux embrochables
- l’arrêt de
fixation de l’essieu embrochable doit encliqueter
- Rabattre les leviers d'appui et
- Faire pivoter les dispositifs tendeurs et dans la position verticale
- Régler la pression d'appui moyennant les écrous tendeurs
et
- Fermer la couverture de la bobine de fil.
Vitesse de fil[m/min] x 60 x 8,9
1000
p.ex. vitesse de fil = 20m/min
Puissance de fusion[kg/h] =
14
20 m/min x 60 x 8,9
1000
= 10,68 kg/h
SOUDAGE TIG
VARIANTE I
Calcul de la vitesse de soudage
Cette formule ne vaut que pour un diamètre de fil de 1,2 mm et des fils
d'acier non ou faiblement alliés. Des pertes par projection ainsi que
déviations de géométrie telles que fente à la racine et surhaussements
de soudure (typiquement 10-20% vitesse basse) n'ont pas été prises en
considération.
Vitesse de soudage[cm/min] =
On a besoin de la télécommande TP 4-SP et du set TIG (torche de
soudage à la main AL 22-S / AL 16-S avec tuyau flexible à gaz, détendeur
de gaz et boîte de pièces de rechange).
Note! Dans cette variante du soudage TIG le contact avec la pièce à
usiner provoque un courant de court-circuit dont l'intensité dépend du
courant de soudage réglé. Les amorçage à partir de 10 A causent
toujours un endommagement de la surface de la pièce à usiner et de la
pointe de l'électrode en tungstène et réduisent la qualité du cordon de
soudage par des inclusions de tungstène.
Vitesse de fil[m/min] x 1,13 x 100
Surface de la section transversale de la
soudure[mm2]
p.ex.soudure d'angle a 6 (la soudure d'angle a 6 a une surface de section
transversale de 36 mm2) et vitesse de fil de 20m/min
Vitesse de soudage[cm/min] =
20 m/min x 1,13 x 100
36 mm 2
= 62,8 cm/min
- L'amorçage de l'arc se fait par le contact de l'électrode en tungstène
avec la pièce à usiner.
- Afin d'interrompre le soudage il suffit d'interrompre le contact de la
torche avec la pièce à usiner jusqu'à ce que l'arc s'éteigne. Remplissage de cratère final par réduction de courant et protection du cratère
final par gaz ne sont pas pourvus.
Étant donné qu'en cas de soudage en plusieurs passes il est difficile de
déterminer les sections transversales des passes de soudure, il résulte
très laborieux de calculer la vitesse de soudage. Un planimètre ou du
papier millimétré est très utile. Les valeurs de réglage de type de cordon,
position de soudage et épaisseur de soudure sont les suivantes:
VALEURS DE RÉGLAGE DE TYPE DE COURANT,
TYPE DE CORDON, POSITION DE SOUDAGE ET
ÉPAISSEUR DE CORDON
Soudure d'angle
Position en gouttière
- soudage de la passe de fond
fentes irrégulières et largeurs de
fente de plus de 2mm: 2,5 4,5m/min
fentes régulières de 2mm: 9m/min
- passes de remplissage
gamme inférieure: 12-15m/min
gamme supérieure: 15-23m/min
- passes de couverture: 15-18m/min
Position horizontale
- a3: 12 - 14m/min
- a4: 12 - 16m/min
- a5: 15 - 18m/min
- a6: 18 - 23m/min
- a7: 20 - 23m/min
- à partir de a8 seulement en
plusieurs passes 20 - 23m/min
- cordon de balayage de 10-12m/min
Position transversale
- soudage de la passe de fond
fentes irrégulières et largeurs de
fente de plus de 2mm: 2,5 4,5m/min
fentes régulières de 2mm: 9m/min
- passes de remplissage: 12 - 18m/
min
- passes de couverture: 9 - 12m/min
Soudage au plafond
- 9 - 11m/min pour toutes les
épaisseurs de cordon et cordons
en une ou plusieurs passes
Soudage au plafond
- soudage de la passe de fond: 3 4m/min
- passes de remplissage: 9-11m/min
- passes de couverture: 9 - 11m/min
Cordon montant
- 4 - 6m/min; épaisseur minimale
de cordon a6
Cordon montant: 3 - 6m/min
Cordon descendant : 9 - 11m/min
Fig.17
Set TIG
VARIANTE II
On a besoin de la télécommande TP 4-SP, la télécommande à pédale TR
52-1, un distributeur de signaux ainsi que du set TIG (torche de soudage
à la main AL 22-S / 16-S avec tuyau flexible à gaz, détendeur de gaz et
boîte de pièces de rechange).
Cordon descendant
- 9 - 11m/min; maximum a3,5
soudage en une passe,
- cordons plus épais en plusieurs
passes
L'utilisation de cette combinaison offre les avantages suivants:
- Réduction du courant de soudage au moment du contact avec la
pièce à usiner par la télécommande à pédale.
- Remplissage du cratère final par réduction de courant moyennant la
télécommande à pédale (décharge lente de la pédale provoque une
réduction du courant de soudage à environ 10 A) est possible - ce qui
garantit une protection optimale par gaz
- Limitation de courant de soudage sur la télécommande TP 4-SP d'un côté toute la course de la pédale est disponible pour la gamme
sélectionnée, de l'autre côté une mince électrode en tungstène par
exemple ne peut pas être surchargée ou fondre quand la pédale est
appuyée à fond.
Position en gouttière
- a3: 12 - 14m/min.
- a4: 12 - 14m/min.
- a5: 17 - 23m/min.
- a6: 17 - 23m/min.
- ab a7: 22 - 30m/min.
Fig.18
15
Distributeur de signaux
FRANÇAIS
Soudures bout à bout
- Dresser la torche de soudage davantage et la mettre en position
normale - l'arc s'amorce (voir fig. c)
- Exécuter le soudage
a) Mettre la buse de gaz
sur la pièce à usiner
Fig.20
Fig.19
-
Débrancher la fiche de réseau
en position "0"
Mettre l'interrupteur de réseau
Démonter la torche MIG/MAG
Brancher la fiche de courant de la torche TIG sur la douille de courant
et la tourner à droite pour la verrouiller
Brancher la fiche de courant du câble de mise à la masse sur la douille
de courant et la tourner à droite pour la verrouiller
Équiper la torche de soudage (voir instructions de service de la torche
de soudage)
Établir la connexion de la masse avec la pièce à usiner
Monter le détendeur de pression sur la bouteille à gaz
Connecter le tuyau flexible à gaz avec le détendeur de pression
Ouvrir la vanne de la bouteille à gaz
Variante I: Raccorder la télécommande TP 4-SP sur la douille de
l'avance de fil T.I.M.E. 30
Variante II: Combinaison de télécommande TP 4-SP, distributeur de
signaux et TR 52-1 sur la douille de l'avance de fil T.I.M.E. 30
-
Inclinaison de la torche
-
Débrancher la fiche de réseau
Mettre l'interrupteur de réseau en position "O"
Démonter la torche de soudage MIG/MAG
Brancher le câble de soudage suivant le type d'électrode sur la douille
de courant et tourner à droite pour le verrouiller
- Raccorder la télécommande TP 4-SP sur la douille de l'appareil
d'avance T.I.M.E. 30
- Brancher la fiche de réseau
Attention! Quand l'interrupteur de réseau se trouve en position "I", l'électrode en barre est sous tension. Veillez à ce que
l'électrode en baguette en ce moment ne soit pas en contact avec
des éléments conducteurs ou mis à la terre tels qu'outils, boîtiers,
etc.
-
Mettre l'interrupteur de réseau en position "I"
Indication "prêt à être mis en service" illuminée
Sélectionner la gamme par le sélecteur de gamme de la TP 4-SP
Sélectionner le courant de soudage par le régulateur de courant de
soudage de la TP 4-SP
- Sélectionner la dynamique par le régulateur de dynamique
de la
télécommande TP 4-SP
de la télé- Sélectionner Hot-Start par le régulateur de Hot-Start
commande TP 4-SP
- Exécuter le soudage
Attention! Quand l'interrupteur de réseau se trouve dans la
position "I", l'électrode en tungstène est sous tension. Veillez à
ce que l'électrode en tungstène en ce moment ne soit pas en
contact avec des éléments conducteurs ou mis à la terre tels
qu'outils, boîtiers, etc.
-
c) Arc amorcé
SOUDAGE MANUEL À
L'ÉLECTRODE ENROBÉE
Télécommande à pédaleTR 52-1
MISE EN SERVICE
-
b) Amorçage par contact
avec la pièce à usiner
Brancher la fiche de réseau
Mettre l'interrupteur de réseau
en position "I"
Indication "prêt à être mis en service"
illuminée
Ouvrir la vanne d'arrêt de gaz sur la torche de soudage, appuyer sur
la gâchette et régler la quantité de gaz désirée sur le détendeur de
pression
Mettre le régulateur de dynamique sur la télécommande TP 4-SP
sur la valeur "0" de l'échelle graduée
Mettre le régulateur de Hot-Start sur la télécommande TP 4-SP sur
la valeur "0" de l'échelle graduée
Sélectionner la gamme de soudage par le sélecteur de gamme de
la TP 4-SP
Régler le courant de soudage par le régulateur de courant de soudage de la télécomm.TP 4-SP ou le limiter comme décrit pour la
variante II
Mettre la buse de gaz sur le point d'amorçage, de manière qu'entre
la pointe en tungstène et la pièce à usiner reste une dist. de 2-3 mm
(voir fig. a)
Dresser la torche de soudage lentement jusqu'à ce que la pointe en
tungstène touche la pièce à usiner (voir fig. b)
SOUDAGE ROBOT
En combinaison avec les composants d'interface robot TSST 153,
faisceau de câbles intermédiaire, appareil de refroidissement FK71 et
avance robot VR 153 la source de courant T.I.M.E. Synergic est appropriée pour le soudage robot.
Appareil d'avance de fil VR 153
- Le moteur d'avance de fil spécial à réglage de vitesse garantit une
vitesse d'avance de fil exacte.
- Option torche push-pull
- Bouton d'introduction de fil et de contrôle de gaz directement sur
l'appareil d'avance de fil
16
DESCRIPTION DES PARAMÈTRES
Interface robot TS ST 153
- Vis de réglage de la quantité de seuil de gaz pour la reconnaissance
de manque de gaz.
- Potentiomètre de réglage de la correction de la période de postcombustion
- Potentiomètre de réglage de la correction de détachement de gouttes
- Indication de l'état des "signaux d'entrée et de sortie" ainsi que des
alimentation en courant et valeurs théoriques par diodes électroluminescentes.
00 ... Indication de la version du logiciel SMS
01 ... Indication de la version de la plaquette à circuits imprimés SMS
02 ... Indication de la version de la plaquette à circuits imprimés NMI
03 ... Indication de la position du commutateur DIP, TPS 330 / 450
04 ... Indication de la position du commutateur DIP, TPS / TS
05 ... Indication de la position du commutateur DIP, DYN - KORR.
06 ... Indication de la position du commutateur DIP, VR 22m / 30m
07 Indication de la position du commutateur DIP, commande automatique de l'appareil de refroidissement
08 ... Essai de la tension pilote d'entrée
09 ... Essai VR - Auto
12 ... Mesure de résistance / inductance du circuit de soudage
16 ... Aide à l'ajustage VR - MIN.
17 ... Aide à l'ajustage VR - MAX.
18 ... VR - contrôle de linéarité à 15m/min et 11 m/min
19 ... VR - essai de glissement
20 ... VR - indication du courant du moteur
21 ... Essai Hallshunt
22 ... Essai de la mesure de tension
24 ... RTC - réglage de l'année
25 ... RTC - réglage du moi
26 ... RTC - réglage de la date
27 ... RTC - réglage du jour
28 ... RTC - réglage de l'heure
29 ... RTC - réglage des minutes
30 ... RTC - réglage des secondes
32 ... Sélection de la langue de pays (D/E)
33 ... Sélection de l'option d'imprimante
34 ... Réglage des intervalles des éléments pour l'impression
35 ... Réglage du temps d'intervalle: minutes
36 ... Réglage du temps d'intervalle: secondes
40 Réglage pour la déconnexion en cause du dépassement des valeur
limites (on/off)
41 ... Réglage du contrôle d'amorçage
42 ... Réglage der de la longueur de fil du timeout d'amorçage
43 ... Réglage du temps d'interruption de surveillance d'amorçage
44 ... Réglage du temps de rupture de l'arc
45 ... Réglage des fonctions de tête double de la TR 23P
Faisceau de câbles de connexion
- disponible dans les longueurs de 4met . m
Appareil de refroidissementFK71
- Le soudage est possible seulement avec appareil de refroidissement
FK71 branché
Des indications plus détaillées se trouvent dans les instructions de
service correspondantes.
Source de courant T.I.M.E. Synergic
Appareil de refroidissement FK 71 avec contrôleur d'eau
Interface robot
Commande robot
Robot
VR 153 T.I.M.E. avec contrôleur d'eau réglable
Torche-machine T.I.M.E.
Faisceau de câbles de connexion VR153, 4/8m
Câble de connexion source de courant / Robot, 8m
Télécommande programmable TR 23P
SOINS ET ENTRETIEN
Représentation de la version standard avec service robot
LE MENU SETUP
Attention! Avant d'ouvrir l'appareil de soudage il faut déconnecter l'appareil, retirer la fiche de réseau et attacher un panneau
d'avertissement pour éviter la reconnexion - si nécessaire, il faut
décharger les condensateurs électrolytiques.
Note! Le menu setup peut être activé seulement dans des sources de
courant avec l'impression "PRO".
Pour tenir l'appareil de soudage en bon état prêt à être mis en service il
faut observer les points suivants:
- Inspection technique des aspects de sécurité suivant les intervalles
prescrits (voir chapitre "Instructions de sécurité")
- Au moins deux fois par an (ou plus souvent suivant le lieu d'installation)
il faut enlever les parties latérales de l'appareil et purger l'appareil de
soudage par de l'air comprimé à pression réduite sec. Il ne faut pas
souffler de courte distance sur les éléments électroniques.
- En cas d'une forte production de poussière il faut nettoyer les
conduits d'air de refroidissement
ENTRER DANS LE MENU SETUP
- Découpler le fil de soudage
- Séparer le câble de courant de soudage des douilles de courant
- Mettre l'interrupteur de réseau dans la position "I" et commuter le
sélecteur de gamme des indications numériques
plusieurs fois
pendant les premières trois secondes
- Appeler le programme d'essai moyennant sélection du numéro de
programme.
Avec torches de soudage refroidies par l'eau:
- Vérifier l'étanchéité des connexions de la torche
- Contrôler le débit d'eau et la qualité de l'eau (remplir seulement du
liquide de refroidissement propre)
- Surveiller la quantité de retour d'eau dans le récipient de réfrigérant
QUITTER LE MENU SETUP
- Mettre l'interrupteur de réseau de la source de courant dans la
position "O" (les paramètres réglés sont mémorisés)
17
FRANÇAIS
Fig.21
DIAGNOSTIC DE DÉFAUTS ET RÉPARATION
Attention! L'appareil ne doit être ouvert que par du personnel expert formé. Avant d'ouvrir l'appareil de soudage il faut déconnecter l'appareil,
retirer la fiche de réseau et attacher un panneau d'avertissement pour éviter toute reconnexion - si nécessaire, il faut décharger les
condensateurs électrolytiques. S'il faut remplacer des coupe-circuits il faut les remplacer par coupe-circuits de même valeur. En cas
d'utilisation de coupe-circuits trop forts nous n'assumons aucune garantie en cas d'éventuels dommages consécutifs.
MESSAGES DE DÉFAUT SUR LES INDICATIONS
La source de courant est équipée d'un système d'auto- diagnostic! Les défauts qui se produisent sont reconnus et indiqués sur les indications sous
forme d'un code d'erreur (E00 - E99).
Message de défaut
Description
E01
Défaut interne dans la commande de la T.I.M.E. Synergic! (défaut lors de l'essai de la mémoire principale)
E02
Défaut interne dans la commande de la T.I.M.E. Synergic! (défaut lors de l'égalisation AD/DA)
E03
La fonction n'est pas installée!
E04
Essai automatique d'avance: aucun mouvement de marche du moteur n'était détecté!
E05
Essai automatique d'avance: défaut de vitesse minimale et maximale!
E06
Essai automatique d'avance: défaut de vitesse maximale!
E07
Essai automatique d'avance: le maximum n'a pas pu être atteint! (réglage de moteur correct jusqu' à la mi-vitesse de moteur)
E08
Essai automatique d'avance: minimum et maximum correctement réglés; le problème est apparu à mi-vitesse! (faute de linéarité)
E09
Essai automatique d'avance: dépassement du temps d'accélération!
E19
Ajustement de l'amplification de HALLSHUNT: décalage HALLSHUNT trop élevé pour régler l'amplification!
E30
Essai automatique: pas de court-circuit dans le circuit de soudage
E33
Processus interrompu par l'utilisateur!
E34
Eprom erroné: la source de courant fut équipée d'un Eprom "commutateur rotatif" au lieu de "sélecteur de programme"!
E35
Eprom erroné pour la version de la plaquette à circuits imprimés: vous avez enfiché une ancienne version d'Eprom dans la
plaquette à circuits imprimés de commande
DÉFAUTS DE L'INSTALLATION DE SOUDAGE
Défaut
Diagnostic
Réparation
Appareil sans fonction
L'indication "prêt à être mis en service" n'est
pas illuminée, l'indication "m/min - mm - V"
est illuminée, l' indication de courant de
soudage est illuminée.
Interruption de l'alimentation du résau
Contrôler l'alimentation de réseau
Défaut des coupe-circuits du réseau
Remplacer le coupe-circuit de réseau
Pas d'alimentation de la commande du bloc de
puissance
Contrôler et remplacer le coupe-circuit 1F10,
si nécessaire
L'indication "m/min - mm - V" et l'indication de
courant de soudage ne sont pas illuminées.
Pas de tension d'alimentation de commande
Contrôler les coupe-circuits 2F1 et 2F12 et
remplacerles coupe-circuits défectueux
L'indication"prêt à être mis en service" est
illuminée, l'indic. "m/min - mm - V" et l'indic. de
courant de soudage ne sont pas illuminées.
Pas d'alimentation du régulateur
Contrôler le coupe-circuits 2F6 et remplacer
si nécessaire
Pas de source de courant
L'indication "prêt à être mis en service" est
illuminée, l'indication de tension trop élevée
ou trop basse est illuminée
Défaillance de phase
Contrôler les coupe-circuits de réseau, les
fiches de réseau et l'alimentation de réseau
Tension de réseau trop élevée ou trop basse.
Le contrôle de tension trop élevée ou trop
basse a déconnecté
Contrôler la tension de réseau
L'indication "prêt à être mis en service" est
illuminée, l'indication de température trop
élevée est illuminée
Le détecteur thermique de sécurité a déconnecté (le ventilateur marche)
Attendre la phase de refroidiss. L'appareil
reconnecte automatiquement après peu de
temps; sinon il faut porter l'appareil au serv.
après-vente
Surcharge de l'appareil,dépassement de la
durée de mise en circuit.
Observer le facteur de service
18
Défaut
L'indication "prêt à être mis en service" est
illuminée, le moteur d'avance de fil marche
Diagnostic
Réparation
Amenée insuffisante d'air de refroidissement
Établir une amenée suffisante d'air
Bloc de puissance fortement encrassé
Ouvrir l'appareil et le purger par de l'air comprimé sec
Appareil de refroidiss. FK71 ne marche pas,
fiche de l'appar. de refroidiss. à 5 borches non
branchée
Brancher la fiche de l'appareil de refroidissement du bon côté et la verrouiller
Appareil de refroidissement FK71 ne marche
pas - défaut du coupe-circuit 2F3
Remplacer le coupe-circuit sur le transformateur de commande VM34.
Défaut du coupe-circuit 2F4 - le ventilateur dans
l'appareil de refroidissem. FK71 ne marche pas
Remplacer le coupe-circuit sur le transformateur de commande VM34.
Défaut du ventilateur dans la source de courant
Remplacer le ventilateur
Défaut du coupe-circuit 2F5 pour le ventilateur de l'appareil
Remplacer le coupe-circuit sur le transformateur de commande VM34
Le contrôle de tension trop élevée ou trop
basse a déconnecté
Contrôler la tension de réseau
Manque de tension de marche à vide
Contrôler la tension de marche à vide sur
l'indication m/min - mm - V (approx. 51V)
Le câble de mise à la masse n'est pas connecté
Établir la connexion avec la pièce de travail
Défaut de l'appareil de soudage
Remplacer l'appareil de soudage
Pôle positif du faisceau de câbles de connexion n'est pas connecté
Brancher le câble et le verrouiller
Arc intermittent
L'indication "prêt à être mis en service" est
illuminée, l'indication de tension trop élevée
ou trop basse est illuminée pendant approx.
10 s.
Manque d'une phase du côté du réseau
Vérifier l'alimentation par le réseau
Fluctuations de courte durée de la tension de
réseau, contrôle de tension trop élevée ou trop
basse déconnecte de temps en temps
Contrôler la tension de réseau
Pas de fonction lors de l'activation de la
gâchette du pistolet
L'indication "prêt à être mis en service" est
illuminée, manque de courant de soudage le moteur d'avance ne marche pas - pas de
gaz de protection
La fiche de commande de la torche n'est pas
branchée ou la connexion à fiches est défectueuse
Brancher et verrouiller la fiche de commande,
contrôler la connexion à fiches et, si nécess.,
remplacer
Défaut de la gâchette du pistolet ou du câble de
commande de la torche
Réparer ou remplacer la torche
Manque d'alimentation negative
Vérifier et remplacer, si nécess., le coupecircuit 2F7
Position erronée du sélecteur de programme
Corriger la sélection de programme
Utilisation d'une télécommande erronée
Utiliser la télécommande TR34 T.I.M.E. ou
TP4-SP ou travailler sans télécommande
Interrupteur de connexion/déconnexion de torche en pos. „gâchette du pistolet désactivée“
Mettre l´interrupteur de connexion/déconn. de
torche en pos. "gâchette du pistolet activée"
Faisceau de câbles de connexion défectueux
ou non branché
Vérifier le faisceau de câbles de connexion
Position erronée du sélecteur de programme
Corriger la sélection de programme
Le programme standard était soudé avec une
torche T.I.M.E.
Utiliser une torche standard ou veiller à un
stick-out court
En cas de fonctionnement à programme: arc
trop court ou trop long
Optimiser la longueur d'arc moyennant le
régulateur de correction de longueur d'arc
En cas de fonctionnement manuel: mauvais
réglage du point de travail
Ajuster les paramètres de tension de soudage, de vitesse de fil et de dynamique (voir les
tables de valeurs de référence imprimées)
L'indication "prêt à être mis en service" est
illuminée,l'indication "Manuell / NoProgram"
clignote
Mauvaises caractéristiques de soudage
arc instable - fortes pertes par projections
19
FRANÇAIS
Contrôler et remplacer le coupe-circuit 2F8
sur le transformateur de commande VM34.
Défaut
Diagnostic
Réparation
Dynamique d'arc trop dure
Corriger la dynamique par la télécomm.TR34
T.I.M.E. en fonctionnement manuel standard
Tube-contact trop grand ou forure usée
Remplacer le tube-contact
Mauvaise connexion de mise à la masse
Assurer un bon contact entre la pince de mise
à la masse et la pièce à usiner
Rempl. les parties carbonisées - si nécessaire,
utiliser un nouveau câble de mise à la masse
Mauvais alliage de fil - mauvais diamètre de fil
Contrôler et, si nécessaire, remplacer la bobine de fil montée
Contrôler la soudabilité du matériau de base
Vitesse de fil irrégulière
Faisceau de câbles de connexion ou câble de
mise à la masse trop long, section de câble
insuffisante
Corriger les paramètres de soudage - augmenter la section du câble, sinon établir de
nouveaux programmes de soudage
Faisceau de câbles de connexion ou câble de
mise à la masse embrouillé ou mal enroulé
Mettre le faisc. de câbles et câbles en pos. aussi.
rectil. que poss. ou enrouler de manière bifilaire
Frein trop fortement serré
Desserrer le frein
Forure trop petite du tube-contact
Visser le tube-contact correct pour le diamètre correspondant
Âme de guidage dans la torche trop courte,
obstruée ou trop étroite.
Suivant le type de torche dévisser le portebuse ou la buse de fil et vérifier la longueur
d'âme
Choisir une âme à diamètre intérieur correct
Remplacer absolument toute âme pliée ou
encrassée
Le fil de soudage forme une boucle entre
les galets d'avance et la buse d'entrée du
fil
Le moteur d'avance de fil ne marche pas
L'indication "prêt à être mis en service" est
illuminée, la tension de marche à vide est
active, le gaz de protection ne passe pas
L'indication "prêt à être mis en service" est
illuminée, la tension de marche à vide est
active, le gaz de protection passe
Pression d'appui insuffisante des galets
d'avance
Régler l'écrou moleté de la vis de réglage
d'appui de telle manière que le fil-électrode
ne soit pas déformé mais transporté sans
problèmes
Mauvaise buse de fil
Veiller à la valeur utilisée
Tube-contact trop étroit
Remplacer le tube-contact
Diamètre intérieur trop petite de l'âme de guidage de fil
Utiliser la bonne âme pour le diamètre de fil
utilisé
Âme de guidage de fil obstruée, enrouillée,
pliée ou trop courte
Remplacer l'âme
Pression d'appui trop forte des galets d'avance
Réduire la pression d'appui moy. l'écrou moleté
Galets d'actionnement erronés (forme de la
gorge, diamètre de la gorge)
Équiper correctement la plaque de moteur
Mauvais équipement de la torche de soudage
Changer l'équipem. de la torche de soudage
Défaut du coupe-circuit du moteur
Remplacer le coupe-circuit de moteur 2F9
sur le transformateur de commande VM34.
L'interrupteur de conn. / déconn. de la torche
sur l'avance de fil est réglé sur "AUS" (déconnecté)
Régler l´interrupteur de connex. / déconnex.
de la torche sur l´avance de fil sur "EIN"
(connecté)
Interruption de l'alimentation en courant sur
l'avance de fil
Vérifier la fiche de commande à 37 broches et
le faisceau de câbles de connexion de la
source de courant à l'appareil d'avance de fil
Usure des balais de charbon, défaut du moteur
Mesurer la tension au moteur; s'il y a de la
tension au moteur, il faut remplacer le moteur
20
Diagnostic
Réparation
Le moteur d'avance de fil fonctionne
toujours à pleine vitesse
Toujours valeur de consigne max.
Contrôler le faisceau de câbles de connexion
Le régulateur de moteur de reçoit pas de valeur
effective de vitesse
Contrôler la fiche de commande à 37 broches
et le faisceau de câbles de connexion de la
source de courant à l'appareil d'avance de fil
La vitesse de fil diffère des valeurs
programmées sur la table
Montage de galets à gorge en V
Le valeurs programmées valent pour des
galets d'avance à gorge trapézoïdale ou
gorge demi-ronde. En cas d'utilisation de
galets à gorge en V il faut corriger la longueur
d'arc.
Après avoir appuyé sur la gâchette du
pistolet en marche à vide la vitesse de fil
est insuffisante
Le moteur d'avance de fil marche à la vitesse
d'approche réglée
La vitesse de fil augmente seulement après
le contact du fil de soudage avec la pièce à
usiner. Il faut appuyer sur la touche
d'introduction pour déterminer la vitesse
d'avance effective.
Après avoir appuyé sur la gâchette du
pistolet la vitesse maximale de fil est de
22m/min.
Éprom erroné dans la source de courant
Contrôler l'Éprom
Mauvais réglage du commutateur S6 ou S7
Contrôler les commutateurs DIP S6 et S7
Gaz passe aussi après avoir lâché la
gâchette du pistolet
Vanne magnét. à gaz défectueuse ou encrassée
Nettoyer ou remplacer la vanne magnét. à
gaz
Défaut du régulateur de moteur NMI4.
Remplacer la plaquette à circuits imprimés
régulatrice de moteur NMI4 .
Télécommande erronée
Utiliser uniquement la télécommande TR34
T.I.M.E. ou TP4-SP
Défaut de la télécommande ou du câble de
télécommande
Séparer le câble de télécommande de
l'avance de fil et contrôler les valeurs
théoriques (m/min)
Le moteur d'avance de fil n'est pas freiné - les
balais de charbon sont usés
Mesurer la tension du moteur; s'il y a une
tension du moteur, il faut remplacer le moteur
Défaut de la plaquette à circuits imprimés régulatrice de moteur NMI4.
Remplacer la plaquette à circuits imprimés
régulatrice de moteur NMI4.
Après la fin du soudage le fil colle sur le
tube-contact
Période de post-combustion trop longue réglée
Réduire la période de post-combustion par le
régulateur de correction de la période de
post-combustion
Courant de soudage sur la buse de gaz
Accumulation de projections dans la buse de
gaz (particulièrement lors du soudage en position)
Retirer la buse de gaz, nettoyer le tube-contact, le porte-buse et la buse de gaz - si
nécessaire arroser par agent séparateur de
Fronius
Élément isolant ou protection contre projections non installé ou défectueux
Si nécessaire, installer un nouvel élément
isolant
Pas assez de réfrigérant dans l'appareil de
refroidissement FK71
Remplir du réfrigérant
Aller et retour d'eau échangés
Connecter correctement les tuyaux flexibles
d'eau
Circuit d'eau obstrué ou tuyaux flexibles d'eau
pliés
Ouvrir le bouchon fileté du réservoir d'eau et
contrôler le retour.
La télécommande est sans fonction
Après la fin du soudage le fil colle dans le
bain de soudage
L'installation de soudage s'échauffe trop la durée de mise en circuit n'est pas
dépassée (seulement installations
refroidies par l'eau)
21
FRANÇAIS
Défaut
CARACTÉRISTIQUES TECHNIQUES
APPAREIL DE REFROIDISSEMENT FK 71
Attention! Si l’appareil est réglé sur une tensions spéciale, les
caractéristiques techniques sont comme indiquées sur la plaque
indicatrice . La fiche de réseau, et l’alimentation par réseau ainsi
que sa protection par coupe-circuits doivent être désignées de
manière correspondante.
Tension de réseau
Consommation de courant
Couple de rotation
SOURCE DE COURANT T.I.M.E. SYNERGIC
Puissance frigorifique
Tension de réseau (+/-10%)
Débit max.
3 x 380 / 400 / 415 V~, 50 - 60 Hz
Coupe-circuits de réseau
Cos phi
Puissance apparente à
60% ED/facteur de service
100% ED/facteur de service
Rendement
Courant de soudage à 60% ED/facteur de service
100% ED/facteur de service
Tension de marche à vide
Tension de travail MIG/MAG
Électrode
TIG
Type de protection
Type de refroidissement
Classe d'isolation
Signe d'homologation
Type de protection
27 kVA
21 kVA
Dimensions longueur/largeur/hauteur mm
Poids (sans réfrigérant)
3 - 450 A
450 A
360 A
50 V
0 - 50 V
0 -55 V
0 - 55 V
IP 21
AF
F
S, CE
AVANCE DE FIL T.I.M.E. 30
Tension de réseau
42 V
Courant nominal du moteur
4,2 A
Puissance nominale
Couple de rotation
Vitesse de fil
Réduction
Type de protection
Classe de protection
Poids
2800 tr/min (50 Hz), 3200 tr/min (60 Hz)
Contenu de refrigérant
0,98
0,99
90 %
Gamme de courant de soudage continue
0,6 A
Refoulement max. de la pompe
40 A à action retardée
150 A
450 A
2 x 380 - 415 V, 50 - 60 Hz
180 W
21 Ncm
0 - 30 m/min
17,6 : 1
IP 23
III
12,5 kg
22
2420 W
3,64 l/min.
3,3 bar
approx. 5,5 l
IP 23
575/365/265
21 kg
DEL-CHECK-LIST, RÉGULATEURS ET COUPE-CIRCUITS
Attention! L'appareil ne doit être ouvert que par du personnel expert. Avant d'ouvrir l'appareil de soudage il faut déconnecter l'appareil, retirer
la fiche de réseaau et applique un panneau d'avertissement afinnd d'éviter une reconnexion - si nécessaire décharger les condensateurs
électrolytiques. S'il faut remplacer des coupe-circuits il faut utiliser des coupe-circuits de la même valeur. En cas d'utilisation de coupe-circuits
trop forts nous n'assumons aucune garantie en cas d'éventuels dommages consécutifs! Il ne faut pas utiliser des régulateurs non désignés.
Protection contre surtensions dans le circuit intermediare
L'indication DEL est illuminée seulement avec protection
active contre surtension
Fig.23
DEL +5V / +15V
Doit être toujours illuminée quand l'appareil
est connecté
L'indication DEL est illuminée lors de
dépassements de réseau
de plus de 15%
Valeur de consigne du courant de soudage
La clarté de l'indication DEL augmente avec
l'augmentation de la valeur de consigne
L'indication DEL est illuminée lors de
dépassements de réseau de plus de 44%
ou lors de défaillance d'une phase
L'indication de la DEL est illuminée pendant
approx. 10 secondes lors de tensions plus
élevée ou plus basses de réseau de +/- 10%
Indications sur la plaquette à circuits imprimés PWM 3
Source de courant démarrage
L'indicatiion DEL est illuminée seulement lors d'un signal de démarrage MIG/MAG
Pas de fonction
L'indication DEL reste toujours sombre
Signal de conduction de courant
L'indication DEL est illuminée quand le
courant de soudage circule
L'indication DEL est illuminée avec impulsion de
post-combustion programmée
Pas de fonction
L'indication DEL reste toujours sombre
Indications sur la plaquette à circuits imprimés WM 34A
23
FRANÇAIS
Fig.22
Indication DEL pour démarrage PWM
Abb.24
Anzeigen und Einstellregler auf Print NMI 4.
24
Signal de conduction de
courant
L'indication DEL est illuminée
quand le courant de soudage
circule
Remise à la valeur initiale du
moteur L'indication DEL est
illuminée:
- pendant 1 sec. après la
connexion de
l'installation.
- après surintensité de
courant aux moteurs
d'avance de fil
Indication DEL vérification
de gaz est illuminée quand
la touche de vérification de
gaz est appuyée
Frein moteur
L'indication DEL est illuminée, quand
le moteur d'avance est freiné
L'indication DEL -15V doit être toujours
illuminée quand l'appareil est connecté,
sinon F7 est défectueux
L'indicatio DEL est illuminée pendant environ 10 sec.:
a) en cas d'une tension trop élevée ou trop basse du réseau de +/- 10 %
b) en cas d'un défaut de température trop élevée de l'appareil.
L'indicatal DEL est illuminée quand
une tension de marche à vide est
active.
Valeur de cons. de l'avance de fil La
clarté de l'indication DEL augmente avec
l'augmentation de la valeur de consigne
L'indication DEL + 5V doit être toujours
illuminée quand l'appareil est connecté,
sinon F6 est défectueux
L'indication DEL d'avance A est illuminée quand la
commande d'avance double est utilisée et quand on a
réglé l'installation sur avance A.
L'indication DEL d'introduction est
illuminée quand la touche d'introduction
est appuyée.
L'indication DEL BRT
est illuminée quand la
gâchette du pistolet est
appuyée
L'indication DEL BRT2
est illuminée quand la
gâchette du pistolet 2 est
appuyée (actuellement
non utilisée.)
L'indication DEL +15V doit être toujours
illuminée quand l'appareil est connecté, sinon
F6 est défectueux
L'indication DEL +10V doit être toujours
illuminée quand l'appareil est connecté
Régulateur de la période HotStart de 0,5 - 2,0 séc. suivant la
valeur de consigne du courant de soudage réglée
Régulateur Out (valeur de consigne PWM)
La clarté de l'indication DEL augmente avec
l'augmentation de la valeur de consigne
Fig.25
Tension de marche à vide connectée
L'indication DEL est illuminée tant que la commande de
connexion de la tension de marche à vide est donnée
Indications et régulateurs sur la plaquette à circuits imprimés MIG 45.
S1
déconnecté/ off
connecté/ on
S1/1
450 A
330 A
S1/2
fonction speciale off
fonction spéciale on
S1/3
impulsion & standard
standard
sans correction de dynamique
avec correcion de dynamique
S1/4
(seulement en service standard)
sans tête double
avec tête double
S1/6
VR A nmax = 30 m/min
VR A nmax = 22 m/min
S1/7
VR B nmax = 30 m/min
VR B nmax = 22 m/min
S1/8
Déconnexion automatique
Service permanent de déconnexion
de l'appareil de refroidissement
de l'appareil de refroidissement
Possibilités de codage sur la plaquette à circuits imprimés NMI4.
FRANÇAIS
Fig.26
S1/5
25
Connexion à fiches X5
Alimentation en courant primaire
Primaire 0V~
F1 6,3 A à action retardée
Pompe de l'appareil de refroidiss.
380V~F3 0,63 A à action retardée
Steckverbindung X1
für Gerätelüfter
Primaire 380V~
F12 6,3 A à action retardée
Connexion à fiches X4
Alimentation en cour. pour BM 45.
Connexion à fiches X6 pour
la commutation du réseau 415V
Moteur d'avance(VR152) 42V~
F9 10 A à action retardée
Connexion à fichesX7 pour
la commutation du réseau 400V
Moteur Pull-Mig 42V~
F10 2 A à action retardée
Connexion à fichesX8 pour
la commutation du réseau 380V
Connexion à fiches X3
Alimentation pour l'électronique
de commande NMI 4.
Ventilateur pour l'appareil de
refroidissement 230V~F4 0,315
A à action retardée
Alimentation NMI 4.
20V~ (+15V / +10V / +5V)
F6 2 A à action retardée
Ventilateur 230V~
F5 0,315 A à action retardée
Tension de marche à vide 36V~
F8 0,315 A à action retardée
AlimentationNMI 4.
20V~(-15V), F7 1 A à action
retardée
Connexion à fichesX2 PWM
Fig.27
Non occupé
Coupe-circuits sur la plaquette à circuits imprimés VM34B
26
D
Ersatzteilliste
GB Spare Parts List
F
Liste de pièces de rechange
I
Lista parti di ricambio
E
Lista de repuestos
P
Lista de peças sobresselentes
NL Onderdelenlijst
N
Reservdelsliste
CZ Seznam náhradních dílù
RUS Ñïèñîê çàïàñíûõ ÷àñòåé
ud_fr_st_tb_00150
012002
20
17
19 16
20
49 37,38
18
12
10
53,54
18
51
11
52
13
41
4,6,8
4,5,8
7
9
14
15
24
23
1
42
48
30
47
29
46
43
32,81,
82,83
31
33,34
26
21,22
35
27
40
55 39
44,45
50
24
25
3
2
64
62,
63
60
28
71,72
61
56
70
59
58
57
65
84
80
77
80
74,75
N.C.
66
56
36
67,68
73
78
69
76
76
79
76
78
53,54
78
TIME SYNERGIC
4,075,077
Ersatzteilliste / Spare parts list / Listes de pièces de rechange / Lista de repuestos / Lista de pecas sobresselentes / Lista dei Ricambi
1/3
el_fr_st_mi_00139
012000
POS.
1
2
3
4
5
6
7
8
9
10
11
12
13
14
15
16
17
18
19
20
21
22
23
24
25
26
27
28
29
30
31
32
33
34
35
36
37
38
39
40
41
42
43
44
45
46
47
48
49
50
51
52
53
54
55
56
57
58
59
60
61
62
63
64
65
BENENNUNG
EINBAUBUCHSE
-70 600
NETZK. H07RNF 4G6 E5 63A 5M
STECKERKRAGEN 5 380 63
LED-HALTERUNG D=8MM/10x19.5
LEUCHTDIODE 1.5 R
P
LEUCHTDIODE 1.5 G 5 P
DRUCK FRONTPL.UNT.TIME SYN. AC
LED-ZUGENTLASTUNG D=9MM/12x19
SCHALTKNE ROT
SW 5 ZG 28
EINSCHUB TPS TIME
DRUCK FRONTPL. 3 TIME SYN. AC
BLINDSTOPFEN M6 ST3/CITOTIG 3
DREHKNOPF D=16
SW SW SW
DRUCK SEITENT.L. TT330-02 AM
DRUCK SEITENT.R. TT330-02 AM
DECKEL RT TS330-02
GRIFFROHR SW TS330-02
GRIFFAUFN. GERADE TP200
FLASCHENKETTE 30x650
KRANAUFNAHME SW TT330
KÜHLKREIS FK71
KÜHLKREIS FK71 60HZ
FAHRWAGEN MW300/450
KONSOLE FÜR FK7/FK71
LENKROLLE STAHL 160 RL 205 11
LAUFRAD KUNST 200 GL 58 20
STARLOCK
20
DROSSEL PRIM. TPS450
DRUCK GEHÄUSE TIME SYNERGIC AC
ZUGENTLASTUNG PVC PG16
HALLGENERATOR HP4
TREIBERTR. TS330,TPS450
VENTILATORT. TIME NEUTRAL
PRINT LEISTUNGSSCHILD GR3 *
SCHUTZBESCHALT. EMV/+ BRENNER
SCHUTZBESCHALT. EMV/- WERKST.
KONELK 4700 350
S 20 SCH
KONELK 3300 450
S 20 SCH
KONFOL 22y 850
S 5 SCH
WIDKOH100K 2 5
SCHALTNOCK OS 3
20 EA 3
KLEMMLEISTE 10 12 35 3EFDS
WIDDRA 22R 50 5
SCHÜTZ
380 10 30
EINSCHALTVERZÖG. 380V 5 SEC.
SCHUTZLEITERDROSSEL 4MM²
PRINT NF 340
VENTILATOR M.F. 10 80x80x38
DRUCK GEHÄUSE STG TS330-02 AC
GUMMIDURCHF. 35
TASTER N290/K1 GRÜN
BUCHSENGEHÄUSE 23 37 EINB.
STEUERTR. 220-415V/50H MIG-MAG
STEUERTR. 380/440/500V 50-60HZ
PRINT PWM 3 D
PRINT RCP 3
DIOSIL
400 60 DO5 SF
A-DROSSEL TP450
VENTILATOR M.F. 220V42W 150x55
MUTTER-PLASTIK PYB 7041
ZÜNDHILFE-RCD TPS450
STECKDOSENGEHÄUSE 5 380 10
STECKDOSENEINSATZ 5 380 10
SICHERUNGSSET MIG-STG. TS330
PRINT NMI 4 D
TIME SYNERGIC
ARTICLE
CURRENT SOCKET/5O-7O MM2/6OOA
MAIN CABLE HO7RNF 4G6 E5 63 5M
PLUG 5 380 63
MOUNTING FOR LED
LED 1.5 V/RED/PLASTIK
LIGTH-EMITTING-DIODE 1,5 G 5 P
FRONT PANEL TIME SYNERGIC
TRACTION RELEASE FOR LED
SWITCH RED SW 5 ZG 28
INSERT TPS TIME
FRONT PANEL TPS TIME SYNERGIC
BLIND STOPPER
TURNING KNOB D=16
SIDE PANEL L. TT330-02
SIDE PANEL R. TT330-02
COVER RED TS330-02
HANDLE TUBE BLACK TS330-02
HANDLE MOUNTING STRAIGHT TP200
BOTTLE CHAIN 3O X 65O
LIFTING FATILITY BLACK TT330
COOLING UNIT FK71
COOLING UNIT FK71 60HZ
CARRIAGE MW300/450
CONSOLE MW300/450
TUMBLER GEAR D=16O
WHEEL D=200 MM
STAR LOCK D= 2O
INDUCTANCE PRIM. TPS450
CASE TIME SYNERGIC
TRACTION RELEASE PVC PG16
HALL GENERATOR HP4
DRIVER TRANSFORM. TS330,TPS450
FUN-PIECE TIME NEUTRAL
PRINT RATING PLATE GR3 *
PROTECTION CIRCUIT EMV/+ TORCH
PROTECTION CIRCUIT EMV/ELECTROLYTIC CAPACITOR 47OO uF
ELECTROLYTIC CAPACITOR 330 450
FOIL CAPACITOR 22y 850 S 5 SCH
CARBON RESISTOR 100K 2 5
CAM SWITCH 0S 3 10 EA 3
TERMINAL STRIP EKL 3E
METAL RESISTOR 22R 50 5
CONTACTOR 380 10 30
TURN ON DELAY 380V 5SEC.
DISCHARGE-COIL 4MM²
PC-BOARD NF 340
FAN M.F. 10 80X80X38
HOUSING MIG-STG TS330-02
RUBBER PASSAGE D=35
TRIGGER GREEN N 290/K1
SOCKET-CASE 23 37
AUXILIARY TRANF.220-415V/50 HZ
AUXILIARY TRANF.380/440/500V50
PC-BOARD PWM 3 D
PRINT CIRCUIT BOARD RCP 3
SILICON DIODE 400 60 DO5 SF
INDUCTANCE OUTPUT TP450
FAN MOTOR 220V42W 150X55
NUT-PLASTIC PYB 7041
IGNITION-HELP RCD TPS450
CASE FOR PLUG SOCKET
PLUG SOCKET HA 4 B
FUSE-SET MIG-STG. TS330
PC-BOARD NMI 4D
DENOMINATION
EMBASE FEMELLE 50/70 600A
CABLE DE RESEAU 4G6 E5 63 5M
PRISE 5POLES 380V 63A
SYSTEME FIXATION DE LED
DIODE DE SIGNALISATION
DIODE DE SIGNALISATION
PANNEAU FRONTAL TIME SYNERGIC
DECONNEXION LED
INTERRUPTEUR ROUGE
PLATINE TPS TIME
PANNEAU FRONTAL TIME SYNERGIC
BOUTON BUTOIR AVEUGLE
BOUTON TOURNANT 16
PANNEAU LATERAL GAUCHE
PANNEAU LATERAL DROIT
COUVERCLE ROUGE TS330 02
TUYAU POIGNEE NOIR
MONTAGE POIGNEE TP200
CHAINE DE BOUTEILLE
INSTRUMENT DE LEVAGE
REFROIDISSEUR FK71
REFRODISSEUR FK71 60HZ
CHARIOT MW300/450
CONSOLE REFROIDISSEUR FK7
GALET PIVOTANT MSG1
ROUE 200 MM
BLOCAGE EN ETOILE 20
INDUCTEUR PRIMAIRE TPS450
CHASSIS TIME SYNERGIC
ECROU FREIN PVC PG16
GENERAEUR DE HALL HP4
TRANSFORMATEUR TS330,TPS450
PIECE DE VENTILATEUR TIME NEU.
PLAQUE SIGNALÉTIQUE IMPRIME G3 *
DISJONCTEUR DE PROTECTION EMV/
DISJONCTEUR DE PROTECTION EMV/
CONDENSATEUR 4700 UF
CONDENSATEUR 3300 450 S20 SCH
CONDENSATEUR
RESISTANCE CARBONE
COMMUTATEUR M/A
BORNIER EKL 3E
RESISTANCE METAL 22R 50 5
CONTACTEUR 380 10 30
TEMPORISATEUR 380V 5S
BOBINE DE DECHARGE 4MM2
CIRCUIT ELECTRONIQUE NF 340
VENTILATEUR 10 80X80X38
CHASSIS MIG-STG TS330-02
TAPIS CAOUTCHOUC 35
GACHETTE VERTE N 290 K1
CASE SUPPORT 23 37
TRANSFORMATEUR AUXILIAIRE 220TRANSFORMATEUR AUXILIAIRE 380CIRCUIT ELECTRONIQUE
CIRCUIT ELECTRONIQUE
DIODE AU SILICIUM
INDUCTANCE DE SORTIE
MOTEUR VENTILATEUR 220V42W 150
ECROU PLASTIQUE PYB 7041
ASSISTANCE ALLUMAGE
CAPOT RECEPTACLE PRISE
SOCLE PRISE HA4B
FUSIBLE-SET MIG-STG. TS330
CIRCUIT ELECTRONIQUE
43.0003.0031
43.0004.1331
43.0003.0055
41.0015.0024
41.0006.0025
41.0006.0045
32.0409.2342
41.0015.0025
42.0406.0207
43.0001.3186
42.0409.2364
42.0300.0607
42.0406.0217
45.0200.0658
45.0200.0670
AM2.0200.6538
BE2.0200.6808
42.0405.0063
42.0407.0017
BE2.0200.5774
4.045.802
4.045.803
4.045.740
4.045.741
44.0001.0078
44.0001.0051
44.0001.0106
43.0010.0122
46.0750.0496
42.0300.1511
43.0001.0862
33.0005.2142
44.0001.1178
42.0409.2621
43.0001.1012
43.0001.1011
41.0005.0170
41.0005.0250
41.0005.0193
41.0001.0248
43.0002.0238
41.0009.0066
41.0001.0532
43.0008.0104
43.0008.0102
43.0004.1153
4.070.544
43.0006.0117
46.0750.0379
42.0402.0039
43.0002.0079
43.0003.0482
33.0005.2158
33.0020.0004
4.070.355
4.070.163
41.0003.0034
33.0010.0112
43.0006.0039
42.0400.0132
43.0001.0733
43.0003.0141
43.0003.0148
43.0012.0004
4.070.379
4,075,077
Ersatzteilliste / Spare parts list / Listes de pièces de rechange / Lista de repuestos / Lista de pecas sobresselentes / Lista dei Ricambi
2/3
el_fr_st_mi_00139
012000
POS.
66
67
68
69
70
71
72
73
74
75
76
77
78
79
80
81
82
83
84
BENENNUNG
PRINT KI 34 A
PRINT NVZ 42
PRINT NVZ 50
PRINT PV 45 S
THERMOELEMENT TP 592S/1
GLESIL 1K2 60 G35 F 3
GLESIL 1K6 60 G35 F 3
SLT 450A TT/TP450/GLE451
SCHWEISSTR. 380/400/415V TP450
SCHWEIßTR. 440V TP/TT/MW450
SICHERUNG 0.315 250 T 5x20
SICHERUNG 0.63 250 T 5x20
SICHERUNG 1 250 T 5x20
SICHERUNG 2 250 T 5x20
SICHERUNG 6.3 250 T 5x20
SICHKLEIN 0.125 T 19372
SICHKLEIN 1 T 19372
SICHKLEIN 2 T 19372
PLT GEPRÜFT 450A TT/TP450/GLE/
ARTICLE
PC-BOARD KI34 A
PC-BOARD NVZ 42
PC-BOARD NVZ 50
PC-BOARD PV 45 S
TP 592S/1 CPL. TP 330
SILICON RECTIFIER 1K2 60 G35
GLESIL 1K6 60 G35 F 3
POWER MODULE SEC.450A TT/TP450
WELDING TRANSF. TP450-02
WELDING TRANSF.440V TP/TT/MW45
FUSE ,315 250 T 5X20
FUSE O.63A/25OV/SLOW BLOW/5X2O
FUSE 1A/25O V/SLOW BLOW/5X2O
FUSE 2A/25OV/SLOW BLOW/5X2O
FUSE 6.3 A/25OV/SLOW BLOW/5X2O
FUSE SMALL 0.125 T 19372
FUSE SMALL 1 T 19372
FUSE SMALL 2 T 19372
POWER MODULE PRIM. CHECK 450A
DENOMINATION
CIRCUIT ELECTRONIQUE
CIRCUIT ELECTRONIQUE NVZ 42
CIRCUIT ELECTRONIQUE NVZ 42
CIRCUIT ELECTRONIQUE PV 45 S
TP 592S/1 TP 330
REDRESSEUR AU SILICIUM
REDRESSEUR AU SILICIUM 1K6 60
MODULE DE PUISSANCE SEC
TRANSFORMATEUR DE SOUDAGE
TRANSFORMATEUR DE SOUDAGE
FUSIBLE 0,315 250 T 5X20
FUSIBLE 0,63A/250V 5X20
FUSIBLE 1A/250 5X20
FUSIBLE 2A/250V 5X20
FUSIBLE 6,3A/250V 5X20
FUSIBLE PETIT 0.125 T 19372
FUSIBLE PETIT 1 T 19372
FUSIBLE PETIT 2 T 19372
MODULE DE PUISSANCE PRIM
*
BITTE SERIENNUMMER ANGEBEN
PLEASE INDICATE SERIAL NUMBER
INDIQUER NUMERO DE SERIE
TIME SYNERGIC
4.070.242
4.070.376
4.070.497
4.070.362
43.0001.0600
41.0002.0037
41.0002.0045
43.0001.0519
33.0005.4069
33.0005.0422
41.0007.0095
41.0007.0046
41.0007.0014
41.0007.0037
41.0007.0065
41.0007.0043
41.0007.0087
41.0007.0112
43.0001.0521
*
4,075,077
Ersatzteilliste / Spare parts list / Listes de pièces de rechange / Lista de repuestos / Lista de pecas sobresselentes / Lista dei Ricambi
3/3
el_fr_st_mi_00139
012000
33
30
25
34
5-9
31
36
27,38
28
26
10
11
4
12
13
1
2,3
35
15
29
POS.
1
2
3
4
5
6
7
8
9
10
11
12
13
14
15
16
17
18
19
20
21
22
23
24
25
26
27
28
29
30
31
32
33
34
35
36
37
38
37
BENENNUNG
DRUCK GEHÄUSE VR153 TIME
DRUCK FRONTPL.U. VR153
DRUCK FRONTPL.U. VR153-4R W RO
DRUCK RÜCKFR. VR153 TIME
MOTORPL. 42V 4R EC. O.RÄ. M.T.
MOTORPL. 42V 4R D-ZA O.RÄ.M.T
MOTORPL. 42V 4R F-ZA O.RÄ.M.T.
MOTORPL. 42V 4R F-ZA 1.2TI 30M
MOTORPL.42V 4R EC.1.2TI 30M MT
STECKDOSENGEHÄUSE EB 20
STECKDOSENEINSATZ 20 14
STECKDOSENGEHÄUSE EB 18
STECKDOSENEINSATZ 18 4
TASTER N290/K1 GRÜN
MAGNETVENTIL-KL.42 0-10 G1/8"
MUTTER-LOCKNUT R3/8" SW21x4.5
ANSCHLUSSCHR. R3/8" SW21X45
MAGNETVENTILA. R1/8"R3/8"
SCHLAUCHTÜLLE M.O-RG. R1/8"x31
STROMSTECKER EB 50-70 600
DREHKNOPF D=16
GR GR GR
DRUCKWÄCHTERAUFN. VR153
DRUCKWÄCHT EPDM M10X1 S 0,1-1B
SCHNELLKUPPL.WASSER 21KATS06
DECKEL SW VR153 TIME
SCHLP.HALT.SW PR4-O/M
ZUGENTLASTUNG SW VR152-MP
RÄNDELSCHRAUBE M8x25
KISTENVERSCHLUSS 95X30X15
VERSCHLUSSHAKEN FORM3 25MM VZ
SCHARNIER S053B120 S6
ABDECKKAPPE 32.0/34.8/11.5/3.2
FRONTPL.O.SW VR123-R
RÜCKFRONT(DECKEL)SW VR153 TIME
FRONTPL.U. SW VR153 TIME
DRAHTEINLAUFBLOCK VR149/153/BUCHSENGEHÄUSE 23 37 EINB.
ZUGENTLASTUNG SW VR123-2R/4R
VR153-K / TIME
20
16 17
32 24
19
18
22
21
23
ARTICLE
CASE VR153 TIME
FRONT PANEL BELOW VR153
FRONT PANEL BELOW VR153-4R W
REAR PANEL VR153 TIME
MOTOR PLATE 42V 4R EC. W.WH.
MOTOR PLATE 42V 4R D-ZA
MOTOR PLATE 24V 4R F-ZA
MOTOR PLATE 42V 4R F-ZA 1.2TI
MOTOR PLATE 42V 4R EC.1.2TI
PLUG-HOUSING EB 20
PLUG-SOCKET-INSERT 20 14
PLUG-HOUSING EB 18
PLUG-SOCKET-INSERT 18 4
TRIGGER GREEN N 290/K1
MAGNETIC VALVE SMAL 42 0-10
LOCKNUT R 3/8" SW 21X6.5
PICK-UP TUBE R3/8" SW21X45
SOLENOID VALVE CONNECTION
HOSE CONNECTION R1/8"/D=7.5
CURRENT PLUG 5O-7OMM2/6OO A
TURN KNOB D=16 GREY/GREY/GREY
MOUNTING PRESSURE CONTR.VR153
WATER FLOW SWITCH
QUICK CONNECTION W
COVER PLATE BLACK VR153 TIME
HOSE PACK MOUNT. BLACK PR4-0/M
TRACTION RELEASE BLACK
KNURLED SCREW
BOX-FASTENER 95x30x15
LOCK-CLAMP FORM3 25MM VZ
HINGE SO53B120 S6
HEYCO-COVERING D=32MM
FRONT PANEL ABOVE BLACK VR123REAR PANEL VR153 TIME
FRONT PANEL VR153 TIME
WIRE-INFEED-BLOCK VR149/153/SOCKET-CASE 23 37
TRACTION RELEASE BLACK
14
DENOMINATION
CHASSIS VR153 TIME
PANNEAU AVANT INFERIEUR
PANNEAU AVANT INFERIEUR
PANNEAU ARRIERE VR153 TIME
PLAQUE DE MOTEUR 42V 4R EC
PLAQUE DE MOTEUR 42V 4R D-ZA
PLAQUE DE MOTEUR 24V 4R F-ZA
PLAQUE DE MOTEUR 42V 4R F-ZA
PLAQUE DE MOTEUR 42V 4R EC
LOGEMENT PRISE EB 20
SUPPORT PRISE INTERNE
LOGEMENT PRISE EB 18
SUPPORT PRISE INTERNE
GACHETTE VERTE N 290 K1
ELECTROVANNE 42 0/10
CONTRE ECROU
TUBE PICK UP SW 21X45
RACORD VALVE SOLENOID
RACCORD R1/8 7,5
PRISE COURANT 50/70 600A
BOUTON A 3 POSITIONS 16
CONTROLE DE MONTEE DE
INTERRUPTEUR DEBIT EAU
RACCORD RAPIDE
COUVERCLE NOIR VR153 TIME
MONTAGE FAISCEAU NOIR PR4
ECROU FREIN VR153-MP
ECROU MOLETE
FIXATIONS BOITE 95X30X15
FERMETURE CROCHET
CHARNIERE SO53B120 S6
COUVERCLE 32.0/34.8/11.5/3.2
PANNEAU AVANT INFERIEUR
PANNEAU ARRIERE VR153 TIME
PANNEAU FRONTAL VR153 TIME
BOBINE FIL DEVIDOIR
CASE SUPPORT 23 37
ECROU FREIN VR123-3R/4R
45.0200.0890
32.0409.1729
32.0409.1880
45.0200.0891
44.0001.1093
44.0001.1095
44.0001.1096
44.0001.1058
44.0001.1065
43.0003.0256
43.0003.0248
43.0003.0255
43.0003.0245
43.0002.0079
43.0013.0004
42.0001.0133
42.0001.2666
42.0401.0085
42.0001.0090
43.0003.0146
42.0406.0081
44.0001.0709
43.0002.0005
44.0001.0348
BE2.0200.8525
BE2.0200.2677
BE2.0200.7817
42.0401.0004
42.0407.0055
42.0200.2474
42.0200.6480
42.0300.1770
BE2.0200.4755
BE2.0200.8527
BE2.0200.8849
44.0450.0893
43.0003.0482
BE2.0200.7817
4.045.777 / 000 / 001 / 002 / 4.045.773.000 / 000
Ersatzteilliste / Spare parts list / Listes de pièces de rechange / Lista de repuestos / Lista de pecas sobresselentes / Lista dei Ricambi
1/1
el_fr_st_dv_00032
012000
2
19
12
1
18
5
3
16
11
15
13
4
7-10
17
6
14
POS. BENENNUNG
KÜHLKREIS FK71 50/60HZ
ARTICLE
FK 71 50/60HZ COOLING UNIT
DENOMINATION
REFROIDISSEUR FK 71 50/60HZ
1
2
3
4
5
6
7
8
9
10
11
12
13
14
15
16
17
18
19
CASE FK71
SHEATH FK71
FAN MOTOR 220V42W 150X55
MAIN CABLE PVC 5X0.75 1.45M FK
WATER COOLER
TERMINAL STRIP 2.5MM2/EKL 1
QUICK CONNECT AG R1/8" NW5
WATER-CONNECT BLUE VST357/457
NUT KST RED VST357/457
NUT KST BLUE VST 357/457
COVER-DISC 11.0/13.5/10.3/3.2
CLAMPING 1 CLIP 16.6
TRACTION RELEASE D=7.1-9/3MM
PUMP Y2841.0023 M.YDS3-M
COVER FK2600
WATERTANK FK71
RAUFILAM HOSE MG 8X3 TR
ANGLE ADAPTER KST D=10.0/70X31
PVC HOSE 10x2 TR
COUVERCLE FK71
CHEMISE FK71
MOTEUR VENTILATEUR 220V42W 150
CABLE DE DISTRIBOUTION 5X0.75
REFRIGERATEUR A L.EAU
BORNIER BK 2,5MM2/EKL 1
RACCORD RAPIDE AG R1/8" NW5
CONNECTION EAU BLEU VST357/457
ECROU ROUGE VST357/457
ECROU BLEU VST357/457
COUVERCLE 11.0/13.5/10.3/3.2
PINCE 1OREILLE 16.6
ECROU DE FREIN 7,1/9 3 MM
POMPE Y2841.0023 M.YDS3-M
TANK CAP FK2600
RESERVOIR D.EAU FK71
TUYAU RAUFILAM MG 8X3 TR
RACCORD ANGULAIRE D=10,0/7x31
TUYAU PVC 10x2 TR
DRUCK GEHÄUSE FK71
MANTEL RT FK71
VENTILATOR M.F. 220V42W 150x55
NETZK. PVC ÖY 5X0,75 1,45M
WASSERKÜHLER
KLEMMLEISTE 2,5 12 16 1EFDS
SCHNELLKUPPLUNG AG R1/8" NW5
WASSERANSCHL. SW VST357/457
MUTTER KST ROT VST357/457
MUTTER KST SW VST 357/457
ABDECKKAPPE 11.0/13.5/10.3/3.2
KLEMME 1OHR 16.6 STUFENLOS
ZUGENTLASTUNG PVC 7.1-9 3
PUMPE Y2841.0023 M.YDS3-MOTOR
TANKDECKEL FK2600
WASSERBEHÄLTER FK 71
SCHLAUCH RAUFI MG 8x3 TR
WINKELSTÜCK KST. D=10,0/7,0x31
SCHLAUCH PVC OG 10X2 TR
4,045,802
46,0450,0208
AM2,0200,8776
43,0006,0039
43,0004,1509
24,0450,0972
41,0009,0060
44,0001,1145
42,0405,0189
42,0405,0186
42,0405,0187
42,0300,1724
42,0407,0442
42,0407,0011
43,0006,0172
42,0401,0865
32,0300,2312
40,0001,0008
42,0300,2019
40,0001,0393
FK 71
Ersatzteilliste / Spare parts list / Listes de pièces de rechange / Lista de repuestos / Lista de pecas sobresselentes / Lista dei Ricambi
1/1
el_fr_st_kg_00045
012001
11,12,10,14
5,18
3
2,17
1
13,11,12,14
6,7,8,9
15
16
4
6,7,8,14
POS. BENENNUNG
ARTICLE
DENOMINATION
1
2
3
4
5
6
7
8
9
10
11
12
13
14
15
16
17
18
CASE BLACK TR16
FRONT PANEL TR34
HANDLE BLACK TP3
RUBBER FOOT
ADHESIVE LABEL TR34
COVER D=16 GREY P
TURNING KNOB D=16 BLACK 6MM P
ARROW-DISC D=16 BLACK
ROTARY SWITCH 6 STEPS/2-POLE
COVER D=23 RED P
TURNING KNOB D=23 BLACK 6MM P
ARROW-DISC D=23 BLACK
COVER D=23 GREY
RESISTOR 2K2 10 ABW 1
MOUNTING CASE PIN FR
PIN CONTACT C 1 CPC
FRONT PANEL TR34 TIME
ADHESIVE LABEL TR34 TIME
CHASSIS NOIR TR16
PANNEAU FRONTAL TR34
POIGNEE NOIRE TP3
PIED CAOUTCHOUC
ETIQUETTE ADHESIVE
CACHE BOUTON GRIS 16 P
BOUTON TOURNANT NOIR
DISQUE DE FLECHE NOIR 16
COMMU ROTATIF 6PLOT 2POLE
COUVERCLE 23 ROUGE P
BOUTON TOURNANT NOIR
DISQUE DE FLECHE NOIR 23
CACHE BOUTON GRIS 23
RESISTANCE 2K2 10 ABW 1
ELEMENT RAPPORT BROCHE
CONTACT AIGUILLE C1 CPC
PANNEAU FRONTAL TR34 TIME
ETIQUETTE ADHESIVE TIME
GEHÄUSE SW TR16
DRUCK FRONTPL. TR34
AC
GRIFF SW TP3
GUMMIFUSS TR16/17/19/21/50/STG
KLEBEET. TR34
DECKEL 16 grau
P
DREHKNOPF 16 schw 6mm ACHSE P
MUTTERABD 16 schw
P
SCHALTDREH
6 2
DECKEL 23 rot
P
DREHKNOPF 23 schw 6mm ACHSE P
PFEILSCH 23 schw
P
DECKEL 23 grau
P
WIDPOT 2K2 10
ABW 1
ANBAUGEHÄUSE STIFT STROMQU FR
STIFTKONTAKT
C 1 CPC
DRUCK FRONTPL. TR 34-TIME AC
KLEBEET. TR 34-TIME
TR34 / TR34 TIME
NR. INDEX NUM.
BE4.0750.0058
42.0409.1594
BE2.0200.5381
42.0300.0501
42.0409.1593
42.0406.0107
42.0406.0099
42.0406.0129
43.0002.0153
42.0406.0093
42.0406.0102
42.0406.0122
42.0406.0117
41.0001.0509
32.0405.0160
43.0003.0486
42.0409.2377
42.0409.2376
4.046.003 / 4.046.056
Ersatzteilliste / Spare parts list / Listes de pièces de rechange / Lista de repuestos / Lista de pecas sobresselentes / Lista dei Ricambi
1/1
el_fr_st_fb_00006
001999
2
4,5,6,12
13
3
7,8,9,12
14
10
1
11
7,8,9,12
14
15
POS.
1
2
3
4
5
6
7
8
9
10
11
12
13
14
15
BENENNUNG
BODEN SW TP4-SP
SCHUTZBÜGEL SW TP4-SP
DRUCK FRONTPL. TP4-SP
DECKEL 40 rot
P
DREHKNOPF 40 schw 6mm ACHSE P
PFEILSCH 40 rot
P
DECKEL 16 grau
P
DREHKNOPF 16 schw 6mm ACHSE P
MUTTERABD 16 rot
P
ANBAUGEHÄUSE STIFT STROMQU FR
STIFTKONTAKT
C 1 CPC
WIDPOT 2K2 10
ABW 1
PRINT YTP 6 A
SCHALTKIPP 12146AK
HAFTMAGNET 63 24 6.5
TP4-SP
ARTICLE
BOTTON BLACK TP4-SP
PROTECTION BOW BLACK TP4-SP
FRONT PANEL TP4-SP
COVER 40 RED P
TURNING KNOB 40BLACK AXLE6MM P
ARROW-DISK 40 RED P
COVER D=16 GREY P
TURNING KNOB D=16 BLACK 6MM P
NUT-COVER 16 RED
MOUNTING CASE PIN FR
PIN CONTACT C 1 CPC
RESISTOR 2K2 10 ABW 1
PC-BOARD YTP 6 A
SWITCH TOGGLE 12146AK
CLAMPING MAGNET 63 24 6.5
DENOMINATION
BOUTON NOIR TP4-SP
PROTECTION ARC NOIRE
PANNEAU FRONTAL TP4/SP
CACHE BOUTON ROUGE 40 P
BOUTON A TOURNER NOIR 40
BOUTON CRANTE ROUGE 40 P
CACHE BOUTON GRIS 16 P
BOUTON TOURNANT NOIR
CAPOT ECROU ROUGE 16
ELEMENT RAPPORT BROCHE
CONTACT AIGUILLE C1 CPC
RESISTANCE 2K2 10 ABW 1
CIRCUIT ELECTRONIQUE YTP 6 A
INTER A BASCULE 12146AK
ECROU MAGNETIQUE 63 24
BE4.0460.0009
BE4.0460.0010
46.0460.0001
42.0406.0250
42.0406.0247
42.0406.0249
42.0406.0107
42.0406.0099
42.0406.0213
32.0405.0160
43.0003.0486
41.0001.0509
4.070.293
43.0002.0284
44.0001.0739
4.046.024
Ersatzteilliste / Spare parts list / Listes de pièces de rechange / Lista de repuestos / Lista de pecas sobresselentes / Lista dei Ricambi
1/1
el_fr_st_fb_00017
001999
2
14
4
9
3
1
3
16
15
5
17
12
6
13
7
11
10
1
8
2
POS. BENENNUNG
ARTICLE
DENOMINATION
1
2
3
4
5
6
7
8
9
10
11
12
13
14
15
16
17
CASE BLACK TR52-1
PROTECTION BOW BLACK TR52-1
BOTTON BLACK TR52-1
PEDAL BLACK TR52-1
PRINT CIRCUIT BOARD TR52
MOUNTING FOR SWITCH
TOOTH RACK COMPL.
COMPRESSIVE SPRING 15 75 2,5
ADHESIVE LABEL TR52-1
TOOTHED WHEEL 18 T
PIN-BEARING HK O6O8
MICRO SWITCH
PLATE-SPRING O,6X12X5O
RUBBER SHEET BLACK
MOUNTING CASE PIN FR
PIN CONTACT C 1 CPC
POTENTIOMETER 220 kOhm
BOITIER NOIR TR52-1
ETRIER DE PROTECTION
BOUTON NOIR TR52/1
PEDALE NOIR TR52-1
CIRCUIT ELECTRONIQUE
FIXATION DE INTERRUPTEUR
CREMAILLERE TR/TM52-1
RESSORT DE COMPRESSION
ETIQUETTE ADHESIVE TR52-1
ROUE DENTEE 18 1,0 20X10X20
DOUILLE D.AIGUILLE HK 0608
MICRO SWITCH
RESSORT 0,6X12X50
TAPIS DE CAOUTCHOUC NOIR
ELEMENT RAPPORT BROCHE
CONTACT AIGUILLE C1 CPC
POTENTIOMETRE 220 KOHM
GEHÄUSEMANTEL SW TR52-1
SCHUTZBÜGEL SW TR52-1
GEHÄUSEBODEN SW TR52-1
PEDAL SW TR52-1
PRINT TR 52
SCHALTERHALTERUNG TR52-1
ZAHNSTANGE TR/TM52-1
FEDERDRUCK 17,5/12,5 75 2,5
KLEBEET. TR52-1
ZAHNRAD
18 1,0 20X10X20
NADELHÜLSE HK0608
SCHALTMIKRO
10
1
FEDERBLATT 12 50 0,6
GUMMIMATTE SW 3x308x110
ANBAUGEHÄUSE STIFT STROMQU FR
STIFTKONTAKT
C 1 CPC
WIDPOT220K
10 0621-013 270
TR52 - 1
NR. INDEX NUM.
BE4.0750.0081
BE2.0200.3845
BE4.0750.0083
BE4.0750.0082
4.070.034
44.0750.0085
44.0750.0086
42.0404.0033
42.0409.0875
42.0403.0083
42.0408.0035
43.0002.0004
42.0404.0152
42.0300.1145
32.0405.0160
43.0003.0486
41.0001.0016
4.045.316
Ersatzteilliste / Spare parts list / Listes de pièces de rechange / Lista de repuestos / Lista de pecas sobresselentes / Lista dei Ricambi
1/1
el_fr_st_fb_00003
001999
28
27
POS. BENENNUNG
ARTICLE
DENOMINATION
1
2
3
4
5
6
7
8
9
10
11
12
13
14
15
16
17
18
19
20
21
22
23
24
25
26
27
28
MOTOR PLATE FEED UNIT NEW
COVER PLATE FEED UNIT NEW
PRESSURE LEVER L.FEED-UNIT NEW
PRESSURE LEVER R. FEED UNIT
CLAMPING AXLE FEED UNIT NEW
PRESSURE PART PUSH MOTORPL.PBT
WASHER 988 10x16x0.3
PRESSURE SPRING 13.2/10 32 1.6
CLAMPING NUT FEED UNIT NEW
BOLT FEED UNIT NEW
WAVE INA KHW6 h6x32
WIRE-GUIDE-INSERT 0.8-1.6
INLET PIPE FEED UNIT NEW
WIRE-GUIDE IN.LIN.2,6*1*0,07M
CENTRAL CONNECTION FEEDER-SIDE
LOOK AT SUPPLEMENT
DRIVING-WHEEL 34.5x20 VR142
MOTOR-S 42 117,8/5,355 17,6:1
WED GET
BLIND-COVER IWGT VR130/131/CASE ACTUAL VALUE UNIT TIME 30
TRANSMITTER-DISC ALU ID8 AD40
HEXAGON NUT 934 M4
VZ
PC-BOARD IWGT C
COVER REAL VALUE TRANSMITTER
MOTOR+IWGT+WASHER TIME 30
CENTRAL.CONN. BINZ.
CENTRING DEVICE MO.PL. F-ZA
PLATINE DEVIDOIR
CAPOT DISTRIBUTEUR
LEVIER DE PRESSION L POUR
LEVIER DE PRESSION R
AXE DE SERRAGE
PICE DE PRESSION
RONDELLE 988 10X16X0,3
RESSORT DE COMPRESSION
ECROU DE SERRAGE
ECROU NOUVEAU DEVIDOIR
ONDULATION INA KHW6 H6X32
ENTREE GUIDE FIL 0,8/1,6
TUYAU ENTREE DEVIDOIR
GAINE GUIDE FIL LINER 2,6*1
CONNEXION CENTRALE
VOIR SUPPLEMENT
GALET DE DEVIDAGE
MOTEUR-S 117,8/5,355 17,6:1
FLASQUE
COUVERCLE AVEUGLE IWGT
CHASSIS VALVE TIME 30
DISQUE DE TRANSMISSION
ECROU DE FIXATION M4
CIRCUIT ELECTRONIQUE
CAPOT TRANSMETTEUR
MOTEUR+IWGT TIME 30
CONNEXION CENTRALE BINZEL
MECANISME DE CENTRAGE
MOTORPLATTE PBT 4R BEARBEITET
DECKPLATTE MOTORPL. PBT
DRUCKHEBEL L. MPL.PBT
DRUCKHEBEL R. MPL.PBT
SPANNACHSE MPL.PA 6
DRUCK DRUCKST. MOTORPL. PBT
PASSCHEIBE 988 10X16X0,3
FEDERDRUCK 13,2/10 32 1,8
SPANNMUTTER MPL.PBT
BOLZEN MOTORPLATTE PBT
ZYLINDERSTIFT 6325 D=6m6 x 32
DRAHTF.EINS. 0.8-1.6 D=8x38
EINLAUFROHR MOTORPL.PBT
DRAHTF.SEELE S 2.9x1x0.07M
ZENTRALA.VORSCH.SEITIG-O-RING
SIEHE BEIBLATT
ANTRIEBSRAD Z=21 M=1.5 34x20
MOTOR-S 42 117,8/5,355 17,6:1
PASSFEDER
6885 3x3x10 BL
BLINDABD. ISTWERTG. VR130/131/
GEHÄUSE ISTWERTGEBER TIME 30
IMPULSSCHEIBE ALU ID8 AD40 T60
6-KANT-MUTTER 934 M4
VZ
PRINT IWGT C
DECKEL IST-WERTGEBER
MOTOR+IWGT+KÜHLSCHEIBE TIME 30
ZENTRALA. E-CONN.
ZENTRIERBLOCK MO.PL F-ZA
MOTORPL.42V 4R F-ZA / E-CON. 1,2TI 30M
-
NR. INDEX NUM.
12.0405.0118
22.0405.0114
32.0405.0112
32.0405.0113
42.0405.0117
42.0409.2106
42.0407.0098
42.0404.0264
42.0405.0116
42.0405.0119
42.0200.7767
42.0100.0333
42.0405.0120
42.0404.0305
44.0001.0052
-----------------44.0001.0683
33.0006.0131
42.0407.0005
42.0405.0082
42.0300.2204
43.0011.0029
42.0400.0222
4.070.294
42.0405.0081
43.0006.0139
44.0001.0442
32.0405.0196
44.0001.1058 / 44.0001.1065
Ersatzteilliste / Spare parts list / Listes de pièces de rechange / Lista de repuestos / Lista de pecas sobresselentes / Lista dei Ricambi
1/1
el_fr_st_mp_00074
001999
brake mechanism.
34,0250,0028
42,0401,0545
42,0404,0034
42,0401,0109
42,0001,0102
42,0404,0026
42,0200,0070
42,0100,0013
32,0001,0265
42,0300,0009
44,0250,0027
brake mechanism.
Ersatzteilliste / Spare parts list / Listes de pièces de rechange / Lista de repuestos / Lista de pecas sobresselentes / Lista dei Ricambi
el_fr_st_so_00182
1/1
012002
POS.
1
2
3
4
5
6
7
8
9
10
11
12
13
14
15
16
17
18
19
20
21
22
23
24
25
26
27
BENENNUNG
SCHLAUCH SCHUTZ MG 45x1,5 SW
ZUGENTLASTUNG TA500
KLEMME SCHRAUB 32-50
ZUGENTL.ROHR SPL.TRABANT/HUMAN
KÜHLERSCHL. D=48X4.5X50
SCHWEISSKABEL H01N2-D 95MM2
KABELSTECKER
-95 800
KABELKUPPLUNG
-95 800
KABEL PVC ÖY 12x0.75
SCHUTZKAPPE
23
STIFTGEHÄUSE
23
37
STIFTKONTAKT
C 1 CPC
BUCHSENGEHÄUSE 23 37 KUPP.
BUCHSENKONTAKT
C 1 CPC
KABEL PVC YSLYJZ 18x0.5
SCHLAUCH SILI MG 20x1.0
WS
SCHLAUCH PVC MG 5x3 SW
KLEMME 1OHR M. EINLAGE 11,3
ANSCHLUSS GASARMATUR 1/4"
KLEMME 1OHR M. EINLAGE 13,3
ÜBERWURFMUTTER R3/8"/D=20x13
SCHLAUCHANSCHL. D=13x32 ST1/2/
DICHTUNG RUND ID= 7x2.0 NBR 70
SCHLAUCH RAUFI MG 8x3 TR
SCHLAUCHANSCHL.NIPPEL 21SBTF08
SCHNELLKUPPLUNG 21KBTF08
STECKNIPPEL 21SFTF08MXX
ARTICLE
HOSE PROTECTION WF 45X1,5 BLA
TRACTION RELEASE TA500
CLAMP SCREW 32-50
CORD FASTENER PIPE D=44X50
COOLER-HOSE D=48x4.5x50
WELD. BABLE 955MM2 GSFFUö
CABLE-PLUG -95 800
CABLE-COUPLING -95 800
PVC-CABLE öY 12X0,75
PROTECTION CAP 23
PIN HOUSING 23 37
PIN CONTACT C 1 CPC
SOCKET CASE 23 37
SOCKET-CONTACT C 1 CPC
PVC-CABLE YSLYJZ 18x0.5
INSULATION HOSE GL-SI/S15 20X1
HOSE PVC THREADED D=5X3 BLACK
HOSE CLAMP 11,3
CONNECTION FOR GAS ARMATURE
CLAMP 1 EAR W.INSERT 13.3
CAP NUT R 3/8 „ D=20X13
HOSE CONNECTION D=13.OX32
SEALING ROUND 7x2.0 NBR70
RAUFILAM HOSE MG 8X3 TR
HOSE CONNECTION NIPP. 21SBTF08
QUICK CONNECT 21KBTF08
PLUG NIPPLE 21SFTF08MXX
30M W. MEYER PAPENBURG
DENOMINATION
TUYAU DE PROTECTION MG
ECROU FREIN TA500
VIS DE CONNEXION 32/50
ATTACHE TUYAU 44X50
TUYAU DE REFROIDISSEUR
CABLE DE SOUDAGE H01N2-D 95MM²
CABLE-PRISE -95 800
RACCORD DE CABLE -95 800
CABLE PVC OY 12X0,75
CAPOT PROTECTION
PROTECTION AIGUILLE 23 37
CONTACT AIGUILLE C1 CPC
CAPOT SUPPORT 23 27 KUPP.
SUPPORT CONTACT C 1 CPC
CABLE PVC YSLYJZ 18X0,5
TUYAU ISOLANT GL SI/S15
TUYAU PVC FILETE NOIR
COLLIER DE SERRAGE 11,3
RACCORD GAZ
COLLIER DE SERRAGE 13,3
CHAPEAU ECROU R 3/8 20X13
RACCORD TUYAU 13X32
RONDELLE DE JOINT 7x2.0 NBR70
TUYAU RAUFILAM MG 8X3 TR
RACCORD DE TUYAU 21 SBTF08
RACCORD RAPIDE 21KBTF08
MANCHON PRISE 21SFTFO8MXX
40.0001.0095
44.0750.0009
42.0407.0072
42.0001.1337
42.0300.1449
40.0003.0015
43.0003.0301
43.0003.0385
40.0003.0117
43.0003.0484
43.0003.0483
43.0003.0486
43.0003.0566
43.0003.0485
40.0003.0284
40.0001.0106
40.0001.0012
42.0407.0062
44.0450.0281
42.0407.0063
42.0001.0943
42.0001.0942
42.0402.0053
40.0001.0008
44.0001.1004
44.0001.1139
44.0001.0971
4,047,112
Ersatzteilliste / Spare parts list / Listes de pièces de rechange / Lista de repuestos / Lista de pecas sobresselentes / Lista dei Ricambi
1/1
el_fr_st_vp_00099
011999
Fronius Worldwide - www.fronius.com/addresses
A
FRONIUS International GmbH
4600 Wels, Buxbaumstraße 2
Tel: +43/(0)7242/241-0, Fax: +43/(0)7242/241-394
E-Mail: [email protected]
http://www.fronius.com
D
57052 Siegen, Alcher Straße 51
Tel: +49/(0)271/37515-0, Fax: +49/(0)271/37515-15
38640 Goslar, Im Schleeke 112
Tel: +49/(0)5321/3413-0, Fax: +49/(0)5321/3413-31
4600 Wels, Buxbaumstraße 2
Tel: +43/(0)7242/241-0, Fax: +43/(0)7242/241-349
Service: DW 307, 340, Ersatzteile: DW 339
E-Mail: [email protected]
10365 Berlin, Josef-Orlopp-Straße 92-106
Tel: +49/(0)30/557745-0, Fax: +49/(0)30/557745-51
6020 Innsbruck, Amraserstraße 56
Tel: +43/(0)512/343275, Fax: +43/(0)512/343275-725
21493 Talkau, Dorfstraße 4
Tel: +49/(0)4156/8120-0, Fax: +49/(0)4156/8120-20
5020 Salzburg, Lieferinger Hauptstraße 128
Tel: +43/(0)662/430763, Fax: +43/(0)662/430763-16
70771 Leinfelden-Echterdingen (Stuttgart),
Kolumbus-Straße 47
Tel: +49/(0)711/782852-0, Fax: +49/(0)711/782852-10
2345 Brunn am Gebirge, Campus 21,
Europaring F11 101
Tel: +43/(0)7242/241-0, Fax: +43/(0)7242/241-349
04328 Leipzig, Riesaer Straße 72-74
Tel: +49/(0)341/27117-0, Fax: +49/(0)341/27117-10
1100 Wien, Favoritner Gewerbering 25
Tel: +43/(0)7242/241-0, Fax: +43/(0)7242/241-349
01723 Kesseldorf (Dresden), Zum alten Dessauer 13
Tel: +49/(0)35204/7899-0, Fax: +49/(0)35204/7899-10
Wilhelm Zultner & Co.
8042 Graz, Schmiedlstraße 7
Tel: +43/(0)316/6095-0, Fax: +43/(0)316/6095-80
Service: DW 325, Ersatzteile: DW 335
E-Mail: [email protected] - www.zultner.at
Wilhelm Zultner & Co.
9020 Klagenfurt, Fallegasse 3
Tel: +43/(0)463/382121-0, Fax: +43/(0)463/382121-40
Service: DW 430, Ersatzteile: DW 431
E-Mail: [email protected] - www.zultner.at
Gebr. Ulmer GmbH & Co.
6850 Dornbirn, Rathausplatz 4
Tel: +43/(0)5572/307, Fax: +43/(0)5572/307-399
Service: DW 369, Ersatzteile: DW 369
CH
FRONIUS Schweiz AG
8153 Rümlang, Oberglatterstraße 11
Tel: +41/(0)1817/9944, Fax: +41/(0)1817/9955
E-Mail: [email protected]
CZ
FRONIUS Ceská republika s.r.o.
100 00 Praha 10, V Olsinách 1022/42
Tel: +420/(0)2/72742369, Fax: +420/(0)2/72738145
E-Mail: [email protected]
38101 Ceský Krumlov, Tovarni 170
Tel: +420/(0)337/712080, Fax: +420/(0)337/711284
D
FRONIUS Deutschland GmbH
67661 Kaiserslautern, Liebigstraße 15
Tel: +49/(0)631/35127-0, Fax: +49/(0)631/35127-50
E-Mail: [email protected]
90530 Wendelstein, Wilhelm-Maisel-Straße 32
Tel: +49/(0)9129/2855-0, Fax: +49/(0)9129/2855-32
51149 Köln Gremberghoven, Welserstraße 10 b
Tel: +49/(0)2203/97701-0, Fax: +49/(0)2203/97701-10
67753 Hefersweiler, Sonnenstraße 2
Tel: +49/(0)6363/993070, Fax: +49/(0)6363/993072
F
FRONIUS France SARL
60306 SENLIS CEDEX, 13 avenue Félix Louat - B.P.195
Tél: +33/(0)3/44 63 80 00, Fax: +33/(0)3/44 63 80 01
E-Mail: [email protected]
N
FRONIUS Norge AS
3056 Solbergelva, P.O. BOX 32
Tel: +47/(0)32/232080, Fax: +47/(0)32 / 232081
E-Mail: [email protected]
SK
FRONIUS Svareci Technika spol. s.r.o.
917 01 Trnava, Priemyselná 1
Tel+ Fax: +421/(0)805/5501761
E-Mail: [email protected]
TR
FRONIUS Kaynak Makinalari San. VE TIC. A.S.
81520 Istanbul, Seyhli, Köyalti Mevkii, Pendik
Tel: +90/(0)216/3785000, Fax: +90/(0)216/3787936
UA
FRONIUS Fackel GmbH
07455 Ukraine, Kiewskaya OBL..,
S. Knjashitschi, Browarskogo R-NA
Tel: +38/(0)44/94-62768; +38/(0)44/94-54170
Fax: +38/(0)44/94-62767; +38 /(0)44/94-60600
E-Mail: [email protected]
USA FRONIUS USA LLC
10503 Citation Drive, Brighton, Michigan 48116
Tel: 810/220-4414, Fax: 810/220-4424
E-Mail: [email protected]
Under http://www.fronius.com/addresses you will find all addresses of our sales branches and partner firms!
ud_fr_st_so_00082
032002