1
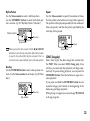
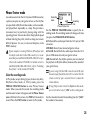
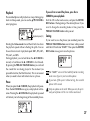
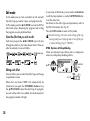
E F G J
取扱説明書
1
Bedienungsanleitung
Manuel d’utilisation
Owner’s manual
Precautions
Location
Using the unit in the following locations can result in a
malfunction.
• In direct sunlight
• Locations of extreme temperature or humidity
• Excessively dusty or dirty locations
• Locations of excessive vibration
• Close to magnetic fields
Power supply
Please connect the designated AC adapter to an AC
outlet of the correct voltage. Do not connect it to an AC
outlet of voltage other than that for which your unit is
intended.
Interference with other electrical devices
Radios and televisions placed nearby may experience
reception interference. Operate this unit at a suitable
distance from radios and televisions.
Handling
To avoid breakage, do not apply excessive force to the
switches or controls.
2
Care
If the exterior becomes dirty, wipe it with a clean, dry
cloth. Do not use liquid cleaners such as benzene or
thinner, or cleaning compounds or flammable polishes.
Keep this manual
After reading this manual, please keep it for later reference.
Keeping foreign matter out of your equipment
Never set any container with liquid in it near this equipment. If liquid gets into the equipment, it could cause a
breakdown, fire, or electrical shock.
Be careful not to let metal objects get into the equipment. If something does slip into the equipment, unplug the AC adapter from the wall outlet. Then contact
your nearest Korg dealer or the store where the equipment was purchased.
THE FCC REGULATION WARNING (for USA)
This equipment has been tested and found to comply
with the limits for a Class B digital device, pursuant to
Part 15 of the FCC Rules. These limits are designed to
provide reasonable protection against harmful interference in a residential installation. This equipment generates, uses, and can radiate radio frequency energy
and, if not installed and used in accordance with the
instructions, may cause harmful interference to radio
communications. However, there is no guarantee that
interference will not occur in a particular installation. If
this equipment does cause harmful interference to radio or television reception, which can be determined
by turning the equipment off and on, the user is encouraged to try to correct the interference by one or
more of the following measures:
• Reorient or relocate the receiving antenna.
• Increase the separation between the equipment and
receiver.
• Connect the equipment into an outlet on a circuit different from that to which the receiver is connected.
• Consult the dealer or an experienced radio/TV technician for help.
Unauthorized changes or modification to this system can void the user’s authority to operate this equipment.
Notice regarding disposal (for EU)
If this “crossed-out trash can” symbol is shown
on the product or in the operating manual, you
must dispose of the product in an appropriate
way. Do not dispose of this product along with
your household trash. By disposing of this product correctly, you can avoid environmental harm
or health risk. The correct method of disposal
will depend on your locality, so please contact
the appropriate local authorities for details.
* Company names, product names, and names of formats
etc. are the trademarks or registered trademarks of their
respective owners.
3
Table of Contents
Precautions ............................................... 2
Introduction .............................................. 6
Main features ........................................... 6
Turning on the power ................................ 7
Controls and connectors ............................ 8
LCD screen ................................................................ 10
Making connections ................................ 11
Connecting to your Computer .............................. 13
Using the editor software ............................................... 13
Transferring audio data .................................................. 13
Initial Settings ......................................... 15
Quick Edit ................................................................. 15
Play mode .............................................. 16
Selecting a program ................................................ 16
PROGRAM MEMORY [A], [B], [C], [D] buttons ......... 16
Using foot switches to select programs ......................... 16
Master level ............................................................... 16
Bypass/Mute ............................................................. 17
Tuner ........................................................................... 17
Specifying the function of the Value encoder .. 18
Key Lock function ................................................... 18
Rhythm & Bass mode .............................. 19
PTN (Pattern play) ................................................... 19
CHAIN (Chain play) ............................................... 21
SONG (Song play) ................................................... 23
Phrase Trainer mode ............................... 25
Select the recording mode ..................................... 25
Recording .................................................................. 26
Playback ..................................................................... 27
Pause ........................................................................... 27
Saving ......................................................................... 27
4
Edit mode ............................................... 28
MIDDRUM: MIDI Drum/Bass ...................................... 36
Select the effect that you wish to edit ................. 28
Editing each effect ................................................... 28
Loading the factory-set data ................... 36
DYNA: Dynamics & Pickup Modeling .........................
AMP: Amp Modeling ......................................................
CAB: Cabinet Modeling ..................................................
MOD: Modulation & Filter Effect Modeling ................
DLY: Delay Modeling ......................................................
DLY: Delay Time ..............................................................
REV: Reverb Modeling ....................................................
NR: Noise reduction ........................................................
RENAME ..........................................................................
WRITE ...............................................................................
28
29
29
30
30
30
30
31
31
31
Utility mode ............................................ 32
Select a utility function .......................................... 32
Change settings for each utility function .......... 32
BACKLIGHT: LCD backlight on/off ............................
KEY-TRN: Key transpose ................................................
KTR+BC: Key transpose + bass cancel ..........................
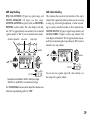
AMP/LIN: Amp/line select ...........................................
FOOTSW: Foot switch pedal settings ............................
USBSEND: USB Send ......................................................
USB RCV: USB Receive ...................................................
AUX>USB: USB audio interface ....................................
32
32
33
33
34
35
35
35
Effect Parameter List ............................... 37
DYNA: Dynamics & Pickup modeling ............... 37
AMP: Amp Modeling ............................................. 39
CAB: Cabinet modeling ......................................... 43
MOD: Modulation & Filter Effect Modeling .... 45
DLY: Delay Modeling ............................................. 49
REV: Reverb Modeling ........................................... 50
Preset Program Names ........................... 51
Rhythm Pattern List ................................. 52
Troubleshooting ...................................... 53
Specifications .......................................... 55
5
Introduction
Thank you for purchasing the KORG PANDORA PX5D
personal multi-effect processor. In order to enjoy your
PANDORA PX5D, please read this owner’s manual carefully and retain it for future reference.
Main features
The PX5D is a versatile multi-effect unit that packs an
incredible range of guitar amps, bass amps and effects
into a compact unit which utilizes Korg’s proprietary
“
” modeling technology to create detailed and
powerful modeling sounds.
Rhythm and Bass function
128 types of rhythm and bass patterns or a metronome
can be used. 16 multiple patterns can also be connected
for successive playback.
100 user and 100 preset programs
Phrase Trainer function
You can use Rhythm & Bass mode to specify a rhythm
pattern, play along with this rhythm pattern from an audio source connected to the AUX jack or USB connector
or on your guitar (or bass) connected to the INPUT jack
while you record the result, and then play back the recording as a loop (maximum of approximately 80 seconds). The playback speed can also be slowed down
without affecting the pitch of the audio. The rhythm selected in Rhythm & Bass mode and the effect output can
also be recorded simultaneously.
Control dials
The PX5D includes 18 types of guitar amp models, 10
types of bass amp models, and 6 type of synths, each of
which can be edited quickly and easily.
AUX pitch function
This lets you modify the pitch of audio from the AUX
jack or USB connector (Key Transpose function) or cancel the low-frequency region (Bass Cancel function).
Backlit LCD
The large LCD screen can be easily viewed even in dark
locations.
TAP/BYPASS button
You can easily set the Delay Time or the tempo of the
Rhythm & Bass function to match the tempo of the song.
180 types of effect variations with a maximum of seven
effects that can be used simultaneously.
IPE (Integrated Parameter Edit) allows effects to be
quickly edited.
6
Auto Tuner function
This feature makes tuning fast and easy. You can also
tune without being heard (i.e., while muted).
Value encoder
This lets you rapidly select programs or edit the effects.
USB-MIDI, USB audio interface function
If you use the included USB cable to connect the PX5D
to your computer, you’ll be able to use the editor software* to edit the PX5D or transfer audio data between
the PX5D and your computer.
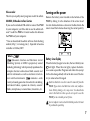
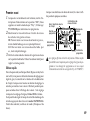
Turning on the power
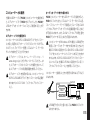
Remove the battery cover located on the bottom of the
PX5D by sliding it in the direction of the arrow. Insert
two AA alkaline batteries as shown in the illustration. Be
sure to insert the batteries observing the correct polarity.
*: You can download the editor software from the Korg
website (http://www.korg.com/). Expected to become
available in October, 2007.
What is
?
(Resonant structure and Electronic circuit
Modeling System) is KORG’s proprietary sound
modeling technology which precisely reproduces the
complex character and nature of both acoustic and
electric instruments as well as electronic circuits in
real world environments.
emulates a wide
variety of sound generation characteristics including
instrument bodies, speakers & cabinets, acoustic
fields, microphones, vacuum tubes, transistors, etc.
Battery Low display
When the battery begins to run low, the Low Battery icon
will light. When this icon lights, replace the batteries as soon as possible. Programs and other data (except
for the data being edited) will not be lost even if the battery is removed and changed.
Batteries that have run down must be removed from the
PX5D. If you leave dead batteries in the unit, malfunctions (battery leakage, etc.) may occur. You should also
remove the batteries when you do not expect to use the
PX5D for an extended period of time.
An AC adapter is not included with this product. It must
be purchased separately.
7
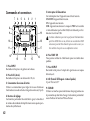
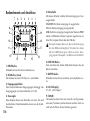
Controls and connectors
7
6
5
4
3
2
1
8
9
19
10
18
11
17
12
13
14
15
16
1. INPUT jack
Connect your guitar or bass to this jack.
2. AUX jack (stereo)
Connect this jack to a CD player or other audio source.
3. INPUT switch
Use this to adjust the input level depending on the output level of your guitar or bass (☞p.15).
4. Control dials
These dials control the gain, tone, and volume of the amp
models and synth parameters.
8
5. Power switch
This switch turns the power on/off.
STANDBY: The power is off.
ON: The power is on.
USB: The power is on. When the PX5D is connected to
your computer via the USB cable, your computer will
supply power via the USB bus.
Some computers may not be able to supply power via USB
bus power. In this case, use a self-powered USB hub (that
obtains power from an external supply), use two batteries, or use the AC adaptor.
6. FOOT SW jack
You can use the included cable for FOOT SW jack to connect two foot switches.
7. OUTPUT jack
Connect this jack to your guitar amp, bass amp, or headphones etc.
8. LCD (Liquid Crystal Display)
(☞p.10 “LCD screen”)
9. CURSOR
Use these buttons to select programs or the parameter
that you wish to edit. These will also operate the Phrase
Trainer function.
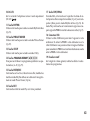
10. DC4.5V
The separately sold AC adapter (DC4.5V
nected here.
) is con-
11. RHYTHM button
Use this button to enter Rhythm & Bass mode (☞p.19).
12. PHRASE TRAINER button
Use this button to enter Phrase Trainer mode (☞p.25).
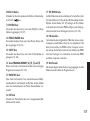
18. USB connector
Use the included USB cable to connect this to your computer. You’ll be able to use the editor software to edit the
PX5D or transfer audio data between the PX5D and your
computer.
19. Value encoder
Use this to adjust the master level, edit effects, and select programs.
13. UTILITY button
Use this button to enter Utility mode (☞p.32).
14. PROGRAM MEMORY [A] [B] [C] [D] buttons
You can assign your favorite programs to these four buttons (A–D) (☞p.16).
15. ENTER/REC button
This button is used to switch an effect on/off, to edit
patterns in Rhythm & Bass mode, or to start recording
in Phrase Trainer mode.
16. EXIT button
Returns to Play mode or to the preceding screen.
17. TAP/BYPASS button
In Edit mode this button lets you specify the delay time
for delay effects (☞p.15), or the rhythm tempo for rhythm
& bass mode (☞p.19). In Play mode, this button will Bypass or Mute the PX5D, and activate the Tuner (☞p.17).
9
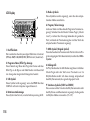
LCD screen
9
1
2
8
3
4
5
6
7
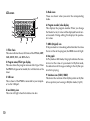
1. Effect chain
This area indicates the on/off status of the DYNA, AMP,
CAB, MOD, DLY, and REV effects.
2. Program name/Effect type display
This area shows the program name or effect type. When
the PX5D is bypassed or muted, this will function as the
tuner.
3. USB icon
This is shown if the PX5D is connected to your computer via the USB port.
4. Low Battery icon
This icon will light when the batteries run low.
10
5. Mode icons
These are shown when you enter the corresponding
mode.
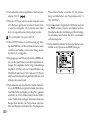
6. Program number/value display
This displays the program number. When you change
the Master Level, its value will be displayed here for several seconds. During editing, this displays the parameter values.
7. ORIG (Original) icon
If the parameter or value being edited matches the value
that is written in the program, the ORIG icon will light.
8. Bar graph
In Play mode or Edit mode, this graph indicates the master level or the value of a parameter. In Rhythm mode,
this indication will change according to the rhythm pattern that’s playing.
9. Variation icons (VARI1, VARI2)
This shows the variation of the rhythm pattern or rhythm
& bass pattern you’re using in Rhythm mode (☞p.20).
Making connections
When connecting an external device (ie-guitar amp, bass amp, CD player, AC adapter, etc.) be sure to turn the unit
off.
CD player etc.*2
Foot switch *5
guitar or bass
headphone*4
mini-component /
stereo etc.
*3
guitar amp /bass amp/
powered monitor
*6
*7
Computer
Digital recorder
AC adapter *1
11
*1 Be sure to use only the specified AC adapter (DC4.5V
).
*2 If a CD player or other audio source is connected to
the AUX jack, you can play along with your guitar or
bass. However the volume must be adjusted from the
connected device.
Connecting cables are sold separately.
*3 The PX5D’s output jack is stereo. If you use a mono
cable to connect it to a guitar or bass amp etc., only
the L (left) output will be heard.
*4 The PX5D’s output level and sound quality will vary
depending on which headphones are used. We recommend using good quality low impedance headphones, 32 Ohms or less with a sensitivity rating near
100dB/mW or above. Many headphones sold for use
with portable CD or cassette players will work fine.
*5 Use the included cable for FOOT SW jack to connect
two foot switches to the PX5D. You can connect two
foot switches such as the Korg PS-1 (sold separately).
In Utility mode you can specify the function of the
pedal switches; for example you can use them to
switch programs, or to start/stop recording and playback in Phrase Trainer mode (☞p.16 “Using foot
switches to select programs,” ☞p.34 “FOOTSW”).
12
*6 Use the included USB cable if you want to connect
the PX5D to your computer. For details on connections to your computer, refer to “Connecting to your
computer.”
*7 If needed, you can attach the included rubber feet to
the bottom of the PX5D.
Connecting to your Computer
If you use the included USB cable to connect the PX5D
to your computer, you’ll be able to use the editor software to edit the PX5D, and transfer audio data between
the PX5D and your DAW software.
Using the editor software
The editor software lets you edit programs, manage data
libraries, and create chains for Rhythm & Bass mode.
You can download the editor software from the Korg website (http://www.korg.com/). For details on installing and
using the editor software, refer to the owner’s manual.
In order to use the editor software, you’ll need to install
the KORG USB-MIDI driver into your computer. (“Installing the software” in the included CD-ROM).
Transferring audio data
If you use a USB cable to connect the PX5D to your computer, the PX5D’s effect output, the rhythm sounds of
Rhythm & Bass mode, and phrases you recorded in
Phrase Trainer mode can be recorded directly into audio
tracks of your DAW software. The playback of your DAW
software can also be monitored through the PX5D.
If you’re computer is running Windows XP, we recommend that you install the KORG USB-ASIO driver (in
the included CD-ROM) into your computer if you want
to transfer audio using the USB connector. For details
on installing the KORG USB-ASIO driver, refer to “Installing the software” on the included CD-ROM.
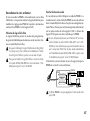
The following illustration shows the signal flow when
the PX5D is connected to your computer.
OUTPUT
PX5D
Rhythem&Bass
INPUT
Effect
Phrase Trainer
USB
The PX5D’s effect will not apply to the audio input via
the USB connector.
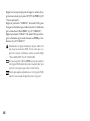
13
Adjust the master level setting to change the volume of
the audio signal that’s sent from the PX5D’s OUTPUT
jack (☞p.16 “Master level”).
Adjust the Utility mode “USBSEND” setting to change
the volume of the audio signal that’s sent from the
PX5D’s USB connector to the computer (☞p.35 “USBSEND”).
Adjust the Utility mode “USB RCV” setting to change
the volume of the audio signal that’s input from the computer to the PX5D (☞p.35 “USB RCV”).
Normally, the signal that’s being input from the AUX
jack is not sent to the USB connector. If you want the
input signal from the AUX jack to be sent to your computer, access the Utility mode “AUX > USB” screen
(☞p.35 “AUX>USB”).
If you’re recording the PX5D’s effect output onto an audio track of your DAW software, turn off the “audio in
thru” function of your software to prevent echo-back.
For details on using your DAW software, refer to the operation manual included with your software.
14
Initial Settings
1
2
3
When you finish making connections, set the power
switch to the “ON” position. (This setting is referred
to as Play mode.)
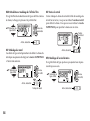
Use the π/† CURSOR to select a program.
Set the input level switch depending on the output
level of your guitar or bass.
HI: High-output pickups (e.g., humbucking or pickups with a preamp)
LO: Low-output pickups (e.g., single-coil type pickups)
Set the volume control of your guitar or bass to its
usual position. Use the Value encoder to adjust the
master level.
When you set the delay time, the value display will indicate the delay time for several seconds.
Amp gain, tone, and volume
Input level switch
Program
name
Master level
adjustment
Program
selection
Set the
delay time
Program
number
Settings that you make using Quick Edit will return to
the original saved settings if you change programs or turn
off the power before Writing (☞p.31 “WRITE”).
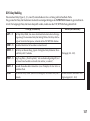
Quick Edit
In each mode (except when Mute/Bypass or Key Lock
are active), you can use the Control dials to adjust the
gain, tone, or volume of amp modeling. When you move
a control dial, the parameter name and value will appear
for several seconds in the value display. If the setting
matches the original setting, the ORIG icon will light.
The Delay Time can also be set by pressing the TAP/BYPASS button twice at the desired interval (except when
in Rhythm & Bass mode).
15
Play mode
Play mode is the mode in which you will normally use
the PX5D.
Selecting a program
Use the π/† CURSOR to select a program. The program/effect type display will show the program name,
and the value display will show the program number.
You can select from one hundred user programs (U00–
U99) and one hundred preset programs (P00–P99). You
can select programs even if you’re in Rhythm & Bass
mode, Phrase Trainer mode (except while recording), or
Utility mode (except while in certain screens).
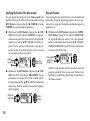
PROGRAM MEMORY [A], [B], [C], [D] buttons
You can assign four of your favorite programs to the PROGRAM
MEMORY [A]–[D] buttons. While you perform, simply press
the corresponding PROGRAM MEMORY [A]–[D] button and
the selected program will be recalled instantly.
Here’s how to assign a program to a button. In this example,
we’ll assign the selected program to button [A].
1
2
16
Use the π/† CURSOR to select the program you
want to assign to button [A].
Press and hold the PROGRAM MEMORY [A] button
for approximately one second. The LCD will indicate
“PGM>A,” and the selected program will be assigned
to button [A].
You can use a foot switch connected to the FOOT SW
jack to switch between the four programs assigned to
PROGRAM MEMORY [A]–[D] (☞p.34 “FOOTSW”).
Using foot switches to select programs
If you connect foot switches to the PX5D’s FOOT SW jack
and use Utility mode to assign the Pedal Switch function,
you’ll be able to use the foot switches to select programs.
Use the included cable for FOOT SW jack to connect your
foot switches. The red jack on one end of the cable will be
Program Up, and the other white jack will be Program
Down (☞p.11 “Making connections,” p.34 “ FOOTSW”).
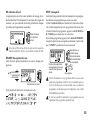
Master level
When you turn the Value encoder to adjust the master
level, the master level value will be shown in the program
number/value display for several seconds. The bar graph
will also change to indicate the level. The master level is
remembered even when the power is turned off.
Bar gragh
Program number display
Master level value
You can also adjust the settings so that the π/† CURSOR will adjust the master level (☞p.18 “Specifying the
function of the Value encoder”).
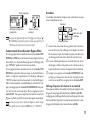
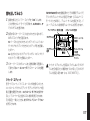
Tuner
The tuner will operate when you bypass or mute.
meter
Bypass/Mute
sharp
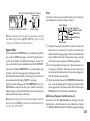
When you press the TAP/BYPASS button for approximately one second, the PX5D will be bypassed, and the
original sound will be dry (no effects). The effect chain
will blink, and the display will indicate “BYPASS” for
approximately one second.
If you press and hold the TAP/BYPASS button for approximately two seconds, the output signal will be muted. The effect chain will blink rapidly, and the display
will indicate “MUTE” for approximately one second.
Bypass/mute will be turned off when you press the TAP/
BYPASS button once again. You can also return to Play
mode by pressing the EXIT button. Bypass or Mute can
also be entered from modes other than Play mode.
note name
calibration
You can also activate Bypass or Mute using two foot
switches connected to the PX5D (☞p.34 “ FOOTSW”).
center mark
1
2
3
Play a single string on your guitar or bass.
The LCD will show the note name and the calibration. If the pitch is more than a semitone higher than
the note name, a sharp symbol will appear at the
upper right of the note name.
The display area will act as a meter to show the pitch.
Tune each string of your guitar or bass so that the
indicator above the center mark is lit.
When you press either the TAP/BYPASS button, the
tuner (bypass/mute) will be turned off. You can also
return to Play mode by pressing the EXIT button.
Calibration (Standard pitch A = 440)
You can use the Value encoder to adjust the calibration
in the range of A = 438 Hz–445 Hz. The calibration setting you make will remain until the power is turned off.
Once the power is turned off, calibration will be reset to
A = 440 Hz.
17
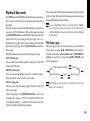
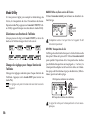
Specifying the function of the Value encoder
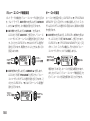
Key Lock function
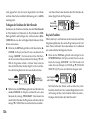
You can specify the function that the Value encoder will
perform in Play mode. While in Play mode, hold down the
EXIT button and press either the √ CURSOR or the ®
CURSOR to assign the following functions.
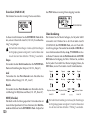
● Hold down the EXIT button and press the √ CURSOR. The LCD will indicate “MASTER” for approximately one second. The Value encoder will adjust the
master level, and the π/† CURSOR will select programs. You can use the Value encoder to quickly adjust the master level. Each time the power is turned
on, this setting will be in recalled.
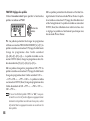
By activating the Key Lock function, you can disable all
operations except for selecting programs. This is a convenient way to prevent accidental operation during a live
performance.
● Hold down the EXIT button and press the TAP/BYPASS button. The LCD will indicate “KEYLOCK”
for approximately one second. The value encoder,
buttons, and knobs other than the π/† CURSOR,
PROGRAM MEMORY [A]–[D] buttons, and the foot
switches will not function.
Select
a program
Adjust the
master level
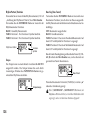
● Hold down the EXIT button and press the ® CURSOR. The LCD will indicate “PROGRAM” for approximately one second. The Value encoder will select programs, and the π/† CURSOR will adjust the
master level. You can use the Value encoder to quickly
select programs.
Adjust the
master level
18
Select a
program
Only program
selection is
possible
The Key Lock function will be cancelled when the
power is turned off. You can also cancel the Key Lock
function by performing “Specifying the function of
the Value encoder.”
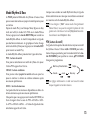
Rhythm & Bass mode
The PX5D provides 128 different rhythm & bass patterns.
You can also connect up to 16 patterns for consecutive
playback.
From Play mode (except when Mute, Bypass, or Key Lock
are active), AUX Pitch mode, or Phrase Trainer mode, press
the RHYTHM button to enter Rhythm & Bass mode. The
pattern will start according to the play type you’ve selected. The bar graph will change according to the rhythm
pattern that’s playing. Press the EXIT button to return to
Play mode.
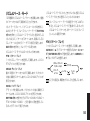
Rhythm & Bass mode provides three types of play.
PTN: Pattern play
You can select one rhythm pattern and play it. The LCD
shows the PTN icon.
CHAIN: Chain play
You can connect up to 16 patterns for consecutive playback. Playback will start after a pre-count.
SONG: Song play
This lets you play the demo songs. Playback will start
after a pre-count.
When you enter Rhythm & Bass mode, the selected type
of play will be the type that had been selected when you
last exited Rhythm & Bass mode.
If you set the Phrase Trainer recording mode to “JAM,”
you’ll be able to record your guitar or bass phrase along
with the rhythm & bass pattern that’s selected in Rhythm
& Bass mode.
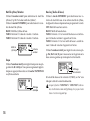
PTN (Pattern play)
This play type lets you select and play one rhythm &
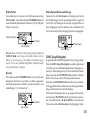
bass pattern. Use the √/® CURSOR to select each parameter, and use the value encoder and the ENTER/REC
button to specify its value. The π/† CURSOR will
switch programs.
Rhythm pattern/variation
Reverb level
Level
Tempo
Bass key
The settings you select here are remembered even when
the power is turned off.
Each time you press the RHYTHM button, you’ll cycle
through the choices of PTN→CHAIN→SONG→PTN→CHAIN→SONG ..., and the LCD will show the icon
for the currently selected type of play.
19
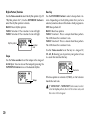
Rhythm Pattern/Variation
Use the Value encoder to select the rhythm pattern (☞p.52
“Rhythm pattern list”). Use the ENTER/REC button to
select the rhythm pattern variation.
BASIC: Basic rhythm pattern.
VARI1: Variation 1. The variation 1 icon will light.
VARI2: Variation 2. The variation 2 icon will light.
Rhythm pattern
variation
icon
Tempo
Use the Value encoder to set the tempo in the range of
40–240 bpm. You can also set the tempo by pressing the
TAP/BYPASS button twice at the desired rhythm.
Bass Key
Use the ENTER/REC button to select a bass pattern variation. Depending on the rhythm pattern that you have
selected, some bass lines will include a chord progression.
OFF: Bass pattern off.
BASIC: Basic bass pattern.
VARI1: Variation 1. This is a major chord bass pattern.
The LCD shows the variation 1 icon.
VARI2: Variation 2. This is a minor chord bass pattern.
The LCD shows the variation 2 icon.
Use the Value encoder to set the key in a range of C,
C#...A#, B allowing you to practice your guitar or bass
in a scale that matches that key.
Root note
Tempo
If the bass pattern is variation 2 (VARI2), an “m” is shown
beside the root note.
If “MTRONM0”–“MTRONM9”(metronome) is selected as the rhythm pattern, there will be no bass notes, and
this screen will not appear.
20
Level
Use the Value encoder to set the level of Rhythm & Bass
sound.
Level
Reverb
Use the Value encoder to set the amount of Reverb for
the Rhythm & Bass.
Reverb level
This uses the same reverb as the program effect. This parameter has no effect if you have selected a program that
does not use reverb modeling, or if the reverb effect level
is “0.”
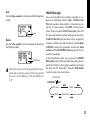
CHAIN (Chain play)
Two or more rhythm & bass patterns connected in a sequence are collectively called a “chain.” CHAIN (Chain
Play) lets you edit a chain and play it. One chain can connect up to sixteen patterns. The PX5D contains twenty
chains. When you select CHAIN (Chain play), there will
be a pre-count and then playback will begin automatically.
CHAIN (Chain Play) lets you select a chain, and specify
its tempo, volume level, and reverb level. Use the √/®
CURSOR to select each parameter, and use the Value
encoder and the ENTER/REC button to specify the value of that parameter.
In the Chain Select screen, you can press the ENTER/
REC button to enter the Chain Edit screen. Here you can
specify the rhythm & bass pattern used by each step of
the chain (☞p.22 “Chain edit”). Press the EXIT button
to return to the chain select screen.
To Chain edit
ENTER/REC
EXIT
Chain select
Write
Tempo
Reverb level
Level
21
Chain select (CHAIN 01–20)
Here you can select one of the twenty chains.
Chain number
Chain edit
In this screen, you can press the ENTER/REC button to
enter the Chain Edit screen (☞p.22 “Chain edit”).
The edited settings will return to the settings of the original program if you switch chains or turn off the power
without Writing.
Tempo
Use the Value encoder or TAP/BYPASS button to set the
tempo (☞p.20 “Tempo”).
Level
Use the Value encoder to set the level of Rhythm & Bass
sound (☞p.21 “Level”).
Reverb
Use the Value encoder to set the amount of Reverb for
the Rhythm & Bass (☞p.21 “Reverb”).
Write
This saves the chain. Use the Value encoder to select the
save-destination (chain number) and press the ENTER/REC
button. The PX5D can store twenty chains.
22
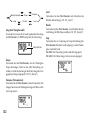
Here you can specify the pattern that will be used for each
step. In the chain select (CHAIN01–20) screen, press the
ENTER/REC button to enter the Chain Edit screen. Use the
√/® CURSOR to select each step, use the π/† CURSOR
to select a parameter, and use the value encoder and ENTER/REC button to specify the value. After you’ve specified the pattern for each step of the chain, press the EXIT
button to return to the Chain Select screen.
Repeat
Repeat
Repeat
Bass key
Bass key
Bass key
Rhythm pattern
Rhythm pattern
Rhythm pattern
Step01
Step02
Step16
The edited settings will return to the settings of the original program if you switch chains or turn off the power
without Writing.
Rhythm Pattern
Use the Value encoder to select a rhythm pattern.
Use the ENTER/REC button to select the rhythm pattern variation (☞p.20 “Rhythm Pattern/Variation”).
Repeat
Use the Value encoder to specify the number of times
that the pattern selected for each step will be repeated.
The pattern will be played repeatedly for the number of
times you specify, and then the pattern specified by the
next step will be played.
Rhythem pattern
Bass key
Step number
repeat
When you turn the value encoder with the √/® CURSOR
held down to move the step, the pattern before the movement
is copied to the pattern following the movement. This is a
convenient way to place multiple copies of the same pattern.
Bass Key
Use the ENTER/REC button to select a bass pattern variation. Use the Value encoder to set the key (☞p.20 “Bass
Key”).
Bass key
Step number
Step number
SONG (Song play)
Here’s how to play the demo songs that are built into
the PX5D. When you select SONG (Song play), there
will be a pre-count and then playback will begin automatically. To pause during playback, you can press the
ENTER/REC button. Press the button once again to resume playback.
If you press and hold the ENTER/REC button for one
second or longer, you’ll return to the beginning of the
demo song and begin playback.
While playing or stopped, you can use the π/† CURSOR
to change programs.
23
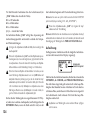
Use the √/® CURSOR to select a parameter, and use
the Value encoder to specify the value.
Song select
Loop
Tempo
Reverb Level
Transpose
Level
Song Select
Use the Value encoder to select the demo song you want
to hear. The PX5D contains three demo songs.
Song number
Tempo
Use the Value encoder to specify the playback tempo. If
you select the “FIL” setting, the demo song will play at
the tempo specified by the song itself (☞p.20 “Tempo”).
Transpose
Use the Value encoder to specify the transposition. You
can transpose the playback pitch in semitone steps.
24
Level
Use the Value encoder to set the level of Rhythm & Bass
sound (☞p.21 “Level”).
Reverb
Use the Value encoder to set the amount of Reverb for
the Rhythm & Bass (☞p.21 “Reverb”).
Loop
Use the Value encoder to change the loop setting. This
specifies how playback will be repeated.
On (ON): The demo song will play repeatedly.
OF (OFF): The demo song will play only once.
Phrase Trainer mode
An audio source from the AUX jack and USB Connector,
a phrase you play on your guitar or bass, or the rhythm
you specified in Rhythm & Bass mode can be recorded,
and played back repeatedly as a loop. This provides a
convenient way to practice by playing along with the
repeating phrase. You can slow down the playback speed
without affecting the pitch, which can help you to learn
difficult phrases. You can save the recorded phrase in the
PX5D’s memory.
If your computer is running Windows XP, and you want
to transfer audio data via the USB connector, we recommend that you install the KORG USB-ASIO driver (provided on the included CD-ROM). For details on how to
install the KORG USB-ASIO driver, refer to “Installing
the software” on the included CD-ROM.
Select the recording mode
In Play mode (except during bypass/mute or key lock),
Rhythm & Bass mode, or Utility mode, press the
PHRASE TRAINER button to enter Phrase Trainer
mode. When you enter this mode, the recording mode
and time select screen will appear, and the Phrase Trainer
icon will blink. In this screen, the PX5D will be ready to
record. Press the EXIT button to return to Play mode.
Recording
mode
Phrase Trainer icon
Recording
time
Use the PHRASE TRAINER button to specify the recording mode. The recording mode will change each time
you press the PHRASE TRAINER button.
AUX: Record the audio input from the AUX jack or USB
connector.
GTR/BAS: Record your connected guitar or bass.
AUX+G/B: Record both the audio input from the AUX
jack or USB connector and your guitar or bass.
JAM: Record both the rhythm pattern you last selected
for playback in Rhythm & Bass mode and the sound of
your guitar (bass).
If you’re using both the USB connector and AUX jack,
the audio input from both jacks will be recorded. Use the
volume control of your connected device to adjust the
volume balance.
If Song Play was last selected in Rhythm & Bass mode,
you won’t be able to select “JAM” as the recording mode.
Use the value dial to select the recording time (for “JAM,”
the number of measures).
25
20: Approximately 20 seconds.
40: Approximately 40 seconds.
80: Approximately 80 seconds.
1, 2, 3…: Number of measures.
If the recording mode is “JAM,” the recording quality
will be set automatically, based on the tempo and the
specified number of measures.
If you select a long recording time (40 or 80), the audio
quality of the recording will be lower.
If the recording mode is “JAM” and the tempo of the rhythm
is extremely slow, it will not be possible to record a large
number of measures. Please adjust the tempo in Rhythm &
Bass mode (maximum length is approximately 80 seconds)
If you want to use Chain in Rhythm & Bass mode to record
a one-measure rhythm pattern etc. in “JAM“ mode using
multiple patterns, specify the number of recording measures to be the number of patterns you're using. For example if you want to use two patterns of a 2/4 time signature
to record a one-measure pattern of a 4/4 time signature,
specify 2 measures as the number of recording measures.
Start playback on your CD or other audio source, and at
the point where you wish to begin recording, press the
ENTER/REC button. Recording will begin.
You can use a foot switch connected to the FOOTSW jack
to start/stop recording (☞p.34 “FOOTSW”).
26
If the recording mode is “JAM,” recording will begin after precount.
If, after recording, you want to change the recording mode
or recording time, press the PHRASE TRAINER button
while playback is paused.
Recording
When you begin recording, the recording time will be indicated as a numerical value.
Recording time
When you want to stop recording, press the ENTER/REC
button, the ® CURSOR, or PHRASE TRAINER button.
Recording will stop, and loop playback will begin automatically. If you do not stop recording, recording will continue until the selected recording time or number of measures has elapsed, and loop playback will begin automatically.
The phrase will be recorded and played back in mono.
Playback
The recorded phrase will playback as a loop. During playback or while paused, you can use the π/† CURSOR to
select programs.
playback time
playback speed(%)
Rotating the Value encoder toward the left will slow down
the playback speed without affecting the pitch. You can
choose from six levels of playback speed: 100%, 90%, 80%,
75%, 66%, and 50%.
During playback, you can hold down the √ CURSOR to
rewind, or hold down the ® CURSOR to fast-forward.
By pressing the PHRASE TRAINER button, you can hold
the sound that was being played at the moment you
pressed the button (the Hold function). This is convenient
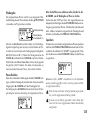
when you need to hear individual notes in a phrase.
Pause
When you press the ® CURSOR, the playback will pause.
Press the ® CURSOR once again, and playback will resume. Pressing the √ CURSOR while playback is paused
will return you to the beginning of the recorded phrase.
If you wish to re-record the phrase, press the ®
CURSOR to pause playback.
Start the CD or other audio source, and press the ENTER/
REC button at the beginning of the desired phrase. If you
want to change the recording mode or time, press the
PHRASE TRAINER button while paused.
Saving
If you want to save the phrase you recorded, press the
PHRASE TRAINER button several times while paused
until the LCD indicates “SAVE?”. Then press the ENTER/
REC button once again to save the phrase.
The “SAVE?” screen will be available from the recording
mode screen if you’ve just recorded a phrase.
If you turn off the power without saving, the recorded
phrase will be erased.
Only one phrase can be saved. When you save, the previously-saved phrase will be over-written and erased.
27
Edit mode
In this mode you can turn each effect on/off, and edit
the effect type, parameter values, and program name.
In Play mode, press the ® CURSOR to access the DYNA
effect edit screen. Renaming the program and writing
the program are also performed here.
Select the effect that you wish to edit
Each time you press the √/® CURSOR, you will cycle
through the effects in the order shown below. When an
effect is selected, its icon will blink.
(Delay time)
In any screen of Edit mode, you can use the Control dials
to edit the Amp models, or use the TAP/BYPASS button
to set the delay time.
For details on the effect types and parameters, refer to
the Effect Parameters list (☞p.37).
Press the EXIT button to return to Play mode.
The edited settings will return to the settings of the original program if you switch programs or turn off the power without Writing (☞p.31 “WRITE”).
DYNA: Dynamics & Pickup Modeling
These are dynamics-type effects such as compressor,
auto-wah, and pickup modeling effects.
Parameter
value
▲/▼: Type selection
Editing each effect
For each effect, you can select the effect type and change
its parameter values.
Effects that are turned “OFF” will automatically be
turned on if you press the ENTER/REC button or use
the π/† CURSOR to select the effect type. If a program
was not written after it was edited, the decimal point of
the program number will light.
28
On, Off
AMP: Amp Modeling
BTQ CLN–OCTFUZZ (15 types) are guitar amps, and
VALVE1–UKMAJOR (10 types) are bass amps.
GSYNTH1–GSYNTH3 are guitar synths, and BSYNTH1–
BSYNTH3 are bass synths. The value display will indicate “Gt” for approximately one second if you’ve selected
a guitar model, or “bA” if you’ve selected a bass model.
Amount of distortion*
Low range*
High range*
CAB: Cabinet Modeling
This simulates the acoustical characteristics of the amp’s
cabinet. This is especially effective when you are not using
an amp (e.g., when using headphones, or when connecting to a mixer, hard-disk recorder, or other audio device).
1X8TWD–4X12VIN (11 types) are guitar amp cabinets, and
LA 4X10–COMBI (12 types) are bass amp cabinets. The
value display will indicate “Gt” for approximately one second if you’ve selected a guitar amp cabinet, or “bA” if you’ve
selected a bass amp cabinet.
Volume*
▲/▼: Type selection
Presence
Mid
range*
▲/▼: Type selection
On, Off
On, Off
* Operation will be different if VALVE1–JAZZ (bass amps),
GSYNTH1–3, or BSYNTH1–3 is selected as the type.
You can also use a guitar amp with a bass cabinet, or a
bass amp with a guitar cabinet.
The VOLUME dial can be used to adjust the volume even
when the amp modeling effect is “OFF.”
29
MOD: Modulation & Filter Effect Modeling
These are modulation and filter-type effects such as chorus, flanger, phaser, and pitch shifter.
Parameter
value
▲/▼: Type selection
DLY: Delay Time
The screen shows the delay time of the delay modeling
effect. In this screen, you can use the Value encoder to
specify the delay time. You can also use the TAP/BYPASS
button to specify the delay time in this screen.
Delay time
On, Off
DLY: Delay Modeling
These are delay-type effects for which you can set the
delay time by pressing the TAP/BYPASS button at a
desired interval.
On, Off
REV: Reverb Modeling
These are reverb-type effects that add spaciousness to
the sound.
Effect
level
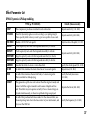
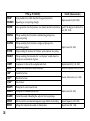
▲/▼: Type selection
Effect
level
▲/▼: Type selection
On, Off
Delay time
30
On, Off
NR: Noise reduction
Increasing this value will produce more noise reduction.
Normally you will adjust this so that you do not hear obtrusive noise when the strings are lightly muted.
Adjust the
depth of
noise
reduction
WRITE
Here you can write (store) a program that you created.
Use the Value encoder to select the writing destination
(User programs only). To cancel writing a program, press
the √ (or ®) CURSOR to select a different screen.
To write the program, press the ENTER/REC button.
When the program has been written, the LCD will indicate “COMPLT” for approximately one second.
Select a user
program
number as the
writing destination
If the NR value is raised excessively, the notes may be cut
off unnaturally. If this occurs, reduce the NR value.
RENAME
Here you can assign a name for each program.
Program number that currently
occupies the writing destination
Write
▲/▼: Select the
character location
Select the character
The following characters can be used:
Before writing an edited program into a different program number, be sure that you do not mind overwriting
the data that is currently in that program number. The
program data that is overwritten will be lost.
It is not possible to write to a preset program (P00–P99).
31
Utility mode
Here you can make settings such as LCD Backlight, Key
Transpose, and Bass Cancel. From Play mode, press the
UTILITY button; the Utility icon will appear, and you’ll
be in Utility mode.
BACKLIGHT: LCD backlight on/off
Use the Value encoder to turn the backlight on/off.
Backlit
On/Off
Select a utility function
Each time you press the UTILITY button, you’ll step through
the utility function screens in the order shown below.
Change settings for each utility function
Change the desired settings for each utility function.
Press the EXIT button to return to Play mode.
These settings are preserved even if you turn off the power.
If you are using batteries, the operating time will be shorter if the backlight is on.
KEY-TRN: Key transpose
Displaying this screen transposes the key of the audio input from the USB connector or AUX jack. Use the Value
encoder to specify the amount of key transposition. The
key can be transposed in a range of +/-1 octave. The value can be adjusted up and down for 3 semitones in 10
cent steps, and in semitone steps (100 cents) for the remainder of the range.
Display of 10 cent units
Transpose
value
Display of 100 cent units
The output signal for key transpose will be mono.
32
KTR+BC: Key transpose + bass cancel
Displaying this screen transposes the key and cancels
the bass of the audio input from the USB connector or
AUX jack. The bass cancel function removes the low-frequency region from the sound, which provides a convenient way for you to practice playing the bass yourself.
The adjustable range of the key transpose function is the
same as for KEY-TRN (☞p.32). By setting the Key Transpose setting to “0” and selecting Key Transpose + Bass
Cancel, you can turn on the Bass Cancel function only.
Transpose
value
The output signal for key transpose and bass cancel will
be mono.
If your computer is running Windows XP, and you want
to transfer audio data via the USB connector, we recommend that you install the KORG USB-ASIO driver (provided on the included CD-ROM). For details on how to
install the KORG USB-ASIO driver, refer to “Installing
the software” on the included CD-ROM.
AMP/LIN: Amp/line select
When you’re using Guitar Amp Modeling, this setting
specifies whether the PX5D will be optimized for headphone/line output or for the specified type of guitar amp.
This setting has no effect if Amp Modeling is off or if
you’ve selected Bass Amp Modeling or Guitar/Bass
Synth.
Line/amp
select
Ln: Choose this setting if you’re connected to a headphone, mixer, or recorder.
AP1: Choose this setting if you’re connected to a cleansounding amp such as an open-backed US-manufactured
combo.
AP2: Choose this setting if you’re connected to an amp
with a distinctive-sounding mid-range such as a UKmanufactured open-back combo.
AP3: Choose this setting if you’re connected to an amp
with a closed-back 4 x 12 cabinet(s).
The amps mentioned above are general examples. The best
setting may differ depending on the type of amp you’re
using, and how it is set.
33
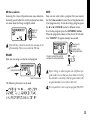
FOOTSW: Foot switch pedal settings
Use the Value encoder to specify the function of the foot
switches connected to the PX5D.
Switch pedal
function
PG: The pedals will switch between the programs assigned to the PROGRAM MEMORY [A]–[D] buttons.
The pedal connected to the UP connector (red) of the included cable for FOOT SW jack will step upward through
the programs in the order of [A]→[B]→[C]→[D]→[A]→...
The pedal connected to the DOWN connector (white) will
step downward through the programs in the order of
[D]→[C]→[B]→[A]→[D]→...
Ud: The pedals will switch between programs U00–P99.
The pedal connected to the UP connector (red) of the included cable for FOOT SW jack will step upward through
the programs in the order of U00→ ... →U99→P00→......
→P99→U00→... The pedal connected to the DOWN connector (white) will step downward through the programs
in the order of U00→P99→ ... →P00→U99→
...→U00→P99→...
34
If you’ve assigned the foot switch to “PG” or “Ud,” you
can activate the Bypass function by simultaneously pressing both foot switches connected to the two jacks, or activate the Mute function by holding down both switches
for one second or longer.
SS: The foot switches will start/stop recording and playback for Phrase Trainer mode. The foot switch connected to the UP connector (red) of the included cable for
FOOT SW jack will start/stop recording. The foot switch
connected to the DOWN connector (white) of the cable
will start/stop playback.
With this setting, the foot switches will operate only
when you’re in Phrase Trainer mode.
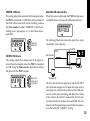
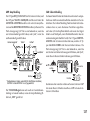
USBSEND: USB Send
This setting adjusts the input level to the computer when
the PX5D is connected via USB. Watch the level meter of
the DAW software on which you’re recording, and use
the Value encoder to adjust “USBSEND” so that the recording level is appropriate (i.e., so that it does not exceed 0 dB).
Adjusts the
Input Level
AUX>USB: USB audio interface
While this screen is displayed, the PX5D will operate as
a standard stereo-in/stereo-out USB audio interface.
The following illustration shows the signal flow when
connected to your computer.
PX5D
USB RCV: USB Receive
This setting adjusts the volume level of the signal received from the computer when the PX5D is connected
via USB. Using the Value encoder, adjust this to balance
the input with the PX5D’s output.
adjusts the
volume level
of the signal
OUTPUT
AUX (Stereo)
USB
CD player etc.
The AUX jack will be the input jack, and the OUTPUT
jack will be the output jack. To adjust the input level to
your computer, watch the level meter of the DAW software on which you’re recording, and adjust the volume
of the external device that’s connected to the AUX jack
(to ensure that the level does not exceed 0 dB). The volume level of the signal being received from the computer is affected by the “USB RCV” setting.
35
The PX5D’s effects, Rhythm & Bass function, and Phrase
Trainer function are not available while you’re using the
PX5D as a USB audio interface.
MIDDRUM: MIDI Drum/Bass
While this screen is displayed, MIDI note-on/off messages received via the USB connector will play the internal bass and drum sound generator.
Loading the factory-set data
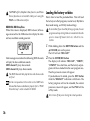
Here’s how to load the preloaded data. This will load
the factory-set effect programs, master level, Rhythm &
Bass mode tuning, and Utility mode settings.
Be aware that if you reload the factory programs, the user
programs and any settings that are remembered when the
power is turned off (master level etc.) will all be overwritten.
1
Note messages received on the following MIDI channels
will play the bass and drum sounds.
MIDI channel 9: plays bass sounds.
MIDI channel 10: plays drum sounds.
The MIDI channels that play the bass and drum sounds
are fixed.
For the correspondence between the received MIDI note
data and the drum sounds that are played, refer to “PX5D
Drum Kit map” on the included CD-ROM.
2
While holding down the RHYTHM button and the
π CURSOR, turn on the power.
The LCD will ask “RELOAD?”
Press the ENTER/REC button
The display will indicate “RELOAD”, “VERIFY”,
“COMPLT” for a short time, and the factory-set programs will be re-loaded into the user program area.
Then the power-on screen will appear.
If you decide not to reload, press the EXIT button
while the “RELOAD?” indication is still shown. The
factory programs will not be reloaded; the normal
power-on screen will appear, and the PX5D will be
in Play mode.
Never turn off the power during the reload operation.
36
Effect Parameter List
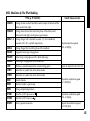
DYNA: Dynamics & Pickup modeling
TYPE (π/† CURSOR)
VALUE (Value encoder)
COMP
This compressor produces consistent levels and sustain.
Adjusts sensitivity (1.0...10.0).
DYNAEXC
This effect dynamically applies an exciter according to your picking strength.
This is especially effective when you want to give more sparkle to clean sounds.
Adjusts sensitivity (0.0...10.0).
VOX WAH
Models a VOX V847 wah pedal.
Adjusts location of the pedal (1.0...10.0).
WAHUP1
Positive-polarity auto-wah that responds sensitively to attacks.
WAHUP2
Positive-polarity auto-wah that responds smoothly to attacks.
WAHDWN1
Negative-polarity auto-wah that responds sensitively to attacks.
WAHDWN2
Negative-polarity auto-wah that responds smoothly to attacks.
Adjusts sensitivity (0.0...10.0).
SLOWATK
Smooths the attack to create a violin-like effect.
AC SIM
An effect that simulates the tonal characters of an acoustic guitar.
Adjusts tone (0.0...10.0).
RESO
An effect that simulates the metallic body of a resonator guitar.
This is suitable for slide playing.
Specify the body resonance
(0.0...10.0).
OCTAVE*
This generates a pitch one octave lower than the original sound, and
mixes it with the original sound to add a sense of depth and low
end. This effect may not operate correctly if two or more strings are
played simultaneously, or when low-pitched strings are played.
Adjusts effect level (0.0...10.0).
An effect that produces bell-like sounds. For the cleanest effect, use
the neck pickup, turn down the tone control of your instrument, and
play near the 12th fret.
Specify the frequency (1.0...10.0).
RING
Specify the attack speed (1.0...10.0).
37
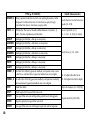
TYPE (π/† CURSOR)
38
VALUE (Value encoder)
RINGUP
RINGDWN
A ring modulator in which the effect changes dynamically
depending on your picking strength.
CRUSHER
A new-generation fuzz that produces an extremely destructive distortion. Specify the degree of destructiveness (0.0...10.0).
HUMSGL
Pickup modeling that transforms a humbucking pickup into a
single-coil pickup.
SGLHUM
Pickup modeling that transforms a single-coil pickup into a
humbucking pickup.
HF TONE
Pickup modeling that simulates the “half-tone” position between two pickups.
PHASOUT
Pickup modeling that simulates the “out of phase” sound when two
pickups are connected out of phase.
B COMP
Compressor for bass with an emphasized attack.
Adjusts sensitivity (1.0...10.0).
LIMITER
A limiter that makes levels more consistent.
Specify the compression ratio (0.0...10.0).
B OD**
Overdrive for bass.
B DIST**
Distortion for bass.
B FUZZ**
Fuzz for bass.
PREAMP1
Preamp set to a clear tone for bass.
PREAMP2
Preamp set to a muted tone for bass.
BALANCE
Creates the sound of blending the output of two bass pickups.
LOWCUT
Filter that cuts the unwanted low-frequency range. Effective for recording.
Adjusts frequency (0.0...10.0).
FRETLES*
Settings that simulate the sound of a fretless bass.
Adjusts tone (0.0. ..10.0).
Adjusts sensitivity (0.0...10.0).
Adjusts tone (0.0...10.0).
Amount of distortion (1.0...10.0).
Adjusts tone (0.0...10.0).
*: The sound will be muddy if you play chords. You should normally play only single notes when using this.
**: This is usually an effect for bass, but you can use it with the Synth amp model to produce a thick sound when using
a guitar.
AMP: Amp Modeling
When using Amp Modeling, the control dials (GAIN/MID, BASS, TREBLE, VOLUME) and Value encoder will be
active. The VOLUME dial can still be used even when Amp Modeling is “OFF.” In order to take full advantage of the
characteristics of Amp Modeling, we recommend that you use it in conjunction with Cabinet Modeling when listening
through headphones or when recording from the line output.
If GSYNTH1–3 or BSYNTH1–3 is selected as the type, the control dials will control filter depth, filter decay, Oscillator
selection (setting), and synth level respectively (☞p.42).
TYPE (π/† CURSOR)
VALUE (Value encoder & Control dial)
BTQ CLN
Clean channel of a high-end 100 W hand made guitar amp.
Recommended CAB: 4x12CLS, 4x12VIN, 4x12MDN
BTQ OD
Overdrive channel of a high-end 100 W hand-made guitar amp.
Recommended CAB: 4x12CLS, 4x12VIN, 4x12MDN
TWD1X12
1x12” guitar combo covered in tweed cloth.
Recommended CAB: 1x12TWD
TWD4X10
4x10 guitar combo but designed for bass guitar.
Recommended CAB: 4x10TWD
VOLUME
............... output volume (0.0...10.0).
BLK2X12
2x12 guitar combo indispensable for country or blues players.
Recommended CAB: 2x12BLK
Value encoder
................ mid frequency (0.0...10.0).
AC15
VOX AC15 manufactured in 1962. Recommended CAB: 1x12VOX
AC15TB
Brilliant channel of a VOX AC15TB. Recommended CAB: 1x12VOX
GAIN/MID
..... amount of distortion (0.0...10.0).
BASS ...... low frequency (0.0...10.0).
TREBLE
............... high frequency (0.0...10.0).
39
TYPE (π/† CURSOR)
40
AC30
VOX AC30 model. Recommended CAB: 2x12VOX
AC30TB
Brilliant channel of a VOX AC30TB.
Recommended CAB: 2x12VOX
UKBLUES
UK-manufactured vintage stack guitar amp head.
Recommended CAB: 4x12CLS
UK '70S
High treble channel of a UK-manufactured 100 W guitar head from
1969. Recommended CAB: 4x12CLS
UK '80S
UK-manufactured 100W guitar head with master volume from 1983.
Recommended CAB: 4x12CLS, 4x12VIN, 4x12MDN
UK '90S
The lead channel of a 100W dual-channel head from the 90’s.
Recommended CAB: 4x12CLS, 4x12VIN, or 4x12MDN
UK MDN
UK-manufactured 100 W modern guitar amp.
Recommended CAB: 4x12VIN, 4x12MDN
US HI-G
100 W guitar amp head covered in snake skin from 1991. Recommended CAB: 4x12VIN, 4x12MDN
US MDN
High-gain guitar amp with an eye-catching metal plate.
Recommended CAB: 4x12VIN, 4x12MDN
FUZZ
A vintage fuzz from the 60’s that produces powerful distortion.
OCTFUZZ
A fuzz that emphasizes the components one octave above. This is
particularly effective when you use the neck pickup, turn down the
tone of your instrument, and play above the 12th fret.
VALUE (Value encoder & Control dial)
GAIN/MID
..... amount of distortion (0.0...10.0).
BASS ....... low frequency (0.0...10.0)
TREBLE
............... high frequency (0.0...10.0).
VOLUME
............... output volume (0.0...10.0).
Value encoder
................ mid frequency (0.0...10.0).
TYPE (π/† CURSOR)
VALUE (Value encoder & Control dial)
VALVE1
A tube bass amp with the ULTRA LO switch turned ON. Recommended CAB: CLS8x10
VALVE2
A tube bass amp ideal for rock. Recommended CAB: CLS8x10
CLASSIC
A tube bass amp whose basic character changes according to the
setting of the value encoder. Recommended CAB: COMBI
SCOOPED
A bass amp that is typical of the 80’s. Recommended CAB: MTL4x10)
TREBLE
............... high frequency (0.0...10.0).
LA STUD
A bass amp that is typical of the LA sound. Recommended CAB: LA
4x10, LA 1x18
VOLUME
............... output volume (0.0...10.0).
GOLDPNL
A bass amp distinctive for its eye-catching gold panel and clean
sound. Recommended CAB: MDN4x10
Value encoder
............ mid-range frequency (1...5).
JAZZ
A combo bass amp favored by jazz bassists. Recommended CAB: JAZ1x15
STUDIO
A tube combo bass amp ideal for the Motown sound. Recommended
CAB: STU1x15
GAIN/MID amount of distortion (0.0...10.0).
BASS ...... low frequency (0.0...10.0).
AC 100
A 100W tube bass amp made by Vox.
Recommended CAB: AC 2x15
TREBLE ...... high frequency (0.0...10.0).
VOLUME .... output volume (0.0...10.0).
UKMAJOR
A 200W tube bass amp made in the UK.
Recommended CAB: UK 4x15, UK 4x12
Value encoder
................ mid frequency (0.0...10.0).
GAIN/MID
................ mid frequency (0.0...10.0).
BASS ....... low frequency (0.0...10.0)
G SYNTH1…3 A chromatic synth for guitar. Variations 1, 2, and 3 have different amounts
of resonance. (We recommend that you turn the CAB setting OFF.)
B SYNTH1…3 A bass synth unique to Korg that modifies the original sound and
provides excellent tracking. Variations 1, 2, and 3 have different amounts
of resonance. (We recommend that you turn the CAB setting OFF.)
Refer to separate Synth parameters.
☞p.42
41
Synth parameters
DEPTH (GAIN/MID)
Adjusts the amount of change in the filter cutoff frequency (-15...0…15).
DECAY (BASS)
Adjusts the decay time of the filter envelope (0.0…10.0).
WAVE (TREBLE)
When GSYNTH1–3 is selected
Selects the waveform (0…15).
0: Sawtooth wave, two octaves down
1: Sawtooth wave, one octave down
2: Sine wave, one octave down
3: Sawtooth wave
4: Sine wave
5: Sawtooth wave, one octave up
6: Sine wave, one octave up
7: Sine wave, two octaves up
Oscillators 8–15 are oscillators 0–7 but with portamento turned on.
When BSYNTH1–3 is selected
Adjusts the waveform (0.0…10.0). A setting of 0 is the same octave as the original
sound. A setting of 10.0 is a waveform one octave below, and intermediate values
adjust the mix between the two waveforms.
SYN LEV (VOLUME)
Adjusts the synth volume (0.0…10.0).
DIR LEV (Value encoder)
Adjusts the guitar or bass volume (0.0…10.0).
The guitar synth (GSYNTH1–3) is effective with single-note playing. It will not produce the correct result if you play chords.
The bass synth (BSYNTH1–3) will produce muddy sound if you play chords.
The guitar synth (GSYNTH1–3) will not produce the expected result if your instrument is tuned incorrectly. If this occurs,
please tune your instrument correctly.
If the sound is unpleasantly distorted, lower the “SYN LEV” and “DIR LEV” until the sound is no longer distorted.
42
CAB: Cabinet modeling
TYPE (π/† CURSOR)
1X8TWD
This model simulates an open back cabinet with one 8-inch speaker for guitar.
2X10BLK
This model simulates a US-made open back cabinet with two 10-inch
speakers for guitar.
VALUE (Value encoder)
4X10TWD This model simulates an open back cabinet with four 10-inch speakers
for guitar.
1X12TWD This model simulates an open back cabinet with one 12-inch speaker
for guitar typically used for blues.
1X12VOX This model simulates a Vox open back cabinet with one 12-inch “Blue”
speaker for guitar.
2X12BLK
PRESENCE: Adjusts the tone of the
high-frequency range (0.0...10.0).
This model simulates a US-made open back cabinet with two 12-inch
speakers for guitar.
2X12VOX This model simulates a Vox open back cabinet with two 12-inch “Blue”
speakers for guitar.
4X12VOX This model simulates a closed-back VOX guitar cabinet, containing
four neodymium speakers
4X12CLS
This simulates a closed back cabinet with four 25W 12-inch speakers for guitar.
4X12MDN This simulates a closed back cabinet with four 75W 12-inch speakers for guitar.
4X12VIN
This simulates a closed back cabinet with four 30W 12-inch speakers for guitar.
43
TYPE (π/† CURSOR)
44
LA 4X10
This model simulates four 10-inch bass speakers for the LA sound.
MDN4X10
This model simulates four 10-inch bass speakers for a modern
sound.
MTL4X10
This model simulates four by 10-inch aluminum-cone bass speakers.
CLS8X10
This model simulates eight 10-inch classic bass speakers.
UK 4X12
This model simulates four 12-inch UK-manufactured bass speakers.
STU1X15
This model simulates one 15-inch speaker studio bass cabinet.
JAZ1X15
This model simulates one 15-inch speaker bass jazz combo.
AC 2X15
This model simulates a two 15-inch speaker AC100 cabinet.
US 2X15
This model simulates two 15-inch US-manufactured bass speakers.
UK 4X15
This model simulates four 15-inch UK-manufactured bass speakers.
LA 1X18
This model simulates one 18-inch speaker for the LA sound.
COMBI
This model simulates a one 12-inch and one 18-inch bass speaker
cabinet.
VALUE (Value encoder)
PRESENCE: Adjusts the tone of the
high-frequency range (0.0...10.0).
MOD: Modulation & Filter Effect Modeling
TYPE (π/† CURSOR)
CHORUS1
Vintage chorus in which the effect sound is output to the left and the
direct sound to the right.
CHORUS2
Vintage stereo chorus that inverts the phase of the effect sound
between left and right, creating more spaciousness.
FLANG1…3
Vintage flanger with a distinctive sound. 1, 2, 3 have feedback
amounts of 0%, 22%, and 60% respectively.
FLANG4
Vintage flanger that inverts the phase of the feedback.
PHASER1
A popular four-stage vintage phaser.
PHASER2
A four-stage vintage phaser with a thick mid-range.
PHASER3
A ten-stage vintage phaser with a mild effect.
12STR
Produces a sound reminiscent of a twelve-string guitar.
U-VIBE1
Simulation of a pedal vibe set to chorus mode.
U-VIBE2
Simulation of a pedal vibe set to vibrato mode.
TREM1
Smooth tremolo.
TREM2
Tremolo found in a guitar amp.
TREM3
Strong and pulsating tremolo.
AT PAN1
Auto Pan. (LFO: square wave
AT PAN2
Auto Pan. (LFO: sine wave
ROTARY1
Rotary speaker simulation.
Adjusts modulation speed
(0.10...10.0 [Hz]).
Adjusts the depth of the effect (0.0...10.0).
Adjusts the modulation speed
(1.0...10.0 [Hz]).
)
)
VALUE (Value encoder)
Adjusts the modulation speed
(0.10...10.0 [Hz]).
Adjusts the modulation speed
(1.0...10.0 [Hz]).
45
TYPE (π/† CURSOR)
46
VALUE (Value encoder)
ROTARY2, 3
Rotary speaker simulation in which your playing dynamics control
the speed. 2 switches from slow to fast when you play strongly.
3 switches from slow to fast when you play softly.
Specify the level at which the rotor
speeds (1.0...10.0).
PITCH1…4
Pitch shifter. The level of the effect differs between variations 1, 2,
and 3. Variation 4 produces only the effect.
Amount of pitch shift (-24, -17,
-12…-1, -d, d, 1…12, 19, 24). [d = detune]
MAJ3UP
Intelligent pitch shifter; a 3rd up in a major key.
MAJ3DWN
Intelligent pitch shifter; a 3rd down in a major key.
MIN3UP
Intelligent pitch shifter; a 3rd up in a minor key.
MIN3DWN
Intelligent pitch shifter; a 3rd down in a minor key.
PER4TH
Intelligent pitch shifter; a 4th up in a major key.
PER5TH
Intelligent pitch shifter; a 5th up in a major key.
Specify the key (C, C#…A#, B).
MAJ6TH
Intelligent pitch shifter; a 6th up in a major key.
FEEDBK1, 2
An effect that artificially generates feedback, and operates when a note
is held for an extended time. 2 generates feedback one octave higher.
FEEDBK3, 4
An effect that artificially generates feedback, and operates constantly
when sustained. 4 generates feedback one octave higher.
5.0...10.0 adjusts the vibrato depth.
FILTER
Fixed filter effect.
Adjusts the frequency (1.0...10.0 [Hz]).
FILTUP1
Positive-polarity low-pass filter auto-wah.
FILTUP2
Low-pass filter auto-wah with positive-polarity and a strong peak.
FILTDN1
Negative-polarity low-pass filter auto-wah.
FILTDN2
Low-pass filter auto-wah with negative-polarity and fast response.
0.0...4.7 adjusts the effect level.
Adjusts sensitivity (0.0...10.0).
TYPE (π/† CURSOR)
TALK 1…4
An effect that simulates a “talking guitar.”
1:YAH-YAH, 2:U-WAH, 3:YOI-YOI, 4:YEAH
RANDOM 1…4 Random step filter that moves a filter randomly.
1, 2, 3, and 4 by changing the frequency band affected by the filter.
VALUE (Value encoder)
Adjusts sensitivity (0.0...10.0).
Adjusts the modulation speed
(1.0...10.0).
DRONE*1
A drone effect that adds a continuous pitch similar to that of a
tambura, an instrument of India (soft effect level).
DRONE2*
A drone effect that adds a continuous pitch similar to that of a
tambura, an instrument of India (strong effect level)
ENVPIT
An envelope pitch shifter that varies the pitch according to your
picking.
ENVCHO
An envelope chorus that applies a chorus effect according to your
picking.
INFFLN1
A flanger that continues rising forever.
INFFLN2
A flanger that continues falling forever.
Specifies the depth of the effect
(0.0...10.0).
INFPIT1, 2
A pitch shifter that rises or falls forever. This will produce the
impression of a never-ending pitch change for any input. Variation 1
has the direct sound and the effect sound. Variation 2 has only the
effect sound.
Specifies the depth of the effect
(-15…0…15). Positive values
produce upward motion, negative
values produce downward motion.
Specify the drone pitch (C, C#...A#,
B).
Specifies the depth of the effect
(-15…0…15). The pitch change can
be positive or negative.
*: It’s effective to set the drone pitch to the tonic note of the song or solo you’re playing.
47
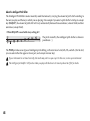
About the Intelligent Pitch Shifter
The Intelligent Pitch Shifter creates musically useful harmonies by varying the amount of pitch shift according to
the note you play and the key in which you are playing. For example if you select a pitch shift of a 3rd up in a major
key (MAJ3UP), the amount of pitch shift will vary automatically between three semitones (a minor third) and four
semitones (a major third).
• When MAJ3UP is used with a key setting of C
The pitch created by the intelligent pitch shifter is shown in
parenthesis ( ).
The PX5D provides seven types of intelligent pitch shifting, with intervals of a 3rd, 4th, 5th, and 6th. (For the 3rd,
you can select either the upper or lower part, and a major or minor key.)
If your instrument is not tuned correctly, the results may not be as you expect. In this case, re-tune your instrument.
The intelligent pitch shifter will function when you play individual notes. It cannot produce the effect for chords.
48
DLY: Delay Modeling
Each delay type, (1, 2, 3, 4, 5) have different amounts of feedback. The delay time is set by the interval at which you
press the TAP/BYPASS button twice. The specified delay time can be checked by holding down the TAP/BYPASS
button.
TYPE (π/† CURSOR)
SLAP1…5
A slap delay effect that produces a distinctive short delay. The
maximum delay time is 500 msec. The delay time will be specified as
one-fourth of the interval at which you press TAP-BYPASS.
ECHO1…5
Tape echo simulation with a warm tone. Delay time: up to 2 sec.
CLRDLY1…5 A clear-sounding delay typical of digital delay units.
Maximum delay time: 1 second.
PPDLY1…5
Dual-tapped ping-pong delay that pans left and right. Maximum
delay time: 2 second.
MULTI1…5
Dual-head tape echo simulation with special stereo design. Creates a
spacious reverberation. Maximum delay time: 2 second.
RVSDLY
A reverse-delay (backward playback) effect.
Maximum delay time: 1 second.
VALUE (Value encoder)
Adjusts effect level (0.0...10.0).
Specifies the balance between the
effect and dry sounds (0.0…10.0).
49
REV: Reverb Modeling
TYPE (π/† CURSOR)
50
DRYAIR
Reverb that produces a sensation of dry air.
WETAIR
Reverb that produces a sensation of wet air.
ROOM1
Bright-sounding room reverb.
ROOM2
Mellow-sounding room reverb.
PLATE1
Tight-sounding plate reverb.
PLATE2
Bright-sounding plate reverb.
HALL1
Reverberation of a mid-sized hall.
HALL2
Reverberation of a large hall.
SPRING1
Spring reverb of a guitar amp.
SPRING2
Dense spring reverb.
BRIGHT
A reverb effect that produces brightly sparkling reverberation.
VALUE (Value encoder)
Adjusts effect level (0.0...10.0).
Preset Program Names
No.
Name
No.
P00
P01
P02
P03
P04
P05
P06
P07
P08
P09
P10
P11
P12
P13
P14
P15
P16
P17
P18
P19
METALIC
BLUEYES
PARALIZ
VOXTREM
COHEED
BOWATTK
WHITERM
FAB4
WHOKIDS
MUDD
FLOYD
AUDIO
MR SG
STRATO
SCORPS
WINTER
SUBSYNT
LINKIN
CHARLOT
SHADOWS
P20
P21
P22
P23
P24
P25
P26
P27
P28
P29
P30
P31
P32
P33
P34
P35
P36
P37
P38
P39
Name
GMBLUES
SRV
SUPACLN
COUNTRY
BLUES
JAZZY
SURF
POP
ROCK
METAL
VOX WAH
OVERDRV
STONED
ACOUSTC
CRY WAH
ASCEND
CHORUS
FIRE
12STRNG
PIEZO
No.
P40
P41
P42
P43
P44
P45
P46
P47
P48
P49
P50
P51
P52
P53
P54
P55
P56
P57
P58
P59
Name
No.
RESO
FEEDBKR
SITAR
SPACED
MEOW
DIALUP
FILTER
ROTARY
DELAYED
REVERSE
BATTERY
CRUSHD
RAGE'D
DRENCHD
CMPLEAD
BIGLEAD
RAVECHO
MDNJAZZ
ROKABLY
MEGAMID
P60
P61
P62
P63
P64
P65
P66
P67
P68
P69
P70
P71
P72
P73
P74
P75
P76
P77
P78
P79
Name
STUTTER
LASHRED
VOXSLAP
ROTODRV
ARENA
WELL
DOC OCT
NOTRITE
ILL
YAPPY
B BLUES
B MOTWN
B JAZZ
B RNB
B CNTRY
B ROCK
B METAL
B FUNK
B DRIVE
B TREM
No.
P80
P81
P82
P83
P84
P85
P86
P87
P88
P89
P90
P91
P92
P93
P94
P95
P96
P97
P98
P99
Name
B FILTR
B CHORD
B SOLO
B PICKR
B SYNTH
B TAP
B HARM
B OCT
B FING
B THUMB
B FRETB BEND
B FROG
B JUICE
B REV
B PEEPS
B THICK
B TAPIT
B SCOOP
B FUZZY
00…69: Guitar program, 70…99: Bass program
51
Rhythm Pattern List
52
No.
Name
No.
1
2
3
4
5
6
7
8
9
10
11
12
13
14
15
16
17
18
19
20
21
22
MTRONM0
MTRONM2
MTRONM3
MTRONM4
MTRONM5
MTRONM6
MTRONM7
MTRONM9
8BEAT1
8BEAT2
8BEAT3
16BEAT1
16BEAT2
16BEAT3
16BEAT4
16BEAT5
16BTSW1
16BTSW2
16BTSW3
16BTSW4
16BTSW5
2/4 1
23
24
25
26
27
28
29
30
31
32
33
34
35
36
37
38
39
40
41
42
43
44
Name
2/4 2
2/4 3
2/4 4
2/4 5
2/4 6
2/4 7
3/4 1
3/4 2
3/4 3
3/4SWG1
3/4SWG2
5/4
3/8 1
3/8 2
5/8
6/8 1
6/8 2
6/8 3
6/8 4
7/8 1
7/8 2
9/8
No.
Name
No.
Name
No.
Name
No.
45
46
47
48
49
50
51
52
53
54
55
56
57
58
59
60
61
62
63
64
65
66
POP1
POP2
ROCK1
ROCK2
ROCK3
ROCK4
ROCK5
R'N'R
METAL1
METAL2
METAL3
METAL4
R'N'B1
R'N'B2
R'N'B3
R'N'B4
BLUES1
BLUES2
8BLUES
BLUESFL
COUNTRY
CNTRYS1
67
68
69
70
71
72
73
74
75
76
77
78
79
80
81
82
83
84
85
86
87
88
CNTRYS2
JAZZ1
JAZZ2
JAZZ3
JAZZ4
FNKRCK1
FNKRCK2
HVYFUNK
JB 1
JB 2
NJCKSWG
MOTOWN1
MOTOWN2
MOTOWN3
MOTOWN4
SURF
REGGAE1
REGGAE2
REGGAE3
BOLERO
DISCO1
DISCO2
89
90
91
92
93
94
95
96
97
98
99
100
101
102
103
104
105
106
107
108
109
110
DISCO3
GOGO1
GOGO2
GOGO3
HOUSE1
HOUSE2
HOUSE3
D'N'B 1
D'N'B 2
SKA1
SKA2
SKA3
2NDLINE
FILLS01
FILLS02
FILLS03
FILLS04
FILLS05
FILLS06
FILLS07
FILLS08
FILLS09
111
112
113
114
115
116
117
118
119
120
121
122
123
124
125
126
127
128
Name
FILLS10
FILLS11
FILLS12
3/4FILS
LATIN1
LATIN2
BOSSA1
BOSSA2
SAMBA1
SAMBA2
RUMBA
AFRO1
AFRO2
CLYPSO1
CLYPSO2
SONGO
LP II
LP III
Troubleshooting
If the PX5D does not operate as you expect, please check
the following points first. If this does not resolve the problem, contact your dealer.
1. Power does not turn on.
• Are batteries installed? Alternatively, is the correct
AC adapter connected to an AC outlet?
2. No sound
• Are your guitar or bass, amp and/or headphones
connected to the correct jacks?
• Is your amp turned on and set correctly?
• Are any cables broken?
• Is the master level of the PX5D set to “0” or to a low
level?
• The VOLUME dial may have been turned down.
• Is the PX5D muted?
Be aware that if all effects are off, the chain display
will disappear, and it will not be possible to distinguish Bypass or Mute from the LCD display.
• Dose the LCD display “AUX>USB” in Utility mode?
When “AUX>USB” is displayed, the output of you
guitar sound will be muted.
• Is the volume of your guitar turned down?
3. The volume from the device connected to the AUX
jack is too loud or too soft, or cannot be heard.
• Adjust the output level of the connected device.
Make connections to the headphone jack of the device, instead of to its line output.
• Are you in Phrase Trainer mode?
Exit Phrase Trainer mode.
• Are you using a connection cable with a built-in resistor?
4. Effects do not apply
• Is the PX5D bypassed? (the effect chain will be blinking)
• Are the effects used in the program turned on?
5. Tuner does not work.
• Is the PX5D bypassed or muted?
6. Can’t install the software
• Is the CD-ROM inserted in your CD drive?
Make sure that the CD-ROM is inserted correctly.
• Could the lens of your CD drive be dirty?
Use a commercially-available lens cleaner to clean
the lens.
• Are you attempting to install from a network CD
drive?
This software cannot be installed from a networkconnected CD drive.
53
• Are you able to use USB?
If you are using Windows XP, go to [Control Panel]
→ [System], and select the [Hardware] tab. In [Device Manager], check the settings for Universal Serial Bus Controller and USB Root Hub.
7. Can’t record using the USB audio function. Or, the
recording level is too low (too high).
• Use the Utility mode “USBSEND” setting to adjust
the input level to your computer. ☞p.35
8. Can’t play back using the USB audio function. Or,
the playback level is too low (too high).
• Use the Utility mode “USB RCV” setting to adjust
the input level to the PX5D. ☞p.35
9. Your software does not respond to the PX5D
• Is the USB cable connected correctly?
• Did you install the driver you need?
• Has your computer detected the connected PX5D?
If you are using Windows XP, go to Control Panel →
“Sounds and Audio Devices Properties” and click
the Hardware tab.
If you are using Mac OS X, go to Macintosh HD →
Application folder → Utility folder → “Audio MIDI
Settings,” select the “MIDI Devices” tab, and check
that the PX5D has been detected.
54
• The connected device or software may not support
the messages you are transmitting. Refer to the owner’s manual of the connected device or software to
verify that it responds to the messages you are transmitting.
Specifications
● Effects: 180 types (Maximum number of effects
available simultaneously: 7)
● Number of programs:
• User: 100
• Preset: 100
● Inputs:
• INPUT (1/4” jack)
• AUX (mini stereo jack)
● Output: line/headphone dual-purpose output
(stereo jack)
● Control:
• FOOTSW jack
• USB connector
● Tuner section:
• detection range: 27.5 Hz–2,093 Hz (A0–C7)
• calibration: A = 438 Hz–445 Hz
● Rhythm section:
• number of pattern: 774 including pattern variations
• Tempo: 40–240 bpm
● Power supply:
• Two AA alkaline batteries:
Allows 7 hours of continuous use (backlight Off)
Allows 5 hours of continuous use (backlight On)
• USB bus-powered (when using the USB connector)
• Separately sold AC adapter (DC4.5V:
)
● Dimensions (W x D x H): 118mm x 75mm x 20mm
(4.65” x 2.95” x 0.79”)
● Weight (not including batteries): 154g (0.34lbs.)
● Included items:
• Owner’s manual
• Two AA alkaline batteries for checking operation
• CD-ROM
• Cable for FOOTSW jack
● Option:
• AC adapter
• KORG PS-1 pedal switch
Appearance and specifications are subject to change
without notice for product improvement.
55
Précautions
Emplacement
L’utilisation de cet instrument dans les endroits suivants peut
en entraîner le mauvais fonctionnement.
• En plein soleil
• Endroits très chauds ou très humides
• Endroits sales ou fort poussiéreux
• Endroits soumis à de fortes vibrations
• A proximité de champs magnétiques
Alimentation
Branchez l’adaptateur secteur fourni à une prise secteur de tension
appropriée. Evitez de brancher l’adaptateur à une prise de courant dont
la tension ne correspond pas à celle pour laquelle l’appareil est conçu.
Interférences avec d’autres appareils électriques
Les postes de radio et de télévision situés à proximité peuvent
par conséquent souffrir d’interférences à la réception. Veuillez
dès lors faire fonctionner cet appareil à une distance raisonnable de postes de radio et de télévision.
Maniement
Pour éviter de les endommager, manipulez les commandes et
les boutons de cet instrument avec soin.
56
Entretien
Lorsque l’instrument se salit, nettoyez-le avec un chiffon propre et sec. Ne vous servez pas d’agents de nettoyage liquides
tels que du benzène ou du diluant, voire des produits inflammables.
Conservez ce manuel
Après avoir lu ce manuel, veuillez le conserver soigneusement
pour toute référence ultérieure.
Evitez toute intrusion d’objets ou de liquide
Ne placez jamais de récipient contenant du liquide près de l’instrument. Si le liquide se renverse ou coule, il risque de provoquer
des dommages, un court-circuit ou une électrocution.
Veillez à ne pas laisser tomber des objets métalliques dans le boîtier (trombones, par ex.). Si cela se produit, débranchez l’alimentation de la prise de courant et contactez votre revendeur korg le
plus proche ou la surface où vous avez acheté l’instrument.
Notice concernant l’élimination du produit
(UE seulement)
Si ce symbole “Poubelle barrée” est imprimé sur
le produit ou dans le manuel de l’utilisateur, vous
devez vous débarrasser du produit de la manière appropriée. Ne jetez pas ce produit avec vos
ordures ménagères. En vous débarrassant correctement du produit, vous préviendrez les dommages environnementaux et les risques sanitaires. La méthode correcte d'élimination dépendra
de votre lieu d’habitation, aussi veuillez contacter les autorités locales concernées pour les détails.
* Les noms de sociétés, noms de produits et noms de formats,
etc. dans ce manuel sont des marques de fabrique ou des
marques déposées de leurs propriétaires respectifs.
57
Table des matiére
Introduction ............................................ 60
Caractéristiques principales .................... 60
Mise sous tension .................................... 61
Commandes et connecteurs ..................... 62
Ecran LCD ................................................................. 64
Raccordements ....................................... 65
Raccordement à votre ordinateur ......................... 67
Utilisation du logiciel d’édition ..................................... 67
Transfert de données audio ............................................ 67
Premier essai .......................................... 69
Edition rapide ........................................................... 69
Mode de jeu Play .................................... 70
Sélection d’un programme .................................... 70
Touches PROGRAM MEMORY [A], [B], [C], [D] ........ 70
Utilisation des pédales pour sélectionner des
programmes ..................................................................... 70
Niveau principal ...................................................... 70
Contournement/Assourdissement (Bypass/Mute)
...................................................................................... 71
Accordeur .................................................................. 71
Définition de la fonction d’encodeur rotatif ..... 72
Fonction de verrouillage des touches ................. 72
Mode Rhythm & Bass .............................. 73
PTN (Lecture de motif) ........................................... 73
CHAIN (Lecture enchaînée) .................................. 75
SONG (Lecture de morceau) ................................. 77
Mode de pratique des phrases ................ 79
Sélection du mode d’enregistrement .................. 79
Enregistrement ......................................................... 80
Reproduction ............................................................ 81
Pause ........................................................................... 81
Sauvegarde ................................................................ 81
58
Mode d’édition EDIT ................................ 82
Sélectionnez l’effet que vous voulez modifier ... 82
Edition de chacun des effets ................................. 82
DYNA: Dynamique et modelage du micro ..................
AMP: Modelage de l’ampli ............................................
CAB: Modelage de l’enceinte .........................................
MOD: Modulation et modelage de l’effet de filtre ......
DLY: Modelage du retard ...............................................
DLY: Durée du retard ......................................................
REV: Modelage de la réverbération ...............................
NR: réduction du bruit ....................................................
RENAME: Réassignation de nom ..................................
WRITE: Sauvegarde ........................................................
82
83
83
84
84
84
84
85
85
85
Mode Utility ............................................ 86
Sélectionnez une fonction de l’utilitaire ............ 86
Changez les réglages pour chaque fonction de
l’utilitaire ................................................................... 86
BACKLIT: Mise en/hors service de l’écran .................. 86
KEY-TRN: Transposition de clé ...................................... 86
KTR+BC: Transposition de clé + Annulation des basses ...... 87
AMP/LIN: Sélection d’ampli/ligne .............................. 87
FOOTSW: Réglages des pédales .................................... 88
USBSEND: USB Send ...................................................... 89
USB RCV: Réception USB ............................................... 89
AUX>USB: Interface audio USB .................................... 89
MIDDRUM: Batterie/Bass MIDI ................................... 90
Rétablissement des programmes par défaut
.............................................................. 90
Liste des paramètres des effets ................ 91
DYNA: Dynamique et modelage du micro ........ 91
AMP: Modelage d’ampli ........................................ 93
CAB: Cabinet modeling ......................................... 97
MOD: Modulation et modelage de
l’effet de filtre ........................................................... 99
DLY: Modelage du retard ..................................... 103
REV: Reverb Modeling ......................................... 104
Liste des programmes présélectionnés ... 105
Liste des motifs rythme ......................... 106
Guide de dépannage ............................ 107
Spécifications techniques ....................... 109
59
Introduction
L’écran à cristaux liquides (LCD) est très lisible, même dans
des endroits sombres.
Caractéristiques principales
Fonction Rythme and Bass
Le PX5D est un multi-effets polyvalent concentrant une
incroyable gamme de sons d’amplis guitare/basse et d’effets dans un boîtier compact utilisant la technologie
“
”de modélisation de Korg pour créer des sons de
modélisation réalistes et puissants.
180 variations d’effets pour sept effets au maximum
peuvent être utilisées simultanément.
Le système IPE (Integrated Parameter Edit) permet
facilement de régler les paramètres d’effets.
100 programmes utilisateur et 100 programmes
présélectionnés
Boutons de réglage
Le PX5D intègre 18 types de modèles d’ampli de guitare, 10
types de modèles d’ampli de basse et 6 types de synthétiseurs,
chacun pouvant être remodelé rapidement et facilement.
60
Ecran à cristaux liquides rétroéclairé
Merci d’avoir fait l’acquisition d’un processeur d’effets
multiples personnel PANDORA PX5D de Korg. Pour lui
assurer une longue vie sans incidents, veuillez lire attentivement le présent manuel et toujours veiller à utiliser l’appareil correctement. Conserver le manuel dans un endroit
sûr afin de pouvoir s’y reporter ultérieurement.
Fonction d’accordeur automatique
Cette fonction facilite et accélère l’accordage. Elle permet
également d’accorder l’instrument sans être entendu (avec
le son coupé).
128 patterns de Rythme and Bass ou un métronome peuvent être utilisés. 16 patterns multiples peuvent aussi être
ajoutés pour une lecture successive.
Fonctionnement de Phrase Trainer
Vous pouvez utiliser le mode Rhythm & Bass pour désigner
un motif de rythme, jouer avec ce motif une source audio raccordée à la prise AUX ou au connecteur USB, ou bien jouez
sur votre guitare (ou basse) raccordée à la prise INPUT tout
en enregistrant le tout, puis écouter l’enregistrement de façon
répétée (maximum 80 secondes environ). La vitesse de lecture
peut aussi être ralentie sans changement de la hauteur du son.
Le rythme sélectionné en mode Rythme and Bass et l’effet peuvent également être enregistrés simultanément.
Fonction de hauteur AUX
Cette fonction permet de régler la hauteur du son transmis
par la prise AUX ou le connecteur USB (fonction de transposition de clé) ou d’annuler la partie basses fréquences
(fonction d’annulation des basses).
Touche TAP/BYPASS
Permet de régler facilement le temps de retard (Delay) ou
le tempo de la fonction rythmique et de basse pour qu’il
corresponde au tempo du morceau.
Encodeur rotatif
Permet de sélectionner rapidement des programmes ou
d’éditer des effets.
Mise sous tension
Retirer le couvercle du logement des piles dans le bas du
coffret en le faisant glisser dans le sens de la flèche. Introduire 2 piles alcalmes de format AA comme indiqué sur
l’illustration. Veiller à bien respecter les indications de polarité des piles.
Fonction d’interfaçage audio USB-MIDI, USB
En reliant le PX5D à votre ordinateur avec le câble USB
fourni vous pourrez utiliser le logiciel* d’édition pour remodeler le PX5D et ou transférer des données audio entre
le PX5D et votre ordinateur.
*: Ce logiciel peut être téléchargé du site Korg (http://
www.korg.com/). Devrait être disponible en octobre, 2007.
Qu’est-ce que la technologie
?
Le
système (de l’anglais Resonant Structure and Electronic
circuit Modeling System) constitue une technique de modelage du
son déposée par Korg qui reproduit avec précision le caractère complexe et la nature tant des instruments acoustiques qu’électriques
ainsi que des circuits électroniques dans des environnements réels.
Le
émule une vaste gamme des caractéristiques de génération des sons y compris des corps d’instruments, des haut-parleurs
et des enceintes des champs acoustiques, des microphones, des tubes à vide, des transistors, etc.
Affichage de pile épuisée
Lorsque la pile s’affaiblit, l’icône de la pile épuisée
s’allume. Dans ce cas, remplacer la pile dès que possible. Les programmes et les autres données (à l’exception de celles en cours
d’édition) seront conservées même lors du retrait de la pile.
Toujours retirer les piles épuisées du PX5D. Si vous les laissez dans l’appareil, elles risquent d’être à l’origine de mauvais fonctionnements (dus à des fuites de produit, etc.). Nous
conseillons également de retirer les piles lorsque vous ne comptez pas utiliser le PX5D pendant une période prolongée.
L’adaptateur secteur n’est pas livré avec l’appareil. Il doit
être acheté séparément.
61
Commandes et connecteurs
7
6
5
4
3
2
1
8
9
19
10
18
11
17
12
13
14
15
16
1. Prise INPUT
Raccorder cette prise à la guitare ou la basse.
2. Prise AUX (stéréo)
Raccorder cette prise à un lecteur de CD, etc.
3. Commutateur de niveau d’entrée
Utilisez ce commutateur pour régler le niveau d’entrée en
fonction du niveau de sortie de votre guitare ou basse (☞p.69).
4. Boutons de réglage
Ces boutons permettent de contrôler le gain, la tonalité et
le volume des modèles d’amplificateurs ainsi que les paramètres du synthétiseur.
62
5. Interrupteur d’alimentation
Cet interrupteur met l’appareil sous et hors tension.
STANDBY: Appareil hors tension.
ON: Appareil sous tension.
USB: Appareil sous tension. Lorsque le PX5D est raccordé
à votre ordinateur par le câble USB, il est alimenté par l’ordinateur via le bus USB.
Certains ordinateurs peuvent ne pas fournir d’alimentation
par le bus USB. Dans ce cas, utilisez un concentrateur USB
autonome (pouvant être alimenté par une autre source), ou
bien utilisez deux piles ou un adaptateur secteur.
6. Prise FOOT SW
Vous pouvez utiliser le câble fourni pour raccorder deux
pédales.
7. Prise OUTPUT
Raccorder cette prise à l’ampli de la guitare ou au casque
d’écoute, etc.
8. LCD (Ecran d’affichage à cristaux liquides)
☞p.64 “Ecran LCD”
9. CURSOR
Utilisez ces touches pour sélectionner des programmes ou
le paramètre qui doit être changé. Ces boutons permettent
aussi d’utiliser la fonction Phrase Trainer.
10. DC4.5V
Sert à raccorder l’adaptateur secteur vendu séparément
(DC4.5V
).
11. Touche RHYTHM
Utilisez cette touche pour accéder au mode Rhythm & Bass
(☞p.73).
17. Touche TAP/BYPASS
En mode Edit, cette touche sert à spécifier la durée du retard pour les effets comportant un délai (☞p.67), ou le tempo du rythme pour le mode Rhythm & Bass (☞p.74). En
mode Play, cette touche sert à contourner le signal ou à couper le signal du PX5D et à mettre le tuner en marche (☞p.71).
13. Touche UTILITY
Utilisez cette touche pour accéder au mode Utility.
18. Connecteur USB
Utilisez le câble USB fourni pour relier l’appareil à votre
ordinateur. En reliant le PX5D à votre ordinateur avec le
câble USB fourni vous pourrez utiliser le logiciel d’édition
pour remodeler le PX5D et ou transférer des données audio
entre le PX5D et votre ordinateur.
14. Touches PROGRAM MEMORY [A] [B] [C] [D]
Vous pouvez attribuer vos programmes préférés à ces quatre touches (A~D) (☞p.79).
19. Encodeur rotatif
Sert à régler le volume général, à éditer les effets et à sélectionner les programmes
12. Touche PHRASE TRAINER
Utilisez cette touche pour accéder au mode Phrase Trainer
(☞p.70).
15. Touche ENTER/REC
Cette touche sert à activer/désactiver un effet, modifier les
motifs en mode Rhythm & Bass ou à démarrer l’enregistrement en mode Phrase Trainer (☞p.86).
16. Touche EXIT
Cette touche établit le mode Play ou l’écran précédent.
63
Ecran LCD
9
1
2
8
3
4
5
6
7
1. Chaîne d’effets
Cette zone indique l’état activé/désactivé des effets DYNA,
AMP, CAB, MOD, DLY et REV.
2. Affichage du nom de programme/des types d’effets
Cette zone indique le nom du programme ou le type d’effet utilisé. Lorsque le PX5D est contourné ou assourdi, cette zone fonctionne comme indicateur d’accordage.
3. Icône USB
Cet icône apparaît si le PX5D est relié à votre ordinateur
par le port USB.
4. Icône de pile épuisée
Cette icône s’allume lorsque les piles s’affaiblissent.
64
5. Icônes de mode
Une de ces icônes apparaît lorsque vous accédez au mode
correspondant.
6. Affichage du numéro de programme/de la valeur
Affiche le numéro de programme.
Lorsque vous modifiez le niveau principal (Level Master),
sa valeur s’affiche ici pendant plusieurs secondes. Pendant
l’édition, l’affichage indique les valeurs des paramètres.
7. Icône ORIG (Icône originales)
Si le paramètre ou la valeur modifié correspond à la valeur
définie dans le programme, l’icône ORIG s’éclaire.
8. Graphique à barres
En mode Play ou en mode Edit, ce graphique indique le
niveau principal ou la valeur d’un paramètre. En mode
Rhythm, cette indication change en fonction du motif de
rythme joué.
9. Icônes de variation (VARI1, VARI2)
Ces icônes montrent la variation du motif de rythme ou du
motif de rythme et basse utilisé en mode Rhythm (☞p.74).
Raccordements
Mettre tous les équipements qui vont être raccordés hors tension (sur OFF) et baisser leur volume.
disques compacts, etc*2
pedales *5
guitare ou
basse
casque d’éoute*4
mini-chaîne/
stéréo, etc
*3
ampli/moniteur
sous tension
*6
*7
Ordinateur
Enregistreur numérique
adaptateur
secteur *1
65
*1 Si vous faites fonctionner le PX5D sur piles, l’adaptateur
secteur n’est pas nécessaire (DC4.5V
).
*2 Si un lecteur CD ou une autre source audio est raccordée à la prise AUX, vous pourrez jouer en même temps
avec votre guitare ou votre basse. Mais le volume devra
être réglé à partir du dispositif raccordé.
Les câbles de connexions ne sont pas fournis d’origine.
*3 La borne OUTPUT est une borne de sortie stéréo. Si vous
utilisez un câble té lé phonique mono pour raccorder l’
PX5D à un ampli pour guitare ou un ampli pour basse,
seul le son L (gauche) sera émis.
*4 Le niveau de sortie du PX5D et sa qualité sonore varieront en fonction du casque d’écoute utilisé. Nous conseillons d’utiliser un casque d’écoute de bonne qualité à
faible impédance, de 32 ohms ou inférieure, avec une sensibilité estimée à 100 dB/mW ou supérieure. La plupart
des casques d’écoute en vente pour les lecteurs de CD
ou pour les magnétophones portables feront l’affaire.
*5 Utilisez le câble en Y fourni pour relier deux pédales au
PX5D. En mode Utility vous pouvez désigner la fonction attribuée aux pédales ; par exemple vous pouvez
utiliser les pédales pour changer de programme ou pour
lancer/arrêter l’enregistrement et la lecture en mode
Phrase Trainer (☞p.70 “Utilisation des pédales pour sélectionner des programmes”, ☞p.88 “FOOTSW”).
66
*6 Utilisez le câble USB fourni pour relier le PX5D à votre
ordinateur. Pour le détail sur le raccordement à l’ordinateur, reportez-vous à “Raccordement à votre ordinateur”.
*7 Si nécessaire, vous pouvez fixer le pied en caoutchouc
fourni sous le PX5D.
Raccordement à votre ordinateur
Si vous raccordez le PX5D à votre ordinateur avec le câble
USB fourni, vous pourrez utiliser le logiciel d’édition pour
modifier les réglages du PX5D et transférer des données
audio entre le PX5D et votre logiciel DAW.
Utilisation du logiciel d’édition
Le logiciel d’édition permet de réaliser des programmes,
de gérer des bibliothèques de données et de créer des chaînes en mode Rhythm & Bass.
Vous pouvez télécharger le logiciel d’édition du site Korg (http:/
/www.korg.com/). Pour le détail sur l’installation et l’utilisation du logiciel d’édition, reportez-vous au mode d’emploi.
Pour pouvoir utiliser le logiciel d’édition, vous devez installer le pilote KORG USB-MIDI sur votre ordinateur. (“Installation du logiciel” sur le CD-ROM)
Transfert de données audio
Si vous utilisez un câble USB pour raccorder le PX5D à votre ordinateur, la sortie d’effet du PX5D, les sons du rythme
dans le mode Rhythm & Bass et les phrases enregistrées en
mode Phrase Trainer peuvent être enregistrées directement
sur les pistes audio de votre logiciel DAW. La lecture du
logiciel DAW peut aussi être contrôlée par le PX5D.
Si votre ordinateur fonctionne sous Windows XP, il est conseillé d’installer le pilote KORG USB-ASIO (sur le CDROM) sur votre ordinateur pour pouvoir transmettre du son
par le connecteur USB. Pour de plus amples informations
sur l’installation du pilote KORG USB-ASIO, reportez-vous
à “Installation du logiciel” sur le CD-ROM fourni.
L’illustration suivante montre le sens du signal lorsque le
PX5D est raccordé à votre ordinateur.
SORTIE
PX5D
Rhythem&Bass
ENTRÉE
Effect
Phrase Trainer
USB
L'effet du PX5D ne sera pas appliqué à l'entrée audio via la
prise USB.
67
Réglez le niveau principal pour changer le volume du signal sonore sortant par la prise OUTPUT du PX5D (☞p.70
“Niveau principal”).
Réglez le paramètre “USBSEND” du mode Utility pour
changer le volume du signal audio transmis à l’ordinateur
par le connecteur USB du PX5D. (☞p.89 “USBSEND”).
Réglez le paramètre “USB RCV” du mode Utility pour changer le volume du signal audio transmis au PX5D par l’ordinateur (☞p.89 “USB RCV”).
Normalement, le signal transmis par la prise AUX n’est
pas envoyé au connecteur USB. Si vous voulez que ce signal soit envoyé à l’ordinateur, accédez au mode Utility
“Écran AUX>USB” (☞p.89 “AUX>USB).
Si vous enregistrez l’effet du PX5D sur une piste audio de
votre logiciel DAW, mettez la fonction “audio in thru” hors
service de votre logiciel pour éviter le retour d’écho.
Pour de plus amples informations sur votre logiciel DAW,
reportez-vous au mode d’emploi fourni avec le logiciel.
68
Premier essai
1
2
3
Lorsque les raccordements sont terminés, mettre l’interrupteur d’alimentation sur la position “ON”. (Nous
appelons ce mode le mode de jeu “Play”.) Utiliser π/
† CURSOR pour sélectionner un programme.
Sélectionnez le niveau d’entrée en fonction du niveau
de sortie de votre guitare ou basse.
HI: Pour un micro avec niveau de sortie élevé. (par ex.,
micro double bobinage ou avec préamplificateur)
LO: Pour un micro avec niveau de sortie faible. (par
ex., micro simple bobinage)
Mettre la commande de volume de la guitare ou basse
sur la position habituelle. Utiliser l’encodeur rotatif pour
régler le volume général.
Edition rapide
Dans chaque mode (sauf lorsque Mute/Bypass ou Key Lock
sont actifs) vous pouvez utiliser les boutons de réglage pour
régler le gain, la sonorité ou le volume de la modélisation
de l’ampli. Lorsque vous tournez un bouton de réglage, le
nom du paramètre et une valeur s’affichent pendant quelques secondes dans l’affichage des valeurs. Si le réglage
correspond au réglage d’origine, l’icône ORIG s’allume.
Il est possible de régler le temps de retard du modelage du
retard en appuyant deux fois sur la touche TAP/BYPASS à
l’intervalle souhaité (sauf dans le mode rythmique et de
basse).
Lorsque vous définissez la durée du retard, la valeur s’affiche pendant quelques secondes.
Gain, tonalité et volume
de l’ampli
Nom du
programme
Sélection des
programmes
Commutateur de
niveau d’entrée
Réglage du
niveau
principal
Règle le
temps de
retard
Numéro du
programme
Les réglages effectués à l’aide de la fonction d’édition rapide
Quick Edit seront remplacés par les réglages d’origine du programme si vous changez de programme ou si vous coupez
l’alimentation avant de les sauvegarder (☞p. 85 “WRITE”).
69
Mode de jeu Play
Le mode de jeu Play est celui que vous utiliserez normalement avec le PX5D.
Sélection d’un programme
Utilisez π/† CURSOR pour sélectionner un programme.
Le nom du programme apparaît dans l’affichage du type
de programme/effet et le numéro de programme dans l’affichage des valeurs.
Vous avez le choix entre cent programmes personnalisés
(U00~U99) et cent programmes préréglés (P00~P99). Ces
programmes peuvent être sélectionnés même si vous êtes
en mode Rhythm & Bass, Phrase Trainer (sauf pendant l’enregistrement) ou en mode Utility (sauf lorsque certains
écrans sont affichés).
Touches PROGRAM MEMORY [A], [B], [C], [D]
Vous pouvez attribuer quatre de vos programmes préférés
aux touches PROGRAM MEMORY [A] à [D]. Pendant que
vous jouez, appuyez simplement sur la touche PROGRAM
MEMORY [A] à [D] souhaitée pour rappeler instantanément le programme sélectionné. Un programme peut être
attribué à une touche de la façon suivante. Dans l’exemple
suivant, le programme sélectionné est attribué à la touche
[A].
1
70
Utilisez π/† CURSOR pour sélectionner le programme que vous voulez attribuer au bouton [A].
2
Appuyez environ une seconde sur la touche PROGRAM
MEMORY [A]. L’écran indique “PGM>A” et le programme sélectionné est attribué au bouton [A].
Vous pouvez utiliser une pédale raccordée à la prise FOOT
SW pour sélectionner un des quatre programmes attribués
aux touches PROGRAM MEMORY [A]–[D] (☞p.88 “
FOOTSW”).
Utilisation des pédales pour sélectionner des programmes
Si vous raccordez des pédales à la prise FOOT SW du PX5D
et utilisez le mode Utility pour désigner la fonction des
pédales, vous pourrez sélectionner des programmes à l’aide
des pédales.
Utilisez le câble fourni pour raccorder les pédales. La prise
rouge à une extrémité du câble servira à changer de programme dans le sens croissant et la prise blanche dans le sens décroissant (☞p.65 “Raccordements”, p.88 ”FOOTSW”).
Niveau principal
Lorsque vous tournez l’encodeur rotatif pour régler le volume principal, la valeur du volume principal apparaît sur l’affichage du numéro de programme/des valeurs pendant plusieurs secondes.
Le graphique à barres qui indique le niveau change aussi.
Le niveau principal est conservé même lorsque l’appareil est
mis hors tension.
Accordeur
Barre graphique
L’accordeur fonctionne lorsque vous contournez ou que
vous assourdissez le son.
Indicateur
Affichage du numéro de
programme
Dièse
Valeur du niveau
principal
Vous pouvez également effectuer des réglages de sorte que π/
† CURSOR permettent de régler le volume principal (☞p.72
“Définition de la fonction d’encodeur rotatif”).
Nom de la note
calibrage
Marque centrale
1
Contournement/Assourdissement (Bypass/Mute)
Si vous appuyez une seconde environ sur la touche TAP/
BYPASS, le PX5D sera contourné et le son original sera sec
(sans effets). La chaîne d’effets clignote et l’affichage indique “BYPASS” pendant environ une seconde.
Si vous appuyez deux secondes environ sur la touche TAP/
BYPASS, le signal de sortie sera coupé. La chaîne d’effets se
mettra à clignoter rapidement et l’affichage indiquera
“MUTE” pendant environ une seconde. La fonction Bypass/
Mute (contournement/assourdissement) se désactive lorsque vous réappuyez sur la touche TUNE/BYPASS.Vous pouvez alors revenir en mode de jeu Play en appuyant sur la
touche EXIT. Vous pouvez également accéder aux fonctions
Bypass ou Mute à partir d’autres modes que le mode de jeu.
Vous ne pouvez pas activer la fonction Bypass ou Mute lorsque
deux pédales sont raccordées au PX5D (☞p.88 “FOOTSW”).
2
3
Jouez sur une seule corde de votre guitare ou de votre basse.
Le nom de la note et le calibrage sont indiqués sur l’écran.
Si la hauteur est à plus d’un demi-ton que le nom de la note,
un dièse apparaît en haut et à droite du nom de la note.
La zone d’affichage indique aussi la hauteur du son. Accordez chaque corde de votre guitare ou de votre basse de sorte que l’indicateur au-dessus du repère central soit éclairé.
Lorsque vous appuyez sur la touche TAP/BYPASS, le tuner (bypass/mute) est mis hors service. Vous pouvez aussi revenir au mode Play en appuyant sur la touche EXIT.
Calibrage (fréquence de la hauteur du La standard)
Vous pouvez utiliser l’encodeur rotatif pour régler le calibrage sur une plage allant de La (A) = 438 Hz à 445 Hz.
Le réglage de calibrage effectué prévaudra jusqu’à la mise
hors tension de l’appareil. A la remise sous tension, le calibrage est réinitialisé à une valeur du La = 440 Hz.
71
Définition de la fonction d’encodeur rotatif
Fonction de verrouillage des touches
Vous pouvez définir la fonction d’encodeur rotatif en mode
de reproduction. En mode de reproduction Play, maintenir
la touche EXIT enfoncée et appuyer soit sur √ CURSOR,
sur ® CURSOR pour lui assigner les fonctions suivantes.
● Maintenez la touche EXIT enfoncée et appuyez sur √ CURSOR.
L’écran affiche “MASTER” pendant environ 1 seconde.
L’encodeur rotatif permet de régler le volume principal alors
que π/† CURSOR permettent de sélectionner les programmes. Vous pouvez utiliser l’encodeur rotatif pour régler plus
rapidement le volume principal. Chaque fois que l’appareil est mis sous tension, ce réglage sera opérationnel.
L’activation de la fonction de verrouillage des touches permet de
désactiver toutes les opérations, sauf la sélection des programmes. C’est un moyen pratique d’éviter toute manipulation accidentelle pendant une représentation en direct.
● Maintenir la touche EXIT enfoncée et appuyer sur la
touche TUNE/BYPASS.
L’écran affiche “KEYLOCK” pendant environ 1 seconde.
L’encodeur rotatif, les touches et les boutons autres que
π/† CURSOR, les touches PROGRAM MEMORY [A]
à [D] et les pédales ne fonctionnent pas.
Sélectionner un
programme
Régler le
niveau
principal
● Maintenir la touche EXIT enfoncée et appuyer sur √ CURSOR.
L’écran affiche “PROGRAM” pendant environ 1 seconde. L’encodeur rotatif permet de sélectionner les
programmes alors que π/† CURSOR permettent de
régler le volume principal. Vous pouvez utiliser l’encodeur rotatif pour sélectionner plus rapidement les
programmes.
Régler le
niveau
principal
72
Sélectionner un
programme
Seule la sélection
des programmes
est possible
La fonction de verrouillage des touches s’annule lorsque
l’appareil est mis hors tension. Vous pouvez également annuler cette fonction par le biais de “Définition de la fonction d’encodeur rotatif”.
Mode Rhythm & Bass
Le PX5D présente 128 motifs de rythmes et basses. Vous
pouvez aussi relier entre eux jusqu’à 16 motifs pour les jouer
en continu.
Depuis le mode Play (sauf lorsque Mute, Bypass ou Key
Lock sont actifs) le mode AUX Pitch ou le mode Phrase
Trainer, appuyez sur la touche RHYTHM pour accéder au
mode Rhythm & Bass. Le motif correspondant au type de
jeu sélectionné commence. Le graphique à barres change
selon le motif de rythme joué. Appuyez sur la touche EXIT
pour revenir au mode Play.
Le mode Rhythm & Bass présente trois types de lecture.
PTN : Lecture de motifs
Vous pouvez sélectionner un motif de rythme et le jouer.
L’icône PTN apparaît sur l’écran.
CHAIN : Lecture enchaînée
Vous pouvez relier jusqu’à 16 motifs entre eux pour les
jouer en continu. La lecture en continu commence après
une mesure préliminaire.
SONG : Lecture de morceau
Ceci permet de lire les morceaux disponibles en démo. La
lecture commence après une mesure préliminaire.
Chaque fois que vous appuyez sur la touche RHYTHM, les
choix changent dans le sens de PTN→CHAIN→ SONG→PTN→CHAIN→SONG ... et l’icône du type de lecture
sélectionné apparaît sur l’écran.
Lorsque vous accédez au mode Rhythm & Bass, le type de
lecture sélectionné sera celui que vous utilisiez au moment
où vous êtes sorti du mode Rhythm & Bass.
Si vous désignez “JAM” comme mode d’enregistrement
Phrase Trainer, vous pourrez enregistrer la phrase de votre
guitare ou de votre basse avec le motif Rhythm & Bass sélectionné dans le mode Rhythm & Bass.
PTN (Lecture de motif)
Ce type de lecture permet de sélectionner et jouer un motif
de rythme et basse. Utilisez √/® CURSOR pour sélectionner chaque paramètre, puis l’encodeur rotatif et la touche ENTER/REC pour spécifier sa valeur. π/† CURSOR
changera les programmes.
Motif de rythme/Variation
Reverb
Level
Tempo
Bass key
Les réglages sélectionnés à ce stade sont conservés même
lorsque l’appareil est mis hors tension.
73
Motif de rythme/Variation
Utilisez l’encodeur rotatif pour sélectionner le motif de
rythme (☞p.106 “Liste des motifs de rythme”).
Utilisez la touche ENTER/REC pour sélectionner la variation du motif de rythme.
BASIC: Motif de rythme de base
VARI1: Variation 1 L’icône de variation 1 s’éclaire.
VARI2: Variation 2 L’icône de variation 2 s’éclaire.
Motif de
rythmique
Icône de
variation
Tempo
Utilisez l’encodeur rotatif pour régler le tempo sur une plage allant de 40 à 240 bpm. Vous pouvez également régler le
tempo en appuyant deux fois sur la touche TAP/BYPASS
au rythme souhaité.
Affichage
du tempo
74
Bass key (Touche de basse)
Utilisez la touche ENTER/REC pour sélectionner une variation du motif de basse. Avec certains motifs de rythme,
les lignes de la basse comprennent une progression d’accords.
OFF: Motif de basse hors service.
BASIC: Motif de basse de base.
VARI1: Variation 1. C’est un motif de basse à accord majeur. L’icône de variation 1 apparaît sur l’écran.
VARI2: Variation 2. C’est un motif de basse à accord mineur. L’icône de variation 2 apparaît sur l’écran.
Utilisez l’encodeur rotatif pour régler la note sur une plage Do, Do# à La#, Si pour vous exercer sur la guitare ou la
basse sur une gamme qui correspond à cette tonalité.
Affichage
de la tonalité
Si le motif de basse est la variation 2 (VARI2), un “m” sera
indiqué à côté de la note fondamentale.
Lorsque la fonction “MTRONM0” à “MTRONM9” (métronome) est sélectionnée comme motif rythmique, il n’y a pas de notes
basses et cet écran n’apparaît pas.
Level (Niveau de rythmique et de basse)
Utilisez l’encodeur rotatif pour régler le niveau de rythmique et de basse.
Niveau de rythmique et de basse
Reverb (Niveau de réverbération rythmique et de basse)
Utilisez l’encodeur rotatif pour régler la quantité de Reverb pour Rhythm and Bass.
Niveau de
réverbération
Le même effet que pour la guitare est utilisé pour la réverbération. Ce paramètre n’a aucun effet si vous avez sélectionné un programme qui n’utilise pas le modelage de la réverbération ou si le niveau de l’effet de réverbération est mis
sur “0”.
CHAIN (Lecture enchaînée)
Deux motifs Rhythm & Bass ou plus reliés entre eux forment ce que l’on appelle une “chaîne”. CHAIN (Lecture
enchaînée) permet de modifier une chaîne et de la jouer.
Une chaîne peut se relier à seize motifs.
Le PX5D contient en tout vingt chaînes.
Lorsque vous sélectionnez CHAIN (lecture enchaînée), une mesure préliminaire est jouée avant le morceau proprement dit.
CHAIN (lecture enchaînée) permet de sélectionner une
chaîne et de spécifier son tempo, son niveau de volume et
son niveau de réverbération.
Utilisez √/® CURSOR pour sélectionner chaque paramètre, puis l’encodeur rotatif et la touche ENTER/REC pour
spécifier la valeur de ce paramètre.
Sur l’écran Chain Select, vous pouvez appuyer sur la touche
ENTER/REC pour accéder à l’écran Chain Edit. Sur cet écran,
vous pouvez désigner le motif de rythme et basse qui sera
utilisé pour chaque maillon de la chaîne (☞p.76 “Édition
d’une chaîne”). Appuyez sur la touche EXIT pour revenir à
l’écran Chain Select.
Éditer une chaîne
ENTER/REC
EXIT
Sélection de la chaîne
Write
Reverb
Tempo
Level
75
Sélection de la chaîne (CHAIN 01 à 20)
Vous pouvez ici sélectionner une des vingt chaînes proposées.
Numéro de chaîne
Édition d’une chaîne
Sur cet écran, vous pouvez appuyer sur la touche ENTER/REC
pour accéder à l’écran Chain Edit (☞p.76“Édition d’une chaîne”).
Les paramètres édités reviendront aux réglages du programme original si vous commutez les chaînes ou mettez l'appareil hors tension sans effectuer l'opération Writing.
Tempo
Utilisez l’encodeur rotatif ou la touche TAP/BYPASS pour
régler le tempo (☞p.74 “Tempo”).
Level (Niveau de rythmique et de basse)
Utilisez l’encodeur rotatif pour régler le niveau de rythmique et de basse (☞p.75 “Level”).
Reverb (Niveau de réverbération rythmique et de basse)
Utilisez l’encodeur rotatif pour régler la quantité de Reverb pour Rhythm and Bass (☞p.75 “Reverb”).
76
Write
Pour sauvegarder la chaîne. Utilisez l’encodeur rotatif pour
sélectionner la destination de la sauvegarde (numéro de chaîne) et appuyez sur la touche ENTER/REC. Le PX5D peut stocker vingt chaînes.
Ici vous pouvez désigner le motif qui doit être utilisé pour
chaque maillon. Sur l’écran de sélection de chaîne (CHAIN01
à 20), appuyez sur la touche ENTER/REC pour accéder à
l’écran Chain Edit. Utilisez √/® CURSOR pour sélectionner chaque maillon, puis de nouveau π/† CURSOR pour
sélectionner un paramètre et utilisez ensuite l’encodeur rotatif et la touche ENTER/REC pour définir la valeur. Après avoir
défini un motif pour chaque maillon de la chaîne, appuyez
sur la touche EXIT pour revenir à l’écran Chain Select.
Repeat
Repeat
Repeat
Bass key
Bass key
Bass key
Rhythm pattern
Rhythm pattern
Rhythm pattern
le pas 01
le pas 02
le pas 16
Les paramètres édités reviendront aux réglages du programme original si vous commutez les chaînes ou mettez l'appareil hors tension sans effectuer l'opération Writing.
Motif de rythme
Utilisez l’encodeur rotatif pour sélectionner le motif de
rythme (☞p.106 “Liste des motifs de rythme”).
Utilisez la touche ENTER/REC pour sélectionner la variation du motif de rythme (☞p.74 “Motif de rythme/Variation”).
Repeat (Répétition de motif)
Utilisez l’encodeur rotatif pour définir le nombre de répétitions
du motif sélectionné pour chaque maillon. Le motif sera joué le
nombre de fois indiqué, puis il fera place au motif suivant.
Répétition
Motif de rythme
Affichage
de la tonalité
Numéro de pas
Lorsque vous tournez l'encodeur de valeur pour déplacer le
pas avec CURSOR √/® maintenu enfoncé, le motif précédant le mouvement sera copié sur le motif suivant le mouvement. C'est une façon pratique de créer plusieurs copies
d'un même motif.
Bass key (Touche de basse)
Utilisez la touche ENTER/REC pour sélectionner une variation du motif de basse. Utiliser l’encodeur rotatif pour
régler la note (☞p.74 “Bass key”).
Numéro d’étape
SONG (Lecture de morceau)
Ici vous indiquez comment jouer les morceaux de démonstration
du PX5D. Lorsque vous sélectionnez SONG (Lecture de morceau),
une mesure préliminaire est jouée avant le morceau proprement dit.
Pour interrompre la lecture, vous pouvez appuyer sur la
touche ENTER/REC. Appuyez une nouvelle fois sur la touche pour continuer la lecture.
Pour revenir au début du morceau et le rejouez il faut appuyer au moins une seconde sur la touche ENTER/REC.
Pendant la lecture ou l’arrêt, vous pouvez utiliser π/†
CURSOR pour changer de programmes.
Utilisez √/® CURSOR pour sélectionner un paramètre
et l’encodeur rotatif pour définir la valeur.
Affichage
de la tonalité
Numéro de pas
77
Sélection de
morceau
Loop
Tempo
Reverb
Transpose
Level
Sélection de morceau
Utilisez l’encodeur rotatif pour sélectionner le morceau de
démo que vous voulez écouter. Le PX5D contient trois
morceaux de démo.
Numéro du
morceau
Tempo
Utilisez l’encodeur rotatif pour définir le tempo de la lecture. Si vous sélectionnez le réglage “FIL”, le morceau de
démo sera joué au tempo original (☞p.74 “Tempo”).
Transpose
Utilisez l’encodeur rotatif pour désigner la transposition.
Vous pouvez transposer la hauteur du son par demi-tons.
78
Level (Niveau de rythmique et de basse)
Utilisez l’encodeur rotatif pour régler le niveau de rythmique et de basse (☞p.75 “Level”).
Reverb (Niveau de réverbération rythmique et de basse)
Utilisez l’encodeur rotatif pour régler la quantité de Reverb pour Rhythm and Bass (☞p.75 “Reverb”).
Loop (Boucle)
Utilisez l’encodeur rotatif pour changer le réglage de la
boucle. Ce réglage indique comment la répétition doit être
exécutée.
On (En service): Le morceau est joué plusieurs fois.
OF (Hors service): Le morceau est joué une seule fois.
Mode de pratique des phrases
Une source audio transmise à la prise AUX et au connecteur USB, une phrase jouée sur votre guitare ou votre basse, ou le rythme défini dans le mode Rhythm & Bass peuvent être enregistrés et lus en boucle.
Il s’agit d’une fonction particulièrement utile pour s’exercer
en jouant sur la phrase qui se répète. Vous pouvez aussi ralentir la vitesse de reproduction sans affecter la hauteur des
notes, afin d’apprendre plus facilement les phrases difficiles.
Vous pouvez sauvegarder la phrase enregistrée dans la mémoire du PX5D.
Si votre ordinateur fonctionne sous Windows XP et si vous
voulez transférer des données audio par le connecteur USB,
il est conseillé d’installer le pilote KORG USB-ASIO (sur
le CD-ROM fourni). Pour de plus amples informations sur
l’installation du pilote KORG USB-ASIO, reportez-vous à
“Installation du logiciel” sur le CD-ROM fourni.
Sélection du mode d’enregistrement
En mode Play (sauf lorsque les fonctions Bypass/Mute et Key
Lock sont utilisées), en mode Rhythm & Bass ou en mode
Utility, appuyez sur la touche PHRASE TRAINER pour accéder au mode Phrase Trainer. Lorsque vous accédez à ce
mode, l’écran de sélection du mode d’enregistrement apparaît et l’icône du mode de pratique des phrases clignote. Lorsque cet écran est affiché, le PX5D est prêt pour l’enregistrement. Appuyez sur la touche EXIT pour revenir au mode Play.
Mode
d’enregistrement
Icône de pratique des phrases
Temps
d’enregistrement
Utilisez la touche PHRASE TRAINER pour désigner le
mode d’enregistrement. Le mode change chaque fois que
vous appuyez sur la touche PHRASE TRAINER.
AUX: Pour enregistrer le son sortant par la prise AUX ou le
connecteur USB.
GTR/BAS: Pour enregistrer de votre guitare ou de votre
basse raccordée.
AUX+G/B: Pour enregistrer à la fois le son sortant par la
prise AUX ou le connecteur USB et le son de votre guitare
ou de votre basse.
JAM: Pour enregistrer à la fois le motif de rythme sélectionné pour la lecture en mode Rhythm & Bass et le son de
votre guitare (basse).
Si vous utilisez le connecteur USB et la prise AUX, le son transmis par les deux prises sera enregistré. Utilisez la commande de
volume de l’appareil raccordé pour équilibrer le volume.
Si la lecture de morceaux a été sélectionnée en dernier dans
le mode Rhythm & Bass, vous ne pourrez pas sélectionner
“JAM” comme mode d’enregistrement.
79
Utilisez l’encodeur rotatif pour sélectionner le temps d’enregistrement (pour “JAM”, le nombre de mesures).
20: Environ 20 secondes.
40: Environ 40 secondes.
80: Environ 80 secondes.
1, 2, 3…: Nombre de mesures.
Si le mode d’enregistrement est “JAM”, la qualité de l’enregistrement se règlera automatiquement, en fonction du tempo et
du nombre de mesures spécifié.
Si vous sélectionnez un long temps d’enregistrement (40 ou
80), la qualité audio de l’enregistrement sera moins bonne.
Si le mode d’enregistrement est “JAM” et le tempo du rythme
est extrêmement lent, il ne sera pas possible d’enregistrer un grand
nombre de mesures. Veuillez ajuster le tempo en mode Rhythm
& Bass (la longueur maximale est d’environ 80 secondes).
Si vous souhaitez utiliser Chain en mode Rhythm & Bass pour
enregistrer un motif rythmique d'une mesure, etc., en mode
“JAM” à l'aide de motifs variés, spécifiez le nombre de motifs
utilisés sous la forme du nombre de mesures à enregistrer. Par
exemple, si vous souhaitez utiliser deux motifs d'une mesure à
deux temps pour enregistrer un motif d'une mesure à quatre temps,
spécifiez 2 mesures comme nombre de mesures à enregistrer.
Démarrer la lecture sur le lecteur de CD ou sur l’autre source
audio et, lorsque vous atteignez le point auquel vous souhaitez commencer l’enregistrement, appuyer sur la touche
ENTER/REC. L’enregistrement commence.
80
Vous pouvez utiliser une pédale raccordée à la prise FOOT
SW pour lancer/arrêter l’enregistrement (☞p.88
“FOOTSW”).
En mode d’enregistrement “JAM”, l’enregistrement commencera après le compte préliminaire.
Si, après l’enregistrement, vous souhaitez modifier le mode
d’enregistrement ou le temps d’enregistrement, appuyez sur
la touche PHRASE TRAINER pendant la pause de la reproduction.
Enregistrement
Lorsque vous commencez l’enregistrement, le temps d’enregistrement apparaît sous forme de valeur numérique.
Affichage du temps
d’enregistrement
Pour arrêter l’enregistrement, appuyez sur la touche ENTER/REC,
sur la touche PHRASE TRANER, ou sur ® CURSOR. L’enregistrement s’arrêtera et la reproduction en boucle démarrera automatiquement. Si vous n’arrêtez pas l’enregistrement, celui-ci continuera jusqu’à ce que le temps d’enregistrement sélectionné soit
écoulé et la reproduction en boucle commencera automatiquement.
La phrase sera enregistrée et reproduite en mono.
Reproduction
La phrase enregistrée sera reproduite en boucle. Pendant
la lecture ou pendant la pause, vous pouvez utiliser π/†
CURSOR pour sélectionner les programmes.
Affichage du temps
de reproduction
Vitesse de
reproduction (%)
Tournez l’encodeur rotatif vers la gauche pour ralentir la vitesse
de reproduction sans modifier la hauteur. Vous pouvez choisir
parmi six niveaux différents de vitesse de reproduction: 100%,
90%, 80%, 75%, 66% et 50%. Pendant la lecture, vous pouvez
appuyer sur √ CURSOR en maintenant la pression pour rembobiner ou sur ® CURSOR pour avant rapidement.
En appuyant sur la touche PHRASE TRAINER, vous pouvez
arrêter le son en cours de jeu au moment où vous avez appuyé
sur la touche (fonction Hold). Cette fonction s’avère pratique pour
pouvoir écouter des notes individuelles au sein d’une phrase.
Si vous souhaitez réenregistrer la phrase, appuyez sur
® CURSOR pour interrompre la lecture.
Démarrer le lecteur de CD ou l’autre source et appuyer sur la
touche ENTER/REC au début de la phrase souhaitée. Si vous
souhaitez changer le mode ou le temps d’enregistrement, appuyez sur la touche PHRASE TRAINER pendant la pause.
Sauvegarde
Si vous souhaitez sauvegarder la phrase enregistrée, appuyez
plusieurs fois sur la touche PHRASE TRAINER pendant une
pause, jusqu’à ce que l’écran LCD indique “SAVE?”. Ensuite,
appuyez une nouvelle fois sur la touche ENTER/REC pour sauvegarder la phrase.
Pause
Lorsque vous appuyez sur ® CURSOR, la reproduction
s’arrête provisoirement (elle se met en pause). Réappuyer
sur ® CURSOR pour reprendre la lecture.
Si vous appuyez sur √ CURSOR pendant que la reproduction est arrêtée (en pause), vous reviendrez au début de
la phrase enregistrée.
L’écran “SAVE?” est disponible depuis le mode d’enregistrement si vous venez juste d’enregistrer une phrase.
Si vous éteignez l’appareil sans sauvegarder la phrase, elle
sera effacée.
Une seule phrase peut être sauvegardée. Lorsque vous sauvegardez une phrase, la phrase précédente est effacée.
81
Mode d’édition EDIT
Ce mode permet d’activer/de désactiver chacun des effets,
d’éditer le type d’effet, les valeurs des paramètres et le nom
du programme. En mode Play, appuyez sur ® CURSOR
pour accéder à l’écran DYNA d’édition des effets.
Ici vous pouvez aussi changer le nom du programme et
réécrire le programme.
Sélectionnez l’effet que vous voulez modifier
À chaque pression du doigt sur √/® CURSOR, les effets
défilent dans l’ordre suivant. Lorsque un effet est sélectionné, son icône clignote.
(Temps
de retard)
Edition de chacun des effets
Pour chaque effet, vous pouvez sélectionner le type d’effet et
régler les valeurs de ses paramètres.
Les effets qui sont hors service (“OFF”) sont mis en service
lorsque vous appuyez sur la touche ENTER/REC ou utilisez π/† CURSOR pour sélectionner le type d’effet. Si un
programme n’a pas été réécrit après avoir changé de nom,
le point décimal du numéro de programme s’éclaire.
Sur n’importe quel écran du mode Edit, vous pouvez utili-
82
ser les boutons de réglage pour modifier les modèles d’ampli, ou utiliser la touche TAP/BYPASS pour spécifier la
durée du retard.
Pour de plus amples informations sur les types d’effets et
les paramètres, reportez-vous à Liste des paramètres des
effets (☞p.91 “Liste des paramètres des effets”).
Appuyez sur la touche EXIT pour revenir au mode Play.
Les réglages du programme original sont rétablis lorsque
vous changez de programme ou éteignez l’appareil sans réécrire le programme (☞p.85 “WRITE”).
DYNA: Dynamique et modelage du micro
Il s’agit d’effets de type dynamiques, comme le compresseur et l’auto-wah, qui modifient la tonalité et les effets de
modelage du micro.
▲/▼: Sélection du
type d’effet
Valeur du
paramètre
Activé, désactivé
AMP: Modelage de l’ampli
Les quinze différents types BTQ CLN à OCTFUZZ (15 types) sont des amplis de guitare et les dix types VALVE1 à
UKMAJOR (10 types) sont des amplis de basse. GSYNTH1
à GSYNT3 sont des synthétiseurs de guitare et BSYNTH1 à
BSYNTH3 sont des synthétiseurs de basse. L’affichage de la
valeur indiquera “Gt” pendant environ une seconde si vous avez
sélectionné un modèle de guitare, ou “bA” si vous avez sélectionné
un modèle de basse.
Importance de
la distorsion*
Plage des basses
Plage des hautes
fréquences*
fréquences*
CAB: Modelage de l’enceinte
Cet effet simule les caractéristiques acoustiques de l’enceinte
de l’ampli. Il est particulièrement efficace lorsque vous n’utilisez pas d’ampli (par ex. lorsque vous utilisez un casque
d’écoute ou lorsque vous branchez la guitare à un mélangeur, à un enregistreur avec disque dur ou à un appareil
audio). Les onze types 1X8TWD à 4X12VIN (11 types) sont
des enceintes pour ampli de guitare et les douze types LA
4X10 à COMBI (12 types) des enceintes pour ampli de basse. L’affichage de la valeur indiquera “Gt” pendant environ une seconde si vous avez sélectionné une enceinte pour
ampli de guitare, ou “bA” si vous avez sélectionné une enceinte pour ampli de basse.
Volume*
▲/▼: Sélection du
type d’effet
Présenc
Plage des
moyennes
fréquences*
▲/▼: Sélection du
type d’effet
Activé, désactivé
Activé, désactivé
*Le fonctionnement sera différent si VALVE1 à JAZZ (amplis de basse),
GSYNTH1 à 3, ou BSYNTH1 à 3 est sélectionné comme type.
Vous êtes libre d’utiliser une ampli de guitare avec une enceinte pour ampli de basse, ou une ampli de basse avec
une enceinte pour ampli de guitare.
Le bouton du VOLUME peut également servir à régler le
VOLUME même quand l’effet de modelage de l’ampli est
“OFF” (désactivé).
83
MOD: Modulation et modelage de l’effet de filtre
Il s’agit d’effets de modulation et de types de filtre comme
le chorus, le flanger, le phaser et le pitch shifter.
▲/▼: Sélection du
type d’effet
Valeur du
paramètre
DLY: Durée du retard
L’écran indique la durée du retard de l’effet de modelage de
retard. Sur cet écran, vous pouvez utiliser l’encodeur rotatif
pour définir la durée. Vous pouvez aussi utiliser la touche
TAP/BYPASS pour spécifier la durée sur cet écran.
Temps
de retard
Activé, désactivé
DLY: Modelage du retard
Ces effets de type retard permettent de définir la durée du
retard par une pression du doigt sur la touche TAP/BYPASS
à l’intervalle souhaité.
▲/▼: Sélection du
type d’effet
Niveau
de l’effet
Activé, désactivé
REV: Modelage de la réverbération
Il s’agit d’effets de type spatiaux qui ajoutent une impression d’espace au son.
▲/▼: Sélection du
type d’effet
Niveau
de l’effet
Activé, désactivé
Temps de retard
84
Activé, désactivé
NR: réduction du bruit
L’augmentation de cette valeur produit davantage de réduction du bruit. Normalement, il convient de la régler de
manière à ne pas entendre les bruits perturbants lorsque
les cordes sont légèrement assourdies.
Réglez l’intensité
de la réduction
du bruit
Si la valeur NR est trop élevée, les notes seront coupées de
manière artificielle. Dans ce cas, réduisez la valeur de NR.
RENAME: Réassignation de nom
Cotte fonction permet de donner un nom à chaque programme.
▲/▼: Sélectionnez
l’emplacement
du caractère
Sélectionnez le caract-
Il est possible d’utiliser les caractères suivants:
WRITE: Sauvegarde
Cette fonction permet d’écrire (de mémoriser) un programme édité ou un programme que vous avez créé.
Utiliser l’encodeur rotatif pour sélectionner la destination d’écriture (valable uniquement pour les programmes utilisateur). Pour
annuler l’écriture d’un programme, appuyez sur √ CURSOR (ou
® CURSOR) pour sélectionner un autre écran.
Pour écrire le programme, appuyez sur la touche ENTER/REC.
Lorsque l’opération de sauvegarde est terminée, l’écran indique “COMPLT” pendant environ une seconde.
Sélectionnez un
numéro de programme utilisateur
comme destination
de sauvegarde.
Numéro de programme
actuellement inscrit sous
la destination de sauvegarde.
Sauvegarde
Avant de mémoriser un programme édité sous un autre
numéro de programme, vérifier si vous ne souhaitez pas conserver les données qui se trouvent déjà sous ce numéro de
programme. Les données qui sont remplacées sont en effet
irrémédiablement perdues.
Il n’est pas possible de mémoriser un programme sous un
emplacement de programme présélectionné.
85
Mode Utility
Ici vous pouvez régler par exemple le rétroéclairage de
l’écran, la transposition de clé et l’annulation des basses.
Depuis le mode Play, appuyez sur la touche UTILITY ; l’icône Utility apparaît lorsque vous êtes dans le mode Utility.
Sélectionnez une fonction de l’utilitaire
À chaque pression du doigt sur la touche UTILITY, les écrans des
fonctions de l’utilitaire changent dans l’ordre suivant.
Changez les réglages pour chaque fonction de
l’utilitaire
Changez les réglages souhaités pour chaque fonction de
l’utilitaire. Appuyez sur la touche EXIT pour revenir au
mode Play.
Ces réglages sont préservés même à la mise hors tension de
l’appareil.
BACKLIT: Mise en/hors service de l’écran
Utilisez l’encodeur rotatif pour allumer ou éteindre le rétroéclairage.
Backlit
On/Off
L’adaptateur secteur n'est pas livré avec l'appareil. Il doit
être acheté séparément.
KEY-TRN: Transposition de clé
L’affichage de cette fenêtre transpose la clé de l’entrée audio
de la prise USB ou de la prise AUX. Utilisez l’encodeur rotatif
pour spécifier l’importance de la transposition des touches
(possibilité de transposition sur une plage de +/- 1 octave). La
valeur peut être adaptée vers le haut et vers le bas sur 3 demitons par pas de 10 centièmes et par pas de demi-tons (100 centièmes) pour le reste de la plage.
Affichage des centaines de centièmes
Transpose
value
Affichage des centaines de centièmes
Le signal de sortie pour la transposition de clé sera monophonique.
86
KTR+BC: Transposition de clé + Annulation des basses
L’affichage de cette fenêtre transpose la clé et annule les
basses de l’entrée audio de la prise USB ou de la prise AUX.
L’annulation des basses consiste à retirer la partie basses
fréquences du son, pour pouvoir la jouer soi-même.
La plage de transposition de la clé est identique à celle de
KEY-TRN (☞p.86). En spécifiant “0” comme réglage Key
Transpose et sélectionnant Key Transpose + Bass Cancel,
vous ne pouvez remettre en service que la fonction Bass
Cancel.
Valeur de la
transposition
Le signal de sortie pour la transposition de clé et l'annulation des basses sera monophonique.
Si votre ordinateur fonctionne sous Windows XP et si vous
voulez transférer des données audio par le connecteur USB,
il est conseillé d’installer le pilote KORG USB-ASIO (sur
le CD-ROM fourni). Pour de plus amples informations sur
l’installation du pilote KORG USB-ASIO, reportez-vous à
“Installation du logiciel” sur le CD-ROM fourni.
AMP/LIN: Sélection d’ampli/ligne
Lorsque vous utilisez Guitar Amp Modeling, ce paramètre
spécifie si le PX5D sera optimisé pour la sortie casque/ ligne ou pour le type d’ampli de guitare spécifié. Il n’agit
pas si Amp Modeling est hors service ou si vous avez sélectionné Bass Amp Modeling ou Guitar/Bass Synth
Sélection de
ligne/ampli
Ln: Choisissez ce réglage si vous êtes raccordé à un casque,
un mixeur ou un enregistreur.
AP1: Choisissez ce réglage si vous êtes raccordé à un ampli
au son net, par exemple un combo fabriqué aux Etats-Unis,
ouvert à l’arrière.
AP2: Choisissez ce réglage si vous êtes raccordé à un ampli
aux médiums distincts, par exemple un combo fabriqué aux
Royaume-Uni, ouvert à l’arrière.
AP3: Choisissez ce réglage si vous êtes raccordé à un ampli
avec coffret(s) 4 x 12 fermé(s) à l’arrière.
Les amplis mentionnés ci-dessus sont des exemples. Sur le
type d’ampli que vous utilisez, le meilleur réglage peut être
différent ainsi que la façon d’effectuer le réglage.
87
FOOTSW: Réglages des pédales
Utilisez l’encodeur rotatif pour spécifier la fonction des
pédales raccordées au PX5D.
Fonction des
pédales
PG: Les pédales permettent de changer les programmes
attribués aux touches PROGRAM MEMORY [A] à [D]. La
pédale raccordée au connecteur UP (rouge) du câble fourni
change les programmes dans l’ordre ascendant
[A]→[B]→[C]→[D]→[A]→... La pédale raccordée au connecteur DOWN (blanc) change les programmes dans l’ordre descendant de [D]→[C]→[B]→[A]→[D]→...
Ud: Les pédales changent les programmes U00 à P99. La
pédale raccordée au connecteur UP (rouge) du câble fourni
change les programmes dans l’ordre ascendant U00 → ...
→ U99 → P00 → ... → P99 → U00 →... La pédale raccordée
au connecteur DOWN (blanc) change les programmes dans
l’ordre descendant de U00 → P99 → ... → P00 → U99 → ...
U00 → P99 → ...
Si vous avez attribué la pédale à “PG” ou “Ud”, vous pourrez mettre en service la fonction Bypass en appuyant simultanément sur les pédales raccordées aux deux prises, ou bien
la fonction Mute en appuyant au moins une seconde sur les
deux pédales.
88
SS: Les pédales permettront de démarrer et d’arrêter l’enregistrement et la lecture en mode Phrase Trainer. La pédale raccordée au connecteur UP (rouge) du câble démarre et
arrête l’enregistrement. La pédale raccordée au connecteur
DOWN (blanc) du câble démarre et arrête la lecture. Avec
ce réglage, les pédales ne fonctionnent que lorsque vous
êtes en mode Phrase Trainer.
USBSEND: USB Send
Ce réglage ajuste le niveau d’entrée dans l’ordinateur lorsque le PX5D est raccordé par une connexion USB. Observez
l’indicateur de niveau du logiciel DAW sur lequel vous enregistrez et utilisez l’encodeur rotatif pour régler “USBSEND”
à un niveau d’enregistrement correct (par ex. pas au-delà de
0 dB).
Niveau d’entrée
dans l’ordinateur
AUX>USB: Interface audio USB
Lorsque cet écran est affiché, le PX5D fonctionne comme une
interface audio USB à entrée stéréo/sortie stéréo standard.
L’illustration suivante montre le sens du signal lorsque l’appareil est raccordé à votre ordinateur.
PX5D
USB RCV: Réception USB
Ce réglage ajuste le niveau de volume du signal reçu de
l’ordinateur lorsque le PX5D est raccordé par une liaison
USB. Avec l’encodeur rotatif, ajustez ce niveau de manière
à équilibrer l’entrée et la sortie du PX5D.
Niveau de
volume du
signal reçu de
l’ordinateur
SORTIE
AUX (stéréo)
USB
disques compacts, etc
La prise AUX sera la prise d’entrée et la prise OUPUT sera la
prise de sortie. Pour régler le niveau à l’entrée de l’ordinateur, observez l’indicateur de niveau du logiciel DAW sur lequel vous enregistrez et ajustez le volume du périphérique
externe, raccordé à la prise AUX (pour vous assurer que le
niveau ne dépasse pas 0 dB). Le niveau de volume du signal
reçu de l’ordinateur est affecté par le réglage “USB RCV”.
89
Les effets du PX5D, la fonction Rhythm & Bass et la fonction Phrase Trainer ne sont pas disponibles lorsque vous
utilisez le PX5D comme interface audio.
MIDDRUM: Batterie/Bass MIDI
Lorsque cet écran est affiché, les messages de notes activées/
désactivées MIDI reçus par le connecteur USB font résonner
le générateur de sons de basses et de batterie interne.
Rétablissement des programmes par défaut
Les données préréglées par défaut en usine se rétablissent
de la façon suivante. Il s’agit des programmes d’effets, du
niveau principal, de l’accord en mode Rhythm & Bass et
des réglages du mode Utility qui ont été spécifiés en usine.
N’oubliez pas que le rétablissement des programmes par défaut a pour effet de supprimer tous les programmes personnalisés et les réglages effectués, normalement conservés à la
mise hors tension de l’appareil (niveau principal, etc.).
1
Les messages de notes reçus sur les voies MIDI suivantes
font résonner les sons de basses et de batterie.
Canal MIDI 9: les sons de basses résonnent.
Canal MIDI 10: les sons de batterie résonnent.
Les canaux MIDI qui reproduisent les sons de basses et de
batterie sont fixes.
Pour la correspondance entre les données de notes MIDI
reçues et les sons de batterie joués, reportez-vous à “PX5D
Drum Kit” sur le CD-ROM.
90
2
Tout en tenant la touche RHYTHM et π CURSOR enfoncé, allumez l’appareil.
La mention “RELOAD?” apparaît sur l’écran.
Appuyez sur la touche ENTER/REC.
“RELOAD”, “VERIFY”, “COMPLT” apparaissent un
instant sur l’écran et les programmes par défaut sont
rechargés dans la zone des programmes personnalisés.
Puis l’écran de mise sous tension apparaît.
Si vous décidez de ne pas rétablir les programmes, appuyez sur la touche EXIT lorsque la mention “RELOAD?” s’affiche. Les programmes par défaut ne seront pas rechargés, l’écran de mise sous tension normal
n’apparaîtra pas et le PX5D sera en mode Play.
N’éteignez jamais l’appareil pendant que le rétablissement
des programmes.
Liste des paramètres des effets
DYNA: Dynamique et modelage du micro
TYPE (π/†CURSOR)
VALUER (Encodeur rotatif)
COMP
Ce compresseur produit des niveaux consistants et de sustain.
Règle la sensibilité (1.0...10.0).
DYNAEXC
Cet effet applique un exciteur dynamique en fonction de la force de
grattage. (Il s’avère particulièrement efficace lorsque vous souhaitez
donner plus d’éclat pour épurer les sons.)
Règle la sensibilité (0.0...10.0).
Règle l’emplacement de la pédale (1.0…10.0).
VOX WAH
Reproduit le son d’une pédale wah VOX V847.
WAHUP1
Wah automatique à polarité positive qui répond de manière sensible aux attaques.
WAHUP2
Wah automatique à polarité positive qui répond doucement aux attaques.
WAHDWN1 Wah automatique à polarité négative qui répond de manière sensible aux attaques.
Règle la sensibilité (0.0...10.0).
WAHDWN2 Wah automatique à polarité négative qui répond doucement aux attaques.
SLOWATK
Adoucit l’attaque pour créer un effet qui ressemble à celui d’un violon.
Spécifie la vitesse de l’attaque (1.0...10.0).
AC SIM
Il s’agit d’un modèle d’effet qui transforme le son d’une guitare
électrique en son de guitare acoustique.
Règle la tonalité (0.0...10.0).
RESO
Effet imitant le corps métallique d’une guitare à résonateur. Il peut être
utilisé pour jouer les glissandos.
Spécifiez la résonance du corps
(0.0…10.0).
OCTAVE*
Cet effet génère une hauteur de son d’une octave inférieure à celle du son d’origine et
mélange l’effet au son d’origine pour ajouter une impression de profondeur et de fin
en douceur. Cet effet peut ne pas fonctionner correctement si vous jouez deux ou
plusieurs cordes simultanément ou lors du jeu des cordes de faible hauteur tonale.
Niveau de l’effet (0.0...10.0).
Effet qui produit des sons semblables à ceux d’une cloche. (Pour un effet
plus épuré, utilisez le micro du manche, réglez la commande volume de
la guitare sur le minimum et jouez près de la 12ème frette.)
Spécifie la fréquence (1.0...10.0).
RING
91
TYPE (π/†CURSOR)
92
VALUER (Encodeur rotatif)
RINGUP
RINGDWN
Un modulateur ring dans lequel l’effet change de manière dynamique en
fonction de la force de grattage.
Règle la sensibilité (0...10.0).
CRUSHER
Nouveau type de fuzz produisant une distorsion destructive.
Spécifiez le degré de destructivité (0.0…10.0).
HUMSGL
Modelage de capteur qui transforme un capteur antironflement en
capteur à bobine unique.
SGLHUM
Modelage de capteur qui transforme un capteur à bobine unique en
capteur antironflement.
HF TONE
Modelage du micro qui simule la position “demi-ton” entre deux micros.
PHASOUT
Modelage du micro qui simule le son “hors phase” lorsque deux micro
sont raccordés en dehors de la phase.
B COMP
Compression des basses avec attaque accentuée.
Règle la sensibilité (1.0...10.0).
LIMITER
Un limiteur qui rend le niveau plus stable.
Précise le taux de compression (0…10.0).
B OD**
Surmultiplication pour basse.
B DIST**
Distorsion pour basse.
B FUZZ**
Fuzz pour basse.
PREAMP1
Réglage du pré-ampli sur une tonalité claire pour basse.
Ajuste la sonorité (0.0…10.0).
Intensité de la distorsion (1.0...10.0).
PREAMP2
Réglage du pré-ampli sur une tonalité assourdie pour basse.
BALANCE
Crée le son de mixage de la sortie de deux micros pour basse.
LOWCUT
Filtre qui coupe la plage de basses fréquences non souhaitée Efficace
pour l’enregistrement.
Spécifie la fréquence (0...10.0).
FRETLES*
Réglages permettant de simuler le son d’une basse sans frettes.
Règle la tonalité. (0...10.0).
Règle la tonalité (0...10.0).
*: Le son sera trouble si vous jouez des accords. Vous ne devriez jouer que des notes uniques lorsque vous utilisez cet effet.
** : Il s’agit habituellement d’un effet pour basse, mais vous pouvez l’utiliser avec l’ampli SYNTH pour produire un son
épais quand vous jouez de la guitare.
AMP: Modelage d’ampli
Lors de l’utilisation du modelage d’ampli, les boutons de réglage (GAIN/MID, BASS, TREBLE, VOLUME) et l’encodeur rotatif
seront actifs. Le bouton VOLUME peut encore être utilisé lorsque le modelage d’ampli est désactivé ou sur “OFF”. Afin de tirer le
meilleur parti des caractéristiques du modelage d’ampli, nous vous recommandons de l’utiliser en association avec le modelage
d’enceinte lorsque vous écoutez dans un casque ou lorsque vous enregistrez par la sortie de ligne.
Si GSYNTH1 à 3 ou BSYNTH1 à 3 est sélectionné comme type de synth, les boutons de réglage permettront de régler respectivement la profondeur du filtre, la décroissance du filtre, la sélection d’oscillateur et le niveau de synth (☞p.96).
TYPE (π/†CURSOR)
BTQ CLN
Canal épuré d’un ampli de guitare fait à la main de 100 W à haute
extrémité. CAB conseillé: 4x12CLS, 4x12VIN, 4x12MDN
BTQ OD
Canal d’overdrive d’un ampli de guitare high end fait main de 100 W.
CAB conseillé: 4x12CLS, 4x12VIN, 4x12MDN
TWD1X12
Ampli de guitare combo recouvert de tweed. CAB conseillé: 1x12 TWD
TWD4X10
Ampli de guitare combo 4x10 conçu pour une basse. CAB conseillé:
4x10TWD
BLK2X12
Ampli de guitare combo 2x12 indispensable pour les joueurs de country
ou de blues. CAB conseillé: 2x12BLK
AC15
VOX AC15 fabriqué en 1962. CAB conseillé: 1x12VOX
AC15TB
Canal brillant d’un VOX AC15TB. CAB conseillé: 1x12VOX
VALEUR (Encodeur rotatif et boutons
de réglage)
GAIN/MID ............... Intensité de la
distorsion (0.0...10.0).
BASS ....... Plage des basses fréquences
(0.0...10.0).
TREBLE .... Plage des hautes fréquences
(0.0...10.0).
VOLUME ............. Volume de sortie
(0.0...10.0).
Encodeur rotatif ............... Plage des
moyennes fréquences (0.0...10.0).
93
TYPE (π/†CURSOR)
94
AC30
Modelage du VOX AC30. CAB conseillé: 2x12VOX
AC30TB
Canal brillant d’un VOX AC30TB. CAB conseillé: 2x12VOX
UKBLUES
Tête d’ancien ampli de guitare stack fabriqué au Royaume-Uni.
CAB conseillé: 4x12CLS
UK ’70S
Canal des extrêmes aigus d’une tête de guitare à 100 W fabriquée au
Royaume-Uni depuis 1969. CAB conseillé: 4x12CLS
UK ’80S
Tête de guitare de 100 W fabriquée au Royaume-Uni depuis 1983 avec
volume maître. CAB conseillé: 4x12CLS, 4x12VIN, 4x12MDN
UK '90S
Canal Lead d’une tête de guitare de 100 W à double canal des années 90.
CAB conseillé: 4x12CLS, 4x12VIN ou 4x12MDN
US MDN
Un ampli de guitare à haut gain avec plaque métallique accrocheuse.
CAB conseillé: 4x12VIN, 4x12MDN
US HI-G
Tête d’ampli de guitare à 100 W couverte de peau de serpent depuis
1991. CAB conseillé: 4x12VIN, 4x12MDN
UK MDN
Un ampli de guitare moderne de 100 W fabriqué au Royaume-Uni.
CAB conseillé: 4x12VIN, 4x12MDN
FUZZ
Un fuzz ancien des années 60 qui produit une distorsion puissante.
OCTFUZZ
Un fuzz qui accentue les composantes à l’octave supérieure. Particulièrement efficace lorsque vous utilisez le capteur pour manche de guitare,
réduisez le son de votre instrument et jouez au-dessus de la 12e barrette.
VALEUR (Encodeur rotatif et boutons de réglage)
GAIN/MID ............... Intensité de la
distorsion (0.0...10.0).
BASS ....... Plage des basses fréquences
(0.0...10.0).
TREBLE . Plage des hautes fréquences
(0.0...10.0).
VOLUME ............. Volume de sortie
(0.0...10.0).
Encodeur rotatif ............... Plage des
moyennes fréquences (0.0...10.0).
TYPE (π/†CURSOR)
VALVE
Un ampli de basse à tube avec commutateur ULTRA LO en position ON. CAB conseillé: CLS8x10
VALVE2
Un ampli de basse avec tube à vide idéal pour le rock. CAB conseillé : CLS8x10
CLASSIC
Un ampli de basse avec tube à vide dont le caractère de base change en fonction
du réglage d’encodeur rotatif. CAB conseillé : COMBI
SCOOPED
Un ampli de basse typique du son des années 80. CAB conseillé: MTL4x10
LA STUD
Un ampli de basse type du son LA. CAB conseillé: LA4x10, 1x12VOX
GOLDPNL
Un ampli de basse différent à cause de sa face dorée tape à l’œil, avec
un son clair. CAB conseillé: MDN4x10
JAZZ
Un ampli de basse combo apprécié des bassistes de jazz.
CAB conseillé : JAZ1x15
STUDIO
Un ampli de basse combo avec tube à vide idéal pour un son Motown.
CAB conseillé : STU1x15
AC 100
Un ampli de basse avec tube à vide de 100W fabriqué par Vox.
CAB conseillé: AC2x15
UKMAJOR
Un ampli de basse avec tube à vide de 200W fabriqué au RU.
CAB conseillé: UK4x15, UK4x12
G SYNTH1…3
Synthétiseur chromatique pour guitare. Les variations 1, 2 et 3 possèdent
des degrés de résonance différents. (Il est conseillé de désactiver (OFF) le
réglage CAB).
B SYNTH1…3
Un synthétiseur de basse caractéristique de Korg modifiant le son original et
fournissant un excellent alignement. Les variations 1, 2 et 3 ont des degrés de
résonance différents. (Il est conseillé de mettre le réglage CAB hors service.)
VALEUR (Encodeur rotatif et boutons de réglage)
GAIN/MID .. moyennes (0.0...10.0).
BASS .................. bassess (0.0...10.0).
TREBLE ............. hautess (0.0...10.0).
VOLUME ........ Volumes (0.0...10.0).
Encodeur rotatif ... Plage des moyennes
fréquences (1…5).
GAIN/MID ............... Intensité de la
distorsion (0.0...10.0).
BASS .................. bassess (0.0...10.0).
TREBLE ............. hautess (0.0...10.0).
VOLUME ........ Volumes (0.0...10.0).
Encodeur rotatif .............. moyennes
(0.0…10.0).
Consulter le tableau de synthé de
guitare séparé.
95
Paramètres de Synth
DEPTH
Ajuste le degré de changement dans la fréquence de coupure du filtre (-15…0…15).
(bouton GAIN/MID)
DECAY
(bouton BASS)
Ajuste la durée de la décroissance de l’enveloppe du filtre (0.0…10.0).
WAVE
(Bouton TREBLE)
Lorsque GSYNTH1 à 3 est sélectionné
Sélectionne la forme de l’onde (0…15).
0 : Onde en dents de scie, deux octaves inférieures
1 : Onde en dents de scie, une octave inférieure
2 : Sans onde, une octave inférieure
3 : Onde en dents de scie
4 : Sans onde
5 : Onde en dents de scie, une octave supérieure
6 : Sans onde, une octave supérieure
7 : Sans onde, deux octaves supérieures
Les oscillateurs 8 à 15 sont identiques aux oscillateurs 0 à 7 mais le portemento est en service.
Lorsque BSYNTH1 à 3 est sélectionné
Ajuste la forme d’onde (0.0…10.0). Le réglage 0 est à la même octave que le son original. Le réglage
10.0 est à l’octave inférieure et valeurs intermédiaires règlent le son entre les deux formes d’ondes.
SYN LEV
Règle le volume du synth (0.0…10.0).
(Bouton VOLUME)
DIR LEV
(Encodeur rotatif)
Ajuste le volume de la guitare ou de la basse (0.0…10.0).
Le synthétiseur de guitare (GSYNTH1 à 3) est efficace lorsque des notes uniques sont jouées. Il ne donne pas de bons résultats
lorsque des accords sont joués. Le synthétiseur de basse (BSYNTH1 à 3) produit des sons troubles lorsque des accords sont joués.
Le synthétiseur de guitare (GSYNTH1 à 3) ne donne pas les résultats escomptés si l’instrument n’est pas bien accordé. Dans ce
cas, il faut accorder l’instrument correctement.
96
Si le son présente une distorsion désagréable réduisez le niveau “SYN LEV” et “DIR LEV” jusqu’à ce que le son ne soit plus
déformé.
CAB: Cabinet modeling
TYPE (π/†CURSOR)
1X8TWD
Ce modèle d’effet simule une enceinte à dos ouvert équipée d’un hautparleur de 8 pouces.
2X10BLK
Ce modèle d’effet simule une enceinte à dos ouvert équipée de deux
haut-parleurs de 10 pouces et avec une tonalité brillante.
4X10TWD
Ce modèle d’effet simule une enceinte à dos ouvert équipée de quatre
haut-parleurs de 10 pouces.
1X12TWD
Ce modèle d’effet simule une enceinte à dos ouvert équipée d’un hautparleur de 12 pouces et avec une tonalité blues.
1X12VOX
Ce modèle d’effet simule une enceinte britannique à dos ouvert équipée
d’un haut-parleur de 12 pouces.
2X12BLK
Ce modèle simule une enceinte américaine pour guitare à dos ouvert
avec deux haut-parleurs de 12 pouces.
2X12VOX
Ce modèle d’effet simule une enceinte britannique à dos ouvert équipée
de deux haut-parleurs de 12 pouces.
4X12VOX
Ce modèle simule un ampli guitare VOX fermé à l’arrière, contenant
quatre haut-parleurs en néodyme.
4X12CLS
Ce modèle d’effet simule une enceinte à dos fermé équipée de quatre
haut-parleurs de 12 pouces et de 25 watts.
4X12MDN
Ce modèle d’effet simule une enceinte à dos fermé équipée de quatre
haut-parleurs de 12 pouces et de 75 watts.
VALUER (Encodeur rotatif)
PRESENCE: Règle la tonalité de la
plage des hautes fréquences
(0.0...10.0).
97
TYPE (π/†CURSOR)
98
LA 4X10
Ce modèle simule quatre haut-parleurs de basses de 10 pouces
reproduisant le son LA.
MDN4X10
Ce modèle simule quatre haut-parleurs de basses de 10 pouces
reproduisant un son moderne.
MTL4X10
Ce modèle simule quatre haut-parleurs de basses à cône d’aluminium de
10 pouces.
CLS8X10
Ce modèle simule huit haut-parleurs de basses classiques de 10 pouces.
UK 4X12
Ce modèle simule quatre haut-parleurs de basses de 12 pouces,
fabriqués en Angleterre.
STU1X15
Ce modèle simule un ampli de basses pour studio à haut-parleur de 15
pouces.
JAZ1X15
Ce modèle simule un combo jazz pour basses à haut-parleur de 15
pouces.
AC 2X15
Ce modèle simule un ampli AC100 à deux haut-parleurs de 15 pouces.
US 2X15
Ce modèle simule deux haut-parleurs de basses de 15 pouces, fabriqués
au Etats-Unis.
UK 4X15
Ce modèle simule quatre haut-parleurs de basses de 15 pouces,
fabriqués au Royaume-Uni.
LA 1X18
Ce modèle simule un haut-parleur de 18 pouces reproduisant le son LA.
COMBI
Ce modèle simule un ampli à un haut-parleur de basses 12 pouces et à
un haut-parleur de 18 pouces.
VALUER (Encodeur rotatif)
PRESENCE: Règle la tonalité
de la plage des hautes fréquences
(0.0...10.0).
MOD: Modulation et modelage de l’effet de filtre
TYPE (π/†CURSOR)
CHORUS1
Ancien chorus dans lequel le son de l’effet est émis vers la gauche et le
son direct vers la droite.
CHORUS2
Ancien chorus stéréo qui inverse la phase du son de l’effet entre la
gauche et la droite, pour créer davantage d’impression d’espace.
FLANG 1…3 Ancien flanger avec un son distinct (1, 2, 3 possèdent respectivement des
intensités de feedback de 0%, 22% et 60%).
FLANG4
Ancien flanger qui inverse la phase du feedback.
PHASER1
Un ancien phaser populaire à quatre phases.
PHASER2
Un ancien phaser à quatre phases avec une plage étendue des moyennes
fréquences.
PHASER3
Un ancien phaser à dix phases avec un effet doux.
12STR
Produit un son réminiscent d’une guitare à 12 cordes.
U-VIBE1
Simulation d’une pédale vibe réglée en mode chorus.
U-VIBE2
Simulation d’une pédale vibe réglée en mode vibrato.
TREM1
Tremolo doux.
TREM2
Tremolo intégré dans un ampli de guitare.
TREM3
Tremolo fort et profond.
AT PAN1
Positionnement panoramique automatique (LFO: onde carrée ).
AT PAN2
Positionnement panoramique automatique (LFO: onde sinusoïdale).
ROTARY1
Simulation d’un haut-parleur rotatif.
VALUER (Encodeur rotatif)
Règle la vitesse de modulation
(0.10...10.0 [Hz]).
Ajuste la profondeur de l’effet (0.0…10.0).
Règle la vitesse de modulation
(1.0...10.0 [Hz]).
Vitesse de modulation
(0.10...10.0 [Hz]).
Vitesse de modulation
(1.0...10.0 [Hz]).
99
TYPE (π/†CURSOR)
VALUER (Encodeur rotatif)
ROTARY2, 3 Simulation d’un haut-parleur rotatif dans lequel la dynamique de jeu
change les vitesses du rotor.
2 passe de lent à rapide lorsque vous jouez fort.
3 passe de lent à rapide lorsque vous jouez doucement.
Spécifie le niveau auquel la vitesse
change (1.0...10.0).
PITCH1…4
Décalage de la hauteur du son. Le niveau de l’effet varie entre les
variations 1, 2 et 3. La variation 4 produit seulement l’effet.
Importance du changement dehauteur (-24,
-17, -12…-1, -d, d, +1…+12, +19, +24). [d=désaccorder]
MAJ3UP
Pitch Shifter intelligent; une tierce plus élevée dans une tonalité majeure.
MAJ3DWN
Pitch Shifter intelligent; une tierce plus basse dans une tonalité majeure.
MIN3UP
Pitch Shifter intelligent; une tierce plus élevée dans une tonalité mineure.
MIN3DWN
Pitch Shifter intelligent; une tierce plus basse dans une tonalité mineure.
PER4TH
Pitch Shifter intelligent; une quarte plus élevée dans une tonalité majeure.
PER5TH
Pitch Shifter intelligent; une quinte plus élevée dans une tonalité majeure.
MAJ6TH
Pitch Shifter intelligent; une sixte plus élevée dans une tonalité majeure.
FEEDBK1, 2
Un effet qui génère artificiellement le feedback et s’active lors du maintien d’une
note pendant un long moment. 2 génère un feedback une octave plus haut.
FEEDBK3, 4
Un effet qui génère artificiellement le feedback et s’active constamment
pendant le sustain. 4 génère un feedback une octave plus haut.
FILTER
Filtre passe bas.
FILTUP1
Filtre passe bas de type auto-wah à polarité positive.
FILTUP2
Auto-wah à filtre passe-bas avec polarité positive et crête harmonique élevée.
FILTDN1
Filtre passe bas de type auto-wah à polarité négative.
FILTDN2
Auto-wah à filtre passe-bas avec polarité négative et réponse rapide.
100
Définir la tonalité (Do, Do#…La#, Si).
0.0...4.7: Règle le niveau de l’effet.
5.0...10.0: Règle l’intensité du vibrato.
Règle la fréquence (1.0...10.0 [Hz]).
Règle la sensibilité (0.0...10.0).
TYPE (π/†CURSOR)
TALK1…4
Effet qui simule une “guitare parlante”.
1: YAH, YAH, 2: U-WAH, 3: YOI-YOI , 4: YEAH
RANDOM 1…4 Filtre à pas aléatoire qui déplace le filtre de manière aléatoire. 1, 2, 3 et 4
changent la bande de fréquence affectée au filtre.
VALUER (Encodeur rotatif)
Règle la sensibilité (0...10.0).
Règle la vitesse de modulation
(0.10...10.0 [Hz]).
DRONE1*
Un effet de drone ou bourdon qui ajoute une note continue similaire à
celle d’un tampura, un instrument de l’Inde (effet faible).
DRONE2*
Un effet de drone ou bourdon qui ajoute une note continue similaire à
celle d’un tampura, un instrument de l’Inde (effet puissant).
ENVPIT
Déphaseur qui fait varier la hauteur de l’enveloppe selon le son capté.
Spécifie la profondeur de l’effet.
ENVCHO
Chorus d’enveloppe qui applique un effet de chorus selon le son capté.
INFFLN1
Effet de flanger augmentant continuellement.
INFFLN2
Effet de flanger diminuant continuellement.
Spécifie la profondeur de l’effet
(0.0…10.0).
INFPIT1, 2
Déphaseur qui élève ou abaisse la hauteur du son en continu. Ceci crée
l’effet d’un changement de hauteur sans fin quel que soit le signal.
Variation 1 reproduit le son direct et le son déphasé. Variation 2
reproduit le son déphasé seulement.
Spécifie la profondeur de l’effet (-15…0…15).
Les valeurs positives produisent un
mouvement vers le haut et les valeurs
négatives un mouvement vers le bas.
Spécifiez la note bourdon
(C, C#...A#, B).
Spécifie la profondeur de l’effet
(-15…0…15). Le changement de
hauteur peut être positif ou négatif.
*: Vous obtiendrez un résultat efficace en réglant la note bourdon sur la tonique de la chanson ou du solo que vous jouez.
101
A propos du Pitch Shifter intelligent
Le Pitch Shifter intelligent crée des harmonies musicalement utiles en variant l’importance de transposition de la hauteur
en fonction de la note jouée et de la tonalité enfoncée. Par exemple, si vous sélectionnez une transposition d’une tierce
vers le haut pour une tonalité majeure (MAJ3UP), l’importance de la transposition de hauteur variera automatiquement
entre trois demi-tons (une tierce mineure) et quatre demi-tons (une tierce majeure).
• Lorsque le paramètre MAJ3UP est utilisé avec un réglage de tonalité sur Do (C).
La hauteur crée par le pitch shifter intelligent est indiquée entre
parenthèses ( ).
Le PX5D fournit sept types de transposition de hauteur intelligents, avec des intervalles de tierces, de quartes, de quintes et
de sixtes (Pour les tierces, vous pouvez sélectionner la partie inférieure ou supérieure et une touche mineure ou majeure).
Si votre instrument n’est pas bien accordé, les résultats risquent de ne pas être ceux attendus. Dans ce cas, réaccorder l’instrument.
Le pitch shifter intelligent fonctionnera uniquement lorsque vous jouez des notes individuelles. Il ne peut pas produire d’effets
pour les accords.
102
DLY: Modelage du retard
Pour chaque type, 1, 2, 3, 4 et 5 possèdent des intensités de feedback différentes. Le temps de retard est défini par l’intervalle entre les deux pressions de la touche TAP/BYPASS. La durée spécifiée comme retard peut être contrôlée par une
pression sur la touche TAP/BYPASS.
TYPE (π/†CURSOR)
SLAP1…5
VALUER (Encodeur rotatif)
Effet Slap Delay produisant un retard court distinct. La durée maximale
du délai est de 500 msec. La durée du délai spécifiée correspond à un
quart de l’intervalle des pressions exercées sur TAP-BYPASS.
ECHO1…5
Simulation d’écho d’enregistrement avec une tonalité chaleureuse.
CLRDLY1…5
Délai à son clair, typique des temporisateurs numériques.
Durée maximale du retard: 1 seconde.
PPDLY1…5
Retard ping-pong à deux taps qui positionne le son panoramiquement à
gauche et à droite.
MULTI1…5
Simulation d’écho d’enregistrement à deux têtes avec un trait stéréo
spécial (crée une réverbération spacieuse).
RVSDLY
Effet de retard inversé (lecture arrière). Durée maximale du retard: 1
seconde.
Niveau de l’effet (0.0...10.0).
Balance entre le signal d’effet et le
signal sec (0.0…10.0).
103
REV: Reverb Modeling
TYPE (π/†CURSOR)
DRYAIR
Réverbération qui produit une sensation d’air sec.
WETAIR
Réverbération qui produit une sensation d’air mouillé.
ROOM1
Réverbération de pièce avec un son brillant.
ROOM2
Réverbération de pièce avec un son doux.
PLATE1
Réverbération de plaque avec un son serré.
PLATE2
Réverbération de plaque avec un son brillant.
HALL1
Réverbération d’une salle de taille moyenne.
HALL2
Réverbération d’une grande salle.
SPRING1
Réverbération à ressort d’un ampli pour guitare.
SPRING2
Réverbération à ressort dense.
BRIGHT
Effet de réverb produisant une réverbération très lumineuse.
104
VALUER (Encodeur rotatif)
Niveau de l’effet (0.0...10.0).
Liste des programmes présélectionnés
No.
P00
P01
P02
P03
P04
P05
P06
P07
P08
P09
P10
P11
P12
P13
P14
P15
P16
P17
P18
P19
Name
METALIC
BLUEYES
PARALIZ
VOXTREM
COHEED
BOWATTK
WHITERM
FAB4
WHOKIDS
MUDD
FLOYD
AUDIO
MR SG
STRATO
SCORPS
WINTER
SUBSYNT
LINKIN
CHARLOT
SHADOWS
No.
P20
P21
P22
P23
P24
P25
P26
P27
P28
P29
P30
P31
P32
P33
P34
P35
P36
P37
P38
P39
Name
GMBLUES
SRV
SUPACLN
COUNTRY
BLUES
JAZZY
SURF
POP
ROCK
METAL
VOX WAH
OVERDRV
STONED
ACOUSTC
CRY WAH
ASCEND
CHORUS
FIRE
12STRNG
PIEZO
No.
P40
P41
P42
P43
P44
P45
P46
P47
P48
P49
P50
P51
P52
P53
P54
P55
P56
P57
P58
P59
Name
RESO
FEEDBKR
SITAR
SPACED
MEOW
DIALUP
FILTER
ROTARY
DELAYED
REVERSE
BATTERY
CRUSHD
RAGE'D
DRENCHD
CMPLEAD
BIGLEAD
RAVECHO
MDNJAZZ
ROKABLY
MEGAMID
No.
P60
P61
P62
P63
P64
P65
P66
P67
P68
P69
P70
P71
P72
P73
P74
P75
P76
P77
P78
P79
Name
STUTTER
LASHRED
VOXSLAP
ROTODRV
ARENA
WELL
DOC OCT
NOTRITE
ILL
YAPPY
B BLUES
B MOTWN
B JAZZ
B RNB
B CNTRY
B ROCK
B METAL
B FUNK
B DRIVE
B TREM
No.
Name
P80
P81
P82
P83
P84
P85
P86
P87
P88
P89
P90
P91
P92
P93
P94
P95
P96
P97
P98
P99
B FILTR
B CHORD
B SOLO
B PICKR
B SYNTH
B TAP
B HARM
B OCT
B FING
B THUMB
B FRETB BEND
B FROG
B JUICE
B REV
B PEEPS
B THICK
B TAPIT
B SCOOP
B FUZZY
00...69 : Programme guitare, 70...99 : Programme basse
105
Liste des motifs rythme
No.
Name
No.
1
2
3
4
5
6
7
8
9
10
11
12
13
14
15
16
17
18
19
20
21
22
MTRONM0
MTRONM2
MTRONM3
MTRONM4
MTRONM5
MTRONM6
MTRONM7
MTRONM9
8BEAT1
8BEAT2
8BEAT3
16BEAT1
16BEAT2
16BEAT3
16BEAT4
16BEAT5
16BTSW1
16BTSW2
16BTSW3
16BTSW4
16BTSW5
2/4 1
23
24
25
26
27
28
29
30
31
32
33
34
35
36
37
38
39
40
41
42
43
44
106
Name
2/4 2
2/4 3
2/4 4
2/4 5
2/4 6
2/4 7
3/4 1
3/4 2
3/4 3
3/4SWG1
3/4SWG2
5/4
3/8 1
3/8 2
5/8
6/8 1
6/8 2
6/8 3
6/8 4
7/8 1
7/8 2
9/8
No.
45
46
47
48
49
50
51
52
53
54
55
56
57
58
59
60
61
62
63
64
65
66
Name
POP1
POP2
ROCK1
ROCK2
ROCK3
ROCK4
ROCK5
R'N'R
METAL1
METAL2
METAL3
METAL4
R'N'B1
R'N'B2
R'N'B3
R'N'B4
BLUES1
BLUES2
8BLUES
BLUESFL
COUNTRY
CNTRYS1
No.
Name
No.
Name
No.
Name
67
68
69
70
71
72
73
74
75
76
77
78
79
80
81
82
83
84
85
86
87
88
CNTRYS2
JAZZ1
JAZZ2
JAZZ3
JAZZ4
FNKRCK1
FNKRCK2
HVYFUNK
JB 1
JB 2
NJCKSWG
MOTOWN1
MOTOWN2
MOTOWN3
MOTOWN4
SURF
REGGAE1
REGGAE2
REGGAE3
BOLERO
DISCO1
DISCO2
89
90
91
92
93
94
95
96
97
98
99
100
101
102
103
104
105
106
107
108
109
110
DISCO3
GOGO1
GOGO2
GOGO3
HOUSE1
HOUSE2
HOUSE3
D'N'B 1
D'N'B 2
SKA1
SKA2
SKA3
2NDLINE
FILLS01
FILLS02
FILLS03
FILLS04
FILLS05
FILLS06
FILLS07
FILLS08
FILLS09
111
112
113
114
115
116
117
118
119
120
121
122
123
124
125
126
127
128
FILLS10
FILLS11
FILLS12
3/4FILS
LATIN1
LATIN2
BOSSA1
BOSSA2
SAMBA1
SAMBA2
RUMBA
AFRO1
AFRO2
CLYPSO1
CLYPSO2
SONGO
LP II
LP III
Guide de dépannage
Si le PX5D ne fonctionne pas comme vous l’espérez, commencer par vérifier les points suivants. Si, malgré cela, vous
ne parvenez pas à résoudre le problème, veuillez prendre contact avec votre revendeur ou avec un centre technique Korg.
1. L’appareil ne se met pas sous tension.
• Les piles sont-elles mises en place? Ou, l’adaptateur
secteur est-il raccordé à une prise de courant?
2. Pas de son
• Votre guitare ou basse, l’ampli ou le casque d’écoute
sont-ils raccordés aux bornes adéquates?
• L’ampli est-il allumé et réglé correctement?
• Des câbles sont-ils abîmés?
• Le niveau principal du PX5D est-il mis sur “0” ou sur
un faible niveau?
• Le bouton du VOLUME est peut être réglé au minimum.
• ILe PX5D est-il assourdi (le son est-il coupé)?
Ne pas oublier que, si tous les effets sont désactivés,
l’affichage en chaîne disparaît et l’écran ne permet plus
de différencier la fonction de dérivation de celle d’assourdissement.
• L”écran LCD “AUX>USB” est-il en mode Utility ?
Si “AUX>USB” est affiché, le son de votre guitare sera
coupé.
• Le volume de la guitare ou la basse est-il réduit au minimum?
3. Le volume de l’appareil raccordé à la borne AUX est
trop fort ou trop faible ou n’est pas audible.
• ARégler le volume de sortie de l’appareil raccordé.
Effectuer les raccordements à la prise pour casque
d’écoute de l’appareil plutôt qu’à sa sortie de ligne.
• Etes-vous en mode de pratique des phrases?
Quitter le mode de pratique des phrases.
4. Les effets ne sont pas appliqués.
• Le PX5D est-il contourné? (Dans ce cas, les témoins de
la chaîne d’effets clignotent).
• Les effets utilisés dans le programme sont-ils activés?
5. Le tuner ne fonctionne pas.
• Etes-vous en mode Play, avec la fonction de dérivation
ou d’assourdissement activée?
6. Impossible d’installer le logiciel
• Est-ce que le CD-ROM est dans le lecteur de CD ?
Assurez-vous que le CD-ROM est bien installé dans le
lecteur de CD-ROM.
• Est-ce que la lentille du lecteur de CD est sale ?
Utilisez un produit de nettoyage de lentille du commerce pour nettoyer la lentille.
107
• Essayez-vous d’installer le logiciel depuis un lecteur
de CD en réseau ?
Le logiciel ne peut pas être installé depuis un lecteur
de CD raccordé à un réseau.
• Pouvez-vous utiliser un dispositif USB ?
Si vous utilisez Windows XP, allez à [Panneau de
configuration] → [Système] et sélectionnez l’onglet
[Matériel]. Dans [Gestionnaire de périphériques],
cliquez sur les réglages de Universal Serial Bus
Controller et USB Root Hub.
7. Impossible d’engager l’enregistrement avec la fonction
audio USB. Ou bien, le niveau d’enregistrement est trop
bas (trop haut).
• Utilisez le réglage “USBSEND” du mode Utility pour
régler le niveau à l’entrée de l’ordinateur (☞p.89).
8. Impossible d’engager la lecture avec la fonction audio
USB. Ou bien, le niveau de lecture est trop bas (trop
haut).
• Utilisez le réglage “USB RCV” du mode Utility pour
régler le niveau à l’entrée du PX5D (☞p.89).
9. Votre logiciel ne répond pas au PX5D
• Est-ce que le câble USB est bien raccordé ?
• Avez-vous installé le pilote dont vous avez besoin ?
• Est-ce que votre ordinateur a détecté le PX5D raccordé ?
Si vous utilisez Windows XP, allez dans le panneau de
configuration. → “Propriétés de sons et périphériques
108
audio” et cliquez sur l’onglet “Matériel”.
Si vous utilisez Mac OS X, allez dans le disque dur du
Macintosh→ Applications → le dossier Utilitaires →
“Configuration audio et MIDI“, sélectionnez l’onglet
“Périphériques MIDI”, et assurez-vous que le PX5D a
bien été détecté.
• Le périphérique raccordé ou le logiciel peuvent ne pas
prendre en compte les messages que vous transmettez.
Reportez-vous au mode d’emploi du périphérique ou
du logiciel raccordé pour vérifier s’il répond aux messages que vous transmettez.
Spécifications techniques
● Effets: 180 types (Effets simultanés: jusqu’à sept effets)
● Nombre de programmes:
• User: 100
• Preset: 100
● Entrée:
• INPUT (prise phone)
• AUX (mini prise stéréo)
● Sortie: sortie à deux fonctions ligne/casque d’écoute
(prise phone stéréo)
● Prises pour fonctions de jeu:
• Prise FOOT SW
• Connecteur USB
● Section accordeur:
• Plage de détection: 27,5 Hz à 2.093 Hz (La0…Do7)
• Calibrage: A = 438 à 445 Hz
● Section de rythmes:
• Nombre de motif rythmique: 774 variations de motifs
intégrées
• Tempo: 40 à 240 bpm
● Alimentation:
• 2 piles alcalines de format AA.
Permet sept heures d’utilisation continue (le rétroéclairage sont désactivés).
Permet cinq heures d’utilisation continue (le rétroéclairage est activé).
• Via le bus USB (quand vous utilisez le connecteur USB).
• Adaptateur secteur (DC4.5V:
ment.
) vendu séparé-
● Dimensions (LxPxH): 118 mm x 75 mm x 20 mm
● Poids: 154g (piles non comprises)
● Articles inclus:
• Manuel d’utilisation
• Deux piles alcalines AA pour la vérification
• CD-ROM
• Câble pour la prise FOOTSW
● Option:
• Adaptateur secteur
• Pédale KORG PS-1
La finition et les spécifications techniques peuvent être
modifiées sans avis préalable, dans un but d’amélioration
du produit.
109
Vorsichtsmaßnahmen
Aufstellungsort
Vermeiden Sie das Aufstellen des Geräts an Orten, an denen
• es direkter Sonneneinstrahlung ausgesetzt ist;
• hohe Feuchtigkeit oder Extremtemperaturen auftreten
können;
• Staub oder Schmutz in großen Mengen vorhanden sind;
• das Gerät Erschütterungen ausgesetzt sein kann.
• in der Nähe eines Magnetfeldes.
Stromversorgung
Schließen Sie das beiliegende Netzteil nur an eine geeignete Steckdose an. Verbinden Sie es niemals mit einer Steckdose einer anderen Spannung.
Störeinflüsse auf andere Elektrogeräte
Dieser kann bei in der Nähe aufgestellten Rund-funkempfängern oder Fernsehgeräten Empfangsstörungen hervorrufen. Betreiben Sie solche Geräte nur in einem geeigneten
Abstand von diesem Erzeugnis.
Bedienung
Vermeiden Sie bei der Bedienung von Schaltern und Reglern unangemessenen Kraftaufwand.
110
Reinigung
Bei auftretender Verschmutzung können Sie das Gehäuse
mit einem trockenen, sauberen Tuch abwischen. Verwenden Sie keinerlei Flüssigreiniger wie beispielsweise Reinigungsbenzin, Verdünnungs- oder Spülmittel. Verwenden
Sie niemals brennbare Reiniger.
Bedienungsanleitung
Bewahren Sie diese Bedienungsanleitung gut auf, falls Sie
sie später noch einmal benötigen.
Flüssigkeiten und Fremdkörper
Stellen Sie niemals Behältnisse mit Flüssigkeiten in der
Nähe des Geräts auf. Wenn Flüssigkeit in das Gerät gelangt, können Beschädigung des Geräts, Feuer oder ein
elek-trischer Schlag die Folge sein.
Beachten Sie, daß keinerlei Fremdkörper in das Gerät gelangen. Sollte ein Fremdkörper in das Gerät gelangt sein,
so trennen Sie es sofort vom Netz. Wenden Sie sich dann
an Ihren KORG-Fachhändler
Hinweis zur Entsorgung (nur EU)
Wenn dieses „durchgestrichener Müllkübel“ Symbol
auf dem Produkt oder in der Bedienungsanleitung erscheint, müssen Sie dieses Produkt sachgemäß als Sondermüll entsorgen. Entsorgen Sie dieses Produkt nicht
im Haushaltsmüll. Durch richtige Entsorgung verhindern Sie Umwelt- oder Gesundheitsgefahren. Die geltenden Vorschriften für richtige Entsorgung sind je
nach Bestimmungsland unterschiedlich. Bitte informieren Sie sich bei der zuständigen Behörde über die bei
Ihnen geltenden Vorschriften zur Entsorgung.
* Die übrigen in dieser Bedienungsanleitung erwähnten Firmen-, Produkt-, Formatnamen usw. sind Warenzeichen oder
eingetra-gene Warenzeichen der rechtlichen Eigentümer und
werden ausdrücklich anerkannt.
111
Inhalt
Einleitung ............................................. 114
Hauptmerkmale .................................... 114
Einschalten ........................................... 115
Bedienelemente und Anschlüsse ............ 116
LCD-Display ......................................................... 118
Herstellen der Anschlüsse ...................... 119
Play-Modus .......................................... 124
Auswahl eines Programms ................................ 124
Tasten PROGRAM MEMORY [A], [B], [C] und [D] .. 124
Verwendung von Fußschaltern zur
Programmauswahl ..................................................... 124
Master-Pegel .......................................................... 124
Bypass/Mute .......................................................... 125
Tuner ....................................................................... 125
Festlegen der Funktion den Wert-Encoder ..... 126
Key Lock-Funktion .............................................. 126
Anschließen an Ihren Computer ...................... 121
Rhythm- & Bass-Modus ......................... 127
Verwendung der Editor-Software ........................... 121
Übertragung von Audiodaten .................................. 121
PTN (Musterwiedergabe) ................................... 127
CHAIN (Kettenwiedergabe) .............................. 129
SONG (Song-Wiedergabe) ................................. 131
Ausprobieren ........................................ 123
Quick Edit (Schnellzugriff) ............................... 123
Phrase Trainer-Modus ........................... 133
Auswahl des Aufzeichnungsmodus ................ 133
Aufzeichnung ........................................................ 134
Wiedergabe ............................................................ 135
Pausenfunktion .................................................... 135
Speichern ............................................................... 135
112
Edit-Modus ........................................... 136
Wählen Sie den Effekt, den Sie bearbeiten
möchten .................................................................. 136
Effektbearbeitung ................................................ 136
DYNA: Dynamics & Pickup Modeling ...................
AMP: Amp Modeling .................................................
CAB: Cabinet Modeling ............................................
MOD: Modulation & Filter Effect Modeling .........
DLY: Delay Modeling .................................................
DLY: Delay Time (Delay-Zeit) ..................................
REV: Reverb Modeling ..............................................
NR: Noise Reduction/Rauschunterdrückung ......
RENAME: Umbenennung .........................................
WRITE: Speichern .......................................................
136
137
137
138
138
138
138
139
139
139
Utility-Modus ........................................ 140
Wählen Sie eine Utility-Funktion aus ............. 140
Ändern Sie die Einstellungen der jeweiligen
Utility-Funktionen ............................................... 140
BACKLIT (Rückbeleuchtung):
LCD-Rückbeleuchtung ein/aus ............................... 140
KEY-TRN: Tonartentransposition (Key transpose) 140
KTR+BC: Tonartentransposition und Bass-Löschen
(Key transpose + bass cancel) ................................... 141
AMP/LIN: Line/Verstärker-Auswahl .................... 141
FOOTSW: Fußschalter (Footswitch)
Schaltpedaleinstellungen ..........................................
USBSEND: USB Send .................................................
USB RCV: USB Receive ..............................................
AUX>USB: USB-Audio-Schnittstelle ......................
MIDDRUM: MIDI Drum/Bass ................................
142
143
143
143
144
Laden werkseitig eingestellter Daten ..... 144
Effektparameterliste .............................. 145
DYNA: Dynamics & Pickup modeling ........... 145
AMP: AMP Modeling ......................................... 147
CAB: Cabinet modeling ...................................... 151
MOD: Modulation&Filter Effect Modeling .. 153
DLY: Delay Modeling .......................................... 157
REV: Reverb Modeling ....................................... 158
Parameterliste der Preset-Programme ... 159
Auflistung der Rhythmus-Patterns .......... 160
Fehlersuche .......................................... 161
Technische Daten .................................. 163
113
Einleitung
Für den Kauf des Korg PANDORA PX5D Personal Multi Effect
Processor möchten wir uns bedanken. Um einen langjährigen problemlosen Betrieb des Gerätes sicherzustellen, sollten Sie dieses
Bedienungshandbuch lesen und das Produkt korrekt verwenden.
Bewahren Sie das Handbuch für den späteren Gebrauch sicher auf.
Hauptmerkmale
Das PX5D ist ein vielseitiges Multi-Effekt-Gerät, das eine
unglaubliche Reihe von Gitarren/Bass-Verstärkern und
Effekten in einer kompakten Einheit zusammenfasst, die
Korgs eigene „
“ Modeling-Technologie einsetzt, um
detaillierte und kräftige Modeling-Sounds zu erzeugen.
180 Typen von Effekt-Variationen mit maximal sieben
gleichzeitig verwendbaren Effekten.
IPE-System (integrierte Parametereditierung)
einfach vorzunehmende Effekteinstellungen.
100 User- und 100 Preset-Programme
Steuerregler
Das PX5D enthält 18 Gitarrenverstärkermodelltypen, 10
Bassverstärkermodelltypen und 6 Synthesizertypen, die alle
schnell und leicht bearbeitet werden können.
LCD-Anzeige mit LED-Hintergrundbeleuchtung
Die Anzeige ist selbst in dunkler Umgebung lesbar.
114
Auto Tuner-Funktion
Diese Funktion erlaubt einfaches und schnelles Stimmen
der Gitarre. Das Stimmen kann auch bei stummgeschalteter Audioausgabe (also unhörbar) vorgenommen werden.
Rhythmus- und Bass-Funktion
128 Typen von Rhythmus- und Bassmustern oder ein Metronom können verwendet werden. 16 mehrfache Muster
können ebenfalls für aufeinanderfolgende Wiedergabe angeschlossen werden.
Phrase-Trainer-Funktion
Sie können den Rhythm- & Bass-Modus verwenden, um ein
Rhythmusmuster festzulegen, und mit diesem Rhythmusmuster
von einer an der AUX-Buchse oder am USB-Anschluss angeschlossenen Audioquelle aus oder mit Ihrer an der INPUT-Buchse angeschlossenen Gitarre (bzw. Ihrem Bass) zusammenspielen, während Sie das Ergebnis aufnehmen, und die Aufnahme dann als
(maximal ca. 80 Sekunden lange) Loop wiedergeben. Die Wiedergabegeschwindigkeit kann auch gesenkt werden, ohne die
Tonhöhe zu beeinflussen. Der im Rhythmus- und Bass-Betrieb
gewählte Rhythmus und der ausgegebene Effekt können ebenfalls gleichzeitig aufgezeichnet werden.
AUX-Pitch-Funktion
Hiermit können Sie die Tonlage des von der AUX-Buchse
oder vom USB-Anschluss kommenden Audiosignals (KeyTranspose-Funktion) verändern oder den Tiefenbereich löschen (Bass-Cancel-Funktion).
Tap/BYPASS-Taster
Mit dem TAP/BYPASS-Taster passen Sie die Delay-Zeit und
das Tempo für die Rhythmus- und Bass-Begleitung an das
Tempo des aktuellen Stücks an.
Wert-Encoder
Mit diesem Regler können Sie Programme direkt aufrufen
und Effekte zügig editieren.
USB-MIDI- und USB-Audioschnittstellenfunktion
Wenn Sie das mitgelieferte USB-Kabel zum Anschluss des PX5D
an Ihren Computer verwenden, können Sie die Editor-Software*
zum Editieren des PX5D oder zum Übertragen von Audiodaten zwischen dem PX5D und Ihrem Computer verwenden.
*: Die Editor-Software können Sie von der Korg-Webseite
(http://www.korg.com/) herunterladen. Soll im Oktober
2007 auf den Markt kommen
Was ist
?
(Resonant Structure and Electronic Circuit Modeling System) ist eine von Korg entwickelte Klangformungstechnologie, die den komplexen Charakter und
das Verhalten von akustischen und elektrischen Instrumenten wie auch elektronischen Schaltungen in realen
Umgebungen präzise nachbildet.
simuliert eine Vielzahl von Klangerzeugungscharakteristiken: Instrumentenkörper/-gehäuse, Lautsprecher und Boxen, akustische Umgebungen, Vakuumröhren, Transistoren, usw.
Einschalten
Batteriedeckel an der Unterseite der Bodenplatte entfernen,
indem Sie ihn in Pfeilrichtung schieben. Legen Sie entsprechend der Abbildung zwei Alkali-Mignonzellen ein. Achten Sie auf die korrekte Polung der Batterien.
Batterieanzeige
Wenn die Batterie nahezu erschöpft ist, leuchtet die Battery Low-Anzeige (
). Ersetzen Sie in diesem Falle die
Batterie möglichst umgehend. Programme und andere
Daten (außer den gerade editierten Daten) gehen im Falle
eines Batterieaustausches nicht verloren.
Leere Batterien dürfen nicht im PX5D verbleiben. Wenn
Sie eine solche Batterie längere Zeit im Gerät lassen, können Fehlfunktionen (z. B. aufgrund einer ausgelaufenen
Batterie) auftreten. Sie sollten Batterien auch entnehmen,
wenn Sie den PX5D für längere Zeit nicht benutzen.
Das Netzteil ist nicht im Lieferumfang dieses Produkts enthalten, sondern separat erhältlich.
115
Bedienelemente und Anschlüsse
7
6
5
4
3
2
1
8
9
19
10
18
11
17
12
13
14
15
16
1. INPUT-Buchse
Schließen Sie hier Ihre Gitarre order Bass an.
2. AUX-Buchse (stereo)
Hier können Sie einen CD-Player o. ä. anschließen.
3. Eingangspegelschalter
Dient zum Einstellen des Eingangspegels, abhängig vom
Ausgangspegel von Gitarre oder Bass (☞S. 123).
4. Steuerregler
Diese Knöpfe dienen zum Einstellen von Gain, Ton und
Lautstärke der Verstärkermodelle, ebenso wie der SynthParameter.
116
5. Netzschalter
Mit diesem Schalter wird die Stromversorgung ein- bzw.
ausgeschaltet.
STANDBY: Die Stromversorgung ist ausgeschaltet.
ON: Die Stromversorgung ist eingeschaltet.
USB: Die Stromversorgung ist eingeschaltet. Wenn das PX5D
über das USB-Kabel an Ihrem Computer angeschlossen ist,
liefert Ihr Computer Strom über den USB-Bus.
Bei einigen Computern kann es sein, dass eine Stromversorgung
über den USB-Bus nicht möglich ist. Verwenden Sie in diesem
Fall einen USB-Hub mit eigener (durch eine externe Versorgung gespeister) Stromquelle, zwei Batterien oder das Netzteil.
6. FOOT SW-Buchse
Zum Anschluss der beiden Fußschalter können Sie das
Kabel verwenden.
7. OUTPUT-Buchse
Schließen Sie hier Ihren verstärker, einen Kopfhörer o. ä.
an.
8. LCD (LC-Display)
☞S. 118 „LCD-Display“
9. CURSOR
Verwenden Sie diese Tasten zur Auswahl von Programmen
oder eines Parameters, den Sie editieren möchten. Durch sie
wird auch die Phrase-Trainer-Funktion gesteuert.
10. DC4.5V-Buchse
Schließen Sie hier den optional erhältlichen Netzteiladapter (DC4.5V
) an.
11. RHYTHM-Taste
Verwenden Sie diese Taste, um in den Rhythm- & BassModus zu gelangen (☞S. 127).
17. TAP/BYPASS-Taste
Im Edit-Modus können Sie mittels dieser Taste die Delay-Zeit
für Delay-Effekte (☞S. 123) oder das Rhythmustempo für den
Rhythm- & Bass-Modus (☞S. 127) festlegen. Im Play-Modus
wird durch diese Tasste das PX5D auf Bypass oder Mute geschaltet und der Tuner (Stimmgerät) aktiviert (☞S. 125).
13. UTILITY-Taste
Verwenden Sie diese Taste, um in den Utility-Modus zu
gelangen (☞S. 140).
18. USB-Anschluss
Verwenden Sie das mitgelieferte USB-Kabel, um es an den
Computer anzuschließen. Wenn Sie das mitgelieferte USBKabel zum Anschluss des PX5D an Ihren Computer verwenden, können Sie die Editor-Software zum Editieren des PX5D
oder zum Übertragen von Audiodaten zwischen dem PX5D
und Ihrem Computer verwenden.
14. Tasten PROGRAM MEMORY [A], [B], [C] und [D]
Diesen vier Tasten (A–D) können Sie Ihre vier bevorzugten
Programme zuweisen (☞S. 124).
19. Wert-Encoder
Mit diesem Regler stellen Sie den Ausgangspegel und die
Effekte ein und wählen die Programme aus.
12. PHRASE-TRAINER-Taste
Verwenden Sie diese Taste, um in den Phrase-Trainer-Modus zu gelangen (☞S. 133).
15. ENTER/REC-Taste
Diese Taste wird zum Ein- bzw. Ausschalten eines Effekts,
zum Bearbeiten von Mustern im Rhythm- & Bass-Modus
oder zum Aufnahmestart im Phrase-Trainer-Modus verwendet.
16. EXIT-Taste
Schaltet zum Play-Modus oder zur vorangehenden Bildschirmansicht zurück.
117
LCD-Display
9
1
2
8
3
4
5
6
7
1. Die Effektkette
Hier werden Sie über den jeweiligen Effektstatus informiert
(DYNA, AMP, CAB, MOD, DLY, REV aktiviert/deaktiviert).
2. Programm Name/Effekt Typ Anzeige
Dieser Bereich zeigt Ihnen den Programm Namen oder den
Effekt Typ an. Im Bypass oder Mute Modus wird dieses Feld
zur Anzeige des integrierten Stimmgerätes benutzt.
3. USB-Symbol
Dieses Symbol wird angezeigt, wenn das PX5D über den
USB-Port an Ihrem Computer angeschlossen ist.
4. Batteriezustandsanzeige
Dieses Symbol leuchtet auf, wenn die Batteriespannung abfällt.
118
5. Modus-Symbole
Diese Symbole werden angezeigt, wenn Sie den entsprechenden Modus einschalten.
6. Program/Value-Anzeige
An dieser Stelle wird die aktuelle Programm-Nummer angezeigt. Verändern Sie den Master-Volume-Pegel („Master
Level“), erscheint hier für einige Sekunden der geänderte
Wert; während der Parametereingabe wird der Wert des
entsprechenden Parameters angezeigt.
7. ORIG-Symbol (Original-Symbol)
Wenn der bearbeitete Parameter oder Wert mit dem im Programm abgelegten Wert übereinstimmt, leuchtet das ORIGSymbol.
8. Balkengrafik
Im Play-Modus oder im Edit-Modus zeigt diese Grafik den
Master-Pegel oder den Wert eines Parameters an. Im
Rhythm-Modus ändert sich diese Anzeige entsprechend
dem Rhythmusmuster, das gerade abgespielt wird.
9. Variations-Symbole (VARI1 und VARI2)
Diese weisen auf die Variation des Rhythmusmusters oder
des Rhythmus- und Bassmusters angezeigt, das Sie gerade
im Rhythm-Modus verwenden (☞S. 127).
Herstellen der Anschlüsse
Schalten Sie alle anzuschließenden Geräte aus, und stellen Sie die Lautstärke auf das Minimum ein.
CD player usw.*2
Fußschalter *5
Gitarre/Bass
Kopfhörer *4
Minikomponenten/
Stereoanlage usw.
*3
Verstärker/
Aktivmonitor
*6
*7
Computer
Digigales Aufnahmegrät
Wechselstromadapter *1
119
*1 Verwenden Sie nur den empfohlenen Wechselstromadapter (DC4.5V
).
*2 Wenn ein CD-Player oder eine andere Tonquelle an die
AUX-Buchse angeschlossen ist, können Sie mit Gitarre oder Bass mitspielen. Die Lautstärke muss dabei
aber vom angeschlossenen Gerät geregelt werden.
Die Anschlußkabel sind separat erhältlich.
*3 LDie OUTPUT-Buchse ist ein Stereo-Ausgang. Wenn
Sie den PX5D über ein Mono-Klinkenkabel an einen
verstärker anschließen, wird nur der Klang des linken Kanals (L) ausgegeben.
*4 Ausgangspegel und Klangverhalten des PX5D können von der Qualität des verwendeten Kopfhörers abhängen. Wir empfehlen hochwertige niederohmige
Kopfhörer (32 Ohm) mit einer Empfindlichkeit von
100 dB/mW oder besser. Mit tragbaren CD-Playern
oder Kassettenrekordern mitgelieferte Kopfhörer sind
oftmals schon ausreichend.
*5 Verwenden Sie zum Anschluss der beiden Fußschalter an das PX5D das mitgelieferte Kabel. Sie können
zwei Fußschalter anschließen, wie Korg PS-1 (getrennt
erhältlich). Im Utility-Modus können Sie die Funktion der Pedalschalter festlegen. Sie können diese zum
Beispiel zum Schalten von Programmen oder zum
Start und Stopp der Aufnahme bzw. Wiedergabe im
120
Phrase-Trainer-Modus verwenden (☞S. 124 „Verwendung von Fußschaltern zur Programmauswahl“, S.
142 „FOOTSW“).
*6 Verwenden Sie das mitgelieferte USB-Kabel, wenn Sie
das PX5D an Ihren Computer anschließen möchten.
Einzelheiten über die Verbindung mit Ihrem Computer entnehmen Sie bitte dem Abschnitt „Anschließen
an Ihren Computer“.
*7 Falls erforderlich, können Sie die mitgelieferten Gummifüße an der Unterseite des PX5D anbringen.
Anschließen an Ihren Computer
Falls Sie das mitgelieferte USB-Kabel zum Anschluss des
PX5D an Ihren Computer verwenden, können Sie die Editor-Software zum Editieren des PX5D und zum Übertragen von Audiodaten zwischen dem PX5D und Ihrer DAWSoftware verwenden.
Verwendung der Editor-Software
Die Editor-Software gibt Ihnen die Möglichkeit, Programme zu bearbeiten, Datenbibliotheken zu verwalten und
Chains für den Rhythm- & Bass-Modus zu erstellen.
Sie können die Editor-Software von der Korg-Webseite (http:/
/www.korg.com/) herunterladen. Näheres zur Installation
und Verwendung der Editor-Software finden Sie im Benutzerhandbuch.
Um die Editor-Software nutzen zu können, müssen Sie den
KORG-USB-MIDI-Treiber auf Ihrem Computer installieren („Installation der Software“ auf der mitgelieferten CDROM).
Übertragung von Audiodaten
Wenn Sie ein USB-Kabel zum Anschließen des PX5D an
Ihren Computer verwenden, können der Effektausgang des
PX5D, die Rhythmus-Sounds des Rhythm & Bass Modus
und Phrasen, die Sie im Phrase-Trainer-Modus aufgezeichnet haben, direkt auf die Audiotracks Ihrer DAW-Software
aufgezeichnet werden. Die Wiedergabe Ihrer DAW-Software kann auch über das PX5D überwacht werden.
Wenn Ihr Computer unter Windows XP läuft, empfehlen
wir, dass Sie den KORG USB-ASIO Treiber (auf der mitgelieferten CD-ROM) in Ihrem Computer installieren, wenn
Sie Audio über USB-Anschluss übertragen wollen. Einzelheiten zur Installation des KORG USB-ASIO-Treibers siehe „Installation der Software“ auf der beliegenden CD-ROM.
Die folgende Abbildung zeigt den Signalfluss, wenn das
PX5D an Ihrem Computer angeschlossen ist.
OUTPUT
PX5D
Rhythem&Bass
INPUT
Effect
Phrase Trainer
USB
Der Effekt des PX5D gilt nicht für den Audio-Eingang über
USB-Anschluss.
121
Stellen Sie die Master-Pegel-Einstellung zur Änderung der
Lautstärke des Audiosignals, ein, das von der OUTPUT-Buchse des PX5D ausgegeben wird (☞S. 124 „Master-Pegel“).
Stellen Sie die Utility-Modus-Einstellung „USBSEND“ zur
Änderung der Lautstärke des Audiosignals ein, dass von
der USB-Buchse des PX5D zum Computer gesandt wird
(☞S. 143„USBSEND“).
Stellen Sie die Utility-Modus-Einstellung „USB RCV“ zur
Änderung der Lautstärke des Audiosignals ein, dass vom
Computer zum PX5D angelegt wird (☞S. 143 „USB RCV“).
Normalerweise wird das von der AUX-Buchse angelegte
Signal nicht zum USB-Anschluss gesandt. Wenn Sie das
Eingangssignal von der AUX-Buchse zum Computer senden wollen, greifen Sie auf die Utility-Modus-Ansicht
„AUX > USB“ zu (☞S. 143 „AUX>USB“).
Hinweis: Wenn Sie den Effektausgang des PX5D auf einem Audio-Track Ihrer DAW-Software aufzeichnen, schalten Sie die „audio thru“-Funktion Ihrer Software aus, um Echo-Back zu verhindern.
Hinweis: Näheres zur Verwendung Ihrer DAW-Software siehe
Dokumentation der Software.
122
Ausprobieren
1
Nachdem Sie alle Anschlüsse hergestellt haben, stellen
Sie den Netzschalter auf „ON“ (Dies wird als Play-Modus bezeichnet.). Wählen Sie mit den π/†-CURSOR
ein relativ unverzerrt klingendes Programm.
2
Betätigen Sie den Eingangspegelschalter für den Ausgangspegel von Gitarre oder Bass.
HI: Pickups mit hohem Ausgang (z.B. HumbuckingPickups oder Pickups mit Vorverstärker)
LO: Pickups mit niedrigem Ausgang (z.B. Einzelspulen-Pickups)
3
Stellen Sie die Lautstärke an der Gitarre wie gewohnt
ein. Stellen Sie die Gesamtlautstärke mit den Wert-Encoder ein.
Quick Edit (Schnellzugriff)
In jedem Modus (außer wenn Mute/Bypass oder Key Lock
aktiv ist), können Sie zur Einstellung des Gain, des Tons oder
der Amp-Modeling-Lautstärke die Steuerregler verwenden.
Wenn Sie einen Steuerregler bewegen, erscheint einige Sekunden lang der Parametername auf dem Wert-Display. Bei
Übereinstimmung mit der ursprünglichen, vordefinierten
Einstellung leuchtet zusätzlich das ORIG-Symbol.
Die Delay-Zeit der Delay-Algorithmen geben Sie durch zweimaliges Betätigen des TAP/BYPASS-Tasters im gewünschten Tempo ein (gilt nicht für den Rhythm & Bass-Mode).
Wenn Sie die Delay-Zeit einstellen, wird diese einige Sekunden lang auf dem Wert-Display angezeigt.
Amp-Gain/Tone/Volume
ProgrammName
Programmwahl-Ta-
Eingangspegel-Regler
MasterPegel-Regler
Tap-Taster für
Delay-Zeit
ProgrammNummer
Nicht abgespeicherte Einstellungen bleiben im Quick EditModus nur so lange erhalten, bis Sie das Programm wechseln oder den Strom abschalten, und werden dann auf die
Original-Werte zurück gesetzt (siehe auch S. 139).
123
Play-Modus
Der Play-Modus ist die Betriebsart, in der Sie den PX5D
normalerweise verwenden.
Auswahl eines Programms
Verwenden Sie zum Wählen eines Programms den π/†CURSOR. Auf dem Programm/Effekttyp-Display wird der
Programmname angezeigt, und auf dem Wert-Display die
Programmnummer. Sie können zwischen einhundert Anwenderprogrammen (U00–U99) und einhundert PresetProgrammen (P00–P99) wählen. Sie können auch dann Programme auswählen, wenn Sie sich im Rhythm- & BassModus, (außer während einer Aufnahme) im Phrase-Trainer-Modus oder (außer unter bestimmten Bildschirmansichten) im Utility-Modus befinden.
Tasten PROGRAM MEMORY [A], [B], [C] und [D]
Den Tasten PROGRAM MEMORY [A]–[D] können Sie vier
Ihrer bevorzugten Programme zuweisen. Drücken Sie während des Spielens einfach eine der entsprechenden PROGRAM-MEMORY-Tasten von [A]–[D], und das ausgewählte Programm wird sofort aufgerufen. So weisen Sie einer Taste ein Programm zu. Bei diesem Beispiel wird das ausgewählte
Programm der Taste [A] zugewiesen.
1
124
Verwenden Sie denπ/†-CURSOR, um das Programm
auszuwählen, das Sie der Taste [A] zuweisen möchten.
2
Drücken Sie die Taste PROGRAM MEMORY [A] und
halten Sie sie ungefähr eine Sekunde lang gedrückt. Auf
dem LCD wird „PGM>A“ angezeigt und das ausgewählte Programm wird der Taste [A] zugewiesen.
Hinweis: Zum Umschalten zwischen den vier Programmen, die
den PROGRAM MEMORYs [A]–[D] zugewiesen wurden, können Sie einen an der FOOT-SW-Buchse angeschlossenen Fußschalter verwenden (☞S. 142 „ FOOTSW“).
Verwendung von Fußschaltern zur Programmauswahl
Wenn Sie an der FOOT-SW-Buchse des PX5D Fußschalter anschließen und mittels des Utility-Modus die Pedal-SwitchFunktion zuweisen, haben Sie die Möglichkeit, die Fußschalter zur Auswahl von Programmen zu verwenden. Verwenden
Sie zum Anschluss Ihrer Fußschalter das mitgelieferte Kabel
für FOOTSW-Anschluss. Der rote Stecker an einem Ende
des Kabel hat dann die Funktion Program Up, und der andere, weiße Stecker diejenige von Program Down (☞S. 119
„Herstellen der Anschlüsse“, S. 142 „FOOTSW“).
Master-Pegel
Verändern Sie diesen durch Drehen den Wert-Encoder, erscheint der aktuelle Wert einige Sekunden lang im DisplayBereich für Programm-Nummer/Parameterwert.
Es ändert sich auch die Balkengrafik, so dass der Pegel angezeigt wird.
Der eingestellte Master-Pegel bleibt auch nach Abschalten
des Stroms erhalten.
Grafische Anzeige (Balkendarstellung)
Tuner
Den Tuner aktivieren Sie, indem Sie das Gerät in den Bypass-Betrieb bzw. stumm schalten („Mute“).
Tuner-Anzeige
Anzeige für Programm-Nummer
Kreuzchen
(Halbton erhöht)
Notenname
Kalibrierung
Master-Pegel
Hinweis: Sie können das Gerät auch so programmieren, dass Sie
den Master-Pegel über den π/†-CURSOR regeln (☞S. 126
„Festlegen der Funktion den Wert-Encoder“).
Bypass/Mute
Wenn Sie die Taste TAP/BYPASS ca. eine Sekunde lang drükken, wird das PX5D umgangen, und der Originalsound ist
trocken (kein Effekt). Die Effekt-LEDs blinken, und im Display erscheint für etwa eine Sekunde die Aufschrift „BYPASS“.
Wenn Sie die Taste TAP/BYPASS ca. zwei Sekunden lang
drücken, wird das Ausgangssignal stummgeschaltet.
Die Effektkette blinkt schnell, und im Display wird für etwa
eine Sekunde die Meldung „MUTE“ angezeigt.
Durch erneutes Betätigen des TUNE/BYPASS- bzw. des
EXIT-Tasters versetzen Sie das Gerät wieder in den PlayModus. Bypass- und Mute-Funktion lassen sich jedoch aus
allen Betriebsarten heraus aktivieren.
Hinweis: Sie können auch die die Funktionen Bypass oder Mute
mit den beiden am PX5D angeschlossenen Fußschaltern aktivieren (☞S. 142 „FOOT SW“).
Mittenmarke
1
2
3
Schlagen Sie eine einzelne Saite auf Ihrer Gitarre oder
Ihrem Bass an. Auf dem LCD werden der Notenname
und die Kalibrierung angezeigt. Wenn die Tonhöhe über
einen Halbton über dem Notennamen liegt, erscheint
rechts oben neben diesem ein Erhöhungszeichen.
Der Display-Bereich fungiert als Messinstrument zur
Anzeige der Tonhöhe. Stimmen Sie alle Saiten Ihrer
Gitarre oder Ihres Basses derart, dass die Anzeige oberhalb der Mittenmarke leuchtet.
Wenn Sie darüber hinaus die TAP/BYPASS-Taste drükken, wird das Stimmgerät (Umgehung/Stummschalten) ausgeschaltet. Sie können auch durch Drücken der
EXIT-Taste zum Play-Modus zurückkehren.
Kalibrierung (Frequenz des Referenztons A)
Sie können mit den Wert-Encoder die Frequenz für den
Referenzton A (Kalibrierung) in einem Bereiche zwischen
A = 438 Hz–445 Hz einstellen. Die Kalibrierungseinstellung
125
wird gespeichert, bis das Gerät abgeschaltet wird. Beim
nächsten Einschalten wird die Kalibrierung auf A = 440 Hz
zurückgesetzt.
Festlegen der Funktion den Wert-Encoder
Sie können die Funktion einstellen, die den Wert-Encoder
im Play-Modus hat. Halten Sie im Play-Modus die EXITTaste gedrückt und betätigen Sie wahlweise den √/®CURSOR, um eine der nachfolgend beschriebenen Funktionen zuzuweisen.
● Halten Sie die EXIT-Taste gedrückt und drücken Sie den √CURSOR. Im Display erscheint für etwa eine Sekunde die
Anzeige „MASTER“. Nun können Sie mit den Wert-Encoder die Gesamtlautstärke einstellen und mit den π/†-CURSOR die Programme aufrufen. Auf diese Weise haben Sie
über den Wert-Encoder direkten Zugriff auf die Lautstärke.
Diese Einstellung bleibt nach dem Ausschalten erhalten.
Programmauswahl
Einstellung
Master-Pegel
● MHalten Sie die EXIT-Taste gedrückt und drücken Sie
den ®-CURSOR. Im Display erscheint für etwa eine
Sekunde die Anzeige „PROGRAM“. Nun können Sie
mit den Wert-Encoder die Programme aufrufen und mit
den π/†-CURSOR die Gesamtlautstärke einstellen.
126
Auf diese Weise haben Sie über den Wert-Encoder direkten Zugriff auf die Programme.
Einstellung
Master-Pegel
Programmauswahl
Key Lock-Funktion
Mittels der Key Lock-Funktion deaktivieren Sie sämtliche
Eingabemöglichkeiten bis auf die Programmauswahl. Auf
diese Weise verhindern Sie insbesondere im Live-Betrieb
ein versehentliches Betätigen der Tasten.
● Halten Sie die EXIT-Taste gedrückt und betätigen Sie die
TUNE/BYPASS-Taste. Im Display erscheint für etwa eine Sekunde die Anzeige „KEYLOCK“. Der Wert-Encoder und
andere Tasten und Knöpfe als CURSOR π/†, PROGRAM
MEMORY [A]–[D] sowie die Fußschalter fungieren nicht.
Nur Programmauswahl möglich
Mit Abschalten des Stroms wird auch die Key LockFunktion deaktiviert. Eine weitere Möglichkeit zur Deaktivierung der Key Lock-Funktion finden Sie unter „
Festlegen der Funktion den Wert-Encoder“.
Rhythm- & Bass-Modus
Das PX5D bietet 128 verschiedene Rhythmus- und Bassmuster. Außerdem können Sie für eine aufeinander folgende
Wiedergabe bis zu 16 Muster miteinander verknüpfen*.
Zum Einschalten des Rhythm- & Bass-Modus drücken Sie im
Play-Modus (außer wenn Mute, Bypass oder Key Lock aktiv
ist), im AUX-Pitch-Modus oder im Phrase-Trainer-Modus die
RHYTHM-Taste. Das Muster wird je nach dem von Ihnen
ausgewählten Wiedergabetyp gestartet. Die Balkengrafik ändert sich je nach dem wiedergegebenen Rhythmusmuster.
Drücken Sie die EXIT-Taste, um zum Play-Modus zurückzuschalten.
Der Rhythm- & Bass-Modus umfasst drei Wiedergabetypen.
PTN: Musterwiedergabe
Sie können ein Rhythmusmuster auswählen und es abspielen. Auf dem LCD wird das PTN-Symbol (PTN = Pattern,
d.h. Muster) angezeigt.
CHAIN: Chain- (Ketten-) Wiedergabe
Sie können bis zu 16 Muster für aufeinander folgende Wiedergabe miteinander verknüpfen. Die Wiedergabe beginnt
nach einer Vorzählung.
SONG: Song-Wiedergabe
Hierdurch haben Sie die Möglichkeit, die Demo-Songs abzuspielen. Die Wiedergabe beginnt nach einer Vorzählung.
Mit jedem Drücken der RHYTHM-Taste schalten Sie in der
Auswahl PTN → CHAIN → SONG → PTN → CHAIN →
SONG... weiter, und auf dem LCD erscheint das Symbol
des gegenwärtig ausgewählten Wiedergabetyps.
Beim Einschalten des Rhythm- & Bass-Modus ist der ausgewählte Wiedergabetyp derjenige, der ausgewählt war, als Sie
zum letzten Mal den Rhythm- & Bass-Modus verlassen haben.
Hinweis: Wenn Sie den Phrase-Trainer-Aufnahmemodus auf
„JAM“ setzen, haben Sie die Möglichkeit, Ihre Gitarren- oder
Bassphrase zusammen mit dem im Rhythm- & Bass-Modus ausgewählten Rhythmus- und Bassmuster aufzunehmen.
PTN (Musterwiedergabe)
Bei diesem Wiedergabetyp können Sie ein Rhythmus- &
Bassmuster auswählen und wiedergeben. Verwenden Sie
den √/®-CURSOR zur Auswahl der einzelnen Parameter und den Wert-Encoder und die ENTER/REC-Taste zur
Festlegung von deren Werten. Durch den ▲/▼-CURSOR
werden Programme geschaltet.
Rhythmus-Pattern/variation
Hallanteil
(„Reverb“)
für Rhythm
& Bass
Level
Tempo
Bass-Tonart
Hinweis: Sämtliche hier vorgenommenen Einstellungen bleiben
auch nach Ausschalten des Geräts erhalten.
127
Rhythm Pattern/Variation
Verwenden Sie zur Auswahl des Rhythmusmusters (☞S. 160
„Auflistung der Rhythmus-Patterns“) den Wert-Encoder.
Verwenden Sie die ENTER/REC-Taste zur Auswahl der
Rhythmusmuster-Variation.
BASIC: Grundrhythmusmuster.
VARI1: Variation 1. Das Variation-1-Symbol leuchtet.
VARI2: Variation 2. Das Variation-2-Symbol leuchtet.
Rhythmus-Pattern
VariationSymbol
Tempo
Das Tempo kann in einem Bereich zwischen 40–240 BPM
eingestellt werden. Das Tempo können Sie auch durch
zweimaliges Drücken des TAP/BYPASS-Tasters im gewünschten Rhythmus einstellen.
Tempoanzeige
Bass Key (Bass-Tonart)
Verwenden Sie die ENTER/REC-Taste zur Auswahl einer
Bassmuster-Variation. Je nach dem von Ihnen ausgewählten Rhythmusmuster enthalten manche Basslinien eine Akkordfolge.
OFF: Bassmuster ausgeschaltet.
BASIC: Grundbassmuster.
VARI1: Variation 1. Dies ist ein Durakkord-Bassmuster. Auf
dem LCD wird Symbol für Variation 1 angezeigt.
VARI2: Variation 2. Dies ist ein Mollakkord-Bassmuster. Auf
dem LCD wird Symbol für Variation 2 angezeigt.
Bei aktivierter Bassbegleitung wählen Sie die Tonart (C, C#...
A#, B) mittels den Wert-Encoder aus, so dass Sie stets zur
gewünschten Tonart üben können.
Bass Tonart
Wenn das Bassmuster Variation 2 (VARI2) ist, wird ein „m“
neben der Grundnote gezeigt.
Wird „METRONM0“–„METRONM9“(Metronom) als
Rhythmus-Pattern selektiert, so wird dieser Bildschirm nicht
angezeigt, und es werden keine Basstöne abgespielt.
128
Level
Verwenden Sie den Wert-Encoder zum Einstellen des
Rhythm & Bass Klangs.
Pegelanzeige
Reverb
Verwenden Sie den Wert-Encoder zum Einstellen des Reverb-Betrags für Rhythmus und Bass.
Hallpegel
Der Reverb-Effekt im Rhythm & Bass-Modus ist identisch
mit dem Gitarreneffekt. Wenn Sie allerdings ein Programm
ohne Reverb-Modeling anwählen oder der Hallpegel „0“
beträgt, zeigt der hier eingestellte Hallanteil hat keinerlei
Auswirkung.
CHAIN (Kettenwiedergabe)
Zwei oder mehr in einer Sequenz miteinander verknüpfte Rhythmus- & Bassmuster werden zusammen als „chain“ („Kette“) bezeichnet. Mit CHAIN (Chain Play - Kettenwiedergabe) können
Sie eine Chain editieren und sie wiedergeben. Es können bis zu
sechzehn Muster in einer Chain miteinander verknüpft werden.
Das PX5D enthält zwanzig Chains. Wenn Sie CHAIN (Chain
Play) auswählen, gibt es eine Vorzählung, und anschließend beginnt die Wiedergabe automatisch.
Mit CHAIN (Chain Play) können Sie eine Chain auswählen sowie ihr Tempo, ihren Lautstärkepegel, ihren Nachhallpegel und ihre Loop-Wiedergabe-Einstellung festlegen.
Verwenden Sie den √/®-CURSOR zur Auswahl der einzelnen Parameter und den Wert-Encoder und die ENTER/
REC-Taste zur Festlegung von deren Werten.
In der Chain-Select-Ansicht können Sie die ENTER/RECTaste drücken, um zur Chain-Edit-Ansicht zu gelangen.
Hier können Sie das in den einzelnen Chain-Schritten verwendete Rhythmus- und Bassmuster festlegen (☞S. 130
„Chain-Bearbeitung“) Drücken Sie die EXIT-Taste, um zur
Chain-Auswahlansicht zurückzukehren.
Zur Chain-Bearbeitung
ENTER/REC
EXIT
Chain select
Write
Tempo
Reverb level
Level
129
Chain Select (CHAIN 01–20)
Hier können Sie eine der zwanzig Chains auswählen.
des PX5D können zwanzig Chains abgelegt werden.
Chain-Nummer
Chain-Bearbeitung
In dieser Ansicht können Sie die ENTER/REC-Taste drükken, um zur Chain-Edit-Ansicht (☞S. 130 „Chain-Bearbeitung“) zu gelangen.
Die bearbeiteten Einstellungen werden auf die Einstellungen
des Originalprogramms zurückgesetzt, wenn Sie Chains schalten oder das Gerät ohne Schreiben ("Writing") ausschalten.
Tempo
Verwenden Sie den Wert-Encoder oder die TAP/BYPASSTaste zur Einstellung des Tempos (☞S. 128 „Tempo“).
Level
Verwenden Sie den Wert-Encoder zum Einstellen des
Rhythm & Bass Klangs (☞S. 129 „Level“).
Reverb
Verwenden Sie den Wert-Encoder zum Einstellen des Reverb-Betrags für Rhythmus und Bass (☞S. 129 „Reverb“).
WRITE (Schreiben)
Hierdurch wird die Chain gespeichert. Verwenden Sie zur
Auswahl des Speicherorts (Chain-Nummer) den Wert-Encoder und drücken Sie die ENTER/REC-Taste. Im Speicher
130
Hier können Sie das Muster festlegen, das für jeden Schritt
verwendet wird. Drücken Sie in der Chain-Select-Ansicht
(CHAIN01–20) die ENTER/REC-Taste, um zur Chain-EditAnsicht zu gelangen. Verwenden Sie den √/®-CURSOR zur
Auswahl der einzelnen Schritte, den π/†-CURSOR zur Auswahl eines Parameters und den Wert-Encoder und die ENTER/
REC-Taste zur Festlegung des Werts. Drücken Sie, nachdem
Sie für jeden Chain-Schritt das Muster festgelegt haben, die
EXIT-Taste, um zur Chain-Select-Ansicht zurückzukehren.
Repeat
Repeat
Repeat
Bass key
Bass key
Bass key
Rhythmus-Pattern
Rhythmus-Pattern
Rhythmus-Pattern
Schritt 01
Schritt 02
Schritt 16
Die bearbeiteten Einstellungen werden auf die Einstellungen
des Originalprogramms zurückgesetzt, wenn Sie Chains schalten oder das Gerät ohne Schreiben ("Writing") ausschalten.
Rhythm Pattern
Verwenden Sie zur Auswahl des Rhythmusmusters den
Wert-Encoder. Verwenden Sie die ENTER/REC-Taste zur
Auswahl der Rhythmusmuster-Variation (☞S. 128 „Rhythm
Pattern/Variation“).
Pattern Repeat (Musterwiederholung)
Verwenden Sie den Wert-Encoder zur Festlegung der Anzahl
der Wiederholungen des für den jeweiligen Schritt ausgewählten Musters. Die Wiedergabe des Musters wird gemäß der von
Ihnen festgelegten Anzahl wiederholt, und anschließend wird
das für den nächsten Schritt festgelegte Muster wiedergegeben.
Rhythmus-Pattern
Bass-Tonar
Wiederholung
Schrittnummer
Schrittnummer
Hinweis: Wenn Sie den Wert-Encoder mit gedrückt gehaltenem
CURSOR √/® zum Bewegen des Schritts drehen, wird das
Muster vor der Bewegung zu dem Muster nach der Bewegung
kopiert. Dies ist eine praktische Möglichkeit, mehrfache Kopien
des gleichen Musters anzulegen.
Bass Key
Verwenden Sie die ENTER/REC-Taste zur Auswahl einer
Bassmuster-Variation. Je nach dem von Ihnen ausgewählten Rhythmusmuster enthalten manche Basslinien eine
Akkordfolge (☞S. 128 „Bass Key“).
Bass Tonart
SONG (Song-Wiedergabe)
So geben Sie die im PX5D integrierten Demo-Songs wieder.
Wenn Sie SONG (Song-Wiedergabe) auswählen, gibt es eine
Vorzählung, und anschließend beginnt die Wiedergabe automatisch. Zum Einlegen einer Pause während der Wiedergabe können Sie die ENTER/REC-Taste drücken. Drücken
Sie die Taste erneut, um die Wiedergabe fortzusetzen.
Wenn Sie die ENTER/REC-Taste mindestens eine Sekunde lang gedrückt halten, kehren Sie zum Anfang des DemoSongs zurück und starten die Wiedergabe.
Während der Wiedergabe oder im gestoppten Zustand können Sie den π/†-CURSOR zum Programmwechsel verwenden. Verwenden Sie den √/®-CURSOR zur Auswahl eines
Parameters und den Wert-Encoder zur Festlegung des Werts.
Step number
131
Song-Auswahl
Loop
Tempo
Reverb
Transpose
Level
Song Select (Song-Auswahl)
Verwenden Sie zur Auswahl des wiederzugebenden Demo-Songs
den Wert-Encoder. Das PX5D verfügt über drei Demo-Songs.
Song-Nummer
Tempo
Verwenden Sie den Wert-Encoder, um das WiedergabeTempo festzulegen. Wenn Sie die „FIL“-Einstellung auswählen, wird der Demo-Song im durch den Song selbst vorgegebenen Tempo abgespielt (☞S. 128 „Tempo“).
Transpose (Transponieren)
Verwenden Sie den Wert-Encoder, um die Transposition festzulegen. Sie können die Wiedergabetonlage in Halbtonschritten transponieren.
132
Level
Verwenden Sie den Wert-Encoder zum Einstellen des
Rhythm & Bass Klangs (☞S. 129 „Level“).
Reverb
Verwenden Sie den Wert-Encoder zum Einstellen des Reverb-Betrags für Rhythmus und Bass (☞S. 129 „Reverb“).
Loop
Verwenden Sie zur Änderung der Loop-Einstellung den
Wert-Encoder. Hierdurch wird festgelegt, wie die Wiedergabe wiederholt wird.
On (EIN): Der Demo-Song wird wiederholt abgespielt.
OF (AUS): Der Demo-Song wird nur einmal abgespielt.
Phrase Trainer-Modus
Eine an der AUX-Buchse oder am USB-Anschluss angeschlossene Audioquelle, eine auf Ihrer Gitarre oder Ihrem Bass gespielte
Phrase oder der von Ihnen im Rhythm- & Bass-Modus festgelegte Rhythmus kann aufgenommen und wiederholt als Loop abgespielt werden. Dies ist ein praktischer Weg, zu der sich wiederholenden Phrase eine schwierige Stelle zu üben. Die Wiedergabegeschwindigkeit läßt sich ohne Beeinflussung der Tonhöhe vermindern, um besonders komplizierte Stücke langsam einüben zu
können. Die aufgenommene Phrase kann im Speicher des
PX5D abgelegt werden.
Wenn Ihr Computer unter Windows XP läuft und Sie Audio-Daten über den USB-Anschluss übertragen möchten,
empfehlen wir, dass Sie den KORG USB-ASIO Treiber (auf
der mitgelieferten CD-ROM) installieren. Einzelheiten zur
Installation des KORG USB-ASIO-Treibers siehe „Installation der Software“ auf der beliegenden CD-ROM.
Auswahl des Aufzeichnungsmodus
Drücken Sie, um in den Phrase-Trainer-Modus zu gelangen, im
Play-Modus (außer während Bypass/Mute oder Key Lock aktiv
sind), im Rhythm- & Bass-Modus oder im Utility-Modus die
PHRASE-TRAINER-Taste. Wenn Sie den Modus aufrufen, wird
die Auswahlseite für den Aufzeichnungsmodus angezeigt, und
das Phrase Trainer-Symbol blinkt. Bei Anzeige dieser Displayseite ist das PX5D aufnahmebereit. Drücken Sie die EXIT-Taste,
um zum Play-Modus zurückzuschalten.
AufnahmeModus
Aufnahmezeit
Phrase Trainer-Symbol
Verwenden Sie die PHRASE-TRAINER-Taste zur Festlegung
des Aufnahmemodus. Der Aufnahmemodus ändert sich jedes Mal, wenn Sie die PHRASE-TRAINER-Taste drücken.
AUX: Aufnahme des Audioeingangs von der AUX-Buchse
oder vom USB-Anschluss.
GTR/BAS: Aufnahme der angeschlossenen Gitarre oder des
angeschlossenen Basses.
AUX+G/B: Aufnahme sowohl des Audioeingangs von der
AUX-Buchse oder vom USB-Anschluss als auch Ihrer Gitarre oder Ihres Basses.
JAM: Aufnahme sowohl des zuletzt von Ihnen im Rhythm& Bass-Modus für die Wiedergabe ausgewählten Rhythmusmusters als auch des Sounds Ihrer Gitarre (Ihres Basses).
Hinweis: Wenn Sie sowohl den USB-Anschluss als auch die
AUX-Buchse verwenden, wird der Audioeingang von beiden
Buchsen aufgenommen. Verwenden Sie zur Anpassung der Lautstärkebalance den Lautstärkeregler des angeschlossenen Geräts.
Falls im Rhythm- & Bass-Modus zuletzt Song Play ausgewählt war, können Sie „JAM“ nicht als Aufnahmemodus
auswählen.
133
Via Wert-Encoder bestimmen Sie die Aufnahmezeit (im
„JAM“-Modus die Anzahl der Takte).
20: ca. 20 Sekunden
40: ca. 40 Sekunden
80: ca. 80 Sekunden
1, 2, 3…: Anzahl der Takte
die Aufnahme beginnen soll. Die Aufzeichnung startet nun.
Im Aufnahme-Modus „JAM“ erfolgt die Anpassung der
Aufzeichnungsqualität automatisch anhand der Tempound Takteinstellungen.
Hinweis: Möchten Sie im Anschluss an eine Aufnahme den Aufnahme-Modus wechseln oder die -zeit verändern, drücken Sie nach
Beendigung der Wiedergabe die PHRASE TRAINER-Taste.
Je länger die Aufnahmezeit (40 oder 80), desto niedriger die
Audioqualität.
Wenn der Aufnahmemodus „JAM“ und das Rhythmustempo extrem langsam ist, ist es nicht möglich, eine große Anzahl von Takten aufzunehmen. Passen Sie dann bitte das Tempo im Rhythm& Bass-Modus an (die Höchstlänge beträgt ca. 80 Sekunden).
Wenn Sie Chain im Rhythm- & Bass-Modus verwenden, um ein
einen Takt langes Rhythmusmuster usw. im JAM-Modus mit
mehrfachen Mustern festzulegen, legen Sie die Anzahl der Aufnahmetakte auf die Anzahl der verwendeten Takte fest. Wenn Sie
z.B. zwei Muster eines 2/4-Taktmaßes zur Aufnahme eines einen
Takt langen Musters eines 4/4-Taktmaßes verwenden wollen, legen Sie 2 Takte als Anzahl der Aufnahmetakte fest.
Starten Sie die Wiedergabe am angeschlossenen CD-Player (oder einer anderen Audioquelle) und betätigen Sie die
ENTER/REC-Taste, wenn die Stelle erreicht wird, an der
134
Hinweis: You can use a foot switch connected to the FOOTSW
jack to start/stop recording (☞S. 142 „FOOTSW“).
Wenn der Aufnahmemodus „JAM“ ist, beginnt die Aufnahme nach der Vorzählung.
Aufzeichnung
Zu Beginn einer Aufnahme wird die mögliche Aufnahmezeit sowohl numerisch im Display angezeigt.
Anzeige der
Aufzeichnungszeit
Möchten Sie die Aufnahme beenden, drücken Sie entweder die
ENTER/REC-, ® CURSOR, oder PHRASE-TRAINER-Taste.
Die Aufnahme stoppt und geht automatisch in die Loop-Wiedergabe über. Beenden Sie eine Aufnahme nicht auf oben beschriebene Weise, endet diese mit Ablauf der zuvor eingestellten Aufnahmezeit. Auch in diesem Fall startet die Loop-Wiedergabe automatisch.
Aufnahme und Wiedergabe einer solchen Phrase erfolgen
stets in mono.
Wiedergabe
Die aufgenommene Phrase wird als Loop abgespielt. Während Wiedergabe oder Pause können Sie den π/†-CURSOR
verwenden, um Programme zu wählen.
Wiedergabelänge
Wiedergabegeschwindigkeit (%)
Wenn Sie den Wert-Encoder nach links drehen, wird die Wiedergabegeschwindigkeit langsamer, ohne dass sich die Tonhöhe der Phrase ändert. Zur Auswahl stehen sechs Wiedergabegeschwindigkeiten:
100, 90, 80, 75, 66 und 50 %. Während der Wiedergabe können Sie
CURSOR √ zum Rücklauf oder CURSOR ® zum Vorlauf drücken.
Durch Drücken der Phrase Trainer-Taste wird der aktuell gespielte
Ton gehalten („Hold“-Funktion). Dies bietet sich insbesondere an,
wenn Sie einzelne Noten einer Phrase „heraus hören“ möchten.
Wenn Sie die Phrase neu aufnehmen wollen, drücken Sie den
®-CURSOR , um die Wiedergabe auf Pause zu schalten.
Starten Sie den CD-Player (bzw. die angeschlossene Audioquelle) und betätigen Sie die ENTER/REC-Taste am Anfang der gewünschten Phrase. Möchten Sie Aufnahmezeit
oder –Modus verändern, stoppen Sie die Wiedergabe und
drücken anschließend die PHRASE TRAINER-Taste.
Speichern
Drücken Sie, wenn Sie die aufgenommene Phrase speichern
möchten, die PHRASE TRAINER-Taste mehrmals im Pause-Betrieb, bis auf dem LCD „SAVE?“ angezeigt wird. Drükken Sie dann erneut die ENTER/REC-Taste, um die Phrase
zu speichern.
Pausenfunktion
Wenn Sie während der Wiedergabe den ®-CURSOR betätigen, wird die Wiedergabe unterbrochen. Eine erneute Betätigung den ®-CURSOR setzt die Wiedergabe fort.
Eine Betätigung den √-CURSOR während unterbrochener Wiedergabe bringt Sie zurück an den Anfang der aufgezeichneten Phrase.
Hinweis: Auf die „SAVE?“-Ansicht kann von der Aufnahmemodus-Ansicht zugegriffen werden, wenn Sie gerade eine Phrase aufgenommen haben.
Wenn Sie das Gerät ohne vorherige Speicherung ausschalten, wird die aufgenommene Phrase gelöscht.
Es kann nur eine Phrase gespeichert werden. Beim Speichern wird die zuvor aufgenommene Phrase überschrieben
und gelöscht.
135
Edit-Modus
Der Edit-Modus bietet die Möglichkeit, jeden Effekt separat ein- und auszuschalten sowie Effekttyp, Parameter und
Programm-Namen zu bearbeiten.
Im Wiedergabebetrieb drücken Sie den ®-CURSOR, um das
Bildschirmbild DYNA Effect Edit abzurufen. Hier erfolgen
auch die Umbenennung und das Schreiben des Programms.
Wählen Sie den Effekt, den Sie bearbeiten möchten
Bei jedem Drücken des √/®-CURSORS schalten Sie in der
unten dargestellten Reihenfolge zum nächsten Effekt weiter.
(Delay-Zeit)
Effektbearbeitung
Für jeden Effekt lassen sich der Effekttyp auswählen und
die Parameter entsprechend einstellen.
Ausgeschaltete Effekte („OFF“) werden automatisch eingeschaltet, wenn Sie die ENTER/REC-Taste drücken oder
den π/† -CURSOR verwenden. Wenn ein Programm nach
der Bearbeitung nicht geschrieben wurde, leuchtet der Dezimalpunkt der Programmnummer.
136
In jeder Bildschirmansicht des Edit-Modus können Sie die Steuerregler zum Bearbeiten der Verstärkermodelle oder die TAP/
BYPASS-Taste zum Einstellen der Delay-Zeit verwenden.
Einzelheiten zu den Effekttypen und -parametern finden
Sie in der Effektparameterliste (☞S. 145).
Drücken Sie die EXIT-Taste, um zum Play-Modus zurückzuschalten.
Die bearbeiteten Einstellungen werden auf die Einstellungen des Originalprogramms zurückgesetzt, wenn Sie Programme schalten oder das Gerät ohne Schreiben („Writing“)
ausschalten (☞S. 139).
DYNA: Dynamics & Pickup Modeling
In diesem Bereich finden Sie Effekte zur Dynamikbearbeitung, z.B. Compressor und Auto-Wah (Klangformung), sowie die Pickup-Modeling-Effekte (Tonabnehmer-Emulation).
▲/▼: Auswahl Effekttyp
ParameterWert
Ein/Aus
AMP: Amp Modeling
Die 15 Typen BTQ CLN–FUZZ sind Gitarrenverstärker, und
die 10 Typen VALVE1–UKMAJOR sind Bassverstärker. Bei
GSYNTH1–GSYNTH3 handelt es sich um Gitarrensynthesizer und bei BSYNTH1–BSYNTH3 um Basssynthesizer. Die
Wert-Anzeige zeigt „Gt“ für ca. eine Sekunde an, wenn Sie
ein Gitarrenmodell gewählt haben, oder „bA“, wenn Sie
ein Bassmodell gewählt haben.
Verzerrungsgrad*
Tiefen*
Höhen*
Lautstärke*
▲/▼: Auswahl
Effekttyp
Mitten*
Ein/Aus
* Die Bedienung ist anders, wenn VALVE1–JAZZ (Bass-Verstärker),
GSYNTH1–3 oder BSYNTH1–3 als Typ gewählt ist.
Der VOLUME-Regler kann auch auch zur Lautstärkeeinstellung verwendet werden, wenn der Amp-Modeling-Effekt auf „OFF“ gestellt ist.
CAB: Cabinet Modeling
In diesem Bereich finden Sie Emulationen diverser Lautsprecherboxen mit Ihren unterschiedlichen akustischen Charakteristiken. Die Cabinet Modeling-Funktion bietet sich insbesondere dann an, wenn Sie keinen Verstärker angeschlossen haben (z.B. im Kopfhörerbetrieb oder wenn das Signal
direkt an ein Mischpult, einen Harddisk-Recorder oder ein
anderes Audiogerät überführt wird). Die 11 Typen 1X8TWD–
4X12VIN sind Gitarrenverstärker-Gehäuse, und die 12 Typen LA 4X10–COMBI sind Bassverstärker-Gehäuse. Die
Wert-Anzeige zeigt „Gt“ für ca. eine Sekunde an, wenn Sie
ein Gitarrenverstärker-Gehäuse gewählt haben, oder „bA“,
wenn Sie ein Bassverstärker-Gehäuse gewählt haben.
▲/▼: Auswahl Boxentyp
Presence
Ein/Aus
Sie können aber wenn Sie wollen auch einen Gitarren-AMP
mit einem Bass-CAB oder einen Bass-AMP mit einem Gitarren-CAB wählen.
137
MOD: Modulation & Filter Effect Modeling
In diesem Bereich finden Sie Modulations- und Filtereffekte wie Chorus, Flanger, Phaser und Pitch Shifter.
▲/▼: Auswahl Effekttyp
ParameterWert
DLY: Delay Time (Delay-Zeit)
Auf dem Bildschirm wird die Delay-Zeit des Delay-ModelingEffekts angezeigt. In dieser Bildschirmansicht können Sie den
Wert-Encoder verwenden, um die Delay-Zeit festzulegen. Zur
Festlegung der Delay-Zeit in dieser Bildschirmansicht können
Sie aber auch die TAP/ BYPASS-Taste verwenden.
Delay-Zeit
Ein/Aus
DLY: Delay Modeling
Hierbei handelt es sich um Delay-Effekte, bei denen Sie die
Delay-Zeit durch Drücken der TAP/BYPASS-Taste auf ein
gewünschtes Intervall einstellen können.
▲/▼: Auswahl Effekttyp
EffektPegel
Ein/Aus
REV: Reverb Modeling
In diesem Bereich finden Sie Halleffekte, die Ihrem Sound
zusätzlich räumliche Tiefe verleihen.
▲/▼: Auswahl
Effekttyp
EffektPegel
Ein/Aus
Delay-Zeit
Ein/Aus
138
NR: Noise Reduction/Rauschunterdrückung
Via Drehregler stellen Sie das Maß der Rauschunterdrückung
ein. Je höher der Wert, desto stärker die Rauschunterdrückung.
Normalerweise sollten Sie eine Einstellung wählen, bei der Sie
bei leicht abgedämpften Saiten kein störendes Rauschen hören.
Einstellung
der
Rauschunterdrückung
WRITE: Speichern
Hier können Sie ein editiertes oder neu erstelltes Programm
speichern. Wählen Sie mit den Wert-Encoder den gewünschten Speicherplatz aus (nur User-Programme).
Um das Schreiben eines Programms abzubrechen, drücken
Sie den √- (oder ®-) CURSOR, um eine andere Bildschirmansicht auszuwählen.
Zum Schreiben des Programms drücken Sie die Taste
ENTER/REC. Nach Ende des Speichervorgangs erscheint
im Display für etwa eine Sekunde die Meldung „COMPLT“.
Wenn der NR-Wert übermäßig erhöht wird, kann es sein,
dass die Noten auf unnatürliche Weise abgeschnitten werden. Verringern Sie in diesem Fall den NR-Wert.
RENAME: Umbenennung
Hier können Sie für jedes Programm einen Namen festlegen.
Aktuelle ProgrammNummer an der zu
überschreibenden
Position
Auswahl der Speicherposition
(User-Programm-Nummer)
Speichern
▲/▼: Zeichenposition
Zeichenauswahl
Die folgenden Zeichen können verwendet werden:
Bevor Sie ein editiertes Programm speichern, vergewissern
Sie sich, daß Sie nicht versehentlich ein wichtiges Programm
überschreiben, welches unter der selektierten Speichernummer vorhanden ist, da die vorhandenen Programmdaten
überschrieben werden und verloren gehen.
Es ist nicht möglich, als Speicherplatz ein Preset-Programm
zu selektieren.
139
Utility-Modus
Hier können Sie Einstellungen wie z.B. die für LCD Backlight, Key Transpose und Bass Cancel vornehmen. Drükken Sie im Play-Modus die UTILITY-Taste. Das UtilitySymbol erscheint dann, und Sie sind im Utility-Modus.
BACKLIT (Rückbeleuchtung): LCD-Rückbeleuchtung ein/aus
Verwenden Sie den Wert-Encoder, um die Rückbeleuchtung ein- bzw. auszuschalten.
LCD-Rückbeleuchtung ein/aus
Wählen Sie eine Utility-Funktion aus
Bei jedem Drücken der UTILITY-Taste gelangen Sie in der
unten dargestellten Reihenfolge schrittweise von einer Utilityfunktions-Ansicht zur nächsten.
Ändern Sie die Einstellungen der jeweiligen
Utility-Funktionen
Ändern Sie die Einstellungen der jeweiligen Utility-Funktionen nach Ihren Wünschen. Drücken Sie die EXIT-Taste,
um zum Play-Modus zurückzuschalten.
Wenn Sie das PX5D mit Batterien betreiben, ist die Batriebsdauer kürzer, wenn die Rückbeleuchtung eingeschalter ist.
KEY-TRN: Tonartentransposition (Key transpose)
Durch Anzeige dieser Bildschirmansicht wird die Tonart des
Audioeingangs vom USB-Anschluss oder von der AUX-Buchse transponiert. Via Wert-Encoder bestimmen Sie nun das Transpositionsmaß (max. +/- 1 Oktave). Für die ersten drei Halbtöne, aufwärts und abwärts, kann der Wert in Schritten à 10 Cent,
für den Rest in Halbtonschritten (100 Cent) angepasst werden.
10-Cent-Anzeige
Transpositionswert
Hinweis: Diese Einstellungen bleiben auch dann erhalten, wenn
Sie das Gerät ausschalten.
100-Cent-Anzeige
Das Ausgabesignal für die Tonarttransposition ist in Mono.
140
KTR+BC: Tonartentransposition und Bass-Löschen
(Key transpose + bass cancel)
Durch Anzeige dieser Bildschirmansicht wird Tonart transponiert und der Bass des Audioeingangs vom USB-Anschluss oder von der AUX-Buchse gelöscht. Durch die BassCancel-Funktion wird der Tiefenbereich aus dem Sound
entfernt, womit Sie über eine praktische Übungsmöglichkeit verfügen, indem Sie selber den Bass spielen. Der einstellbare Bereich für die Tonartentranspositions-Funktion
ist der gleiche wie der für KEY-TRN (☞S. 140).
Durch Einstellen von Key Transpose auf „0“ und Wählen
von Key Transpose + Bass Cancel können Sie die Bass-Cancel-Funktion allein einschalten.
Transpositionswert
Das Ausgabesignal für die Tonarttransposition und Basslöschung ist in Mono.
Wenn Ihr Computer unter Windows XP läuft und Sie Audio-Daten über den USB-Anschluss übertragen möchten,
empfehlen wir, dass Sie den KORG USB-ASIO Treiber (auf
der mitgelieferten CD-ROM) installieren. Einzelheiten zur
Installation des KORG USB-ASIO-Treibers siehe „Installation der Software“ auf der beliegenden CD-ROM.
AMP/LIN: Line/Verstärker-Auswahl
Bei Verwendung von Guitar Amp Modeling wird mit dieser Einstellung festgelegt, ob der PX5D für Lautsprecher/
Line-Ausgang oder für den angegebenen Gitarrenverstärkertyp optimiert wird. Diese Einstellung hat keine Wirkung,
wenn Amp Modeling ausgeschaltet ist und Sie Bass Amp
Modeling oder Guitar/Bass Synth. ausgewählt haben.
Line/Verstärker-Auswahl
Ln: Wählen Sie diese Einstellung, wenn ein Kopfhörer, ein
Mischpult oder ein Recorder angeschlossen ist.
AP1: Wählen Sie diese Einstellung, wenn ein Verstärker mit
klarem Sound, etwa ein in den USA gebauter Comboverstärker mit offener Rückwand, angeschlossen ist.
AP2: Wählen Sie diese Einstellung, wenn ein Verstärker mit
charakteristischem Mittenbereichsound, etwa ein in Großbritannien hergestellter Comboverstärker mit offener Rückwand angeschlossen ist.
AP3: Wählen Sie diese Einstellung, wenn ein Verstärker mit 4x12Gehäuse(n) und geschlossener Rückwand angeschlossen ist.
Bei den oben genannten Verstärkern handelt es sich um allgemeine Beispiele. Die optimale Einstellung kann je nach
dem von Ihnen verwendeten Verstärkertyp und je nachdem,
wie dieser eingestellt ist, variieren.
141
FOOTSW: Fußschalter (Footswitch) Schaltpedaleinstellungen
Verwenden Sie den Wert-Encoder, um die Funktion der am
PX5D angeschlossenen Fußschalter festzulegen.
Schaltpedalfunktion
PG: Die Pedale schalten zwischen den Programmen um,
die den Tasten PROGRAM MEMORY [A]–[D] zugewiesen sind. Das am UP-Anschluss (rot) des mitgelieferten
Kabels angeschlossene Pedal bewegt sich in der Reihenfolge [A] → [B] → [C] → [D] → [A] → ... vorwärts durch die
Programme. Das am DOWN-Anschluss (weiß) angeschlossene Pedal bewegt sich in der Reihenfolge [D] → [C] → [B]
→ [A] → [D] → ... rückwärts durch die Programme.
Ud: Die Pedale schalten zwischen den Programmen U00–
P99 um. Das am UP-Anschluss (rot) des mitgelieferten Kabels angeschlossene Pedal bewegt sich in der Reihenfolge
U00 → ... → U99 → P00 → ... → P99 → U00 → ... vorwärts
durch die Programme. Das am DOWN-Anschluss (weiß)
angeschlossene Pedal bewegt sich in der Reihenfolge U00
→ P99 → ... → P00 → U99 → ... U00 → P99 → ... rückwärts
durch die Programme.
142
Hinweis: Wenn Sie den Fußschalter zu „PG“ oder „Ud“ zugewisen haben, können Sie die Bypass-Funktion durch gleichzeitiges Drücken beider an die beiden Buchsen angeschlossener Fußschalter aktivieren, oder die Mute-Funktion aktivieren, indem Sie
beide Schalter für eine Sekunde oder länger gedrückt halten.
SS: Die Fußschalter starten/stoppen die Aufnahme und
Wiedergabe für den Phrase-Trainer-Modus. Der am UPAnschluss (rot) des Kabels angeschlossene Fußschalter startet/stoppt die Aufnahme. Der am DOWN-Anschluss (weiß)
des Kabels angeschlossene Fußschalter startet/stoppt die
Wiedergabe. Mit dieser Einstellung arbeiten die Fußschalter nur im Phrase-Trainer-Modus.
USBSEND: USB Send
Diese Einstellung stellt den Eingangspegel für den Computer ein, wenn das PX5D über das USB-Kabel am Computer angeschlossen ist. Beobachten Sie den Pegelmesser
der DAW-Software, auf der Sie aufnehmen, und verwenden Sie den Wert-Encoder zur Einstellung von
„USBSEND“, so dass die Pegelaufnahme angemessen ist
(d.h. dass 0 dB nicht überschritten wird).
AUX>USB: USB-Audio-Schnittstelle
Wenn diese Ansicht erscheint, arbeitet das PX5D als standardmäßige Stereo-ein/Stereo-aus USB-Audio-Schnittstelle.
Die folgende Abbildung zeigt den Signalfluss bei Anschluss
an Ihrem Computer.
Adjusts the
Input Level
PX5D
OUTPUT
AUX (Stereo)
USB RCV: USB Receive
Diese Einstellung stellt den Lautstärkepegel für das vom
Computer empfangene Signal ein, wenn das PX5D über
das USB-Kabel angeschlossen ist. Verwenden Sie den WertEncoder, justieren Sie den Balance-Eingang mit dem Ausgang des PX5D.
adjusts the
volume level
of the signal
USB
CD player usw.
Die AUX-Buchse ist die Eingangsbuchse, und die OUTPUTBuchse ist die Ausgangsbuchse. Zur Einstellung des Eingangspegels Ihres Computers beobachten Sie den Pegelmesser der
DAW-Software, auf der Sie aufnehmen, und justieren Sie die
Lautstärke des externen Geräts, das an die AUX-Buchse angeschlossen ist (um sicherzustellen, dass 0 dB nicht überschritten wird). Der Lautstärkepegel des vom Computer empfangenen Signals wird durch die Einstellung „USB RCV“ beeinflusst.
143
Die Effekte des PX5D, Rhythm & Bass Funktion und Phrase-Trainer-Funktion stehen nicht zur Verfügung, während
Sie das PX5D als eine USB-Audio-Schnittstelle verwenden.
MIDDRUM: MIDI Drum/Bass
Während diese Bildschirmansicht angezeigt wird, spielen
über den USB-Anschluss empfangene Note-ein/aus-Meldungen den eingebauten Bass- und Drum-Soundgenerator.
Laden werkseitig eingestellter Daten
So laden Sie die vorher geladenen Daten. Hierdurch werden die werkseitig eingestellten Effektprogramme, MasterPegel, Rhythmus & Bass Modus Tuning und Utility-Modus-Einstellungen geladen.
Beachten Sie, dass beim erneuten Laden der werkseitigen
Programme die Anwenderprogramme und alle beim Ausschalten gespeicherten Einstellungen (Master-Pegel usw.)
überschrieben werden.
1
Auf den folgenden MIDI-Kanälen empfangene Notenmeldungen spielen die Bass- und Drum-Sounds.
MIDI-Kanal 9: spielt Bass-Sounds.
MIDI-Kanal 10: spielt Drum-Sounds.
Die MIDI-Kanäle, welche die Bass- und Drum-Sounds spielen, sind fest eingestellt.
Hinweis: Zu den Entsprechungen zwischen den empfangenen
MIDI-Notendaten und den gespielten Drum-Sounds siehe das
„PX5D Drum Kit map“ auf der mitgelieferten CD-ROM.
144
2
Schalten Sie das Gerät ein, während Sie die RHYTHMTaste und den π-CURSOR gedrückt halten.
Auf dem LCD erscheint die Frage „RELOAD?“ („Erneut laden?“).
Drücken Sie die ENTER/REC-Taste.
Auf dem Display wird für kurze Zeit „RELOAD“, „VERIFY“ und „COMPLT“ angezeigt, und die werkseitig
eingestellten Programme werden erneut in den Anwenderprogrammbereich geladen. Anschließend erscheint
die Einschalten-Ansicht.
Wenn Sie sich entscheiden, nicht neu zu laden, drücken
Sie die EXIT-Taste, während die Anzeige „RELOAD?“
noch erscheint. Die werkseitigen Programme werden
dann nicht neu geladen; die normale Einschalten-Ansicht erscheint, und das PX5D ist im Play-Modus.
Schalten Sie das Gerät niemals während des Neuladen-Vorgangs aus.
Effektparameterliste
DYNA: Dynamics & Pickup modeling
TYPE (π/†CURSOR)
VALUE (Wert-Encoder)
COMP
Spezieller Compressor-Typ für einen konstanten Pegel und Sustain.
DYNAEXC
Dynamischer Exciter-Effekt zur Beeinflussung der Anschlagstärke (besonEmpfindlichkeit (0.0...10.0).
ders geeignet, um Clean-Sounds höhenreicher klingen zu lassen).
VOX WAH
Emuliert das VOX V847 Wah-Pedal.
WAHUP1
Auto-Wah mit positiver Polarität (besonders sensible Ansprache).
WAHUP2
Auto-Wah mit positiver Polarität (besonders weiche Ansprache).
WAHDWN1 Auto-Wah mit negativer Polarität (besonders sensible Ansprache).
Empfindlichkeit (1.0...10.0).
Einstellung der Pedalposition (1.0...10.0).
Einstellung der Empfindlichkeit
(0.0...10.0).
WAHDWN2 Auto-Wah mit negativer Polarität (besonders weiche Ansprache).
SLOWATK
Mildert der anschlag ab (violinenartiger Effekt).
Einstellung der Anschlaggeschwindigkeit (1.0...10.0).
Klang-Regler (0.0…10.0).
AC SIM
Dieser Effekt wandelt den Klang einer E-Gitarre in den einer Akustikgitarre um.
RESO
Ein Effekt, der den metallischen Körper einer Resonatorgitarre simuliert. Legen Sie die Körperresonanz
(0.0...10.0) fest.
Dies ist für Slide-Spiel geeignet.
OCTAVE*
Dieser Effekt erzeugt ein Signal, welches um eine Oktave niedriger liegt als das Ursprungssignal. Beide Signale werden miteinander gemischt, wodurch der Sound runder und baß- Effektpegel (0.0…10.0).
lastiger wird. Werden zwei oder mehr Saiten gleichzeitig angeschlagen, so arbeitet der
Effekt möglicherweise nicht wie erwartet. Gleiches gilt beim Anschlagen von tiefen Saiten.
RING
Erzeugt glockenartige Klänge (Für einen möglichst klaren Ton verwenden
Sie den Hals-Tonabnehmer, drehen den Klangregler Ihrer Gitarre zurück
und schlagen die Saiten in der Nähe des 12. Bundes an.).
Einstellung der Frequenz
(1.0...10.0).
145
TYPE (π/†CURSOR)
VALUE (Wert-Encoder)
RINGUP
RINGDWN
CRUSHER
Ringmodulator mit dynamisch wechselnder Modulation entsprechend der
Empfindlichkeit (0.0…10.0).
Anschlagstärke.
HUM>SGL
Pickup-Modeling, durch das ein Humbucking-Pickup in einen Singlecoil-Pickup verwandelt wird.
SGL>HUM
Pickup-Modeling, durch das ein Singlecoil-Pickup in einen Humbucking-Pickup verwandelt wird.
HF TONE
Pickup-Modeling: emuliert den typischen Sound der „Zwischenposition“
zwischen zwei Tonabnehmern.
PHASOUT
Pickup-Modeling: emuliert den phasenverschobenen Sound zweier „outof-phase“ verdrahteter Tonabnehmer.
Ein Fuzz der jüngsten Generation, der eine äußerst destruktive Verzerrung Legen Sie den Destruktivitätsgrad
(0.0...10.0) fest.
erzeugt.
Stellt den Ton ein (0.0...10.0).
B COMP
Kompressor für Bass mit betontem Attack.
LIMITER
Ein Kompressor/Limiter, der den Pegel begrenzt und dadurcheine höhere Gibt das Kompression sverhältnis
an (0.0…10.0).
Lautstärkeeinstellung ermöglicht.
B OD**
Overdrive-Effekt (Übersteuerung) für Bass.
B DIST**
Distortion-Effekt (Verzerrung) für Bass.
B FUZZ**
Fuzz-Effekt (Verzerrung) für Bass.
PREAMP1
Vorverstärker, eingestellt für einen klaren Sound.
Empfindlichkeit (1.0...10.0).
Verzerrungsgrad (1.0...10.0).
PREAMP2
Vorverstärker, eingestellt für einen gedämpften Sound.
BALANCE
Erzeugt den Klang der gemischten Ausgangssignale zweier Tonabnehmer.
LOWCUT
Filter, das unerwünschte Bassfrequenzen ausfiltert. Wirksam bei der Aufnahme.
Einstellung der Frequenz (0.0…10.0).
FRETLES*
Einstellungen, die den Sound eines bundlosen Bass simulieren.
Klang-Regler (0.0…10.0).
Klang-Regler (0.0…10.0).
*: Beim Spielen von Akkorden ist der Sound trüb. Sie sollten bei Verwendung dieses Effekts normalerweise nur Einzelnoten spielen.
146
**: Dies ist normalerweise ein Effekt für Bass, aber Sie können ihn mit dem SYNTH-Verstärkermodell verwenden, um einen dikken Sound mit Gitarre zu erzielen.
AMP: AMP Modeling
Die Amp Modeling-Algorithmen (Emulationen diverser Verstärkertypen) lassen sich sowohl mittels der Regler GAIN/
MID, BASS, TREBLE und VOLUME als auch via Wert-Encoder beeinflussen. Der Volume-Regler greift darüber hinaus
auch bei deaktivierter („OFF“) Amp Modeling-Funktion. Damit Sie wirklich alles aus den zur Verfügung stehenden
Modeling-Algorithmen heraus holen können, empfehlen wir die Kombination mit der Cabinet Modeling-Funktion –
insbesondere, wenn Sie Kopfhörer verwenden oder via Line-Ausgang aufnehmen möchten. Wenn GSYNTH1–3 oder
BSYNTH1–3 als Typ ausgewählt ist, werden durch die Steuerregler jeweils die Filtertiefe, der Filter-Decay, die OszillatorAuswahl (Einstellung) und der Synthese-Level geregelt (☞S. 150).
TYPE (π/†CURSOR)
BTQ CLN
Clean-Kanal eines handverdrahteten High-End-Gitarrenverstärkers mit 100
W. Empfohlenes CAB- (Gehäuse-) Modell: 4x12CLS, 4x12VIN, 4x12MDN
BTQ OD
Overdrive-Kanal eines handverdrahteten High-End-Gitarrenverstärkers mit 100
W. Empfohlenes CAB- (Gehäuse-) Modell: 4x12CLS, 4x12VIN, 4x12MDN
TWD1X12
Tweed-Combo. Empfohlenes CAB- (Gehäuse-) Modell: 1x12TWD
TWD4X10
4x10 Bass-Combo-Gitarrenverstärkers. Empfohlenes CAB- (Gehäuse-) Modell:
4x10TWD)
BLK2X12
2x12 Combo, typisch für Country- und Blues-Gitarristen. Empfohlenes CAB(Gehäuse-) Modell: 2x12BLK
AC15
VOX AC15, ‘62er Modell. Empfohlenes CAB- (Gehäuse-) Modell: 1x12VOX
AC15TB
Brillanter Kanal eines VOX AC15TB. Empfohlenes CAB- (Gehäuse-) Modell:
1x12VOX
VALUE (Wert-Encoder und Steuerregler)
GAIN/MID
........ Verzerrungsgrad (0.0…10.0).
BASS ................. Tiefen (0.0…10.0).
TREBLE ........... Höhen (0.0…10.0).
VOLUME
... Ausgangslautstärke (0.0…10.0).
Wert-Encoder
........................... Mitten (0.0…10.0).
147
TYPE (π/†CURSOR)
148
VALUE (Wert-Encoder und Steuerregler)
AC30
VOX AC30. Empfohlenes CAB- (Gehäuse-) Modell: 2x12VOX
AC30TB
„Brilliant“-Kanal des VOX AC30 TB. Empfohlenes CAB- (Gehäuse-) Modell:
2x12VOX
UKBLUES
Topteil eines britischen Vintage-Stacks-Gitarrenverstärkers. Empfohlenes
CAB- (Gehäuse-) Modell: 4x12CLS
UK '70S
High-Treble-Kanal eines in Großbritannien gebauten 100-W-Gitarren-Heads
aus dem Jahre 1969. Empfohlenes CAB- (Gehäuse-) Modell: 4x12CLS
UK '80S
In Großbritannien gebauter 100-W-Gitarren-Head mit Mastervolume aus
dem Jahre 1983. Empfohlenes CAB- (Gehäuse-) Modell: 4x12CLS, 4x12VIN,
4x12MDN
GAIN/MID
........ Verzerrungsgrad (0.0…10.0).
BASS ................. Tiefen (0.0…10.0).
UK '90S
Der Leadchannel eines 100-W-Zweikanal-Heads aus den 90ern. Empfohlenes
CAB- (Gehäuse-) Modell: 4x12CLS, 4x12VIN oder 4x12MDN
TREBLE ........... Höhen (0.0…10.0).
UK MDN
Modernes-Gitarrenverstärkers, britisches 100-W-Topteil. Empfohlenes CAB(Gehäuse-) Modell: 4x12VIN, 4x12MDN
US HI-G
Mit Schlangenhaut bespannter 100-W-Gitarren-Amp-Head aus dem Jahre
1991. Empfohlenes CAB- (Gehäuse-) Modell: 4x12VIN, 4x12MDN
US MDN
High-Gain-Gitarrenverstärkers mit typisch auffälliger Metall-Front. Empfohlenes CAB- (Gehäuse-) Modell: 4x12VIN, 4x12MDN
FUZZ
Ein Vintage-Fuzz aus den 1960er Jahren, der eine kräftige Verzerrung erzeugt.
OCTFUZZ
Ein Fuzz, der die eine Oktave höher liegenden Komponenten betont. Er ist
besonders wirkungsvoll, wenn Sie den Neck-Pickup verwenden, den Ton
Ihres Instruments herunterdrehen und oberhalb des 12. Bundes spielen.
VOLUME
... Ausgangslautstärke (0.0…10.0).
Wert-Encoder
........................... Mitten (0.0…10.0).
TYPE (π/†CURSOR)
VALUE (Wert-Encoder und Steuerregler)
VALVE
Ein Vakuumröhren-Bassverstärker mit auf ON geschaltetem Schalter ULTRA LO.
Empfohlenes CAB- (Gehäuse-) Modell: CLS8x10
VALVE2
Ein Vakuumröhren-Bassverstärker, der sich ideal für Rockmusik eignet.
Empfohlenes CAB- (Gehäuse-) Modell: CLS8x10
CLASSIC
Ein Vakuumröhren-Bassverstärker, dessen Grundcharakter je nach Einstellung den Wert-Encoder verschieden ist. (empfohlenes CAB: COMBI)
SCOOPED
Ein Bassverstärker, der sich für die typischen 80er-Sounds eignet. Empfohlenes CAB- (Gehäuse-) Modell: MTL4x10
VOLUME
... Ausgangslautstärke (0.0…10.0).
LA STUD
Ein Bassverstärkre, der sich für den typischen LA-Sound eignet. Empfohlenes CAB- (Gehäuse-) Modell: LA 4x10, LA 1x18
Wert-Encoder
........................... Mittenfrequenz (1...5).
GOLDPNL
Ein Bassverstärkre, der an seinem goldenen Bedienfeld und dem cleanen
Sound zu erkennen ist. (empfohlenes CAB: MDN4x10)
JAZZ
Ein Combo-Bassverstärkre, beliebt bei Jazzbassisten. (empfohlener CAB: JAZ1x15)
STUDIO
Ein ideal für den Motown-Sound geeigneter Combo-VakuumröhrenBassverstärker. (empfohlenes CAB: STU1x15)
AC 100
Ein 100-W-Vakuumröhren-Bassverstärker von Vox. (empfohlenes CAB: AC 2x15)
UKMAJOR
GAIN/MID ..... Mitten (0.0…10.0).
BASS ................. Tiefen (0.0…10.0).
TREBLE ........... Höhen (0.0…10.0).
GAIN/MID .. Verzerrungsgrad (0.0…10.0).
BASS ................. Tiefen (0.0…10.0).
TREBLE ........... Höhen (0.0…10.0).
Ein aus England stammender 200-W-Vakuumröhren-Bassverstärker. Emp- VOLUME .. Ausgangslautstärke (0.0…10.0).
Wert-Encoder .. Pegeleinstellung (0.0…10.0).
fohlenes CAB- (Gehäuse-) Modell: UK 4x15, UK 4x12
G SYNTH1…3 Ein chromatischer Synthesizer für Gitarre. Die Variationen 1,2 und 3 haben jeweils verschiedene Resonanzbeträge. (Wir empfehlen, die CAB-Einstellung auf OFF (Aus) zu schalten.)
B SYNTH1…3 Ein einzigartiger Basssynthesizer von Korg, der den Originalsound modifiziert und ein ausgezeichnetes Tracking bietet. Die Variationen 1,2 und 3 haben jeweils verschiedene Resonanzbeträge. (Wir empfehlen, die CAB-Einstellung auf OFF (Aus) zu schalten.)
siehe Synth-Tabelle. ☞S. 150
149
Synthesizer-Parameter
DEPTH (GAIN/MID-Regler)
Stellt den Änderungsbetrag der Filter-Cutoff-Frequenz ein (-15... 0…15).
DECAY (BASS-Regler)
Stellt die Decay-Zeit der Filterhüllkurve ein (0.0…10.0).
WAVE (TREBLE-Regler)
Wenn GSYNTH1–3 ausgewählt ist
Wählt die Wellenform (0…15).
0: Sägezahnwelle, zwei Oktaven nach unten
1: Sägezahnwelle, eine Oktave nach unten
2: Sinuswelle, eine Oktave nach unten
3: Sägezahnwelle
5: Sägezahnwelle, eine Oktave nach oben
4: Sinuswelle
6: Sinuswelle, eine Oktave nach oben
7: Sinuswelle, zwei Oktaven nach oben
Die Oszillatoren 8 –15 entsprechen den Oszillatoren 0–7, jedoch mit eingeschaltetem Portamento.
Wenn BSYNTH1–3 ausgewählt ist
Stellt die Wellenform ein (0.0…10.0). Die Einstellung 0 bedeutet dieselbe Oktave wie die des
Originalsounds. Die Einstellung 10.0 bedeutet eine Wellenform eine Oktave tiefer. Mit dazwischen liegenden Werten wird eine entsprechende Mischung zwischen den beiden Wellenformen eingestellt.
SYN LEV (VOLUME-Regler)
Stellt die Synthesizer-Lautstärke ein (0.0…10.0).
DIR LEV (Wert-Encoder)
Stellt die Gitarren- oder Bass-Lautstärke ein (0.0…10.0).
Der Gitarren-Synthesizer (GSYNTH1–3) ist beim Spielen von Einzelnoten wirksam. Beim Akkordspiel mit ihm ergibt sich kein
einwandfreies Resultat. Der Basssynthesizer (BSYNTH1–3) erzeugt einen trüben Sound, wenn Sie Akkorde spielen.
Der Gitarren-Synthesizer (GSYNTH1–3) erzeugt nicht das erwünschte Resultat, wenn Ihr Instrument nicht richtig gestimmt ist.
Stimmen Sie in diesem Fall bitte Ihr Instrument richtig.
Senken Sie, wenn der Sound auf unangenehme Weise verzerrt ist, „SYN LEV“ und „DIR LEV“, bis der Sound nicht mehr verzerrt ist.
150
CAB: Cabinet modeling
TYPE (π/†CURSOR)
1X8TWD
Dieses Modell simuliert eine offene Box mit einem 8“-Lautsprecher für
Gitarre.
2X10BLK
Dieses Modell simuliert eine offene Box britischer Bauart mit zwei 10“Lautsprechern für Gitarre.
4X10TWD
Dieses Modell simuliert eine offene Box mit vier 10“-Lautsprechern für
Gitarre.
1X12TWD
Dieses Modell simuliert eine offene Box mit einem 12“-Lautsprecher für
Gitarre. Vom Charakter her geeignet für Blues.
1X12VOX
Dieses Modell simuliert eine offene Box britischer Bauart mit einem 12“Lautsprecher für Gitarre.
2X12BLK
Dieses Modell simuliert ein amerikanisches „open back“ Gehäuse mit zwei
12-Zoll-Lautsprechern für Gitarre.
2X12VOX
Dieses Modell simuliert eine offene Box britischer Bauart mit zwei 12“Lautsprechern für Gitarre.
4X12VOX
Dieses Modell simuliert ein VOX-Gitarrengehäuse mit geschlossener Rückwand und vier Neodymium-Lautsprechern.
4X12CLS
Dieses Modell simuliert eine geschlossene Box mit vier 12“-Lautsprechern
à 25 W für Gitarre.
4X12MDN
Dieses Modell simuliert eine geschlossene Box mit vier 12“-Lautsprechern
à 75 W für Gitarre.
4X12VIN
Dieses Modell simuliert eine geschlossene Box mit vier 12“-Lautsprechern
à 30 W für Gitarre.
VALUE (Wert-Encoder und Steuerregler)
PRESENCE: Höhenregelung
(0.0…10.0).
151
TYPE (π/†CURSOR)
152
LA 4X10
Dieses Modell simuliert vier 10-Zoll-Lautsprecher für den LA-Sound.
MDN4X10
Dieses Modell simuliert vier 10-Zoll-Basslautsprecher für einen modernen Sound.
MTL4X10
Dieses Modell simuliert vier 10-Zoll-Aluminiumkegel-Basslautsprecher.
CLS8X10
Dieses Modell simuliert acht klassische 10-Zoll-Basslautsprecher.
UK 4X12
Dieses Modell simuliert vier in Großbritannien gebaute 12-Zoll-Basslautsprecher.
STU1X15
Dieses Modell simuliert ein 15-Zoll-Lautsprecher-Studiobassgehäuse.
JAZ1X15
Dieses Modell simuliert einen 15-Zoll-Lautsprecher-Bassjazzcombo.
AC 2X15
Dieses Modell simuliert ein AC100-Gehäuse mit zwei 15-Zoll-Lautsprechern.
US 2X15
Dieses Modell simuliert zwei in den USA gebaute 15-Zoll-Basslautsprecher.
UK 4X15
Dieses Modell simuliert vier in Großbritannien gebaute 15-Zoll-Basslautsprecher.
LA 1X18
Dieses Modell simuliert einen 18-Zoll-Lautsprecher für den LA-Sound.
COMBI
Dieses Modell simuliert ein Gehäuse mit einem 12-Zoll- und einem 18Zoll-Basslautsprecher.
VALUE (Wert-Encoder)
PRESENCE: Höhenregelung
(0.0…10.0).
MOD: Modulation&Filter Effect Modeling
TYPE (π/†CURSOR)
CHORUS1
Vintage-Chorus mit Ausgabe des Effektsignals über den linken und des
Direktsignals über den rechten Kanal.
CHORUS2
Vintage-Stereo-Chorus mit phasengedrehtem Effektsignal (links/rechts)
für einen weiten, räumlicheren Sound.
FLANG1…3 Flanger mit typischem Vintage-Sound (Feedback-Werte Typ 1/2/3: 0/22/
60 %).
FLANG4
Vintage-Flanger mit Feedback-Phasendrehung.
PHASER1
Bekannter vierstufiger Vintage-Flanger.
PHASER2
Vierstufiger Vintage-Flanger mit extra fetten Mitten.
PHASER3
Zehnstufiger, dezenter Vintage-Flanger.
12STR
Erzeugt einen Sound, der an eine zwölfsaitige Gitarre erinnert.
U-VIBE1
Pedal Vibe-Emulation (Chorus).
U-VIBE2
Pedal Vibe-Emulation (Vibrato).
TREM1
Dezenter Tremolo-Effekt.
TREM2
Typischer Tremolo-Sound von Gitarrenverstärkern.
TREM3
Intensiver Tremolo-Effekt.
AT PAN1
Auto-Pan (LFO: Rechteckwelle
AT PAN2
Auto-Pan (LFO: Sinuswelle
ROTARY1
Leslie-Simulation („Rotary Speaker“).
VALUE (Wert-Encoder)
Einstellung der Modulationsgeschwindigkeit (0.1...10.0 [Hz]).
Stellt die Tiefe des Effekts ein (0.0...10.0).
Einstellung der Modulationsgeschwindigkeit (1.0...10.0 [Hz]).
).
).
Modulationsgeschwindigkeit
(0.1...10.0 [Hz]).
Modulationsgeschwindigkeit
(1.0...10.0 [Hz]).
153
TYPE (π/†CURSOR)
VALUE (Wert-Encoder)
ROTARY2, 3 Leslie-Simulation mit dynamischer Steuerung der Rotorgeschwindigkeit. Einstellung des Umschaltpegels für die
Typ 2: schaltet bei steigender Spieldynamik von langsam nach schnell. Rotorgeschwindigkeit (1.0...10.0).
Typ 3: schaltet bei sinkender Spieldynamik von langsam nach schnell.
154
PITCH1…4
Pitch-Shifter. Der Pegel des Effekts unterscheidet sich zwischen den
Variationen 1, 2 und 3. Variation 4 erzeugt nur den Effekt.
MAJ3UP
Intelligenter Pitchshifter; (große Terz höher)
MAJ3DWN
Intelligenter Pitchshifter; (große Terz tiefer)
MIN3UP
Intelligenter Pitchshifter; (kleine Terz höher)
MIN3DWN
Intelligenter Pitchshifter; (kleine Terz tiefer)
PER4TH
Intelligenter Pitchshifter; (Quarte höher)
PER5TH
Intelligenter Pitchshifter; (Quinte höher)
MAJ6TH
Intelligenter Pitchshifter; (Sext höher)
FEEDBK1, 2
Feedback-Generierung (setzt ein, wenn eine Note über einen längeren Zeitraum gehalten wird). Typ 2: Feedback eine Oktave höher.
FEEDBK3, 4
Feedback-Generierung (konstanter Verlauf bei gehaltener Note). Typ 4: Feedback eine Oktave höher.
FILTER
Tiefpassfilter.
FILTUP1
Tiefpass-Auto-Wah mit positiver Polarität.
FILTUP2
Tiefpass-Filter mit Auto-Wah mit positiver Polarität und starker Spitze.
FILTDN1
Tiefpass-Auto-Wah mit negativer Polarität.
FILTDN2
Tiefpass-Filter mit Auto-Wah mit negativer Polarität und schnellem Ansprechen.
Stärke der Tonohöhenverschiebung (-24, -17,
-12…-1, -d, d, 1…12, 19, 24). [d = Verstimmung]
Die Grundtonart muß spezifiziert
werden (C, C#...A#, B).
Einstellung des Effektpegels (0.0…4.7).
Einstellung der Vibratointensität (5.0…10.0).
Einstellung der Frequenz (1.0…10.0 [Hz]).
Einstellung der Empfindlichkeit
(0.0…10.0).
TYPE (π/†CURSOR)
TALK 1…4
„Talk Box“-Effekt („Sprechende“ Gitarre).
1: YAH-YAH, 2: U-WAH, 3: YOI-YOI , 4: YEAH
RANDOM 1…4 Random Step-Filter mit Zufallsteuerung der Filterbewegungen.
Typ 1, 2, 3 und 4 mit unterschiedlichen Frequenzbereichen.
DRONE1*
DRONE2*
ENVPIT
ENVCHO
VALUE (Wert-Encoder)
Einstellung der Empfindlichkeit
(0.0...10.0).
Einstellung der Modulationsgeschwindigkeit (1.0...10.0 [Hz]).
Ein Drone-Effekt, der einen kontinuierlichen Pitch hinzufügt, ähnlich wie
bei einem Tambura, einem Instrument aus Indien (weicher Effektpegel).
Legen Sie den Drone-Pitch (C,
Ein Drone-Effekt, der einen kontinuierlichen Pitch hinzufügt, ähnlich wie C#...A#, B) fest.
bei einem Tambura, einem Instrument aus Indien (starker Effektpegel).
Ein Hüllkurven-Pitch-Shifter, der die Tonhöhe Ihrem Picking entsprechend
variiert. Legt die Tiefe des Effekts fest.
Legt die Tiefe des Effekts fest
(-15…0…15). Die TonhöhenEin Hüllkurven-Chorus, der ihrer Anschlagsart entsprechend einen Chor- Änderung kann positiv oder
negativ sein.
Effekt erzeugt.
INFFLN1
Ein Flanger, der unaufhörlich ansteigt.
INFFLN2
Ein Flanger, der unaufhörlich abfällt.
Legt die Tiefe des Effekts fest
(0.0...10.0).
INFPIT1, 2
Ein Pitch-Shifter, der unaufhörlich ansteigt oder abfällt. Dies erzeugt den
Eindruck einer niemals endenden Tonhöhen-Änderung bei jedem Input.
Variation 1 beinhaltet den direkten Sound und den Effektsound. Variation
2 beinhaltet nur den Effektsound.
Legt die Tiefe des Effekts fest
(-15…0…15). Positive Werte bewirken
Aufwärtsbewegung, negative
bewirken Abwärtsbewegung.
*: Es ist effektiv, den Drone-Pitch auf die Tonalnota des gespielten Songs oder Solos einzustellen.
155
Der „Intelligente Pitchshifter“
Der intelligente Pitchshifter erzeugt musikalisch passende Harmonien durch eine Variierung der Tonhöhenverschiebung
im Verhältnis zu gespielten Note und Tonart. Wenn Sie beispielsweise einen Pitchshifter selektieren, der die Harmonie
„große Terz höher“ erzeugt (MAJ3UP), wird die Tonhöhenverschiebung automatisch je nach gespielter Note zwischen
einer kleinen Terz (drei Halbtönen) und einer großen Terz (vier Halbtönen) variieren.
• Wenn MAJ3UP mit der Grundtonart C verwendet wird:
Die Tonhöhe wird in (Klammern) angezeigt.
Das PX5D bietet sieben verschiedene Typen des intelligenten Pitchshifters mit den Intervallen Terz (3), Quarte (4), Quinte
(5) und Sext (6). Bei der Terz können Sie auswählen, ob eine kleine Terz (Molltonart) oder eine große Terz (Durtonart)
erzeugt werden, und ob der erzeugte Ton tiefer oder höher als der Originalton liegen soll.
Wenn Ihr Instrument nicht korrekt gestimmt ist, können die Ergebnisse dieses Effekts unsauber klingen. Stimmen Sie in diesem
Fall Ihr Instrument neu.
Der intelligente Pitchshifter arbeitet nur korrekt, wenn Sie einzelne Noten spielen. Der Effekt ist nicht für Akkorde verfügbar.
156
DLY: Delay Modeling
Die einzelnen Delay-Typen (1, 2, 3, 4 und 5) unterscheiden sich u.a. in Bezug auf ihre Feedback-Werte.
Die gewünschte Delay-Zeit bestimmen Sie durch zweimaliges Betätigen des TAP/BYPASS-Tasters im gewünschten Intervall. Die festgelegte Delay-Zeit kann überprüft werden, indem man die TAP/BYPASS-Taste gedrückt hält.
TYPE (π/†CURSOR)
SLAP1…5
VALUE (Wert-Encoder)
Ein Slap-Delay-Effekt, der einen charakteristische kurze kurze Verzögerung erzeugt. Die maximale Delay-Zeit beträgt 500 ms. Die Delay-Zeit beträgt ein Viertel der Zeitspanne, während der Sie TAP-BYPASS drücken.
ECHO 1…5
Bandecho-Simulation für besonders warmen Sound.
CLRDLY1…5
Ein Delay mit klarem Klang, typisch für digitale Delay-Einheiten. Maximale Delay-Zeit: 1 Sekunde.
PPDLY1…5
Ping-Pong-Delay („Dual-Tap-Delay“ mit zweifachem Signalabgriff; lässt
den Sound zwischen links und rechts hin und her „wandern“).
MULTI1…5
Spezielle Stereo-Bandecho-Simulation (zwei Tonköpfe) für das Extra an
räumlicher Tiefe.
RVSDLY
Ein Reverse-Delay-Effekt (Rückwärtswiedergabe). Maximale Delay-Zeit: 1 Balance zwischen dem Effekt- und
Originalsignal (0.0…10.0).
Sekunde.
Effektpegel (0.0…10.0).
157
REV: Reverb Modeling
TYPE (π/†CURSOR)
158
DRYAIR
Hall-Effekt, der ein Gefühl extrem trockener Luft erzeugt.
WETAIR
Hall-Effekt, der ein Gefühl extrem feuchter Luft erzeugt.
ROOM1
Besonders höhenreicher Room-Effekt.
ROOM2
Sanfter Room-Effekt.
PLATE1
Harter Plate-Effekt.
PLATE2
Besonders höhenreicher Plate-Effekt.
HALL1
Raumtyp: mittelgroße Halle.
HALL2
Raumtyp: große Halle.
SPRING1
Typischer Gitarrenverstärker-Federhall.
SPRING2
Besonders dichter Federhall.
BRIGHT
Ein Reverb-Effekt, der einen hell schillernden Nachhall erzeugt.
VALUE (Wert-Encoder)
Effektpegel (0.0…10.0).
Parameterliste der Preset-Programme
No.
P00
P01
P02
P03
P04
P05
P06
P07
P08
P09
P10
P11
P12
P13
P14
P15
P16
P17
P18
P19
Name
METALIC
BLUEYES
PARALIZ
VOXTREM
COHEED
BOWATTK
WHITERM
FAB4
WHOKIDS
MUDD
FLOYD
AUDIO
MR SG
STRATO
SCORPS
WINTER
SUBSYNT
LINKIN
CHARLOT
SHADOWS
No.
P20
P21
P22
P23
P24
P25
P26
P27
P28
P29
P30
P31
P32
P33
P34
P35
P36
P37
P38
P39
Name
GMBLUES
SRV
SUPACLN
COUNTRY
BLUES
JAZZY
SURF
POP
ROCK
METAL
VOX WAH
OVERDRV
STONED
ACOUSTC
CRY WAH
ASCEND
CHORUS
FIRE
12STRNG
PIEZO
No.
P40
P41
P42
P43
P44
P45
P46
P47
P48
P49
P50
P51
P52
P53
P54
P55
P56
P57
P58
P59
Name
RESO
FEEDBKR
SITAR
SPACED
MEOW
DIALUP
FILTER
ROTARY
DELAYED
REVERSE
BATTERY
CRUSHD
RAGE'D
DRENCHD
CMPLEAD
BIGLEAD
RAVECHO
MDNJAZZ
ROKABLY
MEGAMID
No.
P60
P61
P62
P63
P64
P65
P66
P67
P68
P69
P70
P71
P72
P73
P74
P75
P76
P77
P78
P79
Name
STUTTER
LASHRED
VOXSLAP
ROTODRV
ARENA
WELL
DOC OCT
NOTRITE
ILL
YAPPY
B BLUES
B MOTWN
B JAZZ
B RNB
B CNTRY
B ROCK
B METAL
B FUNK
B DRIVE
B TREM
No.
Name
P80
P81
P82
P83
P84
P85
P86
P87
P88
P89
P90
P91
P92
P93
P94
P95
P96
P97
P98
P99
B FILTR
B CHORD
B SOLO
B PICKR
B SYNTH
B TAP
B HARM
B OCT
B FING
B THUMB
B FRETB BEND
B FROG
B JUICE
B REV
B PEEPS
B THICK
B TAPIT
B SCOOP
B FUZZY
00…69: Gitarrenprogramm, 70…99: Bassprogramm
159
Auflistung der Rhythmus-Patterns
No.
1
2
3
4
5
6
7
8
9
10
11
12
13
14
15
16
17
18
19
20
21
22
160
Name
MTRONM0
MTRONM2
MTRONM3
MTRONM4
MTRONM5
MTRONM6
MTRONM7
MTRONM9
8BEAT1
8BEAT2
8BEAT3
16BEAT1
16BEAT2
16BEAT3
16BEAT4
16BEAT5
16BTSW1
16BTSW2
16BTSW3
16BTSW4
16BTSW5
2/4 1
No.
23
24
25
26
27
28
29
30
31
32
33
34
35
36
37
38
39
40
41
42
43
44
Name
2/4 2
2/4 3
2/4 4
2/4 5
2/4 6
2/4 7
3/4 1
3/4 2
3/4 3
3/4SWG1
3/4SWG2
5/4
3/8 1
3/8 2
5/8
6/8 1
6/8 2
6/8 3
6/8 4
7/8 1
7/8 2
9/8
No.
45
46
47
48
49
50
51
52
53
54
55
56
57
58
59
60
61
62
63
64
65
66
Name
POP1
POP2
ROCK1
ROCK2
ROCK3
ROCK4
ROCK5
R'N'R
METAL1
METAL2
METAL3
METAL4
R'N'B1
R'N'B2
R'N'B3
R'N'B4
BLUES1
BLUES2
8BLUES
BLUESFL
COUNTRY
CNTRYS1
No.
67
68
69
70
71
72
73
74
75
76
77
78
79
80
81
82
83
84
85
86
87
88
Name
No.
Name
No.
CNTRYS2
JAZZ1
JAZZ2
JAZZ3
JAZZ4
FNKRCK1
FNKRCK2
HVYFUNK
JB 1
JB 2
NJCKSWG
MOTOWN1
MOTOWN2
MOTOWN3
MOTOWN4
SURF
REGGAE1
REGGAE2
REGGAE3
BOLERO
DISCO1
DISCO2
89
90
91
92
93
94
95
96
97
98
99
100
101
102
103
104
105
106
107
108
109
110
DISCO3
GOGO1
GOGO2
GOGO3
HOUSE1
HOUSE2
HOUSE3
D'N'B 1
D'N'B 2
SKA1
SKA2
SKA3
2NDLINE
FILLS01
FILLS02
FILLS03
FILLS04
FILLS05
FILLS06
FILLS07
FILLS08
FILLS09
111
112
113
114
115
116
117
118
119
120
121
122
123
124
125
126
127
128
Name
FILLS10
FILLS11
FILLS12
3/4FILS
LATIN1
LATIN2
BOSSA1
BOSSA2
SAMBA1
SAMBA2
RUMBA
AFRO1
AFRO2
CLYPSO1
CLYPSO2
SONGO
LP II
LP III
Fehlersuche
Wenn das PX5D nicht wie erwartet funktioniert, überprüfen Sie bitte zuerst die folgenden Punkte. Falls sich damit
das Problem nicht lösen läßt, setzen Sie sich mit Ihrem Fachhändler oder einem Korg Kundendienst in Verbindung.
1. Das Gerät läßt sich nicht einschalten.
• Sind Batterien eingelegt? Oder ist der Wechselstromadapter mit einer Netzsteckdose verbunden?
2. Keine Klänge hörbar
• Sind Ihre Gitarre, Ihr Verstärker und/oder Ihre Kopfhörer an die richtigen Buchsen angeschlossen?
• Ist Ihr Verstärker eingeschaltet und richtig eingestellt?
• Ist ein Kabel defekt?
• Ist Master Level des PX5D auf „0“ oder einen niedrigen Pegel eingestellt?
• Vergewissern Sie sich, ob der Lautstärkeregler auf die
gewünschte Lautstärke eingestellt ist.
• Ist das PX5D stummgeschaltet?
Wenn alle Effekte ausgeschaltet sind, verschwindet die
Effektketten-Anzeige und die Bypass- und Stummschaltung ist auf dem LCD-Display nicht mehr erkennbar.
• Wird im LCD „AUX>USB“ im Utility-Modus angezeigt?
Wenn „AUX>USB“ angezeigt wird, ist der Gitarrenausgang stummgeschaltet.
• Ist die Lautstärke Ihres Instruments zurückgedreht?
3. Die Lautstärke des an den AUX-Eingängen angeschlossenen Geräts ist zu hoch oder niedrig, oder das
Signal ist überhaupt nicht zu hören.
• Stellen Sie die Ausgangslautstärke am angeschlossenen Gerät ein.
Verbinden Sie das Gerät über den Kopfhörerausgang
(statt über die Summenausgänge) mit dem PX5D.
• EIst der Phrase Trainer-Modus aktiviert?
Verlassen Sie den Phrase Trainer-Modus.
4. Das Signal scheint nicht mit Effekten bearbeitet zu
werden.
• Befindet sich das PX5D im Bypass-Modus (in diesem
Fall blinken die Effekt-LEDs)?
• Werden die gewünschten Effekte im selektierten Programm verwendet?
5. Der Tuner funktioniert nicht.
• Ist im Play-Modus die Bypass- oder Stummschaltung
aktiviert?
161
6. Installation der Software nicht möglich
• Befindet sich die CD-ROM in Ihrem CD-Laufwerk?
Stellen Sie sicher, dass die CD-ROM richtig ins CDROM-Laufwerk eingelegt ist.
• Ist die Linse Ihres CD-Laufwerks möglicherweise verschmutzt?
Verwenden Sie zur Reinigung der Linse einen im Handel erhältlichen Linsenreiniger.
• Versuchen Sie, von einem Netzwerk-CD-Laufwerk aus
zu installieren?
Diese Software kann nicht von einem über ein Netzwerk
verbundenen CD-Laufwerk aus installiert werden.
• Können Sie USB verwenden?
Gehen Sie, wenn Sie Windows XP verwenden, zu [Systemsteuerung] → [System] und wählen Sie die Registerkarte [Hardware]. Überprüfen Sie im [Gerätemanager] die Einstellungen für Universal Serial Bus Controller und USB Root Hub.
7. Aufnahme mit der USB-Audio-Funktion nicht möglich. Oder der Aufnahmepegel ist zu niedrig (zu hoch).
• Verwenden Sie die Utility-Modus-Einstellung
„USBSEND“ zur Justierung des Eingangspegels zu
Ihrem Computer (☞S. 143).
162
8. Wiedergabe mit der USB-Audio-Funktion nicht möglich. Oder der Wiedergabepegel ist zu niedrig (zu hoch).
• Verwenden Sie die Utility-Modus-Einstellung „USB
RCV“ zur Justierung des Eingangspegels zum PX5D
(☞S. 143).
9. Ihre Software reagiert nicht auf das PX5D
• Ist das USB-Kabel richtig angeschlossen?
• Haben Sie den erforderlichen Treiber installiert?
• Hat Ihr Computer das angeschlossene PX5D erkannt?
Gehen Sie bei Verwendung von Windows XP zu Systemsteuerung → „Sound und Audiogeräte Eigenschaften“ und klicken Sie auf die Hardware-Registerkarte.
Gehen Sie bei Verwendung von Mac OS X zu Macintosh HD → Anwendungen-Ordner → Utility-Ordner
→ „Audio-MIDI-Einstellungen“, wählen Sie die Registerkarte „MIDI-Geräte“ und überprüfen Sie, ob das
PX5D erkannt wurde.
• Möglicherweise unterstützt das angeschlossene Gerät
oder die Software die von Ihnen übermittelten Meldungen nicht. Schlagen Sie im Benutzerhandbuch des angeschlossenen Geräts oder der Software nach und vergewissern Sie sich, ob das Gerät oder die Software geeignet ist, auf die von Ihnen übermittelten Meldungen
zu reagieren.
Technische Daten
● Effektvariation: 180 Effektvariationstypen (maximal
7 Effekte gleichzeitig erzeugbar)
● Programmanzahl
• User-Programme: 100
• Preset-Programme: 100
● Eingang:
• Gitarren/Bass-eingang (1/4”-Buchse)
• AUX (Mini-Stereoklinkenbuchse)
● Ausgang: Line/Kopfhörer Mehrzweck-Ausgang (1/
4” Stereo-Buchse)
● Stromversorgung:
• vier AA-Batterien
7 Stunden Dauerbetrieb: Hintergrundbeleuchtung OFF
5 Stunden Dauerbetrieb: Hintergrundbeleuchtung ON
• Stromversorgung über USB-Bus (bei Verwendung
des USB-Anschlusses
• optional erhältliches Netzgerät (DC4.5V:
)
● Abmessungen (BxTxH): 118 mm x 75 mm x 20 mm
● Gewicht: 154g (ohne Batterien)
● Anschlüsse für Spielhifen:
• FOOT SW-Buchse
• USB-Anschluss
● Im Lieferumfang enthalten:
• Bedienungsanleitung
• Zwei AA-Alkalibatterien zur Funktionsprüfung
• CD-ROM
• Kabel für FOOTSW-Anschluss
● Tuner-Sektion:
• Erkennungsbereich: 27,5 Hz–2.093 Hz (A0…C7)
• Kalibrierung: A = 438–445 Hz
● Optional:
• Netzteil
• KORG PS-1 Pedalschalter
● Rhythm Section:
• Nummer des Musters: 774 einschließlich MusterVariationen
• Tempo: 40–240 BPM
Änderungen, die dem technischen Fortschritt dienen, Können
jederzeit ohne Ankündigung vorgenommen werden.
163
安全上のご注意
ご使用になる前に必ずお読みください
ここに記載した注意事項は、製品を安全に正しくご使用いただき、あ
なたや他の方々への危害や損害を未然に防ぐためのものです。
注意事項は誤った取り扱いで生じる危害や損害の大きさ、
または切迫
の程度によって、
内容を「警告」、
「注意」の2つに分けています。これ
らは、あなたや他の方々の安全や機器の保全に関わる重要な内容で
すので、よく理解した上で必ずお守りください。
火災・感電・人身障害の危険を防止するには
図記号の例
記号は、注意(危険、警告を含む)を示しています。記
号の中には、具体的は注意内容が描かれています。左の
図は「一般的な注意、警告、危険」を表しています。
記号は、禁止(してはいけないこと)を示しています。
記号の中には、
具体的な注意内容が描かれることがありま
す。左の図は「分解禁止」を表しています。
記号は、強制(必ず行うこと)を示しています。記号の
中には、具体的な注意内容が描かれることがあります。左
の図は「電源プラグをコンセントから抜くこと」を表して
います。
164
以下の指示を守ってください。
警告
この注意事項を無視した取り扱いをすると、
死亡や重傷を負う可能性が予想されます
・ACアダプターのプラグは、必ずAC100Vの電源コンセント
に差し込む。
・ACアダプターのプラグにほこりが付着している場合は、ほこ
りを拭き取る。
感電やショートの恐れがあります。
・本製品はコンセントの近くに設置し、ACアダプターのプラグ
へ容易に手が届くようにする。
・次のような場合には、直ちに電源を切ってACアダプターの
プラグをコンセントから抜く。
○ ACアダプターが破損したとき
○ 異物が内部に入ったとき
○ 製品に異常や故障が生じたとき
修理が必要なときは、
コルグ・サービス・センターへ依頼して
ください。
・本製品を分解したり改造したりしない。
・修理、部品の交換などで、取扱説明書に書かれている以外の
ことは絶対にしない。
・ACアダプターのコードを無理に曲げたり、発熱する機器に近づけ
ない。また、ACアダプターのコードの上に重いものをのせない。
コードが破損し、感電や火災の原因になります。
・大音量や不快な程度の音量で長時間使用しない。
大音量で長時間使用すると、難聴になる可能性があります。
万一、聴力低下や耳鳴りを感じたら、
専門の医師に相談してく
ださい。
・本製品に異物(燃えやすいもの、硬貨、針金など)を入れない。
・温度が極端に高い場所(直射日光の当たる場所、暖房機器の
近く、発熱する機器の上など)で使用や保管はしない。
・振動の多い場所で使用や保管はしない。
・ホコリの多い場所で使用や保管はしない。
・風呂場、シャワー室で使用や保管はしない。
・雨天時の野外のように、湿気の多い場所や水滴のかかる場所
で、使用や保管はしない。
・本製品の上に、花瓶のような液体が入ったものを置かない。
・本製品に液体をこぼさない。
・濡れた手で本製品を使用しない。
注意
この注意事項を無視した取り扱いをすると、傷害を負う可能性
または物理的損害が発生する可能性があります
・正常な通気が妨げられない所に設置して使用する。
・ラジオ、テレビ、電子機器などから十分に離して使用する。
ラジオやテレビ等に接近して使用すると、本製品が雑音を受
けて誤動作する場合があります。また、
ラジオ、テレビ等に雑
音が入ることがあります。
・外装のお手入れは、乾いた柔らかい布を使って軽く拭く。
・ACアダプターをコンセントから抜き差しするときは、必ずプ
ラグを持つ。
・長時間使用しないときは、電池の液漏れを防ぐために電池を
抜く。
・電池は幼児の手の届かないところへ保管する。
・長時間使用しないときは、ACアダプターをコンセントから抜く。
・指定の ACアダプター以外は使用しない。
・他の電気機器の電源コードと一緒にタコ足配線をしない。
本製品の定格消費電力に合ったコンセントに接続してください。
・電池を過度の熱源(日光、火など)にさらさない。
・スイッチやツマミなどに必要以上の力を加えない。
故障の原因になります。
・外装のお手入れに、ベンジンやシンナー系の液体、コンパウ
ンド質、強燃性のポリッシャーは使用しない。
・不安定な場所に置かない。
本製品が転倒してお客様がけがをしたり、本製品が故障する
恐れがあります。
・本製品の上に乗ったり、重いものをのせたりしない。
本製品が転倒または損傷してお客様がけがをしたり、本製品
が故障する恐れがあります。
* MIDI は社団法人音楽電子事業協会(AMEI)の登録商標です。
* 記載されているすべての製品名および会社名は、各社の商標また
は登録商標です。
165
目次
はじめに ........................................... 168
主な特長 ........................................... 168
電池の入れ方 ..................................... 169
各部の名称と機能 .............................. 170
LCD の表示 ............................................................. 172
接続しよう ......................................... 173
リズム&ベース・モード ....................... 181
PTN(パターン・プレイ)........................................ 181
CHAIN(チェイン・プレイ).................................... 183
SONG(ソング・プレイ)........................................ 185
フレーズ・トレーナー・モード ............... 187
録音モードの選択 ................................................... 187
録音中 ...................................................................... 188
再 生 .......................................................................... 189
一時停止 .................................................................. 189
保 存 .......................................................................... 189
コンピューターとの接続 ......................................... 175
エディター・ソフトを使用する .................................. 175
エディット・モード .............................. 190
オーディオ・データをやり取りする .......................... 175
エディットするエフェクト等の選択 ........................ 190
各エフェクトのエディット ........................................ 190
音を出してみよう ............................... 177
DYNA: ダイナミクス&ピックアップ・モデリング .... 190
クイック・エディット ................................................. 177
AMP: アンプ・モデリング ........................................ 191
プレイ・モード .................................... 178
CAB: キャビネット・モデリング ................................ 191
プログラムの選択 ................................................... 178
マスター・レベル ..................................................... 178
バイパス / ミュート .................................................. 179
チューナー ............................................................... 179
バリュー・エンコーダ機能設定 ............................... 180
キー・ロック設定 ..................................................... 180
166
MOD: モジュレーション&
フィルター・エフェクト・モデリング ........................... 192
DLY: ディレイ・モデリング ....................................... 192
DLY: ディレイ・タイム .............................................. 192
REV: リバーブ・モデリング ...................................... 192
NR: ノイズ・リダクション .......................................... 193
ユーティリティ・モード ........................ 194
MOD: モジュレーション&
フィルター・エフェクト・モデリング ........................ 207
DLY: ディレイ・モデリング ..................................... 211
REV: リバーブ・モデリング .................................... 212
ユーティリティの選択 .............................................. 194
各ユーティリティの設定 .......................................... 194
プリセット・プログラム・リスト ............. 213
BACKLIT: LCD バックライト ................................. 194
リズム・パターン・リスト ..................... 214
RENAME: リネーム ................................................ 193
WRITE: ライト ......................................................... 193
KEY-TRN: キー・トランスポーズ ........................... 194
KTR+BC: キー・トランスポーズ+ ベース・キャンセル
故障かな?と思ったら ......................... 215
.................................................................................. 195
仕 様 ................................................. 217
AMP/LIN: アンプ/ライン・セレクト ....................... 195
FOOTSW : フット・スイッチの設定 ........................ 196
USBSEND: USBセンド・レベル ........................... 197
USB RCV: USBレシーブ・レベル ........................ 197
AUX>USB: USBオーディオ・インターフェイス ... 197
MIDDRUM: MIDIドラム&ベース .......................... 198
工場出荷時のデータのロード ............... 198
エフェクト・パラメーター・リスト .......... 199
DYNA: ダイナミクス・エフェクト&
ピックアップ・モデリング ......................................... 199
AMP: アンプ・モデリング ...................................... 201
CAB: キャビネット・モデリング ............................. 205
167
はじめに
このたびは、
コルグ・パーソナル・マルチ・エフェクト・プロ
セッサーPANDORA PX5Dをお買い上げいただきまして、誠
にありがとうございます。PX5Dを末永くご愛用いただくため
にも、取扱説明書をよくお読みになって正しい方法でご使用
ください。また、取扱説明書は大切に保管してください。
主な特長
PX5D は、コンパクトなサイズながら、ギター / ベース用のアン
プ、エフェクトを兼ね備えた多機能なマルチ・エフェクターです。
”による、緻密で迫
コルグのモデリング・テクノロジー“
力のあるモデリング・サウンドが手軽に楽しむことができます。
エディットできる 180タイプのエフェクト
最大 7 種類のエフェクトを同時に使用できます。
IPE (Integrated Parameter Edit)システム
プログラムを簡単にエディットできます。
100 ユーザー、100プリセット・プログラム
コントロール・ダイヤル
18 タイプのギター・アンプ・モデリング、10タイプのベー
ス・アンプ・モデリング、6タイプのシンセをすばやくエディッ
トすることができます。
168
バックライト
暗い所でも LCD の表示を確認することができます。
オート・チューナー機能
すばやくチューニングできます。音を出さずにチューニング
することもできます(ミュート機能)。
リズム&ベース機能
128種類のリズム&ベース・パターンやクリック音を鳴らすこと
ができます。最大16個のパターンをつなげることもできます。
フレーズ・トレーナー機能
AUX 端子や USB 端子に接続した音源、INPUT 端子に接
続したギター(ベース)で弾いたフレーズ、
リズム&ベース・
モードで設定したリズム・パターンを録音してループ再生す
ることができます(最大約80秒間)。ループ再生時、
ピッチ
を固定して再生スピードを落とすことができます。また、ギ
ターやベースで弾いたフレーズと、
リズム&ベース・モード
のリズム・パターンを同時に録音することもできます。
AUXピッチ機能
AUX端子やUSB端子からの入力音に対してピッチ(音の
高さ)を変更したり
(キー・トランスポーズ)、低音域をキャ
ンセルすることができます(ベース・キャンセル)。ベース・
キャンセルは、ベース練習時に威力を発揮します。
TAP/BYPASS ボタン
曲のテンポに合わせたディレイ・タイムや、
リズム&ベース・
モードの演奏テンポを設定できます。
バリュー・エンコーダ
エフェクトのエディットやプログラムの選択等をすばやく行
うことができます。
電池の入れ方
ケース裏側の電池カバーを、矢印の方向にスライドして外
します。単3形アルカリ乾電池(付属)2本を図のように入
れます。電池の向きを間違えないように注意してください。
USB-MIDI、USB オーディオ・インターフェイス機能
付属のUSBケーブルでPX5Dとコンピューターを接続すると、
エディター・ソフト*でPX5Dをエディットしたり、
コンピューター
とオーディオ・データをやり取りすることができます。
*: エディター・ソフトは、
コルグ・ホームページ(http://
www.korg.co.jp/)からダウン・ロードしてください
(2007 年 10月開始予定)。
とは?
(Resonant structure and Electronic circuit
Modeling System)は、生楽器や電気/電子楽器の発音
メカニズム、発音された音がボディー/キャビネットで共鳴
するメカニズム、その音が出ているフィールドの空気感、
音の伝達経路としてマイク、スピーカなどの電気/音響的
特性、真空管、
トランジスタなどの電気回路による音の変
化など、音色に関わる様々な要因を緻密にデジタルで再
現したコルグ独自のモデリングテクノロジーです。
バッテリー・エンプティ表示
電池容量が少なくなると、LCDにバッテリー・エンプティ・ア
が表示されます。バッテリー・エンプティ・アイコ
イコン
ンが表示されたときは、
なるべく早く電池を交換してくださ
い。電池を外しても、
ライトしているプログラム等(エディッ
ト中のものは除く)の設定は消えません。
ACアダプターは付属されていません。別途にお買い
求めください。
使えなくなった電池は、すぐに取り出してください。そ
のままにしておくと、故障の原因(電池の液漏れ等)と
なります。また、長時間ご使用にならないときも、電池
を取り出しておいてください。
169
各部の名称と機能
7
6
5
4
3
2
1
8
9
19
10
18
11
17
12
13
14
15
5. パワー・スイッチ
電源をオン / オフします。
STANDBY: 電源オフです。
ON: 電源オンです。
USB: 電源オンです。USBケーブルでコンピューターと接
続したときに、
コンピューターからのバス・パワーで電源が
供給されます。
コンピューターによっては、バス・パワーで電源が供給
できない場合があります。そのときはセルフ・パワー
(外部から電源を供給できるタイプ)のハブ、電池また
はACアダプターを使用してください。
16
1. INPUT 端子
ギター(ベース)を接続します。
6. FOOT SW 端子
付属のフット・スイッチ端子用ケーブルを使用してフット・ス
イッチを接続します。
2. AUX 端子
CDプレーヤー等を接続します。
7. OUTPUT 端子
ギター(ベース)
・アンプ、ヘッドホン等を接続します。
3. INPUT スイッチ
ギター(ベース)の出力に合わせて設定します(☞p.177)。
8. LCD
☞p.172“LCD の表示”
4. コントロール・ダイヤル
アンプ・モデリングのゲイン、
トーン、音量をコントロールしま
す。
170
9. CURSOR ( カーソル )
プログラムの選択、エディットするパラメーターの選択、
フ
レーズ・トレーナーの操作等に使用します。
10. DC4.5V端子
別売のACアダプター(コルグ KA191 DC4.5V
を接続します。
11. RHYTHM ボタン
リズム&ベース・モードに入ります(☞p.181)。
16. EXIT ボタン
プレイ・モードや1 つ前の画面に戻ります。
17. TAP/BYPASS ボタン
ディレイ・モデリングのディレイ・タイムや(☞p.177)、
リズ
) ム&ベ ー ス・モ ードで のリズム のテンポを 設 定します
(☞p.182)。また、
プレイ・モードでは、
ボタンを押すことに
よってバイパスやミュートになり、
チューナーが動作します
(☞p.179)。
12. PHRASE TRAINER ボタン
フレーズ・トレーナー・モードに入ります(☞p.187)。
13. UTILITY ボタン
ユーティリティ・モードに入ります(☞p.194)。
14. PROGRAM MEMORY [A] [B] [C] [D] ボタン
気に入ったプログラムを4つのボタン(A∼D)に割り当て
ます(☞p.178)。
18. USB 端子
付属のUSBケーブルを使用してコンピューターと接続し、
エディター・ソフトでPX5Dのプログラム等をエディットした
り、オーディオ・データをやりとりします。
19. バリュー・エンコーダ
マスター・レベルの調整、エフェクト・パラメーターのエ
ディット、
プログラムの選択等に使用します。
15. ENTER/REC ボタン
エフェクトのオン/オフ、
リズム&ベース・モードのチェイン・
エディット、
フレーズ・
トレーナー・モードの録音を開始すると
きなどに使用します。
171
LCD の表示
9
1
2
8
3
4
5
6
7
1. エフェクト・チェイン
DYNA、AMP、CAB、MOD、DLY、REV の各エフェクトのオ
ン/オフを表示します。
2. プログラム / エフェクト・タイプ・ディスプレイ
プログラム名やエフェクト・タイプ等を表示します。また、バ
イパスやミュート時にはチューナーのメーターになります。
3. USB アイコン
付属のUSBケーブルでPX5Dとコンピューターを接続した
ときに表示されます。
4. バッテリー・エンプティー・アイコン
電池容量が少なくなったときに表示されます。
172
5. モード・アイコン
各モードに入ったときに表示されます。
6. プログラム・ナンバー /バリュー・ディスプレイ
プログラム・ナンバー、
マスター・レベル、
パラメーターの値
等を表示します。
7. オリジナル・バリュー・アイコン
エディットしているパラメーターやその値が、
プログラムに
ライトされている値と一致したときに表示されます。
8. バー・グラフ
プレイ・モードやエディット・モードでは、
マスター・レベルや
パラメーターの値を表示します。リズム・モードでは、
プレイ
バックしているリズム・パターンに合わせて表示が変化しま
す。
9. バリエーション・アイコン(VARI1, VARI2)
リズム・モードで使用しているリズム・パターンやベース・パ
ターンのバリエーションを表示します(☞p.182)。
接続しよう
接続する機器の電源はオフにし、各ボリュームは下げておいてください。
フット・スイッチ *5
CDプレーヤー等 *2
ギター(ベース)
ヘッドホン *4
オーディオ機器
*3
ギター(ベース)
・アンプ
*6
*7
コンピューター
レコーダー等
ACアダプター*1
173
*1 ACアダプターを使用する場合は、必ず指定のものを
使用してください。
(別売 ACアダプター:コルグ
)
KA191 DC4.5V
*2 AUX端子にCDプレーヤー等を接続すると、音楽に合
わせてギター(ベース)を演奏することができます。音
量は、接続機器側で調整してください。
接続ケーブルは別売です。
*3 OUTPUT はステレオ出力です。モノラル標準ケーブ
ルでアンプ等に接続したときは、Lチャンネル(左側)の
音のみが出力されます。
*4 使用するヘッドホンによっては、音量、音質が多少異
なって聞こえることがあります。PX5D のサウンドを十
分お楽しみいただくために、なるべく性能の良いヘッド
ホンを使用してください(インピーダンス32Ω以下、出
力音圧レベル 100dB/mW 以上推奨)。
*5 PX5Dと別売のフット・スイッチを接続する場合は、付属
のフット・スイッチ端子用ケーブルを使用してください。
コルグPS−1(別売)などのフット・スイッチを 2 台接
続することができます。ユーティリティ・モードでフット・
スイッチの機能を設定することによって、
プログラムを
切り替えやフレーズ・トレーナー・モードの録音や再生
174
のスタート/ストップを行うことができます(☞p.178
「フット・スイッチによるプログラムの選択」、☞p.196
「 FOOT SW 」)。
*6 PX5Dとコンピューターを接続する場合は、付属のUSB
ケーブルを使用します。コンピューターとの接続につい
ては、
「コンピューターとの接続」を参照してください
(☞p.175)。
*7 必要に応じて付属のゴム足を PX5D の裏側に取りつけ
てください。
コンピューターとの接続
付属のUSBケーブルでPX5Dとコンピューターを接続する
と、エディター・ソフトで PX5D をエディットしたり、PX5Dを
USBオーディオ・インターフェイスとして使用することがで
きます。
エディター・ソフトを使用する
コンピューターにKORG USB-MIDIドライバをインストー
ルすると、専用のエディター・ソフトでエフェクト・プログラム
のエディット、ライブラリー管理、
リズム&ベース・モードの
チェイン作成を行うことができます。
エ ディター・ソフトは 、ホ ー ム・ペ ー ジ( h t t p : / /
www.korg.co.jp/)からダウン・ロードしてください。ま
た、エディター・ソフトのインストールや使用方法について
は、エディター・ソフトの取扱説明書を参照してください。
エディター・ソフトを使用するには、
コンピューターに
KORG USB-MIDIドライバをインストールする必要が
あります(☞CD-ROM 「ソフトウェアのインストー
ル」)。
オーディオ・データをやり取りする
PX5D とコンピューターを U S B ケーブルで接続すると、
リズム&ベース・モードのリズム音、
PX5Dのエフェクト出力、
フレーズ・トレーナー・モードで録音したフレーズを、DAW
ソフトウェアのオーディオ・トラックに直接録音することなど
が可能になります。また、D A W ソフトウェアの再生音を
PX5Dでモニターすることなども可能になります。
コンピューターがWindows XPの場合、USB端子を
使用してオーディオ・データをやり取りするときは、付
属CD-ROMに収録されているKORG USB-ASIOド
ライバをコンピューターにインストールすることをおす
すめします。KORG USB-ASIOドライバのインストー
ルについては、付属 CD-ROM に収録されている「ソ
フトウェアのインストール」を参照してください。
コンピューターと接続したときの信号の流れは、
以下のよう
になります。
OUTPUT
PX5D
Rhythem&Bass
INPUT
Effect
Phrase Trainer
USB
USB端子からの入力音に対しては、PX5Dのエフェクト
はかかりません。
175
PX5D の OUTPUT 端子から出力されるオーディオ信号の
音量は、マスター・レベルで調節します(☞p.178「マス
ター・レベル」)。
PX5DのUSB端子からコンピューターへ入力する信号の音
量は、ユーティリティ・モードの“USB SEND”で調節しま
す(☞p.197「USBSEND」)。
コンピューターからPX5D に入力される信号の音量レベル
は、ユーティリティ・モードの“ USB RCV ”で調節します
(☞p.197「USB RCV」)。
通常、AUX 端子から入力された信号は、USB 端子へ
は送られません。AUX 端子から入力された信号をコ
ンピューターへ送る場合は、ユーティリティ・モードの
“ A U X > U S B ”の画面を表示させます(☞p . 1 9 7
「AUX>USB」)。
PX5Dのエフェクト出力等を DAWソフトウェアのオー
ディオ・トラックに録音する場合は、エコーバックを防ぐ
ためにソフトウェアのオーディオ・イン・スルー機能をオ
フにしてください。
使用するDAWソフトウェアの操作方法等については、
ソフトウエアに付属の取扱説明書を参照してください。
176
音を出してみよう
1
接続を終えたら、パワー・スイッチを“ON”にします。
この状態をプレイ・モードと呼びます。CURSOR π /†
でプログラムを選びます。
2
使用するギター(ベース)の出力の大きさに合わせて、
INPUT スイッチを切替えます。
Hi: ベースや、出力の大きいピックアップ(ハムバッキン
グ・タイプやプリアンプ付きのピックアップ等)を搭載し
たギター。
Lo: 出力の小さいピックアップ(シングル・コイル・タイプ
のピックアップ等)を搭載したギター。
3
ギター(ベース)のボリュームを、通常演奏する程度にし
て弾き、バリュー・エンコーダでマスター・レベルを調整
します。
TAP/BYPASSボタンを複数回押すと、その間隔でディレイ・モ
デリングのディレイ・タイムが設定できます(リズム&ベース・
モードのときは除く)。ディレイ・タイムを設定 すると、バ
リュー・ディスプレイに数秒間ディレイ・タイムが表示されます。
アンプのゲイン、音質、音量
入力レベルの切替え
プログラム名
マスター・レベル
の調整
プログラムの
選択
ディレイ・タイム
の設定
プログラム・
ナンバー
クイック・エディットした設定は、
ライトしないでプログ
ラムを切り替えたり、電源をオフにすると、元のプログ
ラムの設定に戻ります(☞p.193「WRITE」)。
クイック・エディット
各モード(ミュート、
バイパス、
キー・ロック時を除く)のとき、
コントロール・ダイヤルでアンプ・モデリングのゲインや音
質、音量を調整できます。コントロール・ダイヤルを操作す
ると、パラメーター名と値がLCDに数秒間表示されます。
元の設定と一致したときは、
オリジナル・バリュー・アイコン
が表示されます。
177
プレイ・モード
通常の演奏を行うモードです。
プログラムの選択
CURSOR π /†を押して、プログラムを選びます。プログラ
ム / エフェクト・タイプ・ディスプレイにプログラム名、バ
リュー・ディスプレイにプログラム・ナンバーが表示されます。
プログラムは、100 個のユーザー・プログラム(U00 ∼
U99)と100個のプリセット・プログラム(P00∼P99)
から選択でき、
リズム&ベース、
フレーズ・トレーナー(録音
中は除く)、ユーティリティ
(一部の設定画面を除く)の各
モードに入っているときでも選択可能です。
2
PROGRAM MEMORY[A]ボタンを約 1 秒間押した
ままにします。
LCDに“PGM> A”と表示され、
[A]ボタンにプログラ
ムが割り当てられます。
PROGRAM MEMORY[A]∼[D]ボタンに割り当て
られた4つのプログラムを、FOOT SW端子に接続した
フット・スイッチで切り替えることができます(☞p.196
「FOOTSW」)。
フット・スイッチによるプログラムの選択
PX5D の FOOT SW 端子にフット・スイッチを接続し、ユーティ
リティ・モードでフット・スイッチ機能を設定すると、
フット・スイッ
チでプログラムを切り替えることができます。
PROGRAM MEMORY [A] ∼ [D] ボタン
付属のフット・スイッチ端子用ケーブルを使用してフット・ス
4つのプログラムをPROGRAM MEMORY[A]∼[D]ボ
イッチを接続します。ケーブルの赤い端子がプログラム・
タンに割り当てることができます。演奏に使用するプログラ
アップ(UP端子)、白い端子がプログラム・ダウン(DOWN
ムや、気に入ったプログラムを割り当てておくと、
ボタンを押
端子)になっています(☞p.173「接続しよう」、p.196
すだけで、すばやくプログラムを切り替えることができます。 「FOOTSW」)。
次の方法でプログラムをボタンに割り当てます。ここでは、
選択したプログラムを[A]ボタンに割り当てます。
マスター・レベル
1 [A]ボタンに割り当てるプログラムを CURSOR π /†
で選びます。
178
バリュー・エンコーダでマスター・レベルを調節します。マ
スター・レベルを変更すると、バリュー・ディスプレイに数秒
間マスター・レベルの値が表示されます。また、
レベルに合
わせてバー・グラフの表示が変わります。マスター・レベル
は、電源をオフにしても記憶されます。
バー・グラフ
チューナー
バイパスやミュートにすると、
チューナーが動作します。
メーター
プログラム・ナンバー表示
シャープ
マスター・レベルの値
CURSOR π /† でマスター・レベルを変更する設定
にすることもできます(☞p.180「バリュー・エンコー
ダ機能設定」)。
音名
キャリブレーション
中央のマーク
1
ギター(ベース)の弦を弾きます。
LCDに音名とキャリブレーションが表示されます。音名よ
り半音高いときは、音名の右上にシャープが点灯します。
2
文字表示の部分がメーターになり、
ピッチ(音の高さ)の
ズレを表示します。中央のマークの上が点灯するよう
に、弦をチューニングしてください。
3
TAP/BYPASSボタンを押すと、チューナー(バイパスまた
はミュート)が解除され、元のモードに戻ります。EXITボタ
ンを押してプレイ・モードに戻ることもできます。
バイパス /ミュート
TAP/BYPASSボタンを約1秒間押すと、バイパス状態になり、
エフェクトのかからない音が出力されます。LCDのエフェクト・
チェインが点滅し、約1 秒間“BYPASS”と表示されます。
TAP/BYPASSボタンを約2秒間押すと、
ミュート状態にな
り、音が出なくなります。LCDのエフェクト・チェインが速く
点滅して、約 1 秒間“MUTE”と表示されます。
もう一度TAP/BYPASSボタンを押すと、バイパスやミュー
トが解除され、元のモードに戻ります。また、EXITボタンを
押して、
プレイ・モードに戻ることもできます。
なお、バイパスやミュートには、
プレイ・モード以外のモード
からでも入れます。
PX5Dに接続した2つのフット・スイッチでもバイパス、
ミュートにすることができます(☞p.196)。
キャリブレーション(基準ピッチ Aの周波数)
キャリブレーションは、バリュー・エンコーダでA=438∼445Hz
の範囲で変更することができます。変更したキャリブレーショ
ンの設定は、電源をオフにするまで有効です。電源をオフにし
て、再び電源をオンにしたときはA=440Hzになります。
179
バリュー・エンコーダ機能設定
キー・ロック設定
プレイ・モードの機能をバリュー・エンコーダに割り当てま
す。プレイ・モードで、EXIT ボタンを押しながら CURSOR
√ 、
または ®を押すと、次の機能が割り当てられます。
キー・ロックを設定すると、CURSOR π /†、PROGRAM
MEMORY [A]∼[D]ボタン、本体に接続したフット・スイッ
チによるプログラムの選択のみ可能になり、演奏中の誤操
作を防げます。
● EXITボタンを押しながら、CURSOR √ を押します。
LCDに約1秒間“MASTER”と表示され、バリュー・エ
ンコーダにマスター・レベルの調整が割り当てられま
す。このとき、CURSOR π /†にはプログラム選択が
割り当てられます。電源をオンにしたときは、常にこの
設定になります。
プログラム
の選択
マスター・
レベルの調整
● EXIT ボタンを押しながら、CURSOR ®を押します。
LCDに約1秒間“PROGRAM”と表示され、バリュー・
エンコーダにプログラムの選択が割り当てられます。こ
のとき、CURSOR π /†にはマスター・レベル調整が
割り当てられます。
マスター・
レベルの調整
180
プログラム
の選択
● EXITボタンを押しながら、CURSOR π ボタンを押しま
す。L C D に約 1 秒間“ K E Y L O C K ”と表示されます。
CURSOR π /†、PROGRAM MEMORY [A]∼[D]
ボタン、
フット・スイッチは機能し、それ以外のバリュー・
エンコーダ、
ボタン、
ツマミは機能しません。
プログラムの
選択のみ有効
機能しない
電源をオフにすると、
キー・ロック設定は解除されます。
また、左コラムの「バリュー・エンコーダ機能設定」を
行って、キー・ロック設定を解除することもできます。
リズム&ベース・モード
128 種類のリズム&ベース・パターンを演奏します。複数
のパターンをつなげて演奏することもできます。
プレイ・モード(ミュート、バイパス、キー・ロック時を除く)、
AUXピッチ・モード、
フレーズ・トレーナー・モードでRHYTHM
ボタンを押すと、
リズム&ベース・モードに入り、選ばれている
プレイに応じて、パターンがスタートします。演奏しているリ
ズム・パターンに合わせてバー・グラフの表示が変化します。
EXITボタンを押すと、プレイ・モードに戻ります。
リズム&ベース・モードには3 つのプレイがあります。
PTN: パターン・プレイ
1 つのリズム・パターンを選択して演奏します。L C D に
PTNアイコンが表示されます。
CHAIN: チェイン・プレイ
最大16個のパターンをつなげて演奏します。プリカウント
の後に演奏がスタートします。LCD にCHAINアイコンが
表示されます。
リズム&ベース・モードに入ったときのプレイは、前回リズム&
ベース・モードのときに選択していたプレイになります。
フレーズ・トレーナー・モードの録音モードを“JAM”に
すると、
リズム&ベース・モードで選ばれているプレイの
リズム&ベース・パターンを、
ギター(ベース)のフレーズ
といっしょに録音できます。
PTN(パターン・プレイ)
1 つのリズム&ベース・パターンを選択して演奏します。
CURSOR √ /®でパラメーターを選び、バリュー・エンコー
ダとENTER/RECボタンで値を設定します。CURSOR π /
† では、プログラムを選択します。
リズム・パターン/
バリエーション
リバーブ・
レベル
レベル
テンポ
ベース・
キー
ここでの設定は、電源をオフにしても記憶しています。
SONG: ソング・プレイ
デモ・ソングを演奏します。プリカウントの後に演奏がス
タートします。LCD にSONGアイコンが表示されます。
RHYTHMボタンを押すたびにPTN→CHAIN→SONG→
PTN→CHAIN→SONG・・・と切り替わり、現在選択してい
るプレイがアイコンで表示されます。
181
リズム・パターン / バリエーション
リズム&ベース・パターンをバリュー・エンコーダで選びます
(☞p.214「リズム・パターン・リスト」)。
リズム・パターンのバリエーションをENTER/RECボタンで
選びます。
BASIC: 基本のリズム・パターンです。
VARI1: バリエーション1。LCDにバリエーション1アイコ
ンが表示されます。
VARI2: バリエーション2。LCDにバリエーション2アイコ
ンが表示されます。
リズム・パターン
ルート音をバリュー・エンコーダで設定します。ルート音の設
定範囲はC、C#∼ A#、Bです。
バリエーション・
アイコン
テンポ (TEMPO)
演奏テンポをバリュー・エンコーダまたはTAP/BYPASSボ
タンで設定します。TAP/BYPASSボタンを複数回押すと、
押した間隔でテンポが設定されます。
= 40 ∼240 の範囲で設定します。
テンポ
182
ベース・キー (BASSKEY)
ベース・パターンのバリエーションをENTER/RECボタンで
選びます。
OFF: ベース・オフ
BASIC: 基本的なベース・パターンです。
VARI1: バリエーション1。メジャー・コードのベース・パター
ンです。LCDにバリエーション1アイコンが表示されます。
VARI2: バリエーション2。マイナー・コードのベース・パター
ンです。LCDにバリエーション2アイコンが表示されます。
ルート音
ベース・パターンがバリエーション(VARI2 )のときは、
ルート音の横に“m”が表示されます。
パターンに“MTRONM0 ”∼“MTRONM9 ”のメトロ
ノームを選んだときは、ベース・パターンはありませ
ん。この画面も表示されません。
レベル (LEVEL)
リズム&ベース・パターンの音量レベルをバリュー・エンコー
ダで設定します。
レベル
リバーブ・レベル (REVERB)
リズム&ベース・パターンをリバーブ・モデリングへ送る量を
バリュー・エンコーダで設定します。
リバーブ・レベル
プログラム側のエフェクトと同じリバーブが使用されま
す。リバーブ・モデリングを使用していないプログラム
を選択しているときや、
リバーブのエフェクト・レベル
が“0”のときは、
リバーブはかかりません。
CHAIN(チェイン・プレイ)
複数のリズム&ベース・パターンをつなげたものをチェイン
といいます。CHAIN(チェイン・プレイ)では、
これらのチェ
インをエディットし、演奏することができます。1つのチェイ
ンには最大 16 個のパターンをつなげることができます。
PX5Dには20個のチェインが内蔵されています。
CHAIN(チェイン・プレイ)を選択すると、
プリ・カウントの後、
自動的に演奏をスタートします。
CHAIN(チェイン・プレイ)では、
チェインの選択、
テンポ、
音
量レベル、
リバーブ・レベルを設定します。CURSOR √ /®
でパラメーターを選び、バリュー・エンコーダとENTER/
RECボタンで値を設定します。
また、チェインの選択画面で ENTER/REC ボタンを押すと、
チェイン・エディットに入ります。ここでは、各ステップで使用
されるリズム&ベース・パターンを設定します(☞p . 1 8 4
「チェイン・エディット」)。EXITボタンでチェインの選択画面
に戻ります。
チェイン・エディットへ
ENTER
EXIT
チェイン・セレクト
ライト
リバーブ・レベル
テンポ
音量
レベル
183
チェイン・セレクト (CHAIN01 ∼ 20)
チェインを選択します。20 個の中から選択できます。
ライト (WRITE)
チェインの設定を保存します。保存先(チェイン・ナンバー)
をバリュー・エンコーダで選び、ENTER/RECボタンを押し
ます。本体にはチェインを20個保存することができます。
この画面で E N T E R / R E C ボタンを押すと、チェイン・エ
ディットに入ります(☞p.184「チェイン・エディット」)。
エディットした設定は、
ライトしないでチェインを切り替
えたり、電源をオフにすると、元のチェインの設定に戻
ります。
テンポ (TEMPO)
演奏テンポをバリュー・エンコーダで設定します(☞p.182
「テンポ」)。
レベル (LEVEL)
パターンの音量レベルをバリュー・エンコーダで設定します
(☞p.183「レベル」)。
リバーブ・レベル (REVERB)
パターンをリバーブ・モデリングへ送る量をバリュー・エン
コーダで設定します(☞p.183「リバーブ・レベル」)。
184
チェイン・ナンバー
チェイン・エディット
各ステップで使用するパターンを設定します。
チェイン・セレクト(CHAIN01 ∼ 20)で ENTER/REC ボ
タンを押すと、チェイン・エディットに入ります。CURSOR
√ /® でステップ、CURSOR π /†でパラメーターを選び、
バリュー・エンコーダとENTER/REC ボタンで値を設定し
ます。各チェインのパターンを設定後、
EXITボタンでチェイ
ン・セレクトに戻ります。
リピート
リピート
リピート
ベース・キー
ベース・キー
リズム・パターン
リズム・パターン
リズム・パターン
Step 01
Step 02
Step 16
ベース・キー
エディットした設定は、
ライトしないでチェインを切り替
えたり、電源をオフにすると、元のチェインの設定に戻
ります。
リズム・パターン
各ステップで使用するリズム・パターンをバリュー・エン
コーダで選択し、バリエーションをENTER/RECボタンで設
定します(☞p.182「リズム・パターン/バリエーション」)。
ベース・キー
ステップ・ナンバー
リピート
各ステップで選択したパターンのリピート回数をバリュー・エン
コーダで設定します。ここで設定したリピート回数をプレイバッ
クし、次のステップで設定されているパターンを演奏します。
リズム・パターン
ベース・キー
リピート回数
ステップ・ナンバー
ステップ・ナンバー
ステップを移動するときに、CURSOR √ /®を押した
ままバリュー・エンコーダを回すと、移動前のステップ
で選択したパターンが、
移動後のステップにコピーされ
ます。同じパターンを並べるときに便利な機能です。
ベース・キー
ベース・パターンのバリエーションを ENTER/REC ボタン
で選択し、ルート音をバリュー・エンコーダで設定します
(☞p.182「ベース・キー」)。
SONG(ソング・プレイ)
PX5D に内蔵されているデモ・ソングを演奏します。
SONG(ソング・プレイ)を選択すると、
プリ・カウントの後、自
動的に演奏をスタートします。演奏中にENTER/RECボタン
を押すと一時停止します。再度押すと演奏を開始します。
ENTER/RECボタンを1秒以上押すと、
デモ・ソングの先頭
に戻り、演奏を開始します。
演奏中または停止中にはCURSOR π /†でプログラムを変
更できます。
185
CURSOR √ /®でパラメーターを選び、バリュー・エンコー
ダで値を設定します。
ソング・セレクト
ループ
テンポ
リバーブ・レベル
トランスポーズ
レベル
ソング・セレクト (Song Select)
デモ・ソングをバリュー・エンコーダで選択します。PX5Dに
は、3つのデモ・ソングが内蔵されています。
ソング・ナンバー
テンポ (Tempo)
演奏テンポをバリュー・エンコーダで設定します(☞p.182
“FIL”にすると、各デモ・ソングで設定されてい
「テンポ」)。
るテンポで演奏します。
186
トランスポーズ (Transpose)
トランスポーズをバリュー・エンコーダで設定します。演奏
を半音単位で移調することができます。
レベル (Level)
ソングの音量レベルをバリュー・エンコーダで設定します
(☞p.183「レベル」)。
リバーブ・レベル (Reverb)
ソングをリバーブ・モデリングへ送る量をバリュー・エンコー
ダで設定します(☞p.183「リバーブ・レベル」)。
ループ (Loop)
ループ設定をバリュー・エンコーダで設定します。演奏を繰
り返します。
On (ON): デモ・ソングを繰り返し演奏します。
OF (OFF): デモ・ソングを1回だけ演奏します。
フレーズ・トレーナー・モード
USB 端子や AUX 端子からの入力音、ギター(ベース)で弾
リズム&ベース・モードのリズム・パターンを
いたフレーズ、
録音して、ループ(繰り返し)再生します。ピッチ(音の高さ)
を固定して再生スピードを落とすことができるので、聞き取り
にくいフレーズのコピーや練習に役立ちます。また、録音し
たフレーズは本体に保存することができます。
コンピューターがWindows XPの場合、USB端子を
使用してオーディオ・データをやり取りするときは、付
属CD-ROMに収録されているKORG USB-ASIOド
ライバを、
コンピューターにインストールすることをお
すすめします。KORG USB-ASIOドライバのインス
トールについては、付属CD-ROM に収録されている
「ソフトウェアのインストール」を参照してください。
録音モードの選択
プレイ・モード(バイパス、ミュート、キー・ロック時を除く)、
リ
ズム&ベース・モード、ユーティリティ・モードで P H R A S E
TRAINERボタンを押すと、
フレーズ・トレーナー・モードに入
ります。LCDには、
フレーズ・トレーナー・アイコン、録音モー
ドと時間の選択画面が表示され、録音待機状態となります。
録音モード
録音時間
フレーズ・トレーナー・アイコン
録音モードを PHRASE TRAINER ボタンで選びます。
PHRASE TRAINERボタンを押すたびに録音モードが切り
替わります。
AUX: AUX 端子、USB 端子からの入力音を録音。
GTR/BAS: ギター(ベース)音のみを録音。
AUX+G/B: AUX 端子、USB 端子からの入力音とギター
(ベース)音の両方を録音。
JAM: リズム&ベース・モードで最後に選んだプレイで設定さ
れているリズム・パターンとギター(ベース)音の両方を録音。
USB 端子とAUX 端子の両方を使用している場合は、
両端子からの入力音を録音します。音量のバランスは
接続している機器のボリューム等を調節します。
リズム&ベース・モードで最後にソング・プレイが選ばれ
ている場合は、録音モードに“JAM”は選択できません。
EXITボタンを押すと、プレイ・モードに戻ります。
187
バリュー・エンコーダで録音時間(“JAM”のときは小節数)
を選びます。
20: 約 20 秒
40: 約 40 秒
80: 約 80 秒
1、2、3...: 小節数
録音モードが“JAM”のときは、
テンポと設定した小節数か
ら、録音可能な音質が自動的に設定されます。
長い録音時間(40または80)を選んだときは、低い音
質で録音されます。
録音モードが“JAM”で、
リズムが非常にゆっくりなテ
ンポのときは、長い小節数は録音できません。リズム
&ベース・モードでテンポを再設定してください(最長
約 80秒)。
リズム&ベース・モードのチェインを使用して、複数の
パターンで 1 小節を構成するリズム・パターン等を、
JAMモードで録音する場合、録音小節数は、使用して
いるパターン数に設定してください。例えば、2/4 拍
子のパターンを2つ使用して、1小節とする4/4拍子
のパターンを録音する場合、録音小節数は2小節に設
定してください。
CD等をスタートさせ、録音を開始したいところでENTER/
RECボタンを押してください。録音を開始します。
188
FOOT SW端子に接続したフット・スイッチで録音のス
タート / ストップを行うことができます( ☞ p . 1 9 6
「FOOTSW」)。
録音モードが“JAM”のときは、録音前にカウントが入
ります。
いったん録音したあと、録音モードや録音時間を変更
するときは、一時停止中にPHRASE TRAINERボタン
を押します。
録音中
録音を開始すると、録音時間が数値で表示されます。
録音時間の表示
録音を終了したいところで、ENTER/RECボタン、PHRASE
TRAINERボタン、
またはCURSOR ®を押してください。
録音が終了して、自動的にループ再生を開始します。
録音を途中で終了しないときは、選んだ録音時間や小節数
まで録音し、自動的にループ再生を開始します。
フレーズは、モノラルで録音または再生されます。
再生
録音終了後、
フレーズをループ再生します。再生、一時停止
中は、CURSOR π /†でプログラムを選択できます。
再生時間
再生スピード(%)
バリュー・エンコーダで再生スピードを落とすことができま
す。再生スピードは100%、90%、80%、75%、66%、50%の
6 種類です。
再生中にCURSOR ®を押したままにすると早送り、CURSOR
√ を押したままにすると早戻しができます。
また、PHRASE TRAINERボタンを押すと、押した時点の再
生音を保持することができます(ホールド機能)。フレーズ
を 1 音ずつを聞き取るときに便利な機能です。
一時停止
再生中にCURSOR ®押すと、
再生が一時停止します。もう
一度 CURSOR ®を押すと、再生を開始します。一時停止
中にCURSOR √ を押すと、録音したフレーズの先頭に戻
ります。
録音し直すときは
録音し直すときは、CURSOR ®を押して一時停止にします。
CD 等をスタートさせ、録音を開始したいところで ENTER/
REC ボタンを押してください。
録音モードや録音時間を変更するときは、一時停止中に
PHRASE TRAINER ボタンを押します。
保存
録音したフレーズを保存する場合は、一時停止中にPHRASE
TRAINER ボタンを何回か押して、LCDに“SAVE?”を表示さ
せます。再度ENTER/RECボタンを押すと、保存が完了します。
“SAVE?”の画面は、
フレーズが新しく録音されたとき
に、録音モード選択の画面で選択できます。
保存しないで電源をオフにすると、録音した内容は消
去されます。
保存できるフレーズは1つだけです。保存を実行する
と、前に保存したフレーズは消去されます。
189
エディット・モード
各エフェクトのオン/オフ、エフェクト・タイプ、パラメーターの
値、プログラム名等をエディットすることができます。
プレイ・モードでCURSOR ®を押すと、DYNAエフェクトのエ
ディット画面が表示され、エディット・モードに入ります。リネー
ムやプログラムのライトも、エディット・モードで行います。
エディット・モードでは、
どの画面でもコントロール・ダイヤ
ルによってアンプ・モデリングをエディットしたり、TA P /
BYPASSボタンによってディレイ・モデリングのディレイ・タ
イムを設定できます。
エフェクト・タイプとパラメーターについては、
エフェクト・パ
ラメーター・リストを参照してください(☞p.199 ∼)。
EXITボタンを押すと、プレイ・モードに戻ります。
エディットするエフェクト等の選択
CURSOR √ /®を押すごとに、下図の順にエフェクト等を
選ぶことができます。エフェクトが選ばれているときは、そ
のアイコンが点滅します。
(ディレイ・タイム)
各エフェクトのエディット
画面に表示される各エフェクトのエフェクト・タイプや、
それ
ぞれのパラメーターの値を設定します。
“OFF”になっているエフェクトは、ENTER/RECボタンを押
すか、CURSOR π /†でエフェクト・タイプを選ぶと自動的に
オンになります。エディット後、ライトしていないプログラム
はプログラム・ナンバーにドットが点灯します。
190
エディットした設定は、
ライトしないでプログラムを切り
替えたり、
電源をオフにすると、
エディット前のプログラ
ムの設定に戻ります(☞p.193「WRITE」)。
DYNA: ダイナミクス&ピックアップ・モデリング
コンプレッサー、
オート・ワウ等の音色を作るダイナミクス系
とピックアップ・モデルのエフェクトです。
パラメー
ターの値
▲/▼: タイプの選択
エフェクト・オン/オフ
AMP: アンプ・モデリング
アンプをモデリングした迫力あるサウンドが得られます。
B T Q C L N ∼ O C T F U Z Z はギター・アンプ、VA LV E 1 ∼
UKMAJORはベース・アンプ、GSYNTH1∼GSYNTH3はギ
ター用シンセ、BSYNTH1∼BSYNTH3はベース用シンセで
す。ギター・アンプまたはギター用シンセ選択時は“ Gt ”、
ベース・アンプまたはベース用シンセ選択時は“bA”の文字
が、バリュー・ディスプレイに約 1 秒間表示されます。
歪み量* 低音*
高音*
CAB: キャビネット・モデリング
アンプのキャビネットの音響特性をシミュレートします。特
にアンプを接続しないとき(ヘッドホン、
ミキサー、ハード・
ディスク・レコーダー、オーディオ機器等)に効果的です。
1×8TWD∼4×12VINはギター・アンプのキャビネット、LA
4×10 ∼ COMBI はベース・アンプのキャビネットです。ギ
ター・アンプのキャビネット選択時は“Gt”、ベース・アンプの
キャビネット選択時は“bA”の文字が、バリュー・ディスプレイ
に約1 秒間表示されます。
音量*
プレゼンス
▲/▼: タイプの選択
中音*
▲/▼: タイプの選択
エフェクト・オン/オフ
エフェクト・オン/オフ
* タイプをベース・アンプVALVE1∼JAZZまたはシンセ
GSYNTH1∼GSYNTH3、BSYNTH1∼BSYNTH3
にしたときは動作が異なります。
アンプ・モデリングとキャビネット・モデリングは、それぞれギ
ター用とベース用を組み合わせて使用することもできます。
アンプ・モデリングのエフェクトが“OFF”でも、
コントロー
ル・ダイヤルの VOLUMEでの音量調整はできます。
191
MOD: モジュレーション&フィルター・エフェクト・モデリング
コーラス、
フランジャー、
フェイザー、
ピッチ・シフター等の変
調系とフィルターのエフェクトです。
パラメー
ターの値
▲/▼: タイプの選択
DLY: ディレイ・タイム
ディレイ・モデリングのディレイ・タイムが表示されます。この
画面では、バリュー・エンコーダでディレイ・タイムを設定す
ることができます。また、
この画面でもTAP/BYPASSボタ
ンでディレイ・タイムを設定できます。
ディレイ・
タイム
エフェクト・オン/オフ
DLY: ディレイ・モデリング
TAP/BYPASSボタンを押す間隔で、
ディレイ・タイムを設定
する残響系のエフェクトです。
エフェクト・オン/オフ
REV: リバーブ・モデリング
音に広がりを与える残響系のエフェクトです。
エフェク
ト・レベル
▲/▼: タイプの選択
エフェク
ト・レベル
▲/▼: タイプの選択
エフェクト・オン/オフ
ディレイ・タイム
192
エフェクト・オン/オフ
NR: ノイズ・リダクション
値を大きくするほど、
ノイズを抑える効果が強くなります。
通常は、弦を軽くミュートしたときにノイズが気にならない
程度に調整します。
ノイズ・リダ
クションのか
かり具合
値が大きすぎると、接続する楽器によっては音が途切
れることがあります。そのときは値を下げてください。
使用するギター(ベース)やピック・アップに合わせて
調整してください。
RENAME: リネーム
プログラムの名前(7 文字)を設定します。
▲/▼: 変更箇所の選択
文字設定
WRITE: ライト
エディットしたプログラムを保存します。ライト先をバリュー・
エンコーダで選びます(ユーザー・プログラムのみ)。
ライトを中止するときは CURSOR ®(または √ )を押し
て、他の画面を選んでください。
ENTER/RECボタンを押してライトを実行します。ライトが
完了すると、LCDに約 1 秒間“COMPLT”と表示されます。
ライト先
の選択
ライト先のプログラム・ナンバー
ライト
エディットしたプログラムを他のプログラム・ナンバー
にライトする場合は、上書きしてもよいかどうかを、あ
らかじめ確認してください。上書きされたプログラム
は消えてしまいます。
プリセット・プログラム(P00∼P99)にライトするこ
とはできません。
以下の文字が使用できます。
193
ユーティリティ・モード
LCDのバックライト、キー・トランスポーズ、ベース・キャンセ
ルなどを設定します。プレイ・モードでUTILITYボタンを押す
と、ユーティリティ・アイコンが表示され、ユーティリティ・モー
ドに入ります。
ユーティリティの選択
UTILITYボタンを押すたびに、下図の順にユーティリティの
設定画面を選ぶことができます。
各ユーティリティの設定
表示される各画面でユーティリティを設定します。EXITボ
タンを押すと、プレイ・モードに戻ります。
BACKLIT: LCD バックライト
LCD バックライトのオン / オフを切り替えます。
バック・ライト
オン/オフ
電池で使用した場合、バックライトをオンにすると、動
作時間が短くなります。
KEY-TRN: キー・トランスポーズ
この画面を表示しているときは、USB 端子や AUX 端子か
らの入力音をキー・トランスポーズします。バリュー・エン
コーダでトランスポーズの値を設定します。可変幅は、
±1
オクターブです。設定できる値は、上下3半音まで10cent
刻みで、それ以上(以下)は半音(100cent)刻みです。
10cent単位の表示
トランスポー
ズの値
設定は電源をオフにしても保存されます。
100cent単位の表示
キー・トランスポーズした信号は、モノラルで出力されま
す。
194
KTR+BC: キー・トランスポーズ + ベース・キャンセル
この画面を表示しているときは、USB端子やAUX端子か
らの入力音をキー・トランスポーズ、
ベース・キャンセルしま
す。低音域を消すベース・キャンセルは、
ベース練習時に威
力を発揮します。
トランスポーズの可変幅は「 K E Y - T R N 」と同じです
(☞p.194)。
トランスポー
ズの値
トランスポーズの値を 0にすると、ベース・キャンセル機能
だけがオンになります。
キー・トランスポーズ、ベース・キャンセルした信号は、
モノラルで出力されます。
コンピューターがWindows XPの場合、USB端子を
使用してオーディオ・データをやり取りするときは、付
属CD-ROMに収録されているKORG USB-ASIOド
ライバをコンピューターにインストールすることをおす
すめします。KORG USB-ASIOドライバのインストー
ルについては、付属 CD-ROM に収録されている「ソ
フトウェアのインストール」を参照してください。
AMP/LIN: アンプ/ライン・セレクト
ギター・アンプ・モデリング使用時に、
OUTPUT端子の出力
をヘッドホン/ライン向きか、各種ギター・アンプ向きにする
かを設定します。アンプ・モデリング・オフ、ベース・アンプ・
モデリングまたはギター/ ベース・シンセ選択時には、
この
設定の影響は受けません。
ライン/アンプ
・セレクト
Ln: ヘッドホン、
ミキサー、
またはレコーダーなどのライン・
インプットに接続する場合。
A1: US 製オープン・バック・タイプのコンボ・アンプなど、ク
リーン・サウンドを得意とするギター・アンプに接続する場合。
A2: UK製オープン・バック・タイプのコンボアンプなど、中
音域にクセがあるギター・アンプに接続する場合。
A3: 4×12クローズド・バック・キャビネットなど、
スタック・
タイプのギター・アンプに接続する場合。
接続するアンプは代表的な例です。アンプの種類、設
定等によっては最適な設定が異なる場合があります。
195
FOOTSW : フット・スイッチの設定
PX5D に接続したフット・スイッチの機能をバリュー・エン
コーダで設定します。
スイッチ・
ペダルの機能
PG: PROGRAM MEMORY[A]∼[D]ボタンに割り当て
られているプログラムを切り替えます。付属のフット・スイッ
チ端子用ケーブルのUP端子(赤)に接続したフット・スイッ
チを操作するたびに、
[ A ]→[ B ]→[ C ]→[ D ]→[ A ]
→・
・
・の順番で切り替わります。DOWN端子(白)に接続し
たフット・スイッチを操作するたびに、
[ D]→[C]→[B]→
[A]→[D]→・
・
・の順番で切り替わります。
Ud: U00 ∼ P99 のプログラムを切り替えます。付属の
フット・スイッチ端子用ケーブルのUP端子(赤)に接続した
フット・スイッチを操作するたびに、U00 →・
・・→ U99 →
P00→・
・
・→P99→U00→・
・
・の順番でプログラムが切
り替わります。DOWN端子(白)に接続したフット・スイッチ
を操作するたびに、U00 → P99 →・・・→ P00 → U99
→・
・
・→U00→P99→・
・
・の順番でプログラムが切り替わ
ります。
196
“PG”または“Ud”に設定したときは、
各端子に接続し
た2つのフット・スイッチを同時に押すとバイパス、
1秒
以上押すとミュートになります。
SS: フレーズ・トレーナー・モードの録音と再生のスタート/
ストップを行います。付属のフット・スイッチ端子用ケーブル
のUP端子(赤)に接続したフット・スイッチで録音のスター
ト/ ストップを行います。DOWN 端子(白)に接続したフッ
ト・スイッチで録音したフレーズの再生スタート/ストップを
行います。この設定では、フレーズ・トレーナー・モードに
入っているときだけフット・スイッチが機能します。
USBSEND: USB センド・レベル
USB接続時、
コンピューターへ入力するレベルを調節しま
す。録音に使用するDAW ソフトウェア等のレベル・メー
ターを見ながら、録音レベルが適正になるように(0dBを
超えないように)バリュー・エンコーダで調節します。
AUX>USB: USB オーディオ・インターフェイス
この画面を表示しているときは、
ステレオ・イン、ステレオ・
アウトの標準的なUSBオーディオ・インターフェイスとして
使用できます。
入力レベルの
調整
USB RCV: USBレシーブ・レベル
USB接続時、
コンピューターから入力される信号の音量レ
ベルを調節します。PX5Dの出力とバランスがとれるように
バリュー・エンコーダで調節します。
コンピューターと接続したときの信号の流れは、
以下のよう
になります。
PX5D
OUTPUT
AUX (Stereo)
USB
音量レベルの
調整
CDプレーヤーなど
AUX端子が入力端子、OUTPUT端子が出力端子になります。
コンピューターへの入力レベルは、録音に使用するDAWソフ
トウェアのレベル・メーターを見ながら、録音レベルが適正とな
るように(0dBを超えないように)、AUX端子に接続した外部
機器のボリュームを調節します。コンピューターから入力され
る信号の音量レベルは、
“USB RCV”の設定が反映されます。
197
PX5DをUSBオーディオ・インターフェイスとして使用
しているときは、PX5Dのエフェクト、
リズム&ベース機
能、
フレーズ・トレーナー機能は使用できません。
MIDDRUM: MIDIドラム&ベース
この画面が表示されているときに、USB 端子から MIDI
ノートオン/オフ・メッセージを受信すると、内蔵のベース、
ドラム音源が発音します。
以下の MIDIチャンネルで受信したときに発音します。
MIDIチャンネル 9ch: ベース音源が発音。
MIDIチャンネル 10ch: ドラム音源が発音。
ベース、
ドラム音源が発音するMIDIチャンネルは固定
です。
受信するMIDIノート・データのノート・ナンバーとドラ
ム音源の対応ついては、付属CD-ROMに収録されて
いる「PX5D Drum Kit map」を参照してください。
198
工場出荷時のデータのロード
プリロード・データをロードします。工場出荷時のエフェク
ト・プログラム、マスター・レベル、
リズム&ベース・モードの
チェイン、ユーティリティ・モードの各設定がロードされます。
プリロード・データをロードすると、ユーザー・プログラ
ムや各設定がすべて書き替わりますので、注意してく
ださい。
1
RHYTHMボタンとCURSOR π を押しながら、電源を
オンにします。
LCD に“RELOAD?”と表示されます。
2
ENTER/RECボタンを押します。
LCD に“RELOAD”、
“VERIFY”、
“COMPLT”の順に
表示され、
プリロード・データがロードされます。ロード
が完了すると、
プレイ・モードが立ちあがります。
ロードを中止するときは、
“ RELOAD? ”の表示中に
EXITボタンを押します。ロードされずにプレイ・モード
に入ります。
ロード中は、絶対に電源をオフにしないでください。
エフェクト・パラメーター・リスト
DYNA: ダイナミクス・エフェクト&ピックアップ・モデリング
TYPE (CURSOR π /†)
VALUE (バリュー・エンコーダ)
COMP
ピッキングの粒をそろえ、滑らかなサスティンが得られるコンプレッサー。
感度(1.0...10.0)
DYNAEXC
ピッキングの強弱に応じてダイナミックにエキサイターがかかるエフェク
ト。特にクリーン・サウンドで、音に張りを与えたいときに効果的。
感度(0.0...10.0)
VOX WAH
VOX V847ワウ・ペダルのモデリング。
ペダルの位置(1.0...10.0)
WAHUP1
アタックに敏感に反応する、正極性のオート・ワウ。
WAHUP2
アタックに滑らかに反応する、正極性のオート・ワウ。
WAHDWN1 アタックに敏感に反応する、負極性のオート・ワウ。
感度(0.0...10.0)
WAHDWN2 アタックに滑らかに反応する、負極性のオート・ワウ。
SLOWATK
アタックをなまらせてバイオリン奏法のような効果を得るエフェクト。
アタックの速さ(1.0...10.0)
AC SIM
アコースティック・ギターの音色をシミュレートするエフェクト。
トーン(0.0...10.0)
RESO
レゾネイター・ギターの金属ボディをシミュレートするエフェクト。
スライド奏法に適している。
ボディの鳴り
(0.0...10.0)
OCTAVE*
1オクターブ低い音と原音を混ぜ合わせることによって、音に重圧感を与え
るエフェクト(複数の弦を同時に弾いた場合や、低音弦では、誤動作を起こ
すことがある)。
エフェクト・レベル(0.0...10.0)
鐘の音のような音色を作り出すエフェクター。ネック側のピック・アップを使
用し、楽器側のトーンを絞って、12フレット付近で演奏すると、よりきれい
な効果が得られる。
周波数(1.0...10.0)
RING
199
TYPE (CURSOR π /†)
RINGUP
ピッキングの強弱に応じてダイナミックに効果がかかるリング・モジュレーター。
RINGDWN
CRUSHER
極めて破壊的な歪が得られる新世代ファズ。
VALUE (バリュー・エンコーダ)
感度(0.0...10.0)
破壊度(0.0...10.0)
HUM > SGL ハムバッキング・タイプのピックアップの音色を、
シングル・コイル・タイプの
ピックアップの音色にするピックアップ・モデリング。
SGL > HUM シングル・コイル・タイプのピックアップの音色を、ハムバッキング・タイプの
ピックアップの音色にするピックアップ・モデリング。
HF TONE
2つのピックアップのハーフ・トーンをシミュレートするピックアップ・モデリング。
PHASOUT
2 つのピックアップを逆位相でフェイズ・アウトさせた音色をシミュレートす
るピックアップ・モデリング。
トーン(0.0...10.0)
B COMP
アタックを強調したベース用コンプレッサー。
感度(1.0...10.0)
LIMITER
レベルを一定にそろえるリミッター。
圧縮率(0.0...10.0)
B OD**
ベース用オーバードライブ。
B DIST**
ベース用ディストーション。
B FUZZ**
ベース用ファズ 。
PREAMP1
明瞭な音色に設定したベース用プリアンプ。
PREAMP2
落ち着いた音色に設定したベース用プリアンプ。
歪み量(1.0...10.0)
トーン(0.0...10.0)
BALANCE
2 つのピックアップの出力をブレンドした音のシミュレーター。
LOWCUT
不要な低域をカットするフィルター。ベースのレコーディング等に効果的。
周波数(0.0...10.0)
FRETLES*
ベース用フレットレス・ベースのシミュレーター。
効果の深さ(0.0...10.0)
*: 和音を弾くと音が濁ります。基本的に単音で弾いてください。
200
**: 基本的にベース用のエフェクトですが、
アンプ・モデリングのSYNTHと組み合わせることによって、ギターを入力して
も、分厚いサウンドが得られます。
AMP: アンプ・モデリング
アンプ・モデリング使用時は、
コントロール・ダイヤル(GAIN/MID、BASS、TREBLE、VOLUME)とバリュー・エンコーダが使用
できます。アンプ・モデリングが“OFF”のときでも、
コントロール・ダイヤルのVOLUMEは有効です。ヘッドホン使用時やレコー
ディングなどのライン入力への出力時は、アンプ・モデリングの特性を活かすために、キャビネット・モデリングと組み合わせて
使用することをおすすめします。タイプにGSYNTH1∼GSYNTH3、BSYNTH1∼BSYNTH3を選択したときは、
フィルターの
デプスやディケイ、波形の選択や調整、シンセ・レベルをコントロール・ダイヤルで設定します(☞p.204)。
TYPE (CURSOR π /†)
VALUE (バリュー・エンコーダ&
コントロール・ダイヤル )
BTQ CLN
100W 高級ハンド・メイド・ギター・アンプのクリーン・チャンネル。
推奨 CAB: 4X12CLS、4X12VIN、4X12MDN
BTQ OD
100W 高級ハンド・メイド・ギター・アンプのオーバー・ドライブ・チャンネ
ル。推奨 CAB: 4X12CLS、4X12VIN、4X12MDN
TWD1X12
ツイード地でカバーされたコンボ・ギター・アンプのモデリング。
推奨 CAB: 1X12TWD
GAIN/MID ... 歪み量(0.0....10.0)
BASS ........... 低音(0.0....10.0)
TREBLE ....... 高音(0.0....10.0)
TWD4X10
ベース用として設計された 4X10コンボ・ギター・アンプ。
推奨 CAB: 4X10TWD
VOLUME
............. 出力音量(0.0....10.0)
BLK2X12
カントリーやブルース・プレーヤー必須の 2x12コンボ・ギター・アンプ。
推奨 CAB: 2X12BLK
バリュー・エンコーダ
..................... 中音(0.0....10.0)
AC15
1962 年製 VOX AC15 ギター・アンプ。推奨 CAB: 1X12VOX
AC15TB
VOX AC15TB ギター・アンプのブリリアント・チャンネル。
推奨 CAB: 1X12VOX
201
TYPE (CURSOR π /†)
AC30
VOX AC30 ギター・アンプのモデリング。推奨 CAB:2X12VOX
AC30TB
VOX AC30TB ギター・アンプのブリリアント・チャンネル。
推奨 CAB: 2X12VOX
UKBLUES
UK 製ビンテージ・スタック・ギター・アンプ・ヘッド。
推奨 CAB: 4X12CLS
UK '70S
1969 年 UK 製 100W ギター・アンプ・ヘッドのハイ・トレブル・チャンネル。
推奨 CAB: 4X12CLS
UK '80S
1983年 UK 製 100W マスター・ボリューム付きギター・アンプのヘッド。
推奨 CAB: 4X12CLS、4X12VIN、4X12MDN
UK '90S
GAIN/MID ... 歪み量(0.0....10.0)
BASS ........... 低音(0.0....10.0)
TREBLE ....... 高音(0.0....10.0)
UK'80Sに代わって使用された 100Wデュアル・チャンネル・ヘッドのリー VOLUME
ド・チャンネル。推奨 CAB:4X12CLS、4X12VIN、4X12MDN
............. 出力音量(0.0....10.0)
UK MDN
UK 製 100W モダン・ギター・アンプ。
推奨 CAB: 4X12VIN、4X12MDN
US HI-G
蛇皮でカバーされた 1991 年製 100W ギター・アンプのヘッド。
推奨 CAB: 4X12VIN、4X12MDN
US MDN
メタル・プレートが目を引くハイ・ゲイン・ギター・アンプ。
推奨 CAB: 4X12VIN、4X12MDN
FUZZ
強烈な歪が得られる60 年代のビンテージ・ファズ。
OCTFUZZ
1オクターブ上の成分が強調されるファズ。ネック側のピックアップを使用
し、楽器側のトーンを絞って、ハイポジションで演奏すると効果的。
202
VALUE (バリュー・エンコーダ&
コントロール・ダイヤル )
バリュー・エンコーダ
..................... 中音(0.0....10.0)
TYPE (CURSOR π /†)
VALUE ( バリュー・エンコーダ&
コントロール・ダイヤル )
VALVE1
ULTRA LO スイッチを ONにした真空管ベース・アンプ。
推奨 CAB:CLS8X10
VALVE2
ロックに最適な真空管ベース・アンプ。推奨 CAB:CLS8X10
CLASSIC
バリュー・エンコーダの設定で基本的なキャラクターが変わる真空管ベー
ス・アンプ。推奨 CAB: COMBI
SCOOPED
80 年代サウンドの代表的なベース・アンプ。推奨 CAB:MTL4X10
LA STUD
LA サウンドの代表的なベース・アンプ。推奨 CAB:LA 4X10、LA 1X18
VOLUME
............. 出力音量(0.0....10.0)
GOLDPNL
ゴールドのパネルが目を引くクリーンなサウンドが特徴のモダン・ベース・
アンプ。推奨 CAB: MDN4X10
バリュー・エンコーダ
................. 中音の周波数(1...5)
JAZZ
JAZZ ベーシストに愛用されているコンボ・ベース・アンプ。
推奨 CAB:JAZ1X15
STUDIO
MOTOWNサウンドに最適の真空管コンボ・ベース・アンプ。
推奨 CAB: STU1X15
AC 100
VOX 製 100W 真空管ベース・アンプ。
推奨 CAB: AC 2X15
UKMAJOR
UK 製 200W 真空管ベース・アンプ。
推奨 CAB: UK 4X15、UK 4X12)
GSYNTH1…3 ギター用クロマチック・シンセ。1、2、3 でレゾナンスのかかり方が異なる
(CABは OFFを推奨)。
BSYNTH1…3 コルグ独自の原音加工型ベース用シンセ。
トラッキングの良さが特徴。1、
2、3 でレゾナンスのかかり方が異なる(CAB はOFFを推奨)。
GAIN/MID ....... 中音(0.0....10.0)
BASS ........... 低音(0.0....10.0)
TREBLE ....... 高音(0.0....10.0)
GAIN/MID .. 歪み量(0.0....10.0)
BASS ........... 低音(0.0....10.0)
TREBLE ....... 高音(0.0....10.0)
VOLUME .... 出力音量(0.0....10.0)
バリュー・エンコーダ
..................... 中音(0.0....10.0)
☞p.204「シンセ・パラメーター」
203
シンセ・パラメーター
DEPTH (GAIN/MID)
フィルター・カットオフ周波数の変化量の深さ(−15...0...15)。
DECAY (BASS)
フィルターのエンベロープのディケイ
(減衰時間)
(0.0...10.0)。
WAVE (TREBLE)
GSYNTH1 ∼ 3 のとき
波形を選択(0...15)。
0:のこぎり波 2オクターブ・ダウン
1:のこぎり波 1オクターブ・ダウン
2:サイン波 1オクターブ・ダウン
3:のこぎり波
4:サイン波
5:のこぎり波 1オクターブ・アップ
6:サイン波 1オクターブ・アップ
7:サイン波 2オクターブ・アップ
8 ∼ 15 のオシレーターは、ポルタメントがオンに設定された 0 ∼7 のオシレーターになります。
BSYNTH1 ∼ 3 のとき
波形を調整(0.0...10.0)。0.0は原音と同じオクターブ。10.0 は1オクターブ下の波形となり、
その間で 2 つの波形のミックス具合を調整できます。
SYN LEV (VOLUME)
シンセの音量(0.0...10.0)。
DIR LEV
( バリュー・エンコーダ)
ギター(ベース)の音量(0.0...10.0)。
ギター・シンセ(GSYNTH1∼3)は単音を弾いたときに有効です。和音を弾いても正しい効果は得られません。ま
た、ベース・シンセ(BSYNTH1 ∼ 3)は和音を弾くと濁ったサウンドになります。
ギター・シンセ(GSYNTH1∼3)は楽器のチューニングがずれていると、期待した効果が得られません。そのようと
きは、楽器のチューニングをし直してください。
音が不快に歪む場合、
“ SYN LEV”と“DIR LEV”を歪まない程度に調整してください。
204
CAB: キャビネット・モデリング
TYPE (CURSOR π /†)
1X8TWD
8インチ×1 のスピーカー、オープン・バックのギター用キャビネット。
2X10BLK
10インチ×2 のスピーカー、オープンバックのアメリカン・タイプのギター
用キャビネット。
4X10TWD
10インチX4 のスピーカー、オープン・バックのギター用キャビネット。
1X12TWD
12インチX1 のスピーカー、オープン・バックのブルージーな特性を持つ
ギター用キャビネット。
1X12VOX
12インチ×1 のスピーカー、オープン・バック、VOX AC15 のギター用
キャビネット。
2X12BLK
12インチX2 のスピーカー、オープンバック、
アメリカン・タイプのギター
用キャビネット。
2X12VOX
12インチ×2 のスピーカー、オープン・バック、VOX AC30 のギター用
キャビネット。
4X12VOX
12インチ×4 のネオジウムを使ったスピーカー、近年の VOXアンプに使
われているクローズバックのギター用キャビネット。
4X12CLS
25 W、12インチ×4 のスピーカー、
クローズド・バックのギター用キャビ
ネット。
4X12MDN
75 W、12インチ×4 のスピーカー、
クローズド・バックのギター用キャビ
ネット。
4X12VIN
30W、12インチ×4 のスピーカー、
クローズド・バックのギター用キャビ
ネッ ト。
VALUE (バリュー・エンコーダ)
プレゼンス(0.0...10.0)
205
TYPE (CURSOR π /†)
LA 4X10
MDN4X10
10インチX4 のスピーカー、モダン・タイプのベース用キャビネット。
MTL4X10
10インチX4 のアルミニウム製コーン・スピーカーのベース用キャビネット。
CLS8X10
10インチ×8のスピーカー、
クラッシック・タイプのベース用キャビネット。
UK 4X12
12インチX4 のスピーカー、UK 製ベース用キャビネット。
STU1X15
15インチ×1 のスピーカー、ベース用 STUDIO COMBOキャビネット。
JAZ1X15
15インチ×1 のスピーカー、ベース用 JAZZ COMBO キャビネット。
AC 2X15
15インチ×2 のスピーカー、AC100 ベース用キャビネット。
US 2X15
15インチ×2 のスピーカー、US 製ベース用キャビネット。
UK 4X15
15インチ×4 のスピーカー、UK 製ベース用キャビネット。
LA 1X18
18インチ×1 のスピーカー、LA サウンド向けのベース用キャビネット。
COMBI
12インチ×1と18インチ×1 のスピーカー、ベース用コンビネーション・
キャビネット。
206
VALUE (バリュー・エンコーダ)
10インチ×4 のスピーカー、LA サウンド向けのベース用キャビネット。
プレゼンス(0.0...10.0)
MOD: モジュレーション&フィルター・エフェクト・モデリング
TYPE (CURSOR π /†)
VALUE ( バリュー・エンコーダ)
CHORUS1
エフェクト音が左に、ダイレクト音が右に出力されるビンテージ・コーラス。
CHORUS2
左右でエフェクト音の位相を反転させて、広がりを与えるビンテージ・ステ
レオ・コーラス。
FLANG1…3
粘りの有るビンテージ・フランジャー。
1、2、3 でそれぞれフィードバック量が 0%、22%、60%
FLANG4
フィードバックを逆相に設定したビンテージ・フランジャー。
PHASER1
ポピュラーな 4 段のビンテージ・フェイザー。
PHASER2
太い中音域を持つ 4 段のビンテージ・フェイザー。
PHASER3
マイルドな効果が得られる10 段のビンテージ・フェイザー。
12STR
12 弦ギターのようなサウンドが得られます。
U-VIBE1
コーラス・モードに設定したペダル・バイブのモデリング。
U-VIBE2
ビブラート・モードに設定したペダル・バイブのモデリング。
TREM1
滑らかな効果が得られるトレモロ。
TREM2
ギター・アンプに内蔵されているトレモロ。
変調スピード(0.10...10.0[Hz])
効果の深さ(0.0...10.0)
変調スピード(1.0...10.0[Hz])
TREM3
強烈な深い効果が得られるトレモロ。
AT PAN1
オート・パンポット(LFO:矩形波
AT PAN2
オート・パンポット(LFO:サイン波
ROTARY1
ロータリー・スピーカー・シミュレーター。
)。
)。
変調スピード(0.10...10.0[Hz])
変調スピード(1.0...10.0[Hz])
207
TYPE (CURSOR π /†)
VALUE (バリュー・エンコーダ)
ROTARY2, 3
演奏の強弱でローターの回転が切り替わるロータリー・スピーカー・シミュ
スピードが切り替わるレベル
レーター。2は強い演奏でスローからファーストへ切り替え。
(1.0...10.0)
3は弱い演奏でスローからファーストへ切り替え。
PITCH1…4
ピッチ・シフター。
1、2、3でそれぞれエフェクト音のレベルが変化。
4はエフェクト音のみ。
MAJ3UP
インテリジェント・ピッチ・シフター、上 3 度メジャー・キー用。
MAJ3DWN
インテリジェント・ピッチ・シフター、下 3 度メジャー・キー用。
MIN3UP
インテリジェント・ピッチ・シフター、上 3 度マイナー・キー用。
MIN3DWN
インテリジェント・ピッチ・シフター、下 3 度マイナー・キー用。
PER4TH
インテリジェント・ピッチ・シフター、上 4 度メジャー・キー用。
PER5TH
インテリジェント・ピッチ・シフター、上 5 度メジャー・キー用。
MAJ6TH
インテリジェント・ピッチ・シフター、上 6 度メジャー・キー用。
FEEDBK1, 2 音を長く伸ばした時に効果がある、擬似的にフィードバックを発生させるエ
フェクト。2 は1オクターブ高い音程でフィードバック。
FEEDBK3, 4 サスティン状態で常に効果がかかる、擬似的にフィードバックを発生させる
エフェクト。4は1オクターブ高い音程でフィードバック。
FILTER
ロー・パス・フィルター。
FILTUP1
正極性、
ロー・パス・フィルター・タイプのオート・ワウ。
FILTUP2
正極性、
ピークの強いロー・パス・フィルター・タイプのオート・ワウ。
FILTDN1
負極性、
ロー・パス・フィルター・タイプのオート・ワウ。
FILTDN2
負極性、応答の早いロー・パス・フィルター・タイプのオート・ワウ。
208
ピッチ・シフト量(−24, −17, −12...
−1, −d, d, 1...12, 19, 24)
[d: デチューン]
キー(C, C#...A#, B)
0.0...4.7: エフェクト・レベル
5.0...10.0: ビブラートの深さ
周波数(1.0...10.0)
感度(0.0...10.0)
TYPE (CURSOR π /†)
TALK1…4
ギターがしゃべっているような効果が得られるエフェクト。
1:YAH-YAH、2:U-WAH 、3:YOI-YOI 、4:YEAH
RANDOM1…4 フィルターがランダムに動くランダム・ステップ・フィルター。
1、2、3、4 でフィルターの動く帯域が変化。
DRONE1*
インドの楽器タンブーラ的な通奏音を付加するドローン・エフェクト(エフェ
クト・レベル弱)
DRONE2*
インドの楽器タンブーラ的な通奏音を付加するドローン・エフェクト(エフェ
クト・レベル強)
ENVPIT
ピッキングに応じてピッチを変化させるエンベロープ・ピッチ・シフター。
ENVCHO
ピッキングに応じてコーラス効果がかかるエンベロープ・コーラス。
INFFLN1
無限上昇フランジャー。
INFFLN2
無限下降フランジャー。
INFPIT1, 2
無限上昇下降ピッチ・シフター。どんな入力も無限音階化します。1 はダイ
レクト音とエフェクト音。2 はエフェクト音のみ。
VALUE ( バリュー・エンコーダ)
感度(0.0...10.0)
変調スピード(1.0...10.0)
キー(C, C#...A#, B)
効果の深さ(−15...0...15)
ピッチ変化は正側と負側が有。
効果の深さ(0.0...10.0)
効果の深さ(−15...0...15)
+の値で上昇、
−の値で下降。
*: 設定した通奏音程をキーとする楽曲やソロに効果的です。
209
インテリジェント・ピッチ・シフターについて
インテリジェント・ピッチ・シフターは、設定したキーと弾いた音の高さをもとにピッチ・シフトの量を変化させ、音楽的に心
地よいハーモニーを作ります。例えば、上3度メジャー・キー用(MAJ3UP)を選んだ場合、
ピッチシフト量は、音の高さに
よって 1 音半(短3 度)、2音(長 3 度)と自動的に変化します。
● MAJ3UPで、キーをC に設定した場合
( )内がインテリジェント・ピッチ・シフターで作られた音程
PX5Dでは3度、4度、5度、6度のインターバルをもった7種類のインテリジェント・ピッチ・シフターがあります(3度では、
上のパートまたは下のパート、
メジャー・キーまたはマイナー・キーを選ぶことができます)。
楽器のチューニングがずれていると、期待した効果が得られません。そのようときは、楽器のチューニングをし直して
ください。
インテリジェント・ピッチ・シフターは、単音を弾いたときに有効です。和音を弾いても効果は得られません。
210
DLY: ディレイ・モデリング
各タイプ共に1、2、3、4、5でそれぞれフィードバックの量が変わります。ディレイ・タイムは、TAP/BYPASSボタンを2回
押したときの間隔が設定されます。TAP/BYPASS ボタンを押したままにすると、
ディレイ・タイムが確認できます。
TYPE (CURSOR π /†)
SLAP1…5
短いディレイが特徴のスラップ・ディレイ。
ディレイ・タイム: 最大 500msec。TAP/BYPASSボタンをたたく
間隔の 1/4 の長さがディレイ・タイムとして設定。
ECHO1…5
温かいトーンを持つテープ・エコーのモデリング。
ディレイ・タイム: 最大 2sec。
CLRDLY1…5
デジタルならではのクリアなサウンドのディレイ。
ディレイ・タイム最大 1sec。
PPDLY1…5
音が左右に振れる2タップのピンポン・ディレイ。
ディレイ・タイム: 最大 2sec。
MULTI1…5
特別にステレオ仕様にした 2 ヘッドのテープ・エコーのモデリング(広
がりの有る残響が得られます)。ディレイ・タイム最大 2sec。
RVSDLY
リバース(逆回転)効果の得られるディレイ。
ディレイ・タイム: 最大 1sec。
VALUE (バリュー・エンコーダ)
エフェクト・レベル(0.0...10.0)
バランス(0.0...10.0)
211
REV: リバーブ・モデリング
TYPE (CURSOR π /†)
DRYAIR
乾いた空気感をシミュレートしたリバーブ。
WETAIR
湿った空気感をシミュレートしたリバーブ。
ROOM1
明るい音色のルーム・リバーブ。
ROOM2
落ち着いた音色のルーム・リバーブ。
PLATE1
タイトな響きをシミュレートしたプレート・リバーブ。
PLATE2
明るい響きをシミュレートしたプレート・リバーブ。
HALL1
中規模なホールをシミュレートしたリバーブ。
HALL2
大規模なホールをシミュレートしたリバーブ。
SPRING1
ギター・アンプのスプリング・リバーブ。
SPRING2
密度の濃いスプリング・リバーブ。
BRIGHT
煌びやかな残響が得られるブライト・リバーブ。
212
VALUE (バリュー・エンコーダ)
エフェクト・レベル(0.0...10.0)
プリセット・プログラム・リスト
No.
P00
P01
P02
P03
P04
P05
P06
P07
P08
P09
P10
P11
P12
P13
P14
P15
P16
P17
P18
P19
Name
METALIC
BLUEYES
PARALIZ
VOXTREM
COHEED
BOWATTK
WHITERM
FAB4
WHOKIDS
MUDD
FLOYD
AUDIO
MR SG
STRATO
SCORPS
WINTER
SUBSYNT
LINKIN
CHARLOT
SHADOWS
No.
Name
No.
Name
No.
Name
No.
Name
P20
P21
P22
P23
P24
P25
P26
P27
P28
P29
P30
P31
P32
P33
P34
P35
P36
P37
P38
P39
GMBLUES
SRV
SUPACLN
COUNTRY
BLUES
JAZZY
SURF
POP
ROCK
METAL
VOX WAH
OVERDRV
STONED
ACOUSTC
CRY WAH
ASCEND
CHORUS
FIRE
12STRNG
PIEZO
P40
P41
P42
P43
P44
P45
P46
P47
P48
P49
P50
P51
P52
P53
P54
P55
P56
P57
P58
P59
RESO
FEEDBKR
SITAR
SPACED
MEOW
DIALUP
FILTER
ROTARY
DELAYED
REVERSE
BATTERY
CRUSHD
RAGE'D
DRENCHD
CMPLEAD
BIGLEAD
RAVECHO
MDNJAZZ
ROKABLY
MEGAMID
P60
P61
P62
P63
P64
P65
P66
P67
P68
P69
P70
P71
P72
P73
P74
P75
P76
P77
P78
P79
STUTTER
LASHRED
VOXSLAP
ROTODRV
ARENA
WELL
DOC OCT
NOTRITE
ILL
YAPPY
B BLUES
B MOTWN
B JAZZ
B RNB
B CNTRY
B ROCK
B METAL
B FUNK
B DRIVE
B TREM
P80
P81
P82
P83
P84
P85
P86
P87
P88
P89
P90
P91
P92
P93
P94
P95
P96
P97
P98
P99
B FILTR
B CHORD
B SOLO
B PICKR
B SYNTH
B TAP
B HARM
B OCT
B FING
B THUMB
B FRETB BEND
B FROG
B JUICE
B REV
B PEEPS
B THICK
B TAPIT
B SCOOP
B FUZZY
00 ∼ 69: ギター用プログラム、70 ∼ 99: ベース用プログラム
213
リズム・パターン・リスト
No.
1
2
3
4
5
6
7
8
9
10
11
12
13
14
15
16
17
18
19
20
21
22
214
Name
MTRONM0
MTRONM2
MTRONM3
MTRONM4
MTRONM5
MTRONM6
MTRONM7
MTRONM9
8BEAT1
8BEAT2
8BEAT3
16BEAT1
16BEAT2
16BEAT3
16BEAT4
16BEAT5
16BTSW1
16BTSW2
16BTSW3
16BTSW4
16BTSW5
2/4 1
No.
23
24
25
26
27
28
29
30
31
32
33
34
35
36
37
38
39
40
41
42
43
44
Name
2/4 2
2/4 3
2/4 4
2/4 5
2/4 6
2/4 7
3/4 1
3/4 2
3/4 3
3/4SWG1
3/4SWG2
5/4
3/8 1
3/8 2
5/8
6/8 1
6/8 2
6/8 3
6/8 4
7/8 1
7/8 2
9/8
No.
45
46
47
48
49
50
51
52
53
54
55
56
57
58
59
60
61
62
63
64
65
66
Name
POP1
POP2
ROCK1
ROCK2
ROCK3
ROCK4
ROCK5
R'N'R
METAL1
METAL2
METAL3
METAL4
R'N'B1
R'N'B2
R'N'B3
R'N'B4
BLUES1
BLUES2
8BLUES
BLUESFL
COUNTRY
CNTRYS1
No.
67
68
69
70
71
72
73
74
75
76
77
78
79
80
81
82
83
84
85
86
87
88
Name
CNTRYS2
JAZZ1
JAZZ2
JAZZ3
JAZZ4
FNKRCK1
FNKRCK2
HVYFUNK
JB 1
JB 2
NJCKSWG
MOTOWN1
MOTOWN2
MOTOWN3
MOTOWN4
SURF
REGGAE1
REGGAE2
REGGAE3
BOLERO
DISCO1
DISCO2
No.
89
90
91
92
93
94
95
96
97
98
99
100
101
102
103
104
105
106
107
108
109
110
Name
DISCO3
GOGO1
GOGO2
GOGO3
HOUSE1
HOUSE2
HOUSE3
D'N'B 1
D'N'B 2
SKA1
SKA2
SKA3
2NDLINE
FILLS01
FILLS02
FILLS03
FILLS04
FILLS05
FILLS06
FILLS07
FILLS08
FILLS09
No.
111
112
113
114
115
116
117
118
119
120
121
122
123
124
125
126
127
128
Name
FILLS10
FILLS11
FILLS12
3/4FILS
LATIN1
LATIN2
BOSSA1
BOSSA2
SAMBA1
SAMBA2
RUMBA
AFRO1
AFRO2
CLYPSO1
CLYPSO2
SONGO
LP II
LP III
故障かな?と思ったら
故障かな?と思ったら、
まず以下のことを確認してください。
1. 電源が ONしない。
*電池が入ってますか?または、
コンセントにACアダプ
タ−が接続されていますか?
2. 音が出ない。
*ギター(ベース)、
アンプ、ヘッドホンは、それぞれの端
子に正しく接続されていますか?
*アンプの電源が“ON”になっていて、
正しく設定されて
いますか?
*接続コードは断線していませんか?
ヘッドホンを接続して音が出れば、
PX5Dの出力以降の
接続に問題があります。
*マスター・レベルの値が“0”、
または小さい値になって
いませんか?
*コントロール・ダイヤルの VOLUMEを絞ってませんか?
*ミュート(エフェクト・チェインが速く点滅)になってい
ませんか?
すべてのエフェクトが“OFF”のときは、エフェクト・チェイン
の表示が消えてしまいますので、ご注意ください。
*LCDにユーティリティ・モードの“AUX>USB”が表示
されていませんか?
“AUX>USB”が表示されていると、ギターの音は出
力されません。
*ギターのボリュームを絞ってませんか?
3. AUX端子に接続した機器からの音量が大きい、小さい、
音が出ない。
*接続した機器の出力レベルを調整してください。
接続した機器のライン出力ではなく、
ヘッドホン端子を
接続してください。
*フレーズ・トレーナー・モードになっていませんか?
フレーズ・トレーナー・モードから抜けてください。
4. エフェクトがかからない
*バイパス(エフェクト・チェインが点滅)になっていませ
んか?
*プログラムで使用するエフェクトがオンになっていま
すか?
5. チューナが動作しない。
*バイパス、
またはミュートになっていますか?
6. 付属 CD-ROM のソフトウェアがインストールできない
*CD-ROM がCDドライブに正しく入っていますか?
CD-ROMが正しく入っていることを確認してください。
215
*CDドライブのレンズが汚れていませんか?
市販のレンズ・クリーナーでクリーニングしてください。
*ネットワークの CDドライブからインストールをしてい
ませんか?
ネットワークで接続されているCDドライブからはイン
ストールできません。
*USB オーディオ機能が使用可能になっていますか?
Windows XPの場合、[コントロール パネル]の[シス
テム]、[ハードウェア]タブ、[デバイス マネージャ]でユ
ニバーサル シリアル バスコントロール、USB ルート
ハブを確認してください。
7. USBオーディオ機能を使用して録音ができない。または
録音レベルが小さすぎる(大きすぎる)。
*ユーティリティ・モードの“ USBSEND ”でコンピュー
タ ー へ の 入 力レ ベ ル を 適 正 に 調 整し てくだ さ い 。
☞p.197
8. USBオーディオ機能を使用して再生ができない。または
再生レベルが小さすぎる(大きすぎる)。
*ユーティリティ・モードの“USB RCV”でPX5Dへの入
力レベルを適正に調整してください。 ☞p.197
9. ソフトウェアが反応しない
*USB ケーブルが正しく接続されていますか?
216
*必要なドライバをインストールしましたか?
*接続したコンピューターにPX5D は認識されています
か?
Windows XPの場合は、[コントロール パネル]の[サ
ウンドとオーディオ デバイスのプロパティ]、
[ハードウェ
ア]タブで確認してください。
Mac OS Xの場合は、Macintosh HD→アプリケー
ション・フォルダ→ユーティリティ・フォルダ→“Audio
MIDI設定”の“MIDI装置”タブ・ページでPX5Dが認識
されているかを確認してください。
ご使用になるコンピューターのハードウェア環境によっ
ては、USB接続で本機を認識できないことがあります。
*接続している機器やソフトウェアが、PX5Dに対応して
いない場合があります。接続している機器またはソフ
トウェアの取説を参照し、確認してください。
仕様
● エフェクト数:180タイプ(最大同時使用エフェクト数: 7)
● プログラム数: ユーザー 100、
プリセット100
● 入力:
・ ギター / ベース・インプット(標準モノラル・ジャック)
・ AUX(ミニ・ステレオ・ジャック)
● 出力:ライン/ヘッドホン兼用アウト・プット(標準ステレ
オ・ジャック)
● コントロール端子:
・ フット・ペダル端子
・ USB 端子
● チューナ部
・ 測定範囲:27.5Hz ∼ 2,093Hz( A0 ∼ C7)
・ キャリブレーション:A=438∼ 445Hz
● リズム&ベース・パターン:
・ パターン数: バリエーションを含め 774
・ テンポ: =40 ∼ 240
● 電源:
・ 単 3 形アルカリ乾電池 2 本
バックライトOFF 時、連続約 7時間使用可能
バックライトON 時、連続約 5 時間使用可能
・ 別売ACアダプター(コルグ KA191 DC 4.5V
・ USB バス電源方式(USB 端子使用時)
)
● 外形寸法(WXDXH)
: 118mm×75mm×20mm
(突起部含まず)
● 重量: 154g(乾電池を含まず)
● 付属品:
・ 単 3 形アルカリ乾電池 2 本(動作確認用)
・ CD-ROM
・ 取扱説明書
・ USBケーブル
・ フット・スイッチ端子用ケーブル
・ ゴム足
● オプション(別売):
・ ACアダプター(コルグ KA191 DC 4.5V
・ コルグPS-1 ペダル・スイッチ
)
外観及び仕様は改良のため予告なく変更することがありま
すのでご了承ください。
217
保証規定(必ずお読みください)
本保証書は、保証期間中に本製品を保証するもので、付属品類
(ヘッドホンなど)は保証の対象になりません。保証期間内に本
製品が故障した場合は、
保証規定によって無償修理いたします。
1. 本保証書の有効期間はお買い上げ日より1 ケ年です。
2. 次の修理等は保証期間内であっても有料修理となります。
5. 修理、運送費用が製品の価格より高くなることがありますの
で、あらかじめサービス・センターへご相談ください。発送に
かかる費用は、
お客様の負担とさせていただきます。
6. 修理中の代替品、商品の貸し出し等は、
いかなる場合におい
ても一切行っておりません。
・ 消耗部品(電池、スピーカー、真空管、
フェーダーなど)の交換。
本製品の故障、
または使用上生じたお客様の直接、間接の損傷
・ お取扱い方法が不適当のために生じた故障。
につきましては、弊社はいっさいの責任を負いかねますのでご
・ 天災(火災、浸水等)によって生じた故障。
了承ください。
・ 故障の原因が本製品以外の他の機器にある場合。
本保証書は、保証規定により無料修理をお約束するためのもので、
部品交換などにより生じた故障または損傷。
・ 不当な改造、調整、
これよりお客様の法律上の権利を制限するものではありません。
・ 保証書にお買い上げ日、販売店名が未記入の場合、
または字句
が書き替えられている場合。
・ 本保証書の提示がない場合。
尚、当社が修理した部分が再度故障した場合は、保証期間外で
あっても、修理した日より3ケ月以内に限り無償修理いたします。
3. 本保証書は日本国内においてのみ有効です。
This warranty is valid only in Japan.
4. お客様が保証期間中に移転された場合でも、保証は引き続
きお使いいただけます。詳しくは、サービス・センターまでお
問い合わせください。
お願い
1. 保証書に販売年月日等の記入がない場合は無効となりま
す。記入できないときは、
お買い上げ年月日を証明できる領
収書等と一緒に保管してください。
2. 保証書は再発行致しませんので、
紛失しないように大切に保
管してください。
コルグ PX5D
保証書
(日本国内有効)
本保証書は、上記の保証規定により無料修理をお約束するものです。
お買上げ日
年
月
日
販売店名
アフターサービス
修理についてのご質問、
ご相談は、
サービス・センターへお問い合わせください。商品のお取り扱いについてのご質問、
ご相談は、
お
客様相談窓口へお問い合わせください。
お客様相談窓口 TEL 03(5355)5056
● サービス・センター: 〒 168-0073 東京都杉並区下高井戸 1-15-12
TEL 03(5355)3537 FAX 03(5355)4470
IMPORTANT NOTICE TO CONSUMERS
This product has been manufactured according to strict specifications and voltage requirements that are applicable in the country in
which it is intended that this product should be used. If you have purchased this product via the internet, through mail order, and/or
via a telephone sale, you must verify that this product is intended to be used in the country in which you reside.
WARNING: Use of this product in any country other than that for which it is intended could be dangerous and could invalidate the
manufacturer’s or distributor’s warranty. Please also retain your receipt as proof of purchase otherwise your product may be disqualified from the manufacturer’s or distributor’s warranty.
REMARQUE IMPORTANTE POUR LES CLIENTS
Ce produit a été fabriqué suivant des spécifications sévères et des besoins en tension applicables dans le pays où ce produit doit
être utilisé. Si vous avez acheté ce produit via l’internet, par vente par correspondance ou/et vente par téléphone, vous devez vérifier
que ce produit est bien utilisable dans le pays où vous résidez.
ATTENTION: L’utilisation de ce produit dans un pays autre que celui pour lequel il a été conçu peut être dangereuse et annulera la
garantie du fabricant ou du distributeur. Conservez bien votre récépissé qui est la preuve de votre achat, faute de quoi votre produit
ne risque de ne plus être couvert par la garantie du fabricant ou du distributeur.
WICHTIGER HINWEIS FÜR KUNDEN
Dieses Produkt wurde unter strenger Beachtung von Spezifikationen und Spannungsanforderungen hergestellt, die im Bestimmungsland gelten. Wenn Sie dieses Produkt über das Internet, per Postversand und/oder mit telefonischer Bestellung gekauft haben,
müssen Sie bestätigen, dass dieses Produkt für Ihr Wohngebiet ausgelegt ist.
WARNUNG: Verwendung dieses Produkts in einem anderen Land als dem, für das es bestimmt ist, verwendet wird, kann gefährlich
sein und die Garantie des Herstellers oder Importeurs hinfällig lassen werden. Bitte bewahren Sie diese Quittung als Kaufbeleg auf,
da andernfalls das Produkt von der Garantie des Herstellers oder Importeurs ausgeschlossen werden kann.
4015-2 Yanokuchi, Inagi-city, Tokyo 206-0812 Japan
© 2007 KORG INC.