1
AR8000 User Guide
AR8000 Bedienungsanleitung
AR8000 Guide de l’utilisateur
AR8000 Guida dell’utente
AR8000 User Guide
The AR8000 full range 8-channel receiver features DSM2™ technology and is compatible with
all Spektrum™ and JR® aircraft radios that support DSM2 technology including: JR12X, X9303,
Spektrum DX8, DX7, DX7se, DX6i, DX5e and Module Systems.
Note: The AR8000 receiver is not compatible with the Spektrum DX6 parkflyer transmitter.
Features
• 8-channel full range receiver
• Patented MultiLink receiver technology
• Includes one internal and one remote receiver • SmartSafe™ failsafe system
• QuickConnect™ with Brownout Detection
• Flight Log compatible (optional)
• 2048 Resolution
• High-speed 11ms operation when used with capable transmitters
• Hold indicator (Red LED indicates number of holds incurred during flight).
Applications
Full range up to 8-channel aircraft including:
• All types and sizes of glow, gas and electric powered airplanes
• All types and sizes of no-powered gliders
• All types and sizes of glow, gas and electric powered helicopters
Note: Not for use in airplanes that have full carbon fuselages. Not for use in airplanes that
have significant carbon or conductive structures. It is recommended to use either the
AR6250 or AR9300 receivers for carbon fuselage applications.
Specifications:
Type: DSM2 full range receiver
Channels: 8
Modulation: DSM2
Main Receiver Dimensions: 1.27 x 1.35 x 0.45 in (32.3 x 34.3 x 11.4mm)
Remote Receiver Dimensions: 0.80 x 1.10 x 0.27 in (20.3 x 28.0 x 6.9mm)
Main Receiver Weight: .33 oz (9.4 g) Weight with Remote Receiver: .49 oz (13.9 g)
Voltage range: 3.5 to 9.6V
Resolution: 2048
Frame rate: 11ms when paired with the DX7se or DX8
Compatibility: All DSM2 aircraft transmitters and module systems
Patented MultiLink™ Receiver Technology
The AR8000 incorporates dual receivers, offering the security of dual path RF redundancy. An
internal receiver is located on the main printed circuit board, while a second external receiver
is attached to the main board with a 6-inch extension. By locating these receivers in slightly
different locations in the aircraft, each receiver is exposed to its own RF environment, greatly
improving path diversity (the ability for the receiver to see the signal in all conditions).
Antenna Polarization
For optimum RF link performance it’s important that the antennas be mounted in an orientation
that allows for the best possible signal reception when the aircraft is in all possible attitudes
and positions. This is known as antenna polarization. The antennas should be oriented
perpendicular to each other; typically one vertical and one horizontal (see Receiver Installation).
The remote receiver’s antenna should be mounted in a position perpendicular at least 2 inches
away from the main receiver’s antenna using double-sided foam tape.
Receiver Installation
In gas and glow aircraft install the main receiver using the same method you would use to install
a conventional receiver in your aircraft. Typically, wrap the main receiver in protective foam and
fasten it in place using rubber bands or hook and loop straps.
EN
Alternately, in electric airplanes or helicopters, it’s acceptable to use thick double-sided foam
tape to fasten the main receiver in place.
Mounting the remote receiver in a slightly different location, even just inches away from the
primary receiver, gives tremendous improvements in path diversity. Essentially, each receiver
sees a different RF environment and this is key to maintaining a solid RF link, even in aircraft that
have substantial conductive materials (e.g. larger gas engines, carbon fiber, pipes, etc.), which
can weaken the signal.
Using servo tape, mount the remote receiver keeping the remote antennas at least 2 inches away
from the primary antenna. Ideally, the antennas will be oriented perpendicularly to each other. In
airplanes, we’ve found it best to mount the primary receiver in the center of the fuselage on the
servo tray and to mount the remote receiver to the side of the fuselage or in the turtle deck.
In helicopters, there is generally enough room on the servo tray to achieve the necessary separation.
If necessary a mount can be fashioned using clear plastic to mount the external receiver.
Important: Y-Harnesses and Servo Extensions
When using Y-harnesses or servo extensions it’s important to use standard non-amplified
Y-harnesses and servo extensions as this can/will cause the servos to operate erratically or not
function at all. Amplified Y-harnesses were developed several years ago to boost the signal for
some older PCM systems and should not be used with Spektrum equipment. Note that when
converting existing models to Spektrum be certain that all amplified Y-harnesses and or servo
extensions are replaced with conventional non-amplified versions.
Binding
The receiver must be bound to the transmitter before it will operate. Binding is the process of
teaching the receiver the specific code of the transmitter so it will only connect to that specific
transmitter.
1.To bind an AR8000 to a DSM2 transmitter, insert the bind plug in the BATT/BIND port on the
receiver.
Note: To bind an aircraft with an electronic speed controller that powers the receiver through the
throttle channel (ESC/BEC), insert the bind plug into the BATT/BIND port in the receiver and
the throttle lead into the throttle (THRO) port. Proceed to Step #2.
EN
2. Power the receiver. Note that the LED on the receiver should be flashing, indicating that the
receiver is in bind mode and ready to be bound to the transmitter.
3. Move the sticks and switches on the transmitter to the desired failsafe positions (low throttle
and neutral control positions).
4. Follow the procedures of your specific transmitter to enter Bind Mode, the system will
connect within a few seconds. Once connected, the LED on the receiver will go solid
indicating the system is connected.
5. Remove the bind plug from the BATT/BIND port on the receiver before you power off the
transmitter and store it in a convenient place.
6. After you’ve set up your model, it’s important to rebind the system so the true low throttle
and neutral control surface positions are set.
IMPORTANT: Remove the bind plug to prevent the system from entering bind mode the next
time the power is turned on.
SmartSafe™ Failsafe
The AR8000 features SmartSafe failsafe. SmartSafe is ideal for most types of aircraft. With
SmartSafe, when signal is lost the throttle channel only is driven to its preset failsafe position
(normally low throttle) while all other channels hold last command.
• Prevents unintentional electric motor response on start-up.
• Eliminates the possibility of over-driving servos on start-up by storing preset failsafe positions.
• Establishes low-throttle failsafe and maintains last-commanded control surface position if
the RF signal is lost.
Receiver Power Only
• When the receiver only is turned on (no transmitter signal is present), the throttle channel has
no output, to avoid operating or arming the electronic speed control.
• All other channels are driven to their preset failsafe positions set during binding.
After Connection
• When the transmitter is turned on and after the receiver connects to the transmitter, normal
control of all channels occurs.
• After the system makes a connection, if loss of signal occurs SmartSafe drives the throttle
servo only to its preset failsafe position (low throttle) that was set during binding.
• All other channels hold their last commanded position. When the signal is regained, the
system immediately (less than 4ms) regains control.
EN
Plugging in the Leads
Plug the servo leads into the appropriate servo ports in the receiver noting the polarity of the
servo connector.
Red LED Hold Indicator
The AR8000 features a red LED that indicates the number of holds that have occurred since
the receiver was last powered on. The LED will flash the number of holds then pause (e.g.,
flash, flash, flash, pause, flash, flash, flash, pause indicates three holds occurred since the
receiver was last turned on). Note that holds are reset to zero when the receiver is turned off.
During the first flights of a new airplane, it’s recommended to check the red LED hold indicator.
If it’s flashing, it’s important to optimize the installation (move or reposition antennas) until no
hold occurs. On later flights, the LED Hold Indicator can be used to confirm RF link performance.
Range Testing
Before each flying session and especially with a new model, it is important to perform a range
check. All Spektrum aircraft transmitters incorporate a range testing system which, when
activated, reduces the output power, allowing a range check.
30 paces (90 feet/28 meters)
1. With the model restrained on the ground, stand 30 paces (approx. 90 feet/28 meters) away
from the model.
2. Face the model with the transmitter in your normal flying position and place your
transmitter into range check mode.
3. You should have total control of the model with the button depressed at 30 paces (90
feet/28 meters).
4. If control issues exist, call the Product Support Team in the U.S. at 1-877-504-0233 for
further assistance. In the UK or Germany use one of the following contacts.
European Union: +
44 (0) 1279 641 097 (United Kingdom)
or email [email protected]
+49 4121 46199 66 (Germany)
or email [email protected]
Advanced Range Testing
For sophisticated models that have significant conductive material in them, the advanced range
test using a flight log is recommended. The advanced range check will confirm that the internal
and remote receivers are operating optimally and that the installation (position of the receivers)
is optimized for the specific aircraft. This Advanced Range Check allows the RF performance of
each receiver to be evaluated and to optimize the locations of the remote receiver.
Advanced Range Test
1 Plug a Flight Log (SPM9540 - optional) into the Batt/Data port on the AR8000 and turn on
the system (Tx and Rx).
2. Advance the Flight Log until F-frame losses are displayed by pressing the button on the
Flight Log.
3. Have a helper hold your aircraft while observing the Flight Log data.
4. Standing 30 paces away from the model, face the model with the transmitter in your
normal flying position and put your transmitter into range test mode. This causes reduced
power output from the transmitter.
5. Have your helper position the model in various orientations (nose up, nose down, nose
toward the Tx, nose away from the Tx, etc.) while your helper watches the Flight Log
noting any correlation between the aircraft’s orientation and frame losses. Do this for 1
minute. The timer on the transmitter can be used here.
EN
Receiver Power System Requirements
Inadequate power systems that are unable to provide the necessary minimum voltage to the
receiver during flight have become the number one cause of in-flight failures. Some of the
power system components that affect the ability to properly deliver adequate power include:
• Receiver battery pack (number of cells, capacity, cell type, state of charge)
• The ESC’s capability to deliver current to the receiver in electric aircraft
• The switch harness, battery leads, servo leads, regulators etc.
The AR8000 has a minimum operational voltage of 3.5 volts; it is highly recommended the
power system be tested per the guidelines below and in the Flight Log section.
Recommended Power System Test Guidelines
If a questionable power system is being used (e.g. small or old battery, ESC that may not have
a BEC that will support high-current draw, etc.), it is recommended that a voltmeter be used to
perform the following test.
Note: The Hangar 9 Digital Servo & Rx Current Meter (HAN172) or the Spektrum Flight Log
(SPM9540) are the perfect tools to perform the test below.
Plug the voltmeter into an open channel port in the receiver and with the system on, load the
control surfaces (apply pressure with your hand) while monitoring the voltage at the receiver.
The voltage should remain above 4.8 volts even when all servos are heavily loaded.
Note: The latest generations of Nickel-Metal Hydride batteries incorporate a new chemistry
mandated to be more environmentally friendly. These batteries when charged with
peak detection fast chargers have tendencies to false peak (not fully charge) repeatedly.
These include all brands of NiMH batteries. If using NiMH packs, be especially
cautious when charging, making absolutely sure that the battery is fully charged. It is
recommended to use a charger that can display total charge capacity. Note the number
of mAh put into a discharged pack to verify it has been charged to full capacity.
QuickConnect With Brownout Detection
Your AR8000 features QuickConnect with Brownout Detection.
• Should an interruption of power occur (brownout), the system will reconnect immediately when
power is restored (QuickConnect).
• The LED on the receiver will flash slowly indicating a power interruption (brownout) has occurred.
• Brownouts can be caused by an inadequate power supply (weak battery or regulator), a loose
connector, a bad switch, an inadequate BEC when using an electronic speed controller, etc.
• Brownouts occur when the receiver voltage drops below 3.5 volts thus interrupting control as the
servos and receiver require a minimum of 3.5 volts to operate.
How QuickConnect™ With Brownout Detection Works
• When the receiver voltage drops below 3.5 volts the system drops out (ceases to operate).
• When power is restored the receiver immediately attempts to reconnect to the last two
frequencies that it was connected to.
• If the two frequencies are present (the transmitter was left on) the system reconnects
typically within one second.
QuickConnect with Brownout Detection is designed to allow you to fly safely through most short
duration power interruptions, however, the root cause of these interruptions must be corrected
before the next flight to prevent catastrophic safety issues.
Note: If a brownout occurs in flight it is vital that the cause of the brownout be determined
and corrected.
Flight Log (SPM9540 Optional)
The Flight Log is compatible with the AR8000. The Flight Log displays overall RF link
performance as well as the individual internal and external receiver link data. Additionally it
displays receiver voltage.
Using the Flight Log
After a flight and before turning off the receiver or transmitter, plug the Flight Log into the Data
port on the AR8000. The screen will automatically display voltage e.g. 6v2= 6.2 volts.
EN
Note: When the voltage reaches 4.8 volts or less, the screen will flash indicating low voltage.
Press the button to display the following information:
A - Antenna fades on the internal antenna
B – Not used
L – Antenna fades on the external antenna
R – Not used
F - Frame loss
H - Holds
Antenna fades—represents the loss of a bit of information on that specific antenna.
Typically it’s normal to have as many as 50 to 100 antenna fades during a flight. If any single
antenna experiences over 500 fades in a single flight, the antenna should be repositioned in the
aircraft to optimize the RF link.
Frame loss—represents simultaneous antenna fades on all attached receivers. If the RF link
is performing optimally, frame losses per flight should be less than 20. A hold occurs when 45
consecutive frame losses occur. This takes about one second. If a hold occurs during a flight, it’s
important to evaluate the system, moving the antennas to different locations and/or checking to
be sure the transmitter and receivers are all working correctly.
Note: A servo extension can be used to allow the Flight Log to be plugged in more
conveniently. On some models, the Flight Log can be plugged in, attached and left on
the model using double-sided tape. Mounting the Flight Log conveniently to the side
frame is common with helicopters.
ModelMatch
Some Spektrum and JR transmitters offer a patent pending feature called ModelMatch.
ModelMatch prevents the possibility of operating a model using the wrong model memory,
potentially preventing a crash. With ModelMatch each model memory has its own unique code
(GUID) and during the binding process the code is programmed into the receiver. Later, when
the system is turned on, the receiver will only connect to the transmitter if the corresponding
model memory is programmed on screen.
Note: If at any time you turn on the system and it fails to connect, check to be sure the
correct model memory is selected in the transmitter. Please note that the Spektrum
Aircraft Modules do not have ModelMatch.
EN
Tips on Using Spektrum 2.4GHz
While your DSM equipped 2.4GHz system is intuitive to operate, functioning nearly identically to
72MHz systems, following are a few common questions from customers.
Q: Which do I turn on first, the transmitter or the receiver?
A: If the receiver is turned off first—all servos except for the throttle will be driven to their preset
failsafe positions set during binding. At this time the throttle channel doesn’t output a pulse
position preventing the arming of electronic speed controllers or in the case of an engine powered
aircraft the throttle servo remaining in its current position. When the transmitter is then turned
on the transmitter scans the 2.4GHz band and acquires two open channels. Then the receiver
that was previously bound to the transmitter scans the band and finds the GUID (Globally Unique
Identifier code) stored during binding. The system then connects and operates normally.
If the transmitter is turned on first—the transmitter scans the 2.4GHz band and acquires two
open channels. When the receiver is then turned on for a short period (the time it takes to
connect) all servos except for the throttle are driven to their preset failsafe positions while the
throttle has no output pulse. The receiver scans the 2.4GHz band looking for the previously
stored GUID and when it locates the specific GUID code and confirms uncorrupted repeatable
packet information, the system connects and normal operation takes place. Typically this takes
2 to 6 seconds.
Q: Sometimes the system takes longer to connect and sometimes it doesn’t connect
at all?
A: In order for the system to connect (after the receiver is bound) the receiver must receive
a large number of consecutive uninterrupted perfect packets from the transmitter in order to
connect. This process is purposely critical of the environment ensuring that it’s safe to fly when
the system does connect. If the transmitter is too close to the receiver (less than 4 feet) or if the
transmitter is located near metal objects (metal TX case, the bed of a truck, the top of a metal
work bench, etc.) connection will take longer and in some cases connection will not occur as
the system is receiving reflected 2.4GHz energy from itself and is interpreting this as unfriendly
noise. Moving the system away from metal objects or moving the transmitter away from the
receiver and powering the system again will cause a connection to occur. This only happens
during the initial connection. Once connected the system is locked in and should a loss of signal
occur (failsafe) the system connects immediately (4ms) when signal is regained.
Q: I’ve heard that the DSM system is less tolerant of low voltage. Is this correct?
A: All DSM receivers have an operational voltage range of 3.5 to 9.6 volts. With most systems
this is not a problem as in fact most servos cease to operate at around 3.8 volts. When using
multiple high-current draw servos with a single or inadequate battery/power source, heavy
momentary loads can cause the voltage to dip below this 3.5-volt threshold thus causing
the entire system (servos and receiver) to brown out. When the voltage drops below the low
voltage threshold (3.5 volts), the DSM receiver must reboot (go through the start-up process
of scanning the band and finding the transmitter) and this can take several seconds. Please
read the receiver power requirement section as this explains how to test for and prevent this
occurrence.
Q: Sometimes my receiver loses its bind and won’t connect requiring rebinding. What
happens if the bind is lost in flight?
A: The receiver will never lose its bind unless it’s instructed to. It’s important to understand that
during the binding process the receiver not only learns the GUID (code) of the transmitter but the
transmitter learns and stores the type of receiver that it’s bound to. If the transmitter is placed
into bind mode, the transmitter looks for the binding protocol signal from a receiver. If no signal is
present, the transmitter no longer has the correct information to connect to a specific
receiver and in essence the transmitter has been “unbound” from the receiver. We’ve had several
DX7 customers that use transmitter stands or trays that unknowingly depress the bind button
and the system is then turned on losing the necessary information to allow the connection to
take place. We’ve also had DX7 customers that didn’t fully understand the range test process
and pushed the bind button before turning on the transmitter also causing the system to “lose its
bind.”
EN
Warranty Period
Exclusive Warranty- Horizon Hobby, Inc., (Horizon) warranties that the Products purchased (the “Product”)
will be free from defects in materials and workmanship for a period of 1 year from the date of purchase by
the Purchaser.
1-Year Limited Warranty
Horizon reserves the right to change or modify this warranty without notice and disclaims
all other warranties, express or implied.
(a) This warranty is limited to the original Purchaser (“Purchaser”) and is not transferable. REPAIR
OR REPLACEMENT AS PROVIDED UNDER THIS WARRANTY IS THE EXCLUSIVE REMEDY OF THE
PURCHASER. This warranty covers only those Products purchased from an authorized Horizon dealer.
Third party transactions are not covered by this warranty. Proof of purchase is required for warranty claims.
Further, Horizon reserves the right to change or modify this warranty without notice and disclaims all other
warranties, express or implied.
(b) Limitations- HORIZON MAKES NO WARRANTY OR REPRESENTATION, EXPRESS OR IMPLIED,
ABOUT NON-INFRINGEMENT, MERCHANTABILITY OR FITNESS FOR A PARTICULAR PURPOSE OF THE
PRODUCT. THE PURCHASER ACKNOWLEDGES THAT THEY ALONE HAVE DETERMINED THAT THE
PRODUCT WILL SUITABLY MEET THE REQUIREMENTS OF THE PURCHASER’S INTENDED USE.
(c) Purchaser Remedy- Horizon’s sole obligation hereunder shall be that Horizon will, at its option, (i)
repair or (ii) replace, any Product determined by Horizon to be defective. In the event of a defect, these are
the Purchaser’s exclusive remedies. Horizon reserves the right to inspect any and all equipment involved
in a warranty claim. Repair or replacement decisions are at the sole discretion of Horizon. This warranty
does not cover cosmetic damage or damage due to acts of God, accident, misuse, abuse, negligence,
commercial use, or modification of or to any part of the Product. This warranty does not cover damage due
to improper installation, operation, maintenance, or attempted repair by anyone other than Horizon. Return
of any goods by Purchaser must be approved in writing by Horizon before shipment.
Damage Limits
HORIZON SHALL NOT BE LIABLE FOR SPECIAL, INDIRECT OR CONSEQUENTIAL DAMAGES, LOSS OF
PROFITS OR PRODUCTION OR COMMERCIAL LOSS IN ANY WAY CONNECTED WITH THE PRODUCT,
WHETHER SUCH CLAIM IS BASED IN CONTRACT, WARRANTY, NEGLIGENCE, OR STRICT LIABILITY.
Further, in no event shall the liability of Horizon exceed the individual price of the Product on which
liability is asserted. As Horizon has no control over use, setup, final assembly, modification or misuse,
no liability shall be assumed nor accepted for any resulting damage or injury. By the act of use, setup or
assembly, the user accepts all resulting liability.
If you as the Purchaser or user are not prepared to accept the liability associated with the use of this Product,
you are advised to return this Product immediately in new and unused condition to the place of purchase.
Law: These Terms are governed by Illinois law (without regard to conflict of law principals).
Safety Precautions
This is a sophisticated hobby Product and not a toy. It must be operated with caution and common sense
and requires some basic mechanical ability. Failure to operate this Product in a safe and responsible
manner could result in injury or damage to the Product or other property. This Product is not intended
for use by children without direct adult supervision. The Product manual contains instructions for safety,
operation and maintenance. It is essential to read and follow all the instructions and warnings in the
manual, prior to assembly, setup or use, in order to operate correctly and avoid damage or injury.
Questions, Assistance, and Repairs
Your local hobby store and/or place of purchase cannot provide warranty support or repair. Once assembly,
setup or use of the Product has been started, you must contact Horizon directly. This will enable Horizon to
better answer your questions and service you in the event that you may need any assistance. For questions
or assistance, please direct your email to [email protected], or call 877.504.0233 toll
free to speak to a Product Support representative.
Inspection or Repairs
If this Product needs to be inspected or repaired, please call for a Return Merchandise Authorization
(RMA). Pack the Product securely using a shipping carton. Please note that original boxes may be
included, but are not designed to withstand the rigors of shipping without additional protection. Ship via a
carrier that provides tracking and insurance for lost or damaged parcels, as Horizon is not responsible for
EN
merchandise until it arrives and is accepted at our facility. A Service Repair Request is available at www.
horizonhobby.com on the “Support” tab. If you do not have internet access, please include a letter with
your complete name, street address, email address and phone number where you can be reached during
business days, your RMA number, a list of the included items, method of payment for any non-warranty
expenses and a brief summary of the problem. Your original sales receipt must also be included for
warranty consideration. Be sure your name, address, and RMA number are clearly written on the outside of
the shipping carton.
Warranty Inspection and Repairs
To receive warranty service, you must include your original sales receipt verifying the proof-of-purchase
date. Provided warranty conditions have been met, your Product will be repaired or replaced free of charge.
Repair or replacement decisions are at the sole discretion of Horizon Hobby.
Non-Warranty Repairs
Should your repair not be covered by warranty the repair will be completed and payment will be required
without notification or estimate of the expense unless the expense exceeds 50% of the retail purchase cost.
By submitting the item for repair you are agreeing to payment of the repair without notification. Repair
estimates are available upon request. You must include this request with your repair. Non-warranty repair
estimates will be billed a minimum of ½ hour of labor. In addition you will be billed for return freight.
Please advise us of your preferred method of payment. Horizon accepts money orders and cashiers checks,
as well as Visa, MasterCard, American Express, and Discover cards. If you choose to pay by credit card,
please include your credit card number and expiration date. Any repair left unpaid or unclaimed after 90
days will be considered abandoned and will be disposed of accordingly. Please note: non-warranty repair
is only available on electronics and model engines.
Electronics and engines requiring inspection or repair should be shipped to the following address:
Horizon Service Center
4105 Fieldstone Road
Champaign, Illinois 61822, USA
All other Products requiring warranty inspection or repair should be shipped to the following address:
Horizon Product Support
4105 Fieldstone Road
Champaign, Illinois 61822, USA
Please call 877-504-0233 or e-mail us at [email protected] with any questions or
concerns regarding this product or warranty.
European Union:
Electronics and engines requiring inspection or repair should be shipped to one of the following
addresses:
Horizon Hobby Limited
Units 1-4 Ployters Rd
Staple Tye, Harlow
Essex CM18 7NS
United Kingdom
Please call +44 (0) 1279 641 097 or email [email protected] with any questions or concerns
regarding this product or warranty.
Horizon Technischer Service
Hamburger Str. 10
25335 Elmshorn
Germany
Please call +49 4121 46199 66 or email [email protected] with any questions or concerns
regarding this product or warranty.
Horizon Hobby SAS
14 Rue Gustave Eiffel
Zone d’Activité du Réveil Matin
91230 Montgeron
France
Please call +33 (0) 1 60 47 44 47 with any questions or concerns regarding this product or warranty.
EN
Compliance Information for the European Union
Declaration of Conformity
(in accordance with ISO/IEC 17050-1)
No. HH2010012801
Product(s):
Spektrum AR8000 Receiver
Item Number(s):
SPMAR8000
Equipment class:
1
The objects of declaration described above are in conformity with the requirements of the
specifications listed below, following the provisions of the European R&TTE directive 1999/5/EC:
EN 301 489-1 v.1.6.1
General EMC requirements for Radio equipment
EN 301 489-17 v.1.2.1
Signed for and on behalf of:
Horizon Hobby, Inc.
Champaign, IL USA
Jan 28, 2010
Steven A. Hall
Vice President
International Operations and Risk Management
Horizon Hobby, Inc.
Instructions for Disposal of WEEE by
Users in the European Union
This product must not be disposed of with other waste. Instead, it is the user’s
responsibility to dispose of their waste equipment by handing it over to a
designated collection point for the recycling of waste electrical and electronic equipment. The
separate collection and recycling of your waste equipment at the time of disposal will help to
conserve natural resources and ensure that it is recycled in a manner that protects human health
and the environment. For more information about where you can drop off your waste equipment for
recycling, please contact your local city office, your household waste disposal service or where you
purchased the product.
FCC Information
This device complies with part 15 of the FCC rules. Operation is subject to the following two
conditions: (1) This device may not cause harmful interference, and (2) this device must accept any
interference received, including interference that may cause undesired operation.
Caution: Changes or modifications not expressly approved by the party responsible for
compliance could void the user’s authority to operate the equipment.
This product contains a radio transmitter with wireless technology which has been tested and found
to be compliant with the applicable regulations governing a radio transmitter in the 2.400GHz to
2.4835GHz frequency range.
US patent number 7,391,320. Other patents pending.
DSM and DSM2 are trademarks or registered trademarks of Horizon Hobby, Inc. The Spektrum trademark is used with
permission of Bachmann Industries, Inc. Spektrum radios and accessories are exclusively available from Horizon Hobby, Inc.
EN
AR8000 Bedienungsanleitung
Der AR8000 Empfänger mit voller Reichweite unterstützt die DSM2 Technologie und ist
kompatibel mit allen Spektrum und JR Flugsendern die DSM2 Technologie unterstützen
inklusive: JR12X, X9303, Spektrum DX10, DX8, DX7, DX6i, DX5e und Spektrum Module.
Hinweis: Der AR8000 Empfänger ist nicht kompatibel mit dem DX6 Parkfly Sender.
Eigenschaften
• 8 Kanal Empfänger mit voller Reichweite
• patentierte Multilink Empfänger Technologie
• ausgerüstet mit einem internen und einem externen Empfänger
• SmartSafe Failsafe System
• QuickConnect mit Spannungsabfalldedektion (Brownout Detection)
• kompatibel zu Flight Log (optional)
• 2048 Schritte Auflösung
• High Speed 11ms Framerate bei Verwendung eines geeigneten Empfängers.
• Hold Indicator (Rote LED zeigt die Anzahl der aufgetretenen Holds während des
Fluges an)
Anwendungen
Flugzeuge die einen 8 Kanal Empfänger mit voller Reichweite benötigen inklusive:
• alle Typen und Größen von Verbrenner und Elektroflugzeugen
• alle Typen und Größen von Segelflugzeugen
• alle Typen und Größen von Verbrenner und Elektrohelikoptern
Hinweis: Nicht für den Einsatz in Flugzeugen mit Carbon/Kohlefaser Rümpfen oder
Flugzeugen die einen signifikanten Anteil von Carbon/Kohlefaser haben.
Spezifikationen
Typ: DSM2 Empfänger mit voller Reichweite
Kanäle: 8
Modulation: DSM2
Abmessungen Hauptempfänger: 32,3 x 34,3 x 11,4 mm
Abmessngen Satellitenempfänger: 20,3 x 28,0 x 6,9 mm
Betriebsspannung: 3,5 - 9,6 Volt
Aufslösung: 2048 Schritte
Frame Rate: 11ms zusammen mit DX7se/DX8/DX10
Kompatibel mit: allen DSM2 Flugsendern und Modulen
Patentierte Multilink™ Empfänger Technologie
Der AR8000 Empfänger ist mit einem internen Empfänger und einem externen Empfänger
ausgestattet, die mit Ihrer Redundanz ein größtmögliches Maß an Sicherheit bieten. Der interne
Empfänger ist auf der Platine des Mainboards angeordnet, der externe Empfänger befindet sich
in einem separaten Gehäuse, dass mit einem 15,24 langen Anschlusskabel versehen ist.
Werden beide Empfänger an unterschiedlichen Einbauorten placiert, arbeitet jeder Empfänger
mit seinem eigenem RF Umfeld, dass sich die Path Diversity deutlich verbessert. (Path Diversity
= die Fähigkeit des Empfängers ein Signal unter allen Bedingungen zu empfangen) Antennen Polarisation
Für eine optimale RF Verbindung ist es wichtig, dass die Antennen der Empfänger auf einen
optimalen Empfang im Flugzeug in allen möglichen Fluglagen und Flughöhen ausgerichtet
sind. Diese Ausrichtung bezeichnet man als Antennen Polarisation. Die Antennen sollten
rechwinklig zueinander angeordnet sein, eine Waagerecht, die andere Senkrecht ausgerichtet
(siehe Empfänger Einbau). Der externe Empfänger sollte ca. 5cm von dem Hauptempfänger
entfernt eingebaut sein. Bitte achten Sie dabei auf auf die Ausrichtung. Die Empfänger sollten
rechtwinklig zueinander eingebaut werden, in der Antennenausrichtung eine waagerecht, die
Antenne des anderen Empfängers senkrecht.
DE
Empfänger Einbau
Bauen Sie den Empfänger in Verbrenner Flugzeugen so ein wie Sie auch Empfänger anderen
Hersteller einbauen. Wickeln Sie den Empfänger in ein Stück Schaumstoff und befestigen
Ihn dann mit einem Gummiband oder Kabelbinder. In Elektro- Hubschraubern oder ElektroFlugzeugen verwenden Sie bitte zur Befestigung dickes doppelseitiges geschäumtes Klebeband.
Montieren Sie den externen Empfänger wie oben beschrieben ca 5 cm von dem Hauptempfänger
entfernt. So erhält jeder Empfänger sein eigenes RF Umfeld, dass der Schlüssel zu einem
sicheren Empfang ist, auch in Flugzeugen die einen Anteil an schirmenden Komponenten (z.B
goße Benzinmotoren, Carbonfaser, Auspuffanlagen etc..haben) die das Signal beeinflussen
können. In Flugzeugen montieren Sie den Empfängerin der Mitte auf dem Servobrett und den
Satellitenempfänger min. 5 cm entfernt an der Rumpfseitenwand.
In Hubschraubern ist auf den Seitenteilen üblicherweise genug Platz um den notwenigen Abstand
zu erreichen. Falls gewünscht können Sie den externen Empfänger auch an einem Stück klare
Kunstoffplatte befestigen.
Wichtiger Hinweis zu V- Kabeln und Servokabel Verlängerungen
Wenn Sie in ihren Modell V- Kabel oder Servoverlängerungen nutzen ,achten Sie bitte darauf,
dass Sie Standardkabel ohne Verstärkung verwenden. Kabel die mit einem Verstärker versehen
sind können zu Fehlfunktionen führen. Bitte überprüfen Sie das auch ,wenn Sie ein älteres Modell
auf Spektrum Fernsteuertechnik umrüsten.
Binden
Der AR8000 Empfänger muß zum Betrieb mit dem Sender gebunden werden. Der Bindevorgang
ist der Prozess der Übermittlung des senderspezifischen Signals.
1.Um den AR8000 an einen DSM2 Sender zu binden, stecken Sie den Bindestecker in den
BATT/BIND Port an den Empfänger.
DE
Hinweis: Um ein Flugzeug, dass mit einem BEC System durch einen Fahrtenregler mit
Empfängerstrom versorgt wird zu binden, stecken Sie bitte den Bindestecker
in dem BATT/BIND Port des Empfängers und stecken den Reglerstecker in die
GAS/Throttlebuchse. Fahren Sie fort mit Schritt 2.
2. Schalten Sie den Empfänger ein. Der Empfänger wird blinken und damit anzeigen, dass er
sich im Bindemodus befindet.
3. Bewegen Sie die Knüppel und Schalter in die vorgesehenden Failsafe Positionen (Gas
Leerlauf und neutrale Kontrollen)
4. Folgen Sie den senderspezifischen Anweisungen zum Binden und das System wird sich
innerhalb kurzer Zeit binden. Ist das System verbunden leuchtet die LED dauerhaft.
5. Entfernen Sie den Bindestecker und heben Sie ihn an einem sicheren Ort auf.
6. Wenn alle Einstellungen am Modell und Sender vorgenomen sind, binden Sie das System
erneut, dass alle Änderungen gespeichert werden.
Wichtig: Bitte entfernen Sie nach dem Bindevorgang den Bindestecker, sonst wird das
System bei dem nächsten Einschalten den Bindevorgang erneut ausführen.
Failsafe Functionen
Der AR8000 bietet die Smart Safe Failsafe Funktion. Dieses Failsafe ist ideal für die meisten
Flugzeugtypen. Findet ein Signalverlust statt, fährt nur das Gasservo in seine voreingestellte
Failsafe Position (normalerweise Gas Leerlauf), alle andere Servos halten ihre Position.
• Verhindert ungewolltes Anlaufen lassen bei dem Einschalten
• Verhindert das Überdrehen von Servos bei dem Einschalten
• Fährt den Gaskanal auf niedrige Position, alle andere Servos halten ihre Position.
Bei eingeschalteten Empfänger
Ist Smart Safe programmiert und der Empfänger ist ohne Sender eingeschaltet, erhält der
Gaskanal kein Signal ,um ein unabsichtliches Laufen lassen oder Armieren des Motors oder
Regler zu vermeiden. Programmieren von Smart Safe
Die Failsafe Positionen werden über die Knüppelposition während des Bindens eingestellt. Wenn
der Bindevorgang abgeschlossen ist, ist auch die Smart Safe Einstellung übernommen.
Bei eingeschalteten Empfänger
Ist Smart Safe oder Preset Failsafe programmiert und der Empfänger ist ohne Sender
eingeschaltet, erhält der Gaskanal kein Signal ,um ein unabsichtliches Laufen lassen oder
Armieren des Motors oder Regler zu vermeiden. Nach Verbindung
Wird der Sender eingeschaltet und hat sich mit dem Empfänger verbunden besteht eine norme
Verbindung und volle Kontrolle über alle Servos.
DE
Ist das System verbunden und es tritt ein Signalverlust auf, fährt die Smart Drive Funktion das Gas
Servo in die programmierte Fail Safe Funktion, die während dem Binden programmiert wurde.
Alle anderen Kanäle halten ihre Position.
Ist das Signal wieder da, verbindet sich das System unverzüglich ( innerhalb 4ms) und sie
haben wieder volle Kontrolle über das Modell.
Verbinden mit den Servoanschlüssen
Bitte stecken Sie die Servostecker in die dafür vorgesehenden Buchsen und achten dabei auf
die Polarität.
Der LED Hold Indikator
Hold: Ein Hold tritt ein, wenn 45 aufeinander folgende Datenblöcke verloren gehen. Dieses
dauert ca. 1 Sekunde. Wenn ein Hold eintritt, muss das gesamte System, hier insbesondere die
Position der Antennen geprüft werden.
Der AR8000 ist mit einer roten Leuchtdiode ausgestattet, (gekennzeichnet mit einem H), die die
Anzahl der Holds seit dem letzten Einschalten anzeigt Die LED blinkt und zeigt dabei die Anzahl
der Holds, danach erfolgt eine Pause.
Beispiel: blink, blink, blink, Pause, blink, blink, blink. Hier zeigt der Empfänger 3 Holds seit dem
letzten Einschalten. Bitte beachten Sie, dass dieser Speicher mit dem Ausschalten gelöscht
wird. Wir raten an, während erster Flüge mit einem neuen Modell die LED auf Blinken zu
kontrollieren. Sollte ein Blinken auftreten, optimieren Sie die Position des Empfängers oder der
Antennen bis kein Blinken mehr auftritt. Bei späteren Flügen kann der LED Hold Indikator als für
die Empfangleistung angesehen werden.
Standard Reichweitentest
Vor jeder Flugsaison oder mit einem neuen Modell ist es wichtig einen Reichweitentest
durchzuführen. Alle Spektrum Sender sind hierzu mit einem Testsystem ausgestattet, dass die
Sendeleistung reduziert und so bequem am Boden einen Reichweitenest ermöglicht.
30 paces (90 feet/28 meters)
1. Stellen die das Modell auf den Boden und entfernen Sie sich ca. 28m vom Modell.
2. Halten Sie den Sender in ihrer normalen Flugposition und aktivieren Sie den Reichweitest.
Die Sendeleistung wird jetzt reduziert.
3. Sie sollten in dieser Entfernung komplette Kontrolle über das Modell haben.
4. Sollten bei diesem Test Probleme auftreten wenden Sie sich bitte an den Fachhändler oder
an den technischen Service von Horizon Hobby Tel: +49 4121 4619966
European Union: +
44 (0) 1279 641 097 (United Kingdom)
or email [email protected]
+49 4121 46199 66 (Germany)
or email [email protected]
Reichweitentest mit dem Flight Log
Der Standard Reichweitentest ist grundsätzlich für jedes Flugmodell empfohlen.
Für Flugzeuge, die einen Anteil an abschirmenden Materialen haben (z.B Turbinen Jets, einige
Typen von Scale Flugzeugen sowie Modelle mit Carbon Bauteilen etc.) ist der Reichweitetest
mit dem Flight Log angebracht. Mit diesem Test kann die Empfangsleistung jedes einzelnen
Empfängers überprüft werden.
1. Verbinden Sie den Flight Log in den Data Anschluss und schalten Sie Sender und
Empfänger ein.
2. Drücken Sie den Knopf auf dem Flight Log bis auf dem Display Frame Losses erscheint.
3. Bitten Sie einen Helfer das Modell zu halten und dabei den Flight Log zu bebachten.
4. Stellen Sie sich bitte ca. 28 Meter entfernt vom Modell und aktivieren Sie den
Reichweitentest.
DE
5. Bitten Sie den Helfer das Modell in alle möglichen Lagen (Nase rauf / runter, zu dem
Sender hin /vom Sender weg.....) zu bringen und dabei den Flight zu beobachten. Machen
Sie diese bitte für eine Minute. Der Timer auf der Fernsteuerung kann hier hilfreich sein.
Für Großmodelle ist es empfohlen, sie auf die Nase zu stellen und sie für eine Minute um
die eigene Achse zu drehen. Stellen Sie danach das Modell auf das Fahrwerk und drehen
es ebenfalls um die eigene Achse.
6. Ein erfolgreicher Reichweitentest wird weniger als 10 Frame Losses haben. Drücken Sie
den Knopf auf dem Flight Log und blättern Sie durch die Empfangsleistung jeder einzelnen
Antenne. Die Antennenausblendungen sollten bei allen Antennen relativ gleich ein. Sollte
eine Antenne auffallend mehr Frame Losses zeigen ist sie an einem anderem Ort zu
placieren oder anders auszurichten
7. Ein erfolgreicher Reichweitentest sieht im Details so aus:
H - 0 Holds
F - weniger als 10 Frame Losses
A und L Frame Losses werden in der Regel unter 100 sein. Es ist wichtig die einzelnen
Antennen miteinander zu vergleichen. Sollte eine Antenne deutlich höhere Werte
aufweisen (2 - 3 Mal mehr) sollte der Test wiederholt werden. Ergeben sich dann die
gleichen Werte sollte der Empfänger an einer anderen Stelle eingebaut werden.
Nicht ausreichende Empfängerstromversorgung ist eine der Hauptursachen von Störungen oder
Abstürzen. Um dieses zu vermeiden müssen folgende Komponenten hierbei berücksichtigt
werden:
• Empfängerakku (Zellenanzahl, Kapazität. Zelltyp, Alter Ladezustand)
• Schalter Akku Anschlüsse und Regler etc.
• Das Regler BEC kann für die Anzahl der Servos zu schwach sein
Der AR8000 benötigt eine Mindestspannung von 3,5 Volt. Wir raten dringend an, diese mit den
folgenden Richtlinien zur Überprüfung der Empfängerstromversorgung zu testen.
Empfohlenende Richtlinien zum Test der Empfängerstromversorgung
Wenn Sie sich nicht sicher sind ,ob Ihre Empfängerstromversorgung ausreichend ist
empfehlen wir diesen Test. Sie benötigen dazu ein Voltmeter.
Hinweis: Die Hangar 9 Digitalmeter ( HAN 111 und HAN 172) sowie das Spektrum Flight
Log(SPM9540) sind sehr gut geeignet ,um den Test durch zu führen.
Schließen Sie das Voltmeter bei eingeschalteten System an einem freien Servoausgang an und
bewegen Sie die Servos. Geben Sie per Hand etwas Haltekraft auf die Servos und beobachten
dabei die Voltangabe. Die Voltzahl sollte auch bei stärkerer Last nicht unter 4.8 Volt fallen.
Hinweis: Die neueste Generation von NiMh Zellen haben geänderte (mehr umweltfreundliche)
Inhaltstoffe. Diese Akkus neigen bei dem Peak Schnell- Ladeverfahren dazu falsche
Peak Angaben dem Ladegerät mitzuteilen und somit nicht ganz voll geladen zu
werden. Dieses kann alle Marken von neuesten NiMh Zellen betreffen. Wenn Sie
also NiMh Zellen verwenden, stellen Sie bitte immer sicher, dass diese Zellen auch
voll geladen sind. Wir empfehlen hier, um ganz sicher zu gehen, Ladegeräte zu
verwenden, die die geladene mA Menge anzeigen.
QuickConnect™ mit Spannungsabfalldetektion
Ihr AR8000 ist mit einem QuickConnect mit Spannungsabfalldetektion ausgestattet.
• Sollte eine Unterbrechung der Stromversorgung (Brownout) stattfinden, wird sich das System
unverzüglich wieder neu binden (QuickConnect)
• Die orange LED im Empfänger blinkt danach langsam, um die Unterbrechung der
Stromversorgung (Brownout) anzuzeigen
• Unterbrechungen der Stromversorgung können u. a. durch schwache Empfängerakkus,
Wackelkontakte, oder ein nicht ausreichendes BEC System ausgelöst werden.
• Ein Spannungsabfall tritt ein, wenn der Empfängerstrom unter 3,5 Volt fällt.
So arbeitet das Quick Connect mit Spannungabfalldetektion
• Das System wird inaktiv wenn die Empfängerstromversorgung unter 3,5 Volt fällt.
• Ist die Spannung wieder hergestellt, wird sich das System unverzüglich mit den letzten
beiden Frequenzen verbinden, mit denen es verbunden war.
• Sind diese beiden Frequenzen vorhanden (Sender ist an), geschieht das im Bruchteil einer Sekunde.
DE
Quick Connect mit Spannungsabfalldetektion wurde entwickelt um einen sicheren Flug auch bei
kurzzeitigen Spannungsabfällen zu gewährleisten.
Hinweis: Sollten diese auftreten ist die Ursache zur Gefahrenabwehr vor dem nächsten Flug
zu beseitigen.
Flight Log
Der Flight Log ( SPM9540) ist kompatibel zu dem AR8000 Empfänger. Er zeigt die gesamt
Empfangleistung an, wie die Leistung jeder einzelnen Antenne. Zusätzlich zeigt er auch die
Empfängerspannung an.
So arbeitet der Flight Log
Zur Überprüfung der Empfängerspannung schließen Sie den Flight Log an den Data Port des
Empfängers an. Das Display zeigt Ihnen automatisch so die Empfängerspannung 6v2 = 6,2 Vol
an.
Hinweis: Erreicht die Spannung 4,8 Volt oder niedriger, blinkt das Display um Ihnen die
niedrige Spannung anzuzeigen.
Mit drücken des Knopfes an der Oberseite des Display können Sie folgende Informationen abrufen:
A - Antennenausblendungen an der internen Antenne A
B - wird nicht benötigt
L - Antennenausblendungen an der externe Antenne
R - wird nicht benötigt
F - Frame loss
H - Holds
Antennenausblendungen: stehen für den Verlust an Informationsbits einer spezifischen
Antenne. Es ist normal während des Fluges ca. 50 - 100 Antennenausblendungen zu haben.
Sollte eine spezifische Antenne während eines Fluges mehr als 500 Ausblendungen haben,
sollte die Antenne repositioniert werden, um die RF Verbindung zu optimieren.
Frame Loss: steht für gleichzeitige Antennennausblendungen auf allen angeschlossenen
Antennen. Für eine einwandfreie Verbindung sollte die Anzahl der Frame Losses nicht mehr
als 20 pro Minute übersteigen. Wenn 45 aufeinander folgende Frame Loss auftreten setzt
ein Hold ein. Dieser dauert ca. eine Sekunde. Wenn ein Hold im Flug auftritt, ist es zwingend
notwendig das System zu überprüfen und die Antennen an anderen Stellen zu placieren oder
neu auszurichten bis das System wieder einwandfrei arbeitet.
Hinweis: Nutzen Sie zur Verlängerung des Anschlußkabels eine Servoverlängerung. Wenn
das Flight Log im Modell verbleiben soll, befestigen Sie es an einem gut sichtbaren
Ort mit doppelseitigem Klebeband.
ModelMatch
Einige Spektrum und JR Sender bieten die ModellMatch Funktion an. ModelMatch eliminiert die
Möglichkeit, dass ein Modell mit dem falschen Senderspeicherplatz geflogen werden kann.
Mit ModelMatch hat jedes Modell und dazugehöriger Speicherplatz einen eigenen eindeutigen
Code (GUID Globaly Unique Identifier Code) der im Empfänger während des Bindeprozesses gespeichert wird. Wenn später Sender und Empfänger eingeschaltet werden, wird der
Empfänger nur aktiv werden, wenn im Sender der richtige Speicherplatz gewählt ist.
Hinweis: Sollten Sie Sender und Empfänger einschalten und keine Verbindung bekommen,
überprüfen Sie bitte ob Sie den richtigen Speicherplatz gewählt haben. Bitte
beachten Sie, dass Spektrum Module nicht mit ModelMatch ausgerüstet sind.
DE
Tips zum Betrieb von Spektrum 2,4GHz
Nachfolgend einige häufig gestellte Fragen zum Umgang mit dem Spektrum 2,4 GHz System.
1. F: Was schalte ich als erstes ein, Sender oder Empfänger?
A: Wenn der Empfänger als erstes eingeschaltet wird: erfolgen keine Servobewegungen,
alle Servos bleiben in ihren Positionen. Ist ein Regler angeschlossen wird dieser nicht
scharfgeschaltet. Wird dann der Sender eingeschaltet, scant er das Band und sichert zwei
offene Kanäle. Der Empfänger scant ebenfalls das Band und mit der GUID Funktion wird die
Verbindung hergestellt und das System arbeitet normal.
Wenn der Sender zuerst eingeschaltet wird: Der Sender scant das 2,4 GHz Band und sichert
zwei offene Kanäle. Der Empfänger scant ebenfalls das Band und sucht die GUID Information.
Ist diese aktiv und der ununterbrochene Austausch von Dateninformationen bestätigt, verbindet
sich das System. Diese dauert zwischen 2 - 6 Sekunden.
2. F: Manchmal braucht das System länger zum Verbinden, manchmal verbindet es sich
gar nicht.
Damit die Verbindung zwischen Sender und Empfänger (mit einem bereits gebundenen
Empfänger) hergestellt werden kann, muss der Empfänger einen ununterbrochenen
Satz Datensätze vom Sender empfangen. Diese Erstverbindung kann von der Umgebung
beeinflußt werden oder wenn der Sender zu nah(unter 1,20m ) am Empfänger placiert ist.
Metalische Gegenstände / Oberflächen wie z. B. ein Autodach oder eine Alubox können die
Einschaltverbindung durch Reflektion beeinflussen, dass sie länger dauert oder nicht zustande
kommt. Stellen Sie in diesen Fällen den Sender etwas weiter weg vom Modell oder von den
reflektierenden Flächen. Diese gilt nur für das initiale Einschalten, ist die Verbindung gegeben
und ein Loss oder Hold tritt auf, wird sich das System unverzüglich (innerhalb 4ms) wieder
verbinden.
3. F: Ich habe gehört das DSM System ist empfindlicher bei niedrigen Spannungen. Ist
das richtig?
A: Alle DSM Empfänger haben eine Betriebsspannung von 3,5 bis 9,6 Volt. Mit den meisten
Systemen ist das kein Problem, da die meisten Servos eine Spannungsuntergrenze von
3,8 Volt haben. Verwenden Sie mehrere schnelle, kräftige Servos mit entsprechend hohen
Stromverbrauch mit einem ungeeigneten Akku kann im Fall von starker Beanspruchung
die Spannung unter 3,5 Volt fallen und ein Neustart des System nötig machen. Dieser
Neustart benötigt einige Sekunden. Bitte lesen Sie dazu die Anforderungen an die
Empfängerstromversorgung aufmerksam durch, um das zu testen und so einen Fall zu
vermeiden.
4. F: Manchmal verliert der der Empfänger seine Bindung und verbindet sich auch nicht
erneut. Was ist wenn so etwas im Flug passiert?
A: Der Empfänger wird niemals unaufgefordert die Bindung verlieren. Es ist wichtig zu verstehen,
dass während des Bindeprozesses der Empfänger nicht nur den GUID Code übermittelt bekommt,
der Sender kennt und speichert auch den Typ des Empfängers der dazugehört. Wenn sich der
Sender im Bindemodus befindet sucht er das Binde Protokoll Signal des Empfängers. Ist kein
Signal vorhanden, hat der Sender nicht mehr die empfängerspezifische Information und als
Ergebnis dessen ist der Empfänger nicht mehr mit dem Sender gebunden. Es gibt einige DX7
Kunden die ungeeignete Senderpulte benutzt haben, die durch das Einsetzen des Senders den
Bindeknopf drücken und somit den oben beschriebenen Prozess in Gang gesetzt haben. Andere
DX7 Kunden haben leider den Vorgang des Reichweitentest falsch ausgeführt und vor dem
Einschalten den Bindeknopf gedrück und somit die Verbindung verloren.
Alters Empfehlung: 14 Jahre oder älter. Das ist kein Spielzeug. Dieses Produkt ist nicht geeignet
für Kinder ohne direkte Aufsicht ihrer Eltern.
DE
Garantie und Anwenderinformationen
Warnung
Ein ferngesteuertes Modell ist kein Spielzeug. Es kann, wenn es falsch eingesetzt wird, zu
erheblichen Verletzungen bei Lebewesen und Beschädigungen an Sachgütern führen.
Betreiben Sie Ihr RC-Modell nur auf freien Plätzen und beachten Sie alle Hinweise der
Bedienungsanleitung des Modells wie auch der Fernsteuerung.
Garantiezeitraum
Exklusive Garantie – Horizon Hobby Inc (Horizon) garantiert, dass das gekaufte Produkt
(Produkt) frei von Material- und Montagefehlern ist. Der Garantiezeitraum entspricht den
gesetzlichen Bestimmung des Landes, in dem das Produkt erworben wurde. In Deutschland
beträgt der Garantiezeitraum 6 Monate und der Gewährleistungszeitraum 18 Monate nach dem
Garantiezeitraum.
Garantieeinschränkungen
(a) Die Garantie wird nur dem Erstkäufer (Käufer) gewährt und kann nicht übertragen werden.
Der Anspruch des Käufers besteht in der Reparatur oder dem Tausch im Rahmen dieser
Garantie. Die Garantie erstreckt sich ausschließlich auf Produkte, die bei einem autorisierten
Horizon Händler erworben wurden. Verkäufe an dritte werden von dieser Garantie nicht gedeckt.
Garantieansprüche werden nur angenommen, wenn ein gültiger Kaufnachweis erbracht wird.
Horizon behält sich das Recht vor, diese Garantiebestimmungen ohne Ankündigung zu ändern
oder zu modifizieren und widerruft dann bestehende Garantiebestimmungen.
(b) Horizon übernimmt keine Garantie für die Verkaufbarkeit des Produktes, die Fähigkeiten und
die Fitness des Verbrauchers für einen bestimmten Einsatzzweck des Produktes. Der Käufer allein
ist dafür verantwortlich, zu prüfen, ob das Produkt seinen Fähigkeiten und dem vorgesehenen
Einsatzzweck entspricht.
(c) Ansprüche des Käufers – Es liegt ausschließlich im Ermessen von Horizon, ob das Produkt, bei
dem ein Garantiefall festgestellt wurde, repariert oder ausgetauscht wird. Dies sind die exklusiven
Ansprüche des Käufers, wenn ein Defekt festgestellt wird.
Horizon behält sich vor, alle eingesetzten Komponenten zu prüfen, die in den Garantiefall
einbezogen werden können. Die Entscheidung zur Reparatur oder zum Austausch liegt nur bei
Horizon. Die Garantie schließt kosmetische Defekte oder Defekte, hervorgerufen durch höhere
Gewalt, falsche Behandlung des Produktes, falschen Einsatz des Produktes, kommerziellen Einsatz
oder Modifikationen irgendwelcher Art aus. Die Garantie schließt Schäden, die durch falschen
Einbau, falsche Handhabung, Unfälle, Betrieb, Service oder Reparaturversuche, die nicht von
Horizon verursacht wurden, aus. Rücksendungen durch den Käufer direkt an Horizon oder eine
seiner Landesvertretungen bedürfen der schriftlichen Genehmigung von Horizon.
Schadensbeschränkung
Horizon ist nicht für direkte oder indirekte Folgeschäden, Einkommensausfälle oder kommerzielle
Verluste, die in irgendeinem Zusammenhang mit dem Produkt stehen nicht verantwortlich,
unabhängig ab ein Anspruch im Zusammenhang mit einem Vertrag, der Garantie oder der
Gewährleistung erhoben werden. Horizon wird darüber hinaus keine Ansprüche aus einem
Garantiefall akzeptieren, die über den individuellen Wert des Produktes hinaus gehen. Horizon hat
keine Einfluss auf den Einbau, die Verwendung oder die Wartung des Produktes oder etwaiger
Produktkombinationen, die vom Käufer gewählt werden. Horizon übernimmt keine Garantie
und akzeptiert keine Ansprüche für in der folge auftretende Verletzungen oder Beschädigungen.
Mit der Verwendung und dem Einbau des Produktes akzeptiert der Käufer alle aufgeführten
Garantiebestimmungen ohne Einschränkungen und Vorbehalte.
Wenn Sie als Käufer nicht bereit sind, diese Bestimmungen im Zusammenhang mit der Benutzung
des Produktes zu akzeptieren, werden Sie gebeten, dass
Produkt in unbenutztem Zustand in der Originalverpackung vollständig bei dem Verkäufer
zurückzugeben.
Sicherheitshinweise
Dieses ist ein hochwertiges Hobby Produkt und kein Spielzeug. Es muss mit Vorsicht und
Umsicht eingesetzt werden und erfordert einige mechanische wie auch mentale Fähigkeiten. Ein
Versagen, das Produkt sicher und umsichtig zu betreiben kann zu Verletzungen von Lebewesen
und Sachbeschädigungen erheblichen Ausmaßes führen. Dieses Produkt ist nicht für den
Gebrauch durch Kinder ohne die Aufsicht eines Erziehungsberechtigten vorgesehen. Die Anleitung
DE
enthält Sicherheitshinweise und Vorschriften sowie Hinweise für die Wartung und den Betrieb
des Produktes. Es ist unabdingbar, diese Hinweise vor der ersten Inbetriebnahme zu lesen und
zu verstehen. Nur so kann der falsche Umgang verhindert und Unfälle mit Verletzungen und
Beschädigungen vermieden werden.
Fragen, Hilfe und Reparaturen
Ihr lokaler Fachhändler und die Verkaufstelle können eine Garantiebeurteilung ohne Rücksprache
mit Horizon nicht durchführen. Dies gilt auch für Garantiereparaturen. Deshalb kontaktieren Sie in
einem solchen Fall den Händler, der sich mit Horizon kurz schließen wird, um eine sachgerechte
Entscheidung zu fällen, die Ihnen schnellst möglich hilft.
Wartung und Reparatur
Muss Ihr Produkt gewartet oder repariert werden, wenden Sie sich entweder an Ihren
Fachhändler oder direkt an Horizon. Packen Sie das Produkt sorgfältig ein. Beachten Sie, dass
der Originalkarton in der Regel nicht ausreicht, um beim Versand nicht beschädigt zu werden.
Verwenden Sie einen Paketdienstleister mit einer Tracking Funktion und Versicherung, da Horizon
bis zur Annahme keine Verantwortung für den Versand des Produktes übernimmt. Bitte legen Sie
dem Produkt einen Kaufbeleg bei, sowie eine ausführliche Fehlerbeschreibung und eine Liste
aller eingesendeten Einzelkomponenten. Weiterhin benötigen wir die vollständige Adresse, eine
Telefonnummer für Rückfragen, sowie eine Email Adresse.
Garantie und Reparaturen
Garantieanfragen werden nur bearbeitet, wenn ein Originalkaufbeleg von einem autorisierten
Fachhändler beiliegt, aus dem der Käufer und das Kaufdatum hervorgeht. Sollte sich ein
Garantiefall bestätigen wird das Produkt repariert oder ersetzt. Diese Entscheidung obliegt einzig
Horizon Hobby.
Kostenpflichtige Reparaturen
Liegt eine kostenpflichtige Reparatur vor, erstellen wir einen Kostenvoranschlag, den wir Ihrem
Händler übermitteln. Die Reparatur wird erst vorgenommen, wenn wir die Freigabe des Händlers
erhalten. Der Preis für die Reparatur ist bei Ihrem Händler zu entrichten. Bei kostenpflichtigen
Reparaturen werden mindestens 30 Minuten Werkstattzeit und die Rückversandkosten in
Rechnung gestellt. Sollten wir nach 90 Tagen keine Einverständniserklärung zur Reparatur
vorliegen haben, behalten wir uns vor, das Produkt zu vernichten oder anderweitig zu verwerten.
DE
Achtung: Kostenpflichtige Reparaturen nehmen wir nur für Elektronik und Motoren vor.
Mechanische Reparaturen, besonders bei Hubschraubern und RC-Cars sind extrem aufwendig
und müssen deshalb vom Käufer selbst vorgenommen werden.
Europäische Union:
Elektronik und Motoren müssen regelmäßig geprüft und gewartet werden. Für Servicezwecke
sollten die Produkt an die folgende Adresse gesendet werden:
Horizon Technischer Service
Hamburger Str. 10
25335 Elmshorn
Germany
Bitte rufen Sie +49 4121 4619966 an oder schreiben Sie uns ein Email an service@horizonhobby.
de um jede mögliche Frage zum Produkt oder der Garantieabwicklung zu stellen.
Sicherheit und Warnungen
Als Anwender des Produktes sind Sie verantwortlich für den sicheren Betrieb aus dem eine
Gefährdung für Leib und Leben sowie Sachgüter nicht hervorgehen soll. Befolgen Sie sorgfältig
alle Hinweise und Warnungen für dieses Produkt und für alle Komponenten und Produkte, die
Sie im Zusammenhang mit diesem Produkt einsetzen. Ihr Modell empfängt Funksignale und
wird dadurch gesteuert. Funksignale können gestört werden, was zu einem Signalverlust im
Modell führen würde. Stellen Sie deshalb sicher, dass Sie um Ihr Modell einen ausreichenden
Sicherheitsabstand einhalten, um einem solchen Vorfall vorzubeugen.
• Betreiben Sie Ihr Modell auf einem offenen Platz, weit ab von Verkehr, Menschen und Fahrzeugen.
• Betreiben Sie Ihr Fahrzeug nicht auf einer öffentlichen Straße.
• Betreiben Sie Ihr Modell nicht in einer belebten Straße oder einem Platz.
• Betreiben Sie Ihren Sender nicht mit leeren Batterien oder Akkus.
• Folgen Sie dieser Bedienungsanleitung mit allen Warnhinweisen sowie den
Bedienungsanleitungen aller Zubehörteile, die Sie einsetzen.
• Halten Sie Chemikalien, Kleinteile und elektrische Komponenten aus der Reichweite von Kindern.
• Feuchtigkeit beschädigt die Elektronik. Vermeiden Sie das Eindringen von Wasser, da diese
Komponenten dafür nicht ausgelegt sind.
DE
Konformitätserklärung gemäß Gesetz über Funkanlagen und TelekomunikationKonformitätserklärung
gemäß
Gesetz
Funkanlagen
und Telekomunikationseinrichtungen
(FTEG) und der
seinrichtungen
(FTEG)
und
derüber
Richtlinie
1999/5/EG
(R&TTE)
Richtlinie 1999/5/EG (R&TTE)
Declaration of conformity in accordance with the Radio and Telecommunications Termiof conformity in accordance with the Radio and Telecommunications Terminal Equipment Act (FETG) and directive 199/5/EG
nalDeclaration
Equipment
Act (FETG) and directive 1999/5/EG
(R&TTE)
(R&TTE)
Horizon Hobby Deutschland GmbH
Declaration
of conformity in accordance with the Radio and Telecommunications TermiHamburger Straße 10
D-25337
Elmshorn Act (FETG) and directive 1999/5/EG (R&TTE)
nal
Equipment
erklärtKonformitätserklärung
das Hobby
Produkt: Deutschland
Parkzone
Ultra Micro Sukhoi
SU26 über
XP BNF Funkanlagen
(PKZU1080)
Horizon
GmbH
gemäß
Gesetz
und Telekomunikationseinrich
Konformitätserklärung
gemäß Gesetz über Funkanlagen und Telekomunikationseinrichtungen (FT
declares the product:
Richtlinie 1999/5/EG (R&TTE)
Hamburger Straße 10
Richtlinie 1999/5/EG (R&TTE)
Geräteklasse:
D-25337
Elmshorn
equipment class
1
Declaration of conformity in accordance with the Radio and Telecommunications Terminal Equipment Act (F
Declaration
of conformity in accordance with the Radio and Telecommunications
Terminal Equipment Act (FETG) and dir
den grundlegenden Anforderungen des §3 und den übrigen einschlägigen Bestimmungen des (R&TTE)
FTEG (Artikel 3 der R&TTE) entspricht.
(R&TTE)
complies das
with theProdukt:
essential requirments of §3 and other relevant
provisions of the
FTEG (ArticleEmpfänger
3 of the R&TTE directive).
erklärt
Spektrum
AR8000
(SPMAR8000)
declares
the
product:
Angewendete
harmonisierte
Normen:
Harmonised standards applied:
Hobby Deutschland
Horizon Horizon
Hobby Deutschland
GmbH GmbH
Geräteklasse:
EN Straße
60950-1:2006
Gesundheit und Sicherheit1
gemäß §3 (1) 1. (Artikel 3(1)a))
Hamburger
Hamburger
10Straße 10
Health and safety requirments pursuant to §3 (1) 1.(article 3(1)a))
equipment
class
D-25337D-25337
ElmshornElmshorn
EN 301 489-1 V1.6.1
Schutzanforderungen in Bezug auf elektromagnetische Verträglichkeit
EN 301
489-17 V1.2.1
§3 (1) 2, (Artikel 3 (1)
b)) §3 und den übrigen einschlägigen Bestimmungen
den
grundlegenden
Anforderungen
des
Protection requirement concerning electromagnetic compatibility
erklärt
das (Artikel
Produkt:3 der §3
Hobbyzone
Champ
RTF (HBZ4900i,
des
FTEG
R&TTE)
entspricht.
erklärt das
Produkt:
Hobbyzone
RTF
(HBZ4900i,
HBZ49001i)HBZ49001i)
(1) 2, (article
3Champ
(1)b))
declarescomplies
the product:
declares
the
product:
with the essential
requirments of §3 and other relevant provisions of the FTEG
EN 300 328 V1.7.1 (2006-10)
Maßnahmen zur effizienten Nutzung des Frequenzspektrums
3 (2)(Artikel 3 (2))
(Article 3 of the R&TTE §directive).
Measures
for the
Geräteklasse:
1
Geräteklasse:
1 efficient use of the radio frequency spectrum
§ 3 (2) (Article 3 (2))
equipment
class
Angewendete
harmonisierte
Normen:
equipment
class
Harmonised standards applied:
CE
den grundlegenden
Anforderungen
des §3 unddes
den§3übrigen
einschlägigen
Bestimmungen
des FTEG (Artikel
3 der (Artike
R&TTE
den
grundlegenden
Anforderungen
und den
übrigen einschlägigen
Bestimmungen
des FTEG
complies
with
the01.02.2010
essential
requirments
of §3Gesundheit
and other
provisions
of
the FTEG
3 of the
R&TTE
Elmshorn,
complies
with the essential
requirments
of §3 relevant
and
relevantgemäß
provisions
of(Article
the
FTEG
(Article
3 ofdirective)
the R&T
EN
60950-1:2006
undother
Sicherheit
§3 (1)
1. (Artikel
3(1)a))
Health and
Angewendete
harmonisierte
Normen: Normen:
Angewendete
harmonisierte
le 3(1)a))
Harmonised standards applied:
Harmonised standards applied:
________________________
safety requirments pursuant to §3 (1) 1.(artic_______________________________
EN 301Jörg
489-1
V1.6.1Schutzanforderungen
in Bezug auf elektromagnetische
Schamuhn
Birgit Schamuhn
Gesundheit und Sicherheit
gemäß §3 (1) 1. (Artikel 3(1)a))
Geschäftsführerin
Gesundheit und
Sicherheit gemäß §3 (1) 1. (Artikel 3(1)a))
Verträglichkeit
Health and
safety requirments
pursuant
Managing Director
Managing
Directorto §3 (1) 1.(article 3(1)a))
EN 60950-1:2006
Geschäfstführer
EN 60950-1:2006
EN 301 489-17 V1.2.1
Health and safety requirments pursuant to §3 (1) 1.(article 3(1)a))
§3 (1) 2, (Artikel 3 (1) b))
EN 301 489-1 V1.6.1
Schutzanforderungen in Bezug auf elektromagnetische Verträglichkeit
Protection
requirement
concerning
electromagneticVerträglichkeit
EN 301V1.2.1
489-1 V1.6.1
Schutzanforderungen
in Bezug
auf elektromagnetische
EN 301 489-17
§3 (1) 2, (Artikel
3 (1) b))
EN 301 489-17 V1.2.1
§3
(1) 2,GmbH;
(Artikel
3 (1)
b))
compatibility
Horizon Hobby
Deutschland
Hamburger
Str. 10;
D-25337
Elmshorn
Protection
requirement
concerning
electromagnetic
compatibility
HR Pi: HRB 1909; UStIDNr.:DE812678792; Str.Nr.: 1829812324
Protection
requirement
concerning
electromagnetic
compatibility
Geschäftsführer
& Birgit Schamuhn,
Uffe Kloster
(1) 2,
(article
3 (1)b))
§3 (1) 2,§3
(article
3 Jörg
(1)b))
Tel.: +49 4121 4619960 • Fax: +49 4121 4619970 eMail: [email protected]; Internet: www.horizonhobby.de
§3 (1)
2, (article
3 (1)b))
Es gelten unsere allgemeinen Geschäftsbedingungen, die in unseren
Geschäftsräumen
eingesehen
werden können. Ware bleibt bis zur vollständigen Bezahlung Eigentum der
Horizon Hobby zur
Deutschland
GmbH
EN
300
328
V1.7.1
(2006-10)
Maßnahmen
effizienten
Nutzung
des
Frequenzspektrums
EN 300 328 V1.7.1 (2006-10)
Maßnahmen zur effizienten Nutzung des Frequenzspektrums
§ Maßnahmen
3 (2)(Artikel
3 (2))
EN 300 328 V1.7.1 (2006-10)
zur
effizienten Nutzung des Frequenzspektrums
§ 3 (2)(Artikel
3 (2))
§for3 the
(2)(Artikel
3use
(2))
Measures
efficient
of the radio
spectrum
Measures
for the
efficient
usefrequency
of the radio
frequency
Measures
for
the
efficient use of the radio frequency spectrum
§ 3 (2) (Article
3
(2))
spectrum
§
3
(2)
(Article
3
(2))
§ 3 (2) (Article 3 (2))
Elmshorn, 10.02.2010
Elmshorn, 10.02.2010
Elmshorn,
10.02.2010
________________________
Jörg Schamuhn
________________________
Geschäfstführer
Jörg Schamuhn
Managing Director
Geschäfstführer
Managing Director
_______________________________
Birgit Schamuhn
____________________________
Geschäftsführerin
Birgit Schamuhn
Managing Director
Geschäftsführerin
Managing Director
Horizon Hobby Deutschland GmbH; Hamburger Str. 10; D-25335 Elmshorn
HR Pi: HRB 1909; UStiDNr.:DE812678792; Str.Nr.: 1829812324
Horizon Hobby Deutschland GmbH; Hamburger Str. 10; D-25337 Elmshorn
Geschäftsführer
Jörg & Birgit Schamuhn, Sebo Dapper
HR Pi: HRB 1909; UStIDNr.:DE812678792; Str.Nr.: 1829812324
Tel.: +49 4121 4619960 • Fax: +49 Geschäftsführer
4121
4619970
eMail:
[email protected];
Internet:
Jörg &•Birgit
Schamuhn,
Uffe Kloster
Horizon Hobby Deutschland GmbH; Hamburger Str. 10; D-25337 Elmshorn
Tel.: +49 4121 4619960 • Fax: +49 4121 4619970 eMail: [email protected]; Internet: www.horizonhobby.de
HR Pi: HRB 1909; UStIDNr.:DE812678792; Str.Nr.: 1829812324
www.horizonhobby.de
Es gelten unsere allgemeinen Geschäftsbedingungen, die in unseren Geschäftsräumen eingesehen werden können. Ware bleibt bis zur vollständigen Be
Geschäftsführer Jörg & Birgit Schamuhn, Uffe Kloster
Horizon Hobby Deutschland
Es gelten unsere allgemeinen
Geschäftsbedingungen,
die in GmbH
unseren Geschäftsräumen
Tel.: +49 4121 4619960 • Fax: +49 4121 4619970 eMail: [email protected]; Internet: www.horizonh
Es gelten unsere allgemeinen
Geschäftsbedingungen,
die Ware
in unseren
Geschäftsräumen
eingesehen werden können. Ware bleibt bis zur
eingesehen
werden können.
bleibt
bis zur vollständigen
Horizon Hobby Deutschland GmbH
Bezahlung Eigentum der JSB GmbH
DE
Entsorgung in der Europäischen Union
Dieses Produkt darf nicht über den Hausmüll entsorgt werden. Es ist die
Verantwortung des Benutzers, dass Produkt an einer registrierten Sammelstelle
für Elektroschrott abzugeben diese Verfahren stellt sicher, dass die Umwelt
geschont wird und natürliche Ressourcen nicht über die Gebühr beansprucht
werden. Dadurch wird das Wohlergehen der menschlichen Gemeinschaft geschützt. Für weitere
Informationen, wo der Elektromüll entsorgt werden kann, können Sie Ihr Stadtbüro oder Ihren
lokalen Entsorger kontaktieren.
DE
Guide de l'utilisateur - AR8000
Le récepteur 8 voies longue portée à AR8000 est équipé de la technologie DSM2™ et est
compatible avec toutes les radios pour aéronefs Spektrum™ et JR® acceptant la technologie
DSM2 y compris: JR12X, X9303, Spektrum DX8, DX7, DX7se, DX6i, DX5e et les modules.
A noter: Le récepteur AR8000 n'est pas compatible avec l'émetteur Spektrum DX6 parkflyer.
Caractéristiques
• Récepteur longue portée à 8 voies
• Technologie du récepteur MultiLink brevetée
• Inclut un récepteur interne et un récepteur satellite
• Système de sécurité™ SmartSafe
• Système QuickConnect™ à détection de perte de tension
• Compatible Flight Log (optionnel)
• Résolution: 2048
• Fonctionnement grande vitesse 11 ms si utilisé avec émetteurs adéquats
• Indicateur d'interruption (une DEL rouge indique le nombre d'interruptions de
signal survenues au cours du vol).
Applications
Aéronef longue portée jusqu'à 8 voies incluant:
• Aéronefs tous types et toutes tailles à moteur à incandescence, à essence et électriques
• Planeurs tous types et toutes tailles sans moteur
• Hélicoptères tous types et toutes tailles à moteur à incandescence, à essence et
électriques
A noter: N
e pas utiliser dans des aéronefs à fuselage en carbone intégral. Ne pas utiliser
dans des aéronefs dont une grande partie des structures sont en carbone ou en
matériaux conducteurs. Nous recommandons d'utiliser les récepteurs AR6250 ou
AR9300 pour les applications à fuselage carbone.
Caractéristiques:
Type: Récepteur longue portée DSM2
Voies: 8
Modulation: DSM2
Dimensions du récepteur principal: 1,27 x 1,35 x 0,45 pouces (32,3 x 34,3 x 11,4 mm)
Dimensions du récepteur satellite: 0,80 x 1,10 x 0,27 pouces (20,3 x 28,0 x 6,9 mm)
Poids du récepteur principal: 0,33 oz (9,4 g) Poids avec récepteur satellite: 0,49 oz (13,9 g)
Gamme de tension: 3,5 à 9,6 V
Résolution: 2048
Taux de raffraichissement: 11 ms en cas d'appariement avec le DX7se ou le DX8
Compatibilité: tous les émetteurs et modules DSM2 pour aéronefs
Technologie du récepteur™ MultiLink brevetée
L'AR8000 intègre des récepteurs doubles et offre ainsi la sécurité d'une redondance RF deux
voies. Un récepteur interne se trouve sur la platine principale, sachant qu'un second récepteur
externe est connecté à la platine principale par le biais d'une extension de 6 pouces (+/- 15
cm). En implantant ces récepteurs à des endroits très différents de l'aéronef, chaque récepteur
est exposé à son propre environnement RF, ce qui augmente beaucoup la diversité des chemins
pour les ondes (c.-à-d. la capacité du récepteur à lire le signal quel que soit le cas de figure).
Polarisation de l'antenne
Pour que la liaison RF puisse fonctionner de manière optimale, il est important de monter
les antennes selon une orientation permettant la meilleure réception possible du signal
par l'aéronef dans toutes les attitudes et positions. C'est ce que l'on appelle la polarisation
de l'antenne. Les antennes doivent être orientées perpendiculairement l'une par rapport à
l'autre, soit typiquement une antenne à la verticale et l'autre à l'horizontale (cf. Installation du
récepteur). L'antenne du récepteur satellite (secondaire) doit être montée perpendiculairement
à l'antenne du récepteur principal et à une distance minimale de 2 pouces (+/-5 cm) de celle-ci
à l'aide de ruban adhésif double face.
FR
Installation du récepteur
Dans le cas des aéronefs à moteur à essence et à incandescence, installez le récepteur principal
en procédant à l'identique de ce que vous feriez pour un récepteur conventionnel. Enveloppez le
récepteur principal dans de la mousse protectrice et attachez-le à l'aide d'élastiques ou de brides.
Dans les aéronefs ou hélicoptères à moteur électrique, il est acceptable d'utiliser à titre
d'alternative du ruban adhésif double face pour maintenir le récepteur principal en place.
Le montage du récepteur satellite à un endroit légèrement différent, à quelques pouces
seulement du récepteur principal, se traduit par des améliorations impressionnantes au
niveau de la diversité des chemins de réception. Essentiellement, chaque récepteur voit un
environnement RF différent et ce qui permet de maintenir une bonne liaison RF, même dans des
aéronefs constitués pour une part importante de matériaux conducteurs (moteurs à essence de
forte taille, fibre de carbone, tuyaux, etc. par exemple), qui peuvent affaiblir le signal.
Montez le récepteur satellite à l'aide d'adhésif pour servo, en veillant à ce que ses antennes
soient au moins à 2 pouces de l'antenne principale. Idéalement, les antennes devraient être
orientées perpendiculairement l'une par rapport à l'autre. Dans les aéronefs, nous avons
constaté que la meilleure approche consistait à monter le récepteur principal dans le centre du
fuselage sur la platine servos et de monter le récepteur satellite sur le côté du fuselage ou dans
la verrière.
Dans les hélicoptères il y a, en général, suffisamment de place sur la platine servos pour assurer la
séparation nécessaire. On pourra fabriquer, si nécessaire, un support en plastique transparent pour
monter le récepteur satellite.
Important: câbles Y et extensions servo
Lorsque vous utilisez un câble Y ou des extensions servo, il est essentiel d'utiliser des câbles Y et
des extensions servo standard et non amplifiés, sans quoi les servos risquent de fonctionner de
manière aléatoire (voire pas du tout). Les câbles Y amplifiés ont été développés il y a quelques
années déjà pour augmenter le signal de certains anciens systèmes PCM. Ils ne doivent pas
être utilisés avec du matériel Spektrum. Veuillez noter que, lorsque vous rééquipez des modèles
existants avec du matériel Spektrum, vous devez vous assurer que tous les câbles Y et/ou toutes
les extensions servo amplifiés sont remplacés par des versions conventionnelles non amplifiées.
Affectation
Avant de pouvoir fonctionner, le récepteur doit être affecté à l'émetteur. L'affectation est le
processus qui apprend au récepteur le code spécifique de l'émetteur, de sorte qu'il se connecte
uniquement à cet émetteur.
1.Pour affecter un AR8000 à un émetteur DSM2, il faut brancher la prise d'affectation sur le port
BATT/BIND du récepteur.
FR
A noter: Pour affecter un aéronef avec un contrôleur électronique de vitesse qui alimente le
récepteur via le canal des gaz (ESC/BEC), il faut brancher la prise d'affectation sur
le port BATT/BIND du récepteur et le raccordement de la commande des gaz sur
le port de commande des gaz (THRO). Passez à l'étape #2.
2. Alimentez le récepteur. Veuillez noter que la DEL située sur le récepteur doit clignoter,
indiquant ainsi qu'il est en mode affectation et prêt à être affecté à l'émetteur.
3. Déplacez les manettes et interrupteurs de l'émetteur pour les amener dans les positions de
sécurité désirées (gaz bas et position neutre des commandes).
4. Respectez les procédures spécifiques à votre émetteur pour aller en mode affectation, le
système se connectera en quelques secondes. Une fois la connexion établie, la DEL du
récepteur reste allumée, indiquant que le système est connecté.
5. Retirez la prise d'affectation du port BATT/BIND du récepteur avant d'éteindre l'émetteur et
rangez-la dans un endroit approprié.
6. Après avoir préparé votre modèle, il est important de réaffecter le système de façon à ce que
les vraies positions de “gaz bas” et de surfaces de commandes soient réglées.
IMPORTANT: r etirez la prise d'affectation pour éviter que le système n'entre à nouveau en
mode affectation lors de la prochaine mise en marche de l'alimentation.
SmartSafe™ Sécurité intégrée
L'AR8000 est équipé de la sécurité SmartSafe. SmartSafe convient idéalement à la plupart
des avions. Avec SmartSafe, en cas de perte du signal, le canal des gaz uniquement est mis
en position de sécurité préréglée (normalement: gaz bas), tous les autres canaux gardent leur
dernière commande.
FR
• Evite une réponse non intentionnelle du moteur électrique au démarrage.
• Elimine la possibilité de bloquer les servos au démarrage en enregistrant les positions de
sécurité préréglées.
• Applique une sécurité gaz bas et maintient la dernière position demandée des surfaces de
commande en cas de perte du signal RF.
Fonctionnement du récepteur seul
• Lorsque le récepteur est seul sous tension (absence de signal de l'émetteur), la voie des gaz
n’a pas de signal ceci afin d'éviter le fonctionnement ou l'armement de la variateur de vitesse
électronique.
• Tous les autres canaux sont amenés dans leurs positions de sécurité préréglées lors de
l'affectation.
Après la connexion
• Le contrôle normal de tous les canaux se produit lorsque l'émetteur est allumé et que le
récepteur se connecte à l'émetteur.
• Après la connexion du système, et en cas de perte de signal, la sécurité SmartSafe amène
uniquement le servo des gaz à la position de sécurité (gaz bas) qui a été réglée lors de
l'affectation.
• Tous les autres canaux conservent leur dernière position. Lorsque le signal est retrouvé, le
système reprend le contrôle immédiatement (moins de 4 ms).
Branchement des raccordements
Branchez les raccordements des servos dans les prises de servo appropriées du récepteur en
tenant compte de la polarité du connecteur de servo.
Indicateur d'interruptions à DEL rouge
L'AR8000 comporte une DEL rouge indiquant le nombre d'interruptions qui sont survenues
depuis la dernière mise en marche du récepteur. La DEL clignotera pour indiquer le nombre
d'interruptions, puis s'arrêtera (par exemple 3 clignotements arrêt, 3 clignotements, arrêt:
indique que trois interruptions se sont produites depuis la dernière mise en marche du
récepteur). Notez que les interruptions sont remises à zéro lorsque l'on éteint le récepteur. Il est
conseillé de contrôler la DEL rouge d'indication d'interruption au cours des premiers vols d'un
nouvel avion. Si elle clignote, il est important d'optimiser l'installation (déplacer ou repositionner
les antennes) jusqu'à ce qu'il ne se produise plus d'interruption. Au cours des vols ultérieurs, il
est possible d'utiliser la DEL d'indication d'interruptions pour confirmer l'efficacité du lien RF.
Essai de portée
Il est important de procéder à un contrôle de portée avant chaque vol, en particulier avec un
nouveau modèle. Tous les émetteurs pour aéronefs Spektrum disposent d'un système de
contrôle de portée intégré qui, lorsqu'il est activé, réduit la puissance de sortie et permet ainsi
un contrôle de portée.
30 paces (90 feet/28 meters)
1. Le modèle étant retenu au sol, placez-vous à 30 pas (env. 90 pieds/28 mètres) de celui-ci.
2. Tenez-vous face au modèle, l'émetteur étant dans votre position de vol normale, et mettez
votre émetteur en mode contrôle de portée.
3. Vous devez disposer d'un contrôle total du modèle à 30 pas (90 pieds/28 mètres) lorsque
le bouton est enfoncé.
4. S'il y a des problèmes de contrôle, appelez le Centre de Service Spektum au 1-877504-0233 (Etats-Unis) pour obtenir plus d'assistance. Au Royaume-Uni ou en Allemagne,
utilisez l'une des adresses suivantes.
FR
Union Européenne: +44 (0) 1279 641 097 (Royaume-Uni) ou envoyez un courriel
à [email protected] +49 4121 46199 66 (Allemagne)
ou envoyez un courriel à [email protected]
Essai de portée plus poussé
Pour les modèles réduits perfectionnés comportant une part importante de matériaux
conducteurs, il est recommandé d'opter pour l'essai de portée avancé en utilisant un Flight Log.
L'essai de portée avancé confirmera le fonctionnement optimal des récepteurs internes et du
récepteur satellite et que l'installation (la position des récepteurs) est optimisée pour l'aéronef
en question. Cet essai de portée avancé permet d'évaluer les performances RF de chacun des
récepteurs et d'optimiser les endroits d'implantation du récepteur satellite.
Essai de portée plus poussé
1 Raccordez un Flight Log (SPM9540 - optionnel) dans le port Data du AR8000 et mettez le
système en fonction (Tx et Rx).
2. Avancer dans le Flight Log jusqu'à voir s'afficher un F (= Frame Losses = apparition
d'interruptions) lors d'une action sur le bouton du Flight Log.
3. Demandez à un aide de tenir votre aéronef pendant que vous observez les données du
Flight Log.
4. Tenez-vous en face du modèle à 30 pas de celui-ci, l'émetteur étant dans votre position
de vol normale, et mettez votre émetteur en mode contrôle de portée. Ceci provoque une
sortie de puissance réduite de l'émetteur.
5. Demandez à votre aide de positionner le modèle dans toutes les orientations possibles
(nez haut, nez bas, nez orienté vers l'émetteur, nez éloigné de l'émetteur, etc.) tout en
observant le Flight Log en notant toutes les corrélations entre l'orientation de l'aéronef
et l'apparition d'interruptions. Procédez ainsi pendant 1 minute. Vous pouvez utiliser le
chronomètre de l'émetteur à cet effet.
Spécifications pour le système d'alimentation du récepteur
Les systèmes d'alimentation inadaptés et incapables de fournir la tension minimale requise
au récepteur en vol sont devenus la première cause de défaillances en vol. Quelques-uns
des composants du système d'alimentation affectant la capacité à fournir correctement
l'alimentation appropriée sont énumérés ci-après:
• Pack de batteries du récepteur (nombre de batteries, capacité, type de batterie, état de charge)
• La capacité du variateur électronique de vitesse à fournir du courant au récepteur sur les
aéronefs à moteur électrique
• Le câble d'interrupteur, les raccordements des batteries, les raccordements des servos, les
régulateurs, etc.
La tension opérationnelle minimale de l'AR8000 est de 3,5 volts ; il est fortement recommandé de
tester le système d'alimentation d'après les directives ci-après et celles du paragraphe Flight Log.
Directives recommandées pour le test du système d'alimentation
En cas d'utilisation d'un système d'alimentation douteux (par exemple batterie de faible
capacité ou usagée, variateur électronique de vitesse n'ayant pas de BEC capable d’accepter
un fort appel de courant, etc.), nous recommandons d'utiliser un voltmètre pour effectuer le test
suivant.
A noter: Le Hangar 9 Digital Servo & Rx Current Meter (HAN172) ou le Spektrum Flight Log
(SPM9540) sont des outils parfaits pour effectuer le test ci-dessous.
Branchez le voltmètre sur une voie libre. Le système étant en marche, sollicitez les surfaces de
commande (en appliquant une pression avec la main) tout en contrôlant la tension au niveau
du récepteur. La tension doit rester au-dessus de 4,8 volts même lorsque tous les servos sont
fortement sollicitées.
A noter: Les dernières générations de batteries hybrides nickel/métal (NiMH) intègrent
un nouveau mélange chimique, imposé en vue du respect de l'environnement.
Lorsqu'elles sont chargées avec des chargeurs rapides à détection de pics, elles ont
tendance à faire de faux pics (charge incomplète) de manière répétée. Cela vaut pour
toutes les marques de batteries NiMH. Si vous utilisez des packs de batteries NiMH,
soyez particulièrement vigilant lors de la charge et assurez-vous que la batterie est
bien complètement chargée. Nous recommandons d'utiliser un chargeur affichant
la capacité totale de charge. Notez la quantité de mAh mise dans un pack déchargé
afin de vérifier qu'il a bien été chargé à pleine capacité.
FR
Système QuickConnect pour détection de perte de tension
Votre AR8000 est équipé du système QuickConnect à détection de perte de tension.
• En cas d'interruption de l'alimentation (perte de tension), le système se reconnecte
immédiatement lorsque l'alimentation est rétablie (QuickConnect).
• La DEL du récepteur clignote lentement pour indiquer qu'il y a eu une interruption de l'alimentation
(perte de tension).
• Les pertes de tension peuvent être provoquées par une alimentation inadaptée (batterie ou
régulateur faible), un connecteur mal branché, un mauvais interrupteur, un BEC inadapté en cas
d'utilisation d'un variateur électronique de vitesse, etc.
• Les pertes de tension se produisent lorsque la tension du récepteur passe en-dessous de 3,5
volts, ce qui interrompt les commandes puisque les servos et le récepteur requièrent un minimum
de 3,5 volts pour fonctionner.
Fonctionnement de QuickConnect™ avec détection de perte de tension
• Lorsque la tension du récepteur chute en-dessous de 3,5 volts, le système se met en défaut
(cesse de fonctionner).
• Lorsque l'alimentation est rétablie, le récepteur tente immédiatement de se reconnecter aux
deux dernières fréquences auxquelles il était connecté.
• Si les deux fréquences sont présentes (émetteur resté en marche), le système se reconnecte
typiquement en une seconde.
Le système QuickConnect à détection de perte de tension a été conçu pour vous permettre de
voler pendant la plupart des interruptions d'alimentation de courte durée. Néanmoins, la cause
de ces interruptions doit être corrigée avant le prochain vol afin d'éviter des problèmes de
sécurité catastrophiques.
A noter: si une perte de tension se produit en vol, il est impératif d'en déterminer la cause et
d'y remédier.
Flight Log (SPM9540 Optionnel)
Le Flight Log est compatible avec l'AR8000. Le Flight Log affiche les performances de liaison
RF d'ensemble mais aussi, individuellement, les données de liaison de chacun des récepteurs
internes et externes. Outre cela, il affiche la tension du récepteur.
Utilisation du Flight Log
Après un vol et avant de couper le récepteur ou l'émetteur, connectez le Flight Log au port Data
de l'AR8000. L'écran affichera automatiquement la tension, par exemple 6v2 = 6,2 volts.
A noter: Lorsque la tension tombe à 4,8 volts ou moins, l'écran clignotera pour signaler une
tension faible.
Appuyez sur le bouton pour afficher les informations suivantes:
A – Affaiblissements d'antenne sur l'antenne A interne
B – Non utilisé
L – Affaiblissements d'antenne sur l'antenne externe
R – Non utilisé
F – Apparition d'interruptions
H – Interruptions
Les affaiblissements d'antenne - représentent la perte d'un bit d'information sur l'antenne
concernée.
Au cours d'un vol, il est normal qu'il se produise, typiquement, jusqu'à 50 à 100
affaiblissements d'antenne. Si une même antenne subit plus de 500 affaiblissements au cours
d'un même vol, il faudra repositionner l'antenne dans l'aéronef afin d'optimiser la liaison RF.
Apparition d'interruptions - représente des affaiblissements d'antenne simultanés sur tous
les récepteurs connectés. Si la liaison RF fonctionne de façon optimale, les apparitions
d'interruptions ne devraient pas dépasser les 20 par vol. On a une interruption en cas
d'apparition de 45 interruptions consécutives. Ceci prend de l'ordre de une seconde. En cas
d'apparition d'une interruption au cours d'un vol, il est important d'évaluer le système en
déplaçant les antennes pour les mettre à différents endroits et/ou de vérifier que l'émetteur et
les récepteurs fonctionnement tous correctement.
FR
A noter: On pourra utiliser une extension servo pour rendre plus facile le branchement du
Flight Log. On pourra, sur certains modèles, brancher le Flight Log, l'attacher et le
laisser en place sur le modèle en utilisant de l'adhésif double face. Il est courant,
sur les hélicoptères, de monter le Flight Log sur le châssis latéral.
ModelMatch
Certains émetteurs Spektrum et JR proposent une fonction (brevet en instance) appelée
ModelMatch. ModelMatch empêche la possibilité de faire fonctionner un modèle en utilisant
une mémoire de modèle erronée, évitant potentiellement un écrasement au sol. Avec
ModelMatch, chaque mémoire de modèle dispose d'un code unique propre (GUID), qui est
programmé dans le récepteur lors du processus d'affectation. Lorsque le système est mis en
marche ultérieurement, le récepteur se connectera à l'émetteur uniquement si la mémoire de
modèle correspondante est programmée à l'écran.
A noter: si le système ne se connecte pas à tout moment lorsque vous l'allumez, assurezvous que la mémoire de modèle correcte est bien sélectionnée au niveau de
l’émetteur. Veuillez noter que les modules Spektrum Aircraft ne disposent pas de
ModelMatch.
FR
Conseils pour l’utilisation de
Spektrum 2,4 GHz
Bien que votre système 2,4 GHz à technologie DSM soit très intuitif et qu’il fonctionne presque
comme les systèmes 72 MHz, vous trouverez ci-dessus quelques questions fréquentes de
clients.
Q: Dois-je d’abord allumer l’émetteur ou le récepteur ?
R: Si l’on allume le récepteur en premier—tous les servos à l’exception de celui des gaz sont
amenés à la position de sécurité définie pendant l’affectation. A ce moment, il n’y a aucune
impulsion de sortie sur le canal des gaz, ce qui empêche l’initialisation des contrôleurs
électroniques de vitesse ou, dans le cas d’un aéronef à moteur, que le servo des gaz ne reste
dans la position laissée. Lorsque l’on allume ensuite l’émetteur, celui-ci scanne la bande 2,4
GHz et acquiert deux canaux libres. Puis le récepteur précédemment affecté au transmetteur
scanne la bande et trouve le code GUID (Globally Unique IDentifier code) mémorisé pendant
l’affectation. Le système se connecte alors et fonctionne normalement.
Si l’on allume l’émetteur en premier—celui-ci scanne la bande 2,4 GHz et acquiert deux
canaux libres. Lorsque le récepteur est alors mis en marche pour une courte période (le temps
qu’il se connecte), tous les servos à l’exception de celui des gaz sont amenés à leurs positions
de sécurité prédéfinies tandis que le servo des gaz n’a pas d’impulsion de sortie. Le récepteur
scanne la bande 2,4 GHz et recherche le GUID précédemment mémorisé. Quand il le localise et
qu’il confirme des informations non corrompues de façon répétée, le système se connecte et un
fonctionnement normal se met en place, ce qui prend en général de 2 à 6 secondes.
Q: Le système prend parfois plus de temps pour se connecter et parfois ne se connecte
pas du tout.
R: Afin d’assurer la connexion du système (après l’affectation du récepteur), le récepteur doit
recevoir une quantité importante de signaux parfaits, ininterrompus et non corrompus de la
part de l’émetteur. Ce processus est intentionnellement critique par rapport à l’environnement,
assurant ainsi que le vol sera sûr lorsque le système se connecte. Si l’émetteur est trop proche
du récepteur (moins de 1,20 m) ou si l’émetteur se trouve près d’objets en métal (valise en
métal de l’émetteur, chassis d’un véhicule, partie métallique d’un établi, etc.), la connexion
prendra plus de temps et ne s’effectuera pas dans certains cas, le système recevant son propre
signal à 2,4 GHz réfléchi et l’interprétant comme un bruit indésirable. La connexion s’établira
si l’on éloigne le système des objets en métal ou si l’on éloigne l’émetteur du récepteur et que
l’on remet le système en marche. Cela arrive uniquement lors de la connexion initiale. Une fois
connecté, le système est verrouillé. En cas de perte de signal (sécurité intégrée), le système se
connecte immédiatement (4 ms) lorsqu’il retrouve le signal.
Q: J’ai entendu dire que le système DSM tolérait moins les tensions basses. Est-ce vrai ?
R: Tous les récepteurs DSM ont une plage de tension opérationnelle comprise entre 3,5 et 9,6
volts. Ce n’est pas un problème avec la plupart des systèmes, puisqu’en fait presque tous les
servos cessent de fonctionner aux environs de 3,8 volts. En cas d’utilisation de servos multiples
à fort appel de courant avec une batterie/source d’alimentation unique ou inadaptée, les fortes
sollicitations momentanées peuvent faire chuter la tension en-dessous de ce seuil de 3,5
volts et provoquer ainsi une perte de tension sur l’ensemble du système (servos et récepteur).
Lorsque la tension chute en-dessous du seuil de tension basse (3,5 volts), le récepteur DSM
doit se réinitialiser (repasser par le processus de démarrage, c-à-d. scanner la bande et
trouver le récepteur). Cela peut prendre plusieurs secondes. Veuillez lire la section relative
aux spécifications d’alimentation du récepteur, qui explique comment effectuer les tests et
empêcher cet incident.
Q: Parfois, mon récepteur perd son affectation et ne se connecte pas, m’obligeant à une
réaffectation. Que se passe t’il si je perds l’affectation en vol ?
R: Sauf instructions contraires, le récepteur ne perdra jamais son affectation. Il faut comprendre
que, lors du processus d’affectation, le récepteur n’apprend pas seulement le code (GUID) de
l’émetteur, mais que l’émetteur apprend et mémorise aussi le type de récepteur auquel il est
affecté. Lorsque l’on met l’émetteur en mode affectation, il recherche le signal de protocole
FR
d’affectation d’un récepteur. En l’absence de signal, l’émetteur ne dispose plus des informations
correctes pour se connecter à un récepteur précis et est donc en substance «désaffecté» du
récepteur. Nous avons eu de nombreux clients DX7 qui utilisaient des supports ou des pupitres
pour les émetteurs, lesquels ont enfoncé le bouton d’affectation sans que les clients le sachent.
Le système se met alors en route et perd les informations nécessaires à l’établissement de la
connexion. Nous avons également eu des clients DX7 qui ne comprenaient pas complètement
la procédure de test de portée et qui enfonçaient le bouton d’affectation avant d’allumer le
récepteur, ce qui entraînait également une « perte d’affectation » du système.
FR
Durée de la garantie
Garantie exclusive - Horizon Hobby, Inc. (Horizon) garantit que le Produit acheté (le « Produit »)
sera exempt de défauts matériels et de fabrication à sa date d’achat par l’Acheteur. La durée
de garantie correspond aux dispositions légales du pays dans lequel le produit a été acquis. La
durée de garantie est de 6 mois et la durée d’obligation de garantie de 18 mois à l’expiration de
la période de garantie.
Limitations de la garantie
(a) La garantie est donnée à l’acheteur initial (« Acheteur ») et n’est pas transférable. Le recours
de l’acheteur consiste en la réparation ou en l‘échange dans le cadre de cette garantie. La
garantie s’applique uniquement aux produits achetés chez un revendeur Horizon agréé. Les
ventes faites à des tiers ne sont pas couvertes par cette garantie. Les revendications en
garantie seront acceptées sur fourniture d’une preuve d’achat valide uniquement. Horizon
se réserve le droit de modifier les dispositions de la présente garantie sans avis préalable et
révoque alors les dispositions de garantie existantes.
(b) Horizon n’endosse aucune garantie quant à la vendabilité du produit ou aux capacités et
à la forme physique de l’utilisateur pour une utilisation donnée du produit. Il est de la seule
responsabilité de l’acheteur de vérifier si le produit correspond à ses capacités et à l’utilisation
prévue.
(c) Recours de l’acheteur – Il est de la seule discrétion d‘Horizon de déterminer si un produit
présentant un cas de garantie sera réparé ou échangé. Ce sont là les recours exclusifs de
l’acheteur lorsqu’un défaut est constaté.
Horizon se réserve la possibilité de vérifier tous les éléments utilisés et susceptibles d’être
intégrés dans le cas de garantie. La décision de réparer ou de remplacer le produit est du seul
ressort d’Horizon. La garantie exclut les défauts esthétiques ou les défauts provoqués par des
cas de force majeure, une manipulation incorrecte du produit, une utilisation incorrecte ou
commerciale de ce dernier ou encore des modifications de quelque nature qu’elles soient.
La garantie ne couvre pas les dégâts résultant d’un montage ou d’une manipulation erronés,
d’accidents ou encore du fonctionnement ainsi que des tentatives d’entretien ou de réparation
non effectuées par Horizon. Les retours effectués par le fait de l’acheteur directement à Horizon
ou à l’une de ses représentations nationales requièrent une confirmation écrite.
Limitation des dégâts
Horizon ne saurait être tenu pour responsable de dommages conséquents directs ou indirects,
de pertes de revenus ou de pertes commerciales, liés de quelque manière que ce soit au
produit et ce, indépendamment du fait qu’un recours puisse être formulé en relation avec un
contrat, la garantie ou l’obligation de garantie. Par ailleurs, Horizon n’acceptera pas de recours
issus d’un cas de garantie lorsque ces recours dépassent la valeur unitaire du produit. Horizon
n’exerce aucune influence sur le montage, l’utilisation ou la maintenance du produit ou sur
d’éventuelles combinaisons de produits choisies par l’acheteur. Horizon ne prend en compte
aucune garantie et n‘accepte aucun recours pour les blessures ou les dommages pouvant en
résulter. En utilisant et en montant le produit, l’acheteur accepte sans restriction ni réserve
toutes les dispositions relatives à la garantie figurant dans le présent document.
Si vous n’êtes pas prêt, en tant qu’acheteur, à accepter ces dispositions en relation avec
l’utilisation du produit, nous vous demandons de restituer au vendeur le produit complet, non
utilisé et dans son emballage d’origine.
Indications relatives à la sécurité
Ceci est un produit de loisirs perfectionné et non un jouet. Il doit être utilisé avec précaution et
bon sens et nécessite quelques aptitudes mécaniques ainsi que mentales. L’incapacité à utiliser
le produit de manière sûre et raisonnable peut provoquer des blessures et des dégâts matériels
conséquents. Ce produit n’est pas destiné à être utilisé par des enfants sans la surveillance
par un tuteur. La notice d’utilisation contient des indications relatives à la sécurité ainsi que
des indications concernant la maintenance et le fonctionnement du produit. Il est absolument
indispensable de lire et de comprendre ces indications avant la première mise en service.
FR
C’est uniquement ainsi qu’il sera possible d’éviter une manipulation erronée et des accidents
entraînant des blessures et des dégâts.
Questions, assistance et réparations
Votre revendeur spécialisé local et le point de vente ne peuvent effectuer une estimation
d’éligibilité à l’application de la garantie sans avoir consulté Horizon. Cela vaut également pour
les réparations sous garantie. Vous voudrez bien, dans un tel cas, contacter le revendeur qui
conviendra avec Horizon d’une décision appropriée, destinée à vous aider le plus rapidement
possible.
Maintenance et réparation
Si votre produit doit faire l’objet d’une maintenance ou d‘une réparation, adressez-vous soit
à votre revendeur spécialisé, soit directement à Horizon. Emballez le produit soigneusement.
Veuillez noter que le carton d‘emballage d’origine ne suffit pas, en règle générale, à protéger
le produit des dégâts pouvant survenir pendant le transport. Faites appel à un service de
messagerie proposant une fonction de suivi et une assurance, puisque Horizon ne prend
aucune responsabilité pour l’expédition du produit jusqu’à sa réception acceptée. Veuillez
joindre une preuve d’achat, une description détaillée des défauts ainsi qu’une liste de tous les
éléments distincts envoyés. Nous avons de plus besoin d’une adresse complète, d’un numéro
de téléphone (pour demander des renseignements) et d’une adresse de courriel.
Garantie et réparations
Les demandes en garantie seront uniquement traitées en présence d’une preuve d’achat
originale émanant d’un revendeur spécialisé agréé, sur laquelle figurent le nom de l’acheteur
ainsi que la date d’achat. Si le cas de garantie est confirmé, le produit sera réparé Cette
décision relève uniquement de Horizon Hobby.
Réparations payantes
En cas de réparation payante, nous établissons un devis que nous transmettons à votre
revendeur. La réparation sera seulement effectuée après que nous ayons reçu la confirmation
du revendeur. Le prix de la réparation devra être acquitté au revendeur. Pour les réparations
payantes, nous facturons au minimum 30 minutes de travail en atelier ainsi que les frais de
réexpédition. En l’absence d’un accord pour la réparation dans un délai de 90 jours, nous nous
réservons la possibilité de détruire le produit ou de l’utiliser autrement.
Attention: nous n’effectuons de réparations payantes que pour les composants électroniques et
les moteurs. Les réparations touchant à la mécanique, en particulier celles des hélicoptères et
des voitures radiocommandées, sont extrêmement coûteuses et doivent par conséquent être
effectuées par l’acheteur lui-même.
Union Européenne:
Les composants électroniques et les moteurs doivent être contrôlés et entretenus
régulièrement. Les produits devant faire l’objet d’un entretien sont à envoyer à l’adresse
suivante:
Horizon Hobby SAS
14 Rue Gustave Eiffel
91230 Montgeron
France
Appelez-nous au +33 (0)1 60 47 44 70 ou écrivez-nous un courriel à l’adresse
[email protected] pour poser toutes vos questions relatives au produit ou au traitement
de la garantie.
FR
Sécurité et avertissements
En tant qu’utilisateur du produit, vous êtes responsable pour en assurer un fonctionnement sûr
excluant toute atteinte à l’intégrité corporelle ainsi qu’aux biens matériels. Conformez-vous
scrupuleusement à toutes les indications et à tous les avertissements relatifs à ce produit ainsi
qu’aux éléments et produits que vous utilisez conjointement à celui-ci. Votre modèle reçoit des
signaux radio qui le dirigent. Les signaux radio peuvent être sujets à des perturbations, ce qui
peut produire une perte de signal au niveau du modèle. Pour prévenir de tels incidents, vous
devez par conséquent vous assurer que vous maintenez une distance de sécurité suffisante
autour de votre modèle.
• Faites fonctionner votre modèle dans un espace dégagé, à bonne distance de la circulation, des
personnes et des véhicules.
• Ne faites pas fonctionner votre véhicule sur la voie publique.
• Ne faites pas fonctionner votre modèle dans une rue animée ou sur une place.
• Ne faites pas fonctionner votre émetteur lorsque les batteries ou les accumulateurs sont déchargés.
• Conformez-vous à cette notice d’utilisation (avec toutes ses indications et avertissements) ainsi
qu’aux notices d’utilisation des accessoires utilisés.
• Tenez les produits chimiques, les petites pièces et les éléments électriques hors de portée des
enfants.
• L’humidité endommage les composants électroniques. Evitez que l’eau ne pénètre dans ceux-ci:
ils ne sont pas prévus à cet effet.
FR
Informations de conformité pour
l'Union Européenne
Déclaration de conformité
(conformément à la norme ISO/IEC 17050-1)
No. HH2010012801
Produit(s):
Récepteur Spektrum AR8000
Numéro d'article(s):
SPMAR8000
Catégorie d'équipement: 1
L'objet de la déclaration décrit ci-dessus est en conformité avec les exigences des spécifications
énumérées ci-après, suivant les conditions de la directive ETRT 1999/5/CE:
EN 301 489-1 v.1.6.1
EN 301 489-17 v.1.2.1
Exigences générales de CEM pour les équipements radio
Signé en nom et pour le compte de:
Horizon Hobby, Inc.
Champaign, IL USA 28 janvier 2010
Steven A. Hall
Vice-président
Gestion Internationale des Activités et des Risques
Horizon Hobby, Inc.
Brevet US numéro 7,391,320. Autres brevets en instance.
DSM et DSM2 sont des marques déposées ou enregistrées d'Horizon Hobby, Inc. La marque déposée Spektrum est utilisée
avec l'autorisation de Bachmann Industries, Inc. Les radios et accessoires Spektrum sont uniquement disponibles auprès
d'Horizon Hobby, Inc.
Elimination dans l’Union Européenne
Ce produit ne doit pas être éliminé avec les ordures ménagères. Il est de la
responsabilité de l‘utilisateur de remettre le produit à un point de collecte officiel
des déchets d’équipements électriques. Cette procédure permet de garantir le
respect de l’environnement et l’absence de sollicitation excessive des ressources naturelles.
Elle protège de plus le bien-être de la communauté humaine. Pour plus d’informations quant
aux lieux d’éliminations des déchets d‘équipements électriques, vous pouvez contacter votre
mairie ou le service local de traitement des ordures ménagères.
FR
FR
AR8000 Guida dell'utente
Il ricevitore AR8000 a 8 canali a copertura totale ha la tecnologia DSM2™ ed è compatibile con
tutti i dispositivi radio Spektrum e™ JR® per aerei che supportano la tecnologia DSM2 inclusa:
JR12X, X9303, Spektrum DX8, DX7, DX7se, DX6i, DX5e e i sistemi modulari.
Nota: Il ricevitore AR8000 non è compatibile col trasmettitore Spektrum DX6 parkflyer.
Caratteristiche
• Ricevitore a 8 canali a copertura totale
• Tecnologia brevettata MultiLink del ricevitore
• Include un ricevitore interno e un ricevitore a distanza • SmartSafe™ sistema di failsafe
• QuickConnect™ con rilevamento di calo di tensione
• Registro di volo (flight Log) compatibile - opzionale
• Risoluzione da 2048
• Modalità ad alta velocità da 11ms quando è usato con i trasmettitori adeguati
• Indicatore di interruzioni (il LED rosso indica i numeri di interruzioni avvenute
durante il volo).
Applicazioni
Aereo con copertura totale fino a 8 canali, inclusi:
• Tutti i tipi e dimensioni di aerei alimentati a glow, a benzina ed elettrici
• Tutti i tipi e dimensioni di alianti senza motore
• Tutti i tipi e dimensioni di elicotteri alimentati a glow, a benzina ed elettrici
Nota: Da non usare per gli aerei con una fusoliera interamente in carbonio. Da non usare per
gli aerei con elementi significativi in carbonio o strutture conduttrici. Si raccomanda di
usare il ricevitore AR6250 o AR9300 per applicazioni con fusoliera in carbonio.
Specifiche:
Tipo: Ricevitore DSM2 a copertura totale
Canali: 8
Modulazione: DSM2
Dimensioni del ricevitore principale: 1,27 x 1,35 x 0,45 in (32,3 x 34,3 x 11,4 mm)
Dimensioni del ricevitore remoto: 0,80 x 1,10 x 0,27 in (20,3 x 28,0 x 6,9 mm)
Peso del ricevitore principale: .33 oz (9.4 g) Peso il ricevitore remoto: .40 oz (13,9 g)
Intervallo di tensione: 3.5 a 9.6V
Risoluzione: 2048
Frame rate: 11ms se accoppiato a DX7se o DX8
Compatibilità: con tutti i trasmettitori di modelli di aereo DSM2 e i sistemi modulari
MultiLink brevettato™ Tecnologia del ricevitore
L'AR8000 ha due ricevitori, offrendo la sicurezza della ridondanza del doppio percorso RF. Un
ricevitore interno è ubicato nella scheda principale, mentre un secondo ricevitore esterno è
collegato alla scheda principale tramite un'estensione da 15 cm. Posizionando ogni ricevitore in
vari punti dell'aereo, ogni ricevitore è esposto al proprio ambiente RF, migliorando notevolmente
la diversità del percorso (la capacità del ricevitore di vedere il segnale in ogni condizione).
Polarizzazione dell'antenna
Per una ottima prestazione del collegamento RF è importante che le antenne siano montate
in un orientamento che consente la migliore ricezione possibile del segnale quando l'aereo è
in ogni circostanza e in ogni posizione. Tale fattore è noto come polarizzazione dell'antenna.
Le antenne dovrebbero essere orientate l'una perpendicolarmente all'altra, solitamente
una verticale e una orizzontale (vedi installazione del ricevitore). L'antenna del ricevitore a
distanza deve essere montato in posizione perpendicolare, almeno 5 cm distante dal ricevitore
principale, usando del nastro con schiuma da ambo i lati.
Installazione del ricevitore
Negli aerei alimentati a glow e a benzina, bisogna installare il ricevitore usando lo stesso metodo
valido per un qualsiasi ricevitore per aerei. Solitamente, avvolgere il ricevitore principale in una
spugna protettiva e fissarlo in un luogo usando dei nastri in gomma, ganci o bandelle.
IT
In alternativa, negli aerei elettrici, è accettabile l'uso di nastri schiumati da ambo i lati per fissare
il ricevitore al suo posto.
Se si monta questo ricevitore a distanza in una posizione leggermente differente, anche solo alcuni
centimetri lontano dal ricevitore principale, si avrà un grande vantaggio in presenza di una diversità
di percorsi. Essenzialmente, ogni ricevitore vede un diverso ambiente RF e deve mantenere un
solido collegamento RF, anche in quegli aerei con materiali sostanzialmente conduttori (ad es.
grandi motori a benzina, fibra di carbonio, tubature) ecc., che possono indebolire il segnale.
Usando un nastro per il servo, montare il ricevitore a distanza tenendo le relative antenne
ad almeno 5 cm dall'antenna principale. Idealmente, le antenne dovranno essere orientate
perpendicolarmente una accanto all'altra. Negli aeroplani, abbiamo visto che è meglio montare il
ricevitore primario al centro della fusoliera sull'apposito spazio per il servo e montare il ricevitore
remoto lateralmente sulla fusoliera o sul ponte arcuato.
Negli elicotteri c'è generalmente abbastanza spazio sull'apposito alloggiamento del servo per
ottenere la separazione necessaria. Se necessario è possibile eseguire un montaggio del ricevitore
esterno con della plastica trasparente.
Importante: Collegamenti a Y e servo estensioni
Quando si usa un collegamento a Y o delle servo estensioni durante il montaggio è importante
usare dei collegamenti Y standard non-amplificati e delle servo estensioni, in quanto ciò potrà
causare un errato o mancato funzionamento dei servo. I collegamenti a Y amplificati sono stati
sviluppati anni fa per aumentare il segnale per alcuni sistemi PCM vecchi e non dovrebbero
essere usati con l'impianto Spektrum. Da notare che quando si converte un altro modello
esistente in uno Spektrum bisogna accertarsi che tutti i collegamenti a Y e/o le estensioni servo
siano sostituite con delle normali versioni non amplificate.
Collegamento
Il ricevitore deve essere collegato al trasmettitore prima di essere azionato. Il collegamento è il
processo che impartisce al ricevitore il codice specifico del trasmettitore in modo tale che potrà
essere connesso solo a quel trasmettitore specifico.
1.Per collegare un AR8000 ad un trasmettitore DSM2 bisogna inserire il connettore nella porta
BATT/BIND del ricevitore.
IT
Nota: Per collegare un aereo ad un controllo elettronico della velocità che alimenta il
ricevitore tramite il canale throttle (ESC/BEC) bisogna inserire il connettore nella
porta BATT/BIND del ricevitore e il connettore del throttle nella porta del throttle
(THRO). Procedere con la fase #2.
2. Alimentare il ricevitore. Da notare che il LED sul ricevitore dovrebbe lampeggiare indicando che
il ricevitore è in modalità di connessione ed è pronto per essere connesso al trasmettitore.
3. Muovere le barre e gli interruttori sul trasmettitore alle posizioni desiderate di fail-safe, ossia
prova di guasto (throttle basso e posizioni di controllo neutre).
4. Seguire le procedure specifiche per il trasmettitore per iniziare la modalità di collegamento;
il sistema si connetterà in pochi secondi. Dopo la connessione, il LED sul ricevitore rimarrà
fisso, indicando che il sistema è connesso.
5. Rimuovere il plug di collegamento della porta BATT/BIND sul ricevitore prima di staccare
l'alimentazione al trasmettitore, e conservarlo in un luogo sicuro.
6. Dopo aver impostato il vostro modellino è importante ricollegare il sistema in modo tale da
impostare il vero low throttle e le posizioni di superficie di controllo del neutro.
IMPORTANTE: Rimuovere il plug di collegamento per evitare che il sistema si avvii nella
modalità di collegamento la prossima volta che verrà riattivata l'alimentazione.
SmartSafe™ Failsafe
L'AR8000 ha un failsafe SmartSafe. SmartSafe è ideale per la maggior parte dei velivoli. Con
SmartSafe, quando il segnale si perde, solo il canale del throttle è riportato alla sua posizione di
failsafe preimpostata (normalmente throttle basso), mentre gli altri canali mantengono l'ultimo
comando impartito loro.
• Evita una risposta non intenzionale del motore elettrico all'avvio.
• Elimina la possibilità che i servo vengano sovrapilotati all'avvio memorizzando le posizioni
preimpostate del failsafe
• Stabilisce un failsafe del low-throttle e mantiene la posizione di superficie dell'ultimo
comando impartito se il segnale RF viene perso.
Solo l'alimentazione del ricevitore
• Quando solo il ricevitore è acceso (non è presente alcun segnale del trasmettitore) il canale
throttle non ha alcuna uscita al fine di evitare un funzionamento o un azionamento del
controllo elettronico della velocità.
• Tutti gli altri canali passeranno alle posizioni impostate durante il collegamento.
IT
Dopo la connessione
• Il controllo di tutti i canali avviene quando il trasmettitore è acceso e dopo che il ricevitore
si connette al trasmettitore.
• Dopo che il sistema effettua una connessione, se il segnale viene perso, SmartSafe pilota
il servo del throttle solo alla sua posizione di failsafe preimpostata (low throttle) durante il
collegamento.
• Tutti gli altri canali mantengono la loro ultima posizione. Quando il segnale viene
riacquistato, il sistema riprende immediatamente il controllo (meno di 4ms).
Connessione ai cavi
Inserire i cavi dei servo nelle apposite porte nel ricevitore, prestando attenzione alla polarità del
connettore del servo.
Indicatore LED rosso delle interruzioni
L'AR8000 ha un LED rosso che indica il numero di interruzioni verificatesi dall'ultima volta
che il ricevitore è stato alimentato. Il LED lampeggia il numero di interruzioni e poi si ferma (es.
flash,
flash, flash, pausa, flash, flash, flash, pausa indicata tre interruzioni da quando il ricevitore è
stato acceso). Da notare che i tentativi vengono resettati quando il ricevitore è spento. Durante
i primi voli su un nuovo aereo è importante controllare l'indicatore a LED rosso dei tentativi. Se
esso lampeggia è importante ottimizzare l'installazione (spostare o riposizionare le antenne)
finchè non c'è alcun lampeggiamento. Nei voli successivi, l'indicatore rosso a LED può essere
usato per confermare le prestazioni di collegamento RF.
Test del raggio di azione
Prima di iniziare ogni sessione di volo, specialmente con nuovi modelli, è importante effettuare
un test del raggio di azione. Tutti i trasmettitori di aerei Spektrum hanno integrato un sistema
di test del raggio di azione che, quando attivato, riduce la potenza in uscita consentendo il
controllo del raggio d'azione.
30 paces (90 feet/28 meters)
1. Con il modello posizionato a terra, bisogna stare a circa 30 passi (circa 90 piedi,
ossia 28 metri) dal modellino.
2. Mettersi di fronte al modellino col trasmettitore nella vostra normale posizione di volo e
azionare il trasmettitore nella modalità di controllo del raggio d'azione.
3. Dovreste avere il controllo totale del modellino con il pulsante abbassato a 30 passi
(90 piedi/28 metri).
4. Se ci sono problemi relativi al controllo siete pregati di contattare il centro assistenza dei
prodotti negli Stati Uniti al numero 1-877-504-0233 per richiedere assistenza. Nel Regno
Unito o in Germania è possibile usare i seguenti contatti.
Unione Europea: +44 (0) 1279 641 097 (Regno Unito)
o email [email protected]
+49 4121 46199 66 (Germania)
o email [email protected]
Test avanzato del raggio di azione
Per i modelli sofisticati che hanno dei significativi materiali conduttori si raccomanda di
effettuare il test avanzato del raggio di azione usando un registro di volo. Il test avanzato
confermerà che il ricevitore interno e il ricevitore remoto funzionano bene e che il montaggio (la
posizione dei ricevitori) è ottimizzato per il modello specifico di aereo. Questo controllo avanzato
consente la verifica delle prestazioni RF, di valutare la posizione del ricevitore e di ottimizzare le
posizioni del ricevitore remoto.
Test avanzato del raggio di azione
1 Inserire un registro di volo - Flight Log (SPM9540 - opzionale) nella porta dati di AR8000 e
accendere il sistema (Tx e Rx).
IT
2. Avanzare il registro - Flight Log finchè non si vedono delle perdite di frame con -Fpremendo il pulsante sul Flight Log.
3. E' utile avere un aiutante che tenga l'aereo quando si osservano i dati sul Flight Log.
4. Stare a 30 passi dal modellino, con il trasmettitore davanti ad esso durante la normale
posizione di volo e mettere il trasmettitore in modalità test. Ciò causa una minore potenza
in uscita dal trasmettitore.
5. Fare in modo che il vostro aiutante metta il modellino in tutte le posizioni (in salita, in
picchiata, verso il Tx, in direzione opposta al Tx, etc) mentre osserva il Flight Log notando
ogni correlazione fra l'orientamento dell'aereo e le perdite di frame. Continuare con questi
movimenti per un minuto. Qui è possibile usare il timer sul trasmettitore.
Requisiti di sistema di alimentazione del ricevitore
I sistemi di alimentazione inadeguati non sono in grado di fornire la tensione minima necessaria
al ricevitore durante il volo e sono diventati la prima causa di guasti durante il volo. Alcuni dei
componenti del sistema di alimentazione che influiscono sulla capacità di fornire un'adeguata
tensione sono:
• Pacco batterie del ricevitore (numero di cella, capacità, tipi di cella, stato di carica)
• La capacità di ESC di fornire corrente al ricevitore nell'aereo elettrico
• Il collegamento dell'interruttore, i cavi della batteria, cavi del servo, regolatori, etc.
L'AR8000 ha una tensione minima di esercizio di 3.5 volt; quindi si raccomanda vivamente di
testare il sistema di alimentazione in base alle linee guida sottostanti.
Linee guida raccomandate per testare il sistema di alimentazione
Se si usa un sistema di alimentazione non molto idoneo (ad es. batteria piccola o vecchia, ESC
che può non avere un BEC che supporta elevati assorbimenti di corrente, etc.), si raccomanda
di usare un voltmetro per eseguire i seguenti test.
Nota: L'Hangar 9 Digital Servo & Rx Current Meter (HAN172) del registro di volo Spektrum
Flight Log (SPM9540) sono gli utensili ideali per eseguire il test indicato sotto.
Inserire il voltimetro in una porta aperta di un canale nel ricevitore e con il sistema acceso
bisogna caricare le superfici di controllo (applicare pressione con la mano) mentre si monitora
la tensione sul ricevitore. La tensione deve rimanere sopra i 4.8 volt anche se i servo sono
sovraccaricati.
Nota: Le ultime generazioni di batterie ibride al nickel hanno dei nuovi obblighi a livello
chimico, per essere più ecocompatibili. Queste batterie, quando sono caricate con dei
caricatori rapidi con rilevamento di picco, hanno la tendenza a dimostrare un falso picco
(non del tutto cariche). Fra esse ci sono tutte le marche di batterie NiMH. Se si usano dei
set di batterie NiMH bisogna prestare molta attenzione durante la carica, assicurandosi
che le batterie siano del tutto cariche. Si raccomanda di usare un caricatore che possa
indicare correttamente la capacità totale di carica. E' bene notare il numero di mAh in
un set scarico di batterie per verificare che sia stato caricato fino alla piena capacità.
QuickConnect con rilevamento di calo di tensione
Il vostro AR8000 ha un QuickConnect con rilevamento di calo di tensione.
• Se si dovesse verificare un'interruzione dell'alimentazione (calo di tensione) il sistema si
riconnetterà immediatamente quando verrà ripristinata l'alimentazione (QuickConnect).
• Il LED sul ricevitore lampeggerà lentamente indicando che è avvenuta un'interruzione di
alimentazione (calo di tensione).
• I cali di tensione possono essere causati da un'alimentazione inadeguata (batteria scarica o
regolatore non idoneo), un connettore allentato, un interruttore non in buone condizioni, un BEC
inadeguato quando si usa un controllo elettronico della velocità, etc.
• I cali di tensione si verificano quando la tensione del ricevitore scende sotto i 3.5 volt
interrompendo il controllo, in quanto i servo necessitano di almeno 3.5 volt per funzionare.
Come funzione QuickConnect™ con rilevamento di calo di tensione
• Quando la tensione del ricevitore scende sotto i 3.5 volt, il sistema si arresta (smette di
funzionare).
• Quando l'alimentazione è ripristinata il ricevitore tenterà immediatamente di riconnettersi
alle ultime due frequenze alle quali era connesso.
• Se le due frequenze sono presenti (il trasmettitore era rimasto acceso) il sistema si
riconnetterà solitamente in 1 secondo.
IT
QuickConnect con rilevamenti dei cali di tensione è progettato per consentirvi di volare in
sicurezza con delle interruzioni di alimentazione brevissime, tuttavia la causa di tali interruzioni
deve essere eliminata prima di cominciare il prossimo volo, al fine di evitare delle catastrofiche
problematiche legate alla sicurezza.
Nota: Se si verifica un calo di tensione durante il volo, è importante capire subito la sua
causa e correggerla.
Flight Log - Registro di volo (SPM9540 - opzionale)
Flight Log è compatibile con AR8000. Esso visualizza le prestazioni generali dei collegamenti
RF e i dati dei collegamenti esterni ed interni del ricevitore. Inoltre visualizza la tensione del
ricevitore.
Usare il registro di volo - Flight Log
Dopo un volo o prima di spegnere il ricevitore o il trasmettitore, inserire il Flight Log nella porta
dati dell'AR8000. Lo schermo visualizzerà automaticamente la tensione 6v2= 6.2 volt.
Nota: Quando la tensione raggiunge 4.8 volt - o meno - lo schermo indicherà una bassa
tensione.
Premere il pulsante per visualizzare le seguenti informazioni:
A – Dissolvenza del segnale nell'antenna interna
B – Non usato
L – Dissolvenza del segnale nell'antenna esterna
R – Non usato
F – Perdita di frame
H – Hold (interruzione)
Dissolvenza dell'antenna—rappresenta la perdita di informazioni su una antenna specifica.
Solitamente è normale avere circa 50 / 100 dissolvenze di segnale durante un volo. Se una
sola antenna ha oltre 500 dissolvenze di segnale durante un solo volo, allora essa deve essere
riposizionata sul velivolo per ottimizzare il collegamento RF.
Perdita di frame—rappresenta la perdita simultanea di segnale su tutti i ricevitori collegati. Se
il collegamento RF è effettuato correttamente, le perdite di frame per ogni volo dovrebbe essere
inferiori a 20. Si verifica una interruzione quando avvengono 45 perdite di frame consecutive.
Ciò impiega circa un secondo. Se avviene una interruzione durante il volo è importante valutare
il sistema, muovendo le antenne nelle varie posizioni e controllare se il trasmettitore e il
ricevitore funzionano correttamente.
Nota: Una estensione del servo può essere usata per permettere al registro di volo di essere
posizionato nel modo più opportuno. Su alcuni modelli, il registro di volo può essere
inserito, collegato e posizionato sul modello con del nastro biadesivo. Come per gli
elicotteri si può montare il registro di volo lateralmente.
ModelMatch
Alcuni trasmettitori Spektrum e JR offrono una caratteristica con brevetto in corso, chiamata
ModelMatch. ModelMatch impedisce di adoperare un modello che usa il modello di memoria
errato, evitando un potenziale danno. Con ModelMatch, ogni memoria del modello ha il
suo codice unico (GUID) e durante il processo di collegamento il codice è programmato
nel ricevitore. Successivamente, quando il sistema è acceso, il ricevitore si connetterà al
trasmettitore solo se la memoria del modello corrispondente è programmata sullo schermo.
Nota: Se quando si accende il sistema non avviene nessuna connessione bisogna assicurarsi
di aver selezionato la giusta memoria del modello nel trasmettitore. Si prega di notare
che i moduli Spektrum Aircraft non hanno ModelMatch.
IT
Consigli sull’uso di Spektrum
2.4GHz
Quando il vostro sistema da 2.4GHz dotato di DSM è in esecuzione, funzionando quasi
identicamente ai sistemi a 72MHz, i clienti si pongono spesso queste domande.
D: Cosa devo accendere per primo, il trasmettitore o il ricevitore?
R: Se il ricevitore è acceso per primo —Tutti i servo a parte quello del throttle verranno
impostati alle loro posizione di failsafe preimpostate durante il collegamento. A questo
punto, il canale del throttle non emetterà l’impulso di posizione, evitando l’azionamento dei
controlli elettronici di velocità, o in caso di un aereo a motore, il servo del throttle rimane
nella sua posizione attuale. Quando il trasmettitore viene acceso, esso scansiona la banda a
2.4GHz ed acquisisce due canali aperti. Quindi il ricevitore, che era in precedenza collegato
al trasmettitore, scansiona la banda e trova il GUID (Globally Unique Identifier code - codice
identificatore unico globale) memorizzato durante il collegamento. Il sistema quindi si
connetterà e funzionerà normalmente.
Se il trasmettitore è acceso per primo —il trasmettitore scansione la banda da 2.4GHz e
acquisisce due canali aperti. Quando il ricevitore è acceso per un breve periodo (il tempo
impiegato per connettersi) tutti i servo, tranne per il throttle, vengono azionati alle loro posizioni
di failsafe preimpostate, mentre il throttle non ha nessun impulso in uscita. Il ricevitore
scansiona la banda da 2.4GHz cercando il GUID memorizzato in precedenza e quando trova il
codice GUID specifico, confermando le informazioni del pacchetto ripetibile e non corrotto, il
sistema si connette e riprende il suo normale funzionamento. Normalmente impiega da 2 a 6
secondi.
D: A volte il sistema impiega troppo tempo per connettersi e perchè a volte non si
connette affatto?
R: Affinchè il sistema si possa connettere (dopo che il ricevitore è connesso) il ricevitore deve
ricevere un grande numero ininterrotto di pacchetti, in condizioni perfette dal trasmettitore,
per potersi connettere correttamente. Questo processo dipende dall’ambiente circostante,
garantendo che è sicuro volare quando il sistema è connesso. Se il trasmettitore è troppo
vicino al ricevitore (meno di 1,10 m) o se il trasmettitore è ubicato vicino a oggetti metallici
(alloggiamento metallico del TX, un pianale di un camion, un banco da lavoro metallico, etc) la
connessione impiegherà molto tempo e in alcuni casi potrà non avvenire in quanto il sistema
riceverà l’energia a 2.4GHz da sè stesso e la interpreterà come un’interferenza. Spostando
il sistema lontano da oggetti metallici o spostando il trasmettitore lontano dal ricevitore, il
sistema di alimentazione farà in modo di ripristinare la connessione. Ciò accade solo durante la
connessione iniziale. Dopo essersi connesso, il sistema viene bloccato e se ci dovesse essere
una perdita di segnale (failsafe) il sistema si riconnetterà immediatamente (4ms) quando il
segnale viene ripristinato.
D: Ho sentito dire che il sistema DSM è meno tollerante ad una bassa tensione. E’ vero?
R: Tutti i ricevitori DSM hanno un intervallo di tensione di esercizio che va da 3.5 a 9.6 volt. Per
la maggior parte dei sistemi questo non è un problema in quanto la maggior parte dei servo
smettono di funzionare a circa 3.8 volt. Quando si usano dei servo con elevati assorbimenti di
corrente con una batteria o una fonte di alimentazione singola o inadeguata, carichi elevati e
momentanei di corrente possono causare una calo della tensione al di sotto della soglia di 3.5
volt, comportando una caduta di tensione dell’intero sistema (servo e ricevitore). Quando la
tensione cala al di sotto della soglia minima (3.5 volt), il ricevitore DSM deve riavviarsi (ripetere
il processo di avvio e scansionare la banda per trovare il trasmettitore) e ciò può richiedere
alcuni secondi. Leggere attentamente la sezione dei requisiti di alimentazione del ricevitore in
quanto viene spiegato come effettuare il test e come evitare il riavvio.
D: A volte il mio ricevitore perde il contatto e non si connette se non eseguo un nuovo
contatto. Cosa succede se si perde il collegamento durante il volo?
R: Il ricevitore non perde mai il collegamento, a meno che non gli venga palesemente impartito.
E’ importante capire che durante il processo di collegamento il ricevitore non solo apprende il
GUID (codice) del trasmettitore, ma il trasmettitore apprende e memorizza il tipo di ricevitore al
IT
quale è collegato. Se il trasmettitore è posizionato in modalità di collegamento, il trasmettitore
cerca il segnale di protocollo di collegamento del ricevitore. Se non è presente alcun segnale,
il trasmettitore non ha più le informazioni corrette per connettersi ad uno specifico ricevitore
e in assenza del trasmettitore viene“scollegato” dal ricevitore. Abbiamo avuto vari clienti DX7
che usano dei supporti o dei sistemi che tengono inavvertitamente premuto il pulsante del
collegamento e il sistema viene acceso perdendo le informazioni necessarie per consentire la
connessione. Abbiamo anche avuto dei clienti DX7 che non capivano del tutto la procedura del
test e premevano il pulsante di collegamento prima di accendere il trasmettitore, causando una
“perdita di connessione” del sistema.
IT
Periodo di garanzia
Garanzia esclusiva - Horizon Hobby, Inc., (Horizon) garantisce che i prodotti acquistati (il
“Prodotto”) sono privi di difetti relativi ai materiali e di eventuali errori di montaggio. Il periodo
di garanzia è conforme alle disposizioni legali del paese nel quale il prodotto è stato acquistato.
In Germania, tale periodo di garanzia ammonta a 6 mesi e si estende ad altri 18 mesi dopo tale
termine.
limiti della garanzia
(a) La garanzia è limitata all’acquirente originale (Acquirente) e non è cedibile a terzi.
L’acquirente ha il diritto a far riparare o a far sostituire la merce durante il periodo di questa
garanzia. La garanzia copre solo quei prodotti acquistati presso un rivenditore autorizzato
Horizon. Altre transazioni di terze parti non sono coperte da questa garanzia. La prova di
acquisto è necessaria per far valere il diritto di garanzia. Inoltre, Horizon si riserva il diritto di
cambiare o modificare i termini di questa garanzia senza alcun preavviso e di escludere tutte le
altre garanzie già esistenti.
(b) Horizon non si assume alcuna garanzia per la disponibilità del prodotto, per l’adeguatezza
o l’idoneità del prodotto a particolari previsti dall’utente. è sola responsabilità dell’acquirente il
fatto di verificare se il prodotto è adatto agli scopi da lui previsti.
(c) Richiesta dell’acquirente – spetta soltanto a Horizon, a propria discrezione riparare o sostituire qualsiasi prodotto considerato difettoso e che rientra nei termini di garanzia. queste
sono le uniche rivalse a cui l’acquirente si può appellare, se un prodotto è difettoso.
Horizon si riserva il diritto di controllare qualsiasi componente utilizzato che viene coinvolto
nella rivalsa di garanzia. Le decisioni relative alla sostituzione o alla riparazione avvengono solo
in base alla discrezione di Horizon. Questa garanzia non copre dei danni superficiali o danni
per cause di forza maggiore, uso errato del prodotto, negligenza, uso ai fini commerciali, o una
qualsiasi modifica a qualsiasi parte del prodotto.
Questa garanzia non copre danni dovuti ad una installazione errata, ad un funzionamento
errato, ad una manutenzione o un tentativo di riparazione non idonei a cura di soggetti diversi
da Horizon. La restituzione del prodotto a cura dell’acquirente, o da un suo rappresentante, deve
essere approvata per iscritto dalla Horizon.
Limiti di danno
Horizon non si riterrà responsabile per danni speciali, diretti, indiretti o consequenziali; perdita
di profitto o di produzione; perdita commerciale connessa al prodotto, indipendentemente
dal fatto che la richiesta si basa su un contratto o sulla garanzia. Inoltre la responsabilità
di Horizon non supera mai in nessun caso il prezzo di acquisto del prodotto per il quale si
chiede la responsabilità. Horizon non ha alcun controllo sul montaggio, sull’utilizzo o sulla
manutenzione del prodotto o di combinazioni di vari prodotti. Quindi Horizon non accetta
nessuna responsabilità per danni o lesioni derivanti da tali circostanze. Con l’utilizzo e il
montaggio del prodotto l’utente acconsente a tutte le condizioni, limitazioni e riserve di garanzia
citate in questa sede.
Qualora l’utente non fosse pronto ad assumersi tale responsabilità associata all’uso del
prodotto, si suggerisce di di restituire il prodotto intatto, mai usato e immediatamente presso il
venditore.
Indicazioni di sicurezza
Questo è un prodotto sofisticato di hobbistica e non è un giocattolo. Esso deve essere
manipolato con cautela, con giudizio e richiede delle conoscenze basilari di meccanica e delle
facoltà mentali di base. Se il prodotto non verrà manipolato in maniera sicura e responsabile
potrebbero risultare delle lesioni, dei gravi danni a persone, al prodotto o all’ambiente
circostante. Questo prodotto non è concepito per essere usato dai bambini senza una diretta
supervisione di un adulto. Il manuale del prodotto contiene le istruzioni di sicurezza, di
funzionamento e di manutenzione del prodotto stesso. È fondamentale leggere e seguire tutte
le istruzioni e le avvertenze nel manuale prima di mettere in funzione il prodotto. Solo così si
eviterà un utilizzo errato e di preverranno incidenti, lesioni o danni.
IT
Domande, assistenza e riparazioni
Il vostro negozio locale e/o luogo di acquisto non possono fornire garanzie di assistenza o
riparazione senza previo colloquio con Horizon. questo vale anche per le riparazioni in garanzia.
Quindi in tale casi bisogna interpellare un rivenditore, che si metterà in contatto subito con
Horizon per prendere una decisione che vi possa aiutare nel più breve tempo possibile.
Manutenzione e riparazione
Se il prodotto deve essere ispezionato o riparato, si prega di rivolgersi ad un rivenditore
specializzato o direttamente ad Horizon. il prodotto deve essere Imballato con cura. Bisogna
far notare che i box originali solitamente non sono adatti per effettuare una spedizione senza
subire alcun danno. Bisogna effettuare una spedizione via corriere che fornisce una tracciabilità
e un’assicurazione, in quanto Horizon non si assume alcuna responsabilità in relazione alla
spedizione del prodotto. Inserire il prodotto in una busta assieme ad una descrizione dettagliata
degli errori e ad una lista di tutti i singoli componenti spediti. Inoltre abbiasmo bisogno di un
indirizzo completo, di un numnero di telefono per chiedere ulteriori domande e di un indirizzo
e-mail.
Garanzia a riparazione
Le richieste in garanzia verranno elaborate solo se è presente una prova d’acquisto in originale
proveniente da un rivenditore specializzato autorizzato, nella quale è ben visibile la data di
acquisto. Se la garanzia viene confermata, allora il prodotto verrà riparato o sostituito. Questa
decisione spetta esclusivamente a Horizon Hobby.
Riparazioni a pagamento
Se bisogna effettuare una riparazione a pagamento, effettueremo un preventivo che verrà
inoltrato al vostro rivenditore. La riparazione verrà effettuata dopo l’autorizzazione da parte
del vostro rivenditore. La somma per la riparazione dovrà essere pagata al vostro rivenditore.
Le riparazioni a pagamento avranno un costo minimo di 30 minuti di lavoro e in fattura
includeranno le spese di restituzione. Qualsiasi riparazione non pagata e non richiesta entro 90
giorni verrà considerata abbandonata e verrà gestita di conseguenza.
Attenzione: Le riparazioni a pagamento sono disponibili solo sull’elettronica e sui motori. Le
riparazioni a livello meccanico, soprattutto per gli elicotteri e le vetture RC sono molto costose e
devono essere effettuate autonomamente dall’acquirente.
Unione Europea:
L’elettronica e i motore devono essere controllati e mantenuti regolarmente. Per ricevere
assistenza bisogna spedire i prodotti al seguente indirizzo:
Horizon Technischer Service
Hamburger Str. 10
25335 Elmshorn
Germania
Si prega di telefonare al numero +49 4121 4619966 o di inviare una e-mail indirizzo service@
horizonhobby.de per qualsiasi domanda sul prodotto o sulal garanzia.
Sicurezza e avvertenze
In qualità di utenti di questo prodotto siete responsabili per un suo uso sicuro, in quanto esso
potrebbe provocare danno a persone e a cose. Seguite scrupolosamente tutte le indicazioni e
le avvertenze relative al prodotto, a tutti i componenti e a tutti i prodotti che sono connessi ad
esso. Il vostro modello riceve dei segnali radio che servono il per suo controllo. I segnali radio
possono subire delle interferenze o addiriturra la perdita di un segnale da parte del modellino.
Assicuratevi quindi di evitare una perdita di segnale, mantenendo una corretta distanza di
sicurezza dal vostro modellino.
• Azionare il vostro modellino solo all’aperto, lontano da macchine, persone o veicoli.
• Non azionare il vostro veicolo su una strada pubblica.
IT
• Non azionare il vostro modellino su una strada trafficata o su una piazza.
• Non azionare il vostro trasmettitore se esso ha le batterie scariche.
• Seguite queste istruzioni e tutte le indicazioni e quelle del manuale dell’utenti di tutti gli
accessori utilizzati.
• Tenere le sostanze chimiche, le minutenrie e I componenti elettrici lontani dalla portata dei
bambini.
• L’umidità danneggia l’elettronica. Evitare la penetrazione di acqua, in quanto i componenti
non sono impermeabili.
Informazioni sulla conformità per
l'Unione Europea
Dichiarazione di conformità
(in conformità con ISO/IEC 17050-1)
N. HH2008111001
Prodotto(i):
Spektrum Ricevitore AR8000
Numero(i) articolo:
SPMAR8000
Classe dei dispositivi: 1
Gli oggetti presentati nella dichiarazione sopra citata sono conformi ai requisiti delle specifiche
elencate qui di seguito, seguendo le disposizioni della direttiva europea R&TTE 1999/5/EC:
EN 301 489-1 v.1.6.1
EN 301 489-17 v.1.2.1
Requisiti generali di EMC per i dispositivi radio
Firmato per conto di:
Horizon Hobby, Inc.
Champaign, IL USA
Gen 28, 2010
Steven A. Hall
Vice Presidente
Operazioni internazionali e Gestione dei rischi
Horizon Hobby, Inc.
Numero di brevetto US 7,391,320. Altri brevetti in corso.
DSM e DSM2 sono marchi commerciali o marchi registrati di Horizon Hobby, Inc. Il marchio commerciale Spektrum è usato
per concessione di Bachmann Industries, Inc. I dispositivo radio e gli accessori Spektrum sono esclusivamente disponibili
presso Horizon Hobby, Inc.
Smaltimento all’interno dell’Unione Europea
Questo prodotto non deve essere smaltito assieme ai rifiuti domestici. Invece è
responsabilità dell’utente lo smaltimento di tali rifiuti, che devono essere portati
in un centro di raccolta designato per il riciclaggio di rifiuti elettronici. Con tale
procedimento si aiuterà preservare l’ambiente e le risorse non verranno sprecate. in questo
modo si proteggerà il benessere dell’umanità. Per maggiori informazioni sui punti di riciclaggio
si prega di contattare il proprio ufficio locale o il servizio di smaltimento rifiuti.
IT
16496.1I

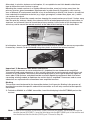

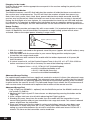

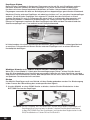
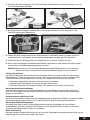
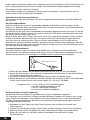


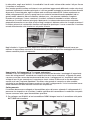
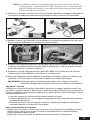
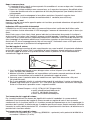


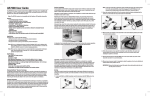


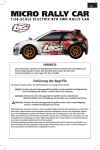


![[DYS 3 Axis Gimbal User Manual]](http://vs1.manualzilla.com/store/data/005821240_1-6054c49231c96ddf730544e81a975eb9-150x150.png)