
1
Fax +32 2 359 95 50
Copies of the I/B. Please reproduce them without any
changes except under special instruction from Team
International BELGIUM. The pages must be reproduced
and folded in order to obtain a booklet A5 (+/- 148.5 mm
width x 210 mm height). When folding, make sure you
keep the good numbering when you turn the pages of
the I/B. Don’t change the page numbering. Keep the
language integrity.
Küchenmaschine/Dampfgarer
Food Processor/Steamer
Robot Multifonctions/Cuiseur Vapeur
Keukenrobot/Stoomkoker
Robot de cocina/Cocina de vapor
Robot de Cozinha/Vaporera
Robot kuchenny/Urządzenie do
gotowania na parze
TKG DG 1000
I/B Version
100116
230V~ 50Hz
Front cover page (first page)
Assembly page 1/80
Fax +32 2 359 95 50
Copies of the I/B. Please reproduce them without any
changes except under special instruction from Team
International BELGIUM. The pages must be reproduced
and folded in order to obtain a booklet A5 (+/- 148.5 mm
width x 210 mm height). When folding, make sure you
keep the good numbering when you turn the pages of
the I/B. Don’t change the page numbering. Keep the
language integrity.
2
Assembly page 2/80
TKG DG 1000 - 100116
Fax +32 2 359 95 50
D
1.
2.
3.
4.
5.
6.
7.
8.
9.
10.
11.
12.
13.
14.
15.
16.
17.
18.
19.
20.
GB
1.
2.
3.
4.
5.
6.
7.
8.
9.
10.
11.
12.
13.
14.
15.
16.
17.
18.
19.
20.
Copies of the I/B. Please reproduce them without any
changes except under special instruction from Team
International BELGIUM. The pages must be reproduced
and folded in order to obtain a booklet A5 (+/- 148.5 mm
width x 210 mm height). When folding, make sure you
keep the good numbering when you turn the pages of
the I/B. Don’t change the page numbering. Keep the
language integrity.
FR
1.
2.
Drehknopf
Kontrollleuchte Dampffunktion
Kontrollleuchte Misch-/Hackfunktion
Aus-Stellung (OFF)
Kappe des Dampfkessels
Dampfaustrittsöffnung
Achse mit Sicherheitsschalter
Motoreinheit
Messereinheit
Klinge
Schutzhaube
Milchbehälter
Deckel des Milchbehälters
Deckel des Mischbehälters
Saugerhalter
Kochbehälter
Misch-/Hackbehälter
Spatel
Reinigungsbürste
Messbecher
4.
5.
6.
7.
8.
9.
10.
11.
12.
13.
14.
15.
16.
17.
18.
19.
20.
Interrupteur rotatif
Témoin lumineux de la fonction
vapeur
Témoin lumineux de la fonction
mélangeur/hachoir
Position OFF (arrêt)
Bouchon de la chaudière
Orifice de la vapeur
Axe avec interrupteur de sécurité
Corps
Unité des lames
Lame
Couvercle de protection
Récipient pour le lait
Couvercle du récipient pour le lait
Couvercle du bol mélangeur
Support de tétines
Bol cuiseur
Bol mélangeur/hachoir
Spatule
Brosse de nettoyage
Bol mesureur
NL
1.
2.
3.
4.
5.
6.
7.
8.
9.
10.
11.
12.
13.
14.
15.
16.
17.
18.
19.
20.
Schakelaar
Controlelampje stoomfunctie
Controlelampje meng-/hakfunctie
Uit-stand (OFF)
Dop van de stoomketel
Stoomuitlaatopening
Aandrijfas met veiligheidsschakelaar
Motorblok
Meseenheid
Mes
Beschermhoesje
Melkkom
Deksel van de melkkom
Deksel van de mengkom
Speenhouder
Kookkom
Meng-/hakkom
Spatel
Reinigingsborsteltje
Maatbeker
3.
Rotary switch
Steam function indicator light
Blending/Chopping function
indicator light
OFF position
Boiler cap
Steam hole
Shaft with security switch
Base unit
Blade unit
Blade
Protective cover
Milk container
Milk container lid
Mixing container lid
Teat stand
Cooking container
Blending/Chopping container
Spatula
Cleaning brush
Measuring cup
3
Assembly page 3/80
TKG DG 1000 - 100116
Fax +32 2 359 95 50
Copies of the I/B. Please reproduce them without any
changes except under special instruction from Team
International BELGIUM. The pages must be reproduced
and folded in order to obtain a booklet A5 (+/- 148.5 mm
width x 210 mm height). When folding, make sure you
keep the good numbering when you turn the pages of
the I/B. Don’t change the page numbering. Keep the
language integrity.
4
Assembly page 4/80
TKG DG 1000 - 100116
Fax +32 2 359 95 50
SP
1.
2.
3.
4.
5.
6.
7.
8.
9.
10.
11.
12.
13.
14.
15.
16.
17.
18.
19.
20.
P
1.
2.
3.
4.
5.
6.
7.
8.
9.
10.
11.
12.
13.
14.
15.
16.
17.
18.
19.
20.
Copies of the I/B. Please reproduce them without any
changes except under special instruction from Team
International BELGIUM. The pages must be reproduced
and folded in order to obtain a booklet A5 (+/- 148.5 mm
width x 210 mm height). When folding, make sure you
keep the good numbering when you turn the pages of
the I/B. Don’t change the page numbering. Keep the
language integrity.
PL
1.
2.
Aspa giratoria
Indicador luminoso de la función
vapor
Indicador luminoso de la función
batidora
Posición apagado OFF
Tapa de caldera
Salida de vapor
Eje con interruptor de seguridad
Bloque motor
Unidad de cuchillas
Cuchilla
Cubierta protectora
Jarra de leche
Tapa jarra de leche
Tapa de la jarra mezcladora
Soporte interior de biberones
Bol de cocción
Bol batidora con asa
Espátula
Cepillo limpiador
Jarra graduada
3.
4.
5.
6.
7.
8.
9.
10.
11.
12.
13.
14.
15.
16.
17.
18.
19.
20.
Pokrętło uruchamiające
Lampka kontrolna dla trybu pracy na
parze
Lampka kontrolna dla trybu
mieszania/krojenia
Pozycja OFF (wyłączone)
Pokrętło gotowania
Otwór na ujście pary
Trzonek z włącznikiem
bezpieczeństwa
Obudowa silnika
Część z ostrzami
Ostrza rozdrabniacza
Nakładki zabezpieczające
Zbiornik na mleko
Pokrywa zbiornika na mleko
Pokrywa zbiornika mieszającego
Podstawa na smoczek
Zbiornik gotujacy
Zbiornik mieszający/krojący
Szpatułka
Szczoteczka
Miarka
Interruptor rotativo
Luz indicadora da função vapor
Mistura/Luz indicadora da função
corte
Posição OFF (desligado)
Tampa da caldeira
Saída do vapor
Eixo com interruptor de segurança
Corpo do motor
Acessório das lâminas corte
Lâmina
Cobertura de proteção
Recipiente para leite
Tampa do recipiente do leite
Tampa do recipiente de mistura
Suporte de chupetas
Recipiente para cozinhar
Mistura/Recipiente para cortar
Espátula
Escova de limpeza
Taça graduada
5
Assembly page 5/80
TKG DG 1000 - 100116
Copies of the I/B. Please reproduce them without any
changes except under special instruction from Team
International BELGIUM. The pages must be reproduced
and folded in order to obtain a booklet A5 (+/- 148.5 mm
width x 210 mm height). When folding, make sure you
keep the good numbering when you turn the pages of
the I/B. Don’t change the page numbering. Keep the
language integrity.
Fax +32 2 359 95 50
WICHTIGE SICHERHEITSVORSCHRIFTEN
Lesen Sie aufmerksam die Gebrauchsanleitung, bevor Sie Ihr Gerät benutzen, und befolgen Sie
immer die Sicherheitsvorschriften und die Gebrauchsanweisung.
Wichtig: Personen (einschließlich Kinder), die aufgrund ihrer physischen, sensorischen oder
geistigen Fähigkeiten oder ihrer Unerfahrenheit oder Unkenntnis nicht in der Lage sind, das
Gerät sicher zu benutzen, sollten dieses Gerät nicht ohne Aufsicht oder Anweisung durch eine
verantwortliche Person benutzen. Kinder sollten beaufsichtigt werden, um sicherzustellen, dass
sie nicht mit dem Gerät spielen.
Kontrollieren Sie, ob die Netzspannung mit der auf dem Gerät vermerkten Spannung
übereinstimmt, bevor Sie das Gerät benutzen.
Lassen Sie Ihr Gerät niemals beim Gebrauch unbeaufsichtigt.
Überprüfen Sie regelmäßig, ob die Anschlussleitung nicht beschädigt ist. Bei Beschädigung
der Anschlussleitung oder des Gerätes letzteres nicht benutzen. Eine beschädigte
Anschlussleitung sollte von einem Fachmann (*) ausgewechselt werden. Dafür kontrollieren
Sie regelmäßig ihren Zustand.
Benutzen Sie das Gerät nur zu Haushaltszwecken, wie in der Bedienungsanleitung
angegeben. Das Gerät darf nicht im Freien verwendet werden.
Tauchen Sie die Antriebseinheit niemals in Wasser oder andere Flüssigkeiten, weder zum
Reinigen, noch zu einem anderen Zweck. Geben Sie das Gerät niemals in die
Spülmaschine.
Benutzen Sie das Gerät nicht in der Nähe einer Wärmequelle.
Das Gerät sollte bei Gebrauch immer auf einer trockenen und ebenen Fläche stehen.
Der Stecker muss unbedingt aus der Steckdose herausgezogen sein, bevor Sie das Gerät
reinigen, das Zubehör wechseln oder wenn Sie es nicht benutzen. Lassen Sie Ihr Gerät
niemals unbeaufsichtigt, wenn es unter Spannung ist.
Für Reparaturen wenden Sie sich bitte an einen Fachmann (*).
Benutzen Sie das Gerät niemals im Freien und bewahren Sie es stets an einem trockenen
Platz auf.
Benutzen Sie nur Zubehör, welches vom Lieferanten empfohlen wurde. Anderes Zubehör
stellt eine Gefahr für den Benutzer dar und das Gerät könnte dadurch beschädigt
werden.
Ziehen Sie niemals an der Anschlussleitung, um das Gerät zu bewegen. Achten Sie darauf,
dass die Anschlussleitung nicht irgendwo hängen bleibt und dies zum Fall des Gerätes
führen könnte. Wickeln Sie die Anschlussleitung nicht um das Gerät oder knicken Sie diese
nicht.
Lassen Sie das Netzkabel nie über Ränder und Tischkanten hängen, heiße Oberflächen
berühren und passen Sie auf, dass es sich nicht verknotet.
Benutzen Sie dieses Gerät nur zu Kochzwecken.
Dieses Gerät ist nicht zum dauerhaften Gebrauch geeignet. Es ist kein professionelles
Gerät. Daher sollten Sie regelmäßige Pausen einlegen.
Sie sollten das Gerät sauber halten, da es in direktem Kontakt mit Lebensmitteln kommt.
Siehe hierzu Abschnitt "Reinigung und Pflege" der Bedienungsanleitung.
Das Messer dieses Gerätes ist sehr scharf, deshalb sollte stets sehr vorsichtig mit diesem
Gerät umgegangen werden.
Um Verletzungen zu vermeiden sollte immer darauf geachtet werden, dass Hände
und/oder andere Objekte nicht in die Nähe der Aufsätze kommen, wenn das Gerät in
Gebrauch ist.
Achten Sie darauf, dass das Zubehör fest und richtig am Motorblock aufgesetzt wird,
bevor Sie das Gerät einschalten.
6
Assembly page 6/80
TKG DG 1000 - 100116
Fax +32 2 359 95 50
Copies of the I/B. Please reproduce them without any
changes except under special instruction from Team
International BELGIUM. The pages must be reproduced
and folded in order to obtain a booklet A5 (+/- 148.5 mm
width x 210 mm height). When folding, make sure you
keep the good numbering when you turn the pages of
the I/B. Don’t change the page numbering. Keep the
language integrity.
Zur Reinigung des Messers können Sie eine Spatel benutzen. Achten Sie bitte darauf, dass
der Netzstecker dabei zuvor aus der Steckdose gezogen wurde.
Mischen Sie niemals kochende Flüssigkeiten mit diesem Gerät.
Das Gerät kann zum Zubereiten von kleinen Mengen benutzt werden, die quasi sofort
verspeist werden. Das Gerät ist nicht zum Zubereiten von großen Mengen geeignet.
Berühren Sie niemals das Messer während das Gerät in Betrieb ist oder versuchen Sie
niemals das Messer auf irgendeine Weise anzuhalten.
Bei Gebrauch des Gerätes empfehlen wir, dass die Antriebseinheit in kurzen Impulsen einund ausgeschaltet werden sollte. Dies führt zu einem besseren Zerkleiner- und MixErgebnis. Das schützt gleichzeitig die Antriebseinheit vor einer zu langen Benutzung. Falls
Sie noch weitere Informationen benötigen, lesen Sie bitte diese Gebrauchsanweisung.
Der Zerkleinerer kann nur verwendet werden, wenn alle Originalteile wie Deckel, Becher
und Messer zusammen verwendet werden und nicht beschädigt sind. Probieren Sie nicht,
ein Teil durch ein anderes zu ersetzen. Wenn Sie ein Stück ersetzen müssen, wenden Sie
sich an Ihren Kundendienst.
Achten Sie darauf, dass das Gerät vollständig erkaltet ist, bevor Sie es reinigen oder
wegräumen.
Bereiten Sie nur Nahrungsmittel, die zum Kochen und zum Verzehr geeignet sind. Legen Sie
keine zu großen Stücke Nahrung in das Gerät, um Risikos auszuschließen.
Achten Sie darauf, dass die Anschlussleitung nicht mit den heißen Teilen des Gerätes in
Kontakt kommt.
Während des Gebrauchs können zugängliche Teile des Gerätes eine sehr hohe
Temperatur erreichen. Berühren Sie diese heißen Teile nicht. Benutzen Sie Topflappen um
das Gerät zu verstellen.
Seien Sie vorsichtig, wenn Sie Ihr Gerät transportieren, welches warme Nahrung, Wasser
oder andere Flüssigkeiten enthält. Es wird empfohlen, das Gerät nicht zu bewegen, wenn
es nicht völlig erkaltet ist.
Das Gerät hat ein kurzes Kabel damit der Benutzer nicht darüber fallen oder darauf treten
kann. Sie können durchaus eine Verlängerungsschnur benutzen. Achten Sie um Unfälle zu
vermeiden darauf, dass die Anschlussleitung nicht herunterhängt und Sie darüber stolpern.
Ihr Gerät darf niemals über eine externe Zeitschaltuhr oder irgendein anderes, separates
Fernbedienungssystem eingeschaltet werden.
(*) Fachmann: anerkannter Kundendienst des Lieferanten oder des Importeurs, der für derartige
Reparaturen zuständig ist. Für eventuelle Reparaturen wenden Sie sich bitte an diesen
Kundendienst.
ANWENDUNGSBEREICH/TÄTIGKEITSBEREICH
•
•
Benutzen Sie das Gerät nur zu Haushaltszwecken, wie in der Bedienungsanleitung
angegeben.
Dieses Gerät ist bestimmt für Haushaltsanwendungen und ähnliche Nutzanwendungen
wie:
Dem Personal vorbehaltene Küchenecken in Laden, Büros und anderen
berufsmäßigen Umgebungen.
Bauernhöfe.
Die Benutzung durch Kunden von Hotels, Motels und anderen
Wohnumgebungen.
Umgebungen des Gästehaustyps.
7
Assembly page 7/80
TKG DG 1000 - 100116
Fax +32 2 359 95 50
Copies of the I/B. Please reproduce them without any
changes except under special instruction from Team
International BELGIUM. The pages must be reproduced
and folded in order to obtain a booklet A5 (+/- 148.5 mm
width x 210 mm height). When folding, make sure you
keep the good numbering when you turn the pages of
the I/B. Don’t change the page numbering. Keep the
language integrity.
VORTEILE IHRES GERÄTES
Ihr Babynahrungsbereiter ist ein Gerät mit vielen Funktionen. Es kann Nahrung dämpfen,
mischen oder hacken, Nahrung, Milch und Flüssigkeiten aufwärmen, und Flaschensauger
sterilisieren. Es bietet Ihnen die nachfolgenden Spezifikationen:
•
•
•
•
•
•
•
•
•
•
Als Dampfgargerät bietet es Ihnen eine gesunde, schnelle und schmackhafte Weise um
Nahrung für Ihr Baby zu kochen.
Besonders schnelllaufendes Messer um Nahrung in sehr kleine Stücke zu hacken.
Kräftiger Dampf um Nahrung in sehr kurzer Zeit zu kochen.
Einfache Bedienung, nur 1 Schalter für den ganzen Prozess.
Indem für die Produktion des Gerätes hochwarmfeste lebensmittelechte PP-Materialien
(Polypropylen) und speziell formulierte Kunststoffe verwendet worden sind, bietet es ein
BPA-freies (Bisphenol A) und Phthalate-freies Gerät, das Ihr Baby schützt vor schädlichen
Chemikalien.
Einfache Reinigung.
Doppelter Überhitzungsschutz: Thermostat und eine Temperatursicherung.
Großer Wassertank von 230cc / 8 Fl.Oz. (Flüssigunze) liefert 30 Minuten Dampfproduktion,
was genügend ist um jede Art von Nahrung in jeder Menge zu verarbeiten.
Geliefert mit einem Milchbehälter, der verwendet werden kann um Milch oder
Flüssigkeiten aufzuwärmen.
Geliefert mit einem Saugerhalter für die Entkeimung von Flaschensaugern.
VOR DER ERSTEN BENUTZUNG
•
•
•
•
•
Entfernen Sie die Verpackung und kontrollieren Sie, dass weder Teile fehlen noch
beschädigt sind.
Lesen Sie die Bedienungsanleitung gründlich durch!
Waschen Sie den Milchbehälter, den Kochbehälter, den Misch-/Hackbehälter, die Deckel
und das Hackmesser bitte in warmem Seifenwasser ab und trocknen Sie diese gründlich.
Wischen Sie die Antriebseinheit mit einem feuchten Lappen ab.
Alle Teile, die mit der Nahrung in Kontakt kommen, sollten vor und nach dem Gebrauch
gründlich gereinigt werden.
WICHTIGE ANWEISUNGEN
•
•
•
•
•
•
•
•
Niemals Speisen wärmer als 50°C oder flüssige oder zu saftige Speisen in die Schüssel
einfüllen.
Um eine Beschädigung der Klinge zu verhindern, sollte man niemals zu harte Speisen
hacken (Muskatnuss, getrocknete Hülsenfrüchte, Mais, Fleisch mit Knochen, Zucker, Eis,
Kaffeebohnen, usw.).
Niemals die Schüssel ganz voll füllen.
Um die Überhitzung des Gerätes zu vermeiden sollte man nie die Dosierungen und Zeiten
für jeden Arbeitsablauf, die in den Tabellen dieser Bedienungsanleitung angegeben sind,
überschreiten. Am Ende jeder Benutzung sollte man das Gerät für mindestens 10 Minuten
abkühlen lassen.
Wenn größere Mengen zu verarbeiten sind, sollte man die Arbeitsabläufe mit
ausreichenden Pausen unterbrechen (15 Sekunden Pause nach 15 Sekunden Betrieb).
Bevor man den Deckel entfernt, muss die Klinge völlig zum Stillstand gekommen sein.
Am Ende jeder Benutzung muss man eine gründliche Reinigung aller Teile, die mit Nahrung
in Kontakt kommen, durchführen indem man aufmerksam die in der vorliegenden
Gebrauchsanweisung aufgeführten Ratschläge befolgt (siehe Abschnitt „Reinigung und
Pflege“).
Die Klinge ist sehr scharf. Mit Vorsicht handhaben.
8
Assembly page 8/80
TKG DG 1000 - 100116
Copies of the I/B. Please reproduce them without any
changes except under special instruction from Team
International BELGIUM. The pages must be reproduced
and folded in order to obtain a booklet A5 (+/- 148.5 mm
width x 210 mm height). When folding, make sure you
keep the good numbering when you turn the pages of
the I/B. Don’t change the page numbering. Keep the
language integrity.
Fax +32 2 359 95 50
•
•
Die Schüssel nicht im Mikrowellenherd benutzen.
Die Motorbasis nicht in Wasser oder andere Flüssigkeiten tauchen.
BEDIENUNG
WASSER IN DEN DAMPFKESSEL GIEßEN
•
•
Ziehen Sie den Stecker aus der Steckdose.
Schrauben Sie die Kappe des Dampfkessels los, indem Sie sie im Gegenuhrzeigersinn
drehen zur Position “
•
•
•
•
•
•
•
•
•
•
•
” und sie abheben (Fig. a).
Kontrollieren Sie, ob der Dampfkessel leer ist, indem Sie den Motorblock umkehren und
sicherstellen, dass kein Wasser herauskommt.
Reinigen Sie wenn nötig den Dampfkessel, siehe Abschnitt “Reinigung des Dampfkessels”.
Verwenden Sie nur Trinkwasser und schlagen Sie im Abschnitt “Dampfgarzeiten” die
Wassermenge nach, die Sie eingießen sollten.
Es wird empfohlen, gereinigtes Wasser oder destilliertes Wasser zu verwenden um die
Kalkablagerung zu minimalisieren, die sich sonst im Dampfkessel formen würde.
Füllen Sie Wasser in den Messbecher, zumindest bis zur gewünschten Markierung (XX min.
oder YY ml).
Gießen Sie das Wasser mit Vorsicht in den Dampfkessel (Fig. a).
Schrauben Sie die Kappe auf den Dampfkessel, indem Sie sie im Uhrzeigersinn drehen zur
Position “ ” (Fig. b).
Achtung!
Um den Hygieneanforderungen nachzukommen, verwenden Sie keine andere Flüssigkeit
um den Dampfkessel zu füllen. Verwenden Sie nur Wasser.
Überfüllen Sie niemals den Dampfkessel. Gießen Sie niemals mehr als 230ml.
Machen Sie die Kappe des Dampfkessels immer gut fest, indem Sie sie im Uhrzeigersinn
drehen zur Position “ ”.
Ziehen Sie immer den Stecker aus der Steckdose, bevor Sie Wasser in den Dampfkessel
gießen.
Kontrollieren Sie immer die nachfolgenden Punkte, bevor Sie das Gerät benutzen:
•
•
•
•
•
•
Die Schutzhauben sind von den Klingen weggenommen.
Der Dampfkessel ist gefüllt mit Wasser.
Die Kappe des Dampfkessels ist gut am Motorblock festgemacht.
Der Schalter ist in der Aus-Stellung “OFF”.
Der Mischbehälter ist fest auf dem Motorblock verriegelt.
Der Deckel des Mischbehälters ist verriegelt.
9
Assembly page 9/80
TKG DG 1000 - 100116
Fax +32 2 359 95 50
Copies of the I/B. Please reproduce them without any
changes except under special instruction from Team
International BELGIUM. The pages must be reproduced
and folded in order to obtain a booklet A5 (+/- 148.5 mm
width x 210 mm height). When folding, make sure you
keep the good numbering when you turn the pages of
the I/B. Don’t change the page numbering. Keep the
language integrity.
NAHRUNG DÄMPFEN
•
•
•
•
•
•
•
•
•
•
•
•
•
•
•
•
•
•
•
•
•
•
Siehe Abschnitt “Wasser in den Dampfkessel gießen” und gießen Sie die richtige
Wassermenge in den Dampfkessel.
Stellen Sie den Mischbehälter auf den Motorblock und machen Sie ihn gut fest, indem Sie
ihn drehen in der in Fig. C angedeuteten Richtung. Stellen Sie sicher, dass die zwei Pfeile ▲
und ▼ sich gegenüberstehen.
Stellen Sie den Kochbehälter in den Mischbehälter (Fig. d).
Geben Sie die in Würfel oder Scheiben geschnittene Nahrung in den Kochbehälter. Die
Stücke sollten nicht mehr als 15mm breit sein oder 15x15x15mm insgesamt. Überfüllen Sie
den Behälter nicht, und drücken Sie die Nahrung nicht zusammen.
Setzen Sie den Deckel auf und verriegeln Sie die Clips (Fig. e).
Stellen Sie sicher, dass der Schalter in der Aus-Stellung “OFF” ist.
Stecken Sie den Stecker in eine Steckdose.
Drehen Sie den Schalter zur Stellung “
”. Der Dampfkessel funktioniert dann und die
rote Kontrollleuchte geht an.
Nach einigen Minuten wird der Behälter mit Dampf gefüllt.
Der Dampfkessel hört automatisch auf zum angemessenen Zeitpunkt (berechnet je nach
der Wassermenge, die Sie eingegossen haben) und die rote Kontrollleuchte geht aus.
Drehen Sie den Schalter zur Aus-Stellung “OFF”. Falls der Dampfkessel sich nicht
automatisch abschaltet zum gewünschten Zeitpunkt, drehen Sie den Schalter zur AusStellung “OFF”.
Wichtig: Falls der Schalter nicht zur Aus-Stellung “OFF” gedreht ist, kann sich der
Dampfkessel erneut aktivieren.
Lassen Sie wenn nötig das Gerät 3 bis 5 Minuten abkühlen.
Nehmen Sie den Mischbehälter vom Motorblock weg (Fig. f).
Öffnen Sie den Deckel. Achtung! Seien Sie vorsichtig, wenn Sie den Deckel öffnen, denn
der Dampf ist kochend heiß.
Entfernen Sie den Kochbehälter. Die Nahrung ist verzehrfertig oder sie kann vermischt
werden.
Das Kochwasser im Mischbehälter kann weggegossen werden.
Achtung!
Behälter, Deckel und Nahrung sind heiß. Seien Sie vorsichtig, wenn Sie diese Teile nach
dem Garprozess hantieren.
Schalten Sie den Dampfkessel niemals an, wenn der Mischbehälter nicht in richtiger
Stellung befestigt worden ist.
Schalten Sie den Dampfkessel
niemals an, ohne dass er mit Wasser
gefüllt ist.
Vorsicht: Heißer Dampf strömt aus
der Dampfaustrittsöffnung und aus
den Seiten des Deckels heraus
während des Dampfprozesses.
Falls Sie die Nahrung nachher nicht
mischen wollen, reinigen Sie immer
den Dampfkessel und alle Teile
unmittelbar nach dem Garprozess.
Lösen und entfernen Sie die Kappe
des Dampfkessels nicht und fügen
Sie kein Wasser im Dampfkessel
hinzu, wenn das Gerät im Einsatz ist.
10
Assembly page 10/80
TKG DG 1000 - 100116
Fax +32 2 359 95 50
•
Copies of the I/B. Please reproduce them without any
changes except under special instruction from Team
International BELGIUM. The pages must be reproduced
and folded in order to obtain a booklet A5 (+/- 148.5 mm
width x 210 mm height). When folding, make sure you
keep the good numbering when you turn the pages of
the I/B. Don’t change the page numbering. Keep the
language integrity.
Warten Sie immer, bis das Gerät abgekühlt ist, bevor Sie einen neuen Dampfgarprozess
starten.
NAHRUNG MISCHEN/HACKEN
•
•
•
•
Stellen Sie den Mischbehälter auf die Motorbasis (Fig. c).
Entfernen Sie die Schutzhauben von den Klingen.
Halten Sie die Messereinheit sorgfältig und stellen Sie sie auf die Achse (Fig. g).
Vergewissern Sie sich davon, dass die Messereinheit in korrekter Stellung ist, und dass sie bis
zum Anschlag eingeschoben ist.
Geben Sie die gekochte Nahrung in den Mischbehälter (Fig. h).
•
Setzen Sie den Deckel auf und verriegeln Sie die Clips (Fig. e).
•
Drehen Sie den Schalter zur Stellung “
” und halten Sie ihn ungefähr 15 Sekunden in
dieser Stellung. Eine blaue Kontrollleuchte leuchtet während des Betriebes und deutet
damit an, dass das Hackmesser funktioniert.
Wiederholen Sie wenn nötig den Hackprozess, aber achten Sie darauf, dass Sie zwischen
zwei Benutzungen eine Pause von mindestens 15 Sekunden einschieben sollten.
Manche Nahrungsmittel können an der Wand des Mischbehälters oder am Deckel kleben
bleiben. Sie können den Spatel verwenden, um die Nahrungsmittel zwischen zwei
Benutzungen zu entfernen.
Ziehen Sie immer den Stecker aus der Steckdose, bevor Sie den Mischbehälter auf jede
mögliche Weise hantieren.
Nehmen Sie den Mischbehälter vom Motorblock weg und heben Sie den Deckel ab.
Nehmen Sie die Messereinheit mit Vorsicht weg.
Nehmen Sie die Nahrung aus dem Behälter anhand des Spatels.
•
•
•
•
•
•
•
•
•
•
•
Achtung!
Kontrollieren Sie immer die Temperatur der Nahrung, bevor Sie Ihr Baby füttern.
Es wird vorgeschlagen, dass Sie mindestens 15 Sekunden warten zwischen zwei
Benutzungen.
Hacken Sie nicht, wenn der Behälter leer ist.
Fügen Sie um Spritzer zu vermeiden nicht zu viel Flüssigkeit zur Nahrung hinzu.
Mischen oder hacken Sie keine gefrorene Nahrung, und keine Nahrung mit Knochen oder
harten Teilen.
11
Assembly page 11/80
TKG DG 1000 - 100116
Fax +32 2 359 95 50
Copies of the I/B. Please reproduce them without any
changes except under special instruction from Team
International BELGIUM. The pages must be reproduced
and folded in order to obtain a booklet A5 (+/- 148.5 mm
width x 210 mm height). When folding, make sure you
keep the good numbering when you turn the pages of
the I/B. Don’t change the page numbering. Keep the
language integrity.
NAHRUNG AUFWÄRMEN UND AUFTAUEN
•
•
•
•
•
•
•
•
Befolgen Sie die Anweisungen im Abschnitt “Nahrung dämpfen” um Nahrung
aufzuwärmen oder aufzutauen.
Wichtiger Hinweis hinsichtlich der Dampfgarzeit – sie ist nur ein grob gerechneter Hinweis.
Die Dampfgarzeit kann variieren je nach dem Gewicht und je nach der Temperatur der
Nahrung.
Wir empfehlen Ihnen, 230ml Wasser zu gießen, dann den Zustand der Nahrung nach 5
Minuten zu kontrollieren für eine kleine Menge Nahrung, nach 10 Minuten für eine
mittelgroße Menge Nahrung, und nach 15 Minuten für eine große Menge Nahrung. Kosten
Sie die Nahrung und verwenden Sie dazu einen Löffel oder eine Gabel.
Achtung!
Überfüllen Sie niemals den Dampfkessel. Gießen Sie niemals mehr als 230ml Wasser.
Seien Sie vorsichtig, wenn Sie den Deckel öffnen, da der Dampf kochend heiß sein kann.
Vorsicht: Heißer Dampf strömt aus der Dampfaustrittsöffnung und aus den Seiten des
Deckels heraus während des Dampfprozesses.
Seien Sie vorsichtig, wenn Sie Behälter, Deckel und Nahrung nach dem Garprozess
wegnehmen, denn sie sind heiß und der Dampf kann kochend heiß sein.
Kontrollieren Sie immer die Temperatur der Nahrung, bevor Sie Ihr Baby füttern.
MILCH ODER ANDERE FLÜSSIGKEIT AUFWÄRMEN
•
•
•
•
•
•
•
•
•
•
Öffnen Sie den Deckel des Milchbehälters (Fig. i).
Gießen Sie Milch oder andere Flüssigkeit in den Milchbehälter (Fig. i) und schließen Sie den
Deckel des Milchbehälters.
Befolgen Sie die Anweisungen im Abschnitt “Wasser in den Dampfkessel gießen”. Gießen
Sie die richtige Wassermenge in den Dampfkessel für die gewünschte Dampfgarzeit.
Stellen Sie den Mischbehälter auf den Motorblock und machen Sie ihn gut fest, indem Sie
ihn drehen in der in Fig. c angedeuteten Richtung.
Stellen Sie den Milchbehälter in den Mischbehälter.
Setzen Sie den Deckel auf und verriegeln Sie die Clips (Fig. e).
Für den Gebrauch befolgen Sie die Anweisungen im Abschnitt “Nahrung dämpfen”.
Nehmen Sie den Milchbehälter weg. Der Inhalt ist trinkfertig.
Achtung!
Behälter und Deckel sind heiß. Seien Sie vorsichtig, wenn Sie diese Teile hantieren.
Kontrollieren Sie die Temperatur der Milch oder der Flüssigkeit, indem Sie sich das
Handgelenk mit einigen Tropfen besprenkeln, bevor Sie Ihr Baby füttern.
12
Assembly page 12/80
TKG DG 1000 - 100116
Fax +32 2 359 95 50
Copies of the I/B. Please reproduce them without any
changes except under special instruction from Team
International BELGIUM. The pages must be reproduced
and folded in order to obtain a booklet A5 (+/- 148.5 mm
width x 210 mm height). When folding, make sure you
keep the good numbering when you turn the pages of
the I/B. Don’t change the page numbering. Keep the
language integrity.
FLASCHENSAUGER STERILISIEREN
•
•
•
•
•
•
•
Gießen Sie 60ml Wasser in den Dampfkessel für 8 Minuten Dampfzeit.
Stellen Sie den Mischbehälter auf den Motorblock und machen Sie ihn gut fest, indem Sie
ihn drehen in der in Figur c angedeuteten Richtung.
Stellen Sie den Saugerhalter auf die Achse (Fig. j).
Hängen Sie Flaschensauger an den Saugerhalter.
Setzen Sie den Deckel auf und verriegeln Sie die Clips (Fig. e).
Für den Gebrauch befolgen Sie die Anweisungen im Abschnitt “Nahrung dämpfen”.
Nehmen Sie die entkeimten Flaschensauger mit Vorsicht weg.
Achtung! Behälter, Flaschensauger und Deckel sind heiß. Seien Sie vorsichtig, wenn Sie diese
Teile hantieren.
DAMPFGARZEITEN
•
•
•
•
Die unten erwähnten Dampfzeiten sind grob gerechnet und sollten je nach der Menge
der Nahrung oder je nach der gewünschten Temperatur angepasst werden.
Die Dampfzeiten geben eine Netto-Dampfzeit an. Fügen Sie 1 bis 3 Minuten hinzu für den
ganzen Prozess, denn es kann 1 bis 3 Minuten dauern, bevor Dampf erzeugt wird.
Kontrollieren Sie immer, dass die Nahrung gekocht ist und dass Getränke richtig temperiert
sind, bevor Sie Ihr Baby füttern.
Füllen Sie Wasser in den Messbecher und verwenden Sie die nachstehenden Tabellen um
die Wassermenge und die Dampfzeit kennenzulernen:
Um Nahrung zu dämpfen
Wasser im Dampfkessel
40ml / 1.3 Fl. Oz.
70ml / 2.3 Fl. Oz.
110ml / 3.7 Fl. Oz.
140ml / 4.7 Fl. Oz.
180ml / 6 Fl. Oz.
230ml / 8 Fl. Oz.
Dampfgarzeit
5 Min.
10 Min.
15 Min.
20 Min.
25 Min.
30 Min.
Um Flüssigkeiten aufzuwärmen (im Milchbehälter)
Flüssigkeit am Anfang bei Raumtemperatur
Menge Milch/Flüssigkeit
Wasser im Dampfkessel
120ml / 4 Fl. Oz.
30ml / 1 Fl. Oz.
180ml / 6 Fl. Oz.
35ml / 1.2 Fl. Oz.
240ml / 8 Fl. Oz.
40ml / 1.4 Fl. Oz.
Dampfgarzeit
2 ½ Min.
3 ½ Min.
4 ½ Min.
Um Flüssigkeiten aufzuwärmen (im Milchbehälter)
Flüssigkeit am Anfang bei Kühlschrank-Temperatur (4°C)
Menge Milch/Flüssigkeit
Wasser im Dampfkessel
Dampfgarzeit
120ml / 4 Fl. Oz.
30ml / 1 Fl. Oz.
3 ½ Min.
180ml / 6 Fl. Oz.
40ml / 1.4 Fl. Oz.
4 ½ Min.
240ml / 8 Fl. Oz.
45ml / 1.6 Fl. Oz.
5 Min.
Um Flaschensauger zu sterilisieren
Wasser im Dampfkessel
Dampfzeit
60ml / 2 Fl. Oz.
8 Min.
13
Assembly page 13/80
TKG DG 1000 - 100116
Fax +32 2 359 95 50
Copies of the I/B. Please reproduce them without any
changes except under special instruction from Team
International BELGIUM. The pages must be reproduced
and folded in order to obtain a booklet A5 (+/- 148.5 mm
width x 210 mm height). When folding, make sure you
keep the good numbering when you turn the pages of
the I/B. Don’t change the page numbering. Keep the
language integrity.
Nahrungsmittel kochen
Nahrung (100g)
Wasser im Dampfkessel
Dampfgarzeit
Lauch
Spinat
Zucchini
Möhren
Blumenkohl
Grüne Bohnen
Erbsen
Kartoffeln
Rüben
Kürbis
Apfel
Birne
Ananas
Erdbeere
Fisch
Hähnchen
Schweinefleisch
Kalbfleisch/Rindfleisch
70ml / 2 ½ Fl. Oz.
70ml / 2 ½ Fl. Oz.
110ml / 4 Fl. Oz.
140ml / 5 Fl. Oz.
140ml / 5 Fl. Oz.
140ml / 5 Fl. Oz.
140ml / 5 Fl. Oz.
140ml / 5 Fl. Oz.
140ml / 5 Fl. Oz.
140ml / 5 Fl. Oz.
70ml / 2 ½ Fl. Oz.
70ml / 2 ½ Fl. Oz.
70ml / 2 ½ Fl. Oz.
70ml / 2 ½ Fl. Oz.
70ml / 2 ½ Fl. Oz.
180ml / 6 Fl. Oz.
180ml / 6 Fl. Oz.
180ml / 6 Fl. Oz.
10 Min.
10 Min.
15 Min.
20 Min.
20 Min.
20 Min.
20 Min.
20 Min.
20 Min.
20 Min.
10 Min.
10 Min.
10 Min.
10 Min.
10 Min.
25 Min.
25 Min.
25 Min.
•
•
•
•
Achtung!
Kontrollieren Sie immer die Temperatur der Nahrung, bevor Sie Ihr Baby füttern.
Kontrollieren Sie die Temperatur der Milch oder der Flüssigkeit, indem Sie sich das
Handgelenk mit einigen Tropfen besprenkeln, bevor Sie Ihr Baby füttern.
Schneiden Sie die Nahrungsmittel immer in Würfel oder Scheiben, bevor Sie sie mit Ihrem
Babynahrungsbereiter kochen.
Die Dampfzeiten in den oben erwähnten Tabellen sind grob gerechnet. Die Dampfgarzeit
hängt ab von der Menge, der Temperatur und der Art der Nahrung.
REINIGUNG UND PFLEGE
BEI DER ZUBEREITUNG VON SPEISEN, WELCHE FARBSTOFFE ENTHALTEN (z.B. MÖHREN) KANN ES
VORKOMMEN, DASS SICH EINIGE TEILE VERFÄRBEN. FOLGEN SIE DER UNTEN ERWÄHNTEN
PFLEGEANLEITUNG – DIESE VERHINDERT EINE BEEINTRÄCHTIGUNG IHRES GERÄTES.
Kein Teil Ihres Gerätes (Motorblock, Mischbehälter, Zubehör) ist spülmaschinenfest.
Reinigung des Motorblocks
•
Ziehen Sie immer den Stecker aus der Steckdose und stellen Sie sicher, dass der
Motorblock erkaltet ist, bevor Sie ihn reinigen.
•
Den Motorblock nie in Wasser oder andere Flüssigkeiten tauchen.
•
Zur Reinigung der Motorbasis nur ein leicht angefeuchtetes Tuch verwenden.
•
Die Motorbasis niemals mit metallenen Gegenständen reinigen oder Schleif- und
Scheuermittel verwenden, weil sonst das Gerät beschädigt werden könnte.
•
Achtung!
Ziehen Sie immer den Stecker aus der Steckdose und stellen Sie sicher, dass der
Motorblock erkaltet ist, bevor Sie ihn reinigen.
Reinigung der Messereinheit
•
Nehmen Sie die Messereinheit vom Behälter weg.
•
Spülen Sie die Messereinheit sorgfältig aus und entfernen Sie Speisereste.
14
Assembly page 14/80
TKG DG 1000 - 100116
Fax +32 2 359 95 50
•
•
•
•
•
•
•
Copies of the I/B. Please reproduce them without any
changes except under special instruction from Team
International BELGIUM. The pages must be reproduced
and folded in order to obtain a booklet A5 (+/- 148.5 mm
width x 210 mm height). When folding, make sure you
keep the good numbering when you turn the pages of
the I/B. Don’t change the page numbering. Keep the
language integrity.
Reinigen Sie das Messer in Seifenwasser oder mit einem neutralen Reinigungsmittel.
Spülen Sie die Messereinheit sorgfältig aus und trocknen Sie sie unmittelbar ab.
Stecken Sie die Schutzhauben auf die Klingen hinauf und bewahren Sie die Messereinheit
außer Reichweite von Kindern auf.
Achtung!
Hantieren Sie die Messereinheit immer mit Vorsicht, da die Klingen sehr scharf sind.
Stecken Sie immer die Schutzhauben auf die Klingen hinauf, wenn die Messereinheit
unbeaufsichtigt ist.
Verwenden Sie niemals Bleichmittel oder chlorhaltige Reinigungsmittel, da diese die
Klingen beschädigen könnten.
Geben Sie die Klingen niemals in die Spülmaschine.
Reinigung des Dampfkessels (nach jedem Gebrauch)
•
Ziehen Sie immer den Stecker aus der Steckdose und stellen Sie sicher, dass das Gerät
erkaltet ist, bevor Sie den Dampfkessel reinigen.
•
Schrauben Sie die Kappe des Dampfkessels los, indem Sie sie im Gegenuhrzeigersinn
drehen und sie abheben (Fig. a).
•
Kontrollieren Sie, ob der Dampfkessel leer ist, indem Sie den Motorblock umkehren und
sicherstellen, dass kein Wasser herauskommt (Fig. k).
•
•
•
•
•
•
Füllen Sie 230ml Wasser in den Messbecher.
Gießen Sie das Wasser mit Vorsicht in den Dampfkessel (Fig. a).
Schrauben Sie die Kappe auf den Dampfkessel, indem Sie sie im Uhrzeigersinn drehen (Fig. b).
Schütteln Sie den Motorblock mehrmals in mehreren Richtungen.
Schrauben Sie die Kappe des Dampfkessels los und entleeren Sie den Dampfkessel über
einem Spülbecken.
Wiederholen Sie wenn nötig die oben erwähnten Anweisungen.
Unterhaltspflege des Dampfkessels
•
Kalkablagerungen laminieren beim normalen Gebrauch innerhalb des Dampfkessels. Es
kann vorteilhaft sein, um vorgekochtes oder filtriertes Wasser zu verwenden in Ihrem
Babynahrungsbereiter, um die Anhaftung von Kalkablagerungen und die Häufigkeit der
Entkalkung zu verringern.
•
Die Kalkablagerungen können regelmäßig beseitigt werden mit einer Essiglösung. Gießen
Sie ungefähr 230ml Essiglösung (im Mischungsverhältnis 1:4, d.h. 1 Teil Essig pro 4 Teile
Wasser) in den Dampfkessel und lassen Sie die Lösung dann 2 Stunden einwirken. Gießen
Sie dann die Lösung weg und spülen Sie den Dampfkessel aus und trocknen Sie ihn ab.
•
Führen Sie dann einen Dampfprozess durch mit 230ml Wasser und nur mit dem leeren
Mischbehälter.
•
Es wird empfohlen, die Reinigung regelmäßig auszuführen – mindestens im
Zweiwochenrhythmus falls Sie hartes Wasser verwenden.
15
Assembly page 15/80
TKG DG 1000 - 100116
Fax +32 2 359 95 50
Copies of the I/B. Please reproduce them without any
changes except under special instruction from Team
International BELGIUM. The pages must be reproduced
and folded in order to obtain a booklet A5 (+/- 148.5 mm
width x 210 mm height). When folding, make sure you
keep the good numbering when you turn the pages of
the I/B. Don’t change the page numbering. Keep the
language integrity.
Achtung! Ziehen Sie immer den Stecker aus der Steckdose und stellen Sie sicher, dass das
Gerät erkaltet ist, bevor Sie es reinigen.
Reinigung der Plastikteile
•
Alle Plastikteile sollten nach jedem Gebrauch gereinigt werden.
•
Spülen Sie sie sorgfältig aus (mit Ausnahme vom Motorblock) und beseitigen Sie alle
Speisereste.
•
Waschen Sie die Plastikteile von Hand mit ein wenig mildem Flüssigreiniger oder neutralem
Reinigungsmittel.
•
Spülen Sie die Plastikteile sorgfältig aus und trocknen Sie sie unmittelbar ab.
Reinigung des Mischbehälters
•
Spülen Sie den Mischbehälter sorgfältig ab und beseitigen Sie alle Speisereste nach jedem
Gebrauch.
•
Stellen Sie sicher, dass keine Speisereste an der Dampföffnung (l) kleben bleiben.
Verwenden Sie die Reinigungsbürste um die Speisereste zu entfernen.
•
Waschen Sie den Behälter (m) von Hand mit ein wenig mildem Flüssigreiniger oder
neutralem Reinigungsmittel.
•
Spülen Sie den Behälter sorgfältig ab und trocknen Sie ihn unmittelbar ab.
•
Stellen Sie sicher, dass es keine Speisereste innerhalb der Dampfkammer gibt. Wiederholen
Sie wenn nötig die zwei oben erwähnten Anweisungen.
UMWELTSCHUTZ – RICHTLINIE 2002/96/EG
Zum Schutz unserer Umwelt und unserer Gesundheit sind Elektro- und Elektronik-Altgeräte nach
bestimmten Regeln zu entsorgen. Dies fordert den Einsatz sowohl des Herstellers bzw.
Lieferanten als auch des Verbrauchers.
Aus diesem Grund darf dieses Gerät, wie das Symbol
auf dem Typenschild bzw. auf der
Verpackung zeigt, nicht in den unsortierten Restmüll gegeben werden. Der Verbraucher hat
das Recht, dieses Gerät über kommunale Sammelstellen zu entsorgen; von dort aus wird die
spezifische Behandlung, Verwertung bzw. das Recycling gem. den Erfordernissen der Richtlinie
sichergestellt.
16
Assembly page 16/80
TKG DG 1000 - 100116
Fax +32 2 359 95 50
Copies of the I/B. Please reproduce them without any
changes except under special instruction from Team
International BELGIUM. The pages must be reproduced
and folded in order to obtain a booklet A5 (+/- 148.5 mm
width x 210 mm height). When folding, make sure you
keep the good numbering when you turn the pages of
the I/B. Don’t change the page numbering. Keep the
language integrity.
IMPORTANT SAFEGUARDS
Please read these instructions carefully before using the appliance, and always follow the
safety and operating instructions.
Important: People (including children) who are not able to use the appliance in a safe way,
due to their physical, sensorial or mental capacity or their lack of experience or knowledge,
must never use the appliance except if they are supervised by a person responsible for their
safety or if they previously received instructions concerning the safe use of the appliance.
Close supervision is necessary to prevent children from using the appliance as a toy.
Check that your mains voltage corresponds to that stated on the appliance.
Never leave the appliance unsupervised when in use.
From time to time check the cord for damages. Never use the appliance if cord or
appliance shows any signs of damage. Should the cord be damaged, it must be
replaced by a competent qualified electrician(*). Therefore check its state regularly.
Only use the appliance for domestic purposes and in the way indicated in these
instructions. It is not designed for commercial use, never use outdoors.
Never immerse the motor unit or the supply cord of the appliance in water or any other
liquid for any reason whatsoever. Never place the motor unit into the dishwasher.
Never use the appliance near hot surfaces.
Always use the appliance on a dry and level surface.
The appliance has to be unplugged from the power supply before cleaning the
appliance, changing the accessories or when not in use. Never leave the appliance
unsupervised when in use.
All repairs should be made by a competent qualified electrician(*).
Never use the appliance outside and always place it in a dry environment.
Never use accessories that are not recommended by the producer. They could constitute
a danger to the user and risk to damage the appliance.
Never move the appliance by pulling the cord. Make sure the cord cannot get caught in
any way. Do not wind the cord around the appliance and do not bend it.
Do not let the supply cord hang over the edge of a table or counter, touch hot surfaces or
become knotted.
Only use this appliance for cooking purposes.
This kind of appliance can not function continuously; it is not a professional type of
appliance. It is necessary to make temporary stops.
It is absolutely necessary to keep this appliance clean at all times as it comes into direct
contact with food. Check the section "CLEANING AND MAINTENANCE" in the instruction
manual.
Caution, the blades of the chopper are very sharp, pay attention not to get cut when
manipulating them (cleaning, emptying of the bowl or change of the accessories).
Make sure your hands and/or any kind of utensil stay clear of the receptacle when the
appliance is in use in order to avoid serious injuries. Never touch the accessories when the
appliance is in use. Furthermore, never try to stop the movement of the blade in any way
whatsoever. Unplug the appliance.
Make sure the accessory is solidly and correctly tightened at the motor block before
starting the appliance.
You may use a scraper (to clean the blades) only when the appliance is unplugged.
Never use this appliance to mix boiling liquids.
The appliance is designed for the preparation of small quantities of food that have to be
consumed rather quickly. It is not designed for the preparation of large quantities at once.
Never touch the blade when the appliance is in use. Furthermore, never try to stop the
movement of the blade in any way whatsoever.
17
Assembly page 17/80
TKG DG 1000 - 100116
Fax +32 2 359 95 50
Copies of the I/B. Please reproduce them without any
changes except under special instruction from Team
International BELGIUM. The pages must be reproduced
and folded in order to obtain a booklet A5 (+/- 148.5 mm
width x 210 mm height). When folding, make sure you
keep the good numbering when you turn the pages of
the I/B. Don’t change the page numbering. Keep the
language integrity.
We recommend that when using your product you operate the motor unit in short on/off
pulses. This will give better chopping, mixing, etc. It will also protect the motor against a
too long use.
The chopper is designed to be used exclusively in its delivery state (bowl, lid and blades in
good state) because it gives all the needed securities. Do not try to substitute one of those
pieces by another one and if you have to replace one, contact your after sales service.
Make sure the appliance has cooled down before cleaning and storing it.
Only cook consumable food. Do not place too large pieces of food in the food steamer.
Make sure the cord never comes into contact with the hot parts of the appliance.
The temperature of the accessible surfaces may be very high when the appliance is in
use. Make sure not to touch these hot parts of the appliance but use the handles. Use
potholders when removing the cover or handling hot containers.
Be cautious while transporting your appliance filled with hot food, water or other liquids. It
is not recommended to move your appliance when it has not completely cooled down.
A short power supply cord is provided to reduce the risk resulting from becoming
entangled in, or tripping over a longer cord. Extension cords may be used if care is
exercised in their use. The longer cord should be arranged so that it will not drape over the
counter top or tabletop where it can be pulled on by children or tripped over.
Your appliance must never be switched on through an external timer or any kind of
separate remote control system.
(*) Competent qualified electrician: after-sales department of the producer or importer or any
person who is qualified, approved and competent to perform this kind of repairs in order to
avoid all danger. In case of need you should return the appliance to this electrician.
FIELD OF APPLICATION/OF OPERATION
•
•
Use the appliance for domestic purposes only and in the way indicated in these
instructions.
This appliance is intended to be used for domestic applications and similar applications
such as:
Kitchen corners reserved for personnel in shops, offices and other professional
environments.
Farms.
The use by clients of hotels, motels and other environments with a residential
character.
Environments of the “bed and breakfast” type.
ADVANTAGES OF YOUR APPLIANCE
Your baby food maker is a multi-function appliance. It can steam-cook food, blend or chop
food, warm up food, milk and liquids, and sterilize teats. It offers the following specifications:
•
•
•
•
•
•
•
•
By steam-cooking, it offers a healthy, speedy and tasty way to cook for your baby.
Extremely high speed blade to grind food in very fine pieces.
Powerful steam to cook food in very short time.
Simple operation, only 1 switch for the whole process.
By using high temperature food-safe PP (polypropylene) material and specially formulated
plastics, it offers a BPA-free (bisphenol A) and phthalates-free appliance that protects your
baby from harmful chemicals.
Easy cleaning.
Double thermal cut-off protection by a thermostat and a temperature fuse.
Large 230cc / 8 Fl.Oz. water tank provides 30 minutes of steam, which is long enough to
process any kind of food and quantity.
18
Assembly page 18/80
TKG DG 1000 - 100116
Fax +32 2 359 95 50
•
•
Copies of the I/B. Please reproduce them without any
changes except under special instruction from Team
International BELGIUM. The pages must be reproduced
and folded in order to obtain a booklet A5 (+/- 148.5 mm
width x 210 mm height). When folding, make sure you
keep the good numbering when you turn the pages of
the I/B. Don’t change the page numbering. Keep the
language integrity.
Comes with a milk container that can be used to warm up milk or liquids.
Comes with a teat stand for the sterilization of teats on baby bottles.
BEFORE THE FIRST USE
•
•
•
•
•
Remove all packaging, and check that no parts are damaged or missing.
Read these instructions carefully!
Wash the milk container, cooking container, blending/chopping container, lids and
chopper blade in warm soapy water and dry thoroughly.
Wipe the motor unit with a damp cloth.
All items coming into contact with foodstuffs should always be cleaned thoroughly before
and after use.
IMPORTANT GUIDELINES
•
•
•
•
•
•
•
•
•
•
Never chop foods warmer than 50°C or pour liquids or juicy foods in the bowl.
To avoid damaging the blade, never chop foodstuffs that are too hard (nutmeg, dried
peas and beans, corn, meat with bones, sugar, ice, coffee beans etc.).
Never fill the bowl completely.
To prevent the appliance from overheating, never exceed the advised doses and time
stated in the tables of this instruction manual. At the end of each operation, let the
appliance cool down for at least 10 minutes.
When chopping larger amounts, make a break at several intervals (15 seconds of use
should be followed by a break of 15 seconds).
Wait until the blade has come to a standstill before opening the lid.
Clean all parts that come in contact with food thoroughly after each operation. To do so,
follow the advice in the cleaning section below.
The blade is very sharp, handle it with care.
Do not put the bowl in the microwave oven.
Never immerse the motor block in water or any other liquid.
OPERATION
POURING WATER INTO THE BOILER
•
Unplug power cord from AC mains.
•
Unfasten the boiler cap from the base unit by turning it anti-clockwise to “
it (fig. a).
•
Check the boiler is empty by turning the base unit upside down and see that no water
comes out.
19
Assembly page 19/80
” and lift
TKG DG 1000 - 100116
Fax +32 2 359 95 50
•
•
Copies of the I/B. Please reproduce them without any
changes except under special instruction from Team
International BELGIUM. The pages must be reproduced
and folded in order to obtain a booklet A5 (+/- 148.5 mm
width x 210 mm height). When folding, make sure you
keep the good numbering when you turn the pages of
the I/B. Don’t change the page numbering. Keep the
language integrity.
•
•
•
Clean the boiler if necessary, refer to section “Cleaning the boiler” for cleaning.
Use only drinkable water and refer to the “Steaming Times” section for the volume of
water to be poured in.
We recommend using purified or distilled water to minimize the amount of limescale that
will otherwise build up inside the boiler.
Fill water into the measuring beaker, at least up to the desired marking (XX min or YY ml).
Pour the water into the boiler carefully (fig. a).
Secure the cap on the boiler by turning it clockwise to “ ” (fig. b).
•
•
•
•
Warning!
To meet hygiene requirements, do not use any other liquid to fill the boiler. Use only water.
Never overfill the boiler; never pour more than 230ml.
Always fasten the boiler cap firmly in clockwise direction to the “ ” position.
Always unplug the power cord before pouring water.
•
Always check the following points before operating the unit:
•
•
•
•
•
•
The protective covers have been removed from the blades.
The boiler has been filled with water.
The boiler cap is secured firmly on the base unit.
The switch is in “OFF” position.
The blending container is locked firmly on the base unit.
The blending container lid is locked.
HOW TO STEAM-COOK FOOD
•
•
•
•
•
•
•
•
•
•
Refer to section “Pouring water into the boiler” and pour the right amount of water into
the boiler.
Place the blending container onto the base unit and secure it firmly by turning it in the
direction as shown in fig. c; make sure the two arrows ▲ and ▼ are in line.
Place the cooking container in the blending container (fig. d).
Place diced or sliced food in suggested sizes not bigger than 15mm in thickness or
15x15x15mm into the cooking container. Do not fill the container excessively, and avoid
pressing on the food.
Put the lid on and lock the clips (fig. e).
Make sure the switch is in “OFF” position.
Plug the power cord into the power socket.
•
•
•
•
•
•
Turn the switch to “
” position, the boiler is then operating and the red light is on.
Steam will be filling the container after a few minutes.
The boiler will stop automatically at the desired time (calculated according to the
quantity of water used) and the red light will go off. Turn the switch to “OFF”. If the boiler
does not turn off automatically after the desired time, turn the switch to “OFF”.
Important: If the switch is not turned to “OFF”, the boiler may activate again.
Let the appliance cool down for 3 to 5 minutes if necessary.
Remove the blending container from the base unit (fig. f).
Open the lid. Warning! Take care when opening the lid as the steam is scalding hot.
Remove the food container: food is ready to eat or to be blended.
The cooking water in the blending container can be disposed of.
•
•
•
Warning!
Containers, lid and food are hot; take care when handling them after cooking.
Never switch on the boiler unless the blending container is secured in the right position.
Never switch on the boiler unless it is filled with water.
20
Assembly page 20/80
TKG DG 1000 - 100116
Fax +32 2 359 95 50
•
•
•
•
Copies of the I/B. Please reproduce them without any
changes except under special instruction from Team
International BELGIUM. The pages must be reproduced
and folded in order to obtain a booklet A5 (+/- 148.5 mm
width x 210 mm height). When folding, make sure you
keep the good numbering when you turn the pages of
the I/B. Don’t change the page numbering. Keep the
language integrity.
Take care: hot steam comes out of the steam hole and out of the sides of the lid during
steaming.
Always clean the boiler and all parts immediately after each cooking operation, if you are
not going to blend food.
Do not unlock and remove the boiler cap and do not add water in the boiler when the
appliance is in use.
Always wait until the appliance has cooled down before starting a new steam-cooking
operation.
HOW TO BLEND/CHOP FOOD
•
•
•
•
Place the blending container onto the base unit (fig. c).
Remove the protective covers from the blade unit.
Hold the blade unit carefully and insert it on the shaft (fig. g). Make sure the blade unit is in
the right position, until it is pushed all the way to the stop on the shaft.
Place the cooked food in the blending container (fig. h).
•
Put the lid on and lock the side clips (fig. e).
21
Assembly page 21/80
TKG DG 1000 - 100116
Fax +32 2 359 95 50
•
Copies of the I/B. Please reproduce them without any
changes except under special instruction from Team
International BELGIUM. The pages must be reproduced
and folded in order to obtain a booklet A5 (+/- 148.5 mm
width x 210 mm height). When folding, make sure you
keep the good numbering when you turn the pages of
the I/B. Don’t change the page numbering. Keep the
language integrity.
•
•
•
•
Turn the switch and hold it in “
” position for approximately 15 seconds, a blue light is
lit during the operation, indicating that the chopper is operating.
Repeat the chopping cycle if necessary, noting that it is recommended to wait at least 15
seconds between each chopping cycle.
Some foodstuffs may be stuck on the wall of the blending container or on the lid, you may
use the spatula to remove foodstuffs between blending cycles.
Always unplug the appliance before manipulating the blending container in any way.
Remove the blending container from the base unit and take off the lid.
Remove the blade unit very carefully.
Remove the food from the container with the spatula.
•
•
•
•
•
Warning!
Always check the temperature of the food before feeding your baby.
It is recommended to wait at least 15 seconds between each blending/chopping cycle.
Do not blend if the container is empty.
Do not add too much liquid to be blended with the food to avoid splatter.
Do not blend or chop frozen food, or food with bones or hard parts.
•
•
HOW TO WARM UP AND DEFROST FOOD
•
•
•
•
•
•
•
•
Follow “How to steam-cook food” to warm up and defrost food.
Important information regarding the steaming time - it is only for reference purposes. The
steaming time may vary depending on the weight and temperature of the food.
We recommend pouring 230ml of water, then to check the food status after 5 minutes for
a small amount of food, after 10 minutes for a medium quantity of food, and after 15
minutes for a large volume of food. Sample the food by using a spoon or fork, in order to
check the cooking level.
Warning!
Never overfill the boiler; never pour more than 230ml of water.
Take care when opening the lid, as steam can be scalding hot.
Take care; hot steam comes out of the steam hole and from the edges of the lid during
steaming.
Take care when removing containers, lid and food, as they are hot, steam can be
scalding.
Always check the food temperature before feeding your baby.
HOW TO WARM UP MILK OR LIQUID
•
•
•
•
•
•
•
•
Open the lid of the milk container (fig. i).
Pour milk or liquid into the milk container (fig. i) and close the lid.
Refer to the “Pouring water into the boiler” section, pour the right amount of water into the
boiler for the steaming time desired.
Place the blending container on the base unit and secure it firmly by turning it in the
direction as shown in fig. c.
Place the milk container in the blending container.
Put the lid on and lock the clips (fig. e).
For the use, repeat the steps explained in “How to steam-cook food”.
Remove the milk container; the contents are ready for drinking.
22
Assembly page 22/80
TKG DG 1000 - 100116
Fax +32 2 359 95 50
•
•
Copies of the I/B. Please reproduce them without any
changes except under special instruction from Team
International BELGIUM. The pages must be reproduced
and folded in order to obtain a booklet A5 (+/- 148.5 mm
width x 210 mm height). When folding, make sure you
keep the good numbering when you turn the pages of
the I/B. Don’t change the page numbering. Keep the
language integrity.
Warning!
Containers and lid are hot, take care when handling them.
Check the temperature of the milk or liquids by sprinkling a few drops onto your wrist
before you start feeding your baby.
HOW TO STERILIZE TEATS
•
•
•
•
•
•
•
Pour 60ml of water into the boiler for 8 minutes of steaming time.
Place the blending container on the base unit and secure it firmly by turning it in the
direction as shown in figure c.
Place the teat stand on top of the shaft (fig. j).
Hang teats on the teat stand.
Put the lid on and lock the clips (fig. e).
For the use, repeat the steps explained in “How to steam-cook food”.
Take out the sterilized teats carefully.
Warning! Container, teats and lid are hot, take care when handling them.
STEAMING TIMES
•
•
•
•
The steaming times below are for reference only and should be adjusted according to the
quantity of food or the desired temperature.
The steaming times mention a “net” steaming time. Add 1 to 3 minutes for the total
process, as it may take 1 to 3 minutes for steam to start being generated.
Always check that food is cooked and drinks are brought to the desired temperature
before feeding your baby.
Fill water in the measuring beaker and use the tables below for the volume of water and
the steaming time:
For steam cooking
Water in boiler
40ml / 1.3 Fl. Oz.
70ml / 2.3 Fl. Oz.
110ml / 3.7 Fl. Oz.
140ml / 4.7 Fl. Oz.
180ml / 6 Fl. Oz.
230ml / 8 Fl. Oz.
Steaming time
5 min.
10 min.
15 min.
20 min.
25 min.
30 min.
23
Assembly page 23/80
TKG DG 1000 - 100116
Fax +32 2 359 95 50
Copies of the I/B. Please reproduce them without any
changes except under special instruction from Team
International BELGIUM. The pages must be reproduced
and folded in order to obtain a booklet A5 (+/- 148.5 mm
width x 210 mm height). When folding, make sure you
keep the good numbering when you turn the pages of
the I/B. Don’t change the page numbering. Keep the
language integrity.
For steam-warming liquids (in the milk container)
Liquid starting at room temperature
Quantity of milk/liquid
Water in boiler
120ml / 4 Fl. Oz.
30ml / 1 Fl. Oz.
180ml / 6 Fl. Oz.
35ml / 1.2 Fl. Oz.
240ml / 8 Fl. Oz.
40ml / 1.4 Fl. Oz.
Steaming time
2 ½ min.
3 ½ min.
4 ½ min.
For steam-warming liquids (in the milk container)
Liquid starting at refrigerator temperature (4°C)
Quantity of milk/liquid
Water in boiler
120ml / 4 Fl. Oz.
30ml / 1 Fl. Oz.
180ml / 6 Fl. Oz.
40ml / 1.4 Fl. Oz.
240ml / 8 Fl. Oz.
45ml / 1.6 Fl. Oz.
Steaming time
3 ½ min.
4 ½ min.
5 min.
For sterilizing teats
Water in boiler
60ml / 2 Fl. Oz.
Food cooking guide
Food (100g)
Leeks
Spinach
Zucchini
Carrots
Cauliflower
Green beans
Peas
Potatoes
Turnips
Pumpkin
Apple
Pear
Pineapple
Strawberry
Fish
Chicken
Pork
Veal/Beef
•
•
•
•
Steaming time
8 min.
Water in boiler
Steaming time
70ml / 2 ½ Fl. Oz.
70ml / 2 ½ Fl. Oz.
110ml / 4 Fl. Oz.
140ml / 5 Fl. Oz.
140ml / 5 Fl. Oz.
140ml / 5 Fl. Oz.
140ml / 5 Fl. Oz.
140ml / 5 Fl. Oz.
140ml / 5 Fl. Oz.
140ml / 5 Fl. Oz.
70ml / 2 ½ Fl. Oz.
70ml / 2 ½ Fl. Oz.
70ml / 2 ½ Fl. Oz.
70ml / 2 ½ Fl. Oz.
70ml / 2 ½ Fl. Oz.
180ml / 6 Fl. Oz.
180ml / 6 Fl. Oz.
180ml / 6 Fl. Oz.
10 min.
10 min.
15 min.
20 min.
20 min.
20 min.
20 min.
20 min.
20 min.
20 min.
10 min.
10 min.
10 min.
10 min.
10 min.
25 min.
25 min.
25 min.
Warning!
Always check the temperature of the food before feeding your baby.
Check the temperature of the milk/liquids by sprinkling a few drops onto your wrist before
you feed your baby.
Always dice or slice food before cooking with the baby food maker.
The steaming times shown in the above tables are for reference only. The steam cooking
time depends on the quantity, temperature and kind of food you prepare.
24
Assembly page 24/80
TKG DG 1000 - 100116
Fax +32 2 359 95 50
Copies of the I/B. Please reproduce them without any
changes except under special instruction from Team
International BELGIUM. The pages must be reproduced
and folded in order to obtain a booklet A5 (+/- 148.5 mm
width x 210 mm height). When folding, make sure you
keep the good numbering when you turn the pages of
the I/B. Don’t change the page numbering. Keep the
language integrity.
CLEANING AND MAINTENANCE
WHEN PROCESSING FOODS WITH COLOUR (E.G. CARROTS) SOME PARTS MAY BECOME
DISCOLOURED. FOLLOW THE CARE INSTRUCTIONS BELOW – THIS WILL NOT AFFECT THE
PERFORMANCE OF YOUR PRODUCT.
No part of the appliance (motor block, blending container, accessories) is dishwasher-safe.
Cleaning the base unit
•
Always unplug the unit and make sure it is cold before cleaning it.
•
Do not immerse the base unit in water or any other liquid.
•
Clean the base unit with a slightly damp cloth only.
•
Do not attempt to clean the base unit with any abrasives or cleaning solvent as this may
cause damage to the unit.
•
Warning!
Always unplug the unit and make sure it is cold before cleaning it.
Cleaning the blade unit
•
Remove the blade unit from the container.
•
Rinse it thoroughly and remove any food residues.
•
Clean it with soapy water or with a neutral detergent.
•
Rinse it thoroughly and dry it immediately.
•
Put the protective covers on and keep the blade unit out of the reach of children.
•
•
•
•
Warning!
Always handle it very carefully as the blades are very sharp.
Always put the protective covers on when unattended.
Never use bleaching agents or chlorine based detergents as they may damage the
blades.
Do not to put the blades in a dishwasher.
Cleaning the boiler (after each operation)
•
Always unplug the unit and make sure it is cold before cleaning the boiler.
•
Unfasten the boiler cap from the base unit by turning it anti-clockwise and lift it (fig. a).
•
Check that the boiler is empty by turning the base unit upside down and see that no
water comes out (fig. k).
•
•
•
•
•
•
Fill 230ml of water into the measuring beaker.
Pour the water into the boiler carefully (fig. a).
Secure the cap on the boiler by turning it clockwise (fig. b).
Shake the base unit several times in different directions.
Unfasten the boiler cap and empty the boiler over a sink.
Repeat the above-mentioned steps if necessary.
25
Assembly page 25/80
TKG DG 1000 - 100116
Fax +32 2 359 95 50
Copies of the I/B. Please reproduce them without any
changes except under special instruction from Team
International BELGIUM. The pages must be reproduced
and folded in order to obtain a booklet A5 (+/- 148.5 mm
width x 210 mm height). When folding, make sure you
keep the good numbering when you turn the pages of
the I/B. Don’t change the page numbering. Keep the
language integrity.
Routine maintenance of the boiler
•
Limescale residues will laminate inside the boiler in normal use. It may be advantageous to
use pre-boiled or filtered water in your baby food maker in order to reduce the limescale
build-up and the need to decalcify.
•
On a regular basis, the residues can be removed by using a white vinegar solution.
Approximately 230ml of a white vinegar solution (in a ratio of 1:4, meaning 1 part of
vinegar to 4 parts of water) should be poured into the boiler and left for 2 hours. The
solution should then be removed and the boiler should be rinsed and dried off.
•
Perform a steaming cycle by using 230ml of water with the empty blending container only.
•
The cleaning process is recommended to be carried out at regular intervals - at least once
every 2 weeks if using hard water.
Warning! Always unplug the unit and make sure it is cold before cleaning it.
Cleaning plastic parts
•
All plastic parts should be cleaned after each operation.
•
Rinse them (except the base unit) thoroughly and remove any food residues.
•
Wash them by hand with a little mild liquid detergent or neutral detergent.
•
Rinse thoroughly and dry immediately.
Cleaning the blending container
•
Rinse it thoroughly and remove any food residues after each use.
•
Make sure the steam hole (l) has no residues stuck to it by using the cleaning brush.
•
Wash the container (m) by hand with a little mild liquid detergent or neutral detergent.
•
Rinse it thoroughly and dry it immediately.
•
Make sure there are no residues inside the steam chamber. Repeat the two steps above if
necessary.
PROTECTION OF THE ENVIRONMENT – DIRECTIVE 2002/96/EC
In order to preserve our environment and protect human health, the waste electrical and
electronic equipment should be disposed of in accordance with specific rules with the
implication of both suppliers and users. For this reason, as indicated by the symbol
on the
rating label or on the packaging, your appliance should not be disposed of as unsorted
municipal waste. The user has the right to bring it to a municipal collection point performing
waste recovery by means of reuse, recycling or use for other applications in accordance with
the directive.
26
Assembly page 26/80
TKG DG 1000 - 100116
Fax +32 2 359 95 50
Copies of the I/B. Please reproduce them without any
changes except under special instruction from Team
International BELGIUM. The pages must be reproduced
and folded in order to obtain a booklet A5 (+/- 148.5 mm
width x 210 mm height). When folding, make sure you
keep the good numbering when you turn the pages of
the I/B. Don’t change the page numbering. Keep the
language integrity.
POUR VOTRE SECURITE
Lisez attentivement cette notice avant toute utilisation, et respectez bien à la fois les consignes
de sécurité et d'usage.
Important: Votre appareil n’est pas prévu pour être utilisé par des personnes (y compris les
enfants) dont les capacités physiques, sensorielles ou mentales sont réduites, ou des personnes
dénuées d’expérience ou de connaissance, sauf si elles ont pu bénéficier, par l’intermédiaire
d’une personne responsable de leur sécurité, d’une surveillance ou d’instructions préalables
concernant son utilisation en toute sécurité.
Il convient de surveiller les enfants pour s’assurer qu’ils ne jouent pas avec l’appareil.
Avant d'utiliser l'appareil, vérifiez que la tension du réseau correspond bien à celle de
l'appareil.
Ne laissez jamais votre appareil sans surveillance lorsque celui-ci est en fonctionnement ou
sous tension.
Vérifiez de temps en temps si le cordon d’alimentation n’est pas endommagé. N'utilisez
pas votre appareil si son cordon d’alimentation ou l'appareil lui-même est endommagé
de quelque façon que ce soit. Si le cordon d’alimentation est endommagé, il doit être
remplacé par un service qualifié compétent(*). Pour cela, vérifiez régulièrement son état.
Utilisez l'appareil uniquement pour des usages domestiques et de la manière indiquée dans la
notice.
Ne plongez jamais l'appareil dans l'eau ou dans tout autre liquide ni pour son nettoyage ni
pour toute autre raison. Ne le mettez jamais au lave-vaisselle.
N'utilisez pas l'appareil près de sources de chaleur.
Posez toujours l'appareil sur une surface plane, stable et sèche.
La fiche du cordon d’alimentation doit obligatoirement être débranchée avant de
nettoyer l'appareil, de changer les accessoires ou lorsqu’il n’est pas en utilisation. Ne
laissez jamais votre appareil sans surveillance lorsque celui-ci est sous tension.
Toute réparation doit être réalisée par un service qualifié compétent (*).
Veillez à ne pas utiliser l'appareil à l'extérieur et entreposez-le dans un endroit sec.
Ne pas utiliser des accessoires non recommandés par le fabricant, cela peut présenter un
danger pour l’utilisateur et risque d’endommager l’appareil.
Ne déplacez jamais l’appareil en tirant sur son cordon d’alimentation. Veillez à ce qu’il ne
puisse être accidentellement accroché et ce, afin d’éviter toute chute de l’appareil.
N'enroulez pas le cordon d'alimentation autour de l'appareil et ne le pliez pas.
Ne laissez pas le cordon d'alimentation pendre au-dessus du bord de la surface de travail
et assurez-vous qu'il n'entre pas en contact avec des surfaces chaudes.
Utilisez cet appareil uniquement dans le cadre d’applications culinaires.
Ce genre d’appareil ne peut fonctionner de façon continue, il ne s’agit pas d’un appareil
de type professionnel. Il est nécessaire d’effectuer des pauses à intervalles réguliers.
Il est indispensable de garder cet appareil propre étant donné qu’il est en contact
direct avec la nourriture. Consultez la rubrique « nettoyage et entretien » du mode
d’emploi.
Attention, les lames du hachoir sont très coupantes, alors prenez garde de ne pas vous
couper lors de leur manipulation (nettoyage, vidage du bol ou changement
d’accessoires).
Gardez vos mains et/ou tout ustensile hors du récipient pendant le fonctionnement de
l’appareil afin d’éviter de graves blessures. Ne touchez jamais les accessoires lorsque
l’appareil est en fonctionnement et ne cherchez surtout pas à les immobiliser. Débranchez
la fiche.
Assurez-vous que l’accessoire utilisé soit fermement et correctement verrouillé au bloc
moteur avant de mettre l’appareil en fonctionnement.
27
Assembly page 27/80
TKG DG 1000 - 100116
Fax +32 2 359 95 50
Copies of the I/B. Please reproduce them without any
changes except under special instruction from Team
International BELGIUM. The pages must be reproduced
and folded in order to obtain a booklet A5 (+/- 148.5 mm
width x 210 mm height). When folding, make sure you
keep the good numbering when you turn the pages of
the I/B. Don’t change the page numbering. Keep the
language integrity.
Pour nettoyer la lame, vous pouvez utiliser un grattoir. Veillez à ce que l'appareil soit
débranché avant de nettoyer la lame.
N'utilisez pas cet appareil pour manipuler des préparations liquides bouillantes.
L’appareil est conçu pour la préparation de petites quantités de nourriture dont la
consommation ne doit pas être trop tardive. L’appareil n’est pas conçu pour la
préparation de grandes quantités à la fois.
Ne touchez pas les lames pendant que l'appareil est en fonctionnement et n'essayez en
aucun cas de retenir la lame de quelque façon que ce soit.
Lors de l'utilisation de l'appareil, il est conseillé d'allumer et éteindre l'appareil par courtes
pulsations. Cela vous permettra de hacher et mixer plus facilement et protègera
également le moteur contre une utilisation trop prolongée.
Le hachoir est prévu pour être utilisé exclusivement dans son état de livraison (bol en bon
état, couvercle et lames) car il fournit toutes les garanties de sécurité requises. Ne
cherchez surtout pas à substituer l’une de ces pièces par une autre et si vous devez en
remplacer une, adressez-vous à votre service après-vente.
Veuillez laisser refroidir votre appareil avant son nettoyage et son rangement.
Ne faites cuire que des aliments appropriés à la cuisson et propres à la consommation.
N’utilisez pas d’aliments de trop grande taille.
Veillez à ce que le cordon n’entre pas en contact avec des surfaces chaudes de
l’appareil.
La température des surfaces accessibles peut être élevée lorsque l'appareil fonctionne;
veillez à ne pas toucher ces surfaces mais utilisez la/les poignée(s). Faites usage de
maniques lorsque vous manipulez l’appareil.
Soyez prudent si vous transportez l’appareil lorsqu’il contient des aliments chauds, de l’eau
ou d’autres liquides. Il est fortement déconseillé de transporter votre appareil lorsqu’il n’est
pas totalement froid.
Le cordon d’alimentation de l’appareil est un cordon de type court, et ce afin de
diminuer les risques d’accidents (chute si vous marchez sur le cordon...). Vous pouvez
toutefois utiliser une rallonge si nécessaire mais afin d’éviter tout risque d’accident,
assurez-vous que la rallonge ne pend pas (d’un coin de table par exemple) ou qu’elle ne
traîne pas par terre.
Votre appareil ne doit jamais être mis en fonctionnement par le biais d’une minuterie
extérieure ou d’un autre système de commande à distance séparé.
Service qualifié compétent: service après-vente du fabricant ou de l'importateur ou une
personne qualifiée, reconnue et habilitée à faire ce genre de réparation afin d'éviter tout
danger. Dans tous les cas, veuillez retourner l'appareil auprès de ce service.
(*)
DOMAINE D'APPLICATION/D'UTILISATION
•
•
Utilisez l'appareil uniquement pour des usages domestiques et de la manière indiquée
dans la notice.
Cet appareil est destiné à être utilisé dans des applications domestiques et analogues
telles que :
Des coins cuisines réservés au personnel dans des magasins, bureaux et autres
environnements professionnels.
Des fermes.
L’utilisation par les clients des hôtels, motels et autres environnements à caractère
résidentiel.
Des environnements du type chambre d’hôtes.
28
Assembly page 28/80
TKG DG 1000 - 100116
Fax +32 2 359 95 50
Copies of the I/B. Please reproduce them without any
changes except under special instruction from Team
International BELGIUM. The pages must be reproduced
and folded in order to obtain a booklet A5 (+/- 148.5 mm
width x 210 mm height). When folding, make sure you
keep the good numbering when you turn the pages of
the I/B. Don’t change the page numbering. Keep the
language integrity.
AVANTAGES DE VOTRE APPAREIL
Votre appareil à nourriture pour bébés est un appareil à usage multiple. Vous pouvez l’utiliser
pour cuire de la nourriture à la vapeur, pour mélanger ou hacher de la nourriture, pour
réchauffer de la nourriture, du lait et des liquides, et pour stériliser des tétines. Il vous offre les
spécifications suivantes:
•
•
•
•
•
•
•
•
•
•
En cuisant à la vapeur, il vous offre une manière saine, rapide et savoureuse pour préparer
de la nourriture pour votre bébé.
Lame à vitesse extrêmement haute pour réduire de la nourriture en pièces très fines par
broyage.
Vapeur puissante pour cuire de la nourriture rapidement.
Simple d’utilisation, seulement 1 interrupteur pour tout le processus.
En utilisant du matériau PP (Polypropylène), qui est sûr pour les aliments et résistant aux
hautes températures, et des plastiques formulés spécialement, il offre un appareil sans
BPA (bisphénol A) et sans phtalates, ce qui protège votre bébé contre les produits
chimiques nocifs.
Nettoyage facile.
Double protection thermique (arrêt automatique): thermostat et fusible thermique.
Grand réservoir d’eau de 230cc / 8 Fl.Oz. produit de la vapeur pendant 30 minutes, ce
qui est suffisant pour préparer tous types de nourriture en toute quantité.
Est livré avec un récipient à lait qui peut être utilisé pour réchauffer du lait ou d’autres
liquides.
Est livré avec un support de tétines pour la stérilisation de tétines.
AVANT LA PREMIERE UTILISATION
•
•
•
•
•
Retirez l'emballage et vérifiez qu'il ne manque aucun accessoire et qu'aucune partie de
l'appareil ne soit défectueuse.
Lisez le mode d'emploi attentivement!
Nettoyez le bol mélangeur/hachoir, le bol cuiseur, le récipient de lait, les couvercles et la
lame du hachoir à l'eau chaude savonneuse et séchez ensuite soigneusement.
Nettoyez le bloc moteur avec un chiffon humide.
Toutes les parties qui entrent en contact avec les aliments doivent être nettoyées
soigneusement avant et après tout usage.
INFORMATION IMPORTANTE
•
•
•
•
•
•
•
•
•
Ne hachez jamais d'aliments de plus de 50°C et ne versez jamais d'aliments liquides dans
le bol mélangeur.
Afin d'éviter d'endommager la lame, ne hachez pas d'aliments trop durs (noix de
muscade, légumes secs, maïs, viande avec os, sucre, glace, café, etc.).
Ne remplissez jamais le bol entièrement.
Afin d'éviter la surchauffe de l'appareil, ne dépassez pas les quantités et le temps
maximum conseillés dans les tableaux joints à cette notice. Après chaque utilisation,
laissez l'appareil refroidir au moins 10 minutes.
Lorsque vous désirez hacher des grandes quantités, il est conseillé d'intercaler une pause
régulièrement (15 secondes d’utilisation, 15 secondes de pause).
Attendez que la lame soit totalement à l'arrêt avant de retirer le couvercle.
Après chaque utilisation, veuillez nettoyer soigneusement toutes les parties qui entrent en
contact direct avec les aliments. Pour cela, veuillez vous référer au paragraphe
nettoyage.
La lame est très coupante, soyez prudent lors de sa manipulation.
Ne mettez pas le bol au micro-ondes.
29
Assembly page 29/80
TKG DG 1000 - 100116
Fax +32 2 359 95 50
•
Copies of the I/B. Please reproduce them without any
changes except under special instruction from Team
International BELGIUM. The pages must be reproduced
and folded in order to obtain a booklet A5 (+/- 148.5 mm
width x 210 mm height). When folding, make sure you
keep the good numbering when you turn the pages of
the I/B. Don’t change the page numbering. Keep the
language integrity.
Ne plongez pas le bloc moteur dans l'eau ou dans tout autre liquide.
UTILISATION
REMPLISSAGE DE LA CHAUDIERE
•
•
Débranchez la fiche de la prise de courant.
Desserrez le bouchon de la chaudière en le tournant dans le sens inverse des aiguilles
d’une montre vers la position “
•
•
•
•
•
•
•
•
•
•
•
” et enlevez-le (fig. a).
Vérifiez si la chaudière est vide en retournant le corps de l’appareil.
Nettoyez la chaudière si nécessaire, référez-vous à la rubrique “Nettoyage de la
chaudière”.
Utilisez uniquement de l’eau potable et référez-vous à la rubrique “Temps de cuisson pour
cuire à la vapeur” pour le volume d’eau à verser dans la chaudière.
Nous vous recommandons d’utiliser de l’eau purifiée ou déminéralisée afin de limiter la
formation de calcaire dans la chaudière.
Versez de l’eau dans le bol mesureur, au minimum jusqu’au niveau désiré (XX min ou YY
ml).
Versez l’eau soigneusement dans la chaudière (fig. a).
Fixez le bouchon sur la chaudière en le tournant dans le sens des aiguilles d’une montre
vers la position “ ” (fig. b).
Attention!
Pour satisfaire aux exigences hygiéniques, n’utilisez pas d’autre liquide pour remplir la
chaudière. Utilisez uniquement de l’eau.
Ne remplissez pas trop la chaudière; ne versez jamais plus de 230ml.
Fixez toujours le bouchon de la chaudière fermement dans le sens des aiguilles d’une
montre vers la position “ ”.
Débranchez toujours la fiche de la prise de courant avant de verser l’eau dans la
chaudière.
Vérifiez toujours les points suivants avant de mettre l’appareil en marche:
•
•
•
•
•
•
Les couvercles de protection ont été enlevés des lames.
La chaudière est remplie d’eau.
Le bouchon de la chaudière est fixé fermement sur le corps de l’appareil.
L’interrupteur est en position “OFF”.
Le bol mélangeur est verrouillé fermement sur le corps de l’appareil.
Le couvercle du bol mélangeur est verrouillé.
30
Assembly page 30/80
TKG DG 1000 - 100116
Fax +32 2 359 95 50
Copies of the I/B. Please reproduce them without any
changes except under special instruction from Team
International BELGIUM. The pages must be reproduced
and folded in order to obtain a booklet A5 (+/- 148.5 mm
width x 210 mm height). When folding, make sure you
keep the good numbering when you turn the pages of
the I/B. Don’t change the page numbering. Keep the
language integrity.
CUIRE A LA VAPEUR
•
•
•
•
•
•
•
•
•
•
•
•
•
•
•
•
•
•
•
•
•
•
•
Référez-vous à la rubrique “Remplissage de la chaudière” et versez la quantité d’eau
désirée dans la chaudière.
Mettez le bol mélangeur sur le corps de l’appareil et fixez-le fermement en le tournant
dans le sens indiqué dans fig. c; assurez-vous que les deux “flèches” ▲ et ▼ sont alignées.
Mettez le bol cuiseur dans le bol mélangeur (fig. d).
Introduisez de la nourriture coupée en dés ou en rondelles pas plus grands que 15mm de
largeur ou 15x15x15mm dans le bol cuiseur. Ne remplissez pas excessivement le bol, et
évitez de tasser la nourriture.
Mettez le couvercle et verrouillez les loquets de fermeture (fig. e).
Assurez-vous que l’interrupteur est en position “OFF”.
Branchez la fiche dans une prise de courant.
Tournez l’interrupteur vers la position “
”. La chaudière se mettra en marche et le
témoin lumineux rouge s’allumera.
De la vapeur remplira le bol après quelques minutes.
La chaudière s’arrêtera automatiquement au moment désiré (calculé selon la quantité
d’eau utilisée) et le témoin lumineux rouge s’éteindra. Tournez l’interrupteur vers “OFF”. Si
la chaudière ne s’arrête pas automatiquement après le temps désiré, tournez
l’interrupteur vers “OFF”.
Important: Si l’interrupteur n’est pas tourné vers “OFF”, la chaudière pourrait s’activer de
nouveau.
Laissez refroidir l’appareil pendant 3 à 5 minutes si nécessaire.
Enlevez le bol mélangeur du corps de l’appareil (fig. f).
Ouvrez le couvercle. Avertissement! Soyez prudent lorsque vous ouvrez le couvercle, car
la vapeur est très chaude.
Enlevez le bol cuiseur: la nourriture est prête à être mangée ou à être mélangée.
L’eau utilisée pour la cuisson dans le bol mélangeur peut être jetée.
Attention!
Les récipients, le couvercle et la nourriture sont chauds; soyez prudent lorsque vous les
manipulez après la cuisson.
Ne mettez jamais la chaudière en marche quand le bol mélangeur n’est pas fixé dans la
position correcte.
Ne mettez jamais la chaudière en marche quand elle n’est pas remplie d’eau.
Soyez prudent: de la vapeur chaude s’échappera de l’orifice de vapeur et des bords du
couvercle pendant la cuisson à la
vapeur.
Si vous n’allez pas
mélanger/hacher la nourriture,
nettoyez toujours la chaudière et
toutes les parties immédiatement
après chaque opération de
cuisson.
En cours de fonctionnement, ne
pas déverrouiller et retirer le
bouchon de la chaudière, ni
rajouter de l’eau.
Toujours attendre que l’appareil
refroidisse avant de débuter une
nouvelle opération de cuisson à la
vapeur.
31
Assembly page 31/80
TKG DG 1000 - 100116
Fax +32 2 359 95 50
Copies of the I/B. Please reproduce them without any
changes except under special instruction from Team
International BELGIUM. The pages must be reproduced
and folded in order to obtain a booklet A5 (+/- 148.5 mm
width x 210 mm height). When folding, make sure you
keep the good numbering when you turn the pages of
the I/B. Don’t change the page numbering. Keep the
language integrity.
MELANGER/HACHER
•
•
•
•
Mettez le bol mélangeur sur le corps de l’appareil (fig. c).
Enlevez les couvercles de protection de l’unité des lames.
Tenez l’unité des lames soigneusement et placez-la sur l’axe (fig. g). Assurez-vous que
l’unité des lames est placée dans la position correcte, jusqu’à ce qu’elle se soit enfoncée
jusqu’au bout.
Introduisez la nourriture cuite dans le bol mélangeur (fig. h).
•
Mettez le couvercle dessus et verrouillez les loquets de fermeture des deux côtés (fig. e).
•
Tournez l’interrupteur et maintenez-le dans la position “
“ pour environ 15 secondes.
Un témoin lumineux bleu s’allume pendant l’opération, vous indiquant que le hachoir est
en fonctionnement.
Répétez cette opération si nécessaire, mais veuillez noter qu’il est recommandé
d’attendre au moins 15 secondes entre deux opérations.
Certains aliments peuvent être collés à la paroi du bol mélangeur ou au couvercle. Vous
pouvez utiliser la spatule pour enlever les aliments entre deux opérations.
Toujours débrancher l’appareil avant de débuter une quelconque intervention au niveau
du bol mélangeur.
Enlevez le bol mélangeur du corps de l’appareil et enlevez le couvercle.
Enlevez l’unité des lames très soigneusement.
Enlevez la nourriture du récipient à l’aide de la spatule.
•
•
•
•
•
•
•
•
•
•
•
Attention!
Vérifiez toujours la température de la nourriture avant de nourrir votre bébé.
Il est recommandé d’attendre au moins 15 secondes entre deux opérations.
Ne mélangez pas si le récipient est vide.
N’ajoutez pas trop de liquide à mélanger avec la nourriture afin d’éviter des
éclaboussures.
Ne mélangez ou ne hachez pas de nourriture congelée, ou de nourriture avec des os ou
des parties dures.
RECHAUFFER ET DECONGELER
•
•
Suivez les instructions décrites dans la rubrique “Cuire à la vapeur” pour réchauffer et
décongeler de la nourriture.
Information importante quant au temps de cuisson à la vapeur : ce n’est qu’une
indication. Le temps de cuisson à la vapeur peut varier selon le poids et la température
des aliments.
32
Assembly page 32/80
TKG DG 1000 - 100116
Fax +32 2 359 95 50
•
•
•
•
•
•
Copies of the I/B. Please reproduce them without any
changes except under special instruction from Team
International BELGIUM. The pages must be reproduced
and folded in order to obtain a booklet A5 (+/- 148.5 mm
width x 210 mm height). When folding, make sure you
keep the good numbering when you turn the pages of
the I/B. Don’t change the page numbering. Keep the
language integrity.
Nous vous conseillons de verser 230ml d’eau, de vérifier alors l’état de la nourriture après 5
minutes pour une petite quantité de nourriture, après 10 minutes pour une quantité de
nourriture moyenne, ou après 15 minutes pour une grande quantité de nourriture. Goûtez
la nourriture à l’aide d’une cuillère ou fourchette, afin de vérifier le niveau de cuisson.
Attention!
Ne remplissez pas trop la chaudière; ne versez jamais plus de 230ml d’eau.
Soyez prudent quand vous ouvrez le couvercle, car la vapeur peut être très chaude.
Faites attention; de la vapeur chaude s’échappe de l’orifice de vapeur et des bords du
couvercle pendant la cuisson à la vapeur.
Soyez prudent quand vous enlevez les récipients, le couvercle et la nourriture, car ils sont
chauds, la vapeur pourrait être bouillante.
Vérifiez toujours la température de la nourriture avant de nourrir votre bébé.
RECHAUFFER DU LAIT OU DU LIQUIDE
•
•
•
•
•
•
•
•
•
•
Ouvrez le couvercle du récipient de lait (fig. i).
Versez du lait ou du liquide dans le récipient de lait (fig. i) et fermez le couvercle.
Référez-vous à la rubrique “Remplissage de la chaudière” et versez la quantité d’eau
correcte dans la chaudière pour le temps de cuisson à la vapeur désiré.
Placez le bol mélangeur sur le corps de l’appareil et verrouillez-le fermement en le
tournant dans le sens indiqué dans fig. c.
Placez le récipient de lait dans le bol mélangeur.
Mettez le couvercle et verrouillez les loquets de fermeture (fig. e).
Pour l’usage, répétez les points mentionnés dans la rubrique “Cuire à la vapeur”.
Enlevez le récipient de lait. Le contenu est prêt à boire.
Attention!
Les récipients et le couvercle sont chauds, soyez donc prudent lorsque vous les manipulez.
Vérifiez la température du lait ou du liquide en aspergeant quelques gouttes sur votre
poignet avant de nourrir votre bébé.
STERILISER DES TETINES
•
•
•
•
•
•
•
Versez 60ml d’eau dans la chaudière pour 8 min. de temps de vapeur.
Placez le bol mélangeur sur le corps de l’appareil et verrouillez-le fermement en le
tournant dans le sens indiqué dans figure c.
Placez le support de tétines sur l’axe comme indiqué dans fig. j.
Accrochez des tétines au support de tétines.
Mettez le couvercle et verrouillez les loquets de fermeture (fig. e).
Pour l’usage, répétez les points mentionnés dans la rubrique “Cuire à la vapeur”.
Enlevez soigneusement les tétines stérilisées.
33
Assembly page 33/80
TKG DG 1000 - 100116
Fax +32 2 359 95 50
Copies of the I/B. Please reproduce them without any
changes except under special instruction from Team
International BELGIUM. The pages must be reproduced
and folded in order to obtain a booklet A5 (+/- 148.5 mm
width x 210 mm height). When folding, make sure you
keep the good numbering when you turn the pages of
the I/B. Don’t change the page numbering. Keep the
language integrity.
Attention! Le récipient, les tétines et le couvercle sont chauds, soyez donc prudent lorsque
vous les manipulez.
TEMPS DE CUISSON POUR CUIRE A LA VAPEUR
•
•
•
•
Les temps de cuisson pour cuire à la vapeur mentionnés ci-dessous ne sont qu’une
indication et doivent être adaptés selon la quantité de nourriture ou selon la température
désirée.
Les temps de cuisson pour cuire à la vapeur indiquent un temps de cuisson “net”. Ajoutez
1 à 3 minutes pour le processus total, parce que ça peut durer 1 à 3 minutes avant que la
vapeur commence à se produire.
Vérifiez toujours si la nourriture est cuite et si les boissons ont été amenées à la température
désirée avant de nourrir votre bébé.
Remplissez le bol mesureur d’eau et référez-vous aux tables ci-dessous pour savoir la
quantité d’eau et le temps de cuisson:
Pour cuire à la vapeur
Volume d’eau
40ml / 1.3 Fl. Oz.
70ml / 2.3 Fl. Oz.
110ml / 3.7 Fl. Oz.
140ml / 4.7 Fl. Oz.
180ml / 6 Fl. Oz.
230ml / 8 Fl. Oz.
Temps de cuisson
5 min.
10 min.
15 min.
20 min.
25 min.
30 min.
Pour réchauffer des liquides à la vapeur (dans le récipient de lait)
Liquide à température ambiante au début
Quantité de lait
Eau dans la chaudière
Temps de cuisson
120ml / 4 Fl. Oz.
30ml / 1 Fl. Oz.
2 ½ min.
180ml / 6 Fl. Oz.
35ml / 1.2 Fl. Oz.
3 ½ min.
240ml / 8 Fl. Oz.
40ml / 1.4 Fl. Oz.
4 ½ min.
Pour réchauffer des liquides à la vapeur (dans le récipient de lait)
Liquide à température de réfrigérateur au début (4°C)
Quantité de lait
Eau dans la chaudière
Temps de cuisson
120ml / 4 Fl. Oz.
30ml / 1 Fl. Oz.
3 ½ min.
180ml / 6 Fl. Oz.
40ml / 1.4 Fl. Oz.
4 ½ min.
240ml / 8 Fl. Oz.
45ml / 1.6 Fl. Oz.
5 min.
Pour stériliser des tétines
Volume d’eau
60ml / 2 Fl. Oz.
Temps
8 min.
34
Assembly page 34/80
TKG DG 1000 - 100116
Fax +32 2 359 95 50
Guide d’aliments
Aliments (100g)
Poireaux
Epinards
Courgette
Carottes
Chou-fleur
Haricots verts
Pois
Pommes de terre
Navets
Citrouille
Pomme
Poire
Ananas
Fraise
Poisson
Poulet
Porc
Veau/Bœuf
•
•
•
•
Copies of the I/B. Please reproduce them without any
changes except under special instruction from Team
International BELGIUM. The pages must be reproduced
and folded in order to obtain a booklet A5 (+/- 148.5 mm
width x 210 mm height). When folding, make sure you
keep the good numbering when you turn the pages of
the I/B. Don’t change the page numbering. Keep the
language integrity.
Volume d’eau
Temps de cuisson
70ml / 2 ½ Fl. Oz.
70ml / 2 ½ Fl. Oz.
110ml / 4 Fl. Oz.
140ml / 5 Fl. Oz.
140ml / 5 Fl. Oz.
140ml / 5 Fl. Oz.
140ml / 5 Fl. Oz.
140ml / 5 Fl. Oz.
140ml / 5 Fl. Oz.
140ml / 5 Fl. Oz.
70ml / 2 ½ Fl. Oz.
70ml / 2 ½ Fl. Oz.
70ml / 2 ½ Fl. Oz.
70ml / 2 ½ Fl. Oz.
70ml / 2 ½ Fl. Oz.
180ml / 6 Fl. Oz.
180ml / 6 Fl. Oz.
180ml / 6 Fl. Oz.
10 min.
10 min.
15 min.
20 min.
20 min.
20 min.
20 min.
20 min.
20 min.
20 min.
10 min.
10 min.
10 min.
10 min.
10 min.
25 min.
25 min.
25 min.
Avertissement!
Vérifiez toujours la température de la nourriture avant de nourrir votre bébé.
Vérifiez la température du lait/du liquide en aspergeant quelques gouttes sur votre
poignet avant de nourrir votre bébé.
Coupez toujours les aliments en dés ou en rondelles avant de les cuire à l’aide de votre
appareil.
Les temps de cuisson indiqués dans les tables ci-dessus ne sont qu’une indication. Le
temps de cuisson pour cuire à la vapeur dépend de la quantité, la température et le type
d’aliments que vous préparez.
NETTOYAGE ET ENTRETIEN
LORS DE LA PREPARATION D'ALIMENTS QUI CONTIENNENT DES COLORANTS (par exemple des
carottes) IL SE PEUT QUE CERTAINES PARTIES DE L'APPAREIL CHANGENT DE COULEUR.
Aucune des parties de l’appareil (bloc moteur, bol mélangeurs, accessoires) n’est susceptible
d’être mise et nettoyée au lave-vaisselle.
Nettoyage du corps de l’appareil
•
Débranchez toujours l'appareil et laissez-le refroidir avant de le nettoyer.
•
N'immergez pas l'appareil dans l'eau ou tout autre liquide.
•
Essuyez l’extérieur de l’appareil uniquement à l’aide d’un chiffon légèrement humide.
•
Ne nettoyez jamais votre appareil à l’aide de produits abrasifs ou détergents car cela
abîmerait le revêtement.
•
Avertissement!
Débranchez toujours l'appareil et laissez-le refroidir avant de le nettoyer.
Nettoyage de l’unité des lames
•
Enlevez l’unité des lames du bol.
•
Rincez-la soigneusement et enlevez tout résidu alimentaire.
•
Nettoyez-la à l’eau savonneuse ou avec un détergent neutre.
35
Assembly page 35/80
TKG DG 1000 - 100116
Fax +32 2 359 95 50
•
•
•
•
•
•
Copies of the I/B. Please reproduce them without any
changes except under special instruction from Team
International BELGIUM. The pages must be reproduced
and folded in order to obtain a booklet A5 (+/- 148.5 mm
width x 210 mm height). When folding, make sure you
keep the good numbering when you turn the pages of
the I/B. Don’t change the page numbering. Keep the
language integrity.
Rincez-la soigneusement et séchez-la immédiatement.
Mettez les couvercles de protection dessus et maintenez l’unité des lames hors de la
portée des enfants.
Avertissement!
Manipulez l’unité des lames toujours très prudemment, car les lames sont très coupantes.
Mettez toujours les couvercles de protection sur les lames quand elles sont sans
surveillance.
N’utilisez jamais de produits à blanchir ou de détergents à base de chlore car cela
pourrait endommager les lames.
Ne mettez jamais les lames au lave-vaisselle.
Nettoyage de la chaudière (après chaque opération)
•
Débranchez toujours l'appareil et laissez-le refroidir avant de nettoyer la chaudière.
•
Desserrez le bouchon de la chaudière du corps de l’appareil en le tournant dans le sens
inverse des aiguilles d’une montre et levez-le (fig. a).
•
Vérifiez si la chaudière est vide en retournant le corps de l’appareil (fig. k).
•
•
•
•
•
•
Versez 230ml d’eau dans le bol mesureur.
Ensuite versez soigneusement l’eau dans la chaudière (fig. a).
Fixez le bouchon sur la chaudière en le tournant dans le sens des aiguilles d’une montre
(fig. b).
Secouez le corps de l’appareil plusieurs fois en différentes directions.
Desserrez le bouchon de la chaudière et videz la chaudière au-dessus d’un évier.
Répétez les points précédents si nécessaire.
Entretien de routine de la chaudière
•
Des résidus calcaires se formeront dans la chaudière pendant l’utilisation normale. Afin de
limiter la formation du dépôt calcaire et de diminuer le besoin de détartrer votre appareil,
il est préférable d’utiliser de l’eau purifiée ou déminéralisée.
•
Les résidus de calcaire peuvent être enlevés de façon régulière en utilisant une solution
de vinaigre blanc et d’eau. Environ 230ml d’une solution de vinaigre blanc et d’eau
(avec les proportions 1:4, c’est-à-dire 1 partie de vinaigre pour 4 parties d’eau) devrait
être versé dans la chaudière et laissé pour 2 heures. Enlevez alors la solution, rincez la
chaudière et séchez-la.
•
Ensuite exécutez une opération de cuisson à la vapeur en utilisant 230ml d’eau avec
uniquement le bol mélangeur vide.
•
Nous vous conseillons de nettoyer la chaudière de façon régulière – au moins une fois
toutes les 2 semaines si vous utilisez de l’eau dure.
Avertissement! Débranchez toujours l'appareil et laissez-le refroidir avant de le nettoyer.
36
Assembly page 36/80
TKG DG 1000 - 100116
Fax +32 2 359 95 50
Copies of the I/B. Please reproduce them without any
changes except under special instruction from Team
International BELGIUM. The pages must be reproduced
and folded in order to obtain a booklet A5 (+/- 148.5 mm
width x 210 mm height). When folding, make sure you
keep the good numbering when you turn the pages of
the I/B. Don’t change the page numbering. Keep the
language integrity.
Nettoyage des parties en plastique
•
Toutes les parties en plastique doivent être nettoyées après chaque opération.
•
Rincez-les (sauf le corps de l’appareil) soigneusement et enlevez tout résidu alimentaire.
•
Laves-les à la main à l’aide d’un peu de détergent liquide doux ou de détergent neutre.
•
Rincez soigneusement et séchez immédiatement.
Nettoyage du bol mélangeur
•
Rincez-le soigneusement et enlevez tout résidu alimentaire après chaque utilisation.
•
Assurez-vous à l’aide de la brosse de nettoyage qu’il n’y a pas de résidus qui collent à
l’orifice de vapeur (l).
•
Lavez le bol (m) à la main avec un peu de détergent liquide doux ou de détergent
neutre.
•
Rincez-le soigneusement et séchez-le immédiatement.
•
Assurez-vous qu’il n’y a pas de résidus alimentaires dans la chambre à vapeur. Répétez les
deux points précédents si nécessaire.
PROTECTION DE L’ENVIRONNEMENT – DIRECTIVE 2002/96/CE
Afin de préserver notre environnement et notre santé, l’élimination en fin de vie des appareils
électriques et électroniques doit se faire selon des règles bien précises et nécessite
l’implication de chacun, qu’il soit fournisseur ou utilisateur. C’est pour cette raison que votre
appareil, tel que le signale le symbole
apposé sur sa plaque signalétique ou sur
l'emballage, ne doit en aucun cas être jeté dans une poubelle publique ou privée destinée
aux ordures ménagères. L'utilisateur a le droit de déposer l'appareil gratuitement dans des lieux
publics de collecte procédant à un tri sélectif des déchets pour être soit recyclé, soit réutilisé
pour d’autres applications conformément à la directive.
37
Assembly page 37/80
TKG DG 1000 - 100116
Fax +32 2 359 95 50
Copies of the I/B. Please reproduce them without any
changes except under special instruction from Team
International BELGIUM. The pages must be reproduced
and folded in order to obtain a booklet A5 (+/- 148.5 mm
width x 210 mm height). When folding, make sure you
keep the good numbering when you turn the pages of
the I/B. Don’t change the page numbering. Keep the
language integrity.
BELANGRIJKE VEILIGHEIDSVOORSCHRIFTEN
Lees de gebruiksaanwijzing aandachtig alvorens u uw toestel gebruikt, en respecteer altijd de
veiligheids- en de gebruiksvoorschriften.
Belangrijk: Personen (kinderen inbegrepen) die wegens hun fysieke, sensoriële of mentale
capaciteiten, of wegens hun gebrek aan ervaring of kennis, het toestel niet veilig kunnen
gebruiken, mogen dit toestel niet zonder toezicht of instructies van een verantwoordelijke
persoon gebruiken. Hou kinderen goed in het oog om te vermijden dat ze met het toestel
spelen.
Controleer of de netspanning overeenkomt met deze van het toestel vooraleer u het
gebruikt.
Laat uw toestel tijdens het gebruik nooit zonder toezicht.
Controleer regelmatig of het snoer niet beschadigd is. Gebruik het toestel niet indien het
snoer of het toestel zelf enige beschadiging zouden vertonen. Een beschadigd snoer
dient te worden vervangen door een bekwame gekwalificeerde dienst(*). Controleer
daarvoor zijn staat regelmatig.
Gebruik het toestel enkel voor huishoudelijk gebruik en op de wijze zoals vermeld in de
gebruiksaanwijzing.
Dompel het toestel nooit onder in water of in enige andere vloeistof, noch om het te
reinigen, noch om welke andere reden ook. Steek het nooit in een vaatwasmachine.
Gebruik het toestel niet in de nabijheid van warmtebronnen.
Plaats het toestel tijdens het gebruik op een horizontaal en droog oppervlak.
De stekker dient uit het stopcontact verwijderd te worden vooraleer het toestel te
reinigen, vooraleer de accessoires te monteren of demonteren, of als het toestel niet in
gebruik is. Laat uw toestel tijdens het gebruik nooit zonder toezicht.
Herstellingen dienen te worden uitgevoerd door een bekwame gekwalificeerde dienst(*).
Gebruik het toestel niet buiten en berg het op in een droge plaats.
Gebruik geen accessoires die niet door de fabrikant aanbevolen werden. Dit kan
gevaarlijk zijn voor de gebruiker en het toestel beschadigen.
Trek nooit aan het snoer om het toestel te verplaatsen. Zorg dat het elektriciteitssnoer
nergens kan achterhaken en daardoor de val van het toestel veroorzaken. Draai het
snoer niet rond het toestel en plooi het niet.
Zorg ervoor dat het snoer niet over de rand van de tafel of kast hangt, een heet
oppervlak raakt of in de knoop geraakt.
Gebruik dit toestel enkel voor culinaire doeleinden.
Dit soort toestel is niet geschikt voor langdurig gebruik. Het is immers geen professioneel
toestel. Daarom dient u regelmatig pauzes in te lassen.
Het is absoluut noodzakelijk om dit toestel proper te houden vermits het in direct contact
komt met etenswaren. Raadpleeg het hoofdstuk "Reiniging en onderhoud" van de
gebruiksaanwijzing.
Opgepast, de messen van de hakmolen zijn zeer scherp, wees voorzichtig dat u zich niet
snijdt.
Houd uw handen en/of andere objecten buiten de recipiënt tijdens de werking van het
toestel om zware verwondingen te vermijden.
Zorg dat het accessoire stevig en juist vergrendeld is op het motorblok vooraleer het
toestel in werking te zetten.
Om het mes te reinigen kunt u een spatel gebruiken, maar zorg ervoor dat de stekker
eerst uit het stopcontact werd gehaald.
Gebruik dit toestel nooit om kokende vloeistoffen te mixen.
38
Assembly page 38/80
TKG DG 1000 - 100116
Fax +32 2 359 95 50
Copies of the I/B. Please reproduce them without any
changes except under special instruction from Team
International BELGIUM. The pages must be reproduced
and folded in order to obtain a booklet A5 (+/- 148.5 mm
width x 210 mm height). When folding, make sure you
keep the good numbering when you turn the pages of
the I/B. Don’t change the page numbering. Keep the
language integrity.
Het toestel is ontworpen voor de bereiding van kleine hoeveelheden voedsel voor quasi
onmiddellijk verbruik. Het toestel is niet ontworpen voor de bereiding van grote
hoeveelheden tegelijk.
Raak het mes nooit aan als het toestel in werking is, tracht evenmin op welke manier dan
ook de beweging van het mes te stoppen.
Bij gebruik raden wij u aan met korte intervallen het toestel aan en uit te schakelen. Dat
geeft een beter hak- en mengresultaat. Dat beschermt tegelijkertijd ook het motorblok
tegen een te langdurig gebruik.
De hakmolen is ontworpen om in zijn leveringsstaat gebruikt te worden (beker, deksel en
messen in goede staat) want hij levert alle noodzakelijke zekerheden. Probeer nooit de
stukken door andere te vervangen en als u een stuk vervangen wenst, richt u dan tot de
klantendienst.
Wacht tot het toestel volledig is afgekoeld alvorens het te reinigen of op te bergen.
Kook enkel eetwaren geschikt om te koken en voor consumptie. Leg geen te grote
stukken voedsel in het toestel.
Zorg ervoor dat het snoer niet in aanraking komt met de warme onderdelen van het
toestel.
Wanneer het toestel in werking is, kunnen toegankelijke delen ervan een zeer hoge
temperatuur bereiken. Raak deze warme onderdelen niet aan maar gebruik de
handvaten. Gebruik pannenlappen wanneer u het toestel wenst te verplaatsen.
Wees voorzichtig wanneer u uw toestel verplaatst waarin zich warm voedsel, water of
andere vloeistoffen bevinden. Het is niet raadzaam uw toestel te bewegen wanneer het
niet volledig is afgekoeld.
Het apparaat wordt met een kort snoer geleverd, zodat u niet over het snoer zou
struikelen. Indien nodig kan u een verlengsnoer gebruiken. Zorg ervoor dat het
verlengsnoer nergens in de weg hangt (bijvoorbeeld over de rand van een tafel of op de
grond), en dit om eender welk risico te vermijden.
Uw toestel mag nooit worden aangezet door middel van een externe timer of een
separaat systeem met afstandsbediening.
(*) Bekwame gekwalificeerde dienst: klantendienst van de fabrikant of de invoerder, die erkend
en bevoegd is om dergelijke herstellingen te doen zodat elk gevaar vermeden wordt. Gelieve
het toestel bij problemen naar deze dienst terug te brengen.
TOEPASSINGS-/GEBRUIKSDOMEIN
•
•
Gebruik het toestel enkel voor huishoudelijk gebruik en op de wijze zoals vermeld in de
gebruiksaanwijzing.
Dit toestel is bestemd om te worden gebruikt voor huishoudelijke toepassingen en
gelijkaardige toepassingen zoals:
Keukenhoeken voorbehouden voor het personeel in winkels, kantoren en
andere professionele omgevingen.
Boerderijen.
Het gebruik door de klanten van hotels, motels en andere omgevingen met een
residentieel karakter.
Omgevingen van het gastenverblijf-type.
VOORDELEN VAN UW TOESTEL
Uw toestel voor babyvoeding is een multifunctioneel toestel. Het kan voedsel stomen, mengen
of hakken, voedsel, melk en vloeistoffen opwarmen, en spenen van zuigflessen steriliseren. Het
biedt de volgende specificaties:
39
Assembly page 39/80
TKG DG 1000 - 100116
Fax +32 2 359 95 50
•
•
•
•
•
•
•
•
•
•
Copies of the I/B. Please reproduce them without any
changes except under special instruction from Team
International BELGIUM. The pages must be reproduced
and folded in order to obtain a booklet A5 (+/- 148.5 mm
width x 210 mm height). When folding, make sure you
keep the good numbering when you turn the pages of
the I/B. Don’t change the page numbering. Keep the
language integrity.
Door voedsel te stomen biedt het een gezonde, snelle en smakelijke manier om voor uw
baby te koken.
Mes dat draait met een extreem hoge snelheid om voedsel in erg fijne stukjes te malen.
Krachtige stoom om voedsel in erg korte tijd te koken.
Eenvoudige bediening met slechts 1 schakelaar voor het hele proces.
Door het gebruik van PP-materiaal (polypropyleen), dat bestand is tegen hoge
temperaturen en geschikt is voor voedsel, en van speciaal geformuleerde plasticsoorten,
beschikt u over een toestel dat vrij is van bisfenol A en van ftalaten en dat uw baby aldus
beschermt tegen schadelijke chemicaliën.
Eenvoudige reiniging.
Dubbele thermische bescherming (uitschakeling bij oververhitting) door een thermostaat
en een temperatuurzekering.
Groot waterreservoir van 230cc / 8 Fl.Oz. levert 30 minuten stoom, wat lang genoeg is om
eender welk voedsel in eender welke hoeveelheid te verwerken.
Geleverd met een melkkom die gebruikt kan worden om melk of andere vloeistoffen op
te warmen.
Geleverd met een speenhouder om spenen van zuigflessen te steriliseren.
VOOR HET EERSTE GEBRUIK
•
•
•
•
•
Verwijder de verpakking van het toestel en de accessoires, en kijk na of er geen enkel
onderdeel van het toestel ontbreekt of defect is.
Lees de gebruiksaanwijzing aandachtig!
Reinig de melkkom, de kookkom, de meng-/hakkom, de deksels en het hakmes in warm
zeepwater, en droog ze zorgvuldig af.
Reinig het motorblok met een vochtige doek.
Alle onderdelen die in contact komen met voedsel zouden voor en na gebruik telkens
grondig schoongemaakt moeten worden.
BELANGRIJKE INFORMATIE
•
•
•
•
•
•
•
•
•
•
Hak geen voedingsmiddelen van meer dan 50°C en giet geen vloeibare of al te sappige
voedingsmiddelen in de kom.
Om beschadiging van het mes te vermijden, gelieve geen te harde voedingsmiddelen fijn
te malen (muskaatnoot, gedroogde peulvruchten, maïs, vlees met beenderen, suiker, ijs,
koffiebonen enz.).
Vul de kom nooit volledig.
Om oververhitting van het toestel te vermijden, gelieve de aanbevolen hoeveelheid en
gebruikstijd aangegeven in de tabellen van deze handleiding te volgen. Laat het toestel
minstens 10 minuten afkoelen na elk gebruik.
Indien u grote hoeveelheden wilt hakken, gelieve dan regelmatig pauzes in te lassen
(telkens 15 seconden pauze na 15 seconden gebruik).
Wacht totdat het mes volledig tot stilstand is gekomen vooraleer u het deksel afneemt.
Gelieve na elk gebruik alle delen die rechtstreeks in contact komen met
voedingsmiddelen grondig te reinigen door de stappen in de paragraaf "reiniging en
onderhoud" te volgen.
Het mes is heel scherp. Wees dus voorzichtig wanneer u het hanteert.
Plaats de kom niet in de microgolfoven.
Dompel het motorblok nooit onder in water of andere vloeistoffen.
40
Assembly page 40/80
TKG DG 1000 - 100116
Fax +32 2 359 95 50
Copies of the I/B. Please reproduce them without any
changes except under special instruction from Team
International BELGIUM. The pages must be reproduced
and folded in order to obtain a booklet A5 (+/- 148.5 mm
width x 210 mm height). When folding, make sure you
keep the good numbering when you turn the pages of
the I/B. Don’t change the page numbering. Keep the
language integrity.
GEBRUIK
WATER IN DE STOOMKETEL GIETEN
•
•
Trek de stekker uit het stopcontact.
Maak de dop van de stoomketel los door hem in tegenwijzerzin te draaien naar stand
“
•
•
•
•
•
•
•
•
•
•
•
” en hem op te tillen (fig. a).
Controleer of de stoomketel leeg is door het motorblok ondersteboven te houden en te
zien of er geen water uit komt.
Maak de stoomketel schoon indien nodig. Raadpleeg hoofdstuk “Reiniging van de
stoomketel” voor het schoonmaken.
Gebruik enkel drinkbaar water en raadpleeg het hoofdstuk “Stoomtijden” voor het
volume water dat in de stoomketel gegoten moet worden.
Wij raden u aan om gezuiverd of gedestilleerd water te gebruiken om zo de hoeveelheid
kalkaanslag die zich anders in de stoomketel zal neerzetten tot een minimum te beperken.
Vul de maatbeker met water, op zijn minst tot aan de gewenste markering (XX min of YY
ml).
Giet het water voorzichtig in de stoomketel (fig. a).
Bevestig de dop op de stoomketel door hem in wijzerzin te draaien naar stand “ ” (fig.
b).
Opgelet!
Gebruik om aan de hygiënevoorschriften te voldoen geen andere vloeistof om de
stoomketel te vullen. Gebruik enkel water.
Vul de stoomketel niet te vol; giet nooit meer dan 230ml in de stoomketel.
Draai de dop van de stoomketel altijd stevig vast in wijzerzin naar stand “ ”.
Trek altijd de stekker uit het stopcontact voordat u water in de stoomketel giet.
Controleer altijd de volgende punten vooraleer u het toestel inschakelt:
•
•
•
•
•
•
De beschermhoesjes zijn verwijderd van de messen.
De stoomketel is gevuld met water.
De dop van de stoomketel is stevig bevestigd op het motorblok.
De schakelaar staat in de uit-stand (“OFF”).
De mengkom is stevig op het motorblok vergrendeld.
Het deksel van de mengkom is vergrendeld.
41
Assembly page 41/80
TKG DG 1000 - 100116
Fax +32 2 359 95 50
Copies of the I/B. Please reproduce them without any
changes except under special instruction from Team
International BELGIUM. The pages must be reproduced
and folded in order to obtain a booklet A5 (+/- 148.5 mm
width x 210 mm height). When folding, make sure you
keep the good numbering when you turn the pages of
the I/B. Don’t change the page numbering. Keep the
language integrity.
VOEDSEL STOMEN
•
•
•
•
•
•
•
•
•
•
•
•
•
•
•
•
•
•
•
•
•
•
Raadpleeg hoofdstuk “Water in de stoomketel gieten” en giet de juiste hoeveelheid
water in de stoomketel.
Zet de mengkom op het motorblok en maak ze stevig vast door ze in de richting te
draaien die is aangegeven in fig. c; zorg ervoor dat de twee pijlen ▲ en ▼ recht
tegenover elkaar staan.
Zet de kookkom in de mengkom (fig. d).
Leg het in blokjes of schijfjes gesneden voedsel in de voorgestelde afmetingen - niet
groter dan 15mm dik of 15x15x15mm in totaal - in de kookkom. Vul de kom niet te veel, en
pers het voedsel niet samen.
Zet het deksel op de mengkom en sluit de klepjes (fig. e).
Zorg ervoor dat de schakelaar in de uit-stand (“OFF”) staat.
Steek de stekker in het stopcontact.
Draai de schakelaar naar stand “
”. De stoomketel treedt dan in werking en het rode
controlelampje licht op.
Na enkele minuten vult stoom de kom.
De stoomketel stopt automatisch op het gewenste tijdstip (berekend op basis van de
gebruikte hoeveelheid water) en het rode lampje gaat dan uit. Draai de schakelaar naar
stand “OFF”. Als de stoomketel niet automatisch wordt uitgeschakeld na de gewenste
stoomtijd, draai de schakelaar dan naar stand “OFF”.
Belangrijk: als de schakelaar niet naar “OFF” wordt gedraaid, wordt de stoomketel
mogelijk opnieuw geactiveerd.
Laat het toestel indien nodig 3 tot 5 minuten afkoelen.
Neem de mengkom weg van het motorblok (fig. f).
Open het deksel. Opgelet! Wees voorzichtig wanneer u het deksel opent, want de stoom
is gloeiend heet.
Neem de kookkom uit de mengkom: het voedsel is klaar om op te eten of om gemengd
te worden.
Het kookwater in de mengkom kan worden weggegoten.
Opgelet!
De kommen, het deksel en het voedsel zijn heet. Wees voorzichtig wanneer u ze na het
koken vastneemt.
Schakel de stoomketel nooit aan wanneer de mengkom niet op zijn juiste plaats is
bevestigd.
Schakel de stoomketel nooit aan
wanneer hij niet met water gevuld
is.
Wees voorzichtig: hete stoom
ontsnapt uit de stoomopening en
langs de zijkanten van het deksel
tijdens het stomen.
Maak de stoomketel en alle delen
altijd onmiddellijk na elke
kookbeurt schoon, als u het
voedsel niet gaat vermengen.
Maak de dop van de stoomketel
niet los en verwijder hem niet, en
voeg geen water toe in de
stoomketel wanneer het toestel in
gebruik is.
42
Assembly page 42/80
TKG DG 1000 - 100116
Fax +32 2 359 95 50
•
Copies of the I/B. Please reproduce them without any
changes except under special instruction from Team
International BELGIUM. The pages must be reproduced
and folded in order to obtain a booklet A5 (+/- 148.5 mm
width x 210 mm height). When folding, make sure you
keep the good numbering when you turn the pages of
the I/B. Don’t change the page numbering. Keep the
language integrity.
Wacht altijd tot het toestel is afgekoeld, vooraleer u met een nieuwe stoomkookbeurt
begint.
VOEDSEL MENGEN/FIJNHAKKEN
•
•
•
•
Zet de mengkom op het motorblok (fig. c).
Verwijder de beschermhoesjes van de meseenheid.
Houd de meseenheid voorzichtig vast en zet ze op de as (fig. g). Zorg ervoor dat de
meseenheid correct geplaatst is, d.w.z. dat ze helemaal op de as geschoven is tot ze niet
meer verder kan.
Doe het gekookte voedsel in de mengkom (fig. h).
•
Zet het deksel op de mengkom en sluit de klepjes aan de zijkant (fig. e).
•
Draai de schakelaar naar stand “
” en houd hem ongeveer 15 seconden in deze
stand. Een blauw lampje licht op tijdens het gebruik en duidt daarmee aan dat de
hakmolen in werking is.
Herhaal de hakcyclus indien nodig, maar vergeet niet dat het aangeraden is om ten
minste 15 seconden te wachten tussen twee hakbeurten.
Sommige voedingsmiddelen kunnen aan de wand van de mengkom of aan het deksel
blijven kleven. U kan de spatel gebruiken om de voedingsmiddelen tussen twee
hakbeurten te verwijderen.
Trek altijd de stekker uit het stopcontact vooraleer u de mengkom op eender welke
manier hanteert.
Neem de mengkom van het motorblok en neem het deksel af.
Verwijder heel voorzichtig de meseenheid.
Neem het voedsel uit de kom met behulp van de spatel.
•
•
•
•
•
•
•
•
•
•
•
Opgelet!
Controleer altijd de temperatuur van het voedsel vooraleer u uw baby voedt.
Het is aangeraden om ten minste 15 seconden te wachten tussen twee meng-/
hakbeurten.
Gebruik de meng-/hakfunctie nooit met een lege kom.
Voeg om spatten te vermijden niet te veel vloeistof toe aan het voedsel dat vermengd zal
worden.
Meng of hak geen ingevroren voedsel of voedsel met beenderen of harde delen.
43
Assembly page 43/80
TKG DG 1000 - 100116
Fax +32 2 359 95 50
Copies of the I/B. Please reproduce them without any
changes except under special instruction from Team
International BELGIUM. The pages must be reproduced
and folded in order to obtain a booklet A5 (+/- 148.5 mm
width x 210 mm height). When folding, make sure you
keep the good numbering when you turn the pages of
the I/B. Don’t change the page numbering. Keep the
language integrity.
VOEDSEL OPWARMEN OF ONTDOOIEN
•
•
•
•
•
•
•
•
Volg de aanwijzingen in hoofdstuk “Voedsel stomen” om voedsel op te warmen of te
ontdooien.
Belangrijke informatie wat de stoomtijd betreft - die is enkel een indicatie. De stoomtijd
kan variëren naargelang het gewicht of de temperatuur van het voedsel.
Wij raden u aan om 230ml water in de stoomketel te gieten, en dan de staat van het
voedsel na 5 minuten te controleren voor een kleine hoeveelheid voedsel, na 10 minuten
voor een gemiddelde hoeveelheid voedsel, en na 15 minuten voor een grote
hoeveelheid voedsel. Proef het voedsel met een lepel of vork om het kookniveau te
controleren.
Opgelet!
Vul de stoomketel niet te vol. Giet nooit meer dan 230ml water.
Wees voorzichtig wanneer u het deksel opent, want de stoom kan gloeiend heet zijn.
Wees voorzichtig: hete stoom ontsnapt uit de stoomopening en langs de zijkanten van het
deksel tijdens het stomen.
Wees voorzichtig wanneer u de kommen, het deksel en het voedsel wegneemt want ze
zijn heet. De stoom kan gloeiend heet zijn.
Controleer altijd de temperatuur van het voedsel vooraleer u uw baby voedt.
MELK OF ANDERE VLOEISTOF OPWARMEN
•
•
•
•
•
•
•
•
•
•
Open het deksel van de melkkom (fig. i).
Giet melk of een andere vloeistof in de melkkom (fig. i) en sluit het deksel van de
melkkom.
Raadpleeg hoofdstuk “Water in de stoomketel gieten” en giet de juiste hoeveelheid
water in de stoomketel voor de gewenste stoomtijd.
Zet de mengkom op het motorblok en maak ze stevig vast door ze in de richting te
draaien die is aangegeven in fig. c.
Zet de melkkom in de mengkom.
Zet het deksel op de mengkom en sluit de klepjes (fig. e).
Herhaal om het toestel in gebruik te nemen de stappen die zijn beschreven in hoofdstuk
“Voedsel stomen”.
Neem na gebruik de melkkom weg. De inhoud is klaar om gedronken te worden.
Opgelet!
De kommen en deksels zijn heet. Wees voorzichtig wanneer u ze vastneemt.
Controleer de temperatuur van de melk of vloeistof door enkele druppels op uw pols te
sprenkelen vooraleer u uw baby voedt.
44
Assembly page 44/80
TKG DG 1000 - 100116
Fax +32 2 359 95 50
Copies of the I/B. Please reproduce them without any
changes except under special instruction from Team
International BELGIUM. The pages must be reproduced
and folded in order to obtain a booklet A5 (+/- 148.5 mm
width x 210 mm height). When folding, make sure you
keep the good numbering when you turn the pages of
the I/B. Don’t change the page numbering. Keep the
language integrity.
SPENEN VAN ZUIGFLESSEN STERILISEREN
•
•
•
•
•
•
•
Giet 60ml water in de stoomketel voor 8 minuten stoomtijd.
Zet de mengkom op het motorblok en maak ze stevig vast door ze in de richting te
draaien die is aangegeven in fig. c.
Zet de speenhouder bovenop de as (fig. j).
Hang spenen aan de speenhouder.
Zet het deksel op de mengkom en sluit de klepjes (fig. e).
Herhaal om het toestel in gebruik te nemen de stappen die zijn beschreven in hoofdstuk
“Voedsel stomen”.
Neem na gebruik de gesteriliseerde spenen voorzichtig weg.
Opgelet! De kom, de spenen en het deksel zijn heet. Wees voorzichtig wanneer u ze
vastneemt.
STOOMTIJDEN
•
•
•
•
De onderstaande stoomtijden zijn enkel ter indicatie en zouden moeten worden
aangepast naargelang de hoeveelheid voedsel of de gewenste temperatuur.
De stoomtijden vermelden een “netto” stoomtijd. Voeg 1 tot 3 minuten toe voor het totale
proces, want het kan 1 tot 3 minuten duren vooraleer er stoom wordt geproduceerd.
Controleer altijd dat het voedsel gekookt is en dat dranken op de gewenste temperatuur
zijn gebracht vooraleer u uw baby voedt.
Vul de maatbeker met water en gebruik de onderstaande tabellen voor het volume
water en de stoomtijd:
Stoomkoken
Water in stoomketel
40ml / 1.3 Fl. Oz.
70ml / 2.3 Fl. Oz.
110ml / 3.7 Fl. Oz.
140ml / 4.7 Fl. Oz.
180ml / 6 Fl. Oz.
230ml / 8 Fl. Oz.
Stoomtijd
5 min.
10 min.
15 min.
20 min.
25 min.
30 min.
Vloeistoffen met stoom opwarmen (in de melkkom)
Vloeistof bij aanvang op kamertemperatuur
Hoeveelheid melk/vloeistof
Water in stoomketel
120ml / 4 Fl. Oz.
30ml / 1 Fl. Oz.
180ml / 6 Fl. Oz.
35ml / 1.2 Fl. Oz.
240ml / 8 Fl. Oz.
40ml / 1.4 Fl. Oz.
Stoomtijd
2 ½ min.
3 ½ min.
4 ½ min.
Vloeistoffen met stoom opwarmen (in de melkkom)
Vloeistof bij aanvang op koelkasttemperatuur (4°C)
Hoeveelheid melk/vloeistof
Water in stoomketel
120ml / 4 Fl. Oz.
30ml / 1 Fl. Oz.
180ml / 6 Fl. Oz.
40ml / 1.4 Fl. Oz.
240ml / 8 Fl. Oz.
45ml / 1.6 Fl. Oz.
Stoomtijd
3 ½ min.
4 ½ min.
5 min.
Spenen van zuigflessen steriliseren
Water in stoomketel
Stoomtijd
60ml / 2 Fl. Oz.
8 min.
45
Assembly page 45/80
TKG DG 1000 - 100116
Fax +32 2 359 95 50
Kookgids
Voeding (100g)
Prei
Spinazie
Courgettes
Wortelen
Bloemkool
Groene bonen
Erwten
Aardappelen
Raap
Pompoen
Appel
Peer
Ananas
Aardbeien
Vis
Kip
Varkensvlees
Kalfsvlees/Rundvlees
•
•
•
•
Copies of the I/B. Please reproduce them without any
changes except under special instruction from Team
International BELGIUM. The pages must be reproduced
and folded in order to obtain a booklet A5 (+/- 148.5 mm
width x 210 mm height). When folding, make sure you
keep the good numbering when you turn the pages of
the I/B. Don’t change the page numbering. Keep the
language integrity.
Water in stoomketel
Stoomtijd
70ml / 2 ½ Fl. Oz.
70ml / 2 ½ Fl. Oz.
110ml / 4 Fl. Oz.
140ml / 5 Fl. Oz.
140ml / 5 Fl. Oz.
140ml / 5 Fl. Oz.
140ml / 5 Fl. Oz.
140ml / 5 Fl. Oz.
140ml / 5 Fl. Oz.
140ml / 5 Fl. Oz.
70ml / 2 ½ Fl. Oz.
70ml / 2 ½ Fl. Oz.
70ml / 2 ½ Fl. Oz.
70ml / 2 ½ Fl. Oz.
70ml / 2 ½ Fl. Oz.
180ml / 6 Fl. Oz.
180ml / 6 Fl. Oz.
180ml / 6 Fl. Oz.
10 min.
10 min.
15 min.
20 min.
20 min.
20 min.
20 min.
20 min.
20 min.
20 min.
10 min.
10 min.
10 min.
10 min.
10 min.
25 min.
25 min.
25 min.
Opgelet!
Controleer altijd de temperatuur van het voedsel vooraleer u uw baby voedt.
Controleer de temperatuur van de melk of vloeistof door enkele druppels op uw pols te
sprenkelen vooraleer u uw baby voedt.
Snijd het voedsel altijd in blokjes of schijven vooraleer u het met dit toestel voor
babyvoeding kookt.
De stoomtijden in bovenstaande tabellen zijn enkel ter indicatie. De stoomkooktijd hangt
af van de hoeveelheid, de temperatuur en het soort voedsel dat u bereidt.
REINIGING EN ONDERHOUD
WANNEER U VOEDINGSMIDDELEN BEREIDT DIE KLEURSTOFFEN BEVATTEN (bijvoorbeeld wortelen),
ZOU HET KUNNEN DAT BEPAALDE DELEN VAN HET TOESTELVERKLEUREN.
Geen enkel deel van het toestel (motorblok, mengkom, accessoires) is vaatwasbestendig.
Reiniging van het motorblok
•
Trek altijd de stekker uit het stopcontact vooraleer u het toestel reinigt en zorg ervoor dat
het voldoende is afgekoeld.
•
Dompel het motorblok nooit onder in water of andere vloeistoffen.
•
Gebruik enkel een licht vochtige doek om het motorblok te reinigen.
•
Gebruik geen metalen voorwerpen, schuurmiddelen of krassende voorwerpen voor de
reiniging, want dit zou het toestel kunnen beschadigen.
•
Opgelet!
Trek altijd de stekker uit het stopcontact vooraleer u het toestel reinigt en zorg ervoor dat
het voldoende is afgekoeld.
Reiniging van de meseenheid
•
Verwijder de meseenheid uit de kom.
•
Spoel de meseenheid grondig af en verwijder eventuele etensresten.
•
Maak ze schoon in zeepwater of met een neutraal afwasmiddel.
46
Assembly page 46/80
TKG DG 1000 - 100116
Fax +32 2 359 95 50
•
•
•
•
•
•
Copies of the I/B. Please reproduce them without any
changes except under special instruction from Team
International BELGIUM. The pages must be reproduced
and folded in order to obtain a booklet A5 (+/- 148.5 mm
width x 210 mm height). When folding, make sure you
keep the good numbering when you turn the pages of
the I/B. Don’t change the page numbering. Keep the
language integrity.
Spoel ze grondig af en droog ze daarna onmiddellijk af.
Zet de beschermhoesjes op de messen en houd de meseenheid buiten het bereik van
kinderen.
Opgelet!
Neem de meseenheid altijd erg voorzichtig vast, want de messen zijn heel scherp.
Zet altijd de beschermhoesjes op de messen wanneer de meseenheid zonder toezicht is.
Gebruik nooit bleekmiddelen of chloorhoudende afwasmiddelen, want ze zouden de
messen kunnen beschadigen.
Steek de messen niet in een vaatwasmachine.
Reiniging van de stoomketel (na elk gebruik)
•
Trek altijd de stekker uit het stopcontact vooraleer u de stoomketel reinigt en zorg ervoor
dat het toestel voldoende is afgekoeld.
•
Maak de dop van de stoomketel los door hem in tegenwijzerzin te draaien en op te tillen
(fig. a).
•
Controleer dat de stoomketel leeg is door het motorblok ondersteboven te houden en te
zien dat er geen water uit komt (fig. k).
•
•
•
•
•
•
Vul de maatbeker met 230ml water.
Giet het water voorzichtig in de stoomketel (fig. a).
Maak de dop op de stoomketel vast door hem in wijzerzin te draaien (fig. b).
Schud het motorblok meerdere keren in verschillende richtingen.
Maak de dop van de stoomketel los en giet de stoomketel leeg boven een gootsteen.
Herhaal indien nodig de bovenvermelde stappen.
Routine-onderhoud van de stoomketel
•
Kalkaanslag vormt zich in de stoomketel bij normaal gebruik. Het kan voordelig zijn om
voorgekookt of gefilterd water te gebruiken in uw toestel voor babyvoeding om de
vorming van kalkaanslag en de nood om te ontkalken te verminderen.
•
Op regelmatige basis kan de kalkaanslag verwijderd worden met een azijnoplossing. Giet
ongeveer 230ml van een oplossing met witte azijn (in een verhouding van 1:4, dit wil
zeggen 1 deeltje azijn voor 4 deeltjes water) in de stoomketel en laat het mengsel 2 uur
inwerken. Giet het daarna weg en spoel de stoomketel uit en droog hem af.
•
Voer daarna een stoomcyclus uit met 230ml water en met enkel de lege mengkom op
het motorblok.
•
Het is aanbevolen om dit routine-onderhoud regelmatig uit te voeren – op zijn minst om
de 2 weken indien u hard water gebruikt.
Opgelet! Trek altijd de stekker uit het stopcontact en zorg ervoor dat het toestel is
afgekoeld vooraleer u het schoonmaakt.
47
Assembly page 47/80
TKG DG 1000 - 100116
Fax +32 2 359 95 50
Copies of the I/B. Please reproduce them without any
changes except under special instruction from Team
International BELGIUM. The pages must be reproduced
and folded in order to obtain a booklet A5 (+/- 148.5 mm
width x 210 mm height). When folding, make sure you
keep the good numbering when you turn the pages of
the I/B. Don’t change the page numbering. Keep the
language integrity.
Reiniging van de plastic delen
•
Alle plastic delen zouden na elk gebruik gereinigd moeten worden.
•
Spoel ze grondig af (behalve het motorblok) en verwijder eventuele etensresten.
•
Was ze met de hand met een klein beetje mild vloeibaar afwasmiddel of neutraal
afwasmiddel.
•
Spoel ze grondig af en droog ze onmiddellijk af.
Reiniging van de mengkom
•
Spoel de mengkom grondig uit en verwijder eventuele etensresten na elk gebruik.
•
Zorg ervoor dat er geen etensresten kleven aan de dampopening (l) en gebruik hiervoor
het reinigingsborsteltje.
•
Was de kom (m) met de hand met een klein beetje mild vloeibaar afwasmiddel of
neutraal afwasmiddel.
•
Spoel de mengkom grondig uit en droog ze onmiddellijk daarna af.
•
Zorg ervoor dat er geen etensresten in de stoomkamer achterblijven. Herhaal indien nodig
de twee bovenstaande stappen.
MILIEUBESCHERMING – RICHTLIJN 2002/96/EG
Om ons milieu en onze gezondheid te beschermen, moet afgedankte elektrische en
elektronische apparatuur in overeenstemming met welbepaalde regels weggegooid worden.
Dit vergt zowel de inzet van de leveranciers als van de gebruikers. Om deze reden mag uw
apparaat, zoals op het typeplaatje of op de verpakking aangegeven door het symbool
,
niet met het gewone huisvuil weggegooid worden. De gebruiker heeft het recht het toestel
gratis naar een gemeentelijk centrum van gescheiden inzameling te brengen waar het
overeenkomstig de richtlijn hergebruikt, gerecycleerd of voor andere doeleinden gebruikt zal
worden.
48
Assembly page 48/80
TKG DG 1000 - 100116
Fax +32 2 359 95 50
Copies of the I/B. Please reproduce them without any
changes except under special instruction from Team
International BELGIUM. The pages must be reproduced
and folded in order to obtain a booklet A5 (+/- 148.5 mm
width x 210 mm height). When folding, make sure you
keep the good numbering when you turn the pages of
the I/B. Don’t change the page numbering. Keep the
language integrity.
CONSEJOS DE SEGURIDAD
Lea detenidamente el modo de empleo antes de utilizar el aparato, y siempre siga las
medidas de seguridad y el modo de funcionamiento.
Importante: Las personas (incluidos niños) con incapacidades físicas, sensoriales o mentales, o
sin experiencia o conocimiento nunca deben utilizar el aparato, salvo si están bajo la
vigilancia de una persona responsable de su seguridad o si recibieron previamente
instrucciones con respecto al uso seguro del aparato.
Es necesario vigilar a los niños para que no jueguen con el aparato.
Antes de utilizar el aparato, compruebe que el voltaje de la red eléctrica coincide con el
del aparato.
No deje nunca su aparato sin vigilancia cuando esté en marcha.
Compruebe de vez en cuando que el aparato no esté dañado y no utilice su aparato si
el cable o el aparato están dañados por el motivo que sea. Cualquier reparación debe
ser realizada por un servicio cualificado competente(*). Si el cable está dañado, debe ser
reemplazado por un servicio cualificado competente(*).
Utilice el aparato sólo para usos domésticos y de la manera indicada en el modo de empleo.
No sumerja nunca el aparato en el agua o en cualquier otro líquido ni para su limpieza ni
por cualquier otra razón. No lo introduzca nunca en el lavavajillas.
No utilice el aparato cerca de fuentes de calor.
Desenchufe el aparato siempre que no lo utilice o para montar y desmontar los
accesorios y para limpiarlo. La clavija eléctrica debe ser desenchufada cuando deje el
aparato sin vigilancia.
Procure no utilizar el aparato en el exterior y colóquelo en un sitio seco.
No utilice accesorios no recomendados por el fabricante, ello puede conllevar un riesgo
para el usuario y dañar el aparato.
No mueva nunca el aparato estirando del cable. Procure que el cable no se enganche
en alguna parte, a fin de evitar posibles caídas del mismo.
Utilice este aparato sólo para aplicaciones culinarias.
Este aparato no puede funcionar de manera continuada, no es un aparato profesional. Es
necesario efectuar pausas a intervalos regulares.
Es indispensable guardar el aparato limpio, ya que está en contacto directo con los
alimentos. Consulte el punto "Limpieza" en el modo de empleo.
Cuidado: las cuchillas de la picadora están muy afiladas, tenga mucho cuidado cuando
las manipule (limpieza, vaciado de la jarra o cambio de accesorios).
Asegúrese de que el accesorio utilizado está acoplado (y bloqueado) correctamente al
bloque motor antes de poner el aparato en marcha.
No meta las manos ni cualquier objeto en el recipiente durante el funcionamiento del
aparato para no herirse. No toque los accesorios cuando el aparato esté funcionando y
no intente parar su movimiento. Desenchufe la clavija.
El aparato está concebido para preparar pequeñas cantidades de alimentos cuyo
consumo no puede ser tardío. El aparato no está concebido para preparar grandes
cantidades a la vez.
Utilice la picadora sólo en su estado de entrega (jarra en buen estado, tapa, cuchillas),
para una seguridad óptima. No intente reemplazar cualquier parte por otra y si tiene que
reemplazar una, diríjase al servicio postventa.
Deje enfriar el aparato antes de limpiarlo o guardarlo.
Cocine sólo alimentos apropiados a la cocción y al consumo culinario. No ponga
alimentos muy grandes.
Procure que el cable no entre en contacto con las superficies calientes del aparato.
49
Assembly page 49/80
TKG DG 1000 - 100116
Fax +32 2 359 95 50
Copies of the I/B. Please reproduce them without any
changes except under special instruction from Team
International BELGIUM. The pages must be reproduced
and folded in order to obtain a booklet A5 (+/- 148.5 mm
width x 210 mm height). When folding, make sure you
keep the good numbering when you turn the pages of
the I/B. Don’t change the page numbering. Keep the
language integrity.
No toque las superficies calientes del aparato, utilice las asas. Utilice guantos cuando
manipule el aparato.
Tenga cuidado si transporta el aparato con comida caliente, agua u otros líquidos. Es
totalmente desaconsejado transportar su aparato cuando las paredes no estén totalmente
frías.
El cable de alimentación del aparato es un cable corto a fin de disminuir el riesgo de
accidentes (caídas al tropezar con él, etc.). Puede utilizar una extensión eléctrica si es
necesario, pero: para evitar riesgos asegúrese de que el cable de la extensión no cuelga
(por ejemplo de una mesa) y que no quede en el suelo.
Su aparato nunca debe ser puesto en marcha mediante un minutero externo o un sistema
de mando a distancia separado.
Servicio técnico cualificado: servicio técnico del fabricante o del importador o una persona
cualificada, reconocida y habilitada a fin de evitar cualquier peligro. En cualquier caso
devuelva el aparato al servicio técnico.
(*)
CAMPO DE APLICACIÓN/DE FUNCIONAMIENTO
•
•
Utilice el aparato sólo para usos domésticos y de la manera indicada en el modo de
empleo.
Este aparato está diseñado para uso doméstico o aplicaciones similares como:
Cocinas reservadas para personal en tiendas, oficinas y otros profesionales.
Granjas.
El uso por clientes de hoteles, moteles, y otros con un carácter residencial.
Profesionales tipo de “camas y desayunos”.
VENTAJAS DE SU APARATO
Su robot de cocina es un aparato multifunción. Puede cocinar al vapor, batir, calentar
comida, leche u otros líquidos además de esterilizar. Le ofrece las siguientes ventajas:
•
•
•
•
•
•
•
•
•
•
Le ofrece la posibilidad de cocinar al vapor los alimentos de bebes de manera saludable,
rápida y apetitosa.
Triturar los alimentos a gran velocidad.
Gran potencia para cocinar al vapor en poco tiempo.
Fácil manejo, tan sólo un interruptor para todo los procesos.
Usarlo con materiales de PP (polipropileno) que permiten altas temperaturas y con
plásticos especialmente formulados, que protegen a su bebe de agentes químicos
perjudiciales.
Fácil limpieza.
Doble protección de control de temperatura por constar de un termostato y de un
fusible.
Su gran depósito de agua de 230 cc/ 8 Fl.Oz. permite vapor durante 30 minutos, que es
tiempo suficiente para cocinar cualquier tipo o cantidad de comida.
Se presenta con una jarra para leche que le permite calentar leche o cualquier líquido.
Se presenta con un pie que permite la esterilización de biberones.
ANTES DE LA PRIMERA UTILIZACIÓN
•
•
•
Quite el embalaje y compruebe que no falta ningún accesorio y que ninguna parte del
aparato está defectuosa.
¡Lea detenidamente el manual de instrucciones!
Limpie la jarra de leche, bol de cocción y el bol de trituración, las tapas, y cuchillas de la
picadora con agua caliente y detergente y séquelos con cuidado.
50
Assembly page 50/80
TKG DG 1000 - 100116
Fax +32 2 359 95 50
•
•
Copies of the I/B. Please reproduce them without any
changes except under special instruction from Team
International BELGIUM. The pages must be reproduced
and folded in order to obtain a booklet A5 (+/- 148.5 mm
width x 210 mm height). When folding, make sure you
keep the good numbering when you turn the pages of
the I/B. Don’t change the page numbering. Keep the
language integrity.
Limpie el bloque motor con un paño suave húmedo.
Todos los elementos que entren en contacto con elementos de comida deben ser
limpiados antes y después de cada uso.
IMPORTANTES DIRECTRICES
•
•
•
•
•
•
•
•
•
•
Nunca pique comida caliente a 50°C o vierta líquidos o comidas jugosas en el bol.
Para prevenir dañar la cuchilla, nunca pique productos alimenticios demasiado duros
(nueces, guisantes secos, maíz, carne con huesos, azúcar, hielo, café etc.).
Nunca llene el bol completamente.
Para prevenir que el aparato se sobrecaliente, nunca se exceda de las dosis y tiempo
establecido en la tablas que se acompañan en este manual. Al final de cada utilización,
deje enfriar al menos durante 10 minutos.
Cuando pique grandes cantidades, hacer un pan en varios intervalos (vea la sección
“COMO TRITURAR / TROCEAR COMIDA”).
Espere hasta que la cuchilla haya parado antes de abrir la tapa.
Limpie todas las partes que entran en contacto con la comida después de cada uso.
Para hacer esto, siga los consejos de la sección de limpieza.
La cuchilla es muy afilada, por favor tenga cuidado.
No ponga el bol en el microondas.
Nunca sumerja el motor en agua o en cualquier otro líquido.
FUNCIONAMIENTO
LLENADO DE AGUA DE LA CALDERA
•
•
Desconecte el cable del enchufe principal.
Para abrir la tapa de la caldera, gírela en sentido contrario a las agujas del reloj hasta la
posición “
•
•
•
•
•
•
•
” y levántela (fig. a).
Compruebe que la caldera está vacía, girando su base arriba y abajo para comprobar
que no sale ningún resto de agua.
Si es necesario, limpie la caldera, a tal fin, ver las indicaciones del apartado “Limpieza de
la caldera”.
Use exclusivamente agua potable y compruebe en el apartado “Tiempos de vapor” el
volumen de agua que se recomienda.
Es recomendable utilizar agua purificada o destilada para reducir la cantidad de
impurezas que de otra manera se pueden quedar en el interior de la caldera.
Llene de agua la jarra medidora, al menos hasta las marcas señaladas (XX min. o YY ml).
Llene la caldera cuidadosamente (fig. a).
Cierre la tapa de la caldera girándola en sentido agujas del reloj a posición “ ” (fig. b).
51
Assembly page 51/80
TKG DG 1000 - 100116
Fax +32 2 359 95 50
•
•
•
•
Copies of the I/B. Please reproduce them without any
changes except under special instruction from Team
International BELGIUM. The pages must be reproduced
and folded in order to obtain a booklet A5 (+/- 148.5 mm
width x 210 mm height). When folding, make sure you
keep the good numbering when you turn the pages of
the I/B. Don’t change the page numbering. Keep the
language integrity.
ADVERTENCIA !
Por razones higiénicas, no use ningún otro líquido para llenar la caldera. Use
exclusivamente agua.
Nunca llene a rebosar la caldera. No debe sobrepasar los 230 ml.
Cierre siempre la tapa de la caldera firmemente, en sentido agujas de reloj en la posición
“ ”.
Siempre desconecte su aparato antes de llenar la caldera.
Compruebe siempre las siguientes instrucciones antes de poner en funcionamiento su
aparato:
•
•
•
•
•
•
Las cubiertas protectoras han sido quitadas de las cuchillas.
La caldera está llena de agua.
La tapa de la caldera está firmemente cerrada.
El interruptor está en posición OFF.
La jarra de triturado esta colocada de manera correcta a la base.
La tapa de esta jarra esta cerrada.
COMO COCINAR AL VAPOR
•
•
•
•
•
•
•
•
•
•
•
•
•
•
•
•
Ver la sección “Llenado de agua de la caldera”, y coloque la cantidad recomendada
de agua en el interior.
Coloque la jarra en la base y asegúrela firmemente, girándola en la dirección como se
aprecia en la figura c: asegúrese que las dos flechas ▲ y ▼ quedan alineadas.
Coloque la jarra de cocción en el interior de la jarra (fig. d).
Coloque los alimentos cortados a tacos o rodajas no mayores de 15 mm de espesor o de
15x15x15mm en el recipiente de cocción. No llene este recipiente excesivamente y evite
presionar la comida.
Coloque la tapa en el recipiente y cierre las pestañas (fig. e).
Asegúrese que el interruptor esta en posición “OFF”.
Conecte el cable al enchufe.
Coloque el interruptor en la posición “
”. La caldera empieza a funcionar y el piloto
permanece encendido con luz roja.
El vapor comenzará a llenar el recipiente tras unos minutos.
La caldera se parará automáticamente en el tiempo deseado (calculado de acuerdo a
la cantidad de agua utilizada), y el piloto rojo se apagará. Gire el interruptor a la posición
“OFF”. Si la caldera no se apagara automáticamente tras el tiempo deseado, coloque el
interruptor en posición “OFF”.
Importante: Si el interruptor no se coloca en posición “OFF”, la caldera podría volver a
ponerse en funcionamiento.
Deje el aparato enfriar de 3 a 5 minutos.
Separe el recipiente contenedor de la base (fig. f).
Abra la tapa. Atención ¡ Tenga precaución al abrir la tapa ya que el vapor puede
quemar.
Saque la comida del recipiente: la comida estará lista para ser consumida o para ser
triturada.
El agua de cocción del recipiente puede ser utilizada.
ADVERTENCIA ¡
•
Los recipientes, tapas y alimentos están calientes; tenga cuidado cuando los manipule
tras la cocción.
•
Nunca conecte la caldera sin asegurarse que el recipiente está colocado correctamente
en su posición.
52
Assembly page 52/80
TKG DG 1000 - 100116
Copies of the I/B. Please reproduce them without any
changes except under special instruction from Team
International BELGIUM. The pages must be reproduced
and folded in order to obtain a booklet A5 (+/- 148.5 mm
width x 210 mm height). When folding, make sure you
keep the good numbering when you turn the pages of
the I/B. Don’t change the page numbering. Keep the
language integrity.
Fax +32 2 359 95 50
•
•
•
•
•
Nunca conecte la caldera hasta que la llene con agua.
Tenga cuidado: el vapor sale a través del conducto del mismo y por los lados de la tapa
durante la función.
Limpie siempre la caldera y todos los elementos inmediatamente después de cada
utilización de cocción, si no va a triturar alimentos.
No abra ni quite la tapa de la caldera, ni añada agua cuando el aparato esté en
funcionamiento.
Espere siempre a que el aparato se haya enfriado antes de comenzar un nuevo proceso
de cocina.
COMO TRITURAR / TROCEAR COMIDA
•
•
•
•
•
•
•
•
•
•
•
•
Coloque el recipiente en la base (fig. c).
Saque las cubiertas protectoras.
Sujete la unidad de cuchillas con precaución e introdúzcalas en la base (fig. g).
Asegúrese que la coloca en posición correcta, hasta que llegue a fondo del recipiente.
Coloque los alimentos en el recipiente (fig. h).
Coloque la tapa y cierre las pestañas (fig. e).
Gire el interruptor y manténgalo en la posición “
” durante 15 segundos
aproximadamente, un piloto con luz azul permanecerá encendido durante la operación,
indicando que la trituradora está en funcionamiento.
Repita el ciclo de troceado si fuera necesario, teniendo en cuenta que se recomienda
esperar al menos 15 segundos entre cada ciclo.
Algunos restos de comida pueden quedar adheridos a las paredes del recipiente o a la
tapa, debe utilizar la espátula para quitarlos entre cada uno de los ciclos.
Desconecte siempre su aparato antes de cualquier manipulación que vaya a hacer en el
recipiente.
Saque el contenedor de la unidad base y quite la tapa.
Saque con precaución la unidad de cuchillas.
Extraiga los alimentos de la jarra utilizando la espátula.
CONSEJOS :
•
Compruebe siempre la temperatura de los alimentos antes de dar la comida a los bebés.
•
Se recomienda esperar al menos 15 segundos entre cada ciclo de triturado/troceado.
53
Assembly page 53/80
TKG DG 1000 - 100116
Copies of the I/B. Please reproduce them without any
changes except under special instruction from Team
International BELGIUM. The pages must be reproduced
and folded in order to obtain a booklet A5 (+/- 148.5 mm
width x 210 mm height). When folding, make sure you
keep the good numbering when you turn the pages of
the I/B. Don’t change the page numbering. Keep the
language integrity.
Fax +32 2 359 95 50
•
•
•
No utilice la función de triturado con el recipiente vacío.
No añada mucho líquido para triturar junto a los alimentos para evitar salpicaduras.
No triture o pique alimentos congelados, o comida con huesos o partes duras.
COMO CALENTAR O DESCONGELAR ALIMENTOS
•
•
•
Siga las instrucciones de “Como cocinar al vapor” para calentar o descongelar alimentos.
La información facilitada sobre el tiempo de cocción, es solamente para su referencia.
Este tiempo puede variar en función del peso y la temperatura de los alimentos.
Recomendamos llenar el deposito con 230 ml de agua, después comprobar el estado de
los alimentos después de 5 minutos para una cantidad `pequeña de comida, después
tras 10 minutos para cantidad media y tras 15 minutos para una gran cantidad. Pruebe la
comida utilizando una cuchara o un tenedor para comprobar el estado de cocción.
AVISO :
•
Nunca rebose la caldera, no la llene con más de 230 ml de agua.
•
Tenga precaución cuando abra la tapa ya que el vapor puede estar caliente.
•
El vapor sale a traves del conducto de vapor y por los bordes de la tapa durante el
proceso, tenga cuidado.
•
Preste atención cuando manipule el contenedor, la tapa y la comida, porque pueden estar
calientes y el vapor puede quemarle.
•
Compruebe siempre la temperatura de los alimentos antes de dar de comer a los bebes.
COMO CALENTAR LECHE O LIQUIDOS
•
•
•
•
•
•
•
•
Abra la tapa de la jarra de leche (fig. i).
Llénela con leche o cualquier líquido que desee (fig. i) y ciérrela con la tapa.
Siga las instrucciones de “Llenado de agua de la caldera”, llenándola con la cantidad de
agua recomendada para el tiempo de vapor deseado.
Coloque el recipiente en la base y asegúrelo firmemente girándolo en la dirección que
señala la figura C.
Coloque la jarra de leche dentro del recipiente.
Coloque la tapa y cierre las pestañas (fig. e).
Para el uso, repita las instrucciones referidas en el apartado “Como cocinar al vapor”.
Saque la jarra de leche, el contenido estará listo para ser bebido.
AVISO :
•
Los recipientes y tapas están calientes, tenga precaución cuando los manipule.
•
Compruebe la temperatura de la leche o líquidos, echando unas gotas en su muñeca
antes de alimentar a su bebé.
54
Assembly page 54/80
TKG DG 1000 - 100116
Fax +32 2 359 95 50
Copies of the I/B. Please reproduce them without any
changes except under special instruction from Team
International BELGIUM. The pages must be reproduced
and folded in order to obtain a booklet A5 (+/- 148.5 mm
width x 210 mm height). When folding, make sure you
keep the good numbering when you turn the pages of
the I/B. Don’t change the page numbering. Keep the
language integrity.
COMO ESTERILIZAR BIBERONES
•
•
•
•
•
•
•
Coloque 60 ml de agua en la caldera, para un tiempo de vapor del 8 minutos.
Coloque el recipiente en la base y asegúrelo firmemente, girándolo en la dirección que
muestra la figura C.
Introduzca el stand de biberones por el eje del recipiente (fig. j).
Coloque el biberón en el stand.
Coloque la tapa y cierre las pestañas (fig. e).
Para su uso, siga las instrucciones referidas en el apartado “Como cocinar al vapor”.
Una vez acabada la función, saque el biberón esterilizado con precaución.
AVISO: Los recipientes, biberones y tapas están calientes, tenga precaución cuando los
maneje.
TIEMPOS DE VAPOR
•
•
•
•
Los tiempos que a continuación se detallan son orientativos, y deben ser ajustados de
acuerdo a la cantidad de comida o temperatura deseada.
Los tiempos detallados deben considerarse como tiempos netos. Se recomienda añadir de
1 a 3 minutos para el total del proceso, ya que este es el tiempo que puede transcurrir para
que comience a generarse vapor.
Compruebe siempre que los alimentos están cocinados y que los líquidos tienen la
temperatura adecuada antes de alimentar a su bebe.
Llene el agua con el medidor y utilice las tablas siguientes para conocer las
recomendaciones de volumen de agua con el tiempo de vapor.
Para cocinar al vapor
Agua en caldera
40ml / 1.3 Fl. Oz.
70ml / 2.3 Fl. Oz.
110ml / 3.7 Fl. Oz.
140ml / 4.7 Fl. Oz.
180ml / 6 Fl. Oz.
230ml / 8 Fl. Oz.
Tiempo de vapor
5 min.
10 min.
15 min.
20 min.
25 min.
30 min.
Para vaporizar-calentar líquidos (en la jarra de leche)
El líquido se encuentra a temperatura ambiente
Cantidad de
Agua en caldera
Tiempo de vapor
leche/liquido
120ml / 4 Fl. Oz.
30ml / 1 Fl. Oz.
2 ½ min.
180ml / 6 Fl. Oz.
35ml / 1.2 Fl. Oz.
3 ½ min.
240ml / 8 Fl. Oz.
40ml / 1.4 Fl. Oz.
4 ½ min.
55
Assembly page 55/80
TKG DG 1000 - 100116
Fax +32 2 359 95 50
Copies of the I/B. Please reproduce them without any
changes except under special instruction from Team
International BELGIUM. The pages must be reproduced
and folded in order to obtain a booklet A5 (+/- 148.5 mm
width x 210 mm height). When folding, make sure you
keep the good numbering when you turn the pages of
the I/B. Don’t change the page numbering. Keep the
language integrity.
Para vaporizar-calentar liquido (en la jarra de leche)
El líquido se encuentra a temperatura de nevera (4ºC)
Cantidad de
Agua en caldera
Tiempo de vapor
leche/liquido
120ml / 4 Fl. Oz.
30ml / 1 Fl. Oz.
3 ½ min.
180ml / 6 Fl. Oz.
40ml / 1.4 Fl. Oz.
4 ½ min.
240ml / 8 Fl. Oz.
45ml / 1.6 Fl. Oz.
5 min.
Para esterilizar biberones
Agua en caldera
60ml / 2 Fl. Oz.
Guía para cocinar
Alimentos (100g)
Puerros
Espinacas
Calabacín
Carlotas
Coliflor
Judías verdes
Guisantes
Patatas
Nabos
Calabaza
Manzanas
Peras
Piña
Fresas
Pescado
Pollo
Cerdo
Vaca/Cordero
Tiempo de vapor
8 min.
Agua en caldera
Tiempo de vapor
70ml / 2 ½ Fl. Oz.
70ml / 2 ½ Fl. Oz.
110ml / 4 Fl. Oz.
140ml / 5 Fl. Oz.
140ml / 5 Fl. Oz.
140ml / 5 Fl. Oz.
140ml / 5 Fl. Oz.
140ml / 5 Fl. Oz.
140ml / 5 Fl. Oz.
140ml / 5 Fl. Oz.
70ml / 2 ½ Fl. Oz.
70ml / 2 ½ Fl. Oz.
70ml / 2 ½ Fl. Oz.
70ml / 2 ½ Fl. Oz.
70ml / 2 ½ Fl. Oz.
180ml / 6 Fl. Oz.
180ml / 6 Fl. Oz.
180ml / 6 Fl. Oz.
10 min.
10 min.
15 min.
20 min.
20 min.
20 min.
20 min.
20 min.
20 min.
20 min.
10 min.
10 min.
10 min.
10 min.
10 min.
25 min.
25 min.
25 min.
AVISO :
•
Compruebe siempre la temperatura de los alimentos antes de alimentar a su bebe.
•
Compruebe la temperatura de los líquidos/leche derramando unas gotas en la muñeca
antes de alimentar a su bebe.
•
Corte o trocee siempre los alimentos antes de cocinarlos con el robot.
•
Los tiempos de cocción que figuran en las tablas anteriores son estimativos. El tiempo de
cocción dependerá de la cantidad, temperatura y tipo de alimentos que Vd prepare.
LIMPIEZA
CUANDO PREPARE ALIMENTOS CON COLOR (zanahorias por ejemplo), ES POSIBLE QUE
ALGUNAS PARTES CAMBIEN DE COLOR. SIGA LOS CONSEJOS QUE A CONTINUACION SE
DETALLAN – ESTO NO AFECTARA A LA IMAGEN DE SU PRODUCTO.
Ninguna parte de su aparato (bloque motor, recipiente, accesorios) tiene dispositivo de
limpieza.
56
Assembly page 56/80
TKG DG 1000 - 100116
Fax +32 2 359 95 50
Copies of the I/B. Please reproduce them without any
changes except under special instruction from Team
International BELGIUM. The pages must be reproduced
and folded in order to obtain a booklet A5 (+/- 148.5 mm
width x 210 mm height). When folding, make sure you
keep the good numbering when you turn the pages of
the I/B. Don’t change the page numbering. Keep the
language integrity.
LIMPIEZA DE LA UNIDAD BASE
•
•
•
•
Desconecte su aparato y asegúrese que está frío antes de limpiarlo.
No sumerja la base en agua o cualquier otro liquido.
Limpie la unidad base con un paño ligeramente humedecido.
No intente limpiarla con productos abrasivos ya que podría resultar dañada.
AVISO :
•
Antes de limpiarla, asegúrese que el cable está desconectado y que el aparato está frío.
LIMPIEZA DE LA UNIDAD DE CUCHILLAS
•
•
•
•
•
Saque la unidad del recipiente.
Enjuaguela cuidadosamente, quitando cualquier residuo de comida que tenga.
Lávelas con agua jabonosa o bien utilizando un detergente neutro.
Aclárelas y séquelas inmediatamente.
Coloque las cubiertas protectoras y mantenga esta unidad fuera del alcance de los niños.
AVISO :
•
Maneje con precaución este elemento ya que las cuchillas están muy afiladas.
•
Coloque siempre las cubiertas protectoras cuando no la utilice.
•
Nunca utilice detergentes con lejías ya que éstos pueden dañar las cuchillas.
•
No ponga las cuchillas en el lavavajillas.
LIMPIEZA DE LA CALDERA
•
•
•
•
•
•
•
•
•
Antes de la limpieza, asegúrese que el aparato está desconectado y frío.
Abra la tapa girándola en sentido contrario a las agujas del reloj y levántela (fig. a).
Compruebe que la caldera está vacía, girándola de arriba abajo y asegurándose que no
sale agua (fig. k).
Llene la jarra medidora con 230 ml de agua.
Introduzca esta cantidad de agua en la caldera (fig. a).
Cierre la tapa de la caldera girándola en sentido de las agujas del reloj.
Remueva la unidad base varias veces en distintas direcciones.
Abra nuevamente la tapa y vacíe la caldera sobre una pila o fregadero.
Repita estos pasos cuantas veces sea necesario.
RUTINA DE MANTENIMIENTO DE LA CALDERA
•
Los residuos, debido a su uso normal, quedan depositados en el interior de la caldera. Es
conveniente utilizar agua previamente hervida o agua filtrada en su aparato para evitar
residuos y la necesidad de descalcificar.
57
Assembly page 57/80
TKG DG 1000 - 100116
Fax +32 2 359 95 50
•
•
•
Copies of the I/B. Please reproduce them without any
changes except under special instruction from Team
International BELGIUM. The pages must be reproduced
and folded in order to obtain a booklet A5 (+/- 148.5 mm
width x 210 mm height). When folding, make sure you
keep the good numbering when you turn the pages of
the I/B. Don’t change the page numbering. Keep the
language integrity.
Como norma general, los residuos pueden ser eliminados utilizando una solución de vinagre
blanco. Aproximadamente 230 ml de vinagre (en proporción 1:4, lo que significa 1 parte de
vinagre por cada 4 partes de agua); deberá introducirse esta solución en la caldera y
dejarla por 2 horas. Tras este tiempo, vaciar la caldera, enjuagar y aclarar y secar.
Seguidamente hacer un ciclo de vapor, utilizando 230 ml de agua, con el contenedor
vacío.
Este proceso de limpieza se recomienda seguir de manera regular, al menos una vez cada
2 semanas, si se utiliza agua corriente.
AVISO : Asegúrese que su aparato está desconectado y frío, antes de proceder a su limpieza.
LIMPIEZA DE LAS PARTES PLASTICAS
•
•
•
•
Tras cada utilización, las partes plásticas de su aparato deben ser limpiadas.
Enjuáguelas (excepto la unidad base) y quite cuidadosamente cualquier resto de comida.
Lávelas a mano con un poco de detergente suave o neutro.
Aclárelas y séquelas inmediatamente.
LIMPIEZA DEL CONTENEDOR DE ALIMENTOS
•
•
•
•
•
Enjuáguelo cuidadosamente y quite cualquier resto de comida que pueda contener.
Asegúrese que el orificio de salida del vapor (l) no tenga ningún residuo adherido, utilizando
para esto el cepillo.
Lave el recipiente (m) a mano con una pequeña dosis de detergente suave o neutro.
Aclare y seque inmediatamente.
Asegúrese que no hay residuos en el interior de la cámara de vapor. Repita los pasos
anteriores si fuera necesario.
PROTECCIÓN DEL MEDIO AMBIENTE – DIRECTIVA 2002/96/CE
Para poder preservar nuestro medio ambiente y proteger la salud humana, los residuos
eléctricos y equipos electrónicos deberían ser destruidos de acuerdo con unas normas
especificas con la implicación de ambos proveedores y consumidores. Por esta razón, como
indica el símbolo
en la placa de datos técnicos, su aparato no debería ser tirado en un
contenedor municipal sino que debería ser devuelto a la tienda, o dejado en un punto de
recolección para ser reciclado o usado para otras aplicaciones conforme a la directiva.
58
Assembly page 58/80
TKG DG 1000 - 100116
Fax +32 2 359 95 50
Copies of the I/B. Please reproduce them without any
changes except under special instruction from Team
International BELGIUM. The pages must be reproduced
and folded in order to obtain a booklet A5 (+/- 148.5 mm
width x 210 mm height). When folding, make sure you
keep the good numbering when you turn the pages of
the I/B. Don’t change the page numbering. Keep the
language integrity.
IMPORTANTES CONSELHOS DE SEGURANÇA
Antes de utilizar o aparelho leia com sentido de responsabilidade as instruções de
funcionamento e respeite sempre as orientações de segurança e de utilização dadas no
manual das instruções.
Importante: As pessoas (incluindo as crianças) que não estão habilitadas para utilizar com
segurança o aparelho, seja por incapacidade física, sensorial ou mental ou ausência de
experiência ou conhecimentos, nunca devem utilizar o aparelho a não ser que estejam a ser
vigiados por uma pessoa responsavel pela sua segurança ou tenham recebido preparação
para a utilização do aparelho de forma correcta e em segurança.
Vigilância apertada deve ser feita sobre as crianças para que estas não façam do aparelho
um brinquedo.
Verifique que existe correspondência entre a voltagem da corrente eléctrica que vai
utilizar e a que está indicada na placa sinalética do aparelho.
Na utilização do aparelho nunca o abandone e mantenha-o sempre vigiado.
Verifique com frequência se o cabo da alimentação apresenta sinais de danos. Nunca
use o aparelho se este apresentar sinais de danos no cabo da alimentação ou no
próprio aparelho. O cabo da alimentação danificado tem de ser substituido por pessoas
credenciadas(*). Mantenha vigilância apertada sobre o cabo da alimentação.
Use o aparelho apenas para fins domésticos e de acordo com as instruções deste
manual. O aparelho não foi concebido para usos iprofissionais. Não use o aparelho ao ar
livre.
Nunca mergulhe o aparelho em água ou em outros líquidos seja po que motivo for.
Nunca coloque o aparelho na máquina de lavar a loiça.
Nunca utilize o aparelho junto de fontes de calor.
Utilize sempre o aparelho bem seco e assente em superficies planas e secas.
Retire a ficha do cabo da alimentação da tomada eléctrica antes de o limpar, mudar
acessórios ou o mudar de local. Nunca abandone o aparelho com a ficha do cabo da
alimentação colocada na tomada eléctrica. Mantenha o aparelho vigiado.
Toda e qualquer reparação tem de ser realizada por pessoa credenciada(*). Nunca use o
aparelho no exterior mas sempre em locais secos.
Nunca utilize acessórios que não tenham sido recomendados pelo fabricante ou pessoas
credenciadas por razões de segurança. Evite eventuais danos no aparelho.
Nunca movimente o aparelho de um lado para o outro pegando-o pelo cabo da
alimentação. Verifique sempre que o cabo da alimentação não vai ficar preso durante a
utilização. Não enrole o cabo da alimentação à volta do corpo do aparelho nem o
dobre.
Não deixe o cabo da alimentaçãor à beira da mesa ou do banca da cozinha, ou que
toque em superfícies quentes ou sirva de chicote em brincadeira.
Use o aparelho apenas na preparação dos alimentos indicados neste manual.
O aparelho não pode funcionar de forma continua. O aparelho não pode ser utilizado
como aparelho profissional. Durante a utilização do aparelho faça paragens constantes
conforme as instruções deste manual.
É absolutamente obrigatório manter sempre o aparelho limpo e acima de tudo antes de
o utilizar na preparação dos alimentos. Leia neste manual "LIMPEZA".
CUIDADO: as lâminas da picadora são muito afiadas e cortantes pelo que deve ter muito
cuidado quando lhes tocar para limpar, esvaziar o recipiente que as contém, retirar,
colocar ou guardar. Ao tocar nas lâminas faça-o com muita prudência.
Confirme sempre que as mãos/ou qualquer utensílio não estão no recipiente quando vai
utilizar o aparelho de forma a evitar ferimentos indesejáveis. Mais, nunca tente parar as
59
Assembly page 59/80
TKG DG 1000 - 100116
Fax +32 2 359 95 50
Copies of the I/B. Please reproduce them without any
changes except under special instruction from Team
International BELGIUM. The pages must be reproduced
and folded in order to obtain a booklet A5 (+/- 148.5 mm
width x 210 mm height). When folding, make sure you
keep the good numbering when you turn the pages of
the I/B. Don’t change the page numbering. Keep the
language integrity.
lâminas seja por que motivo for. Retire sempre a ficha do cabo da alimentação da
tomada eléctrica e deixe que as lâmina deixe de girar.
Verifique que o acessório está bem colocado e fixo ao corpo do motor antes de utilizar o
aparelho.
Pode utilizar uma escova (para limpar as lâminas) mas sempre com a ficha do cabo da
alimentação retirada da tomada eléctrica.
Nunca coloque no aparelho líquidos a ferver. Os danos causados no aparelho ou nos
utilizadores não estão cobertos pela garantia.
O aparelho foi concebido para a preparação de pequenas porções de alimentos que se
devem consumir rapidamente. O aparelho não foi concebido para a preparação de
grandes quantidades de alimentos de uma só vez.
Nunca toque na lâmina com o aparelho a funcionar ou com a ficha do cabo da
alimentação colocada na tomada eléctrica. Nunca tente parar o movimento das
lâminas seja por que motivo for.
Na utilização do aparelho faça-o com tempos curtos. Deste modo obterá melhores
picados, misturas, etc. e dará maior longevidade ao motor. Leia por favor este manual
até ao fim onde encontrará alguns conselhos para picar certos alimentos.
A picadora foi concebida para ser exclusivamente utilizada tal como é apresentada
(taça, tampa e lâmina em bom estado) por razões de segurança. Não tente substituir
uma das peças por outras. Contacte os serviços de assistência técnica credenciados ou
pessoas credenciadas.
Antes de limpar ou guardar o aparelho, deixe-o arrefecer.
O aparelho apenas deve ser utilizado na preparação de alimentos adequados ao
mesmo. O tamanho dos alimentos deve ser apropriado às dimensões do aparelho.
Não deixe que o cabo da alimentação toque nas partes quentes do aparelho.
Com o aparelho em funcionamento as superfícies ficam com temperaturas elevadas
pelo que não pode tocar nestas partes. Utilize as pegas na manipulação do aparelho.
Seja prudente ao mudar o aparelho para outro local com alimentos quentes, com água ou
com outros liquidos. É totalmente desaconselhado mudar o aparelho enquando não
estiver totalmente frio.
O cabo de alimentação é curto para evitar riscos de acidentes (quedas caso se tropece
no cabo,…) mas poderá usar uma extensão. Evite riscos certificando-se que a extensão
não está presa ou que não tem fio terra.
O aparelho nunca deve ser ligado mediante um temporizador externo ou outro sistema de
comando a distância separado.
(*) Pessoas credenciadas/serviços de assistência técnicos credenciados: serviços prestados
pelo fabricante, importador, distribuidor ou pessoas habilitadas e credenciadas para reparar
este tipo de aparelhos de forma a iliminarem riscos e salvaguardarem a segurança na
utilização dos aparelhos eléctricos. Contacte sempre com serviços e pessoas credenciadas.
UTILIZAÇÃO/FUNCIONAMENTO
•
•
Utilize o aparelho unicamente para os fins domésticos e respeite sempre as informações
dadas no manual das instruções sobre a utilização e o funcionamento do aparelho.
Este aparelho foi concebido exclusivamente para o uso doméstico incluindo:
Espaços reservados aos empregados das lojas, escritórios e outras profissões.
Habitação rural.
Clientes dos hoteis, apartamentos de férias, motel e residenciais.
Também em refeições nos quartos ou no serviço de pequenos almoços.
60
Assembly page 60/80
TKG DG 1000 - 100116
Fax +32 2 359 95 50
Copies of the I/B. Please reproduce them without any
changes except under special instruction from Team
International BELGIUM. The pages must be reproduced
and folded in order to obtain a booklet A5 (+/- 148.5 mm
width x 210 mm height). When folding, make sure you
keep the good numbering when you turn the pages of
the I/B. Don’t change the page numbering. Keep the
language integrity.
VANTAGENS DO APARELHO
O seu Robot de Cozinha é um aparelho multi-funcional destinado a fazer comida. Pode
cozinhar comida a vapor, picar alimentos, aquecer alimentos, leite e líquidos, assim como
esterilizar chupetas. Oferece as seguintes especificações:
•
•
•
•
•
•
•
•
•
•
Ao cozinhar a vapor, oferece ao seu bebê comida saudável de uma maneira rápida e
saborosa.
De uma forma extremamente rápida tritura os alimentos em pedaços muito finos.
Tem uma potência para cozinhar a vapor bastante elevada, que lhe permite cozinhar
em muito pouco tempo.
O modo de operar com o aparelho é muito simples, apenas com um botão de
interruptor para todas as operações.
Como trabalha com temperaturas muito elevadas utilizam-se materiais seguros como PP
(polipropileno) e outros plásticos BPA (bisfenol A) especialmente desenvolvidos para
proteger o seu bebê de substancias químicas que possam ser nocivas.
É fácil de limpar.
Tem uma dupla proteção de curto-circuito, protegido por um termostato e por um fusível
de temperatura.
Apresenta uma capacidade 230cc / 8Fl.Oz. da qual o recipiente de água proporciona
30 minutos de vapor, tempo suficiente para processar qualquer tipo de alimento e
quantidade.
O aparelho vem com um recipiente para leite, pode utilizar para aquecer leite ou
qualquer outro liquido.
O aparelho vem com um suporte para esterilizar chupetas.
ANTES DA PRIMEIRA UTILIZAÇÃO
•
•
•
•
Retire todas as embalagens e protecções do aparelho. Verifique que os acessórios estão
todos e em boas condições de funcionamento.
Leia este manual cuidadosamente!
Lave o recipiente para leite, o recipiente para cozinhar, a taça para triturar, as tampas e
a lâmina em sabonária tépida e seque tudo muito bem. Cuidado ao manusear as
lâminas muito cortantes para não se ferir.
Limpe o corpo do motor da picadora com um pano humedecido.
IMPORTANTE
•
•
•
•
•
•
•
Nunca pique na taça alimentos com temperaturas acima dos 50°C ou líquidos ou
alimentos suculentos.
Para evitar danos na lâmina de corte, nunca pique alimentos pesados como (noz
moscada, ervilhas ou feijões secos, cereais, carne com osso, açucar, gelo, grãos de café
etc.).
Nunca encha a taça.
Para evitar o sobre aquecimento do aparelho na utilização, nunca ultrapasse a
quantidade de alimentos a picar nem os tempos indicados nas instruções deste manual
para o funcionamento da picadora. No fim de cada utilização, deixe arrefecer a
picadora no mínimo 10 minutos.
Quando picar grandes quantidades de alimentos, faça-o com paragens sucessivas (veja
o ponto “PARA PICAR OS ALIMENTOS”).
Antes de abrir a tampa da picadora, deixe que a lâmina pare de girar completamente.
No fim de cada utilização da picadora, limpe todos os acessórios que estão em contacto
directo com os alimentos. Siga as instruções indicadas no ponto LIMPEZA.
61
Assembly page 61/80
TKG DG 1000 - 100116
Fax +32 2 359 95 50
•
•
•
Copies of the I/B. Please reproduce them without any
changes except under special instruction from Team
International BELGIUM. The pages must be reproduced
and folded in order to obtain a booklet A5 (+/- 148.5 mm
width x 210 mm height). When folding, make sure you
keep the good numbering when you turn the pages of
the I/B. Don’t change the page numbering. Keep the
language integrity.
A lâmina de corte é muito afiada e portante bastante cortante. Tenha cuidado ao tocarlhe para que não se corte.
Nunca ponha a taça da picadora no micro ondas.
Nunca mergulhe o bloco do motor em água ou outros líquidos.
UTILIZAÇÂO
INTRODUZIR ÁGUA NA CALDEIRA
•
•
Retire a ficha do cabo de alimentação da tomada eléctrica.
Retire a tampa da caldeira, localizada no corpo do motor, girando-a no sentido
contrario aos ponteiros do relógio, fixando-a na posição do simbolo “
seguida levante-a (fig. a).
•
•
•
•
•
•
•
•
•
•
•
” e em
Comprove que a caldeira está vazia, colocando-a de pernas para o ar e verificando
que não deixa cair água.
Se necessário limpe a caldeira, consulte a informação facilitada no apartado “Limpeza
da caldeira”.
Utilize apenas água potável e consulte o “Tempo de Vapor” para obter e introduzir
dentro da caldeira apenas o volume de água que necessita.
Recomendamos que utilizasse água purificada ou destilada para minimizar a quantidade
de calcário que possa acumular-se dentro da caldeira.
Encha o copo graduado de água respeitando as marcas dos limites máximos e mínimos
(XX min. e YY ml).
Introduza a água na caldeira com cuidado (fig. a).
Coloque a tampa da caldeira, girando-a no sentido dos ponteiros do relógio fixando-a
na posição “ ” (fig. b).
Atenção!
Por motivos de higiene, não utilize outros líquidos para encher a caldeira. Apenas água.
Nunca passe o limite máximo da capacidade de água, não introduza mais que 230ml.
Coloque sempre a tampa da caldeira na posição correta, girando-a no sentido dos
ponteiros do relógio fixando-a na posição “ ”.
Retire sempre a ficha do cabo de alimentação da tomada elétrica antes de encher a
caldeira com água.
Antes de utilizar o aparelho verifique os seguintes pontos
•
•
•
Que retirou as proteções das lâminas de corte.
Que introduziu água na caldeira.
Que a tampa da caldeira está na posição correta.
62
Assembly page 62/80
TKG DG 1000 - 100116
Fax +32 2 359 95 50
•
•
•
Copies of the I/B. Please reproduce them without any
changes except under special instruction from Team
International BELGIUM. The pages must be reproduced
and folded in order to obtain a booklet A5 (+/- 148.5 mm
width x 210 mm height). When folding, make sure you
keep the good numbering when you turn the pages of
the I/B. Don’t change the page numbering. Keep the
language integrity.
Que o botão interruptor está na posição OFF.
Que o recipiente de mistura está firmemente colocado no corpo do motor.
Que a tampa do recipiente de mistura está bloqueada.
PARA COZINHAR ALIMENTOS A VAPOR
•
•
•
•
•
•
•
•
•
•
•
•
•
•
•
•
•
Leia o apartado de “Introduzir água na caldeira” e introduza na caldeira a quantidade
correta de água.
Coloque o recipiente de mistura no corpo do motor e fixe-o firmemente, girando-o na
direção correta como indicado na fig. c; verifique que as duas setas ▲ e ▼ estão
alinhadas.
Coloque o recipiente de cozinhar dentro do recipiente de mistura (fig. d).
Coloque os alimentos dentro do recipiente de cozedura, cortados em cubos ou fatias de
modo a que o seu tamanho não seja superior a 15 mm de espessura ou 15x15x15mm.
Não encha o recipiente demasiado, evite criar pressão entre os alimentos.
Coloque a tampa e bloqueie-a através dos clipes laterais.
Comprove que o botão interruptor do aparelho está na posição “OFF”.
Coloque a ficha do cabo de alimentação do aparelho na tomada elétrica.
Coloque o botão interruptor na posição “
”, e a caldeira começa a funcionar,
acender-se-á a luz indicadora vermelha.
Em poucos minutos, o vapor começa a subir e a encher o recipiente.
A caldeira pára de funcionar automaticamente, no tempo desejado (calculado de
acordo com a quantidade de água utilizada) e a luz indicadora vermelha apagar-se-á.
Coloque o interruptor na posição “OFF”. Se a caldeira não parar automaticamente
depois do tempo desejado, coloque o botão interruptor na posição “OFF”.
Importante: se o botão interruptor não for colocado na posição “OFF” a caldeira poderá
reativar-se.
Deixe o aparelho arrefecer 3 a 5 minutos, se necessário.
Retire o recipiente de mistura do corpo do motor (fig. f).
Abra a tampa. Atenção! Tenha cuidado quando abrir a tampa porque o vapor queima!
Retire o recipiente da comida: esta está pronta para comer o para misturar.
A água utilizada para cozinhar, depositada no recipiente de mistura pode deitar-se fora.
Atenção
Os recipientes, a tampa e a comida estão quentes; tenha cuidado quando lhes tocar
depois de cozinhados.
63
Assembly page 63/80
TKG DG 1000 - 100116
Fax +32 2 359 95 50
•
•
•
•
•
•
Copies of the I/B. Please reproduce them without any
changes except under special instruction from Team
International BELGIUM. The pages must be reproduced
and folded in order to obtain a booklet A5 (+/- 148.5 mm
width x 210 mm height). When folding, make sure you
keep the good numbering when you turn the pages of
the I/B. Don’t change the page numbering. Keep the
language integrity.
Nunca ligue a caldeira antes de ter colocado recipiente de mistura na sua posição
correta.
Nunca acenda a caldeira antes de a ter enchido com água.
Atenção: o vapor quente sai do orifício de saída do vapor assim como do rebordo da
tampa durante o processo de cozedura a vapor.
Imediatamente depois de cada cozinhado, deve limpar a caldeira e todos os acessórios,
se não necessitar utilizá-los novamente.
Não desbloqueie nem retire a tampa da caldeira, e não adicione água na caldeira
enquanto o aparelho estiver em uso.
Espere sempre que o aparelho arrefeça, antes de iniciar outro cozinhado a vapor.
PARA PICAR OS ALIMENTOS
•
•
•
•
Coloque o recipiente de mistura no corpo do motor (fig. c).
Retire as proteções das laminas do acessório das lâminas de corte.
Segure com cuidado o acessório e coloque-o sobre o eixo do recipiente (fig. g).
Comprove que o acessório de corte está corretamente colocado na posição certa,
deve empurrá-lo por todo o eixo do recipiente até sentir o final deste.
Coloque os alimentos que deseja picar no recipiente (fig. h).
•
Coloque a tampa e bloqueie os clipes laterais de segurança (fig. e).
•
Gire o botão interruptor e bloqueie-o na posição “
” durante aproximadamente 15
segundos, a luz azul acender-se-á durante o processo, indicando que a picadora está
em funcionamento.
Repita o processo de picar se for necessário, ressaltando que é recomendável esperar
pelo menos 15 segundos entre cada ciclo de triturar.
Algum alimento pode ficar nas paredes da picadora ou na tampa, pode usar uma
espátula para retirar esses pedaços de comida entre cada ciclo de corte.
Desligue sempre o aparelho antes de qualquer operação com a picadora.
Retire o recipiente de picar do corpo do motor e remova-lhe a tampa.
Com prodência, retire o acessório das lâminas de corte.
Retire a comida do recipiente com a ajuda de uma espátula.
•
•
•
•
•
•
•
•
•
•
Atenção
Verifique sempre a temperatura da comida antes de dá-la ao seu bebê.
Recomendamos que aguardasse aproximadamente 15 segundos entre cada ciclo de
corte.
Não acione picadora com o recipiente vazio.
Não adicione demasiado liquido quando picar os alimentos, a fim de evitar salpicos.
64
Assembly page 64/80
TKG DG 1000 - 100116
Fax +32 2 359 95 50
•
Copies of the I/B. Please reproduce them without any
changes except under special instruction from Team
International BELGIUM. The pages must be reproduced
and folded in order to obtain a booklet A5 (+/- 148.5 mm
width x 210 mm height). When folding, make sure you
keep the good numbering when you turn the pages of
the I/B. Don’t change the page numbering. Keep the
language integrity.
Não tente triturar nem cortar comida congelada, nem comida com ossos ou com partes
duras.
PARA AQUECER E DESCONGELAR OS ALIMENTOS
•
•
•
•
•
•
•
Siga as instruções de “Para cozinhar alimentos a vapor” para aquecer e descongelar os
alimentos.
É muito importante que veja o tempo que necessita para a cozedura a vapor – é uma
referência. O tempo de cozer a vapor depende do peso e da temperatura a que estão
os alimentos.
Recomendamos que enchesse a caldeira com 230 ml de água, e passados 5 minutos
verificasse o estado da comida, de uma pequena quantidade, passados 10 minutos
verificasse o estado de uma porção maior, e passados 15 minutos de toda a comida.
Deve provar a comida utilizando um garfo ou uma colher, a fim de verificar a
temperatura e o nível de cozimento dos alimentos.
Atenção
Nunca deve exceder a capacidade da caldeira; não deve introduzir mais que 230 ml de
água na caldeira.
Tenha cuidado quando abrir a tampa, o vapor queima.
Atenção: o vapor quente sai do orifício do vapor assim como do rebordo da tampa
durante o processo de cozedura a vapor.
Tenha em atenção quando manusear os recipientes, a tampa e os alimentos porque
estão muito quentes e o vapor pode queimar.
PARA AQUECER LEITE E OUTROS LIQUIDOS
•
•
•
•
•
•
•
•
•
Abra a tampa do recipiente do leite (fig. i).
Coloque o leite ou o liquido que pretende aquecer no recipiente (fig. i) e feche a tampa.
Siga as instruções do apartado “Introduzir água na caldeira”, colocando a quantidade
de água necessária para o tempo de cozer a vapor recomendado.
Coloque o recipiente de mistura no corpo do motor e coloque-o corretamente girando-o
no sentido indicado na fig. c.
Coloque a tampa e bloqueie-a com os clipes laterais (fig. e).
Para continuar, siga os passos indicados no apartado “Para cozinhar alimentos a vapor”.
Retire o recipiente do leite; e o liquido está pronto para a servir.
Atenção
Os recipientes, assim como a tampa estão quentes, tenha cuidado ao manuseá-los.
Verifique a temperatura do leite ou dos líquidos no seu pulso antes de dá-los a provar ao
seu bebê.
65
Assembly page 65/80
TKG DG 1000 - 100116
Fax +32 2 359 95 50
Copies of the I/B. Please reproduce them without any
changes except under special instruction from Team
International BELGIUM. The pages must be reproduced
and folded in order to obtain a booklet A5 (+/- 148.5 mm
width x 210 mm height). When folding, make sure you
keep the good numbering when you turn the pages of
the I/B. Don’t change the page numbering. Keep the
language integrity.
PARA UTILIZAR O ESTERILIZADOR DE CHUPETAS
•
•
•
•
•
•
•
Introduza 60 ml de água na caldeira para 8 minutos de esterilização.
Coloque o recipiente de mistura no corpo do motor e fixe-a firmemente girando-a na
direção indicada na figura c.
Coloque o suporte das chupetas na parte superior do eixo (fig. j).
Coloque as chupetas no suporte.
Coloque a tampa do recipiente e bloqueie-a com os clipes laterais (fig. e).
Para continuar, siga os passos indicados no apartado “Para cozinhar alimentos a vapor”.
Retire com cuidado o esterilizador de chupetas.
Atenção! O recipiente, as chupetas e a tampa estão quentes, tenha cuidado ao manuseá-los.
TEMPOS DE COZER A VAPOR
•
•
•
•
Os tempos para cozer a vapor, indicados abaixo são apenas uma referência e devem
ser ajustados de acordo com a quantidade de comida ou a temperatura desejada.
Os tempos indicados estão mencionados em tempo “neto”. Acrescente-lhes 1 a 3
minutos na totalidade do processo, deve necessitar de 1 a 3 minutos extra de vapor para
o inicio do processo.
Verifique sempre os alimentos depois de cozinhados a vapor, assim como as bebidas,
verificando se estão na temperatura desejada antes de servi-las ao seu bebê.
Utilize um medidor de água para encher a caldeira e use as tabelas abaixo para obter o
volume de água e os tempos necessários para o processo de vapor:
Para cozinhar a vapor
Água na caldeira
40 ml / 1.3 Fl. Oz.
70 ml / 2.3 Fl. Oz.
110 ml / 3.7 Fl. Oz.
140 ml / 4.7 Fl. Oz.
180 ml / 6 Fl. Oz.
230 ml / 8 Fl. Oz.
Tempo de vapor
5 min.
10 min.
15 min.
20 min.
25 min.
30 min.
Para aquecer líquidos (no recipiente do leite)
Liquido á temperatura ambiente
Quantidade de
Água na caldeira
leite/liquido
120 ml / 4 Fl. Oz.
30 ml / 1 Fl. Oz.
180 ml / 6 Fl. Oz.
35 ml / 1.2 Fl. Oz.
240 ml / 8 Fl. Oz.
40 ml / 1.4 Fl. Oz.
Tempo de vapor
2 ½ min.
3 ½ min.
4 ½ min.
Para aquecer líquidos (no recipiente do leite)
Liquido á temperatura do frigorifico (4ºC)
Quantidade de
Água na caldeira
leite/liquido
120 ml / 4 Fl. Oz.
30 ml / 1 Fl. Oz.
180 ml / 6 Fl. Oz.
40 ml / 1.4 Fl. Oz.
240 ml / 8 Fl. Oz.
45 ml / 1.6 Fl. Oz.
Para esterilizar chupetas
Água na caldeira
60 ml / 2 Fl. Oz.
Tempo de vapor
3 ½ min.
4 ½ min.
5 min.
Tempo de vapor
8 min.
66
Assembly page 66/80
TKG DG 1000 - 100116
Fax +32 2 359 95 50
Copies of the I/B. Please reproduce them without any
changes except under special instruction from Team
International BELGIUM. The pages must be reproduced
and folded in order to obtain a booklet A5 (+/- 148.5 mm
width x 210 mm height). When folding, make sure you
keep the good numbering when you turn the pages of
the I/B. Don’t change the page numbering. Keep the
language integrity.
Guia de alimentos cozinhados
Alimento (100g)
Água na caldeira
Alho-francês
Espinafres
Courgette
Cenouras
Couve-flor
Feijão verde
Ervilhas
Batatas
Nabos
Abóbora
Maçã
Pêra
Ananás
Morango
Peixe
Frango
Porco
Carne de porco
•
•
•
•
Tempo de vapor
70 ml / 2 ½ Fl. Oz.
70 ml / 2 ½ Fl. Oz.
110 ml / 4 Fl. Oz.
140 ml / 5 Fl. Oz.
140 ml / 5 Fl. Oz.
140 ml / 5 Fl. Oz.
140 ml / 5 Fl. Oz.
140 ml / 5 Fl. Oz.
140 ml / 5 Fl. Oz.
140 ml / 5 Fl. Oz.
70 ml / 2 ½ Fl. Oz.
70 ml / 2 ½ Fl. Oz.
70 ml / 2 ½ Fl. Oz.
70 ml / 2 ½ Fl. Oz.
70 ml / 2 ½ Fl. Oz.
180 ml / 6 Fl. Oz.
180 ml / 6 Fl. Oz.
180 ml / 6 Fl. Oz.
10 min.
10 min.
15 min.
20 min.
20 min.
20 min.
20 min.
20 min.
20 min.
20 min.
10 min.
10 min.
10 min.
10 min.
10 min.
25 min.
25 min.
25 min.
Atenção!
Verifique sempre a temperatura dos alimentos antes de dá-las ao seu bebê.
Prove a temperatura do leite/líquidos por aspiração no seu pulso antes de dá-lo ao seu
bebê.
Corte sempre os alimentos em cubos antes de colocá-los no Robot de cozinha.
Os tempos de cozimento a vapor indicados nas tabelas são apenas uma referência. O
tempo de cozedura a vapor depende da quantidade, temperatura e tipo de alimento
que deseja preparar.
LIMPEZA
QUANDO PREPARA ALIMENTOS TAIS COMO CENOURAS ALGUMAS PARTES DO APARELHO
FICAM COLORIDAS. SIGA AS INSTRUÇÕES DOS CUIDADOS INDICADOS ABAIXO - TAL NÃO
AFECTA O BOM FUNCIONAMENTO DO APARELHO.
Não introduza nenhuma parte do aparelho (corpo do motor, recipiente de mistura,
acessórios) na máquina de lavar.
Limpar o corpo do motor
•
Desligue a ficha do cabo de alimentação da tomada elétrica, e verifique que o
aparelho arrefeceu antes de limpá-lo.
•
Não imersa o corpo do motor em água ou qualquer outro liquido.
•
Limpe o corpo do motor apenas com um pano ligeiramente úmido.
•
Não experimente limpar o corpo do motor com produtos abrasivos nem solventes, pode
danificar o aparelho.
•
Atenção!
Deve desligar o cabo de alimentação da ficha da tomada de corrente elétrica, e
verificar que o aparelho arrefeceu antes de limpá-lo.
67
Assembly page 67/80
TKG DG 1000 - 100116
Fax +32 2 359 95 50
Copies of the I/B. Please reproduce them without any
changes except under special instruction from Team
International BELGIUM. The pages must be reproduced
and folded in order to obtain a booklet A5 (+/- 148.5 mm
width x 210 mm height). When folding, make sure you
keep the good numbering when you turn the pages of
the I/B. Don’t change the page numbering. Keep the
language integrity.
Limpar o acessório das lâminas de corte
•
Retire o acessório do recipiente.
•
Lave-o bem e retire os restos dos alimentos.
•
Limpe-o com água ensaboada ou com um detergente neutro.
•
Lave-o bem e seque-o imediatamente.
•
Coloque as proteções nas lâminas e mantenha o acessório das laminas de corte longe
do alcance das crianças.
•
•
•
•
Atenção!
Manuseie as laminas e o acessório destas com muito cuidado, são cortantes.
Coloque sempre as proteções nas laminas quando não está perto do objeto.
Não utilize nunca alvejantes ou detergentes á base de cloro, podem danificar as lâminas.
Não coloque as lâminas na máquina de lavar.
Limpar a caldeira (após cada operação)
•
Desligue a ficha do cabo de alimentação na tomada elétrica, e verifique que o
aparelho arrefeceu antes de limpá-lo.
•
Solte a tampa da caldeira do corpo do motor, rodando-a no sentido contrario ao dos
ponteiros do relógio (fig. a).
•
Comprove que a caldeira está vazia voltando-a de pernas para o ar e verificando que
não cai mais água (fig. k).
•
•
•
•
•
•
Encha a caldeira com 230 ml de água com o copo medidor.
Introduza a água na caldeira com cuidado (fig. a).
Coloque a tampa da caldeira de forma segura rodando-a no sentido dos ponteiros do
relógio (fig. b).
Agite o corpo do motor várias vezes em direções diferentes.
Desaperte a tampa da caldeira e esvazie-a, por completo, para dentro de uma pia.
Repita os passos mencionados anteriormente, se necessário.
Manutenção de rotina da caldeira
•
Resíduos de calcário podem acumular-se dentro da caldeira, com o seu uso normal
diário. Recomendamos, seria vantajoso, utilizar água purificada, destilada, pré-fervida ou
filtrada no seu Robot de cozinha, desta forma, reduzirá a formação de calcário e a
necessidade de descalcificação.
•
De uma forma geral, os resíduos de calcário podem ser removidos usando uma solução
aguada com vinagre branco. Numa quantidade aproximada de 230 l de água com
vinagre (na proporção de 1:4, onde uma 1 parte de vinagre corresponde a 4 de água)
pode ser introduzida na caldeira e retirada após 2 horas. Quando retirar a solução da
caldeira, deve limpá-la e secá-la.
•
Realize um ciclo de vapor usando 230 ml de água com o recipiente de mistura vazio.
68
Assembly page 68/80
TKG DG 1000 - 100116
Fax +32 2 359 95 50
•
Copies of the I/B. Please reproduce them without any
changes except under special instruction from Team
International BELGIUM. The pages must be reproduced
and folded in order to obtain a booklet A5 (+/- 148.5 mm
width x 210 mm height). When folding, make sure you
keep the good numbering when you turn the pages of
the I/B. Don’t change the page numbering. Keep the
language integrity.
Recomendamos que realizasse o processo de limpeza e manutenção em intervalos
regulares – pelo menos uma vez cada duas semanas, sobretudo se a água for dura.
Atenção! Retire sempre a ficha do cabo de alimentação da tomada elétrica e comprove
que o aparelho está frio antes de começar a limpá-lo.
Limpar os acessórios de plástico
•
Todos os acessórios de plástico devem ser limpos após cada utilização.
•
Lave-os em profundidade (exceto o corpo do motor) retirando os restos de comida.
•
Lave-os á mão com um pouco de detergente liquido suave ou detergente neutro.
•
Depois de lavá-los bem seque-os imediatamente.
Limpar o recipiente de mistura
•
Lave-o em profundidade retirando os restos de comida, após cada operação.
•
Comprove que o orifício da saída do vapor (l) não está entupido com restos de comida,
usando uma escova de limpeza.
•
Lave o recipiente de mistura (m) á mão com um pouco de detergente liquido suave ou
detergente neutro.
•
Depois de lavá-lo bem seque-o imediatamente.
•
Verifique que não há restos de comida no compartimento do vapor. Repita os 2 passos
descritos anteriormente, se necessário.
PROTECÇÃO DO MEIO AMBIENTE – DIRECTIVA 2002/96/CE
Para a preservação do ambiente e da nossa saúde, a eliminação no fim da vida útil dos
aparelhos eléctricos e electrónicos, deve-se efectuar no cumprimento das legislações em
vigor e pela participação de todos quer sejam produtores ou utilizadores. É por esta razão que
, informando que em caso algum o
o vosso aparelho tem na placa sinalética o símbolo
aparelho deve ser colocado no caixote do lixo camarário ou privado para que não vá para
as lixeiras comuns mas sim devolvido ao revendedor ou depositado nos locais apropriados e
identificados para a recolha destes aparelhos para que uma vez recolhidos sejam reciclados,
reutilizados ou lhe sejam dados outras aplicações.
69
Assembly page 69/80
TKG DG 1000 - 100116
Fax +32 2 359 95 50
Copies of the I/B. Please reproduce them without any
changes except under special instruction from Team
International BELGIUM. The pages must be reproduced
and folded in order to obtain a booklet A5 (+/- 148.5 mm
width x 210 mm height). When folding, make sure you
keep the good numbering when you turn the pages of
the I/B. Don’t change the page numbering. Keep the
language integrity.
ZASADY BEZPIECZNEGO UŻYTKOWANIA
Zanim zaczniesz używać urządzenie przeczytaj uważnie instrukcję i postępuj wyłącznie z jej
wskazaniami.
Ważne: Osoby (w tym dzieci), które ze względów zdrowotnych lub innych mających wpływ na
bezpieczne użytkowanie urządzenia, nie mogą należycie obsługiwać urządzenia nie powinny
go użytkować. Użytkowanie urządzenia może stanowić dla niech niebezpieczeństwo
skaleczenia. Szczególnie dotyczy to dzieci, które mogą uznać urządzenie za zabawkę.
Zanim włączysz urządzenie sprawdź czy napięcie sieciowe zgadza się z parametrami
podanymi na tabliczce znamionowej urządzenia.
Podczas użycia nie zostawiaj urządzenia bez nadzoru. Trzymaj z dala od dzieci i osób
niepowołanych.
Regularnie sprawdzaj czy kabel zasilający nie jest uszkodzony. Nie używaj urządzenia z
uszkodzonym kablem zasilającym.
Urządzenie służy tylko do użytku domowego i powinno być używane zgodnie ze
wskazaniami niniejszej instrukcji.
Nie zanurzaj w wodzie ani żadnym innym płynie. Nie czyść w zmywarce do naczyń.
Nie używaj w pobliżu źródeł ciepła.
Przed czyszczeniem oraz montażem i demontażem urządzenia zawsze wyłącz urządzenie
z sieci.
Nie używaj na zewnątrz, zadbaj aby urządzenie pracowało w suchym otoczeniu.
Nigdy nie używaj urządzeń ani części nie posiadających rekomendacji producenta
ponieważ może to być niebezpieczne dla użytkownika. Mogą one również wpłynąć na
wadliwe działanie urządzenia lub jego uszkodzenie.
Nigdy nie ciągnij, nie podnoś itp. urządzenia za kabel ani nie wyłączaj wtyczki z sieci w ten
sposób. Nie owijaj kabla wokół urządzenia, nie zginaj go, nie skręcaj.
Używaj urządzenia wyłącznie do prac kuchennych.
Aby urządzenie nie uległo przegrzaniu pamiętaj o kilku- minutowych przerwach w jego
pracy.
Ze względu na kontakt z żywnością urządzenie powinno być cały czas czyste.
Zachowaj szczególna ostrożność przy pracy i czyszczeniu urządzenia. Końcówka miksera
posiada ostre ostrze więc pamiętaj aby czyścić je ostrożnie (czyszczenie, opróżnianie
zbiorników czy zmiana akcesoriów). Zachowaj szczególną ostrożność i nie dopuść aby
urządzenie znalazło się bez opieki.
Przed uruchomieniem urządzenia sprawdź czy wszelkie części I akcesoria zostały
prawidłowo zamontowane.
Zadbaj aby ręce oraz wszelkie akcesoria, których używasz przy przygotowaniu posiłków
był czyste.
Do czyszczenia ostrzy możesz użyć twardszych materiałów. Czyszczenie przeprowadzaj
wyłącznie po odłączeniu urządzenia od sieci.
Nie używaj urządzenia do miksowania ciepłych płynów.
Urządzenie zostało zaprojektowane do przygotowania małych porcji produktów
żywnościowych. Urządzenie nie służy do przemysłowego przerobu żywności.
Nie dotykaj ostrzy, kiedy urządzenie jest włączone. Pod żadnym pozorem nie staraj się
zatrzymać ręką obracających się ostrzy.
Wyłącz urządzenie z sieci, kiedy nie jest używanie oraz przed jego czyszczeniem.
Używaj wyłącznie do gotowania produktów spożywczych. Nie umieszczaj w urządzeniu
zbyt dużych kawałków.
Upewnij się że kabel zasilający nie styka sie z nagrzanymi elementami urządzenia.
70
Assembly page 70/80
TKG DG 1000 - 100116
Copies of the I/B. Please reproduce them without any
changes except under special instruction from Team
International BELGIUM. The pages must be reproduced
and folded in order to obtain a booklet A5 (+/- 148.5 mm
width x 210 mm height). When folding, make sure you
keep the good numbering when you turn the pages of
the I/B. Don’t change the page numbering. Keep the
language integrity.
Fax +32 2 359 95 50
Temperatura urządzenia i akcesoriów może być bardzo wysoka podczas używania. Nie
dotykaj nagrzanych elementów bez użycia rękawic kuchennych. Używaj ich podczas
zdejmowania pokrywy czy wyjmowania misy.
Zachowaj szczególna ostrożność w trakcie przenoszenia. Zalecamy, aby nie przenosić
urządzenia zanim całkowicie nie ostygnie.
Urządzenie posiada krótki kabel zasilający, by zminimalizować ryzyko jego zaplątania lub
potknięcia się. Przedłużacze mogą być używane tylko przy zachowaniu szczególnej
ostrożności. Dłuższy kabel musi być tak ułożony, by uniemożliwić jego przypadkowe
pociągnięcie np. przez dzieci.
Nie wolno włączać urządzenia za pomocą zewnętrznego timera lub innego
dodatkowego urządzenia sterującego.
(*) Uprawniony elektryk: Osoba wskazana przez dział sprzedaży producenta lub importera lub
każda osoba posiadająca niezbędne kwalifikacje umożliwiające dokonywanie tego typu
napraw bez stwarzania zagrożenia. W każdym przypadku urządzenie należy przekazywać tym
osobom.
ZAKRES ZASTOSOWANIA/DZIAŁANIA
•
•
Urządzenie służy tylko do użytku domowego i powinno być używane zgodnie ze
wskazaniami niniejszej instrukcji.
Urządzenie służy do użytku domowego oraz zastosowaniach podobnych:
Aneksy kuchenne dla personelu pracowniczego, biura i inne podobne.
Gospodarstwa rolnicze.
Do użytku klientów hoteli, motel i innych podobnych.
Pomieszczenia typu “bed and breakfast”.
ZALETY URZADZENIA
Urządzenie do przygotowywania posiłku dla dzieci jest urządzeniem wielofunkcyjnym. Może
gotować na parze, mieszać, kroić, rozdrabniać, podgrzewać jedzenie, mleko i inne płyny oraz
sterylizować smoczki. Z jego pomocą możesz:
•
Zdrowo, szybko i smacznie przygotować posiłek na parze dla dziecka.
•
Posiekać bardzo drobno dzięki bardzo ostrym ostrzom.
•
W krótkim czasie przygotować posiłek na parze.
•
W prosty sposób obsłużyć urządzenie – tylko 1 przycisk.
•
Przy użyciu materiałów składowych urządzenia (specjalny plastik oraz propylen) oraz
bardzo wysokiej temperatury zapewniasz dziecku posiłek wolny od szkodliwych
chemikaliów.
•
Łatwy w utrzymaniu w czystości.
•
Podwójna ochrona odcinająca zasilania – termostat i bezpiecznik.
•
Duży zbiornik na wodę 230cc / 8 Fl. Oz. zapewni 30 minutowy proces gotowania na
parze co jest czasem wystarczającym do przygotowania każdej porcji jedzenia.
•
W zestawie z pojemnikiem na mleko służącym do podgrzewania mleka i płynów.
•
W zestawie ze stojakiem na smoczki do sterylizacji.
PRZED PIERWSZYM UŻYCIEM
•
•
•
Rozpakuj urządzenie i sprawdź czy żadna z jego części nie jest uszkodzona lub czy którejś
nie brakuje.
Przeczytaj uważnie instrukcję!
Umyj misę, pojemnik na mleko, pojemnik do gotowania, pojemnik do krojenia, pokrywy i
ostrza w bieżącej wodzie z płynem do mycia naczyń. Opłucz umyte części i dokładnie
osusz.
71
Assembly page 71/80
TKG DG 1000 - 100116
Fax +32 2 359 95 50
•
•
Copies of the I/B. Please reproduce them without any
changes except under special instruction from Team
International BELGIUM. The pages must be reproduced
and folded in order to obtain a booklet A5 (+/- 148.5 mm
width x 210 mm height). When folding, make sure you
keep the good numbering when you turn the pages of
the I/B. Don’t change the page numbering. Keep the
language integrity.
Część silnikową urządzenia przetrzyj miękka ściereczką.
Wszystkie elementy urządzenia mające kontakt z jedzeniem powinny być zawsze umyte
przed i po przygotowaniu posiłku.
WAŻNE WSKAZÓWKI DOTYCZĄCE UŻYTKOWANIA
•
•
•
•
•
•
•
•
•
•
Nigdy nie rozdrabniaj produktów jeżeli ich temperaturę jest wyższa niż 50°C. Nie umieszczaj
płynów w misie urządzenia.
Aby uniknąć zniszczenia ostrzy nie rozdrabniaj bardzo twardych produktów (gałki
muszkatołowej, suchego grochu i fasoli, kukurydzy, mięsa z kością, cukru, lodu, kawy itp.).
Nigdy nie napełniaj pojemnika w całości.
Aby uniknąć przegrzania urządzenia, nigdy nie przekraczaj podanych w instrukcji czasów
rozdrabniania. Po zakończeniu każdej operacji pozwól aby urządzenie ostygło przez 10
minuty.
Przy rozdrabnianiu większych ilości produktu, rób przerwy pomiędzy kolejnymi porcjami
rozdrabniania (zobacz paragraf „JAK ZMIESZAĆ/POKROIĆ JEDZENIE”).
Przed otwarciem pokrywy poczekaj aż ostrza całkowicie się zatrzymają.
Po każdej operacji wyczyść części, które miały kontakt z żywnością.
Ostrza są bardzo ostre. Zachowaj szczególna ostrożność, kiedy ich dotykasz.
Nie umieszczaj pojemnika rozdrabniacza w kuchence mikrofalowej.
Nigdy nie zanurzaj części silnikowej w wodzie ani żadnym innym płynie.
DZIAŁANIE URZĄDZENIA
WLEWANIE WODY DO URZĄDZENIA
•
Wyłącz urządzenie z gniazdka zasilającego.
•
Odkręć pokrętło zbiornika przekręcając przeciwnie do wskazówek zegara ”
•
Sprawdź czy pojemnik jest pusty – możesz w tym celu przekręcić urządzenie do góry
nogami.
Wyczyść zbiornik jeśli jest to konieczne – patrz Dział czyszczenie zbiornika.
Używaj tylko pitnej wody i sprawdzaj zawsze ilość wody wymagana do przygotowania
danego posiłku.
Zaleca się używanie wody destylowanej minimalizując w ten sposób ryzyko osadzania się
kamienia w zbiorniku.
Wlej wodę do miarki zgodnie z wymogiem dotyczącym przygotowywania danego posiłku.
Wlej wodę z miarki do zbiornika (rys.a).
Zamknij pokrywę przekręcając zgodnie ze wskazówkami zegara „ ” (rys.b).
•
•
•
•
•
•
72
Assembly page 72/80
”.
TKG DG 1000 - 100116
Copies of the I/B. Please reproduce them without any
changes except under special instruction from Team
International BELGIUM. The pages must be reproduced
and folded in order to obtain a booklet A5 (+/- 148.5 mm
width x 210 mm height). When folding, make sure you
keep the good numbering when you turn the pages of
the I/B. Don’t change the page numbering. Keep the
language integrity.
Fax +32 2 359 95 50
Ostrzeżenie!
•
W celu zachowania zasad higieny nie używaj żadnych innych płynów niż woda. UŻYWAJ
TYLKO WODY.
•
Nie przepełniaj pojemnika na wodę. Nigdy nie wlewaj więcej niż 230ml wody.
•
Upewnij się, że pokrywa zbiornika na wodę jest dobrze zamknięta – pozycja „ ”.
•
Zawsze wyłączaj urządzenie z zasilania zanim wlejesz do niego wodę.
Zanim włączysz urządzeni sprawdź zawsze następujące punkty:
•
Zabezpieczenie na ostrzach zostało usunięte.
•
Zbiornik został napełniony wodą.
•
Pokrywa zabezpieczająca zbiornik jest dobrze umiejscowiona.
•
Włącznik jest w pozycji „OFF”.
•
Pojemnik mieszający jest poprawnie umiejscowiony na bazie urządzenia.
•
Pokrywa pojemnika jest poprawnie zamknięta.
JAK PRZYRZĄDZIC POSIŁEK NA PARZE
•
•
•
•
•
•
•
•
•
•
•
•
•
•
•
•
Odnieś się do działu „Wlewanie wody do zbiornika” i wlej wymaganą ilość wody do
zbiornika.
Umieść pojemnik na podstawie urządzenia i upewnij się ze został poprawnie zamocowany
przekręcając go zgodnie z rys. c; upewnij się że dwie strzałki znajdują się w jednej linii.
Umieść pojemnik do gotowania w pojemniku mieszającym (rys.d).
Umieść pokrojone jedzenie – nie większe niż 15mm kawałki w pojemniku gotującym. Nie
przepełnij pojemnika.
Nałóż pokrywę i zablokuj ja bocznymi klipsami.
Upewnij się, że pokrętło jest w pozycji OFF.
Włóż wtyczkę do gniazda zasilającego.
”, urządzenie rozpocznie pracę i zapali się czerwona
Przekręć pokrętło do pozycji „
lampka kontrolna.
Para wypełni pojemnik po kilku minutach.
Urządzenie wyłączy się automatycznie we wskazanym czasie (w oparciu o wlaną ilość
wody) i czerwona lampka kontrolna się wyłączy. Przekręć pokrętło do pozycji OFF. Jeśli
urządzenie nie wyłączy się automatycznie po określonym czasie, przekręć pokrętło na
pozycje OFF.
WAZNE: Jeśli pokrętło nie znajduje się w pozycji OFF, urządzenie może zacząć gotować
wodę ponownie.
Pozwól urządzeniu ostygnąć 3-5 minut.
Zdejmuj pojemnik mieszający z podstawy urządzenia (rys.f).
Otwórz pokrywę. Uwaga: zachowaj szczególna ostrożność podczas otwierania pokrywy
ponieważ para jest gorąca.
Zdejmij pojemnik z jedzeniem: posiłek jest gotowy do zjedzenia lub do zmieszania.
Zgromadzona woda z pojemnika może zostać wylana.
Ostrzeżenie!
•
Pojemniki, pokrywki oraz jedzenie są gorące; zachowaj szczególną ostrożność biorąc je do
ręki.
•
Nie włączaj urządzenia dopóki pojemnik nie został na nim poprawnie umieszczony.
•
Nie włączaj urządzenia gdy nie ma w nim wody.
•
Uwaga – podczas pracy z otworów urządzenia wydobywa się para.
•
Zawsze wymyj wszystkie elementy urządzenia jeśli nie będziesz już niego korzystał.
•
Nie otwieraj żadnej z pokryw podczas pracy urządzenia.
•
Zawsze poczekaj aż urządzenie ostygnie zanim zaczniesz go na nowo używać.
73
Assembly page 73/80
TKG DG 1000 - 100116
Fax +32 2 359 95 50
Copies of the I/B. Please reproduce them without any
changes except under special instruction from Team
International BELGIUM. The pages must be reproduced
and folded in order to obtain a booklet A5 (+/- 148.5 mm
width x 210 mm height). When folding, make sure you
keep the good numbering when you turn the pages of
the I/B. Don’t change the page numbering. Keep the
language integrity.
JAK ZMIESZAĆ/POKROIĆ JEDZENIE
•
•
•
•
Ustaw pojemnik na podstawie urządzenia (rys.c).
Zdejmij zabezpieczenia z ostrzy.
Delikatnie i ostrożnie zamontuj jednostkę z ostrzem na trzonie (rys.g). Upewnij się, że
znajduję się ona w poprawnej pozycji.
Włóż jedzenie do pojemnika (rys.h).
•
Nałóż pokrywę i zablokuj boczne klipsy (rys.e).
•
Przekręć pokrętło i przytrzymaj do pozycji „
” – prze około 15 sekund, niebieska
lampka zapali się wskazując na prace czoppera.
Powtarzaj cykl krojenia jeśli to konieczne, zaleca się odczekanie minimum 15 sekund
pomiędzy kolejnymi siekaniami.
Kawałki jedzenia mogą przykleić się do ścianek – w celu ich usunięcia użyj szpatułki.
Pamiętaj by zawsze wyłączyć urządzenie od prądu chcąc wykonać jakikolwiek manewry
związane z pojemnikiem.
Zdejmij pojemnik z urządzenia, odkryj pokrywę.
Delikatnie zdejmij jednostkę z ostrzami.
Wyjmij jedzenie z pojemnika przy użyciu szpatułki.
•
•
•
•
•
•
74
Assembly page 74/80
TKG DG 1000 - 100116
Fax +32 2 359 95 50
Copies of the I/B. Please reproduce them without any
changes except under special instruction from Team
International BELGIUM. The pages must be reproduced
and folded in order to obtain a booklet A5 (+/- 148.5 mm
width x 210 mm height). When folding, make sure you
keep the good numbering when you turn the pages of
the I/B. Don’t change the page numbering. Keep the
language integrity.
Ostrzeżenie!
•
Sprawdzaj temperaturę przed podaniem posiłku dziecku.
•
Zaleca się odczekanie minimum 15 sekund pomiędzy kolejnymi siekaniami/ mieszaniami.
•
Nie używaj urządzenia jeśli pojemnik jest pusty.
•
W celu uniknięcia rozpryskiwania nie dodawaj zbyt wielu płynnych składników.
•
Nie krój/mieszaj zamrożonych posiłków, jedzenia z kośćmi czy twardymi elementami.
JAK PODGRZAĆ I ROZMROZIĆ JEDZENIE
•
•
•
Postępuj zgodnie z działem „Jak ugotować jedzenie na parze” w celu jego podgrzania
lub rozmrożenia.
W odniesieniu do czasu gotowania na parze – zależy on od wagi i temperatury jedzenia.
Zaleca się wlać 230ml wody, średnio będzie to czas - 5 minut dla małej porcji, 10 minut dla
średniej porcji i 15 minut dla dużej porcji. Sprawdź poziom gotowość używając łyżki lub
widelca.
Ostrzeżenie!
•
Nie przepełniaj pojemnika; nigdy nie wlewaj więcej niż 230 ml wody.
•
Uwaga – podczas pracy z otworów urządzenia wydobywa się para, zachowaj wiec
szczególną uwagę.
•
Sprawdzaj temperaturę przed podaniem posiłku dziecku.
JAK PODGRZAC MLEKO I INNE NAPOJE
•
•
•
•
•
•
•
•
Otwórz pojemnik na mleko (rys.i).
Wlej mleko czy też inny napój do pojemnika (rys.i) i zamknij pokrywę.
Odnieś się do działu „Gotowanie wody w urządzeniu”, wlej odpowiednią ilość wody.
Umieść pojemnik mieszający na podstawie i zabezpiecz go poprzez przekręcenie zgodnie
z rysunkiem c.
Umieść pojemnik z mlekiem w pojemniku mieszającym.
Włóż pokrywę i zablokuj klipsy boczne (rys.e).
W celu uruchomienia postępuj zgodnie z krokami w dziale „JAK PRZYGOTOWAĆ JEDZENIE
NA PARZE”.
Zdejmij pojemnik z mlekiem; składniki są gotowe do spożycia.
Ostrzeżenie!
•
Pojemnik i pokrywa są gorące, zachować ostrożność.
•
Przed podaniem dziecku sprawdź temperaturę mleka czy innych przygotowywanych
napojów poprzez nakropienie kilku kropel na nadgarstek.
JAK STERYLIZOWAĆ SMOCZKI
•
Wlej 60 ml wody do pojemnika na 8 minut.
75
Assembly page 75/80
TKG DG 1000 - 100116
Copies of the I/B. Please reproduce them without any
changes except under special instruction from Team
International BELGIUM. The pages must be reproduced
and folded in order to obtain a booklet A5 (+/- 148.5 mm
width x 210 mm height). When folding, make sure you
keep the good numbering when you turn the pages of
the I/B. Don’t change the page numbering. Keep the
language integrity.
Fax +32 2 359 95 50
•
•
•
•
•
•
Umieść pojemnik mieszający na podstawie urządzenia i sprawdź poprawność jego
umiejscowienia zgodnie z rys. c.
Umieść podstawę na smoczki na górze trzonu (rys.j).
Zawieś smoczki na podstawie.
Nałóż pokrywę i zablokuj klipsy (rys.e).
W celu uruchomienia postępuj zgodnie z krokami opisanymi w dziale ”JAK
PRZYGOTOWAC JEDZENIE NA PARZE”.
Ostrożnie wyjmij wysterylizowane smoczki z urządzenia.
Ostrzeżenie! Pojemniki, smoczki i pokrywa są gorące, zachowaj ostrożność.
CZAS PRZYGOTOWYWANIA NA PARZE
•
•
•
•
Podany poniżej czas jest czasem oględnym - powinien być dostosowywany do ilości
jedzenia czy oczekiwanej temperatury.
Zawsze należy dodać 1 do 3 minut do całkowitego czasu przygotowywania, ponieważ
wskazany poniżej czas jest czasem „netto” nie uwzględniającym czasu wytworzenia się
pary.
Zawsze sprawdzaj czy posiłki są przygotowane a napoje podgrzane.
Wlej wodę do miarki i w oparciu o poniższą tabele dostosuj ilość wody i czas pracy.
Gotowanie na parze
Ilość wody
40ml / 1.3 Fl. Oz.
70ml / 2.3 Fl. Oz.
110ml / 3.7 Fl. Oz.
140ml / 4.7 Fl. Oz.
180ml / 6 Fl. Oz.
230ml / 8 Fl. Oz.
Czas gotowania
5 min.
10 min.
15 min.
20 min.
25 min.
30 min.
Ogrzewanie napojów (w pojemniku na mleko)
Napoje w temperaturze pojowej
Ilość mleka/napojów
Ilość wody
120ml / 4 Fl. Oz.
30ml / 1 Fl. Oz.
180ml / 6 Fl. Oz.
35ml / 1.2 Fl. Oz.
240ml / 8 Fl. Oz.
40ml / 1.4 Fl. Oz.
Czas gotowania
2 ½ min.
3 ½ min.
4 ½ min.
Ogrzewanie napojów (w pojemniku na mleko)
Napoje w temperaturze 4°C
Ilość mleka/napojów
Ilość wody
120ml / 4 Fl. Oz.
30ml / 1 Fl. Oz.
180ml / 6 Fl. Oz.
40ml / 1.4 Fl. Oz.
240ml / 8 Fl. Oz.
45ml / 1.6 Fl. Oz.
Czas gotowania
3 ½ min.
4 ½ min.
5 min.
Sterylizowanie smoczków
Ilość wody
60ml / 2 Fl. Oz.
Czas
8 min.
76
Assembly page 76/80
TKG DG 1000 - 100116
Fax +32 2 359 95 50
Przykładowe posiłki
Typ (100g)
Por
Szpinak
Cukinia
Marchewka
Kalafior
Zielona fasola
Groszek
Ziemniaki
Rzepa
Dynia
Jabłko
Gruszka
Ananas
Truskawka
Ryba
Kurczak
Wieprzowina
Cielęcina/Wołowina
Copies of the I/B. Please reproduce them without any
changes except under special instruction from Team
International BELGIUM. The pages must be reproduced
and folded in order to obtain a booklet A5 (+/- 148.5 mm
width x 210 mm height). When folding, make sure you
keep the good numbering when you turn the pages of
the I/B. Don’t change the page numbering. Keep the
language integrity.
Ilość wody
Czas gotowania
70ml / 2 ½ Fl. Oz.
70ml / 2 ½ Fl. Oz.
110ml / 4 Fl. Oz.
140ml / 5 Fl. Oz.
140ml / 5 Fl. Oz.
140ml / 5 Fl. Oz.
140ml / 5 Fl. Oz.
140ml / 5 Fl. Oz.
140ml / 5 Fl. Oz.
140ml / 5 Fl. Oz.
70ml / 2 ½ Fl. Oz.
70ml / 2 ½ Fl. Oz.
70ml / 2 ½ Fl. Oz.
70ml / 2 ½ Fl. Oz.
70ml / 2 ½ Fl. Oz.
180ml / 6 Fl. Oz.
180ml / 6 Fl. Oz.
180ml / 6 Fl. Oz.
10 min.
10 min.
15 min.
20 min.
20 min.
20 min.
20 min.
20 min.
20 min.
20 min.
10 min.
10 min.
10 min.
10 min.
10 min.
25 min.
25 min.
25 min.
Ostrzeżenie!
•
Sprawdzaj temperaturę przed podaniem posiłku dziecku.
•
Przed podaniem dziecku sprawdź temperaturę mleka czy innych przygotowywanych
napojów poprzez nakropienie kilku kropel na nadgarstek.
•
Zawsze krój czy siekaj jedzenie przed przygotowaniem go w urządzeniu.
•
Podany powyżej czas jest czasem oględnym i powinien być dostosowywany do ilości
jedzenia czy oczekiwanej temperatury.
CZYSZCZENIE I KONSERWACJA
PRZY ROZDRABNIANIU PRODUKTÓW POWODUJĄCYCH PRZEBARWIENIA (np. MARCHEW)
NIEKTÓRE CZĘŚĆI URZĄDZENIA MOGĄ ZMIENIĆ KOLOR. NIE MA TO WPŁYWU NA DZIAŁANIE
URZADZENIA. ABY SPRÓBOWAĆ WYCZYŚCIĆ POSTĘPUJ ZGODNIE Z UWAGAMI PONIŻEJ.
Żadna z części składowych urządzenia (akcesoria, pojemniki, jednostka główna) nie jest
przystosowana do mycia w zmywarce.
Czyszczenie jednostki głównej – bazy
•
Zawsze odłączaj urządzenie od prądu i upewnij się że ostygło.
•
Nie zanurzaj podstawy w wodzie czy innym płynie.
•
Czyść podstawę wilgotna szmatka.
•
Nie używaj szorstkich ścierek ani środków mogących zniszczyć powierzchnię urządzenia.
Ostrzeżenie!
•
Zawsze odłączaj urządzenie od prądu i upewnij się że ostygło.
Czyszczenie jednostki z ostrzami
•
Wyjmij jednostkę z ostrzami z pojemnika.
•
Przemyj dokładnie i usuń pozostałe resztki jedzenia.
•
Czyść z użyciem wody z płynem lun neutralnych detergentów.
•
Opłukuj ponownie woda i natychmiast wysusz.
77
Assembly page 77/80
TKG DG 1000 - 100116
Fax +32 2 359 95 50
•
Copies of the I/B. Please reproduce them without any
changes except under special instruction from Team
International BELGIUM. The pages must be reproduced
and folded in order to obtain a booklet A5 (+/- 148.5 mm
width x 210 mm height). When folding, make sure you
keep the good numbering when you turn the pages of
the I/B. Don’t change the page numbering. Keep the
language integrity.
Nałóż nakładki zabezpieczające i trzymaj z dala od dzieci.
Ostrzeżenie!
•
Zachowaj szczególną ostrożność ponieważ ostrza są bardzo ostre.
•
Pamiętaj zawsze o nałożeniu nakładek zabezpieczających.
•
Nie używaj nigdy środków wybielających oraz detergentów z chlorem ponieważ mogą
zniszczyć ostrza.
•
Nie wkładaj ostrzy do zmywarki.
Czyszczenie pojemnika gotującego wode
•
Zawsze odłączaj urządzenie od prądu i upewnij się że ostygło.
•
Odkręć otwór zbiornika – przeciwnie do wskazówek zegara (rys. a).
•
Sprawdź czy zbiornik jest pusty poprzez przekręcenie go i sprawdzenie czy nie wyleje się z
niego woda (rys.k).
•
•
•
•
•
•
Wlej 230 ml wody do miarki.
Wlej wodę z miarki do zbiornika (rys.a).
Zamknij pokrywę zgodnie ze wskazówkami zegara (rys b).
Wstrząśnij urządzeniem kilkakrotnie w różne strony.
Zdejmij pokrywę i wylej wodę nad zlewozmywakiem.
W razie konieczności powtarzaj powyższe punkty.
Rutynowe sprawdzanie zbiornika
•
W celu zredukowania naturalnie osadzającego się kamienia zaleca się używanie
przegotowanej lub odfiltrowanej wody.
•
Standardowo osad usunąć można przy użyciu octu. Około 230ml jasnego octu (w
proporcji 1:4, oznacza 1 proporcja octu na 4 porcje wody) należy wlać do zbiornika i
pozostawić na 2 godziny. Wylać i wysuszyć zbiornik.
•
Następnie użyj 230 ml wody w zbiorniku z pustym pojemnikiem.
•
Zaleca się wykonywać tego typu oczyszczanie minimum co 2 tygodnie jeśli używana
woda jest twarda.
Ostrzeżenie!
•
Zawsze odłączaj urządzenie od prądu i upewnij się że ostygło.
Czyszczenie plastikowych elementów
•
•
•
•
Wszystkie plastikowe elementy powinny być dokładnie umyte po każdorazowym
użytkowaniu.
Opłukuj je dokładnie i usuń resztki pokarmu.
Umyj je ręcznie z użyciem niewielkiej ilości płynu.
Opłukaj i wysusz.
78
Assembly page 78/80
TKG DG 1000 - 100116
Fax +32 2 359 95 50
Copies of the I/B. Please reproduce them without any
changes except under special instruction from Team
International BELGIUM. The pages must be reproduced
and folded in order to obtain a booklet A5 (+/- 148.5 mm
width x 210 mm height). When folding, make sure you
keep the good numbering when you turn the pages of
the I/B. Don’t change the page numbering. Keep the
language integrity.
Czyszczenie pojemnika mieszającego
•
•
•
•
•
Opłukaj go dokładnie i usuń resztki pokarmu.
Upewnij się że w otworze pary (I) nie ma pozostałości pokarmu.
Umyj pojemnik (m) ręcznie pod wodą z niewielką ilością płynu lub neutralnego
detergentu.
Opłukaj i natychmiastowo wysusz.
Upewnij się że nigdzie nie ma pozostałości pokarmu. W razie konieczności powtórz
powyższe dwa kroki.
OCHRONA ŚRODOWISKA NATURALNEGO
Symbol
na tabliczce znamionowej urządzenia oznacza, że produktu nie wolno wyrzucać
razem z innymi odpadami z gospodarstw domowych. Polskie prawo zabrania pod karą
grzywny łączenia zużytego sprzętu elektrycznego i elektronicznego wraz z innymi odpadami.
Dbając o pozbycie się produktu w należyty sposób, można zapobiec potencjalnym
negatywnym skutkom dla środowiska naturalnego i zdrowia ludzkiego, jakie mogłyby wyniknąć
z niewłaściwego postępowania z odpadami powstałymi ze zużytego sprzętu elektronicznego.
System zbierania zużytego sprzętu jest zgodny z obowiązującymi na terenie Rzeczpospolitej
Polskiej normami prawnymi, ( Ustawa z dnia 29 lipca 2005, Dziennik Ustaw Nr 180 poz.1494 i
1495) obowiązki wynikające z ustawy przejęła w imieniu przedsiębiorcy Organizacja Odzysku.
Gospodarstwo domowe pełni istotną rolę w przyczynianiu się do ponownego użycia i odzysku,
w tym recyklingu, zużytego sprzętu elektrycznego. Przestrzeganie zasad selektywnej zbiórki
sprzętu ma zapewnić właściwy poziom ochrony zdrowia ludzkiego i środowiska naturalnego.
Waga netto urządzenia- . 2,1 kg
79
Assembly page 79/80
TKG DG 1000 - 100116
Copies of the I/B. Please reproduce them without any
changes except under special instruction from Team
International BELGIUM. The pages must be reproduced
and folded in order to obtain a booklet A5 (+/- 148.5 mm
width x 210 mm height). When folding, make sure you
keep the good numbering when you turn the pages of
the I/B. Don’t change the page numbering. Keep the
language integrity.
Fax +32 2 359 95 50
TKG DG 1000
Deutsch
6
English
17
Français
27
Nederlands
38
Español
49
Português
59
Polska
70
Back cover page (last page)
Assembly page 80/80


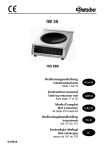
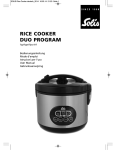

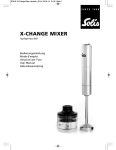
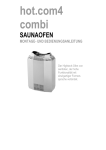
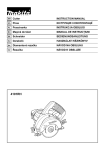
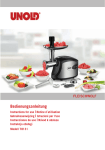
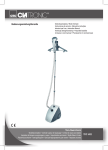
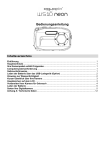


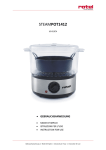
![ES400 User Guide [Polish] (P/N 72E-136310](http://vs1.manualzilla.com/store/data/006874962_1-c4d97a1f31b1a0824b4bf66769534ff9-150x150.png)