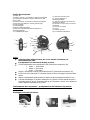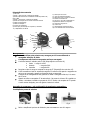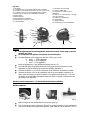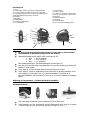
1
Caution: Only inflate product to the manufacturer’s specifications. Vehicle
tyre pressures can generally be found in the handbook, on the door pillar or on
the inside of the fuel filler cap.
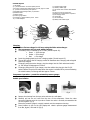
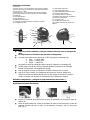
The LCD display will show the current tyre pressure.
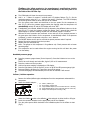
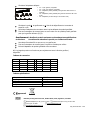
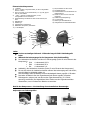
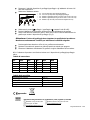
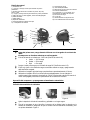
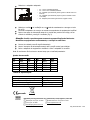
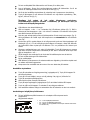
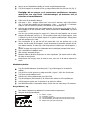
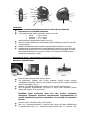
Hold + or – button for approx 5 seconds until LCD display flashes (Fig 2). Set the
required pressure using the + or – buttons then wait 2-3 seconds. The LCD will display
the current pressure value to which the tyre will be inflated.
Turn the yellow power switch anti-clockwise to the tyre symbol for the compressor to
start (Fig 3). When the pressure gauge reaches the required value the compressor will
automatically switch off and the LCD display will show “OFF”.
If accidentally over inflated, deflate the tyre by depressing the deflation button on the air
hose (Fig 4). To check the pressure release the button, wait 2 seconds then check the
digital display for pressure reading. Repeat until the desired pressure is reached.
Unscrew the valve connector and reconnect to the next tyre. If the required pressure is
the same press the M button for the compressor to automatically inflate. If the pressure
is different, re set the compressor using the + and – buttons.
The ON/OFF button can be used to override the preset pressure value if required.
Remove the valve connector from the tyre valve.
Replace the tyre valve dust cap.
Note:- The gauge on this compressor is for guidance only. Check pressure with a known
accurate gauge.
The compressor can be used without the engine running but this will drain the power
from the battery.
Handheld pressure gauge
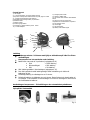
Press the pressure gauge release (Control Layout 8). Press the M button to turn on the
gauge.
Press M to scroll through and select Bar, Kg/cm², KPA or Psi measurement.
Press the nozzle onto the tyre valve.
Hold until pressure reading is displayed on LCD display.
Press the light button (Control Layout 5) to turn on & off the LED pressure gauge light.
Press and hold the M button for 5 seconds to turn off the gauge.
The hand held gauge will automatically turn off after 90 seconds if left unused.
Inflator / Deflator operation
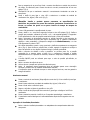
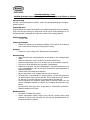
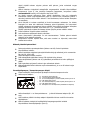
Remove the inflator/deflator pipe and adapters from the compartment underneath the
compressor.
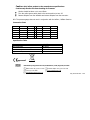
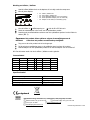
Select the suitable adapter:
o
o
o
o
o
B1
B2
B3
B4
B5
-
Inflator / Deflator pipe
Short Inflator / Deflator pipe
Large inflatable adaptor (can be used with either B1 or B2 & B5)
Small inflatable adaptor (can be used with either B1 or B2 & B5)
Adaptor for B3 & B4 (when connecting to B2)
Select the inflation outlet or the deflation inlet and push in either the B1 or B2 pipe.
Insert the connector adapter into the appropriate inlet of the inflatable
Turn the yellow power switch clockwise to the inflatable symbol for the inflator to start
(Fig 3).