1
Manual instruction
Operating instruction
• Remove the motor unit (3) and set it to one side.
• Screw out the four sharpening stone cover
screws (7).
Sharpening a bit
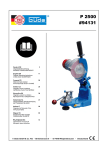
• Insert the drill bit into the smallest suitable drill
guide (5) on the drill sharpener.
• Press the On/Off switch (4) into position “I” to
switch on the device.
• Turn the drill bit loosely and quickly to and
fro, from left to right, untill you feel resistance, for
about 10 times (for small drill bits, 5 times could be
enough). This operation sharpens the first cutting
edge of the drill bit.
• Pull the drill out, turn it through 180°
(horizontally) and insert it again until it meets the
sharpening stone.
• Turn the drill in the same way as for grinding the
first edge. This sharpens the second cutting edge of
the drill.
• If necessary repeat whole process until both
cutting edges of the drill are sharp.
• Press the On /Off switch (4) into position “0” to
switch off the device.
NOTE: The cutting edges of the drill
must be of the same length.
Replacing the sharpening stone
NOTE: Always pull the mains plug out of
the socket before doing any work on
the device. Replace the sharpening
stone if it is worn or damaged. You will need a
Phillips screwdriver for this procedure.
• Remove the four rubber feet (11) from the
underside of the device, if necessary use a small
slotted head screwdriver or similar device as an aid
far doing this.
• Using a phillips screwdriver, screw out the four
motor unit screws (6) under the rubber feet.
fig.2
1
5
3
EN
• Remove the sharpening stone cover (8). Remove
the sharpening stone.
• Clamp the sharpening head push rod (9) in
a vice. Using a 20 mm open spanner, release the
threaded connection holding the sharpening stone
on the shaft.
NOTE: left-handed thread turn clockwise
to release.
• Mount the new sharpening stone on the shaft
with flattened edge at the bottom. Insert the
sharpening stone into the device.
• Put the sharpening stone cover (8) back in place.
Screw the cover in place with the four sharpening
stone cover screws (7).
• Align the sharpening head push rod (9) perfectly
with the motor unit push rod (10). Otherwise
the motor unit (3) will not fit together with the
sharpening head (1).
• Now place the sharpening head cover (1)
precisely back on to the motor unit (3) and tighten
the four motor unit screws (6).
• Put the four rubber feet (11) back in place.
fig.1
fig.3
7
8
11
9
6
11
10