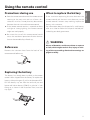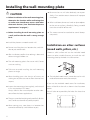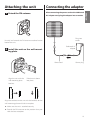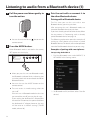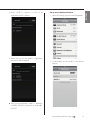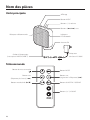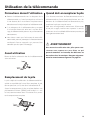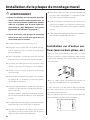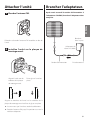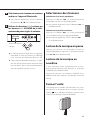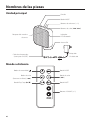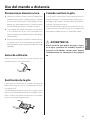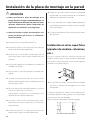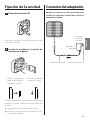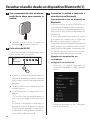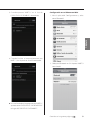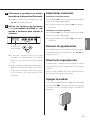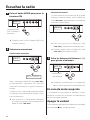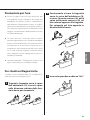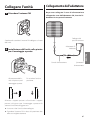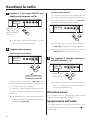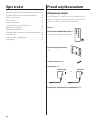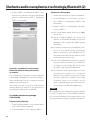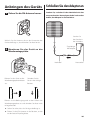
1
ENGLISH FRANÇAIS Model MJBTS-1 USER MANUAL ESPAÑOL oo Thank you for purchasing this product. oo Be sure to read this user manual before operating the product and use it correctly. oo Store this manual in a safe place for future reference. ITALIANO POLSKA DEUTSCH PORTUGUÊS 3D0813250A IMPORTANT SAFETY PRECAUTIONS CAUTION oo DO NOT REMOVE THE EXTERNAL CASES OR CABINETS TO EXPOSE THE ELECTRONICS. NO USER SERVICEABLE PARTS ARE WITHIN. CAUTION: TO REDUCE THE RISK OF ELECTRIC SHOCK, DO NOT REMOVE COVER (OR BACK). NO USER-SERVICEABLE PARTS INSIDE. The lightning flash with arrowhead symbol, within an equilateral triangle, is intended to alert the user to the presence of uninsulated “dangerous voltage” within the product’s enclosure that may be of sufficient magnitude to constitute a risk of electric shock to persons. The exclamation point within an equilateral triangle is intended to alert the user to the presence of important operating and maintenance (servicing) instructions in the literature accompanying the appliance. 2 oo IF YOU ARE EXPERIENCING PROBLEMS WITH THIS PRODUCT, CONTACT THE RETAILER WHERE YOU PURCHASED THE PRODUCT. DO NOT USE THE PRODUCT UNTIL IT HAS BEEN REPAIRED. oo USE OF CONTROLS OR ADJUSTMENTS OR PERFORMANCE OF PROCEDURES OTHER THAN THOSE SPECIFIED HEREIN MAY RESULT IN HAZARDOUS RADIATION EXPOSURE. IN USA, USE ONLY ON 120 V SUPPLY. IMPORTANT SAFETY INSTRUCTIONS 1) Read these instructions. 2) Keep these instructions. 3) Heed all warnings. 4) Follow all instructions. 5) Do not use this apparatus near water. 6) Clean only with dry cloth. 7)Do not block any ventilation openings. Install in accordance with this manual. 8)Do not install near any heat sources such as radiators, heat registers, stoves, or other apparatus (including amplifiers) that produce heat. 9)Do not defeat the safety purpose of the polarized or grounding-type plug. A polarized plug has two blades with one wider than the other. A grounding type plug has two blades and a third grounding prong. The wide blade or the third prong are provided for your safety. If the provided plug does not fit into your outlet, consult an electrician for replacement of the obsolete outlet. 10)Protect the power cord from being walked on or pinched particularly at plugs, convenience receptacles, and the point where they exit from the apparatus. 11)Only use attachments/accessories specified by the manufacturer. 12)Use only with the cart, stand, tripod, bracket, or table specified by the manufacturer, or sold with the apparatus. When a cart is used, use caution when moving the cart/apparatus combination to avoid injury from tip-over. 13)Unplug this apparatus during lightning storms or when unused for long periods of time. 14)S top use immediately when the apparatus has been damaged in any way, such as power-supply cord or plug is damaged, liquid has been spilled or objects have fallen into the apparatus, the apparatus has been exposed to rain or moisture, does not operate normally, or has been dropped. < The apparatus draws nominal non-operating power from the AC outlet with its POWER or STANDBY/ON switch not in the ON position. < The mains plug is used as the disconnect device, the disconnect device shall remain readily operable. CAUTION < Do not expose this apparatus to drips or splashes. < Do not place any objects filled with liquids, such as vases, on the apparatus. < Do not install this apparatus in a confined space such as a book case or similar unit. <The apparatus should be located close enough to the AC outlet so that you can easily reach the power cord plug at any time. < If the product uses batteries (including a battery pack or installed batteries), they should not be exposed to sunshine, fire or excessive heat. WARNING Products with Class construction are equipped with a power supply cord that has a grounding plug. The cord of such a product must be plugged into an AC outlet that has a protective grounding connection. The Bluetooth® word mark and logos are registered trademarks owned by Bluetooth SIG, Inc. and any use of such marks by Ryohin Keikaku Co. Ltd. is under license. Android is a trademark of Google Inc. iPhone is a trademark of Apple Inc., registered in the U.S. and other countries. IOS is a trademark or registered trademark of Cisco in the U.S. and other countries and is used under license. Other company names and product names in this document are the trademarks or registered trademarks of their respective owners. 3 BBPrecautions concerning batteries Misuse of batteries could cause them to rupture or leak leading to fire, injury or the staining of nearby things. Please read and observe the following precautions carefully. oo Be sure to insert the batteries with correct positive (+) and negative (_) orientations. oo If the remote control is not used for a long time (more than a month), remove the batteries to prevent them from leaking. oo If the batteries leak, wipe away the leakage inside the battery compartment and replace the batteries with new ones. oo Do not use batteries of types other than those specified. oo Do not heat or disassemble batteries. Never throw batteries into fire or water. oo Do not carry or store batteries with other metallic objects. The batteries could short circuit, leak or explode. oo Never recharge a battery unless it is confirmed to be a rechargeable type. 4 For European Customers ENGLISH Disposal of electrical and electronic equipment (a)All electrical and electronic equipment should be disposed of separately from the municipal waste stream via collection facilities designated by the government or local authorities. (b)By disposing of electrical and electronic equipment correctly, you will help save valuable resources and prevent any potential negative effects on human health and the environment. (c)Improper disposal of waste electrical and electronic equipment can have serious effects on the environment and human health because of the presence of hazardous substances in the equipment. (d)The Waste Electrical and Electronic Equipment (WEEE) symbol, which shows a wheeled bin that has been crossed out, indicates that electrical and electronic equipment must be collected and disposed of separately from household waste. (e)Return and collection systems are available to end users. For more detailed information about the disposal of old electrical and electronic equipment, please contact your city office, waste disposal service or the shop where you purchased the equipment. Disposal of batteries and/or accumulators (a)Waste batteries and/or accumulators should be disposed of separately from the municipal waste stream via collection facilities designated by the government or local authorities. (b)By disposing of waste batteries and/or accumulators correctly, you will help save valuable resources and prevent any potential negative effects on human health and the environment. (c)Improper disposal of waste batteries and/or accumulators can have serious effects on the environment and human health because of the presence of hazardous substances in them. (d)The WEEE symbol, which shows a wheeled bin that has been crossed out, indicates that batteries and/or accumulators must be collected and disposed of separately from household waste. If a battery or accumulator contains more than the specified values of lead (Pb), mercury (Hg), and/or cadmium (Cd) as defined in the Battery Directive (2006/66/EC), then the chemical sym- Pb, Hg, Cd bols for those elements will be indicated beneath the WEEE symbol. (e)Return and collection systems are available to end users. For more detailed information about the disposal of waste batteries and/or accumulators, please contact your city office, waste disposal service or the shop where you purchased them. 5 Wireless equipment precautions Compliance of radio transmitter and interference USA model This device complies with Part.15 of FCC Rules. Operation is subject to the following two conditions: 1) This device may not cause interference 2) This device must accept any interference, including interference that may cause undesired operation of the device. Labeling of authorization FCC ID: XEG-MJBTS1 Radiation Exposure requirements This equipment meets the regulation, which is recognized internationally, for the case of human exposure to radio waves generated by the transmitter. Based on the following two conditions: oo End-users and installers must be provided with antenna installation instructions and transmitter operating conditions for satisfying RF exposure compliance. oo This equipment should be installed and operated with minimum distance 20 cm between the radiator and your body. EEA (European Economic Area) model Statement of compliance This equipment complies with the harmonised standards of DIRECTIVE 1999/5/EC ( R&TTE ) USA model This equipment complies with FCC radiation exposure limits set forth for an uncontrolled environment and meets the FCC radio frequency Exposure Guidelines. Labeling of conformity CE marking: EEA (European Economic Area) model CAUTION Changes or modifications not expressly approved by the party responsible for compliance could void the user’s authority to operate the equipment. CAUTION Authorization of wireless devices are different in countries or regions. Please use only in the country where you purchased the product. oo Depending on the country, restrictions on the use of Bluetooth wireless technology might exist. Confirm the laws and regulations of the country or region where you want to use the unit before use. 6 This equipment complies with EN.62311; Assessment of electronic and electrical equipment related to human exposure restrictions for electromagnetic fields; the harmonised standard of DIRECTIVE 1999/5/EC. Bluetooth® notes This equipment has been tested and found to comply with the limits for a Class B digital device, pursuant to Part 15 of the FCC Rules. These limits are designed to provide reasonable protection against harmful interference in a residential installation. This equipment generates, uses, and can radiate radio frequency energy and, if not installed and used in accordance with the instructions, may cause harmful interference to radio communications. However, there is no guarantee that interference will not occur in a particular installation. When using this unit with a mobile phone or other Bluetooth devices, they should be no more than about 10 m apart. Depending on the circumstances of use, however, the effective transmission distance might be shorter. Wireless communication with every device that supports Bluetooth wireless technology is not guaranteed. To determine the compatibility between this unit and another device that supports Bluetooth wireless technology, refer to that device's operation manual or contact the shop where you purchased it. If this equipment does cause harmful interference to radio or television reception, which can be determined by turning the equipment off and on, the user is encouraged to try to correct the interference by one or more of the following measures. oo Reorient or relocate the equipment and/or the receiving antenna. oo Increase the separation between the equipment and receiver. oo Connect the equipment into an outlet on a circuit different from that to which the receiver is connected. oo Consult the dealer or an experienced radio/TV technician for help. 7 ENGLISH Information for interference (FCC requirements) Table of contents Before use Wireless equipment precautions. . . . . . . . . . . . . . . . . . . . . 6 Bluetooth® notes. . . . . . . . . . . . . . . . . . . . . . . . . . . . . . . . . . . . 7 Included parts Before use. . . . . . . . . . . . . . . . . . . . . . . . . . . . . . . . . . . . . . . . . . . 8 Names of parts. . . . . . . . . . . . . . . . . . . . . . . . . . . . . . . . . . . . . 10 Using the remote control. . . . . . . . . . . . . . . . . . . . . . . . . . . 11 Installing the wall-mounting plate . . . . . . . . . . . . . . . . . . 12 Attaching the unit. . . . . . . . . . . . . . . . . . . . . . . . . . . . . . . . . . 13 Connecting the adaptor. . . . . . . . . . . . . . . . . . . . . . . . . . . . 13 Listening to audio from a Bluetooth device. . . . . . . . . 14 Listening to the radio. . . . . . . . . . . . . . . . . . . . . . . . . . . . . . . 18 Troubleshooting. . . . . . . . . . . . . . . . . . . . . . . . . . . . . . . . . . . . 19 Specifications. . . . . . . . . . . . . . . . . . . . . . . . . . . . . . . . . . . . . . . 21 If any of the included parts should be missing or damaged, please contact the retailer where you purchased the product. Remote control × 1 CR2025 button cell lithium battery for remote control × 1 (installed in remote control when shipped new) Wall-mounting plate × 1 Wood screws × 4 Dedicated AC adaptor × 1 For Europe For USA or User manual (this document) × 1 8 oo Avoid placing the unit in direct sunlight, close to a heater or any other place that might become hot. Furthermore, do not place it on top of an amplifier or other equipment that generates heat. Doing so might result in discoloration or deformation, or cause a malfunction. 2 While continuing to pull the tab toward the AC adaptor plug, insert the concave part (A) of the plug into the convex part (B) on the inside opposite the tab. Then, push it into the other side in the direction of the arrow. (B) oo If a nearby TV is turned on when the unit is being used, lines might appear on the screen depending on the broadcast frequency. This is not a malfunction of the unit or the TV. If you see such lines, turn the unit off or unplug the dedicated AC adaptor from the socket. (A) oo When the dedicated AC adaptor is plugged into an outlet, standby power is consumed. For customers in the UK Change the AC adaptor plug so that it suits the outlets where you are using the unit. 1 While pulling the tab toward the AC adaptor plug, pull the plug in the direction shown by the arrow below to remove it. 3 Insert the plug until you hear a click. 9 ENGLISH Precautions for use Names of parts Main unit Display MODE button Volume (–/+) buttons Skip (.//) buttons Remote control receiver LED Bluetooth indicator FM antenna Power cord (ON/OFF switch) Dedicated AC adaptor Remote control Power ( ) button Skip (lower frequency) (.) button Play/Stop (y/J) button MODE button Skip (raise frequency) (/) button MUTE button VOLUME (+/–) buttons 10 Using the remote control When to replace the battery oo Point the remote control toward the remote control receiver on the main unit and use it from a distance of 5 m or less. Do not place any obstructions between the main unit and the remote control. oo If the remote control receiver is exposed to direct sunlight or strong lighting, the remote control might not work properly. If the maximum operating distance between the remote control and the main unit decreases, or the remote control's buttons stop working, replace the battery with a new one. For information about the disposal of a used battery, refer to its label or follow the disposal method prescribed by your local government. oo Be aware that use of this remote control could cause the accidental operation of other devices that can be controlled by infrared rays. QWARNING Before use Remove the isolation sheet from the back of the remote control before use. Misuse of batteries could cause them to rupture or leak, which might result in fire, injury or staining of the surroundings. Review the warnings on page 4 carefully. Replacing the battery The battery has already been installed in the remote control when shipped from the factory. To replace the battery, while pushing on , pull in the direction of . Pull the battery tray out from the end and put one button cell lithium battery (CR2025) in with the “+” side facing up, as shown in the illustration. Then, insert the tray again. 11 ENGLISH Precautions during use Installing the wall-mounting plate QCAUTION oo Before installation of the wall-mounting plate, determine the location while confirming that no radio wave interference occurs with other electronic devices. (See “Radiation Exposure requirements” on page 6.) oo Before installing the wall-mounting plate on a wall, confirm that the wall is strong enough for it. oo Be aware that we will take absolutely no responsibility if an accident occurs because of improper installation. oo After installation, do not rest hands or place objects on the unit or pull on it forcefully. Doing so could cause the unit to fall off the wall. oo This mount cannot be attached to sound absorption panels. oo Install the plate on a smooth vertical wall. oo Do not install the plate in a location that small children or pets could reach. Installation on other surfaces (wood walls, pillars, etc.) oo After installation, confirm that nothing is loose and there are no gaps before use. Choose a solid surface and use the included wood screws or other suitable fasteners to install the wallmounting plate by the holes in its four corners. oo The wall-mounting plate is for use on walls. Do not use it on a ceiling. oo Take care to avoid installing the wall-mounting plate at an angle. oo When handling parts that the tips of screws are sticking out of, take care not to allow them to hurt anyone. oo Inspect the mounting plate regularly, and reinstall it in a new position if it is loose. Always check it after an earthquake or other vibration or force has been applied to it. oo The parts provided are designed specifically for this unit. Do not use them for any other purpose. oo When storing parts, store them in a location that cannot be reached by small children or pets. 12 oo The included wood screws cannot be used in walls made of concrete or earth, for example. If you use the included wood screws for installation, holes will be left in the wall as shown in the illustration below. We will take no responsibility for holes like these that occur. Attaching the unit After connecting the power cord to the dedicated AC adaptor cord, plug the adaptor into an outlet. Plug into outlet Unwind and extend the FM antenna attached to the back of the unit. Dedicated AC adaptor 2 Install the unit on the wall-mounting plate. Power cord Align the unit with the wall-mounting plate brackets. Power plug Slide the unit down into place. Align the brackets on the unit with the brackets on the wall-mounting plate and slide it into place. oo Make sure the unit is attached securely. oo Extend the FM antenna to the position that provides the best reception. 13 ENGLISH 1 Extend the FM antenna. Connecting the adaptor Listening to audio from a Bluetooth device (1) 1 Pull the power cord down gently to turn the unit on. 3 Pair the unit with or connect it to the other Bluetooth device. Pairing with a Bluetooth device oo You can also use the Power ( ) button on the remote control. 2 Press the MODE button. When Bluetooth mode is activated as the source, “BT” appears on the display. BT The first time you use this unit with a new Bluetooth device, you must pair them. After activating this unit's Bluetooth mode, use the other Bluetooth device to pair them. If you have already paired the other device, follow the instructions in “Connecting with an already paired Bluetooth device” on page 16. The following explanation provides examples of setting up smart phones to use them as paired Bluetooth devices. For details, refer to the operation manual of the Bluetooth device that you are using. Examples of pairing with smart phones Set up using Android 4.0 1. Find the Bluetooth item under WIRELESS & NETWORKS in the Settings menu. oo When you put this unit into Bluetooth mode, the Bluetooth indicator blinks, indicating that it can be paired with or connected to another Bluetooth device. oo You can also use the MODE button on the remote control. oo The unit retains its mode setting when the unit is off. If the unit was in Bluetooth mode the last time you turned the unit off, you can skip this step. If you unplug the dedicated AC adaptor from the outlet or disconnect the power cord from the dedicated AC adaptor, however, the unit will be reset to its default settings (TUNER mode, volume 10). 14 2. Set Bluetooth to ON, and then select “Scan for devices”. 4. When pairing with the MJBTS-1 completes, the devices are connected. Set up on an iPhone with iOS 6 1. Open the Settings app and select “Bluetooth”. 2. Set Bluetooth to ON. “MJBTS-1 Not Paired” appears. oo After pairing completes, “MJBTS-1” becomes a “PAIRED DEVICES” instead of an “AVAILABLE DEVICES”. Continued on the next page 15 ENGLISH 3. When “MJBTS-1” appears in the list of AVAILABLE DEVICES, select it. Listening to audio from a Bluetooth device (2) 3. Select “MJBTS-1 Not Paired”. When pairing completes, “MJBTS-1 connected” appears. Connecting with an iPhone running iOS 6 1. Open the Settings app and select “Bluetooth”. 2. S et Bluetooth to ON. “MJBTS-1 Not Connected” appears. 3. Select “MJBTS-1 Not Connected” to connect with the MJBTS-1. oo If a request for a passcode appears on the screen of the Bluetooth device, enter “0000” (four zeros). oo When this unit connects with another Bluetooth device, its Bluetooth indicator lights and it will make a short beeping sound twice. oo The other Bluetooth device and this unit should be no more than a few meters away from each other when paired and connected. If the distance is too great, pairing might not be possible and the connection could be lost. Connecting with an already paired Bluetooth device When this unit is on and the Bluetooth device is also on and its Bluetooth function is on, they should usually connect automatically. If they do not connect automatically, however, you can connect them manually as shown in the following examples with smart phones. Examples of connecting manually with smart phones Connecting with Android 4.0 1. Find the Bluetooth item under WIRELESS & NETWORKS in the Settings menu. 2. Set Bluetooth to ON to connect with the MJBTS-1. 16 oo If the Bluetooth indicator on the front of this unit blinks continuously for 10 minutes, it will automatically enter standby mode. If this occurs, turn the unit on again. oo This unit can remember up to 8 paired devices. If a 9th device is paired, the oldest pairing will be discarded so that there are never more than 8 pairings. (If the same device is paired more than once, however, it only counts as 1 pairing.) NOTE Regardless of the connection status of this unit and another Bluetooth device, if the Bluetooth indicator continues blinking for a long time, restart both this unit and the other device and then reconnect them. Bluetooth device. oo You can also use the remote control Play/Stop (y/9) button. 5 Use the Volume (–/+) buttons or the remote control VOLUME +/– buttons to adjust the volume. VOL 05 Volume level shown Selecting songs Selecting the previous song Press the . button on the main unit or a similar control on the Bluetooth device. oo You can also use the . button on the remote control. Selecting the next song Press the / button on the main unit or a similar control on the Bluetooth device. oo You can also use the / button on the remote control. Pausing playback oo The volume can be adjusted in a range between 00 and 32. (“MAX” is shown on the display at 32.) (The default volume level is 10.) Press pause or a similar control on the Bluetooth device or press the Play/Stop (y/9) button on the remote control. oo Depending on the connected Bluetooth device, its volume buttons might be disabled. For details, see the operation manual of the device you are using. Muting playback If you want to temporarily mute the volume of this unit, press the MUTE button on the remote control. Press the MUTE button on the remote control again to return to the previous volume level. Turning the unit off Gently pull the power cord down or press the Power ( ) button on the remote control to turn this unit off. After doing this, turn the Bluetooth device off. 17 ENGLISH 4 Select and play an audio file on the Listening to the radio 1 Press the MODE button to set the source to FM. )0 Manual tuning If you want to tune in a station that cannot be tuned in automatically, press the Skip (.//) buttons repeatedly to set the frequency of the station. )0 When “FM” appears, the frequency is shown. oo You can also use the MODE button on the remote control. 2 Choose a station. oo Each time you press a Skip (.//) button, the frequency will change by 0.1 MHz. oo You can also use the Skip (.//) buttons on the remote control. Automatic tuning 3 Press the volume (–/+) buttons to )0 adjust the volume. VOL 05 Press and hold Press and hold a skip (.//) button for 2 or more seconds until the frequency shown on the display begins to change. When a station has been automatically tuned in, the display will stop changing and show the frequency. oo To stop automatic tuning at any time, briefly press a Skip (.//) button. Volume level shown oo The volume can be adjusted in a range between 00 and 32. (“MAX” is shown on the display at 32.) If reception is poor If reception is poor, change the direction and placement of the FM antenna and find a position that provides the best reception. Turning the unit off Gently pull the power cord down or press the Power ( ) button on the remote control. 18 Troubleshooting (1) If it still does not function properly, please contact the retailer where you purchased the unit. General The unit does not work. ee Plug the dedicated AC adaptor into an outlet that is supplying power. ee Check the connection between the power cord and dedicated AC adaptor cord. ee Change the battery in the remote control. There is no sound. ee Adjust the volume. The remote control does not work. ee An isolation sheet is inserted in the battery compartment when shipped from the factory. Pull it out before use. For details, see page 11. ee If the battery is dead, replace it with a new one. ee Use the remote control from a distance of 5 m or less, and point it at the main unit. ee If any obstruction is between this unit and the remote control, operation might not be possible, so change positions as necessary. ee If a bright light is near the unit, turn it off. Radio Station cannot be tuned or its reception is poor. ee Change the position of the FM antenna. Bluetooth wireless technology Unable to pair with a Bluetooth device. ee Refer to the operation manual of that Bluetooth device. ee Turn both this unit and the other Bluetooth device off once and then turn them on and try pairing again. ee Turn off the Bluetooth devices other than the one that you are trying to pair with the unit. ee Make the Bluetooth device delete (forget) the “MJBTS-1” pairing and then try pairing again. (See “Pairing with a Bluetooth device” on page 14.) Unable to connect. ee Confirm that the Bluetooth device is on and that its Bluetooth function is on. ee Is the Bluetooth device too far away? Is there a wall or other obstruction between the unit and that device? ee Turn this unit off and then on again. ee Make the Bluetooth device delete (forget) the “MJBTS-1” pairing and then try pairing again. (See “Pairing with a Bluetooth device” on page 14.) The sound is noisy. ee Locate the unit as far as possible from televisions, microwaves and other devices that produce electromagnetic waves. Continued on the next page 19 ENGLISH If you should have any trouble with this unit please review the following information. Troubleshooting (2) The sound breaks up. ee Is there a wireless LAN, another Bluetooth device, a microwave oven or anything similar nearby? Use this unit as far as possible from such things. ee Keep this unit and the Bluetooth device as close as possible when using them. Try changing their locations. ee When using a smart phone application for something other than music playback, the sound might break up. If this occurs, do not use applications other than the music playback application. This unit uses a microcomputer, and sometimes it might not operate correctly due to noise and other interference from around the unit. In this case, unplug its AC adaptor from the power outlet once and wait for a while before plugging it into the outlet again. Then, try using the unit again. 20 Cleaning If the main unit or remote control becomes dirty, wipe with a soft cloth using a diluted pH-neutral cleaner. Do not use chemically treated wiping cloths, thinner or similar substances as they could damage the surface of the unit. QWARNING! Unplug the AC adaptor from the power outlet before cleaning. Specifications General Version. . . . . . . . . . . . . . . . . . . . . . . . . . . . . . . . . . . . . . . . . . . . . 3.0 Profiles . . . . . . . . . . . . . . . . . . . . . . . . . . . . . . . . . . . A2DP, AVRCP Codec. . . . . . . . . . . . . . . . . . . . . . . . . . . . . . . . . . . . . . . . . . . . . SBC Copy protection. . . . . . . . . . . . . . . . . . . SCMS-T supported* Class . . . . . . . . . . . . . . . . . . . . . . . . . . . . . . . . . . . . . . . . . . . . . . . . . 2 (about 10m maximum reception distance) *SCMS-T support enables the playback of copyrightprotected music and 1seg audio. Power voltage and frequency. . . . . . . . . . AC 100 V - 240 V, 50/60 Hz, 0.75 A Rated power consumption. . . . . . . . . . . . . . . . . . . . . . . . . 5 W Maximum outer dimensions (main unit) 172 mm (W) × 172 mm (H) × 41 mm (D) Weight . . . . . . . . . . . . . . . . . . . . . . . . . . . . . . . . . . . . . . . . . . . 485 g (not including dedicated AC adaptor ) Tuner Items included Frequency range . . . . . . . . . . . . . . . . 87.5 MHz – 108.0 MHz Remote control × 1 Button cell lithium battery for remote control (CR2025) × 1 (installed in remote when shipped new) Speakers Wall-mounting plate × 1 Units . . . . . . . . . . . . . . . . . . . . . . . . . . . . . . 3.5cm full range × 2 Rated impedance . . . . . . . . . . . . . . . . . . . . . . . . . . . . . . . . . . 4 Ω Dedicated AC adaptor × 1 Amplifier Rated output (JEITA)**. . . . . . . . . . . . . . . . . . . . . . . . . . 2 W × 2 Frequency response . . . . . . . . . . . . . . . . . . . 50 Hz – 20 kHz **Value measured using the JEITA (Japan Electronics and Information Technology Industries Association) standard Wood screws × 4 User manual (this document) × 1 For the purpose of improvement, specifications and appearances are subject to change without notice. Illustrations in this manual might differ in part from production models. 21 ENGLISH Bluetooth wireless technology oo N’exposez pas cet appareil à des gouttes ou à des éclaboussures. oo Ne placez pas des objets remplis de liquides, comme des vases sur l’appareil. oo N’installez pas cet appareil dans un endroit confiné comme une bibliothèque ou une unité semblable. oo L’appareil tire une énergie nominale de la prise CA quand son interrupteur MISE EN MARCHE (alimentation) ou VEILLE/MARCHE n’est pas sur la position MARCHE. oo L’appareil doit être placé assez près de la prise CA afin que vous puissiez facilement atteindre le cordon d’alimentation à tout moment. oo La prise de secteur est utilisée pour débrancher l’appareil, le dispositif de débranchement doit toujours être capable de fonctionner facilement. oo Les produits avec une construction de Classe sont équipés d’un cordon d’alimentation qui possède une prise de mise à la terre. Le cordon de ce produit doit être branché dans une prise secteur qui possède une connexion protectrice de mise à la terre. oo Si le produit utilise des piles (y compris un ensemble de piles ou des piles installées), elles ne doivent pas être exposées à la lumière du soleil, au feu ou à une chaleur excessive. 22 BBPrécautions concernant les piles Un mauvais usage des piles pourrait occasionner une rupture ou une fuite qui pourraient provoquer un incendie, des blessures ou des taches sur les objets situés près d’elles. Veuillez lire et observer soigneusement les précautions suivantes. oo Assurez-vous d’insérer les piles dans les orientations correctes, positif (+) et négatif (_). oo Si la télécommande n’est pas utilisée pendant longtemps (plus d’un mois), retirez les piles pour éviter qu’elles ne fuient. oo Si la pile fuit, essuyez la fuite à l’intérieur du compartiment des piles et remplacez les anciennes piles par des nouvelles. oo N’utilisez pas des piles de types autres que ceux qui sont stipulés. oo Ne chauffez pas et ne démontez pas les piles. Ne jetez jamais les piles dans le feu ou dans l’eau. oo Ne transportez pas et ne stockez pas, les piles avec d’autres objets métalliques. Les piles pourraient court-circuiter, fuir ou exploser. oo Ne rechargez jamais une pile s’il n’est pas confirmé qu’elle est d’un type rechargeable. Pour les clients européens FRANÇAIS Elimination des équipements électriques et électroniques. (a)Tous les équipements électriques et électroniques doivent être éliminés séparément du flux de déchets municipaux via des installations de collecte désignées par le gouvernement ou les autorités locales. (b)En éliminant correctement les équipements électriques et électroniques, vous aiderez à sauvegarder des ressources précieuses et vous éviterez tous les effets négatifs potentiels sur la santé humaine et l’environnement. (c)Une élimination incorrecte des équipements électriques et électroniques usagés peut avoir des effets graves sur l’environnement et la santé humaine à cause de la présence de substances dangereuses dans les équipements. (d)Le symbole (DEEE) Déchets équipements électriques et électroniques, qui montre une poubelle à roulettes rayée d’une croix, indique que les équipements électriques et électroniques doivent être ramassés et éliminés séparément des déchets ménagers. (e)Les systèmes de retour et de collecte sont disponibles pour les utilisateurs finaux. Pour des renseignements plus détaillés au sujet de l’élimination des vieux équipements électriques et électroniques, veuillez contacter votre bureau municipal, le service d’élimination des déchets ou le magasin où vous avez acheté les équipements. Elimination des piles et/ou accumulateurs (a)Les piles et/ou accumulateurs usagés doivent être éliminés séparément du flux de déchets municipaux via des installations de collecte désignées par le gouvernement ou les autorités locales. (b)En éliminant correctement les piles et/ou accumulateurs usagés, vous aiderez à sauvegarder des ressources précieuses et à éviter des effets négatifs potentiels sur la santé humaine et l’environnement. (c)Une élimination inadéquate des piles et/ou accumulateurs usagés peut avoir des effets graves sur l’environnement et la santé humaine à cause de la présence de substances dangereuses qu’ils contiennent. (d)L e symbole (DEEE) Déchets équipements électriques et électroniques, qui montre une poubelle à roulettes rayée d’une croix, indique que les piles et/ou accumulateurs doivent être collectés et éliminés séparément des déchets ménagers. Si une pile ou un accumulateur contient plus que les valeurs précisées de plomb (Pb), mer- Pb, Hg, Cd cure (Hg), et/ou cadmium (Cd) comme défini dans la Directive Pile (2006/66/EC), les symboles chimiques de ces unités seront indiqués sous le symbole DEEE. (e)Les systèmes de retour et de collecte sont disponibles pour les utilisateurs finaux. Pour des renseignements plus détaillés au sujet de l’élimination des piles et/ou accumulateurs usagés, veuillez contacter votre bureau municipal, le service d’élimination des déchets ou le magasin où vous avez acheté les équipements. 23 Précautions concernant les équipements sans fil Conformité de l’émetteur radio et interférences Obligations concernant l’exposition aux radiations Modèle USA Cet équipement respecte les réglementations, qui sont reconnues internationalement, pour le cas d’exposition humaine aux ondes radio produites par l’émetteur. Cet appareil est conforme aux Règlements FCC (Commission fédérale des Communications) Section 15. Le fonctionnement est soumis aux deux conditions suivantes : 1) L’appareil ne doit pas provoquer d’interférences 2) Cet appareil doit accepter les interférences, y compris les interférences qui peuvent provoquer le fonctionnement non désiré de l’appareil. Etiquetage de l’autorisation. FCC ID : Modèle EEE (Zone économique européenne) Cet équipement est conforme aux normes harmonisées de la DIRECTIVE 1999/5/EC (R&TTE) Etiquetage de conformité Marque CE AVERTISSEMENT Les changements ou modifications non expressément approuvés par la partie responsable de la conformité pourraient annuler l’autorisation de l’utilisateur d’utiliser l’équipement. AVERTISSEMENT Les autorisations concernant les appareils sans fil sont différentes selon les pays et les régions. Veuillez les utiliser uniquement dans le pays où vous avez acheté le produit. oo Selon le pays, des restrictions pour l’utilisation de Bluetooth peuvent exister. Assurez-vous de la conformité des lois et des règlementations du pays ou de la région où vous souhaitez utiliser l’unité avant son utilisation. 24 Sur la base des deux conditions suivantes : oo Les utilisateurs finaux et les installateurs doivent recevoir des instructions concernant l’installation de l’antenne et les conditions de fonctionnement de l’émetteur afin de respecter la conformité de l’exposition aux FR. oo Cet équipement doit être installé et être utilisé, avec une distance minimum de 20 cm entre le radiateur et votre corps ; Déclaration de conformité Modèle USA Cet équipement est conforme aux limites d’exposition aux radiations FCC fixées pour un environnement non contrôlé et conforme aux directives FCC pour l’exposition aux fréquences radio. Modèle EEE (Zone économique européenne) Cet équipement est conforme à la norme EN.62311 ; Evaluation de l’équipement électronique et électrique relative aux restrictions concernant l’exposition humaine aux champs électromagnétiques ; la norme harmonisée de la DIRECTIVE 1999/5/EC. Bluetooth® notes Informations pour les interférences (obligations FCC) Si cet équipement provoque des interférences nuisibles à la réception de la radio ou de la télévision, ce qui peut être déterminé en éteignant et en mettant en marche l’équipement, il est conseillé à l’utilisateur d’essayer de corriger l’interférence au moyen d’une ou plusieurs des mesures suivantes. oo Réorientez ou réimplantez l’équipement et/ou l’antenne réceptrice. oo Augmentez l’espacement entre l’équipement et le récepteur. oo Branchez l’équipement dans une prise sur un circuit différent de celui auquel le récepteur est raccordé. oo Consultez le détaillant ou un technicien radio/TV expérimenté pour obtenir de l’aide. 25 FRANÇAIS Cet équipement a été testé et déclaré conforme aux limites pour un appareil numérique de Classe B, conformément à la Section 15 des Règlements FCC. Ces limites sont destinées à fournir une protection raisonnable contre les interférences dangereuses dans une installation résidentielle. Cet équipement génère, utilise et peut provoquer un rayonnement de fréquence radio et, s’il n’est pas installé et utilisé conformément aux instructions, il peut provoquer des interférences nuisibles aux communications radio. Cependant, il n’est pas garanti que des interférences ne se produiront pas dans une installation particulière. Lorsque vous utilisez cette unité avec un portable ou d’autres appareils Bluetooth, ils ne doivent pas se situer à plus de 10 m les uns des autres. Cependant, selon les circonstances d’utilisation, la distance efficace de transmission peut être moins grande. La communication sans fil avec tout appareil qui prend en charge Bluetooth n’est pas garantie. Pour déterminer la compatibilité entre cette unité et un autre appareil qui prend en charge Bluetooth, veuillez vous reporter au manuel de fonctionnement de l’appareil ou contacter le magasin où vous l’avez acheté. Table des matières Avant utilisation Précautions concernant les équipements sans fil. . . . 24 Bluetooth® notes. . . . . . . . . . . . . . . . . . . . . . . . . . . . . . . . . . . 25 Pièces incluses Avant utilisation. . . . . . . . . . . . . . . . . . . . . . . . . . . . . . . . . . . . 26 Nom des pièces. . . . . . . . . . . . . . . . . . . . . . . . . . . . . . . . . . . . 28 Utilisation de la télécommande. . . . . . . . . . . . . . . . . . . . . 29 Installation de la plaque de montage mural . . . . . . . . 30 Attacher l’unité. . . . . . . . . . . . . . . . . . . . . . . . . . . . . . . . . . . . . 31 Brancher l’adaptateur. . . . . . . . . . . . . . . . . . . . . . . . . . . . . . . 31 Ecouter un contenu audio à partir d’un appareil Bluetooth. . . . . . . . . . . . . . . . . . . . . . . . . . . . . . . . . . 32 Ecouter la radio. . . . . . . . . . . . . . . . . . . . . . . . . . . . . . . . . . . . . 36 Problèmes. . . . . . . . . . . . . . . . . . . . . . . . . . . . . . . . . . . . . . . . . . 37 Spécifications. . . . . . . . . . . . . . . . . . . . . . . . . . . . . . . . . . . . . . . 39 Si l’une des pièces incluses est manquante ou endommagée, veuillez contacter le détaillant où vous avez acheté le produit. Télécommande × 1 CR2025 pile bouton au lithium pour télécommande × 1 (installée dans la télécommande lorsqu’elle est envoyée neuve) Plaque de montage mural × 1 Vis bois × 4 Adaptateur secteur CA dédié × 1 Pour l’Europe Pour les USA ou Manuel utilisateur (ce document) × 1 26 Précautions d’emploi oo Si une TV est allumée à proximité lorsque l’unité est utilisée, des lignes peuvent apparaître sur l’écran selon la fréquence de diffusion. Il ne s’agit pas d’un mauvais fonctionnement de l’unité ou de la TV. Si vous voyez ces lignes, éteignez l’unité ou débranchez l’adaptateur CA dédié de la prise. en continuant à tirer le tab vers la prise de l’adaptateur CA insérez la partie concave (A) de la prise dans la partie convexe (B) sur la partie interne opposée au tab. Puis, poussez-la de l’autre côté dans la direction de la flèche. (B) (A) oo Lorsque l’adaptateur CA dédié est branché dans une prise de l’énergie de secours est consommée. Pour les clients au Royaume-Uni Changez la prise de l’adaptateur CA afin qu’elle corresponde aux prises avec lesquelles vous utilisez l’unité. 1 Lorsque vous tirez le tab vers la prise de l’adaptateur CA, tirez la prise dans la direction indiquée par la flèche ci-dessous pour le retirer. 3 Insérez la fiche jusqu’à ce que vous entendiez un clic. 27 FRANÇAIS oo Evitez de placer l’unité sous la lumière directe du soleil, près d’un chauffage ou dans un autre endroit qui pourrait devenir chaud. Par ailleurs, ne la placez pas sur un amplificateur ou un autre équipement générant de la chaleur. Sinon, cela pourrait produire une décoloration ou une déformation, ou provoquer un mauvais fonctionnement. 2 Tout Nom des pièces Unité principale Affichage Bouton MODE Boutons (–/+) volume Boutons (.//) saut Récepteur télécommande Indicateur LED Bluetooth Antenne FM Cordon d’alimentation (Interrupteur MARCHE/ARRET) Adaptateur de réseau AC dédié Télécommande Bouton de mise en marche ( ) Bouton MODE Bouton saut (fréquence plus basse) (.) Bouton saut (augmenter la fréquence) (/) Bouton marche/arrêt (y/J) Bouton de MISE EN SOURDINE Boutons (+/–) VOLUME 28 Utilisation de la télécommande Quand doit-on remplacer la pile oo Pointez la télécommande vers le récepteur de la télécommande sur l’unité principale et utilisez-la à une distance de 5 m ou moins. Ne placez aucun obstacle entre l’unité principale et la télécommande. oo Si le récepteur de la télécommande est exposé à la lumière directe du soleil ou à un fort éclairage, la télécommande pourrait ne pas fonctionner correctement. Si la distance maximum de fonctionnement entre la télécommande et l’unité principale diminue, ou si les boutons de la télécommande ne fonctionnent plus, remplacez la pile par une pile neuve. Pour tous renseignements concernant l’élimination d’une pile usagée, veuillez vous reporter à son étiquette ou suivre la méthode d’élimination prescrite par votre gouvernement local. oo Vous devez savoir que l’utilisation de cette télécommande pourrait provoquer le fonctionnement accidentel d’autres appareils qui peuvent être contrôlés par des rayons infrarouges. QAVERTISSEMENT Avant utilisation Retirez la feuille isolante du dos de la télécommande avant utilisation. Une mauvaise utilisation des piles peut occasionner une rupture ou une fuite, ce qui pourrait entraîner un incendie, des blessures ou des taches dans les environs. Revoyez soigneusement les avertissements figurant à la page 22. Remplacement de la pile La pile a déjà été installée dans la télécommande lorsqu’elle est expédiée de l’usine. Pour remplacer la pile, tout en poussant sur , tirez dans la direction de . Sortez le compartiment à piles et placez dedans une pile bouton au lithium (CR2025) avec le côté « + » vers le haut, comme montré dans l’illustration. Puis, remettez le compartiment en place. 29 FRANÇAIS Précautions durant l’utilisation Installation de la plaque de montage mural QAVERTISSEMENT oo Avant l’installation de la plaque de montage mural, déterminez l’emplacement tout en vous assurant qu’aucune interférence d’ondes radio ne se produit avec d’autres appareils électroniques. (Voir Obligations concernant l’exposition aux radiations à la page 24.) oo Avant d’installer une plaque de montage mural sur un mur, assurez-vous que le mur est assez solide pour la soutenir. oo Vous devez savoir que nous ne serons absolument pas tenus pour responsables si un accident se produit suite à une installation incorrecte. oo Après l’installation, ne mettez pas vos mains, et ne placez pas des objets, sur l’unité et ne tirez pas dessus avec force. En le faisant, l’unité pourrait tomber du mur. oo Cette plaque de montage ne peut être attachée à des panneaux d’absorption des sons. oo Installez la plaque sur un mur vertical lisse. oo N’installez pas la plaque dans un endroit que des jeunes enfants ou des animaux de compagnie peuvent atteindre. oo Après l’installation, assurez-vous que tout est bien fixé et qu’il n’y a pas d’interstices avant l’utilisation. Installation sur d’autres surfaces (murs en bois, piliers, etc.) Choisissez une surface solide et utilisez les vis à bois incluses, ou d’autres attaches adéquates, pour installer la plaque de montage mural par les trous situés dans ses quatre coins. oo La plaque de montage mural est destinée à être utilisée sur des murs. Ne l’utilisez pas sur un plafond. oo Veillez à ne pas installer la plaque de montage mural en angle. oo Lorsque vous manipulez des pièces sur lesquelles les pointes des vis ressortent, assurez-vous qu’elles ne vont blesser personne. oo Inspectez régulièrement la plaque de montage et installez-la à nouveau dans une nouvelle position si elle est mal fixée. Vérifiez-la toujours après un tremblement de terre, ou une autre vibration ou force qui a été appliquée sur elle. oo Les pièces fournies sont conçues spécialement pour cette unité. Ne pas les utiliser dans un autre but oo Lorsque vous stockez les pièces, faites-le dans un endroit qui ne peut être atteint par de jeunes enfants ou des animaux de compagnie. 30 oo Les vis à bois incluses ne peuvent être utilisées sur des murs en béton ou en terre, par exemple. Si vous utilisez les vis à bois incluses pour l’installation, des trous seront laissés dans le mur comme montré dans l’illustration ci-dessous. Nous ne pourrons être tenus pour responsables des trous semblables qui pourraient se produire. Attacher l’unité 1 Etendre l’antenne FM. Brancher l’adaptateur. Après avoir raccordé le cordon d’alimentation à l’adaptateur CA dédié, branchez l’adaptateur dans une prise. FRANÇAIS Branchez dans la prise Déroulez et étendez l’antenne FM attachée au dos de l’unité. 2 Installez l’unité sur la plaque de montage mural. Adaptateur de réseau AC dédié Cordon d’alimentation Alignez l’unité avec les crochets de la plaque de montage mural. Prise de courant Faites glisser l’unité en place. Alignez les crochets de l’unité sur les crochets de la plaque de montage mural et faites-la glisser en place. oo Assurez-vous que l’unité est attachée solidement. oo Etendez l’antenne FM jusqu’à la position assurant la meilleure réception. 31 Ecouter un contenu audio à partir d’un appareil Bluetooth (1) 1 Tirez doucement le cordon d’alimentation vers le bas pour mettre l’unité en marche. oo Vous pouvez également utiliser le bouton de Mise en marche (alimentation) ( ) sur la télécommande. 2 Appuyez sur le bouton MODE. Lorsque le mode Bluetooth est activé comme source, "BT" apparaît sur l’affichage. BT 3 Couplez l’unité ou connectez-la à l’appareil Bluetooth. Couplage avec un périphérique Bluetooth. La première fois que vous utilisez cette unité avec un nouveau périphérique Bluetooth, vous devez les coupler. Après avoir activé le mode Bluetooth de cette unité, utilisez l’autre périphérique Bluetooth pour les coupler. Si vous avez déjà fait un couplage avec l’autre périphérique, suivez les instructions dans Se connecter avec un appareil Bluetooth déjà couplé. à la page 34. L’explication suivante fournit des exemples de configuration de smart phones pour les utiliser comme périphériques Bluetooth couplés. Pour plus de détails, reportez-vous au manuel de fonctionnement de l’appareil Bluetooth que vous utilisez. Exemples de mise en liaison avec des smart phones. Configurer l’utilisation de Android 4.0 1. Trouvez l'intitulé Bluetooth dans SANS FIL & RESEAUX dans le menu Réglages. oo Lorsque vous mettez cette unité en mode Bluetooth, l’indicateur Bluetooth clignote, indiquant qu’il peut être mis en liaison ou connecté avec un autre appareil Bluetooth. oo Vous pouvez également utiliser le bouton MODE sur la télécommande. 32 oo L’unité conserve ce réglage de mode lorsque l’unité est éteinte. Si l’unité était en mode Bluetooth la dernière fois que vous l’avez éteinte, vous pouvez sauter cette étape. Si vous débranchez l’adaptateur AC dédié de la prise ou si vous déconnectez le cordon d’alimentation de l’adaptateur AC dédié, l’unité va cependant se replacer sur ses réglages par défaut (mode TUNER, volume 10). 2. Mettez Bluetooth sur MARCHE (ON) et puis choisissez « Rechercher appareils ». 3. Lorsque MJBTS-1 apparaît dans la liste des APPAREILS DISPONIBLES, choisissez-le. Programmer sur un iPhone avec iOS 6 1. Ouvrez l’application Réglages et choisissez Bluetooth. FRANÇAIS 4. Lorsque le couplage avec le MJBTS-1 est terminé, les appareils sont connectés. 2. Réglez Bluetooth sur ON. MJBTS-1 non couplé apparaît. oo Lorsque le couplage est terminé MJBTS-1 devient « APPAREILS COUPLES » au lieu de « APPAREILS DISPONIBLES » Suite à la page suivante 33 Ecouter un contenu audio à partir d’un appareil Bluetooth (2) 3. Choisissez MJBTS-1 Non couplé Lorsque le couplage est terminé, MJBTS-1 connecté »apparaît. Se connecter avec un iPhone utilisant iOS 6 1. Ouvrez l’application Réglages et choisissez Bluetooth. 2. Réglez Bluetooth sur ON. MJBTS-1 Non connecté apparaît. 3. Sélectionnez « MJBTS-1 Non connecté » pour vous connecter avec MJBTS-1. oo Si la demande d’un code de base apparaît sur l’écran de l’appareil Bluetooth, entrez « 0000 » (quatre zéros). oo Lorsque cette unité se connecte à un autre appareil Bluetooth, son indicateur Bluetooth s’éclaire et va émettre deux fois un bip court. oo L’autre appareil Bluetooth et cette unité ne doivent pas être éloignés l’un de l’autre de plus de quelques mètres lorsqu’ils sont couplés et connectés. Si la distance est trop grande, le couplage peut ne pas être possible et la connexion pourrait être perdue. Se connecter avec un appareil Bluetooth déjà couplé. Lorsque cette unité est en marche et que l’appareil Bluetooth est aussi en marche, ils doivent normalement se connecter automatiquement. Cependant, s’ils ne se connectent pas automatiquement, vous pouvez les connecter manuellement comme montré dans les exemples suivants avec des smart phones. Exemples de connexion manuelle avec des smart phones. Connexion à Android 4.0 1. Trouvez l’intitulé Bluetooth dans SANS FIL & RESEAUX dans le menu Réglages. 2. Mettez Bluetooth sur ON (marche) pour le connecter avec le MJBTS-1. 34 oo Si l’indicateur Bluetooth sur la face de cette unité clignote continuellement pendant 10 minutes, il va automatiquement entrer en mode veille. Si cela se produit, remettez de nouveau l’unité en marche. oo Cet unité peut se souvenir de jusqu’à 8 appareils couplés. Si un 9ème appareil est couplé, le couplage le plus ancien sera éliminé, de manière à ce qu’il n’y ait jamais plus de 8 couplages. (Cependant, si le même appareil est couplé plus d’une fois, il ne compte que pour 1 couplage). NOTE Quel que soit le statut de la connexion de cette unité et d’un autre appareil Bluetooth, si l’indicateur Bluetooth continue à clignoter pendant longtemps, remettez en marche cette unité et l’autre appareil et ensuite reconnectez-les. 4 Sélectionnez et écoutez un contenu audio sur l’appareil Bluetooth. oo Vous pouvez également utiliser le bouton Marche/Arrêt (y/9) de la télécommande. les boutons +/– VOLUME de la télécommande pour régler le volume. VOL 05 Niveau de volume indiqué oo Le volume peut être réglé dans une gamme entre 00 et 32. MAX est indiqué sur l’affichage à 32). (Le niveau de volume par défaut est 10). oo Selon l’appareil Bluetooth connecté, ses boutons de volume peuvent être désactivés. Pour plus de détails, voir le manuel de fonctionnement de l’appareil que vous utilisez. Sélectionner la chanson précédente Appuyez sur le bouton . sur l’unité principale ou un contrôle similaire sur l’appareil Bluetooth. oo Vous pouvez également utiliser le bouton . sur la télécommande. Sélectionner la prochaine chanson Appuyez sur le bouton / sur l’unité principale ou sur un contrôle similaire sur l’appareil Bluetooth. oo Vous pouvez également utiliser le bouton / sur la télécommande. Lecture de la musique en pause Appuyez sur pause ou sur un contrôle similaire sur l’appareil Bluetooth ou appuyez sur le bouton Marche/ Arrêt (y/9) de la télécommande. Lecture de la musique en sourdine Si vous souhaitez mettre temporairement en sourdine le volume de cette unité, appuyez sur le bouton SOURDINE de la télécommande. Appuyez de nouveau sur le bouton SOURDINE de la télécommande pour retourner au précédent niveau de volume. Fermer l’unité Tirez doucement le cordon d’alimentation vers le bas ou appuyez sur le bouton Mise en marche (alimentation) ( ) de la télécommande pour éteindre cette unité. Ensuite, éteignez l’appareil Bluetooth. 35 FRANÇAIS 5 Utilisez les boutons (–/+) volume ou Sélectionner des chansons Ecouter la radio 1 Appuyez sur le bouton MODE pour mettre la source sur FM. )0 Lorsque FM apparaît, la fréquence est indiquée. oo Vous pouvez également utiliser le bouton MODE sur la télécommande. 2 Choisissez une station. Réglage automatique )0 Réglage manuel Si vous voulez vous brancher sur une station qui ne peut être sélectionnée automatiquement, appuyez sur les boutons Saut (.//) à plusieurs reprises pour régler la fréquence de la station. )0 oo Chaque fois que vous appuyez sur un bouton Saut (.//), la fréquence va changer de 0,1 MHz. oo Vous pouvez également utiliser les boutons Saut (.//) de la télécommande. 3 Appuyez sur les boutons volume (–/+) pour régler le volume. VOL 05 Maintenez ce bouton enfoncé Maintenez enfoncé le bouton saut (.//) pendant 2 secondes ou plus jusqu’à ce que la fréquence indiquée sur l’affichage commence à changer. Quand une station a été automatiquement choisie, l’affichage va arrêter de changer et montrer la fréquence. oo Pour arrêter le réglage automatique à tout moment, appuyez brièvement sur un bouton Saut (.//). 36 Niveau de volume indiqué oo Le volume peut être réglé dans une gamme entre 00 et 32. MAX est indiqué sur l’affichage à 32). Si la réception n’est pas bonne Si la réception n’est pas bonne, changez la direction et le placement de l’antenne FM et trouvez une position assurant la meilleure réception. Fermer l’unité Tirez doucement le cordon d’alimentation vers le bas et appuyez sur le bouton Mise en marche ( ) de la télécommande. Problèmes (1) Si vous avez des problèmes avec cette unité, veuillez revoir les renseignements suivants. S’il ne fonctionne toujours pas convenablement, veuillez contacter le distributeur chez qui vous avez acheté l’unité. L’unité ne fonctionne pas. ee Branchez l’adaptateur CA dédié dans une prise qui fournit de l’électricité. ee Vérifiez la connexion entre le cordon d’alimentation et le cordon de l’adaptateur CA dédié. ee Changez la pile de la télécommande. Il n’y a pas de son. ee Réglez le volume. La télécommande ne fonctionne pas. ee Une feuille isolante est insérée dans le compartiment à piles lorsqu’elle est expédiée de l’usine. Retirez-la avant utilisation. Pour plus de détails, voir page 29. ee Si la pile est morte, remplacez-la par une pile neuve. ee Utilisez la télécommande à une distance de 5 m ou moins, et pointez-la vers l’unité principale. ee Si un obstacle se trouve entre cette unité et la télécommande, le fonctionnement ne sera peutêtre pas possible, donc changez les positions comme nécessaire. ee Si une lumière éblouissante se trouve près de l’unité, éteignez-la. La station ne peut être calée ou sa réception n’est pas bonne. ee Changez la position de l’antenne FM. Bluetooth Impossible de coupler avec un appareil Bluetooth. ee Reportez-vous au manuel de fonctionnement de cet appareil Bluetooth. ee Eteignez une fois cet appareil et l’autre appareil Bluetooth et remettez-les en marche et essayez de nouveau de les coupler. ee Eteignez les appareils Bluetooth autres que celui que vous essayez de coupler avec l’unité. ee Assurez-vous que l’appareil Bluetooth annule (oublie) la liaison « MJBTS-1 » et puis essayez de nouveau d’établir la liaison entre eux. (Voir Couplage avec un périphérique Bluetooth. à la page 32.) Impossible de se connecter. ee Assurez-vous que l’appareil Bluetooth est allumé et que sa fonction Bluetooth fonctionne. ee L’appareil Bluetooth est-il situé trop loin ? Y a-t-il un mur ou un autre obstacle entre l’unité et cet appareil ? ee Eteignez cette unité et allumez-la à nouveau. ee Assurez-vous que l’appareil Bluetooth annule (oublie) la liaison « MJBTS-1 » et puis essayez de nouveau d’établir la liaison entre eux. (Voir Couplage avec un périphérique Bluetooth. à la page 32.) Le son est bruyant. ee Placez l’unité aussi loin que possible des télévisions, micro-ondes ou autres appareils produisant des ondes électromagnétiques. Suite à la page suivante 37 FRANÇAIS Général Radio Problèmes (2) Le son s’est interrompu. ee Y a-t-il un LAN (réseau local) sans fil, un autre appareil Bluetooth, un four à micro ondes ou quelque chose de similaire à proximité ? Utilisez cette unité aussi loin que possible de ces objets. ee Gardez cette unité et l’appareil Bluetooth aussi près l’un de l’autre que possible lorsque vous les utilisez. Essayez de changer leur emplacement. ee Lorsque vous utilisez une application smart phone pour quelque chose d’autre que de la lecture de musique, le son peut s’interrompre. Si cela se produit, n’utilisez pas des applications autres que l’application lecture de musique. Cette unité utilise un micro-ordinateur et parfois il peut ne pas fonctionner correctement à cause du bruit et d’autres interférences provenant d’autour de l’unité. Dans ce cas, débranchez une fois son adaptateur CA de la prise et attendez un moment avant de le rebrancher dans la prise. Puis, essayez d’utiliser à nouveau l’unité. 38 Nettoyage Si l’unité principale ou la télécommande sont sales, nettoyez-les avec un chiffon doux en utilisant un produit de nettoyage au pH neutre. N’utilisez pas de chiffons traités chimiquement, des substances plus fines ou similaires car ils pourraient endommager la surface de l’unité. QAVERTISSEMENT ! Débranchez l’adaptateur CA de la prise avant le nettoyage. Spécifications Général Version. . . . . . . . . . . . . . . . . . . . . . . . . . . . . . . . . . . . . . . . . . . . . 3.0 Profils . . . . . . . . . . . . . . . . . . . . . . . . . . . . . . . . . . . . A2DP, AVRCP Codec. . . . . . . . . . . . . . . . . . . . . . . . . . . . . . . . . . . . . . . . . . . . . SBC Protection copie. . . . . . . . . . . . pris en charge par SCMS-T* Classe. . . . . . . . . . . . . . . . . . . . . . . . . . . . . . . . . . . . . . . . . . . . . . . . 2 (environ 10 m maximum de distance réception) *L a prise en charge *SCMS-T permet la lecture de musique protégée par le droit d’auteur et l’audio 1seg. Tension et fréquence Modèle pour l’Europe. . . . . . . . . . . CA 220 V - 240 V, 50 Hz Modèle pour les USA. . . . . . . . . . . . . . . . . . . CA 120 V, 60 Hz Consommation électrique. . . . . . . . . . . . . . . . . . . . . . . . . . 5 W Dimensions extérieures maximum (unité principale) 172 mm (Largeur) × 172 mm (Hauteur) × 41 mm (Profondeur) Poids . . . . . . . . . . . . . . . . . . . . . . . . . . . . . . . . . . . . . . . . . . . . . 485 g (non compris l’adaptateur CA dédié) Tuner Gamme des fréquences . . . . . . . . . 87,5 MHz – 108,0 MHz Articles inclus Télécommande × 1 Haut-parleurs Unités . . . . . . . . . . . . . . . . . . . .3,5 cm gamme complète × 2 Taux d’impédance . . . . . . . . . . . . . . . . . . . . . . . . . . . . . . . . . 4 Ω Bouton pile au lithium pour la télécommande (CR2025) × 1 (installé dans la télécommande lorsqu’elle est expédiée neuve) Plaque de montage mural × 1 Vis bois × 4 Amplificateur Puissance nominale (JEITA)** . . . . . . . . . . . . . . . . . . . 2 W × 2 Réponse fréquence. . . . . . . . . . . . . . . . . . . . . . 50 Hz – 20 kHz **Valeur mesurée en utilisant la norme JEITA Association japonaise des industries de l’électronique et de l’informatique) Adaptateur secteur CA dédié × 1 Manuel utilisateur (ce document) × 1 Dans un but d’améliorations, les spécifications et les apparences sont soumises à des changements sans préavis. Les illustrations dans ce manuel peuvent être en partie différentes des modèles de production. 39 FRANÇAIS Bluetooth oo No exponga este aparato a goteos ni salpicaduras. oo No coloque encima del aparato ningún objeto con líquido, como un jarrón. oo No instale este aparato en un espacio cerrado, como una librería o una unidad similar. oo El aparato saca la potencia nominal no operativa de la toma CA sin que su botón POWER o STANDBY/ON esté encendido en posición ON. oo El aparato debe colocarse lo bastante cerca de la toma CA para poder enchufar al cable fácilmente en cualquier momento. oo El enchufe de red se utiliza como dispositivo de desconexión y debe estar siempre accesible. oo Los productos de Clase están equipados con un cable de alimentación que tiene un enchufe de conexión a tierra. El cable de este producto debe enchufarse a una toma CA con protección de conexión a tierra. oo Si el producto utiliza pilas (ya sea una batería de pilas o pilas instaladas), no deben exponerse al sol, al fuego o a un calor excesivo. BBPrecauciones relativas a las pilas El mal uso de las pilas podría dar lugar a rupturas o fugas y provocar un incendio, lesiones o manchas en los objetos situados cerca. Lea y siga atentamente las siguientes precauciones. oo Asegúrese de colocar las pilas con los polos positivo (+) y negativo (_) correctamente. oo Si no se utiliza el mando a distancia durante mucho tiempo (más de un mes), saque las pilas para evitar fugas. oo Si las pilas pierden, limpie la fuga dentro del compartimento para pilas y cámbielas por otras nuevas. oo No utilice pilas distintas de las especificadas en las instrucciones. oo No caliente o desmonte las pilas. No tire nunca las pilas al fuego o al agua. oo No lleve o guarde las pilas junto con otros objetos metálicos. Las pilas podrían sufrir un cortocircuito, fuga o explosión. oo No cargue nunca una pila o batería a menos que esté seguro de que es recargable. 40 Para los clientes europeos ESPAÑOL Eliminación de los aparatos eléctricos y electrónicos (a)Todos los aparatos eléctricos y electrónicos deben eliminarse separados de los sistemas de recogida de basura municipales a través de las instalaciones de recogida designadas por el gobierno o las autoridades locales. (b)Si elimina los aparatos eléctricos y electrónicos correctamente, ayudará a ahorrar recursos muy valiosos y evitar los posibles efectos adversos sobre la salud humana y el medio ambiente. (c)La eliminación incorrecta de los residuos de aparatos eléctricos y electrónicos puede tener efectos graves sobre el medio ambiente y la salud humana debido a la presencia de sustancias nocivas en los equipos. (d)El símbolo de Residuos de Aparatos Eléctricos y Electrónicos (RAEE), que muestra un contenedor de basura con ruedas tachado, indica que los aparatos eléctricos y electrónicos deben ser recogidos y eliminados separados de los residuos domésticos. (e)Existen sistemas de devolución y recogida disponibles para los usuarios finales. Para información más detallada sobre la eliminación de los aparatos eléctricos y electrónicos viejos, póngase en contacto con su oficina municipal, el servicio de eliminación de residuos o la tienda donde compró el aparato. Eliminación de las pilas y/o acumuladores (a)Los residuos de pilas y/o acumuladores deben eliminarse separados de los sistemas de recogida de basura municipales a través de las instalaciones de recogida designadas por el gobierno o las autoridades locales. (b)Si elimina las pilas y/o acumuladores correctamente, ayudará a ahorrar recursos muy valiosos y evitar los posibles efectos adversos sobre la salud humana y el medio ambiente. (c)La eliminación incorrecta de los residuos de pilas y/o acumuladores puede tener efectos graves sobre el medio ambiente y la salud humana debido a la presencia de sustancias nocivas. (d)El símbolo RAEE, que muestra un contenedor de basura con ruedas tachado, indica que las pilas y/o acumuladores deben ser recogidos y eliminados separados de los residuos domésticos. Si una pila o acumulador contiene valores de plomo (Pb), mercurio (Hg), y/o cadmio (Cd) más elevados de los especificados en la Directiva sobre Pilas (2006/66/CE), los símbolos químicos para Pb, Hg, Cd estos elementos aparecerán debajo del símbolo RAEE. (e)Existen sistemas de devolución y recogida disponibles para los usuarios finales. Para información más detallada sobre la eliminación de las pilas y/o acumuladores, póngase en contacto con su oficina municipal, el servicio de eliminación de residuos o la tienda donde compró el aparato. 41 Precauciones con los aparatos inalámbricos Conformidad de los radiotransmisores e interferencia Requisitos de exposición a la radiación Modelo EE.UU. Este aparato cumple con la normativa, reconocida internacionalmente, en cuanto a la exposición humana a las ondas de radio generadas por el transmisor. Este aparato cumple con Part.15 de la Normativa FCC. Su funcionamiento está sujeto a las dos condiciones siguientes: 1) Este aparato no debe causar interferencias 2) Este aparato debe aceptar cualquier interferencia, incluso las interferencias que puedan afectar al correcto funcionamiento del mismo. Etiquetado de autorización FCC ID: Modelo EEE (Espacio Económico Europeo) Este aparato cumple con los estándares armonizados de la DIRECTIVA 1999/5/CE (R&TTE) Etiquetado de conformidad Marcado CE: ATENCIÓN Los cambios o modificaciones no expresamente aprobados por la parte responsable de la conformidad podrían anular la autoridad del usuario para utilizar el aparato. ATENCIÓN La autorización para los aparatos inalámbricos es distinta según los países o regiones. Se recomienda utilizar el producto solo en el país donde se adquirió. oo Dependiendo de los países, puede haber restricciones en el uso de la tecnología Bluetooth. Confirme las leyes y normativas del país o región donde quiera utilizar el aparato antes de hacerlo. 42 Según las dos condiciones siguientes: oo Los usuarios finales y los instaladores deben disponer de las instrucciones para la instalación de antenas y las condiciones de uso de los transmisores para cumplir con las exigencias de exposición RF. oo Este aparato debe instalarse y utilizarse a una distancia mínima de 20 cm entre el radiador y su cuerpo. Declaración de conformidad Modelo EE.UU. Este aparato cumple con los límites de exposición a la radiación de FCC establecidos para un entorno no controlado y con las directrices sobre exposición a la radiofrecuencia de FCC. Modelo EEE (Espacio Económico Europeo) Este aparato cumple con la norma EN.62311 sobre Evaluación de los aparatos eléctricos y electrónicos respecto de las restricciones relativas a la exposición de las personas a los campos electromagnéticos; el estándar armonizado de la DIRECTIVA 1999/5/CE. Notas sobre la tecnología Bluetooth® Información sobre interferencias (requisitos FCC) Si este aparato provoca interferencias perjudiciales para la recepción de radio o televisión, lo que podrá confirmar encendiendo y apagando el aparato, se recomienda al usuario intentar corregir las interferencias realizando una o varias de las siguientes acciones. oo Reoriente o coloque el aparato y/o la antena receptora en otro lugar. oo Aumente la distancia entre el aparato y el receptor. oo Conecte el aparato a una toma en un circuito distinto del de donde está conectado el receptor. oo Consulte al distribuidor o a un técnico experto en radio/TV para solicitar ayuda. 43 ESPAÑOL Este aparato ha sido probado y cumple con los límites para un equipo digital de Clase B, según la parte 15 de la Normativa FCC. Estos límites están pensados para ofrecer una protección razonable contra las interferencias perjudiciales en una instalación residencial. Este aparato genera, utiliza y puede emitir energía de radiofrecuencia y, de no instalarse y utilizarse conforme a las instrucciones, puede provocar interferencias perjudiciales para las comunicaciones de radio. Sin embargo, no hay garantías de que no se produzcan interferencias en una instalación particular. Al utilizar este aparato con un teléfono móvil u otros dispositivos con tecnología Bluetooth, no deben estar separados a más de 10m. de distancia. Sin embargo, según las condiciones de uso, la distancia de transmisión efectiva puede ser inferior. La comunicación inalámbrica con cualquier dispositivo con tecnología Bluetooth no está garantizada. Para determinar la compatibilidad entre este aparato y otro dispositivo con tecnología Bluetooth, consulte el manual de instrucciones de este dispositivo o póngase en contacto con la tienda donde lo adquirió. Índice Antes de utilizarlo Precauciones con los aparatos inalámbricos. . . . . . . . . 42 Notas sobre la tecnología Bluetooth®. . . . . . . . . . . . . . . 43 Piezas incluidas Antes de utilizarlo . . . . . . . . . . . . . . . . . . . . . . . . . . . . . . . . . . 44 Nombres de las piezas. . . . . . . . . . . . . . . . . . . . . . . . . . . . . . 46 Uso del mando a distancia. . . . . . . . . . . . . . . . . . . . . . . . . . 47 Instalación de la placa de montaje en la pared . . . . . . 48 Fijación de la unidad. . . . . . . . . . . . . . . . . . . . . . . . . . . . . . . . 49 Conexión del adaptador. . . . . . . . . . . . . . . . . . . . . . . . . . . . 49 Escuchar el audio desde un dispositivo Bluetooth. . . 50 Escuchar la radio. . . . . . . . . . . . . . . . . . . . . . . . . . . . . . . . . . . .54 Solución de problemas. . . . . . . . . . . . . . . . . . . . . . . . . . . . . 55 Especificaciones. . . . . . . . . . . . . . . . . . . . . . . . . . . . . . . . . . . . 57 Si faltara alguna de las siguientes piezas o estuviera dañada, póngase en contacto con el distribuidor donde adquirió el producto. Mando a distancia × 1 Pila de botón de ión de litio CR2025 para mando a distancia ×1 (instalada en mando a distancia cuando se envía nuevo) Placa de montaje en la pared × 1 Tornillos de madera × 4 Adaptador CA dedicado × 1 Para Europa Para EE.UU. o Manual de instrucciones (este documento) × 1 44 Precauciones de uso oo Evite exponer la unidad a la luz directa del sol o colocarla cerca de un radiador o cualquier otro lugar que alcance temperaturas elevadas. No la coloque encima de un amplificador u otro aparato que genere calor, ya que podría decolorarse o deformarse, o podría provocar un fallo en el funcionamiento. dejar de tirar de la lengüeta hacia el adaptador CA, inserte la parte cóncava (A) del enchufe en la parte convexa (B) en el lado opuesto interior de la lengüeta. Empújelo hacia el otro lado en la dirección de la flecha. (B) (A) ESPAÑOL oo Si hay un televisor encendido cerca de la unidad cuando la esté utilizando, pueden aparecer líneas en la pantalla dependiendo de la frecuencia de emisión. Esto no significa un mal funcionamiento de la unidad o el televisor. Si aparecen estas líneas, apague la unidad o desenchufe el adaptador CA dedicado de la toma de corriente. 2 Sin oo Cuando el adaptador CA dedicado está enchufado a una toma de corriente, consume energía en standby. Para los clientes del Reino Unido Cambie el enchufe del adaptador CA para ajustarlo a las tomas de corriente del lugar donde esté utilizando la unidad. 3 Inserte el enchufe hasta que escuche un clic. 1 Tire de la lengüeta hacia el adap- tador CA mientras tira del enchufe en la dirección que indica la fecha abajo para extraerlo. 45 Nombres de las piezas Unidad principal Pantalla Botón MODE Botones de volumen (−/+) Botones de salto (.//) Receptor del mando a distancia Indicador LED Bluetooth Antena FM Adaptador CA dedicado Cable de alimentación (interruptor ON/OFF) Mando a distancia Botón de encendido ( ) Botón de salto (frecuencia inferior) (.) Botón Play/Stop (y/J) Botón MODE Botón de salto (/) Botón MUTE Botones VOLUME (+/−) 46 Uso del mando a distancia Precauciones durante el uso Cuándo sustituir la pila oo Oriente el mando a distancia hacia el receptor del mando a distancia de la unidad principal y utilícelo a una distancia máxima de 5 m. No coloque ningún objeto que pueda obstaculizar la comunicación entre la unidad principal y el mando a distancia. Si la distancia máxima de funcionamiento entre el mando a distancia y la unidad principal disminuye, o si los botones del mando a distancia dejan de funcionar, sustituya la pila por otra nueva. Para más información sobre la eliminación de las pilas usadas, consulte su etiqueta o siga las instrucciones de eliminación establecidas por sus autoridades locales. oo Si el receptor del mando a distancia está expuesto a la luz directa del sol o a una iluminación muy intensa, puede que el mando a distancia no funcione correctamente. Antes de utilizarlo QADVERTENCIA El mal uso de las pilas podría dar lugar a rupturas o fugas y provocar un incendio, lesiones o manchas en los objetos situados cerca. Repase cuidadosamente las advertencias de la página 40. Retire la lámina aislante de la parte posterior del mando a distancia antes de utilizarlo. Sustitución de la pila La pila viene ya instalada en el mando a distancia de fábrica. Para sustituirla, tire en la dirección de mientas empuja en . Tire del compartimento para pilas hasta el final e introduzca una pila de botón de ión de litio (CR2025) con el lado “+” hacia arriba, como se muestra en la ilustración. Vuelva a insertar el compartimento. 47 ESPAÑOL oo Tenga en cuenta que el uso de este mando a distancia podría causar el funcionamiento accidental de otros dispositivos que se puedan controlar con rayos infrarrojos. Instalación de la placa de montaje en la pared QATENCIÓN oo Antes de instalar la placa de montaje en la pared, elija bien el lugar comprobando que no haya interferencias de ondas de radio con otros aparatos electrónicos (Véase “Requisitos de exposición a la radiación” en la página 42.) oo Antes de instalar la placa de montaje en una pared, verifique que ésta es lo suficientemente resistente. oo Tenga en cuenta que no nos haremos en absoluto responsables en caso de producirse un accidente debido a una incorrecta instalación. oo Una vez instalada, no se apoye, coloque objetos o tire enérgicamente de la unidad, ya que ésta podría caerse de la pared. oo Esta placa no puede instalarse en paneles de absorción acústica. oo Instale la placa en una pared vertical lisa. oo No instale la placa en un lugar que esté al alcance de los niños o animales domésticos. oo Después de su instalación, compruebe que no haya nada suelto y que no haya huecos antes de utilizarlo. oo La placa de montaje es para colocar en paredes, no la coloque en techos. Instalación en otras superficies (paneles de madera, columnas, etc.) Elija una superficie sólida y utilice los tornillos de madera suministrados u otros remaches adecuados para instalar la placa de pared a través de los agujeros situados en las cuatro esquinas. oo Evite instalar la placa de montaje en paredes con ángulo. oo Cuando manipule piezas con las puntas de los tornillos sobresaliendo, tenga cuidado de que no causen daño a nadie. oo Revise la placa de la pared regularmente, y vuélvala a instalar en otro lugar si está suelta. Compruébela siempre tras un terremoto u otra vibración o fuerza ejercida sobre ella. oo Las piezas suministradas están destinadas específicamente para esta unidad. No las utilice para ningún otro fin. oo Guarde las piezas en un lugar que esté fuera del alcance de los niños o animales domésticos. 48 oo Los tornillos de madera suministrados no pueden utilizarse en paredes de hormigón o en el suelo, por ejemplo. Si utiliza los tornillos de madera suministrados para la instalación, quedarán unos agujeros en la pared como se muestra en la ilustración abajo. No nos haremos responsables de estos agujeros. Fijación de la unidad 1 Extienda la antena FM. Conexión del adaptador Después de conectar el cable de alimentación al cable del adaptador CA dedicado, enchufe el adaptador en la toma. Desenrolle y extienda la antena FM fijada en la parte posterior de la unidad. Adaptador CA dedicado 2 Instale la unidad en la placa de montaje en la pared. Cable de alimentación Alinee la unidad con los soportes de la placa de montaje en la pared. Enchufe de corriente Deslice la unidad hasta insertarla en su lugar. Alinee los soportes de la unidad con los de la placa de montaje en la pared y deslícela hasta que quede bien insertada. oo Asegúrese de que la unidad esté bien sujeta. oo Extienda la antena FM hasta la posición que permita la mejor recepción. 49 ESPAÑOL Enchufe a la toma de corriente Escuchar el audio desde un dispositivo Bluetooth (1) 1 Tire suavemente del cable de alimen- tación hacia abajo para encender la unidad. oo También puede utilizar el botón de Encendido ( ) del mando a distancia. 2 Pulse el botón MODE. Cuando esté activado el modo Bluetooth como fuente, aparecerá “BT” en la pantalla. BT 3 Sincronice la unidad o conéctela a otro dispositivo Bluetooth. Sincronización con un dispositivo Bluetooth La primera vez que utilice esta unidad con un nuevo dispositivo Bluetooth, debe sincronizarlos. Después de activar el modo Bluetooth de la unidad, utilice el otro dispositivo Bluetooth para sincronizarlos. Si ya ha sincronizado el otro dispositivo, siga las instrucciones en “Conectar con un dispositivo Bluetooth ya sincronizado” en la página 52. La siguiente explicación proporciona ejemplos de cómo configurar los smartphones para utilizarlos como dispositivos Bluetooth sincronizados. Para más detalles, consulte el manual de instrucciones del dispositivo Bluetooth que esté utilizando. Ejemplos de sincronización con smartphones Configuración con Android 4.0 1. Encontrará la sección Bluetooth en CONEXIONES INALÁMBRICAS Y REDES del menú Ajustes. oo Al poner la unidad en modo Bluetooth, el indicador de Bluetooth parpadeará, indicando que se puede sincronizar con otro dispositivo Bluetooth. oo También puede utilizar el botón MODE del mando a distancia. oo La unidad guarda su configuración al ser apagada. Si la unidad estaba en modo Bluetooth la última vez que la apagó, puede saltarse este paso. En cambio, si desenchufa el adaptador CA dedicado de la toma o desconecta el cable de alimentación del adaptador CA dedicado, se restablecerán las configuraciones predeterminadas (modo TUNER, volumen 10). 50 2. Coloque el Bluetooth en ON y seleccione “Escanear dispositivos”. 3. Cuando aparezca “MJBTS-1” en la lista de DISPOSITIVOS DISPONIBLES, selecciónelo. Configuración en un iPhone con iOS 6 1. Abra la aplicación Configuraciones y seleccione “Bluetooth”. ESPAÑOL 4. Cuando finalice el emparejamiento con MJBTS-1, los dispositivos estarán conectados. 2. Coloque el Bluetooth en ON. Aparece “MJBTS-1 no enlazado”. oo Una vez finalizado el emparejamiento, “MJBTS-1” aparece como “DISPOSITIVOS SINCRONIZADOS” en lugar de “DISPOSITIVOS DISPONIBLES”. Continúa en la siguiente página 51 Escuchar el audio desde un dispositivo Bluetooth (2) 3. Seleccione “MJBTS-1 no enlazado”. Una vez completada la sincronización, aparece “MJBTS-1 conectado”. Conectar a un iPhone con iOS 6 1. Abra la aplicación Configuraciones y seleccione “Bluetooth”. 2. Coloque el Bluetooth en ON. Aparece “MJBTS-1 no conectado”. 3. Seleccione “MJBTS-1 no conectado” para conectarlo con el MJBTS-1. oo Si aparece en la pantalla del dispositivo Bluetooth un mensaje solicitando una clave de acceso, introduzca “0000” (cuatro ceros). oo Cuando esta unidad se conecte con otro dispositivo Bluetooth, su indicador Bluetooth parpadeará y emitirá un breve pitido dos veces. oo El otro dispositivo Bluetooth y esta unidad no deben estar separados más de unos metros cuando estén sincronizados y conectados. Si la distancia es demasiado grande, puede que no puedan sincronizarse y se pierda la conexión. Conectar con un dispositivo Bluetooth ya sincronizado Cuando esta unidad esté encendida y el dispositivo Bluetooth también y su función Bluetooth esté activada, en principio deben conectarse automáticamente. Si no es así, puede conectarlos manualmente como se indica en los siguientes ejemplos con smartphones. Ejemplos de conexión manual con smartphones Conectar con Android 4.0 1. Encontrará la sección Bluetooth en CONEXIONES INALÁMBRICAS Y REDES del menú Ajustes. 2. Coloque el Bluetooth en ON para conectarlo con el MJBTS-1. 52 oo Si el indicador Bluetooth en la parte frontal de esta unidad parpadea continuamente durante 10 minutos, entrará automáticamente en modo standby. En este caso, vuelva a encender la unidad. oo Esta unidad puede recordar hasta 8 dispositivos sincronizados. Si se sincroniza un noveno dispositivo, se descartará el más antiguo para que no haya nunca más de 8 enlaces. (Sin embargo, si el mismo dispositivo está sincronizado más de una vez, solo cuenta como una). NOTA Independientemente del estado de conexión entre esta unidad y otro dispositivo Bluetooth, si el indicador Bluetooth sigue parpadeando durante mucho tiempo, reinicie la unidad y el otro dispositivo y vuelva a sincronizarlos. 4 Seleccionar y reproducir un archivo de audio en el dispositivo Bluetooth. oo También puede utilizar el botón Play/Stop (y/9) del mando a distancia. 5 Utilice los botones de Volumen (−/+) o los botones VOLUME +/− del mando a distancia para ajustar el volumen. VOL 05 oo El volumen se puede ajustar en un rango entre 00 y 32. (“MAX” aparece en la pantalla como 32). (El nivel de volumen por defecto es 10). oo Según el dispositivo Bluetooth conectado, sus botones de volumen pueden estar desactivados. Para más detalles, consulte el manual de instrucciones del dispositivo que esté utilizando. Seleccionar la canción anterior Pulse el botón . de la unidad principal o un botón similar en el dispositivo Bluetooth. oo También puede utilizar el botón . del mando a distancia. Seleccionar la canción siguiente Pulse el botón / de la unidad principal o un botón similar en el dispositivo Bluetooth. oo También puede utilizar el botón / del mando a distancia. Detener la reproducción Pulse el botón de pausa o un botón similar en el dispositivo Bluetooth o pulse el botón Play/Stop (y/9) del mando a distancia. Silenciar la reproducción Si quiere poner el volumen de esta unidad en silencio temporalmente, pulse el botón MUTE del mando a distancia. Vuelva a pulsar el botón MUTE del mando a distancia para volver al nivel de volumen anterior. Apagar la unidad Tire suavemente del cable hacia abajo o pulse el botón de Encendido ( ) del mando a distancia para apagar la unidad. Una vez realizado, apague el dispositivo Bluetooth. 53 ESPAÑOL Nivel de volumen indicado Seleccionar canciones Escuchar la radio 1 Pulse el botón MODE para poner la fuente en FM. )0 Sintonización manual Si quiere sintonizar una emisora que no se puede sintonizar automáticamente, pulse el botón de Salto (.//) repetidamente para establecer la frecuencia de la emisora. )0 Cuando aparezca “FM”, se indicará la frecuencia. oo También puede utilizar el botón MODE del mando a distancia. 2 Seleccione una emisora. Sintonización automática oo Cada vez que pulse el botón de Salto (.//), la frecuencia cambiará 0,1 MHz. oo También puede utilizar el botón de Salto (.//) del mando a distancia. 3 Pulse los botones de Volumen (−/+) )0 para ajustar el volumen. VOL 05 Pulsar y mantener 54 Nivel de volumen indicado Pulse y mantenga el botón de Salto (.//) pulsado durante 2 segundos o más hasta que la frecuencia indicada en la pantalla empiece a cambiar. Cuando se haya sintonizado automáticamente una emisora, la pantalla dejará de cambiar y mostrará una frecuencia. En caso de mala recepción oo Para interrumpir la sintonización automática en cualquier momento, pulse brevemente el botón de Salto (.//). Apagar la unidad oo El volumen se puede ajustar en un rango entre 00 y 32. (“MAX” aparece en la pantalla como 32). Si la recepción es mala, cambie la dirección y la colocación de la antena FM y encuentre una posición que permita una mejor recepción. Tire suavemente del cable hacia abajo o pulse el botón de Encendido ( ) del mando a distancia. Solución de problemas (1) Si tiene algún problema con esta unidad, consulte la siguiente información. Si sigue sin funcionar correctamente, póngase en contacto con la tienda donde adquirió la unidad. General No hay sonido. ee Ajuste el volumen. El mando a distancia no funciona. ee El compartimento para pilas viene de fábrica con una lámina aislante. Retírela antes de utilizar la unidad. Para más detalles, consulte la página 47. ee Si la pila está agotada, sustitúyala por una nueva. ee Utilice el mando a distancia como mucho a 5 m de la unidad y oriéntelo en su dirección. ee Si hay algún obstáculo entre esta unidad y el mando a distancia, puede que no funcione. En ese caso, cambie la unidad de sitio. ee Si hay una luz brillante cerca de la unidad, apáguela. El sonido es ruidoso. ee Coloque la unidad lo más lejos posible de televisores, microondas y otros aparatos que produzcan ondas electromagnéticas. La emisora no se puede sintonizar o su recepción es mala. ee Cambie la posición de la antena FM. Tecnología inalámbrica Bluetooth Imposible emparejar con un dispositivo Bluetooth. ee Consulte el manual de instrucciones del dispositivo Bluetooth. ee Apague esta unidad y el otro dispositivo Bluetooth, vuelva a encenderlos e intente emparejarlos de nuevo. ee Apague todos los dispositivos Bluetooth excepto el que esté intentando emparejar con la unidad. ee Elimine el emparejamiento del dispositivo Bluetooth con “MJBTS-1” y vuelva a intentarlo de nuevo. (Véase “Sincronización con un dispositivo Bluetooth” en la página 50.) Imposible la conexión. ee Compruebe que el dispositivo Bluetooth esté encendido y que la función Bluetooth esté activada. ee ¿Está el dispositivo Bluetooth demasiado lejos? ¿Hay alguna pared u otro obstáculo entre la unidad y este dispositivo? ee Apague la unidad y vuelva a encenderla. ee Elimine el emparejamiento del dispositivo Bluetooth con “MJBTS-1” y vuelva a intentarlo de nuevo. (Véase “Sincronización con un dispositivo Bluetooth” en la página 50.) Continúa en la siguiente página 55 ESPAÑOL La unidad no funciona. ee Enchufe el adaptador CA dedicado a una toma que suministre corriente. ee Compruebe la conexión entre el cable de alimentación y el cable del adaptador CA dedicado. ee Cambie la pila del mando a distancia. Radio Solución de problemas (2) El sonido se corta. ee ¿Se encuentra cerca un LAN inalámbrico, otro dispositivo Bluetooth, un microondas u otro aparato similar? Utilice esta unidad lo más lejos posible de esos aparatos. ee Mantenga esta unidad y el dispositivo Bluetooth lo más cerca posible al utilizarlos. Intente cambiar sus ubicaciones. ee Si utiliza una aplicación del smartphone para otra cosa que no sea reproducir música, el sonido puede cortarse. En este caso, no utilice otras aplicaciones si no es para la reproducción de música. Esta unidad utiliza un microordenador y a veces puede que no funcione correctamente debido al ruido o a otras interferencias cerca de la unidad. En este caso, desenchufe el adaptador CA de la toma eléctrica y espere unos minutos antes de volverlo a enchufar. Intente utilizar la unidad de nuevo. 56 Limpieza Si la unidad principal o el mando a distancia se ensucian, límpielos con un trapo suave y un producto de pH-neutro diluido. No utilice trapos de limpieza tratados químicamente, disolventes o sustancias similares, ya que podrían dañar la superficie de la unidad. Q¡ADVERTENCIA! Desenchufe el adaptador CA de la toma de corriente antes de limpiar la unidad. Especificaciones Tecnología inalámbrica Bluetooth Versión. . . . . . . . . . . . . . . . . . . . . . . . . . . . . . . . . . . . . . . . . . . . . 3.0 Perfiles. . . . . . . . . . . . . . . . . . . . . . . . . . . . . . . . . . . A2DP, AVRCP Códec. . . . . . . . . . . . . . . . . . . . . . . . . . . . . . . . . . . . . . . . . . . . . SBC Protección contra copias. . . . . . . . . . . SCMS-T soportado* Clase. . . . . . . . . . . . . . . . . . . . . . . . . . . . . . . . . . . . . . . . . . . . . . . . . 2 (distancia de recepción máxima 10m aproximadamente) *SCMS-T permite la reproducción de música protegida por copyright y audio 1seg. Gama de frecuencias. . . . . . . . . . . . 87,5 MHz – 108,0 MHz Altavoces Unidades. . . . . . . . . . . . . . . . . . . 3,5 cm rango completo × 2 Impedancia nominal. . . . . . . . . . . . . . . . . . . . . . . . . . . . . . . . 4 Ω Tensión eléctrica y frecuencia Modelo para Europa. . . . . . . . . . . . CA 220 V - 240 V, 50 Hz Modelo para EE.UU. . . . . . . . . . . . . . . . . . . . . CA 120 V, 60 Hz Potencia nominal. . . . . . . . . . . . . . . . . . . . . . . . . . . . . . . . . . . 5 W Dimensiones exteriores máximas (unidad principal) 172 mm (W) × 172 mm (H) × 41 mm (D) Peso. . . . . . . . . . . . . . . . . . . . . . . . . . . . . . . . . . . . . . . . . . . . . . 485 g (sin incluir el adaptador CA dedicado) ESPAÑOL Sintonizador General Piezas incluidas Mando a distancia × 1 Pila de botón de ión de litio para mando a distancia (CR2025) × 1 (instalada en mando a distancia cuando se envía nuevo) Placa de montaje en la pared × 1 Tornillos de madera × 4 Adaptador CA dedicado × 1 Manual de instrucciones (este documento) × 1 Amplificador Potencia nominal (JEITA)**. . . . . . . . . . . . . . . . . . . . . . 2 W × 2 Respuesta de frecuencia. . . . . . . . . . . . . . . . . 50 Hz – 20 kHz **V alor calculado utilizando el estándar JEITA (Asociación Japonesa de Industrias Electrónicas y de Tecnología de la Información) Con vistas a mejorar el producto, las especificaciones y presentaciones están sujetas a cambios sin previo aviso. Las ilustraciones de este manual pueden diferir parcialmente de los modelos de producción. 57 oo Non esporre questo apparecchio a gocciolamenti o schizzi. oo Non collocare oggetti contenenti liquidi, per esempio vasi, sopra l'apparecchio. oo Non installare questo apparecchio in spazi ristretti come scaffali o unità simili. oo L'apparecchio conduce corrente nominale non operativa di alimentazione dalla presa di rete CA quando l'interruttore POWER o STANDBY/ON non è in posizione ON. oo L'apparecchio deve essere collocato sufficientemente vicino alla presa CA in modo che si possa facilmente raggiungere il cavo di alimentazione in qualsiasi momento. oo La presa di rete viene utilizzata come dispositivo di disconnessione, il quale deve essere sempre acceso. oo I prodotti di Classe sono dotati di un cavo di alimentazione con pinza di messa a terra. Il cavo del prodotto deve essere collegato a una presa di corrente CA dotata di sistema di messa a terra. oo Se il prodotto è dotato di batterie (gruppo batterie esterno o batterie installate internamente), non esporre queste ultime a luce solare, fiamme o temperature estreme. 58 BBPrecauzioni relative alle batterie L’uso improprio delle batterie può causare rotture o perdite che possono avere come conseguenza incendi, lesioni o macchie sugli oggetti circostanti. Leggere attentamente e rispettare le seguenti precauzioni. oo Accertarsi di inserire le batterie con i poli positivo (+) e negativo (_) orientati correttamente. oo Se il telecomando non viene utilizzato per un lungo periodo di tempo (più di un mese), rimuovere le batterie per prevenire fuoriuscite. oo Se le batterie presentano perdite, pulire il materiale fuoriuscito all’interno dell’alloggiamento batterie e sostituire le batterie. oo Non utilizzare batterie di tipo diverso da quello indicato. oo Non riscaldare o smontare le batterie. Non gettare mai le batterie nel fuoco o nell'acqua. oo Non trasportare o stoccare le batterie insieme a oggetti metallici. Le batterie possono essere soggette a corto circuito, fuoriuscite o esplosione. oo Non ricaricare mai una batteria prima di assicurarsi che sia di tipo ricaricabile. Per gli utenti europei Smaltimento di apparecchiature elettriche ed elettroniche (a)Tutte le apparecchiature elettriche ed elettroniche devono essere smaltite separatamente dai rifiuti urbani, mediante appositi impianti di raccolta designati dal governo o dalle autorità locali. (b)Il corretto smaltimento di apparecchiature elettriche ed elettroniche consente di salvaguardare importanti risorse e previene qualsiasi effetto nocivo sulla salute e sull’ambiente. (c)Lo smaltimento non corretto di apparecchiature elettriche ed elettroniche può invece avere gravi conseguenze sull'ambiente e sulla salute per la presenza di sostanze pericolose all’interno dell’apparecchiatura. (d)Il simbolo "rifiuti di apparecchiature elettriche ed elettroniche" (RAEE), il quale mostra un cestino dei rifiuti con le ruote barrato da una croce, indica che l’apparecchiatura elettrica ed elettronica in oggetto deve essere smaltita separatamente dagli altri rifiuti domestici. (e)Servizi di reso e prelievo a disposizione dell’utente finale Per informazioni più dettagliate circa lo smaltimento di apparecchiature elettriche ed elettroniche non più in uso, contattare il proprio comune, il servizio di smaltimento rifiuti oppure il negozio in cui è stata acquistata l’apparecchiatura. ITALIANO Smaltimento di batterie e/o accumulatori (a)Batterie e accumulatori esauriti devono essere smaltiti separatamente dai rifiuti urbani, mediante appositi impianti di raccolta designati dal governo o dalle autorità locali. (b)Il corretto smaltimento di batterie e/o accumulatori esauriti consente di salvaguardare importanti risorse e previene qualsiasi effetto nocivo sulla salute e sull’ambiente. (c)Lo smaltimento non corretto di batterie e/o accumulatori esauriti può invece avere gravi conseguenze sull'ambiente e sulla salute per la presenza di sostanze pericolose al loro interno. (d)Il simbolo "rifiuti di apparecchiature elettriche ed elettroniche" (RAEE), il quale mostra un cestino dei rifiuti con le ruote barrato da una croce, indica che batterie e/o accumulatori esauriti devono essere smaltiti separatamente dagli altri rifiuti domestici. Se la batteria o accumulatore contiene quantità di piombo superiori ai livelli specificati di Pb, Hg, Cd piombo (Pb), mercurio (Hg) e/o cadmio (Cd), come definito nella Direttiva batterie (2006/66/CE), i simboli chimici di questi elementi saranno visualizzati sotto il simbolo WEEE. (e)Servizi di reso e prelievo a disposizione dell’utente finale Per informazioni più dettagliate circa lo smaltimento di batterie e/o accumulatori esauriti, contattare il proprio comune, il servizio di smaltimento rifiuti oppure il negozio in cui sono stati acquistati. 59 Precauzioni relative ad apparati wireless Conformità del trasmettitore radio e interferenze Requisiti in materia di esposizione alle radiazioni Modello USA Questa apparecchiatura è conforme alle norme riconosciute internazionalmente in materia di esposizione degli operatori a onde radio generate dal trasmettitore. Questo dispositivo è conforme alle Regole FCC (parte 15). Il funzionamento è soggetto ai seguenti due stati: 1) Questo dispositivo non può causare interferenze 2) Questo dispositivo deve ricevere qualsiasi interferenza, comprese le interferenze che possono causare un funzionamento indesiderato del dispositivo. Etichettatura di autorizzazione FCC ID: Modello SEE (Spazio economico europeo) Questa apparecchiatura è conforme alle norme armonizzate della Direttiva 1999/5/CE (R&TTE) Etichettatura di conformità Marchio CE: ATTENZIONE Eventuali modifiche non espressamente approvate dall’ente responsabile per l’accreditamento di conformità possono invalidare il diritto dell’utente a utilizzare l’apparecchiatura. ATTENZIONE Le autorizzazioni in materia di dispositivi wireless possono variare in diversi Paesi o regioni. Utilizzare l’apparecchiatura unicamente nel Paese in cui è stata acquistata. oo A seconda del Paese, possono essere previste delle restrizioni sull’utilizzo dei dispositivi Bluetooth. Prendere visione delle leggi e norme vigenti nel Paese in cui si intende utilizzare l’unità prima dell’utilizzo effettivo. 60 Si applicano le seguenti due condizioni: oo Agli utenti finali e agli installatori devono essere fornite tutte le istruzioni per l’installazione dell'antenna e informazioni sulle condizioni di utilizzo del trasmettitore per soddisfare i requisiti previsti in materia di esposizione alle radiazioni. oo Questa apparecchiatura deve essere installata e utilizzata a una distanza minima di 20 cm dal corpo dell’operatore. Dichiarazione di conformità Modello USA Questa apparecchiatura è conforme ai limiti FCC in materia di esposizione alle radiazioni in ambiente non controllato e alle linee guida FCC in materia di esposizione alle onde radio. Modello SEE (Spazio economico europeo) Questa apparecchiatura è conforme allo standard EN 62311 "Valutazione degli apparecchi elettronici ed elettrici in relazione ai limiti di base per l'esposizione umana ai campi elettromagnetici" e alle norme armonizzate della Direttiva 1999/5/CE. Note sui dispositivi Bluetooth® Informazioni sulle interferenze (requisiti FCC) L’apparecchiatura è stata testata ed è risultata conforme ai limiti previsti per i dispositivi digitali di Classe B, ai sensi delle norme FCC (parte 15). Questi limiti sono stati fissati per garantire un’adeguata protezione contro le interferenze dannose nelle installazioni residenziali. Questa apparecchiatura genera, utilizza e può irradiare energia in radiofrequenza e, se non installata e utilizzata in conformità alle istruzioni, può causare interferenze dannose alle comunicazioni radio. Tuttavia, non vi è alcuna garanzia che non si verifichino interferenze in una particolare installazione. Quando si utilizza l’unità con un telefono cellulare o altri dispositivi Bluetooth, mantenere i dispositivi a una distanza massima di 10 m. A seconda delle circostanze di utilizzo, tuttavia, la distanza di trasmissione effettiva potrebbe essere minore. Non possiamo garantire che la comunicazione wireless funzioni con tutti i dispositivi che supportano la tecnologia Bluetooth. Per verificare la compatibilità tra questa unità e un altro dispositivo che utilizza la tecnologia Bluetooth, fare riferimento al manuale d’uso del dispositivo in questione oppure contattare il rivenditore. ITALIANO Se questo apparecchio causa interferenze dannose alla ricezione radio o televisiva, che possono essere determinate dall’accensione o dallo spegnimento dell’apparecchiatura stessa, l'utente dovrà correggere l'interferenza adottando una o più delle seguenti misure. oo Riorientare o riposizionare l’apparecchiatura e/o l’antenna ricevente. oo Distanziare ulteriormente l’apparecchiatura e il ricevitore. oo Collegare l’apparecchiatura a una presa su un circuito diverso da quello cui è collegato il ricevitore. oo Consultare il rivenditore o un tecnico radio/TV esperto. 61 Indice Prima dell’utilizzo Precauzioni relative ad apparati wireless . . . . . . . . . . . . 60 Note sui dispositivi Bluetooth® . . . . . . . . . . . . . . . . . . . . . 61 Componenti forniti Prima dell’utilizzo. . . . . . . . . . . . . . . . . . . . . . . . . . . . . . . . . . . 62 Nomi dei componenti. . . . . . . . . . . . . . . . . . . . . . . . . . . . . . 64 Utilizzo del telecomando. . . . . . . . . . . . . . . . . . . . . . . . . . . 65 Installazione della piastra per il montaggio a parete . . . . 66 Collegare l’unità. . . . . . . . . . . . . . . . . . . . . . . . . . . . . . . . . . . . 67 Collegamento dell’adattatore. . . . . . . . . . . . . . . . . . . . . . . 67 Riproduzione di file audio su un dispositivo Bluetooth. . 68 Ascoltare la radio. . . . . . . . . . . . . . . . . . . . . . . . . . . . . . . . . . . 72 Risoluzione dei problemi . . . . . . . . . . . . . . . . . . . . . . . . . . . 73 Specifiche. . . . . . . . . . . . . . . . . . . . . . . . . . . . . . . . . . . . . . . . . . 75 Se uno qualsiasi dei componenti forniti con l’apparecchiatura fosse assente o danneggiato, contattare il rivenditore presso cui si è acquistato il prodotto. Telecomando × 1 Pila a bottone al litio CR2025 × 1 per il telecomando (inserita nel telecomando al momento della spedizione) Piastra per montaggio a parete × 1 Viti per legni × 4 Adattatore CA dedicato × 1 Per l’Europa Per gli USA o Manuale d’uso (il presente documento) × 1 62 Precauzioni per l'uso oo Evitare di esporre l'unità alla luce diretta del sole e di collocarla vicino a radiatori o altri luoghi che potrebbero surriscaldarsi. Inoltre si raccomanda di non collocare l’apparecchiatura sopra un amplificatore o altra apparecchiatura che generi calore. In caso contrario l’apparecchiatura potrebbe essere soggetta a scolorimento o deformazione o causare un malfunzionamento. verso la spina dell'adattatore CA, inserire la parte concava (A) della spina nella parte convessa (B) sul lato interno opposto alla linguetta. Poi spingerla nel lato opposto in direzione della freccia. (B) (A) ITALIANO oo Se viene acceso un televisore nelle vicinanze quando l’apparecchiatura è in funzione, potrebbero essere visualizzate delle linee sullo schermo, in base alla frequenza di trasmissione. Questo non è un sintomo del malfunzionamento dell’unità o della TV. Se sullo schermo vengono visualizzate queste linee, spegnere l'unità o scollegare dalla presa l'adattatore CA dedicato. 2 Continuando a tirare la linguetta oo Quando l'adattatore CA dedicato è inserito in una presa, il consumo passa in modalità standby. Per clienti nel Regno Unito Cambiare la spina dell'adattatore CA in modo che si adatti alle prese cui è collegata l'unità. 3 Inserire la spina fino a udire un "clic". 1 Tirando la linguetta verso la spina dell’adattatore CA, tirare la spina nella direzione indicata dalla freccia in basso per rimuoverla. 63 Nomi dei componenti Unità principale Display Pulsante MODE Pulsanti volume (−/+) Pulsanti skip (.//) Ricevitore del telecomando Spia Bluetooth Antenna FM Cavo di alimentazione (Pulsante di accensione On/Off ) Adattatore CA dedicato Telecomando Pulsante di accensione ( ) Pulsante MODE Pulsante skip (abbassa frequenza) (.) Pulsante skip (alza frequenza)(/) Pulsante Play/Stop (y/J) Pulsante MUTE Pulsanti VOLUME (+/−) 64 Utilizzo del telecomando Precauzioni durante l’uso Quando sostituire la batteria oo Puntare il telecomando verso il ricevitore del telecomando dell'unità principale e utilizzarlo da una distanza massima di 5 metri. Non posizionare ostacoli tra l'unità principale e il telecomando. Se la massima funzionalità del prodotto diminuisce entro la distanza massima di 5 metri oppure i pulsanti del telecomando smettono di funzionare, sostituire la batteria con una nuova. Per ulteriori informazioni sullo smaltimento delle batterie usate, fare riferimento all’apposita etichetta o attenersi alla normativa locale in materia di smaltimento rifiuti. oo Se il ricevitore del telecomando è esposto alla luce diretta del sole o a una fonte di luce troppo intensa, il telecomando potrebbe non funzionare correttamente. oo Si tenga presente che questo telecomando potrebbe causare l’accensione accidentale di altri dispositivi controllati a raggi infrarossi. Prima dell’utilizzo L’uso improprio delle batterie può causare rotture o perdite che possono avere come conseguenza incendi, lesioni o macchie sull’ambiente circostante. Consultare attentamente le avvertenze a pagina 58. Sostituzione della batteria La batteria è già inserita nel telecomando al momento della spedizione dalla fabbrica. Per sostituire la batteria, spingere su e tirare in direzione di . Estrarre l’alloggiamento della batteria e inserire una pila a bottone al litio (CR2025) con il polo "+" rivolto verso l’alto, come mostrato in figura. A questo punto reinserire l’alloggiamento. 65 ITALIANO Rimuovere l’involucro protettivo dal retro del telecomando prima di utilizzarlo. QATTENZIONE Installazione della piastra per il montaggio a parete QATTENZIONE oo Prima del montaggio della piastra per il montaggio a parete, individuare la posizione e accertarsi che non vi sia alcuna interferenza di onde radio con altri dispositivi elettronici. (Vedere "Requisiti in materia di esposizione alle radiazioni" a pagina 60.) oo Prima di installare la piastra sulla parete, verificare che il muro sia abbastanza resistente. oo Installare la piastra su una parete verticale priva di irregolarità. oo Non installare la piastra dove potrebbe essere raggiunta da bambini o animali domestici. oo Dopo l'installazione, verificare che la piastra sia ben fissata alla parete. oo Si noti che l’azienda declina qualsiasi responsabilità per eventuali incidenti dovuti a un’installazione non corretta. oo Dopo l'installazione, non appoggiare mani o oggetti sopra l'unità né forzarla in altro modo. In caso contrario, l’unità potrebbe cadere a terra. oo Questo supporto non può essere fissato a pannelli fonoassorbenti. Installazione su altre superfici (pareti in legno, colonne ecc.) Scegliere una superficie stabile e utilizzare le viti per legno fornite con il prodotto o altri dispositivi di fissaggio adatti per installare la piastra di montaggio tramite i fori presenti sui quattro angoli. oo La piastra è stata progettata appositamente per essere montata su una parete. Non fissare la piastra al soffitto. oo Evitare di installare la piastra a parete in corrispondenza di un angolo. oo Quando si maneggiano parti che presentano viti sporgenti, prestare attenzione a non ferire altre persone nelle vicinanze. oo Ispezionare la piastra regolarmente e reinstallarla in un’altra posizione se non è ben fissata. Eseguire sempre un controllo in seguito al verificarsi di un terremoto o qualora la piastra fosse soggetta ad altra vibrazione. oo I componenti forniti sono stati progettati appositamente per questa unità. Non utilizzarli per altri scopi. oo I componenti devono essere stoccati in un luogo che non sia facilmente raggiungibile da bambini piccoli o animali domestici. 66 oo Le viti per legno, per esempio, non possono essere utilizzate su pareti di cemento o in terra. Se si utilizzano le viti di legno fornite, sul muro verranno praticati dei fori simili a quelli mostrati in figura. Non ci assumiamo alcuna responsabilità per danni legati alle perforazioni eseguite. Collegare l’unità 1 Estendere l’antenna FM Collegamento dell’adattatore Dopo aver collegato il cavo di alimentazione all’apposito cavo dell’adattatore CA, inserire l'adattatore in una presa di corrente. Collegare alla presa di corrente Srotolare ed estendere l’antenna FM collegata sul retro dell'unità. 2 Installazione dell’unità sulla piastra Adattatore CA dedicato per il montaggio a parete. ITALIANO Cavo di alimentazione Allineamento dell’unità sulla piastra per il montaggio a parete. Spinotto di alimentazione Far scivolare l’unità in posizione. Allineare i supporti presenti sull'unità con i supporti presenti sulla piastra per il montaggio a parete e far scorrere l’unità fino ad agganciarla. oo Assicurarsi che l'unità sia ben collegata. oo Estendere l'antenna FM in base alla posizione che offre una migliore ricezione. 67 Riproduzione di file audio su un dispositivo Bluetooth (1) 1 Tirare il cavo di alimentazione delicatamente per accendere l'unità. 3 Associare o collegare l'unità con un altro dispositivo Bluetooth. Associazione di un dispositivo Bluetooth oo In alternativa, è possibile utilizzare il pulsante di accensione ( ) presente sul telecomando. 2 Premere il pulsante MODE Quando si attiva il Bluetooth come modalità di origine, sul display viene visualizzato "BT". BT La prima volta che si utilizza questa unità con un nuovo dispositivo Bluetooth, è necessario associare i due dispositivi. Dopo aver attivato la modalità Bluetooth sull’unità, utilizzare il dispositivo Bluetooth per associare i dispositivi. Se l’unità è già stata associata a un altro dispositivo, consultare "Collegamento con un dispositivo Bluetooth già associato" a pagina 70. La seguente spiegazione fornisce una serie di esempi per l’impostazione di uno smart phone per il collegamento con un altro dispositivo tramite Bluetooth. Per maggiori informazioni, consultare il manuale d'uso del dispositivo Bluetooth che si sta utilizzando. Esempi su come associare l’unità a uno smart phone Impostazione con Android 4.0 oo Quando si imposta l'unità in modalità Bluetooth, la spia Bluetooth lampeggia, indicando che il dispositivo può essere associato o collegato a un altro dispositivo Bluetooth. 1. Individuare la voce Bluetooth sotto WIRELESS E RETI nel menu Impostazioni. oo In alternativa, è possibile utilizzare il pulsante MODE presente sul telecomando. oo L'unità mantiene in memoria le modalità impostate anche in seguito allo spegnimento. Se l'unità era in modalità Bluetooth durante l’ultima accensione, è possibile saltare questo passaggio. Se si scollega l'adattatore CA dedicato dalla presa di corrente o il cavo di alimentazione dall'adattatore CA dedicato, saranno ripristinate le impostazioni di default (modalità TUNER, volume 10). 68 2. Impostare Bluetooth su ON, quindi selezionare "Cerca dispositivi". 3. Nell’elenco dei DISPOSITIVI DISPONIBILI selezionare "MJBTS-1". Impostazione su un iPhone con iOS 6 1. Aprire Impostazioni applicazione e selezionare "Bluetooth". ITALIANO 4. Al termine dell'associazione con il dispositivo MJBTS-1, i dispositivi saranno connessi. 2. Impostare Bluetooth su ON. Sul display viene visualizzato "MJBTS-1 non associato". oo Al termine dell'associazione, "MJBTS-1" viene visualizzato come "DISPOSITIVO ASSOCIATO" anziché come "DISPOSITIVO DISPONIBILE". Segue alla pagina successiva 69 Riproduzione di file audio su un dispositivo Bluetooth (2) 3. Selezionare "MJBTS-1 non associato". Al termine dell’associazione, sul display viene visualizzato "MJBTS-1 collegato". Collegamento con iPhone con sistema iOS 6 1. Aprire Impostazioni applicazione e selezionare "Bluetooth". 2. Impostare Bluetooth su ON. Sul display viene visualizzato "MJBTS-1 non connesso". 3. Selezionare "MJBTS-1 non connesso" per connettersi con il MJBTS-1. oo Se sullo schermo del dispositivo Bluetooth viene richiesto un codice di accesso, inserire "0000" (quattro zeri). oo Quando l’unità si connette con un altro dispositivo Bluetooth, le spie Bluetooth lampeggeranno e verrà emesso un doppio segnale acustico. oo Una volta associati o connessi, il dispositivo Bluetooth e l’unità devono trovarsi a non più di un paio di metri di distanza l'uno dall’altro. Se i dispositivi sono troppo distanti, l’associazione potrebbe non avvenire e si potrebbe perdere la connessione. Collegamento con un dispositivo Bluetooth già associato Quando l’unità è accesa e il dispositivo Bluetooth è acceso con il Bluetooth attivato, la connessione dovrebbe avvenire automaticamente. Se la connessione non avviene automaticamente, è possibile collegare i dispositivi manualmente come mostrato negli esempi seguenti sul collegamento con uno smart phone. Esempi di collegamento manuale con uno smart phone Connessione con Android 4.0 1. Individuare la voce Bluetooth sotto WIRELESS E RETI nel menu Impostazioni. 2. Impostare Bluetooth su ON per la connessione con MJBTS-1. 70 oo Se la spia Bluetooth sul lato anteriore dell'unità lampeggia continuamente per 10 minuti, l’unità entrerà automaticamente in modalità standby. In questo caso, accendere nuovamente l’unità. oo L’unità può memorizzare fino a 8 dispositivi associati. In caso di associazione di un nono dispositivo, il dispositivo vecchio sarà rimosso, in modo che il numero di dispositivi memorizzati sia sempre 8. (Se lo stesso dispositivo viene associato più volte, sarà conteggiata una sola associazione) NOTA Indipendentemente dallo stato della connessione tra l’unità e un altro dispositivo Bluetooth, se l'indicatore Bluetooth continua a lampeggiare a lungo, riavviare sia l'unità che l'altro dispositivo e poi ricollegarli. 4 Selezionare e riprodurre un file audio direttamente sul dispositivo Bluetooth. oo In alternativa, è possibile utilizzare il pulsante Play/Stop (y/9) presente sul telecomando. 5 Per regolare il volume, utilizzare i pulsanti volume (−/+) oppure i pulsanti VOLUME +/− presenti sul telecomando. VOL 05 Visualizzazione livello volume oo A seconda del dispositivo Bluetooth collegato, i pulsanti volume potrebbero essere disabilitati. Per maggiori informazioni, consultare il manuale d'uso del dispositivo che si sta utilizzando. Selezione della traccia precedente Premere il pulsante . sull'unità principale o un comando analogo sul dispositivo Bluetooth. oo In alternativa, è possibile utilizzare il pulsante . presente sul telecomando. Selezione della traccia successiva Premere il pulsante / sull'unità principale o un comando analogo sul dispositivo Bluetooth. oo In alternativa, è possibile utilizzare il pulsante / presente sul telecomando. Sospensione della riproduzione Premere “pausa” o un comando analogo sul dispositivo Bluetooth oppure il tasto Play/Stop (y/9) sul telecomando. Disabilitazione audio (Mute) Se si desidera disattivare temporaneamente il volume dell’unità, premere il tasto MUTE sul telecomando. Premere il tasto MUTE sul telecomando per tornare al livello di volume precedente. Spegnimento dell’unità Tirare delicatamente il cavo di alimentazione verso il basso o premere il pulsante di accensione ( ) sul telecomando per spegnere l’unità. A questo punto, spegnere il dispositivo Bluetooth. 71 ITALIANO oo Il livello del volume può essere impostato da 00 a 32. (Sul display viene visualizzato "MAX" se il volume è impostato su 32) (Il volume è impostato di default su 10.) Selezione delle tracce Ascoltare la radio 1 Premere il pulsante MODE per impostare la sorgente su FM. )0 Sintonizzazione manuale Se si desidera sintonizzare una stazione che non può essere sintonizzata automaticamente, premere ripetutamente il pulsanti skip (.//) per impostare la frequenza della stazione. )0 Quando viene visualizzato "FM", viene indicata anche la frequenza. oo In alternativa, è possibile utilizzare il pulsante MODE presente sul telecomando. 2 Scegliere una stazione. Sintonizzazione automatica oo Ogni volta che si preme un pulsante skip (.//), la frequenza varierà di 0,1 MHz. oo In alternativa, è possibile utilizzare i pulsanti (.//) presenti sul telecomando. 3 Per regolare il volume, utilizzare i )0 pulsanti volume (−/+). VOL 05 Pressione prolungata Tenere premuto il pulsante (. // ) per almeno 2 secondi, fino a quando la frequenza indicata sul display non inizia a cambiare. In seguito alla sintonizzazione automatica di una stazione, il display si stabilizzerà e mostrerà la frequenza. oo Per interrompere la sintonizzazione automatica in qualsiasi momento, premere brevemente un pulsante skip (.//). Visualizzazione livello volume oo Il livello del volume può essere impostato da 00 a 32. (Sul display viene visualizzato "MAX" se il volume è impostato su 32) Ricezione scarsa Se la ricezione è scarsa, ridirezionare e riposizionare l'antenna FM per migliorare la ricezione. Spegnimento dell’unità Tirare delicatamente il cavo di alimentazione verso il basso o premere il pulsante di accensione ( ) sul telecomando. 72 Risoluzione dei problemi (1) In caso di problemi con l’unità, consultare la sezione che segue. Radio Se le procedure consigliate non risolvono il problema consultare il rivenditore dell’unità. È impossibile sintonizzare le stazioni oppure la ricezione è scarsa. ee Riposizionare l’antenna FM. Aspetti generali Bluetooth L’unità non funziona ee Collegare l'adattatore CA dedicato a una presa di corrente funzionante. ee Controllare che il cavo di alimentazione e il cavo dell'adattatore CA siano ben collegati. ee Sostituire la batteria del telecomando. Non viene emesso alcun suono. ee Regolare il volume. Il suono è disturbato. ee Collocare l'unità il più lontano possibile da televisori, forni a microonde e altri dispositivi che producono onde elettromagnetiche. Impossibile connettere l’unità. ee Verificare che il dispositivo Bluetooth sia acceso e che la funzione Bluetooth sia attiva. ee Verificare che il dispositivo Bluetooth non sia troppo lontano. Verificare che non siano presenti ostacoli tra l’unità e il dispositivo. ee Spegnere e riaccendere l’unità. ee Eliminare (rimuovere dalla memoria) il dispositivo "MJBTS-1" dal dispositivo Bluetooth, quindi eseguire nuovamente la procedura di associazione dei dispositivi. (Vedere "Associazione di un dispositivo Bluetooth" a pagina 68.) Segue alla pagina successiva 73 ITALIANO Il telecomando non funziona. ee Al momento della spedizione l’alloggiamento della batteria presenta un involucro protettivo. Rimuovere l’involucro prima di utilizzare il dispositivo. Per informazioni vedere pagina 65. ee Se la batteria è esaurita, sostituirla con una nuova. ee Usare il telecomando da una distanza massima di 5 metri, e puntarlo verso l'unità principale. ee In presenza di ostacoli tra l’unità e il telecomando, il telecomando potrebbe non funzionare. Quindi cambiare posizione. ee Se nei pressi dell’unità è installata una lampada di forte intensità, spegnerla. Impossibile associare l’unità con un dispositivo Bluetooth. ee Fare riferimento al manuale d’uso del dispositivo Bluetooth. ee Spegnere sia l'unità che il dispositivo Bluetooth una sola volta, quindi riaccenderli e ripetere di nuovo la procedura. ee Spegnere dispositivi Bluetooth diversi da quello che si sta cercando di associare con l'unità. ee Eliminare (rimuovere dalla memoria) il dispositivo "MJBTS-1" dal dispositivo Bluetooth, quindi eseguire nuovamente la procedura di associazione dei dispositivi. (Vedere "Associazione di un dispositivo Bluetooth" a pagina 68.) Risoluzione dei problemi (2) Il suono si interrompe. ee Verificare che non siano presenti reti WLAN, altri dispositivi Bluetooth o simili nelle vicinanze. Utilizzare l’unità il più lontano possibile da questi dispositivi. ee Mantenere l’unità e il dispositivo Bluetooth il più vicino possibile durante il loro utilizzo. Provare a riposizionare i dispositivi. ee Se si utilizza un'applicazione smart phone per scopi diversi dalla riproduzione di musica, il suono potrebbe interrompersi. In questo caso, non utilizzare applicazioni diverse da quelle per la riproduzione musicale. L’unità utilizza un microcomputer e a volte potrebbe non funzionare correttamente a causa del rumore o di altre interferenze nell’area circostante. In questo caso, scollegare l'adattatore CA dalla presa di corrente una sola volta e attendere qualche istante prima di ricollegarlo di nuovo. A questo punto, riprovare a utilizzare l’unità. 74 Pulizia In presenza di sporco sull’unità principale o sul telecomando, pulire con un panno morbido utilizzando detergenti a pH neutro. Non utilizzare panni chimicamente trattati, diluenti o sostanze simili, per non danneggiare la superficie dell'unità. QATTENZIONE! Scollegare l'adattatore CA dalla presa di corrente prima della pulizia. Specifiche Bluetooth Aspetti generali Versione. . . . . . . . . . . . . . . . . . . . . . . . . . . . . . . . . . . . . . . . . . . . 3.0 Profili. . . . . . . . . . . . . . . . . . . . . . . . . . . . . . . . . . . . . A2DP, AVRCP Codec. . . . . . . . . . . . . . . . . . . . . . . . . . . . . . . . . . . . . . . . . . . . . SBC Protezione da copia . . . . supporta protezione contenuti SCMS-T* Classe. . . . . . . . . . . . . . . . . . . . . . . . . . . . . . . . . . . . . . . . . . . . . . . . 2 (Distanza massima di ricezione: 10 m) *La protezione per i contenuti SCMS-T consente di riprodurre musica protetta da copyright e audio 1seg. Tensione e frequenza di alimentazione Modello per l’Europa . . . . . . . . . . . 220 V - 240 V CA, 50 Hz Modello per gli USA . . . . . . . . . . . . . . . . . . . . 220 V CA, 60 Hz Consumo. . . . . . . . . . . . . . . . . . . . . . . . . . . . . . . . . . . . . . . . . . . 5 W Dimensioni massime esterne (unità principale) 172 mm (W) × 172 mm (H) × 41 mm (D) Peso. . . . . . . . . . . . . . . . . . . . . . . . . . . . . . . . . . . . . . . . . . . . . . 485 g (adattatore CA dedicato non incluso) Tuner Componenti inclusi Intervallo di frequenza. . . . . . . . . . . 87,5 MHz – 108,0 MHz Telecomando × 1 Unità. . . . . . . . . . . . . . . . . . . . . . . . . . . . . . 3,5 cm full range × 2 Impedenza nominale. . . . . . . . . . . . . . . . . . . . . . . . . . . . . . . 4 Ω Piastra per montaggio a parete × 1 Viti per legni × 4 Adattatore CA dedicato × 1 Manuale d’uso (il presente documento) × 1 Amplificatore Potenza nominale in uscita (JEITA)**. . . . . . . . . . . . 2 W × 2 Risposta in frequenza. . . . . . . . . . . . . . . . . . . . 50 Hz - 20 kHz **Valore misurato conformemente agli standard JEITA (Japan Electronics and Information Technology Industries Association) Per fini di miglioramento, le specifiche e le caratteristiche estetiche sono soggette a modifiche senza preavviso. Le illustrazioni contenute in questo manuale potrebbero differire leggermente dai modelli reali. 75 ITALIANO Altoparlanti Pila a bottone al litio (CR2025) per il telecomando × 1 (già inserita nel telecomando al momento della spedizione) oo Nie narażaj tego urządzenia na zachlapania. oo Nie umieszczaj naczyń zawierających płyny na tym urządzeniu. oo Nie instaluj tego urządzenia w ciasnym miejscu. oo Urządzenie pobiera nominalną nie operacyjną energię z gniazdka AC nawet gdy przełącznik POWER or STANDBY/ON nie jest w pozycji ON. oo Urządzenie powinno być zainstalowane na tyle blisko gniazdka AC, aby w każdej chwili można było bez problemu podłączyć kabel zasilający. oo Główna wtyczka jest również urządzeniem wyłączającym i jako taka powinna zawsze być dostępna i gotowa do użycia. oo Produkty konstrukcji klasy są wyposażone w kabel zaslający z z uziemieniem. Kabel zasilający takiego urządzenia musi być podłączony do gniazdka z uziemieniem. oo Jeśli produkt jest zasilany bateriami (zarówno zestawem baterii jak i bateriami instalowanymi), nie może być wystawiony na bezpośrednie działanie promieni słonecznych, ogień lub nadmierne ciepło. BBOstrzeżenia dotyczące baterii. Nieprawidłowe użytkowanie baterii może skutkować ich pęknięciem i wyciekiem, który może prowadzić do pożaru, zranienia lub uszkodzenia okolicznych przedmiotów. Przeczytaj dokładnie poniższe ostrzeżenia. oo Upewnij się, że baterie mają prawidłowo ułożone bieguny (+) i (_). oo Jeśli pilot nie jest używany przez dłuższy czas (więcej niż miesiąc), wyjmij baterie, aby uniknąć uszkodzenia głośników przez wylanie z baterii. oo Jeśli dojdzie do wycieku z baterii, wytrzyj zalany przedział baterii szmatką do sucha i wymień baterie na nowe. oo Nie stosuj innych baterii niż te opisane w niniejszej specyfikacji. oo Nie podgrzewaj i nie rozbieraj baterii. Nigdy nie wrzucaj baterii do wody i do ognia. oo Nie przechowuj baterii z innymi metalowymi przedmiotami. Baterie mogą mieć krótkie spięcie, które może doprowadzić do przecieku lub eksplozji. oo Nigdy nie ładuj baterii o ile nie są do tego przystosowane. 76 Dla klientów z Europy. Utylizacja sprzętów elektrycznych i elektronicznych. (a)Urządzenia elektryczne i elektroniczne powinny być utylizowane oddzielnie od pozostałych odpadów w specjalnych punktach odbioru wskazanych przez władze lokalne lub rządowe. (b)Prawidłowo utylizując urządzenia elektryczne i elektroniczne pomagasz zachować wartościowe surowce i zapobiegasz potencjalnemu negatywnemu ich wpływowi na zdrowie ludzi i środowisko naturalne. (c)Nieprawidłowa utylizacja elektrycznych i elektronicznych może mieć poważne konsekwencje dla środowiska naturalnego i na zdrowie ludzi z powodu zawartości niebezpiecznych substancji. (d)Elektryczne i elektroniczne śmieci (Waste Electrical and Electronic Equipment) symbol (WEEE), który przedstawia przekreślony kosz na kółkach, wskazuje, że elektryczne i elektroniczne urządzenia muszą być gromadzone i utylizowane osobno od domowych odpadów. (e)Systemy odbioru są dostępne dla końcowych użytkowników. Więcej szczegółowych informacji o utylizacji urządzeń elektrycznych i elektronicznych można uzyskać w urzędzie miasta, serwisie utylizacji odpadów lub w sklepie, w którym zakupione zostało urządzenie. POLSKA Utylizacja baterii i/lub akumulatorów (a)Zużyte baterie i akumulatory powinny być utylizowane oddzielnie od pozostałych odpadów w specjalnych punktach odbioru wskazanych przez władze lokalne lub rządowe. (b)Prawidłowo utylizując baterie i akumulatory pomagasz zachować wartościowe surowce i zapobiegasz potencjalnemu negatywnemu ich wpływowi na zdrowie ludzi i środowisko naturalne. (c)Nieprawidłowa utylizacja baterii i akumulatorów może mieć poważne konsekwencje dla środowiska naturalnego i na zdrowie ludzi z powodu zawartości niebezpiecznych substancji. (d)E lektryczne i elektroniczne śmieci (Waste Electrical and Electronic Equipment) symbol (WEEE), który przedstawia przekreślony kosz na kółkach, wskazuje, że elektryczne i elektroniczne urządzenia muszą być gromadzone i utylizowane osobno od domowych odpadów. Jeśli bateria lub akumulator zawiera więcej ołowiu (Pb), rtęci (Hg), i/lub kadmu (Cd) niż zapi- Pb, Hg, Cd sano w Dyrektywie Baterii (2006/66/EC), to chemiczne symbole tych pierwiastków powinny być umieszczone poniżej symbolu WEEE. (e)Systemy odbioru są dostępne dla końcowych użytkowników. Więcej szczegółowych informacji o utylizacji ubaterii i akumulatorów można uzyskać w urzędzie miasta, serwisie utylizacji odpadów lub w sklepie, w którym zakupione zostało urządzenie. 77 Ostrzeżenia dotyczące urządzeń bezprzewodowych Zgodność transmitera radiowego i interferencja Wymagania ekspozycji na promieniowanie Model USA To urządzenie spełnia międzynarodowe wymogi ekspozycji człowieka na fale radiowe generowane prze trnasmiter. To urządzenie jest zgodne z przepisami FCC Part.15. Użytkowanie możliwe pod dwoma poniższymi warunkami: 1) To urządzenie nie może powodować interferencji. 2) To urządzenie musi zaakceptować interferencję włączając taka, która spowoduje nieprawidłowe działanie urządzenia. Etykiety autoryzujące FCC ID: EEA (European Economic Area) model To urządzenie jest zgodne z Dyrektywą 1999/5/EC (R&TTE) Etykieta zgodności Oznaczenie CE: UWAGA Zmiany i modyfikacje nie zaakceptowane przez stronę odpowiedzialną za zgodność mogą doprowadzić do władze użytkownika do przejęcia operacji urządzenia. UWAGA Autoryzacja urządzeń bezprzewodowych jest różna w różnych krajach i regionach. Użytkuj tylko w kraju, w którym ten produkt został kupiony. oo W zależności od kraju mogą pojawić się ograniczenia w użytkowaniu technologii Bluetooth. Przed użytkowaniem sprawdź regulacje prawne w kraju, w którym zamierzasz korzystać z tego urządzenia. 78 Spełnia dwa poniższe warunki: oo Użytkownik końcowy i instalator musi być wyposażony w instrukcję montażu anteny i mieć prawidłowe warunki do transmisji aby zgodność na ekspozycję RF była satysfakcjonująca. oo To urządzenie powinno być zainstalowane i użytkowane w odległości minimum 20cm od grzejnika i Twojego ciała. Oświadczenie zgodności Model USA To urządzenie spełnia wymogi limitów FCC ekspozycji na promieniowanie oraz wytyczne FCC ekspozycji na działanie fal radiowych. EEA (European Economic Area) model To urządzenie spełnia wymogi EN.62311 sharmonizowane standardy dyrektywy nr 1999/5/ EC w sprawie urządzeń radiowych i końcowych urządzeń telekomunik acyjnych oraz wzajemnego uznawania ich zgodności. Wskazówki dotyczące technologii Bluetooth® Informacje o interferencji (wymogi FCC) To urządzenie zostało przetestowane i spełnia limity urządzenia cyfrowego klasy B, zgodnie z Normami FCC Part 15. Te limity są zaprojektowane aby zapewnić racjonalną ochronę przed szkodliwym działaniem interferencji z instalacją w mieszkaniu. To urządzenie generuje, wykorzystuje i może emitować energię częstotliwości radiowych oraz jeśli nie jest zainstalowane i używane zgodnie z instrukcją może mieć szkodliwy wpływ na komunikację radiową. Nie można zagwarantować, że interferencja nie pojawi się w przypadku danej instalacji. Komunikacja urządzenia z telefonem komórkowym lub innym urządzeniem komunikującym się za pomocą technologii Bluetooth powinna odbywać się w odległości do 10m. W zależności od warunków użytkowania efektywna odległość transmisji może okazać się mniejsza. Bezprzewodowa komunikacja z każdym urządzeniem komunikującym się za pomocą technologii Bluetooth nie jest gwarantowana. W celu sprawdzenia możliwości komunikacji z innym urządzeniem za pomocą technologii Bluetooth należy sprawdzić podręcznik użytkownika lub skontaktować się ze sklepem, w którym urządzenie zostało kupione. POLSKA Jeśli to urządzenie powoduje nieprawidłowe działanie odbiorników radiowych i telewizyjnych, użytkownik może podjąć jedno z poniżej opisanych działań: oo Zmienić lokalizację urządzenia i/lub anteny odbiorczej. oo Zwiększyć dystans pomiędzy urządzeniem, a odbiornikiem. oo Podłączyć urządzenie do gniazdka na obwodzie innnym niż ten do którego podłączony jest odbiornik. oo Skonsultować się z dealerem lub doświadczonym technikiem radiowym lub telewizyjnym. 79 Spis treści Przed użytkowaniem Ostrzeżenia dotyczące urządzeń bezprzewodowych.78 Wskazówki dotyczące technologii Bluetooth® . . . . . . 79 Załączone części Przed użytkowaniem. . . . . . . . . . . . . . . . . . . . . . . . . . . . . . . 80 Nazwy części. . . . . . . . . . . . . . . . . . . . . . . . . . . . . . . . . . . . . . . 82 Użytkowanie pilota. . . . . . . . . . . . . . . . . . . . . . . . . . . . . . . . . 83 Instalacja płytki mocującej do ściany . . . . . . . . . . . . . . . 84 Mocowanie urządzenia. . . . . . . . . . . . . . . . . . . . . . . . . . . . . 85 Podłączenie Adaptora AC. . . . . . . . . . . . . . . . . . . . . . . . . . . 85 Słuchanie audio z urządzenia z technologią Bluetooth. . 86 Słuchanie radia. . . . . . . . . . . . . . . . . . . . . . . . . . . . . . . . . . . . . 90 Radzenie sobie z problemami. . . . . . . . . . . . . . . . . . . . . . . 91 Specyfikacja. . . . . . . . . . . . . . . . . . . . . . . . . . . . . . . . . . . . . . . . 93 Jeśli którakolwiek z załączonych części będzie uszkodzona, lub będzie jej brakować prosimy o kontakt ze sklepem, w którym produkt został zakupiony. Pilot × 1 Bateria litowa CR2025 do pillota × 1 (zainstalowana fabrycznie w pilocie) Płytka mocująca do ściany ×1 Śruby do drewna × 4 Adaptor AC × 1 Dla Europy Dla USA lub Podręcznik użytkownika (ten dokument) × 1 80 Wskazówki użytkowania oo Unikaj umieszczania urządzenia w miejscu narażonym na bezpośrednie działanie promieni słonecznych i blisko innych źródeł ciepła . Ponadto nie umieszczaj urządzenia na wzmacniaczu, ani na innym urządzeniu, które generuje ciepło. Takie postępowanie może doprowadzić do deformacji i przebarwień, lub spowodować nieprawidłowe działanie urządzenia. oo Jeśli niedalego włączony jest odbiornik TV podczas użytkowania urządzenia, na ekranie TV mogą pojawić się linie w zależności od częstotoliwości nadawania. Taki efekt nie oznacza nieprawidłowego działani urządzenia ani odbiornika TV. Jeśli zauważysz takie linie wyłącz urządzenie lub odłącz zasilanie. 2 Odciągnij zatrzask i włóż odpowiednią końcówkę wtyczki (A) do głównej części (B) adaptora AC. Zacznij ją wkładać od przeciwnej strony niż zatrzask. Następnie popchnij końcówkę w kierunku wskazanym przez strzałkę. (B) (A) oo Zawsze gdy adaptor AC jest włączony do sieci pobierana jest energia standby. Zmień wtyczkę adaptora AC na taką, aby pasowała do gniazdek w miejscu gdzie używasz urządzenia. 1 Aby zmienić wtyczkę w Adaptorze 3 Wciśnij wtyczkę, aż usłyszysz charakterystyczne kliknięcie. AC odciągnij zatrzask w kierunku wskazanym przez strzałkę na rysunku poniżej. 81 POLSKA Dla klientów z UK Nazwy części Głośnik Wyświetlacz Wybór trybu - przycisk MODE Regulacja głośności (−/+) Przyciski "skip" (.//) Odbiornik sygnałów z pilota Wskaźnik LED Bluetooth Antena FM Kabel zasilający (Włącznik/wyłącznik - ON/OFF) Adaptor AC Pilot Zasilanie ( ) przycisk Wybór trybu - przycisk MODE Przycisk przełącz (niższa częstotliwość) (.) Przycisk przełącz (wyższa częstotliwość) (/) Przycisk Play/Stop (y/J) Przycisk MUTE (wyciszenie) Regulacja głośności (+/−) 82 Użytkowanie pilota Wskazówki użytkowania Kiedy wymienić baterię? oo Wyceluj pilota w odbiornik sygnału pilota na głośniku i wypróbuj jego działanie z odległości do 5m. Nie umieszczaj żadnych przeszkód pomiędzy pilotem a urządzeniem. Jeśli maksymalny zasięg operowania urządzeniem za pomocą pilota się zmniejsza, lub gdy urządzenie nie reaguje na polecenia pilota - zmień baterie na nowe. Utylizuj baterie zgodnie z instrukcją na etykiecie baterii lub zgodnie z zaleceniami Twojego rządu. oo Jeśli odbiornik sygnałów pilota jest wystawiony na bezpośrednie działanie promieni słonecznych lub silne naświetlenie to pilot może nie działać prawidłowo. oo Miej świadomość, że użytkowanie tego pilota może spowodować przypadkowe operowanie innymi urządzeniami, które mogą być kontrolowane za pomocą pilota. Przed użytkowaniem QOSTRZEŻENIE Nieprawidłowe użytkowanie baterii może skutkować ich pęknięciem i wyciekiem, który może prowadzić do pożaru, zranienia lub uszkodzenia okolicznych przedmiotów. Przeczytaj dokładnie ostrzeżenie na stronie 76. Zdejmij folię izolującą z pleców pilota przed użytkowaniem. POLSKA Wymiana baterii Bateria w pilocie została fabrycznie zainstalowana. Aby wymienić baterię naciśnij i przytrzymaj w miejscu i pocągnij w kierunku . Wyciągnij szufladkę baterii i włóż jedną baterię litową (CR2025) znakiem "+" do góry, tak jak pokazano na ilustracji. Włóż szufladkę baterii do środka. 83 Instalacja płytki mocującej do ściany QUWAGA oo Przed instalacją płytki mocującej na ścianie ustal odpowiednią lokalizację sprawdzając czy urządzenie nie interferuje z innymi urządzeniami elektronicznymi. (Patrz "Wymagania ekspozycji na promieniowanie" na stronie 78.) oo Przed instalacją płytki mocującej do ściany upewnij się, że ściana jest wystarczająco silna, aby utrzymać urządzenie. oo MUJI nie odpowiada za wypadki spowodowane nieprawidłową instalacją urządzenia. oo Po zainstalowaniu nie opieraj rąk, nie umieszczaj żadnych przedmiotów na urządzeniu, ani nie ciągnij go zbyt mocno. Takie postępowanie może doprowadzić do upadku urządzenia ze ściany. oo Ta płytka nie może być przymocowana do paneli absorbujących dźwięki. oo Zainstaluj płytkę na gładkiej pionowej ścianie. oo Nie instaluj płytki w miejscu dostępnym dla dzieci i zwierząt domowych. oo Po instalacji upewnij się, że nie ma dziur i nic nie jest luźne. oo Płytka jest przeznaczona do mocowania na ścianach. Nie mocuj płytki do sufitu. Instalacja na innych powierzchniach (ściany z drewna, słupy itd.) Wybierz twardą powierzchnię i wykorzystaj załączone śruby do drewna lub inne odpowiednie mocowania, aby zainstalować płytkę mocującą przekładając je przez otwory w jej 4 rogach. oo Nie mocuj płytki do ściany pod kątem. oo Podczas montażu zadbaj o to, aby wystające łby śrub nie zraniły nikogo. oo Sprawdzaj płytkę mocującą do ściany regularnie i popraw instalację, lub zmień miejsce lokalizacji jeśli się poluzuje. Zawsze sprawdzaj płytkę po trzęsieniu ziemi lub po innych wibracjach, które mogły ją poluzować. oo Załączone części są zaprojektowane specjalnie na potrzeby tego urządzenia. Nie wykorzystuj ich do innych celów. oo Składuj części w miejscu niedostępnym dla dzieci i zwierząt domowych. 84 oo Załączone śruby do drewna nie mogą być wykorzystane do mocowania do ścian wykonanych np.. z betonu lub cegły. W przypadku zastosowania załączonych śrub do drewna w ścianie pozostaną otwory tak jak przedstawiono na ilustracji poniżej. Nie bierzemy odpowiedzialności za powstałe otwory w ścianie tego rodzaju. Mocowanie urządzenia 1 Rozwiń antenę FM. Podłączenie Adaptora AC. Po podłączeniu kabla zasilającego do kabla od Adaptora AC podłącz Adaptor do gniazdka. Podłącz do gniazdka Wyjmij i rozwiń antenę FM podłączoną z tyłu urządzenia. 2 Zamontuj urządzenie na płytce mocującej zainstalowanej na ścianie. Adaptor AC Kabel zasilający Wtyczka POLSKA Wstaw urządzenie nad uchwyty płytki mocującej. Zsuń urządzenie po uchwytach w dół, aż wpasuje się w swoje miejsce. Ustaw uchwyty urządzenia nad uchwytami płytki mocującej. oo Upewnij się, że urządzenie jest bezpiecznie zamontowane. oo Ustaw antenę FM w pozycji, zapewniającej najlepszy odbiór. 85 Słuchanie audio z urządzenia z technologią Bluetooth (1) 1 Pociągnij delikatnie w dół kabel zasilający, aby włączyć urządzenie. 3 Parowanie lub łączenie urządzenia z innym urządzeniem poprzez technologię komunikacji Bluetooth. Parowanie z urządzeniem obsuługującym technologię Bluetooth. oo Możesz również wykorzystać przycisk Power ( ) na pilocie. 2 Wciśnij przycisk Trybu (MODE). Gdy aktywny jest tryb źródło komunikacji Bluetooth, na wyświetlaczu pojawi się napis "BT". BT Zawsze przy pierwszym użyciu urządzenia z innym urządzeniem za pomocą technologii Bluetooth należy je sparować. Po aktywowaniu trybu Bluetooth użyj drugiego urządzenia z technologią Bluetooth, aby je sparować. Jeśli już sparowałeś inne urządzenie postępuj zgodnie z instrukcjami w "Łączenie z urządzeniem z technologią Bluetooth, które zostało już wcześniej sparowane." na stronie 88. Poniższe prz ykłady pokazują jak połacz yć smartfon z urządzeniem poprzez technologię Bluetooth. Szczegóły znajdziesz w podręczniku użytkownika urządzenia z technologią Bluetooth, którego używasz. Przykłady parowania ze smartfonami. Współpraca z Android 4.0 oo Jeśli włączysz tryb Bluetooth, wskaźnik technologii Bluetooth będzie mrygał informując, że urządzenie może być skomunikowane z innym urządzeniem za pomocą technologii Bluetooth. 1. Znajdź ikonę Bluetooth w ustawieniach Menu Sieci Zwykłe i Bezprzewodowe. oo Możesz używać przyski trybu (MODE) za pomocą pilota. oo Urządzenie zachowuje ustawienia trybu gdy jest wyłączone. Jeśli urządzenie było w trybie Bluetooth podczas ostatniego użytkowania to możesz opuścić ten krok. Jeśli odłączysz Adaptor AC z gniazdka lub odłączysz kabel zasilający od Adaptora urządzenie powróci do swoich domyślnych ustawień (tryb Radia [TUNER], głośność 10). 86 2. Ustaw Bluetooth na "ON", i wybierz Skanuj Urządzenia (Scan for devices). 3. Wybierz "MJBTS-1" gdy pojawi się na liście DOSTĘPNE URZĄDZENIA BLUETOOTH. 4. Urządzenia zostaną połączone gdy zakończy się parowanie z MJBTS-1. Współpraca z iPhone iOS 6 1. Otwórz app Ustawieniai wybierz "Bluetooth". 2. Ustaw Bluetooth na "ON". Pojawi się komunikat "MJBTS-1 nie sparowano" (MJBTS-1 Not Paired). POLSKA oo Gdy parowanie zostanie zakończone, "MJBTS-1" stanie się POWIĄZANYM URZĄDZENIEM (PAIRED DEVICES) zamiast DOSTĘPNE URZĄDZENIE (AVAILABLE DEVICES). Dalszy ciąg na następnej stronie 87 Słuchanie audio z urządzenia z technologią Bluetooth (2) 3. Wybierz MJBTS-1 nie połączono (MJBTS-1 Not Paired) Gdy parowanie zostanie zakończone pojawi się komunikatg MJBTS-1 połączono (MJBTS-1 connected). Połączenie z iPhone iOS 6 1. Otwórz app Ustawienia i wybierz "Bluetooth". 2. Ustaw Bluetooth na "ON". Pojawi się komunikat "MJBTS-1 nie połączono" (MJBTS-1 Not Connected). 3. Wybierz "MJBTS-1 nie połaczono" aby połączyć się z MJBTS-1. oo Jeśli trzeba będzie podać hasło wpisz "0000" (cztery zera). oo Gdy to urządzenie połączy się z innym urządzeniem w technologii Bluetooth, to wskaźnik Bluetooth świeci i wydaje dwa krótkie sygnały dźwiękowe. oo Urządzenia nie powinny być oddalone o więcej niż o kilka metrów jedno od drugiego podczas parowania. Jeśli odległość jest za duża parowanie może nie być możliwe i połączenie może zostać przerwane. oo Jeśli wskaźnik Bluetooth na forncie mryga cały czas przez 10 minut to znaczy, że automatycznie wejdzie w tryb Standby. Jeśli tak się zdarzy Łączenie z urządzeniem z technologią Bluetooth, które zostało już wcześniej sparowane. Jeśli urządzenie jest włączone i drugie urządzenie z technologią Bluetooth jest również włączone, a jego tryb Bluetooth działa, urządzenia powinny połączyć się automatycznie. Jeśli mimo wszystko nie łączą się automatycznie możesz połączyć je ręcznie tak jak pokazano na przykładach wykorzystania Smartfonów. Przykłady połączenia ręcznego Smartfonów. Połączenie z Android 4.0 1. Znajdź ikonę Bluetooth w ustawieniach Menu Sieci Zwykłe i Bezprzewodowe. 2. Ustaw Bluetooth na "ON", i połącz z MJBTS-1. 88 to wyłącz i włącz urządzenie ponownie. oo To urządzenie może zapamiętać do 8 innych sparowanych urządzeń. Jeśli sparowane zostanie 9-te urządzenie to zostanie usunięte najstarsze sparowane urządzenie, tak że nigdy nie będzie więcej niż 8 urządzeń. (Jeśli to samo urządzenie będzie sparowane dwukrotnie to i tak liczy się jako jedno połączenie) UWAGA Bez względu na status połączenia tego urządzenia z innym urządzeniem w technologii Bluetooth, jeśli wskaźnik Bluetooth mryga przez dłuższy czas zrestartuj obydwa urządzenia i połącz je ponownie. 4 Wybierz i odtwórz plik audio na urządzeniu z technologią Bluetooth. oo Możesz również użyć przyciski pilota Play/Stop (y/9). 5 Użyj przycisków regulacji głośności (VOLUME) (−/+) lub tych samych przycisków na pilocie, aby regulować głośność. VOL 05 Wyświetlacz poziomu głośności oo Głośność może być regulowana w skali od 00 do 32. (Napis "MAX" pojawi się, gdy głośność osiągnie poziom 32.) (Domyślnie ustawiony jest poziom głośności 10.) Wybieranie poprzedniego utworu Wybierz przycisk . na urządzeniu lub ten sam przycisk na drugim urządzeniu z technologią Bluetooth. oo Możesz również użyć przycisku . na pilocie. Wybieranie następnego utworu. Wybierz przycisk / na urządzeniu lub ten sam przycisk na drugim urządzeniu z technologią Bluetooth. oo Możesz również użyć przycisku / na pilocie. Pauza Wciśnij przycisk Pauza na urządzeniu z technologią Bluetooth lub wciśnij przycisk Play/Stop (y/9) na pilocie. Wyciszanie Jeśli chcesz czasowo wyciszyć całkowicie to urządzenie wciśnij przycisk (MUTE) na pilocie. Aby przywrócić poprzedni poziom głośności wciśnij ponownie przycisk (MUTE) na pilocie. Wyłączanie urządzenia. Aby wyłączyć urządzenie pociągnij delikatnie kabel zasilający, lub wciśnij przycisk Power ( ) na pilocie. Po wyłączeniu urządzenia wyłącz drugie urządzenie z technologią Bluetooth. 89 POLSKA oo W zależności od podłączonego urządzenia z technologią Bluetooth, jego przyciski regulujące głośność mogą zostać zdezaktywowane. Więcej szczegółów znajduje się w Podręczniku Użytkownika urządzenia, którego używasz. Wybieranie utworów Słuchanie radia 1 Wciśnij przycisk trybu (MODE) aby ustawić źródło FM. )0 Dostrajanie ręczne Jeśli chcesz znaleźć stację, która nie może być odnaleziona automatycznie wciskaj przycisk (Skip) (.//), aż odnajdziesz żądaną częstotliwość. )0 Gdy pojawi się napis "FM", pokazana zostanie częstotliwość. oo Możesz używać przyski trybu (MODE) za pomocą pilota. 2 Wybierz stację. Automatyczne dostrajanie. oo Za każdym razem gdy wciskasz przycisk (Skip) (.//) częstotliwość będzie zmieniać się o 0.1 MHz. oo Możesz również uż yć prz ycisku (Skip) (.//) na pilocie. 3 Wciśnij przyciski (−/+), aby wyregu- )0 lować głośność. VOL 05 Wciśnij i przytrzymaj. Wciśnij i przytrzymaj przycisk (skip) (.//) przez co najmniej 2 sekundy, aż na wyświetlaczu częstotliwość zacznie się zmieniać. Gdy stacja zostanie automatycznie dostrojona wyświetlacz przestanie zmieniać częstotliwość. oo Aby zatrzymać automatyczne dostrajanie w każdej chwili, krótko wciśnij przycisk (Skip) (.//). Wyświetlacz poziomu głośności oo Głośność może być regulowana w skali od 00 do 32. (Napis "MAX" pojawi się, gdy głośność osiągnie poziom 32.) Jeśli odbiór jest słaby Jeśli odbiór jest słaby, zmień kierunek i ułożenie anteny FM iż znajdź pozycję, która zapewnia najlepszy odbiór. Wyłączanie urządzenia. Aby wyłączyć urządzenie pociągnij delikatnie kabel zasilający, lub wciśnij przycisk Power ( ) na pilocie. 90 Radzenie sobie z problemami (1) Jeśli będziesz miał(a) jakikolwiek problem z tym urządzeniem przeczytaj poniższe wskazówki Radio Jeśli nadal nie działa prawidłowo, skontaktuj się ze sklepem, w którym dokonałeś(aś) zakupu. Stacja nie może być odnaleziona, lub odbiór jest słaby ee Zmień ułożenie Anteny FM Ogólne Bluetooth Urządzenie nie działa ee Podłącz adaptor AC do gniazdka zasilającego. ee Sprawdź połączenie kabla zasilającego z adaptorem AC. ee Wymień baterię w pilocie. Nie ma dźwięku ee Dostosuj poziom głośności. Dzwięk jest hałaśliwy. ee Ustaw urządzenie najdalej jak to tylko możliwe od odbiorników TV, kuchenek mikrofalowych i innych urządzeń, które wytwarzają fale elektromagnetyczne. Nie łączy się. ee Sprawdź, czy urządzenie z technologią Bluetooth jest włączone i że ma włączoną funkcję Bluetooth. ee Czy drugie urządzenie z technologią Bluetooth nie jest za daleko? Czy pomiędzy urządzeniami jest ściana lub inna przeszkoda? ee Wyłącz urządzenie i włącz je ponownie. ee Skasuj na drugim urządzeniu połączenie z "MJBTS-1" i spróbuj sparować je ponownie. (Zobacz "Parowanie z urządzeniem obsuługującym technologię Bluetooth." na stronie 86.) Dalszy ciąg na następnej stronie 91 POLSKA Pilot nie działa ee Folia izolacyjna jest fabrycznie umieszczona w pomieszczeniu baterii. Wyjmij ją przed użytkowaniem Więcej szczegółów na stronie 83. ee Jeśli bateria jest wyczerpana wymień ją na nową. ee Użyj pilota z odległości 5 m lub mniej i wyceluj go w urządzenie. ee Jeśli pomiędzy pilotem, a urządzeniem jest jakakolwiek przeszkoda operowanie pilotem będzie niemożliwe. Usuń przeszkodę lub zmień pozycję. ee Jeśli obok urządzenia świeci jasne światło - wyłącz je. Nie może połączyć się z innym urządzeniem. ee Sprawdź podręcznik użytkownika drugiego urządzenia z technologią Bluetooth. ee Wyłącz i ponownie włącz obydwa urządzenia z technologią Bluetooth i spróbuj ponownie je sparować. ee Wyłącz inne urządzenia z technologią Bluetooth oprócz tego, z którym chcesz sparować głośniki. ee Skasuj na drugim urządzeniu połączenie z "MJBTS-1" i spróbuj sparować je ponownie. (Zobacz "Parowanie z urządzeniem obsuługującym technologię Bluetooth." na stronie 86.) Radzenie sobie z problemami (2) Dźwięk się rwie ee Czy w okolicy jest sieć bezprzewodowa LAN, inne urządzenie z technologią Bluetooth, kuchenka mikrofalowa lub inne podobne urządzenia w okolicy? Używaj tego urządzenia w jak największej odległości od tych urządzeń. ee Trzymaj sparowane urządzenia z technologią Bluetooth możliwie blisko siebie. Spróbuj zmienić ich lokalizację. ee Jeśli używasz aplikacji na smartfonie w jakimkolwiek innym celu niż słuchanie muzyki, dźwięk może zacząć się rwać. Jeśli dojdzie do takiej sytuacji nie używaj innych aplikacji podczas słuchania muzyki. To urządzenie używa mikrokomputera i czasami może nie funkcjonować prawidłowo z uwagi na hałas oraz wpływ innych urządzeń w okolicy. W takim przypadku odłącz Adaptor AC z gniazdka elektrycznego i odczekaj chwilę przed ponownym jego podłączeniem. Następnie spróbuj użyć urządzenia ponownie. 92 Czyszczenie Jeśli urządzenie lub pilot zostaną zabrudzone, wytrzyj je suchą szmatką lub użyj detergentu z neutralnym pH. Nie używaj szmatek nasączonych chemikaliami, rozpuszczalników, ani innych podobnych substancji ponieważ mogą uszkodzić powierzchnię urządzenia. QOSTRZEŻENIE! Odłącz Adaptor AC przed czyszczeniem Specyfikacja Bluetooth Ogólne Wersja. . . . . . . . . . . . . . . . . . . . . . . . . . . . . . . . . . . . . . . . . . . . . . 3.0 Profile. . . . . . . . . . . . . . . . . . . . . . . . . . . . . . . . . . . . A2DP, AVRCP Codec. . . . . . . . . . . . . . . . . . . . . . . . . . . . . . . . . . . . . . . . . . . . . SBC Zabezpieczenie kopii. . . . . . . . . . . . . . . obsługuje SCMS-T* Klasa . . . . . . . . . . . . . . . . . . . . . . . . . . . . . . . . . . . . . . . . . . . . . . . . . 2 (maksymalny dystans połączenia wynosi ok. 10m) *SCMS-T pozwala na odtwarzanie muzyki zabezpieczonej przed kopiowaniem i audio 1seg. Moc zasilania i częstotliwości Model Europejski. . . . . . . . . . . . . . . . AC 220 V - 240 V, 50 Hz Model USA. . . . . . . . . . . . . . . . . . . . . . . . . . . . . AC 120 V, 60 Hz Znamionowe zużycie mocy. . . . . . . . . . . . . . . . . . . . . . . . . 5 W Maksymalne wymiary zewnętrzne (główna część) 172 mm (szer.) × 172 mm (wys.) × 41 mm (głęb.) Waga. . . . . . . . . . . . . . . . . . . . . . . . . . . . . . . . . . . . . . . . . . . . . 485 g (bez Adaptora AC) Radio Skala częstotliwości. . . . . . . . . . . . . . 87.5 MHz – 108.0 MHz Przedmioty w zestawie Pilot × 1 Głośniki Głośniki. . . . . . . . . . . . . . . . . . . . . . . . . . . . 3.5cm full range × 2 Opór nominalny. . . . . . . . . . . . . . . . . . . . . . . . . . . . . . . . . . . . 4 Ω Bateria litowa do pilota (CR2025) × 1 (zainstalowana fabrycznie w pilocie) Płytka mocująca do ściany × 1 Śruby do drewna × 4 Adaptor AC × 1 Podręcznik użytkownika (ten dokument) × 1 Nominalna moc wyjściowa (JEITA)**. . . . . . . . . . . . 2 W × 2 Charakterystyka częstotliwości. . . . . . . . . . . 50 Hz – 20 kHz **Wartość mierzona przy użyciu standardów JEITA (Japan Electronics and Information Technology Industries Association) W przypadku wprowadzenia innowacji lub poprawek specyfikacja i wygląd mogą ulec zmianie bez powiadamiania użytkownika. Ilustracje w tej instrukcji mogą różnić się nieznacznie od prawdziwego urządzenia. 93 POLSKA Wzmacniacz oo Setzen Sie das Gerät keinem tropfenden oder spritzenden Wasser aus. oo Stellen Sie keine mit Flüssigkeiten gefüllten Gegenstände wie etwa Vasen auf das Gerät. oo Installieren Sie das Gerät nicht in einem engen Raum wie etwa einem Bücherregal oder einem vergleichbaren Element. oo Die Versorgung des Gerätes mit Nennleistung im nichtausgelösten Zustand erfolgt über eine AC-Steckdose oder einen STANDBY/EIN-Schalter, welcher sich nicht in der EIN-Position befindet. oo Das Gerät sollte nahe genug an der AC-Steckdose aufgestellt werden, sodass Sie den Netzstecker jederzeit leicht erreichen können. oo Der Netzstecker wird als Unterbrechungs vorrichtung verwendet, diese Unterbrechungs vorrichtung muss immer betriebsbereit sein. oo Class- -Produkte sind mit einem Netzkabel augestattet, welches mit einer Erdungsvorrichtung versehen ist. Das Kabel eines solchen Produkts muss in eine AC-Steckdose gesteckt werden, welche über eine Schutzleiterverbindung verfügt. oo Falls das Produkt mit Batterin betrieben wird (einschließlich einem Batteriesatz oder eingebauten Akkus), so sollten diese weder Sonneneinstrahlung, Feuer noch übermäßiger Wärme ausgesetzt sein. BBVorsichtsmaßnahmen hinsichtlich Batterien Die fehlerhafte Verwendung von Batterien kann zu deren Bruch oder Auslaufen führen, wodurch wiederum die Gefahr von Bränden, Verletzungen oder Verscchmutzung von sich in der Nähe befindenden Gegenständen besteht. Bitte lesen Sie die folgenden Vorsichtsmaßnahmen sorgfältig durch und beachten Sie diese. oo Stellen Sie sicher, dass Sie die Batterien mit dem Pluspol (+) und dem Minuspol (_) in der richtigen Richtung einlegen. oo Sollte die Fernbedienung für längere Zeit nicht verwendet werden (mehr als einen Monat), entfernen Sie die Batterien, um diese vor dem Auslaufen zu schützen. oo Sollten die Batterien auslaufen, wischen Sie die ausgetretene Flüssigkeit im Batteriefach weg und ersetzen Sie die Batterien. oo Verwenden Sie keine anderen Batterien als jene Arten, die vorgegeben sind. oo Erhitzen oder zerlegen Sie die Batterien nicht. Werfen Sie die Batterien niemals in ein offenes Feuer oder Wasser. oo Tragen oder verwahren Sie die Batterien nicht mit anderen metallischen Objekten. Die Batterien könnten einen Kurzschluss verursachen, auslaufen oder explodieren. oo Laden Sie eine Batterie nur dann auf, wenn diese als wiederaufladbar gekennzeichnet ist. 94 Für europäische Kunden Entsorgung von Elektro- und Elektronikgeräten (a)Jegliche Elektro- und Elektronikgeräte sind getrennt vom allgemeinen Hausmüll über staatlich dafür vorgesehene Stellen zu entsorgen. (b)Durch die korrekte Entsorgung von Elektro- und Elektronikgeräten helfen Sie dabei, wertvolle Ressourcen zu schützen und mögliche schädliche Auswirkungen auf Mensch und Umgebung zu verhindern. (c)Unsachgemäße Entsorgung von Elektrik- und Elektronikgeräteabfall kann durch das Vorhandensein von gefährlichen Stoffen schwerwiegende Auswirkungen auf die Umwelt und die menschliche Gesundheit haben. (d)Das WEEE-Symbol (Waste Electrical and Electronic Equipment; Elektro- und Elektronikgeräteabfall), welches eine durchgestrichene Mülltonne darstellt, kennzeichnet elektrische und elektronische Geräte, die nicht mit dem gewöhnlichen, unsortierten Hausmüll entsorgt werden dürfen. (e)R ücknahme- und Sammelsysteme stehen Endverbrauchern zur Verfügung. Für nähere Informationen über die Entsorgung Ihrer alten Elektro- und Elektronikgeräte wenden Sie sich bitte an die lokalen Behörden, das Müllentsorgungsunternehmen oder das Geschäft, in dem Sie das Produkt erworben haben. DEUTSCH Entsorgung von Batterien und/oder Akkumulatoren (a)Altbatterien und/oder –akkumulatoren sind getrennt vom allgemeinen Hausmüll über staatlich dafür vorgesehene Stellen zu entsorgen. (b)Durch die korrekte Entsorgung von Altbatterien und/oder -akkumulatoren helfen Sie dabei, wertvolle Ressourcen zu schützen und mögliche schädliche Auswirkungen auf Mensch und Umwelt zu verhindern. (c)Unsachgemäße Entsorgung von Altbatterien und/oder -akkumulatoren kann durch das Vorhandensein von gefährlichen Stoffen schwerwiegende Auswirkungen auf die Umwelt und die menschliche Gesundheit haben. (d)Das WEEE-Symbol (Waste Electrical and Electronic Equipment; Elektro- und Elektronikgeräteabfall), welches eine durchgestrichene Mülltonne darstellt, kennzeichnet Altbatterien und/oder -akkumulatoren, die nicht mit dem gewöhnlichen, unsortierten Hausmüll entsorgt werden dürfen. Pb, Hg, Cd Wenn die Batterie oder der Akku einen höheren als den festgelegten Wert an Blei (Pb), Quecksilber (Hg) und/oder Kadmium (Cd) enthält als jener, der in der Batterie-Direktive (2006/66/EC) angegeben ist, dann erscheint das chemische Symbol unterhalb des WEEE-Symbols. (e)Rücknahme- und Sammelsysteme stehen Endverbrauchern zur Verfügung. Für nähere Informationen über die Entsorgung Ihrer Altbatterien und -akkumulatoren wenden Sie sich bitte an die lokalen Behörden, das Müllentsorgungsunternehmen oder das Geschäft, in dem Sie das Produkt erworben haben. 95 Vorsichtsmaßnahmen hinsichtlich drahtloser Geräte Einhaltung des Funksenders und Störung Anforderungen bezüglich der Strahlenbelastung USA-Modell Dieses Gerät entspricht der international anerkannten Vorschrift für den Fall der durch den Sender erzeugten Funkwellenbelastung eines Menschen. Das Gerät entspricht Teil 15 der FCC-Bestimmungen. Der Betrieb dieses Geräts unterliegt den folgenden zwei Bedingungen: 1) Dieses Gerät darf keine Störungen verursachen 2) Das Gerät muss unanfällig gegenüber beliebigen empfangenen Störungen sein, einschließlich solcher, die einen unerwünschten Betrieb verursachen. Kennzeichnung der Zulassung FCC-ID: EWR-Modell (Europäische Wirtschaftsregion) Dieses Gerät erfüllt die harmonisierten Normen der DIREKTIVE 1999/5/EC (R&TTE) Konformitätskennzeichnung CE-Zeichen: WARNHINWEIS Änderungen und Umbauten, die von den für die Konformität verantwortlichen Parteien nicht ausdrücklich genehmigt wurden, können die Befugnis des Benutzers, das Gerät zu betreiben, aufheben. WARNHINWEIS Die Genehmigung drahtloser Geräte ist je nach Land oder Region unterschiedlich. Bitte verwenden Sie das Produkt nur in dem Land, in dem Sie jenes erworben haben. oo Je nach Land könnten Beschränkungen zur Verwendung von Bluetooth bestehen. Machen Sie sich mit den Gesetzen und Rechts vorschriften des Landes, in welchem Sie das Gerät verwenden möchten, vor der Nutzung vertraut. 96 Basierend auf den folgenden zwei Voraussetzungen: oo Endverbraucher und Installateure müssen über eine Antenneninstallationsanleitung sowie Sender-Betriebsbedingungen verfügen, um die Bedingungen der HF-Strahlenexposition entsprechend einzuhalten. oo Dieses Gerät sollte so installiert und in Betrieb gesetzt werden, dass ein Mindestabstand von 20 cm zwischen dem Gerät und Ihrem Körper gewährleistet ist. Einhaltungserklärung USA-Modell Dieses Gerät entspricht den FCC-Grenzwerten für Strahlenbelastung, die für eine nicht kontrollierte Umgebung festgelegt wurden und stimmt mit den FCC-Richtlinien zur Strahlenbelastung überein. EWR-Modell (Europäische Wirtschaftsregion) Dieses Gerät entspricht EN.62311; Bewertung von elektrischen und elektronischen Einrichtungen in Bezug auf Begrenzungen der Exposition von Personen in elektromagnetischen Feldern; die harmonisierten Normen der DIREKTIVE 1999/5/EC. Hinweise zu Bluetooth® Informationen hinsichtlich Störungen (FCC-Anforderungen) Dieses Gerät wurde getestet und entspricht den Grenzwerten für ein digitales Gerät der Klasse B, entsprechend Teil 15 der FCC-Vorschriften. Diese Anforderungen gewährleisten angemessenen Schutz gegen elektromagnetische Störungen im häuslichen Bereich. Diese Ausrüstung erzeugt, verwendet und kann Hochfrequenzstrom ausstrahlen. Wird sie nicht gemäß der Anweisungen installiert und verwendet, kann dies zu schädlichen Störungen im Funkverkehr führen. Es besteht jedoch dennoch keine Garantie dafür, dass bei bestimmten Anwendungen keine Störungen erzeugt werden. Bei Verwendung dieses Geräts mit einem Mobiltelefon oder anderen Geräten mit Bluetooth sollten diese nicht mehr als 10 m voneinander entfernt sein. Je nach den Umständen der Nutzung könnte die tatsächliche Übertragungsentfernung jedoch kürzer sein. Eine drahtlose Datenübertragung kann nicht mit jedem Gerät, welches Bluetooth unterstützt, garantiert werden. Informationen zur Ermittlung der Kompatibilität zwischen dieser Einheit und einem anderen Gerät, welches Bluetooth unterstützt, entnehmen Sie bitte der Betriebsanleitung dieses Gerätes oder setzen Sie sich mit dem Geschäft, in dem Sie dieses erworben haben, in Verbindung. DEUTSCH Sollte dieses Gerät den Radio- oder Fernsehempfang stören (Sie können dies überprüfen, indem Sie das Gerät aus- und wieder einschalten), so ist der Benutzer dazu angehalten, die Störungen durch eine der folgenden Maßnahmen zu beheben. oo Richten Sie das Gerät und/oder die Antenne neu aus oder platzieren Sie diese in einem anderen Bereich. oo Vergrößern Sie die Entfernung zwischen dem Gerät und dem Empfangsgerät. oo Schließen Sie das Gerät an einem anderen Strom kreis als dem des Empfangsgeräts an. oo Bitten Sie den Händler oder einen erfahrenen Radio- oder Fernsehtechniker um Unterstützung. 97 Inhaltsverzeichnis Vor der Nutzung Vorsichtsmaßnahmen hinsichtlich drahtloser Geräte. . . 96 Hinweise zu Bluetooth®. . . . . . . . . . . . . . . . . . . . . . . . . . . . . 97 Beiliegende Teile Vor der Nutzung. . . . . . . . . . . . . . . . . . . . . . . . . . . . . . . . . . . . 98 Teilenamen. . . . . . . . . . . . . . . . . . . . . . . . . . . . . . . . . . . . . . . . 100 Verwendung der Fernbedienung. . . . . . . . . . . . . . . . . . 101 Montage der Wandmontageplatte . . . . . . . . . . . . . . . . 102 Anbringen des Geräts . . . . . . . . . . . . . . . . . . . . . . . . . . . . . 103 Schließen Sie den Adapter an. . . . . . . . . . . . . . . . . . . . . . 103 Anhören von Musik über ein Gerät mit Bluetooth. . 104 Radio hören. . . . . . . . . . . . . . . . . . . . . . . . . . . . . . . . . . . . . . . 108 Problembehebung. . . . . . . . . . . . . . . . . . . . . . . . . . . . . . . . 109 Technische Einzelheiten. . . . . . . . . . . . . . . . . . . . . . . . . . . 111 Sollten jegliche der beiliegenden Teile fehlen oder fehlerhaft sein, setzen Sie sich bitte mit dem Händler in Verbindung, von dem Sie das Produkt erworben haben. Fernbedienung × 1 CR2025 LithiumKnopfzellenbatterie für die Fernbedienung × 1 (bei Neuversand in die Fernbedienung eingesetzt) Wandmontageplatte × 1 Holzschrauben × 1 Zugehöriger Netzadapter × 1 Für Europa Für die USA oder Betriebsanleitung (dieses Dokument) × 1 98 Warnhinweise für den Gebrauch oo Vermeiden Sie es, das Gerät in direktem Sonnenlicht, in der Nähe einer Heizung oder an jeglichem anderen Ort, welcher sich erhitzen könnte, aufzustellen. Stellen Sie das Gerät des Weiteren nicht auf einen Verstärker oder auf Geräte, welche Hitze erzeugen. Dies kann eine Farbänderung, Deformierung oder Störung des Gerätes verursachen. 2 Während Sie die die L asche weiterhin in Richtung des Netzadaptersteckers ziehen, stecken Sie den eingewölbten Teil (A) in den herausgewölbten Teil (B) auf der Innenseite der Lasche. Schieben Sie es dann in die andere Seite in Richtung des Pfeils. (B) oo Sofern ein sich in der Nähe befindliches TV-Gerät eingeschaltet ist, könnten je nach Rundfunkfrequenz Linien auf dem Bildschirm erscheinen. Dies ist keine Störung des Geräts oder des TV-Geräts. Wenn Sie diese Linien sehen, dann schalten Sie das Gerät aus oder trennen Sie den entsprechenden Netzadapter von der Steckdose. (A) oo Wenn der entsprechende Netzadapter an eine Steckdose angeschlossen ist, dann wird Energie im Standby-Modus verbraucht. Für Kunden im Vereingten Königreich Tauschen Sie den Netzadapterstecker aus, so dass dieser der jeweiligen Steckdose an dem Ort, an dem Sie das Gerät benutzen, angepasst wird. 3 Stecken Sie den Stecker so weit hin- 1 Ziehen Sie an der Lasche des Netzadaptersteckers und ziehen Sie den Stecker in Richtung des Pfeils weiter unten, um diesen zu entfernen. 99 DEUTSCH ein, bis Sie ein Klickgeräusch hören. Teilenamen Hauptgerät Anzeige MODE-Taste Lautstärke-Tasten (-/+) Tasten zum Überspringen (.//) Fernbedienungsempfänger LED Bluetooth Anzeige FM-Antenne Zugehöriger Netzadapter Netzkabel (EIN/AUS-Taste) Fernbedienung Power-Taste ( ) Taste zum Überspringen (niedrigere Frequenz) (.) Wiedergabe/Pause-Taste (y/J) MODE-Taste Taste zum Überspringen (höhere Frequenz) (/) MUTE-Taste Lautstärke-Tasten (+/−) 100 Verwendung der Fernbedienung Vorsichtsmaßnahmen während der Verwendung Wann die Batterie ausgetauscht werden sollte oo Halten Sie die Fernbedienung in Richtung des Fernbedienungsempfängers am Hauptgerät und verwenden Sie diese aus einer Entfernung von maximal 5 m. Platzieren Sie keine Hindernisse zwischen dem Hauptgerät und der Fernbedienung. Wenn sich der maximale Betriebsabstand zwischen der Fernbedienung und dem Hauptgerät verringert oder die Tasten der Fernbedienung nicht mehr funktionieren, dann ersetzen Sie die Batterie durch eine neue. Entnehmen Sie Informationen zur Entsorgung einer gebrauchten Batterie dem Etikett oder befolgen Sie die regional vorgeschriebene Entsorgungsvorgehensweise. oo Wenn der Fernbedienungsempfänger direktem Sonnenlicht oder kräftigem Licht ausgesetzt ist, könnte es sein, dass die Fernbedienung nicht ordnungsgemäß funktioniert. oo Bitte beachten Sie, dass die Verwendung dieser Fernbedienung den unbeabsichtigten Betrieb anderer durch Infrarotstrahlen steuerbaren Geräte verursachen kann. Vor der Nutzung Entfernen Sie die Isolierfolie von der Rückseite der Fernbedienung vor der Verwendung. QWARNHINWEIS Die fehlerhafte Verwendung von Batterien kann zu deren Bruch oder Auslaufen führen, wodurch wiederum die Gefahr von Bränden, Verletzungen oder Verschmutzung von sich in der Nähe befindenden Gegenständen besteht. Lesen Sie bitte die Warnhinweise auf Seite 94 sorgfätig durch. DEUTSCH Austausch der Batterie Bei Versand aus dem Werk wurde die Batterie bereits in die Fernbedienung eingesetzt. Zum Ersetzen der Batterie drücken Sie auf , während Sie gleichzeitig in die Richtung von ziehen. Ziehen Sie das Batteriefach vom Ende heraus und legen Sie eine Lithium-Knopfzellenbatterie (CR2025) mit der „+“-Seite nach oben wie in der Abbildung gezeigt ein. Setzen Sie dann das Fach wieder ein. 101 Montage der Wandmontageplatte QWARNHINWEIS oo Ermitteln Sie die Position vor Montage der Wandmontageplatte, während Sie sicherstellen, dass keine Funkwellenstörungen mit anderen elektronischen Geräten auftreten. (Lesen Sie dazu „Anforderungen bezüglich der Strahlenbelastung“ auf Seite 96.) oo Stellen Sie vor Anbringen der Wandmontage platte an einer Wand sicher, dass die Wand stabil genug ist. oo Montieren Sie die Platte an einer glatten senkrechten Wand. oo Montieren Sie die Platte nicht an einer Position, die kleine Kinder oder Haustiere erreichen können. oo Stellen Sie nach der Montage sicher, dass vor der Verwendung nichts locker ist und dass keine Lücken vorhanden sind. oo Beachten Sie, dass wir im Falle eines durch unsachgemäße Montage verursachten Unfalls keinerlei Verantwortung übernehmen werden. oo Stützen Sie Ihre Hände nach der Montage nicht auf dem Gerät ab oder stellen Sie keine Objekte darauf ab. Dadurch könnte das Gerät von der Wand fallen. oo Diese Befestigung kann nicht an einer Schalldämm platte angebracht werden. Montage auf anderen Ober flächen (Holzwände, Pfeiler usw.) Wählen Sie eine feste Oberfläche und verwenden Sie die enthaltenen Holzschrauben oder andere geeignete Befestigungsmittel, um die Wandmontageplatte an den Löchern der vier Ecken zu montieren. oo Die Wandmontageplatte ist zur Verwendung an einer Wand bestimmt. Verwenden Sie diese nicht an einer Zimmerdecke. oo Achten Sie darauf, die schräge Montage der Wandmontageplatte zu vermeiden. oo Achten Sie beim Umgang mit Teilen, bei denen die Spitzen der Schrauben herausragen, darauf, dass diese niemanden verletzen können. oo Prüfen Sie die Wandmontageplatte regelmäßig und montieren Sie diese an einer anderen Stelle, falls diese sich gelockert hat. Überprüfen Sie diese immer nach einem Erdbeben oder wenn andere Vibrationen oder Kräfte darauf eingewirkt haben. oo Die bereitgestellten Teile wurden speziell für dieses Gerät entwickelt. Verwenden Sie diese zu keinem anderen Zweck. oo Bei Lagerung der Teile verwahren Sie diese an einem Ort, welcher durch keine kleinen Kinder oder Haustiere erreicht werden kann. 102 oo Die beiliegenden Holzschrauben können beispielsweise nicht an Beton- oder Erdwänden verwendet werden. Wenn Sie die beiliegenden Holzschrauben zur Montage verwenden, werden wie in der Abbildung weiter unten gezeigt, Löcher in der Wand entstehen. Für die Entstehung von Löchern wie diesen werden wir keinerlei Verantwortung übernehmen. Anbringen des Geräts Schließen Sie den Adapter an 1 Ziehen Sie die FM-Antenne heraus. Stecken Sie, nachdem Sie das Netzkabel mit dem entsprechenden Netzadapterkabel verbunden haben, den Adapter in die Steckdose. Stecken Sie den Stecker in die Steckdose Wickeln Sie die Antenne, die an der Hinterseite des Gerätes befestigt ist, ab und ziehen Sie diese heraus. Zugehöriger Netzadapter 2 Montieren Sie das Gerät an der Wandmontageplatte. Netzkabel Schieben Sie das Gerät in die richtige Position. DEUTSCH Richten Sie das Gerät an den Wandmontageplattenhaltern aus. Netzstecker Richten Sie die Befestigungsteile an den Haltern der Wandmontageplatte aus und schieben Sie diese in die richtige Position. oo Stellen Sie sicher, dass das Gerät gut befestigt ist. oo Ziehen Sie die FM-Antenne in die Position, an der sie den besten Empfang bietet. 103 Anhören von Musik über ein Gerät mit Bluetooth (1) 1 Ziehen Sie den Netzstecker sanft nach unten, um das Gerät einzuschalten. oo Sie können dafür ebenfalls die Power-Taste ( ) auf der Fernbedienung verwenden. 2 Drücken Sie auf die MODUS-Taste. Sobald der Bluetooth Modus als Quelle aktiviert ist, erscheint „BT“ auf der Anzeige. BT 3 Koppeln oder verbinden Sie das Gerät mit einem Bluetooth Gerät. Kopplung mit einem Bluetooth Gerät Wenn Sie das Gerät das erste Mal mit einem neuen Bluetooth Gerät verwenden, dann müssen Sie diese koppeln. Aktivieren Sie den Bluetooth Modus am Gerät und verwenden Sie das andere Bluetooth Gerät, um beide zu koppeln. Wenn Sie das andere Gerät bereits gekoppelt haben, dann folgen Sie den Anweisungen in „Verbindung mit einem bereits gekoppelten Bluetooth Gerät“ auf Seite 106. Die folgende Erklärung bietet Beispiele zur Einrichtung von Smartphones, um diese als gekoppelte Bluetooth Geräte zu verwenden. Nähere Informationen sind der Betriebsanleitung des von Ihnen verwendeten Bluetooth Gerätes zu entnehmen. Beispiele der Kopplung mit Smartphones Einrichtung bei Verwendung von Android 4.0 oo Wenn Sie dieses Gerät in den Bluetooth Modus schalten, dann blinkt die Anzeige, wodurch angezeigt wird, dass es mit einem anderen Bluetooth Gerät verbunden werden kann. 1. Den Menüpunkt Bluetooth finden Sie in Ihrem Einstellungsmenü unter WIRELESS & NETWORKS. oo Sie können ebenfalls die MODE-Taste auf der Fernbedienung verwenden. oo Das Gerät behält die Modus-Einstellung im ausgeschalteten Zustand bei. Wenn das Gerät sich im Bluetooth Modus befand, als Sie es das letzte Mal ausgeschaltet haben, dann können Sie diesen Schritt überspringen. Wenn Sie den entsprechenden Netzadapter aus der Steckdose ziehen oder das Netzkabel vom zugehörigen Netzadapter trennen, dann wird das Gerät auf die Standard-Einstellungen zurückgesetzt (RADIO-Modus, Lautstärke 10). 104 2. Schalten Sie Bluetooth EIN und wählen Sie dann „Gerät suchen“ aus. 3. Sobald „MJBTS-1” in der Liste der AVAILABLE DEVICES erscheint, wählen Sie dieses aus. 4. Wenn die Kopplung mit MJBTS-1 abgeschlossen ist, sind die beiden Geräte miteinander verbunden. Einrichtung bei einem iPhone mit iOS 6 1. Öffnen Sie die Einstellungsanwendung und wählen Sie „Bluetooth“ aus. 2. Schalten Sie Bluetooth EIN. „MJBTS-1 Not Paired” erscheint. DEUTSCH oo Nachdem die Kopplung abgeschlossen ist, wird „MJBTS-1” zu einem „PAIRED DEVICES“ anstelle eines „AVAILABLE DEVICES“. Fortsetzung auf der nächsten Seite 105 Anhören von Musik über ein Gerät mit Bluetooth (2) 3. Wählen Sie „MJBTS-1 Not Paired” aus. Wenn die Kopplung abgeschlossen ist, erscheint die Meldung „MJBTS-1 connected”. Verbindung mit einem iPhone mit iOS 6 1. Öffnen Sie die Einstellungsanwendung und wählen Sie „Bluetooth“ aus. 2. Schalten Sie Bluetooth EIN. Die Meldung „MJBTS-1 Not Connected” erscheint. 3. Wählen Sie „MJBTS-1 Not Connected” aus, um eine Verbindung mit MJBTS-1 herzustellen. oo Wenn auf dem Bildschirm des Bluetooth Gerätes eine Meldung zur Eingabe eines Sicherheitscodes erscheint, dann geben Sie „0000“ (vier mal eine null) ein. oo Wenn sich dieses Gerät mit einem anderen Bluetooth Gerät verbindet, dann leuchtet die Bluetooth Anzeige und es ertönt zweimal ein kurzer Piepton. Verbindung mit einem bereits gekoppelten Bluetooth Gerät Wenn dieses Gerät sowie das Bluetooth Gerät eingeschaltet sind und die Bluetooth Funktion aktiviert ist, dann sollten die Geräte sich automatisch miteinander verbinden. Wenn sich diese jedoch nicht automatisch miteinander verbinden, können Sie diese wie in den folgenden Smartphone-Beispielen manuell miteinander verbinden. Beispiele der manuellen Verbindung mit Smartphones Verbindung mit Android 4.0 1. Den Menüpunkt Bluetooth finden Sie in Ihrem Einstellungsmenü unter WIRELESS & NETWORKS. 2. Schalten Sie Bluetooth EIN, um eine Verbin dung mit MJBTS-1 herzustellen. 106 oo Das andere Bluetooth Gerät und dieses Gerät sollten während der Kopplung und Verbindung nicht mehr als wenige Meter voneinander entfernt sein. Wenn die Entfernung zu groß ist, könnte es vorkommen, dass die Kopplung nicht möglich ist oder dass die Verbindung unterbrochen wird. oo Wenn die Bluetooth Anzeige an der Vorder seite des Geräts für 10 Minuten durchgehend blinkt, wird es sich automatisch in den Standby-Modus schalten. Wenn dies auftritt, dann schalten Sie das Gerät wieder ein. oo Dieses Gerät kann bis zu 8 gekoppelte Geräte speichern. Wenn das 9. Gerät gekoppelt wird, wird das älteste gekoppelte Gerät gelöscht, so dass immer nur 8 gekoppelte Geräte vorhanden sind. (Wenn das gleiche Gerät jedoch mehr als einmal gekoppelt wird, zählt dieses nur als ein gekoppeltes Gerät.) BITTE BEACHTEN SIE Unabhängig von dem Verbindungsstatus dieses Geräts und einem anderen Bluetooth Gerät sollten Sie sowohl dieses Gerät als auch das andere Gerät ein- und ausschalten und erneut verbinden, wenn die Bluetooth Anzeige für eine längere Zeit blinkt. 4 Wählen Sie eine Audio-Datei auf dem Bluetooth Gerät aus und spielen Sie diese ab. oo Sie können ebenfalls die Wiedergabe/PauseTaste (y/9) auf Ihrer Fernbedienung verwenden. 5 Verwenden Sie die LautstärkeTasten (−/+) oder die LAUTSTÄRKETasten auf Ihrer Fernbedienung, um die Lautstärke zu regeln. VOL 05 Angezeigtes Lautstärkeniveau oo Die Lautstärke kann innerhalb eines Bereichs zwischen 00 und 32 geregelt werden. (Bei der Anzeige von „32” erscheint „MAX“.) (Das Standardeinstellungsniveau der Lautstärke ist 10.) Auswahl des vorherigen Songs Betätigen Sie die Taste . auf dem Hauptgerät oder eine ähnliche Steuerungstaste auf dem Bluetooth Gerät. oo Sie können ebenfalls die Taste . auf der Fern bedienung verwenden. Auswahl des nächsten Songs Betätigen Sie die Taste / auf dem Hauptgerät oder eine ähnliche Steuerungstaste auf dem Bluetooth Gerät. oo Sie können ebenfalls die Taste / auf der Fernbe dienung verwenden. Anhalten der Wiedergabe Drücken Sie auf Pause oder eine ähnliche Steuerungs taste auf dem Bluetooth Gerät oder betätigen Sie die Wiedergabe/Stop-Taste (y/9) auf der Fernbedienung. Stummschaltung der Wiedergabe Wenn Sie die Lautstärke des Geräts vorübergehend stummschalten möchten, dann betätigen Sie die MUTE-Taste auf der Fernbedienung. Drücken Sie die MUTE-Taste auf Ihrer Fernbedienung erneut, um zu der vorherigen Lautstärkeeinstellung zurückzugelangen. Ausschalten des Geräts Ziehen Sie das Netzkabel sanft nach unten oder betätigen Sie die Power-Taste ( ) auf der Fernbedienung, um das Gerät auszuschalten. Schalten Sie danach das Bluetooth Gerät aus. 107 DEUTSCH oo Je nach angeschlossenem Bluetooth Gerät könnten die Lautstärke -Tasten deaktiviert sein. Weitere Informationen sind der Betriebsanleitung des von Ihnen verwendeten Gerätes zu entnehmen. Song-Auswahl Radio hören 1 Drücken Sie die MODE-Taste, um die Einstellung auf FM zu setzen. )0 Sobald „FM“ erscheint, wird die Frequenz angezeigt. Manuelle Frequenzeinstellung Wenn Sie einen Sender einstellen möchten, der nicht automatisch eingestellt werden kann, dann drücken Sie die Tasten zum Überspringen (.//) wiederholt, um die Frequenz des Senders einzustellen. )0 oo Sie können ebenfalls die MODE-Taste auf der Fernbedienung verwenden. 2 Wählen Sie einen Sender aus. Automatische Frequenzeinstellung )0 oo Jedes Mal wenn Sie die Taste zum Über springen (.//) betätigen, wird die Frequenz um 0.1 MHz verändert. oo Sie können ebenfalls die Tasten zum Über springen .// auf Ihrer Fernbedienung verwenden. 3 Drücken Sie die Lautstärke-Tasten (−/+) auf Ihrer Fernbedienung, um die Lautstärke zu regeln VOL 05 Gedrückt halten Halten Sie eine der Tasten zum Überspringen (.//) für mindestens 2 Sekunden gedrückt, bis sich die Frequenz auf der Anzeige verändert. Sobald ein Sender automatisch eingestellt wurde, wird sich die Anzeige nicht weiter verändern und die Frequenz wird angezeigt. oo Sie können die automatische Frequenzein stellung jederzeit beenden, indem Sie eine der Taste zum Überspringen (.//) kurz betätigen. Angezeigtes Lautstärkeniveau oo Die Lautstärke kann innerhalb eines Bereichs zwischen 00 und 32 geregelt werden. (Bei der Anzeige von „32” erscheint „MAX“.) Bei schlechtem Empfang Verändern Sie die Richtung und Position der FMAntenne im Falle schlechter Empfangsqualität, um die geeignete Position für guten Empfang zu finden. Ausschalten des Geräts 108 Ziehen Sie sanft am Netzkabel oder betätigen Sie die Power-Taste ( ) auf der Fernbedienung. Problembehebung (1) Lesen Sie bei etwaigen Problemen mit dem Gerät bitte die folgenden Informationen. Sollte es dennoch nicht ordnungsgemäß funktionieren, dann setzen Sie sich mit dem Händler, bei dem Sie das Produkt erworben haben, in Verbindung. Allgemein Das Gerät funktioniert nicht. ee Stecken Sie den entsprechenden Netzadapter in eine mit Strom versorgte Steckdose. ee Überprüfen Sie die Verbindung zwischen dem Netz kabel und dem entsprechenden AC-Adapterkabel. ee Wechseln Sie die Batterie in der Fernbedienung. Es ist kein Ton zu hören. ee Regeln Sie die Lautstärke. Der Ton ist verrauscht. ee Positionieren Sie das Gerät so weit entfernt wie möglich von TV-Geräten, Mikrowellen und anderen Geräten, die elektromagnetische Wellen produzieren. Sender kann nicht eingestellt werden oder die Empfangsqualität ist schlecht. ee Verändern Sie die Position der FM-Antenne. Bluetooth Kann nicht mit einem Bluetooth Gerät gekoppelt werden. ee Lesen Sie die Betriebsanleitung des Bluetooth Geräts. ee Schalten Sie dieses Gerät und das andere Bluetooth Gerät einmal aus, schalten Sie diese dann wieder ein und versuchen Sie, diese erneut zu koppeln. ee Schalten Sie alle anderen Bluetooth Geräte, welche Sie nicht mit dem Gerät koppeln möchten, aus. ee Löschen Sie die Kopplung des Bluetooth Geräts mit „MJBTS-1” (sodass das Gerät diese Kopplung „vergisst“) und versuchen Sie dann, diese erneut zu koppeln. (Lesen Sie dazu „Kopplung mit einem Bluetooth Gerät“ auf Seite 104.) Keine Verbindung möglich. ee Stellen Sie sicher, dass das Bluetooth Gerät eingeschaltet ist und die Bluetooth Funktion aktiviert ist. ee Ist das Bluetooth Gerät zu weit entfernt? Befindet sich eine Wand oder ein anderes Hindernis zwischen dem Gerät und dem anderen Gerät? ee Schalten Sie das Gerät noch einmal ein und aus. ee Löschen Sie die Kopplung des Bluetooth Geräts mit „MJBTS-1” (sodass das Gerät diese Kopplung „vergisst“) und versuchen Sie dann, diese erneut zu koppeln. (Lesen Sie dazu „Kopplung mit einem Bluetooth Gerät“ auf Seite 104.) Fortsetzung auf der nächsten Seite 109 DEUTSCH Die Fernbedienung funktioniert nicht. ee Bei Versand aus dem Werk wird eine Isolierfolie in das Batteriefach eingelegt. Nehmen Sie dieses vor der Verwendung heraus. Weitere Informationen finden Sie aus Seite 101. ee Sofern die Batterie leer ist, ersetzen Sie diese mit einer neuen. ee Verwenden Sie die Fernbedienung aus einer Entfernung von maximal 5 m und richten Sie diese auf das Hauptgerät. ee Falls sich z wischen dem Gerät und der Fernbedienung ein Hindernis befindet, könnte es sein, dass der Betrieb nicht möglich ist. Verändern Sie daher die Position wenn nötig. ee Wenn sich in der Nähe des Geräts ein helles Licht befindet, dann schalten Sie dieses aus. Radio Problembehebung (2) Der Ton ist unterbrochen. ee Befindet sich ein Wireless-LAN-Gerät, ein anderes Bluetooth Gerät, eine Mikrowelle oder etwas ähnliches in der Nähe? Verwenden Sie dieses Gerät so weit entfernt wie möglich von diesen Geräten. ee Versuchen Sie, dieses Gerät sowie das Bluetooth Gerät während der Verwendung so nah wie möglich zueinander zu positionieren. Versuchen Sie, deren Positionen zu verändern. ee Wenn Sie eine Smartphone-Anwendung für etwas anderes als Musikhören verwenden, könnte es sein, dass der Ton unterbrochen wird. Verwenden Sie in diesem Fall keine anderen Anwendungen als die Musikwiedergabe. Dieses Gerät verwendet einen Mikrocomputer, welcher manchmal aufgrund von Geräuschen oder anderen Störungen in der Nähe des Geräts eventuell nicht ordnungsgemäß funktioniert. Trennen Sie in diesem Fall den Netzadapter einmal von der Steckdose und warten Sie kurz. Stecken Sie den Adapter dann wieder in die Steckdose. Versuchen Sie dann, das Gerät erneut zu verwenden. 110 Reinigung Wenn das Hauptgerät oder die Fernbedienung verschmutzt sind, reinigen Sie dies emit einem weichen Tuch sowie einem verdünnten pH-neutralen Reinigungsmittel. Ver wenden Sie keine chemisch behandelten Wischtücher, Verdünner oder ähnliche Substanzen, da diese die Oberfläche des Geräts beschädigen könnten. QWARNHINWEIS! Ziehen Sie vor der Reinigung den Netzadapter aus der Steckdose. Technische Einzelheiten Bluetooth Allgemein Version. . . . . . . . . . . . . . . . . . . . . . . . . . . . . . . . . . . . . . . . . . . . . 3.0 Profile. . . . . . . . . . . . . . . . . . . . . . . . . . . . . . . . . . . . A2DP, AVRCP Codec. . . . . . . . . . . . . . . . . . . . . . . . . . . . . . . . . . . . . . . . . . . . . SBC Kopierschutz . . . . . . . . . . . . . . . . . . . . . . SCMS-T unterstützt* Klasse . . . . . . . . . . . . . . . . . . . . . . . . . . . . . . . . . . . . . . . . . . . . . . . . 2 (etwa 10 m maximale Empfangsentfernung) *SCMS-T Unterstützung ermöglicht die Wiedergabe von urheberrechtlich geschützter Musik und 1seg Audiodateien. Netzspannung und -frequenz Modell für Europa . . . . . . . . . . . . . . . AC 220 V - 240 V, 50 Hz Modell für die USA. . . . . . . . . . . . . . . . . . . . . . AC 120 V, 60 Hz Nennleistungsaufnahme . . . . . . . . . . . . . . . . . . . . . . . . . . . 5 W Maximale Außenmaße (Hauptgerät) 172 mm (B) × 172 mm (H) × 41 mm (T) Gewicht. . . . . . . . . . . . . . . . . . . . . . . . . . . . . . . . . . . . . . . . . . 485 g (ohne zugehörigen AC-Adapter) Radio Mitgelieferte Artikel Frequenzbereich . . . . . . . . . . . . . . . . 87.5 MHz – 108.0 MHz Fernbedienung × 1 Lautsprecher Einheiten. . . . . . . . . . . . . . . . . . . . . . . . . 3,5 cm Breitband × 2 Nennimpedanz. . . . . . . . . . . . . . . . . . . . . . . . . . . . . . . . . . . . . 4 Ω Lithium-Konofzellbatterie für die Fernbedienung (CR2025) × 1 (bei Neuversand in die Fernbedienung eingesetzt) Wandmontageplatte × 1 Holzschrauben × 1 Zugehöriger Netzadapter × 1 Betriebsanleitung (dieses Dokument) × 1 Verstärker Zu Verbesserungszwecken sind Änderungen der technischen Einzelheiten sowie des Aussehens ohne Vorankündigng vorbehalten. Abbildungen könnten in dieser Anleitung von Produk tionsmodellen abweichen. 111 DEUTSCH Nennleistung (JEITA)**. . . . . . . . . . . . . . . . . . . . . . . . . . 2 W × 2 Frequenzbereich . . . . . . . . . . . . . . . . . . . . . . . . 50 Hz – 20 kHz **mit Hilfe des JEITA-Standards (Japan Electronics and Information Technology Industries Association; japanische Vereinigung der Elektronik- und Informations technologie) gemessener Wert oo Não exponha este aparelho a gotas ou salpicos. oo Não coloque objetos com líquidos, tais como vasos, sobre o aparelho. oo Não instalar este aparelho num espaço limitado tal como uma estante de livros ou um objeto semelhante. oo O aparelho atrai tensão nominal não operativa da saída CA quando o interruptor POWER ou STANDBY/ON não está na posição ON. oo O aparelho deve estar situado suficientemente perto da saída CA de forma a ser possível chegar facilmente ao cabo de alimentação em qualquer momento. oo A ficha principal é usada como dispositivo de desconexão e o dispositivo de desconexão deve permanecer sempre operável. oo Os produtos com construção Classe estão equipados com um cabo de alimentação que tem um cabo de ligação à terra. O cabo deste produto deve ser ligado a uma saída CA que tenha uma conexão terra protegida. oo Se o produto usar pilhas (incluindo bateria de pilhas ou pilhas instaladas), não deve ser exposto a luz solar, fogo ou calor excessivo. BBPrecauções relativamente às pilhas A má utilização das pilhas pode provocar a sua rutura ou derrame, que pode levar a incêndio, ferimentos ou coloração de objetos próximos. Por favor leia e siga as seguintes precauções com atenção. oo Certifique-se que as pilhas estão inseridas com as orientações positiva (+) e negativa (_) corretas. oo Se o controlo remoto não for usado durante um longo período de tempo (mais de um mês), remova as pilhas de forma a prevenir derramações das mesmas. oo Se as pilhas tiverem derramado, limpe a fuga dentro do compartimento das pilhas e substitua as pilhas por umas novas. oo Não usar pilhas de outros tipos para além dos especificados. oo Não aquecer ou desmontar as pilhas. Nunca deitar as pilhas no fogo ou em água. oo Não transportar ou armazenar as pilhas juntamente com outros objetos metálicos. As pilhas podem sofrer um curto-circuito, fuga ou explodir. oo Nunca recarregar uma pilha a menos que seja do tipo recarregável. 112 Para Clientes Europeus Eliminação de equipamento elétrico e eletrónico (a)Todos os equipamentos elétricos e eletrónicos devem ser eliminados separadamente dos resíduos municipais mediante instalações de recolha designadas pelo governo ou autoridades locais. (b)Ao eliminar equipamentos elétricos e eletrónicos de forma correta, está a ajudar a salvar recursos valiosos e a prevenir quaisquer potenciais efeitos negativos na saúde humana e no ambiente. (c)A eliminação incorreta de resíduos de equipamentos elétricos e eletrónicos pode ter efeitos graves no ambiente e na saúde humana por causa da presença de substâncias perigosas no equipamento. (d)O símbolo Resíduo de Equipamento Elétrico e Eletrónico (WEEE), que mostra um caixote do lixo com rodas que foi eliminado, indica que o equipamento elétrico e eletrónico deve ser recolhido e eliminado separadamente dos resíduos domésticos. (e)Existem sistemas de devolução e recolha disponíveis para usuários finais. Para mais informações sobre a eliminação de equipamento elétrico e eletrónico velho, contacte o seu gabinete municipal, serviço de recolha de resíduos ou o estabelecimento onde adquiriu o equipamento. Eliminação de pilhas e/ou acumuladores (a)As pilhas e/ou acumuladores devem ser eliminados separadamente dos resíduos municipais mediante instalações de recolha designadas pelo governo ou autoridades locais. (b)Ao eliminar as pilhas e/ou acumuladores de forma correta, está a ajudar a salvar recursos valiosos e a prevenir quaisquer potenciais efeitos negativos na saúde humana e no ambiente. (c)A eliminação incorreta de pilhas e/ou acumuladores pode ter efeitos graves no ambiente e na saúde humana por causa da presença de substâncias perigosas nos mesmos. (d)O símbolo WEEE, que mostra um caixote do lixo com rodas que foi eliminado, indica que as pilhas e/ou acumuladores devem ser recolhidos e eliminados separadamente dos resíduos domésticos. Se uma pilha ou acumulador contiver mais do que os valores especificados de chumbo (Pb), mercúrio (Hg), e/ou cádmio (Cd) tal como definido na Diretiva de Pilhas (2006/66/EC), então os Pb, Hg, Cd símbolos químicos para esses elementos serão indicados por baixo do símbolo WEEE. (e)Existem sistemas de devolução e recolha disponíveis para usuários finais. Para mais informações sobre a eliminação de pilhas e/ou acumuladores, contacte o seu gabinete municipal, serviço de recolha de resíduos ou o estabelecimento onde os adquiriu. PORTUGUÊS 113 Precauções com equipamento sem fios Conformidade do transmissor e interferência rádio Modelo EUA Este aparelho cumpre com Part.15 dos Regulamentos FCC A operação está sujeita às duas condições seguintes: 1) Este dispositivo não poderá causar interferência 2) Este dispositivo deve aceitar qualquer interferência, incluindo interferência que possa provocar um funcionamento não desejado do dispositivo. Etiquetagem da autorização FCC ID: Requerimentos de Exposição a Radiação Este equipamento está de acordo com as regulações, o que é reconhecido internacionalmente, para o caso de exposição humana a ondas rádio geradas pelo transmissor. Com base nas duas seguintes condições: oo Os usuários finais e os instaladores devem estar equipados com instruções de instalação da antena e com condições de funcionamento do transmissor para estar em conformidade com exposição RF. oo Este equipamento deverá ser instalado e operado a uma distância mínima de 20 cm entre o radiador e o corpo. Modelo EEA (Zona Económica Europeia) Este equipamento cumpre com os padrões harmonizados da DIRETIVA 1999/5/EC (R&TTE) Etiquetagem de conformidade Marcação CE: CUIDADO As alterações ou modificações não expressamente aprovadas pela parte responsável pela conformidade, poderão anular a autoridade do cliente para operar este equipamento. CUIDADO A autorização de dispositivos sem fios varia de acordo com os países e regiões. Usar apenas no país onde adquiriu o produto. oo Dependendo do país, poderão existir restrições sobre a utilização da tecnologia Bluetooth. Confirme as leis e regulamentos do país ou região onde pretende usar a unidade antes da sua utilização. 114 Declaração de conformidade Modelo EUA Este equipamento cumpre com os limites de exposição a radiação FCC avançados para um ambiente não controlado e está em conformidade com as Linhas Mestras de Exposição a frequência rádio FCC. Modelo EEA (Zona Económica Europeia) Este equipamento está em conformidade com EN.62311; Avaliação de equipamento eletrónico e elétrico relacionado com restrições a exposição de campos eletromagnéticos a humanos; o padrão harmonizado da DIRETIVA 1999/5/EC. Notas sobre a tecnologia Bluetooth® Informação para interferência (requerimentos FCC) Este equipamento foi testado e considerado apto para cumprir com os limites para um dispositivo digital Classe B, de acordo com a Parte 15 dos Regulamentos FCC. Estes limites estão desenhados para proporcionar proteção razoável contra interferência prejudicial numa instalação residencial. Este equipamento gera, usa e pode irradiar frequência rádio e, se não for instalado e usado de acordo com as instruções, pode provocar interferência prejudicial às comunicações do rádio. No entanto, não há garantia de que a interferência não ocorra numa instalação em particular. Quando usar esta unidade com um telemóvel ou outros dispositivos Bluetooth, estes não devem estar separados por mais de 10 m. No entanto, dependendo das circunstâncias de utilização, a distância efetiva de transmissão pode ser mais curta. Não está garantida a comunicação sem fios com todos os dispositivos que suportam a tecnologia Bluetooth. Para determinar a compatibilidade entre esta unidade e outro dispositivo que suporte Bluetooth, consulte o manual de funcionamento do dispositivo ou contacte o estabelecimento onde foi adquirido. Se este equipamento provocar interferência prejudicial à receção do rádio ou televisão, que pode ser determinada ligando ou desligando o equipamento, o usuário é encorajado a tentar corrigir a interferência mediante uma ou mais das seguintes medidas. oo Reorientar ou mudar a localização do equipamento e/ou da antena de receção. oo Aumentar a separação entre o equipamento e o recetor. oo Conectar o equipamento a uma saída num circuito diferente ao qual o recetor está conectado. oo Consultar o vendedor ou um técnico rádio/TV experiente para ajuda. PORTUGUÊS 115 Tabela de conteúdos Antes de usar Precauções com equipamento sem fios. . . . . . . . . . . . 114 Notas sobre a tecnologia Bluetooth®. . . . . . . . . . . . . . . 115 Peças incluídas Antes de usar. . . . . . . . . . . . . . . . . . . . . . . . . . . . . . . . . . . . . . Nomes de peças. . . . . . . . . . . . . . . . . . . . . . . . . . . . . . . . . . . Usar o controlo remoto. . . . . . . . . . . . . . . . . . . . . . . . . . . . Instalação da placa de montagem em parede . . . . . Fixar a unidade. . . . . . . . . . . . . . . . . . . . . . . . . . . . . . . . . . . . Conectar o adaptador. . . . . . . . . . . . . . . . . . . . . . . . . . . . . Ouvir áudio a partir de um dispositivo Bluetooth. . . Ouvir rádio. . . . . . . . . . . . . . . . . . . . . . . . . . . . . . . . . . . . . . . . Resolução de problemas. . . . . . . . . . . . . . . . . . . . . . . . . . . Especificações. . . . . . . . . . . . . . . . . . . . . . . . . . . . . . . . . . . . . 116 118 119 120 121 121 122 126 127 129 Se faltar alguma das peças incluídas ou se alguma delas estiver danificada, contactar o vendedor onde tiver adquirido o produto. Controlo remoto × 1 Pilha de lítio tipo botão CR2025 para controlo remoto × 1 (instalada no controlo remoto quando enviado da fábrica) Placa de montagem em parede × 1 Parafusos para madeira × 4 Adaptador CA dedicado × 1 Para a Europa Para os EUA ou Manual de utilizador (este documento) × 1 116 Precauções de utilização oo Evite colocar a unidade sob luz solar direta, perto de um aquecedor ou em qualquer outro local que possa sofrer aquecimento. Além disso, não coloque-o sobre um amplificador ou outro equipamento que gere calor. Isso irá resultar em descoloração ou deformação ou provocar um mau funcionamento. oo Se estiver ligada alguma televisão nas proximidades quando a unidade estiver a ser usada, poderão aparecer linhas no ecrã dependendo da frequência de emissão. Isso não é um mau funcionamento da unidade ou da televisão. Se vir essas linhas, desligue a unidade ou desconecte o adaptador CA dedicado da tomada. 2 Ao mesmo tempo que empurrar o separador no sentido do cabo adaptador CA, insira a peça côncava (A) do cabo na peça convexa (B) no lado oposto interior do separador. Então, puxe para o outro lado no sentido da flecha. (B) (A) oo Quando o adaptador CA dedicado estiver ligado a uma saída será consumida energia em standby. Para clientes no Reino Unido Troque o cabo adaptador CA de forma a estar de acordo com as saídas onde estiver a usar a unidade. 1 Ao mesmo tempo que puxar o separador no sentido do cabo adaptador CA, empurre o cabo no sentido mostrado pela flecha abaixo para o remover. 3 Insira o cabo até ouvir um clique. PORTUGUÊS 117 Nomes de peças Unidade principal Ecrã de apresentação Botão MODE Botões de volume (−/+) Botões saltar (.//) Recetor de controlo remoto Indicador LED Bluetooth Antena FM Adaptador CA dedicado Cabo de alimentação (Interruptor ON/OFF) Controlo remoto Botão de alimentação ( ) Botão MODE Botão saltar (baixar frequência) (.) Botão saltar (aumentar frequência) (/) Botão Play/Stop (y/J) Botão MUTE Botões de VOLUME (+/−) 118 Usar o controlo remoto Precauções durante a utilização Quando substituir a pilha oo Aponte o controlo remoto no sentido do recetor de controlo remoto na unidade principal e use-o a uma distância de 5 m ou menos. Não coloque obstruções entre a unidade principal e o controlo remoto. oo Se o recetor de controlo remoto estiver exposto a luz solar direta ou a iluminação forte, o controlo remoto poderá não funcionar corretamente. Se a distância máxima entre o controlo remoto e a unidade principal diminuir, ou se os botões do controlo remoto deixarem de trabalhar, substitua a pilha por uma nova. Para informações sobre a eliminação de uma pilha usada, consulte a sua etiqueta ou seguir o método de eliminação prescrito pelo seu governo local. oo Tenha em atenção que o uso deste controlo remoto pode provocar o funcionamento acidental de outros dispositivos que possam ser controlados por raios infravermelhos. QAVISO Antes de usar Remova a capa de isolamento da parte traseira do controlo remoto antes de a usar. A utilização incorreta das pilhas pode provocar a sua rutura ou derrame, o que poderá resultar em fogo, ferimentos ou coloração do meio envolvente. Reveja cuidadosamente os avisos na página 112. Substituição das pilhas PORTUGUÊS As pilhas já foram instaladas no controlo remoto quando este foi enviado da fábrica. Para substituir as pilhas, ao mesmo tempo que empurra , puxe no sentido de . Empurre a bandeja das pilhas desde a extremidade e coloque uma pilha de lítio tipo botão (CR2025) com a marca "+" virada para cima, tal como indicado na ilustração. Insira então novamente a bandeja. 119 Instalação da placa de montagem em parede QCUIDADO oo Antes da instalação da placa de montagem numa parede, determine a localização ao mesmo tempo que se confirma que não ocorra interferência de ondas rádio com outros dispositivos eletrónicos. (Ver "Requerimentos de Exposição a Radiação" na página 114.) oo Antes de instalar a placa de montagem em parede numa parede, confirme que a parede seja suficientemente forte para ela. oo Ter em atenção que não aceitaremos nenhuma responsabilidade pela ocorrência de um acidente por instalação incorreta. oo Após a instalação, não pouse as mãos ou coloque objetos na unidade e não a empurre com força. Isso poderia provocar a queda da unidade da parede. oo Esta montagem não pode ser afixada a painéis de absorção de som. oo Instale a placa numa parede vertical suave. oo Não instale a placa numa localização que possa estar ao alcance de crianças pequenas ou animais de estimação. oo Após a instalação, confirme que não há partes soltas nem intervalos antes de a usar. oo A placa de montagem em paredes é para uso em paredes. Não usar num teto. Instalação noutras superfícies (painéis de madeira, pilares, etc.) Escolha uma superfície sólida e use os parafusos para madeira incluídos ou outros parafusos para instalar a placa de montagem em parede pelos orifícios nas suas quatro esquinas. oo Evite instalar a placa de montagem em paredes num canto. oo Quando manusear peças cujas extremidades de parafusos estejam saídas, evite que estas possam magoar alguém. oo Inspecionar regularmente a placa de montagem, e instale-a numa nova posição se estiver folgada. Verifique-a sempre após um terremoto ou após qualquer vibração ou força que tenha sido aplicada sobre ela. oo As peças proporcionadas estão especificamente desenhadas para esta unidade. Não as use para qualquer outro propósito. oo Quando armazenar peças, coloque-as numa localização que não esteja ao alcance de crianças pequenas ou animais de estimação. 120 oo Os parafusos para madeira incluídos não podem ser usados em paredes de betão ou terra, por exemplo. Se usar os parafusos para madeira na instalação, isso irá deixar orifícios na parede tal como mostrado na ilustração abaixo. Não aceitaremos qualquer responsabilidade pela ocorrência destes orifícios. Fixar a unidade 1 Prolongar a antena FM. Conectar o adaptador Após conectar o cabo de alimentação ao cabo adaptador CA dedicado, ligue o adaptador a uma saída. Ligar a uma saída Desenrole e prolongue a antena FM ligada à parte traseira da unidade. 2 Instale a unidade na placa de mon- Adaptador CA dedicado tagem em parede. Cabo de alimentação Alinhe a unidade com os colchetes da placa de montagem na parede. Cabo de alimentação Faça deslizar a unidade para o local indicado. PORTUGUÊS Alinhe os colchetes na unidade com os colchetes na placa de montagem em parece e deslize-os para o local indicado. oo Certifique-se de que a unidade fica bem presa. oo Prolongue a antena FM para a posição que proporcione a melhor receção. 121 Ouvir áudio a partir de um dispositivo Bluetooth (1) 1 Puxe o cabo de alimentação para baixo para ligar a unidade. 3 Emparelhar a unidade ou conectá- -la com outro dispositivo Bluetooth. Emparelhar com um dispositivo Bluetooth oo Também pode usar o botão Power ( ) no controlo remoto. 2 Pressione o botão MODE. Quando o modo Bluetooth estiver ativado como fonte irá aparece "BT" no ecrã de apresentação. BT A primeira vez que usar esta unidade com um novo dispositivo Bluetooth será necessário emparelhá-los. Após ativar o modo Bluetooth desta unidade, use o outro dispositivo Bluetooth para os emparelhar. Se já tiver emparelhado com outro dispositivo, siga as instruções em "Conectar com um dispositivo Bluetooth já emparelhado" na página 124. A seguinte explicação proporciona exemplos de configuração de smartphones para os usar com dispositivos Bluetooth emparelhados. Para mais pormenores, consulte o manual de funcionamento do dispositivo Bluetooth que estiver a usar. Exemplos de emparelhamento com smartphones. Configuração com Android 4.0 1. Encontre o item Bluetooth sob SEM FIOS E REDES no menu de Configuração. oo Quando colocar esta unidade em modo Bluetooth, o indicador Bluetooth irá piscar, indicando que pode ser emparelhado ou conectado com outro dispositivo Bluetooth. oo Também pode usar o botão MODE no controlo remoto. oo A unidade retém a sua configuração de funcionamento quando a unidade estiver desligada. Se a unidade estivesse em modo Bluetooth da última vez que tiver sido desligada, pode saltar este passo. No entanto, se desligar o adaptador CA dedicado da saída ou desconectar o cabo de alimentação do adaptador CA dedicado, a unidade será reposta às suas configurações iniciais (modo TUNER, volume 10). 122 2. Coloque o Bluetooth em ON, e depois selecione "Pesquisar dispositivos". 3. Quando aparecer “MJBTS-1” na lista de DISPOSITIVOS DISPONÍVEIS, selecione-o. 4. Quando o emparelhamento com MJBTS-1 estiver completo, os dispositivos estão conectados. Configuração num iPhone com iOS 6 1. Abrir a app Configurações e selecionar "Bluetooth". 2. Configurar Bluetooth para ON. Aparece “MJBTS-1 Não Emparelhado” PORTUGUÊS oo Depois do emparelhamento estar completado, "MJBTS-1" aparece como "DISPOSITIVOS EMPARELHADOS" em vez de "DISPOSITIVOS DISPONÍVEIS". Continua na página seguinte 123 Ouvir áudio a partir de um dispositivo Bluetooth (2) 3. Selecionar “MJBTS-1 Não Emparelhado” Quando o emparelhamento estiver completado, aparece “MJBTS-1 conectado” Conectar com um iPhone a funcionar com iOS 6 1. Abrir a app Configurações e selecionar "Bluetooth". 2. Configurar Bluetooth para ON. Aparece “MJBTS-1 Não Conectado” 3. Selecionar “MJBTS-1 Não Conectado” para conectar com o MJBTS-1. oo Se aparecer um pedido de palavra-chave no ecrã do dispositivo Bluetooth, introduzir “0000” (quatro zeros). oo Quando esta unidade se conectar com outro dispositivo Bluetooth, as suas luzes indicadoras Bluetooth irão acender e irá fazer um curto bip sonoro duas vezes. Conectar com um dispositivo Bluetooth já emparelhado Quando esta unidade estiver ligada e o dispositivo Bluetooth também estiver ligado, tal como a sua função Bluetooth, em princípio deveriam conectar-se automaticamente. No entanto, se não se conectarem automaticamente, poderá conectá-los manualmente tal como mostrado nos seguintes exemplos com smartphones. Exemplos de conexão manual com smartphones. Conectar com Android 4.0 1. Encontrar o item Bluetooth sob SEM FIOS E REDES no menu de Configuração. 2. Configurar Bluetooth para ON para conectar com o MJBTS-1. 124 oo O outro dispositivo Bluetooth e a esta unidade não devem estar a mais do que alguns metros um do outro quando emparelhados e conectados. Se a distância for demasiado grande, o emparelhamento poderá não ser possível e a conexão será perdida. oo Se o indicador Bluetooth na parte frontal desta unidade piscar continuamente durante 10 minutos, irá entrar automaticamente em modo standby. Se isto ocorrer, ligue novamente a unidade. oo Esta unidade pode recordar até 8 dispositivos emparelhados. Se for emparelhado um nono dispositivo, o emparelhamento mais velho será descartado de forma a que não haja nunca mais de 8 emparelhamentos. (No entanto, se o mesmo dispositivo for emparelhado mais do que uma vez, irá contar apenas como 1 emparelhamento.) NOTA Independentemente do estado da conexão desta unidade e outro dispositivo Bluetooth, se o indicador Bluetooth continuar a piscar durante um longo período de tempo, reinicie a unidade e o outro dispositivo e torne a estabelecer uma conexão entre ambos. 4 Selecionar e reproduzir um ficheiro de áudio no dispositivo Bluetooth. Selecionar canções oo Também pode usar o botão Play/Stop (y/9) do controlo remoto. Selecionar a canção anterior Prima o botão . na unidade principal ou um controlo semelhante no dispositivo Bluetooth. 5 Use os botões de Volume (−/+) ou oo Também pode usar o botão . no controlo remoto. os botões VOLUME +/− do controlo remoto para ajustar o volume. VOL 05 Selecione a canção seguinte Prima o botão / na unidade principal ou um controlo semelhante no dispositivo Bluetooth. oo Também pode usar o botão / no controlo remoto. Nível de volume indicado Pausar a reprodução oo O volume pode ser ajustado num intervalo entre 00 e 32. (é mostrado “MAX” no ecrã de apresentação a 32.) (O nível de volume por defeito é 10.) oo Dependendo do dispositivo Bluetooth conectado, os seus botões de volume poderão estar desativados. Para mais pormenores, veja o manual de funcionamento do dispositivo que estiver a usar. Prima pausa ou um controlo semelhante no dispositivo Bluetooth ou prima o botão Play/Stop (y/9) no controlo remoto. Colocar a reprodução em modo silencioso Se desejar silenciar temporariamente o volume desta unidade, prima o botão MUTE no controlo remoto. Prima o botão MUTE novamente no controlo remoto para regressar ao nível de volume anterior. Desligar a unidade Com cuidado, puxe o cabo de alimentação para baixo ou prima o botão Power ( ) no controlo remoto para desligar esta unidade. Depois disso, desligue o disposi- PORTUGUÊS tivo Bluetooth. 125 Ouvir rádio 1 Pressione o botão MODE para configurar a fonte para FM. )0 Sintonização manual Se desejar sintonizar uma rádio que não possa ser sintonizada automaticamente, prima os botões Saltar (.//) repetidamente para configurar a frequência da estação. )0 Quando aparecer "FM", é mostrada a frequência. oo Também pode usar o botão MODE no controlo remoto. 2 Escolher uma estação. Sintonização automática )0 oo Cada vez que premir um botão Saltar (. // ), a frequência irá mudar em 0.1 MHz. oo Também pode usar os botões Saltar (.//) no controlo remoto. 3 Prima os botões de volume (−/+) para ajustar o volume. VOL 05 Prima e mantenha Prima e mantenha o botão Saltar (.//) durante 2 segundos ou mais até que a frequência mostrada no ecrã começar a mudar. Quando uma estação tiver sido automaticamente sintonizada, o ecrã irá parar de mudar e irá mostrar a frequência. oo Para parar a sintonização automática em qualquer momento, prima rapidamente um botão Saltar (.//). Nível de volume indicado oo O volume pode ser ajustado num intervalo entre 00 e 32. (é mostrado “MAX” no ecrã de apresentação a 32.) Se a receção for fraca Se a receção for fraca, altere a direção e localização da antena FM e encontre uma posição que proporcione uma melhor receção. Desligar a unidade Puxe o cabo de alimentação para baixo ou prima o botão Power ( ) no controlo remoto. 126 Resolução de problemas (1) Se encontrar algum problema com esta unidade, consulte a seguinte informação. Rádio Se mesmo assim não funcionar de forma adequada, contacte o vendedor onde a unidade foi adquirida. A estação não pode ser sintonizada ou a sua receção é fraca. ee Mudar a posição da antena FM. Geral Tecnologia sem fios Bluetooth A unidade não funciona. ee Ligue o adaptador CA dedicado a uma saída de alimentação de tensão. ee Verifique a conexão entre o cabo de alimentação e o cabo adaptador CA dedicado. ee Mude a pilha no controlo remoto. Não há som. ee Ajustar o volume. O controlo remoto não funciona. ee É inserida uma capa isolante no compartimento da pilha quando é enviada da fábrica. Puxe para fora antes de usar. Para mais pormenores, ver página 119. ee Se a pilha estiver gasta, substitua-a por uma nova. ee Use o controlo remoto a partir de uma distância de 5 m ou menos, e aponte à unidade principal. ee Se houver alguma obstrução entre esta unidade e o controlo remoto, a operação poderá não ser possível, pelo que poderá ser necessário mudar posições. ee Se houver alguma luz brilhante perto da unidade, desligue-a. Incapaz de conectar. ee Confirme se o dispositivo Bluetooth está ligado e que a sua função Bluetooth também está ligada. ee O dispositivo Bluetooth está muito longe? Existe alguma parede ou outra obstrução entre a unidade e esse dispositivo? ee Desligar esta unidade e ligar novamente. ee Fazer o dispositivo Bluetooth eliminar (esquecer) o emparelhamento “MJBTS-1” e tentar emparelhar novamente. (Ver "Emparelhar com um dispositivo Bluetooth" na página 122.) PORTUGUÊS O som é ruidoso. ee Localizar a unidade tão longe quanto possível de televisões, micro-ondas e outros dispositivos que produzam ondas eletromagnéticas. Incapaz de emparelhar com um dispositivo Bluetooth. ee Consulte o manual de funcionamento desse dispositivo Bluetooth. ee Desligue esta unidade e o outro dispositivo Bluetooth uma vez e depois torne a ligá-los e tentar emparelhá-los novamente. ee Desligue outros aparelhos Bluetooth para além daquele que estiver a tentar emparelhar com a unidade. ee Faça o dispositivo Bluetooth eliminar (esquecer) o emparelhamento “MJBTS-1” e tentar emparelhar novamente. (Ver "Emparelhar com um dispositivo Bluetooth" na página 122.) Continua na página seguinte 127 Resolução de problemas (2) O som é interrompido. ee Existe um LAN sem fios, outro dispositivo Bluetooth, um forno micro-ondas ou algum objeto semelhante nas proximidades? Use esta unidade o mais afastada possível desses objetos. ee Mantenha esta unidade e o dispositivo Bluetooth o mais próximos possível quando os usar. Tentar mudar as suas localizações. ee Quando usar uma aplicação de smartphone para outra coisa para além da reprodução de música, o som poderá ser interrompido. Se isto ocorrer, não use outras aplicações para além da aplicação de reprodução de música. Esta unidade usa um microcomputador, e por vezes poderá não funcionar corretamente devido a ruído e outras interferências perto da unidade. Nesse caso, desligue o adaptador CA da saída de alimentação uma vez e espere um bocado antes de o tornar a ligar à saída. Então, volte a tentar usar a unidade. 128 Limpeza Se a unidade principal ou o controlo remoto estiverem sujos, limpe-os com um pano suave usando um produto de pH neutral diluído. Não usar panos de limpeza tratados quimicamente, substâncias solventes ou outras semelhantes uma vez que poderiam danificar a superfície da unidade. QAVISO! Desligar o adaptador CA da saída de alimentação antes de limpar. Especificações Tecnologia sem fios Bluetooth Geral Versão. . . . . . . . . . . . . . . . . . . . . . . . . . . . . . . . . . . . . . . . . . . . . . 3.0 Perfis. . . . . . . . . . . . . . . . . . . . . . . . . . . . . . . . . . . . . A2DP, AVRCP Codec. . . . . . . . . . . . . . . . . . . . . . . . . . . . . . . . . . . . . . . . . . . . . SBC Proteção cópia . . . . . . . . . . . . . . . . . . . . SCMS-T suportado* Classe. . . . . . . . . . . . . . . . . . . . . . . . . . . . . . . . . . . . . . . . . . . . . . . . 2 (cerca de 10m de distância máxima de receção) *O suporte SCMS-T permite a reprodução de música protegida por direitos de autor e áudio 1seg. Tensão de alimentação e frequência Modelo para a Europa. . . . . . . . . . CA 220 V - 240 V, 50 Hz Modelo para os EUA. . . . . . . . . . . . . . . . . . . CA 120 V - 60 Hz Taxa de consumo de alimentação. . . . . . . . . . . . . . . . . . . 5 W Dimensões máximas de saída (unidade principal) 172 mm (W) × 172 mm (H) × 41 mm (D) Peso. . . . . . . . . . . . . . . . . . . . . . . . . . . . . . . . . . . . . . . . . . . . . . 485 g (não incluindo adaptador CA dedicado) Sintonizador Banda de frequência. . . . . . . . . . . . . 87.5 MHz – 108.0 MHz Itens incluídos Controlo remoto × 1 Colunas Unidades. . . . . . . . . . . . . . . . . . . 3.5cm banda completa × 2 Taxa de impedância . . . . . . . . . . . . . . . . . . . . . . . . . . . . . . . . 4 Ω Pilha de lítio tipo botão para controlo remoto (CR2025) × 1 (instalada em remoto quando enviado novo) Placa de montagem em parede × 1 Parafusos para madeira × 4 Adaptador CA dedicado × 1 Manual de utilizador (este documento) × 1 Amplificador Taxa de saída (JEITA)**. . . . . . . . . . . . . . . . . . . . . . . . . . 2 W × 2 Resposta de frequência. . . . . . . . . . . . . . . 50 MHz – 20 MHz **Valor medido usando o padrão JEITA (Associação Japonesa de Indústrias Eletrónicas e de Tecnologia da Informação) Com o objetivo de melhoria, as especificações e o aspecto estão sujeitos a alterações sem notificação prévia. As ilustrações neste manual podem diferir em parte dos modelos de produção. PORTUGUÊS 129 130 131 RYOHIN KEIKAKU EUROPE LTD. 8-12 LEEKE STREET, LONDON WC1X 9HT www.muji.eu MUJI U.S.A. LIMITED 250 West 39th Street, Suite 605 New York, NY 10018 www.muji.us