1
GB
Operation
4.5
Pressure Relief Procedure
Be sure to follow the Pressure Relief Procedure when
shutting the unit down for any purpose, including
servicing or adjusting any part of the spray system,
changing or cleaning spray nozzles, or preparing for
cleanup.
1. Lock the spray gun by turning the gun trigger lock to the
locked position.
2. Turn off the sprayer.
a. To turn off the gas engine,
• set the pressure to minimum by turning the pressure control
knob fully counterclockwise,
• move the throttle lever to the slow position, and
• turn the engine switch to the OFF position.
b. To turn off the electric motor,
• set the pressure to minimum by turning the pressure control
knob fully counterclockwise,
• move the ON/OFF switch to the OFF position.
4.7
Folding the Spray Gun Support Bar
The spray gun support bar can be lifted vertically in order to make
the sprayer smaller for storage. The spray guns or spray hoses do not
need to be removed. Follow the steps below.
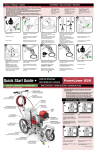
1. Loosen the support bar clamps (fig. 12, 1). Pull the support
bar (2), with gun holder assemblies and spray guns still
attached, away from the cart as far as it will go without being
completely removed.
i
The support bar needs to remain completely within
the tilt sleeve (3) so that both support bar clamps
can re-engage.
2. Tighten the support bar clamps (1). Both clamps need to be
engaged into the support bar (2).
3. Loosen the spray gun holder clamps (4) and slide both spray
guns as far to the end of the support bar as they can go.
4. Loosen the vertical support clamp knob (5) on the riser. Turn
the crank (6) so that the entire support bar assembly is raised
as far as it will go. Tighten the vertical support clamp knob (5).
3. Close the hydraulic shut-off valve on the hydraulic pressure
hose.
4. Unlock the gun by turning the gun trigger lock to the
unlocked position.
5. Hold the metal part of the gun firmly to the side of a metal
waste container to earth the gun and avoid a build up of static
electricity.
6. Trigger the gun to remove any pressure that may still be in the
hose.
7. Lock the gun by turning the gun trigger lock to the locked
position.
8. Place the bleed hose into the metal waste container.
9. Open the bleed valve by turning it fully counterclockwise.
4.6
6
5
7
3
Operating the Front Caster
The front caster on the cart is designed to track the sprayer in either
a straight line or allow free motion. Standing behind the sprayer, the
trigger on the left handle of the cart controls the operation of the
front caster.
1. To lock the front caster in the straight line position, squeeze
then release the caster trigger and move the sprayer forward.
2. To allow free motion of the front caster, squeeze and hold the
caster trigger.
1
2
4
5. Loosen the tilt knob (7). Carefully raise the support bar to a
vertical position.
Attention
Pinch hazard. Make sure keep fingers away from
all moving parts. Make sure no hoses or cables get
pinched in any moving parts.
6. Tighten the tilt knob (7) to secure in place.
12PowrLiner