1
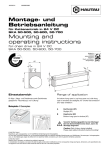
02/2012
224996F
HAUTAU RAZ K
Rauchabzugszentrale
Smoke and heat exhaust control unit
Montage- und Betriebsanleitung
Installation and operating instructions
D
Mitglied im Fachkreis
elektromotorisch
betriebene Rauch und
Wärmeabzugsanlagen
Produktbeschreibung
Product description
Die Rauchabzugszentrale HAUTAU RAZ K enthält die gesamte
Elektronik, um 24 V DC-Antriebe für Fenster und Rauchabzugsklappen im Brandfall sowie zur allgemeinen Be- und
Entlüftung zu steuern. Die Notstromversorgung stellt bei einem
Netzausfall die Funktion der RWA-Anlage für mind. 72 Stunden
sicher.
The smoke and heat exhaust control unit HAUTAU RAZ K
contains all the electronics needed to control 24 V DC drives
for windows and smoke outlet top-hung windows: in the event
of fire and for general ventilation. In case of power failure, the
emergency power supply guarantees the operation of the
SHEV facility for at least 72 hours.
Funktionen
Öffnen im Gefahrenfall:
Manuell durch Feuertaster, automatisch durch Rauch- und
Thermomelder oder durch Fremdansteuerung.
Schließen im Gefahrenfall:
Manuell durch Reset-Taste im Feuertaster.
Tägliche Be- und Entlüftung:
Durch Lüftungstaster “AUF-STOP-ZU” (stufenlose Öffnung)
sowie automatisches Schließen mit übergeordnetem Wind-/
Regenmelder.
Functions
Opening in the event of an emergency:
Manually by fire pushbutton, automatically by smoke and heat
detector or third-party activation.
Closing in the event of an emergency:
Manually by reset button inside the fire pushbutton.
Daily ventilation:
By ventilation pushbutton “OPEN-STOP-CLOSE” (continuous
opening) and automatic closing by superordinate wind/rain
sensor.
Ausführungen / Models
Kunststoff, Aufputz (AP)
PVC, surface housing
Kunststoff, Unterputz (UP)
PVC, flush housing
Stahlblech, Aufputz (AP)
Metal sheet, surface housing
optional: abschließbar
optional: lockable
© HAUTAU GmbH
Nachdruck, auch auszugsweise, nur mit schriftlicher Genehmigung des Herausgebers.
Im Sinne des Fortschritts behalten wir uns Konstruktionsänderungen und dadurch bedingte Abweichungen von Abbildungen, Abmessungen, Leitungsangaben
usw. vor. Die Abbildungen zeigen die Artikel nicht in natürlicher Größe und stehen auch nicht im gleichen Verhältnis zueinander.
© HAUTAU GmbH
Reprint, even in excerpts, not without the publisher’s approval. In consideration of progress, we reserve the right to apply construction modifications and to
consequently change any figures, dimensions, wire specifications etc. The figures do not show items in their actual size and are also not of the same proportion.
ACHTUNG
ATTENTION
FÜR EINE SICHERE MONTAGE BEACHTEN SIE ALLE
ANWEISUNGEN. FALSCHE MONTAGE KANN ZU
SCHWEREN VERLETZUNGEN ODER ZUM TOD FÜHREN.
FOLLOW THESE INSTRUCTIONS TO ENSURE THE SAFETY
OF ALL PERSONS. WRONG INSTALLATION MAY CAUSE
SEVERE INSURIES OR LEADS TO DEATH.
Sicherheitshinweise
Safety instructions
Die Zentrale entspricht dem aktuellen Stand der Technik. Dies
betrifft Leistungsfähigkeit, Material, Funktionsweise und den
sicheren Betrieb der Zentrale.
Lebensgefahr durch Stromschlag!
Die Rauchabzugszentrale wird mit 230 V AC / 50 Hz
betrieben. Es besteht Lebensgefahr durch das
Berühren stromführender Teile.
Gefahr für Personen durch Stromschlag!
Bei Wartungsarbeiten an der Zentrale trennen Sie
diese mittels Trennvorrichtung allpolig vom Netz und
sichern Sie diese vor unbeabsichtigtem Wiedereinschalten. Die Trennvorrichtung muss deutlich
gekennzeichnet sein. Ziehen Sie die Anschlussstecker der Notstrom-Akkumulatoren ab.
Quetsch- und Klemmgefahr!
Sichern Sie Quetsch- und Scherstellen zwischen
Fensterflügeln und Rahmen, Lichtkuppeln und Aufsatzkranz bis zu einer Höhe von 2,5 m durch Einrichtungen, die bei Berührung und Unterbrechung
durch eine Person die Bewegung zum Stillstand
bringen (Richtlinie für kraftbetätigte Fenster, Türen
und Tore der Berufsgenossenschaften).
Die Montage der Zentrale ist von sachkundigem und sicherheitsbewusstem Elektro-Fachpersonal entsprechend dieser
Montage- und Betriebsanleitung durchzuführen.
Hierzu zählen Elektroinstallateure oder Facheinrichter mit einer
Schulung auf dem Gebiet der Elektroinstallation. Alle Arbeiten
an netzspannungsführenden Bauteilen dürfen nur durch eine
Fachkraft mit abgeschlossener Ausbildung im Bereich Elektroinstallation durchgeführt werden.
The control unit correspond with the actual standard of technology. This affects performance, material, functioning and the
safe operation of the control unit.
Mortal danger to persons due to electricity!
The smoke and heat exhaust control unit will be
operated with 230 V AC / 50 Hz. Mortal danger by
touching cables that are live.
Danger to persons due to electricity!
During service/maintenance works at the unit, the
supply voltage has to be disconnected via isolating
link at all poles. Protect the system against unintentional re-starting. The isolating link has to be labeled
clearly. Pull off the connecting plugs of the
emergency power supply (battery packs).
Danger! Crushing and cutting points!
Potential crushing and cutting points between the
casement and the window frame, dome lights and
support frame must be secured up to a height of
2.5 m by safety equipment, which if touched or
interrupted by a person will immediately stop the
movement (guideline for power operated windows,
doors and gates of the professional association).
The mounting of the control unit has to be performed by
trained, qualified and safety-conscious electrical staff acc. to
this mounting and operating instruction.
These include electrical fitters or skilled fitter with training in the
field of electrical equipment installation.
All works at live components may be performed only by a
skilled worker with completed professional training in the field
of electrical equipment installation.
Installationshinweise
Installation information
Vor Beginn der Installation überprüfen Sie bitte die Vollständigkeit der Lieferung. Bei Unstimmigkeiten informieren Sie umgehend den Lieferanten.
Anschluss aller Bauteile nur nach Anschlussplänen, welche der
Zentrale und den Antrieben beigefügt sind.
Beachten Sie zwingend die DIN, VDE sowie Vorschriften der
Berufsgenossenschaften und die Landesbauordnung (Auswahl
VDE 0100, VDE 0833, VDE 0800, BGV).
Alle Leitungen, außer der Netzzuleitung, führen 24 V DC. Verlegen Sie diese nicht zusammen mit Starkstromleitungen (VDEVorschriften beachten). Stimmen Sie den Leitungstyp in jedem
Fall mit der zuständigen Behörde (Feuerwehr, TÜV, Brandschutzbehörde usw.) ab. Führen Sie die maximalen Leitungslängen und minimalen Leitungsquerschnitte gemäß der
technischen Angaben in dieser Anleitung aus. Beachten Sie
die maximalen Anschlussmöglichkeiten der Zentrale.
Stimmen Sie die Platzierung der Zentrale und der Feuertaster
ebenfalls mit der zuständigen Brandschutzbehörde ab (Landesbauordnung beachten). Verwenden Sie geeignetes Befestigungsmaterial. Bei der Montage der Antriebe beachten Sie
bitte die auftretenden Kräfte.
Die Installation der RAZ K muss als Trennvorrichtung einen
Schalter oder Leistungsschalter enthalten. Dieser muss in der
Nähe des Geräts und für den Benutzer leicht erreichbar sein.
Für den Netzanschluss verwenden Sie nur zugelassene
Leitungen nach DIN VDE 0250-xxx mit einem Leitungsquerschnitt von max. 1,5 mm2, z. B. NYM-J 3 x 1,5.
Gehen Sie bei der Leitungsverlegung nie sternförmig vor, sondern immer von Feuertaster zu Feuertaster, Rauchmelder zu
Rauchmelder, Thermomelder zu Thermomelder und von Antrieb zu Antrieb.
Make sure your shipment is complete prior to commencing
installation. Please notify your supplier immediately in case of
any irregularities.
Connect all components only in accordance with the terminal
connection diagrams included with the central unit and the
drives.
You absolutely have to observe the regulations of the professional association and state building regulations.
All wires except the feeder wire conduct 24 V DC and must not
be laid together with electric power lines (observe VDE regulations). The wiring type must always be authorised by the
responsible authority (fire service, technical inspection, fire
protection etc.). All maximum wire lengths and minimum cross
sections must correspond with the technical specifications
provided in these instructions. Make sure to observe the
maximum possible connection options of the control unit.
When positioning the central unit and the pushbuttons, please
follow all fire protection and state building regulations. Use
suitable mounting material. When installing the drives, please
pay attention to the occurring forces.
The installation of the RAZ K has to include a switch/circuitbreaker in function of an isolating link. This must be located
near the unit and easy to reach for the user.
For the feeder wire use approved cables according to
DIN VDE 0250-xxx with a cross-section of max. 1,5 mm2,
e.g. NYM-J 3 x 1,5.
Never wire the components of the same loop in a star configuration. Always go from fire pushbutton to fire pushbutton, from
smoke detector to smoke detector and from drive to drive.
2
Installationshinweise
(Forts.)
Installation information
(cont’d)
Beachten Sie die Anschaltung von Ersatz- oder Abschlusswiderständen bei RWA- und Meldelinien.
In der letzten Abzweigdose vor dem Antrieb müssen zwei
Überwachungsdioden (1N 4007) gemäß Anschlussplan installiert werden.
Überprüfen Sie zum Abschluss alle Funktionen, Funktions- und
Betriebsanzeigen der Rauchabzugszentrale sowie den
Schwenkbereich der Antriebe. Füllen Sie die Errichterbescheinigung im Kontrollbuch aus und leiten Sie das Anforderungsformular sowie den dazugehörigen Briefumschlag an den
Betreiber der Rauchabzugszentrale weiter.
Zeichnungen, Montage- und Betriebsanleitung sowie Kontrollbuch gehören in die Zentrale. Bitte legen Sie die Unterlagen vollständig für den späteren Gebrauch in die
Zentrale zurück.
Make sure to connect shunt and terminating resistors for
central smoke and heat exhaust ventilation and alarm system
loops. Two monitoring diodes (1N 4007) must be installed in
the last conduit box in front of the drive and in accordance with
the terminal connection diagram.
Finish by checking all functions as well as function and operation displays on the central smoke exhaust unit and the pivoting range of the drives. Complete the assembler’s certificate
included in the control book and forward the request form and
the corresponding envelope to the operator of the central
smoke exhaust unit.
All drawings, installation and operating instructions and
the control book must be kept with the central unit. Please
store these documents in their entirety in the central
smoke exhaust unit for future reference.
Technische Daten
Technical specification
Netzanschluss
Netzabsicherung
Ausgangsspannung
Max. Ausgangsstrom
Belastungszyklus
Leistungsaufnahme
Schutzart
Umgebungstemperatur
Konformität (CE)
2 Akkus
Mains connection
Mains fuse
Output voltage
Max. output current
Loadcycle
Power consumption
Protection class
Environmental temp.
Conformity (CE)
2 battery packs
230 V AC / 50 Hz
T 500 mA / 250 V
24 bis 28 V DC
4 A (darf nicht überschritten werden!)
4 min. / 4 A, 16 min. / 0,3 A
84 W
IP 30 nach DIN 40 050
-5° bis +40° C
12 V; 1,2 Ah (wartungsfrei)
B x H x T (mm)
97 x 59 x 43
Notstromversorgung
72 Std.
Brandgruppen
1
Lüftungsgruppen
1
Gehäuseabmessung
B x H x T (mm)
Stahlblech
302 x 302 x 115
Kunststoff
(AP) 287 x 236 x 112
(UP) 283 x 232 x 70 (112)
230 V AC / 50 Hz
T 500 mA / 250 V
24 bis 28 V DC
4 A (must not be exceeded!)
4 min. / 4 A, 16 min. / 0,3 A
84 W
IP 30 according to DIN 40 050
-5° bis +40° C
12 V; 1,2 Ah (maintenance-free)
W x H x D (mm)
97 x 59 x 43
Emergency power supply 72 hrs.
Fire groups
1
Ventilation groups
1
Housing dimensions
W x H x D (mm)
Metal sheet
302 x 302 x 115
PVC
(surface) 287 x 236 x 112
(flush) 283 x 232 x 70 (112)
Merkmale
Features
- Leitungsnetz ruhestromüberwacht (Linienüberwachung), 24 V
- Kabelzuführung von oben
- Montage mit 4 Schrauben
- Kontrollanzeigen in der Zentrale für Alarm- und Linienüberwachung Netz/Akku, Antriebe, Feuertaster und Rauchmelder.
- Reset in der Zentrale möglich.
- Potentialfreier Kontakt für externe Alarm- und Störungsmeldung sowie Anschlussmöglichkeiten von Lüftungstastern,
Zuluft-Antrieben und eines Wind-Regenmelders.
Achtung: Bei eingestellter Totmannschaltung werden sämtliche automatischen Lüftungssignale (z.B. Wind-Regenmelder)
nicht berücksichtigt!
- Bei Stromausfall während der Alarmöffnung bleibt der Befehl
“AUF” gespeichert, die Zentrale fährt weiter über Akku auf.
- Lüftungstaster im Alarmfall und bei jeglicher Störung gesperrt.
Bei Netzausfall blinkt die LED “Betrieb” in den Feuertastern.
- Die Rauchabzugszentrale RAZ K entspricht den geltenden
EN-Normen.
- Werkseitig voreingestellte Werte:
- Windmesszeit: 5 s
- Windimpulse pro Minute: 30
- Sperrzeit Wind/Regen: 50 s
- Lüftungszeit: 0 s, Lüftungszyklus: 0 h
(keine automatische Lütung voreingestellt)
- Öffnungsweite: 1 s
(Automatikbetrieb, bei dem die Antriebe auch im Lüftungsbetrieb voll öffnen und die Ausgänge nach Betätigung des
Lüftungstasters nach 3 Minuten stromlos geschaltet werden.)
Diese Werte können mit Hilfe des HAUTAU ConfigTool RAZ K
geändert werden.
- mains quiescent current-controlled (line monitoring),
system voltage 24 V DC
- cable feed from the top
- four-screw installation
- Indicator lights on the control unit for alarm and line monitoring mains/battery packs, drives, fire pushbutton and smoke
detector.
- Reset is possible in the control unit.
- Potential-free contact for external alarm and error messages
and connection options for ventilation pushbuttons, drives for
supply air, and a wind/rain sensor.
Attention: By setting deathman-version every automatically
ventilation signals (e.g. wind-rainsensor) are not considered!
- In the event of a power failure during alarm opening, the
“OPEN” command remains saved, allowing the control unit to
open on battery power.
- The ventilation pushbutton will be blocked in the event of an
alarm or any kind of failure. The “Mode” LED in the fire
pushbuttons flashes in the event of mains failure.
- The RAZ K control unit corresponds to legal EN standards.
- Factory-preset values:
- Wind measurement time: 5 s
- Wind impulses per second: 30
- Locking time wind/rain: 50 s
- Ventilation time: 0 s, ventilation cycle: 0 h
(no automatic ventilation preset)
- Opening width: 1 s
(automatic version, the drives open completly also by venti
lation and after pushing the ventilation button cutoffoutput
after 3 minutes.
This values can be modified with the HAUTAU ConfigTool
RAZ K.
3
Anschlussmöglichkeiten
Connection options
autom. Alarmauslösung in 2-Leiter-Technik:
max. 10 Melder als Rauch-/Thermomelder oder als FremdAnsteuerung (z. B. Brandmeldezentrale)
manuelle Alarmauslösung:
max. 6 Feuertaster mit Sichtanzeige, weitere Feuertaster ohne
Sichtanzeige
Lüftungsbetätigung:
max. 10 Lüftungstaster, 1 Wind-/Regenmelder
Antriebe:
Ausgangsstrom max. 4 A; die Summe der Stromaufnahmen
der angeschlossenen Antriebe darf diesen Wert nicht überschreiten. Beim Einsatz eines Regenmelders muss die Stromaufnahme von 0,5 A berücksichtigt werden.
Automatic alarm triggering in dual conductor design:
up to 10 detectors as smoke or heat detectors or activated by
a third-party device (e.g. central fire alarm system)
Manual alarm triggering:
up to 6 fire pushbuttons with display, additional fire pushbuttons without display
Ventilation activation:
up to 10 ventilation pushbuttons, 1 wind/rain sensor
Drives:
Output current max. 4 A; the total current consumption of the
connected drives must not exceed this limit. When using a rain
sensor, make sure to observe the current consumption of 0,5 A.
4
Leitungsverlegeplan / Wiring diagram
Anwendungsbeispiel / Application example
7
3 x siehe Tabelle/Formel
3 x see table/formula
5
WG/H 10
8 REM/H 10
(WREM/H 10)
7
3 x siehe Tabelle/Formel
3 x see table/formula
5
5 x 0,8
über / over 100 m: 5 x 1,5
5
6
Antriebsleitung
Drive line
7
2 x 0,8
6
Zuleitung 230 V ~ 4
Feeder wire 230 V ~
3 x 1,5
1 Lüftungstaster LT
Ventilation pushbutton LT
2 Feuertaster FR 900
Fire pushbutton FR 900
3 Rauchabzugszentrale RAZ K
Smoke and heat exhaust control unit RAZ K
4 Netzzuleitung 230 V AC (bauseitige Absicherung < 6 A)
Feeder wire 230 V AC (fuse provided by customer < 6 A)
5 Abzweigdose (bauseits)
Conduit box (by customer)
6 Rauchmelder RM 523 oder Thermomelder TM 523 (max. 10 Stück)
Smoke detector RM 523 or heat detector TM 523 (max. 10 units)
7 Antriebe
Drives
8 Windgeber WG/H 10, Regenmelder REM/H 10 (WREM/H 10)
Wind transmitter WG/H 10, rain sensor REM/H 10 (WREM/H 10)
4 x 0,8
1
6 x 0,8
HAUTAU LT
2
3
1
HAUTAU LT
2
Leitungslängen und Querschnitte
Wire lengths and cross-sections
Berechnungsformel:
Calculation formula:
ges. Stromaufnahme [A] x max. Leitungslänge [m]
Kabelquerschnitt [mm2] =
Cable cross-section [mm2] =
73
total current consumption [A] x max. wire lengths [m]
73
Leitungsquerschnitt
Wire cross-section
Antriebe mit … / drives with ...
3 x 1,5 mm²
0,5 A
3 x 2,5 mm²
3 x 6,0 mm²
3 x 1,5 mm²
0,8 A
3 x 2,5 mm²
3 x 6,0 mm²
3 x 1,5 mm²
1,0 A
3 x 2,5 mm²
3 x 6,0 mm²
3 x 1,5 mm²
1,3 A
3 x 2,5 mm²
3 x 6,0 mm²
3 x 1,5 mm²
1,6 A
3 x 2,5 mm²
3 x 6,0 mm²
3 x 1,5 mm²
2,0 A
3 x 2,5 mm²
3 x 6,0 mm²
Anzahl aller Antriebe je Antriebsleitung / Total number of drives per drive line
1
219
365
872
136
228
547
109
182
438
84
140
336
68
114
273
54
91
216
2
109
182
438
68
114
273
54
91
219
42
70
168
34
57
136
27
45
108
Achtung:
Die Klemmstellen in der Steuerung sind für maximale
Leitungsquerschnitte bis 2,5 mm2 ausgelegt. Werden größere
Querschnitte verwendet, so ist eine Querschnittsreduzierung
unmittelbar vor der Steuerung durchzuführen. Die Schutzleiterverbindung ist zur Vermeidung eines elektrischen Schlages
zuerst anzuschließen, bevor andere Leitungen wie Netzleitungen oder äußere Leitungen angeschlossen werden.
Die VDE-Vorschriften sind zu beachten.
3
73
121
192
45
76
182
36
60
145
28
46
112
4
54
91
219
34
57
136
27
45
108
5
42
72
208
27
45
109
6
36
60
145
7
31
52
125
8
27
45
109
Caution:
The clamping points in the control unit are designed for wire
cross-sections of up to 2,5 mm2. For larger cross-sections,
reduce the cross-section immediately in front of the control
unit. To prevent electric shock, connect the earth wire first
before connecting any other lines such as the mains supply
line or any external lines.
Observe all applicable VDE regulations.
5
Montage der Zentrale
Mounting of the control unit
Die RAZ K ist so zu montieren, dass sie für das Wartungspersonal leicht zugänglich ist (z. B. auf Montage in Augenhöhe
achten). Um das Bedienteil zu erreichen, muss die Klappe vollständig geöffnet werden können. Der Aufkleber “Rauchabzug”
ist an geeigneter Stelle zu platzieren.
Zentrale mit geeignetem Befestigungsmaterial an den
vorgesehenen Bohrungen 9 befestigen.
Kunststoff-Gehäuse: Für die Leitungen müssen ausschließlich die entsprehenden Stellen an der Gehäuserückwand !Pa
bzw. auf der Oberseite des Gehäuses !Pb aufgebohrt werden.
Die Seiten und der Boden dürfen keine Öffnungen enthalten.
Stahlblech-Gehäuse:
Achten Sie auf die Erdung des Gehäuses !A.
Die Leitungen werden durch die vorgesehenen Kabeldurchführungen !Pc von oben eingeführt.
Sorgen Sie für eine eindeutige Kennzeichnung der Adern aller
Komponenten, die an die RAZ K angeschlossen werden,
sowie der Zuleitungen für die Stromversorgung. Dies ist nötig,
um ggf. bei einem Austausch der Platine die Anschlüsse richtig
zuordnen zu können.
The RAZ K has to be mounted in such a way, that it is easily
accessible for the maintenance staff (e.g. observe mounting at
eye-level). To reach the operation panel, the door should be
opened completely. The label “Smoke outlet” has to be sticked
at a suitable place.
Use suitable mounting material to attach the control unit at the
designated borings 9.
PVC housing: For the wires bore the housing exclusively at
the corresponding positions at back !Pa or top !Pb. At sides
and at the bottom no openings are allowed.
Metal sheet housing:
Pay attention to earth the housing !A.
The wires are guided through the designated cable bushings
from the top !Pc.
Ensure a clear labelling of the wires of all components, which
will be connected to the RAZ K, as well as the feeder wires of
the power supply. This is necessary to relate the connections
correctly in case of replacing the circuit board.
!Pc
9
9
302
232
236
9
283
114
302
4,5
115
273
!Pb
!Pa
70
112
287
N L
!A
6
4
WG/H 10
L 1 2
Regenmelder
Rain sensor
Windgeber
Wind transmitter
2 3 4 5
10k
2
1 2 3 4
Lüftungstaster LT
Ventilation pushbutton LT
RM 523 / TM 523
Lüftungstaster
Ventilation pushbutton
alternativ: / alternative:
4
2 10k
Melder
Detector
1 2 3 4 5 6
10k
1a
Jumper
braun / brown
blau / blue
braun / brown
blau / blue
3
Antriebe
Drives
Widerstand 2k (Farbcodierung rot, schwarz, rot, gold) beim Anschluss einer Brandmelde-Zentrale
2k terminal resistor (color-coding red, black, red, gold) if connected to a central fire alarm system
Mains/
battery packs
Endwiderstand 10k (Farbcodierung braun, schwarz, orange, gold) für die Leitungsüberwachung in dem einzigen oder letzten Rauchmelder RM 523
(oder Thermomelder TM 523) lt. Anschlussplan befestigen. Ist kein Melder vorhanden, so ist der Endwiderstand 10k unter den Klemmen RM + und RM grün / green
(Melder) in der Zentrale zu befestigen!
Install the 10k terminal resistor (color-coding brown, black, orange, gold) used for line monitoring in the only or last smoke detector RM 523 (or heat detector TM 523)
OK
according to the terminal connection diagram. If no detector has been installed, install the 10k terminal resistor in the control unit below terminals RM + and RM - (detector)!
2 Dioden 1N 4007 (schwarz) für die Leitungsüberwachung in dem einzigen oder letzten Elektroantrieb lt. Anschlussplan befestigen.
Netz/Akku
Install 2 1N 4007 diodes (black) used for line monitoring in the only or last electric drive according to the terminal connection diagram.
a) im letzten Feuertaster; b) ist kein Feuertaster FR 900 vorhanden, so sind 2 Z-Dioden 15 V (orange) in der Zentrale wie gezeigt zu befestigen!
a) in the last fire pushbutton; b) if no fire pushbutton FR 900 has been installed, install 2 Z-diodes 15 V (orange) in the control unit as shown!
M
=
M
=
ausgelöst
triggered
Alarm
rot / red
gelb / yellow
Melder
Feuertaster
Detector Fire pushbutton
Störung / Malfunction
Antriebe
Drives
LED’s
24 V max. 30 Watt
Relais zieht bei
Alarm an
24 V max. 30 Watt
Relay is activated by
alarm
Potentialfrei von der
Rauchabzugszentrale
an zentrale Leitstelle
Störung
Potential-free from
smoke and heat exhaust
control unit to central
control station malfunction
24 V max. 30 Watt
Relais fällt bei Störung ab
24 V max. 30 Watt
Relay is deactivated
by malfunction
Potentialfrei von der
Rauchabzugszentrale
an zentrale Leitstelle
Alarm
Potential-free from
smoke and heat exhaust
control unit to central
control station alarm
Spindelantriebe SA ... / Spindle drives SA ...
Achtung! Werden andere Antriebe eingesetzt,
Anschlussplan auf der folgenden Seite beachten.
Caution! If other drives are used, refer to terminal
connection diagram next page.
Feuertaster
Fire pushbutton
7 6 5 43 2 1
7 6 5 4 3 21
1b
Z-diodes
15 V
RM 523 / TM 523
Feuertaster FR 900
Fire pushbutton FR 900
Anwendungsbeispiel / Application example
3
1
2
1
LT +
LT-AUF
LT-ZU
LT-LED
WIND +
WIND -
Versorgung + / Supply +
Versorgung - / Supply -
1 2 3 4 56
Schlüsseltaster ST 010
Key pushbutton ST 010
Windmelder WM/H 10 und/oder
Regenmelder REM/H 10
Wind sensor WM/H 10 and/or
Rain sensor REM/H 10
ST 010
Windgeber WG/H 10
Wind transmitter WG/H 10
WM/H 10
REM/H 10
T 400mA / 250V
LT +
LT-AUF
LT-ZU
LT-LED
Versorgung + / Supply +
Auf / Opened
Zu / Closed
Sichtanzeige Auf / Display Open
REGEN +
REGENDAT
REGEN -
Versorgung + / Supply +
Datenleitung / Data line
Versorgung - / Supply -
LT
2k 0,5 W
RM +
RM RM +
RM -
Versorgung + / Supply +
Versorgung - / Supply -
RWA-AUF
RWA-ZU
RWA-OK
RWA-AL
RWA-ST
RWA-GND
Alarm - Linie / Alarm - Loop
Reset - Zu / Reset - Close
Betriebskontrolle / Operating control
Alarmanzeige / Alarm indicator
Störanzeige / Malfunction signal
GND / GND
FR 900
FR 900
Brandmelde-Zentrale
Central fire alarm system
T 5,0 A / 250 V
Abzweigdose
Conduit box
Rauchmelder RM 523
Thermomelder TM 523
Smoke detector RM 523
Heat detector TM 523
REL-AL
REL-AL/NO
REL-AL/NC
Abzweigdose
Conduit box
M1 +
M1 M-LINIE
M2 +
M2 -
Versorgung + (-) / Supply + (-)
Versorgung - (+) / Supply - (+)
Linie / Loop
Versorgung + (-) / Supply + (-)
Versorgung - (+) / Supply - (+)
PE
N NETZ / MAINS
L 230 V AC
T 500mA / 250V
REL-ST
REL-ST/NO
REL-ST/NC
Windgeber/Regenmelder WREM/H 10
Wind transmitter/Rain sensor WREM/H 10
Anschlussplan / Terminal connection diagram
7
Zusatzplan Antriebe / Additional diagram drives
Polarity for drives OPEN
Kettenantrieb SKA 45, 50
Chain drive SKA 45, 50
Kettenantrieb SKA 20
Chain drive SKA 20
2 3 4
M
Abzweigdose
Conduit box
1N 4007
1N 4007
Abzweigdose
Conduit box
1N 4007
Abzweigdose
Conduit box
123 45
1
1N 4007
2 3 4
Abzweigdose
Conduit box
1
Kettenantrieb SKA 30, 60 Twin
PRIMAT kompakt
Elektrobeschlagschere SBS
Chain drive SKA 30, 60 Twin
PRIMAT kompakt
Electric fitting stay SBS
Spindelantrieb SA
Spindle drive SA
blau / blue
braun /
brown
Elektroantrieb SM 100
Electric drives SM 100
1N 4007
Abzweigdose
Conduit box
Polarität bei Antriebe AUF
1 2
Abzweigdose
Conduit box
M1 M1 +
MLINIE
Versorgung - (+) / Supply (+)
Versorgung + (-) / Supply + ()
Linie / Loop
Abzweigdose
Conduit box
ZVR
s.w. / blackwhite
schwarz / black
s.w. / blackwhite ZVR
1234
1234
1234
1234 1234 1234
12
SF 225
M1
Versorgung - (+) / Supply (+)
Versorgung + (-) / Supply + ()
Linie / Loop
Linie / Loop
SF 225
1234
SYN 2K
M1 M1 +
MLINIE
Abzweigdose
Conduit box
MLINIE
M1 M1 +
Versorgung - (+) / Supply (+)
Versorgung + (-) / Supply + ()
3
Synchronantriebe
Sync drives
schwarz / black
1 234
M1
8
2
1234
Abzweigdose
Conduit box
1234
1 2
A3
1 2 3
1
12 3 4
FTA 3
1 2
A2
123 4 1234
M1 M1 +
MLINIE
1 2 34
1 2
A1
M1 M1 +
MLINIE
1 2 3
Synchronantriebe
Sync drives
M
1234
ZV/R
ZV/R
234
SYN 2K
Abzweigdose
Conduit box
ZV
12 3 4
M1
Versorgung - (+) / Supply (+)
Versorgung + (-) / Supply + ()
Linie / Loop
M
1234
schwarz / black
s.w. / blackwhite
schwarz / black
s.w. / blackwhite
12 3 4
12 3 4
FTA 3
1 2
A3
1 2 3
Synchronantriebe mit Zusatzverriegelung
und externer SynchronFolgesteuerung SF 225
Sync drives with additional locking and external
sync sequence control system SF 225
1 234
Abzweigdose
Conduit box
1 2
A2
M1
Synchronantriebe
Sync drives
Abzweigdose
Conduit box
1 2
A1
2 3 4
Versorgung - (+) / Supply (+)
Versorgung + (-) / Supply + ()
Linie / Loop
Versorgung - (+) / Supply (+)
Versorgung + (-) / Supply + ()
Linie / Loop
1 2 34
1
M1
Synchronantriebe mit externer
Synchronsteuerung SYN 2K
Sync drives with external
sync control system SYN 2K
Synchronantriebe
Sync drives
M
blau / blue
braun /
brown
M1 M1 +
MLINIE
Abzweigdose
Conduit box
M1 M1 +
MLINIE
Antriebe mit Lastabschaltung, Zusatzverriegelung
und TandemFolgesteuerung FTA 3 24 V DC
Drives with overload cutoff, additional locking
and Tandem sequence control FTA 3 24 V DC
ZV
M1
Versorgung - (+) / Supply (+)
Versorgung + (-) / Supply + ()
Linie / Loop
M1
Versorgung - (+) / Supply (+)
Versorgung + (-) / Supply + ()
Linie / Loop
M1
M
Abzweigdose
Conduit box
2 3 4
M1 M1 +
MLINIE
Abzweigdose
Conduit box
1
Abzweigdose
Conduit box
M
123 45
Montage der Akkus
Installing the battery packs
Zentrale vom Netz trennen und öffnen. Akkuleitung !F auf den
Minuspol von Akku !S, Akkuleitung !G auf den Pluspol von
Akku !D. Mit der Akku-Brücke !H den Minuspol von Akku !D
und den Pluspol von Akku !S verbinden. Zentrale schließen
und Netz einschalten.
Disconnect the central unit from the mains supply and open it.
Connect battery wire !F with negative pole of battery pack !S
and battery wire !G with the positive pole of battery pack !D.
Use the battery pack bridge !H to connect the negative pole of
battery pack !D with the positive pole of battery pack !S.
Close the central unit and switch the mains on.
schematische Darstellung
schematic figure
REL-ST/NC
REL-ST/NO
REL-ST
REL-AL/NC
REL-AL/NO
REL-AL
M2-
M2+
M-LINE
M1-
M1+
RWA-GND
RM-
RWA-ST
RWA-AL
RWA-OK
RWA-ZU
RWA-AUF
RM+
LT-LED
LT-ZU
LT-AUF
LT+
REGEN-
REGEN+
WIND-
WIND+
PE
PE
N
L
PE
REGENDAT
N L
N L
!G
!D
!F
!F !G
!S
Akku und Sicherung T 5A
accu and fuse T 5A
zu verwenden: 2x Akku 12 V; 1,2 Ah
to be used: 2x battery pack 12 V; 1,2 Ah
!H
Funktionstest
Function test
Nach erfolgter Montage aller Bauteile (Feuertaster, Rauchbzw. Thermomelder, Antriebe, Lüftungstaster usw.) ist die
Funktion der Zentrale zu überprüfen.
Netzversorgung 230 V AC einschalten und Akkus aufstecken.
Auf der Platine leuchtet die Netz-LED (grün) und im Feuertaster
leuchtet die Betriebsanzeige (grün).
Check the central unit functions properly after successful installation of all components (fire pushbuttons, smoke or heat
detector, drives, ventilation pushbuttons, etc).
Switch on the 230 V AC power supply on and slip on the battery packs.
The mains LED (green) on the circuit board and the operation
LED (green) in the fire pushbutton (green) are lit.
To ensure the battery packs are sufficiently charged for testing,
do not perform the function test until 2 hours after installation
is complete. The battery packs will have reached their full operating capacity after at least 10 hours of mains operation.
Die Funktionsprüfung sollte erst nach 2 Stunden durchgeführt
werden, damit die Akkus die ausreichende Kapazität für den
Prüfvorgang erreichen. Die volle Betriebskapazität erhalten die
Akkus nach mindestens 10-stündigem Netzbetrieb.
Funktionstest:
Anlage über die Feuertaster durch Betätigung der Alarm Taste
(rot) auslösen. Die roten LEDs im Feuertaster und auf der Platine leuchten.
Prüfen, ob alle Fenster sich öffnen und ganz geöffnet sind.
Fenster anschließend über die Zu-Taste (schwarz) im Feuertaster schließen.
Alle Rauchmelder mit Rauchmelderprüfgerät auslösen, LED
(rot) am Melder leuchtet.
Meldereinsatz entnehmen und reinigen. Um das Gerät aus
dem Alarmzustand zurückzusetzen, muss RESET im Feuertaster oder an der RAZ K für mind. 5 Sekunden gedrückt
gehalten werden.
Kontrolle der Lüftungstaster durch Bestätigung der AUF-,
STOP- und ZU-Tasten.
Achtung: durch die Einschaltdauer von ED=20% wird die
Lüftung nach 4 Minuten gesperrt. Das Zufahren der Fenster und das Öffnen der Fenster im Alarmfall ist jedoch jederzeit möglich. Nach 16 Minuten wird die Lüftung wieder
freigegeben.
Netzversorgung 230 V AC ausschalten, auf der Platine erlischt
die Netz-LED (grün), im Feuertaster blinkt die Betriebsanzeige
(grün).
Anlage nochmals über die Feuertaster durch Betätigung der
Alarm-Taste (rot) auslösen. Prüfen, ob alle Fenster ganz geöffnet sind.
Fenster anschließend über die ZU-Taste (schwarz) im Feuertaster schließen (keine Selbsthaltung).
Mit Rauchmelderprüfgerät auslösen, LED (rot) am Melder
leuchtet.
Meldereinsatz entnehmen und reinigen. Um das Gerät aus
dem Alarmzustand zurückzusetzen, muss RESET im Feuertaster oder an der RAZ K für mind. 5 Sekunden gedrückt
gehalten werden.
Function test:
Push the alarm button (red) on the fire pushbuttons to turn the
system on. The red LEDs in the fire pushbutton and on the circuit board are lit.
Check if all windows open and are opened all the way before
closing the windows by pushing the Close button (black) in the
fire pushbutton.
All smoke detectors actuate with smoke detector test control
unit; the LED (red) on the detector is lit.
Remove and clean the detector insert. To reset the control unit
from alarm, keep the RESET button at the fire pushbutton or at
the RAZ K pressed for at least 5 seconds.
Check the ventilation pushbuttons by pressing the OPEN,
STOP, and CLOSE buttons.
Attention: By the duty cycle of DC = 20%, the ventilation is
blocked after 4 minutes. Closing the windows and opening
the windows in the event of an alarm is always possible.
After 16 minutes the ventilation is released.
Switch off the 230 V AC power supply; the mains LED on the
circuit board (green) is turned off and the operation LED in the
fire push-button (green) is flashing.
Push the alarm button (red) on the fire pushbuttons again to
actuate the system. Check if all windows are opened all the
way.
Afterwards, close the windows by pressing the CLOSE button
(black) in the fire pushbutton (no catch).
Actuate with smoke detector test control unit; the LED (red) on
the detector is lit.
Remove and clean the detector insert. To reset the control unit
from alarm, keep the RESET button at the fire pushbutton or at
the RAZ K pressed for at least 5 seconds.
9
Bedienteil / Operation panel
!J Netz/Akkus OK
Mains/Battery packs OK
!K Alarm ausgelöst
Alarm triggered
!K
!L
“Ö Melder (Störung)
Detector (malfunction)
“S Fenster geöffnet
Window opened
“D AUF
OPEN
“F STOP
STOP
Fenster geöffnet
Motoranschluss: Spannung liegt für
3 Minuten an und schaltet dann ab
Permanent signal: window open
Flashing signal: connection drive: voltage applied for 3
minutes, then cutoff output
“S
“F “D
!J
!L Antrieb (Störung)
Drive (malfunction)
“A Feuertaster (Störung)
Fire pushbutton (malfunction)
Dauersignal:
Blinksignal:
“Ö
“A
“G ZU
CLOSE
“H Zurücksetzen (RESET)
(mind. 5s gedrückt halten)
RESET (press for at least 5s)
“J Service-Schnittstelle
Service interface
“G
“H
“J
Dauersignal:
Blinksignal:
Störsignal bei Netzbetrieb
Störsignal bei gleichzeitiger Störung Netz
und/oder Akku
Permanent signal: error signal during mains operation
Flashing signal: error signal during concurrently main supply
error and/or battery pack error
Beseitigung von
Fehlfunktionen
Elimination of fault functions
LED Netz (grün) blinkt
Mains LED (green) is flashing
- es liegt keine Netzspannung 230 V AC an
- Netzsicherung ist ausgeschaltet/defekt
- Netzeingangssicherung ist defekt
- 230 V AC mains supply not connected
- mains fuse switched off/faulty
- mains input fuse faulty
Bei den nachfolgenden möglichen Fehlerquellen ist zu beachten,
dass eine Zustandsänderung der Akkus nur alle 5 Minuten angezeigt wird. D. h., die mögliche Fehlerursache ist bereits beseitigt,
aber die LED leuchtet erst nach 5 Minuten wieder.
- Akkusicherung ist defekt
- Akku ist nicht angeschlossen
- Akku hat einen Drahtbruch
- Akku hat bei Inbetriebnahme keine 2 Stunden geladen
Please note by the following possible fault functions: a change in
state of the battery pack will be displayed only every 5 minutes.
It means the possible source of error is eliminated, but the LED
lights only after 5 minutes again.
- battery pack fuse faulty
- battery pack not connected
- battery pack wire break
- battery pack was not loaded for 2 hours at bringing the
central unit into service
LED OK (grün) im Feuertaster blinkt
OK LED (green) in fire pushbutton is flashing
- es liegt keine Netzspannung 230 V AC an
- Netzsicherung ist ausgeschaltet/defekt
- Netzeingangssicherung ist defekt
- 230 V AC mains supply not connected
- mains fuse switched off/faulty
- mains input fuse faulty
Durchlaufendes Blinken von oben nach unten und zurück
der linken LED-Reihe
Left LEDs flashing up and down
Es liegt keine Netzspannung an, Zentrale läuft über Akkubetrieb
und die Akkus haben eine zu niedrige Betriebsspannung.
- Akkus sind nicht ausreichend aufgeladen und müssen aufgeladen werden.
- Lebensdauer der Akkus erreicht, Akkus müssen ausgetauscht
werden.
Überwachung Rauchmelder:
LED Störung Melder (gelb) leuchtet
- Melder ist nicht richtig im Montagesockel arretiert
- Endwiderstand 10k ist nicht im Montagesockel des letzten oder
einzigen Rauchmelders angeklemmt
- Anschluss an Rauchabzugszentrale prüfen
LED Störung Melder (gelb) blinkt
keine Netzspannung und/oder Akkufehler und
- Melder ist nicht richtig im Montagesockel arretiert
- Endwiderstand 10k ist nicht im Montagesockel des letzten oder
einzigen Rauchmelders angeklemmt
- Anschluss an Rauchabzugszentrale prüfen
10
Mains supply not connected, control unit in battery pack operation
and the battery pack has a too low operating voltage.
- battery pack is not loaded and has to be loaded.
- lifespan of the battery pack is reached, battery pack has to be
changed.
Monitoring smoke detector:
LED malfunction detector (yellow) is lit
- detector not properly installed on mounting base
- 10k terminal resistor not connected in the mounting base of the
last or only smoke detector
- check connection to central smoke and heat exhaust unit
LED malfunction detector (yellow) is flashing
Mains supply not connected und/or battery pack fault and
- detector not properly installed on mounting base
- 10k terminal resistor not connected in the mounting base of the
last or only smoke detector
- check connection to central smoke and heat exhaust unit
Beseitigung von
Fehlfunktionen (Forts.)
Elimination of fault functions
(cont’d)
Überwachung Feuertaster:
LED Störung Feuertaster (gelb) leuchtet
Monitoring fire pushbutton:
LED malfunction fire pushbutton (yellow) is lit
- Jumper ist nicht im letzten oder einzigen Feuertaster gesetzt
- Anschluss an Rauchabzugszentrale prüfen
- jumper is not set in the last or only fire pushbutton
- check connection to central smoke and heat exhaust unit
LED Störung Feuertaster (gelb) blinkt
Monitoring fire pushbutton:
LED malfunction fire pushbutton (yellow) is flashing
keine Netzspannung und/oder Akkufehler und
- Jumper ist nicht im letzten oder einzigen Feuertaster gesetzt
- Anschluss an Rauchabzugszentrale prüfen
Überwachung Antrieb:
LED Störung Antrieb (gelb) leuchtet
- Linienüberwachung nicht angeschlossen
- Diode(n) falsch montiert/defekt
- Sicherung defekt
LED Störung Antrieb (gelb) blinkt
keine Netzspannung und/oder Akkufehler und
- Linienüberwachung nicht angeschlossen
- Diode(n) falsch montiert/defekt
- Sicherung defekt
Mains supply not connected und/or battery pack fault and
- jumper is not set in the last or only fire pushbutton
- check connection to central smoke and heat exhaust unit
Monitoring drive:
LED malfunction drive (yellow) is lit
- lines monitoring not connected
- wrong mounted/faulty diode(s)
- fuse faulty
LED malfunction drive (yellow) is flashing
Mains supply not connected und/or battery pack fault and
- lines monitoring not connected
- wrong mounted/faulty diode(s)
- fuse faulty
Rauchmelder löst/lösen nicht aus
- Melder ist nicht richtig im Montagesockel arretiert
- Klemmfehler beim Anschluss
- Meldereinsatz ist defekt
Rauchmelder löst immer aus
- Messkammer verschmutzt
- Klemmfehler
Smoke detector(s) are not triggered
- detector not properly installed on mounting base
- connection to the wrong terminal
- detector insert faulty
Smoke detector always triggers
- photogrammetric camera is dirty
- wrong wire connection
LED Störung Melder (gelb) und Alarm (rot) leuchtet
- Diode 15 V und Widerstand 10k wurden vertauscht
LED Störung Melder (gelb) und Alarm (rot) blinkt
keine Netzspannung und/oder Akkufehler und
- Diode 15 V und Widerstand 10k wurden vertauscht
Lüftungstaster hat keine Funktion
- Antrieb öffnet nicht oder nur teilweise: die Einschaltdauerbegrenzung ist aktiv; nach 16 Minuten Pause ist die Lüftung
wieder aktiv
- Auslösung des Rauchabzugs
- Auslösung übergeordnete Funktion (z. B. Wind-Regenmelder)
- Die Sensorfläche des Regenmelders ist nicht vollständig
abgetrocknet: das Gerät ist zunächst für weitere 60 s gesperrt
- Netzausfall
LED Störung im Feuertaster leuchtet
- Störung der Feuertasterlinie
- Störung der Rauchmelderlinie
- Störung der Antriebslinie
LED Störung im Feuertaster blinkt
keine Netzspannung und/oder Akkufehler und
- Störung der Feuertasterlinie
- Störung der Rauchmelderlinie
- Störung der Antriebslinie
LED malfunction detector (yellow) and alarm (red)
are lit
- diode 15 V exchanged for 10k terminal resistor
LED malfunction detector (yellow) and alarm (red)
are flashing
Mains supply not connected und/or battery pack fault and
- diode 15 V exchanged for 10k terminal resistor
Ventilation pushbutton is not operational
- Drive does not open or only partially: the duty cycle limit is active;
after a break of 16 minutes the ventilation is active again
- activation of smoke outlet
- activation of superordinate function (e. g. wind/rain detector)
- The sensor surface of the rain sensor has not dried up completely: at this time, the device is locked for further 60 s
- mains failure
LED malfunction in fire pushbutton is lit
- malfunction fire pushbutton loop
- malfunction smoke detector loop
- malfunction drive loop
LED malfunction in fire pushbutton is flashing
Regenmelder funktioniert nicht
Mains supply not connected and/or battery pack fault and
- malfunction fire pushbutton loop
- malfunction smoke detector loop
- malfunction drive loop
- Sicherung defekt
- Zentrale läuft im Totmannbetrieb
Rain sensor does not work
- fuse faulty
- deathman-version is setting
11
Pflege
Care
Alle Geräte und Kabelanschlüsse auf äußere Beschädigung
und Verschmutzung prüfen. Rauchabzüge, Zentralen, Feuertaster, Lüftungstaster usw. dürfen nicht in ihrer Funktionstüchtigkeit, z. B. durch bauliche Maßnahmen oder Lagergut,
beeinträchtigt werden.
Check all devices and cable connections for external damage
and dirt. The operability of smoke outlets, central units, fire
pushbuttons, ventilation pushbuttons etc. must not be affected
by, for example, structural measures or stored goods.
Wartung
Service
Rauch- und Wärmeabzugsanlagen müssen gemäß den
gesetzlichen Bestimmungen (Bauordnung und Landesbauordnung) mindestens einmal jährlich von einer RWA-Fachfirma
mit qualifiziertem Personal gewartet werden. Wir empfehlen
daher einen Wartungsvertrag.
Zur Gewährleistung einer zuverlässigen Notstromversorgung
lassen Sie die verwendeten Akkus regelmäßig überprüfen und
ggf. ersetzen. Die Akkus müssen spätenstens alle 4 Jahre ausgetauscht werden. Ensorgen Sie verbrauchte Akkus ordnungsgemäß entsprechend der gesetzlichen Bestimmungen.
Die Prüfplakette an der Zentrale muss erneuert und das
Kontrollbuch geführt werden.
Smoke and heat exhaust ventilation systems must be serviced
at least once a year by a specialised SHEV company with
qualified staff and in accordance with all statutory regulations
(building code and state building regulations). Therefore we
recommend a service contract.
To guarantee a reliable emergency power supply, please check
the used battery packs regularly and replace them if necessary.
The battery packs must be replaced no later than every 4
years. Dispose of the battery packs in an ecologically desirable
way (acc. to legal regulations).
The inspection plate on the central unit must be renewed, and
a control book must be kept.
Instandhaltung
Maintenance
Müssen Komponenten überprüft, repariert oder ausgetauscht
werden, wenden Sie sich bitte an den Hersteller. Verwenden
Sie nur Original-Ersatzteile. Eine Veränderung von Anschlüssen
ist nur im Rahmen der Anschlussmöglichkeiten gestattet.
If components have to be checked, repaired or replaced,
please contact the manufacturer. You have to use only original
parts. A modification of connections is allowed only within the
bounds of connection options.
Entsorgung
Disposal
Entsorgen Sie dieses Gerät nach der Verwendung gemäß
ElektroG.
Dispose of the components of this product according to local
regulations.
HAUTAU GmbH · Postfach 1151 · D 31689 Helpsen
Fon + 49 57 24 / 3 93-0 · Fax -125 · [email protected] · www.HAUTAU.de