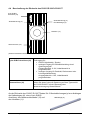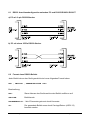
1
Ingenieurbüro M. Zipperer GmbH Etzenbach 16 D-79219 Staufen Betriebsanleitung Rührwerke R100C, R100CL und R100 CT R100C/R100CL/R100CL/R100CT - mikroprozessorgesteuertes Rührwerk hohe Leistungsabgabe hinterleuchtetes alphanumerisches LCD Drehmoment- und Leistungsanzeige gleichzeitige Anzeige von Drehzahl und Drehmoment Fuzzylogic Regelung Soft motor start/stop einstellbare Sicherheitsabschaltfunktion programmierbare max. Motordrehzahl programmierbare Drehmomentbegrenzung switch off Timer (1 Min - 99 Tage) Übertemperaturschutz RS232 Schnittstelle zur Computersteuerung analoger Spannungseingang für einfache externe Drehzahlsteuerung analoger Ausgang für Analogwertschreiber Inhalt ALLGEMEINE INFORMATIONEN ............................................................................................................... 5 1 1.1 1.2 AUSPACKEN DES GERÄTES .................................................................................................................................. 5 LIEFERUMFANG UND ZUBEHÖR ........................................................................................................................... 5 SICHERHEITSHINWEISE .............................................................................................................................. 7 2 2.1 2.2 2.3 ERLÄUTERUNG DER SICHERHEITSHINWEISE IN DER GEBRAUCHSANLEITUNG ...................................................... 7 ERLÄUTERUNG DER SICHERHEITSHINWEISE AUF DEM GERÄT ............................................................................. 7 ALLGEMEINE SICHERHEITSHINWEISE .................................................................................................................. 7 AUFBAU ............................................................................................................................................................ 9 3 3.1 3.2 3.3 3.4 HALTESTANGEN MONTIEREN ............................................................................................................................... 9 RÜHRWERK AM STATIV BEFESTIGEN ................................................................................................................... 9 RÜHRWERKZEUG MONTIEREN.............................................................................................................................. 9 MONTAGE DES RÜHRWELLENSCHUTZES............................................................................................................ 10 BEDIENUNG UND BETRIEB .........................................................................................................................10 4 4.1 4.2 4.3 4.4 4.5 4.6 BESTIMMUNGSGEMÄßER GEBRAUCH ................................................................................................................. 10 DAS BEDIENFELD .............................................................................................................................................. 11 BESCHREIBUNG DES BEDIENFELDS .................................................................................................................... 12 BESCHREIBUNG DER RÜCKSEITE DES R100 C/R100CL/R100 CT ..................................................................... 13 GERÄT EINSCHALTEN ........................................................................................................................................ 14 ZEITGESTEUERTER BETRIEB DES RÜHRWERKS .................................................................................................. 14 SICHERHEITSFUNKTIONEN .......................................................................................................................15 5 5.1 5.2 5.3 5.4 5.5 5.6 ROTORBLOCKADE ERKENNUNG......................................................................................................................... 15 ÜBERLAST-SCHUTZ ........................................................................................................................................... 15 ÜBERTEMPERATURSCHUTZ R100C.................................................................................................................... 15 ÜBERTEMPERATURSCHUTZ R100CT ................................................................................................................. 15 ÜBERTEMPERATURSCHUTZ R100CL ................................................................................................................. 16 I/O ANSCHLUSS (9-PIN SUB-D) ........................................................................................................................ 16 DIE RS232 SCHNITTSTELLE DES R100C/R100CL/R100CT ......................................................................17 6 6.1 RS232 ANSCHLUSSKONFIGURATION ZWISCHEN PC UND R100C/R100CL/R100CT ......................................... 18 6.2 FORMAT EINES RS232-BEFEHLS........................................................................................................................ 18 6.3 FORMAT DES CONTROLLER HANDSHAKE .......................................................................................................... 19 6.4 RS232 BEFEHLE DES R100C/R100CL/R100CT ................................................................................................ 20 6.5 PROGRAMMIERBEISPIELE ................................................................................................................................... 21 6.5.1 Schreiben von Parametern zum Rührmotor .............................................................................................. 21 6.5.2 Auslesen von Parametern aus dem Rührmotor ......................................................................................... 22 6.6 ANSCHLUSS VON MEHR ALS EINEM GERÄT AN DEN COMPUTER......................................................................... 22 DAS SETUP MENÜ .........................................................................................................................................24 7 7.1 BEISPIEL: ÄNDERUNG DER SETUP EINSTELLUNGEN........................................................................................... 25 8 FEHLERMELDUNGEN ..................................................................................................................................27 9 REINIGUNG UND WARTUNG ......................................................................................................................27 10 10.1 10.2 ABBAU TRANSPORT UND LAGERUNG .................................................................................................28 ABBAU............................................................................................................................................................... 28 TRANSPORT UND LAGERUNG ............................................................................................................................. 28 11 ENTSORGUNG ............................................................................................................................................28 12 GEWÄHRLEISTUNG UND HAFTUNGSAUSSCHLUSS .........................................................................29 13 TECHNISCHE DATEN ...............................................................................................................................30 13.1 13.2 TECHNISCHE DATEN R100C .............................................................................................................................. 30 TECHNISCHE DATEN R100CL ........................................................................................................................... 31 Betriebsanleitung/Instruction Manual R100C/R100CL/R100CT 07/2010 Version 1.07 Page/Seite 2 13.3 TECHNISCHE DATEN R100CT ........................................................................................................................... 33 REPARATUREN ..........................................................................................................................................34 14 14.1 RÜCKSENDEFORMULAR ..................................................................................................................................... 35 15 KONFORMITÄT .........................................................................................................................................36 16 APPENDIX A ...............................................................................................................................................37 16.1 ANZEIGE DER SYSTEMINFORMATION: ................................................................................................................ 37 GENERAL INFORMATION ...........................................................................................................................39 1 1.1 1.2 UNPACKING THE INSTRUMENT ........................................................................................................................... 39 SCOPE OF DELIVERY .......................................................................................................................................... 39 SAFETY INFORMATION ..............................................................................................................................40 2 2.1 2.2 2.3 EXPLANATION OF THE SAFETY INFORMATION IN THE INSTRUCTION MANUAL .................................................... 40 EXPLANATION OF THE SAFETY INFORMATION ON THE DEVICE ........................................................................... 41 GENERAL SAFETY INFORMATION ...................................................................................................................... 41 SET-UP .............................................................................................................................................................42 3 3.1 3.2 3.3 3.4 MOUNTING OF SUPPORT RODS .......................................................................................................................... 42 ATTACH THE OVERHEAD STIRRER TO A STAND ................................................................................................. 42 ATTACHMENT OF STIRRING PADDLE ................................................................................................................. 42 ASSEMBLING THE SHAFT PROTECTOR ............................................................................................................... 43 SET-UP AND OPERATION ............................................................................................................................43 4 4.1 4.2 4.3 4.4 4.5 4.6 INTENDED USE................................................................................................................................................... 43 THE FRONT PANEL CONTROLS .......................................................................................................................... 44 DESCRIPTION OF THE FRONT PANEL FUNCTIONS ................................................................................................ 45 DESCRIPTION OF THE REAR PANEL ON THE R100C/R100CL/R100CT ............................................................... 46 STIRRING OPERATION ........................................................................................................................................ 47 TIMER CONTROLLED OPERATION ....................................................................................................................... 47 SAFETY FUNCTIONS ....................................................................................................................................48 5 5.1 5.2 5.3 5.4 5.5 5.6 ROTOR STUCK DETECTION ................................................................................................................................. 48 OVERLOAD PROTECTION .................................................................................................................................... 48 OVERTEMPERATURE PROTECTION R100C ......................................................................................................... 48 OVERTEMPERATURE PROTECTION R100CL ....................................................................................................... 48 OVERTEMPERATURE PROTECTION R100CT ....................................................................................................... 49 I/O CONNECTOR (9-PIN SUB-D)........................................................................................................................ 49 THE RS232 INTERFACE OF THE R100C/R100CL/R100CT .......................................................................50 6 6.1 RS232 CONNECTION CONFIGURATION BETWEEN PC AND THE R100C/R100CL/R100CT ................................. 51 6.2 FORMAT OF AN RS232-COMMAND .................................................................................................................... 51 6.3 FORMAT OF THE CONTROLLER HANDSHAKE ..................................................................................................... 52 6.4 RS232 COMMANDS OF THE R100C/R100CL/R100CT....................................................................................... 53 6.5 PROGRAMMING EXAMPLES ................................................................................................................................ 54 6.5.1 Writing parameters to the stirrer .............................................................................................................. 54 6.5.2 Reading parameters from the stirrer ........................................................................................................ 55 6.6 CONNECTION OF MORE THAN ONE UNIT TO A COMPUTER ................................................................................... 55 THE SETUP MENU .........................................................................................................................................57 7 7.1 EXAMPLE: HOW TO CHANGE SETUP SETTINGS ................................................................................................... 59 8 ERROR MESSAGES .......................................................................................................................................61 9 CLEANING AND MAINTENANCE ...............................................................................................................61 10 10.1 10.2 DISMANTLING, TRANSPORT AND STORAGE ....................................................................................62 DISMANTLING.................................................................................................................................................... 62 TRANSPORT AND STORAGE ................................................................................................................................ 62 Betriebsanleitung/Instruction Manual R100C/R100CL/R100CT 07/2010 Version 1.07 Page/Seite 3 11 DISPOSAL ....................................................................................................................................................62 12 WARRANTY AND LIABILITY ..................................................................................................................63 13 TECHNICAL DATA ....................................................................................................................................64 13.1 13.2 13.3 14 14.1 TECHNICAL DATA R100C ................................................................................................................................. 64 TECHNICAL DATA R100CL ............................................................................................................................... 65 TECHNICAL DATA R100CT ............................................................................................................................... 67 REPAIRS ......................................................................................................................................................68 REPAIR RETURN FORM ...................................................................................................................................... 69 15 DECLARATION OF CONFORMITY ........................................................................................................70 16 APPENDIX A ...............................................................................................................................................71 16.1 DISPLAYING THE SYSTEM INFO: ......................................................................................................................... 71 Betriebsanleitung/Instruction Manual R100C/R100CL/R100CT 07/2010 Version 1.07 Page/Seite 4 1 Allgemeine Informationen Das Rührwerk R100C/R100CL/R100CT wurde gem. DIN EN 61010 gefertigt und geprüft. Das Gerät hat das Werk in sicherheitstechnisch einwandfreiem Zustand verlassen. Um diesen Zustand zu erhalten und einen gefahrlosen Betrieb sicherzustellen, muss der Anwender die Hinweise und Warnvermerke beachten, die in dieser Gebrauchsanleitung enthalten sind. 1.1 Auspacken des Gerätes Untersuchen Sie den äußeren Karton, der das Instrument umgibt. Achten Sie auf Beschädigungen wie z.B. eingedrückte Wände, chemische Beeinträchtigungen des Kartons, Wassermarken, oder andere physikalische Einflüsse, die den Inhalt beschädigt haben könnten. Bei Beschädigungen informieren Sie bitte sofort den Spediteur und fragen Sie nach den notwendigen Maßnahmen. Wenn es keine sichtbare Beschädigung des äußeren Kartons gibt, dann öffnen Sie diesen vorsichtig. 1.2 Lieferumfang und Zubehör Eine vollständige Sendung hat folgenden Umfang: 1 Rührwerk R100 C, 1 Rührwerk R100CT 1 Rührwerk R100CL 2 Haltestangen 1 Betriebsanleitung Art. Nr. 60218-00 oder Art. Nr. 60314-00 oder Art. Nr. 60315-00 Art. Nr. 10402-64 Zubehör und Rührwerkzeuge (optional): U-Stativ Art. Nr. 60494-00 1 Halteklammer zur Befestigung am Stativ Art. Nr. 60495-00 1 Rührwellenschutz mit Vorrichtung zur Befestigung am Stativ Art. Nr. 20 Weiteres Zubehör wie z.B. geeignete Rührflügel finden Sie in unserer Preisliste. Wichtiger Hinweis: Ist das Gerät unbeschädigt und alle Teile vollständig, so können Sie nach dem Studium der Betriebsanleitung mit dem Betrieb des Gerätes beginnen. Wichtiger Hinweis: Bitte lesen Sie die Betriebsanleitung gründlich durch und stellen Sie sicher, dass Sie alles verstanden haben, bevor Sie das Gerät in Betrieb nehmen. Sollten Sie nach dem Durchlesen der Anleitung noch weitere Fragen zur Installation, zum Betrieb oder zur Wartung haben, wenden Sie sich bitte an den Lieferanten oder den Hersteller des Gerätes unter folgender Adresse: Ingenieurbüro M. Zipperer GmbH Etzenbach 16 D-79219 Staufen +49-(0)7636-7803-0 Wichtiger Hinweis: Diese Betriebsanleitung sollte jederzeit zur Verfügung stehen, insbesondere demjenigen, der dieses Gerät benutzen möchte. Deshalb sollte diese Betriebsanleitung in der Nähe des Gerätes aufbewahrt werden. Die Geräte sind standardmäßig mit einem EURO-Stecker (DIN 49441 CEE 7/VII10/ 16 A 250 V) versehen. Für Nordamerika mit einem US-Norm Stecker (NEMA Pub.No.WDI1961 ASA C 73.1. 1961 Seite 8 15A 125V). Falls Sie das Gerät in einem Land mit anderem Stecker-System betreiben möchten, müssen Sie einen zugelassenen Adapter verwenden oder der mitgelieferte Stecker muss durch einen Fachmann ausgewechselt und durch einen für dieses Netz passenden und zugelassenen Stecker ersetzt werden. Bei Lieferung ist das Gerät geerdet. Beim Auswechseln des Originalsteckers achten Sie bitte unbedingt darauf, dass Schutzleiter am neuen Stecker angeschlossen wird! Betriebsanleitung/Instruction Manual R100C/R100CL/R100CT 07/2010 Version 1.07 Page/Seite 6 2 Sicherheitshinweise 2.1 Erläuterung der Sicherheitshinweise in der Gebrauchsanleitung Dieses Symbol hebt folgende Hinweise hervor, welche durch den Anwender unbedingt beachtet werden müssen! Jegliche Missachtung der nebenstehenden Hinweise, kann die sichere Funktion wie die Sicherheit des Anwenders selbst beinträchtigen. Dieses Symbol hebt Verbote hervor, welche durch den Anwender unbedingt beachtet werden müssen! Jegliche Missachtung der nebenstehenden Verbote, kann die Funktionstüchtigkeit, sowie die Sicherheit des Anwenders erheblich beinträchtigen. Dieses Symbol hebt Hinweise hervor, welche durch den Anwender unbedingt beachtet werden sollten um einen sicheren Betrieb des Gerätes gewährleisten zu können. Achtung Brand- oder Explosionsgefahr Hinweis zur Reparatur / Wartung Hinweis zum Netzanschluss 2.2 Erläuterung der Sicherheitshinweise auf dem Gerät Warnung vor allg. Gefahren: Dieses Symbol weist darauf hin, dass die Betriebsanleitung unbedingt vor Inbetriebnahme des Gerätes vollständig gelesen und verstanden werden sollte. Eine unsachgemäße Handhabung kann den sicheren Betrieb des Gerätes und die Gesundheit des Anwenders gefährden. 2.3 Allgemeine Sicherheitshinweise Achtung: Beachten Sie alle im Unfallverhütungsvorschriften! Labor geltenden Sicherheits- und Achtung: Verwenden Sie dieses Gerät nicht in unsicherer Umgebung und speziell nicht in explosionsgefährdender Umgebung. Lebensgefahr! Betriebsanleitung/Instruction Manual R100C/R100CL/R100CT 07/2010 Version 1.07 Page/Seite 7 Achtung: Ausschließlich unterwiesene Anwender dürfen das Gerät in Betrieb nehmen. Achtung: Achten Sie vor der Verbindung des Gerätes mit dem Stromnetz darauf, dass die Netzspannung mit den Angaben auf dem Typenschild übereinstimmt. Achtung: Äußerste Vorsicht beim Umgang mit leicht entzündlichen Medien. Beachten Sie die Sicherheitsdatenblätter. Das Gerät ist nicht explosionsgeschützt! Der Hauptschalter trennt das Gerät nicht vollständig von der Stromquelle. Um das Gerät vollständig vom Netz/der Stromversorgung zu trennen, ziehen Sie bitte den Netzstecker. Hinweis: Stellen Sie sicher, dass alle Sicherheitshinweise des Gerätes bzw. auf dem Gerät selbst, während des Betriebs deutlich zu sehen sind. Achtung: Öffnen Sie das Gerät nicht. Reparaturen sind eingewiesenen ServiceTechnikern vorbehalten. Bitte schließen Sie das Gerät nur an eine geerdete Steckdose an. Bitte achten Sie auf sichere Befestigung des Gerätes. Betriebsanleitung/Instruction Manual R100C/R100CL/R100CT 07/2010 Version 1.07 Page/Seite 8 3 Aufbau 3.1 Haltestangen montieren Spannfutterschlüssel (B) Haltestangen (A) Schrauben Sie die beiden Haltestangen (A) in den dafür vorgesehenen Gewindebohrungen auf der Rückseite des Gerätes fest. Ziehen Sie diese mit Hilfe des Spannfutterschlüssels (B) kräftig fest. 3.2 Rührwerk am Stativ befestigen Rändelschraube (E) Befestigen Sie jetzt die Spezialhalteklammer (C) an der Stativstange (D). Führen Sie die Haltestangen (A) des Rührwerks in die dafür Vorgesehenen Aussparungen der Spezialhalteklammer (C) und drehen die Rändelschrauben (E) so lange, bis der Antrieb sicher befestigt ist. Spezialhalteklammer (C) 3.3 Stativstange (D) Rührwerkzeug montieren Schieben Sie das Rührwerkzeug (G) wie dargestellt in das Spannfutter (F) und ziehen Sie es in der gewünschten Position mit dem Spannfutterschlüssel (B) kräftig fest. Durch eine Längsverschiebung des Rührwerkzeugs bei gelöstem Spannfutter (F) können Sie die Eintauchtiefe des Rührwerkzeugs einstellen. Spannfutter (F) Rührwerkzeug (G) Spannfutterschlüssel (B) Betriebsanleitung/Instruction Manual R100C/R100CL/R100CT 07/2010 Version 1.07 Page/Seite 9 3.4 Montage des Rührwellenschutzes Befestigungsstange für Rührwellenschutz (H) Verwenden Sie zum Schutz vor Verletzungen beim Arbeiten mit dem Gerät einen Rührwellenschutz. Befestigungsschrauben (J) Aussparungen (K) Schraube (L) Rührwellenschutz (M) Montieren Sie die Befestigungsstange (H) des Rührwellenschutzes mit Hilfe einer Kreuzklemme (z.B. Art.Nr.60492-00) vor dem Bohrfutter des Gerätes am Stativ. Jetzt führen Sie die Aussparungen (K) an die Befestigungsschrauben (J) und drehen den Rührwellenschutz bis zum Anschlag der Aussparungen nach links.Die Höhe der beiden Halbschalen können sie mit Hilfe der Schraube (L) verstellen. Überprüfen Sie vor jeder Inbetriebnahme und in regelmäßigen Abständen den festen Sitz des Rührwellenschutzes. Die Position des Rührwellenschutzes darf nur im Stillstand und mit gezogenem Netzstecker verändert werden. 4 Bedienung und Betrieb 4.1 Bestimmungsgemäßer Gebrauch Der Rührmotor R100C/R100CL/R100CT ist für den qualifizierten Gebrauch im Labor bestimmt. Er eignet sich zum Rühren und Mischen von Flüssigkeiten mittlerer bis hoher Viskosität. Zum bestimmungsgemäßen Gebrauch muss das Gerät an einem Stativ befestigt werden. Die Grundvoraussetzung für den dauerhaften Einsatz ist die Einhaltung der maximal zulässigen Umgebungstemperaturen (Temperatur und Feuchtigkeit) sowie eine korrosionsfreie Atmosphäre. Betriebsanleitung/Instruction Manual R100C/R100CL/R100CT 07/2010 Version 1.07 Page/Seite 10 4.2 Das Bedienfeld Das Bedienfeld des R100C/R100CL/R100CT erleichtert die Dateneingabe und dient zur visuellen Darstellung aller relevanten Daten auf einem zweizeiligen alphanumerischen LCD - Display (1). Die Eingabe und Änderung von Einstellungen erfolgt über das linke Handrad (5) in Verbindung mit Funktions- und Hotkeytasten. Die Drehzahl des Rührmotors wird über den rechten Drehknopf (7) eingestellt. LCD-Anzeige (1) Timer LED (2) Timer Taste (3) Display select Taste (4) Load LED (6) Handrad (5) Drehzahlregler (7) Power LED (8) Power ein/aus Taste (9) (Sicht auf das R100C/R100CL/R100CT-Bedienfeld) Betriebsanleitung/Instruction Manual R100C/R100CL/R100CT 07/2010 Version 1.07 Page/Seite 11 4.3 Beschreibung des Bedienfelds LCD -Anzeige (1) Die LCD Anzeige zeigt alle relevanten Systemdaten Timer LED (2) gibt an, dass der Timer aktiviert ist und das Gerät automatisch abschaltet wenn die eingestellte Zeit abgelaufen ist. Einstellung der Ausschaltverzögerung durch das Handrad in der Reihenfolge: Tage:Stunden:Minuten. Timer Taste (3) Select Display Taste (4) Handrad (5) Load LED (6) Drehzahlregler (7) Power LED(8) Power ein/aus Taste (9) Drücken Sie diesen Knopf kurz um von einer Anzeigeoption zur nächsten zu gelangen Drücken Sie diesen Knopf und halten ihn für min. 3 sec. um die relative Drehmomentmessung (Mr) auf Null zu stellen. Drücken und halten Sie diesen Knopf min. 5 sec. um von der relativen Drehmomentmessung zur absoluten Drehmomentmessung (Ma) zurückzugelangen (Das gleiche gilt für die Leistungsabgabe-Messfunktion) Eingabe und Änderung von Einstellungen gibt an, dass das Gerät die eingestellte Drehzahl nicht halten kann aufgrund eines zu hohen Nenndrehmoments an der Motorwelle. Unter solchen Bedingungen reduziert das Gerät die Motordrehzahl, so dass das max. zulässige Nenndrehmoment am Motor nicht überschritten wird. zur manuellen Einstellung der Drehzahl gibt an, dass das Gerät eingeschaltet ist Drücken Sie diesen Knopf zum Ein/Ausschalten des Gerätes. Betriebsanleitung/Instruction Manual R100C/R100CL/R100CT 07/2010 Version 1.07 Page/Seite 12 4.4 Beschreibung der Rückseite des R100 C/R100CL/R100 CT 9-pin SUB-D Anschluss (10) Gewindebohrung (a) für Haltestange (A) Gewindebohrung (a) Ventilator (11) Netzanschluss (12) (Ansicht Rückseite R100C/R100CL/R100CT) 9-pin SUB-D Anschluss (10) Ein/Ausgang für: RS232 Schnittstelle ( Duplex) analoger Eingang für Drehzahleinstellung durch Spannungssignal Eingangsbereich: 0-10V, Arbeitsbereich ist programmierbar. analoger Ausgang für Drehzahl, Drehmoment oder Leistungsüberwachung. Ausgangsbereich: 0-4V , Arbeitsbereich programmierbar. Netzanschluss (12) Achten Sie darauf, dass die Spannung auf dem Typenschild des R100C/R100CT mit der Spannung Ihrer Netzstromversorgung übereinstimmt! An der Rückseite des R100C/ R100CT finden Sie 2 Gewindebohrungen(a) zum Anbringen der Haltestangen (A), einen 9-pin SUB-D Anschluss, das Netzanschlusskabel (12) und Haltestange (A) den Ventilator (11). Betriebsanleitung/Instruction Manual R100C/R100CL/R100CT 07/2010 Version 1.07 Page/Seite 13 4.5 Gerät einschalten Achtung: Achten Sie vor der Verbindung des Gerätes mit dem Stromnetz darauf, dass die Netzspannung mit den Angaben auf dem Typenschild übereinstimmt. Achtung: Achten Sie darauf, dass der Drehzahlregler (7) auf Linksanschlag gedreht ist! Achtung: Das Gerät immer nur mit der ein/aus Taste (9) abstellen. Das Gerät ist nur dann vollständig von der Stromquelle getrennt, wenn Sie den Netzstecker ziehen. Drücken Sie die Power Taste (9) Drehzahl am Drehzahlregler (7) einstellen. Der digitale Wert der eingestellten Motordrehzahl kann in der oberen Zeile der Anzeige (1) abgelesen werden. HINWEIS Die maximal zulässige Motordrehzahl kann im Setup Menü eingestellt/begrenzt werden Das Rührwerk R100C/R100CL/R100CT ist mit soft-start/stop zur Vermeidung von Flüssigkeitsspritzern versehen. Achtung: Sorgen Sie dafür, dass die Flüssigkeit nicht aus dem Behälter geschleudert werden kann. Benutzen Sie ein geeignetes Gefäß, bei dem die Gefäßwände noch genügend über den Flüssigkeitsstand hochragen. Manchmal ist ein geeigneter Deckel als Spritzschutz sinnvoll. Wenn Sie mit Spritzern rechnen müssen, ziehen Sie Schutzkleidung an und tragen Sie eine Schutzbrille. 4.6 Zeitgesteuerter Betrieb des Rührwerks Ein interner Zeitgeber kann durch Drücken der Timer Taste (3) aktiviert werden. Dieser Timer ermöglicht das automatische Abschalten des gesamten Gerätes. Diese Abschaltzeit kann durch Drehen des Handrades (5) in Minuteninkrementen verändert werden. Eine eingestellte Zeit von 10 Minuten bewirkt das Ausschalten des Gerätes nach 10 Minuten. Timer (3) drücken und durch Drehen des Handrades (5) die gewünschte Ausschaltzeit einstellen. (dd:hh:mm , Tage:Stunden:Minuten) minimale Ausschaltzeit: 1 Minute maximale Ausschaltzeit: 99 Tage : 23 Stunden : 59 Minuten Die Timer LED (2) leuchtet auf wenn die Timer-Funktion aktiviert ist. Betriebsanleitung/Instruction Manual R100C/R100CL/R100CT 07/2010 Version 1.07 Page/Seite 14 5 Sicherheitsfunktionen 5.1 Rotorblockade Erkennung Sollte die Drehmomentzunahme über der Zeit einen bestimmten Grenzwert überschreiten, nimmt das Gerät an, dass der Rührflügel (Rotor) blockiert wurde und stellt sofort ab. Die Abschalt-Sensitivität kann im Setup Menü eingestellt werden. ( Parameter: Cut off limit) 5.2 Überlast-Schutz Sollte Drehmoment oder Leistung den erlaubten Bereich überschreiten, verringert das Gerät automatisch die Motordrehzahl bis das Drehmoment bzw. die Abgabeleistung in den zulässigen Bereich zurückkehrt. Tritt dieser Fall ein, leuchtet die rote “Load” LED (6) auf. Hinweis Solange die “Load” LED (6) leuchtet, kann der Motor die eingestellte Solldrehzahl nicht halten. 5.3 Übertemperaturschutz R100C Sollte die Motortemperatur den maximal zulässigen Grenzwert überschreiten, so reduziert das Gerät automatisch die Abgabeleistung durch Reduzieren der Drehzahl ( “Foldback” Charakteristik). Dies schützt das Gerät vor Beschädigung durch ständigen Betrieb unter Überlast. Dieser Überlastzustand wird auch durch die rote “Load“ LED (6) angezeigt. Das Kühlergebläse (11) auf der Rückseite des Gerätes wird bei Bedarf automatisch zugeschaltet. Sollte die Motortemperatur 70°C überschreiten, so schaltet sich das Gerät sofort aus. Dieser Sicherheitskreis arbeitet unabhängig zur Mikroprozessorregelung. Hinweis Zur Wiederinbetriebnahme nach der notwendigen Abkühlung das Gerät erst ausschalten, dann mittels Power ein/aus Taste (9) wieder einschalten 5.4 Übertemperaturschutz R100CT Sollte die Motortemperatur den maximal zulässigen Grenzwert überschreiten, so reduziert das Gerät automatisch die Abgabeleistung durch Reduzieren der Drehzahl ( “Foldback” Charakteristik). Dies schützt das Gerät vor Beschädigung durch ständigen Betrieb unter Überlast. Dieser Überlastzustand wird auch durch die rote “Load“ LED (6) angezeigt. Das Kühlergebläse (11) auf der Rückseite des Gerätes wird bei Bedarf automatisch zugeschaltet. Sollte die Motortemperatur 70°C überschreiten, so schaltet sich das Gerät sofort aus. Dieser Sicherheitskreis arbeitet unabhängig zur Mikroprozessorregelung. Betriebsanleitung/Instruction Manual R100C/R100CL/R100CT 07/2010 Version 1.07 Page/Seite 15 5.5 Übertemperaturschutz R100CL Sollte die Motortemperatur den maximal zulässigen Grenzwert überschreiten, so reduziert das Gerät automatisch die Abgabeleistung durch Reduzieren der Drehzahl ( “Foldback” Charakteristik). Dies schützt das Gerät vor Beschädigung durch ständigen Betrieb unter Überlast. Dieser Überlastzustand wird auch durch die rote “Load“ LED (6) angezeigt. Das Kühlergebläse (11) auf der Rückseite des Gerätes wird bei Bedarf automatisch zugeschaltet. 5.6 I/O Anschluss (9-pin SUB-D) Pinbelegung des 9-pin SUB-D Anschlusses (10) an der Rückseite des Gerätes: RS232 Steuersignale Analoger Eingang (0-10V) zur externen Drehzahlsteuerung Analoger Ausgang (0-4V) zum Aufnehmen der Prozessparameter (Drehzahl, Drehmoment oder Abgabeleistung) Pinausgang des I/O Anschlusses: Pin Nummer Beschreibung 1 + 5V (max. 10mA) 2 TxD (Sendeleitung) RxD (Empfangsleitung) Nicht belegt 3 4 5 7 GND (Signal Masse) analoger Spannungsausgang (0-4V) nicht belegt 8 nicht belegt 9 analoger Spannungseingang (0-10V) 6 1 6 5 9 Pinbelegung der I/O Buchse (Draufsicht - 9 pin Sub-D Buchse) Betriebsanleitung/Instruction Manual R100C/R100CL/R100CT 07/2010 Version 1.07 Page/Seite 16 6 Die RS232 Schnittstelle des R100C/R100CL/R100CT Die RS232 Schnittstelle erlaubt die Fernsteuerung aller Rührfunktionen. In dieser Konfiguration kann ein Computer auf jedes angeschlossene Gerät über eine Adresse (daisy chaining) zugreifen. Diese Adresse ist für jedes einzelne Gerät programmierbar (Setup Menü, slave-address). Zum daisy-chaining, ist die Sendeleitung (TxD) des PC an die Empfangsleitung (RxD) des ersten Gerätes angeschlossen. Die Sendeleitung dieses Gerätes wird dann an die Empfangsleitung des nächsten Gerätes in der Kette angeschlossen. Die Sendeleitung des letzten Gerätes in der Kette wird wieder zur Empfangsleitung des PC zurückgeführt, wodurch die Kette geschlossen wird (Ring). Um ein individuelles Gerät in der Kette zu adressieren, trägt jedes Gerät eine so genannte ´Slave-address´ (Wertebereich 1..... 255). Als Standard ist die Adresse 1 eingestellt. Die slave-address 0 ist als allgemeine Adresse definiert, auf die alle Geräte antworten. Die slave-address kann im Setup-Menu eingestellt/verändert werden. Alle Geräte in einer Kette müssen auf die gleiche Baud-Rate eingestellt sein! Ein Windows Software Paket zur Steuerung eines Gerätes ist optional erhältlich. 1 6 5 9 Pinbelegung der seriellen Schnittstelle (Draufsicht - 9 pin Sub-D Buchse) Parameter der seriellen Schnittstelle (1200-4800,8,N,1): Baudrate: Menü) Databits: Parity: Stopbits: 1200-4800 Baud (1200 Standard, siehe auch: Set-up 8 Bit none 1 Pinausgang des RS232-Anschlusses: Beschreibung Pin Nummer TxD (Sendeleitung) RxD (Empfangsleitung) GND (Masse) 2 3 5 (SUB-D -Buchse) Betriebsanleitung/Instruction Manual R100C/R100CL/R100CT 07/2010 Version 1.07 Page/Seite 17 6.1 RS232 Anschlusskonfiguration zwischen PC und R100C/R100CL/R100CT a) PC mit 9-pin RS232-Stecker b) PC mit einem 25-Pin RS232-Stecker 6.2 Format eines RS232-Befehls Jeder Befehl der an das Gerät geschickt wird muss folgendes Format haben: ADR , CMDCODE , PARAMETERLISTE <CR> Beschreibung: ADR: Slave Adresse des Geräts welche den Befehl ausführen soll CMDCODE: Befehlscode PARAMETERLIST: 1 bis 6 Parameter getrennt durch Kommata CR: Der gesendete Befehl muss durch Carriage/Return (ASCII 13) beendet werden. Betriebsanleitung/Instruction Manual R100C/R100CL/R100CT 07/2010 Version 1.07 Page/Seite 18 6.3 Format des Controller Handshake Nach Empfang eines RS232-Befehls wird das Gerät: 1. den erhaltenen Befehl an das nächste Gerät (oder zurück zum PC) senden (ECHO) 2. mit einem Handshake antworten, welcher wie folgt definiert ist: ADR , "HS", RETCODE , PARAMETERLIST CR Erklärung: ADR: Slave Address des Gerätes, das den Handshake sendet RETCODE: Fehlercode (siehe Tabelle 1 unten) PARAMETERLIST: 1 bis 6 Parameters, jeder Parameter ist durch ein Komma "," getrennt (siehe auch Tabelle 2, Befehl-Codes) CR der Handshake wird wie jeder Befehl mit ASCII-code 13 (CR) beendet Tabelle Return Codes: (Tabelle1) Return Code OK UC PA NA PR PL DF Erklärung Befehl ausgeführt, kein Fehler Unbekannter Befehl Falsche Parameternummer zu viele oder zu wenige spezifische Parameters) Befehl in aktueller Betriebsart nicht erlaubt Mindestens ein Parameter liegt außerhalb des Bereichs Mindestens ein Parameter ist zu lang Unbekanntes Datenformat Parameterliste siehe Tabelle 1 keine keine aktueller Betriebszustand keine keine keine Betriebsanleitung/Instruction Manual R100C/R100CL/R100CT 07/2010 Version 1.07 Page/Seite 19 6.4 RS232 Befehle des R100C/R100CL/R100CT Tabelle 2: CMD. Erklärung CODE Parameterliste Bereich RAC 1. Dummy Parameter um Übertragung einzuleiten 1 Aktuelle Einstellung des R100C/R100CL/ R100CT auslesen WTR Schreiben des Timer RTR Auslesen des Timer WSE RSE RSS -> Controller sendet handshake A) aktuelle Motordrehzahl (rpm) B) aktuelles Drehmoment (relativ) C) aktuelles Drehmoment (absolut) D) aktuelle Leistung (relativ) E) aktuelle Leistung (absolut) A) Zeitwert in [sec] 1. Dummy parameter um Übertragung einzuleiten 0..2592000 1 -> Controller sendet handshake: 0..2592000 A) Zeitwert (Sekunden) 0 = Timer ausgeschaltet Setzen der A) Motordrehzahl in 1/min 0..2000 Motordrehzahl in 1/min 0 Motor halt (Drehzahl=0) wenn programmierte Drehzahl über dem erlaubtem Grenzwert liegt wird der Wert auf die erlaubte Grenze reduziert ( Set-up Menu, max. Motor 1/min) Auslesen des Motor 1. Dummy Parameter um Übertragung 1 Sollwerts (SET) einzuleiten Auslesen des Systemstatus -> Controller sendet handshake: 0..2000 A) Motor Sollwert in rpm 1. Dummy Parameter um Übertragung einzuleiten 1 -> Controller sendet handshake: 1. aktueller Systemstatus Code 1 normaler Betrieb 1 0/1 2. RTY Auslesen der Typeninformation des Gerätes Überlast 0 keine Überlast 1 Motorüberlast 1. Dummy Parameter um Übertragung einzuleiten -> Controller sendet handshake: A) Name des angeschlossenen Gerätes B) Firmenversionsnummer C) ON/OFF Zähler D) Gesamtbetriebszeit in Minuten Betriebsanleitung/Instruction Manual R100C/R100CL/R100CT 07/2010 Version 1.07 1 string string Zahl Zahl Page/Seite 20 CMD. Erklärung CODE Parameterliste WSM Auswahl ob Drehzahlvorgabe über Frontpanel (Drehzahlknopf) oder über RS232 erfolgen soll A) Control Parameter Verriegeln/Freigeben der Tastatur 1. 0 Vorgabe der Drehzahl am Bedienpanel (=Einschaltzustand) 1 Vorgabe der Drehzahl durch RS232Befehle ( über WSE Befehl) öffnen/ schließen 0/1 KEN WSA OFF WEE 6.5 Einstellen der RS232 Slave-Adresse, + umnummerieren der Slaves Gerät ausschalten Set-up Parameter abspeichern Bereich 0/1 0 Frontpanel Tastatur ist deaktiviert (außer On/Off Knopf) 1 Frontpanel Tastatur ist aktiviert 1. Neue Slave-Adresse des Gerätes 1...255 1. Sicherheitsparameter 1. Sicherheitsparameter 1234 4321 Programmierbeispiele Die folgenden Anwendungsbeispiele zeigen wie RS232 Befehle an den Rührmotor geschickt werden und wie die Parameter des Rührgerätes ausgelesen werden können. 6.5.1 Schreiben von Parametern zum Rührmotor Wenn, z.B. die Motordrehzahl auf 500 1/min eingestellt werden soll, sind die folgenden zwei Befehlsfolgen an das Gerät mit Slave-address 1 zu senden: Slave address Befehlscode 1. Parameter hier: 1 um den RS232-Modus zu aktivieren und um die Drehzahlvorgabe über das Bedienpanel zu deaktivieren 1,WSM,1 1,WMS,500 ; 1. Befehl: Deaktivieren der Steuerung über das Bedienpanel und Aktivierung der Steuerung über RS232 ; 2. Befehl: Einstellen der Drehzahl auf 500 1/min Der R100C Controller sendet dann folgende Befehle zum nächsten Gerät (oder zurück an den PC wenn nur ein Gerät angeschlossen ist): 1,WSM,1 1,HS,OK ; Echo des 1. Befehls ; Handshake (Antwort) zum 1. Befehl (=akzeptiert, kein Fehler) 1,WMS,500 1,HS,OK ; Echo des 2. Befehls ; Handshake (Antwort) zum 2. Befehl (=akzeptiert, kein Fehler) Betriebsanleitung/Instruction Manual R100C/R100CL/R100CT 07/2010 Version 1.07 Page/Seite 21 6.5.2 Auslesen von Parametern aus dem Rührmotor Um die tatsächlichen Werte der Drehzahl, des Drehmoments und der Leistungsabgabe auszulesen senden Sie folgenden Befehl zum Gerät mit Slave-Adresse 1. Slave address=1 Befehlscode (RAC = Auslesen der Istwerte) 1. Parameter hier: nur dummy Parameter zur Protokollerfüllung (mindestens ein Parameter muss gesendet werden) 1,RAC,1 ;siehe auch Tabelle 2: RAC-Befehl Das Gerät sendet dann die folgenden zwei Befehlsfolgen an das nächste Gerät (oder zurück an den PC): 1,RAC,1 1,HS,OK, 300.0, 50.0, 56.0, 15.7, 17.59 ;Echo des erhaltenen Befehls ;Handshake (Antwort) mit Rückgabeparametern absolute Leistungsabgabe (Pa) in Watt relative Leistungsabgabe (Pr) in Watt absolutes Drehmoment (Ma) in Ncm relatives Drehmoment (Mr) in Ncm 1. Parameter ist aktuelle Drehzahl in 1/min Return code (s. Tabelle 1), OK = kein Fehler Beschreibt, dass dies ein handshake ist und kein Befehl (handshake Bezeichner) Slave Adresse des Gerätes, das den den handshake sendete HINWEIS: Jede Befehls- oder Handshake-Folge wird mit ASCII-Code 13 (CR) beendet. 6.6 Anschluss von mehr als einem Gerät an den Computer Das leistungsstarke Protokoll der RS232 Schnittstelle lässt auch zu, dass andere CAT Laborgeräte wie z.B. Magnetrührer (M26, MCS66), Mikrodosierpumpen (HPLH Serie), Dispenser (Liquid Processor) an nur eine RS232 Schnittstelle auf Computerseite angeschlossen werden können. Durch Zuweisung unterschiedlicher Slave-Adressen der angeschlossenen Geräte hat der Computer individuellen Zugriff. Für den Anschluss von mehr als einem Gerät an den Computer wird ein spezielles Y-Kabel für jedes zusätzliche Gerät benutzt. (RS232 -Y- Kabel, Art. Nr.: 60709-00). Zur Anwendungsanpassung ist ein Windows Programm optional erhältlich. Betriebsanleitung/Instruction Manual R100C/R100CL/R100CT 07/2010 Version 1.07 Page/Seite 22 Anwendungsbeispiel: Betriebsanleitung/Instruction Manual R100C/R100CL/R100CT 07/2010 Version 1.07 Page/Seite 23 7 Das Setup Menü Generelle Einstellungen werden in einem nichtflüchtigen Speicher (EEPROM) gesichert. Zur Änderung der Einstellung drücken und halten Sie die ´Select Display´ Taste (4), während das Gerät mit der Power On/Off Taste (9) eingeschaltet wird. Die folgenden Einstellungen können im Setup Menü des R100C/R100CL/R100CT justiert werden: RS232 Address Baudrate Max MotorRpm Max torque CutOff limit Definiert die Adresse unter welcher der Rührer über die RS232 angesprochen werden kann. Werkseinstellung: 1 Bereich: 1-255 Baudrate der RS232 Schnittstelle Werkseinstellung: 1200 Baud Optionen: 1200, 2400, 4800 Baud Benutzer wählbare max. Motordrehzahl in 1/min Werkseinstellung R100C: 2000 rpm Bereich: 40-2000 rpm Werkseinstellung R100CL: 1100 rpm Bereich: 30-1100 rpm Werkseinstellung R100CT: 500 rpm Bereich: 10-500 rpm Maximales Drehmoment am Schaft in Ncm Werkseinstellung R100C: 100 Ncm Bereich: 10-150Ncm Werkseinstellung R100CL: 250 Ncm Bereich: 10-250Ncm Werkseinstellung R100CT: 600 Ncm Bereich: 10-600Ncm Abschaltbegrenzungssensibilität in Prozent ( Rotorblockade-Erkennung) Überschreitet der Drehmomentanstieg über die Zeit eine bestimmte Grenze, nimmt das Gerät an, dass der Rotor plötzlich blockiert wurde und schaltet sofort ab. Werkseinstellung: 50% Bereich: 10-100% (100% deaktiviert diesen Sicherheitstest) Analog input HINWEIS Je niederer der eingegebene Wert desto sensibler reagiert das Gerät auf plötzliche Drehmomenterhöhungen. Zulassen oder Sperren der Drehzahleinstellung durch externe analoge Volt-Steuerung. Werkseinstellung: deaktiviert Mögliche Optionen: aktiviert/deaktiviert Betriebsanleitung/Instruction Manual R100C/R100CL/R100CT 07/2010 Version 1.07 Page/Seite 24 An Inp. F=0 An Inp. F=1 An. Output An. Out U=0V An. Out U=4V 7.1 Definiert die Steuerungsspannung ( analoger Eingang) bei welcher der Motor gestoppt werden soll (Drehzahl=0). Die Spannung am analogen Eingang wirkt als Multiplikationsfaktor auf die frontseitig eingestellte Drehzahl ( Drehzahleinstellknopf). Dieser Wert gibt die Eingangsspannung wieder, bei der der Multiplikationsfaktor Null ist. Diese Einstellung ist nur relevant wenn der analoge Eingang aktiviert ist (s.o.). Werkseinstellung: 0.0 V Bereich: -20.0 - 30.0 V Dieser Wert reflektiert die Eingangsspannung bei der der Drehzahlmultiplikationsfaktor 1.0 ist. Diese Einstellung ist nur relevant wenn der analoge Eingang aktiviert ist. Werkseinstellung: 5.0 V Bereich: -20.0 - 30.0 V Wählt aus welche Funktion/Wert auf dem analogen Ausgangsstecker überwacht werden soll. Werkseinstellung: DISABLED (Deaktiviert) Erhältliche Optionen: Torque-R (relatives Drehmoment) Torque-A (absolutes Drehmoment) Power-R (relative Leistung) Power-A (absolute Leistung) DISABLED (Ausgang deaktiviert, 0V ouput) Dieser Wert definiert den Vorgangswert (Drehzahl, Drehmoment oder Leistung) der zu einem Spannungsausgang von 0.0V am analogen Spannungsausgangsstecker (pin No. 6) gehört. Dieser Wert gibt an welcher Vorgangswert (Drehzahl Drehmoment oder Leistung) zur Ausgangspannung von 4.0V am analogen Spannungsausgangsstecker (pin No. 6) gehört. Beispiel: Änderung der Setup Einstellungen Beispiele für die notwendigen Schritte um die maximal zulässige Motordrehzahl im Setup Menü einzustellen/definieren: Drücken und halten Sie die ´Select Display´ Taste (4), während der R100C eingeschaltet wird. Das Gerät initialisiert und schaltet dann in das Setup Menü. Hinweis: Die ´Select Display´ Taste (4) muss gedrückt gehalten werden bis das Setup Menü auf dem Display (1) erscheint. Drehen Sie das Handrad (5) bis ´Max MotorRpm´ auf dem Display (1) erscheint Drücken Sie die Timer Taste (3) um die max. Motordrehzahl zu ändern( Edit Pfeil erscheint). Drehen Sie das Handrad (5) um den Wert einzustellen. Drücken Sie die ´Select Display´ Taste (4) um das Setup Menü zu verlassen. Drücken Sie die ´Select Display´ Taste (4) noch einmal wenn das Gerät um die Bestätigung der Speicherung der Setup Parameter bittet. Betriebsanleitung/Instruction Manual R100C/R100CL/R100CT 07/2010 Version 1.07 Page/Seite 25 LCD-Anzeige (1) Timer LED (2) Timer Taste (3) Display select Taste (4) Load LED (6) Hand rad (5) Drehzahlregler (7) Power LED (8) Power ein/aus Taste (9) (Sicht auf das R100C/R100CL/R100CT-Bedienfeld) HINWEIS: Die verschiedenen Optionen /Parameters im Setup Menü können einfach durch Drehen des Handrads (5) angezeigt /ausgewählt werden. Um einen angezeigten Wert zu ändern, drücken Sie die Timer-Taste (3) und ein Editierpfeil () erscheint vor dem zu ändernden Parameter. Solange der Editierpfeil auf dem Display (1) erscheint wird durch Drehen des Handrads (5) der angezeigte Wert verändert. Wird das Handrad (5) ca. 3 Sekunden nicht berührt, verschwindet der Editierpfeil und eine andere Menüoption kann durch Drehen des Handrads (5) ausgewählt werden. Beim Editieren des Setup Parameter, wird die ´Select Display´ Taste (4) zum Verlassen des Setup Menüs benutzt , oder um eine Auswahl zu bestätigen. Die ´Timer´ Taste (3) wird benutzt, um einen angezeigten Wert zu editieren/ändern. Das Setup-Menü kann nur durch Drücken der Power On/Off Taste (9) oder der ´Select Display´ Taste (4) verlassen werden! Drücken der Power On/Off Taste (9) innerhalb des Setup Menüs verhindert, dass das Gerät eventuell geänderte Einstellungen im nichtflüchtigen Speicher sichert. Nach Drücken der ´Select Display´ Taste (4) fragt das Gerät, ob die Einstellungen im nichtflüchtigen Speicher gesichert werden sollen. Um dies zu bestätigen, drücken Sie ´Select Display´ Taste (4) nochmals. Sollen die Parameter nicht gespeichert werden, drehen Sie das Handrad (5) bis „NO“ angezeigt wird und drücken erst dann die ´Select Display´ Taste (4). Betriebsanleitung/Instruction Manual R100C/R100CL/R100CT 07/2010 Version 1.07 Page/Seite 26 8 Fehlermeldungen Der R100C/R100CL/R100CT Rührmotor besitzt ein internes Selbstdiagnosesystem. Dieses System ermöglicht dem Gerät Fehler selbst zu erkennen. Tritt ein Fehler auf, so schaltet sich das Gerät selbst aus. Der letzte Fehler bzw. Abschaltgrund wird nächsten Wiedereinschalten des Gerätes für ca. 3 Sekunden im Display angezeigt. Fehlermeldung: Abschaltgrund: Time-out der programmierbare Abschalt-Timer ist abgelaufen (Timer Taste) rotor stuck Eine zu schnelle Erhöhung des Rotordrehmoments wurde festgestellt (siehe auch: Setup Menü) Overtemp. Motortemperatur zu hoch RS232 Off Das Gerät wurde durch einen RS232 Befehl ausgeschaltet Sensor Err. Temperaturfühler oder Schaltkreis defekt. 9 Reinigung und Wartung Das Gehäuse des Gerätes besteht aus lackiertem bzw. eloxiertem Aluminium. Das Bedienfeld ist chemisch sehr beständig und spritzwassergeschützt. Verwenden sie zur Reinigung ein feuchtes Tuch und eine milde Seifenlauge. Verwenden Sie auf keinen Fall Stahlwolle oder aggressive Reinigungsmittel um das Gerät zu reinigen Die Oberfläche des Gerätes kann dadurch beschädigt werden. Versuchen Sie auf keinen Fall das Gerät bei Fehlfunktion zu reparieren. Es gibt keine Komponenten innerhalb des Gerätes welche durch den Benutzer gewartet werden müssen. Die Gewährleistung erlischt bei jedem Versuch das Gerät zu öffnen oder gar zu reparieren. Betriebsanleitung/Instruction Manual R100C/R100CL/R100CT 07/2010 Version 1.07 Page/Seite 27 10 Abbau Transport und Lagerung 10.1 Abbau Schalten Sie das Gerät ab und ziehen Sie den Netzstecker aus der Steckdose. Damit Sie das Gerät problemlos abbauen können, entfernen Sie bitte Kolben, Behälter oder andere Gerätschaften um das Rührwerk. Spannfutter (F) Spannfutterschlüssel (B) Rührwerkzeug (G) Nehmen Sie zuerst das Rührwerkzeug (G) aus dem Gerät. Hierzu lösen Sie das Spannfutter (F) mit Hilfe des Spannfutterschlüssels (B). Lockern Sie dann die Spezialhalteklammer (C) und entfernen das Gerät aus dieser. Jetzt können Sie die Haltestangen (A) entfernen. 10.2 Transport und Lagerung Verwenden Sie zum Verpacken des Gerätes, wenn möglich, die Original-Verpackung. Schützen Sie jedes einzelne Modul mit Luftpolsterfolie gegen Stöße von außen. Wenn Sie die einzeln verpackten Module in einen Karton geben, achten Sie auf ausreichende Zwischenräume, welche abschließend mit Dämmmaterial ausgefüllt werden sollten. Sollten Sie die Original-Verpackung nicht verwenden, kennzeichnen Sie das Paket von außen mit folgenden Hinweisen: - Glassymbol (Vorsicht, zerbrechlich) - Regenschirm (Vor Nässe schützen) - Verpackungsinhalt (Angabe über den Inhalt) Für eine sachgemäße Lagerung, beachten Sie bitte die folgenden Hinweise. 1. 2. 3. Für die Lagerung des Gerätes separieren Sie die einzelnen Module voneinander. Verpacken Sie jedes Modul in eine separate, luftdichte Plastiktasche. Stellen Sie folgende Umgebungsbedingungen sicher: Max. Umgebungstemperatur: Max. Luftfeuchtigkeit: RT bis +40°C 80% 11 Entsorgung Schadhafte und/oder entsorgte elektrische oder elektronische Geräte müssen an den dafür vorgesehenen Recycling-Stellen abgegeben werden. Auch das Verpackungsmaterial sollte umweltgerecht (Materialtrennung) entsorgt werden. Betriebsanleitung/Instruction Manual R100C/R100CL/R100CT 07/2010 Version 1.07 Page/Seite 28 12 Gewährleistung und Haftungsausschluss Der Hersteller verpflichtet sich dem Käufer gegenüber dieses Produkt entweder durch Reparatur oder nach Wahl des Herstellers durch Austausch jeden Fehler in Material oder Verarbeitung zu beheben, der sich innerhalb von 24 Monaten nach Auslieferung dieses Produktes herausstellt. Für den Fall des Austausches wird die Gewährleistung weiterhin bis zum Ende der 24monatigen Laufzeit ab Kaufdatum laufen. Für allfälligen Kundendienst ist der Händler oder der Hersteller einzuschalten. Diese Gewährleistung wird nicht gewährt, wenn der Defekt oder die Fehlfunktion verursacht wird durch Unfall, Nachlässigkeit, unsachgemäßen Gebrauch, unsachgemäßen Service und andere Gründe, die nicht auf fehlerhafte Materialien oder Verarbeitung zurückzuführen sind. Sämtliche Gewährleistung- und Gewährleistungsansprüche sind beschränkt auf die fachgerechte und sachgemäße Anwendung des Gerätes unter Beachtung der allgemeinen Sicherheitsvorschriften und dieser Betriebsanleitung. Der Hersteller ist zu keinerlei anderen Leistungen als den in dieser Gewährleistungserklärung enthaltenen verpflichtet. Insbesondere sind Personen- und Sachschäden, die als Folge von fehlerhaften Teilen oder sonstigen Funktionsfehlern auftreten, von der Haftung ausgeschlossen. Die Verpflichtung des Herstellers ist im Umfang begrenzt auf die Reparatur oder den Austausch von fehlerhaften Teilen. Der Hersteller ist unter keinen Umständen zu Schadensersatz verpflichtet für Folgeschäden jeder Art, die aus der Verwendung und dem Besitz dieses Produktes sich ergeben können. Achtung: Der Benutzer hat die Aufgabe selbst festzustellen, ob dieses Gerät für seinen speziellen Anwendungsfall geeignet ist. Bei Fragen wenden Sie sich bitte an Ihren Händler, oder direkt an den Hersteller. Betriebsanleitung/Instruction Manual R100C/R100CL/R100CT 07/2010 Version 1.07 Page/Seite 29 13 Technische Daten 13.1 Technische Daten R100C Type: R100C Spezifikationen Netzspannung LCD-Display 110/230V, 300W, 50/60 Hz (siehe Typenschild) hintergrundbeleuchtetes Display, zeigt alle relevanten Systemdaten Gleichzeitige Anzeige der eingestellten und tatsächlichen Werte von Drehzahl, Drehmoment und Leistungsabgabe. schnelle und intuitive Einstellung des Timers und des Systems Programmierbarer switch-off timer, programmierbar von 1 Minute bis 99 Tage. Auflösung: 1 Minute Zeigt tatsächliches Drehmoment am Schaft in Ncm (Anzeige des relativen oder absoluten Wertes möglich) Genauigkeit: 5% Zeigt die tatsächliche Leistungsabgabe am Schaft in Watt. (Anzeige des relativen oder absoluten Wertes möglich) Genauigkeit: 5% Mikroprozessorgesteuert für einfache Bedienung und Genauigkeit Softstart und Softstop logic verhindert Spritzen Präzise Einstellung der Motordrehzahl von 40 bis 2000 1/min max. 220 Watt Leistungsabgabe am Schaft robuster, leistungsstarker Bürstenmotor geräuscharmer Riemenantrieb max. Drehmoment: 150 Ncm (20 min) Dauerdrehmoment (bei 1100 1/min: 100 Ncm max. Drehmomentbegrenzung (programmierbar) erkennt und schützt vor folgenden gefährlichen Situationen: Handrad (5) Timer Funktion Drehmoment Anzeige Anzeige der Leistungsabgabe Motorspezifikationen Multistep Sicherheitssystem Hilfsfunktionen RS232-Schnittstelle Rotorblockade- Erkennung Motorüberhitzung Selbsttest aller Sicherheitsfunktionen nach Einschalten Benutzerprogrammierbare Begrenzungen für: maximal zulässige Motordrehzahl (40-2000 rpm) maximal zulässiges Drehmoment am Schaft (10-150 Ncm) programmierbare Baudrate: 1200,2400,4800; 8,N,1 Vollständiger Zugang zu allen Rührfunktionen (lesen und schreiben) daisy chaining ermöglicht es bis 255 Geräte an nur eine serielle Schnittstelle am Computer anzuschließen. Windows control software optional erhältlich. Betriebsanleitung/Instruction Manual R100C/R100CL/R100CT 07/2010 Version 1.07 Page/Seite 30 Type: R100C Spezifikationen Analoger Spannungseingang zur Überschreibung der eingestellten Drehzahl mit einem externen Spannungssteuerungssignal. Analoger Spannungsausgang zur Dokumentation von Drehzahl, Drehmoment oder Leistungsabgabe. Eingangsbereich: 0-10V Betriebsbereich programmierbar Ermöglicht einfache Drehzahlsteuerung über ein externes Potentiometer Zulässige Umgebungstemperatur Max. relative Feuchtigkeit Sicherheitsklasse gem. DIN EN 60529 Gehäuseabmessungen 5 - 40 °C innerhalb der Umgebung, z.B. Abzug Gewicht 5 Kg Abgabebereich: 0-4V Betriebsbereich von Abgabe und Überwachungsfunktion (Drehzahl, Drehmoment oder Leistungsabgabe) ist programmierbar. 80 % RH IP42 77.5 x 190 x 170 mm (230 mm inklusive Bohrfutter) 13.2 Technische Daten R100CL Type: R100CL Spezifikationen Netzspannung LCD-Display 110/230V, 300W, 50/60 Hz (siehe Typenschild) hintergrundbeleuchtetes Display, zeigt alle relevanten Systemdaten Gleichzeitige Anzeige der eingestellten und tatsächlichen Werte von Drehzahl, Drehmoment und Leistungsabgabe. schnelle und intuitive Einstellung des Timers und des Systems Programmierbarer switch-off timer, programmierbar von 1 Minute bis 99 Tage. Auflösung: 1 Minute Zeigt tatsächliches Drehmoment am Schaft in Ncm (Anzeige des relativen oder absoluten Wertes möglich) Genauigkeit: 5% Zeigt die tatsächliche Leistungsabgabe am Schaft in Watt. (Anzeige des relativen oder absoluten Wertes möglich) Genauigkeit: 5% Handrad (5) Timer Funktion Drehmoment Anzeige Anzeige der Leistungsabgabe Betriebsanleitung/Instruction Manual R100C/R100CL/R100CT 07/2010 Version 1.07 Page/Seite 31 Type: R100CL Motorspezifikationen Multistep Sicherheitssystem Hilfsfunktionen RS232-Schnittstelle Analoger Spannungseingang zur Überschreibung der eingestellten Drehzahl mit einem externen Spannungssteuerungssignal. Analoger Spannungsausgang zur Dokumentation von Drehzahl, Drehmoment oder Leistungsabgabe. Spezifikationen Mikroprozessorgesteuert für einfache Bedienung und Genauigkeit Softstart und Softstop logic verhindert Spritzen Präzise Einstellung der Motordrehzahl von 40 bis 2000 1/min max. 230 Watt Leistungsabgabe am Schaft robuster, leistungsstarker Bürstenmotor geräuscharmer Riemenantrieb max. Drehmoment: 250 Ncm (20 min) Dauerdrehmoment (bei 700 1/min: 200 Ncm max. Drehmomentbegrenzung (programmierbar) erkennt und schützt vor folgenden gefährlichen Situationen: Rotorblockade- Erkennung Motorüberhitzung Selbsttest aller Sicherheitsfunktionen nach Einschalten Benutzerprogrammierbare Begrenzungen für: maximal zulässige Motordrehzahl (30-1100 rpm) maximal zulässiges Drehmoment am Schaft (250 Ncm) programmierbare Baudrate: 1200,2400,4800; 8,N,1 Vollständiger Zugang zu allen Rührfunktionen (lesen und schreiben) daisy chaining ermöglicht es bis 255 Geräte an nur eine serielle Schnittstelle am Computer anzuschließen. Windows control software optional erhältlich. Eingangsbereich: 0-10V Betriebsbereich programmierbar Ermöglicht einfache Drehzahlsteuerung über ein externes Potentiometer Abgabebereich: 0-4V Betriebsbereich von Abgabe und Überwachungsfunktion (Drehzahl, Drehmoment oder Leistungsabgabe) ist programmierbar. Zulässige Umgebungstemperatur Max. relative Feuchtigkeit Sicherheitsklasse gem. DIN EN 60529 Gehäuseabmessungen 5 - 40 °C innerhalb der Umgebung, z.B. Abzug Gewicht 5 Kg 80 % RH IP42 77.5 x 190 x 170 mm (230 mm inklusive Bohrfutter) Betriebsanleitung/Instruction Manual R100C/R100CL/R100CT 07/2010 Version 1.07 Page/Seite 32 13.3 Technische Daten R100CT Type: R100CT Spezifikationen Netzspannung LCD-Display 110/230V, 300W, 50/60 Hz (siehe Typenschild) hintergrundbeleuchtetes Display, zeigt alle relevanten Systemdaten Gleichzeitige Anzeige der eingestellten und tatsächlichen Werte von Drehzahl, Drehmoment und Leistungsabgabe. schnelle und intuitive Einstellung des Timers und des Systems Programmierbarer switch-off timer, programmierbar von 1 Minute bis 99 Tage. Auflösung: 1 Minute Zeigt tatsächliches Drehmoment am Schaft in Ncm (Anzeige des relativen oder absoluten Wertes möglich) Genauigkeit:10% Zeigt die tatsächliche Leistungsabgabe am Schaft in Watt. (Anzeige des relativen oder absoluten Wertes möglich) Genauigkeit: 10% Mikroprozessorgesteuert für einfache Bedienung und Genauigkeit Softstart und Softstop logic verhindert Spritzen Präzise Einstellung der Motordrehzahl von 10 bis 500 1/min max. 220 Watt Leistungsabgabe am Schaft robuster, leistungsstarker Bürstenmotor geräuscharmer Riemenantrieb max. Drehmoment: 600 Ncm (20 min) Dauerdrehmoment (bei 250 1/min: 400 Ncm max. Drehmomentbegrenzung (programmierbar) erkennt und schützt vor folgenden gefährlichen Situationen: Handrad (5) Timer Funktion Drehmoment Anzeige Anzeige der Leistungsabgabe Motorspezifikationen Multistep Sicherheitssystem Hilfsfunktionen RS232-Schnittstelle Rotorblockade- Erkennung Motorüberhitzung Selbsttest aller Sicherheitsfunktionen nach Einschalten Benutzerprogrammierbare Begrenzungen für: maximal zulässige Motordrehzahl (10-500 rpm) maximal zulässiges Drehmoment am Schaft (10-600 Ncm) programmierbare Baudrate: 1200,2400,4800; 8,N,1 Vollständiger Zugang zu allen Rührfunktionen (lesen und schreiben) daisy chaining ermöglicht es bis 255 Geräte an nur eine serielle Schnittstelle am Computer anzuschließen. Windows control software optional erhältlich. Betriebsanleitung/Instruction Manual R100C/R100CL/R100CT 07/2010 Version 1.07 Page/Seite 33 Type: R100CT Spezifikationen Analoger Spannungseingang zur Überschreibung der eingestellten Drehzahl mit einem externen Spannungssteuerungssignal. Analoger Spannungsausgang zur Dokumentation von Drehzahl, Drehmoment oder Leistungsabgabe. Eingangsbereich: 0-10V Betriebsbereich programmierbar Ermöglicht einfache Drehzahlsteuerung über ein externes Potentiometer Zulässige Umgebungstemperatur Max. relative Feuchtigkeit Sicherheitsklasse gem. DIN EN 60529 Gehäuseabmessungen 5 - 40 °C innerhalb der Umgebung, z.B. Abzug Gewicht 5,5 Kg Abgabebereich: 0-4V Betriebsbereich von Abgabe und Überwachungsfunktion (Drehzahl, Drehmoment oder Leistungsabgabe) ist programmierbar. 80 % RH IP42 77.5 x 195 x 195 mm (250 mm inklusive Bohrfutter) 14 Reparaturen Bitte sorgen Sie bei der Anlieferung von Reparaturgeräten, die mit gefährlichen Arbeitsstoffen in Berührung gekommen sind dafür: -Möglichst genaue Stoffangabe des Mediums -Schutzmaßnahmen zum sicheren Umgang für unser Annahme- und Wartungspersonal -Kennzeichnung der Verpackung gemäß der Gefahrenstoffverordnung Betriebsanleitung/Instruction Manual R100C/R100CL/R100CT 07/2010 Version 1.07 Page/Seite 34 14.1 Rücksendeformular Wichtig: 1. Kalibrieren des Instruments wird automatisch durchgeführt. 2. Sie erhalten einen Kostenvoranschlag für die zu erwartenden Reparaturkosten. 3. Reparaturen werden bei Freigabe durchgeführt. KONTAKT Ansprechpartner: Fax Nr. Tel. Email: Rechnungsanschrift: Firma Adresse Lieferanschrift: Firma Adresse GERÄTEINFORMATION Modell Problem-/Fehlerbeschreibung Serien- Nr. Betriebsbedingungen (bitte ausfüllen, wenn zutreffend) Umgebungstemp. Rel. Feuchtigkeit Zuladegewicht Volumen Temperatur in °C Probentemperatur Probenbeschreibung* Drehzahl Viskosität Laufzeit *HINWEIS: Sollte das Gerät mit gefährlichen Stoffen in Berührung gekommen sein, muss es vor dem Versand an CAT dekontaminiert werden. Fügen Sie der Rücklieferung die entsprechenden Sicherheitsdatenblätter bei. RÜCKSENDUNG UPS Paketpost Andere** **Bitte nennen Sie uns Ihren Spediteur, Anschrift, Sachbearbeiter/in sowie dessen/deren Telefonnummer VERPACKUNGSHINWEISE Bitte entfernen Sie sämtliches Zubehör. (Z.B. Dispergierwerkzeuge, Rührpaddel, etc.) Reinigen Sie das Gerät und Zubehör von Probematerial-Rückständen Legen Sie dem Gerät die entsprechenden Sicherheitsdatenblätter für eventuell benutzte gefährliche Stoffe bei. Verpacken Sie das Gerät in die Originalverpackung. Sollte diese nicht mehr vorhanden sein, achten Sie darauf, dass das Gerät sowie Zubehör ausreichend geschützt verpackt wird. Plattenstativ und Halteklammer bitte nicht einschicken. Diese senden Sie nur zurück, wenn sie beschädigt sind. Um Transportschäden zu vermeiden, achten Sie bitte darauf, dass Gerät und Zubehör individuell verpackt werden. Verpacken Sie das Gerät mit dem Zubehör in einen ausreichend starken Versandkarton. Kennzeichnen Sie dessen Außenseite mit Beispiel: “Vorsicht” oder “Vorsicht-zerbrechlich” und schicken Sie die Waren an: Ingenieurbüro CAT, M. Zipperer GmbH, Service Department, Etzenbach 16, D-79219 Staufen Betriebsanleitung/Instruction Manual R100C/R100CL/R100CT 07/2010 Version 1.07 Page/Seite 35 Etzenbach 16,D-79219 Staufen Tel.: +49 (0) 7636 78030 Fax: +49 (0) 7636 780345 E-Mail: [email protected] Internet: http://www.cat-ing.de 15 Konformität Konformitätserklärung Declaration of conformity Déclaration de conformité Wir erklären in alleiniger Verantwortung, dass dieses Produkt (siehe Tabelle) den Bestimmungen der Richtlinien entspricht und mit den folgenden Normen oder normativen Dokumenten übereinstimmt: 2006/95/EG DIN EN 61010-1; VDE 0411-1:2002-08;Berichtigung 1; VDE 0411-1 Berichtigung 1:2002-11; Berichtigung 2; VDE 0411-1 Berichtigung 2:2004-01 DIN EN 61010-2-051; VDE 0411-2-051:2004-07 2004/108/EG DIN EN 61326-1; VDE 0843-20-1:2006-10 DIN EN 61000-6-2; VDE 0839-6-2:2006-03 DIN EN 61000-6-4; VDE 0839-6-4:2007-09 DIN EN 61000-4-2; VDE 0847-4-2:2009-12 DIN EN 61000-4-3; VDE 0847-4-3:2008-06 DIN EN 61000-4-4; VDE 0847-4-4:2005-07 DIN EN 61000-4-5; VDE 0847-4-5:2007-06 DIN EN 61000-4-6; VDE 0847-4-6:2009-12 DIN EN 55011; VDE 0875-11:2010-05 DIN EN 55014-1; VDE 0875-14-1:2010-02 DIN EN 55014-2; VDE 0875-14-2:2009-06 2006/42/EG DIN EN ISO 12100-1:2004-04 DIN EN ISO 12100-2:2004-04 Bei einer nicht mit uns abgestimmten Änderung des Gerätes verliert diese Erklärung ihre Gültigkeit und die Gewährleistung erlischt. Ingenieurbüro CAT M. Zipperer GmbH 1Ellen Gebel CE-Dokumentenbeauftragte 79219 Staufen, den 12. Juli 2010 Type R100C, R100CL, R100CT 230V + 10% 50/60Hz, 300W 1 Text wurde maschinell erstellt und ist auch ohne Unterschrift gültig. Betriebsanleitung/Instruction Manual R100C/R100CL/R100CT 07/2010 Version 1.07 Page/Seite 36 16 Appendix A 16.1 Anzeige der Systeminformation: Zur zusätzlichen Benutzerinformation zählt der R100C/R100CL/R100CT Gesamtbedienzeit und die Häufigkeit der Ein/Aus Schaltungen. die Drücken und halten Sie die Timer Taste (3) während des Einschaltens des R100C/R100CL/R100CT. Das Gerät initialisiert und zeigt dann das System Info screen. Drücken Sie eine beliebige Taste um die nächste Information zu sehen. Die System Info wird auf dem Display (1) angezeigt und beinhaltet folgende Information: 1. Gesamtbetriebszeit des Gerätes (Tage: Stunden:Minuten) 2. Häufigkeit der Einschaltungen des R100C/R100CL/R100CT Betriebsanleitung/Instruction Manual R100C/R100CL/R100CT 07/2010 Version 1.07 Page/Seite 37 Instruction Manual Stirring motor R100C, R100CL and R100CT R100C, R100CL and R100CT - microprocessor controlled overhead stirrers high power output back-lit alphanumeric LC-Display Torque and power readout Simultaneous display of speed and torque Fuzzylogic control Soft motor start/stop adjustable safety cut-off function programmable max. motor speed programmable min. motor speed programmable torque limitation switch off Timer (1 min - 99 days) Overtemperature protection RS232 interface for computer control analogue output for recorder Betriebsanleitung/Instruction Manual R100C/R100CL/R100CT 07/2010 Version 1.07 Page/Seite 38 1 General Information The CAT overhead stirrer R100C/R100CL/R100CT is designed in accordance with Safety Class 1, and built and tested in accordance with DIN EN 61010. According to these regulations, the unit is designed to meet the requirements for safe and correct operations. To maintain the proper safety and operational functions of the instrument, the user should follow the instructions and safety guidelines in this manual. 1.1 Unpacking the instrument Unpack the instrument carefully and check to see that it is not damaged. It is important that any damage incurred in transport be recognized at the time of unpacking. Notify your carrier or forwarding agent immediately in case of such damage. 1.2 Scope of Delivery Please check that the package contains the following: 1 Overhead Stirrer R100C 1 Overhead Stirrer R100CT 1 Overhead Stirrer R100CL 2 Support Rods 1 Instruction Manual Part No. 60218-00 or Part No. 60314-00 or Part No. 60315-00 Part No. 10402-64 Accessories and stirring tools (optional): Special Clamp to fix the unit to a stand Part No. 60495-00 Stirring shaft protector to Part No. 20 be fixed to the stand U-Stand Part No. 60494-00 Please see price list for further accessories such as suitable stirring paddles Important Note: After reading and understanding the instruction manual you may now start operating the unit. Important Note: Read this instruction manual carefully before operating the instrument. Should there be any additional questions, after reading these instructions, concerning the set-up, operation or warranty, please contact either your distributor, or the manufacturer at the following address Ingenieurbüro CAT M. Zipperer GmbH Etzenbach 16 D-79219 Staufen +49-7636-7803-0 Betriebsanleitung/Instruction Manual R100C/R100CL/R100CT 07/2010 Version 1.07 Page/Seite 39 Important Note: Please store the instruction manual in a place easily accessible to every user. A EURO AC plug (DIN 49441 CEE 7/VII10/ 16 A 250 V) is standard on all instruments. For North America instruments feature standard US plugs (NEMA Pub.No.WDI1961 ASA C 73.1. 1961 page 8 15A 125V). When operating the instruments in countries with different AC plug systems use an approved adapter or have a qualified electrician replace the AC plug with an approved model suitable fort the country of operation. The instrument is earthed as supplied. When replacing the original AC plug, ensure that the earth conductor is connected to the new plug! 2 Safety Information 2.1 Explanation of the safety information in the instruction manual This symbol emphasizes the following notices, which have to be strictly observed by the user! Disregarding of warnings may result in impairment of serviceability as well as impairment of the user. This symbol emphasizes prohibitions, which have to be strictly observed. Any disregard of the prohibitions may result in severe impairment of serviceability as well as severe impairment of the user. This symbol emphasizes notices, which have to be observed by the user to assure a safe operation of the unit. CAUTION: Hazard of fire or explosion! Advise for repair / maintenance Advise for connection to the mains Betriebsanleitung/Instruction Manual R100C/R100CL/R100CT 07/2010 Version 1.07 Page/Seite 40 2.2 Explanation of the safety information on the device CAUTION: This symbol indicates to read the instruction manual carefully prior to operation of the instrument. Please mark points which require special attention in your field of application so they are not overlooked. Disregarding of warnings may result in impairment of serviceability as well as impairment of the user. 2.3 General Safety Information Attention: Please comply with all safety and accident-prevention regulations applicable to laboratory work. Attention: Use great caution when working in the vicinity of highly flammable or explosive substances. The instrument is not explosion-proof. Attention: Only instructed users may operate the instrument. Attention: When connecting the instrument to an AC power outlet, ensure that your local supply voltage matches that indicated on the instrument’s rating plate. Turn the power switch off when not using the instrument and before disconnecting it from its AC power outlet. Important Note: Make sure that all safety information of the instrument respectively on the device itself are clearly visible during operation Attention: Do not open the instrument. Repairs are only to be carried out by trained service technicians. Always connect the instrument to an earthed AC power outlet. Ensure that the unit is firmly attached to a stand. Betriebsanleitung/Instruction Manual R100C/R100CL/R100CT 07/2010 Version 1.07 Page/Seite 41 3 Set-up 3.1 Mounting of Support Rods Chuck key (B) Screw the two support rods (A) into the threaded holes at the back of the overhead stirrer. Support rods (A) 3.2 Use the chuck (B) to firmly tighten them. Attach the Overhead Stirrer to a Stand special clamp (C) Rod stand (D) Mount the special clamp to the rod (C) of the stand (D). Insert the support rods (A) of the over head stirrer into the openings of the special clamp (C) and turn the knurled screws (E) until the drive unit is firmly attached to the stand. knurled screw (E) 3.3 Attachment of Stirring Paddle Insert the stirring paddle (G) into the chuck (F) (as shown in the picture) and firmly tighten it in the desired position. Use the chuck key (B) to do so. The immersion depths of the stirring tool may be adjusted by loosening the chuck (F) and axially moving the stirring tool. chuck (F) Stirring paddle (G) Betriebsanleitung/Instruction Manual R100C/R100CL/R100CT 07/2010 Version 1.07 Page/Seite 42 3.4 Assembling the Shaft Protector Fastening Rod for Stirring Shaft Protector (H) Use a stirring shaft protector to provide protection against injury when working with the unit. Screws (J) Bores (K) Screw (L) Attach the fastening rod (H) of the shaft protector (M) in front of the chuck to the stand; e.g. use cross over clamp part no. 60492-00) to fix the stirring shaft protector. Now bring the pockets (K) to the screws (J) and turn the stirring shaft protector to the left to the limit stop. The screw (L) is used to adjust the length of the stirring shaft protector. Shaft Protector (M) Check that the stirring shaft protector is held in position securely prior to each use and also at regular intervals. The position of the stirring shaft protector must only be adjusted when the unit is stationary and the power supply is disconnected. 4 Set-up and Operation 4.1 Intended Use The R100C/R100CL/R100CT is designed for use in chemical and biological laboratories of industrial enterprises, universities and pharmacies. It is suitable for stirring and mixing of liquids from medium to high viscosity. For correct use the device must be fixed to an appropriate stand. To ensure maximum service life, observe the specified ambient conditions (temperature and humidity) and ensure that the instrument is not exposed to a corrosive atmosphere. Betriebsanleitung/Instruction Manual R100C/R100CL/R100CT 07/2010 Version 1.07 Page/Seite 43 4.2 The Front Panel Controls The innovative key-pad makes data entry easy and incorporates a 2-line alpha-numeric LCD-display (1) which shows all relevant data. The entry and changing of timer or setup settings is made via the encoder wheel (5), the motor speed is set with the right speed control knob (7). LCD-Display (1) Timer LED (2) Timer button (3) Display select button (4) Load LED (6) Incremental encoder wheel (5) Speed control knob (7) Power LED (8) Power on/off button (9) (view on the R100C/R100CL/R100CT front panel) Betriebsanleitung/Instruction Manual R100C/R100CL/R100CT 07/2010 Version 1.07 Page/Seite 44 4.3 Description of the front panel functions LCD display (1) The LCD display shows all relevant system data indicates that timer is active and unit will be automatically switched off when timer is expired If required, pressing this key initiates the timer function which Timer button (3) will shut down the R100C/R100CL/R100CT. To change the timer setting use the left encoder wheel. The timer is calibrated to show - days : hours : minutes. Select Display button (4) Press this key once shortly to step from one display option to the next. Press and hold this key for 3 seconds to zero the relative torque measurement (Mr). Press and hold this key for at least 5 seconds to switch back from relative torque measurement (Mr) to absolute torque measurement (Ma). (The same applies also to the Power output measurement function) Encoder Wheel (5) entry and change of timer or setup settings Indicates when the unit is not able to hold set motor speed Load LED(6) due to too high torque taken from motor shaft. Under this condition the unit will reduce the real motor speed so that the maximum allowed motor torque is not exceeded. Speed control knob (7) setting the speed manually indicates that unit is powered up Power LED(8) Power on/off button (9) Press this key to turn the unit on or off. Timer LED (2) Betriebsanleitung/Instruction Manual R100C/R100CL/R100CT 07/2010 Version 1.07 Page/Seite 45 4.4 Description of the rear panel on the R100C/R100CL/R100CT Support Rod (A) 9-pole SUB-D connector (10) Thread (a) Thread (a) Fan (11) Mains input (12) (rear view of the R100C/R100CL/R100CT) 9-pole SUB-D connector In/Output for: RS232 interface (full duplex) analogue input for speed setting via voltage signal input range: 0-10V, operation range programmable mains power supply analogue output for speed, torque or power monitoring. output range: 0-4V, operation range programmable make sure that the voltage printed on corresponds to the voltage from your mains ! the R100C On the rear panel of the R100C/R100CL/R100CT you will find 2 threads (a) to attach the support rods (A), a 9-pin SUB-D connector (10), a fan and the mains power supply cable (12). support rod (A) Betriebsanleitung/Instruction Manual R100C/R100CL/R100CT 07/2010 Version 1.07 Page/Seite 46 4.5 Stirring operation CAUTION! The units are not to be used in environments with danger of explosion. CAUTION! The unit is not to be used without supervision. CAUTION! When connecting the instrument to an AC power outlet, ensure that your local supply voltage matches that indicated on the instrument’s rating plate. Press the power on/off button (9) set the desired motor speed using the speed setting knob (7). The digital value of the set motor speed can be read out in the top line of the display (1) The maximum allowed motor speed can be adjusted / limited in the setup menu The R100C/R100CL/R100CT has a soft start feature which helps to prevent the liquid from splashing. Attention: Avoid splashing of liquids by using a suitable vessel, lower liquid level. Make sure that suitable protective clothing and eye-wear is used. This instruction sheet does not purport to address all of the safety problems which might result from the use of this instrument, chemicals, reagents, apparatus or equipment employed in any specific test or protocols. It is the responsibility of the user to consult their authorised safety advisors and establish appropriate health and safety practices and then determine the application of regulatory limitations prior to use. 4.6 Timer controlled operation The Timer function can be activated by pressing the Timer key (3). The Edit arrow appears in the display (1) and the time can be changed in increments of one minute by turning the encoder wheel (5). If the time is set to zero, the timer function is disabled. If, for example, a time of ten minutes is selected (00:10:00), the unit will shut down after ten minutes. The readout of the timer is in: days : hours : minutes press Timer (3) and then turn the encoder wheel (5) to set the desired shut down time. The Timer LED signals if the timer is running Betriebsanleitung/Instruction Manual R100C/R100CL/R100CT 07/2010 Version 1.07 Page/Seite 47 5 Safety Functions 5.1 Rotor stuck detection If the torque increase versus time exceeds a certain limit the unit will assume that the rotor was suddenly blocked and will switch off immediately. Cut-off limit sensitivity can be adjusted in the Set-up menu ( Cut off limit) 5.2 Overload protection If the torque or power drawn from the stirring motor exceeds the allowed range, the unit will automatically reduce the motor speed until the torque is reduced to the allowed range. If this happens the LED Load (6) is switched on. As long as the Load LED (6) is on, the motor is not able to hold the set motor speed. 5.3 Overtemperature protection R100C If the temperature inside the unit exceeds the maximum operating temperature, the unit will automatically reduce power output (speed and torque) in order to get back to a safe operating point ( = fold back characteristic). This prevents the unit to be destroyed by constant overload operation. This overload condition is also signalled by the red ´Load´ LED (6). Furthermore a cooling fan (11) on the rear side of the instrument is automatically switched on if required. If the temperature inside the R100C exceeds 70°C by any means, the unit will shut down immediately. This safety feature is fully "redundant". The unit either shuts down if the microprocessor measures a temperature higher than 70°C, or if the thermo-switch (inside the R100C) detects a temperature higher than 70°C. Important Note: Before re-starting the unit after cooling down, switch it off and then on again by using the on/off button. 5.4 Overtemperature protection R100CL If the temperature inside the unit exceeds the maximum operating temperature, the unit will automatically reduce power output (speed and torque) in order to get back to a safe operating point ( = fold back characteristic). This prevents the unit to be destroyed by constant overload operation. This overload condition is also signalled by the red ´Load´ LED (6). Furthermore a cooling fan (11) on the rear side of the instrument is automatically switched on if required. Betriebsanleitung/Instruction Manual R100C/R100CL/R100CT 07/2010 Version 1.07 Page/Seite 48 5.5 Overtemperature protection R100CT If the temperature inside the unit exceeds the maximum operating temperature, the unit will automatically reduce power output (speed and torque) in order to get back to a safe operating point ( = fold back characteristic). This prevents the unit to be destroyed by constant overload operation. This overload condition is also signalled by the red ´Load´ LED (6). Furthermore a cooling fan (11) on the rear side of the instrument is automatically switched on if required. If the temperature inside the R100CT exceeds 70°C by any means, the unit will shut down immediately. This safety feature is fully "redundant". 5.6 I/O Connector (9-pin SUB-D) Pinout of the I/O connector The following signals are led out on the 9-pin SUB-D connector on the rear side of the instrument: RS232 control signals Analogue input (0-10V) for speed override. Analogue output (0-4V) for recording of process parameters (speed, torque, power) Pin Number Description 1 + 5V (max. 10mA) 2 TxD (RS232 transmit data) RxD (RS232 receive data) n.c. 3 4 5 7 GND (signal ground) analogue output (0-4V) n.c. 8 n.c. 9 analogue output (0-10V) 6 1 5 6 9 socket of the I/O connector (view on socket - 9 pin Sub-D socket) Betriebsanleitung/Instruction Manual R100C/R100CL/R100CT 07/2010 Version 1.07 Page/Seite 49 6 The RS232 interface of the R100C/R100CL/R100CT The RS232 interface enables remote control of all stirrer functions. In this configuration a computer can access each connected unit via a sub address (daisy chaining). This address is programmable for every unit (Setup menu, slave-address). For daisy-chaining, the transmit line (TxD) of the PC is connected to the receive line (RxD) of the first unit. The transmit line of this unit is then connected to the receive line of the next unit in the chain. The transmit line of the last unit in the chain is returned to the receive line of the PC, which closes the link (ring). For addressing a specific unit in a daisy-chain, each controller carries a so called ´Slaveaddress´ which can be any number from 1 to 255. The default slave address is 1. The slave-address 0 is defined as the general call address on which all controllers will respond. The slave-address can be set/changed in the Setup-menu. A Windows© Software package for control of a connected unit is optional available. 1 6 5 9 socket of the serial interface (view on socket - 9 pin Sub-D socket) Parameters of the serial interface (1200-4800,8,N,1): Baudrate: Databits: Parity: Stopbits: 1200-4800 Baud (1200 default, see also: Set-up menu) 8 Bit none 1 Pinout of the RS232 connector: Description pin number TxD (transmit data) RxD (receive data) GND (GROUND) 2 3 5 (female 9 pin SUB-D socket) Betriebsanleitung/Instruction Manual R100C/R100CL/R100CT 07/2010 Version 1.07 Page/Seite 50 6.1 RS232 Connection configuration between PC and the R100C/R100CL/R100CT a) PC with 9-pin RS232-plug b) PC with a 25-pin RS232-plug 6.2 Format of an RS232-Command Each command which is sent to the device must have the format: ADR , CMDCODE , PARAMETERLIST <CR> Description: ADR: Slave Address of the unit to execute the command CMDCODE: Command-code PARAMETERLIST: 1 to 6 parameters separated by commas CR: The command string must be terminated by Carriage/Return (ASCII 13) Betriebsanleitung/Instruction Manual R100C/R100CL/R100CT 07/2010 Version 1.07 Page/Seite 51 6.3 Format of the Controller Handshake After receiving a RS232-command the unit will : 1. Send the received command to the next unit (or back to the PC - daisy chaining) 2. Answer with a handshake string, which is defined as follows: ADR , "HS", RETCODE , PARAMETERLIST CR Explanation: ADR: Slave Address of the unit sending the handshake RETCODE: Errorcode (see table 1 below) PARAMETERLIST: 1 to 6 parameters, each parameter is separated by a comma "," (see also table 2, Command codes) CR the handshake as any command, is terminated by ASCII-code 13 (CR) Table of return codes: (Table1) Return Code OK UC PA NA PR PL DF Explanation command executed, no error unknown command wrong parameter number (too few or too many parameters specified) command is not allowed in actual operation mode at least one parameter is out of range at least one parameter is too long unknown data format Parameterlist see table 1 none none actual operation mode none none none Betriebsanleitung/Instruction Manual R100C/R100CL/R100CT 07/2010 Version 1.07 Page/Seite 52 6.4 RS232 commands of the R100C/R100CL/R100CT Table 2: CMD. CODE Explanation Parameter list Range RAC Read actual settings from the unit 1. Dummy parameter to initiate transfer 1 0..2592000 1 WTR Write Timer -> Controller sends in handshake A) actual motor speed (rpm) B) actual torque (relative) C) actual torque (absolute) D) actual power (relative) E) actual power (absolute) A) Timer value in [sec] RTR Read Timer 1. Dummy parameter to initiate transfer WSE Write Motor (SET) define motor speed setpoint in rmp´s RSE Read motor setpoint (SET) -> Controller sends in handshake: A) Timer value (seconds) 0 = Timer disabled A) Motor speed in rpm´s 0 Motor is switched stopped (speed=0) if selected speed is above allowed limit, value will be reduced to allowed limit ( Set-up menu, Max MotorRpm) 1. Dummy parameter to initiate transfer 0..2592000 0..2000 1 -> Controller sends in handshake: RSS Read system status A) Motor setpoint in rpm 1. Dummy parameter to initiate transfer 0..2000 1 -> Controller sends in handshake: 1. actual systemstatus code 1 normal operation 1 Overload condition 0 no overload condition 1 Motor is under overload operation 1. Dummy parameter to initiate transfer 2. RTY Read Type Information of unit -> Controller sends in handshake: A) name of connected device B) firmware version number C) ON/OFF counts D) total operation time in minutes Betriebsanleitung/Instruction Manual R100C/R100CL/R100CT 07/2010 Version 1.07 0/1 1 string string number number Page/Seite 53 CMD. CODE Explanation Parameter list WSM Keyboard or RS232 speed control (Write serial mode) A) Select if setting for motor speed is accepted from frontpanel (speed control knob) or via RS232 command (WSE) Lock/Unlock frontpanel keyboard KEN WSA Set RS232 slaveaddress, + renumber slaves Switch unit off Save set-up settings to EEPROM OFF WEE 6.5 Range Control parameter 0/1 0 frontpanel control of motor speed 1 RS232 control of motor speed (via WSE command) 1. lock / unlock parameter 0/1 0 frontpanel keyboard is disabled (except On/Off button) 1 frontpanel keyboard is enabled 1. New slave-address of unit 0...255 1. Security parameter 1. Security parameter 1234 4321 Programming examples The following application examples show how RS232 commands can be sent to the stirrer and how actual parameters can be read out from the stirrer. 6.5.1 Writing parameters to the stirrer If, for example the motor speed should be set to 500 rpm´s, the following two command strings have to be sent to the unit with slave-address 1: Slave address Command code 1. parameter here: 1 to enable serial mode and to disable front panel control of motor speed 1,WSM,1 1,WMS,500 ; 1. command: disable front panel control and enable RS232 control ; 2. command: set motor speed to 500 rpm The R100 Controller then sends the following strings to the next unit (or back to the PC if only one device is connected): 1,WSM,1 1,HS,OK ; Echo of the 1. Command ; Handshake (response) to the 1. Command (=accepted, no error) 1,WMS,500 1,HS,OK ; Echo of the 2. command ; Handshake (response) to the 2. Command (=accepted, no error) Betriebsanleitung/Instruction Manual R100C/R100CL/R100CT 07/2010 Version 1.07 Page/Seite 54 6.5.2 Reading parameters from the stirrer To read the actual values of motor speed, torque and power output send the following command to the unit with SlaveAdress 1. Slave address=1 Command code (RAC = Read actual settings) 1. parameter here: only dummy parameter to fulfil protocol (at least one parameter must be sent) 1,RAC,1 ;see also table 2: RAC-command The Controller then sends the following two strings to the next unit (or back to the PC): 1,RAC,1 1,HS,OK, 300.0, 50.0, 56.0, 15.7, 17.59 ;Echo of the received command ;Handshake (response) with return parameters absolute power output (Pa) in Watt relative power output (Pr) in Watt absolute torque (Ma) in Ncm relative torque (Mr) in Ncm 1. parameter is actual motor speed in rpm Return code (see table 1), OK = no error Describes that this is a handshake and not a command (handshake designator) Slave address of the unit which sent the handshake Every command or handshake sequence is terminated by ASCII-Code 13 (CR) 6.6 Connection of more than one unit to a computer The powerful protocol of the RS232 interface allows also for connection of other CAT Laboratory instruments like hotplate stirrers (M26, MCS66), micrometering pumps (HPLH series), dispensers (Liquid Processor) to only one RS232 interface on the computer side. By assigning different slave-addresses to each connected unit the computer can access each unit individually. For connection of more than one unit to a computer a special Y-cable is used for every additional unit (RS232 Y-cable part no.: 60709-00). For application adaptation a Windows program is optionally available. Betriebsanleitung/Instruction Manual R100C/R100CL/R100CT 07/2010 Version 1.07 Page/Seite 55 Application example: Betriebsanleitung/Instruction Manual R100C/R100CL/R100CT 07/2010 Version 1.07 Page/Seite 56 7 The Setup menu Global settings are stored in a non-volatile memory (EEPROM). To modify these global settings press and hold the ´Select Display´ key, while switching the unit on with the Power On/Off key. The following settings R100C/R100CL/R100CT: RS232 Address Baudrate Max MotorRpm Min MotorRpm Max torque could be adjusted in the setup menu of Defines the address under which the stirrer can be accessed using RS232 commands. factory setting: 1 range: 1-255 Baudrate of the RS232 interface factory setting: 1200 Baud options: 1200, 2400, 4800 Baud User selectable maximum motor speed in rpm. factory setting R100C: 2000 rpm range: 40-2000 rpm factory setting R100CL: 1100 rpm range: 30-1100 rpm factory setting R100CT: 500 rpm range: 10-500 rpm User selectable minimum motor speed in rpm. factory setting R100C: 40 rpm range: 40-2000 rpm factory setting R100CL: 30 rpm range: 30-1100 rpm factory setting R100CT: 10 rpm range: 10-500 rpm Maximum allowed torque on shaft in Ncm factory setting R100C: 150 Ncm Range: 10-150Ncm Maximum allowed torque on shaft in Ncm factory setting R100CL: 250 Ncm Range: 10-250Ncm Maximum allowed torque on shaft in Ncm factory setting R100CT: 600 Ncm factory setting: 600 Ncm Range: 10-600Ncm Betriebsanleitung/Instruction Manual R100C/R100CL/R100CT 07/2010 Version 1.07 Page/Seite 57 the CutOff limit Analogue input An Inp. F=0 An Inp. F=1 An Output An. Out U=0V An. Out U=4V Cut-off limit sensitivity in percent ( rotor stuck detection) If the torque increase versus time exceeds a certain limit the unit will assume that the rotor was suddenly blocked. If this happens the unit will shut down immediately. factory setting: 60% range: 10-100% (100% disables this safety check) The lower the entered value, the more sensitive the unit will react on sudden torque increases. Allow or block speed setting via external analogue voltage control. Defines the control voltage ( analogue input) when the motor has to be stopped (speed = 0). The voltage at the analogue input functions as multiplication factor onto the frontally set speed ( speed control knob). This value reflects the input voltage at which the multiplication factor is zero. This setting is only relevant if the analogue input is enabled (see above). Factory setting: 0.0 V Range: -20.0 - 30.0 V This value reflects the input voltage at which the multiplication factor of the speed is 1.0. Selects which function/value has to be monitored on the analogue output pin. Factory setting: DISABLED Available options: Torque-R (relative torque) Torque-A (absolute torque) Power -R (relative power) Power-A (absolute power) DISABLED (output de-activated, 0V output) This value defines the operation value (speed, torque or power) which is related to a voltage outlet of 0.0V at the analogue pin output (pin no. 6) This value indicates which operation value (speed, torque or power) is related to the output voltage of 4.0V at the analogue pin output (pin no. 6). Betriebsanleitung/Instruction Manual R100C/R100CL/R100CT 07/2010 Version 1.07 Page/Seite 58 7.1 Example: How to change setup settings Example of the necessary steps to set/define the maximum allowed motor speed in the setup menu: press and hold the ´Select Display´ key (4), whilst switching on the R100C/R100CT. The unit initialises and then switches into the Setup menu. The ´Select Display´ key (4) must be pressed down until the Setup menu appears on the display. turn the handwheel (5) until ´Max MotorRpm´ occurs on the display press the Timer key (3) to edit the max. motor speed ( Edit arrow appears). turn the handwheel (5) to adjust the value. press the ´Select Display´ key (4) to leave the setup menu. press the ´Select Display´ key (4) once again when the units asks to save the setup parameters. Important Note The different options/parameters in the setup menu can be displayed/selected by simply turning the handwheel (5). To change a displayed value press the Timer key (3) and an edit arrow () will appear in front of the parameter to be changed. As long as the edit arrow is on the display, turning the handwheel (5) will change the displayed value. If the handwheel (5) is not touched for approx. 3 seconds the edit arrow will disappear and an other menu option can be selected by turning the handwheel (5). When editing the setup parameters, the ´Select Display´ button (4) is used to leave the setup menu, or to confirm a selection. The ´Timer´ button (3) is used to edit/change a displayed value. The Setup-menu can only be left by pressing the Power On/Off key (9) or the ´Select Display´ key (4) ! Pressing the Power On/Off key (9) from within the setup menu will prevent the unit to store eventually changed settings to non-volatile memory. After pressing the ´Select Display´ key (4) the unit will ask if the settings should be stored to non-volatile memory. To confirm this question press ´Select Display´ (4) again. If the parameters should not be stored turn the handwheel (5) until “NO” is displayed and then press the ´Select Display´ button (4). Betriebsanleitung/Instruction Manual R100C/R100CL/R100CT 07/2010 Version 1.07 Page/Seite 59 LCD-Display (1) Timer LED (2) Timer button (3) Display select button (4) Load LED (6) Incremental encoder wheel (5) Speed control knob (7) Power LED (8) Power on/off button (9) (view on the R100C/R100CL/R100CT front panel) Betriebsanleitung/Instruction Manual R100C/R100CL/R100CT 07/2010 Version 1.07 Page/Seite 60 8 Error messages The R100C/R100CL/R100CT overhead stirrer has an on-board self diagnostic program that detects possible failures and, should one occur, the R100C/R100CL/R100CT shuts itself down. To enable the user to prevent the problem re-occurring, the R100C/R100CL/R100CT will display any of the following error messages as it is switched on again. Please read carefully the following table of error messages. Error message: Reason for shut down: Time-out the programmable timer has expired (timer key) rotor stuck A too fast increase of rotor torque was detected (see also: Setup menu) Overtemp. the motor temperature was too high RS232 Off The unit was switched off by an RS232 command Sensor Err. The temperature measurement sensor or circuit is damaged 9 Cleaning and Maintenance The outer casing consists of painted or anodised aluminium and a chemically resistant splash-proof membrane key-pad and therefore easily cleaned with warm water and any suitable liquid laboratory detergent. Do not use steel wool or any similar plastic wool sponge to clean the unit. In case of malfunction do not attempt to repair the unit. There are no userserviceable parts in this instrument. The CAT R100C/R100CL/R100CT should only be opened and repaired by authorised service personnel. Any work on the electronics inside the unit should only be carried out by knowledgeable, trained personnel. Any attempt by the user to repair the unit will immediately render the guarantee null and void. Please contact your local distributor in the event of a problem. Betriebsanleitung/Instruction Manual R100C/R100CL/R100CT 07/2010 Version 1.07 Page/Seite 61 10 Dismantling, Transport and Storage 10.1 Dismantling Switch the unit off. Disconnect the unit from the mains. Remove any glass beakers and any other equipment around the overhead stirrer. Remove the stirring tool (G) by loosening the chuck (F) with the chuck key (B). Loosen the special clamp (C) and remove the clamp from the support rods. Unscrew the support rods (A). Now you may remove the instrument from the working area. chuck (F) chuck key (B) Stirring tool (G) 10.2 Transport and Storage Prior to transport: Switch the instrument off and unplug the power supply. Place the instrument and its parts in its original packaging or another suitable container to protect it during transport. Close the packaging with adhesive tape. Store the instrument in a dry environment. Please observe the specified conditions of the ambient (temperature and humidity). Do not subject the instrument to mechanical shocks or vibration during transporting it. In case you do not use the original packaging please mark the box with the following notes: Glass symbol (handle with care, fragile) Umbrella (keep dry) Content (list of content) Storage ambient: Max. ambient temperature : Max. humidity: RT to +40°C 80% 11 Disposal Please dispose of used instruments and defective components at your local recycling collection point. Prior to disposal, sort according to materials: metal, glass, plastic, etc. Also be sure to dispose of the packing material in an environmental-friendly manner. Betriebsanleitung/Instruction Manual R100C/R100CL/R100CT 07/2010 Version 1.07 Page/Seite 62 12 Warranty and Liability The manufacturer agrees to either repair, or replace, at the manufacturer's discretion, any defects in materials or workmanship which develop within 24 months of the delivery of this product to the original user. In the event of replacement, the replacement unit will be guaranteed for the remainder of the original twenty-four (24) month period or ninety (90) days, whichever is longer. If this product should require service, contact your local distributor or manufacturer for necessary instructions. This guarantee will not apply if the defect or malfunction was caused by accident, neglect, unreasonable use or fitness for a particular purpose, which extend beyond the description and period set forth herein. The manufacturer's sole obligation under this guarantee is limited to the repair or replacement of a defective product and the manufacturer shall not, in any event, be liable for any incidental or consequential damages of any kind, resulting from use or possession of the product. Attention: The user has to determine, if the instrument is suitable for his specific application. If there are any further queries, contact your local dealer or the manufacturer direct. Betriebsanleitung/Instruction Manual R100C/R100CL/R100CT 07/2010 Version 1.07 Page/Seite 63 13 Technical Data 13.1 Technical Data R100C Type: R100C Specifications Electrical power requirements LCD-Display 110/230V, 300W, 50/60 Hz (see R100C rear panel) bright back-lit LCD display, showing all relevant system data. Simultaneous display of set and real values of motor speed, torque, or power output. Incremental encoder wheel allows fast and intuitive adjustment of timer and system settings Timer function programmable switch-off timer, programmable from 1 minute to 99 days. Resolution: 1 minute Torque output display displays true torque at shaft in Ncm (relative or absolute readout possible) Accuracy: 5% Power output display displays true power output at shaft in watts. (relative or absolute readout possible) Accuracy: 5% Motor specification torque microprocessor controlled for easy operation and accuracy soft-start and soft-stop logic prevents splashing of liquid precise adjustable motor speed from 50 to 2000 rpm max. 220 watts shaft power output extra long life, high performance, brush motor silent belt drive power transmission max. torque: 150 Ncm (20 min) continuous torque output (at 1100 rpm): 100 Ncm maximum limitation of torque (programmable) Multistep safety system detects and protects against the following dangerous situations: Auxiliary functions rotor stuck/block detection motor overtemperature monitoring self test of all safety functions after switching on User programmable limits for: maximum motor speed (40-2000 rpm) maximum allowed torque at shaft (10-150 Ncm) Betriebsanleitung/Instruction Manual R100C/R100CL/R100CT 07/2010 Version 1.07 Page/Seite 64 Type: R100C Specifications RS232 interface programmable baudrate: 1200,2400,4800; 8,N,1 Full remote access of all stirrer functions (read and write) daisy chain feature by sub addressing allows to connect up to 255 units to only one serial interface on the computer side. Windows control software optional available Permissible ambient temperature Permissible humidity 5 - 40 °C within operating area, e.g. fume cupboard Safety class acc. to DIN EN 60529 Case dimensions IP42 weight 5 Kg 80 % RH Length including chuck 230 mm 77.5 x 190 x 170 mm 13.2 Technical Data R100CL Type: R100CL Specifications Electrical power requirements LCD-Display 110/230V, 300W, 50/60 Hz (see R100CL rear panel) bright back-lit LCD display, showing all relevant system data. Simultaneous display of set and real values of motor speed, torque, or power output. Incremental encoder wheel allows fast and intuitive adjustment of timer and system settings Timer function programmable switch-off timer, programmable from 1 minute to 99 days. Resolution: 1 minute Torque output display displays true torque at shaft in Ncm (relative or absolute readout possible) Accuracy: 5% Power output display displays true power output at shaft in watts. (relative or absolute readout possible) Accuracy: 5% Betriebsanleitung/Instruction Manual R100C/R100CL/R100CT 07/2010 Version 1.07 Page/Seite 65 Type: R100CL Motor specification Multistep safety system Specifications torque microprocessor controlled for easy operation and accuracy soft-start and soft-stop logic prevents splashing of liquid precise adjustable motor speed from 50 to 2000 rpm max. 230 watts shaft power output extra long life, high performance, brush motor silent belt drive power transmission max. torque: 250 Ncm (20 min) continuous torque output (at 700 rpm): 200 Ncm maximum limitation of torque (programmable) detects and protects against the following dangerous situations: Auxiliary functions RS232 interface rotor stuck/block detection motor overtemperature monitoring self test of all safety functions after switching on User programmable limits for: maximum motor speed (30-1100 rpm) maximum allowed torque at shaft (10-150 Ncm) programmable baudrate: 1200,2400,4800; 8,N,1 Full remote access of all stirrer functions (read and write) daisy chain feature by sub addressing allows to connect up to 255 units to only one serial interface on the computer side. Windows control software optional available Permissible ambient temperature Permissible humidity 5 - 40 °C within operating area, e.g. fume cupboard Safety class acc. to DIN EN 60529 Case dimensions IP42 weight 5 Kg 80 % RH Length including chuck 230 mm 77.5 x 190 x 170 mm Betriebsanleitung/Instruction Manual R100C/R100CL/R100CT 07/2010 Version 1.07 Page/Seite 66 13.3 Technical Data R100CT Type: R100CT Specifications Electrical power requirements LCD-Display 110/230V, 300W, 50/60 Hz (see R100CT rear panel) bright back-lit LCD display, showing all relevant system data. Simultaneous display of set and real values of motor speed, torque, or power output. Incremental encoder wheel allows fast and intuitive adjustment of timer and system settings Timer function programmable switch-off timer, programmable from 1 minute to 99 days. Resolution: 1 minute Torque output display displays true torque at shaft in Ncm (relative or absolute readout possible) Accuracy: 10% Power output display displays true power output at shaft in watts. (relative or absolute readout possible) Accuracy: 10% Motor specification torque microprocessor controlled for easy operation and accuracy soft-start and soft-stop logic prevents splashing of liquid precise adjustable motor speed from 10 to 500 rpm max. 220 watts shaft power output extra long life, high performance, brush motor silent belt drive power transmission max. torque: 600 Ncm (20 min) continuous torque output at 250 rpm: 400 Ncm maximum limitation of torque (programmable) Multistep safety system detects and protects against the following dangerous situations: Auxiliary functions rotor stuck/block detection motor overtemperature monitoring self test of all safety functions after switching on User programmable limits for: maximum motor speed (10-500 rpm) maximum allowed torque at shaft (10-600 Ncm) Betriebsanleitung/Instruction Manual R100C/R100CL/R100CT 07/2010 Version 1.07 Page/Seite 67 Type: R100CT Specifications RS232 interface programmable baudrate: 1200,2400,4800; 8,N,1 Full remote access of all stirrer functions (read and write) daisy chain feature by sub addressing allows to connect up to 255 units to only one serial interface on the computer side. Windows control software optional available Permissible ambient temperature Permissible humidity 5 - 40 °C within operating area, e.g. fume cupboard Safety class acc. to DIN EN 60529 Case dimensions IP42 weight 5.5 Kg 80 % RH Length including chuck 250 mm 77.5 x 195 x 195 mm 14 Repairs When returning instruments for repair that have come into contact with hazardous substances, please: Fill in attached “Repair Return Form” Provide precise information on the relevant medium Take protective measures to ensure the safety of our receiving and maintenance personnel Mark the package as appropriate for hazardous materials. Betriebsanleitung/Instruction Manual R100C/R100CL/R100CT 07/2010 Version 1.07 Page/Seite 68 14.1 Repair Return Form CONTACT/USER INFORMATION Contact: Fax No. Phone No. Email: Billing: Company Address Shipping: Company Address INSTRUMENT INFORMATION Model Please describe all problems/malfunctions Serial No. Operating Conditions (please fill in if applicable) Ambient Temp. Humidity Load Volume Temperature in °C Sample Temperature Sample Description* Speed Viscosity Operating Time *NOTE: If the instrument was exposed to hazardous material, it must be decontaminated BEFORE returning it to CAT and an MSDS for hazardous material must be included with the instrument. RETURN SHIPPING UPS Air Parcel Post Collect** Other** **Your account number is required for UPS collect respectively the address and contact of your preferred forwarder if you choose any other transport means. PACKAGING INSTRUCTIONS TO RETURN A CAT INSTRUMENT FOR REPAIR Remove all accessories (e.g. homogniser tools, stirring paddles) from the instrument Clean excess testing material off the instrument/accessory Include MSDS sheets for all hazardous materials used with this instrument Pack the instrument in its original box. If the box is not available, take care to wrap the instrument and accessories with enough material to support them. DO NOT send pedestal stand unless there is a problem with the upright rod, clamp or base. If there is a problem with the stand remove the upright rod from the base and individually wrap each item to avoid contact with the instrument. (Applicable for overhead stirrers and homogenisers.) Pack the instrument and related items in a strong box for shipping. Mark the outside of the box with handling instructions. Example: “Handle with care” or “Fragile- Delicate Instrument” and send to: Ingenieurbüro CAT, M. Zipperer GmbH, Service Department, Etzenbach 16, D-79219 Staufen Betriebsanleitung/Instruction Manual R100C/R100CL/R100CT 07/2010 Version 1.07 Page/Seite 69 Etzenbach 16,D-79219 Staufen Tel.: +49 (0) 7636 78030 Fax: +49 (0) 7636 780345 E-Mail: [email protected] Internet: http://www.cat-ing.de 15 Declaration of conformity We declare under our sole responsibility that this product (see table) corresponds to the regulations and conforms with the standards or standardized documents 2006/95/EC DIN EN 61010-1; VDE 0411-1:2002-08;Amendment 1; VDE 0411-1 Amendment 1:2002-11; Amendment 2; VDE 0411-1 Amendment 2:2004-01 DIN EN 61010-2-051; VDE 0411-2-051:2004-07 2004/108/EC DIN EN 61326-1; VDE 0843-20-1:2006-10 DIN EN 61000-6-2; VDE 0839-6-2:2006-03 DIN EN 61000-6-4; VDE 0839-6-4:2007-09 DIN EN 61000-4-2; VDE 0847-4-2:2009-12 DIN EN 61000-4-3; VDE 0847-4-3:2008-06 DIN EN 61000-4-4; VDE 0847-4-4:2005-07 DIN EN 61000-4-5; VDE 0847-4-5:2007-06 DIN EN 61000-4-6; VDE 0847-4-6:2009-12 DIN EN 55011; VDE 0875-11:2010-05 DIN EN 55014-1; VDE 0875-14-1:2010-02 DIN EN 55014-2; VDE 0875-14-2:2009-06 2006/42/EC, 93/68/EEC DIN EN ISO 12100-1:2004-04 DIN EN ISO 12100-2:2004-04 In the case of a modification of the unit which has not been agreed on with us, this declaration becomes null and void and the warranty expires. Ingenieurbüro CAT M. Zipperer GmbH Ellen Gebel CE-Dokumentenbeauftragte 79219 Staufen, den 12. Juli 2010 Type R100C/R100CL/R100CT 230V + 10% 50/60Hz, 300W Betriebsanleitung/Instruction Manual R100C/R100CL/R100CT 07/2010 Version 1.07 Page/Seite 70 16 Appendix A 16.1 Displaying the system info: For additional user information the R100C tracks the total operation time and the number of powerup´s. press and hold the Timer key, whilst switching on the R100C. The unit initialises and then displays the System Info screen. Press any key to display the next info. The system Info is shown on the LCD-display and contains the following information: 1. total operation time of the unit (days:hours:minutes) 2. number of times the R100C/R100CL/R100CT has been turned on Betriebsanleitung/Instruction Manual R100C/R100CL/R100CT 07/2010 Version 1.07 Page/Seite 71