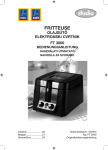
1
SALVIS Fritteuse SALVIS Deep Fat Fryer SALVIS Friteuse Stand‐ und Einbaufritteusen Freestanding‐ and Built‐in Deep Fat Fryers Friteuse sur pieds et à encastrer Betriebsanleitung Operating Instructions Mode d`Emploi Fryline Inhaltsverzeichnis / Table of contents / Table des matières Seite / Page / Page de-Originalbetriebsanleitung . . . . . . . . . . . . . . . . . . . . . . . . . . . . . . . 1. 2. 3. 4. Benutzerhinweise . . . . . . . . . . . . . . . . . . . . . . . . . . . . . . . . . . . . . . . . . . . . . . . . . . . . . . . . . . . . . . . . . . . . 1.1 Anwenden dieser Betriebsanleitung . . . . . . . . . . . . . . . . . . . . . . . . . . . . . . . . . . . . . . . . . . . . . . . . 1.2 Warnzeichen, Gefahrensymbole und Hinweissymbole . . . . . . . . . . . . . . . . . . . . . . . . . . . . . . . . 1.3 Symbole vor dem Text . . . . . . . . . . . . . . . . . . . . . . . . . . . . . . . . . . . . . . . . . . . . . . . . . . . . . . . . . . . 1.4 Bestimmungsgemäßer Gebrauch . . . . . . . . . . . . . . . . . . . . . . . . . . . . . . . . . . . . . . . . . . . . . . . . . 1.5 Fehlanwendungen . . . . . . . . . . . . . . . . . . . . . . . . . . . . . . . . . . . . . . . . . . . . . . . . . . . . . . . . . . . . . . 1.6 Eintragen der Typenschilddaten . . . . . . . . . . . . . . . . . . . . . . . . . . . . . . . . . . . . . . . . . . . . . . . . . . . Sicherheitshinweise . . . . . . . . . . . . . . . . . . . . . . . . . . . . . . . . . . . . . . . . . . . . . . . . . . . . . . . . . . . . . . . . . . Gerätebeschreibung . . . . . . . . . . . . . . . . . . . . . . . . . . . . . . . . . . . . . . . . . . . . . . . . . . . . . . . . . . . . . . . . . . Bedienfeldbeschreibung . . . . . . . . . . . . . . . . . . . . . . . . . . . . . . . . . . . . . . . . . . . . . . . . . . . . . . . . . . . . . . 4.1 Hinweise zu Merkmalen, Varianten und Einstellungen . . . . . . . . . . . . . . . . . . . . . . . . . . . . . . . . 4.2 Bedienfeld ohne „Zeitsteuerung“ . . . . . . . . . . . . . . . . . . . . . . . . . . . . . . . . . . . . . . . . . . . . . . . . . . 4.3 Bedienfeld mit “Zeitsteuerung . . . . . . . . . . . . . . . . . . . . . . . . . . . . . . . . . . . . . . . . . . . . . . . . . . . . . 4.3.1 4.3.2 4.3.3 5. 6. Inbetriebnahme . . . . . . . . . . . . . . . . . . . . . . . . . . . . . . . . . . . . . . . . . . . . . . . . . . . . . . . . . . . . . . . . . . . . . . 5.1 Betriebsbereitschaft herstellen . . . . . . . . . . . . . . . . . . . . . . . . . . . . . . . . . . . . . . . . . . . . . . . . . . . . Betriebsart „Zeit und Temperatur“ ‐ Bedienung der Steuerung . . . . . . . . . . . . . . . . . . . . . . . . . . . 6.1 Gerät einschalten . . . . . . . . . . . . . . . . . . . . . . . . . . . . . . . . . . . . . . . . . . . . . . . . . . . . . . . . . . . . . . . 6.2 Temperaturen auswählen, ändern und anzeigen . . . . . . . . . . . . . . . . . . . . . . . . . . . . . . . . . . . . . 6.2.1 6.2.2 6.3 6.4 7. Grundeinstellungen für Temperatur und Zeit ändern . . . . . . . . . . . . . . . . . . . . . . . . . . . . . . . . . . 18 6.4.1 6.4.2 18 18 Grund‐Einstellungen von Temperaturen ändern . . . . . . . . . . . . . . . . . . . . . . . . . . . . . . . . . . . . . . . . Grund‐Einstellungen der Kurzzeituhren ändern (Option Zeitsteuerung) . . . . . . . . . . . . . . . . . . . . . Zeit und Soll‐Temperatur über Nummer der „Produkttaste“ wählen und starten . . . . . . . . . . . . . . Zeit und Soll‐Temperatur für aktuellen Frittiervorgang ändern . . . . . . . . . . . . . . . . . . . . . . . . . . . . . Zwei einzeln steuerbare Hebevorrichtungen für großes Becken . . . . . . . . . . . . . . . . . . . . . . . . . . . 19 19 20 20 20 21 21 22 23 23 23 Öl‐/Fettnutzungsdauer . . . . . . . . . . . . . . . . . . . . . . . . . . . . . . . . . . . . . . . . . . . . . . . . . . . . . . . . . . . 24 8.2.1 8.2.2 8.2.3 24 24 24 Anzeigen der verbleibenden Zeit für die Öl‐/Fettnutzungsdauer . . . . . . . . . . . . . . . . . . . . . . . . . . . Aufschieben der Meldung für Ende Öl‐/Fettnutzungsdauer . . . . . . . . . . . . . . . . . . . . . . . . . . . . . . . Zurücksetzen des Zählers für Öl‐/Fettnutzungsdauer . . . . . . . . . . . . . . . . . . . . . . . . . . . . . . . . . . . . Automatische Garzeitkorrektur . . . . . . . . . . . . . . . . . . . . . . . . . . . . . . . . . . . . . . . . . . . . . . . . . . . . Automatisches Umschalten in Standby‐Betrieb . . . . . . . . . . . . . . . . . . . . . . . . . . . . . . . . . . . . . . Ändern von Grund‐Einstellungen in der Steuerung . . . . . . . . . . . . . . . . . . . . . . . . . . . . . . . . . . . 25 25 26 8.5.1 8.5.2 26 26 Einstellen der Parameter . . . . . . . . . . . . . . . . . . . . . . . . . . . . . . . . . . . . . . . . . . . . . . . . . . . . . . . . . . . Parametertabelle (Anzeige nur bei Option Zeitsteuerung) . . . . . . . . . . . . . . . . . . . . . . . . . . . . . . . . Filtern des Frittier‐Öles/Frittier‐Fettes . . . . . . . . . . . . . . . . . . . . . . . . . . . . . . . . . . . . . . . . . . . . . . . . . . 9.1 Ablassen und Filtern des Frittier‐Öles/Frittier‐Fettes . . . . . . . . . . . . . . . . . . . . . . . . . . . . . . . . . . 9.2 Umfüllen des Frittier‐Öles/Frittier‐Fettes (von Hand, ohne Pumpe) . . . . . . . . . . . . . . . . . . . . . . 9.3 Filtersystem mit Pumpe (Option) . . . . . . . . . . . . . . . . . . . . . . . . . . . . . . . . . . . . . . . . . . . . . . . . . . 9.3.1 9.3.2 9.3.3 9.3.4 2 14 15 16 17 17 8.1.1 10. 12 12 14 14 14 15 Kurzzeituhr auswählen, ändern und starten . . . . . . . . . . . . . . . . . . . . . . . . . . . . . . . . . . . . . . . . . . . . Mehrere Kurzzeituhren starten . . . . . . . . . . . . . . . . . . . . . . . . . . . . . . . . . . . . . . . . . . . . . . . . . . . . . . Abschalten einer Kurzzeituhr, wenn mehrere Kurzzeituhren gestartet sind . . . . . . . . . . . . . . . . . . 7.4 Anzeigen der Ist‐Temperatur im Becken . . . . . . . . . . . . . . . . . . . . . . . . . . . . . . . . . . . . . . . . . . . . 7.5 Grundeinstellungen für Zeit und Soll‐Temperatur ändern . . . . . . . . . . . . . . . . . . . . . . . . . . . . . . Funktionen Option „Zeitsteuerung“ . . . . . . . . . . . . . . . . . . . . . . . . . . . . . . . . . . . . . . . . . . . . . . . . . . . . 8.1 Korb‐Hebeautomatik ab‐ oder einschalten (Option) . . . . . . . . . . . . . . . . . . . . . . . . . . . . . . . . . . . 8.3 8.4 8.5 10 11 11 6.3.1 6.3.2 6.3.3 Betriebsart „Produkttasten“ ‐ Bedienung der Steuerung . . . . . . . . . . . . . . . . . . . . . . . . . . . . . . . . . 7.1 Werksseitige Belegung der „Produkttasten“ . . . . . . . . . . . . . . . . . . . . . . . . . . . . . . . . . . . . . . . . . 7.2 Gerät einschalten . . . . . . . . . . . . . . . . . . . . . . . . . . . . . . . . . . . . . . . . . . . . . . . . . . . . . . . . . . . . . . . 7.3 Zeit und Temperatur über „Produkttaste“ wählen . . . . . . . . . . . . . . . . . . . . . . . . . . . . . . . . . . . . . 8.2 9. Soll‐Temperatur auswählen und ändern . . . . . . . . . . . . . . . . . . . . . . . . . . . . . . . . . . . . . . . . . . . . . . . Anzeigen der Ist‐Temperatur im Becken . . . . . . . . . . . . . . . . . . . . . . . . . . . . . . . . . . . . . . . . . . . . . . 6 6 6 6 6 6 7 7 9 9 9 10 10 Kurzzeituhr (Option Zeitsteuerung) . . . . . . . . . . . . . . . . . . . . . . . . . . . . . . . . . . . . . . . . . . . . . . . . 7.3.1 7.3.2 8. Auswahl der Betriebsarten bei Option „Zeitsteuerung“ . . . . . . . . . . . . . . . . . . . . . . . . . . . . . . . . . . . Betriebsart „Zeit und Temperatur“ . . . . . . . . . . . . . . . . . . . . . . . . . . . . . . . . . . . . . . . . . . . . . . . . . . . . Betriebsart „Produkttasten“ - Anzeige Zeit und Produkttaste . . . . . . . . . . . . . . . . . . . . . . . . . . . . . . 6 Umpumpen des Frittier‐Öles/Frittier‐Fettes vom Behälter in das Becken . . . . . . . . . . . . . . . . . . . . Entfernen des Einlaufrohres . . . . . . . . . . . . . . . . . . . . . . . . . . . . . . . . . . . . . . . . . . . . . . . . . . . . . . . . . Ausspülen des Beckens mit Frittier‐Öl/Frittier‐Fett mittels Pumpe . . . . . . . . . . . . . . . . . . . . . . . . . . Entfernen des Entleerungsschlauches . . . . . . . . . . . . . . . . . . . . . . . . . . . . . . . . . . . . . . . . . . . . . . . . Frittieren . . . . . . . . . . . . . . . . . . . . . . . . . . . . . . . . . . . . . . . . . . . . . . . . . . . . . . . . . . . . . . . . . . . . . . . . . . . . 10.1 Hinweise zum Frittier‐Öl/Frittier‐Fett . . . . . . . . . . . . . . . . . . . . . . . . . . . . . . . . . . . . . . . . . . . . . . . . 10.2 Gargut hinzugeben . . . . . . . . . . . . . . . . . . . . . . . . . . . . . . . . . . . . . . . . . . . . . . . . . . . . . . . . . . . . . . 10.3 Frittierfehler erkennen und beseitigen . . . . . . . . . . . . . . . . . . . . . . . . . . . . . . . . . . . . . . . . . . . . . . 27 27 28 28 28 29 30 31 31 31 31 32 Inhaltsverzeichnis / Table of contents / Table des matières Seite / Page / Page 11. Betriebsschluss . . . . . . . . . . . . . . . . . . . . . . . . . . . . . . . . . . . . . . . . . . . . . . . . . . . . . . . . . . . . . . . . . . . . . . 32 12. Reinigung und Pflege . . . . . . . . . . . . . . . . . . . . . . . . . . . . . . . . . . . . . . . . . . . . . . . . . . . . . . . . . . . . . . . . . 12.1 Entleeren, Reinigen . . . . . . . . . . . . . . . . . . . . . . . . . . . . . . . . . . . . . . . . . . . . . . . . . . . . . . . . . . . . . 32 33 12.1.1 12.1.2 12.1.3 12.2 Entleeren des Beckens . . . . . . . . . . . . . . . . . . . . . . . . . . . . . . . . . . . . . . . . . . . . . . . . . . . . . . . . . . . . . Entleeren des Behälters mittels Pumpe (Option Pumpe) . . . . . . . . . . . . . . . . . . . . . . . . . . . . . . . . . Reinigen des Beckens und des Filtersystems . . . . . . . . . . . . . . . . . . . . . . . . . . . . . . . . . . . . . . . . . . 33 33 34 Edelstahlflächen reinigen . . . . . . . . . . . . . . . . . . . . . . . . . . . . . . . . . . . . . . . . . . . . . . . . . . . . . . . . . 35 13. Störungen und Abhilfe . . . . . . . . . . . . . . . . . . . . . . . . . . . . . . . . . . . . . . . . . . . . . . . . . . . . . . . . . . . . . . . . 35 14. Technische Daten . . . . . . . . . . . . . . . . . . . . . . . . . . . . . . . . . . . . . . . . . . . . . . . . . . . . . . . . . . . . . . . . . . . . 37 15. Aufstellen, Anschließen . . . . . . . . . . . . . . . . . . . . . . . . . . . . . . . . . . . . . . . . . . . . . . . . . . . . . . . . . . . . . . 15.1 Transport . . . . . . . . . . . . . . . . . . . . . . . . . . . . . . . . . . . . . . . . . . . . . . . . . . . . . . . . . . . . . . . . . . . . . . 15.2 Aufstellung . . . . . . . . . . . . . . . . . . . . . . . . . . . . . . . . . . . . . . . . . . . . . . . . . . . . . . . . . . . . . . . . . . . . . 15.3 Elektrischer Anschluss . . . . . . . . . . . . . . . . . . . . . . . . . . . . . . . . . . . . . . . . . . . . . . . . . . . . . . . . . . . 37 37 38 38 16. Wartung . . . . . . . . . . . . . . . . . . . . . . . . . . . . . . . . . . . . . . . . . . . . . . . . . . . . . . . . . . . . . . . . . . . . . . . . . . . . . 39 17. Hinweise zur Entsorgung . . . . . . . . . . . . . . . . . . . . . . . . . . . . . . . . . . . . . . . . . . . . . . . . . . . . . . . . . . . . . 39 18. EG‐Konformitätserklärung . . . . . . . . . . . . . . . . . . . . . . . . . . . . . . . . . . . . . . . . . . . . . . . . . . . . . . . . . . . . 39 en-Translation of the original operating instructions . . . . . . . . . . . 40 1. User information . . . . . . . . . . . . . . . . . . . . . . . . . . . . . . . . . . . . . . . . . . . . . . . . . . . . . . . . . . . . . . . . . . . . . 1.1 Using these operating instructions . . . . . . . . . . . . . . . . . . . . . . . . . . . . . . . . . . . . . . . . . . . . . . . . . 1.2 Warning symbols, danger symbols and informational symbols . . . . . . . . . . . . . . . . . . . . . . . . . 1.3 Symbols in front of the text . . . . . . . . . . . . . . . . . . . . . . . . . . . . . . . . . . . . . . . . . . . . . . . . . . . . . . . 1.4 Use as intended . . . . . . . . . . . . . . . . . . . . . . . . . . . . . . . . . . . . . . . . . . . . . . . . . . . . . . . . . . . . . . . . 1.5 Misuse . . . . . . . . . . . . . . . . . . . . . . . . . . . . . . . . . . . . . . . . . . . . . . . . . . . . . . . . . . . . . . . . . . . . . . . . 1.6 Documenting the type plate data . . . . . . . . . . . . . . . . . . . . . . . . . . . . . . . . . . . . . . . . . . . . . . . . . . 40 40 40 40 40 40 41 2. Safety instructions . . . . . . . . . . . . . . . . . . . . . . . . . . . . . . . . . . . . . . . . . . . . . . . . . . . . . . . . . . . . . . . . . . . 41 3. Description of the appliance . . . . . . . . . . . . . . . . . . . . . . . . . . . . . . . . . . . . . . . . . . . . . . . . . . . . . . . . . . 43 4. Control panel description . . . . . . . . . . . . . . . . . . . . . . . . . . . . . . . . . . . . . . . . . . . . . . . . . . . . . . . . . . . . . 4.1 Notes on characteristics, versions and settings . . . . . . . . . . . . . . . . . . . . . . . . . . . . . . . . . . . . . . 4.2 Control panel without "time control" . . . . . . . . . . . . . . . . . . . . . . . . . . . . . . . . . . . . . . . . . . . . . . . . 4.3 Control panel with "time control" . . . . . . . . . . . . . . . . . . . . . . . . . . . . . . . . . . . . . . . . . . . . . . . . . . . 43 43 44 44 4.3.1 4.3.2 4.3.3 Selection of the modes for "time control" option . . . . . . . . . . . . . . . . . . . . . . . . . . . . . . . . . . . . . . . . Operating mode „Time and temperature” . . . . . . . . . . . . . . . . . . . . . . . . . . . . . . . . . . . . . . . . . . . . . . Operating mode ”Product keys” - display of time and product key . . . . . . . . . . . . . . . . . . . . . . . . . 44 45 45 5. Initial use . . . . . . . . . . . . . . . . . . . . . . . . . . . . . . . . . . . . . . . . . . . . . . . . . . . . . . . . . . . . . . . . . . . . . . . . . . . . 5.1 Getting ready for use . . . . . . . . . . . . . . . . . . . . . . . . . . . . . . . . . . . . . . . . . . . . . . . . . . . . . . . . . . . . 46 46 6. Operating mode „Time and Temperature” ‐ Operating the control unit . . . . . . . . . . . . . . . . . . . . 6.1 Switching the appliance on . . . . . . . . . . . . . . . . . . . . . . . . . . . . . . . . . . . . . . . . . . . . . . . . . . . . . . . 6.2 Selecting, changing and displaying the temperatures . . . . . . . . . . . . . . . . . . . . . . . . . . . . . . . . . 48 48 48 6.2.1 6.2.2 6.3 6.4 7. Selecting and changing the setpoint temperature . . . . . . . . . . . . . . . . . . . . . . . . . . . . . . . . . . . . . . . Displaying the actual temperature in the bowl . . . . . . . . . . . . . . . . . . . . . . . . . . . . . . . . . . . . . . . . . . Short time clock (time control option) . . . . . . . . . . . . . . . . . . . . . . . . . . . . . . . . . . . . . . . . . . . . . . . 49 6.3.1 6.3.2 6.3.3 50 51 51 Selecting, changing and starting the short time clock . . . . . . . . . . . . . . . . . . . . . . . . . . . . . . . . . . . . Setting up several short time clocks . . . . . . . . . . . . . . . . . . . . . . . . . . . . . . . . . . . . . . . . . . . . . . . . . . Switching off a short‐time clock when several short time clocks have been started . . . . . . . . . . . Changing the basic settings for temperature and time . . . . . . . . . . . . . . . . . . . . . . . . . . . . . . . . 52 6.4.1 6.4.2 52 52 Changing the basic settings of temperature . . . . . . . . . . . . . . . . . . . . . . . . . . . . . . . . . . . . . . . . . . . . Changing the basic settings of the short‐time clocks (time control option) . . . . . . . . . . . . . . . . . . . Operating mode ”Product keys” ‐ Operating the control unit . . . . . . . . . . . . . . . . . . . . . . . . . . . . . 7.1 Factory‐set assignment of the "product keys" . . . . . . . . . . . . . . . . . . . . . . . . . . . . . . . . . . . . . . . . 7.2 Switching the appliance on . . . . . . . . . . . . . . . . . . . . . . . . . . . . . . . . . . . . . . . . . . . . . . . . . . . . . . . 7.3 Selecting time and temperature via the "product key" . . . . . . . . . . . . . . . . . . . . . . . . . . . . . . . . . 7.3.1 7.3.2 7.4 7.5 48 49 Selecting and starting time and setpoint temperature via the number of the "product key" . . . . . . Changing the time and the setpoint temperature for the current frying process . . . . . . . . . . . . . . . Displaying the actual temperature in the bowl . . . . . . . . . . . . . . . . . . . . . . . . . . . . . . . . . . . . . . . Changing the basic settings for time and setpoint temperature . . . . . . . . . . . . . . . . . . . . . . . . . 53 53 54 54 54 55 55 56 3 Inhaltsverzeichnis / Table of contents / Table des matières 8. Functions for appliances with "time control" option . . . . . . . . . . . . . . . . . . . . . . . . . . . . . . . . . . . . 8.1 Switch automatic basket lift function off or on (option) . . . . . . . . . . . . . . . . . . . . . . . . . . . . . . . . . 8.1.1 8.2 8.3 8.4 8.5 9. Seite / Page / Page Two individually controllable basket lifts for large bowls . . . . . . . . . . . . . . . . . . . . . . . . . . . . . . . . . . 57 57 57 Oil/fat utilization period . . . . . . . . . . . . . . . . . . . . . . . . . . . . . . . . . . . . . . . . . . . . . . . . . . . . . . . . . . . 58 8.2.1 8.2.2 8.2.3 58 58 58 Displaying the remaining time of the oil/fat utilization period . . . . . . . . . . . . . . . . . . . . . . . . . . . . . . . Postponing the report for the oil/fat utilization period's expiry . . . . . . . . . . . . . . . . . . . . . . . . . . . . . . Resetting the counter for the oil/fat utilization period . . . . . . . . . . . . . . . . . . . . . . . . . . . . . . . . . . . . . Automatic cooking time correction . . . . . . . . . . . . . . . . . . . . . . . . . . . . . . . . . . . . . . . . . . . . . . . . . Automatic switching to standby mode . . . . . . . . . . . . . . . . . . . . . . . . . . . . . . . . . . . . . . . . . . . . . . Changing control default settings . . . . . . . . . . . . . . . . . . . . . . . . . . . . . . . . . . . . . . . . . . . . . . . . . . 59 59 60 8.5.1 8.5.2 60 60 Setting the parameters . . . . . . . . . . . . . . . . . . . . . . . . . . . . . . . . . . . . . . . . . . . . . . . . . . . . . . . . . . . . . Parameter table (display only for time control option) . . . . . . . . . . . . . . . . . . . . . . . . . . . . . . . . . . . Filtering the frying‐oil/frying‐fat . . . . . . . . . . . . . . . . . . . . . . . . . . . . . . . . . . . . . . . . . . . . . . . . . . . . . . . . 9.1 Draining and filtering of the frying‐oil/frying‐grease . . . . . . . . . . . . . . . . . . . . . . . . . . . . . . . . . . . 9.2 Refilling the frying oil/frying grease (manually, without pump) . . . . . . . . . . . . . . . . . . . . . . . . . . 9.3 Filter system with pump (option) . . . . . . . . . . . . . . . . . . . . . . . . . . . . . . . . . . . . . . . . . . . . . . . . . . . 9.3.1 9.3.2 9.3.3 9.3.4 Pumping the frying oil/frying grease from the container into the bowl . . . . . . . . . . . . . . . . . . . . . . . Removing the filling tube . . . . . . . . . . . . . . . . . . . . . . . . . . . . . . . . . . . . . . . . . . . . . . . . . . . . . . . . . . . Rinse the bowl with frying oil/frying grease via the pump . . . . . . . . . . . . . . . . . . . . . . . . . . . . . . . . . Removing the drain hose . . . . . . . . . . . . . . . . . . . . . . . . . . . . . . . . . . . . . . . . . . . . . . . . . . . . . . . . . . . 61 61 62 62 62 63 64 65 10. Deep frying . . . . . . . . . . . . . . . . . . . . . . . . . . . . . . . . . . . . . . . . . . . . . . . . . . . . . . . . . . . . . . . . . . . . . . . . . . 10.1 Notes regarding frying oil/frying grease . . . . . . . . . . . . . . . . . . . . . . . . . . . . . . . . . . . . . . . . . . . . . 10.2 Adding food to be cooked . . . . . . . . . . . . . . . . . . . . . . . . . . . . . . . . . . . . . . . . . . . . . . . . . . . . . . . . 10.3 Recognising and eliminating mistakes when frying . . . . . . . . . . . . . . . . . . . . . . . . . . . . . . . . . . . 65 65 65 66 11. Completion of operation . . . . . . . . . . . . . . . . . . . . . . . . . . . . . . . . . . . . . . . . . . . . . . . . . . . . . . . . . . . . . . 66 12. Cleaning and care . . . . . . . . . . . . . . . . . . . . . . . . . . . . . . . . . . . . . . . . . . . . . . . . . . . . . . . . . . . . . . . . . . . . 12.1 Draining, cleaning . . . . . . . . . . . . . . . . . . . . . . . . . . . . . . . . . . . . . . . . . . . . . . . . . . . . . . . . . . . . . . . 66 67 12.1.1 12.1.2 12.1.3 12.2 Emptying the bowl . . . . . . . . . . . . . . . . . . . . . . . . . . . . . . . . . . . . . . . . . . . . . . . . . . . . . . . . . . . . . . . . . Drain the container with pump (pump option) . . . . . . . . . . . . . . . . . . . . . . . . . . . . . . . . . . . . . . . . . . . Cleaning the bowl and the filter system . . . . . . . . . . . . . . . . . . . . . . . . . . . . . . . . . . . . . . . . . . . . . . . 67 67 68 Cleaning stainless steel surfaces . . . . . . . . . . . . . . . . . . . . . . . . . . . . . . . . . . . . . . . . . . . . . . . . . . 69 Errors and remedies . . . . . . . . . . . . . . . . . . . . . . . . . . . . . . . . . . . . . . . . . . . . . . . . . . . . . . . . . . . . . . . . . . 69 14. Technical specifications . . . . . . . . . . . . . . . . . . . . . . . . . . . . . . . . . . . . . . . . . . . . . . . . . . . . . . . . . . . . . . 71 15. Installation and Connection . . . . . . . . . . . . . . . . . . . . . . . . . . . . . . . . . . . . . . . . . . . . . . . . . . . . . . . . . . . 15.1 Transport . . . . . . . . . . . . . . . . . . . . . . . . . . . . . . . . . . . . . . . . . . . . . . . . . . . . . . . . . . . . . . . . . . . . . . 15.2 Installation . . . . . . . . . . . . . . . . . . . . . . . . . . . . . . . . . . . . . . . . . . . . . . . . . . . . . . . . . . . . . . . . . . . . . 15.3 Electrical connection . . . . . . . . . . . . . . . . . . . . . . . . . . . . . . . . . . . . . . . . . . . . . . . . . . . . . . . . . . . . 71 71 72 72 16. Maintenance . . . . . . . . . . . . . . . . . . . . . . . . . . . . . . . . . . . . . . . . . . . . . . . . . . . . . . . . . . . . . . . . . . . . . . . . . 73 17. Disposal information . . . . . . . . . . . . . . . . . . . . . . . . . . . . . . . . . . . . . . . . . . . . . . . . . . . . . . . . . . . . . . . . . 73 18. EU‐Declaration of Conformity . . . . . . . . . . . . . . . . . . . . . . . . . . . . . . . . . . . . . . . . . . . . . . . . . . . . . . . . . 73 13. fr-Traduction du mode d'emploi original . . . . . . . . . . . . . . . . . . . . . . 74 1. Recommandations pour les utilisateurs . . . . . . . . . . . . . . . . . . . . . . . . . . . . . . . . . . . . . . . . . . . . . . . . 1.1 Utilisation du présent mode d'emploi . . . . . . . . . . . . . . . . . . . . . . . . . . . . . . . . . . . . . . . . . . . . . . . 1.2 Pictogrammes d'avertissement, de danger et de recommandations . . . . . . . . . . . . . . . . . . . . . 1.3 Symboles au début d'un texte . . . . . . . . . . . . . . . . . . . . . . . . . . . . . . . . . . . . . . . . . . . . . . . . . . . . . 1.4 Utilisation conforme . . . . . . . . . . . . . . . . . . . . . . . . . . . . . . . . . . . . . . . . . . . . . . . . . . . . . . . . . . . . . 1.5 Utilisations erronées . . . . . . . . . . . . . . . . . . . . . . . . . . . . . . . . . . . . . . . . . . . . . . . . . . . . . . . . . . . . . 1.6 Saisie des données de la plaque signalétique . . . . . . . . . . . . . . . . . . . . . . . . . . . . . . . . . . . . . . . 74 74 74 74 74 74 75 2. Consignes de sécurité . . . . . . . . . . . . . . . . . . . . . . . . . . . . . . . . . . . . . . . . . . . . . . . . . . . . . . . . . . . . . . . . 75 3. Description de l'appareil . . . . . . . . . . . . . . . . . . . . . . . . . . . . . . . . . . . . . . . . . . . . . . . . . . . . . . . . . . . . . . 77 4. Description du panneau de commande . . . . . . . . . . . . . . . . . . . . . . . . . . . . . . . . . . . . . . . . . . . . . . . . . 4.1 Indications sur les caractéristiques, les variantes et réglages . . . . . . . . . . . . . . . . . . . . . . . . . . 4.2 Panneau de commande sans "commande temporisée mécanique" . . . . . . . . . . . . . . . . . . . . . 4.3 Panneau de commande avec "commande temporisée mécanique" . . . . . . . . . . . . . . . . . . . . . 77 77 78 78 4.3.1 4.3.2 4.3.3 4 Sélection des modes d'exploitation pour l'option "Commande temporisée mécanique" . . . . . . . . Mode d'exploitation "Temps et température" . . . . . . . . . . . . . . . . . . . . . . . . . . . . . . . . . . . . . . . . . . . Mode d'exploitation "Touche produit" - Indication du temps et de la touche produit . . . . . . . . . . . . 78 79 79 Inhaltsverzeichnis / Table of contents / Table des matières Seite / Page / Page 5. Mise en service . . . . . . . . . . . . . . . . . . . . . . . . . . . . . . . . . . . . . . . . . . . . . . . . . . . . . . . . . . . . . . . . . . . . . . 5.1 Mise en service . . . . . . . . . . . . . . . . . . . . . . . . . . . . . . . . . . . . . . . . . . . . . . . . . . . . . . . . . . . . . . . . . 80 80 6. Mode d'exploitation "Temps et température" Utilisation de la commande . . . . . . . . . . . . . . . . 6.1 Mise en marche de l'appareil . . . . . . . . . . . . . . . . . . . . . . . . . . . . . . . . . . . . . . . . . . . . . . . . . . . . . 6.2 Sélectionner, modifier et afficher une température . . . . . . . . . . . . . . . . . . . . . . . . . . . . . . . . . . . . 82 82 82 6.2.1 6.2.2 6.3 6.4 7. 83 6.3.1 6.3.2 6.3.3 84 85 85 Modifier le réglage initial pour la température et le temps . . . . . . . . . . . . . . . . . . . . . . . . . . . . . . 86 6.4.1 6.4.2 86 86 7.3.2 Modifier le réglage initial des températures . . . . . . . . . . . . . . . . . . . . . . . . . . . . . . . . . . . . . . . . . . . . Modifier le réglage initial des minuteries (option commande temporisée mécanique) . . . . . . . . . . Sélectionner la durée et la température de consigne via le numéro de la "Touche produit" et démarrer . . . . . . . . . . . . . . . . . . . . . . . . . . . . . . . . . . . . . . . . . . . . . . . . . . . . . . . . . . . . . . . . . . . . . . Modifier la durée et la température de consigne pour la friture en cours . . . . . . . . . . . . . . . . . . . . . 7.4 Affichage de la température effective dans le bac . . . . . . . . . . . . . . . . . . . . . . . . . . . . . . . . . . . . 7.5 Modifier le réglage initial pour le temps et la température de consigne . . . . . . . . . . . . . . . . . . . Fonctions de l'option "Commande temporisée mécanique" . . . . . . . . . . . . . . . . . . . . . . . . . . . . . . 8.1 Arrêter ou enclencher le dispositif de levage automatique du panier (option) . . . . . . . . . . . . . 8.1.1 8.3 8.4 8.5 9. Sélectionner, modifier et démarrer une minuterie . . . . . . . . . . . . . . . . . . . . . . . . . . . . . . . . . . . . . . . Démarrer plusieurs minuteries . . . . . . . . . . . . . . . . . . . . . . . . . . . . . . . . . . . . . . . . . . . . . . . . . . . . . . . Arrêter une minuterie lorsque plusieurs minuteries sont enclenchées. . . . . . . . . . . . . . . . . . . . . . . Mode d'exploitation "Touche produit" - Utilisation de la commande . . . . . . . . . . . . . . . . . . . . . . . 7.1 Affectation en usine des "Touches produit" . . . . . . . . . . . . . . . . . . . . . . . . . . . . . . . . . . . . . . . . . 7.2 Mise en marche de l'appareil . . . . . . . . . . . . . . . . . . . . . . . . . . . . . . . . . . . . . . . . . . . . . . . . . . . . . 7.3 Sélectionner la durée et la température via la "Touche produit" . . . . . . . . . . . . . . . . . . . . . . . . 8.2 82 83 Minuterie (option commande temporisée mécanique) . . . . . . . . . . . . . . . . . . . . . . . . . . . . . . . . 7.3.1 8. Choisir et modifier une température de consigne . . . . . . . . . . . . . . . . . . . . . . . . . . . . . . . . . . . . . . . . Indication de la température effective dans le bac . . . . . . . . . . . . . . . . . . . . . . . . . . . . . . . . . . . . . . . Deux dispositifs de levage à commande séparée pour un grand bac . . . . . . . . . . . . . . . . . . . . . . . 87 87 88 88 88 89 89 90 91 91 91 Durée d'utilisation de l'huile / la graisse . . . . . . . . . . . . . . . . . . . . . . . . . . . . . . . . . . . . . . . . . . . . . 92 8.2.1 8.2.2 8.2.3 92 92 92 Indication de la durée d'utilisation restant de la graisse / l'huile . . . . . . . . . . . . . . . . . . . . . . . . . . . . Différer le message pour la fin de la durée d'utilisation de l'huile / la graisse . . . . . . . . . . . . . . . . . Réinitialiser le compteur pour la durée d'utilisation de l'huile / la graisse . . . . . . . . . . . . . . . . . . . . . Correction automatique du temps de cuisson . . . . . . . . . . . . . . . . . . . . . . . . . . . . . . . . . . . . . . . Passage automatique en mode veille . . . . . . . . . . . . . . . . . . . . . . . . . . . . . . . . . . . . . . . . . . . . . . Modification de réglages initiaux dans la commande . . . . . . . . . . . . . . . . . . . . . . . . . . . . . . . . . 93 93 94 8.5.1 8.5.2 94 94 Réglage des paramètres . . . . . . . . . . . . . . . . . . . . . . . . . . . . . . . . . . . . . . . . . . . . . . . . . . . . . . . . . . . Tableau des paramètres (affichage seulement avec l'option commande temporisée mécanique) Filtrage de l'huile / la graisse de friture . . . . . . . . . . . . . . . . . . . . . . . . . . . . . . . . . . . . . . . . . . . . . . . . . 9.1 Évacuation et filtrage de l'huile / la graisse de friture . . . . . . . . . . . . . . . . . . . . . . . . . . . . . . . . . . 9.2 Transvaser l'huile/la graisse de friture (à la main, sans pompe) . . . . . . . . . . . . . . . . . . . . . . . . 9.3 Système de filtrage avec pompe (option) . . . . . . . . . . . . . . . . . . . . . . . . . . . . . . . . . . . . . . . . . . . 9.3.1 9.3.2 9.3.3 9.3.4 Transvasement de l'huile/la graisse de friture du récipient vers le bac . . . . . . . . . . . . . . . . . . . . . . Enlever le tuyau d'arrivée . . . . . . . . . . . . . . . . . . . . . . . . . . . . . . . . . . . . . . . . . . . . . . . . . . . . . . . . . . . Rincer le bac avec de l'huile/de la graisse de friture à l'aide de la pompe . . . . . . . . . . . . . . . . . . . . Retirer le tuyau de vidage . . . . . . . . . . . . . . . . . . . . . . . . . . . . . . . . . . . . . . . . . . . . . . . . . . . . . . . . . . . 95 95 96 96 96 97 98 99 10. Friture . . . . . . . . . . . . . . . . . . . . . . . . . . . . . . . . . . . . . . . . . . . . . . . . . . . . . . . . . . . . . . . . . . . . . . . . . . . . . . . 10.1 Recommandations pour l'huile/la graisse de friture . . . . . . . . . . . . . . . . . . . . . . . . . . . . . . . . . . . 10.2 Ajouter l'aliment à cuire . . . . . . . . . . . . . . . . . . . . . . . . . . . . . . . . . . . . . . . . . . . . . . . . . . . . . . . . . . 10.3 Reconnaître et éliminer les problèmes lors de la friture . . . . . . . . . . . . . . . . . . . . . . . . . . . . . . . . 99 99 99 100 11. Éteindre l'appareil . . . . . . . . . . . . . . . . . . . . . . . . . . . . . . . . . . . . . . . . . . . . . . . . . . . . . . . . . . . . . . . . . . . . 100 12. Nettoyage et entretien . . . . . . . . . . . . . . . . . . . . . . . . . . . . . . . . . . . . . . . . . . . . . . . . . . . . . . . . . . . . . . . . 12.1 Vidage, nettoyage . . . . . . . . . . . . . . . . . . . . . . . . . . . . . . . . . . . . . . . . . . . . . . . . . . . . . . . . . . . . . . . 100 101 12.1.1 12.1.2 12.1.3 12.2 Vidage du bac . . . . . . . . . . . . . . . . . . . . . . . . . . . . . . . . . . . . . . . . . . . . . . . . . . . . . . . . . . . . . . . . . . . . Vidage du récipient à l'aide de la pompe (option pompe) . . . . . . . . . . . . . . . . . . . . . . . . . . . . . . . . . Nettoyage du bac et du système de filtrage . . . . . . . . . . . . . . . . . . . . . . . . . . . . . . . . . . . . . . . . . . . . 101 101 102 Nettoyer les surfaces en inox . . . . . . . . . . . . . . . . . . . . . . . . . . . . . . . . . . . . . . . . . . . . . . . . . . . . . 103 13. Défauts et remèdes . . . . . . . . . . . . . . . . . . . . . . . . . . . . . . . . . . . . . . . . . . . . . . . . . . . . . . . . . . . . . . . . . . . 103 14. 15. Caractéristiques techniques . . . . . . . . . . . . . . . . . . . . . . . . . . . . . . . . . . . . . . . . . . . . . . . . . . . . . . . . . . Installation, raccordement . . . . . . . . . . . . . . . . . . . . . . . . . . . . . . . . . . . . . . . . . . . . . . . . . . . . . . . . . . . . 15.1 Transport . . . . . . . . . . . . . . . . . . . . . . . . . . . . . . . . . . . . . . . . . . . . . . . . . . . . . . . . . . . . . . . . . . . . . . 15.2 Mise en place . . . . . . . . . . . . . . . . . . . . . . . . . . . . . . . . . . . . . . . . . . . . . . . . . . . . . . . . . . . . . . . . . . 15.3 Branchement électrique . . . . . . . . . . . . . . . . . . . . . . . . . . . . . . . . . . . . . . . . . . . . . . . . . . . . . . . . . . 105 105 105 106 106 16. Entretien . . . . . . . . . . . . . . . . . . . . . . . . . . . . . . . . . . . . . . . . . . . . . . . . . . . . . . . . . . . . . . . . . . . . . . . . . . . . 107 17. 18. Consignes relatives à l'élimination des déchets . . . . . . . . . . . . . . . . . . . . . . . . . . . . . . . . . . . . . . . . . Déclaration de conformité CE . . . . . . . . . . . . . . . . . . . . . . . . . . . . . . . . . . . . . . . . . . . . . . . . . . . . . . . . . 107 107 5 de-Originalbetriebsanleitung de 1. Benutzerhinweise 1.1 Anwenden dieser Betriebsanleitung Lesen Sie die Betriebsanleitung sorgfältig durch, bevor Sie das Gerät in Betrieb nehmen. Die Betriebsanleitung enthält wichtige Hinweise für die ordnungsgemäße Bedienung und Installation. Bewahren Sie die dem Gerät beiliegenden Dokumente immer griffbereit auf und geben Sie diese mit dem Gerät weiter. Der Betreiber des Gerätes muss dafür sorgen, dass die Betriebsanleitung dem beauftragten Personal zu gänglich ist. 1.2 Warnzeichen, Gefahrensymbole und Hinweissymbole Warnung! Gefahr durch Stromschlag mit möglicher schwerer Körperverletzung oder Tod als Folge. Vorsicht! Warnung vor einer möglichen Körperverletzung, einem gesundheitlichen Risiko oder Sach schaden. Vorsicht! Warnung vor heißen Gegenständen und möglicher Körperverletzung durch Verbrennungen. Im Brandfall auch schwere körperliche Verbrennungen möglich! Information! Hinweise mit besonders nützlichen Informationen und Tipps. 1.3 Symbole vor dem Text Sie werden zu einer Handlung aufgefordert. − Aufzählung, Auflistung Hinweise, Funktionsabläufe Text ohne Symbol: Beschreibungen oder Erklärungen nach einer Überschrift. 1.4 Bestimmungsgemäßer Gebrauch Das Gerät dient zur gewerblichen Nutzung und darf nur betrieben werden − von eingewiesenem Personal, − wenn das Gerät beaufsichtigt wird, − für den nach Betriebsanleitung vorgesehenen Zweck. Das Gerät darf nur für die Zubereitung von Speisen verwendet werden! Z. B. zum Frittieren und Backen von Fleisch, Fisch, Kartoffeln, Gemüse, Mehlspeisen, gefüllte Teig‐ und Backwaren. Das Gerät darf nur mit flüssigem Speisefett oder Speiseöl betrieben werden! Das Speisefett oder Speiseöl muss speziell zum Frittieren geeignet sein. 1.5 Fehlanwendungen (Vernünftigerweise vorhersehbare Fehlanwendung) Das Gerät darf nicht betrieben werden, − im Freien, − mit Wasser in allen Aggregatszuständen oder anderen, nicht dem Verwendungszweck entspre chenden Flüssigkeiten, − zum Schmelzen von Wachs oder ähnlichem Material. Das Gerät darf nicht benutzt werden, − von Kindern, − von Personen mit eingeschränkten physischen, sensorischen oder geistigen Fähigkeiten und − ungeschultem Personal. 6 de 1.6 Eintragen der Typenschilddaten Tragen Sie vor der Aufstellung des Gerätes die Typenschilddaten in die nachfolgenden Zeilen ein. Bitte geben Sie diese Daten an, wenn Sie eine Serviceleistung für das Gerät benötigen. Dies trägt zu einer schnelleren Bearbeitung Ihrer Fragen bei. Typ: 2. Baujahr: Maschinen‐Nr.: Sicherheitshinweise Gebrauch Tragen Sie beim Bedienen des Gerätes Arbeitskleidung und Schuhe, die speziell für Arbeiten an Fritteusen geeignet sind. Das Gerät darf nur transportiert werden, wenn − das Gerät abgekühlt ist, − das Frittier‐Öl oder das Frittier‐Fett abgelassen und − der Behälter im Unterbau entleert ist. Das Gerät nicht als Ablage oder Abstellfläche verwenden! Für Schäden durch nicht bestimmungsgemäßen Gebrauch haftet allein der Benutzer. Bei Rauchentwicklung des Fettes, die Energiezufuhr sofort unterbrechen! Beachten Sie die Hinweise auf Seite 32 in, Kapitel 10.3 “Frittierfehler erkennen und beseitigen” und auf Seite 35, Kapitel 13. “Stö rungen und Abhilfe”! Beachten Sie die Vorschriften und Regeln der Berufsgenossenschaften! Option Pumpe: Manuelles Ein‐ und Ausschalten der Pumpe, deshalb den Pumpvorgang beaufsichtigen und bei Erreichen des Füllstandes im Becken die Pumpe abschalten. Wichtig, es erfolgt kein automa tisches Abschalten, wenn das Becken überfüllt wird! Geräte mit Rollen dürfen nur in entleertem und abgekühltem Zustand vor‐ und zurück bewegt werden. Wenn Sie Betriebsstörungen nicht anhand Seite 35, Kapitel 13. ”Störungen und Abhilfe” beseitigen können, das Gerät ausschalten und den Kundendienst benachrichtigen. Verletzungsgefahr Während des Betriebes besteht Verbrennungsgefahr durch − heißes Frittier‐Öl/Frittier‐Fett, − heiße Fettspritzer und − heiße Oberflächen. Vorsicht beim Herausziehen, Einschieben oder Ausheben des gefüllten Behälters! Der Behälter darf nur entnommen werden, wenn das Frittier‐Öl/Frittier‐Fett abgekühlt ist. Mit entsprechender Sorgfalt vorgehen, sonst kann dies zum Überschwappen und Spritzen von Frittier‐Öl/Frittier‐Fett führen! Bei Zweibecken‐Fritteusen beachten! Wenn der Behälter von Hand entleert oder umgefüllt werden muss, nur den Inhalt von einem Becken in den Behälter ablassen! Wird der Inhalt von beiden Becken in den Behälter abgelassen, wird der Behälter für das Umfüllen von Hand zu schwer! Option Pumpe: Während die Pumpe läuft darf die Verschlusskupplung nicht entriegelt oder das Einlauf rohr und der Entleerungsschlauch nicht in die Verschlusskupplung gesteckt werden. 7 de Option Pumpe: Mit der Pumpe darf keine Reinigungslösung oder Wasser umgepumpt werden! Es könnte sonst Restwasser in der Pumpe und im Entleerungsschlauch verbleiben! Dies kann im Betrieb zu starkem Spritzen, Aufschäumen, Überlaufen des Beckens und zur Fettexplosion führen! Keine Flüssigkeiten in das Frittier‐Öl/Frittier‐Fett laufen lassen. Werden die Frittier‐Arbeiten unterbrochen oder beendet und es befindet sich noch heißes Frittier‐Öl oder Frittier‐Fett im Becken, muss das Becken mit einem geeignetem Deckel abgedeckt werden. Da durch wird verhindert, dass jemand versehentlich, zum Beispiel beim Ausrutschen, in das Becken greift. Während Reinigungsarbeiten an und neben Fritteusen, dürfen diese nicht betrieben werden. Wasser darf auf keinen Fall im Becken oder Behälter mit Frittier‐Öl/Frittier‐Fett vermischt werden. Dies würde zu starkem Spritzen, Aufschäumen, Überlaufen des Beckens oder zur Fettexplosion führen! Brandgefahr Bei Unterschreiten der Minimum‐Füllstandsmarke besteht Brandgefahr! Kontrollieren Sie deshalb regelmäßig den Füllstand und füllen Sie die fehlende Menge Frittier‐Öl oder Frittier‐Fett nach. Beachten Sie die Minimum‐ und Maximum‐Füllmarke! Durch Backgut und Gewürze verunreinigtes Frittier‐Öl/Frittier‐Fett nicht mehr verwenden. Es kann sich schon bei Temperaturen im Regelbereich des Gerätes entzünden und zum Überschäumen führen. Lassen Sie sich als Benutzer der Geräte einweisen, wo sich der bauseitige Sicherungsautomat für die zu bedienenden Geräte befindet. Im Brandfall können Sie somit das Gerät gefahrlos abschalten. Brandbekämpfung Zur Bekämpfung eines Brandes müssen zugelassene Feuerlöscher für Speiseöl‐ und Speisefettbrände und ein Fritteusen‐Deckel vorhanden sein. Wasser aus Sprinkleranlagen darf nicht in das Fett gelan gen. Löschen Sie brennendes Fett und Öl niemals mit Wasser! Gelangt Wasser in das heiße Frittier‐Öl/ Frittier‐Fett kommt es zu einer Explosion! Verwenden Sie nur zugelassene Löschmittel für Spei seöl‐ und Speisefettbrände! Beschädigungsgefahr Keine ätzenden oder säurehaltigen Reiniger am Frittierkorb und Heizkörper verwenden, sonst Zerstö rung des Korrosionsschutzes und Rostgefahr! Das Gerät nicht mit Wasserleitungsschlauch, Hochdruckreiniger, Dampf‐Hochdruckreiniger oder Dampfreiniger abspritzen bzw. reinigen! Frontblenden und Geräteverkleidungen nicht mit Schaumreiniger einsprühen! Der Schaumreiniger dringt in kleinste Ritzen und zerstört die Elektrik und Elektronik! Option Pumpe: Die Pumpe nur einschalten, wenn sich Frittier‐Öl im Behälter befindet und das Einlauf rohr aufgesteckt ist. Die Pumpe nicht trocken laufen lassen! Nach längeren Stillstandszeiten das Gerät durch einen Kundendienst auf Funktionstüchtigkeit überprü fen lassen. Ermittlung und Beurteilung von Gefährdungen nach dem Arbeitsschutzgesetz Nach dem Arbeitsschutzgesetz hat der Arbeitgeber zu beurteilen, welche Gefährdungen für die Be schäftigten mit der Arbeit verbunden sind und welche Maßnahmen des Arbeitsschutzes erforderlich sind. Beachten Sie hierzu die Hinweise der Berufsgenossenschaft für Großküchen! Der Arbeitgeber muss die persönlichen Schutzausrüstungen benennen und bereitstellen. 8 de 3. Gerätebeschreibung Hebevorrichtung Verschlusskupplung (Option Pumpe) Flachrohrheizkörper Nur bei Standfritteusen: Hebel zum Schwenken des Heizkörpers Hebel und Sicherung für Kugelablaufhahn Behälter mit Filtersys tem Griff zum Schwenken des Heizkörpers für Ein baufritteusen Gerät ohne Zeitsteuerung Gerät mit Zeitsteuerung Fritteuse mit − Flachrohrheizkörper für schonendes und wirtschaftliches Frittieren, − im Flachrohrheizkörper integrierter elektronischer Temperaturfühler und Sicherheitstemperaturbe grenzer, − automatische Fettschmelzfunktion für schonendes Aufheizen. Tiefgezogenes Becken mit − großen, reinigungsfreundlichen Radien, − Flachrohrheizkörper innerhalb des Beckens schwenkbar, − Fettablauf nach unten durch Kugelablaufhahn. Im Unterbau Behälter mit Filtersystem für Frittier‐Öl oder Frittier‐Fett. Optionen Filtersystem mit Pumpe Zeitsteuerung mit den Funktionen − Kurzzeituhr, − Garzeitkorrektur, − Standby‐Funktion, − zwei Betriebsarten (Zeit und Temperatur oder Produkttaste) Zeitsteuerung mit Korb‐Hebeautomatik 4. Bedienfeldbeschreibung 4.1 Hinweise zu Merkmalen, Varianten und Einstellungen Die beschriebenen Funktionen in dieser Betriebsanleitung beziehen sich auf die werkseitigen Einstel lungen der Steuerung. Einige Hinweise zur Bedienung und Steuerung können abweichen, wenn Einstellungen vom Benutzer oder Kundendienst in der Steuerung verändert wurden. Dies betrifft zum Beispiel den Signalton, Stand by‐Funktion, Standby‐Temperatur, Temperaturschritte und Garzeitkorrektur, siehe Seite 26, Kapitel 8.5 Sie können Tasten‐ und Signaltöne ab‐ und einschalten und die Dauer der Signaltöne ändern, siehe Seite 26, Kapitel 8.5 Die Einstellmöglichkeiten sind auch abhängig von der Ausstattung des Gerätes. Wichtig! Abhängig von der Einstellung der Betriebsart „Zeit und Temperatur“ oder „Produkttasten“, beach ten Sie bitte, dass Sie sich während dem Lesen im entsprechenden, Kapitel befinden. Siehe Überschrift in der Kopfzeile! Wartezeit zwischen Einstellungs‐ oder Abfragevorgängen beachten Zwischen verschiedenen Einstellungs‐ oder Abfragevorgängen ca. 3 Sekunden warten. Zum Beispiel − zwischen der Einstellung der Soll‐Temperatur und − Anzeige der Ist‐Temperatur. Erst nach dieser Wartezeit ist die Steuerung wieder bereit für eine neue Einstellung oder Abfrage. 9 de 4.2 Bedienfeld ohne „Zeitsteuerung“ Hinweise zur Bedienung der Steuerung siehe Seite 14, Kapitel 6.1 „Gerät einschalten“ und Kapitel 6.2 „Temperaturen auswählen, ändern und anzeigen“! Taste “Temperatur/Pumpe” (Option Pumpe) - Ist‐Temperatur abfragen, wenn das Gerät eingeschaltet ist. - Pumpe ein‐/ausschalten, nur wenn das Gerät mit Taste “Ein/Aus” ausgeschaltet ist. Die Kontrollleuchte leuchtet, wenn die Pumpe eingeschaltet ist (Option). Anzeige - Parameternummer Anzeige - Soll‐ oder Ist‐Temperatur - Fehlernummer Taste “aufwärts” Taste “abwärts” In 1‐er oder 5‐er Schritten, abhängig von der Einstellung in, Kapitel 8.5 Punkt leuchtet, wenn Heizung an ist Punkt blinkt, während des Aufheizvor ganges, wenn die Ist‐Tempera tur mehr als 10°C niedriger als die Soll‐Temperatur ist. Taste “P” in Kombination mit anderen Tasten - Temperaturwahl (Tasten 1, 2, 3 und 4) - Änderung der gespeicherten Temperatur 4.3 Tasten “1, 2, 3 und 4”- Temperatur - Auswählen der Temperatur Warten Sie mit dem Start des Frittiervorganges, bis der Punkt erloschen ist! Taste “Ein/Aus” - Zum Ein‐/Ausschalten 3 Sekunden gedrückt halten. Bedienfeld mit “Zeitsteuerung Betriebsart „Zeit und Temperatur“ oder Betriebsart „Produkttaste“ 4.3.1 Auswahl der Betriebsarten bei Option „Zeitsteuerung“ Bei Geräten mit der Ausstattung „Zeitsteuerung“ haben Sie die Möglichkeit in zwei verschiedenen Be triebsarten zu arbeiten: Betriebsart „Zeit und Temperatur“ oder Betriebsart „Produkttasten“. Geräte mit der Option „Zeitsteuerung“ werden standardmäßig mit der Einstellung Betriebsart „Zeit und Temperatur“ ausgeliefert. Ändern der Betriebsarten siehe Seite 26, Kapitel 8.5 Betriebsart „Zeit und Temperatur“ Betriebsart „Zeit und Temperatur“ In der Betriebsart „Zeit und Temperatur“ werden während des Betriebes die Zeit und Soll‐Temperatur angezeigt. Z. B. Vier Tasten für die individuelle, frei wählbare Spei cherung von Temperaturen und Garzeiten. Immer abrufbar für die schnelle, komfortable Bedienung. Beschreibung Bedienfeld siehe Seite 11, Kapi tel 4.3.2 Betriebsart „Produkttasten“ Z. B. Betriebsart „Produkttasten“ In der Betriebsart „Produkttasten“ werden während des Betriebes die Zeit und die Nummer der gewähl ten Produktaste z. B. „P22“ angezeigt. Es kann immer nur eine „Produkttaste“ ausgewählt werden. Eine Kombination hintereinander ist nicht möglich. Beschreibung Bedienfeld siehe Seite 11, Kapi tel 4.3.3 10 de 4.3.2 Betriebsart „Zeit und Temperatur“ Taste “Temperatur/Pumpe” (Option Pumpe) - Ist‐Temperatur abfragen, wenn das Gerät eingeschaltet ist. - Pumpe ein‐/ausschalten, nur wenn das Gerät mit Taste “Ein/Aus” ausgeschaltet ist. Die Kontrollleuchte leuchtet, wenn die Pumpe eingeschaltet ist (Option). Anzeige - Zeit in Minuten und Sekunden - Parameternummer Anzeige - Soll‐ oder Ist‐Temperatur - Fettnutzungsdauer - Parameterwerte - Fehlernummer Taste “aufwärts” Die Kontrollleuchte leuchtet, wenn die Korb‐Hebeautomatik eingeschaltet ist (Option). Taste “abwärts” In 1‐er oder 5‐er Schritten, abhängig von der Einstellung in, Kapitel 8.5 Taste “Start/Stop” - Kurzzeituhr starten oder stoppen, - Hebevorrichtung absenken/ ausheben - Grundeinstellungen zur Kurzzeituhr ändern Punkt leuchtet, wenn Heizung an ist Punkt blinkt, während des Aufheizvor ganges, wenn die Ist‐Tempera tur mehr als 10°C niedriger als die Soll‐Temperatur ist. Taste “P” in Kombination mit anderen Tasten - Temperaturwahl (Tasten 1, 2, 3 und 4) - Änderung der gespeicherten Temperatur - Anzeige der Fettnutzungsdauer - Einstellungen von Parametern 4.3.3 Tasten “1, 2, 3 und 4”- Zeit/Temperatur - Auswahl der Kurzzeituhr , - Abbrechen des Signaltones, - Auswählen der Temperatur Die Kontrollleuchten in den Tasten - leuchten, wenn die Kurzzeituhr eingeschaltet ist, - blinken, wenn die Kurzzeituhr abläuft. Warten Sie mit dem Start des Frittiervorganges, bis der Punkt erloschen ist! Taste “Ein/Aus” - Zum Ein‐/Ausschalten 3 Se kunden gedrückt halten. Betriebsart „Produkttasten“ - Anzeige Zeit und Produkttaste Taste “Temperatur/Pumpe” (Option Pumpe) - Ist‐Temperatur und Soll‐Temperatur abfragen, wenn das Gerät eingeschaltet ist. - Pumpe ein‐/ausschalten, nur wenn das Gerät mit Taste “Ein/Aus” ausgeschaltet ist. Die Kontrollleuchte leuchtet, wenn die Pumpe eingeschaltet ist (Option). Anzeige - Zeit in Minuten und Sekunden - Parameternummer - Ist‐Temperatur Anzeige - Nummer „Produkttaste“ - Soll‐Temperatur - Fettnutzungsdauer - Parameterwerte - Fehlernummer Taste “aufwärts” Die Kontrollleuchte leuchtet, wenn die Korb‐Hebeautomatik eingeschaltet ist (Option). Taste “abwärts” In 1‐er oder 5‐er Schritten, abhängig von der Einstellung in, Kapitel 8.5 Taste “Start/Stop” - Kurzzeituhr starten oder stoppen, - Hebevorrichtung absenken/ ausheben Punkt leuchtet, wenn Heizung an ist Punkt blinkt, während des Aufheizvor ganges, wenn die Ist‐Tempera tur mehr als 10°C niedriger als die Soll‐Temperatur ist. Taste “P” in Kombination mit anderen Tasten - Änderung der gespeicherten Zeit und Temperatur - Anzeige der Fettnutzungsdauer - Einstellungen von Parametern Warten Sie mit dem Start des Tasten “1, 2, 3 und 4” = 20 Produkttasten Frittiervorganges, bis der Punkt erloschen ist! - Auswahl der „Produkttasten“, - Abbrechen des Signaltones, Taste “Ein/Aus” - Auswählen der Temperatur - Zum Ein‐/Ausschalten 3 Se Die Kontrollleuchten in den Tasten 1‐4 sind bei Ein kunden gedrückt halten. stellung der Betriebsart „Produkttasten“ ohne Funktion. 11 de 5. Inbetriebnahme Das Gerät vor der Erstinbetriebnahme mit fettlösendem Reinigungsmittel säubern. Gereinigte Teile und Flächen mit weichem Lappen trockenreiben. Reinigung siehe Seite 32, Kapitel 12. 5.1 Betriebsbereitschaft herstellen Ablaufhahn schließen - Hebel nach oben schwen ken und Sicherung einrasten. Zu Auf Hebel für Ablaufhahn Sicherung für Ablaufhahn Einbaufritteuse Griff zum Schwenken des Heizkörpers Heizkörperauflage vorne höher Frittierkorb und Einlegesieb aus dem Becken ent nehmen. Schwenken des Heizkörpers Bei Einbaufritteusen: Becken Heizkörper Griff am Heizkörper einhängen und Heizkörper nach oben schwenken. Bei Standfritteusen: Heizkörper nach oben schwenken, durch Drehen des Hebels gegen den Uhrzeigersinn. Standfritteuse Korb‐Halterung Frittierkorb Heizkörperauflage seitenrichtig in das Becken einsetzen - höhere Auflage vorne platzieren. Einlegesieb Heizkörper einschwenken. Heizkörperauflage vorne höher Einlegesieb auf den Heizkörper legen. Option Korb‐Hebeautomatik: Hebevor richtung Hebel zum Schwen ken des Heizkörpers 12 Korb‐Halterung auf die Hebevorrichtung auf stecken. Frittierkorb in Korb‐Halterung einhängen de Option Pumpe: Anschlussstutzen für Pumpenansaugung mit O‐Ring (Rundring) Grobfilter Haltebügel für Feinfilter Ansaugrohr Haltebügel und Feinfilter zusammenfügen. Feinfilter mit Haltebügel in den Behälter einsetzen. Grobfilter in den Feinfilter einsetzen. Feinfilter Führungs rollen Bohrung und Aussparung für Feinfilter Einsetzen der Filter Option Pumpe: Ansaugrohr, mit Anschluss stutzen nach hinten zeigend, in den Behälter ste cken. Ausgieß öffnung Behälter Führungsschienen Füllstandsmarken Behälter in die Führungsschiene einsetzen und bis zum Anschlag nach hinten schieben. Becken Becken befüllen Führungsschiene Führungsrollen vom Behälter in Pfeilrichtung einsetzen Becken mit frischem, rein pflanzlichem Frittier‐Öl oder halbflüssigem Frittier‐Fett befüllen. Ausdehnung durch Erwärmung beachten! Das Becken bis zur “Minimum‐Markierung” befüllen. Nach dem Aufheizen kontrollieren und bei Bedarf Frittier‐Öl/Frittier‐Fett nachfüllen. Für das Befüllen des Beckens kein Hart‐Fett (Block‐Fett) verwenden! Dieses Frittier‐Fett würde nach dem Erkalten erstarren und ein Filter‐ und Pumpvorgang wäre nicht mehr möglich! Das Gerät darf nur mit flüssigem Speisefett oder Speiseöl betrieben werden! VORSICHT! Rutschgefahr! Fettspritzer auf dem Fußboden sofort beseitigen. 13 Betriebsart „Zeit und Temperatur“ de 6. Betriebsart „Zeit und Temperatur“ ‐ Bedienung der Steuerung Geräte ohne Zeitsteuerung: Bedienung der Steue rung siehe Kapitel 6.1 und 6.2! Soll‐Temperatur Z. B. Geräte mit „Zeitsteuerung“ werden standardmäßig mit der Einstellung Betriebsart „Zeit und Temperatur“ ausgeliefert. Möchten Sie mit der Betriebsart „Produkttasten“ arbeiten, können Sie diese Einstellung selbst vor nehmen. Ändern der Betriebsart siehe Seite 26, Ka pitel 8.5 Bedienung der Steuerung bei Betriebsart „Produkt tasten“ siehe Seite 19, Kapitel 7. 6.1 Gerät einschalten Bauseitigen elektrischen Hauptschalter einschalten. In der Anzeige − erscheint kurz die Versionsnummer und Typ‐Nummer der Steuerung. − leuchten drei Punkte. 3 sec. Taste “Ein‐/Aus” drücken und 3 Sekunden halten. In der Anzeige erscheint die Soll‐Temperatur. Um eine hohe Temperaturbelastung des Frittier‐Öles/Frittier‐Fettes während des Aufheizens zu ver meiden, schaltet die Steuerung erst nach Erreichen von ca. 90°C Fetttemperatur automatisch auf die volle Heizleistung. 6.2 Temperaturen auswählen, ändern und anzeigen Werksseitig eingestellte Soll‐Temperaturen: Taste 1=110°C Taste 2=160°C Taste 3=170°C Taste 4=180°C Die werksseitig gespeicherten Soll‐Temperaturen können Sie ändern, siehe Seite 18, Kapitel 6.4.1 6.2.1 Soll‐Temperatur auswählen und ändern Taste “P” 3 sec. drücken. Innerhalb 3 Sekunden die Taste “1, 2, 3 oder 4” drücken. Option Zeitsteuerung: Die Anzeige für “Zeit” erlischt kurzzeitig. Wenn die Soll‐Temperatur verändert werden soll: - Innerhalb 3 Sekunden die Taste “Aufwärts” oder “Abwärts” drücken und halten. Zunächst erfolgt langsamer, dann schneller Vor‐ oder Rücklauf. Durch drücken der Taste erfolgt die Einstellung um einen Schritt vor bzw. zurück. Die für diese Taste geänderte Soll‐Temperatur erscheint in der Anzeige und wird auch nach dem Aus‐ 3 sec. und Einschalten mit der Taste “Ein/Aus” wieder angezeigt. Die vorgenommene Temperatur‐Veränderung ist nicht mehr vorhanden, nach dem − Drücken einer anderen Temperatur‐Taste (Taste “P und 1, 2, 3 oder 4“) oder, − Aus‐ und Einschalten des bauseitigen elektrischen Hauptschalters. 14 Betriebsart „Zeit und Temperatur“ 6.2.2 de Anzeigen der Ist‐Temperatur im Becken Wenn das Gerät eingeschaltet ist, Taste “Temperatur/Pumpe” drücken. Die aktuelle Ist‐Temperatur im Becken wird 3 Sekunden lang angezeigt. 6.3 Kurzzeituhr (Option Zeitsteuerung) Werksseitig eingestellte Zeiten − Taste 1=4 Minuten − Taste 2=4 Minuten und 30 Sekunden − Taste 3=5 Minuten − Taste 4=5 Minuten und 30 Sekunden Die werksseitig gespeicherten Zeiten können Sie ändern, siehe Seite 18, Kapitel 6.4.2 Hinweise Zeiteinstellung Eine Änderung der Zeit‐Einstellung kann nur für eine Kurzzeituhr vorgenommen werden, die noch nicht gestartet wurde. Die vorgenommenen Zeit‐Veränderungen sind nicht mehr vorhanden, wenn − eine andere Taste mit anderer Zeit gedrückt, − das Gerät mit Taste „Ein/Aus“ oder − das Gerät mit dem bauseitigen Hauptschalter aus‐ und wieder eingeschaltet wurde. Optionen zur Kurzzeituhr Gerät ohne Korb‐Hebeautomatik - nach Ablauf der eingestellten Zeit ertönt ein Signalton. Sie können Tasten‐ und Signaltöne ab‐ und einschalten und die Dauer der Signaltöne ändern, siehe Seite 26, Kapitel 8.5 Gerät mit Korb‐Hebeautomatik - nach Ablauf der eingestellten Zeit wird der Frittierkorb aus dem Becken gehoben und ein Signalton ertönt. Funktion Korb‐Hebeautomatik (Option) Die Kontrollleuchte in der Taste “START/STOP” leuchtet, wenn die Korb‐Hebeautomatik einge schaltet ist (Korb‐Hebeautomatik aus‐ oder einschalten, siehe Seite 23, Kapitel 8.1). Die Korb‐Hebeautomatik wartet mit dem Absenken der Hebevorrichtung, wenn − die Öl‐ oder Fetttemperatur im Becken unter 90°C liegt, − die Ist‐Temperatur mehr als 5°C niedriger als die Soll‐Temperatur oder − die Ist‐Temperatur mehr als 30°C höher als die Soll‐Temperatur ist. 15 Betriebsart „Zeit und Temperatur“ de 6.3.1 Kurzzeituhr auswählen, ändern und starten Gewünschte Taste “1, 2, 3 oder 4” drücken. Die gespeicherte Zeit erscheint in der Anzeige. - Die Kontrollleuchte in der Taste leuchtet. Wenn die Zeit für den aktuellen Frittiervorgang verändert werden soll: 3 sec. Innerhalb 3 Sekunden die Taste “Aufwärts” oder “Abwärts” drücken und halten. Zunächst erfolgt langsamer, dann schneller Vor‐ oder Rücklauf. Durch drücken der Taste erfolgt die Einstellung um einen Schritt vor bzw. zurück. Taste “START/STOP” drücken. Die Kontrollleuchte in der Taste „1, 2, 3, oder 4“ blinkt. Die Zeit läuft rückwärts ab. Ausnahme bei eingeschalteter Korb‐Hebeautomatik: Die Steuerung wartet mit dem Zurückzählen der Zeit und Absenken der Hebevorrichtung, wenn − die Ist‐Temperatur mehr als 5°C niedriger als die Soll‐Temperatur oder − die Ist‐Temperatur mehr als 30°C höher als die Soll‐Temperatur ist. − Nach Erreichen der Soll‐Temperatur wird der Frittierkorb über die Hebevorrichtung automatisch in das Becken abgesenkt und die Zeit läuft rückwärts ab. Während des Frittiervorganges kann die Soll‐Temperatur verändert werden. Nach Ablauf der Zeit ertönt ein Signalton. Gerät mit eingeschalteter Korb‐Hebeautomatik: Der Korb wird automatisch ausgehoben. Abbrechen des Signaltons − die Taste “1, 2, 3 oder 4” mit der blinkenden Kontrollleuchte drücken oder − 10 Sekunden warten, bis der Signalton automatisch beendet wird. Das blinkende Leuchtsignal in der Taste schaltet von Blinken auf Leuchten um. In der Anzeige erscheint die zuvor eingestellte Zeit. 16 Betriebsart „Zeit und Temperatur“ 6.3.2 de Mehrere Kurzzeituhren starten Diese Funktion können Sie z. B. nutzen, wenn Sie mehrere Portionskörbe in einem Becken einsetzen. Oder um eine Zwischenzeit einzustellen, die anzeigt, dass z. B. das Gargut aufgeschüttelt werden muss. Es können bis zu vier Kurzzeituhren gleichzeitig verwendet werden. Gewünschte Taste zum Beispiel “1, 2, 3 oder 4” und Taste “START/STOP” - drücken. Für jede zu verwendete Taste diesen Vorgang wiederholen, bis alle gewünschten Zeiten eingestellt und gestartet wurden. Wenn die Korb‐Hebeautomatik eingeschaltet ist: − Der Korb wird automatisch nach dem Start der ersten Kurzzeituhr in das Becken abgesenkt. − Die zuerst eingestellte Kurzzeituhr hat für das Ausheben des Korbes Gültigkeit. − Die kürzeste verbleibende Zeit erscheint in der Anzeige, unabhängig davon welche Taste zuerst gedrückt wurde. Wenn keine Korb‐Hebeautomatik verwendet wird: − Die kürzeste verbleibende Zeit erscheint in der Anzeige, unabhängig davon welche Taste zuerst gedrückt wurde. Die Kontrollleuchten der ausgewählten Tasten leuchten und die Kontrollleuchte in der Taste mit der kürzesten verbleibenden Zeit blinkt. Alle aktivierten Kurzzeituhren laufen jede für sich rückwärts ab. Bei Geräten mit Korb‐Hebeautomatik wird der Korb automatisch aus dem Becken gehoben. Nach Ablauf der Zeit ertönt ein Signalton. - Zum Abbrechen des Signaltons die Taste mit der blinkenden Kontrollleuchte drücken. Die Kontrollleuchte in der Taste erlischt. Die nächste kürzeste verbleibende Zeit erscheint in der Anzeige und die Kontrollleuchte in der Taste blinkt. Diese Abläufe wiederholen sich bis alle ausgewählten Zeiten abgelaufen sind. 6.3.3 Abschalten einer Kurzzeituhr, wenn mehrere Kurzzeituhren gestartet sind Beispiel: Die Kontrollleuchte in der Taste “1” blinkt und die Kontrollleuchte in den Tasten “3” und “4” leuchten. Es soll die Kurzzeituhr auf Taste “3” abgeschaltet werden. + Taste “3” drücken. 3 sec. Die Kontrollleuchte in der Taste “3” blinkt. Innerhalb 3 Sekunden die Taste “START/STOP” drücken. Die Kontrollleuchte in der Taste “3” erlischt. Die Kurzzeituhr ist abgeschaltet. Wurde mit dieser Kurzzeituhr die Korb‐Hebeautomatik verwendet, wird der Korb aus dem Becken ge hoben. Die nächste kürzeste verbleibende Zeit erscheint in der Anzeige und die Kontrollleuchte in der Taste blinkt. 17 Betriebsart „Zeit und Temperatur“ de 6.4 Grundeinstellungen für Temperatur und Zeit ändern 6.4.1 Grund‐Einstellungen von Temperaturen ändern Mit dieser Funktion können Sie die werksseitig eingestellten Temperaturen verändern. Diese Einstellungen bleiben auch nach dem Ein‐ und Ausschalten mit dem bauseitigen Hauptschalter gespeichert. Das Gerät muss ausgeschaltet sein. In der Anzeige leuchten drei Punkte. 3 sec. - Taste “P” drücken. Innerhalb 3 Sekunden die Taste “1, 2, 3 oder 4” drücken deren Einstellung geändert werden soll. Die Temperatur‐Anzeige blinkt. Die gespeicherte Temperatur erscheint in der Anzeige. 3 sec. Innerhalb 3 Sekunden die Taste “Aufwärts” oder “Abwärts” drücken und halten. Zunächst erfolgt langsamer, dann schneller Vor‐ oder Rücklauf. Durch drücken der Taste erfolgt die Einstellung um einen Schritt vor bzw. zurück. 3 sec. Innerhalb 3 Sekunden die Taste “P” drücken. Die eingestellte Temperatur ist gespeichert. In der Anzeige leuchten drei Punkte. 6.4.2 Grund‐Einstellungen der Kurzzeituhren ändern (Option Zeitsteuerung) Mit dieser Funktion können Sie die werksseitig eingestellten Zeiten verändern. Diese Einstellungen bleiben auch nach dem Ein‐ und Ausschalten mit dem bauseitigen Hauptschalter gespeichert. Das Gerät muss ausgeschaltet sein. In der Anzeige leuchten drei Punkte. 3 sec. - Taste “START/STOP” drücken. Innerhalb 3 Sekunden die Taste “1, 2, 3 oder 4” drücken deren Einstellung geändert werden soll. Die Zeit‐Anzeige blinkt. Die gespeicherte Zeit erscheint in der Anzeige. 3 sec. Innerhalb 3 Sekunden die Taste “Aufwärts” oder “Abwärts” drücken und halten. Zunächst erfolgt langsamer, dann schneller Vor‐ oder Rücklauf. Durch drücken der Taste erfolgt die Einstellung um einen Schritt vor bzw. zurück. 3 sec. Innerhalb 3 Sekunden die Taste “START/STOP” Die eingestellte Zeit ist gespeichert. In der Anzeige leuchten drei Punkte. 18 drücken. Betriebsart „Produkttasten“ 7. de Betriebsart „Produkttasten“ ‐ Bedienung der Steuerung Nummer „Produkttaste“ Z. B. Möchten Sie die Betriebsart „Produkttasten“ verwenden müssen Sie diese einstellen, da diese werkseitig nicht voreingestellt ist. Ändern der Be triebsart siehe Seite 26, Kapitel 8.5 In der Betriebsart „Produkttasten“ werden ihnen gleichzeitig Zeit und Nummer der gewählten Produkt taste angezeigt. Sie können 20 Nummern für Pro dukttasten verwenden, siehe, Kapi tel 7.1 Werksseitige Belegung der „Produkttasten“ Bedienung der Steuerung bei Betriebsart „Produkt tasten“ wie in diesem, Kapitel 7. beschrieben. 7.1 Werksseitige Belegung der „Produkttasten“ Die gespeicherten Zeiten und Temperaturen können Sie für jede Nummer der „Produkttaste“ verändern. Sie haben zwei Möglichkeiten der Änderung: − Ändern für aktuellen Frittiervorgang - die Änderung bleibt nur so lange erhalten, bis eine andere Num mer der „Produkttaste“ eingestellt wird! Siehe Seite 21, Kapitel 7.3.2. − Ändern und dauerhaft speichern, - die Änderung wird zur Nummer der „Produkttaste“ gespeichert und bleibt auch nach dem Aus‐ und Einschalten erhalten! Siehe Seite 22, Kapitel 7.5. Nummer Pro Taste(n) drücken dukttaste Produktname Zeit Temperatur 1 1 8,00 Min. 160° C 2 2 4,00 Min. 170° C 3 3 4,00 Min. 175° C 4 4 4,00 Min. 180° C 11 1+1 4,00 Min. 160° C 12 1+2 5,00 Min. 160° C 13 1+3 6,00 Min. 160° C 14 1+4 7,00 Min. 160° C 21 2+1 4,30 Min. 170° C 22 2+2 5,00 Min. 170° C 23 2+3 6,00 Min. 170° C 24 2+4 7,00 Min. 170° C 31 3+1 4,30 Min. 175° C 32 3+2 5,00 Min. 175° C 33 3+3 6,00 Min. 175° C 34 3+4 7,00 Min. 175° C 41 4+1 4,30 Min. 180° C 42 4+2 5,00 Min. 180° C 43 4+3 6,00 Min. 180° C 44 4+4 7,00 Min. 180° C 19 Betriebsart „Produkttasten“ de 7.2 Gerät einschalten Bauseitigen elektrischen Hauptschalter einschalten. In der Anzeige − erscheint kurz die Versionsnummer und Typ‐Nummer der Steuerung. − leuchten drei Punkte. 3 sec. Taste “Ein‐/Aus” drücken und 3 Sekunden halten. In der rechten Anzeige erscheint kurz die Soll‐Temperatur, anschließend die Nummer der „Produkt taste“. In der linken Anzeige erscheint die Garzeit. Um eine hohe Temperaturbelastung des Frittier‐Öles/Frittier‐Fettes während des Aufheizens zu ver meiden, schaltet die Steuerung erst nach Erreichen von ca. 90°C Fetttemperatur automatisch auf die volle Heizleistung. 7.3 Zeit und Temperatur über „Produkttaste“ wählen Eine Übersicht der hinterlegten Zeiten und Temperaturen finden Sie auf Seite 19, Kapitel 7.1 7.3.1 - Zeit und Soll‐Temperatur über Nummer der „Produkttaste“ wählen und starten Nummer für „Produkttaste“ mit Tasten 1 bis 4 wählen: Z. B. − für Produkte 1‐4 die Taste “1, 2, 3 oder 4” drücken oder − für Produkte mit zweistelliger Nummer z. B. „Produkttaste“ „12“ die Taste 1 und 2 kurz hinterein ander drücken. Die Anzeige für “Zeit” und „Nummer Produkttaste“ erlischt kurzzeitig. Die Soll‐Temperatur zur „Produkttaste“ wird für die Dauer von ca. 1 Sekunde angezeigt. In der linken Anzeige erscheint die Zeit, in der rechten Anzeige die Nummer der „Produkttaste“. Taste “START/STOP” drücken. Die Kontrollleuchte in der Taste “START/STOP” blinkt. Die Zeit läuft rückwärts ab. Ausnahme bei eingeschalteter Korb‐Hebeautomatik: Die Steuerung wartet mit dem Zurückzählen der Zeit und Absenken der Hebevorrichtung, wenn − die Ist‐Temperatur mehr als 5°C niedriger als die Soll‐Temperatur oder − die Ist‐Temperatur mehr als 30°C höher als die Soll‐Temperatur ist. − Nach Erreichen der Soll‐Temperatur wird der Frittierkorb über die Hebevorrichtung automatisch in das Becken abgesenkt und die Zeit läuft rückwärts ab. Nach Ablauf der Zeit ertönt ein Signalton. Gerät mit eingeschalteter Korb‐Hebeautomatik: Der Korb wird automatisch ausgehoben. Abbrechen des Signaltons − die Taste “1, 2, 3 oder 4” drücken oder − 10 Sekunden warten, bis der Signalton automatisch beendet wird. In der Anzeige erscheint die zuvor eingestellte Zeit und Nummer der „Produkttaste“. Ändern von Einstellungen Ändern von Zeit und Soll‐Temperatur für Betriebsart „Produkttasten“: − ohne Speicherung, nur für aktuellen Frittiervorgang, siehe Seite 21, Kapitel 7.3.2, − mit dauerhafter Speicherung, siehe Seite 22, Kapitel 7.5 Ändern von Signaltönen: − Sie können Tasten‐ und Signaltöne ab‐ und einschalten und die Dauer der Signaltöne ändern, siehe Seite 26, Kapitel 8.5 20 Betriebsart „Produkttasten“ 7.3.2 de Zeit und Soll‐Temperatur für aktuellen Frittiervorgang ändern Während die Kurzzeituhr abläuft, können die Zeit und Soll‐Temperatur nicht verändert werden. Die vorgenommene Temperatur‐Veränderung ist nicht mehr vorhanden, nach dem − Drücken einer anderen Temperatur‐Taste, − Aus‐ und Einschalten mit Taste „Ein/Aus“ oder − Aus‐ und Einschalten des bauseitigen elektrischen Hauptschalters. Um die werkseitig voreingestellten Zeit und Soll‐Temperatur Ihren Erfordernissen anzupassen und dau erhaft zu speichern, wenden Sie die Vorgehensweise an wie ab Seite 22, Kapitel 7.5 beschrieben. Änderung der Zeit / Temperatur für aktuellen Frittiervorgang Taste “P” drücken. Die Zeit blinkt in der linken Anzeige. 3 sec. Wenn Änderung erfolgen soll, innerhalb 3 Sekunden die Taste “Aufwärts” drücken und halten. oder “Abwärts” Zunächst erfolgt langsamer, dann schneller Vor‐ oder Rücklauf. Durch Drücken der Taste erfolgt die Einstellung um einen Schritt vor bzw. zurück. Taste “P” drücken. Die geänderte Zeit ist gespeichert. 3 sec. Die Soll‐Temperatur blinkt in der rechten Anzeige. Wenn Änderung erfolgen soll, innerhalb 3 Sekunden die Taste “Aufwärts” drücken und halten. oder “Abwärts” Zunächst erfolgt langsamer, dann schneller Vor‐ oder Rücklauf. Durch drücken der Taste erfolgt die Einstellung um einen Schritt vor bzw. zurück. Speichern der Einstellungen - Taste “P” drücken oder ca. 3 Sekunden warten. 7.4 Anzeigen der Ist‐Temperatur im Becken Wenn das Gerät eingeschaltet ist, Taste “Temperatur/Pumpe” drücken. Es werden zwei Temperaturen 3 Sekunden lang angezeigt: − Linke Anzeige Ist‐Temperatur und − rechte Anzeige Soll‐Temperatur. 21 Betriebsart „Produkttasten“ de 7.5 Grundeinstellungen für Zeit und Soll‐Temperatur ändern Mit dieser Funktion können Sie werksseitig eingestellte Vorgaben für Zeit und Soll‐Temperatur Ihren Er fordernissen anpassen. + Diese Einstellungen bleiben auch nach dem Ein‐ und Ausschalten mit dem bauseitigen Hauptschalter gespeichert. Das Gerät muss ausgeschaltet sein. In der Anzeige leuchten drei Punkte. Taste “P” drücken. Innerhalb 3 Sekunden Nummer für „Produkttaste“ mit Tasten 1 bis 4 wählen: Z. B. 3 sec. - − für Produkte 1‐4 die Taste “1, 2, 3 oder 4” drücken oder − für Produkte mit zweistelliger Nummer z. B. „Produkttaste 12“ die Taste 1 und 2 kurz hintereinander drücken. Die Anzeige für Zeit blinkt. Die Nummer der „Produkttaste“ wird angezeigt. 10 sec. Wenn die Zeit geändert werden soll: Innerhalb 10 Sekunden die Taste “Aufwärts” oder “Abwärts” drücken und halten. Zunächst erfolgt langsamer, dann schneller Vor‐ oder Rücklauf. Durch drücken der Taste erfolgt die Einstellung um einen Schritt vor bzw. zurück. 10 sec. Innerhalb 10 Sekunden die Taste ”P” drücken. Die eingestellte Zeit ist gespeichert. 10 sec. Die Anzeige für Soll‐Temperatur blinkt. 10 sec. Innerhalb 10 Sekunden die Taste “Aufwärts” Wenn die Soll‐Temperatur geändert werden: oder “Abwärts” drücken und halten. Zunächst erfolgt langsamer, dann schneller Vor‐ oder Rücklauf. Durch drücken der Taste erfolgt die Einstellung um einen Schritt vor bzw. zurück. Speichern der eingestellten Soll‐Temperatur: Innerhalb 10 Sekunden die Taste “P” drücken. nicht gedrückt, erfolgt keine Speicherung der geränderten Soll‐Temperatur Wurde die Taste “P” und der Einstellvorgang wird automatisch nach 10 Sekunden abgebrochen. 22 Funktionen Option „Zeitsteuerung“ 8. de Funktionen Option „Zeitsteuerung“ Diese Funktionen sind für die beiden Betriebsarten „Zeit und Temperatur“ und „Produkttasten“ identisch. Option „Zeitsteuerung“ Betriebsart „Zeit und Temperatur“ 8.1 Betriebsart „Produkttasten“ Korb‐Hebeautomatik ab‐ oder einschalten (Option) Nur bei Geräten mit Zeitsteuerung und Korb‐Hebeautomatik! Über die Kurzzeituhr wird die Hebevorrichtung automatisch aus‐ oder eingefahren. Diese Funktion kann auch abgeschaltet werden. Dies ist zum Beispiel erforderlich, wenn mit mehreren Portionskörben in einem Becken gearbeitet wird und die Kurzzeituhr verwendet werden soll. Abschalten der Korb‐Hebeautomatik 3 sec. Taste “START/STOP” drücken und 3 Sekunden halten. Die Kontrollleuchte in der Taste erlischt. Die Hebevorrichtung fährt nach unten. Ausnahme: Die Korb‐Hebeautomatik wartet mit dem Einfahren der Hebevorrichtung, bis die Öl‐ oder Fetttemperatur im Becken über 90°C beträgt. Einschalten der Korb‐Hebeautomatik 3 sec. Taste “START/STOP” drücken und 3 Sekunden halten. Die Kontrollleuchte in der Taste leuchtet. Die Hebevorrichtung fährt nach oben. Ausnahme: Die Korb‐Hebeautomatik wartet mit dem Ausfahren der Hebevorrichtung, bis die Öl‐ oder Fetttemperatur im Becken über 90°C beträgt. 8.1.1 Zwei einzeln steuerbare Hebevorrichtungen für großes Becken Standardmäßig ist die Steuerung so eingestellt, dass mit den beiden Hebevorrichtungen ein großer Korb ausgehoben werden kann. Möchten Sie die beiden Hebevorrichtungen einzeln ansteuern, muss dies durch den Kundendienst einge stellt werden. Bei Betriebsart „Zeit und Temperatur: Taste 1 und 2 für Hebevorrichtung links Taste 3 und 4 für Hebevorrichtung rechts Bei Betriebsart „Produkttasten“: In dieser Betriebsart ist es nicht möglich, die Hebevorrichtungen einzeln anzusteuern. Es werden beide Hebevorrich tungen gleichzeitig gesteuert! 23 Funktionen Option „Zeitsteuerung“ de 8.2 Öl‐/Fettnutzungsdauer Die Steuerung errechnet und verändert in Abhängigkeit der Temperatur die Fettnutzungsdauer für die Dauer des Betriebes: − niedrigere Temperatur = längere Fettnutzungsdauer − hohe Temperatur = kürzere Fettnutzungsdauer Die Öl‐/Fettnutzungsdauer ist sehr stark von der Frittiertemperatur, der eingesetzten Ware und der Reini gung des Frittier‐Öles oder Frittier‐Fettes abhängig. Die einstellbare Öl‐/Fettnutzungsdauer kann daher nur ein Anhaltswert sein und muss an die Gegebenhei ten vor Ort angepasst werden. Werksseitig ist die Funktion Öl‐/Fettnutzungsdauer abgeschaltet. Einschalten und Einstellen der Öl‐/Fett nutzungsdauer, siehe Seite 26, Kapitel 8.5 8.2.1 Anzeigen der verbleibenden Zeit für die Öl‐/Fettnutzungsdauer Taste “P” 3 sec. drücken. Innerhalb 3 Sekunden die Taste “Temperatur/Pumpe” drücken. Die verbleibende Zeit in Stunden wird für die Dauer von 3 Sekunden angezeigt. Erscheinen in der Anzeige drei Striche “- - -”, ist die Funktion “Öl‐/Fettnutzungsdauer” abgeschaltet. 8.2.2 Aufschieben der Meldung für Ende Öl‐/Fettnutzungsdauer Um während Stoßzeiten kein Frittier‐Öl oder Frittier‐Fett austauschen zu müssen, kann die Meldung um eine Stunde abgeschaltet/verschoben werden. Nach Ablauf der Zeit für die Öl‐/Fettnutzungsdauer: In der Anzeige erscheint abwechselnd und . Es ertönt ein Signalton. 3 sec. Taste “P” drücken. Innerhalb 3 Sekunden die Taste “Temperatur/Pumpe” drücken. Die Meldung erlischt und die Öl‐/Fettnutzungsdauer ist um eine Stunde verlängert. 8.2.3 Zurücksetzen des Zählers für Öl‐/Fettnutzungsdauer Nach dem Befüllen mit neuem Frittier‐Öl oder Frittier‐Fett muss der Zähler für die Fettnutzungsdauer zu rückgestellt werden. 3 sec. Taste “P” drücken. Innerhalb 3 Sekunden die Taste “Temperatur/Pumpe” drücken und 3 Sekunden halten. In der Anzeige wird die aktualisierte Fettnutzungsdauer 3 Sekunden lang angezeigt. 24 Funktionen Option „Zeitsteuerung“ 8.3 de Automatische Garzeitkorrektur Diese Einstellung kann durch den Benutzer ab‐ oder zugeschaltet werden, siehe Seite 26, Kapitel 8.5 Ist die Funktion Garzeitkorrektur aktiviert und wird mit der Kurzzeituhr oder Korb‐Hebeautomatik gearbei tet, verlängert die Steuerung bei größeren Portionen automatisch die Garzeit. Dies hat den Vorteil, dass Sie bei unterschiedlichen Füllmengen nicht jedes mal die Frittierzeit verändern müssen. Ermitteln der Garzeit‐Einstellung Damit die Funktion Garzeitkorrektur optimale Einstellwerte ermitteln kann, sollte zum Ermitteln der Zeitein stellung 1/5 der Maximalmenge frittiert werden. Beispiel: Maximalmenge 1000 Gramm, 1/5 entspricht 200 Gramm. Erforderliche Soll‐Temperatur für das zu frittierende Gargut einstellen. Frittierkorb mit 200 Gramm Frittiergut befüllen. Kurzzeituhr mit ausreichend hoher Garzeit‐Einstellung (z. B. 10 Minuten) starten. Frittierkorb mit Frittiergut ohne Zeitverlust in das Becken einsetzen. Garvorgang überwachen: Wenn fertig gegart die angezeigte Restzeit ablesen und notieren. Frittierzeit aus Garzeit‐Einstellung (z. B. 10 Minuten) und Restzeit errechnen. Ist das Frittierergebnis in Ordnung kann jetzt mit der ermittelten Zeit bei unterschiedlichen Mengen frittiert werden! Wenn Sie die Frittierware wechseln, z. B. Hersteller oder von Kühlware zu Tiefkühlware, sollten Sie die Garzeit‐Einstellung überprüfen. 8.4 Automatisches Umschalten in Standby‐Betrieb Die Steuerung schaltet die Fritteuse automatisch in den Standby‐Betrieb, wenn − über einen Zeitraum von 30 Minuten (werksseitige Einstellung) keine Taste gedrückt oder − von der Steuerung kein Temperaturabfall festgestellt wurde der auf einen Frittiervorgang schließen lässt. Einstellungen zum Standby‐Betrieb, siehe Seite 26, Kapitel 8.5 − Aus‐ und Einschalten der Funktion Standby‐Betrieb, − Standby‐Temperatur im Becken, − Zeiteingabe ab wann der Start des Standby‐Betriebes erfolgen soll. Anzeige des Standby‐Betriebes In beiden Anzeigen leuchten drei Striche “- - -”. Die Soll‐Temperatur wird auf 90°C (werksseitige Einstellung) zurückgeschaltet. Beenden Standby‐Betrieb - Beliebige Taste “1, 2, 3 oder 4” drücken. Die zuvor eingestellte Temperatur und Zeit erscheinen in der Anzeige. Die Kontrollleuchte in der Taste leuchtet. Das Gerät heizt auf die eingestellte Soll‐Temperatur. 25 Funktionen Option „Zeitsteuerung“ de 8.5 Ändern von Grund‐Einstellungen in der Steuerung 8.5.1 Einstellen der Parameter Entsprechend der Ausstattung des Gerätes gibt es verschiedene Einstellmöglichkeiten der Steuerung, siehe nachfolgende Parametertabelle, Kapitel 8.5.2. Der Einstellmodus wird automatisch abgeschaltet wenn nicht innerhalb 10 Sekunden die Taste “P” oder Taste “Aufwärts” oder “Abwärts” gedrückt werden. Bereits vorgenommene Einstellungen, die nicht mit der Taste “P” bestätigt wurden, sind nicht gespeichert. Einstellung ändern Das Gerät muss eingeschaltet sein. Zuerst Taste “P” drücken und halten, anschließend Taste “Temperatur/Pumpe” beide gleichzeitig 3 Sekunden halten. Der zuletzt eingestellte Parameter wird angezeigt. Innerhalb 10 Sekunden die Taste “Aufwärts” wünschte Parameter angezeigt wird. Innerhalb 10 Sekunden die Taste “P” Der Wert des Parameters blinkt. oder “Abwärts” drücken ‐ so oft drücken, bis der ge drücken. Innerhalb 10 Sekunden die Taste “Aufwärts” wünschte Wert eingestellt ist. oder “Abwärts” so oft drücken, bis der ge Eingestellten Wert speichern - innerhalb 10 Sekunden die Taste “P” drücken. Einstellvorgang verlassen 10 Sekunden warten - die Funktion “Einstellen der Parameter” ist abgeschaltet. Oder: Zuerst Taste “P” kurz drücken. 8.5.2 26 drücken und halten, anschließend gleichzeitig Taste “Temperatur/Pumpe” Parametertabelle (Anzeige nur bei Option Zeitsteuerung) Para meter Werkseitige Einstellung P01 Einstellbereich Beschreibung 0 0=Aus 1-99 Stunden Zeit‐Einstellung für die Nutzungsdauer von Frittier‐Öl oder Frittier‐Fett. Damit die geänderte Einstellung sofort wirksam wird, muss der Zähler zurückgesetzt werden, siehe Seite 24, Kapi tel 8.2.3 P02 1 0=Aus, 1=Ein Signal‐ und Tastenton ein‐ oder abschalten P03 10 Sekunden 0-60 Sekunden Signalton abschalten (0) und Dauer des Signaltones einstellen (1-60 Sekunden) P04 0 0=Aus, 1=Ein Standby‐Funktion ein‐ oder ausschalten P05 30 Minuten 10-120 Min. Funktion Standby starten nach Anzahl Minuten P06 90°C 60-170°C Standby‐Temperatur im Becken P07 0 0=1°C, 1=5°C Temperaturverstellung in Schritten pro Tasten druck P08 1 0=Aus, 1=Ein Garzeitkorrektur ein‐ oder ausschalten P09 0 0=Aus, 1=Ein Betriebsart „Produkttasten“ ein‐ oder ausschalten Einstellung Kunde de 9. Filtern des Frittier‐Öles/Frittier‐Fettes VORSICHT! Heiße Oberflächen! Verbrennungsgefahr! Schutzhandschuhe, Schutzkleidung und Schutz brille tragen! Filtern Sie täglich das Frittier‐Öl/Frittier‐Fett. Dadurch erhöht sich die Lebensdauer erheblich und das Frittier‐Öl und Frittier‐Fett kann länger verwendet werden. Option Pumpe: Da der Umfüllvorgang mit Pumpe wesentlich einfacher ist, bietet es sich an, das Frittier‐Öl/ Frittier‐Fett zusätzlich auch während kurzen Frittierpausen zu filtern. Siehe auch Seite 28, Kapitel 9.3.1. 9.1 Ablassen und Filtern des Frittier‐Öles/Frittier‐Fettes Gerät ausschalten - Taste “Ein/Aus” und 3 Sekunden halten. Grobfilter Haltebügel für Feinfilter drücken Die Kontrollleuchte in der Taste erlischt. In der Anzeige leuchten drei Punkte. Feinfilter Ausgießöffnung Vor dem Filtervorgang − Feinfilter einsetzen, − Grobfilter in den Feinfilter einsetzen, − Feinfilter mit Grobfilter in den Behälter ein setzen, − Behälter in den Unterbau einsetzen. Behälter Entleeren des Beckens und Filtern Frittierkorb Zum Entleeren und Filtern in den Behälter muss das Frittier‐Öl/Frittier‐Fett noch mindestens 60°C heiß sein! Einlegesieb Ablaufhahn öffnen - Sicherung anheben und He bel drehen bis zum Anschlag. Becken Zu Auf Das Frittier‐Öl/Frittier‐Fett fließt in den Behälter und wird gleichzeitig gefiltert. Hebel für Ablaufhahn Während dem Abfließen prüfen, dass der Behäl ter nicht überläuft! Sicherung für Ablaufhahn VORSICHT! Verbrennungsgefahr! Vorsicht Behälter heiß! Frittierkorb entnehmen. Einlegesieb entnehmen und Speisereste entfer nen. Heizkörper nach oben schwenken. Becken reinigen. 27 de 9.2 Umfüllen des Frittier‐Öles/Frittier‐Fettes (von Hand, ohne Pumpe) Bei Geräten ohne Pumpe (Option), muss das Umfüllen des Frittier‐Öles/Frittier‐Fettes vom Behälter in das Becken von Hand erfolgen. Vorbereitende Arbeiten Frittier‐Öl/Frittier‐Fett im Behälter abkühlen las sen! Grobfilter Fett‐ und hitzebeständige Schuhe, Handschuhe und Schutzkleidung tragen. Feinfilter Behälter in den Führungsschienen langsam und vorsichtig bis zum Anschlag herausziehen. Behälter Führungs schiene Vorsicht vor abtropfendem Frittier‐Öl/Frittier‐ Fett und Verschmutzung des Bodens durch Frittier‐ Öl/Frittier‐Fett! Deshalb z. B. ein Edelstahl‐Behälter für die zu entnehmenden Teile bereitstellen! Grobfilter und Feinfilter herausnehmen und in den bereitgestellten Edelstahl‐Behälter ablegen. Umfüllen Griff oben Ausgießöffnung Griff vorne Führungsschiene Behälter Behälter vorsichtig aushängen: − Behälter in den Führungsschienen bis An schlag heraus ziehen, − am vorderen Griff den Behälter etwas anheben, − Behälter weiter bis Anschlag heraus ziehen, − den Behälter mit beiden Griffen aus den Füh rungsschienen entnehmen. Das Frittier‐Öl/Frittier‐Fett über die Ausgießöff nung in das Becken oder in ein hitzebeständiges Gefäß leeren. VORSICHT! Rutschgefahr! Fettspritzer auf dem Fußboden sofort beseitigen. 9.3 Filtersystem mit Pumpe (Option) Bei Geräten mit Pumpe erfolgt das Umfüllen des Frittier‐Öles/Frittier‐Fettes vom Behälter in das Becken mittels Pumpe. Um auch die letzten Frittierrückstände aus dem Becken zu entfernen, haben Sie die Möglichkeit das Be cken mit Frittier‐Öl/Frittier‐Fett mittels Pumpe auszuspülen. Siehe nachfolgende Beschreibung Seite 30, Kapitel 9.3.3. 9.3.1 Umpumpen des Frittier‐Öles/Frittier‐Fettes vom Behälter in das Becken Das abgelassene und gefilterte Frittier‐Öl/Frittier‐Fett wird mittels Pumpe vom Behälter in das Becken ge pumpt. Filtern während kurzer Frittierpausen Mit der nachfolgend beschriebenen Vorgehensweise können Sie auch während kurzer Betriebspausen das Frittier‐Öl/Frittier‐Fett filtern und in das Becken pumpen. 28 de Vorbereiten Einlaufrohr mit Griff Frittier‐Öl/Frittier‐Fett in den Behälter ablassen und filtern, siehe Seite 27, Kapitel 9.1. Taste “Temperatur/ Pumpe” mit Kontroll leuchte Verschluss kupplung VORSICHT! Verbrennungsgefahr durch heiße Oberflächen! Das Einlaufrohr und die Ver schlusskupplung werden heiß! Einlaufrohr in Verschlusskupplung eindrücken. Hebel für Ablaufhahn Das Einlaufrohr muss fühlbar und hörbar ein rasten. Sicherung für Ablaufhahn VORSICHT! Überschäumen des Frittier‐ Öles/Frittier‐Fettes! Füllstand des Frittier‐Öles/ Frittier‐Fettes im Becken beachten! Nicht höher als bis zur Füllstandsmarke befüllen! Ausdehnung durch Erwärmung beachten! Behälter Manuelles Ein‐ und Ausschalten der Pumpe: Der Befüllvorgang muss beaufsichtigt und von Hand abgeschaltet werden! Zu Auf Ablaufhahn schließen - Hebel nach oben schwen ken und Sicherung einrasten. Umpumpen Bei Zweibecken‐Fritteusen wird die Pumpe über das linke Bedienfeld gesteuert. Zweibecken‐Fritteuse Option Pumpe nur über linkes Bedienfeld bedienbar. Das Gerät muss ausgeschaltet sein (in der Anzeige leuchten drei Punkte). Pumpe einschalten - Taste “Temperatur/Pumpe” drücken und 3 Sekunden halten. Die Kontrollleuchte in der Taste leuchtet und die Pumpe läuft an. Bitte beachten: Die Ansaugzeit kann bis zu 3 Minuten betragen. Wenn der Füllstand des Frittier‐Öles/Frittier‐Fettes im Becken erreicht ist, die Pumpe ausschalten Taste “Temperatur/Pumpe” drücken und 1 Sekunde halten. Nach Überschreiten von 5 Minuten Pumpzeit wird die Pumpe automatisch abgeschaltet. Die Kontrollleuchte in der Taste erlischt. 9.3.2 Entfernen des Einlaufrohres Einlaufrohr mit Griff Verschlusskupplung VORSICHT! Verbrennungsgefahr durch heiße Oberflächen! Das Einlaufrohr und die Ver schlusskupplung sind heiß, wenn heißes Frittier‐Öl/ Frittier‐Fett gepumpt wurde! Einlaufrohr festhalten und Verschlusskupplung nach unten schieben. Einlaufrohr ausstecken und über dem Becken leer laufen und abtropfen lassen. 29 de 9.3.3 Ausspülen des Beckens mit Frittier‐Öl/Frittier‐Fett mittels Pumpe Das Ausspülen des Beckens ist nur erforderlich, wenn das Frittier‐Öl/Frittier‐Fett weiter verwendet werden soll. Hierbei werden die letzten verbliebenen Frittierrückstände aus dem Becken gespült und gefiltert. Korb‐Halterung Einlaufrohr mit Griff Frittierkorb Frittier‐Öl/Frittier‐Fett in den Behälter ablassen und filtern, siehe Seite 27, Kapitel 9.1. VORSICHT! Verbrennungsgefahr durch heiße Oberflächen! Einlegesieb Frittierkorb entnehmen. Griff zum Schwenken des Heizkörpers für Ein baufritteuse Korb‐Halterung abnehmen. Einlegesieb entnehmen und Speisereste entfer nen. Heizkörperauflage Becken Taste “Temperatur/ Pumpe” Entleerungs schlauch Heizkörper Hebel für Ablaufhahn Sicherung für Ablaufhahn Behälter Heizkörper nach oben schwenken. Heizkörperauflage entnehmen. Ausspülen des Beckens Den Entleerungsschlauch zwischen Einlaufrohr und Verschlusskupplung stecken und einrasten. Das Einlaufrohr und der Entleerungsschlauch müssen fühlbar und hörbar einrasten. Einlaufrohr am Griff halten und in das Becken halten. Pumpe einschalten Bei Zweibecken‐Fritteusen wird die Pumpe über das linke Bedienfeld gesteuert. Zweibecken‐Fritteuse Option Pumpe nur über linkes Bedienfeld bedienbar. Das Gerät muss ausgeschaltet sein (in der Anzeige leuchten drei Punkte). Pumpe einschalten - Taste “Temperatur/Pumpe” drücken und 3 Sekunden halten. Die Kontrollleuchte in der Taste leuchtet und die Pumpe läuft an. Becken mit Frittier‐Öl/Frittier‐Fett mittels Einlaufrohr ausspülen. Pumpe ausschalten Nach dem Ausspülvorgang die Pumpe ausschalten - Taste “Temperatur/Pumpe” 1 Sekunde halten. drücken und Nach Überschreiten von 5 Minuten Pumpzeit wird die Pumpe automatisch abgeschaltet. Die Kontrollleuchte erlischt. Ablaufhahn schließen - Hebel nach oben schwenken und Sicherung einrasten. Heizkörper einschwenken. Entfernen des Entleerungsschlauches siehe Seite 31, Kapitel 9.3.4. 30 de 9.3.4 Entfernen des Entleerungsschlauches VORSICHT! Verbrennungsgefahr durch heißes Einlaufrohr, Verschlusskupplungen und aus laufendem Frittier‐Öl/Frittier‐Fett! Schutzhandschuhe, Schutzkleidung und Schutzbrille tragen! Einlaufrohr mit Griff Verschlusskupplung 2. Entleerungs schlauch Einlaufrohr in das Becken halten. Damit das Einlaufrohr und der Entleerungs schlauch leer laufen können, die Reihenfolge beim Abziehen beachten: 1. am Becken, 2. am Einlaufrohr. (1.) Entleerungsschlauch festhalten und Ver schlusskupplung in Richtung des Beckens schieben. Entleerungsschlauch im Becken leer laufen und abtropfen lassen. (2.) Entleerungsschlauch festhalten und Ver schlusskupplung in Richtung des Schlauches schieben. 1. Verschluss kupplung VORSICHT! Rutschgefahr! Fettspritzer auf dem Fußboden sofort beseitigen. 10. Frittieren 10.1 Hinweise zum Frittier‐Öl/Frittier‐Fett Anforderungen an das Frittier‐Öl/Frittier‐Fett: Hohe Oxydationsstabilität, Rauchpunkt (über 230°C), lange Lebensdauer, geringes Schäumen, geruchs‐ und geschmacksneutral. Nur Frittier‐Öl oder flüssiges Frittier‐Fett verwenden! Nur frisches 100% pflanzliches Frittier‐Öl/Frittier‐Fett verwenden. Speiseöle und tierische Fette nicht verwenden. Diese sind wegen mangelnder Hitzestabilität nicht ge eignet. Um eine Selbstentzündung zu vermeiden kein verdorbenes oder altes Frittier‐Öl/Frittier‐Fett verwen den. Die Lebensdauer des Frittier‐Öles oder Frittier‐Fettes verlängert sich durch: − regelmäßiges Entfernen der Backrückstände, − Filtern des Frittier‐Öles/Frittier‐Fettes und − durch Abdecken der Fritteuse bei Nichtbetrieb (Schutz vor Licht‐ und Sauerstoffeinfluss). Nicht über der Fritteuse würzen, da Salz und Gewürze die Alterung des Frittier‐Öles oder des Frittier‐ Fettes beschleunigen. Um die Geschmacksneutralität zu gewährleisten Fisch‐, Fleisch‐ oder Kartoffelprodukte möglichst in getrennten Becken zubereiten. 10.2 Gargut hinzugeben Erst nach Erlöschen des Punktes in der Anzeige, wenn die Soll‐Temperatur im Becken annähernd er reicht ist, den Frittiervorgang beginnen. Um ein Überschäumen zu vermeiden den befüllten Frittierkorb kurz in das heiße Frittier‐Öl/Frittier‐Fett tauchen. In kurzen Betriebspausen die Temperatur auf ca. 110oC einstellen und das Fritteusen‐Becken mit dem Deckel abdecken oder die Funktion Standby‐Betrieb einschalten (Option Zeitsteuerung), siehe Seite 26, Kapitel 8.5 31 de 10.3 11. 3 sec. Frittierfehler erkennen und beseitigen Frittier‐Öl / Frittier‐Fett Ursachen Schäumt stark Verbrauchtes bzw. ungeeignetes Frittier‐Öl z.B. Speiseöl verwendet Verschiedene Öle und Fette wurden vermischt Frittiergut enthält zu viel Feuchtigkeit Zu große Mengen Frittiergut im Frittierbecken Reinigungsmittelrückstände aus dem Becken nicht entfernt Bräunt schlecht Das Frittier‐Öl oder Frittier‐Fett ist neu Frittiergut enthält zu viel Feuchtigkeit Backzeit zu kurz Zu geringe Temperatur eingestellt Entwickelt Rauch Zu hohe Temperatur eingestellt Ungeeignetes Öl oder Fett mit niedrigem Rauchpunkt verwendet Frittier‐Öl/Frittier‐Fett zu lange in Gebrauch Riecht schlecht Backrückstände (Panaden) wurden nicht entfernt Frittier‐Öl/Frittier‐Fett zu lange in Gebrauch Öl oder Fett zum Frittieren nicht geeignet Verdirbt schnell Backrückstände (Panaden) nicht regelmäßig entfernt Verschiedene Öle oder Fette wurden vermischt Das Frittier‐Öl/Frittier‐Fett wurde zu lange erhitzt, ohne zu frittieren Frittier‐Öl/Frittier‐Fett nicht richtig gelagert (zu viel Licht und Sauerstoff) Rückstände von Reinigungsmitteln im Becken Verbrauch zu hoch Temperatur für die Speise zu hoch oder zu niedrig eingestellt Abtropfzeit des Frittier‐Öles oder Frittier‐Fettes zu kurz Zu lange Backdauer Verfärbung Verunreinigung des Frittier‐Öles durch Backgut / Gewürze Frittier‐Öl/Frittier‐Fett zu lange in Gebrauch Backrückstände (Panaden) nicht entfernt Betriebsschluss Gerät ausschalten - Taste “Ein/Aus” drücken und 3 Sekunden halten. Die Kontrollleuchte in der Taste erlischt. In der Anzeige leuchten drei Punkte. Das Frittier‐Öl/Frittier‐Fett filtern und das Gerät reinigen, siehe nachfolgendes, Kapitel 12. “Reinigung und Pflege”. Bauseitigen elektrischen Hauptschalter abschalten. 12. Reinigung und Pflege Keine ätzenden Reiniger auf die Bedienblende bringen! Das Gerät nicht mit Wasserleitungsschlauch, Hochdruckreiniger, Dampf‐Hochdruckreiniger oder Dampfreiniger abspritzen bzw. reinigen! Bedienungsanleitung der Reinigungsmittelhersteller beachten! Keine scheuernden Putzmittel verwenden! Keine ätzenden oder säurehaltigen Reiniger am Frittierkorb und Heizkörper verwenden, sonst Zerstö rung des Korrosionsschutzes und Rostgefahr! Edelstahl darf nicht längere Zeit mit konzentrierten Säuren, Essigessenz, Kochsalzlösung, Senf, Würz mischungen in Kontakt kommen da sonst die Schutzschicht angegriffen wird. Edelstahlflächen nach Gebrauch klarspülen. Geeignete Reinigungs‐ und Pflegemittel erhalten Sie bei Ihrem Kundendienst. 32 de 12.1 Entleeren, Reinigen 12.1.1 Entleeren des Beckens 3 sec. Gerät ausschalten - Taste “Ein/Aus” drücken und 3 Sekunden halten. Die Kontrollleuchte in der Taste erlischt. In der Anzeige leuchten drei Punkte. 12.1.2 Fett‐ und hitzebeständige Schuhe, Handschuhe und Schutzkleidung tragen. Zum Filtern muss das Frittier‐Öl/Frittier‐Fett noch mindestens 60°C heiß sein! Entleeren des Beckens und Filtern des Frittier‐Öles/Frittier‐Fettes, siehe ab Seite 27, Kapitel 9. Entleeren/Umfüllen des Frittier‐Öles/Frittier‐Fettes ohne Pumpe aus dem Behälter in das Becken oder in ein hitzebeständiges Gefäß, siehe Seite 28, Kapitel 9.2. Entleeren des Behälters mittels Pumpe (Option Pumpe) Um den Behälter nicht von Hand entleeren zu müssen können Sie das zu entsorgende Frittier‐Öl/ Frittier‐Fett mit der Pumpe in ein Gefäß umpumpen. Entleerungsschlauch Vorbereiten Frittier‐Öl/Frittier‐Fett in den Behälter ablassen und filtern, siehe Seite 27, Kapitel 9.1. Taste “Temperatur/ Pumpe” mit Kontroll leuchte Einlaufrohr mit Griff VORSICHT! Verbrennungsgefahr durch heiße Oberflächen! Das Einlaufrohr, der Entleerungs schlauch, die Verschlusskupplung und das Gefäß werden heiß! Den Entleerungsschlauch zwischen Einlaufrohr und Verschlusskupplung stecken. Die Verschlusskupplungen müssen fühlbar und hörbar einrasten. Einlaufrohr in ein hitzebeständiges Gefäß halten. Behälter Umpumpen Hitzebeständiges Ge fäß mit Tragegriffen Manuelles Ein‐ und Ausschalten der Pumpe: Der Entleervorgang muss beaufsichtigt und von Hand abgeschaltet werden! Pumpe einschalten Zweibecken‐Fritteuse Option Pumpe nur über linkes Bedienfeld bedienbar. Bei Zweibecken‐Fritteusen wird die Pumpe über das linke Bedienfeld gesteuert. Das Gerät muss ausgeschaltet sein - in der Anzeige leuchten drei Punkte. drücken und 3 Sekunden halten. Pumpe einschalten - Taste “Temperatur/Pumpe” Die Kontrollleuchte in der Taste leuchtet und die Pumpe läuft an. Bitte beachten: Die Ansaugzeit kann bis zu 3 Minuten betragen. Nach Überschreiten von 5 Minuten Pumpzeit wird die Pumpe automatisch abgeschaltet. Gefäß nur bis 3/4 der Höhe befüllen! Pumpe ausschalten Wenn das Gefäß 3/4 gefüllt oder das Frittier‐Öl/Frittier‐Fett vollständig aus dem Behälter abgepumpt ist, die Pumpe ausschalten - Taste “Temperatur/Pumpe” Die Kontrollleuchte in der Taste erlischt. drücken und 1 Sekunde halten. Das Gefäß mit einem Deckel fest verschließen und mit einem Warnschild ”Heiße Stoffe” kennzeichnen. VORSICHT! Rutschgefahr! Fettspritzer auf dem Fußboden sofort beseitigen. Entfernen des Entleerungsschlauches siehe Seite 31, Kapitel 9.3.4. 33 de 12.1.3 Reinigen des Beckens und des Filtersystems VORSICHT! Heiße Oberflächen! Verbrennungsgefahr! Schutzhandschuhe, Schutzkleidung und Schutzbrille tragen! Nur im abgekühlten Zustand reinigen! Das Becken und der Behälter müssen vor der Reinigung entleert werden! − Entleeren/Ablassen des Beckens und filtern, siehe Seite 27, Kapitel 9.1 − Umfüllen des Behälters ohne Pumpe, siehe Seite 28, Kapitel 9.2 − Entleeren des Behälters mittels Pumpe, siehe Seite 33, Kapitel 12.1.2 Option Pumpe: Die Reinigungslösung nicht mit der Pumpe umpumpen, sonst können Reste von Reini gungsmittel und Wasser in der Pumpe und im Leitungssystem verbleiben! Frittierkorb und Einlegesieb aus dem Becken ent nehmen. Einbaufritteuse Griff zum Schwenken des Heizkörpers Heizkörperauflage vorne höher Korbhalterung entnehmen (Option). Schwenken des Heizkörpers Becken Heizkörper Bei Einbaufritteusen: Griff am Heizkörper einhängen und Heizkörper nach oben schwenken. Bei Standfritteusen: Heizkörper nach oben schwenken durch drehen des Hebels gegen den Uhrzeigersinn. Standfritteuse Korbhalterung Grob‐ und Feinfilter aus dem Behälter ent nehmen. Frittierkorb Leeren Behälter einschieben. Einlegesieb Reinigen des Beckens und Heizkörper Heizkörperauflage Becken Heizkörper Hebel zum Schwenken des Heizkörpers Hebel für Ablaufhahn Sicherung für Ablaufhahn Verkrustungen am Heizkörper mit verdünntem Grillreiniger (Mischungsverhältnis: 1 Teil Grillreini ger, 10 Teile Wasser) einsprühen. Ca. 10 Min. einwirken lassen. Keine scheuernden Putzmittel am Heizkörper anwenden! Heizkörper nicht verkratzen! Becken mit fettlösendem Reinigungsmittel und heißem Wasser reinigen. Reinigungslösung nach unten in den Behälter ablassen. Becken mit klarem Wasser nachspülen und mit weichem, fusselfreiem Tuch trockenreiben. Behälter Ablaufhahn schließen - Hebel nach oben schwen ken und Sicherung einrasten. Behälter mit der Reinigungslösung entleeren. Be hälter reinigen und trockenreiben. VORSICHT! Rutschgefahr! Fettspritzer auf dem Fußboden sofort beseitigen. 34 de Reinigen der Einzelteile Behälter entleeren. Grobfilter In der Spülmaschine (mit Öffnung nach unten) oder im Spülbecken mit fettlösendem Reinigungs mittel reinigen: − Einlegesieb, − Grobfilter, − Haltebügel, − Feinfilter, − Behälter. Haltebügel Feinfilter Behälter Reinigen des Frittierkorbes Keine scheuernden Putzmittel am Frittierkorb anwenden! Frittierkorb nicht verkratzen! Der Frittierkorb darf nicht in eine ätzende oder säurehaltige Reinigungslauge getaucht werden! Frittierkorb mit fettlösendem Reinigungsmittel oder in der Spülmaschine reinigen. Frittierkorb klarspülen und trockenreiben. O‐Ring (Rundring) Reinigen der Teile für Filtersystem mit Pumpe Einlaufrohr mit Griff Entleerungs schlauch Ansaugrohr Option Pumpe: Oberflächen mit Spültuch und fettlösendem Reinigungsmittel reinigen (nicht in Reinigungslauge eintauchen): − Ansaugrohr, − Einlaufrohr, − Entleerungsschlauch. Nach der Reinigung alle Teile und Flächen gründ lich abtrocknen. 12.2 Edelstahlflächen reinigen Edelstahlflächen mit fettlösendem Reinigungsmittel oder Spezial‐Edelstahlpflegemittel reinigen. Unterbau mit fettlösendem Reinigungsmittel reinigen. Gereinigte Teile und Flächen mit weichem Lappen trockenreiben. Betriebsbereitschaft wiederherstellen, siehe Seite 12, Kapitel 5.1. Becken mit dem Deckel abdecken. 13. Störungen und Abhilfe Sollten an diesem Gerät Störungen auftreten, so überprüfen Sie diese bitte anhand folgender Tabelle: Störung Mögliche Ursache Abhilfe Nach dem Einschalten er folgt keine Reaktion im An zeigefeld. Bauseitigen Hauptschalter vor dem Gerät nicht einge schaltet. Hauptschalter einschalten. Die gesamte Stromversor gung fehlt. Energieversorgungsunternehmen benachrichtigen. Die Netzsicherung hat ab geschaltet. Eventuelle Fehler im Gerät von einem autorisierten Kundendienst überprüfen lassen. Netzsicherung wieder einschalten. 35 de Störung Mögliche Ursache Abhilfe Das Gerät ist eingeschaltet, heizt aber nicht. Heizkörper ist hochge schwenkt und somit automatisch abgeschaltet. Heizkörper vollständig einschwenken. Die Pumpe ist einge schaltet, fördert aber kein Frittier‐Öl/Frittier‐Fett. Es befindet sich nicht ge nügend Frittier‐Öl oder Frittier‐Fett im Behälter. Die Pumpe saugt Luft an. Becken oder Behälter mit Frittier‐Öl oder halb flüssigem Frittier‐Fett befüllen. Hartes Frittier‐Fett verwendet. Das Frittier‐Fett ist im Behälter oder in der Pumpe erstarrt. Erstarrtes Frittier‐Fett aus dem Behälter schöpfen. Frittier‐Öl oder halbflüssiges Frittier‐Fett verwenden! Der O‐Ring (Rundring) am Anschlussstutzen des Ansaugrohres ist defekt oder fehlt. Die Pumpe saugt Luft an. Neuen O‐Ring (Rundring) einsetzen. Die Pumpe ist eingeschaltet und läuft nicht an. Die Kon trollleuchte in der Taste „Temperatur/Pumpe“ blinkt. Pumpe zu schwergängig. Mehrmals die Pumpe ein‐ und ausschalten. Wenn die Pumpe nicht anläuft, Kundendienst benach richtigen. Die Pumpe fördert nach über 5 Minuten Laufzeit noch kein Frittier‐Öl/Frittier‐ Fett. Pumpenschieber abgenutzt. Kundendienst benachrichtigen. Fehleranzeige: E01 und E03 Temperaturfühler kurzge schlossen. Gerät aus‐ und einschalten. Tritt der Fehler wei terhin auf benachrichtigen Sie den Kundendienst. Fehleranzeige: E02 und E04 Temperaturfühler unterbro chen. Gerät aus‐ und einschalten. Tritt der Fehler wei terhin auf benachrichtigen Sie den Kundendienst. Fehleranzeige: E05 und E06 Der Sicherheitstemperatur‐ Begrenzer hat abgeschaltet. Heizkörper oder Schütz defekt. Sicherheitstemperatur‐Begrenzer einschalten (E07-E08). Gerät spannungsfrei schalten (5 Sekunden). Tritt der Fehler weiterhin auf benachrichtigen Sie den Kundendienst. Fehleranzeige: E07 und E08 Maximum‐Temperatur über schritten. Prüfen, ob sich ausreichend Frittier‐Öl oder Frittier‐Fett im Becken befindet. Fehlermeldung abschalten -> Geräte aus‐ und ein schalten. Der Sicherheitstemperatur‐ Begrenzer hat abgeschaltet. Sicherheitstemperatur‐Begrenzer einschalten. Tritt die Störung wiederholt auf das Gerät von einem Kundendienst oder Elektro‐Fachmann überprüfen lassen. Sicherung Kugelab laufhahn Pro Heizkörper ein roter Rückstell‐Knopf für Si cherheitstemperatur‐Begrenzer. Prüfen ob sich ausreichend Frittier‐Öl oder Frittier‐Fett im Becken befindet. Fehlermeldung abschalten -> Geräte aus‐ und ein schalten. Fehleranzeige: E09 und E10 Temperaturanstieg zu schnell. Fehleranzeige: E20 bis E34 Fehler in der Steuerung Gerät aus‐ und einschalten. Tritt der Fehler wei terhin auf benachrichtigen Sie den Kundendienst. Hinweisanzeige: Abwechselnd OIL und 0 Fettnutzungsdauer Anzeigen, Aufschieben, Zurücksetzen des Zählers für die Fettnutzungsdauer, siehe Seite 24, Kapi tel 8.2 In den Anzeigen erscheinen Zeichen, die nicht der An zeige von Zeit und Tempe ratur entsprechen. Sie haben versehentlich Einstellmenüs ausgewählt, die nur für Servicearbeiten durch den Kundendienst vorgesehen sind. Gerät aus‐ und wieder einschalten. Falls Sie die Störung nicht beseitigen können, − das Gerät ausschalten und vom Elektro‐Netz trennen, − Gehäuse nicht öffnen, − Kundendienst benachrichtigen. 36 Rückstell‐Knopf Sicherheits‐ Temperaturbegrenzer de 14. Technische Daten Technische Daten Einbecken‐Fritteuse Einbecken‐Fritteuse Einbecken‐Fritteuse Zweibecken‐Fritteuse Breite 200 mm 300 mm 400 mm 400 mm Tiefe 650 mm 650 mm 650 mm 650 mm Höhe 750 / 900 mm 750 / 900 mm 750 / 900 mm 750 / 900 mm Gesamtanschlusswert 8 / 9,5 kW 11 / 13 kW 16 / 19 kW 2 x 8 / 2 x 9,5 kW Absicherung 3 x 16A 3 x 16A / 3 x 20A 3 x 25 A / 3 x 32A 2 x (3 x 16)A Spannung 400V 3 50/60 Hz 400V 3 50/60 Hz 400V 3 50/60 Hz 400V 3 50/60 Hz Regelbereich Temperatur 50 - 190 °C 50 - 190 °C 50 - 190 °C 50 - 190 °C Beckengröße 160x428x338 mm 260x428x338 mm 360x428x338 mm 2x160x428x338 mm Gesamtfüllmenge Frittier‐Öl 7,5 - 9,0 Liter 12,5 - 14,5 Liter 17,0 - 20,5 Liter 2 x 7,5 - 9,0 Liter Nutzfüllmenge Frittier‐Öl 4,5 - 6,0 Liter 7,5 - 9,8 Liter 10,0 - 13,5 Liter 2 x 4,5 - 6,0 Liter Anzahl der Heizkörper 1 1 2 1 pro Becken Korbgröße 140x320x155 mm 220x320x155 mm 300x320x155 mm / 2 x 140x320x155 mm 2 x 140x320x155 mm Füllmenge Korb 0,9 kg 1,5 kg 1x1,8 / 2 x 0,9 kg 2 x 0,9 kg Stundenleistung gekühlt 20 kg 30 kg 40 kg 40 kg Stundenleistung Tiefkühlware 17 kg 27 kg 34 kg 34 kg Wärmeabgabe sensibel 0,72 / 0,86 kW 1,17 kW 1,44 / 1,71 kW 1,44/ 1,71 kW Wärmeabgabe latent 5,60 / 6,65 kW 9,10 kW 11,20 / 13,30 kW 11,20 / 13,3 kW Dampfabgabe 8,25 / 9,79 kg/h 13,39 kg/h 16,48 / 19,57 kg/h 16,48 / 19,57 kg/h Gerätegeräusch 70 dB (A) 70 dB (A) 70 dB (A) 70 dB (A) Schutzgrad gegen Wasser IPX4 IPX4 IPX4 IPX4 Technische Änderungen vorbehalten! 15. Aufstellen, Anschließen Beachten Sie die örtlichen küchentechnischen Vorschriften. Die Installationen müssen nach den Montageanweisungen des Herstellers und nach den anerkannten Regeln der Technik durchgeführt werden. Lassen Sie die Aufstellung und Einweisung der Geräte vom Kundendienst durchführen. 15.1 Transport Transportieren Sie das Gerät nur im entleerten Zustand. Gewicht des Gerätes beachten. Transportieren Sie das Gerät mit geeigneten Transporthilfen, wie z. B. Hubwagen. 37 de 15.2 Aufstellung Aufstellen Sicherungen gegen Umkippen − waagerecht und erschütterungsfrei, Wandbefesti gung oben − unter einer Absaughaube mit Flammschutzfiltern, − nicht an brennbare Wände. Lasche mit Sollbruchstelle: Kann entfernt werden, wenn erforderlich. Gerätever bindung Bei Einzel‐Aufstellung von Geräten: Das Gerät gegen Umkippen sichern, z. B. durch Festschrau ben an der Wand oder an Nachbargeräte. Wandbefesti gung seitlich Ausreichend Freiraum über dem Gerät berück sichtigen! Es dürfen sich keine Regale über dem Gerät befinden oder bewegliche Schwenkvorrich tungen über das Gerät geschwenkt werden können! Ausreichend Bewegungsflächen für die Be dienung berücksichtigen! Auch so, dass während dem Hantieren an der Fritteuse keine Gefährdung durch versehentliches Anstoßen an Personen erfolgt. Die Bewegungsfläche vor der Fritteuse sollte mindestens einen Meter breit sein! Geräte die mit Wasser betrieben werden nicht neben Fritteusen aufstellen! Mindestabstand neben Fritteusen von 900 mm einhalten oder eine Spritzschutzeinrichtung (Abweisblech) mit einer Mindest höhe von 350 mm installieren. Es dürfen sich auch keine Wasserhähne oder Schlauchbrausen in der Nähe von Fritteusen befinden! Es dürfen keine Lenkrollen am Gerät angebracht werden. Die werksseitig angebrachten Rollen an der Geräterückseite dürfen nicht verändert werden. Die Rollen sind nur zum Vor‐ und Zurückbewegen des Gerätes vorgesehen. Beachten Sie die Arbeitssicherheitsinformationen von der Berufsgenossenschaft zu Fritteusen! Die Füllmengen werden addiert, wenn mehrere Fritteusen nebeneinander aufgestellt werden. Dies erfordert in diesen Fällen besondere Brandschutzvorkehrungen! Schutzfolien am Gerät abziehen. Kleberückstände mit Reinigungs‐ oder Waschbenzin entfernen. 15.3 Elektrischer Anschluss Der Elektroanschluss muss von einem zugelassenen Elektro‐Installateur vorgenommen werden − nach den geltenden Bestimmungen VDE 0100 − und den Bestimmungen der jeweils zuständigen Energieversorgungsunternehmen. Die bewegliche Netzanschlussleitung muss mindestens nach H 07 RN‐F ausgeführt sein. Ein elektrischer Hauptschalter muss leicht zugänglich vorgeschaltet werden. Der Schalter muss das Gerät wirksam und allpolig vom Netz trennen. Die Kontaktöffnung muss dabei mindestens 3 mm betra gen. Weisen Sie den Betreiber und das Bedienpersonal ein, wo sich der bauseitige elektrische Haupt schalter für das Gerät befindet, damit das Gerät bei Gefahren für den Benutzer (z. B. Brandgefahr) gefahrlos ausgeschaltet werden kann. Aus Sicherheitsgründen empfehlen wir Ihnen den Einbau eines Fehlerstrom‐Schutzschal ters (FI) > 10 mA. Für den elektrischen Anschluss die Daten auf dem Typenschild beachten! Das Gerät in das Potentialausgleichsystem einbeziehen. Die Wirksamkeit muss nach VDE0190 ge prüft sein. Netzanschlussleitung bauseits fest anklemmen. 38 de 16. Wartung Lassen Sie an diesem Gerät eine regelmäßige Inspektion und Wartung durchführen. Wartungsarbeiten sind: Z. B. Sicherheits‐, Funktions‐ und Dichtigkeitsprüfungen. Die Sicherheitseinrichtungen müssen mindestens einmal jährlich durch einen Sachkundigen auf ihren ordnungsgemäßen Zustand überprüft werden. Das Ergebnis dieser Prüfung muss in einer Bescheini gung festgehalten und bis zur nächsten Prüfung aufbewahrt werden. Installations‐, Wartungs‐ und Reparaturarbeiten dürfen nur von Elektro‐Fachleuten durchgeführt wer den. Nur Original‐Zubehör und Original‐Ersatzteile verwenden! Wir empfehlen Ihnen einen Wartungsvertrag mit dem Kundendienst abzuschließen. 17. Hinweise zur Entsorgung Vor dem Demontieren das Gerät spannungsfrei schalten und gegen Wiedereinschalten sichern. An schließend das Netzkabel an der Netzanschlussdose und am Gerät abklemmen. Altgeräte sind kein wertloser Abfall! Durch umweltgerechte Entsorgung können wertvolle Rohstoffe wiedergewonnen werden. Beachten Sie im Falle einer Entsorgung des Gerätes die jeweiligen gesetzlichen Vorschriften. Gewerbliche Elektrogeräte dürfen nicht in die kommunale Abfallentsorgung gelangen oder mit dem Hausmüll entsorgt werden. 18. EG‐Konformitätserklärung Diese Erklärung bezieht sich nur auf die Maschinen in dem Zustand, in dem sie in den Verkehr gebracht wurden. Die Erklärung verliert ihre Gültigkeit, wenn das Produkt ohne Zustimmung umgebaut oder verändert wird. Hiermit erklären wir, dass die nachfolgend bezeichneten Maschinen aufgrund ihrer Konzipierung und Bau art, sowie in den von uns in Verkehr gebrachten Ausführungen den einschlägigen Bestimmungen der Ma schinenrichtlinie 2006/42/EG entsprechen. Die Maschinen entsprechen zusätzlich den Bestimmungen der Richtlinie 2006/95/EG über elektrische Betriebsmittel und 2004/108/EG über elektromagnetische Ver träglichkeit. Maschinentypen Fritteuse FSP, Stand‐ und Einbaufritteusen Angewandte harmonisierte EN‐Normen EN 60335-2-37:2008-12 EN 55014 -1:2007-06 -2:2002-08 EN 61000-3-2:2006-10 EN 61000-3-11:2001-04 EN 62233:2008-08 Dokumentationsbevollmächtigter SERVATOR ServiceLine GmbH, Thomas Schmalz, Wilhelm‐Frank‐Straße 36, D‐97980 Bad Mergentheim 39 en-Translation of the original operating instructions en 1. User information 1.1 Using these operating instructions Please read the operating instructions thoroughly before starting to use the appliance. The operating instructions contains important information for operating and installing the appliance properly. Always keep the documents accompanying the appliance close to hand and pass these on with the appli ance to any new owner. The owner of the appliance must ensure that the operating instructions are accessible to the staff em ployed to operate the appliance. 1.2 Warning symbols, danger symbols and informational symbols Warning! Risk of electric shock that could result in bodily injury or death. Caution! Warning of a possible bodily injury, a health risk or property damage. Caution! Warning of hot objects and possible bodily injury by burns. In case of fire, severe bodily injury is also possible! Information! Notes containing especially useful information and tips. 1.3 Symbols in front of the text You are prompted to act. − Enumeration, listing Notes, operational sequences Text without symbol: Descriptions or explanations following a header. 1.4 Use as intended The appliance is for commercial use and may only be operated − by trained personnel, − if the appliance is supervised, − for the purpose designated in the operating instructions. The appliance may only be used for the preparation of foodstuffs. E. g. for deep frying meat, fish, pota toes, vegetables, confections, filled pastries and baked goods. The appliance may only be used with liquid cooking fat or oil. The cooking fat or oil must be specially suited for deep frying. 1.5 Misuse (Reasonably foreseeable misuse) The appliance must not be operated, − in the open, − with water in all conditions of the appliance or other, inappropriate fluid for the intended use, − for melting of wax or similar material. The appliance must not be used, − by children, − by persons with restricted physical, sensory or mental abilities and − untrained personnel. 40 en 1.6 Documenting the type plate data Please write the type plate data on the following lines prior to installing the device. Please state this data when ordering a service for the appliance. This will expedite the response to your question. Type: 2. Year of manufacture: Machine‐no.: Safety instructions Use Wear work clothing and shoes that are specifically designed for working on deep fat fryers when using the appliance. The appliance is only to be transported − while it is cooled off. − the frying‐oil or frying‐grease has been drained, − and if the container below is emptied. Do not use the appliance as a storage or work surface. The user alone is responsible for damage caused by use contrary to the intended use. Immediately disconnect the power supply if smoke is produced by the hot fat. Observe the notes on page 66 in Chapter 10.3 “Recognising and fixing deep frying faults” and on page 69 in Chapter 13. “Troubleshooting”! Please observe the stipulations and rules of the professional associations! Pump option: Manual switching on and off of the pump, therefore supervise the pumping process and switch off the pump when the filling level in the bowl has been reached. Important, there is no auto matic switching off when the bowl is overfilled! Appliances on wheels must only be moved about if they have been emptied and cooled off. If you cannot remedy malfunctions with the help of page 69 section 13. ”faults and remedies”, switch off the appliance and notify customer service. Risk of injury During operation, there is a risk of burns from − hot frying‐oil/frying‐grease − hot fat splashes and − hot surfaces. Careful when pulling out, sliding in or lifting out the filled container! The container must only be re moved if the frying‐oil/frying‐grease has cooled down sufficiently. Use appropriate care to avoid hot frying‐oil/frying‐grease from spilling over and splattering! Observe the following with dual‐bowl‐deep fat fryers! When the container must be emptied or refilled by hand, allow only the content from one bowl to drain into the container! If the contents of both bowls are drained into the container, the container will become too heavy to lift manually! Pump option: While the pump is running, the cap may not be unlocked nor the intake bowle and the drain hose inserted into the cap. 41 en Pump option: No cleaning solution or water may be pumped with the pump! Residual water may other wise remain in the pump and the drain hose! During operation, this may cause heavy splattering, foam ing and overflowing of the bowl and to grease explosions! Do not let any liquids run into the cooking‐oil/‐grease. If the deep frying‐process is interrupted or ended, and there is still hot cooking‐oil/‐grease in the bowl, the bowl must be covered with an appropriate lid. This will prevent persons from accidentally reaching into the bowl, i.e. if they were to slip. Whilst cleaning of the deep fat fryers themselves is in progress, or any cleaning is being undertaken in their vicinity, they should never be switched on. Under no circumstances may water be mixed with fry ing oil in the basin or vat. This would result in dangerous splashing, frothing, overflowing of the basin or explosion of the fat. Risk of fire If the minimum fill level is not reached, there is the risk of fire! Therefore regularly check the level and add any shortfall of cooking‐oil or ‐grease. Pay attention to the marks showing minimum‐ and maximum‐fill levels! Do not use cooking‐oil/‐grease which has been soiled by food or spices. It can ignite even within the temperatures set by the appliance and can froth over. As a user of this appliance, you must learn where the site's fuse box is located for the appliances you operate. In case of a fire, you will be able to safely shut the appliance off. Fire safety Approved extinguishers for food oil and grease fires as well as a deep fat fryer lid must be available to fight fires. Water from sprinkler systems must not get into the fat. Never try and extinguish burning oil or fat with water! If water gets into the hot cooking oil/cooking fat an explosion will occur! Only use extinguishers approved for cooking oil and cooking fat fires! Risk of damage Do not use any caustic or acid cleaning agents on the frying basket and heater; this may destroy the corrosion protection and cause danger of rusting! Do not spray off or clean the appliance with water hoses, high‐pressure cleaners, high‐pressure steam cleaners or general steam cleaners. Do not spray foam cleaner on front panels and appliance panels. The foam cleaner gets into the smal lest of cracks and destroys the electrical and electronic systems. Pump option: Switch on the pump only when the container contains frying‐oil and the filling tube is plugged on. Do not let the pump run dry! If the appliance has not been used for some time, have customer service check it for correct operation. Determination and assessment of hazards in accordance with the German Health and Safety at Work Act According to the German Health and Safety at Work Act, the employer must assess what hazards are present for those occupied in the work and what health and safety measures are necessary. Observe the information supplied by the employers' liability insurance association for commercial kitchens. The employer must specify and provide the personal protective equipment. 42 en 3. Description of the appliance Lifting device lock coupling (pump option) Flat tube heating element Only for Freestanding deep fat fryers: Lever to swivel the heater Lever and latch for ball drain tap Container with filter system Handle to swivel the heating element for built‐in deep fat fryers Appliance without time control Appliance with time control deep fat fryer with − Flat tube heating element for gentle and eco nomic deep frying, − Electronic temperature sensor integrated in the flat tube heating element and safety temperature limiter, − Automatic grease melting function for gentle heat ing. Deep‐drawn bowl with − large, easy‐to‐clean radii, − flat tube heating elements can be swivelled inside bowl, − grease drain toward the bottom via ball drain tap. In the base, there is a container with a filter system for frying‐oil or frying‐grease. Options Filter system with pump Time control with the following functions: − Short time clock, − cooking time correction, − standby‐function, − two operating modes (time and temperature or product key) Time control with‐automatic basket lift 4. Control panel description 4.1 Notes on characteristics, versions and settings The functions described in these operating instructions refer to the factory settings of the control. Some notes regarding the operation and control may deviate from these if control settings have been changed by the user or the customer service. This applies, for example, to the acoustic signal, standby function, standby temperature, temperature steps and cooking time correction, see page 60 chapter 8.5 You can switch key sounds and acoustic signals off and on and change the length of the acoustic signal, see page 60 chapter 8.5 The setting options also depend on the equipment of the appliance. Important! Please make sure that you are reading the correct chapter for whichever operating mode you selected, i.e. for either the "Time and temperature" or the "Product keys" mode. See title in the header! Observe the waiting period between setting and request actions. Allow for a waiting period of approx. 3 seconds between setting or request actions. For example − between setting the setpoint temperature and − displaying the actual temperature. The control is only ready for a new setting or request action after expiry of this waiting period. 43 en 4.2 Control panel without "time control" Please see page 48, Chapter 6.1 „Switching the appliance on“ and Chapter 6.2 „Selecting, changing and displaying the temperatures“ for information on how to operate the control unit! "Temperature/pump" key (pump option) - Querying the actual temperature when the appliance is switched on. - Switch pump on/off, only if the appliance has been switched off at "on/off" key. The indicator light glows when the pump is switched on (option). Display - Parameter number Display - Setpoint or actual temperature. - Error number "Up" key "Down" key In increments of 1 or 5, depending on the setting in chapter 8.5 Dot is illuminated when heating is on, dot flashes during the heating‐up process if the actual temperature is by more than 10°C lower than the setpoint temperature. "P" key in combination with other keys - Temperature selection (keys 1, 2, 3 and 4) - Changing the stored temperature 4.3 Wait until the dot has gone out before starting with the frying process. Keys "1, 2, 3 and 4" temperature - Selecting the temperature "On/off" key - For switching on/off, hold it down for 3 seconds. Control panel with "time control" Operating mode "Time and temperature" or operating mode "Product key" 4.3.1 Selection of the modes for "time control" option Appliances equipped with a "Timer" can be operated in two different modes: In "Time and temperature" or "Product keys" mode. Appliances with a "Timer" are always set to "Time and temperature" mode before delivery. For changing the modes, see page 60, chapter 8.5 Operating mode „Time and temperature“ Operating mode „Time and temperature“ In "Time and temperature" mode, the time and set point temperature are always displayed during opera tion. E.g. There also four buttons for saving different, freely selectable temperatures and cooking times. These can be accessed at any time for quick and easy op eration. For description of the control panel see page 45 chapter 4.3.2 Operating mode ”Product keys”: E.g. Operating mode ”Product keys” In the "product keys" mode, the time and the number of the selected product key are displayed, e. g. "P22". Only one "product key" can be selected each time. Successive combination is not possible. For description of the control panel see page 45 chapter 4.3.3 44 en 4.3.2 Operating mode „Time and temperature” "Temperature/pump" key (pump option) - Querying the actual temperature when the appliance is switched on. - Switch pump on/off, only if the appliance has been switched off at "on/off" key. The indicator light glows when the pump is switched on (option). Display - Time in minutes and seconds - Parameter number Display - Setpoint or actual temperature. - Fat utilization period - Parameter values - Error number "Up" key "Down" key In increments of 1 or 5, depending on the setting in chapter 8.5 The control lamp glows when the automatic basket lift is switched on (option). Dot is illuminated when heating is on, dot flashes during the heating‐up process if the actual temperature is by more than 10°C lower than the setpoint temperature. "Start/stop" key - Starting or stopping the short time clock, - Lowering/raising the basket lift - Changing the basic settings for the short time clock "P" key in combination with other keys - Temperature selection (keys 1, 2, 3 and 4) - Changing the stored temperature - Display of the fat utilization period - Setting of parameters 4.3.3 "1, 2, 3 and 4" keys - time/temperature - Selection of the short time clock, - Interrupting the acoustic signal, - Selecting the temperature The indicator lights in the keys - are illuminated when the short time clock is switched on, - flash when the short time clock has expired Wait until the dot has gone out before starting with the frying process. "On/off" key - For switching on/off, hold it down for 3 seconds. Operating mode ”Product keys” - display of time and product key "Temperature/pump" key (pump option) - Querying actual and setpoint temperature when the appliance is switched on. - Switch pump on/off, only if the appliance has been switched off at "on/off" key. The indicator light glows when the pump is switched on (option). Display - Time in minutes and seconds - Parameter number - Actual temperature Display - "Product key" number - Setpoint temperature - Fat utilization period - Parameter values - Error number "Up" key The control lamp glows when the automatic basket lift is switched on (option). "Down" key In increments of 1 or 5, depending on the setting in chapter 8.5 "Start/stop" key - Starting or stopping the short time clock, - Lowering/raising the basket lift Dot is illuminated when heating is on, dot flashes during the heating‐up process if the actual temperature is by more than 10°C lower than the setpoint temperature. "P" key in combination with other keys - Changing the stored time and temperature - Display of the fat utilization period - Setting of parameters Keys "1, 2, 3 and 4" = 20 product keys - Selection of the "product keys". - Interrupting the acoustic signal, - Selecting the temperature When setting the "product keys" mode, the indicator lights in keys 1-4 are without function. Wait until the dot has gone out before starting with the frying process. "On/off" key - For switching on/off, hold it down for 3 seconds. 45 en 5. Initial use Before using the appliance for the first time, clean with a cleaning product that dissolves grease. Dry the cleaned parts and surfaces with a soft cloth. For cleaning, see page 66 section 12. 5.1 Getting ready for use Close drain tap - turn lever up and engage safety catch. Close Open Lever for drain tap Safety catch for drain tap Built‐in deep‐fat fryer Handle to turn the heating element Heating element support higher at the front Remove frying basket and insertable sieve from the bowl. Turning the heating element Bowl Heating element For built‐in deep fat fryers: Hook handle onto the heating element and raise the heating element. For free standing deep fat fryers: Raise the heating element by turning the lever anticlockwise. Free standing deep fat fryer Basket holder Frying basket Insert the heating element support the right way round - place higher support at the front. Insertable sieve Swivel heating element in. Heating element support higher at the front Place insertable sieve on the heating element. Automatic basket lift option: Basket lift Slot the basket holder onto the basket lift. Hook frying basket in basket holder Lever to swivel the heater 46 en Pump option: Connecting piece for pump suctioning with O‐ring (round ring) Inserting the filters Join the retaining clamp and fine filter. Coarse filter Retaining clamp for fine filter Intake tube Insert coarse filter into fine filter. Fine filter Guide rolls Opening and notch for fine filter Insert fine filter with retaining clamp into con tainer. Pump option: Insert intake tube, with the connect ing piece pointing toward the rear, into the con tainer. Pour opening Container Guide rails Filling level marks Insert the container in the guide rail and push back against the stop. Bowl Fill bowl Fill the bowl with fresh, pure vegetable frying oil or semi‐liquid frying fat. Mind expansion due to heating! Fill the bowl up to the "minimum mark". Check after heating and top up with frying oil/frying fat if needed. Do not use solid fat (fat block) to fill the bowl! This frying fat would harden after cooling and filtering and pumping would no longer be possible! The appliance may only be used with liquid cook ing fat or oil. Guide rail Insert guide rolls of container in the direction of arrow CAUTION Danger of slipping! Immediately clean any fat splashes off the floor. 47 Operating mode „Time and temperature” en 6. Operating mode „Time and Temperature” ‐ Operating the control unit Setpoint temperature E.g. Devices without timer: Please see chapter 6.1 and 6.2 for information on how to operate the control unit! Appliances with a timer are always set to "Time and temperature" before delivery. Should you wish to work in the "product keys" mode, you can make this setting yourself. For changing the mode, see page 60, chapter 8.5 For operating the control in "product keys" mode, see page 53, chapter 7. 6.1 Switching the appliance on Switch on the local electrical main switch. In the display − the version number and the type number of the control will briefly be displayed. − three dots are illuminated. 3 sec. Press the "on/off" key and hold down for 3 seconds. The setpoint temperature is shown on the display. To avoid a high temperature load of the cooking oil/fat during the heating‐up process, the control only automatically switches to the full heating capacity after attainment of a fat temperature of approx. 90°C. 6.2 Selecting, changing and displaying the temperatures Factory‐set setpoint temperatures: Key 1 = 110°C Key 2 = 160°C Key 3 = 170°C Key 4 = 180°C For changing the setpoint temperatures stored at the factory, see page 52 chapter 6.4.1 6.2.1 Selecting and changing the setpoint temperature Press the "P" 3 sec. key. Within 3 seconds, press the key "1, 2, 3 or 4". Time control option: The display for "time" briefly goes off. For changing the setpoint temperature: - Within 3 seconds, press and hold down the "up" or "down" key. First, the values are reduced or increased slowly, then rapidly. By pressing the key, the setting is re duced or increased by one step respectively. The setpoint temperature that has been changed for this key is shown on the display and will also be 3 sec. displayed after switching the appliance off and on at the "on/off" The performed temperature change is cancelled after − pressing a different temperature key (key "P and 1, 2, 3 or 4") or − switching the customer's electrical main switch on and off. 48 key. Operating mode „Time and temperature” 6.2.2 en Displaying the actual temperature in the bowl When the appliance is switched on, press the "temperature/pump" key. The current actual bowl temperature is displayed for 3 seconds. 6.3 Short time clock (time control option) Factory‐set times − − − − Key 1 = 4 minutes Key 2 = 4 minutes and 30 seconds Key 3 = 5 minutes Key 4 = 5 minutes and 30 seconds For changing the times stored at the factory, see page 52 chapter 6.4.2 Notes on the time setting The time setting can only be changed for a short time clock that has not yet been started. The performed time changes are cancelled if − a different key with a different time is pressed, − the appliance is switched off with the "on/off", or − the appliance was switched off and on again at the customer's electrical main switch. Options for the short time clock Appliance without automatic basket lift - after expiry of the set time, an acoustic signal is output. You can switch key sounds and acoustic signals off and on and change the length of the acoustic sig nal, see page 60 chapter 8.5 Appliance with automatic basket lift - after expiry of the set time, the frying basket is lifted out of the bowl and an acoustic signal is output. Automatic basket lift function (option) The control lamp in the "START/STOP" key is illuminated if the automatic basket lift is switched on (for switching automatic basket lift off or on, see page 57 chapter 8.1). The automatic basket lift waits until it lowers the basket lift if − the oil or fat temperature in the bowl is lower than 90°C, − the actual temperature is by more than 5°C lower than the setpoint temperature, or − the actual temperature is by more than 30°C higher than the setpoint temperature. 49 Operating mode „Time and temperature” en 6.3.1 Selecting, changing and starting the short time clock Press the desired key "1, 2, 3 or 4". The stored time is shown on the display. - The indicator light in the key glows. For changing the time for the current frying process: 3 sec. Within 3 seconds, press and hold down the "up" or "down" key. First, the values are reduced or increased slowly, then rapidly. By pressing the key, the setting is re duced or increased by one step respectively. Press the "START/STOP" key . The indicator lamp in the key "1, 2, 3 or 4" flashes. The time runs down. Except when the automatic basket lift is switched on: The control waits before it runs down the time and lowers the basket lift if − the actual temperature is by more than 5°C lower than the setpoint temperature, or − the actual temperature is by more than 30°C higher than the setpoint temperature. − Once the setpoint temperature has been reached, the frying basket is automatically lowered into the bowl and the time runs down. The setpoint temperature can be changed duringthe frying process. After expiry of the time, an acoustic signal is output. Appliance with switched on automatic basket lift: The basket is lifted out automatically. Interrupting the acoustic signal − Press the key "1, 2, 3 or 4" with the flashing indicator lamp or − wait for 10 seconds until the acoustic signal stops automatically. The flashing indicator light in the key switches from flashing to continuously glowing. The previously set time is shown on the display. 50 Operating mode „Time and temperature” 6.3.2 en Setting up several short time clocks You can use this function, for instance, if you insert several portion baskets in one bowl. Or for setting an interim time that indicates, for example, that the food being cooked must be agitated. Up to four short time clocks can be used simultaneously. Press the desired, for example key "1, 2, 3 or 4", and "START/STOP" key - . Repeat this procedure for each key to be used until all desired times have been set and started. If the automatic basket lift is is switched on : − The basket is lowered automatically into the tank after the first short time clock has been started. − The short time clock set first for lifting the basket is valid. − The next shortest remaining time is shown on the display, regardless of which key was pressed first. If no automatic basket lift is used: − The next shortest remaining time is shown on the display, regardless of which key was pressed first. The control lamps of the selected keys glow and the indicator lamp in the key with the shortest remain ing time flashes. All activated short time clocks are separately counted down. In appliances with automatic basket lift, the basket is automatically lifted out of the bowl. After expiry of the time, an acoustic signal is output. - Tointerrupt the acoustic signal press the key with the flashing indicator light. The indicator light in the key goes out. The next shortest remaining time is shown on the display and the indicator light in the key flashes. These procedure are repeated until all selected times have expired. 6.3.3 Switching off a short‐time clock when several short time clocks have been star ted Example: The indicator light in the key "1" flashes and the indicator light in the keys "3" and "4" are illu minated. The short time clock on key "3" is to be switched off. + Press key "3". 3 sec. The indicator light in key "3" flashes. Within 3 seconds, press the "START/STOP" key. The indicator light in key "3" goes out. The short time clock has been switched off. If the automatic basket lift was used with this short‐time clock, the basket is lifted out of the bowl. The next shortest remaining time is shown on the display and the indicator light in the key flashes. 51 Operating mode „Time and temperature” en 6.4 Changing the basic settings for temperature and time 6.4.1 Changing the basic settings of temperature With this function, you can change the factory‐set temperatures. These settings remain stored even after the appliance has been switched on and off at the customer's electrical main switch. The appliance must be switched off. Three dots glow on the display. 3 sec. - Press the "P" key. Within 3 seconds, press the key "1, 2, 3 or 4" the setting of which is to be changed. The temperature display flashes. The stored temperature is shown on the display. 3 sec. Within 3 seconds, press and hold down the "up" 3 sec. Within 3 seconds, press the "P" or "down" key. First, the values are reduced or increased slowly, then rapidly. By pressing the key, the setting is re duced or increased by one step respectively. key. The set temperature has been stored. Three dots glow on the display. 6.4.2 Changing the basic settings of the short‐time clocks (time control option) With this function, you can change the factory‐set times. These settings remain stored even after the appliance has been switched on and off at the customer's electrical main switch. The appliance must be switched off. Three dots glow on the display. 3 sec. - Press the "START/STOP" key . Within 3 seconds, press the key "1, 2, 3 or 4" the setting of which is to be changed. The time display flashes. The stored time is shown on the display. 3 sec. Within 3 seconds, press and hold down the "up" 3 sec. Within 3 seconds, press the "START/STOP" key key. First, the values are reduced or increased slowly, then rapidly. By pressing the key, the setting is re duced or increased by one step respectively. The set time has been stored. Three dots glow on the display. 52 or "down" . Operating mode "Product keys" 7. en Operating mode ”Product keys” ‐ Operating the control unit "Product key" number E.g. Should you wish to use the "product keys" mode, you must set this as it is not preset at the factory. For changing the mode, see page 60, chapter 8.5 In the "product keys" mode, the time and the number of the selected product key are displayed simultan eously. You can use 20 numbers for product keys, see chapter 7.1 Factory‐set assignment of the "product keys" Operation of the control in "product keys" mode as described in this chapter 7.. 7.1 Factory‐set assignment of the "product keys" You can changes the stored times and temperatures for each number of the "product key". You have two options to make the change: − Change for current frying process - the change is only stored until a different number of the "product key" has been set! See page 55 Chapter 7.3.2. − Changing and storing permanently, - the changed is stored for the number of the "product" key and remains stored even after switching the appliance off and on! See page 56 Chapter 7.5. Product key number Press key(s) 1 Product name Time Temperature 1 8.00 minutes 160°C 2 2 4.00 minutes 170°C 3 3 4.00 minutes 175°C 4 4 4.00 minutes 180°C 11 1+1 4.00 minutes 160°C 12 1+2 5.00 minutes 160°C 13 1+3 6.00 minutes 160°C 14 1+4 7.00 minutes 160°C 21 2+1 4.30 minutes 170°C 22 2+2 5.00 minutes 170°C 23 2+3 6.00 minutes 170°C 24 2+4 7.00 minutes 170°C 31 3+1 4.30 minutes 175°C 32 3+2 5.00 minutes 175°C 33 3+3 6.00 minutes 175°C 34 3+4 7.00 minutes 175°C 41 4+1 4.30 minutes 180°C 42 4+2 5.00 minutes 180°C 43 4+3 6.00 minutes 180°C 44 4+4 7.00 minutes 180°C 53 Operating mode "Product keys" en 7.2 Switching the appliance on Switch on the local electrical main switch. In the display − the version number and the type number of the control will briefly be displayed. − three dots are illuminated. 3 sec. Press the "on/off" key and hold down for 3 seconds. The setpoint temperature is briefly shown on the right display, after this the number of the "product key". The cooking time is shown on the left display To avoid a high temperature load of the cooking oil/fat during the heating‐up process, the control only automatically switches to the full heating capacity after attainment of a fat temperature of approx. 90°C. 7.3 Selecting time and temperature via the "product key" For an overview of the stored times and temperatures, refer to page 53 chapter 7.1 7.3.1 - Selecting and starting time and setpoint temperature via the number of the "product key" Select the number for the "product key" by pressing the keys 1 to 4: E.g. − for products1‐4, press the key "1, 2, 3 or 4" or − for products with two‐digit numbers, e.g. "product key" "12", press key 1 and immediately after that key 2. The display for "time" and "product key number" briefly goes off. The setpoint temperature for the "product key" is displayed for approx 1 second. The time is briefly shown on the left display, the number of the "product key" on the right display. Press the "START/STOP" key. The indicator light in key "START/STOP" flashes. The time runs down. Except when the automatic basket lift is switched on: The control waits before it runs down the time and lowers the basket lift if − the actual temperature is by more than 5°C lower than the setpoint temperature, or − the actual temperature is by more than 30°C higher than the setpoint temperature. − Once the setpoint temperature has been reached, the frying basket is automatically lowered into the bowl and the time runs down. After expiry of the time, an acoustic signal is output. Appliance with switched on automatic basket lift: The basket is lifted out automatically. Interrupting the acoustic signal − Press the key "1, 2, 3 or 4" or − wait for 10 seconds until the acoustic signal stops automatically. The previously set time is shown and the number of the "product key" is shown on the display. Changing settings Changing the time and the setpoint temperature for "product keys" mode: − without storing, only for the current frying process, see page 55 chapter 7.3.2, − with permanent storing, see page 56 chapter 7.5 Changing acoustic signals: − You can switch key sounds and acoustic signals off and on and change the length of the acoustic sig nal, see page 60 chapter 8.5 54 Operating mode "Product keys" 7.3.2 en Changing the time and the setpoint temperature for the current frying process The time and the setpoint temperature cannot be changed while the short time clock runs down. The performed temperature change is cancelled after − a different temperature key is pressed, − the appliance is switched off and on at the "On/Off" key, or − the appliance is switched off and on at the customer's electrical main switch. To adjust the time and setpoint temperature set at the factory to your requirements and permanently store these changes, follow the procedure described on page and following in 56 chapter 7.5. Changing the time / setpoint temperature for the current frying process Press the "P" key. The time flashes on the left display. 3 sec. - If you wish to change it, press and hold down the "up" or "down" key within 3 seconds. First, the values are reduced or increased slowly, then rapidly. By pressing the key, the setting is re duced or increased by one step respectively. Press the "P" key. The changed time has been stored. The setpoint temperature flashes on the right display. 3 sec. If you wish to change it, press and hold down the "up" or "down" key within 3 seconds. First, the values are reduced or increased slowly, then rapidly. By pressing the key, the setting is redu ced or increased by one step respectively. To save the settings - Press the "P" key or wait for approx. 3 seconds. 7.4 Displaying the actual temperature in the bowl When the appliance is switched on, press the "temperature/pump" key. Two temperatures are displayed for 3 seconds: − Actual temperature on the left display and − setpoint temperature on the right display. 55 Operating mode "Product keys" en 7.5 Changing the basic settings for time and setpoint temperature With this function, you can adjust the factory‐set values for time and setpoint temperature to your require ments. + These settings remain stored even after the appliance has been switched on and off at the customer's electrical main switch. The appliance must be switched off. Three dots glow on the display. Press the "P" 3 sec. - key. Within 3 seconds, select the number for the "product key" by pressing the keys 1 to 4: E.g. − for products1‐4, press the key "1, 2, 3 or 4" or − for products with two‐digit numbers, e.g. "product key 12", press key 1 and immediately after that key 2. The time display flashes. The number of the "product key" is briefly displayed. 10 sec. For changing the time: Within 10 seconds, press and hold down the "up" or "down" key. First, the values are reduced or increased slowly, then rapidly. By pressing the key, the setting is re duced or increased by one step respectively. 10 sec. Within 10 seconds, press the "P" key. The set time has been stored. 10 sec. The setpoint temperature display flashes. For changing the setpoint temperature: 10 sec. Within 10 seconds, press and hold down the "up" or "down" key. First, the values are reduced or increased slowly, then rapidly. By pressing the key, the setting is re duced or increased by one step respectively. Storing the factory‐set setpoint temperature: Within 10 seconds, press the "P" key. was not pressed, the changed setpoint temperature is not stored and the setting proced If the "P" ure is automatically interrupted after 10 seconds. 56 “Timer“ option functions 8. en Functions for appliances with "time control" option These functions are identical for both the "Time and temperature" and "Product keys" operating mode. "Time control" option Operating mode "Time and temperature" 8.1 Operating mode ”Product keys”: Switch automatic basket lift function off or on (option) Only for appliances with time control and automatic basket lift! Use the short time clock to automatically raise or lower the basket lift. This function can also be switched off. This is, for example, required when you work with several portion baskets in one bowl and the short time clock is to be used. Switching off the automatic basket lift 3 sec. Press the "START/STOP" key and hold down for 3 seconds. The indicator light in the key goes out. The basket lift moves down. Exception: The automatic basket lift waits before lowering the basket lift until the oil or fat temperature in the bowl is higher than 90°C. Switching on the automatic basket lift 3 sec. Press the "START/STOP" key and hold down for 3 seconds. The indicator light in the key glows. The basket lift moves up. Exception: The automatic basket lift waits before raising the basket lift until the oil or fat temperature in the bowl is higher than 90°C. 8.1.1 Two individually controllable basket lifts for large bowls By default, the control is set in such manner that a large basket can be lifted out using the two basket lifts. If you wish to control the two basket lifts individually, this must be set by the customer service. For "time and temperature" mode: For "product keys" mode: In this mode, it is not possible to control the basket lifts individually. Both basket lifts are controlled simultaneously! Key 1 and 2 for left basket lift Key 3 and 4 for right basket lift 57 “Timer“ option functions en 8.2 Oil/fat utilization period The control calculates and modifies the fat utilization period for the duration of the operation in dependence of the temperature: − Lower temperature = longer fat utilization period − High temperature = shorter fat utilization period The oil/fat utilization period greatly depends on the frying temperature, the products used and the cleaning of the frying oil or frying fat. The settable oil/fat utilization period can therefore only be regarded as a reference value that must be ad apted to the local condition. By factory setting, the oil/fat utilization period function is switched off. Switching on and setting of the oil/fat utilization period, see page 60 Chapter 8.5 8.2.1 Displaying the remaining time of the oil/fat utilization period Press the "P" 3 sec. key. Within 3 seconds, press the "Temperature/pump" key . The remaining time in hours is displayed for 3 seconds. If three dashes "- - -" are shown on the display, the oil/fat utilization period function is switched off. 8.2.2 Postponing the report for the oil/fat utilization period's expiry To avoid having to replace any cooking oil or cooking fat during peak times, the report can be suppressed or postponed by one hour. After expiry of the oil/fat utilization period: The display alternately shows and . An acoustic signal is output. 3 sec. Press the "P" key. Within 3 seconds, press the "Temperature/pump" key . The report signal is suppressed and the oil/fat utilization period is prolonged by 1 hour. 8.2.3 Resetting the counter for the oil/fat utilization period After the bowl's refilling with new cooking oil or cooking fat, the counter for the fat utilization period must be reset. 3 sec. Press the "P" key. Within 3 seconds, press the "Temperature/pump" key and hold down for 3 seconds. The display shows the updated fat utilization period for 3 seconds. 58 “Timer“ option functions 8.3 en Automatic cooking time correction The user can switch this setting off or on, see page 60 chapter 8.5 If the cooking time correction function has been activated and if you work with the short time clock or the automatic basket lift, the control automatically extends the cooking time for large portions. This has the benefit that you do not need to change the frying period for different filled quantities. Determining the cooking time setting To determine the time setting, fry 1/5 of the maximum quantity so that the cooking time correction function can determine optimal settings. Example: Maximum quantity 1000 grams, 1/5 is equivalent with 200 grams. Set the required setpoint temperature for the food to be fried. Fill frying basket with 200 grams of food to be fried. Start short time clock with a sufficiently high cooking time setting (e.g. 10 minutes). Insert the frying basket with the food to be fried into the bowl without time loss. Monitor the cooking process: When the food is cooked, read and write down the displayed remaining time. Calculate the frying time based on the cooking time setting (e.g. 10 minutes) and the remaining. time If the frying result is right, different quantities can be fried based on the determined time. If you change the product to be fried, e.g. the manufacturer or switch from refrigerated to deep frozen products, you should check the cooking time setting. 8.4 Automatic switching to standby mode The control switches the deep‐fat fryer automatically to standby mode if − no key was pressed for a period of 30 minutes (factory setting), or − the control could not determine a temperature drop that would indicate a frying process. Settings for standby mode, see page 60 Chapter 8.5 − Switching the standby mode function off and on, − standby temperature in bowl, − time setting from that the standby mode is to start. Display of the standby mode Three dashes "- - -" glow on both displays. The setpoint temperature is set back to 90°C (factory setting). Terminating the standby mode - Press any key "1, 2, 3 or 4". The temperature and time previously set are shown on the display. The indicator light in the key glows. The appliance heats to the set setpoint temperature. 59 “Timer“ option functions en 8.5 Changing control default settings 8.5.1 Setting the parameters Depending on the equipment of the appliance, different setting options are possible for the control, see parameter table below, chapter 8.5.2 The setting mode is switched off automatically if the "P" key or the "up" or "down" key are not pressed within 10 seconds. Any settings made that were not confirmed by pressing the "P" key are not stored. Changing the setting The appliance must beswitched on. First, press and hold down the "P" key, then press the "Temperature/pump" simultaneously for 3 seconds. The parameter set last will be displayed. Within 10 seconds, keep pressing the "up" played. Within 10 seconds, press the "P" key ‐ hold both or "down" key until the desired parameter is dis or "down" key until the desired value has been set. key. The value of the parameter flashes. Within 10 seconds, keep pressing the "up" Storing the set value - within 10 seconds, press the "P" key. Exiting the setting process Wait for 10 seconds - the "setting the parameters" function is switched off. Or: First, press and hold down the "P" time. 8.5.2 60 , then briefly press the "temperature/pump" key at the same Parameter table (display only for time control option) Param eters Factory set ting P01 Setting range Description 0 0=Off 1-99 hours Time setting for the utilization period of the cook ing oil or cooking fat. To assure an immediate ef fectiveness of the changed setting, the short time clock has to be reset, refer to page 58, chapter 8.2.3 P02 1 0=off, 1=on Switching the acoustic signal and key sound on or off P03 10 seconds 0-60 seconds Switching acoustic signal off (0) and setting length of the acoustic signal (1-60 seconds) P04 0 0=off, 1=on Switching the standby function on or off P05 30 minutes 10-120 minutes Starting the standby function after x minutes P06 90°C 60-170°C Standby temperature in bowl P07 0 0=1°C, 1=5°C Temperature adjustment in increments each time key is pressed P08 1 0=off, 1=on Switching the cooking time correction on or off P09 0 0=off, 1=on Switching the "product keys" mode on or off Customer setting en 9. Filtering the frying‐oil/frying‐fat ATTENTION! Hot surfaces! Risk of burns. Wear protective gloves, safety clothing and safety goggles! Filter the frying oil/frying grease daily. This will significantly increase the product life and the frying oil and frying grease can be used longer. Pump option: As the refilling process with a pump is much easier, it is recommended filtering the frying oil/frying grease additionally during short frying breaks. See also chapter 62, page 9.3.1. 9.1 Draining and filtering of the frying‐oil/frying‐grease To switch the appliance off - press the button “On/Off” Retaining clamp for fine filter Coarse filter Fine filter and hold it for three seconds. The indicator light in the button goes out. Three points will light up in the display. Pouring spout Before filtering − Insert fine filter, − Insert coarse filter into fine filter, − Insert fine filter with the coarse filter into the container. − Insert the container into the base. Container Emptying the bowl and filtering Frying basket Insert sieve bowl For emptying and filtering, the frying‐oil/frying‐fat must still be at least 60°C hot! Open the drain tap - lift the safety catch and turn the lever as far as it goes. Close Open The frying oil/frying grease flows into the con tainer and is filtered at the same time. Lever for drain tap During the draining process, check to make sure the container does not overflow! Safety catch for drain tap Container CAUTION! Risk of burns. Caution hot. Remove frying basket. Take out the insert sieve and remove any food residue. Tilt the heater upward. Clean bowl. 61 en 9.2 Refilling the frying oil/frying grease (manually, without pump) With appliances without pump (option), the filling of the frying oil/frying grease in the bowl must be done by hand. Preparatory work Let the frying oil/frying grease cool off in the con tainer! Coarse filter Wear grease and heat resistant shoes, gloves and protective clothing. Fine filter Remove the container from the guide rails slowly and carefully up to the stop. Container Guide rail Be cautious - dripping frying oil or frying grease and contamination of floor due to frying oil/fry ing grease! Therefore, have a stainless steel con tainer ready for the parts to be removed! Remove the coarse and fine filters and set them into the stainless steel container. Refilling Top handle Pouring spout Front handle Guide rail Container Carefully unhook the container: − Pull the container out of the guide rails to the stop, − slightly lift the container by the front handle, − keep pulling the container out to the stop, − remove the container from the guide rails by both handles. Empty the frying oil/frying grease via the pouring spout into the bowl or into a heat‐resistant con tainer. CAUTION! Danger of slipping! Immediately clean any fat splashes off the floor. 9.3 Filter system with pump (option) With appliances with pumps, the filling of the frying oil/frying grease from the container into the bowl is handled by the pump. In order to remove all residue from the bowl, you can rinse the bowl with the frying oil/frying grease by means of the pump. See description below; page 64 in Chapter 9.3.3. 9.3.1 Pumping the frying oil/frying grease from the container into the bowl The drained and filtered frying oil/frying grease is pumped from the container into the bowl by the pump. Filtern during short frying breaks Using the procedure described in the following, you can filter the frying oil/frying grease and pump it into the container. 62 en Preparation Filling tube with handle Drain frying oil/frying grease into the container and filter it; see page 61 in Chapter 9.1. Press the “Temperature/Pump” button with indicator light Cap CAUTION! Risk of burns on account of hot surfaces! The filling tube and the cap will get hot! Push the filling tube into the cap. The filling tube must engage perceivably and audibly. Lever for drain tap Safety catch for drain tap CAUTION! Foaming of frying‐oil/frying‐fat Observe filling level of the frying oil/frying grease in the bowl! Do not fill higher than to the filling level mark! Keep the expansion by heat in mind! Manual switching on and off of the pump: The filling process must be supervised and switched off by hand! Container Close Close the drain tap - swing the lever up and latch. Open Repumping For dual bowl deep fat fryers, the pump is controlled using the left control panel. Dual bowl deep‐fat fryer Pump option can only be operated using the left control panel. The appliance must be switched off (three points will light up in the display). Start the pumping procedure - press the “Temperature/Pump” button and hold it for 3 seconds. The indicator light in the button comes on and the pump starts. Please observe: The intake time may last up to three minutes. Once the filling level of the frying oil/frying grease has been reached in the bowl, switch the the pump off - press the button“Temperature/Pump” and hold it for one second. After the pump time of 5 minutes has been exceeded, the pump will be switched off automatically. The indicator light in the button goes out. 9.3.2 Removing the filling tube Filling tube with handle CAUTION! Risk of burns on account of hot surfaces! The filling tube and the cap are hot, if hot frying oil/frying grease was pumped! Cap Hold the filling tube and push cap toward the bot tom. Unplug the filling tube and allow to drain empty in the bowl and to drip dry. 63 en 9.3.3 Rinse the bowl with frying oil/frying grease via the pump Rinsing the bowl is only necessary if the frying oil/frying grease is to be used again. Here, the last remain ing frying residue is rinsed from the bowl and filtered. Basket holder Filling tube with handle Frying basket Drain frying oil/frying grease into the container and filter it; see page 61 in Chapter 9.1. CAUTION! Risk of burns on account of hot surfaces! Insert sieve Remove frying basket. Handle to swivel the heating element for built‐in deep fat fryers Remove basket holder. Take out the insert sieve and remove any food residue. Heater support bowl “Temperature/Pump” button Drain hose Heating element Lever for drain tap Safety catch for drain tap Container Swivel the heater upward. Take out heater support. Rinsing the bowl Insert the drain hose between filling tube and cap and let it lock. The filling tube and the drain hose must engage perceivably and audibly. Hold the filling tube on the handle and into the bowl. Switch on the pump For dual bowl deep fat fryers, the pump is controlled using the left control panel. Dual bowl deep‐fat fryer Pump option can only be operated using the left control panel. The appliance must be switched off (three points will light up in the display). Start the pumping procedure - press the “Temperature/Pump” button and hold it for 3 seconds. The indicator light in the button comes on and the pump starts. Rinse the bowl with frying oil/frying grease via the filling tube. Switch off the pump. Switch the pump off after rinsing - press the button “Temperature/Pump” and hold it for 1 second. After the pump time of 5 minutes has been exceeded, the pump will be switched off automatically. The indicator light goes off. Close the drain tap - swing the lever up and latch. Swivel heating element in. To remove the drain hose, see page 65 in Chapter 9.3.4 64 en 9.3.4 Removing the drain hose CAUTION! Risk of burning through hot filling tube, cap and draining frying‐oil/frying‐fat! Wear pro tective gloves, safety clothing and safety goggles! Hold the filling tube into the bowl. Filling tube with handle Cap To allow the filling tube and drain hose to drain properly, observe the sequence when pulling off: 1. on the bowl, 2nd on the filling tube. (1.) Hold the drain hose and push cap toward the bowl. 2. Drain hose Allow the drain hose to drain empty in the bowl and to drip dry. (2.) Hold the drain hose and push cap toward the hose. 1. Cap CAUTION Danger of slipping! Immediately clean any fat splashes off the floor. 10. Deep frying 10.1 Notes regarding frying oil/frying grease Notes regarding frying oil/frying grease: Must not oxidise easily, smoke point (over 230°C), long life, low foaming, no smell and neutral taste. Only use frying oil or liquid frying grease! Use only 100% vegetable frying oil/frying grease. Do not use unsuitable edible oils or animal fats. These are not suitable because they decompose at high temperatures. To prevent self combustion, do not use spoiled or old frying oil/frying grease. The life of the frying oil or grease will be extended: − by regularly removing food residues and − Filtering the frying oil/frying grease, and − by covering the deep fat fryer when not in use (protects against light and oxygen). Do not add spices above the deep fat fryer as salt and spices accelerate the aging of the frying oil/ grease. To prevent flavours from crossing, prepare fish, meat or potato products in separate bowls. 10.2 Adding food to be cooked You can start the deep frying process after the point disappears from the display and after the setpoint temperature has nearly been reached in the bowl. In order to avoid foaming, briefly dip the filled frying basket into the hot frying oil/frying grease. During short operation breaks, set the temperature to approx. 110oC and cover the deep fat fryer bowl with the lid or switch to standby mode (timer option), see starting on page 60 in Chapter 8.5.1 / 8.5.2 65 en 10.3 11. 3 sec. Recognising and eliminating mistakes when frying Frying oil/frying grease Causes Foams heavily Used or unsuitable oil was used, e.g. salad oil Different oils and fats were mixed Food being fried contains too much moisture Too high a quantity of food in the frying bowl Cleaner residues were not removed from the bowl Browns badly The frying oil or frying grease is new Food being fried contains too much moisture Cooking time too short Temperature setting too low Smoke develops Temperature setting too high Unsuitable oil or fat with low smoke point used The frying oil/frying grease has been in use too long Smells bad Food remnants (breadcrumb coatings) were not removed The frying oil/frying grease has been in use too long Oil or fat is not suitable for frying Spoils quickly Food remnants (breadcrumb coatings) were not removed regularly Different oils and fats were mixed The frying oil/frying grease was heated too long without frying anything Frying oil/frying grease was stored incorrectly (too much light and oxygen) Cleaner residues in the bowl Consumption too high Temperature for the food was set too high or too low Dripping time of the frying oil/frying grease too short Overlong cooking time Discolouration Contamination of the frying oil/frying grease by food/spices The frying oil/frying grease has been in use too long Food remains (breadcrumb coatings) was not removed Completion of operation Switch appliance off - press the “On/Off” button and hold it for three seconds. The indicator light in the button goes out. Three points will light up in the display. Filter the frying‐oil/frying‐grease and clean the appliance, see the following Chapter12. “Cleaning and care”. Turn off the mains switch. 12. Cleaning and care Keep caustic cleaners away from the control panel! Do not spray off or clean the appliance with water hoses, high‐pressure cleaners, high‐pressure steam cleaners or general steam cleaners. Follow the instructions supplied by the manufacturer of the cleaning product! Do not use abrasive cleaning agents. Do not use any caustic or acid cleaning agents on the frying basket and heater; this may destroy the corrosion protection and cause danger of rusting! Stainless steel must not be in prolonged contact with concentrated acids, vinegar essence, salt solu tion, mustard or spice mixtures, otherwise the protective layer will be attacked. After use, rinse stain less steel surfaces until water runs clear. Suitable cleaning and maintenance products can be obtained from your customer service. 66 en 12.1 Draining, cleaning 12.1.1 Emptying the bowl 3 sec. Switch appliance off - press the “On/Off” The indicator light in the button goes out. Three points will light up in the display. 12.1.2 button and hold it for three seconds. Wear grease and heat resistant shoes, gloves and protective clothing. For filtering, the frying oil/frying grease must still be at least 60°C hot! Draining and filtering of the frying oil/frying grease, see starting on page 61 in Chapter 9. Empty/refill the frying oil/frying grease without a pump from the container into the bowl or into a heat‐resistant container, see page 62 in Chapter 9.2. Drain the container with pump (pump option) In order not to have to empty the container by hand, you can use the pump to pump the frying oil/frying grease to be disposed of. Drain hose Preparation Drain frying oil/frying grease into the container and filter it; see page 61 in Chapter 9.1: Press the “Temperature/Pump” button with indicator light Filling tube with handle CAUTION! Risk of burns on account of hot surfaces! The filling tube, the drain hose, the bowl will get hot! Insert the drain hose between filling tube and cap. The caps must engage perceivably and audibly. Hold filling tube into heat‐resistant vessel. Repumping Container Heat‐resistant vessel with carrying handles Manual switching on and off of the pump: The filling process must be supervised and switched off by hand! Switch on the pump For dual bowl deep fat fryers, the pump is controlled using the left control panel. The appliance must be switched off - three points will light up in the display. Dual bowl deep‐fat fryer Pump option can only be operated using the left control panel. button and hold it for 3 seconds. Start the pumping procedure - press the “Temperature/Pump” The indicator light in the button comes on and the pump starts. Please observe: The intake time may last up to three minutes. After the pump time of 5 minutes has been exceeded, the pump will be switched off automatically. Only fill the container 3/4 full! Switch off the pump When 3/4 of the bowl is full or if the frying oil/frying grease has been completely pumped out of the con tainer, switch off pump - press the button “Temperature/Pump” The indicator light in the button goes out. and hold it for 1 second. Firmly close the container with a lid and label it with a notice ”hot material”. CAUTION Danger of slipping! Immediately clean any fat splashes off the floor. To remove the drain hose, see page 65 in Chapter 9.3.4 67 en 12.1.3 Cleaning the bowl and the filter system ATTENTION! Hot surfaces! Risk of burns. Wear protective gloves, safety clothing and safety goggles! Only clean when cooled down! The bowl and the container must be emptied before cleaning! − Emptying/draining the bowl, see Page 61 in Chapter 9.1 − To fill the bowl without a pump, see page 62 in Chapter 9.2 − To empty the bowl with a pump, see page 67 in Chapter 12.1.2 Pump option: Do not pump the detergent with the pump; residues of cleaning agent and water may remain otherwise in the pump and the tubing! Remove the frying basket and the insert sieve from the bowl. Built‐in deep fat fryer Handle to turn the heating element Heater support higher in the front Remove the basket holder (option). Swivelling the heater With built‐in deep fat fryers: bowl Heating element Hook handle onto the heating element and raise the heating element. With freestanding deep fat fryers: Swing the heater up by turning the lever in the anti‐clockwise direction. Freestanding deep fat fryer Basket holder Remove coarse and fine filter from the container. Frying basket Slide in the empty container. Insert sieve Cleaning the bowl and heater Spray caked on residues on the heating element with diluted grill cleaner (mixing ratio: 1 part grill cleaner to 10 parts water). Leave to soak in for approx. 10 min. Heater support bowl Heating element Lever to swivel the heater Lever for drain tap Safety catch for drain tap Do not use any abrasive cleaners on the heating element! Do not scratch the heating element! Clean the bowl with cleaner that dissolves fat and hot water. Drain the cleaning solution down into the con tainer. Rinse clean the bowl with clear water and rub dry with soft, fluff free cloth. Close the drain tap - swing the lever up and latch. Container CAUTION Danger of slipping! Immediately clean any fat splashes off the floor. 68 en Cleaning the individual parts Draining the container. Coarse filter Clean in the dishwasher (with opening pointing down) or in the sink with fat‐dissolving cleaning agent: − Insert sieve, − coarse filter, − holding bow, − Fine filter, − Container. Holding bow Fine filter Container Cleaning the frying basket Do not use any abrasive cleaners on the frying basket! Do not scratch the frying basket! The frying bas ket may not be immersed into a caustic or acid cleaning solution! Clean frying basket with fat‐dissolving cleaning agent or clean in the dishwasher. Rinse frying basket well and rub dry. O‐ring (round ring) Filling tube with handle Drain hose Intake tube Cleaning the parts for the filter system with pump Pump option: Clean surfaces with rinsing cloth and fat‐dissolving cleaning agent (do not immerse in cleaning solution): − Intake tube, − Filling tube, − Drain hose. After cleaning, thoroughly dry all parts and sur faces. 12.2 Cleaning stainless steel surfaces Clean stainless steel surfaces with grease‐dissolving cleaning products or special stainless steel clean ers. Clean support structure with fat‐dissolving cleaning agent. Dry the cleaned parts and surfaces with a soft cloth. Restoring the ready to operate mode, see page 46 in Chapter 5.1 Close the bowl with the lid. 13. Errors and remedies If there are malfunctions on the device, check these against the following table: Malfunction Possible cause Remedy There is no reaction on the display when the ap pliance has been switched on. Main switch not turned on in front of the device. Turn on the main switch. The entire power supply system is missing. Notify the electricity supply company. The network fuse has been tripped. Have possible appliance faults checked by an au thorized customer service agent. Reset the circuit breaker. 69 en Malfunction Possible cause Remedy The appliance is switched on but does not heat up. The heater is swivelled up and therefore turned off automatically. Swivel heating element in to the stop. The pump is switched on, but does not feed any fry ing oil/frying grease. There is not enough oil or deep frying grease in the container. Pump is sucking air. Fill the bowl or container with frying oil or frying grease. Solid frying grease was used. The frying oil/frying grease has become solid in the container or in the pump. Remove the solid frying grease from the container. Only use frying oil or semi‐liquid frying grease! The O‐Ring (round ring) on the connecting hub of the suction pipe is defective or missing. Pump is sucking air. Insert new O‐ring (round ring). Pump is switched on and fails to start. The indicator light in key "Temperature/ pump" flashes. Pump moves too sluggishly. Switch the pump on and off repeatedly. If the pump does not start, notify the customer service. The pump is switched on and runs for 5 minutes, but does not feed any fry ing oil/frying grease. Pump pusher worn. contact customer service. Fault report: E01 and E03 Short circuit in the temperature sensor. Turn the appliance on and off. Contact the customer service if the fault recurs. Fault report: E02 and E04 Interruption of the temperature sensor. Turn the appliance on and off. Contact the customer service if the fault recurs. Fault report: E05 and E06 The safety temperature‐ limiter has turned off. Heating element or contactor defective. Switch on the safety temperature‐limiter (E07-E08). Disconnect the appliance from mains power (5 se conds). Contact the customer service if the fault recurs. Fault report: E07 and E08 Maximum temperature exceeded. Check whether there are sufficient amounts of oil or deep frying grease in the bowl. Switch off the error message -> and switch the ap pliances off and back on. The safety temperature‐ limiter has turned off. Switch on the safety temperature‐limiter. If fault occurs again, let customer service or an electrician check the appliance. Securing the ball drain tap Reset button safety temperature controller One red reset button for the safety temperature limiter per each heater. Fault report: E09 and E10 Temperature increase too rapid. Check whether there are sufficient amounts of oil or deep frying grease in the bowl. Switch off the error message -> and switch the ap pliances off and back on. Fault report: E20 to E34 Faults in the control Turn the appliance on and off. Contact the customer service if the fault recurs. Note display: Alternate OIL and 0 Grease utilisation period Display, postpone, reset the grease utilisation counter, see page 58 in Chapter 8.2 Symbols will appear in the displays which do not con cur with the display of time and temperature. You have inadvertently selected setting menus that are only intended for service work performed by customer service. Turn the appliance on and off. If you cannot remedy the error, − turn off the appliance and disconnect it from power, − do not open the housing, − contact customer service. 70 en 14. Technical specifications Technical specifications Single bowl deep fat fryer Single bowl deep fat fryer Single bowl deep fat fryer Dual bowl deep fat fryer Width 200 mm 300 mm 400 mm 400 mm Depth 650 mm 650 mm 650 mm 650 mm Height 750 / 900 mm 750 / 900 mm 750 / 900 mm 750 / 900 mm Total connection value 8 / 9.5 kW 11 / 13 kW 16 / 19 kW 2 x 8 / 2 x 9.5 kW Fuse 3 x 16A 3 x 16A / 3 x 20A 3 x 25A / 3 x 32A 2 x (3 x 16)A Voltage 400V 3 50/60 Hz 400V 3 50/60 Hz 400V 3 50/60 Hz 400V 3 50/60 Hz Temperature range 50 - 190 °C 50 - 190 °C 50 - 190 °C 50 - 190 °C Bowl size 160x428x338 mm 260x428x338 mm 360x428x338 mm 2x160x428x338 mm Total fill volume of frying oil 7.5 - 9.0 l 12.5 - 14.5 l 17.0 - 20.5 l 2 x 7.5 - 9.0 l Total use volume of frying oil 4.5 - 6.0 l 7.5 - 9.8 l 10.0 - 13.5 l 2 x 4.5 - 6.0 l Number of heaters 1 1 2 1 per bowl Basket size 140x320x155 mm 220x320x155 mm 300x320x155 mm / 2 x 140x320x155 mm 2 x 140x320x155 mm Basket fill volume 0.9 kg 1.5 kg 1x1.8 / 2 x 0.9 kg 2 x 0.9 kg Hourly capacity - cooled 20 kg 30 kg 40 kg 40 kg Hourly capacity - frozen food 17 kg 27 kg 34 kg 34 kg Thermal output, sensitive 0.72 / 0.86 kW 1.17 kW 1.44 / 1.71 kW 1.44 / 1.71 kW Thermal output, latent 5.60 / 6.65 kW 9.10 kW 11.20 / 13.30 kW 11.20 / 13.3 kW Steam output 8.25 / 9.79 kg/h 13.39 kg/h 16.48 / 19.57 kg/h 16.48 / 19.57 kg/h Appliance noise level 70 dB (A) 70 dB (A) 70 dB (A) 70 dB (A) Degree of protection against water IPX4 IPX4 IPX4 IPX4 We reserve the right to make technical changes 15. Installation and Connection Please observe the local kitchen regulation. Installation work must be carried out in accordance with the manufacturer's assembly instructions and in accordance with accepted technical regulations. Let customer services set up and install the appliance and provide instruction. 15.1 Transport Only transport the appliance while empty. Note the weight of the appliance. Transport the appliance using suitable transport equipment, e.g. a lift carriage. 71 en 15.2 Installation Setup − Horizontal and not sensitive to vibrations, − under an extraction hood with flame protection filters, − not against flammable walls. Safeguard against tipping Top wall mount Latch with break location: Can be removed if necessary. Appliance connection For stand‐alone installation of appliances: Prevent the appliance from tipping over, e.g. by screwing it to the wall or to adjacent appliances. Side wall mount Ensure sufficient clearance above the appliance! There must not be any shelves above the appli ance or movable swivelling devices! Ensure sufficient movement areas for operation! So that there will be no risk of inadvertent push ing into other persons while working with the deep fat fryer. The clearance in front of the deep fat fryer should be at least one meter! Do not install appliances operated with water next to deep fat fryers. Maintain the minimum distance from deep fat fryers of 900 mm or fit a splash guard (sheet metal deflector) with a minimum height of 350 mm. Nor may any water taps or spray hoses be installed near deep fat fryers. It is prohibited to install caster wheels on the appliance. The factory installed wheels on the back of the appliance must not be altered. The wheels are only intended for the appliance to be rolled toward the front and the back. Observe the health and safety information supplied by the employers' liability insurance association for deep fat fryers. Capacities are added together if a number of deep fat fryers are installed next to one another. In such cases, special fire protection measures will be required. Pull the protective film off the device. Remove residual adhesive with cleaner's naphtha. 15.3 Electrical connection Electrical connection must be carried out by a qualified electrician − according to the current VDE 0100 regulations − and the rules of the power supply company concerned. The flexible mains connection must be at least H 07 RN‐F. An easily accessible main switch has to be installed upstream of the device. The main switch must ef fectively disconnect the appliance from the mains at all poles. The contact opening must be at least 3 mm. Instruct the manager and the operating personnel where the main switch provided in the kitchen for the appliance is located so that the appliance may be switched off without danger in the event of hazards to the user (e.g. risk of fire). For safety reasons, we recommend installing a 10 mA residual current device (RCD). Observe the data on the type plate when making the electrical connections! Include the device into the potential equalization system. Its efficiency must be checked in accordance with VDE0190. Securely connect the mains connection cable at the customer's premises. 72 en 16. Maintenance Have the device inspected and serviced on a regular basis. Maintenance tasks include: e.g. safety, function and leak testing. The safety equipment shall be inspected for correct condition by a technical expert at least once a year. The result of this inspection shall be recorded in a certificate and kept until the next inspection. Installation‐, maintenance‐ and repair work must only be carried out by qualified electricians. Only use original accessories and original spare parts. We recommend agreeing a maintenance contract with a customer service agent. 17. Disposal information Prior to disassembly, switch off the power to the appliance and secure it against being switched back on. Then, disconnect the mains cable from the mains socket and the appliance. Old appliances are not worthless rubbish. By environmentally conscious disposal practices, we can regain valuable raw materials. In case of disposal of the appliance, observe the respective local regulations. Commercial electrical appliances may not enter the municipal waste disposal stream or be disposed of with household waste. 18. EU‐Declaration of Conformity This declaration applies only to machines that are in their original condition. This declaration will lose its validity if the product is refurbished or modified without permission. We hereby declare that the machines identified below comply with the appropriate health and safety re quirements of the Machine Directive 2006/42/EG on the basis of their design and construction and in the versions placed on the market by us. The machines also comply with the requirements of the directive 2006/95/EG for electrical machines and 2004/108/EG for electro‐magnetic compatibility. Machine types Deep Fat Fryer FSP, Freestanding and Built‐in Deep Fat Fryers Harmonized EN standards applied EN 60335-2-37:2008-12 EN 55014 -1:2007-06 -2:2002-08 EN 61000-3-2:2006-10 EN 61000-3-11:2001-04 EN 62233:2008-08 Authorized representative for the compilation of the technical dokumentation SERVATOR ServiceLine GmbH, Thomas Schmalz, Wilhelm‐Frank‐Straße 36, D‐97980 Bad Mergentheim 73 fr-Traduction du mode d'emploi original fr 1. Recommandations pour les utilisateurs 1.1 Utilisation du présent mode d'emploi Lire attentivement le présent mode d'emploi, avant de mettre l'appareil en service. Le mode d'emploi contient des informations importantes relatives à l'utilisation et l'installation correctes de l'appareil. Conserver toujours la documentation jointe à l'appareil à portée de main et la remettre au nouveau proprié taire en cas de vente. L'exploitant de l'appareil doit veiller à ce que le personnel mandaté ait accès au mode d'emploi. 1.2 Pictogrammes d'avertissement, de danger et de recommandations Avertissement ! Risque de décharge électrique avec graves blessures corporelles possibles, pouvant même avoir une issue mortelle. Prudence ! Avertissement de la présence éventuelle de blessures corporelles, d'un risque pour la santé ou de dommages matériels. Prudence ! Avertissement de la présence d'objets brûlants et de blessures corporelles possibles suite à des brûlures. En cas d'incendie, graves brûlures possibles ! Information ! Recommandations contenant des informations et conseils particulièrement utiles. 1.3 Symboles au début d'un texte Invite à effectuer une opération. − Énumération, listage Remarques, cycles de fonctionnement Texte non accompagné d'un symbole : descriptions ou explications à la suite d'un titre. 1.4 Utilisation conforme L'appareil est destiné à un usage commercial et doit être utilisé uniquement − par du personnel autorisé, − lorsqu'il est sous surveillance, − pour le but stipulé par le mode d'emploi. L'appareil ne peut être utilisé que pour la préparation d'aliments! Par ex.pour frire, cuire la viande, le poisson, les pommes de terres, les légumes, les desserts, les pâtes garnies et boulangeries sucrées. L'appareil ne doit être utilisé qu'avec de la graisse ou de l'huile alimentaire ! La graisse ou l'huile alimentaire doit être appropriée spécialement pour la friture. 1.5 Utilisations erronées (Utilisation erronée raisonnablement prévisible) L’appareil ne doit pas être utilisé − à l'extérieur, − avec de l'eau dans tous les états d'agrégat ou avec d'autres liquides ne correspondant pas à la fonction prévue, − pour la fonte de cire ou de matériel similaire. L’appareil ne doit pas être utilisé − par des enfants, − par des personnes avec des capacités physiques, sensorielles ou mentales limitées et − par du personnel non qualifié. 74 fr 1.6 Saisie des données de la plaque signalétique Avant d'installer l'appareil, inscrire sur les lignes suivantes les caractéristiques figurant sur la plaque signa létique. Indiquer ces données lors d'une prise de contact avec le service après‐vente. Ceci permet un traitement plus rapide des demandes. Type : 2. Année de construction : Nº de machine : Consignes de sécurité Utilisation Pour manipuler l'appareil, porter des vêtements de travail et des chaussures convenant spécialement aux travaux sur des friteuses. L'appareil ne doit être transporté que si − il a suffisamment refroidi, − l'huile ou la graisse de friture a été évacuée et si − le réservoir est vidé dans la base. Ne pas utiliser l'appareil pour ranger ou déposer des objets ! La responsabilité en cas de dommages découlant d'une utilisation non conforme incombe à l'utilisateur et à lui seul. En cas de dégagement de fumée de la graisse, couper immédiatement l'alimentation en énergie ! Veuillez tenir compte des indications données à la page 100, au chapitre 10.3 “Reconnaître et éliminer les problèmes de friture” et à la page 103, chapitre 13. "Dérangements et remèdes" ! Respecter les prescriptions et les règlementations des associations professionnelles! Option pompe : Mise en marche et arrêt manuel de la pompe, par conséquent surveiller le processus de pompage et arrêter la pompe lorsque le niveau de remplissage du bac est atteint. Important ! Il n'y a pas de coupure automatique lorsque le bac est trop rempli ! Les appareils montés sur roulettes ne doivent être avancés et reculés qu'après avoir été vidés et avoir refroidi. S'il s'avère impossible de remédier aux dysfonctionnements à l'aide de la page 103, chapitre 13. ”Défauts et remèdes”, arrêter l'appareil et contacter le service après‐vente. Risque de blessures Risque de brûlure pendant le fonctionnement dû − à l'huile/la graisse de friture brûlante, − aux éclaboussures d'huile très chaude et − aux surfaces brûlantes. Prudence en retirant, insérant ou levant le récipient rempli ! Le récipient ne doit être retiré que lorsque l'huile/la graisse de friture a refroidi. Faire preuve de vigilance en conséquence, afin d'éviter tout débordement et éclaboussure d'huile/de graisse de friture ! À respecter pour les friteuses à deux bacs ! Si le récipient doit être vidé ou transvasé manuellement, ne vider que le contenu d'un bac dans le récipient ! Si le contenu des deux bacs est vidé dans le réservoir, ce dernier est trop lourd pour le transvasement manuel ! 75 fr Option pompe : lorsque la pompe fonctionne, le raccord de fermeture ne doit pas être déverrouillé ou le tuyau d'arrivée et le tuyau de vidage ne doivent pas être insérés dans le raccord de fermeture. Option pompe : ne pas pomper de solution de nettoyage ou de l'eau avec la pompe ! Autrement, de l'eau pourrait rester dans la pompe et dans le tuyau de vidage ! Cela peut causer de fortes écla boussures, l'écumage et le débordement du bac et même l'explosion de la graisse durant le fonction nement ! Ne laisser aucun liquide s'écouler dans l'huile/la graisse de friture. Si de l'huile ou de la graisse de friture chaude se trouve encore dans le bac après l'interruption ou à la fin de la friture, le bac doit être protégé par un couvercle approprié. Ceci empêche de mettre les mains par inadvertance dans le bac, par exemple en glissant. Pendant les travaux de nettoyage sur ou à côté des friteuses, il est interdit de faire fonctionner ces dernières. De l'eau ne doit en aucun cas être mélangée avec de l'huile/de la graisse de friture dans le bac ou dans le récipient. Ceci pourrait entraîner de fortes éclaboussures, une production de mousse, le débordement du bac ou une explosion de graisse. Risque d'incendie Risque d'incendie lorsque le volume d'huile est inférieur au repère de remplissage minimum ! Il est par conséquent important de contrôler régulièrement le niveau de remplissage et de faire l'appoint d'huile ou de graisse de friture. Respecter le repère de remplissage minimum et maximum ! Ne plus réutiliser l'huile/la graisse de friture dénaturée par de la pâte ou des épices. Elle peut déjà s'enflammer même à des températures dans la plage de régulation de l'appareil et déborder. En tant qu'utilisateur des appareils, se faire montrer ou se trouve la boîte à fusibles pour les appareils à commander. Ceci permet, en cas d'incendie, de pouvoir couper l'appareil sans risque. Lutte contre l'incendie Pour lutter contre le feu des extincteurs pour huile alimentaire et feux de graisse alimentaire ainsi qu'un couvercle pour la friteuse doivent être à disposition. L'eau provenant de dispositifs d'arrosage ne doit pas s'infiltrer dans la graisse. Ne jamais éteindre un incendie provoqué par de la graisse ou de l'huile avec de l'eau ! Lorsque de l'eau pénètre dans l'huile / la graisse de friture, cela provoque une explosion ! N'utilisez que des ex tincteurs approuvés pour les incendies d'huile et de graisse alimentaire ! Risque d'endommagement N'utiliser aucun produit de nettoyage corrosif ou acide sur le panier à friture et les éléments de chauf fage pour éviter la destruction de la protection anticorrosion et tout risque de rouille ! Ne pas nettoyer ou rincer l'appareil avec un tuyau d'eau, nettoyeur haute pression, nettoyeur haute pression à vapeur ou un nettoyeur vapeur ! Ne pas pulvériser les panneaux avant et les revêtements de l'appareil avec du nettoyant moussant ! Le nettoyant moussant pénètre dans les fentes les plus petites et endommage le système électrique et électronique ! Option pompe : ne mettre la pompe en marche que si le récipient contient de l'huile de friture et que si le tuyau d'arrivée est raccordé. Ne pas faire marcher la pompe à sec ! Si l'appareil n'a pas été utilisé pendant une longue période, faire vérifier son fonctionnement par un service après‐vente. Détermination et appréciation des risques d'après la loi sur les conditions de travail D'après la loi sur les conditions de travail, l'employeur doit apprécier quels risques sont liés au travail effectué par les employés et quelles mesures de sécurité au travail sont nécessaires. Respecter ici les recommandations faites par les associations professionnelles pour les cuisines industrielles ! L'employeur doit désigner et mettre des équipements de protection personnels à disposition. 76 fr 3. Description de l'appareil Dispositif de levage Raccord de fermeture Option pompe Élément chauffant à tubes plats Seulement pour friteuse sur table : Levier pour basculer l'élément chauffant Levier et sécurité pour robinet à bille d'écoulement Réservoir avec système de filtrage Poignée pour basculer l'élément de chauffe pour friteuse encastrée Appareil sans commande temporisée Appareil avec commande temporisée Friteuse avec − Élément chauffant tubulaire plat pour une friture douce et économique, − sonde de température électronique intégrée dans l'élément chauffant tubulaire plat et thermostat limiteur, − fonction de fusion automatique de la graisse pour mise à température en douceur. Bac embouti avec − grands rayons facilitant le nettoyage, − Élément chauffant à tubes plats pouvant être pi voté à l'intérieur du bac, − écoulement de la graisse vers le bas par le robi net à bille d'écoulement. Dans la base, réservoir avec système de filtrage pour huile ou graisse de friture. Options Système de filtrage avec pompe Commande temporisée avec les fonctions − minuterie, − correction du temps de cuisson, − fonction veille, − deux modes d'exploitation (temps et température ou touche produit) Commande temporisée avec système automatique de levage du panier 4. Description du panneau de commande 4.1 Indications sur les caractéristiques, les variantes et réglages Les fonctions décrites dans ces instructions de service se rapportent aux réglages effectués en usine sur la commande. Certaines indications relatives au manipulation et à la commande peuvent varier lorsque des modifications de réglages ont été effectuées sur la commande par l'utilisateur ou le service après‐vente. Il en est ainsi par exemple du signal sonore, des fonctions veille et température, des mesures de température et de la correction du temps de cuisson, voir page 94, chapitre 8.5 Vous pouvez allumer ou éteindre le bruit des touches et le signal sonore ainsi que modifier la durée des signaux sonores, voir page 94, chapitre 8.5 Les possibilités de réglage dépendent également de l'équipement de l'appareil. Important ! En fonction du réglage du mode d'exploitation "Temps et température" ou "Touches produit", lors de la lecture, reportezvous au chapitre correspondant. Voir intitulé en entête ! Respecter le temps d'attente entre réglage et interrogation Attendre environ 3 secondes entre les différents réglages ou interrogations. Par exemple − entre le réglage de la température de consigne et − l'affichage de la température effective. Ce n'est qu'après ce temps d'attente que la commande est à nouveau prête pour un autre réglage ou une nouvelle interrogation. 77 fr 4.2 Panneau de commande sans "commande temporisée mécanique" Pour les consignes relatives à l'utilisation de la commande, voir page 82, chapitres 6.1 "Mise en marche de l'appareil" et 6.2 "Sélectionner, modifier et afficher une température". Appuyer sur la touche "Température/pompe" (option pompe) - Interroger la température effective lorsque l'appareil est allumé. - Allumer / arrêter la pompe seulement lorsque l'appareil est arrêté avec la touche "Marche/Arrêt". Affichage Le témoin de contrôle brille - Numéro du paramètre lorsque la pompe est allumée (option). Affichage - Température effective ou de consigne - Numéro d'erreur Touche "Vers le haut" Touche "Vers le bas" En 1 ou 5 étapes, en fonction du réglage indiqué au chapitre 8.5 Le point brille, lorsque le chauffage est allumé Le point clignote, durant le procédé d'échauffement, lorsque la température effective est supérieure de plus de 10°C à la température de consigne. Touche "P" combinée à d'autres touches - Choix de la température (touches 1, 2, 3 et 4) - Modification de la température mémorisée 4.3 Touches "1, 2, 3 et 4" - Température - Choix de la température Attendez jusqu'à ce que le point soit éteint avant de démarrer la friture ! Touche "Marche/Arrêt" - Pour mettre en marche/arrêter la maintenir enfoncée durant Panneau de commande avec "commande temporisée mécanique" Mode d'exploitation "Temps et température" ou "Touche produit" 4.3.1 Sélection des modes d'exploitation pour l'option "Commande temporisée mécanique" Pour les appareils équipés d'une "Commande temporisée mécanique", il vous est possible de travailler dans deux modes d'exploitation différents : "Temps et température" ou "Touches produit". Les appareils avec option "Commande temporisée mécanique" sont automatiquement livrés avec le mode d'exploitation réglé sur "Temps et température". Pour modifier les modes d'exploitation, voir page 94, chapitre 8.5 Mode d'exploitation "Temps et température" En mode d'exploitation "Temps et température", le temps et la température de consigne sont indiqués durant le fonctionnement. Quatre touches sont disponibles pour la sauvegarde individuelle et librement sélectionnable des températ ures et des temps de cuisson. Elles peuvent être actionnées à tout moment pour une utilisation rapide et pratique. Description du panneau de commande, voir page 79, chapitre 4.3.2 p. ex. Mode d'exploitation "Touches produit" p. ex. 78 Mode d'exploitation ”Temps et température” Mode d'exploitation "Touches produit" En mode d'exploitation "Touches produit", le temps et le numéro de la touche du produit sélectionné, p. ex. "P22", sont affichés durant le fonctionnement. Une seule "Touche produit" peut être choisie à la fois. Une combinaison l'une après l'autre n'est pas possible. Description du panneau de commande, voir page 79, chapitre 4.3.3 fr 4.3.2 Mode d'exploitation "Temps et température" Appuyer sur la touche "Température/pompe" (option pompe) - Interroger la température effective lorsque l'appareil est allumé. - Allumer / arrêter la pompe seulement lorsque l'appareil est arrêté avec la touche "Marche/Arrêt". Affichage - Temps en minutes et secondes - Numéro du paramètre Le témoin de contrôle brille lorsque la pompe est allumée (option). Affichage - Température effective ou de consigne - Durée d'utilisation de la graisse - Valeurs de paramètres - Numéro d'erreur Touche "Vers le haut" Touche "Vers le bas" En 1 ou 5 étapes, en fonction du réglage indiqué au chapitre 8.5 Le témoin de contrôle brille lorsque le dispositif de levage automatique du panier est enclenché (option). Touche "Démarrage/Arrêt" - Démarrer ou arrêter la minuterie, - Relever/abaisser le dispositif de levage - Modifier le réglage initial pour la minuterie Touche "P" combinée à d'autres touches - Choix de la température (touches 1, 2, 3 et 4) - Modification de la température mémorisée - Indication de la durée d'utilisation de la graisse - Réglage de paramètres 4.3.3 Touches "1, 2, 3 et 4" - Temps/température - Sélection de la minuterie, - Interrompre le signal sonore, - Choix de la température Les témoins de contrôle des touches - brillent, lorsque la minuterie est enclenchée, - clignotent, lorsque la minuterie arrive à i ti Le point brille, lorsque le chauffage est allumé Le point clignote, durant le procédé d'échauffement, lorsque la température effective est supérieure de plus de 10°C à la température de consigne. Attendez jusqu'à ce que le point soit éteint avant de démarrer la friture ! Touche "Marche/Arrêt" - Pour mettre en marche/arrêter la maintenir enfoncée durant 3 secondes. Mode d'exploitation "Touche produit" - Indication du temps et de la touche produit Appuyer sur la touche "Température/pompe" (option pompe) - Interroger la température effective et de consigne, lorsque l'appareil est allumé. - Allumer / arrêter la pompe seulement lorsque l'appareil est arrêté avec la touche "Marche/Arrêt". Affichage - Temps en minutes et secondes - Numéro du paramètre Le témoin de contrôle brille - Température effective lorsque la pompe est allumée (option). Le témoin de contrôle brille lorsque le dispositif de levage automatique du panier est enclenché (option). Touche "Démarrage/Arrêt" - Démarrer ou arrêter la minuterie, - Relever/abaisser le dispositif de levage Touche "P" combinée à d'autres touches - Modification du temps et de la température mémorisés - Indication de la durée d'utilisation de la graisse - Réglage de paramètres Affichage - Numéro "Touche produit" - Température de consigne - Durée d'utilisation de la graisse - Valeurs de paramètres - Numéro d'erreur Touche "Vers le haut" Touche "Vers le bas" En 1 ou 5 étapes, en fonction du réglage indiqué au chapitre 8.5 Le point brille, lorsque le chauffage est allumé Le point clignote, durant le procédé d'échauffement, lorsque la température effective est supérieure de plus de 10°C à la température de consigne. Attendez jusqu'à ce que le Touches "1, 2, 3 et 4" = 20 touches produit point soit éteint avant de - Sélection des "Touches produit", démarrer la friture ! - Interrompre le signal sonore, Touche "Marche/Arrêt" - Choix de la température - Pour mettre en marche/arrêter Les témoins de contrôle dans les touches 1-4 n'ont pas la maintenir enfoncée durant de fonction en cas de réglage en mode "Touches produit". 3 secondes. 79 fr 5. Mise en service Nettoyer l'appareil avec un produit dégraissant avant la première mise en service. Essuyer les pièces et surfaces nettoyées avec un chiffon doux. Nettoyage, voir page 100, chapitre 12. 5.1 Mise en service Fermer le robinet d'évacuation - Pivoter le levier vers le haut et enclencher la protection. fermé ouvert Levier pour robinet d'écoulement Protection pour robinet d'écoulement Enlever le panier à friture et la passoire encastrable du bac. Friteuse encastrable Poignée pour basculer l'élément chauffant Support élément chauffant devant plus haut Pivoter l'élément chauffant Pour les friteuses encastrables: Bac Élément chauffant Accrocher la poignée sur l'élément chauffant et pivoter ce dernier vers le haut. Pour les friteuses sur pied: Pivoter l'élément chauffant vers le haut, en tournant le levier dans le sens inverse des aiguilles d'une montre. Friteuse sur pied Support panier Panier à friture Mettre le support de l'élément chauffant dans le bac en respectant le bon côté - placer le plus haut support à l'avant Passoire encastrable Pivoter l'élément chauffant. Support élément chauffant devant plus haut Mettre la passoire encastrable sur l'élément chauffant. Dispositif de levage Levier pour basculer l'élément chauffant 80 Option Levage automatique du panier: Mettre le support panier sur le dispositif de levage. Accrocher le panier à friture dans le support fr Option pompe: Tubulure de raccordement pour aspiration de pompe avec joint torique (joint rond) Montage du filtre Raccorder l'étrier de fixation et le filtre fin. Gros filtre Etrier de fixation pour filtre fin Filtre fin Tubulure d'aspiration Rouleaux de guidage Perçage et logement pour filtre fin Mettre le filtre fin avec l'étrier de fixation dans le récipient. Mettre le gros filtre dans le filtre fin. Option pompe: Mettre la tubulure d'aspiration dans le récipient, avec la tubulure de rac cordement montrant vers l'arrière. Orifice de versement Récipient Rails de guidage Repère de niveau de remplissage Mettre le récipient dans le rail de guidage et le faire glisser vers l'arrière jusqu'à la butée. Bac Remplissage du bac Rail de guidage Introduire le rouleau de guidage du récipient dans le sens de la flèche Remplir le bac avec de l'huile de friture fraîche, purement végétale ou de la graisse pour friture semi‐liquide. Tenir compte de l'extension due à la chaleur ! Remplir le bac jusqu'à la "marque de remplissage minimum". Après la mise à température, vérifier et rajouter de l'huile / la graisse de friture si nécessaire. Ne pas utiliser de graisse dure (bloc de graisse) pour remplir le bac! Cette graisse de friture fige rait après le refroidissement si bien qu'un pompage et filtrage ne serait plus possible ! L'appareil ne peut être utilisé qu'avec de la graisse alimentaire liquide ou de l'huile alimen taire! PRUDENCE! Risque de dérapage ! Net toyer immédiatement les éclaboussures de graisse sur le sol. 81 Mode d'exploitation ”Temps et température” fr 6. Mode d'exploitation "Temps et température" Utilisation de la commande Température de consigne p. ex. Appareils sans commande temporisée mécanique : Utilisation de la commande, voir chapitre 6.1 et 6.2. Les appareils avec option "Commande temporisée mécanique" sont automatiquement livrés avec le mode d'exploitation réglé sur "Temps et températ ure". Si vous souhaitez travailler en mode "Touches pro duit", il vous est possible d'effectuer vous‐même le réglage. Pour modifier le mode d'exploitation, voir page 94, chapitre 8.5 Manipulation de la commande en mode "Touches produit" voir page 87, chapitre 7. 6.1 Mise en marche de l'appareil Enclencher l'interrupteur électrique principal. Sur l'écran d'affichage − le numéro de version et le numéro du type apparaissent un bref instant. − trois points brillent. 3s Appuyer sur la touche “Marche/Arrêt” et la maintenir appuyée pendant 3 secondes. La température de consigne apparaît sur l'écran d'affichage. Pour éviter une haute sollicitation thermique de l'huile / la graisse de friture lors de la mise à température, la commande ne passe à la pleine puissance de chauffage qu'après que la graisse ait atteint une température d'environ 90°C. 6.2 Sélectionner, modifier et afficher une température Températures de consigne réglées en usine: Touche 1 = 110°C Touche 2 = 160°C Touche 3 = 170°C Touche 4 = 180°C Vous pouvez modifier les températures de consigne enregistrées à l'usine, voir page 86, chapitre 6.4.1 6.2.1 Choisir et modifier une température de consigne Appuyer sur la touche "P" . Appuyer dans les 3 secondes sur la touche "1, 2, 3 ou 4". Option commande temporisée mécanique: L'affichage pour "Durée" s'éteint un bref instant. 3s Lorsque la température de consigne doit être modifiée: - ou "Vers le bas" et la maintenir ap Appuyer dans les 3 secondes sur la touche "Vers le haut" puyée. L'avance ou le retour rapide a d'abord lieu lentement, puis rapidement. Appuyer sur la touche pour régler un pas vers l'avant ou vers l'arrière. La température de consigne modifiée pour cette touche apparaît sur l'écran d'affichage et est indiquée 3s à nouveau même après l'arrêt et la mise en marche avec la touche "Marche/Arrêt" La modification de température effectuée disparaît après − avoir appuyé sur une autre touche de température (touche “P et 1, 2, 3 ou 4“) ou, − avoir allumé et éteint l'interrupteur électrique principal. 82 . Mode d'exploitation ”Temps et température” 6.2.2 fr Indication de la température effective dans le bac Lorsque l'appareil est allumé, appuyer sur la touche “Température/pompe” . La température effective actuelle dans le bac est affichée pendant 3 secondes. 6.3 Minuterie (option commande temporisée mécanique) Temps réglés en usine − − − − Touche 1 = 4 minutes Touche 2 = 4 minutes et 30 secondes Touche 3 = 5 minutes Touche 4 = 5 minutes et 30 secondes Vous pouvez modifier les temps enregistrés en usine, voir page 86, chapitre 6.4.2 Indications relatives au réglage de l'heure Il est possible de modifier le temps uniquement pour une minuterie qui n'a pas encore démarré. La modification de temps effectuée disparaît lorsque − une autre touche avec une autre durée est appuyée, − l'appareil est arrêté avec la touche "Marche/Arrêt" ou − l'appareil a été arrêté puis rallumé avec l'interrupteur principal. Options pour la minuterie Appareil sans dispositif de levage automatique du panier - un signal sonore retentit à la fin du temps réglé. Vous pouvez allumer ou éteindre le bruit des touches et le signal sonore ainsi que modifier la durée des signaux sonores, voir page 94, chapitre 8.5 Appareil avec dispositif de levage automatique du panier - à la fin du temps réglé, le panier à friture est enlevé du bas et un signal sonore retentit. Fonction dispositif de levage automatique du panier (option) Le témoin de contrôle de la touche “DÉMARRAGE/ARRÊT” brille, lorsque le dispositif de levage automatique de panier est allumé (pour allumer ou éteindre le dispositif de levage automatique du panier, voir page 91, chapitre 8.1). Le dispositif de levage automatique du panier attend avant d'abaisser le dispositif de levage lorsque − la température de l'huile ou la graisse de friture dans le bac est inférieure à 90°C, − la température effective est inférieure de plus de 5°C à la température de consigne ou − que la température effective est supérieure de plus de 30°C à la température de consigne. 83 Mode d'exploitation ”Temps et température” fr 6.3.1 Sélectionner, modifier et démarrer une minuterie Appuyer sur une touche de votre choix “1, 2, 3 ou 4” . Le temps mémorisé clignote sur l'écran d'affichage de gauche. - Le témoin de contrôle de la touche brille. Lorsque la durée de la friture en cours doit être modifiée: 3s Appuyer dans les 3 secondes sur la touche "Vers le haut" puyée. ou "Vers le bas" et la maintenir ap L'avance ou le retour rapide a d'abord lieu lentement, puis rapidement. Appuyer sur la touche pour régler un pas vers l'avant ou vers l'arrière. Appuyer sur la touche "DÉMARRAGE/ARRÊT" . Le témoin de contrôle dans la touche "1, 2, 3, ou 4" clignote. Le compte à rebours démarre. Exception lorsque le dispositif de levage automatique du panier est enclenché: La commande attend avant d'entamer le compte à rebours et d'abaisser le dispositif de levage lorsque − la température effective est inférieure de plus de 5°C à la température de consigne ou − que la température effective est supérieure de plus de 30°C à la température de consigne. − Lorsque la température de consigne est atteinte, le panier à friture est abaissé automatiquement dans le bac au moyen du dispositif de levage et le compte à rebours démarre. La température de consigne peut être modifiée en cours de friture. Lorsque le temps est écoulé, un signal sonore retentit. Appareil avec dispositif de levage automatique du panier allumé: Le panier est remonté auto matiquement. Interruption du signal sonore − Appuyer sur la touche “1, 2, 3 ou 4” avec le témoin de contrôle clignotant ou − attendre 10 secondes jusqu'à ce que le signal sonore s'arrête automatiquement. Le signal lumineux clignotant de la touche passe de clignotement à scintillement. La durée réglée au préalable apparaît à l'écran d'affichage. 84 Mode d'exploitation ”Temps et température” 6.3.2 fr Démarrer plusieurs minuteries Vous pouvez utiliser cette option, p. ex., lorsque vous mettez plusieurs paniers pour portions dans un bac. Ou pour régler un temps intermédiaire, qui indique, p. ex., que l'aliment doit être remué. Il est possible d'utiliser jusqu'à quatre minuteries simultanément. Appuyer sur une touche de votre choix, par exemple “1, 2, 3 ou 4” et sur la touche "DÉMARRAGE/ ARRÊT" - . Répéter cette opération pour chaque touche devant être utilisée, jusqu'à ce que toutes les temps souhaités soit réglés et démarrés. Lorsque le dispositif de levage automatique du panier est enclenché: − Le panier est abaissé dans le bac automatiquement après le démarrage de la première minuterie. − La première minuterie réglée sert à relever le panier. − Le temps restant le plus court, apparaît à l'écran peu importe quelle touche a été pressée d'abord. Lorsqu'aucun dispositif de levage automatique n'est utilisé: − Le temps restant le plus court, apparaît à l'écran peu importe quelle touche a été pressée d'abord. Les témoins de contrôle des touches sélectionnées brillent et les témoins de contrôle de la touche avec le temps restant le plus court clignote. Toutes les minuteries activées enclenchent le compte à rebours individuellement. Pour les appareils avec dispositif de levage automatique du panier, ce dernier est relevé auto matiquement du bac. Lorsque le temps est écoulé, un signal sonore retentit. - Afin d'interrompre le signal sonore appuyer sur la touche dont le témoin de contrôle clignote. Le témoin de contrôle de la touche s'éteint. Le prochain temps restant le plus court apparaît à l'écran d'affichage et le témoin de contrôle de la touche clignote. Ces actions se répètent jusqu'à ce que toutes les durées choisies soient écoulées. 6.3.3 Arrêter une minuterie lorsque plusieurs minuteries sont enclenchées. Exemple: Le témoin de contrôle de la touche "1" clignote et celui des touches "3" et "4" brille. La minuterie sur la touche "3" doit être arrêtée. + Appuyer sur la touche "3". 3s Le témoin de contrôle dans la touche "3" clignote. Appuyer dans les 3 secondes sur la touche "DÉMARRAGE/ARRÊT" . Le témoin de contrôle de la touche "3" s'éteint. La minuterie est arrêtée. Si le dispositif de levage automatique du panier a été utilisé avec cette minuterie, celui‐ci est relevé du bac. Le prochain temps restant le plus court apparaît à l'écran d'affichage et le témoin de contrôle de la touche clignote. 85 Mode d'exploitation ”Temps et température” fr 6.4 Modifier le réglage initial pour la température et le temps 6.4.1 Modifier le réglage initial des températures Cette fonction vous permet de modifier les températures mémorisées à l'usine. Ces réglages restent en mémoire même après la mise en marche et l'arrêt avec l'interrupteur principal. L'appareil doit être arrêté. Trois points brillent dans l'affichage. 3s - Appuyer sur la touche "P" . Appuyer dans les 3 secondes sur la touche "1, 2, 3 ou 4" dont le réglage doit être modifié. L'affichage de la température clignote. La température mémorisée apparaît sur l'écran d'affichage. 3s Appuyer dans les 3 secondes sur la touche "Vers le haut" appuyée. ou "Vers le bas" et la maintenir L'avance ou le retour rapide a d'abord lieu lentement, puis rapidement. Appuyer sur la touche pour régler un pas vers l'avant ou vers l'arrière. 3s Appuyer dans les 3 secondes sur la touche "P" . La température réglée est enregistrée. Trois points brillent dans l'affichage. 6.4.2 Modifier le réglage initial des minuteries (option commande temporisée mécanique) Cette fonction vous permet de modifier les durées mémorisées à l'usine. Ces réglages restent en mémoire même après la mise en marche et l'arrêt avec l'interrupteur principal. L'appareil doit être arrêté. Trois points brillent dans l'affichage. 3s - Appuyer sur la touche "DÉMARRAGE/ARRÊT" . Appuyer dans les 3 secondes sur la touche "1, 2, 3 ou 4" dont le réglage doit être modifié. L'affichage de la durée clignote. Le temps mémorisé clignote sur l'écran d'affichage de gauche. 3s Appuyer dans les 3 secondes sur la touche "Vers le haut" puyée. ou "Vers le bas" et la maintenir ap L'avance ou le retour rapide a d'abord lieu lentement, puis rapidement. Appuyer sur la touche pour ré gler un pas vers l'avant ou vers l'arrière. 3s Appuyer dans les 3 secondes sur la touche "DÉMARRAGE/ARRÊT" La durée réglée est sauvegardée. Trois points brillent dans l'affichage. 86 . Mode d'exploitation "Touche produit" 7. fr Mode d'exploitation "Touche produit" - Utilisation de la commande Numéro "Touche produit" p. ex. Si vous souhaitez utiliser le mode "Touche produit", vous devez le régler vous‐même, étant donné qu'il n'a pas été pré‐réglé en usine. Pour modifier le mode d'exploitation, voir page 94, chapitre 8.5 Lorsque vous utilisez le mode d'exploitation "Touches produit", la durée et le numéro de la touche produit sélectionnée sont indiqués simultanément. Vous pouvez utiliser 20 numéros pour des touches produit, voir cha pitre 7.1 Affectation en usine des "Touches produit" Manipulation de la commande en mode "Touches produit" comme décrit dans ce chapitre 7.. 7.1 Affectation en usine des "Touches produit" Il vous est possible de modifier la durée et les températures pour chaque numéro de "Touches produit". Vous disposez de deux possibilités pour cela: − Modification pour la friture en cours - la modification demeure seulement jusqu'à ce qu'un autre numéro de la "Touche produit" soit réglé! Voir page 89, chapitre 7.3.2. − Modification et sauvegarde permanente, - la modification est enregistrée pour le numéro de la "Touche produit" et demeure même après la mise en marche et l'arrêt! Voir page 90, chapitre 7.5. Numéro de la touche produit Appuyer sur la/les touche(s) 1 Nom du produit Temps Température 1 8,00 mn 160°C 2 2 4,00 mn 170°C 3 3 4,00 mn 175°C 4 4 4,00 mn 180°C 11 1+1 4,00 mn 160°C 12 1+2 5,00 mn 160°C 13 1+3 6,00 mn 160°C 14 1+4 7,00 mn 160°C 21 2+1 4,30 mn 170°C 22 2+2 5,00 mn 170°C 23 2+3 6,00 mn 170°C 24 2+4 7,00 mn 170°C 31 3+1 4,30 mn 175°C 32 3+2 5,00 mn 175°C 33 3+3 6,00 mn 175°C 34 3+4 7,00 mn 175°C 41 4+1 4,30 mn 180°C 42 4+2 5,00 mn 180°C 43 4+3 6,00 mn 180°C 44 4+4 7,00 mn 180°C 87 Mode d'exploitation "Touche produit" fr 7.2 Mise en marche de l'appareil Enclencher l'interrupteur électrique principal. Sur l'écran d'affichage − le numéro de version et le numéro du type apparaissent brièvement. − trois points brillent. 3s Appuyer sur la touche “Marche/Arrêt” et la maintenir appuyée pendant 3 secondes. La température de consigne apparaît un bref instant dans l'écran d'affichage de droite, ensuite, les numéros de la "Touche produit". Le temps de cuisson apparaît dans l'écran d'affichage de gauche. Pour éviter une haute sollicitation thermique de l'huile / la graisse de friture lors de la mise à température, la commande ne passe à la pleine puissance de chauffage qu'après que la graisse ait atteint une température d'environ 90°C. 7.3 Sélectionner la durée et la température via la "Touche produit" Vous trouverez un aperçu des durées et des températures mémorisées à la page 87, chapitre 7.1 7.3.1 - Sélectionner la durée et la température de consigne via le numéro de la "Touche produit" et démarrer Choisir le numéro pour la "Touche produit" avec les touches 1 à 4: p. ex. − pour les produits 1‐4 appuyer sur la touche “1, 2, 3 ou 4” ou − pour les produits à deux chiffres p.ex. „Touche Produit„ "12“ appuyer brièvement sur les touches 1 et 2 l'une après l'autre. L'affichage pour "Durée" et "Numéro touche produit" s'éteint un bref instant. La température de consigne correspondant à la "Touche produit" est affichée pour 1 seconde environ. La durée apparaît dans l'affichage de gauche, le numéro de la "Touche produit" dans l'affichage de droite. Appuyer sur la touche “DÉMARRAGE/ARRÊT” . Le témoin de contrôle de la touche "DÉMARRAGE/ARRÊT" clignote. Le compte à rebours démarre. Exception lorsque le dispositif de levage automatique du panier est enclenché: La commande attend avant d'entamer le compte à rebours et d'abaisser le dispositif de levage lorsque − la température effective est inférieure de plus de 5°C à la température de consigne ou − que la température effective est supérieure de plus de 30°C à la température de consigne. − Lorsque la température de consigne est atteinte, le panier à friture est abaissé automatiquement dans le bac au moyen du dispositif de levage et le compte à rebours démarre. Lorsque le temps est écoulé, un signal sonore retentit. Appareil avec dispositif de levage automatique du panier allumé: Le panier est remonté auto matiquement. Interruption du signal sonore − appuyer sur la touche "1, 2, 3 ou 4” ou − attendre 10 secondes jusqu'à ce que le signal sonore s'arrête automatiquement. La durée et le numéro de la "Touche produit" réglés préalablement apparaissent à l'écran. Modification de réglages Modification de la durée et de la température de consigne pour le mode "Touche produit": − sans sauvegarde, uniquement pour la friture en cours, voir page 89, chapitre 7.3.2, − avec sauvegarde permanente, voir page 90, chapitre 7.5 Modification de signaux sonores: − Vous pouvez allumer ou éteindre le bruit des touches et le signal sonore ainsi que modifier la durée des signaux sonores, voir page 94, chapitre 8.5 88 Mode d'exploitation "Touche produit" 7.3.2 fr Modifier la durée et la température de consigne pour la friture en cours Il n'est pas possible de modifier la durée et la température de consigne pendant que la minuterie arrive à expiration. La modification de température effectuée disparaît après − avoir appuyé sur une autre touche température, − un arrêt et une mise en marche avec la touche "Marche/Arrêt" ou − avoir allumé et éteint l'interrupteur électrique principal. Afin d'adapter la durée et la température de consigne pré‐réglée en usine à vos besoins et de les sau vegarder de manière permanente, veuillez procéder comme décrit à la page 90, chapitre 7.5. Modification de la durée / température pour la friture en cours Appuyer sur la touche "P" . Le temps clignote dans l'affichage de gauche. 3s - Si une modification doit être effectuée, appuyer dans les 3 secondes sur la touche "Vers le haut" ou "Vers le bas" et la maintenir enfoncée. L'avance ou le retour rapide a d'abord lieu lentement, puis rapidement. Appuyer sur la touche pour régler un pas vers l'avant ou vers l'arrière. Appuyer sur la touche "P" . La durée modifiée est sauvegardée. 3s La température de consigne clignote dans l'affichage de droite. Si une modification doit être effectuée, appuyer dans les 3 secondes sur la touche "Vers le haut" ou "Vers le bas" et la maintenir enfoncée. L'avance ou le retour rapide a d'abord lieu lentement, puis rapidement. Appuyer sur la touche pour régler un pas vers l'avant ou vers l'arrière. Sauvegarde des réglages - Appuyer sur la touche "P" ou attendre environ 3 secondes. 7.4 Affichage de la température effective dans le bac Lorsque l'appareil est allumé, appuyer sur la touche “Température/pompe” . Deux températures s'affichent durant 3 secondes: − affichage de gauche, température effective et − affichage de droite, température de consigne. 89 Mode d'exploitation "Touche produit" fr 7.5 Modifier le réglage initial pour le temps et la température de consigne Cette fonction vous permet d'adapter les spécifications pour la durée et la température de consigne réglées en usine à vos besoins. + Ces réglages restent en mémoire même après la mise en marche et l'arrêt avec l'interrupteur principal. L'appareil doit être arrêté. Trois points brillent dans l'affichage. Appuyer sur la touche "P" 3s - . Choisir le numéro pour la "Touche produit" avec les touches 1 à 4 dans les 3 secondes: p. ex. − pour les produits 1‐4 appuyer sur la touche “1, 2, 3 ou 4” ou − pour les produits à deux chiffres "Touche Produit 12“, p.ex., appuyer sur les touches 1 et 2 tout de suite l'une après l'autre. L'affichage de la durée clignote. Le numéro de la "Touche produit" est indiqué. 10 s Lorsque la durée doit être modifiée: Appuyer dans les 10 secondes sur la touche "Vers le haut" appuyée. 10 s et la maintenir L'avance ou le retour rapide a d'abord lieu lentement, puis rapidement. Appuyer sur la touche pour ré gler un pas vers l'avant ou vers l'arrière. Appuyer dans les 10 secondes sur la touche "P" 10 s ou "Vers le bas" . La durée réglée est sauvegardée. L'affichage pour la température de consigne clignote. 10 s Lorsque la température de consigne doit être modifiée: Appuyer dans les 10 secondes sur la touche "Vers le haut" appuyée. ou "Vers le bas" et la maintenir L'avance ou le retour rapide a d'abord lieu lentement, puis rapidement. Appuyer sur la touche pour régler un pas vers l'avant ou vers l'arrière. Enregistrement de la température de consigne: Appuyer dans les 10 secondes sur la touche "P" . n'est pas appuyée, la sauvegarde de la température de consigne modifiée n'a pas Si la touche "P" lieu et le réglage est interrompu automatiquement après 10 secondes. 90 Fonctions de l'option "Commande temporisée mécanique" 8. fr Fonctions de l'option "Commande temporisée mécanique" Ces fonctions sont identiques pour les deux modes d'exploitation "Temps et température" et "Touches produit". Option "Commande temporisée mécanique" Mode d'exploitation ”Temps et température” 8.1 Mode d'exploitation "Touches produit" Arrêter ou enclencher le dispositif de levage automatique du panier (option) Uniquement pour les appareils avec commande temporisée mécanique et dispositif de levage automatique du panier! Le dispositif de levage est sorti ou rentré automatiquement au moyen de la minuterie. Il est également possible de désactiver cette fonction. Cela est nécessaire, par exemple, lorsque l'on travaille avec plu sieurs paniers pour portions dans un bac et que la minuterie doit être utilisée. Désactiver le dispositif de levage automatique du panier 3s Appuyer sur la touche “DÉMARRAGE/ARRÊT” et la maintenir appuyée durant 3 secondes. Le témoin de contrôle de la touche s'éteint. Le dispositif de levage s'abaisse. Exception: Le dispositif de Levage automatique du panier attend jusqu'à ce que la température de l' huile ou de la graisse qui se trouve dans le bac soit supérieure à 90° avant de descendre. Activer le dispositif de levage automatique du panier 3s Appuyer sur la touche “DÉMARRAGE/ARRÊT” et la maintenir appuyée durant 3 secondes. Le témoin de contrôle de la touche brille. Le dispositif de levage remonte. Exception: Le dispositif de Levage automatique du panier attend jusqu'à ce que la température de l' huile ou de la graisse qui se trouve dans le bac soit supérieure à 90° avant de remonter. 8.1.1 Deux dispositifs de levage à commande séparée pour un grand bac La commande est réglée par défaut de telle sorte qu'il est possible de soulever un grand bac avec les deux dispositifs de levage. Si vous désirez commander les deux dispositifs de levage séparément, le réglage doit être effectué par le service après‐vente. Mode d'exploitation "Temps et température" : Touche 1 et 2 pour le dispositif de levage de gauche Touche 3 et 4 pour le dispositif de levage de droite En mode d'exploitation "Touches produit": Ce mode d'exploitation ne permet pas de commander les dispositifs de levage individuellement. Les deux dispositifs de levage sont commandés simultanément! 91 Fonctions de l'option "Commande temporisée mécanique" fr 8.2 Durée d'utilisation de l'huile / la graisse La commande calcule et modifie la durée d'utilisation de la graisse pour la durée de service en fonction de la température: − température plus basse = durée d'utilisation de la graisse plus longue − température élevée = courte durée d'utilisation de la graisse La durée d'utilisation de l'huile / la graisse dépend très fortement de la température de friture, du produit utilisé et du filtrage de l'huile ou de la graisse de friture. La durée d'utilisation variable de l'huile / la graisse ne peut donc être qu'une valeur indicative et doit être adaptée aux conditions sur place. La fonction durée d'utilisation de l'huile / la graisse a été désactivée à l'usine. Enclenchement et réglage de la durée d'utilisation de l'huile/ la graisse, voir page 94, chapitre 8.5 8.2.1 Indication de la durée d'utilisation restant de la graisse / l'huile Appuyer sur la touche "P" 3s . Appuyer dans les 3 secondes sur la touche "Température/pompe" . Le temps restant en heures s'affiche durant 3 secondes. Lorsque trois traits “- - -” apparaissent, c'est que la fonction "Durée d'utilisation de l'huile / la graisse" est éteinte. 8.2.2 Différer le message pour la fin de la durée d'utilisation de l'huile / la graisse Pour ne pas avoir à échanger l'huile ou la graisse de friture pendant les heures de pointe, il est possible de désactiver/repousser le message d'une heure. Après l'expiration du temps d'utilisation de la graisse / l'huile et apparaissent en alternance sur l'écran d'affichage. Un signal sonore retentit. 3s Appuyer sur la touche "P" . Appuyer dans les 3 secondes sur la touche "Température/pompe" . Le message disparaît et la durée d'utilisation de l'huile / la graisse est prolongée d'une heure. 8.2.3 Réinitialiser le compteur pour la durée d'utilisation de l'huile / la graisse Après avoir effectué le remplissage avec de l'huile / la graisse de friture fraîche, le compteur pour la durée d'utilisation de l'huile / la graisse doit être réinitialisé. 3s Appuyer sur la touche "P" . Appuyer dans les 3 secondes sur la touche "Température/pompe" 3 secondes. et la maintenir appuyée pendant La duré d'utilisation actualisée de l'huile / la graisse est affichée pendant 3 secondes. 92 Fonctions de l'option "Commande temporisée mécanique" 8.3 fr Correction automatique du temps de cuisson Ce réglage peut être activé ou désactivé par l'utilisateur, voir page 94, chapitre 8.5 Si la fonction correction du temps de cuisson est activée et si le dispositif de levage du panier ou la minu terie sont utilisés, la commande prolonge automatiquement le temps de cuisson pour les grosses portions. L'avantage ici est que vous n'avez pas à modifier le temps de friture à chaque fois que vous avez des volumes différents. Détermination du réglage du temps de cuisson Afin que la fonction correction du temps de cuisson soit en mesure de déterminer des valeurs de consigne optimales, 1/5 de la quantité maximale devrait être frite pour déterminer le réglage de la durée. Exemple: Quantité maximale 1000 grammes, 1/5 équivaut à 200 grammes. Régler la température de consigne requise pour l'aliment à frire. Remplir le panier à friture avec 200 grammes de l'aliment à frire. Démarrer la minuterie avec un réglage du temps de cuisson (p. ex. 10 minutes) suffisamment élevé. Mettre le panier à friture contenant l'aliment à frire immédiatement dans le bac. Surveiller la cuisson: Lorsque la cuisson est arrivée à son terme, lire le temps restant et le noter. Calculer le temps de friture en fonction du réglage du temps de cuisson (p. ex. 10 minutes) et du temps résiduel. Si le résultat de la friture est satisfaisant, il est maintenant possible, avec la durée déterminée, de frire des quantités différentes! Lorsque vous changez de produit, p. ex. nouveau fabricant ou que vous passer d'un produit frais à un pro duit congelé, il vous faut alors vérifier le réglage du temps de cuisson. 8.4 Passage automatique en mode veille La commande met la friteuse automatiquement en mode veille lorsque − aucune touche n'est appuyée pendant 30 minutes (réglage usine) ou − qu'aucune baisse de température n'a été enregistrée par la commande ce qui indiquerait une friture en cours. Réglages mode veille, voir page 94, chapitre 8.5 − Activer et désactiver la mise en veille, − Température de veille dans le bac, − Saisie de l'heure à laquelle le mode veille doit démarrer. Affichage du mode veille Trois traits “- - -” apparaissent dans les deux écrans d'affichage. La température de consigne est ramenée à 90°C (réglage en usine). Quitter le mode veille - Appuyer sur une touche quelconque “1, 2, 3 ou 4” . La durée et la température réglées préalablement apparaissent à l'écran. Le témoin de contrôle de la touche brille. L'appareil chauffe jusqu'à atteindre la température de consigne réglée. 93 Fonctions de l'option "Commande temporisée mécanique" fr 8.5 Modification de réglages initiaux dans la commande 8.5.1 Réglage des paramètres Plusieurs possibilités de réglage sont possibles en fonction de l'équipement de l'appareil, voir le tableau des paramètres suivant, chapitre 8.5.2. ou les touches "Vers le Le mode réglage est automatiquement désactivé lorsque la touche "P" haut" ou "Vers le bas" ne sont pas appuyées au bout de 10 secondes. Les réglages ayant déjà effectués, mais qui n'ont pas été confirmés avec la touche "P", ne sont pas sauvegardés. Modifier le réglage L'appareil doit être arrêté. D'abord appuyer sur la touche "P" et la maintenir enfoncée, appuyer ensuite sur la touche - les maintenir toutes les deux appuyées en même temps pendant "Température/pompe" 3 secondes. Le dernier paramètre réglé est indiqué. Appuyer dans les 10 secondes sur la touche "Vers le haut" paramètre désiré s'affiche. Appuyer dans les 10 secondes sur la touche "P" La valeur du paramètre clignote. ou "Vers le bas" jusqu'à ce que le ou "Vers le bas" jusqu'à ce que la . Appuyer dans les 10 secondes sur la touche "Vers le haut" valeur souhaitée soit ajustée. Sauvegarder la valeur réglée - appuyer dans les 10 secondes sur la touche "P" . Quitter le mode réglage Attendre 10 secondes - la fonction "Réglage des paramètres" est désactivée. Ou. D'abord appuyer sur la touche "P" et la maintenir enfoncée, ensuite appuyer simultanément un bref instant sur la touche "Température/pompe" 8.5.2 94 . Tableau des paramètres (affichage seulement avec l'option commande temporisée mécanique) Para mètre Réglage à l'usine Plage de ré glage P01 0 0=arrêt 1-99 heures Réglage du temps d'utilisation de l'huile ou la graisse de friture. Pour que la modification du réglage effec tuée prenne effet immédiatement, le compteur doit être réinitialisé, voir page 92, chapitre 8.2.3 P02 1 0=arrêt, 1=marche Activer ou arrêter le signal sonore et le bruit des touches P03 10 secondes 0-60 secondes Arrêter le signal sonore (0) et régler la durée du sig nal sonore (1-60 secondes) P04 0 0=arrêt, 1=marche Activer ou désactiver la fonction veille P05 30 minutes 10-120 mn Démarrer la fonction veille après le nombre de mi nutes P06 90°C 60-170°C Température de veille dans le bac P07 0 0=1°C, 1=5°C Ajustage de la température par étape en appuyant sur la touche P08 1 0=arrêt, 1=marche Activer ou désactiver la correction du temps de cuisson P09 0 0=arrêt, 1=marche Activer ou désactiver le mode "Touches produit" Description Réglage client fr 9. Filtrage de l'huile / la graisse de friture PRUDENCE ! Surfaces brûlantes ! Risque de brûlure ! Porter des gants, des vêtements et des lunettes de protection ! Filtrer quotidiennement l'huile/la graisse de friture. Ceci permet d'augmenter considérablement la durée de vie et l'utilisation de l'huile et de la graisse de friture. Option pompe : Vu que le transvasement à l'aide de la pompe est beaucoup plus simple, il est préférable de filtrer en plus l'huile/la graisse de friture pendant de courtes pauses de friture. Voir aussi page 96, cha pitre 9.3.1. 9.1 Évacuation et filtrage de l'huile / la graisse de friture Arrêter l'appareil - Appuyer sur la touche et la maintenir appuyée « marche/arrêt » pendant 3 secondes. Filtre grossier Étrier de fixation pour filtre fin Le témoin de contrôle s'éteint dans la touche. Filtre fin Orifice de déversement Trois points s'allument sur l'affichage. Avant le filtrage − Mettre le filtre fin en place − Mettre le filtre grossier dans le filtre fin − Mettre le filtre fin avec le filtre grossier dans le récipient − Mettre le récipient dans la base. Récipient Vidage du bac et filtrage Panier à friture Tamis amovible Bac Pour le vidage et le filtrage dans le récipient, l' huile / la graisse de friture doit avoir encore une température d'au moins 60°C ! Ouvrir le robinet d'écoulement - Soulever la protection et tourner le levier jusqu'en butée. fermé ouvert L'huile/la graisse de friture coule dans le récipient et est simultanément filtrée. Levier pour robinet d'écoulement Durant l'écoulement, vérifier que le récipient ne déborde pas ! Protection pour robinet d'écoulement Récipient PRUDENCE ! Risque de brûlures ! Pru dence ! Très chaud ! Retirer le panier de friture. Enlever le tamis amovible et les restes d'ali ments. Pivoter l'élément chauffant vers le haut. Nettoyer le bac. 95 fr 9.2 Transvaser l'huile/la graisse de friture (à la main, sans pompe) Dans le cas des appareils sans pompe (option), l'huile/la graisse de friture peut être transvasée à la main du réservoir dans le bac. Travaux de préparation Faire refroidir l'huile/la graisse de friture dans le récipient ! Filtre grossier Porter des chaussures, des gants et des vête ments de protection résistants à la graisse et à la chaleur. Filtre fin Tirer lentement et avec précaution le récipient jusqu'en butée sur les rails de guidage. Récipient Rail de guidage Faire attention aux gouttes l'huile/graisse de friture qui tombent et à l'encrassement du sol par l'huile/la graisse de friture ! Préparer par conséquent par ex. un récipient en acier inoxydable pour les éléments à retirer ! Retirer le filtre grossier et le filtre fin et les dépo ser dans le récipient en acier inoxydable préparé à cet effet. Poignée en haut Orifice de déversement Poignée avant Rail de guidage Récipient Transvasement Décrocher soigneusement le récipient : − Tirer le récipient jusqu'en butée sur les rails de guidage, − soulever légèrement le récipient au niveau de la poignée avant, − continuer de tirer le récipient jusqu'en butée, − retirer le récipient des rails de guidage en le tenant au niveau des deux poignées. Vider l'huile/la graisse de friture par l'orifice de déversement dans le bac ou un récipient résistant à la chaleur. PRUDENCE ! Risque de dérapage ! Net toyer immédiatement les éclaboussures de graisse sur le sol. 9.3 Système de filtrage avec pompe (option) Dans le cas des appareils avec pompe, l'huile/la graisse de friture est transvasée par la pompe du ré servoir dans le bac. Pour pouvoir évacuer les derniers résidus de friture du bac, il est possible de rincer le bac avec de l'huile/la graisse de friture, à l'aide de la pompe. Voir la description suivante page 98, chapitre 9.3.3. 9.3.1 Transvasement de l'huile/la graisse de friture du récipient vers le bac L'huile/la graisse de friture évacuée et filtrée est pompée à l'aide de la pompe du réservoir dans le bac. Filtrage pendant de courtes pauses de friture La procédure ci‐après décrite permet de filtrer l'huile/la graisse de friture également pendant des courtes pauses de friture et de la pomper dans le bac. 96 fr Préparatifs Tuyau d'arrivée avec poignée Vider l'huile/la graisse de friture dans le récipient et la filtrer, voir page 95 , chapitre 9.1 : Touche « température/pompe » avec témoin de contrôle. Raccord de fermeture PRUDENCE ! Risque de brûlure dû aux surfaces brûlantes ! Le tuyau d'arrivée et le raccord de fermeture s'échauffent énormément ! Enfoncer le tuyau d'arrivée dans le raccord de fermeture. Le tuyau d'arrivée doit s'encliqueter de manière perceptible et audible. Levier pour robinet d'écoulement Protection pour robinet d'écoulement PRUDENCE ! Débordement de l'huile/ la graisse de friture ! Respecter le niveau de rem plissage de l'huile/la graisse de friture dans le bac ! Ne pas remplir la cuve au‐delà du repère de niveau de remplissage ! Tenir compte de l'expansion due à l'échauffement ! Récipient Mise en marche et arrêt manuel de la pompe : La procédure de remplissage doit être surveillée et arrê tée manuellement! fermé ouvert Fermer le robinet d'écoulement - Pivoter le levier vers le haut et encliqueter la sécurité. Friteuse à deux bacs Option pompe utilisable uniquement via le panneau de commande gauche. Transvasement Pour les friteuses à deux bacs, la pompe est com mandé à partir du panneau de commande de gauche. L'appareil doit être hors circuit (trois points sont allumés sur l'affichage). Mettre la pompe en marche - Appuyer sur la touche « température/pompe » puyée pendant 3 secondes. Le témoin de contrôle s'allume dans la touche et la pompe démarre. et la maintenir ap Tenir compte de ce qui suit : le temps d'aspiration peut durer jusqu'à 3 minutes. Lorsque le niveau de remplissage de l'huile/la graisse de friture est atteint dans le bas, couper la pompe - appuyer sur la touche « température/pompe » et la maintenir appuyée pendant 1 seconde. La pompe est automatiquement arrêtée après un dépassement de la durée de pompage de 5 minutes. Le témoin de contrôle s'éteint dans la touche. 9.3.2 Enlever le tuyau d'arrivée Tuyau d'arrivée avec poignée Raccord de fermeture PRUDENCE ! Risque de brûlure dû aux surfaces brûlantes ! Le tuyau d'arrivée et le raccord de fermeture sont très chauds lorsque l'huile/la graisse de friture brûlante est pompée ! Retenir le tuyau d'entrée et pousser le raccord de fermeture vers le bas. Débrancher le tuyau d'entrée et le vider par le bac et le laisser goutter. 97 fr 9.3.3 Rincer le bac avec de l'huile/de la graisse de friture à l'aide de la pompe Le rinçage du bac n'est nécessaire que lorsque l'huile/la graisse de friture doit resservir. Les derniers ré sidus de friture restants sont alors rincés et filtrés hors du bac. Support de panier Tuyau d'arrivée avec poignée Panier à friture Vider l'huile/la graisse de friture dans le récipient et la filtrer, voir page 95 , chapitre 9.1. PRUDENCE ! Risque de brûlure dû aux sur faces brûlantes ! Tamis amovible Retirer le panier de friture. Poignée pour basculer l'élément chauffant pour friteuse encastrée Retirer le support de panier. Enlever le tamis amovible et les restes d'ali ments. Support d'élément chauffant Bac Appuyer sur la touche « température/pompe » Tuyau de vidage Élément chauffant Levier pour robinet d'écoulement Protection pour robinet d'écoulement Pivoter l'élément chauffant vers le haut. Retirer le support de l'élément chauffant. Rincer le bac Insérer et encliqueter le tuyau de vidage entre le tuyau d'arrivée et le raccord de fermeture. Le tuyau d'arrivée et le tuyau de vidage doivent s'encliqueter de manière perceptible et audible. Récipient Tenir le tuyau d'arrivée par la poignée et le maintenir dans le bac. Mettre la pompe en marche. Pour les friteuses à deux bacs, la pompe est com mandé à partir du panneau de commande de gauche. Friteuse à deux bacs Option pompe utilisable uniquement via le panneau de commande gauche. L'appareil doit être hors circuit (trois points sont allumés sur l'affichage). Mettre la pompe en marche - Appuyer sur la touche « température/pompe » puyée pendant 3 secondes. et la maintenir ap Le témoin de contrôle s'allume dans la touche et la pompe démarre. Rincer le bac avec de l'huile/la graisse de friture à l'aide du tuyau d'arrivée. Arrêter la pompe. Couper la pompe après le rinçage - Appuyer sur la touche « Temperature/pompe 1 appuyée. et la maintenir La pompe est automatiquement arrêtée après un dépassement de la durée de pompage de 5 minutes. Le témoin de contrôle s'éteint. Fermer le robinet d'écoulement - Pivoter le levier vers le haut et encliqueter la sécurité. Rentrer l'élément de chauffage. Retirer le tuyau de vidage, voir page 99, chapitre 9.3.4. 98 fr 9.3.4 Retirer le tuyau de vidage PRUDENCE ! Risque de brûlure par le tuyau d'arrivée brûlant, les raccords de fermeture et l'huile/la graisse de friture qui s'écoule! Porter des gants, des vêtements et des lunettes de protection ! Raccord de fermeture Tuyau d'arrivée avec poignée 2. Tuyau de vidage Maintenir le tuyau d'arrivée dans le bac. Afin que le tuyau d'arrivée et le tuyau de vidage puissent fonctionner se vider, respecter l'ordre de débranchement suivant : 1. sur le bac, 2. sur le tuyau d'arrivée. (1.) Retenir le tuyau de vidage et glisser le rac cord de fermeture en direction du bac. Vider le flexible de vidage dans le bac et le laisser s'égoutter. (2.) Retenir le tuyau de vidage et glisser le rac cord de fermeture en direction du flexible. 1. Raccord de fermeture PRUDENCE ! Risque de dérapage ! Net toyer immédiatement les éclaboussures de graisse sur le sol. 10. Friture 10.1 Recommandations pour l'huile/la graisse de friture Impératifs posés à l'huile/la graisse de friture : Haute stabilité d'oxydation, point de fumée (au‐delà de 230°C), long cycle de vie, peu moussant, neutre à l'odeur et au goût. N'utiliser que de l'huile ou de la graisse liquide pour la friture ! N'utiliser que de l'huile/la graisse de friture à 100% végétale. Ne pas utiliser d'huile alimentaire ou de graisses animales. Elles sont inappropriées pour cause de manque de stabilité à la chaleur. Pour éviter un auto‐allumage, ne pas utiliser d'huile / graisse de friture gâtée ou vieille. Le durée de vie de l'huile/la graisse de friture se prolonge par : − un retrait régulier des résidus de pâtes, − un filtrage de l'huile / la graisse de friture et par − le recouvrement de la friteuse lorsqu'elle n'est pas en marche (protection contre la lumière et l'in fluence de l'oxygène). Ne pas assaisonner au‐dessus de la friteuse car le sel et les épices accélèrent le vieillissement de l' huile / graisse de friture. Pour garantir la neutralité du goût, préparer le poisson, la viande ou les produits à base de pommes de terre dans des bacs séparés autant que possible. 10.2 Ajouter l'aliment à cuire La phase de friture ne peut commencer que lorsque le point a disparu de l'affichage et que la température de consigne est presque atteinte dans le bac. Pour éviter un débordement, plonger brièvement le panier de friture plein dans l'huile/la graisse de friture brûlante. Pendant les courts arrêts de fonctionnement, régler la température sur 110oC environ et poser le cou vercle sur le bac de friteuse ou bien activer la fonction veille (option commande temporisée), voir à partir de la page 94, chapitre 8.5.1 / 8.5.2 99 fr 10.3 11. 3 sec Reconnaître et éliminer les problèmes lors de la friture Huile/graisse de friture Causes possible Mousse fortement Utilisation d'huile de friture usée ou inapproprié p. ex. huile alimentaire Différentes huiles et graisses ont été mélangées Les produits à frire contiennent trop d'humidité Quantité trop importante d'aliments à frire dans le bac Résidus de détergent pas été enlevés du bac Ne dore pas les aliments Huile ou graisse de friture vierge Les produits à frire contiennent trop d'humidité Temps de cuisson trop court Température réglée trop bas Développement de fumée Température réglée trop haut Utilisation d'huile ou graisse inappropriée avec point de fumée bas Huile/graisse de friture trop longtemps utilisée Mauvaise odeur Restes de pâtes (panures) pas enlevés Huile/graisse de friture trop longtemps utilisée Huile ou graisse inappropriée pour la friture Se gâte facilement Résidus de pâte (panure) pas enlevés régulièrement Différentes huiles et graisses mélangées L'huile / la graisse de friture a été chauffée trop longtemps sans frire Huile/graisse de friture mal stockée (trop de lumière et d'oxgène) Résidus de détergents dans le bac Consommation trop importante Température réglée trop haut ou trop bas pour les aliments Égouttement trop court de l'huile ou de la graisse de friture Temps de cuisson trop long Décoloration Impuretés dans l'huile de friture dues aux aliments / épices Huile/graisse de friture trop longtemps utilisée Restes de pâtes (panures) pas enlevés Éteindre l'appareil Arrêter l'appareil - Appuyer sur la touche « marche/arrêt » et la maintenir appuyée pendant 3 secondes. Le témoin de contrôle s'éteint dans la touche. Trois points s'allument sur l'affichage. Filtrer l'huile/la graisse de friture et nettoyer l'appareil, voir le chapitre suivant 12. « Nettoyage et entretien ». Mettre l'interrupteur principal sur la position arrêt. 12. Nettoyage et entretien Ne appliquer de détergent corrosif sur l'applique de commande avant ! Ne pas nettoyer ou rincer l'appareil avec un tuyau d'eau, nettoyeur haute pression, nettoyeur haute pression à vapeur ou un nettoyeur vapeur ! Respecter le mode d'emploi des fabricants de détergents ! Ne pas utiliser de détergent récurant ! N'utiliser aucun produit de nettoyage corrosif ou acide sur le panier à friture et les éléments de chauf fage, autrement destruction de la protection anticorrosion et risque de rouille ! Les surfaces en inox ne doivent pas rester en contact prolongé avec les acides concentrés, l'essence de vinaigre, les solutions salines, la moutarde, les mélanges de condiments qui attaquent le revête ment protecteur. Rincer les surfaces en inox à l'eau claire après utilisation. Notre service après‐vente fournit des produits de nettoyage et d'entretien appropriés. 100 fr 12.1 Vidage, nettoyage 12.1.1 Vidage du bac 3 sec Arrêter l'appareil - Appuyer sur la touche « marche/arrêt » 3 secondes. Le témoin de contrôle s'éteint dans la touche. Trois points s'allument sur l'affichage. 12.1.2 et la maintenir appuyée pendant Porter des chaussures, des gants et des vêtements de protection résistants à la graisse et à la chaleur. Pour le filtrage, l'huile / la graisse de friture doit avoir encore une température d'au moins 60°C ! Pour le vidage du bac et le filtrage de l'huile/la graisse de friture, voir à partir de la page 95, chapitre 9. Vidage/transvasement de l'huile/la graisse de friture sans pompe hors du réservoir dans le bac ou dans un récipient résistant à la chaleur, voir page 96, chapitre 9.2. Vidage du récipient à l'aide de la pompe (option pompe) Pour ne pas avoir à vider le réservoir à la main, il est possible de transvaser l'huile/la graisse à éliminer dans un récipient, à l'aide de la pompe. Tuyau de vidage Préparatifs Vider l'huile/la graisse de friture dans le récipient et la filtrer, voir page 95 , chapitre 9.1 : Touche « température/pompe » avec témoin de contrôle. Tuyau d'arrivée avec poignée PRUDENCE ! Risque de brûlure dû aux surfaces brûlantes ! Le tuyau d'arrivée, le tuyau de vidage, le raccord de fermeture et le récipient s'échauffent fortement ! Insérer le tuyau de vidage entre le tuyau d'arrivée et le raccord de fermeture. Les raccords de fermeture doivent s'encliqueter de manière perceptible et audible. Tenir le tuyau d'arrivée dans un récipient ré sistant à la température. Récipient Récipient résistant à la température avec poignées de transport Transvasement Mise en marche et arrêt manuel de la pompe: La procédure de vidage doit être surveillée et arrêtée manuellement ! Mettre la pompe en marche. Friteuse à deux bacs Option pompe utilisable uniquement via le panneau de commande gauche. Pour les friteuses à deux bacs, la pompe est com mandé à partir du panneau de commande de gauche. L'appareil doit être hors circuit - trois points sont allumés sur l'affichage. et la maintenir ap Mettre la pompe en marche - Appuyer sur la touche « température/pompe » puyée pendant 3 secondes. Le témoin de contrôle s'allume dans la touche et la pompe démarre. Tenir compte de ce qui suit : le temps d'aspiration peut durer jusqu'à 3 minutes. La pompe est automatiquement arrêtée après un dépassement de la durée de pompage de 5 minutes. Ne pas remplir le récipient au‐delà des 3/4 ! 101 fr Arrêter la pompe Lorsque le récipient est rempli aux 3/4 ou que l'huile/la graisse de friture est complètement pompée du récipient, couper la pompe - appuyer sur la touche « temperature/pompe » pendant 1 seconde. Le témoin de contrôle s'éteint dans la touche. et la maintenir appuyée Bien fermer le récipient avec un couvercle et le marquer d'un panneau avertisseur « Matières brûlantes ». PRUDENCE ! Risque de dérapage ! Nettoyer immédiatement les éclaboussures de graisse sur le sol. Retirer le tuyau de vidage, voir page 99, chapitre 9.3.4. 12.1.3 Nettoyage du bac et du système de filtrage PRUDENCE ! Surfaces brûlantes ! Risque de brûlure ! Porter des gants, des vêtements et des lunettes de protection ! Ne nettoyer qu'à l'état refroidi ! Le bac et le récipient doivent être vidés avant le nettoyage ! − Pour le vidage/l'évacuation du bac et le filtrage, voir page 95 chapitre 9.1 − Pour transvaser l'huile sans pompe dans le récipient, voir page 96, chapitre 9.2 − Pour vider l'huile du récipient sans pompe, voir page 101, chapitre 12.1.2 Option pompe : ne pas transvaser la solution détergente avec la pompe, sinon des restes de dé tergents et d'eau risquent de rester dans la pompe et dans le système de conduites! Retirer le panier de friture et le tamis du bac. Friteuse encastrée Retirer le support du panier (option). Poignée pour basculer l'élément chauffant Support d'élément chauffant Basculer l'élément chauffant Dans le cas des friteuses encastrées : plus haut à l'avant accrocher la poignée sur l'élément chauffant et pivoter ce dernier vers le haut. Bac Élément chauffant Friteuse sur table Support de panier Support d'élément chauffant Bac Élément chauffant Protection pour robinet d'écoulement Récipient 102 Enlever le filtre grossier et le filtre fin du récipient. Insérer le récipient vide. Vaporiser les dépôts adhérant sur l'élément chauffant un nettoyant pour grill dilué (rapport de mélange : 1 dose de nettoyant grill, 10 doses d'eau). Laisser agir pendant 10 mn env. Ne pas utiliser de détergent récurant sur l' élément de chauffage ! Ne pas rayer l'élément chauffant ! Tamis amovible Levier pour robinet d'écoulement pivoter l'élément chauffant vers le haut en faisant tourner le levier dans le sens inverse des aiguilles d'une montre. Nettoyage du bac et de l'élément de chauf fage Panier à friture Levier pour basculer l'élément chauffant Dans le cas des friteuses sur table : Nettoyer le bac avec un produit dégraissant et de l'eau chaude. Vider la solution détergente dans le récipient vers le bas. Rincer le bac à l'eau claire et essuyer avec un chiffon doux, non pelucheux. Fermer le robinet d'écoulement - Pivoter le levier vers le haut et encliqueter la sécurité. PRUDENCE ! Risque de dérapage ! Net toyer immédiatement les éclaboussures de graisse sur le sol. fr Nettoyage des pièces détachées Vider le récipient. Filtre grossier Le laver dans le lave‐vaisselle (avec l'ouverture vers le bas) ou dans l'évier avec un détergent dégraissant : − Tamis amovible − Filtre grossier − Étrier de retenue − Filtre fin − Récipient. Étrier de retenue Filtre fin Récipient Nettoyage du panier à friture Ne pas utiliser de détergent récurant sur le panier à friture ! Ne pas rayer le panier de friture ! Le panier à friture ne doit pas être plongé dans une lessive corrosive ou acide ! Nettoyer le panier à friture avec un produit dégraissant ou le laver dans le lave‐vaisselle. Rincer et essuyer le panier à friture. Joint torique (joint rond) Tuyau d'arrivée avec poignée Tuyau de vidage Tube d'aspiration Nettoyage des pièces du système filtrant avec pompe Option pompe : nettoyer les surfaces avec une lavette et un détergent dégraissant (ne pas plon ger dans la lessive) : − tubulure d'aspiration, − tuyau d'arrivée, − tuyau de vidage. Après le nettoyage, sécher minutieusement toutes les pièces et surfaces. 12.2 Nettoyer les surfaces en inox Nettoyer les surfaces en inox avec des produits nettoyants dégraissants ou des nettoyants spécial inox. Nettoyer la base avec un produit dégraissant. Essuyer les pièces et surfaces nettoyées avec un chiffon doux. Pour remettre l'appareil en ordre de marche, voir page 12, chapitre 5.1. Recouvrir le bac avec le couvercle. 13. Défauts et remèdes Si des défauts se produisent sur cet appareil, les vérifier à l'aide du tableau suivant : Défaut Cause possible Remède Pas de réaction sur le panneau d'affichage après la mise en marche. L'interrupteur principal en amont de l'appareil n'est pas enc lenché. Enclencher l'interrupteur principal. Toute l'alimentation en courant électrique fait défaut. Aviser l'entreprise d'approvisionnement en électricité . Le fusible principal est disjoncté. Faire contrôler les défauts éventuels dans l'appareil par un service après‐vente agréé. Remettre le fusible principal en service. 103 fr Défaut Cause possible Remède L'appareil est allumé mais ne chauffe pas. L'élément chauffage étant relevé, il est automatiquement coupé. Rentrer complètement l'élément de chauffage. La pompe est activée mais n'ali mente aucune huile/graisse de friture. Quantité insuffisante d'huile ou de graisse de friture dans le récipient. La pompe aspire de l'air. Remplir le bac ou le récipient d'huile de friture ou de graisse de friture semi‐liquide. Graisse dure utilisée pour la friture. La graisse de friture s'est figée dans le récipient ou dans la pompe. Enlever la graisse de friture figée hors du récipient. Utiliser de l'huile ou de la graisse semi‐liquide pour la friture ! Défaillance ou absence du joint torique (joint rond) sur le manc hon de raccord du tuyau d'aspi ration. La pompe aspire de l'air. Mettre un nouveau joint torique (joint rond) en place. La pompe est allumée, mais ne démarre pas. Le voyant de cont rôle de la touche « Température / Pompe » clignote. Pompe grippée. Démarrer et arrêter la pompe à plusieurs reprises. Informer le service clientèle si la pompe ne dé marre pas. Après 5 minutes de marche, la pompe de débite toujours ni huile, ni graisse de friture. Vanne de pompe usée. Avertir le service après‐vente. Affichage des erreurs : E01 et E03 Court‐circuit de la sonde de température. Éteindre et allumer l'appareil. Si l'erreur se repro duit, en informer le service après‐vente. Affichage des erreurs : E02 et E04 Interruption de la sonde de température. Éteindre et allumer l'appareil. Si l'erreur se repro duit, en informer le service après‐vente. Affichage des erreurs : E05 et E06 Le limiteur de température de sécurité a réagi. Défaillance de l'élément chauf fant ou du contacteur. Activer le limiteur de température de sécurité (E07-E08). Mettez l'appareil hors tension (5 secondes). Si l'erreur se reproduit, en informer le service après‐vente. Affichage des erreurs : E07 et E08 Dépassement de la température maxi. Vérifier si le bac contient une quantité suffisante d'huile ou graisse de friture. Éliminer le message d'erreur -> éteindre et allumer l'appareil. Le limiteur de température de sécurité a réagi. Activer le limiteur de température de sécurité. Si la défaillance se reproduit, faire vérifier l'appareil par le service après‐vente ou un électricien qualifié. Sécurité du robinet d'écoulement Affichage des erreurs : E09 et E10 Montée trop rapide de la température. Un bouton de remise à zéro rouge par élément chauffant pour limiteur de température de Vérifier si le bac contient une quantité suffisante d'huile ou graisse de friture. Éliminer le message d'erreur -> éteindre et allumer l'appareil. Affichage des erreurs : E20 à E34 Erreur dans le système de com mande Éteindre et allumer l'appareil. Si l'erreur se repro duit, en informer le service après‐vente. Avertissement : OIL et 0 en alternance Durée d'utilisation de la graisse Pour l'affichage, le décalage, la remise à zéro du compteur pour la durée d'utilisation de la graisse, voir page 92, chapitre 8.2 L'affichage indique des ca ractères ou symboles ne correspondant ni au temps, ni à la température. Les menus de paramétrage ont été sélectionnés par in advertance, ces derniers étant exclusivement prévus pour les opérations effectuées par le service après‐vente. Éteindre et allumer l'appareil. S'il s'avère impossible de remédier à la panne, − arrêter l'appareil et le débrancher du réseau électrique, − ne pas ouvrir le boîtier, − Avertir le service après‐vente. 104 Bouton de remise à zéro du limiteur de température de sécurité fr 14. Caractéristiques techniques Caractéristiques techniques Friteuse à un bac Friteuse à un bac Friteuse à un bac Friteuse à deux bacs Largeur 200 mm 300 mm 400 mm 400 mm Profondeur 650 mm 650 mm 650 mm 650 mm Hauteur 750 / 900 mm 750 / 900 mm 750 / 900 mm 750 / 900 mm Puissance électrique globale 8 / 9,5 kW 11 / 13 kW 16 / 19 kW 2 x 8 / 2 x 9,5 kW Protection par fusible 3 x 16A 3 x 16A / 3 x 20A 3 x 25A / 3 x 32A 2 x (3 x 16)A Tension 400V 3 50/60 Hz 400V 3 50/60 Hz 400V 3 50/60 Hz 400V 3 50/60 Hz Plage de régulation de température 50 - 190 °C 50 - 190 °C 50 - 190 °C 50 - 190 °C Taille du bac 160x428x338 mm 260x428x338 mm 360x428x338 mm 2x160x428x338 mm Plein complet d'huile de friture 7,5 - 9,0 litres 12,5 - 14,5 litres 17,0 - 20,5 litres 2 x 7,5 - 9,0 litres Plein utile d'huile de friture 4,5 - 6,0 litres 7,5 - 9,8 litres 10,0 - 13,5 litres 2 x 4,5 - 6,0 litres Nombre d'éléments chauf fants 1 1 2 1 par bac Taille du panier 140x320x155 mm 220x320x155 mm 300x320x155 mm / 2 x 140x320x155 mm 2 x 140x320x155 mm Capacité du panier 0,9 kg 1,5 kg 1x1,8 / 2 x 0,9 kg 2 x 0,9 kg Performance horaire, produits refroidis 20 kg 30 kg 40 kg 40 kg Performance horaire, produits congelés 17 kg 27 kg 34 kg 34 kg Dégagement de chaleur sen sible 0,72 / 0,86 kW 1,17 kW 1,44 / 1,71 kW 1,44 / 1,71 kW Dégagement de chaleur latente 5,60 / 6,65 kW 9,10 kW 11,20 / 13,30 kW 11,20 / 13,3 kW Dégagement de vapeur 8,25 / 9,79 kg/h 13,39 kg / h 16,48 / 19,57 kg/h 16,48 / 19,57 kg/h Niveau de bruit de l'appareil 70 dB (A) 70 dB (A) 70 dB (A) 70 dB (A) Degré de protection contre les eaux IPX4 IPX4 IPX4 IPX4 Sous réserve de modifications techniques ! 15. Installation, raccordement Respecter les prescriptions locales relatives aux cuisines. Les installations doivent être effectuées selon les indications de montage du fabricant et conformément aux règles reconnues en matière de technique. Laisser le service client se charger du montage et de la livraison de l'appareil. 15.1 Transport Ne transporter l'appareil qu'à l'état vide. Respecter le poids de l'appareil. Transporter l'appareil avec des auxiliaires de transport appropriés, tels que chariot élévateur p. ex. 105 fr 15.2 Mise en place Mise en place − à l'horizontale et à l'abri de secousses, − sous une hotte avec filtres de protection contre les flammes, − pas contre des parois inflammables. Sécurité contre le basculement Fixation murale en haut Languette avec point de rupture : peut être enlevée si nécessaire. Liaison d'appareil En cas de montage individuel des appareils : Protéger l'appareil contre tout basculement, par ex. en le vissant contre la paroi ou les appareils se trouvant à proximité. Fixation murale latérale Respecter un espace libre suffisant au‐dessus de l'appareil ! Des étagères ne doivent pas se trou ver au‐dessus de l'appareil ou des dispositifs pi votants ne doivent pas être pivotés au‐dessus de l'appareil ! Veiller à disposer d'un espace libre suffisant pour assurer la commande ! Également de manière à ce que des personnes ne risquent pas d'être bousculées par inadvertance pendant que l'on s'affaire sur la friteuse. L'espace libre devant la friteuse devrait avoir une largeur être d'au moins un mètre ! Ne pas disposer les appareils exploités avec de l'eau à côté des friteuses ! Respecter une distance minimum de 900 mm à proximité des friteuses ou installer un dispositif de protection contre les écla boussures (tôle de protection) d'une hauteur minimum de 350 mm. Il ne doit pas non plus y avoir de robinets ou de flexibles de douche à proximité des friteuses ! Des roulettes ne doivent pas se trouver sur l'appareil. Les roulettes mises en place par l'usine sur la partie arrière de l'appareil ne doivent pas être modifiées. Les roulettes ne sont prévues que pour avancer ou reculer l'appareil. Respecter les informations relatives à la sécurité au travail sur les friteuses fournies par les asso ciations professionnelles ! Les quantités de remplissage sont additionnées lorsque plusieurs friteuses sont disposées les unes à côté des autres. Dans ce cas des mesures particulières de protection contre l'incendie sont requises ! Retirer les films protecteurs de l'appareil. Supprimer les traces de colle avec de l'essence de lavage ou à nettoyer. 15.3 Branchement électrique Le branchement électrique ne doit être effectué que par un installateur électrique agréé − conformément aux directives VDE 0100 en vigueur − et aux règlements des entreprises d'approvisionnement en électricité compétentes. La ligne de réseau mobile doit être au moins effectuée selon H 07 RN‐F. Un interrupteur principal électrique doit être placé en amont et facilement accessible. L'interrupteur doit couper l'appareil du réseau de manière efficace et sur tous les pôles. L'ouverture du contact doit s'élever au moins à 3 mm. Informer l'utilisateur et les opérateurs, de l'endroit où se trouve l'interrupteur principal électrique de l'installation pour l'appareil, afin que ce dernier puisse être mis hors circuit sans danger en cas de risques pour l'utilisateur (risques d'incendie p. ex.). Pour des raisons de sécurité, nous vous recommandons d'installer un interrupteur de protection contre les courants de court‐circuit (FI) > 10 mA. Observer les données figurant sur la plaque signalétique pour procéder au branchement électrique ! Intégrer l'appareil au système de liaison équipotentielle. Son efficacité doit être vérifiée selon VDE0190. Connecter la conduite de raccordement au réseau du côté de l'installation. 106 fr 16. Entretien Faire inspecter et entretenir l'appareil régulièrement. Les travaux d'entretien sont : les contrôles de sécurité, de fonctionnement et d'étanchéité, par exemple. Le bon état des dispositifs de sécurité doit être vérifié au moins une fois par an par une personne compétente. Le résultat de ce contrôle doit être consigné dans une attestation et conservé jusqu'au prochain contrôle. Les travaux d'installation, de maintenance et de réparation ne doivent être effectués que par des spécialistes des installations électriques. Utiliser uniquement des accessoires et pièces de rechange d'origine ! Nous recommandons de passer un contrat d'entretien avec le service après‐vente. 17. Consignes relatives à l'élimination des déchets Avant de démonter l'appareil, le mettre hors tension et le protéger contre toute remise en service. Déb rancher ensuite le câble secteur de la prise secteur et de l'appareil. Les appareils usés ne sont pas des déchets sans valeur! Grâce à une élimination conforme à l'environ nement, il est possible de récupérer des matières premières précieuses. En cas d'élimination de l'appareil, respecter les directives légales en vigueur. Les appareils électriques industriels ne doivent pas être jetés dans les déchets communaux ou élimi nés avec les déchets ménagers. 18. Déclaration de conformité CE La présente déclaration ne se réfère qu'aux machines se trouvant dans l'état dans lequel elles ont été mises en circulation. La déclaration perd toute validité à partir du moment où elle a été modifiée ou transformée sans notre accord préalable. Nous déclarons par la présente, que de par leur conception et leur construction, les machines ci‐après désignées ainsi que les modèles que nous avons mis en circulation répondent aux exigences de la ré glementation 2006/42/CE en vigueur, relative aux machines. Les machines satisfont en outre aux direc tives de la réglementation 2006/95/EG concernant les moyens d'exploitation électriques et 2004/108/EG relative à la compatibilité électromagnétique. Types de machines Friteuse FSP, Friteuse sur pieds et à encastrer Normes EN harmonisées utilisées EN 60335-2-37:2008-12 EN 55014 -1:2007-06 -2:2002-08 EN 61000-3-2:2006-10 EN 61000-3-11:2001-04 EN 62233:2008-08 Mandataire pour compilation de la documentation technique est SERVATOR ServiceLine GmbH, Thomas Schmalz, Wilhelm‐Frank‐Straße 36, D‐97980 Bad Mergentheim 107 876911 / 10.09 / 3.14 SALVIS AG Nordstrasse 15 CH‐4665 Oftringen Tel. +41 (0)62 788 18 18 Fax. +41 (0)62 788 18 98 Internet: www.salvis.ch E‐Mail: [email protected]