1
○ ○ ○ ○ ○ ○ ○ ○ ○ ○ ○ ○ ○ ○ ○ ○ ○ ○ ○ ○ ○ ○ ○ ○ ○ ○ ○ ○ ○ ○ ○ ○ ○ ○ ○ ○ ○ ○ ○ ○ ○ ○ ○ ○ ○ ○ ○ ○ ○ ○ ○ ○ ○ ○ ○ ○ ○ ○ ○ ○ ○ ○ ○ ○ ○ ○ ○ ○ ○ ○ ○ ○ ○ ○ ○ ○ ○ ○
185
○ ○ ○ ○ ○ ○ ○ ○ ○ ○ ○ ○ ○ ○ ○ ○ ○ ○ ○ ○ ○ ○ ○ ○ ○ ○ ○ ○ ○ ○ ○ ○ ○ ○ ○ ○ ○ ○ ○ ○ ○ ○ ○ ○ ○ ○ ○ ○ ○ ○ ○ ○ ○ ○ ○ ○ ○ ○ ○ ○ ○ ○ ○ ○ ○ ○ ○ ○ ○ ○ ○ ○ ○ ○ ○ ○ ○ ○
MILLI-Q 185 PLUS
User manual
Manuel d'utilisation
Betriebsanleitung
Manual de operaciòn y mantenimiento
Manuale operativo
Copyright
Copyright © 1990, all rights reserved, Millipore Corporation.
PF04517, Rev. A , 10/93.
Trademarks
Millipore is a registered trademark of Millipore Corporation.
MILLI-RO, MILLI-RX, DURAPORE are trademarks of Millipore Corporation
ANATEL A 100 P is a trademark of ANATEL INSTRUMENT Corporation.
ENGLISH
• Table of contents
Chapter 5 : Troubleshooting
Troubleshooting table
11
11
Chapter 6 : Appendix
Appendix 1 : Main fuse replacement
Appendix 2 : Main P.C. board, fuse replacement
Appendix 3 : Replacement of fuse on U.V. Lamp P.C. board
15
15
15
15
3
3
3
3
3
4
Chapter 7 : Ordering information
17
Chapter 3 : Operation
Standard modes of operation
Additional displays
Use of keyboard
Electrical connections
Startup
Installation of final filter-MILLIPAK 40
Withrawing water
5
5
6
6
7
7
7
8
Chapter 9 : Additionnal information
Technical assistance
Warranty
Chapter 4 : Maintenance
Maintenance schedule
Replacement of Q-PAK purification element
Replacement of final filter MILLIPAK 40
Replacement of the U.V. lamp
9
9
9
9
9
Table of contents
i
Chapter 1 : Introduction
General description
Description of function
Schematic
Specifications
1
1
1
1
2
Chapter 2 : Installation
Unpacking
Positioning of MILLI-Q 185 PLUS
Installation
Inlet water connection
Installation of purification pack Q-PAK
At back of document
Chapter 8 : Figures
i
i i
1
INTRODUCTION
○ ○ ○ ○ ○ ○ ○ ○ ○ ○ ○ ○ ○ ○ ○ ○ ○ ○ ○ ○ ○ ○ ○ ○ ○ ○ ○ ○ ○ ○ ○ ○ ○ ○ ○ ○ ○ ○ ○ ○ ○ ○ ○ ○ ○ ○ ○ ○ ○ ○ ○ ○ ○ ○ ○ ○ ○ ○ ○ ○ ○ ○ ○ ○ ○ ○ ○ ○ ○ ○ ○ ○ ○ ○ ○ ○ ○ ○
• General description
• Description of function
The MILLI-Q 185 PLUS has been developed specifically to produce
Ultrapure water with the lowest level of organics currently attainable. This
water quality can be produced using a laboratory grade feed water
prepurified by Reverse Osmosis, or distillation to feed the system.
The system is designed to produce up to 1.5 litres/minute of Ultrapure
water on demand.
This water quality should be used for all critical applications requiring the
lowest levels of organics : e.g., Critical H.P.L.C., G.C./M.S., Langmuir
Blodgett monolayers, I.C.
The MILLI-Q 185 PLUS System main components are shown on figure 1 as
follows :
The prepurified feedwater (Reverse Osmosis, or Distilled) is driven by a
built in pump, through a chamber where the feedwater is exposed to
ultraviolet light (U.V.) of low wavelength (185 nm + 254 nm). This initiates
oxidation of dissolved organic compounds remaining from the
prepurification process, (Reverse Osmosis or Distillation). The U.V.
irradiation also displays a bacteriocidal action.
The U.V. treated feedwater is then passed through the Q-PAK purification
element which removes the ionic compounds plus the by products of U.V.
photooxidation.
A Built-in three way valve allows recirculation of the water until the
required water quality is achieved. When the required water quality is
reached, turning the three way valve allows water to pass through the
MILLIPAK 40 final filter unit at the point of use.
(A)
(B)
(C)
(D)
(E)
(F)
(G)
(H)
(I)
(J)
(K)
Water purification module - Q PAK.
Protected point of use.
Point of use, final filter, 0.22 µm membrane. MILLIPAK 40 unit.
Point of use 3 - way valve.
Control panel.
Q-PAK locking handle.
Indicator lights.
Liquid Crystal Display.
Keyboard.
Feed water inlet connection.
Removeable plug - blocking the socket for the wall mounting
bracket arm.
(L) Knurled screw locking rear cabinet in place.
(M) Female Jack socket for connection of remote control device.
(N) Power inlet (mains cord).
(O) Main fuse holder.
(P) ON / OFF switch.
(Q) Heat sink.
• Schematic
The MILLI-Q 185 PLUS system operating schematic is shown on figure 2
as follows :
(A)
(B)
(C)
(D)
(E)
(F)
(G)
(H)
Inlet solenoid valve.
Pump.
U.V. lamp in external housing.
Water purification pack - Q-PAK.
Resistivity measurement cell to measure product water quality.
Three way valve.
Final filter Millipak 40 (0.22 µm).
Check valve.
INTRODUCTION
1
• Specifications
Dimensions
Height
Width
Depth
Operating weight
495 mm (19.5 in)
297 mm (11.7 in)
433 mm (17 in)
17 kg
Electrical specifications
230 V/50Hz - 180 VA
Fuse 1 Amp slow blow
Hydraulic specifications
Feed water tubing
External diameter 8 mm
Maximum length 3 M
Feed water pressure
Minimum - Positive head (0.3M)
0.03 bar (0.5 psi)
Maximum - 1.0 bar (15 psi)
Feed water flowrate
1.5 Litres / min
Performance
Product water flow rate
T.O.C. (Total Oxidisable Carbon)
2
INTRODUCTION
≤ 1.5 litres / min
< 5 ppb typical value by ANATEL A 100 P
2
I N S TA L L AT I O N
○ ○ ○ ○ ○ ○ ○ ○ ○ ○ ○ ○ ○ ○ ○ ○ ○ ○ ○ ○ ○ ○ ○ ○ ○ ○ ○ ○ ○ ○ ○ ○ ○ ○ ○ ○ ○ ○ ○ ○ ○ ○ ○ ○ ○ ○ ○ ○ ○ ○ ○ ○ ○ ○ ○ ○ ○ ○ ○ ○ ○ ○ ○ ○ ○ ○ ○ ○ ○ ○ ○ ○ ○ ○ ○ ○ ○ ○
• Unpacking
• Installation
On unpacking the MILLI-Q 185 PLUS you should find the following items,
as shown on figure 3.
INLET WATER CONNECTION (FIGURE 5)
- Feedwater stored in Reservoir :
(A)
(B)
(C)
(D)
(E)
MILLI-Q 185 PLUS unit.
Power cord .
Point of use mounting cover.
Users manual.
Adaptor, 1/2" Female - 8 mm (0,3 in) tubing with built in screen
filter.
(F) Teflon tape.
Following items to be ordered separately
(G) Water purification Pack - Q-PAK 1.
(H) Final filter unit - Millipak 40 (0.22 µm).
Items G + H = Cat N° CPMQK05R1.
• Positioning of MILLI-Q 185 PLUS
The MILLI-Q 185 PLUS unit may be placed on a laboratory bench, or wall
mounted.
To mount the unit on the wall, order the wall mounting bracket
(Cat N° ZFMQ00WMB) and verify that the wall is able to support the
operating weight of the unit (17 Kg).
1. Cut the feedwater tubing (C) to the desired length (< 3 m).
2. Remove the protective plug (B) from the INLET connection (D) by
pressing on collet (A) and pulling plug.
3. Connect feedwater tubing (C) to the INLET connection by inserting
the tube firmly into the fitting. Verify that the connection is good by
pulling back several times on the tube.
4. Connect the tube to the valve on the outlet from the reservoir. This
valve should already be fitted with an adaptor to accept 8 mm
diameter tubing.
- Feedwater delivered from a pressurized line in a distribution loop.
1. If the pressure is > 1 bar, then the pressure should be reduced.
Use Pressure Regulator (Cat. N° ZFMQ000PR).
2. Connect feed tubing (C) to the outlet of the pressure regulator.
Figure 4 shows the connection of the MILLI-Q 185 PLUS with different
feedwater delivery options (reservoir or pressurized line).
NOTE : The isolating valve (on the pressurized line), the pressure regulator
and pressure gauge shown on figure 4 are not supplied with the system.
INSTALLATION
3
• Installation of purification pack - Q-PAK
(Figure 6)
1. Swing the pack locking handle to the left by pressing on the locking
tab and pulling down on the handle. Remove the protective plugs
(A).
2. Remove the protective caps (B) on the Q-PAK.
3. Wet the two O-rings (C) of the pack with a few drops of water.
4. Position the Q-PAK in its cavity. Hold the MILLI-Q 185 PLUS (D)
firmly and push home the Q-PAK (E), if necessary use a slight side to
side movement.
5. Replace and lock the pack retaining arm (F) in position.
4
INSTALLATION
3
O P E R AT I O N
○ ○ ○ ○ ○ ○ ○ ○ ○ ○ ○ ○ ○ ○ ○ ○ ○ ○ ○ ○ ○ ○ ○ ○ ○ ○ ○ ○ ○ ○ ○ ○ ○ ○ ○ ○ ○ ○ ○ ○ ○ ○ ○ ○ ○ ○ ○ ○ ○ ○ ○ ○ ○ ○ ○ ○ ○ ○ ○ ○ ○ ○ ○ ○ ○ ○ ○ ○ ○ ○ ○ ○ ○ ○ ○ ○ ○ ○
• Standard modes of operation
The MILLI-Q 185 PLUS displays several modes of operation. Certain can be activated via the keyboard, others are preprogrammed and automatic.
OPERATING MODE DISPLAY
ACTIVATION
STATUS OF MILLI-Q 185 PLUS
STANDBY
Press OPERATE/STANDBY
button, when system is in OPERATE mode
The system is in the STANDBY mode and is not producing purified
water.
TEMPERATURE : 25°C
Press button TEMPERATURE when
the system is in the STANDBY mode.
Display of the reference TEMPERATURE 25°C
(Temperature compensated measurement at 25°C).
TEST : .. ; . MΩ.cm
Press button OPERATE/STANDBY
when system is in STANDBY mode
Display of automatic self test result, to verify system calibration
(15 ± 1 MΩ.cm displayed for 4 secs.).
PRODUCT: .. ; .MΩ.cm
Display appears automatically 4 secs after
having pressed the OPERATE/STANDBY
button, when the system has been in STANDBY
mode.
This display comes after the Auto-test display.
Display of the product water resistivity.
TEMPERATURE : ..°C
Press the button TEMPERATURE while the
system is in the OPERATE or RECIRCULATION
mode.
Automatic function when system is in
STANDBY mode.
Display of the product water temperature at the Q-PAK outlet.
RECIRCULATION
Periodic function of the system during the STANDBY mode.
The system will recirculate water automatically for 15 minutes every
hour, in order to maintain water quality during periods of non-use.
The 15 mn RECIRCULATION period begins 45 mn after the system
is placed in STANDBY mode, and thereafter once every hour while
the unit is in STANDBY. In addition, the RECIRCULATION mode
is also activated each time the unit is switched ON.
OPERATION
5
• Additional Displays
DISPLAY
STATUS OF MILLI-Q 185 PLUS
PRODUCT : XX MΩ.cm
This display indicates a resistivity value which is out of scale. See TROUBLESHOOTING chapter.
TEST INCORRECT
Displayed when the Auto-test result displayed is < 14 MΩ.cm or > 16 MΩ.cm
See TROUBLESHOOTING chapter.
BATTERY
The battery on the P.C. board is discharged.
The data stored when the system was switched OFF has now been lost. See TROUBLESHOOTING chapter.
EXCHANGE PACK
- Flashes when the Q-PAK should be changed. See MAINTENANCE chapter.
- Continously illuminated, when the Q-PAK is not in place, or incorrectly fitted. See TROUBLESHOOTING chapter.
U.V.
- Flashes for 30 seconds when the U.V. lamp is first switched ON (heating up of lamp).
- Continously illuminated when the U.V. lamp is lit and its operating efficiency is at an optimum level.
• Use of Keyboard
The keyboard allows the user to control the operating mode of the system, and to display a number of preset parameters governing the correct function
of the system.
DESIGNATION OF BUTTON
6
FUNCTION
OPERATE/STANDBY
Pressing on this button will successively activate the OPERATE and STANDBY modes.
TEMPERATURE
- During STANDBY mode : pressing this button during STANDBY mode will cause the reference temperature
25 °C to be displayed (temperature compensated measurement at 25 °C).
When the button is subsequently released the temperature display will disappear after 3 seconds.
- During RECIRCULATION mode or OPERATE mode : pressing this button during these modes, the
current product water temperature in the system is displayed when the button is subsequently released the
temperature display will disappear after 3 seconds.
OPERATION
• Electrical connections (at the back of system)
REMOTE STANDBY socket. This inlet allows the MILLI-Q 185 PLUS to be
controlled from an external remote unit. (REMOTE STANDBY/OPERATE
modes).
Contact Millipore Technical Services for further information concerning the
use of this function.
• Startup (Figure 7)
1. Verify that the Q-PAK is correctly installed and that all connections
have been correctly made.
2. Open the feed water isolating valve.
3. Put the point of use 3 way valve (A)
(RECIRCULATION/PRODUCTION) in the PRODUCTION position.
Control the filling of the recipient by opening and closing the three
way valve (A) a few times.
8. After having drawn 5 - 7 litres of water via fitting (C), turn the 3 way
valve (A) to the RECIRCULATION position.
Press the OPERATE/STANDBY button twice to put the system into
STANDBY mode. If possible, leave the system like this overnight, to
allow the Q-PAK contents to fully rehydrate.
9. The following morning, press the OPERATE/STANDBY button,
TEST : . ., .MΩ.cm should be displayed for 4 seconds, then 2
seconds later the UV indicator light should flash for 30 seconds,
while the lamp heats up. At the end of this 30 second period the
indicator light should be constantly illuminated. Draw off 2-3 litres of
water.
Put the system back into STANDBY mode by pressing once on the
OPERATE/STANDBY button.
4. Position a container (B) under the outlet fitting (C) for the MILLIPAK
40 filter unit.
• Installation of final filter-MILLIPAK 40 (0.22␣ µm)
(Figure 8)
5. Switch the system ON by pressing the main ON/OFF switch at the
rear (see figure 1(P)).
The display should now show RECIRCULATION.
If BATTERY appears, switch the system OFF for two seconds, then
back ON.
When the Q-PAK has been completely purged of air, and allowed to
rehydrate overnight you can proceed to fit the MILLIPAK final filter.
6. If the system is fed from a pressurized line via a pressure regulator,
adjust the exit pressure from the regulator between 0.5 and 1 bar
when the MILLI-Q 185 PLUS is in production (3 way valve (A) open
in the PRODUCTION position and water flowing out of fitting (C)).
7. Leave the system running allowing water to flow out of fitting (C).
This will allow all the air to be purged from the system and the
Q-PAK.
1. Cover the thread (A) of the MILLIPAK filter unit with 2-3 turns of
Teflon tape, in order to assure a watertight seal.
2. Screw the MILLIPAK filter unit into the female fitting (C) at the point of
use on the MILLI-Q 185 PLUS. Make sure that the vent (D) is accessible.
3. Press the OPERATE/STANDBY button to put the system in OPERATE
mode. Turn the 3 way valve to the PRODUCTION position.
OPERATION
7
4. Purge the air contained in the MILLIPAK 40, with water, by slightly
unscrewing the vent cap (E)...
5. When water exits the vent, and the air pocket has disappeared,
retighten the vent cap.
6. Place the 3 way valve in the RECIRCULATION position and put the
system in the STANDBY mode.
7. Insert the MILLIPAK filter into the clip (F) of the point of use cover (G).
8. Install the Millipak filter and the point of use cover on the
MILLI-Q␣ 185 PLUS by lightly pressing the tabs (H) situated on each
side of the cover and inserting these tabs in the two grooves (J)
intended for this purpose.
The MILLI-Q 185 PLUS is now ready for use.
• Withrawing water
1. Press the button OPERATE/STANDBY (figure 1(I)) to put the system in
the OPERATE mode.
2. After 6 seconds the U.V. indicator light (figure 1 (G)) should flash.
Wait a further 30 seconds until the indicator light is continously
illuminated and the resistivity of the water has reached 18.2 MΩ.cm,
before drawing water. This delay allows the lamp to reach its
optimum temperature.
3. Withdraw water now by turning the 3 way valve (figure 1 (D)) to the
PRODUCTION position.
8 OPERATION
4. To stop drawing water, turn the 3 way valve back to the
RECIRCULATION position. Press the OPERATE/STANDBY button to
put the system in the STANDBY mode.
NOTE : When you do not require water, leave the MILLI-Q 185 PLUS in the
STANDBY mode.
In order to maintain water quality during non use periods the system will
automatically recirculate water for 15 minutes every hour during STANDBY
mode. (The display will show RECIRCULATION during this period).
During STANDBY mode make sure that the 3 way valve is in the
RECIRCULATION position, to avoid water flowing out of the point of use
during the 15 min RECIRCULATION.
4
MAINTENANCE
○ ○ ○ ○ ○ ○ ○ ○ ○ ○ ○ ○ ○ ○ ○ ○ ○ ○ ○ ○ ○ ○ ○ ○ ○ ○ ○ ○ ○ ○ ○ ○ ○ ○ ○ ○ ○ ○ ○ ○ ○ ○ ○ ○ ○ ○ ○ ○ ○ ○ ○ ○ ○ ○ ○ ○ ○ ○ ○ ○ ○ ○ ○ ○ ○ ○ ○ ○ ○ ○ ○ ○ ○ ○ ○ ○ ○ ○
• Maintenance schedule
4. Install the replacement Q-PAK as described in INSTALLATION
chapter.
FREQUENCY
ACTION
When the indicator light
EXCHANGE PAK flashes, or
when the resistivity no longer
reaches 18.2 MΩ.cm after
a few minutes of recirculation.
Replace the purification
pack Q-PAK,
and the final filter MILLIPAK 40.
Once a year, or when the U.V.
indicator light no longer
lights up.
Replace the U.V. lamp.
When the flow rate
through the final filter
becomes unacceptably low.
Replace the MILLIPAK 40
final filter.
If this has only been in place a
short time check the quality of
the feedwater to the
MILLI-Q␣ 185 PLUS unit.
NOTE : It is preferable to carry out this replacement in the afternoon or
evening in order to allow the Q-PAK to rehydrate, in the system, overnight.
• Replacement of final filter MILLIPAK 40
(Figure␣ 8)
1. Put the MILLI-Q 185 PLUS on STANDBY mode.
2. Press on the twin tabs (H) of the point of use cover (G) to remove the
cover and the MILLIPAK.
3. Pull on the cover to remove it from MILLIPAK.
4. Unscrew used MILLIPAK from its fitting.
5. Install new MILLIPAK as described in INSTALLATION chapter.
• Replacement of Q-PAK purification element
• Replacement of the U.V. lamp (Figure 9)
1. Put the MILLI-Q 185 PLUS system in STANDBY mode.
The rear cabinet of the unit should be removed. When the MILLI-Q␣ 185␣ PLUS
is wall mounted, the system should be lifted down from its support bracket.
DO NOT SWITCH OFF THE SYSTEM.
1. Switch OFF the system and remove the power cable (figure 1 (N) (P))
2. Unlock the Q-PAK retaining arm (see figure 1(F))
3. Pull out the used Q-PAK
MAINTENANCE
9
2. Unscrew the knurled knob (figure 1 (L)) and also the pin for the wall
mounting bracket (figure 1 (K)) (if wall mounted).
3. Remove the rear cover by sliding it backwards.
4. Disconnect connector (A) from the U.V. lamp unit by pulling up.
5. Unscrew locking ring (B) withdraw the quartz tube (D) the used U.V.
lamp and the O-ring (E) as shown.
6. Put in place the new quartz tube containing the new U.V. lamp.
USE GLOVES WHEN HANDLING THESE NEW ELEMENTS.
The tube should rest on a spring which will automatically centre it in
the correct position.
7. Replace the O-ring (E), place the pressure ring (C) in position and
screw down the locking ring (B) to tighten the whole assembly.
8. Connect the U.V. lamp (connector (A)).
9. Replace the rear cabinet, plug in the power cable, and switch the
system ON.
Verify the correct functioning of the U.V. lamp : U.V. indicator light
should be illuminated during OPERATE mode.
10
MAINTENANCE
5
TROUBLESHOOTING
○ ○ ○ ○ ○ ○ ○ ○ ○ ○ ○ ○ ○ ○ ○ ○ ○ ○ ○ ○ ○ ○ ○ ○ ○ ○ ○ ○ ○ ○ ○ ○ ○ ○ ○ ○ ○ ○ ○ ○ ○ ○ ○ ○ ○ ○ ○ ○ ○ ○ ○ ○ ○ ○ ○ ○ ○ ○ ○ ○ ○ ○ ○ ○ ○ ○ ○ ○ ○ ○ ○ ○ ○ ○ ○ ○ ○ ○
• Troubleshooting table
If the MILLI-Q 185 PLUS unit is not functioning correctly please look initially at the table below.
This table is an initial aid in helping you to diagnose the reason for the incorrect functioning of the system.
If this is not sufficient please contact your local Millipore Service Department. (List of addresses at the back of this manual).
PROBLEM
CAUSE
REMEDIAL ACTION
No power to MILLI-Q 185 PLUS
The power light is OFF.
- Main socket is not receiving power.
- Power cord not properly connected.
- Main power fuse blown.
- P.C. board fuse blown.
- Check mains.
- Check connections.
- Replace main fuse (appendix 1).
- Replace P.C. board fuse (appendix 2).
EXCHANGE PACK light flashing.
Q-PAK needs to be changed.
Replace Q-PAK. See MAINTENANCE chapter.
EXCHANGE PACK light
constantly illuminated.
Q-PAK is not in place, or has been incorrectly
installed.
Replace Q-PAK. See MAINTENANCE chapter.
The U.V. indicator
light does not light up when
the system is in production
or RECIRCULATION mode.
- The U.V. lamp fuse is blown.
- Replace the fuse on the P.C. board, for the U.V. lamp
(see appendix 3).
- Replace the U.V lamp see MAINTENANCE chapter.
- Internal water temperature is too high. See section
TEMPERATURE > 35 °C indication later in this table.
BATTERY is displayed on the
screen.
- The U.V. lamp is defective.
- TEMPERATURE > 35 °C is displayed.
Battery discharged.
Leave the system under power for 48 hours to recharge
the battery, switch off the system for 2 seconds to erase
the display BATTERY at the end of the recharge.
TROUBLESHOOTING
11
PROBLEM
TEST INCORRECT is displayed
after the autotest.
PRODUCT : XX MΩ.cm displayed
TEMPERATURE > 35 °C
is displayed during PRODUCTION
or RECIRCULATION mode.
CAUSE
- Poor calibration of temperature circuit.
With system in STANDBY mode press button
TEMPERATURE.
TEMPERATURE 25 °C should be displayed. Call
MILLIPORE Technical Service if the value is different.
- Poor calibration of resistivity circuit.
If the temperature is correctly calibrated, pressing
OPERATE/STANDBY button should cause
TEST : 15.0 MΩ.cm (±1 MΩ.cm) to be displayed.
Call MILLIPORE Technical Service if this value is out of
specification.
- Presence of air in the measurement circuit.
- Purge the air from Q-PAK and measurement circuit by
opening the point of use valve.
- Fault in calibration of measurement circuit
(TEST INCORRECT).
- Calibrate measurement circuit. (See above).
- The water temperature in the system has
reached 36 °C, and needs to come down to
35 °C to relight the U.V. lamp
This is caused by leaving the system on
OPERATE mode for too long, without
drawing water.
- Feed water temperature is too high.
- Put the system in STANDBY mode when not in use.
- Withdraw water from the system to help to decrease
the temperature, to allow the U.V. lamp to relight.
- If it is not possible to reduce the feedwater temperature,
then remove jumper “E” on the P.C. Board to cancel
this function. Contact MILLIPORE Service Department.
TEMPERATURE < 0 °C or
- Feedwater temperature is > 40 °C.
TEMPERATURE > + °C is displayed
during OPERATE mode.
- The thermistor, or its connection to the
resistivity cell, is defective.
12
TROUBLESHOOTING
REMEDIAL ACTION
- Check feed water temperature and decrease it if it is
elevated.
- Call MILLIPORE Service department.
PROBLEM
CAUSE
REMEDIAL ACTION
The resistivity of water in the system The Q-PAK is exhausted.
does not reach 18.2 MΩ.cm after
several minutes of recirculation.
Replace the Q-PAK. See MAINTENANCE chapter.
No water produced in OPERATE
mode.
- Isolating valve on feedwater is closed.
- Faulty inlet solenoid valve.
- Pump running dry.
- Open the feed isolating valve.
- Call MILLIPORE Service Department.
- The pump can pull in water only when it is primed.
Introduce water into the system by gravity feed, or by
pressure.
Low flow rate of water in
OPERATE mode.
- Lack of feedwater.
- Verify the feedwater line to the system. Verify correct
pressure, tubing diameter, tubing length, and flow.
- Purge air from MILLIPAK 40 final filter
(see OPERATION chapter, START-UP section)
- Replace MILLIPAK 40 final filter. See MAINTENANCE
chapter.
- Air pocket build up in MILLIPAK 40 final filter.
- MILLIPAK 40 final filter plugged.
TROUBLESHOOTING
13
14
TROUBLESHOOTING
6
APPENDIX
○ ○ ○ ○ ○ ○ ○ ○ ○ ○ ○ ○ ○ ○ ○ ○ ○ ○ ○ ○ ○ ○ ○ ○ ○ ○ ○ ○ ○ ○ ○ ○ ○ ○ ○ ○ ○ ○ ○ ○ ○ ○ ○ ○ ○ ○ ○ ○ ○ ○ ○ ○ ○ ○ ○ ○ ○ ○ ○ ○ ○ ○ ○ ○ ○ ○ ○ ○ ○ ○ ○ ○ ○ ○ ○ ○ ○ ○
• Appendix 1 : Main fuse replacement (Figure 10) • Appendix 3 : Replacement of fuse on U.V. Lamp
P.C. board (Figure 11)
1. Switch OFF power to the MILLI-Q 185 PLUS.
2. Unplug and disconnect the main power cord to the system.
3. Remove the fuse holder (A) (figure 1 (O)).
4. Remove the faulty fuse (B) and replace by new fuse (C).
1. Follow the same procedure as Appendix 2, change fuse (D) of the
U.V. lamp P.C. Board (B).
NOTE : When changing a faulty fuse, we suggest a new fuse be kept as a
spare in the secondary position.
5. Replace the fuse holder in position.
• Appendix 2 : Main P.C. Board, fuse␣ replacement
(Figure 11)
1. Switch OFF power to the MILLI-Q 185 PLUS system and unplug the
power cable.
2. Unscrew the knurled knob (figure 1 (L)) to remove rear cabinet.
3. Change the fuse (C) of the Main P.C. Board (A).
APPENDIX
15
16
APPENDIX
7
O R D E R I N G I N F O R M AT I O N
○ ○ ○ ○ ○ ○ ○ ○ ○ ○ ○ ○ ○ ○ ○ ○ ○ ○ ○ ○ ○ ○ ○ ○ ○ ○ ○ ○ ○ ○ ○ ○ ○ ○ ○ ○ ○ ○ ○ ○ ○ ○ ○ ○ ○ ○ ○ ○ ○ ○ ○ ○ ○ ○ ○ ○ ○ ○ ○ ○ ○ ○ ○ ○ ○ ○ ○ ○ ○ ○ ○ ○ ○ ○ ○ ○ ○ ○
Description
Catalogue number
SYSTEM
MILLI-Q 185 PLUS, 220 V/ 50Hz
Water purification system
(U.V. lamp already installed /QPAK NOT INCLUDED)
ZFMQ 050 UV
EXPENDABLES
QPAK 1 kit (Feed water : Reverse Osmosis/Distilled)
(includes 1x QPAK 1 and 1 x MILLIPAK filter)
CPMQ K05 R1
QPAK 1
CPMQ 004 R1
QPAK 2 kit (Feed water : Deionised)
(includes 1x QPAK 2 and 1 x MILLIPAK filter)
CMPQ K05 D2
QPAK 2
CMPQ 004 D2
MILLIPAK filter 0,22 µm (2/pk)
MPGL 04S K2
U.V. lamp exchange kit
CFMQ 185 01
Inlet pressure regulator
ZFMQ 000 PR
System wall mounting bracket
ZFMQ 00W MB
ACCESSORIES
ORDERING INFORMATION 17
18 ORDERING INFORMATION
FRANCAIS
• Table des matières
Table des matières
i
Chapitre 1 : Introduction
Généralités
Principe de fonctionnement
Schéma de principe
Caractéristiques
1
1
1
1
2
Chapitre 2 : Installation
Déballage
Mise en place du MILLI-Q 185 PLUS
Installation
Mise en place du pack de purification Q-PAK
3
3
3
3
4
Chapitre 3 : Utilisation
Modes de fonctionnement
Messages complémentaires
Utilisation du clavier
Connexion électrique à l'arrière
Mise en service
Mise en place du filtre final MILLIPAK 40
Soutirage de l'eau
5
5
6
6
7
7
7
8
Chapitre 4 : Entretien
Tableau des périodicités
Remplacement du pack de purification
Remplacement du filtre final MILLIPAK 40
Remplacement de la lampe U.V.
9
9
9
9
9
Chapitre 5 : Maintenance
Tableau de maintenance
11
11
Chapitre 6 : Annexes
Annexe 1 : Remplacement du fusible secteur
Annexe 2 : Remplacement du fusible circuit imprimé
principal
Annexe 3 : Remplacement du fusible circuit imprimé de la
lampe U.V.
15
15
Chapitre 7 : Guide d'achat
17
15
15
En fin de document
Chapitre 8 : Figures
Chapitre 9 : Informations complémentaires
Assistance technique
Garantie
i
i i
1
INTRODUCTION
○ ○ ○ ○ ○ ○ ○ ○ ○ ○ ○ ○ ○ ○ ○ ○ ○ ○ ○ ○ ○ ○ ○ ○ ○ ○ ○ ○ ○ ○ ○ ○ ○ ○ ○ ○ ○ ○ ○ ○ ○ ○ ○ ○ ○ ○ ○ ○ ○ ○ ○ ○ ○ ○ ○ ○ ○ ○ ○ ○ ○ ○ ○ ○ ○ ○ ○ ○ ○ ○ ○ ○ ○ ○ ○ ○ ○ ○
• Généralités
• Principe de fonctionnement
Le MILLI-Q 185 PLUS a été conçu pour produire de l’eau ultrapure épurée
des matières organiques à partir d’eau osmosée ou distillée.
L’eau produite, d’un débit nominal instantané de 1,5 l/mn, sera utilisée
pour toutes les applications critiques où la quantité de matières organiques
la plus faible possible est souhaitée.
Les principaux constituants du MILLI-Q 185 PLUS, figure 1, sont :
Une pompe pousse l’eau d’alimentation prépurifiée (osmosée ou distillée)
le long d’une source UV (Ultra Violet) à faible longueur d’onde
(185␣ nm␣ +␣ 254 nm) qui oxyde les matières organiques et détruit les
bactéries, puis à travers le Q-PAK dont la fonction est de retenir les ions et
les matières organiques oxydées. Une vanne 3 voies permet de recirculer
l’eau produite en amont de la pompe jusqu’à l’obtention de la qualité
désirée, puis d’alimenter le point d’utilisation à travers un filtre 0,22 µm.
(A)
(B)
(C)
(D)
(E)
(F)
(G)
(H)
(I)
(J)
(K)
Un pack de purification de l’eau Q-PAK 1.
Un point de soutirage protégé.
Un filtre final 0,22 µm MILLIPAK 40.
Une vanne 3␣ voies de soutirage.
Un panneau de contrôle.
Une poignée de verrouillage du pack.
Des indicateurs lumineux.
Un afficheur à cristaux liquides.
Un clavier.
Un raccord pour l’alimentation en eau.
Un bouchon fermant le trou de passage de la tige utilisée pour le
montage mural.
(L) Un écrou moleté verrouillant le capot arrière.
(M) Un connecteur femelle de raccordement du contrôle à distance.
(N) Une prise secteur.
(O) Un porte-fusibles.
(P) Un interrupteur marche/arrêt.
(Q) Un dissipateur de chaleur.
• Schéma de principe
La chaîne fonctionnelle de MILLI-Q 185 PLUS est représentée figure 2. Elle
comprend :
(A)
(B)
(C)
(D)
(E)
(F)
(G)
(H)
Une électrovanne d’entrée.
Une pompe.
Une lampe UV montée dans un carter.
Un pack de purification de l’eau Q-PAK.
Une sonde de mesure de la résistivité de l’eau produite.
Une vanne 3 voies.
Un filtre final 0,22 µm MILLIPAK 40.
Un clapet anti-retour.
INTRODUCTION
1
• Caractéristiques
Dimensions
Spécifications
Hauteur
Largeur
Profondeur
Poids en fonctionnement
495 mm (19.5 in)
297 mm (11.7 in)
433 mm (17 in)
17 kg
Spécifications électriques
230 V/50 Hz - 180 VA
Fusible 1A retardé
Spécifications hydrauliques
Tuyau d’alimentation en eau
Pression d’eau d’entrée
Débit d’eau d’entrée
ø 8 mm
longueur : 3 m maximum
0,03 bar (0,5 psi) minimum
1 bar (15 psi) maximum
1,5 l/mn
Performances
Débit d’eau produite
Cot (alimentation en eau osmosée)
2
INTRODUCTION
1,5 l/mn maximum
< 5 ppb typique
mesuré avec appareil ANATEL A 100 P
2
I N S TA L L AT I O N
○ ○ ○ ○ ○ ○ ○ ○ ○ ○ ○ ○ ○ ○ ○ ○ ○ ○ ○ ○ ○ ○ ○ ○ ○ ○ ○ ○ ○ ○ ○ ○ ○ ○ ○ ○ ○ ○ ○ ○ ○ ○ ○ ○ ○ ○ ○ ○ ○ ○ ○ ○ ○ ○ ○ ○ ○ ○ ○ ○ ○ ○ ○ ○ ○ ○ ○ ○ ○ ○ ○ ○ ○ ○ ○ ○ ○ ○
• Déballage
• Installation
Les différents composants fournis sont représentés sur la figure 3 et
énumérés ci-dessous :
BRANCHEMENT DE L’ARRIVÉE DE L’EAU (Figure 5)
- A partir d’une cuve :
(A)
(B)
(C)
(D)
(E)
(F)
MILLI-Q 185 PLUS.
Cordon secteur.
Capot de montage du filtre MILLIPAK.
Manuel d’utilisation.
Adaptateur 1/2" femelle-tuyau 8 mm avec filtre à tamis intégré
Ruban Teflon.
Commandé séparément :
- Pack de purification de l’eau Q-PAK (G)
- Filtre final 0,22 µm Millipak 40 (H)
G + H = Cat N° CPMQK05R1
• Mise en place du MILLI-Q 185 PLUS
Le MILLI-Q 185 PLUS peut être posé sur une paillasse ou fixé au mur.
Dans le cas d’un montage mural, utiliser l’équerre de montage mural,
Cat. N° ZFMQ 00W MB, et, s’assurer que le mur est capable de supporter
le poids de l’appareil. La figure 4 vous montre la connectique d’un
MILLI-Q 185 PLUS avec ses différentes alimentations.
1. Couper le tuyau d’alimentation (C) à la longueur désirée (< 3 m).
2. Retirer le bouchon de protection (B) de la connection INLET (D) en
appuyant sur le collier (A).
3. Connecter le tuyau d’alimentation (C) à l’entrée INLET en l’insérant
fermement dans le raccord puis vérifier que la connection est bonne
en tirant plusieurs fois sur le tuyau.
4. Connecter le tuyau à la vanne de sortie de cuve équipée d’un
adaptateur pour tube de ø 8 mm.
- A partir d’une boucle de distribution de l’eau sous pression :
1. La pression doit être réduite, utiliser pour cela un réducteur/régulateur de pression (Cat. N° ZFMQ 000 PR).
2. Connecter le tuyau d’alimentation (C) à la sortie du régulateur de
pression.
NOTA : La vanne d’arrêt, le régulateur de pression et son manomètre
représentés sur la figure 4 ne sont pas fournis.
INSTALLATION
3
• Mise en place du pack de purification Q-PAK
(Figure 6)
1. Amener la poignée de verrouillage du pack vers le bas en appuyant
dessus, et, retirer les bouchons de protection (A).
2. Retirer les bouchons de protection (B) du Q-PAK.
3. Mouiller les 2 joints (C) du pack à l’aide de quelques gouttes d’eau.
4. Positionner le Q-PAK dans son logement. Maintenir fermement le
MILLI-Q 185 PLUS (D) et emboiter le pack (E) en créant de légers
mouvement de pivotement.
5. Verrouiller la poignée de maintien du pack (F).
4
INSTALLATION
3
U T I L I S AT I O N
○ ○ ○ ○ ○ ○ ○ ○ ○ ○ ○ ○ ○ ○ ○ ○ ○ ○ ○ ○ ○ ○ ○ ○ ○ ○ ○ ○ ○ ○ ○ ○ ○ ○ ○ ○ ○ ○ ○ ○ ○ ○ ○ ○ ○ ○ ○ ○ ○ ○ ○ ○ ○ ○ ○ ○ ○ ○ ○ ○ ○ ○ ○ ○ ○ ○ ○ ○ ○ ○ ○ ○ ○ ○ ○ ○ ○ ○
• Modes de fonctionnement
Le MILLI-Q 185 PLUS présente plusieurs modes de fonctionnement controlés par le clavier ou par le programme interne de l’appareil.
Les modes de fonctionnement sont répertoriés ci-dessous :
MODES DE FONCTIONNEMENT
ACTION
ETAT DU MILLI-Q 185 PLUS
STANDBY
Appui sur le bouton
OPERATE/STANDBY.
L’appareil est en état de veille.
TEMPERATURE : 25 °C
Appui sur le bouton TEMPERATURE
en mode STANDBY.
Affichage de la température de référence 25 °C.
TEST:..,. MΩ.cm
Appui sur le bouton
OPERATE/STANDBY.
Affichage de la calibration de l’appareil
(15 ± 1 MΩ.cm, pendant 4 secondes).
PRODUCT:..,.MΩ.cm
4 secondes après l’appui
sur le bouton OPERATE/STANDBY.
Affichage de la résistivité de l’eau
mesurée pendant la production.
TEMPERATURE:..°C
Appui sur le bouton TEMPÉRATURE
en mode de production ou
RECIRCULATION.
Affichage de la température de l’eau à la
sortie du pack de purification.
RECIRCULATION
Automatique.
Fonctionnement séquencé de l’appareil pendant le mode
STANDBY pour maintenir la qualité de l’eau,15 mn toutes les
heures. Le mode RECIRCULATION est activé à chaque mise
sous tension et 45 mn après le passage en mode STANDBY.
UTILISATION
5
• Messages complémentaires
MESSAGES ÉMIS
ETAT DU MILLI - Q PLUS 185
PRODUCT : XX MΩ.cm
S'affiche lorsque la mesure de résistivité est hors échelle. Se reporter au chapitre MAINTENANCE.
TEST INCORRECT
S’affiche lorsque l’affichage test est < 14 MΩ ou > 16 MΩ. Se reporter au chapitre MAINTENANCE.
BATTERY
Les informations sauvegardées lors de la dernière mise hors tension du MILLI-Q 185 PLUS ont été perdues.
Se reporter au chapitre MAINTENANCE.
EXCHANGE PACK
- Clignote lorsque le Q-PAK doit être changé. Se reporter au chapitre ENTRETIEN.
- Allumé lorsque le Q-PAK n’est pas en place ou mal engagé. Se reporter au chapitre MAINTENANCE.
U.V.
- Clignote pendant 30 secondes à la mise sous tension de la lampe U.V. (montée en température de la lampe).
- Allumé lorsque la lampe U.V. est allumée et que son efficacité est optimum.
• Utilisation du clavier
Le clavier permet de contrôler le mode de fonctionnement de l’appareil et d’afficher certains paramètres.
DESIGNATION
6
FONCTION
OPERATE/STANDBY
En appuyant sur cette touche, on fait apparaître successivement les modes STANDBY et Production.
TEMPERATURE
- En mode STANDBY : en appuyant sur cette touche la température de référence 25 °C est affichée. Lorsque la
touche est relachée, l’affichage de la température disparait après 3 secondes.
- En mode RECIRCULATION ou production : en appuyant sur cette touche la température de l’eau est affichée.
Lorsque la touche est relachée, l’affichage de la température disparait après 3 secondes.
UTILISATION
• Connexion électrique à l’arrière
Entrée REMOTE STANDBY. Cette entrée permet le contrôle
à distance du fonctionnement du MILLI-Q 185 PLUS (Modes REMOTE
STANDBY/Production) contacter le service technique Millipore pour
informations.
• Mise en service (Figure 7)
1. S’assurer que le Q-PAK est bien en place et que les raccordements
sont bien effectués.
8. Après avoir soutiré 5 à 7 litres d’eau, mettre la vanne 3␣ voies (A) sur
la position RECIRCULATION, appuyer 2 fois sur le bouton
OPERATE/STANDBY pour mettre l’appareil en mode STANDBY.
Si possible, laisser l’appareil une nuit dans cet état pour permettre
aux composants du pack de se réhydrater.
9. Le lendemain matin, appuyer sur le bouton OPERATE/STANDBY,
TEST: ..,. MΩ.cm s’affiche 4 secondes, puis 2 secondes après le
voyant U.V. clignote pendant 30 secondes avant d’être allumé en
permanence. Prélever 2 à 3 litres d’eau.
Remettre l’appareil en mode STANDBY en appuyant sur le bouton
OPERATE/STANDBY.
2. Ouvrir la vanne d’alimentation en eau.
3. Placer la vanne 3 voies RECIRCULATION/PRODUCTION (A) sur la
position PRODUCTION.
• Mise en place du filtre final MILLIPAK 40
(Figure 8)
4. Placer un récipient (B) sous le raccord (C) de fixation du filtre
0,22 µm.
Lorsque le Q-PAK a été purgé, on peut procéder au montage du filtre
MILLIPAK :
5. Mettre l’appareil sous tension en appuyant sur l’interrupteur
Marche/Arrêt (voir figure 1(P)). L’afficheur doit indiquer
RECIRCULATION. Si l’affichage BATTERY apparait, couper le secteur
pendant 2␣ secondes.
1. Recouvrir le filetage (A) du filtre MILLIPAK avec 2 à 3 tours de ruban
Téflon (B) pour une bonne étanchéité.
6. Si l’appareil est alimenté à travers un régulateur de pression, ajuster
la pression de sortie entre 0,5 et 1 bar lorsque le MILLI-Q 185 PLUS
est en production (vanne 3 voies (A) sur la position PRODUCTION).
7. Laisser l’appareil en fonctionnement pour que l’eau s’écoule en
purgeant l’air par le point de soutirage. Contrôler le remplissage du
récipient avec la vanne 3 voies (A).
2. Visser le MILLIPAK sur le raccord femelle (C) du point de soutirage
du MILLI-Q 185 PLUS. S’assurer que l’évent (D) est accessible.
3. Appuyer sur le bouton OPERATE/STANDBY pour mettre l’appareil
en mode de production. Mettre la vanne 3 voies sur la position
PRODUCTION.
4. Purger l’air contenu dans le filtre MILLIPAK en dévissant légèrement
le bouchon de l’évent (E).
UTILISATION
7
5. Lorsque l’eau s’écoule et que la poche d’air a disparu, resserrer le
bouchon de purge.
6. Placer la vanne 3 voies sur la position RECIRCULATION et mettre
l’appareil en mode STANDBY.
7. Insérer le filtre MILLIPAK dans le clip (F) du capot de protection (G).
8. Monter le MILLIPAK et son capot sur le MILLI-Q 185 PLUS en pressant légèrement les languettes (H) situées de chaque côté du capot et
en les insérant dans les 2 fentes (J) prévues à cet effet.
Le MILLI-Q 185 PLUS est alors prêt à fonctionner.
• Soutirage de l’eau
1. Appuyer sur le bouton OPERATE/STANDBY (voir figure 1(I)) pour
mettre l’appareil en mode de production.
2. Après 6 secondes le voyant U.V. (voir figure 1(G)) clignote. Attendre
encore 30 secondes que le voyant soit allumé et que la résistivité
atteigne 18.2 MΩ.cm avant de soutirer de l’eau. Cette temporisation
permet à la lampe d’atteindre sa température optimum de fonctionnement.
3. Soutirer l’eau nécessaire à votre application en positionnant la vanne
3␣ voies (voir figure 1(D)) sur PRODUCTION.
4. Remettre la vanne 3␣ voies sur la position RECIRCULATION.
Appuyer sur le bouton OPERATE/STANDBY pour mettre l’appareil
en mode STANDBY.
8 UTILISATION
NOTA : Lorsque vous ne puisez pas d’eau, laisser le MILLI-Q 185 PLUS
en mode STANDBY. Afin de maintenir la qualité de l’eau entre
chaque utilisation, l’appareil recircule l’eau automatiquement
15 mn toutes les heures (affichage RECIRCULATION).
En mode STANDBY, positionner la vanne 3␣ voies sur RECIRCULATION
pour éviter tout écoulement de l’eau pendant le mode
RECIRCULATION.
4
ENTRETIEN
○ ○ ○ ○ ○ ○ ○ ○ ○ ○ ○ ○ ○ ○ ○ ○ ○ ○ ○ ○ ○ ○ ○ ○ ○ ○ ○ ○ ○ ○ ○ ○ ○ ○ ○ ○ ○ ○ ○ ○ ○ ○ ○ ○ ○ ○ ○ ○ ○ ○ ○ ○ ○ ○ ○ ○ ○ ○ ○ ○ ○ ○ ○ ○ ○ ○ ○ ○ ○ ○ ○ ○ ○ ○ ○ ○ ○ ○
• Tableau de périodicités
NOTA : Il est préférable d’effectuer cet échange le soir pour pouvoir laisser
le Q-PAK se réhydrater pendant la nuit.
PERIODICITÉ
Lorsque la lampe EXCHANGE
PACK clignote ou lorsque
la résistivité n’atteint plus
18,2 MΩ.cm après quelques
minutes de RECIRCULATION.
ACTION
Changer le pack de purification
Q-PAK et le filtre final MILLIPAK 40.
• Remplacement du filtre final MILLIPAK 40
(Figure 8)
1. Mettre le MILLI-Q 185 PLUS en mode STANDBY.
Tous les ans ou lorsque le voyant Changer la lampe U.V.
U.V. ne s’allume plus.
2. Appuyer sur les languettes (H) du capot (G) pour retirer le capot et le
MILLIPAK.
Lorsque le débit de soutirage à
Changer le filtre final MILLIPAK 40.
travers le filtre final devient faible. Si celui-ci est en place depuis peu
de temps, vérifier la qualité de
l’eau d’alimentation du
MILLI-Q␣ 185 PLUS.
3. Tirer sur le capot pour le dessolidariser du MILLIPAK.
• Remplacement du pack de purification
1. Mettre le MILLI-Q 185 PLUS en mode STANDBY, ne pas couper le
secteur.
2. Déverrouiller la poignée de maintien (voir figure 1(F)).
3. Retirer le Q-PAK usagé en le tirant.
4. Installer le Q-PAK neuf comme décrit dans le chapitre INSTALLATION.
4. Dévisser le MILLIPAK usage.
5. Installer le MILLIPAK neuf comme décrit dans le chapitre INSTALLATION.
• Remplacement de la lampe U.V. (Figure 9)
Le capot arrière de l’appareil doit être démonté. Dans le cas d’un montage
mural, le MILLI-Q 185 PLUS doit être enlevé de son support.
1. Mettre l’appareil hors tension et débrancher le cordon secteur.
2. Dévisser le bouton moleté (voir figure 1(L)) et eventuellement l’écrou
de la tige du montage mural (voir figure 1(K)) si elle existe.
3. Enlever le capot arrière en le glissant vers l’arrière.
ENTRETIEN
9
4. Débrancher le connecteur (A) de la lampe U.V.
5. Dévisser la bague de serrage (B), retirer le tube de quartz (D), la
lampe U.V. usagée et le joint torique (E).
6. Mettre en place le nouveau tube de quartz contenant la lampe U.V.
neuve.
UTILISER DES GANTS POUR MANIPULER CES ELEMENTS
Le tube repose sur un ressort qui le centre automatiquement.
7. Changer le joint torique (E), placer la bague d’appui (C) et visser la
bague de serrage (B).
8. Connecter la lampe U.V. (connecteur (A)).
9. Réinstaller le capot arrière, brancher le cordon secteur et mettre
l’appareil sous tension.
Vérifier le bon fonctionnement de la lampe : voyant U.V. allumé en
mode de production.
10
ENTRETIEN
5
MAINTENANCE
○ ○ ○ ○ ○ ○ ○ ○ ○ ○ ○ ○ ○ ○ ○ ○ ○ ○ ○ ○ ○ ○ ○ ○ ○ ○ ○ ○ ○ ○ ○ ○ ○ ○ ○ ○ ○ ○ ○ ○ ○ ○ ○ ○ ○ ○ ○ ○ ○ ○ ○ ○ ○ ○ ○ ○ ○ ○ ○ ○ ○ ○ ○ ○ ○ ○ ○ ○ ○ ○ ○ ○ ○ ○ ○ ○ ○ ○
• Tableau de maintenance
Lors de disfonctionnement du MILLI-Q 185 PLUS reportez vous au tableau ci-dessous. Ce tableau représente une première aide au diagnostic de panne,
si celui-ci ne s’averait pas suffisant, contacter le service de maintenance de Millipore (liste des adresses en fin de document).
CAUSES
DEFAUT
REMEDE
Le MILLI-Q 185 PLUS est
hors tension.
- La prise secteur n’est pas alimentée.
- Le cordon secteur est mal connecté.
- Le fusible secteur est défectueux.
- Le fusible du circuit imprimé est défectueux.
Vérifier votre installation électrique.
Vérifier les connexions.
Changer le fusible secteur. Voir annexe 1.
Changer le fusible du circuit imprimé. Voir annexe 2.
Le voyant EXCHANGE PACK
clignote.
Le Q-PAK doit être changé.
Voir chapitre ENTRETIEN.
Le voyant EXCHANGE PACK
est allumé.
Le Q-PAK est mal engagé ou enlevé.
Remettre en place le Q-PAK. Voir chapitre ENTRETIEN.
Le voyant U.V. ne s’allume pas
lorsque l’appareil est en
production ou en RECIRCULATION
automatique.
- Le fusible de protection de la lampe U.V.
est défectueux.
- La lampe U.V. est défectueuse.
- TEMPERATURE > 35 °C est affiché.
Changer le fusible du circuit imprimé de la lampe U.V.
Voir annexe 3.
Changer la lampe U.V. Voir chapitre ENTRETIEN.
La température de l’eau est trop élevée. Voir rubrique
TEMPERATURE > 35 °C.
BATTERY est affiché.
Batterie déchargée.
Mettre l’appareil sous tension pendant plus de 48 h
pour recharger la batterie.
Couper le secteur 2 secondes pour effacer l’information
BATTERY.
MAINTENANCE
11
DEFAUT
TEST INCORRECT est affiché
après le test 15 MΩ.cm.
CAUSES
- Mauvaise calibration du circuit température.
- Mauvaise calibration du circuit résistivité.
PRODUCT : XX MΩ cm est affiché
REMEDE
En mode STANDBY, appuyer sur le bouton
TEMPERATURE, TEMPERATURE 25 °C doit être affiché.
Appeler le service technique Millipore si cette valeur est
différente.
Si la température est bien calibrée en appuyant sur le
bouton OPERATE/STANDBY, TEST :␣ 15 MΩ.cm ±
1 MΩ doit être affiché. Appeler le service Technique
MILLIPORE si cette valeur est hors spécification.
- Présence d'air dans le circuit de mesure.
Purger le Q-PAK et le circuit de mesure en ouvrant la
vanne de puisage.
- Défaut de calibration du circuit de mesure
(TEST INCORRECT).
Calibrer le circuit de mesure (voir ci-dessus).
TEMPERATURE > 35 °C est affiché
pendant la production ou la
recirculation.
La température de l’eau a dépassé 36 °C et
doit redescendre à 35 °C pour autoriser
l’allumage de la lampe U.V.
- L’appareil est resté trop longtemps en mode
de production sans soutirage d’eau.
- La température de l’eau d’entrée ou la
température ambiante est trop élevée.
Mettre l’appareil en mode STANDBY, lorsqu’il n’est pas
utilisé. Soutirer de l’eau pour faire baisser la
température. S’il n’est pas possible de la réduire enlever
le cavalier E sur le circuit imprimé pour mettre cette
fonction hors service. Contacter le service de
maintenance MILLIPORE.
TEMPERATURE < 0 °C ou
TEMPERATURE > + °C est affichée
pendant la production.
- La température de l’eau d’entrée est
supérieure à 40 °C.
- La thermistance ou sa connexion est
défectueuse.
Vérifier l’alimentation en eau.
La résistivité de l’eau n’atteint pas
18.2 MΩ.cm après plusieurs
minutes de recirculation.
Le Q-PAK est saturé.
Changer le Q-PAK. Voir chapitre ENTRETIEN.
12
MAINTENANCE
Appeler le service de maintenance MILLIPORE.
DEFAUT
CAUSES
REMEDES
Pas de débit d’eau en production.
- Vanne d'alimentation en eau fermée.
- Electrovanne d'entrée défectueuse.
- Pompe désamorcée.
Ouvrir la vanne.
Appeler le service de maintenance MILLIPORE.
La pompe peut aspirer lorsqu’elle a été amorcée.
Introduire de l’eau dans l’appareil en l’alimentant par
gravité ou sous pression.
Faible débit d’eau en production.
- Défaut d’alimentation en eau.
Vérifier l’alimentation en eau de l’appareil.
Pression d’alimentation, section et longueur des tuyaux.
Purger le filtre. Voir chapitre UTILISATION, section mise
en service.
- Poche d’air dans le filtre MILLIPAK 40.
- Filtre MILLIPAK 40 colmaté.
MAINTENANCE
13
14
MAINTENANCE
6
ANNEXES
○ ○ ○ ○ ○ ○ ○ ○ ○ ○ ○ ○ ○ ○ ○ ○ ○ ○ ○ ○ ○ ○ ○ ○ ○ ○ ○ ○ ○ ○ ○ ○ ○ ○ ○ ○ ○ ○ ○ ○ ○ ○ ○ ○ ○ ○ ○ ○ ○ ○ ○ ○ ○ ○ ○ ○ ○ ○ ○ ○ ○ ○ ○ ○ ○ ○ ○ ○ ○ ○ ○ ○ ○ ○ ○ ○ ○ ○
• Annexe 1 : Remplacement du fusible secteur
(Figure 10)
• Annexe 3 : Remplacement du fusible du circuit
imprimé de la lampe U.V. (Figure 11)
1. Mettre hors tension le MILLI-Q 185 PLUS.
2. Débrancher et déconnecter le cordon secteur.
3. Dégager le porte-fusibles (A).
4. Retirer le fusible défectueux (B) et le remplacer par le fusible neuf
(C).
Même procédure que l’annexe 2, changer le fusible (D) du circuit imprimé
de la lampe U.V. (B).
NOTA : Prévoir un fusible de remplacement à l’endroit prévu à cet effet.
5. Replacer le porte-fusibles dans son logement.
• Annexe 2 : Remplacement du fusible circuit
imprimé principal (Figure 11)
1. Mettre hors tension le MILLI-Q 185 PLUS. Débrancher le cordon
secteur.
2. Dévisser l’écrou moleté (voir figure 1(L)) pour enlever le capot
arrière.
3. Changer le fusible (C) du circuit imprimé principal (A).
ANNEXES
15
16
ANNEXES
7
G U I D E D ' A C H AT
○ ○ ○ ○ ○ ○ ○ ○ ○ ○ ○ ○ ○ ○ ○ ○ ○ ○ ○ ○ ○ ○ ○ ○ ○ ○ ○ ○ ○ ○ ○ ○ ○ ○ ○ ○ ○ ○ ○ ○ ○ ○ ○ ○ ○ ○ ○ ○ ○ ○ ○ ○ ○ ○ ○ ○ ○ ○ ○ ○ ○ ○ ○ ○ ○ ○ ○ ○ ○ ○ ○ ○ ○ ○ ○ ○ ○ ○
Description
Référence
SYSTEME
MILLI-Q 185 PLUS, 220 V/ 50Hz
(QPAK non inclu)
ZFMQ 050 UV
CONSOMMABLES
Kit QPAK 1 (MILLI-Q alimenté par eau osmosée)
(comprend 1x QPAK 1 et un filtre MILLIPAK)
CPMQ K05 R1
QPAK 1 seul
CPMQ 004 R1
Kit QPAK 2 (MILLI-Q alimenté par eau déionisée)
(comprend 1 QPAK 2 et un filtre MILLIPAK)
CMPQ K05 D2
QPAK 2 seul
CMPQ 004 D2
Filtre MILLIPAK 0,22 µm (2/pq)
MPGL 04S K2
Kit de remplacement de la lampe UV
CFMQ 185 01
Régulateur de pression pour l'eau d'entrée
ZFMQ 000 PR
Dispositif pour montage mural
ZFMQ 00W MB
ACCESSOIRES
GUIDE D'ACHAT 17
18 GUIDE D'ACHAT
DEUTSCH
• Inhaltsangabe
Inhaltsangabe
i
1
Kapitel 5 : Störungsbeseitigung
Übersichtstabelle
11
11
Kapitel 6 : Anhang
Anhang 1 : Auswechseln der Hauptsicherung
Anhang 2 : Sicherungswechsel auf der Hauptplatine
Anhang 3 : Auswechseln der Sicherung für die UV-Lampe
15
15
15
15
17
Kapitel 1: Einleitung
Allgemeine Beschreibung
Beschreibung der Funktionen
Fließschema
Spezifikationen
1
1
2
Kapitel 2 : Installation
Lieferumfang
Montage des MILLI-Q 185 PLUS Systems
Installation
Einbau des Q-Pak Aufbereitungsmoduls
3
3
3
3
4
Kapitel 7 : Bestellinformationen
Kapitel 3 : Betrieb
Standardbetriebsfunktionen
Zusätzliche Anzeigen
Tastatureingaben
Elektrische Anschlüsse
Inbetriebnahme
Einbau des Millipak 40 Endfilters
Wasserentnahme
5
5
6
6
7
7
7
8
Kapitel 9 : Zusätzliche Informationen
Technische Hinweise
Gewährleistung
Kapitel 4 : Wartung
Wartungshinweise
Austausch des Q-Pak Aufbereitungsmoduls
Austausch des Millipak 40 Endfilters
Auswechseln der UV-Lampe
9
9
9
9
9
Am Ende der Bedienungsanleitung :
Kapitel 8 : Abbildungen
i
i i
1
EINLEITUNG
○ ○ ○ ○ ○ ○ ○ ○ ○ ○ ○ ○ ○ ○ ○ ○ ○ ○ ○ ○ ○ ○ ○ ○ ○ ○ ○ ○ ○ ○ ○ ○ ○ ○ ○ ○ ○ ○ ○ ○ ○ ○ ○ ○ ○ ○ ○ ○ ○ ○ ○ ○ ○ ○ ○ ○ ○ ○ ○ ○ ○ ○ ○ ○ ○ ○ ○ ○ ○ ○ ○ ○ ○ ○ ○ ○ ○ ○
• Allgemeine Beschreibung
• Beschreibung der Funktionen
Das MILLI-Q 185 PLUS System wurde speziell zur Herstellung ultrareinen
Wassers mit dem niedrigsten Gehalt an Organika, der derzeit erreicht
werden kann, entwickelt. Diese Wasserqualität kann erreicht werden,
indem man zur Speisung des Systems Laborwasser, das durch
Umkehrosmose oder Destillation vorgereinigt wurde, verwendet. Das
MILLI-Q 185 PLUS System produziert bei Bedarf bis zu 1,5 l/min ultrareines
Wasser. Diese Wasserqualität sollte für alle kritischen Anwendungen, bei
denen ein möglichst niedriger Gehalt an Organika verlangt wird, eingesetzt
werden:
z. B. kritische HPLC, GC/MS, Langmuir Blodgett Monolayers, usw. Die
Hauptkomponenten, aus denen das MILLI-Q 185 PLUS System aufgebaut
ist, sind wie folgt in Abbildung 1 dargestellt :
Das vorgereinigte Speisewasser (Umkehrosmosewasser oder Destillat)
wird durch eine eingebaute Pumpe durch eine Kammer gefördert, in der
das Speisewasser ultraviolettem Licht (UV) mit niedrigen Wellenlängen
(185 nm + 254 nm) ausgesetzt wird. Dieses leitet die Oxidation von
gelösten organischen Verbindungen ein, die nach dem Vorreinigungsprozeß
(Umkehrosmose oder Destillation) noch im Wasser verblieben sind. Die
UV-Bestrahlung hat auch eine bakterizide Wirkung. Das UV-behandelte
Speisewasser wird dann durch das Q-Pak Aufbereitungsmodul geführt, in
dem die ionischen Verbindungen entfernt werden. Ein eingebautes
3-Wege-Ventil gestattet die Rezirkulation des Wassers, bis die gewünschte
Wasserqualität erreicht ist. Nach Erreichen der gewünschten Wasserqualität
erlaubt die Drehung des 3-Wege-Ventils die Passage des Wassers durch
den Millipak 40 Endfilter zur Entnahmestelle.
(A) Wasseraufbereitungsmodul - Q-Pak 1
(B) Geschützte Entnahmestelle
(C) Endfilter an der Entnahmenstelle, Millipak 40 Filtereinheit mit
0,22␣ µm Membran
(D) 3-Wege-Ventil an der Entnahmestelle
(E) Tastatur mit Anzeige
(F) Q-Pak Sicherungshebel
(G) Kontrolleuchten
(H) LCD-Anzeige
(I) Tastatur
(J) Anschluß des Speisewassers
(K) Abnehmbarer Stopfen - Vorrichtung für Wandmontage
(L) Rändelschraube zur Sicherung des rückwärtigen Teils des Systems
(M) Anschlußbuchse für Fernbedienung
(N) Netzsteckeranschluß
(O) Halter für die Hauptsicherung
(P) Ein-/Ausschalter
(Q) Wärmeableitung
• Fließschema
Eine schematische Darstellung des Betriebes des MILLI-Q 185 PLUS
Systems zeigt die Abbildung 2 wie folgt:
(A)
(B)
(C)
(D)
(E)
(F)
(G)
(H)
Einlaßventil
Pumpe
UV-Lampe mit Gehäuse
Q-Pak Wasseraufbereitungsmodul
Widerstandsmeßzelle zur Messung der Wasserqualität
3-Wege-Ventil
Millipak 40 Endfilter (0,22 µm)
Druckhalteventil
EINLEITUNG
1
• Spezifikationen
Abmessungen
Höhe
Breite
Tiefe
Betriebsgewicht
495 mm (19.5 in)
297 mm (11.7 in)
433 mm (17 in)
17 kg
Elektrische Spezifikationen
230 V/50Hz - 180 VA
1 Amp slow blow Sicherung
Hydraulische Spezifikationen
Speisewasserzuleitung
Äußerer Durchmesser 8 mm
Maximale Länge 3 m
Speisewasserdruck
Minimum 0,03 bar (0,5 psi)
Speisewasserfließrate
Maximal - 1,0 bar (15 psi)
1,5 l/min
Leistung
Produktwasserfließrate
T.O.C. (Total Oxidisable Carbon)
2
EINLEITUNG
1,5 l/min maximum
< 5 ppb, typischer Wert nach
Anatel A 100 P
2
I N S TA L L AT I O N
○ ○ ○ ○ ○ ○ ○ ○ ○ ○ ○ ○ ○ ○ ○ ○ ○ ○ ○ ○ ○ ○ ○ ○ ○ ○ ○ ○ ○ ○ ○ ○ ○ ○ ○ ○ ○ ○ ○ ○ ○ ○ ○ ○ ○ ○ ○ ○ ○ ○ ○ ○ ○ ○ ○ ○ ○ ○ ○ ○ ○ ○ ○ ○ ○ ○ ○ ○ ○ ○ ○ ○ ○ ○ ○ ○ ○ ○
• Lieferumfang
• Installation
Beim Auspacken des MILLI-Q 185 PLUS Systems sollten Sie die in der
Abbildung 3 gezeigten Gegenstände vorfinden :
SPEISEWASSERANSCHLUSS (ABBILDUNG 5)
Speisung aus einem Tank :
(A) MILLI-Q 185 PLUS System
(B) Netzkabel
(C) Abdeckung für Endfiltereinheit
(D) Betriebsanleitung
(E) Adapter, 1/2" außen - 8 mm Schlauchschnellverschluß mit
eingebautem Edelstahlsieb
(F) Teflonband
Separat zu bestellendes Zubehör:
(G) Q-Pak Aufbereitungsmodul
(H) Endfiltereinheit - Millipak 40 (0,22 µm).
Zubehör G + H = Kat.-Nr. CPMQK05R1.
• Montage des MILLI-Q 185 PLUS Systems
Das MILLI-Q 185 PLUS System kann leicht auf einem Labortisch stehend
oder an der Wand installiert werden. Wenn Sie das System an eine Wand
montieren möchten, bestellen Sie bitte die Wandhalterung
(Kat.-Nr␣ .␣ ZFMQ␣ 00W MB) und stellen Sie sicher, daß die Wand das
Betriebsgewicht der Einheit (17 kg) tragen kann.
Abbildung 4 zeigt den Anschluß de MILLI-Q 185 PLUS systems mit
verschiedenen Speisewasseroptionen (Tank oder Druckleitung).
Hinweis : Das Absperrventil (in der Druckleitung), der Druckminderer und
das Manometer, wie sie in Abbildung 4 gezeigt werden, sind nicht im
Lierferumfang enthalten.
1. Schneiden Sie den Speisewasserschlauch (C) auf die gewünschte
Länge (< 3 m).
2. Entfernen Sie die Schutzkappe (B) von der Einlaßverbindung (D),
indem Sie auf den Klemmring (A) drücken und den Stopfen
herausziehen.
3. Schließen Sie den Speisewasserschlauch (C) an die Einlaßverbindung an, indem Sie den Schlauch fest in die Schnellverbindung
einstecken. Stellen Sie sicher, daß die Verbindung hält, indem Sie
mehrmals am Schlauch ziehen.
4. Verbinden Sie den Schlauch mit dem Ventil am Auslaß des Tanks.
Dieses Ventil sollte bereits mit einem Adapter versehen sein, um
einen Schlauch mit 8mm Durchmesser aufnehmen zu können.
SPEISUNG AUS EINER RINGLEITUNG
1. Beträgt der Eingangsdruck mehr als 1 bar, muß dieser reduziert
werden. Setzen Sie hierzu den Druckminderer
(Kat.-Nr.␣ ZFMQ␣ 000␣ PR) ein.
2. Verbinden Sie die Speisewasserzuführung (C) mit dem Ausgang des
Druckminderers.
INSTALLATION
3
• Einbau des Q-Pak Aufbereitungsmoduls
(Abbildung 6)
1. Entriegeln Sie den Sicherungshebel für das Q-Pak Modul, indem Sie
auf die Verschlußraste drücken und den Hebel nach unten links
ziehen. Entfernen Sie die Schutzkappen (A).
2. Entfernen Sie die Schutzkappen (B) am Q-Pak.
3. Befeuchten Sie die zwei O-Ringe (C) des Q-Paks mit ein paar
Tropfen Wasser.
4. Setzen Sie das Q-Pak in das System an die dafür vorgesehene Stelle
ein. Halten Sie das MILLI-Q 185 PLUS System (D) mit einer Hand
fest, währenddessen Sie das Modul mit der anderen Hand in das
System einschieben (E). Wenn notwendig, rücken Sie das Q-Pak
leicht hin und her.
5. Führen Sie den Sicherungshebel wieder in seine Position nach rechts
und lassen ihn einrasten (F).
4
INSTALLATION
3
BETRIEB
○ ○ ○ ○ ○ ○ ○ ○ ○ ○ ○ ○ ○ ○ ○ ○ ○ ○ ○ ○ ○ ○ ○ ○ ○ ○ ○ ○ ○ ○ ○ ○ ○ ○ ○ ○ ○ ○ ○ ○ ○ ○ ○ ○ ○ ○ ○ ○ ○ ○ ○ ○ ○ ○ ○ ○ ○ ○ ○ ○ ○ ○ ○ ○ ○ ○ ○ ○ ○ ○ ○ ○ ○ ○ ○ ○ ○ ○
• Standardbetriebsfunktionen
Das MILLI-Q 185 PLUS System führt bestimmte Betriebsfunktionen durch.
Einige können über die Tastatur aktiviert werden, andere sind vorprogrammiert und laufen automatisch ab.
BETRIEBSZUSTANDSSYSTEMS
AKTIVIERUNG
STATUS DES MILLI-Q 185 PLUS ANZEIGE
STANDBY
Drücken Sie auf OPERATE/STANDBY,
wenn das Gerät im OPERATE Modus ist.
Das System ist im STANDBY Modus und produziert kein
aufgereinigtes Wasser.
TEMPERATURE 25° C
Drücken Sie auf TEMPERATURE, wenn
das Gerät im STANDBY Modus ist.
Anzeigen der Referenztemperatur 25 ° C.
(Kalibrierungstemperatur).
TEST: ; MΩ.cm
Drücken Sie auf OPERATE/STANDBY,
wenn das System im STANDBY
Modus ist.
Anzeige der Ergebnisse des automatischen Selbsttests, zur
Verifizierung der Systemkalibrierung (15 + 1 MΩ.cm wird für
4 Sekunden angezeigt).
PRODUCT: ; MΩ.cm
Die Anzeige erscheint automatisch für
4 Sekunden, nachdem OPERATE/
STANDBY gedrückt wurde, wenn das
System im STANDBY Modus war.
Diese Anzeige erscheint nach der
Anzeige des Autotests.
Anzeige des Widertandes des Produktwassers.
TEMPERATURE : °C
Drücken Sie auf TEMPERATURE, wenn
das System im OPERATE oder
RECIRCULATION Modus ist.
Anzeige der Produktwassertemperatur am Q-Pak Auslaß.
RECIRCULATION
Automatische Funktion, wenn das System
im STANDBY Modus ist.
Periodische Funktion des Systems während des STANDBY Modus.
Das System rezirkuliert das Wasser automatisch in jeder stunde für
15 Minuten, um eine entsprechend hohe Wasserqualität während
der Nichtbenutzung aufrecht zu erhalten. Die15-minütige Rezirkulationsphase beginnt 45 Minuten, nachdem das System in den
STANDBY Modus geschaltet wurde. Danach rezirkuliert das System
jede Stunde, wenn es im STANDBY Modus steht. Zusätzlich wird die
Rezirkulation bei jedem Einschalten aktiviert.
BETRIEB
5
• Zusätzliche Anzeigen
Anzeige
Status des MILLI-Q 185 PLUS Systems
TEST INCORRECT
Wird angezeigt, wenn das Ergebnis des Autotests bei < 14 MΩ.cm oder > 16 MΩ.cm liegt.
Siehe Kapitel : STÖRUNGSBESEITIGUNG
BATTERY
Die Batterie des PC-Board ist entladen. Die gespeicherten Daten gingen verloren als das System ausgeschaltet
wurde. Siehe Kapitel: STÖRUNGSBESEITIGUNG
EXCHANGE PAK
Leuchtet auf, wenn das Q-Pak ausgewechselt werden sollte. Siehe Kapitel : WARTUNG. Leuchtet ständig, wenn
das Q-Pak nicht eingebaut ist oder nicht korrekt in der Halterung sitzt. Siehe Kapitel : STÖRUNGSBESEITIGUNG
U. V.
Leuchtet für 30 Sekunden auf, wenn die UV-Lampe eingeschaltet wird (Aufheizen der Lampe). Leuchtet ständig,
wenn die UV-Lampe in Betrieb ist und ihre Effizienz ein Optimum erreicht hat.
• Tastatureingaben
Die Tastatur gestattet dem Verwender den Betriebsmodus des Systems zu steuern und eine Anzahl von vorgegebenen Parametern anzuzeigen, die für
das korrekte Funktionieren des Systems Voraussetzung sind.
Bezeichnung de Tasten
6
Funktion
OPERATE/STANDBY
Drücken der Taste aktiviert hinterein-ander den OPERATE und STANDBY Modus.
TEMPERATURE
Während des STANDBY Modus: Drücken der Taste während des STANDBY Modus führt zur Anzeige der
Referenztemperatur 25°C. Wird die Taste anschließend losgelassen, verschwindet die Temperaturanzeige nach
3␣ Sekunden.
Während des RECIRCULATION Modus oder OPERATE Modus : Bei Drücken der Taste während dieser Modi wird
die im System vorherrschende Produktwassertemperatur angezeigt. Nach Loslassen des Knopfes verschwindet die
Temperaturanzeige innerhalb von 3 Sekunden.
BETRIEB
• Elektrische Anschlüsse (an der Rückseite des
Systems)
REMOTE STANDBY Anschluß : dieser Anschluß gestattet es, das
MILLI-Q␣ 185 PLUS System mittels einer externen Fernbedienung zu steuern
(REMOTE STANDBY/OPERATE Modus). Für weitere Informationen
betreffend dieser Funktion setzen Sie sich bitte mit dem Technischen Service
Ihrer Millipore Niederlassung in Verbindung.
• Inbetriebnahme (Abbildung 7)
1. Stellen Sie sicher, daß das Q-Pak korrekt eingebaut ist und alle
Verbindungen korrekt hergestellt wurden.
2. Öffnen Sie die Speisewasserzufuhr.
3. Stellen Sie das Entnahme 3-Wege-Ventil (A) von RECIRCULATION/
PRODUCTION auf die Position PRODUCTION.
4. Stellen Sie einen Auffangbehälter (B) unter den Auslaßanschluß (C)
für die Millipak-40 Endfilter Einheit.
5. Schalten Sie das System ein, indem Sie den Hauptschalter ON/OFF
auf der Rückseite drücken (Abbildung 1 (P)). Die Anzeige zeigt nun
RECIRCULATION an. Falls die Anzeige BATTERY erscheint, schalten
Sie das System für 2 Sekunden aus und dann wieder ein.
6. Falls das System über eine Ringleitung mit Druckminderer gespeist
wird, stellen Sie den Ausgangsdruck am Druckminderer zwischen
0,5 und 1 bar ein, während das MILLI-Q 185 PLUS System auf
PRODUCTION steht (der 3-Wege-Hahn (A) ist offen in der Position
PRODUCTION und Wasser fließt aus dem Anschluß (C) ).
7. Lassen Sie das System laufen, wobei Wasser an dem Anschluß (C)
austritt. Dies gestattet das Entweichen jeglicher Luft aus dem System
und dem Q-Pak. Kontrollieren Sie das Füllen des Systems durch
mehrmaliges Öffnen und Schließen des 3-Wege-Ventils (A).
8. Nachdem Sie ungefähr 5-7 Liter Wasser aus dem Anschluß (C)
gezapft haben, stellen Sie das 3-Wege-Ventil (A) auf die Position
RECIRCULATION. Drücken Sie die OPERATE/STANDBY Taste
zweimal, um das System in den STANDBY Modus zu schalten. Wenn
möglich, belassen Sie das System in diesem Modus über Nacht,
damit der Inhalt des Q-Paks ausreichend quellen kann.
9. Drücken Sie am nächsten Morgen die OPERATE/STANDBY Taste:
Test: ..., MΩ.cm wird für 4 Sekunden angezeigt. 2 Sekunden später
leuchtet die Anzeige für die UV-Lampe für 30 Sekunden auf,
während die Lampe aufgeheizt wird. Nach 30 Sekunden leuchtet die
Anzeigelampe kontinuierlich. Entnehmen Sie nun 2-3 Liter Wasser.
Stellen Sie das System zurück auf den STANDBY Modus durch
einmaliges Drücken der OPERATE/STANDBY Taste.
• Einbau des Millipak 40 Endfilters (Abbildung 8)
Nach vollständiger Entlüftung und Quellung des Q-Paks über Nacht, kann
der Millipak Endfilter eingebaut werden.
1. Umwickeln Sie das Gewinde (A) der Millipak Filtereinheit mit 2-3
Lagen Teflonband, um eine Wasserabdichtung zu erreichen.
2. Schrauben Sie die Millipak Filtereinheit in den
Innengewindeanschluß (C) der Entnahmestelle des MILLI-Q 185
PLUS Systems. Stellen Sie sicher, daß die Entlüftung (D) zugänglich
ist.
BETRIEB
7
3. Drücken Sie die OPERATE/STANDBY Taste, um das System in den
OPERATE Modus zu stellen. Drehen Sie das 3-Wege-Ventil auf
PRODUCTION.
4. Entlüften Sie die Millipak 40 Filtereinheit, indem Sie die
Entlüftungskappe (E) leicht öffenen.
5. Sobald Wasser aus der Entlüftung austritt und eingeschlossene Luft
verschwunden ist, ziehen Sie die Entlüftungskappe wieder an.
6. Stellen Sie das 3-Wege-Ventil in die Position RECIRCULATION und
stellen Sie das System in den STANDBY Modus.
7. Führen Sie den Millipak Endfilter in den Halter (F) der
Entnahmestellenabdeckung (G) ein.
8. Bauen Sie den Millipak Endfilter und die Entnahmeabdeckung am
MILLI-Q 185 PLUS System durch leichtes Drücken der Laschen (H),
die sich auf beiden Seiten der Abdeckung befinden, ein und lassen
Sie die beiden Laschen in den Vertiefungen (J), die für diesen Zweck
vorgesehen sind, einrasten. Das MILLI-Q 185 PLUS System ist nun für
den Einsatz vorbereitet.
• Wasserentnahme
1. Drücken Sie die Taste OPERATE/STANDBY (Abbildung 1), um das
System in den OPERATE Modus zu bringen.
2. Nach 6 Sekunden leuchtet die Anzeigeleuchte UV (Abbildung 1 (G))
auf. Warten Sie mit der Wasserentnahme weitere 30 Sekunden, bis
die Anzeige kontinuierlich leuchtet und der Widerstand einen Wert
von 18,2 MΩ.cm erreicht hat. Diese Verzögerung gestattet der
Lampe ihre optimale Temperatur zu erreichen.
3. Die Wasserentnahme erfolgt nun durch Drehen des 3-Wege-Ventils
(Abbildung 1 (D)) auf die Position PRODUCTION.
4. Nach der Wasserentnahme wird das 3-Wege-Ventil zurück auf die
Position RECIRCULATION gestellt. Drücken Sie die OPERATE/
STANDBY Taste, um das System in den STANDBY Modus zu
bringen.
Hinweis : Wenn Sie kein Wasser benötigen, lassen Sie das
MILLI-Q␣ 185␣ PLUS System im STANDBY Modus. Um die hohe
Wasserqualität konstant aufrecht zu erhalten, rezirkuliert das System
automatisch während der Phasen des Nichteinsatzes das Wasser in jeder
Stunde für 15 Minuten, wenn das System im STANDBY Modus steht. (Die
Anzeige zeigt während dieser Zeiten RECIRCULATION.)
Stellen Sie sicher, daß das 3-Wege-Ventil während des STANDBY Modus
in der Position RECIRCULATION steht, um zu verhindern, daß während der
15 minütigen Rezirkulation Wasser an der Entnahmestelle austritt.
8 BETRIEB
4
WA R T U N G
○ ○ ○ ○ ○ ○ ○ ○ ○ ○ ○ ○ ○ ○ ○ ○ ○ ○ ○ ○ ○ ○ ○ ○ ○ ○ ○ ○ ○ ○ ○ ○ ○ ○ ○ ○ ○ ○ ○ ○ ○ ○ ○ ○ ○ ○ ○ ○ ○ ○ ○ ○ ○ ○ ○ ○ ○ ○ ○ ○ ○ ○ ○ ○ ○ ○ ○ ○ ○ ○ ○ ○ ○ ○ ○ ○ ○ ○
• Wartungshinweise
Häufigkeit
Maßnahme
Wenn die Anzeige EXCHANGE
PAK aufleuchtet oder wenn der
Widerstand nach einigen Minuten
Rezirkulation keine 18,2 MΩ.cm
erreicht.
Ersetzen Sie das Q-Pak
Aufbereitungsmodul und den
Millipak 40-Endfilter.
Einmal im Jahr oder wenn die
Anzeige UV nicht mehr
aufleuchtet.
Ersetzen Sie die UV-Lampe.
Wenn die Fließrate durch den
Endfilter zu gering wird.
Ersetzen Sie den Millipak
40 Endfilter. Wurde der
endfilter erst vor kurzem
eingebaut, überprüfen Sie die
Qualität des Speisewassers zum
MILLI-Q 185 PLUS System.
Hinweis : Vorzugsweise wird der Austausch am Nachmittag oder
Abend vorgenommen, damit das Q-Pak im System über Nacht
quellen kann.
• Austausch des Millipak 40-Endfilters
(Abbildung 8)
1. Bringen Sie das MILLI-Q 185 PLUS System in den STANDBY Modus.
2. Drücken Sie auf die beiden Laschen (H) an der Entnahmeabdeckung
(G), um die Abdeckung und den Millipak abnehmen zu können.
3. Ziehen Sie an der Abdeckung, um sie von dem Millipak zu
entfernen.
4. Schrauben Sie den Millipak aus seiner Anschlußhalterung heraus.
5. Bauen Sie einen neuen Millipak, wie im Kapitel INSTALLATION
beschrieben, ein.
• Austausch des Q-Pak Aufbereitungsmoduls
• Auswechseln der UV-Lampe (Abbildung 9)
1. Bringen Sie das MILLI-Q 185 PLUS System in den STANDBY Modus.
SCHALTEN SIE DAS SYSTEM NICHT AUS.
Der rückwärtige Teil der Einheit muß entfernt werden. Wenn das
Milli-Q␣ Plus 185 System an der Wand installiert ist, nehmen Sie es von der
Wandhalterung.
2. Lösen Sie den Q-Pak Feststellhebel (siehe Abbildung 1 (F)).
3. Ziehen Sie das gebrauchte Q-Pak heraus.
1. Schalten Sie das System aus und ziehen Sie den Netzstecker
(Abbildung 1(N) (P)).
4. Bauen Sie das neue Q-Pak, wie im Kapitel INSTALLATION
beschrieben, ein.
WARTUNG
9
2. Lösen Sie die Rändelmutter (Abbildung 1(L)) und den Stift für die
Wandhalterung (Abbildung 1 (K), falls an der Wand montiert).
3. Entfernen Sie die rückwärtige Abdeckung, indem Sie sie rückwärts
abziehen.
4. Unterbrechen Sie die Verbindung (A) zur UV-Lampe.
5. Schrauben Sie den Befestigungsring (B) los, entnehmen Sie den
Quarzzylinder (D) und die gebrauchte UV-Lampe und entfernen Sie
den O-Ring (E), wie dargestellt.
6. Setzen Sie den neuen Quarzzylinder, der die neue UV-Lampe
enthält, ein. BENUTZEN SIE BAUMWOLLHANDSCHUHE, WENN SIE
DIESE ELEMENTE ANFASSEN. Der Zylinder sollte auf einer Feder
aufsitzen, die für die automatische Zentrierung in der korrekten
Position sorgt.
7. Setzen Sie den O-Ring (E) wieder ein, plazieren Sie den Druckring
(C) in seine Position und schrauben Sie den Befestigungsring (B) fest,
um den Einsatz zusammenzuhalten.
8. Schließen Sie die UV-Lampe an (Anschluß A).
9. Setzen Sie den rückwärtigen Teil wieder ein, schließen Sie den
Netzstecker an und schalten Sie das System auf ON. Stellen Sie das
einwandfreie Funktionieren der UV-Lampe sicher: Die Anzeigeleuchte
UV sollte während des OPERATE Modus brennen.
10
WARTUNG
5
STÖRUNGSBESEITIGUNG
○ ○ ○ ○ ○ ○ ○ ○ ○ ○ ○ ○ ○ ○ ○ ○ ○ ○ ○ ○ ○ ○ ○ ○ ○ ○ ○ ○ ○ ○ ○ ○ ○ ○ ○ ○ ○ ○ ○ ○ ○ ○ ○ ○ ○ ○ ○ ○ ○ ○ ○ ○ ○ ○ ○ ○ ○ ○ ○ ○ ○ ○ ○ ○ ○ ○ ○ ○ ○ ○ ○ ○ ○ ○ ○ ○ ○ ○
• Übersichtstabelle
Die folgende Übersicht unterstützt Sie dabei, eventuell auftretende Probleme mit dem MILLI-Q 185 PLUS System genauer zu diagnostiziren und zu lösen.
Wenn Sie sich unsicher sind, worin das Problem besteht oder wie das Problem zu lösen ist, wenden Sie sich bitte an die Serviceabteilung Ihrer
nächstgelegenen Millipore Niederlassung (eine Liste der Adressen finden Sie am Ende diese Bedienungsanleitung).
Problem
Grund
Lösung
Keine Stromversorgung zum
MILLI-Q 185 PLUS System,
Powerlampe leuchtet nicht.
- Keine Stromversorgung am Hauptanschluss.
- Netzkabel nicht angeschlossen.
- Hauptsicherung durchgebrannt.
- Platinensicherung durchgebrannt.
- Kontrollieren Sie das Stromkabel.
- Kontrollieren Sie die Verbindungen.
- Ersetzen Sie die Hauptsicherung (s.Anhang 1)
- Ersetzen Sie die Platinensicherung (s.Anhang 2)
EXCHANGE PAK Lampe leuchtet.
- Q-Pak muß ausgewechselt werden.
Ersetzen Sie das Q-Pak. Siehe Kapitel WARTUNG.
EXCHANGE PAK Lampe leuchtet
ständig.
- Q-Pak nicht vorhanden oder nicht korrekt
eingebaut.
Ersetzen Sie das Q-Pak.
Siehe Kapitel WARTUNG
Die UV-Anzeigelampe leuchtet
nicht, obwohl das System
produziert oder im
RECIRCULATION Modus steht.
- Die UV-Lampensicherung ist durchgebrannt.
- Ersetzen Sie die Sicherung für die UV-Lampe auf der
Platine (siehe Anhang 3).
- Ersetzen Sie die UV-Lampe. Siehe Abschnitt
WARTUNG.
- Die interne Wassertemperatur ist zu hoch.
Siehe TEMPERATURE > 35 °C.
Die Anzeige
BATTERY leuchtet auf
- Die Batterie ist entladen.
- Die UV-Lampe ist defekt.
- Temperatur >35 °C wird angezeigt.
Lassen sie das System für 48 Stunden eingeschaltet, um
die Batterie aufzuladen. Schalten Sie danach für 2
Sekunden das System aus, um die Anzeige BATTERY zu
löschen.
STÖRUNGSBESEITIGUNG
11
Grund
Lösung
TEST INCORRECT wird angezeigt,
wenn das System den Autotest
durchführt.
- Temperatur oder widerstand sind falsch
kalibriert .
Drücken sie die Taste TEMPERATURE während das
System im STANDBY Modus steht. TEMPERATURE 25␣ °C
sollte angezeigt werden.
Rufen Sie den Millipore Service an, falls der Wert nicht
angezeigt wird.
Falls die Temperatur korrekt kalibriert wurde, sollte
durch Drücken der Taste OPERATE/STANDBY die
Anzeige Test: 15.0 MΩ.cm (± 1 MΩ.cm) angezeigt
werden. Rufen Sie die Millipore Serviceabteilung an,
falls der spezifizierte Wert nicht erscheint.
Während des PRODUCTION oder
RECIRCULATION Modus wird
Temperature > 35 °C angezeigt.
- Die Wassertemperatur im System hat 36 °C
erreicht und muß auf < 35 °C gesenkt
werden, damit sich die UV-Lampe wieder
einschaltet.
Das System war zu lange im OPERATE
Modus, ohne daß Wasser entnommen
wurde.
- Die Speisewassertemperatur ist zu hoch.
- Stellen Sie das System in den STANDBY Modus, wenn
es nicht gebraucht wird.
- Entnehmen Sie Wasser vom System, um die
Temperatur zu senken und um ein Wiedereinschalten
der UV-Lampe zu erreichen.
- Sollte es nicht möglich sein, die
Speisewassertemperatur zu reduzieren, entfernen Sie
die Überbrückung E auf der Hauptplatine, um diese
Funktion außer Betrieb zu setzen. Rufen Sie die
Millipore Serviceabteilung an.
Auf der Anzeige erscheint
Temperature < 0°C oder
Temperature >+°C während des
OPERATE Modus.
- Speisewassertemperatur ist >40°C.
- Der Thermistor oder seine Anschlüsse zur
Widerstandszelle sind defekt.
- Prüfen Sie die Speisewassertemperatur und senken Sie
diese ggfs.
- Rufen Sie die Millipore Serviceabteilung an.
Problem
12
STÖRUNGSBESEITIGUNG
Problem
Grund
Lösung
Der Widerstand des Wassers im
System erreicht nicht 18.2 MΩ.cm
nach einigen Minuten der
Rezirkulation.
- Das Q-Pak ist erschöpft.
Ersetzen Sie das Q-Pak (siehe Abschnitt WARTUNG).
Es wird kein Wasser im OPERATE
Modus produziert.
- Absperrventil zum Speisewasser ist
geschlossen. Einlaßventil arbeitet nicht korrekt
- Die Pumpe läuft trocken.
Öffnen Sie das Absperrventil.
Rufen Sie die MILLIPORE Servicabteilung an. Die Pumpe
kann nur Wasser ziehen, wenn sie vollständig gefüllt ist.
Füllen Sie das System mit Wasser durch Schwerefluß
oder Druck.
Niedrige Fließrate im OPERATE
Modus.
- Unzureichende Speisewasserzufuhr.
- Kontrollieren Sie die Speisewasserzuleitung. Stellen Sie
den korrekten Druck, den Schlauchdurchmesser,
Schlauchlänge und die Fließrate sicher.
- Entfernen Sie die Luft aus dem Millipak 40 Endfilter
(siehe Kapitel BETRIEB, Absatz Inbetriebnahme).
- Der Millipak 40 Endfilter ist durch Luft
verblockt.
- Der Millipak 40 Endfilter hat sich zugesetzt.
- Ersetzen Sie den Millipak 40 Endfilter (siehe Kapitel
WARTUNG).
STÖRUNGSBESEITIGUNG
13
14
STÖRUNGSBESEITIGUNG
6
ANHANG
○ ○ ○ ○ ○ ○ ○ ○ ○ ○ ○ ○ ○ ○ ○ ○ ○ ○ ○ ○ ○ ○ ○ ○ ○ ○ ○ ○ ○ ○ ○ ○ ○ ○ ○ ○ ○ ○ ○ ○ ○ ○ ○ ○ ○ ○ ○ ○ ○ ○ ○ ○ ○ ○ ○ ○ ○ ○ ○ ○ ○ ○ ○ ○ ○ ○ ○ ○ ○ ○ ○ ○ ○ ○ ○ ○ ○ ○
• Anhang 1: Auswechseln der Hauptsicherung
(Abbildung 10)
• Anhang 3: Auswechseln der Sicherung für die
UV-Lampe (Abbildung 11)
1. Stellen Sie den Hauptschalter des Milli-Q Plus 185 Systems auf OFF.
Wechseln Sie die Sicherung (D) für die UV-Lampe auf der Hauptplatine (B) entsprechend der Anleitung in Anhang 2.
2. Unterbrechen Sie die Stromversorgung zum System durch Abziehen
des Stromversorgungskabel.
3. Entfernen Sie den Sicherungshalter (A) (Position O in Abbildung 1 ).
4. Entfernen Sie die defekte Sicherung (B) und ersetzen sie durch eine
neue Sicherung (C).
Hinweis : Wenn Sie eine defekte Sicherung austauschen, schlagen wir
vor, daß Sie eine neue Sicherung stets als Ersatzteil in der 2. Position
bereithalten.
5. Bauen Sie den Sicherungshalter wieder ein.
• Anhang 2: Sicherungswechsel auf der
Hauptplatine (Abbildung 11)
1. Schalten Sie das Milli-Q Plus 185 System auf OFF und ziehen Sie
das Stromversorgungskabel ab.
2. Schrauben Sie die Rändelschraube (L Abbildung 1) ab, um den
Rückteil der Anlage abzunehmen.
3. Wechseln Sie die Sicherung (C) auf der Hauptplatine (A).
ANHANG
15
16
ANHANG
7
B E S T E L L I N F O R M AT I O N E N
○ ○ ○ ○ ○ ○ ○ ○ ○ ○ ○ ○ ○ ○ ○ ○ ○ ○ ○ ○ ○ ○ ○ ○ ○ ○ ○ ○ ○ ○ ○ ○ ○ ○ ○ ○ ○ ○ ○ ○ ○ ○ ○ ○ ○ ○ ○ ○ ○ ○ ○ ○ ○ ○ ○ ○ ○ ○ ○ ○ ○ ○ ○ ○ ○ ○ ○ ○ ○ ○ ○ ○ ○ ○ ○ ○ ○ ○
Beschreibung
Katalognummer
System
MILLI-Q 185 PLUS 220V/50Hz Wasseraufbereitungssystem
(UV-Lampe bereits installiert/Q-Pak nicht enthalten)
ZFMQ 050 UV
Verbrauchsmaterial
Q-Pak 1 Kit (Speisewasser: Umkehrosmose/Destillat)
(enthält 1 x Q-Pak 1 und 1 x Millipak Filter)
CPMQ K05 R1
Q-Pak 1
CPMQ 004 R1
Q-Pak 2 Kit
(Speisewasser: Deionisat).
(enthält 1 x Q-Pak 2 und 1 x Millipak Filter)
CMPQ K05 D2
Q-Pak 2
CMPQ 004 D2
Millipakfilter 0,22 um
(2 St./Pack.)
MPGL 04S K2
UV-Lampe Austauschkit
CFMQ 185 01
Druckminderer
ZFMQ 000 PR
Wandhalterung
ZFMQ 00W MB
Zubehör
BESTELLINFORMATIONEN 17
18 BESTELLINFORMATIONEN
ESPAÑOL
• Indice
Indice
i
Capítulo 1 : Introducción
Descripción general
Función del equipo
Diagrama de flujos
Especificaciones
1
1
1
1
2
Capítulo 2 : Instalación
Desembalado
Localización del equipo
Instalación
Conexión de entrada de agua
Instalación del bloque de purificación QPAK
3
3
3
3
3
4
Capítulo 3 : Operación
Modos normales de operación
Otra información disponible
Uso del teclado
Conexiones eléctricas (parte trasera)
Puesta en marcha
Instalación y purga del filtro final Millipak-40
Obtención de agua de alta pureza
5
5
6
6
7
7
7
8
Capítulo 4 : Mantenimiento
Calendario de mantenimiento
Sustitución del bloque de purificación QPAK
Sustitución del filtro final Millipak
Sustitución de la lámpara U.V.
9
9
9
9
10
Capítulo 5 : Diagnóstico y solución de problemas
Guía de diagnóstico y solución de problemas
11
11
Capítulo 6 : Apéndices
Apéndice 1 : sustitución del fusible general
Apéndice 2 : sustitución del fusible en la tarjeta principal
Apéndice 3 : sustitución del fusible en la tarjeta
de la lámpara U.V.
15
15
15
Capítulo 7 : Información para pedidos
17
15
Anexos sin número de página :
Capítulo 8 : Figuras
Capítulo 9: Información complementaria
Asistencia técnica Millipore
Garantía
i
i i
1
INTRODUCCION
○ ○ ○ ○ ○ ○ ○ ○ ○ ○ ○ ○ ○ ○ ○ ○ ○ ○ ○ ○ ○ ○ ○ ○ ○ ○ ○ ○ ○ ○ ○ ○ ○ ○ ○ ○ ○ ○ ○ ○ ○ ○ ○ ○ ○ ○ ○ ○ ○ ○ ○ ○ ○○ ○ ○ ○ ○ ○ ○ ○ ○ ○ ○ ○ ○ ○ ○ ○ ○ ○ ○ ○ ○ ○ ○ ○
• Descripción general
• Función del equipo
El sistema MILLI-Q 185 PLUS produce, a partir de agua pretratada
mediante ósmosis inversa o destilación, agua ultrapura con el menor
contenido en carbono orgánico total (C.O.T.) que permite la tecnología
actual. Un MILLI-Q 185 PLUS produce, bajo demanda, 1,5 l/min de agua
ultrapura. Las aplicaciones más típicas del agua producida por un
MILLI-Q 185 PLUS son los análisis instrumentales de alta sensibilidad,
como los realizados mediante GC, GC/MS, HPLC, monocapas de Langmuir
Blodgett e IC.
El agua de entrada, previamente tratada mediante ósmosis inversa o
destilación, pasa en primer lugar a través de una bomba, que la impulsa
hacia la cámara de foto-oxidación ultravioleta, equipada con una
lámpara U.V. de doble longitud de onda (185 y 254 nm), cuya misión es
la oxidación de los residuos de materia orgánica liberados por la etapa
de pretratamiento. La radiación U.V. presenta también un efecto germicida.
A continuación, el agua atraviesa un bloque de purificación QPAK, que
elimina todos los compuestos ionizados. Una válvula de tres vías permite
al usuario recircular el agua hasta que ésta alcance la calidad requerida,
momento en que basta con accionar la válvula para obtener agua
ultrapura en el punto de uso.
Los principales componentes de un MILLI-Q 185 PLUS son (figura 1) :
(A)
(B)
(C)
(D)
(E)
(F)
(G)
(H)
(I)
(J)
(K)
Bloque de purificación QPAK.
Punto de uso con visera de protección.
Filtro final Millipak-40, con membrana de 0,22 µm.
Válvula de tres vías.
Panel de control.
Aleta de sujeción del bloque de purificación QPAK.
Pilotos luminosos.
Pantalla de cristal líquido.
Teclado.
Conector para entrada de agua.
Tapón que cubre el orificio de adaptación de la escuadra para
instalación mural.
(L) Tornillo de cierre de la cubierta trasera
(M) Conexión para clavija de control remoto.
(N) Entrada general de corriente.
(O) Porta-fusible principal.
(P) Interruptor principal «ON/OFF».
(Q) Bloque disipador de calor.
• Diagrama de flujos
El esquema operativo de un MILLI-Q 185 PLUS es el siguiente (figura 2)␣ :
(A)
(B)
(C)
(D)
(E)
(F)
(G)
(H)
Válvula solenoide de entrada
Bomba
Cámara de foto-oxidación U.V.
Bloque de purificación QPAK
Sensor de resistividad del agua ultrapura
Válvula de tres vías
Filtro final Millipak
Válvula anti-retorno
INTRODUCCION
1
• Especificaciones
Dimensiones
Altura
Anchura
Profundidad
Peso, en funcionamiento
495 mm (19,5")
297 mm (11,7")
433 mm (17")
17 kg
Especificaciones eléctricas
230 V/50 Hz - 180 VA
Fusible : 1 A, lento
Especificaciones hidráulicas
Tubo de entrada de agua
Longitud máxima 3 m
Presión de entrada de agua
Máximo, 1,0 bar (15 psi)
Caudal de entrada de agua
8 mm D.E.
Mínimo, columna de 0,3 m altura
1,5 l/min
Rendimiento
Caudal de producción
Carbono orgánico total (C.O.T.)
Resistividad
2
INTRODUCCION
1,5 l/min
< 5 ppb (valor medio con agua pretratada por ósmosis inversa, determinado
con ANATEL A-100P)
18,2 MΩ.cm
2
I N S TA L L A C I O N
○ ○ ○ ○ ○ ○ ○ ○ ○ ○ ○ ○ ○ ○ ○ ○ ○ ○ ○ ○ ○ ○ ○ ○ ○ ○ ○ ○ ○ ○ ○ ○ ○ ○ ○ ○ ○ ○ ○ ○ ○ ○ ○ ○ ○ ○ ○ ○ ○ ○ ○ ○ ○ ○ ○ ○ ○ ○ ○ ○ ○ ○ ○ ○ ○ ○ ○ ○ ○ ○ ○ ○ ○ ○ ○ ○ ○ ○
• Desembalado
Al desembalar el MILLI-Q 185 PLUS, usted debe disponer de los siguientes
componentes, según se indica en la figura 3 :
(A)
(B)
(C)
(D)
(E)
Equipo MILLI-Q 185 PLUS
Cable de alimentación eléctrica
Visera de protección del punto de uso
Manual de operación y mantenimiento
Adaptador rosca hembra de 1/2" - tubo de 8 mm ø, con filtro de
rejilla
(F) Rollo de cinta de Teflon, para recubrimiento de piezas roscadas
Artículos que debe adquirir por separado (ver capítulo 7,
INFORMACIÓN PARA PEDIDOS») :
(G) Bloque de purificación QPAK
(H) Filtro final Millipak-40 de 0,22 µm
• Localización del equipo
El MILLI-Q 185 PLUS puede ser instalado directamente sobre una mesa o
banco de trabajo, o ser colgado sobre una pared (ciertas operaciones de
mantenimiento precisan abrir la cubierta trasera, para lo cual el equipo
debe ser separado de la pared). Para el montaje mural, es imprescindible
verificar que tanto la propia pared como los elementos de fijación sean
capaces de soportar el peso del equipo en funcionamiento (17 kg);
necesitará, además, una escuadra para montaje mural, no incluida con el
equipo (ver capítulo 7, INFORMACIÓN PARA PEDIDOS).
Es preciso realizar una preinstalación : una toma de corriente permanente
(que no se interrumpa por la noche ni los fines de semana) y una toma de
agua pretratada con llave de corte y rosca macho de 1/2", próximas al
equipo y, eventualmente, un regulador de presión (ninguno de estos
componentes se incluye con el equipo). El MILLI-Q 185 PLUS puede
utilizarse conectado a un depósito automático Millipore que le suministrará
el agua pretratada. En la figura 4 se ilustran las diversas conexiones a
realizar. En caso necesario, consulte a Millipore.
• Instalación
CONEXIÓN DE ENTRADA DEL AGUA (FIGURA 5)
- Para agua pretratada tomada de un depósito :
1. Cierre la llave de corte instalada en la toma de agua pretratada, e
instale sobre ella el adaptador (E). Corte el tubo (C) a la longitud
necesaria para que quede recto, sin bucles (longitud < 3 m).
2. Extraiga el tapón protector (B) del acceso de entrada, marcado
INLET (D), presionando para ello el collarín (A) mientras tira del
tapón.
3. Conecte un extremo del tubo que ha cortado (C) al acceso de
entrada, marcado INLET (K), insertando para ello el tubo a fondo
en el orificio. Tire del tubo para comprobar el ajuste.
4. La toma de agua pretratada debe terminar en una rosca macho de
1/2" (pieza no incluida con el equipo). Cubra esta rosca macho
con cinta de Teflon y enrosque sobre ella el adaptador con rosca
hembra de 1/2" (componente E, figura 3). A continuación, conecte
el otro extremo del tubo (C) a dicho adaptador.
INSTALLACION
3
- Para agua pretratada tomada de una línea presurizada :
1. Si la presión de la línea es superior a 1 bar, instale, a continuación
de la llave de corte, un regulador de presión (referencia
ZFMQ000PR).
2. Conecte el extremo del tubo (C) a la salida del regulador de
presión.
• Instalación del bloque de purificación QPAK
(figura 6)
1. Baje la aleta gris de sujeción (F) del equipo, oprimiendo para ello
la zona marcada PUSH. Extraiga los tapones protectores (A).
2. Desembale el bloque QPAK y extraiga los tapones (B) de los dos
adaptadores.
3. Humedezca las juntas (C) de dichos adaptadores con unas gotas
de agua.
4. Oriente el QPAK con los dos adaptadores hacia arriba y hacia el
equipo. Sujetando firmemente el equipo (D) con una mano, sitúe y
empuje el QPAK (E) en su alojamiento con la otra mano, balanceándolo ligeramente hasta que quede encajado.
5. Eleve y fije la aleta de sujeción (F).
4
INSTALLACION
3
OPERACION
○ ○ ○ ○ ○ ○ ○ ○ ○ ○ ○ ○ ○ ○ ○ ○ ○ ○ ○ ○ ○ ○ ○ ○ ○ ○ ○ ○ ○ ○ ○ ○ ○ ○ ○ ○ ○ ○ ○ ○ ○ ○ ○ ○ ○ ○ ○ ○ ○ ○ ○ ○ ○ ○ ○ ○ ○ ○ ○ ○ ○ ○ ○ ○ ○ ○ ○ ○ ○ ○ ○ ○ ○ ○ ○ ○ ○ ○
• Modos normales de operación
El MILLI-Q 185 PLUS tiene diversos modos operativos, presentados en el «display». Unos deben ser activados mediante el teclado, mientras que otros
están programados y son automáticos.
MENSAJE EN PANTALLA
ACCIONAMIENTO
ESTADO DEL MILLI-Q 185 PLUS
STANDBY
Presionando la tecla OPERATE/STANDBY,
cuando el sistema está en modo de operación.
En modo de espera (standby), sin consumir ni producir agua
TEMPERATURE : 25°C
Presionando la tecla TEMPERATURE,
cuando el sistema está en modo de espera.
En modo de espera, mostrando la temperatura de referencia
(la lectura de resistividad se presenta compensada a 25°C).
TEST : ..;.MΩ.cm
Presionando la tecla OPERATE/STANDBY,
cuando el sistema está en modo de espera.
En modo de operación, mostrando el resultado del auto-test, que
verifica la precisión del calibrado del resistivímetro (la lectura debe
ser de 15 ± 1 MΩ.cm, durante 4 segundos).
PRODUCT : ..;. MΩ.cm
Aparece 4 segundos después del anterior, tras
presionar la tecla OPERATE/STANDBY,
cuando el sistema está en modo de espera.
En modo de operación, mostrando la resistividad del agua
producida, durante el funcionamiento de la bomba. Según la
posición de la válvula de tres vías, durante el modo de operación
el equipo puede estar en recirculación (válvula en
RECIRCULATION) o en producción (válvula en PRODUCTION).
TEMPERATURE : ..°C
Presionando la tecla TEMPERATURE, cuando
el sistema está en modo de operación o de
RECIRCULATION
En modo de operación, mostrando la temperatura del agua
purificada, a la salida del bloque Q-PAK.
RECIRCULATION
Se activa automáticamente, de forma periódica,
cuando el sistema está en modo de espera.
En modo de espera, recirculando automáticamente el agua contenida en el equipo. Esta función se activa durante 15 minutos cada
hora, a fin de mantener la calidad del agua durante los periodos
de inactividad del equipo. La recirculación comienza automáticamente cuando han transcurrido 45 minutos desde que el equipo ha
sido puesto en modo de espera, y se repite una vez cada hora
durante todo el tiempo que el equipo se mantenga en modo de
espera. Al poner el equipo en modo de operación, el mensaje
RECIRCULATION aparece en pantalla durante unos segundos.
OPERACION
5
• Otra información disponible
MENSAJE EN PANTALLA
INTERPRETACION
"PRODUCT : XX.X MΩ.cm" Este mensaje indica que el valor de resistividad está fuera de escala. Ver DIAGNOSTICO Y SOLUCION DE
PROBLEMAS.
TEST INCORRECT
Este mensaje aparece cuando el resultado del auto-test es <14 MΩ.cm ó >16 MΩ.cm Vea el capítulo 5,
DIAGNOSTICO Y SOLUCION DE PROBLEMAS.
BATTERY
La batería interna está descargada y se ha perdido la información almacenada en la memoria del equipo. Vea el
capítulo 5, DIAGNOSTICO Y SOLUCION DE PROBLEMAS.
EXCHANGE PACK
(piloto luminoso)
Encendido continuamente cuando el QPAK falta o no está bien conectado. Vea el capítulo 4,
MANTENIMIENTO.
Parpadeando para indicar que el bloque QPAK debe cambiarse por otro. Vea el capítulo 5, DIAGNOSTICO Y
SOLUCION DE PROBLEMAS.
UV
(piloto luminoso)
Parpadea durante 30 segundos cuando se enciende la lámpara (etapa de calentamiento)
Encendido continuamente cuando la lámpara está funcionando y su rendimiento es el óptimo.
• Uso del teclado
El teclado permite al usuario acceder a los valores preseleccionados y activar o modificar los modos operativos.
TECLA
6
FUNCION
OPERATE/STANDBY
Presionando esta tecla se alternan los modos de operación y de espera.
TEMPERATURE
Presionando esta tecla cuando el sistema está en modo de espera, aparece TEMPERATURE : 25 °C, que es la
temperatura de referencia para la lectura de resistividad, ya que ésta se presenta compensada a 25 °C.
Presionando esta tecla cuando el sistema está en modo de operación, aparece TEMPERATURE : .. °C, que es la
temperatura real del agua producida por el equipo.
En ambos casos, el mensaje desaparece tres segundos después de soltar la tecla.
OPERACION
• Conexiones eléctricas (parte trasera del equipo)
Conexión hembra REMOTE STANDBY Conexión para clavija de control
remoto. Permite que un equipo externo (por ejemplo, un auto-analizador)
modifique automáticamente el modo operativo del equipo, alternándolo
entre operación y espera, en función de sus necesidades. Para más
información, consulte a Millipore.
• Puesta en marcha (figura 7)
1. Verifique que el QPAK está bien instalado y que se han hecho todas
las conexiones indicadas.
2. Abra la llave de corte de la toma de agua pretratada.
3. Sitúe la válvula de tres vías (A) en la posición PRODUCTION.
4. Sitúe un recipiente (B) en la repisa del equipo, bajo el punto de uso
del agua (C).
5. Ponga el equipo en marcha, accionando el interruptor principal
ON/OFF, situado detrás del equipo (ver componente P, figura 1).
La pantalla mostrará RECIRCULATION. Si aparece BATTERY,
apague (OFF) el interruptor general durante dos segundos, y
enciéndalo (ON) de nuevo.
6. Si hay un regulador de presión instalado antes del equipo, ajústelo
para dar una presión de salida de entre 0,5 y 1 bar, mientras el
equipo está en modo de producción (con el agua saliendo por el
punto de uso).
7. Deje el equipo en modo de producción, con la salida de agua
purificada (C) abierta, para eliminar el aire contenido en el equipo
y en el bloque QPAK. Cada vez que se llene el recipiente (B), cierre
la válvula de tres vías (A) para retirarlo y vaciarlo en un desagüe.
8. Cuando hayan salido entre 5 y 7 litros de agua, sitúe la válvula de
tres vías (A) en RECIRCULATION, y presione dos veces la tecla
OPERATE/STANDBY para dejar el equipo en espera. Si no necesita
agua purificada inmediatamente, deje el equipo así hasta la
mañana siguiente, para permitir que el bloque QPAK se rehidrate
totalmente.
9. Por la mañana, presione la tecla OPERATE/STANDBY. Aparecerá
TEST : ..;. MΩ.cm durante cuatro segundos y, dos segundos
después, el piloto UV comenzará a parpadear durante 30
segundos, indicando el calentamiento de la lámpara U.V., tras lo
cual quedará encendido de forma continua. Entonces, abra la
válvula de tres vías y extraiga dos o tres litros de agua. Presione de
nuevo la tecla OPERATE/STANDBY para dejar el equipo en espera.
• Instalación y purga del filtro final Millipak-40
(figura 8)
Si ya ha realizado los pasos anteriores (purga, rehidratación nocturna y
nueva purga del bloque QPAK) puede usted instalar el filtro final Millipak.
Proceder en otro orden podría causar la obturación inmediata del filtro
Millipak.
1. Cubra la rosca macho (A) del filtro Millipak con dos o tres vueltas
de cinta de Teflon, para asegurar su estanqueidad.
2. Enrosque el Millipak en el adaptador hembra (C) del punto de uso
del equipo. Asegúrese de que el orificio de venteo (D) del Millipak
queda accesible.
3. Presione de nuevo OPERATE/STANDBY para situar el equipo en
operación. Sitúe la válvula de tres vías en la posición
PRODUCTION.
OPERACION
7
4. Desenrosque ligeramente el tapón de venteo (E) del Millipak para
desalojar el aire de su interior.
5. Cuando comience a salir agua por el orificio del venteo y haya
desaparecido la burbuja de aire del interior del filtro, cierre el
tapón.
6. Sitúe la válvula de tres vías en la posición RECIRCULATION. Sitúe el
equipo en modo de espera (STANDBY).
7. Inserte el filtro Millipak en el alojamiento interior (F) de la visera de
protección (G) del punto de uso.
8. Instale la visera sobre el punto de uso del equipo, presionando para
ello las aletas (H) situadas a ambos lados de la visera, e
insertándolas en las muescas (J) que hay en el equipo.
El MILLI-Q 185 PLUS está ya listo para su uso.
• Obtención de agua de alta pureza (figura 1)
1. Presione la tecla OPERATE/STANDBY (I) para situar el equipo en
operación.
2. Transcurridos dos segundos, el piloto UV comenzará a parpadear,
mientras la resistividad del agua irá subiendo en la pantalla. Antes
de obtener agua, espere unos 30 segundos, hasta que el piloto UV
luzca continuamente y a que la resistividad alcance los 18,2
MΩ.cm. Esta breve espera permite que la lámpara U.V.alcance su
régimen óptimo de funcionamiento.
8 OPERACION
3. Para obtener agua, sitúe un recipiente en la repisa del equipo, bajo
el punto de uso, y sitúe la válvula de tres vías (D) en la posición
PRODUCTION.
4. Para detener la producción de agua, sitúe la válvula de tres vías en
la posición RECIRCULATION. Presione de nuevo la tecla OPERATE/
STANDBY para dejar el equipo en espera.
NOTA : mientras no utilice el equipo, déjelo siempre en espera (con el
mensaje STANDBY en pantalla y la válvula de tres vías en RECIRCULATION).
Nunca lo apague por el interruptor principal, ni lo desconecte de la red,
a no ser que vaya a trasladarlo o a realizar alguna operación de
mantenimiento que así lo precise.
El equipo necesita corriente para realizar la recirculación automática
intermitente del agua (15 minutos de cada hora). Por otra parte, si la
válvula de tres vías quedara en la posición PRODUCTION, en lugar de
recircular, el agua inundaría su laboratorio, a razón de 90 litros/hora...
4
MANTENIMIENTO
○ ○ ○ ○ ○ ○ ○ ○ ○ ○ ○ ○ ○ ○ ○ ○ ○ ○ ○ ○ ○ ○ ○ ○ ○ ○ ○ ○ ○ ○ ○ ○ ○ ○ ○ ○ ○ ○ ○ ○ ○ ○ ○ ○ ○ ○ ○ ○ ○ ○ ○ ○ ○ ○ ○ ○ ○ ○ ○ ○ ○ ○ ○ ○ ○ ○ ○ ○ ○ ○ ○ ○ ○ ○ ○ ○ ○ ○
• Calendario de mantenimiento
FRECUENCIA
3. Extraiga el bloque QPAK del equipo.
ACCION
Cuando se encienda el piloto
EXCHANGE PACK, o cuando
la resistividad sea inferior de
18 MΩ tras varios minutos de
recirculación.
Sustituir el bloque de
purificación QPAK y el filtro
final Millipak.
Anualmente, o cuando deje de
lucir el piloto UV.
Sustituir la lámpara U.V.
Cuando el caudal de producción
sea muy bajo.
Sustituir el filtro final Millipak.
Si esto ocurre con un Millipak
nuevo, verifique la calidad del
agua que alimenta al
MILLI-Q 185 PLUS.
4. Instale un bloque QPAK nuevo, siguiendo lo indicado en el capítulo
2, INSTALACIÓN. Antes de obtener agua, proceda a la purga del
bloque QPAK, sin filtro Millipak en el punto de uso (ver sección
Puesta en marcha en el capítulo 3 OPERACION).
NOTA : Es recomendable realizar esta sustitución al final de la jornada de
trabajo, para permitir la purga, la rehidratación nocturna y la nueva
purga del bloque QPAK.chapter.
• Sustitución del filtro final Millipak (figura 8)
Si, además del Millipak, ha de sustituir el bloque QPAK, realice siempre
primero la sustitución del bloque QPAK (ver apartado anterior).
1. Sitúe el equipo en posición de espera.
• Sustitución del bloque de purificación QPAK
(figura 1)
1. Presione la tecla OPERATE/STANDBY para situar el equipo en
modo de espera.
NO PONGA EL INTERRUPTOR GENERAL EN OFF.
2. Baje la aleta gris de sujeción (F) del equipo, oprimiendo para ello la
zona marcada PUSH.
2. Presione las aletas laterales (H) de la visera de protección (G) del
punto de uso y extraiga la visera con el Millipak usado.
3. Separe la visera del Millipak usado.
4. Desenrosque el Millipak usado del adaptador del punto de uso.
5 Instale un nuevo Millipak (ver sección Instalación y purga del filtro
final Millipak en el capítulo 3 OPERACION).
MANTENIMIENTO
9
• Sustitución de la lámpara U.V. (figura 9)
Para esta operación, debe abrir la cubierta trasera del equipo. Si éste está
montado en la pared, será necesario separarlo de la escuadra de montaje
mural.
LA LAMPARA UV NUEVA NO DEBE TOCARSE DIRECTAMENTE CON
LAS MANOS.
7. Reponga la junta tórica (E), ajuste el anillo de presión (C) y
enrosque el anillo de cierre (B), con lo que el conjunto quedará
cerrado.
1. Sitúe el interruptor principal figura 1 (P)) en OFF y desconecte
completamente el cable de entrada de corriente (figura 1 (N)).
9. Reponga la cubierta trasera, conecte el cable de entrada de corriente y sitúe el interruptor en ON.
Verifique el correcto funcionamiento de la lámpara U.V. : el piloto
UV debe lucir durante el modo de operación del equipo.
2. Desenrosque el tornillo de cierre de la cubierta trasera (figura 1 (L))
y el tapón o clavija de fijación a la escuadra de montaje mural
(figura␣ 1(K)).
3. Extraiga la cubierta posterior, tirando de ella hacia atrás.
4. Desconecte el adaptador (A) de la lámpara U.V., tirando de él
hacia arriba.
5. Desenrosque el anillo de cierre (B) y tome el tubo de cuarzo (D), la
lámpara U.V. usada y la junta tórica (E) como muestra la figura.
6. Extraiga la nueva lámpara U.V. de su envase, sin tocarla con las
manos. UTILICE SIEMPRE GUANTES, PREFERIBLEMENTE DE
ALGODÓN, PARA MANIPULAR UNA LÁMPARA U.V. NUEVA.
El tubo de la lámpara debe apoyar sobre un muelle, que ayudará a
centrarlo.
10
MANTENIMIENTO
8. Conecte la lámpara U.V. (clavija A).
5
DIAGNOSTICO Y SOLUCION DE PROBLEMAS
○ ○ ○ ○ ○ ○ ○ ○ ○ ○ ○ ○ ○ ○ ○ ○ ○ ○ ○ ○ ○ ○ ○ ○ ○ ○ ○ ○ ○ ○ ○ ○ ○ ○ ○ ○ ○ ○ ○ ○ ○ ○ ○ ○ ○ ○ ○ ○ ○ ○ ○ ○ ○ ○ ○ ○ ○ ○ ○ ○ ○ ○ ○ ○ ○ ○ ○ ○ ○ ○ ○ ○ ○ ○ ○ ○ ○ ○
• Guía de diagnóstico y solución de problemas
Si el MILLI-Q 185 PLUS no funciona correctamente, consulte inmediatamente la siguiente tabla, como primer recurso para diagnosticar la causa del
problema. Si esto no fuera suficiente, póngase en contacto con el Servicio Técnico de Millipore (la lista completa de oficinas Millipore está al final de
este manual).
PROBLEMA
CAUSA
SOLUCION
Equipo sin corriente
(piloto POWER apagado).
- La toma mural no recibe corriente.
- El cable de corriente está mal conectado.
- El fusible principal está fundido.
- El fusible de la tarjeta electrónica está fundido.
Compruebe la red eléctrica.
Compruebe el cable.
Sustituya el fusible principal (apéndice 1).
Sustituya el fusible de la tarjeta electrónica (apéndice 2).
Piloto EXCHANGE PACK
parpadeando.
- El bloque QPAK debe sustituirse.
Sustituya el bloque QPAK (vea el capítulo 4,
MANTENIMIENTO).
Piloto EXCHANGE PACK
encendido continuamente.
- El bloque QPAK falta o no está bien
conectado.
Conecte correctamente el bloque QPAK (vea el
capítulo␣ 2, INSTALACION).
Piloto UV apagado, durante el
modo de operación (producción o
recirculación).
- El fusible de la lámpara U.V. está fundido.
- La lámpara U.V. está agotada, o mal
instalada.
Sustituya el fusible de la lámpara U.V., situado en la
tarjeta electrónica (apéndice 3).
Sustituya la lámpara U.V. (vea el capítulo 4,
MANTENIMIENTO).
Compruebe si la pantalla indica TEMPERATURE > 36 °C
y localice ese problema en esta misma tabla.
- La temperatura del agua es demasiado alta.
Pantalla indicando BATTERY.
- La batería está descargada.
Si acaba de conectar el equipo a la red, apáguelo
(interruptor principal en OFF) durante dos segundos y
vuelva a encenderlo.
Si la batería está realmente descargada, deje el equipo
en STANDBY durante 48 horas para cargarla.
Después, sitúe el interruptor principal en OFF durante
2 segundos y vuelva a encenderlo, para borrar el
mensaje BATTERY.
DIAGNOSTICO Y SOLUCION DE PROBLEMAS
11
PROBLEMA
Pantalla indicando TEST
INCORRECT, tras el auto-test.
CAUSA
- Calibración incorrecta de temperatura.
- Calibración incorrecta de resistividad.
Pantalla indicando
"PRODUCT : XX.X MΩ.cm
- Presencia de aire en el circuito de medicion.
- Fallo en la calibración (TEST INCORRECT).
Pantalla indicando TEMPERATURE
> 35 °C, durante el modo de
operación (producción o
recirculación).
12
- La temperatura del agua ha llegado a 36 °C,
y ha de bajar a 35 °C para que este mensaje
desaparezca y la lámpara U.V. vuelva a
funcionar.
Las posibles causas son : el agua pretratada
está demasiado caliente o el
MILLI-Q 185 PLUS ha sido dejado durante
mucho tiempo en modo de operación, sin
sacar agua de él.
- El agua pretratada está demasiado caliente.
DIAGNOSTICO Y SOLUCION DE PROBLEMAS
SOLUCION
- Con el equipo en modo de espera, presione la tecla
TEMPERATURE.
Si aparece TEMPERATURE 25 °C, el calibrado es
correcto (ver más abajo).
Si aparece otro valor, póngase en contacto con el
Servicio Técnico de Millipore.
Si el calibrado de temperatura ha sido correcto,
presione la tecla OPERATE/STANDBY :
- Si aparece TEST : 15 MΩ.cm (± 1 MΩ.cm), el
calibrado es correcto.
Si aparece un valor mayor de 16 o menor de 14,
póngase en contacto con el Servicio Técnico de
Millipore.
- Purge el aire del Q-PAK y del resto del circuito,
abriend de la válvula de tres viás.
- El circuito de medicion debe ser calibrad (ver más
arriba).
- Mantenga siempre el equipo en modo de espera
(pantalla indicando STANDBY) mientras no lo utilice.
- Extraiga agua del equipo para que baje la
temperatura.
- Si aún así no desaparece el mensaje ni se enciende la
lámpara U.V., compruebe la temperatura del agua que
entra al equipo (especialmente si el agua procede de
un destilador convencional) e intente reducirla (probablemente, la refrigeración del destilador es
insuficiente).
- Si no puede reducir la temperatura del agua
pretratada, es posible (aunque no muy recomendable)
cancelar esta función. Póngase en contacto con el
Servicio Técnico de MILLIPORE.
PROBLEMA
Pantalla indicando TEMPERATURE
< 0 °C ó TEMPERATURE > + °C,
durante el modo de operación.
CAUSA
SOLUCION
- La temperatura del agua pretratada es mayor
de 40 °C.
- Compruebe la temperatura del agua que entra al
equipo e intente reducirla (ver más arriba).
- El termistor es defectuoso, o está mal
conectado a la sonda de resistividad.
- Póngase en contacto con el Servicio Técnico de
Millipore.
Pantalla indicando una resistividad - El bloque Q-PAK está agotado.
del agua purificada inferior a
18 MΩ.cm, tras varios minutos de
recirculación.
Sustituya el bloque QPAK (vea el capítulo 4,
MANTENIMIENTO).
No sale agua, en modo de
operación y con la válvula de tres
vías en PRODUCTION.
Abra la válvula de corte.
Póngase en contacto con el Servicio Técnico de Millipore.
Cebe la bomba, introduciendo en ella agua a presión o
por gravedad. Asegúrese de que siempre hay aporte de
agua suficiente: caudal y presión del agua; diámetro,
longitud y recorrido del tubo de entrada (ver más abajo).
- Válvula de corte cerrada, impidiendo la
entrada de agua al equipo.
- La válvula solenoide de entrada funciona mal.
- La bomba no está correctamente cebada.
El caudal de agua es muy bajo, en - El aporte de agua al equipo es insuficiente.
modo de operación y con la
válvula de tres vías en
PRODUCTION.
- El filtro final Millipak contiene aire.
- El filtro final Millipak está obturado.
Verifique el aporte de agua al equipo:, caudal
(≥ 1,5 l/min), presión (columna ≥ 30 cm) del agua;
diámetro (≥ 8 mm), longitud (< 3 m) y recorrido (sin
bucles) del tubo de entrada.
Purgue el aire del filtro Millipak (ver el capítulo 3,
OPERACIÓN).
Sustituya el filtro Millipak (vea el capítulo 4,
MANTENIMIENTO).
DIAGNOSTICO Y SOLUCION DE PROBLEMAS
13
14
DIAGNOSTICO Y SOLUCION DE PROBLEMAS
6
APENDICES
○ ○ ○ ○ ○ ○ ○ ○ ○ ○ ○ ○ ○ ○ ○ ○ ○ ○ ○ ○ ○ ○ ○ ○ ○ ○ ○ ○ ○ ○ ○ ○ ○ ○ ○ ○ ○ ○ ○ ○ ○ ○ ○ ○ ○ ○ ○ ○ ○ ○ ○ ○ ○ ○ ○ ○ ○ ○ ○ ○ ○ ○ ○ ○ ○ ○ ○ ○ ○ ○ ○ ○ ○ ○ ○ ○ ○ ○
• Apéndice 1 : sustitución del fusible general
(figura 10)
• Apéndice 2 : sustitución del fusible en la tarjeta
principal (figura 11)
1. Sitúe el interruptor principal en OFF.
1. Sitúe el interruptor principal en «OFF» y desconecte completamente
el cable de entrada de corriente.
2. Desconecte completamente el cable de entrada de corriente.
3. Extraiga el porta-fusible (A) (componente O, figura 1).
4. Extraiga el fusible fundido (B) y sustitúyalo por el de repuesto (C).
2. Desenrosque el tornillo de cierre de la cubierta trasera (figura 1 (L))
y el tapón o clavija de fijación a la escuadra de montaje mural
(figura␣ 1 (K)). Extraiga la cubierta posterior, tirando de ella hacia
atrás.
NOTA : Es conveniente que adquiera otro fusible de repuesto y lo guarde 3. Deslice hacia fuera parte de la tarjeta electrónica principal (A) y
sustituya el fusible (C). Introduzca la tarjeta, cierre la cubierta
en el alojamiento que hay en el porta-fusible.
trasera, conecte de nuevo el cable y sitúe el interruptor general en
ON.
5. Vuelva a colocar el porta-fusible. Conecte de nuevo el cable y sitúe el
interruptor general en ON.
• Apéndice 3: sustitución del fusible en la tarjeta
de la lámpara U.V. (figura 11)
Proceda exactamente igual que en el apéndice 2, pero sustituya el fusible
(D) que hay en la tarjeta de la lámpara U.V. (B).
APENDICE
15
16
APENDICE
7
I N F O R M A C I Ó N PA R A P E D I D O S
○ ○ ○ ○ ○ ○ ○ ○ ○ ○ ○ ○ ○ ○ ○ ○ ○ ○ ○ ○ ○ ○ ○ ○ ○ ○ ○ ○ ○ ○ ○ ○ ○ ○ ○ ○ ○ ○ ○ ○ ○ ○ ○ ○ ○ ○ ○ ○ ○ ○ ○ ○ ○ ○ ○ ○ ○ ○ ○ ○ ○ ○ ○ ○ ○ ○ ○ ○ ○ ○ ○ ○ ○ ○ ○ ○ ○ ○
Descripción
Referencia
SISTEMA
Sistema MILLI-Q 185 PLUS, 220V/50Hz
ZFMQ 050 UV
MATERIAL FUNGIBLE
Kit Q-PAK1 : incluye un bloque de purificación Q-PAK1, y un filtro
final Millipak
CPMQ K05 R1
Bloque de purificación Q-PAK1 (adecuado para alimentación con
agua destilada o de ósmosis inversa)
CPMQ 004 R1
Kit Q-PAK2 : incluye un bloque de purificación Q-PAK2, y un filtro
final Millipak
CPMQ K05 D2
Bloque de purificación Q-PAK2 (adecuado para alimentación con
agua desionizada)
CPMQ 004 D2
Filtro final Millipak, envase de 2
MPGL 04S K2
Kit de reposición de lámpara U.V.
CFMQ 185 01
Regulador de presión de entrada
ZFMQ 000 PR
Escuadra para montaje mural de MILLI-Q 185 PLUS
JMSP MQW MB
ACCESORIOS
INFORMACIÓN PARA PEDIDOS 17
18 INFORMACIÓN PARA PEDIDOS
ITALIANO
• Indice
Indice
i
Capitolo 1 : Introduzione
Descrizione generale
Principio di funzionamento
Schema
Specifiche tecniche
1
1
1
1
2
Sostituzione del filtro finale MILLIPAK
Sostituzione della lampada U.V.
9
9
Capitolo 5 : Ricerca e riparazione guasti
tavola di ricerca e riparazione guasti
11
11
Capitolo 2 : Installazione
Disimballaggio
Posizionamento del Milli-Q 185 Plus
Installazione
Connessione all’acqua di alimentazione
Installazione del blocco di purificazione Q-PAK
3
3
3
3
3
4
Capitolo 6: Appendice
Appendice 1 : Sostituzione del fusibile principale
Appendice 2 : Sostituzione del fusibile sulla scheda PC
principale
Appendice 3 : Sostituzione del fusibile sulla scheda PC
della lampada U.V.
15
15
Capitolo 3 : Funzionamento
Modi operativi standard
Visualizzazioni addizionali
Uso della tastiera
Connessioni elettriche
Avviamento
Installazione del filtro finale MILLIPAK-40
Prelievo dell’acqua
5
5
6
6
7
7
7
8
Capitolo 7 : Informazioni per l’ordine
17
Capitolo 4 : Manutenzione
Piano di manutenzione
Sostituzione del blocco di purificazione Q-PAK
9
9
9
15
15
Alla fine del manuale
Capitolo 8 : Figure
Capitolo 9 : Informazioni addizionali
Assistenza Tecnica
Garanzia
i
i i
1
INTRODUZIONE
○ ○ ○ ○ ○ ○ ○ ○ ○ ○ ○ ○ ○ ○ ○ ○ ○ ○ ○ ○ ○ ○ ○ ○ ○ ○ ○ ○ ○ ○ ○ ○ ○ ○ ○ ○ ○ ○ ○ ○ ○ ○ ○ ○ ○ ○ ○ ○ ○ ○ ○ ○ ○○ ○ ○ ○ ○ ○ ○ ○ ○ ○ ○ ○ ○ ○ ○ ○ ○ ○ ○ ○ ○ ○ ○ ○
• Descrizione generale
• Principio di funzionamento
Il sistema MILLI-Q 185 PLUS è stato sviluppato specificatamente per
produrre acqua ultrapura con il più basso contenuto di sostanze organiche
attualmente ottenibile. Questo tipo di acqua può essere ottenuto utilizzando
per l’alimentazione acqua a grado laboratorio prodotta per Osmosi
Inversa o per distillazione.
il sistema è in grado di produrre fino a 1,5 litri/minuto di acqua ultrapura,
nel momento in cui è necessaria.
Questa acqua dovrebbe essere utilizzata per tutte le applicazioni critiche
che necessitano del più basso contenuto di organici possibile: es. HPLC
critici, GC/MS, monostrati di Langmuir Blodgett, I.C.
I componenti principali del MILLI-Q 185 PLUS sono mostrati in figura 1 :
L’acqua di alimentazione ( Osmotizzata o Distillata ) viene spinta, dalla
pompa del sistema, attraverso una camera dove viene esposta alla luce
ultravioletta (U.V.) a bassa lunghezza d’onda(185 + 254 nm). L’esposizione
agli U.V. permette l’ossidazione dei composti organici non eliminati dal
processo di pretrattamento (Osmosi Inversa o Distillazione) ed inoltre ha
un effetto battericida. L’acqua così trattata passa poi attraverso il blocco
di purificazione Q-PAK per la rimozione delle specie ioniche. Una valvola
a tre vie permette il ricircolo dall’acqua fino al raggiungimento della
qualità desiderata. Raggiunta la qualità desiderata, commutando la
valvola a tre vie, si effettua il prelievo attraverso il filtro finale MILLIPAK 40.
A) Modulo di purificazione dell’acqua - Q-PAK 1
B) Punto d’uso protetto
C) Punto d’uso, filtro finale con membrana da 0,22 µm. Unità
MILLIPAK 40
D) Valvola a 3 vie.
E) Pannello di controllo
F) Leva di bloccaggio del Q-PAK
G) Spie luminose
H) Visualizzatore a cristalli liquidi
I) Tastiera
J) Connessione d’ingresso dell’acqua di alimentazione
K) Tappo asportabile - bloccaggio del manicotto per la staffa di
montaggio a muro.
L) Volantino di bloccaggio del pannello posteriore
M) Presa femmina per il jack di comando a distanza
N) Alimentazione elettrica.
O) Porta fusibile principale
P) Interruttore dell’alimentazione
Q) Piastra dissipatrice di calore.
• Schema
Lo schema di funzionamento del Milli-Q 185 Plus è mostrato in figura 2␣ :
A)
B)
C)
D)
E)
F)
G)
H)
Elettrovalvola d’ingresso
Pompa
Contenitore lampada U.V.
Blocco di purificazione Q-PAK
Sensore di resistività
Valvola a tre vie
Filtro finale MILLIPAK 40 (0,22 µm)
Valvola di non ritorno
INTRODUZIONE
1
• Specifiche Tecniche
Dimensioni
Altezza
Larghezza
Profondità
Peso operativo
495 mm
297 mm
433 mm
17 Kg
Specifiche Elettriche
230 V/50 Hz - 180 VA
Fusibile lento da 1 Ampere
Specifiche Idrauliche
Tubazione di alimentazione
Pressione di alimentazione
Portata di alimentazione
Diametro esterno 8 mm
Lunghezza massima 3 m
Minima 0,03 bar (0,3 m colonna d’acqua)
1,5 litri /min.
Prestazioni
Portata acqua prodotta
T.O.C.
2
INTRODUZIONE
1,5 litri/min.
< 5 ppb misurato con Anatel A 100 P
2
I N S TA L L A Z I O N E
○ ○ ○ ○ ○ ○ ○ ○ ○ ○ ○ ○ ○ ○ ○ ○ ○ ○ ○ ○ ○ ○ ○ ○ ○ ○ ○ ○ ○ ○ ○ ○ ○ ○ ○ ○ ○ ○ ○ ○ ○ ○ ○ ○ ○ ○ ○ ○ ○ ○ ○ ○ ○ ○ ○ ○ ○ ○ ○ ○ ○ ○ ○ ○ ○ ○ ○ ○ ○ ○ ○ ○ ○ ○ ○ ○ ○ ○
• Disimballaggio
• Installazione
Nell’imballo del MILLI-Q 185 PLUS troverete i seguenti articoli, come da
figura 3 :
CONNESSIONE CON L’ACQUA DI ALIMENTAZIONE (FIGURA 5)
A)
B)
C)
D)
E)
Unità MILLI-Q 185 PLUS
Cavo di alimentazione
Coperchio per il punto d’uso
Manuale operativo
Adattatore 1/2" Femmina a tubo da 8 mm, con inserito un filtro a
rete
F) Nastro di Teflon
Articoli da ordinare separatamente
G) Blocco di purificazione Q-PAK 1
H) Filtro finale MILLIPAK 40 ( 0,22 µm)
Articoli G+H = N° Cat. CPMQK05R1
• Posizionamento del MILLI-Q 185 PLUS
Il sistema MILLI-Q 185 Plus può essere posizionato su un banco da
laboratorio o appeso a muro.
Per montare il sistema a muro è necessario ordinare la staffa di montaggio
(N° Cat. ZFMQ00WMB) e verificare che la parete sia in grado di
sopportare il peso operativo dell’unità (17 Kg).
La figura 4 mostra la connessione del MILLI-Q 185 PLUS con differenti
opzioni di alimentazione (serbatoio o linea in pressione).
- Acqua di alimentazione contenuta in un serbatoio :
1. Tagliare il tubo di alimentazione (C) nella lunghezza necessaria
(<␣ 3␣ m).
2. Rimuovere il tappo di protezione (B) dalla connessione INLET (D)
premendo il collare (A) ed estraendo il tappo :
3. Connettere il tubo (C) alla connessione INLET inserendo il tubo
all’interno del connettore. Verificare la tenuta tirando più volte il
tubo.
4. Connettere il tubo alla valvola di uscita del serbatoio. Questa valvola
deve essere dotata di attacco per tubo da 8 mm di diametro.
- Acqua di alimentazione da una rete di distribuzione in pressione.
1 Se la pressione è maggiore di un bar è necessario installare un
riduttore di pressione (N° Cat. ZFMQ000PR).
2 Connettore il tubo di alimentazione (C) all’uscita del regolatore di
pressione.
NOTA : La valvola di intercettazione (sulla linea pressurizzata), il regolatore
di pressione ed il manometro mostrati in figura 4 non sono forniti col
sistema.
INSTALLAZIONE
3
• Installazione del blocco di purificazione Q-PAK
(Figura 6)
1. Ruotare verso sinistra la leva di bloccaggio facendo pressione sulla
linguetta e spingendo verso il basso. Rimuovere i tappi di
protezione␣ (A).
2. Rimuovere i tappi di protezione (B) sul Q-PAK.
3. Inumidire i due O-Ring (C) con alcune gocce d’acqua.
4. Posizionare il Q-PAK nella sua cavità. Tenere fermo il
MILLI-Q␣ 185␣ PLUS (D) e spingere in sede il Q-PAK (E), se necessario
muoverlo leggermente.
5. Riportare in posizione iniziale la leva di bloccaggio (F).
4
INSTALLAZIONE
3
FUNZIONAMENTO
○ ○ ○ ○ ○ ○ ○ ○ ○ ○ ○ ○ ○ ○ ○ ○ ○ ○ ○ ○ ○ ○ ○ ○ ○ ○ ○ ○ ○ ○ ○ ○ ○ ○ ○ ○ ○ ○ ○ ○ ○ ○ ○ ○ ○ ○ ○ ○ ○ ○ ○ ○ ○ ○ ○ ○ ○ ○ ○ ○ ○ ○ ○ ○ ○ ○ ○ ○ ○ ○ ○ ○ ○ ○ ○ ○ ○ ○
• Modi Operativi Standard
Il MILLI-Q 185 PLUS visualizza parecchi modi operativi. Alcuni possono essere attivati dalla tastiera, mentre gli altri sono preprogrammati ed automatici.
VISUALIZZAZIONE DEL
MODO OPERATIVO
ATTIVAZIONE
STATO DEL MILLI-Q 185 PLUS
STANDBY
Premere il pulsante OPERATE/STANDBY,
quando il sistema è in modo OPERATE.
Il sistema è in modo STANDBY e non produce acqua.
TEMPERATURE : 25°C
Premere il pulsante TEMPERATURE quando
il sistema è in modo STANDBY.
Visualizza TEMPERATURE 25°C (Temperatura alla quale vien e
compensata la misura della resistività).
TEST:..;.MΩ x cm
Premere il pulsante OPERATE/STANDBY,
quando il sistema è in modo STANDBY.
Visualizza il risultato dell’auto-test automatico.
PRODUCT : ..°C
La visualizzazione appare automaticamente
4 sec. dopo avere premuto il pulsante
OPERATE/STANDBY, quando il sistema è in
modo STANDBY.
La visualizzazione avviene dopo l’Auto-test.
Visualizza la resistività dell’acqua prodotta.
TEMPERATURE : ... °C
Premere il pulsante TEMPERATURE mentre il
sistema è in modo OPERATE o
RECIRCULATION.
Visualizza la temperatura dell’acqua all’uscita dal Q-PAK
RECIRCULATION
Funzionamento automatico quando il
sistema è in modo STANDBY.
Funzionamento periodico del sistema durante il modo STANDBY. Il
sistema ricircolerà l’acqua automaticamente per 15 minuti ogni ora,
in modo da mantenere costante la qualità dell’acqua durante i
periodi di non utilizzo. I 15 minuti di RECIRCOLO iniziano 45
minuti dopo che il sistema è stato posizionato in modo STANDBY.
Inoltre il modo RECIRCULATION si attiva ogni qual volta il sistema
viene posto su ON.
FUNZIONAMENTO
5
• Visualizzazioni addizionali
VISUALIZZAZIONE
STATO DEL MILLI-Q 185 PLUS
PRODUCT : XX MΩ x cm
Il visualizzatore indica che il valore della resistivitã é fuori scala.
Vedi il capitolo RICERCA E RIPARAZIONE GUASTI.
TEST INCORRECT
Visualizzato quando il risultato dell’Auto-test è <di 14 MΩ x cm o > di 16 MΩ x cm
Vedere il capitolo Ricerca e riparazione guasti.
BATTERY
La batteria sulla scheda PC è scarica.
I dati memorizzati quando il sistema è stato spento sono persi. Vedere il capitolo Ricerca e riparazione guasti.
EXCHANGE PACK
- Lampeggia quando è necessario sostituire il Q-PAK. Vedere il capitolo Manutenzione.
- Luce fissa, quando il Q-PAK non è in sede o è mal posizionato. Vedere il capitolo Ricerca e riparazione guasti.
U.V.
- Lampeggia per 30 secondi quando si accende la lampada U.V. per la prima volta (riscaldamento della
lampada).
- Luce fissa, quando la lampada U.V. è accesa ed è perfettamente efficiente.
• Utilizzo della Tastiera
La tastiera permette all’utilizzatore di controllare il modo operativo del sistema e visualizzare i parametri prefissati che governano il corretto
funzionamento del sistema.
NOME DEL PULSANTE
6
FUNZIONE
OPERATE/STANDBY
Premendo questo pulsante si passa da OPERATE a STANDBY e viceversa.
TEMPERATURE
- Durante il modo STANDBY: premendo questo pulsante, durante il modo STANDBY, si visualizza la temperatura
di compensazione di 25°C (temperatura di compensazione della resistività).
- Durante i modi OPERATE e RECIRCULATION: premendo questo pulsante, durante i modi indicati, si visualizza la
temperatura dell’acqua prodotta.
- Rilasciando il pulsante, in entrambi i casi, la temperatura rimane visualizzata per 3 secondi.
FUNZIONAMENTO
• Connessioni elettriche (sul retro del sistema)
Presa REMOTE STANDBY. Questa presa permette di controllare il MILLIQ 185 PLUS da un’unità di comando remota.(Modo REMOTE STANDBY/
OPERATE).
Contattare l’Assistenza Tecnica Millipore per ulteriori informazioni sull’uso
di questa funzione.
• Avviamento (Figura 7)
1. Verificare che il Q-PAK sia correttamente installato e che tutte le
connessioni siano fatte correttamente.
2. Aprire la valvola dell’acqua di alimentazione.
3. Posizionare la valvola a 3 vie (A) RECIRCULATION/PRODUCTION
su PRODUCTION.
4. Mettere un contenitore (B) sotto l’uscita dell’unità filtrante MILLIPAK
40.
5. Accendere il sistema su ON per mezzo del pulsante ON/OFF, posto
sul retro (vedi figura 1 (P)). Il visualizzatore ora mostra
RECIRCULATION. Se appare BATTERY, spegnere il sistema per 2
secondi e poi riaccenderlo.
6. Se il sistema è alimentato da una linea in pressione attraverso un
regolatore di pressione, regolare la pressione, in uscita al
regolatore, tra 0,5 e 1 bar, quando il MILLI-Q 185 PLUS è in
produzione. (valvola a 3 vie (A) su PRODUCTION con acqua che
esce dall’uscita (C).
7. Lasciare acceso il sistema permettendo all’acqua di uscire da (C).
Ciò consente l’espulsione dell’aria dal sistema e dal Q-PAK. Aprire e
chiudere più volte la valvola a 3 vie.
8. Dopo avere scaricato 5-7 litri di acqua, commutare la valvola a 3
vie (A) Sulla posizione RECIRCULATION. Premere due volte il
pulsante OPERATE/STANDBY per porre il sistema in modo
STANDBY. Se possibile lasciare il sistema tutta la notte, in questa
posizione, in modo da reidratare perfettamente le resine contenute
nel Q-PAK.
9. Al mattino successivo, premere il pulsante OPERATE/STANDBY,
viene visualizzato per 4 secondi TEST : ..,. MΩ x cm, quindi 2
secondi più tardi l’indicatore della lampada ad U.V. inizia a
lampeggiare, mentre la lampada si riscalda. Alla fine dei 30 secondi
di lampeggiamento, l’indicatore luminoso mostra una luce fissa .
Scaricare 2-3 litri di acqua. Porre quindi nuovamente il sistema in
modo STANDBY premendo una volta il pulsante
OPERATE/STANDBY.
• Installazione del filtro finale millipak 40
(0,22␣ µm) (Figura 8)
Dopo che il Q-PAK è stato spurgato dall’aria, e lasciato reidratare per una
notte, si procede all’installazione del filtro finale MILLIPAK.
1. Avvolgere sul filetto (A) del MILLIPAK 2 o 3 giri di nastro di Teflon, in
modo da garantire la tenuta.
2. Avvitare il MILLIPAK sulla connessione femmina (C) del punto
d’uscita del sistema MILLI-Q 185 PLUS. Fare in modo che l’uscita di
ventilazione (D) sia accessibile.
FUNZIONAMENTO
7
3. Premere il pulsante OPERATE/STANDBY in modo OPERATE. Ruotare
la valvola a 3 vie in posizione PRODUCTION.
3. Prelevare l’acqua ruotando la valvola a 3 vie (D figura 1) sulla
posizione PRODUCTION.
4. Espellere l’aria contenuta nel MILLIPAK 40, allentando il tappo di
ventilazione (E)..
4. Per chiudere il prelievo, ruotare la valvola a 3 vie sulla posizione
RECIRCULATION. Premere il pulsante OPERATE/STANDBY per
porre il sistema in modo STANDBY.
5. Quando inizia ad uscire l’acqua, e non ci sono più bolle d’aria,
riavvitare il tappo.
6. Commutare la valvola a 3 vie in posizione RECIRCULATION e porre
il sistema in modo STANDBY.
7. Inserire il MILLIPAK nella clip (F) del coperchio (G).
8. Installare il MILLIPAK con il suo coperchio sul MILLI-Q 185 PLUS
facendo una leggera pressione sulle linguette (H) poste su ciascuna
parte del coperchio ed inserirle nelle due fenditure (J) .
Il MILLI-Q 185 PLUS è ora pronto per l’uso.
• Prelievo dell'acqua
1. Premere il pulsante OPERATE/STANDBY (I in figura 1) per porre il
sistema in modo OPERATE.
2. Dopo 6 secondi lampeggia l’indicatore della luce U.V. (G, figura 1).
Aspettare altri 30 secondi fino a che l’indicatore mostra una luce
fissa e la resistività dell’acqua ha raggiunto i 18,2 MΩ x cm, prima
di prelevare l’acqua. Questa attesa permette alla lampada di
raggiungere la temperature ottimale.
8 FUNZIONAMENTO
NOTA : Quando non avete necessità di prelevare acqua, lasciate il
MILLI-Q 185 PLUS in modo STANDBY. Per poter mantenere inalterata la
qualità dell’acqua durante i periodi di non utilizzo, il sistema ricircola
automaticamente l’acqua per 15 minuti ogni ora, durante il modo
STANDBY. (Il visualizzatore mostra RECIRCULATION).
Durante il modo STANDBY accertarsi che la valvola a 3 vie sia commutata
su RECIRCULATION, per evitare una fuoriuscita di acqua dal punto d’uso
durante i 15 minuti di ricircolo.
4
MANUTENZIONE
○ ○ ○ ○ ○ ○ ○ ○ ○ ○ ○ ○ ○ ○ ○ ○ ○ ○ ○ ○ ○ ○ ○ ○ ○ ○ ○ ○ ○ ○ ○ ○ ○ ○ ○ ○ ○ ○ ○ ○ ○ ○ ○ ○ ○ ○ ○ ○ ○ ○ ○ ○ ○ ○ ○ ○ ○ ○ ○ ○ ○ ○ ○ ○ ○ ○ ○ ○ ○ ○ ○ ○ ○ ○ ○ ○ ○ ○
• Piano di manutenzione
3. Togliere il Q-PAK esausto.
4. Installare il nuovo Q-PAK come descritto nel capitolo
INSTALLAZIONE
FREQUENZA
AZIONE
Quando l’indicatore luminoso
EXCHANGE PACK lampeggia, o
la resistività non raggiunge i
18,2 MΩ x cm dopo alcuni
minuti di ricircolo.
Sostituire il blocco di purificazione Q-PAK ed il filtro finale
MILLIPAK 40.
Una volta all’anno, o quando
l’indicatore della lampada U.V.
non si accende.
Sostituire la lampada U.V.
• Sostituzione del filtro finale MILLIPAK 40
(Figura 8)
Quando la portata attraverso il
filtro finale diventa troppo bassa.
Sostituire il filtro finale
MILLIPAK 40.
Se il filtro è stato montato da
poco controllare la qualità
dell’acqua di alimentazione al
MILLI-Q 185 PLUS
1. Porre il MILLI-Q 185 PLUS in modo STANDBY.
NOTA : E’ preferibile effettuare la sostituzione nel tardo pomeriggio in
modo da permettere al nuovo Q-PAK di reidratarsi perfettamente durante
la notte.
2. Premere le due linguette (H) poste sul coperchio (G) per rimuovere il
coperchio e il MILLIPAK 40.
4. Svitare il MILLIPAK 40 dalla connessione.
5. Installare il nuovo MILLIPAK 40 come descritto nel capitolo
INSTALLAZIONE.
• Sostituzione del blocco di purificazione Q-PAK
1. Porre il sistema MILLI-Q 185 PLUS in modo STANDBY.
NON SPEGNERE IL SISTEMA.
2. Sbloccare il braccio di ritenuta del Q-PAK (vedi figura 1 (F))
MANUTENZIONE
9
• Sostituzione della lampada U.V. (Figura 9)
E’ necessario rimuovere la parte posteriore dello strumento. Se il
MILLI-Q␣ 185 PLUS è montato a muro è necessario toglierlo dalla staffa
di supporto.
1. Spegnere il sistema e rimuovere il cavo di alimentazione
(figura␣ 1␣ (N) (P)).
2. Svitare il volantino (figura 1 (L)) e anche l’inserto per la staffa di
montaggio a muro (figura 1 (K)) (se montato a muro).
3. Rimuovere il coperchio posteriore tirandolo.
4. Disconnettere il connettore (A) dalla lampada U.V., tirandolo.
5. Svitare l’anello di serraggio (B) togliendo il tubo di quarzo (D) con
la lampada U.V.
6. Inserire il nuovo tubo di quarto. USARE GUANTI DI COTONE PER
MANEGGIARE IL TUBO.
Il tubo appoggia su di una molla che ne permette il corretto
posizionamento.
7. Sostituire l’O-ring (E), porre l’anello di tenuta (C) in posizione ed
avvitare l’anello di bloccaggio (B) per chiudere il tutto.
8. Connettere la lampada U.V. (connettore (A)).
10
MANUTENZIONE
9. Reinserire il coperchio posteriore, il cavo di alimentazione e
accendere il sistema.
Verificare il corretto funzionamento della valvola U.V. : la spia
luminosa della lampada U.V. deve rimanere fissa durante il modo
OPERATE.
5
R I C E R C A E R I PA R A Z I O N E G U A S T I
○ ○ ○ ○ ○ ○ ○ ○ ○ ○ ○ ○ ○ ○ ○ ○ ○ ○ ○ ○ ○ ○ ○ ○ ○ ○ ○ ○ ○ ○ ○ ○ ○ ○ ○ ○ ○ ○ ○ ○ ○ ○ ○ ○ ○ ○ ○ ○ ○ ○ ○ ○ ○ ○ ○ ○ ○ ○ ○ ○ ○ ○ ○ ○ ○ ○ ○ ○ ○ ○ ○ ○ ○ ○ ○ ○ ○ ○
• Tavola di ricerca e riparazione guasti
Se l’unità MILLI-Q 185 PLUS mostra un funzionamento non corretto, consultare la tavola sotto riportata.
Questa tavola serve di aiuto per diagnosticare la ragione del funzionamento incorretto del sistema.
Se ciò non fosse sufficiente contattare il Servizio di Assistenza Tecnica presso la filiale più vicina. (La lista degli indirizzi è alla fine di questo manuale).
PROBLEMA
La spia di accensione rimane
spenta
CAUSA
- Assenza di alimentazione alla presa
principale.
- Cavo di alimentazione non perfettamente
collegato.
- Fusibile principale bruciato
- Fusibile sulla scheda PC bruciato.
AZIONI CORRETTIVE
Controllare l’alimentazione.
Controllare l’allacciamento.
Sostituire il fusibile principale (appendice 1).
Sostituire il fusibile della scheda PC (appendice 2)
La spia EXCHANGE PACK
lampeggia.
Necessità di sostituzione del Q-PAK.
Sostituire il Q-PAK. Vedere capitolo MANUTENZIONE.
La spia EXCHANGE PACK è a
luce fissa.
Q-PAK non installato o non correttamente
installato.
Sostituire il Q-PAK. Vedere capitolo MANUTENZIONE.
La spia dell’U.V. non si illumina
quando il sistema è in modo
PRODUCTION o RECIRCULATION
- Fusibile della lampada U.V. bruciato.
- La lampada U.V. è difettosa.
- viene visualizzato TEMPERATURE > 35 °C.
Sostituire.il fusibile sulla scheda della lampada U.V.
(appendice 3)
Sostituire la lampada U.V.. Vedere capitolo
MANUTENZIONE.
Temperatura interna dell’acqua troppo elevata. Vedere
TEMPERATURE > 35 °C.
Viene visualizzato BATTERY
Batteria scarica.
Lasciare il sistema sotto tensione per 48 ore. per
ricaricare la batteria, quindi spegnere il sistema per 2
secondi per eliminare la visualizzazione BATTERY.
RICERCA E RIPARAZIONE GUASTI
11
PROBLEMA
Viene visualizzato TEST
INCORRECT dopo l’Auto-test a
15 MΩ x cm.
CAUSA
- Circuito della temperatura mal calibrato.
- Circuito della resistività mal calibrato.
Viene visualizzato
PRODUCT : XX MΩ.cm
AZIONI CORRETTIVE
Con il sistema in modo STANDBY premere il pulsante
TEMPERATURE. Si dovrebbe visualizzare TEMPERATURE
25°C. Chiamare l’Assistenza Tecnica se il valore è
differente. Se la temperatura di calibrazione è corretta,
premere il pulsante OPERATE/STANDBY, si dovrebbe
visualizzare TEST: 15.0 MΩ x cm(±1 MΩ x cm).
Chiamare l’Assistenza Tecnica se il valore è fuori
specifica.
- Presenza di aria nel circuito di misura.
- sfiatare l'aria dal Q-PAK e dal circuito di misura
aprendo la valvola del punto di prelievo.
- Difetto di calibrazione del circuito di misura
(TEST INCORRECT).
- Calibrare il circuito di misura (vedi sopra).
Viene visualizzato
TEMPERATURE > 35 °C
durante i modi
PRODUCTION o RECIRCULATION
- La temperatura dell’acqua nel sistema ha
superato i 36 °C ed è necessario che scenda
sotto i 35 °C perché possa riaccendersi la
lampada U.V..
Ciò succede quando si lascia il sistema in modo
OPERATE per lungo tempo senza prelevare
acqua.
Porre il sistema in modo STANDBY quando non è in uso.
Scaricare acqua per favorire la diminuzione della
temperatura e permettere la riaccensione della lampada
U.V..
Se non è possibile ridurre la temperatura dell’acqua di
alimentazione, allora rimuovere il cavallotto E sulla
scheda PC per disabilitare questa funzione. Contattare
l’Assistenza Tecnica.
Viene visualizzato
TEMPERATURE < 0°C o
TEMPERATURE > +°C durante il
modo OPERATE.
- La temperatura dell’acqua è > di 40°C.
- Il termistore o la sua connessione alla cella di
misura della resistività è difettosa.
Controllare la temperatura dell’acqua di alimentazione
e diminuirla se è troppo elevata.
Chiamare l’Assistenza Tecnica.
La resistività dell’acqua non
raggiunge i 18,2 MΩ x cm dopo
parecchi minuti di ricircolo.
- Il Q-PAK è esausto.
Sostituire il Q-PAK. Vedere capitolo MANUTENZIONE.
12
RICERCA E RIPARAZIONE GUASTI
PROBLEMA
CAUSA
AZIONI CORRETTIVE
Assenza di produzione d’acqua in
modo OPERATE.
- La valvola dell’acqua di alimentazione è
chiusa.
- Non funziona l’elettro valvola d’ingresso.
- La pompa sta funzionando a secco.
Aprire la valvola di alimentazione.
Chiamare l’Assistenza Tecnica.
La pompa opera solo con acqua di alimentazione in
leggera pressione. Alimentare il sistema per gravità o in
pressione.
Bassa portata d’acqua in modo
OPERATE
- Mancanza di acqua di alimentazione.
Verificare la linea di alimentazione idrica.
Verificare la pressione, il diametro dei tubi, la lunghezza
dei tubi e la portata.
Eliminare l’aria dal filtro finale MILLIPAK 40 (vedere il
capitolo OPERATION, sezione AVVIAMENTO)
Sostituire il filtro finale MILLIPAK 40. Vedere il capitolo
MANUTENZIONE.
- Presenza di aria nel filtro finale MILLIPAK 40.
- il filtro MILLIPAK è intasato.
RICERCA E RIPARAZIONE GUASTI
13
14
RICERCA E RIPARAZIONE GUASTI
6
APPENDICE
○ ○ ○ ○ ○ ○ ○ ○ ○ ○ ○ ○ ○ ○ ○ ○ ○ ○ ○ ○ ○ ○ ○ ○ ○ ○ ○ ○ ○ ○ ○ ○ ○ ○ ○ ○ ○ ○ ○ ○ ○ ○ ○ ○ ○ ○ ○ ○ ○ ○ ○ ○ ○ ○ ○ ○ ○ ○ ○ ○ ○ ○ ○ ○ ○ ○ ○ ○ ○ ○ ○ ○ ○ ○ ○ ○ ○ ○
• Appendice 1 : Sostituzione del fusibile
principale (Figura 10)
• Appendice 2 : Sostituzione fusibile Scheda PC
principale (Figura 11)
1. Spegnere il sistema
1. Spegnere il sistema e rimuovere il cavo di alimentazione dalla presa
di corrente.
2. Rimuovere il cavo di alimentazione dalla presa di corrente.
3. Rimuovere il porta fusibile (A) (posizione (O) in figura 1).
4. Togliere il fusibile bruciato (B) e sostituirlo con uno nuovo (C).
NOTA : Cambiando il fusibile, suggeriamo di porre un secondo fusibile
nell’alloggiamento a lato, come riserva.
5. Reinserire il portafusibile in sede.
2. Svitare la manopola ((L) figura 1) e rimuovere la parte posteriore.
3. Sostituire il fusibile (C) della Scheda PC principale (A).
• Appendice 3 : Sostituzione del fusibile sulla
scheda PC della lampada U.V. (Figura 11)
Seguire le stesse procedura di Appendice 2, sostituire il fusibile (D) sulla
scheda PC (B) della lampada U.V..
APPENDICE
15
16
APPENDICE
7
I N F O R M A Z I O N I P E R L’ O R D I N E
○ ○ ○ ○ ○ ○ ○ ○ ○ ○ ○ ○ ○ ○ ○ ○ ○ ○ ○ ○ ○ ○ ○ ○ ○ ○ ○ ○ ○ ○ ○ ○ ○ ○ ○ ○ ○ ○ ○ ○ ○ ○ ○ ○ ○ ○ ○ ○ ○ ○ ○ ○ ○ ○ ○ ○ ○ ○ ○ ○ ○ ○ ○ ○ ○ ○ ○ ○ ○ ○ ○ ○ ○ ○ ○ ○ ○ ○
Descrizione
Numero
di Catalogo
SISTEMA
MILLI-Q 185 PLUS, 220V/50 Hz
Sistema di purificazione
(Lampada U.V. installata/QPAK NON INCLUSO)
ZFMQ050UV
MATERIALE
DI CONSUMO
Kit QPAK 1 (Alimentazione : Osmosi
Inversa /Distillazione)
(include 1 QPAK 1 e 1 filtro MILLIPAK 40)
CPMQK05R1
QPAK 1
CPMQ004R1
Kit QPAK 2 (Alimentazione: Deionizzazione)
(include 1 QPAK 2 e 1 filtro MILLIPAK 40)
CPMQK05D2
QPAK 2
CPMQ004D2
Filtro MILLIPAK 40, 0,22 µm (Conf. da 2)
MPGL04SK2
Kit sostituzione lampada U.V.
CFMQ18501
Regolatore di pressione
ZFMQ000PR
Staffa di montaggio a muro
ZFMQ00WMB
ACCESSORI
INFORMAZIONI PER L'ORDINE 17
18 INFORMAZIONI PER L'ORDINE
FIGURES
FIGURES 1 and 2
8
FIGURES
○ ○ ○ ○ ○ ○ ○ ○ ○ ○ ○ ○ ○ ○ ○ ○ ○ ○ ○ ○ ○ ○ ○ ○ ○ ○ ○ ○ ○ ○ ○ ○ ○ ○ ○ ○ ○ ○ ○ ○ ○ ○ ○ ○ ○ ○ ○ ○ ○ ○ ○ ○ ○ ○ ○ ○ ○ ○ ○ ○ ○ ○ ○ ○ ○ ○ ○ ○ ○ ○ ○ ○ ○ ○ ○ ○ ○ ○
D
E
H
185
POWER
OPERATE/
STAND BY
EXCHANGE
RACK
TEMPERATURE
G
C
F
U.V.
B
I
A
O
P
H
N
E
M
C
D
L
G
B
K
Q
A
J
Figure 1
F
Figure 2
FIGURES 3, 4 and 5
B
E
C
F
MAN
UAL
D
MILLIP
O
A
RE
B
D
B
G
H
C
C
Figure 3
185
Figure 4
Figure 5
A
FIGURE 6
C
r
ate
PRESS
PRESS
w
QPACK
A
A
F
PRESS
PRESS
1
5
3
B
QPACK
D
QPACK
2
4
E
Figure 6
FIGURES 7 and 8
A
B
C
D
E
C
1
3
2
B
H
A
J
G
185
F
5
4
Figure 7
Figure 8
FIGURES 9,10 and 11
A
B
C
B
A
Figure 10
B
C
E
D
A
C
B
D
Figure 9
Figure 11
9
T E C H N I C A L I N F O R M AT I O N
○ ○ ○ ○ ○ ○ ○ ○ ○ ○ ○ ○ ○ ○ ○ ○ ○ ○ ○ ○ ○ ○ ○ ○ ○ ○ ○ ○ ○ ○ ○ ○ ○ ○ ○ ○ ○ ○ ○ ○ ○ ○ ○ ○ ○ ○ ○ ○ ○ ○ ○ ○ ○ ○ ○ ○ ○ ○ ○ ○ ○ ○ ○ ○ ○ ○ ○ ○ ○ ○ ○ ○ ○ ○ ○ ○ ○ ○
• Technical assistance
For futher information on Millipore products, please contact your nearest Millipore subsidiary.
AUSTRALIA
Millipore Australia Pty. Limited
A.C.N. 001 239 818
Private Bag No. 18
87-89 Mars Road
Lane Cove, N.S.W.2066
Tel. Toll Free (008) 222-111
In Sydney Area (02) 428-7333
FAX (02) 427-0611
AUSTRIA, CENTRAL EUROPE,
C.I.S., AFRICA, MIDDLE EAST
and GULF
Millipore Ges.m.b.H.
Hietzinger Hauptstraße 145
A-1130 Wien, Austria
Tel. (43) 1 877 8926
Telex 131464 miliv a
FAX (1) 877 1654
BALTIC REPUBLICS
Millipore Oy
Ruukinkuja 1
SF-02320 Espoo 32, Finland
Tel. (90) 801 90 77
FAX (90) 801 46 40
BELGIUM and LUXEMBOURG
Millipore S.A.-N.V.
Rue de la Fusée
60/Raketstraat 60
B-1130 Bruxelles-Brussel
Tel. (02) 242.17.40
FAX (02) 242.27.85
BRAZIL
Millipore Indústria e Comércio
Ltda.
Rua Prof. Campos de Oliveira,
430
CEP 04675
São Paulo-SP
Tel. (011) 548-7011
Telex 11 57751 MILY BR
FAX (011) 548-7923
CANADA
Millipore (Canada) Ltd.
3688 Nashua Drive
Mississauga, Ontario/L4V 1M5
Tel. Toll Free 1-800-268-4881
In Toronto Area (416) 678-2161
FAX (416) 678-0882
CHINA, People’s Republic of
Millipore China Ltd.
Suite 1101-1106 and 16
Asia Pacific Bldg.
No. 8 Ya Bao Road
Chao Yang District
Beijing
Postal Code 100020
Tel. (86-1) 5135114/51351167/5125992/5126123
Telex 22685 NMLBJ
FAX (86-1) 5126113
Millipore China Ltd.
Room 615, China Hotel Office
Tower
Linhua Lu
Guangzhou
Postal Code 510015
Tel. (86) 20-686217
Millipore China Ltd.
Suite 2805, Union Building
100 Yan An Road (E)
Shanghai 200002
Tel. (86) 21-3203856
FAX (86) 21-3200236
CZECH REPUBLIC
Millipore (Austria) Ges.m.b.H.
Obchodní Zastoupení
Rícanova 21
CS-169 00 Praha 6
Tel. (42) 2-35 02 27
(42) 2-35 23 75
FAX (42) 2-35 02 27
(42) 2-35 23 75
DENMARK
Millipore A/S
Baldersbuen 46
DK-2640 Hedehusene
Tel. 46 59 00 23
FAX 46 59 13 14
FINLAND
Millipore Oy
Ruukinkuja 1
SF-02320 Espoo
Tel. (90) 801 90 77
FAX (90) 801 46 40
T E C H N I C A L
I N F O R M A T I O N
ˇRíˇcanova
FRANCE
Millipore S.A.
BP 307
F-78054 Saint-Quentin Yvelines
Cedex
Tel. (1) 30.12.70.00
Telex 698 371 F
FAX (1) 30.12.71.80
GERMANY
Millipore GmbH
Postfach 6147
D-65731 Eschborn
Tel. (06196) 494-0
Telex 40 72 704 mil d
FAX (06196) 482237
HONG KONG
Millipore China Ltd.
Millipore Asia Ltd.
1401 Cityplaza 4
12 Taikoo Wan Road
Hong Kong
Tel. (852) 803 9111
Telex 33140 MWBHK HX
FAX (852) 513 0313
HUNGARY
Millipore kft
Andor ut 60
H-1119 Budapest
Tel. 36 11 66 86 74
Telex 20 25 55
FAX 36 11 81 29 59
T E C H N I C A L
INDIA
Millipore (India) Pvt. Ltd.
50A, 2nd Phase Ring Road
Peenya
Bangalore 560 058
Tel. (812) 394657, 396320
Telex 845-5089 MLPR IN
Cable: Millipore
FAX (812) 396345
JAPAN
Nihon Millipore Ltd.
Dai 5 Koike Bldg. 3-12
Kitashinagawa 1-Chome
Shinagawa-Ku
Tokyo 140
Tel. (03) 3474-9111
Telex 24948 MILLIPOR J
FAX (03) 3474-9130
ITALY
Millipore S.p.A.
Via Achille Grandi, 23
I-20090 Vimodrone MI
Tel. (02) 25078.1
Telex 312 284 milspa i
FAX (02) 2650324
KOREA
Millipore Korea Ltd.
2 FL, Soseok Building
157-21, Samsung-Dong
Kangnam-Ku
Seoul 135-090
Tel. (82-2) 5548305
FAX (82-2) 5636253
Millipore S.p.A.
Via D. Sansotta 100
I-00144 Roma
Tel. (06) 5203600
FAX (06) 5295735
Millipore S.p.A.
P.za S. Croce 42
I-35123 Padova
Tel. (049) 8803720
FAX (049) 8803735
I N F O R M A T I O N
MALAYSIA
Millipore Asia Ltd.
Malaysia Branch
B4 - 05, PJ. Industrial Park
Section 13, Jalan Kemajuan
46200 Petaling Jaya, Selangor
Tel. (60) 3-7571322
FAX (60) 3-7571711
MEXICO
Millipore S.A. de C.V.
Avenida Ingenieros
Militares 85-PB
México 11230 D.F.
Tel. (525) 576-96-88
FAX (525) 576-87-06
THE NETHERLANDS
Millipore B.V.
Penningweg 33
Postbus 166
NL-4870 AD Etten-Leur (N.B.)
Tel. (01608) 22000
Telex 54 840 milwa nl
FAX (01608) 22436
NORWAY
Millipore AS
Postboks 39 Simensbråten
N-1107 Oslo
Tel. 22 67 82 53
FAX 22 68 53 15
POLAND
Millipore (Austria) Ges.m.b.H.
Oddzial w Warszawie
Ul. Pulawska 107 d/21
PL-02-595 Warszawa
Tel. (48) 22-44 76 10
(48) 22-44 09 02
Telex 825 422
FAX (48) 22-44 09 02
PUERTO RICO
Millipore Corporation
Puerto Rico Branch
P.O. Box 11977
Cidra, Puerto Rico 00639
Tel. (809) 747-8444
FAX (809) 747-8449
SINGAPORE
Millipore Asia Ltd.
#07-01 Jumbo Industrial Bldg.
19 Kim Keat Road
Singapore 1232
Tel. (65) 253-2733
Telex RS 56556 MILLIP
FAX (65) 254-4056
SPAIN
Millipore Ibérica, S.A.
Avda. del Llano Castellano, 13-3º
E-28034 Madrid
Tel. 91-729 03 00
Telex 23545 milli e
FAX 91-729 29 09
Millipore Ibérica, S.A.
Entenza, 24
E-08015 Barcelona
Tel. 93-325 96 16
Telex 50524 wtrs e
FAX 93-325 98 96
Millipore Ibérica, S.A.
Edificio Congreso, módulo 320
Polígono del Aeropuerto
E-41020 Sevilla
Tel. 95-425 68 77
FAX 95-425 62 06
SWEDEN
Millipore AB
Box 7090
S-172 07 Sundbyberg
Tel. 08-628 69 60
FAX 08-628 64 57
SWITZERLAND
Millipore AG
Chriesbaumstrasse 6
CH-8604 Volketswil
Tel. (01) 945-3242
Telex 82 94 08 MILAG CH
FAX (01) 945-3766
TAIWAN
Millipore Asia Ltd.
Unit #804, 8/F, Lotus Bldg.
136 Jen-Ai Road, Sec. 3
Taipei 10628 R.O.C.
Tel. (886-2) 7001742
FAX (886-2) 7553267
U.S.A.
Millipore Corporation
P.O. Box 255
Bedford, MA 01730
Tel. Toll Free (including
Massachusetts)
800-225-1380
In Western States, Alaska &
Hawaii
800-632-2708
In Puerto Rico 809-747-8444
In All Other Countries
Millipore Intertech
397 Williams Street
Marlborough, MA 01752-9162
U.S.A.
Tel. (508) 624-8622
FAX (508) 624-8630
U.K. and IRELAND
Millipore (U.K.) Ltd.
“The Boulevard”
Blackmoor Lane Watford,
Hertfordshire WD1 8YW
Tel. (0923) 816375
Telex 24191 milpor g
FAX (0923) 818297
T E C H N I C A L
I N F O R M A T I O N
•Warranty
Millipore Corporation (Millipore) warrants the products manufactured by
it against defects in materials and workmanship when used in accordance
with the applicable instructions for a period of one year from the date of
shipment of the products. MILLIPORE MAKES NO OTHER WARRANTY,
EXPRESSED OR IMPLIED. THERE IS NO WARRANTY OF
MERCHANTABILITY OR FITNESS FOR A PARTICULAR PURPOSE.
The warranty provided herein and the data, specification and descriptions
of Millipore products appearing in Millipore’s published catalogues and
product literature may not be altered except by express written agreement
signed by an officer of Millipore. Representations, oral or written, which
are inconsistent with this warranty or such publications are not authorized
and if given, should not be relied upon.
T E C H N I C A L
I N F O R M A T I O N
In the event of a breach of the foregoing warranty, Millipore’s sole
obligation shall be to repair or replace, at its option, any product or part
thereof that proves defective in materials or workmanship within the
warranty period, provided the customer notifies Millipore promptly of any
such defect. The exclusive remedy provided herein shall not be deemed to
have failed of its essential purpose so long as Millipore is willing to repair
or replace any nonconforming Millipore product or part. Millipore shall
not be liable for consequential damages resulting from economic loss or
property damages sustained by a customer from the use of its products.
However, in some states the purchaser may have rights under state law in
addition to those provided by this warranty.


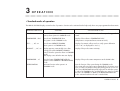
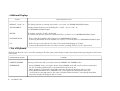
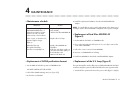
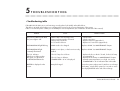
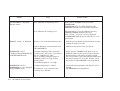
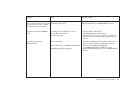


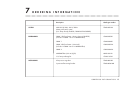


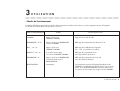
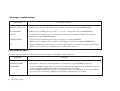
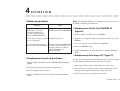
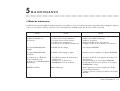
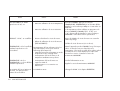
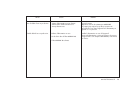


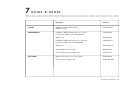


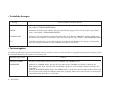
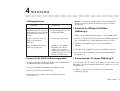
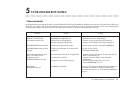
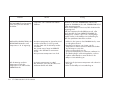
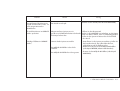


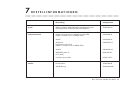


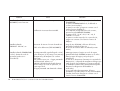
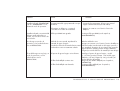

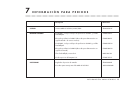


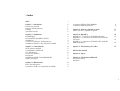

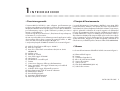
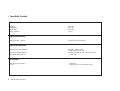


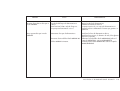


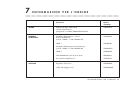


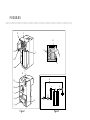


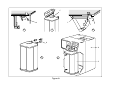

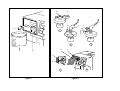

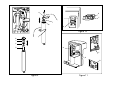
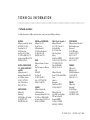
![2 Drücken Sie [OK].](http://vs1.manualzilla.com/store/data/006793142_1-d536e7beecbcefb243f92339952c4477-150x150.png)