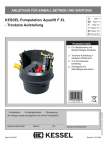
1
ANLEITUNG FÜR EINBAU, BEDIENUNG UND WARTUNG
KESSEL - Schaltgerät Aqualift F
mit Drucksensor
Bestell-Nr. 28730 (Mono), 28745 (Duo)
Bedienungsanleitung
Page 1-28
Installation Manual
Page 29-56
Guide Installation
Page 57-84
Istruzioni per l’installazione
Pagina 85-112
Handleiding voor montage
Pagina 113-140
Instrukcja Zabudowy
Str. 141-168
Produktvorteile
■ Schaltgerät Spritzwassergeschützt IP 54
■ codierte Steckverbindungen für einfachste Montage
■ für KESSEL-Pumpen bis 1,2
kW Aufnahmeleistung
■ mit SDS-System
(Selbstdiagnosesystem)
■ Drucksensor zur sicheren
Aufnahme von Füllständen
■ Wartungspflichtige Anlage
(siehe Übergabeprotokoll)
Installation
Inbetriebnahme
Techn. Änderungen vorbehalten
Abb. 1 zeigt Art.-Nr. 28730
Einweisung
der Anlage wurde durchgeführt von Ihrem Fachbetrieb:
Name/Unterschrift
Stand 01/2012
Datum
Ort
Stempel Fachbetrieb
Sach-Nr. 010-586
1. Sicherheitshinweise
Die in dieser Betriebsanleitung enthaltenen Sicherheitshinweise, die für Einbau, Betrieb, Wartung
und Instandsetzung des Aggregats beachtet werden müssen, sind mit folgenden Symbolen gekennzeichnet:
Allgemeines Gefahrensymbol nach ISO 3864-B-3-1 zur Kennzeichnung von
Gefährdungen für Personen.
Gefahrensymbol nach ISO 3864-B-3-6 zur Warnung vor elektrischer Spannung.
Dieses Wort kennzeichnet Sicherheitshinweise, deren Nichtbeachtung Gefahren für die Maschine und deren Funktion hervorrufen kann.
Achtung
Diese Bedienungsanleitung muss ständig an der Anlage vorhanden sein.
Sehr geehrter Kunde,
wir freuen uns, dass Sie sich für ein Produkt von KESSEL entschieden haben.
Die gesamte Anlage wurde vor Verlassen des Werkes einer strengen Qualitätskontrolle unterzogen. Prüfen Sie bitte dennoch sofort, ob die Anlage vollständig und unbeschädigt bei Ihnen
angeliefert wurde. Im Falle eins Transportschadens setzen Sie sich mit Ihrem
Lieferanten in Verbindung.
Vor Montage und Inbetriebnahme der KESSEL-Abwasserstation Aqualift-F Compact ist diese
Einbau- und Bedienungsanleitung sorgfältig zu lesen.
KESSEL AG
Allgemeine Sicherheitsvorkehrungen
Bei Installation, Betrieb, Wartung oder Reparatur der Anlage sind die Unfallverhütungsvorschriften, die relevanten Normen und Richtlinien sowie die Vorschriften der örtlichen
Energie- und Versorgungsunternehmen zu beachten.
Personalqualifikation und -schulung
Das Personal für Bedienung, Wartung, Inspektion und Montage muss die entsprechende
Qualifikation für diese Arbeiten aufweisen.
2
1. Sicherheitshinweise
Verantwortungsbereich, Zuständigkeit und die Überwachung des Personals müssen
durch den Betreiber genau geregelt sein. Liegen bei dem Personal nicht die notwendigen
Kenntnisse vor, so ist dieses zu schulen und zu unterweisen. Dies kann, falls erforderlich,
im Auftrag des Betreibers der Anlage durch den Hersteller/Lieferanten erfolgen. Weiterhin ist durch den Betreiber sicherzustellen, dass der Inhalt der Betriebsanleitung durch
das Personal voll verstanden wird. Dazu hat eine dokumentierte Einweisung zu erfolgen.
Gefahr durch elektrische Spannung
Diese Anlage enthält elektrische Spannungen und steuert drehende, mechanische Anlagenteile. Bei Nichtbeachtung der Bedienungsanleitung können erheblicher Sachschaden, Körperverletzung oder gar tödliche Unfälle die Folge sein. Vor allen Arbeiten an der
Anlage ist diese sicher vom Netz zu trennen. Hauptschalter und Sicherungen müssen
abgeschaltet, d.h. spannungsfrei geschalten und gegen Wiedereinschalten gesichert
werden. Sind nur Sicherungen vorhanden, sind diese auszuschalten und mit einem Hinweis zu versehen, damit dritte Personen die Hauptsicherung nicht wieder einschalten
können. Für alle elektrischen Arbeiten an der Anlage gilt die VDE 0100. Die Anlage muss
über eine Fehlerstrom-Schutzeinrichtung (RCD) mit einem Bemessungsfehlerstrom von
30mA versorgt werden. Das Schaltgerät steht unter Spannung und darf nicht geöffnet
werden. Nur Elektrofachkräfte dürfen Arbeiten an den elektrischen Einrichtungen durchführen. Der Begriff Elektrofachkraft ist in der VDE 0105 definiert. Es ist sicherzustellen,
dass sich die Elektrokabel sowie alle anderen elektrischen Anlagenteile in einem einwandfreien Zustand befinden. Bei Beschädigung darf die Anlage auf keinen Fall in Betrieb genommen werden bzw. ist umgehend abzustellen. Elektrische Leitungen so
verlegen, dass sie nicht geknickt werden und zugentlastet sind.
Verbrennungsgefahr für Hände und Finger
Teile der Anlage können während des Betriebes eine hohe Temperatur entwickeln.
Die Anlage stellt eine Komponente einer Gesamtanlage dar. Beachten Sie deshalb
auch die Bedienungsanleitungen der Gesamtanlage und der einzelnen Komponenten. Bei jeder Montage, Wartung, Inspektion und Reparatur an einer der Komponenten ist immer die Gesamtanlage außer Betrieb zu setzen und gegen
Wiedereinschalten zu sichern.
Die Betriebssicherheit der gelieferten Anlage ist nur bei bestimmungsgemäßer Verwendung gewährleistet. Die Grenzwerte der technischen Daten dürfen auf keinen
Fall überschritten werden.
Vom Hersteller zugelassenes Zubehör dient der Sicherheit. Die Verwendung anderer
Teile kann die Haftung für die daraus entstehenden Folgen aufheben.
Die Anlage darf nicht in explosionsgefährdeten Bereichen betrieben werden.
Der Netzstecker, die Sicherung und der Fehlerstromschutzschalter müssen frei zugänglich sein, um die Anlage im Störungsfall vom Netz zu trennen.
3
Inhaltsverzeichnis
1.
Sicherheitshinweise
...........................................................................Seite
2.
Allgemein
...........................................................................Seite........5
3.
Montage/
Elektroanschluss
3.1..Wandmontage des Schaltgerätes ...............Seite........6
3.2..Kabelanschluss ...........................................Seite........7
3.3..Elektroanschluss .........................................Seite........8
3.4..Anschlusspläne ...........................................Seite........9
3.5..Externer Signalgeber...................................Seite........11
3.6..Potentialfreier Kontakt.................................Seite........11
3.7..Kürzen der Kabel.........................................Seite........11
3.8..Verlängerung der Kabel...............................Seite........11
3.9..Anschluss Luftschlauch/Drucksensor.........Seite........11
4.
Betrieb
4.1..Inbetriebnahme ...........................................Seite........13
4.2..Anzeige-/Bedienelemente Mono.................Seite........13
4.3..Anzeige-/Bedienelemente Duo ...................Seite........14
4.4 Betriebszustände des Schaltgeräts ............Seite........14
5.
Fehlererkennung
...........................................................................Seite........17
6.
Zusatzfunktionen
6.1
6.2
6.3
6.4
6.5
7.
Technische Daten
...........................................................................Seite........21
8.
Inspektion uns Wartung
8.1
8.2
8.3
8.4
8.5
9.
Gewährleistung
...........................................................................Seite........23
10. Konformitätserklärung
2-3
Automatischer Pumpenfunktionstest ..........Seite........20
Kontrolle der Batteriespannung ..................Seite........20
Batteriefunktion ...........................................Seite........20
Potentialfreier Alarmausgang (Option) ........Seite........20
Automatische Wiedereinschaltversuche
bei Pumpenfehler ........................................Seite........20
Inspektion....................................................Seite........22
Wartung .......................................................Seite........22
Hinweise zum elektrischen Schaltgerät ......Seite........22
Hinweise zu den Pumpen............................Seite........22
Störungen....................................................Seite........22
...........................................................................Seite........24
11. Übergabeprotokoll für den Betreiber..............................................................Seite........25
12. Übergabeprotokoll für das einbauende Unternehmen..................................Seite........27
4
2. Allgemein
Bei allen Arbeiten an der Anlage sind
die Einbau- und Bedienungsanleitungen aller Einzelkomponenten zu beachten.
Verwendungszweck der Schaltgeräte:
Das Schaltgerät dient der Pumpenansteuerung zum Leeren von Behältern und zum
Anzeigen von den Betriebszuständen.
Über den Drucksensor im Schaltgerät werden
die Schaltpunkte festgestellt. Die Schaltpunkte
sind werkseitig voreingestellt.
Eine Veränderung der Schaltpunkte ist möglich. Bitte kontaktieren Sie den KESSELWerkskundendienst.
Abb.2 zeigt 28703
Abb. 3 zeigt 824821B
Abb. 4 zeigt 28451
5
3. Montage / Elektroanschluss
3.1 Wandmontage des Schaltgerätes
2 Halbrundkopfschrauben (TX20) 4,5 x 35
mm soweit eindrehen, dass das Schaltgerät wandbündig eingehängt werden kann.
Hierbei auf genügend Wandabstand rechts
achten, damit eine Deckelöffnung möglich
ist. Schrauben, Kunststoffdübel und Bohrschablone sind im Lieferumfang enthalten.
Das Schaltgerät muss trocken und frostsicher installiert werden, vorzugsweise im
Haus, wo etwaige Alarmmeldungen auch
wahrgenommen werden können. Vor direkter Sonneneinstrahlung schützen!
Zur Montage muss das Schaltgerät nicht
geöffnet werden. Zwei waagerechte Bohrlöcher Ø 6 mm, im Abstand von 168 mm
(Mono) bzw. 254 mm (Duo) anbringen. Die
Achtung
Die Batterien sind erst bei der Inbetriebnahme anzustecken.
x
Abb. 5
x = 168 mm bei Mono-Schaltgerät
x = 254 mm bei Duo-Schaltgerät
6
3. Montage / Elektroanschluss
3.2 Kabelanschluss
Hinweis zum Kabelschutz
Bei freiverlegten Sonden- und Pumpenkabel ist vor Verbiß von Ungeziefer zu schützen. Ein entsprechender Schutzmantel ist
über den KESSEL-Kundendienst erhältlich.
Die Steuerleitungen für Sonde und Pumpe
durch das Kabelleerrohr (DN 50) ziehen.
Gegebenenfalls die Leitungen für den
externen Signalgeber und den potentialfreien Kontakt verlegen. Anschließend
am Schaltgerät Pumpenstecker (Abb. 6)
und Stecker optische Sonde (Abb. 7)
entsprechend den Markierungen (Lupenausschnitte) aufstecken und verschrauben
(3 Nm für Pumpenanschluss / 1 Nm für
Sondenanschluss).
Verschraubung für Druckanschluss handfest anziehen.
↕
Spalt
Abb. 8
Spalt Pumpenstecker: 3-4 mm
Spalt optische Sonde: 1-2 mm
Komplette Anschlussdarstellung
Abb. 6 Pumpenstecker
➀
➁
➀ Netzanschluss
➁ Pumpe
➂ Pumpe 2 (nur Duo)
➃ optische Sonde
➄ Drucksensor
Abb. 7 Stecker optische Sonde
7
➃
➄
Abb. 9
3. Montage / Elektroanschluss
3.3 Elektroanschluss
Hinweis: Bei Direktanschluss sind die Informationen der untenstehenden Tabelle sowie
die Anschlusspläne unter Punkt 3.4 zu beachten.
Diese Arbeiten dürfen nur von einer Elektrofachkraft durchgeführt werden.
EINZELANLAGE - Sicherheitshinweise beachten !
Auszuführende Arbeit
Beschreibung
Netzanschluss
• Die vorgeschriebene installationsseitige Vorsicherung
darf 16A („C“-Automat) nicht überschreiten.
• Der Netzanschluss für die gesamte Anlage ist ein
Schutzkontaktstecker mit 1,7 m Anschlussleitung.
Pumpenzuleitungen
• Die Pumpenzuleitungen sind entsprechend der
Adernfarbe an die entsprechenden Klemmen der
Klemmenböcke „Pumpe 1“ und „Pumpe 2“ anzuschließen (Reihenfolge beachten).
Pumpe Ader PE
= Klemme PE;
Pumpe Ader blau (bl) = Klemme blau
Pumpe Ader braun (br)= Klemme grau
• Der Schutzleiter ist jeweils an der Klemme PE des
Klemmblocks „Pumpe 1“ und „Pumpe 2“ anzuschließen.
Niveaueingänge
optische Sonde
• Die Sondenleitung ist entsprechend der Adernkennzeichnung an die Klemmen des Klemmblocks
„Sonde“ anzuschließen.
Die Reihenfolge beachten.
Sonde Ader blau (bl)
= Klemme blau
Sonde Ader weiß (ws)
= Klemme weiß
Sonde Ader schwarz (sw) = Klemme schwarz
8
3. Montage / Elektroanschluss
3.4 Anschlusspläne
3.4.1 Anschlussplan Schaltgerät Aqualift Mono
Abb. 10
9
3. Montage / Elektroanschluss
3.4.2 Anschlussplan Schaltgerät Aqualift Duo
Abb. 11
10
3. Montage / Elektroanschluss
3.9 Anschluss Luftschlauch / Drucksensor
3.5 Externer Signalgeber
Der externe Signalgeber (Best.Nr. 20162) zur
Übertragung des Warntons in andere Räume
kann nach Bedarf angeschlossen werden.
Achtung
Den Schlauch stetig steigend verlegen,
nicht knicken oder rollen.
Den Schlauch des Drucksensors in die
Verschraubung am Schaltgerät stecken
und die Überwurfmutter verschrauben.
Gegebenenfalls ist er zu kürzen.
Bei Druckleitungslängen von über 10 m ist
mit einem Kleinkompressor zur Druckerhaltung zu arbeiten.
Die maximale Druckleitungslänge von
30 m darf nicht überschritten werden.
3.6 Potentialfreier Kontakt
Optional kann eine Zusatzplatine mit einem
potentialfreien Kontakt (Best.Nr. 80072) angeschlossen werden. Auf diese Weise kann
eine Sammelstör- oder Sammelalarmmeldung an übergeordnete Gebäudeleittechnik
übertragen werden.
3.7 Kürzen der Kabel
Achtung
Nach Ablängen des Kabels, Neuauflegen
der Adern gemäß untenstehender Abbildung.
Hinweis:
Die Vorschriften der VDE 0100, VDE
01107, IEC, bzw. der örtlichen Energieversorgungsunternehmen sind zu beachten.
Das Schaltgerät darf nicht in explosionsgefährdeten Räumen installiert werden. Der Netzanschluss ist 230 V AC / 50
Hz mit max. Absicherung „C“ 16A träge
vorzusehen (FI-Schutzschalter 30 mA).
Abb.12
Abschluss der Elektroarbeiten
Nach dem vollständigen Elektroanschluss
ist der Deckel des Schaltgerätes wieder
ordnungsgemäß zu verschließen.
3.8 Verlängerung der Kabel
Werden mehr als 5 m Kabellänge benötigt,
so gibt es hierfür 10m-Verlängerungen
(Art.-Nr. 80889 Sonde, Art.-Nr. 80890
Motor und Art. Nr. 80891 Pumpe). Die maximale Leitungslänge von 30 m darf nicht
überschritten werden.
11
4. Betrieb
d
b
e
a
f
g
c
a)
b)
c)
d)
e)
f)
g)
h)
Gehäuse Schaltgerät
Verschlussschraube
Netzanschluss
grüne LED „Power“
rote LED „Alarm“
orange LED “NIVEAU”
orange LED “PUMPE”
Alarm-Taste
k
l
i)
k)
l)
m)
h
i
m
„TEST“-Taste “PUMPE”
Anschluss Pumpe
Anschluss optische Sonde
Anschluss Drucksystem
Abb. 13
12
4. Betrieb
4.1 Inbetriebnahme
Den Batteriestecker auf der Platine anstecken (Abb. 14) den Gehäusedeckel
schließen und verriegeln. Vor der Inbetriebnahme müssen Pumpen, Drucksensor und
optische Sonde fest eingebaut und angeschlossen sein.
Prüfen der Anschlussleitungen auf festen
Sitz, danach Netzanschluss herstellen.
Das Schaltgerät führt einen Grundfunktionstest, die sog. Initialisierung durch. Dies wird
durch ein Lauflicht ca. 8 sec. nach Anstekken der Batterie, bzw. des Netzsteckers angezeigt. Bei der Initialisierung werden
Batterie, Netz, Drucksensor, optische Sonden- und Motoranschlüsse überprüft.
Bei korrektem Anschluss des Schaltgerätes
leuchtet anschließend:
- die grüne POWER LED bei Mono-Schaltgeräten
- keine LED bei Duo-Schaltgeräten.
Die Anlage ist jetzt betriebsbereit.
Abb. 14
4.2 Beschreibung der Anzeige- und Bedienelemente Schaltgerät Mono
Anzeigeelemente
Normalbetrieb
(zur Information
für den Bediener)
Störungen
Bedienelemente
Taste
LED
Farbe
Funktion
„Power“
grün
Spannungsversorgung in Ordnung
„Alarm“
rot
Alarm-Niveau überschritten etc.
„Niveau“
orange Ein-Niveau überschritten
„Pumpe“
orange Pumpenausgang aktiviert
siehe 5. Fehlererkennung
„Alarm“
„Pumpe“
Ausschalten des akustischen Alarms,
Quittieren von Warnungen und Fehlern,
Anwählen und Verändern von Einstellungen
Handbetrieb Pumpe
13
4. Betrieb
4.3 Beschreibung der Anzeige- und Bedienelemente Schaltgerät Duo
Anzeigeelemente
Normalbetrieb
(zur Information
für den Bediener)
Störungen
Bedienelemente
Taste
Mono/Duo
LED
orange
„Niveau“
rot
„Alarm“
orange
„Pumpe I“
orange
„Pumpe II“
siehe 5. Fehlererkennung
„Alarm“
„Pumpe“
Funktion
Ein-Niveau überschritten
Alarm-Niveau überschritten etc.
Pumpenausgang I aktiviert
Pumpenausgang II aktiviert
Ausschalten des akustischen Alarms,
Quittieren von Warnungen und Fehlern,
Anwählen und Verändern von Einstellungen
Handbetrieb Pumpe I und Pumpe II
4.4 Betriebszustände des Schaltgeräts
Die Anlage wird über das AUS-NIVEAU,
EIN1-NIVEAU, EIN2-NIVEAU (nur bei Schaltgerät Aqualift F Duo, Art.-Nr. 28745) und
ALARM-NIVEAU geschaltet.
für Mono-Schaltgerät
zusätzlich für Duo-Schaltgerät
Ausgangszustand:
Power LED leuchtet / keine LED leuchtet
Wenn mit steigendem Niveau im Behälter
das EIN1-NIVEAU überschritten wird, startet die Einschaltverzögerung von 2 Sekunden. Die Pumpe I wird eingeschaltet und
läuft bis das AUS-NIVEAU wieder unterschritten wird.
Während des Pumpenlaufs leuchten die
orange LED „NIVEAU“ und die orange
LED „PUMPE I“.
4.4.1 Normalbetrieb - Drucksensor und
optische Sonde funktionsfähig.
Die Niveaumessung erfolgt über zwei von
einander unabhängige Verfahren. Das
AUS-NIVEAU, EIN1-NIVEAU und EIN2-NIVEAU (nur bei Schaltgerät Aqualift F Duo, Art.Nr. 28745) werden über einen Drucksensor
gemessen.
Das ALARM-NIVEAU wird über eine optische Sonde gemessen.
Wenn ein Messverfahren ausfällt, bleibt
die Anlage trotzdem über das andere
Messverfahren funktionsfähig.
Am Schaltgerät wird der Sondenfehler
bzw. Niveaufehler optisch und akustisch
angezeigt.
Bei Duo-Schaltgerät:
Mit dem Überschreiten des EIN1-NIVEAUS werden die Pumpen immer abwechselnd eingeschaltet. Es läuft nur eine Pumpe. Wenn die 2.
Pumpe läuft, leuchtet die orange LED „PUMPE
II“.
14
4. Betrieb
4.4.2 Kurzzeitig erhöhtes Niveau Drucksensor und optische
Sonde funktionsfähig
Die orange LED „NIVEAU“ und die orange
LED „PUMPE I“ leuchten. Nach einer Einschaltverzögerung von 2 Sekunden wird
Pumpe II mit eingeschaltet. Die orange LED
„PUMPE II“ leuchtet und die rote LED
„ALARM“ blinkt. Beide Pumpen laufen miteinander.
Nach einer Einschaltverzögerung von 2
Sekunden leuchtet die rote LED „ALARM“
(ALARM-Niveau überschritten). Der akustische Alarm ertönt. Wenn das ALARMNIVEAU wieder unterschritten wird,
erlischt der akustische Alarm und die rote
LED „ALARM“ blinkt. Beide Pumpen laufen
miteinander.
30mm über dem AUS-NIVEAU wird PUMPE II
vorzeitig ausgeschaltet. Die orange „PUMPE IILED“ erlischt.
Pumpe I läuft noch weiter bis das AUSNIVEAU unterschritten ist. Und die Nachlaufzeit verstrichen ist.
Die orange LED „PUMPE I“ und die
orange LED „NIVEAU“ erlöschen.
Die blinkende LED „ALARM“ zeigt an,
dass das ALARM-NIVEAU, wenn auch nur
kurzzeitig, überschritten war.
Ausgangszustand: Keine LED leuchtet
Wenn mit steigendem Niveau im Behälter das
EIN1-NIVEAU und EIN2-NIVEAU überschritten
wird, startet die Einschaltverzögerung von 2
Sekunden. Die Pumpe I wird eingeschaltet. Die
orange LED „NIVEAU“ und die orange LED
„PUMPE I“ leuchten. Nach einer weiteren Einschaltverzögerung von 2 Sekunden wird
Pumpe II mit eingeschaltet. Die orange LED
„PUMPE II“ leuchtet und die rote LED „ALARM“
blinkt. Beide Pumpen laufen gleichzeitig.
30mm über dem AUS-NIVEAU wird PUMPE II
vorzeitig ausgeschaltet. Die orange „PUMPE II“
-LED erlischt.
Pumpe I läuft noch weiter bis das AUS-NIVEAU
unterschritten ist und wird dann ausgeschaltet. Die orange LED „PUMPE I“, die orange LED
„NIVEAU“ und die rote LED „ALARM“ erlöschen.
Mit dem Überschreiten des EIN2-NIVEAUS wird
die zweite Pumpe immer zeitverzögert nach
der ersten eingeschaltet und vorzeitig ausgeschaltet.
4.4.4 Ausfall Drucksystem, optische
Sonde funktionsfähig
4.4.3 Kurzzeitig stark erhöhtes Niveau
- Drucksensor und optische
Sonde funktionsfähig
Ausgangszustand:
Power LED leuchtet / keine LED leuchtet.
Wenn mit steigendem Niveau im Behälter
das ALARM-NIVEAU überschritten wird,
startet die Einschaltverzögerung von 2
Sekunden. Die rote LED „ALARM“ leuchtet und der akustische Alarm ertönt. Die
Pumpe I wird eingeschaltet. Die orange
LED „PUMPE I“ leuchtet. Nach einer Ein-
Ausgangszustand:
Power LED leuchtet / keine LED leuchtet.
Wenn mit steigendem Niveau im Behälter
das EIN1-NIVEAU, EIN2-NIVEAU und
ALARM-NIVEAU überschritten wird, startet die Einschaltverzögerung von 2 Sekunden. Die Pumpe I wird eingeschaltet.
15
4. Betrieb
schaltverzögerung von 2 Sekunden wird
Pumpe II mit eingeschaltet. Die orange LED
„PUMPE II“ leuchtet. Beide Pumpen laufen miteinander.
Wenn das ALARM-NIVEAU wieder unterschritten wird, erlischt der akustische
Alarm und die rote LED „ALARM“ blinkt.
Nach vier Sekunden wird PUMPE II vorzeitig
ausgeschaltet. Die orange „PUMPE II-LED“ erlischt.
Später wird Pumpe I ausgeschaltet.
Die orange LED „PUMPE I“ erlischt.
Während des Pumpenlaufs leuchte die orange
LED „PUMPE II“.
Wenn eine Pumpe angewählt, aber nicht
eingeschaltet wurde, wird der Handbetrieb
nach 10 Sekunden automatisch verlassen.
Wenn innerhalb der 10 Sekunden Niveau
erkannt wird, wird der Handbetrieb sofort
verlassen und die Pumpe(n) automatisch
eingeschaltet.
4.4.5 Handbetrieb
Wenn die Anlage im Normalbetrieb ist,
kann mit der Taste „PUMPE“ Pumpe I oder
Pumpe II eingeschaltet werden.
Das Einschalten der Pumpe erfolgt in zwei
Schritten, zuerst die Pumpe anwählen und
dann einschalten.
Wenn die Taste „PUMPE“ kurz gedrückt wird,
blinkt die orange LED „PUMPE I“. Pumpe I ist
angewählt.
Wenn die Taste „PUMPE“ noch einmal gedrückt wird, wird Pumpe II ausgewählt.
Durch längeres Drücken wird Pumpe I eingeschaltet. Die Pumpe I läuft solange wie
die Taste gedrückt wird, mindestens aber
für 2 Sekunden. Während des Pumpenlaufs leuchte die orange LED „PUMPE I“.
Für das Einschalten der Pumpe II muss zuerst
Pumpe II angewählt werden. Die orange LED
„PUMPE II“ blinkt.
Die Pumpe II läuft solange wie die Taste gedrückt wird, mindestens aber für 2 Sekunden.
16
5. Fehlererkennung
Mit dem KESSEL-Schaltgerät können Fehler bei der Inbetriebnahme sowie während des
Betriebs erkannt und somit leicht abgestellt werden.
Allgemein
Mono Duo
Zeichenerklärung
Power
Alarm
Niveau
Pumpe
Niveau
Alarm
Pumpe I
Pumpe II
Störungen bei Netzbetrieb Mono und Duo
Mono Duo
Ursache
Dauerleuchten
langsames Blinken (1s)
schnelles Blinken (0.5s)
Aus
kurzes aufblinken alle 2 s
Abstellmaßnahme
Hinweise
Batterien fehlen Beide Batterien anschlieoder sind defekt ßen, ggf. durch neue Batterien ersetzen.
Die Funktionsbereitschaft
des Gerätes wird durch ein
erneutes Lauflicht angezeigt.
Initialisierung: Die Anlage
kann in Betrieb genommen
werden, d. h. sie ist funktionsfähig.
Betrieb: Die Fehlermeldung
wird spätestens nach 5
Min. angezeigt. Die Anlage
ist funktionsbereit; Handbetrieb ist möglich. Das Austauschen/Anschließen der
Batterien wird nach spätestens 5 Min. durch keine
leuchtende LED angezeigt.
Alarm Niveau
überschritten
Niveaufehler/
Sondenfehler.
Optische Sonde
verschmutzt.
Zulaufmenge prüfen,
Pumpe,
Drucksystem prüfen
Alarm Niveau war kurzzeitig
überschritten.
Drucksensor defekt; es wird
mit der optischen Sonde
geschaltet.
Grenzlaufzeit
Schaltspielhäufigkeit
Sonde verschmutzt
Eine Pumpe ist mehr als 6
Zulaufmenge prüfen
Minuten an einem Stück gePumpe prüfen
laufen oder beide Pumpen
Drucksystem prüfen
haben zusammen mehr als
regelmäßige Reinigung der 20 Schaltspiele in 3 Minuten.
Sonde.
Bei bestimmten Abwässern
kann sich ein Film auf der
Sonde bilden, der den Kontakt der Sonde auslöst.
Sonde reinigen.
17
5. Fehlererkennung
Mono Duo
Ursache
Abstellmaßnahme
Hinweise
Bei übermäßiger Schaumbildung die Dosierung
(Waschmaschine, Dusche)
reduzieren.
Wasserenthärtungsanlagen
führen zu weicherem Wasser und ggf. zu höherer
Schaumbildung.
Initialisierung:
„Pumpe I“ nicht
angeschlossen,
verpolt, gebrochen.
Im Betrieb:
„Pumpe I“ defekt
oder “Pumpe”
überhitzt, Motorschutz schaltet
Pumpe ab.
Netzstecker ziehen Batterie abklemmen; Steuerleitungen auf korrekten
Anschluss, festen Sitz
bzw. Durchgang kontrollieren, ggf. Pumpe austauschen.
Bei Überhitzung Zulauf
begrenzen; ggf. Sonden/
Schwimmer reinigen.
Initialisierung:
„Sonde“ nicht
angeschlossen,
verpolt oder gebrochen
Im Betrieb:
„Sonde“ defekt
Netzstecker ziehen Batte- - Die Abfrage der Sonde errie abklemmen; Steuerlei- folgt alle 2 sec.
tungen auf korrekten - Pumpen können von Hand
Anschluss, festen Sitz betätigt werden.
bzw. Durchgang kontrollie- - Wenn das Ein-Niveau überren, ggf. Stecker nach- schritten ist, wird eine
ziehen oder Sonde aus- Pumpe automatisch eingeschaltet.
tauschen.
- Wenn die Pumpe ausgeschaltet ist, wechselt die optische Anzeige wieder zu
Sondenfehler.
Relaisfehler
(Relaiskontakt
defekt)
Netzstecker ziehen,
Anlage außer Betrieb
nehmen.
Kommunikationsfehler oder
Verbindungsstecker zwischen beiden
Platinen entfernt.
Verbindung wieder her- Zwischen beiden Platinen
stellen.
findet kein
Datenaustausch statt.
18
Fehlererkennung erfolgt nur
im Betrieb (siehe dazu Kap. 6
„Zusatzfunktionen“).
Pumpe schaltet nach Abkühlung (ca 10 min.) automatisch wieder ein, wenn
Niveau vorliegt.
Das Schaltgerät ist nicht
mehr funktionsfähig.
5. Fehlererkennung
Netzausfall:
Mono Duo
Ursache
Abstellmaßnahme
Hinweise
Netzspannung
fehlt.
Netzspannung kontrollieren, Die Pumpen können
ohne Netzspannung kein
ggf. wiederherstellen.
Abwasser entsorgen! Die
Alarmmeldung bleibt aktiv.
Netzspannung
fehlt und Niveau
vorhanden.
Netzspannung kontrollieren, Die Pumpen können
ohne Netzspannung kein
ggf. wiederherstellen.
Abwasser entsorgen! Die
Alarmmeldung bleibt aktiv.
19
6. Zusatzfunktionen
6.1 Automatischer Pumpenfunktionstest
Einmal wöchentlich werden die Pumpen automatisch auf ihre Funktion überprüft. Dazu
werden die Pumpe(n) für 2 sec. nacheinander
angesteuert.
Erkannte Fehler werden mit der entsprechenden Meldung angezeigt und können
dann wie im Kap. 5 beschrieben, beseitigt
werden.
Typ:
Size 9V, ANSI 1604
• Duracell Alcaline MN 1604
• Energizer Alcaline 522
• Ultralife U9VLBP
6.4 Potentialfreier Alarmausgang (Option)
Die KESSEL-Schaltgeräte Aqualift Mono
und Duo können mit einem Anschluss für
einen potentialfreien Kontakt aus-, bzw.
nachgerüstet werden.
Dazu wird nur die Zusatzplatine (Best.Nr.
80072) im Schaltgerät angesteckt und die
gewünschte Steuerleitung an die Anschlussklemmen angeschlossen. Das Relais fällt bei
Fehlermeldungen und Netzausfall ab.
6.2 Kontrolle der Batteriespannung
Die Steuerung überprüft konstant die Batteriespannung. Liegt diese bei Einbau bereits
unter 12,5 V, läßt sich die Anlage trotzdem
in Betrieb nehmen.
In diesem Fall sind die Batterien zu erneuern. Dazu trennen Sie zunächst das Schaltgerät vom Netz. Nach Öffnen des
Schaltgerätedeckels sind beide Batterie-Anschlussleitungen von den Batterien abzustecken, die Batterien auszutauschen und
die neuen Batterien wieder anzuschließen.
Danach ist der Deckel wieder zu schließen
und der Netzstecker einzustecken. Die gebrauchten Batterien sind fachgerecht zu entsorgen!
Achtung
Der potentialfreie Anschluss ist nur bis 42 V
DC / 0,5 A zugelassen.
6.5 Automatische Wiedereinschaltversuche bei Pumpenfehler
Bei einem Motorfehler versucht das Schaltgerät im Abstand von 2 Minuten bis zu 30mal die Pumpe einzuschalten. Wenn der
automatische Wiedereinschaltversuch erfolgreich ist, quittiert sich der Pumpenfehler
selbsttätig. Wenn die automatischen Wiedereinschaltversuche erfolglos waren, wird
der Pumpenfehler weiterhin angezeigt.
Bei Duoanlagen erfolgen die automatischen Wiedereinschaltversuche bei einem und zwei Motorfehlern. Die Anlage ist bei einem Motorfehler
durch die 2. Pumpe funktionsfähig, d.h. wenn Niveau ansteht wird abgepumpt und die optische
Anzeige wechselt.
6.3 Batteriefunktion
Die Batterien melden den Netzausfall akustisch und optisch. Die Pumpen können
nicht mit den Batterien (d.h. bei Netzausfall)
betrieben werden. Ohne Batterien oder defekten Batterien haben Sie keine Meldung
über einen Netzausfall.
Achtung
Bei Entsorgung des Schaltgerätes sind die
Batterien ebenfalls zu entnehmen und entsprechend fachgerecht zu entsorgen!
Für die KESSEL Schaltgeräte Aqualift F
Mono und Duo sind folgende Batterietypen
zu verwenden:
20
7. Technische Daten
Schaltgerät
KESSEL KTP 1000
(Mono und Duo)
KESSEL KTP 500
(Mono und Duo)
Netzanschluss
Absicherung „C“ 16A;
Absicherung „C“ 16A
FI 30 mA
FI 30 mA
Netzspannung / Netzfrequenz
230 V AC / 50 Hz
230 V AC / 50 Hz
Leistung Standby
ca. 5 Watt
ca. 5 Watt
Netzstrom in Betrieb
5,3 A (1 Motor);
2,3 A (1 Motor);
10,6A (2 Motoren)
4,7A (2 Motoren)
Einsatztemperatur
0°C bis + 40°C
0°C bis + 40°C
Schutzart
IP 54 (Schaltgerät)
IP 54 (Schaltgerät)
Schutzklasse
I
I
Schaltleistung
230 V AC, min. 0,8 A,
max. 10A, cos phi =1
230 V AC, min. 0,8 A,
max. 10A, cos phi =1
Schaltleistung des
42 V DC / 0,5 A
42 V DC / 0,5 A
potentialfreien Kontaktes (Option)
Pumpe
Aufnahmeleistung (P1)
1080 W
480 W
Nennstrom
5,3 A
2,3 A
Betriebsart
S3 - 30%
S1
Schutzart
IP 68 max. 3 m/24 h
IP 68 max. 3 m/24 h
Steuerleitung Pumpe
3x1 mm2
3x1 mm2
Steuerleitung Sonde (Alarmgeber)
3x0,75 mm2
3x0,75 mm2
21
8. Inspektion und Wartung
8.1 Inspektion
Die Gesamtanlage ist monatlich vom Betreiber durch Beobachtung eines Schaltspiels
auf Betriebsfähigkeit und Dichtheit zu überprüfen:
• Abwasserzulauf sicherstellen
• Anschalten Niveau-Signal und Pumpe abwarten
• Abwasserzulauf abstellen
• Ausschalten Niveau-Signal und Pumpe
abwarten
• Den Luftschlauch vom Schaltgerät abschrauben, das Staurohr herausnehmen,
reinigen und durchblasen. Anschließend
zuerst den Luftschlauch am Schaltgerät
wieder anschließen und danach das Staurohr wieder einsetzten.
Diese Arbeiten empfehlen wir auch nach
längerem Stillstand oder Zwischenlagerung.
8.2 Wartung
Bei allen Wartungsarbeiten, Anlage
vom Netz trennen! Sicherheitshinweise beachten! Alle nachfolgend
beschriebenen Inspektions- und Wartungsarbeiten dürfen nur von autorisiertem Fachpersonal durchgeführt werden. Reparaturen
dürfen nur durch den Hersteller vorgenommen werden.
Die Batterien sind Verschleißteile und müssen im Rahmen der Wartung (oder mind. 1
x jährlich) überprüft und gegebenfalls gewechselt werden. Beim Wechseln ist auf
umweltgerechte Entsorgung zu achten. Ersatz darf nur durch die angegebenen Typen
(6.3) erfolgen.
Reparaturen dürfen nur durch den Hersteller
vorgenommen werden.
Wartungsarbeiten sind regelmäßig von autorisiertem Fachpersonal durchzuführen.
Wartungszyklen und Umfang entnehmen
Sie bitte der Einbau und Bedienungsanleitung der Anlagenkomponente, die die
Pumpe(n) enthält.
Beim Schaltgerät Aqualift F sind folgende
Tätigkeiten durchzuführen:
8.4 Hinweise zu den Pumpen
Bitte halten Sie diese Reihenfolge
unbedingt ein, damit die Funktion
gewährleistet ist.
• Kontrolle der elektrischen Anschlussleitungen, sowie des Staurohrs und des Luftschlauches auf mechanische Beschädigungen und Verschleiß, z.B. Risse,
Knicke, Verschmutzungen, Ablagerungen.
8.5 Störungen
8.3 Hinweise zum elektrischen
Schaltgerät
Unabhängig von den Wartungszyklen ist bei
zunehmenden Betriebsgeräuschen, abnehmender Förderleistung oder Schwingungen
im Rohrsystem das Laufrad und das Pumpengehäuse auf festsitzende Verunreinigungen oder Verschleiß zu prüfen.
Sollten nicht behebbare Störungen auftreten, wenden Sie sich bitte im Zweifelsfall an
Ihren Fachbetrieb (siehe Stempel auf Deckblatt), der auch die Installation durchgeführt
hat. Unsere Kundendienstpartner finden Sie
unter: www.kessel.de
22
9. Gewährleistung
frist für Leichtflüssigkeitsabscheider, Fettabscheider, Schächte, Kleinkläranlagen und
Regenwasserzisternen auf 20 Jahre bezüglich Behälter. Dies bezieht sich auf die Dichtheit, Gebrauchstauglichkeit und statische
Sicherheit.
1. Ist eine Lieferung oder Leistung mangelhaft,
so hat KESSEL nach Ihrer Wahl den Mangel
durch Nachbesserung zu beseitigen oder
eine mangelfreie Sache zu liefern. Schlägt
die Nachbesserung zweimal fehl oder ist sie
wirtschaftlich nicht vertretbar, so hat der
Käufer/Auftraggeber das Recht, vom Vertrag zurückzutreten oder seine Zahlungspflicht entsprechend zu mindern. Die
Feststellung von offensichtlichen Mängeln
muss unverzüglich, bei nicht erkennbaren
oder verdeckten Mängeln unverzüglich nach
ihrer Erkennbarkeit schriftlich mitgeteilt werden. Für Nachbesserungen und Nachlieferungen haftet KESSEL in gleichem Umfang
wie für den ursprünglichen Vertragsgegenstand. Für Neulieferungen beginnt die Gewährleistungsfrist neu zu laufen, jedoch nur
im Umfang der Neulieferung.
Es wird nur für neu hergestellte Sachen eine
Gewährleistung übernommen.
Die Gewährleistungsfrist beträgt 24 Monate
ab Auslieferung an unseren Vertragspartner.
§ 377 HGB findet weiterhin Anwendung.
Über die gesetzliche Regelung hinaus erhöht die KESSEL AG die Gewährleistungs-
Voraussetzung hierfür ist eine fachmännische Montage sowie ein bestimmungsgemäßer Betrieb entsprechend den aktuell
gültigen Einbau- und Bedienungsanleitungen und den gültigen Normen.
2. KESSEL stellt ausdrücklich klar, dass Verschleiß kein Mangel ist. Gleiches gilt für
Fehler, die aufgrund mangelhafter Wartung
auftreten.
Hinweis: Das Öffnen von versiegelten Komponenten oder Verschraubungen darf nur
durch den Hersteller erfolgen. Andernfalls
können Gewährleistungsansprüche ausgeschlossen sein.
Stand 01. 06. 2010
23
10. Konformitätserklärung
24
11. Übergabeprotokoll für den Betreiber
Bezeichnung
Tag / Uhrzeit
__________________________________________________________
Objektbezeichung
Adresse / Telefon / Telefax
__________________________________________________________
__________________________________________________________
Bauherr
Adresse / Telefon / Telefax
__________________________________________________________
__________________________________________________________
Planer
Adresse / Telefon / Telefax
__________________________________________________________
__________________________________________________________
Ausführende Fachfirma
Adresse / Telefon / Telefax
__________________________________________________________
__________________________________________________________
KESSEL-Kommissions-Nr.
__________________________________________________________
Abnahmeberechtigter
Adresse / Telefon / Telefax
__________________________________________________________
__________________________________________________________
Anlagen-Betreiber
Adresse / Telefon / Telefax
__________________________________________________________
__________________________________________________________
Übergabeperson
__________________________________________________________
Sonstige Anwesende / Sonstiges ______________________________________________________
Die aufgeführte Inbetriebnahme und Einweisung wurde im Beisein des Abnahmeberechtigten
und des Anlagenbetreibers durchgeführt. Bitte Durchschrift ans Werk senden!
Ort, Datum
Unterschrift
Abnahmeberechtigter
Unterschrift
Anlagenbetreiber
✂
25
Unterschrift
einbauendes Unternehmen
26
12. Übergabeprotokoll für das einbauende Unternehmen
❏
❏
❏
Die Inbetriebnahme und Einweisung wurde im Beisein des Abnahmeberechtigten
und des Anlagenbetreibers durchgeführt.
Der Anlagenbetreiber/Abnahmeberechtigte wurde auf die Wartungspflicht des Produktes gemäß der beiliegenden Bedienungsanleitung hingewiesen.
Die Inbetriebnahme und Einweisung wurde nicht durchgeführt
Dem Auftraggeber / Inbetriebnehmer wurden folgende Bauteile und/oder Produktkomponenten übergeben:
________________________________________________________________________________
________________________________________________________________________________
________________________________________________________
________________________________________________________________________________
________________________________________________________________________________
________________________________________________________
Die Inbetriebnahme und Einweisung wird durchgeführt durch (Firma, Adresse, Ansprechpartner, Tel.):
________________________________________________________________________
________________________________________________________________________
________________________________________________________________________
________________________________________________________________________
Die exakte Terminabstimmung der Inbetriebnahme/Einweisung wird durch den Anlagenbetreiber und Inbetriebnehmer durchgeführt.
Ort, Datum
Unterschrift
Abnahmeberechtigter
Unterschrift
Anlagenbetreiber
✂
27
Unterschrift
einbauendes Unternehmen
K Rückstauverschlüsse
K Kleinkläranlagen
K Abläufe / Duschrinnen
K Regenwassernutzung
K Hebeanlagen
K Abscheider
-Fettabscheider
-Öl-/ Benzin-/
Koaleszenzabscheider
-Stärkeabscheider
-Sinkstoffabscheider
K Schächte
INSTALLATION, OPERATION AND MAINTENANCE INSTRUCTIONS
KESSEL Aqualift F Control Unit
with pressure sensor
Order Number 28730 (for single pump control), 28745 (for twin pump control)
Product Advantages
■ Control unit splash proof
(IP 54)
■ Quick connect cable plugs
for easy installation
■ For KESSEL pumps up to
1.2 kW power
■ With Self Diagnosis System
(SDS)
■ Pressure sensor for
accurate wastewater
level monitoring
■ This product requires
maintenance – please
see instructions at end
of manual
Installation
Commissioning
Subject to technical amendments
Illustration shows Article Number 28730
Hand-Over
this unit was installed by the following licensed company
Name/Sign
Edition 01/2012
Date
Town
Company Stamp
Order-Nr. 010-586
1. Safety Instructions
The safety instructions in this manual for the installation, operation and maintenance of this product which must be followed are identified by the following symbols:
General danger symbol according to ISO 3864-B-3-1 which identifies
danger to persons.
Danger symbol according to ISO 3864-B-3-6 which warns for electrical
current
This word identifies safety instructions which if not followed could
cause risk to the machine and its function.
Danger
This operation manual must always be kept with the control unit.
Dear customer,
We are pleased that you have decided to buy a KESSEL product.
The entire system was subjected to a stringent quality control before leaving the factory. Nevertheless, please check immediately whether the system has been delivered to you complete
and undamaged. In case of any transport damage, please contact the shipping company.
This manual should be fully read before the system is installed and placed into operation.
KESSEL AG
General Safety Precautions
All local and international safety and accident prevention regulations must
be followed including any appropriate DIN and VDE norms and guidelines.
Personnel qualifications
Any personnel who will be installing, operating, inspecting or servicing this product must
be properly qualified.
30
1. Safety Instructions
Any personnel operating this system must be fully qualified. If required, training for this
product can be provided by the manufacturer or supplier. Any personnel operating this
system must have fully read and understand this manual. It should be documented orientation / training should take place.
Danger – Electrical Current
The system operates on electrical current. Noncompliance with the operating instructions may result in considerable damage to property, personal injuries or even fatal accidents. This unit should be completely disconnected from power before any work is
undertaken. The main power switch and the fuse should be turned off / disconnected
and secured against accidental reconnection. If only a fuse is available for disconnection,
the fuse must be clearly marked to avoid a third party from accidentally turning the fuse
back on. VDE 0100 must be followed when any electrical work is performed on the unit.
The unit must be supplied with an residual current device (RCD) with a 30mA rating. The
control unit is connected to power and should not be opened. Only qualified electricians
should conduct any work on this system. The definition of qualified electricians is defined
in VDE 0105. All electrical cables must be in perfect operating order / condition. The system should not be placed into operation or immediately disconnected from its power
source in the case that the cables or the control unit show any signs of damage. All cables should be properly installed as to prevent a kink in the cable.
Burn risk for hands and fingers
The system can reach high temperatures during operation.
This alarm unit is a part of a complete system. Due to this please observe and comply with the installation and operational manual of the complete system and any
other components of the system. Prior to any installation, maintenance, inspection
or repair work on any of the system’s components all power to the system must be
disconnected and secured against accidental re-connection during the work.
Proper operation of the system is only guaranteed by appropriate use of the system.
Any technical limits of the system must not be exceeded.
Using original KESSEL replacement parts assured proper operation of the system.
Use of any other replacement parts could void the guarantee as well as any damage
claims caused by failure of the non-certified part. This unit must not be operated in
areas designated as an explosion risk area. The plug and fuse of the system must
be easily accessible in order to quickly disconnect the system from power if required.
31
Table of contents
1.
Safety Instructions
...........................................................................Page 30-31
2.
General
...........................................................................Page........33
3.
Installation /
Electrical Connections
3.1..Wall mounting of the control unit ...............Page........34
3.2..Cable connections ......................................Page........35
3.3..Electrical connections .................................Page........36
3.4..Connection plans ........................................Page........37
3.5..Remote alarm signal ...................................Page........39
3.6..Potential free contact ..................................Page........39
3.7..Shortening of cables ...................................Page........39
3.8..Extending the cables...................................Page........39
3.9..Connection of pressure sensor ...................Page........39
4.
Operation
4.1..Commissioning ...........................................Page........40
4.2..Displays / Operating controls of mono system
....... ....................................................................Page........43
4.3..Displays / Operating controls of duo system
....... ....................................................................Page........44
4.4 Operating states of the control unit.............Page........44
5.
Trouble shooting / Remedial actions ..............................................................Page........45
6.
Additional functions
6.1 Automated pump function tests..................Page........48
6.2 Battery power monitoring............................Page........48
6.3 Battery function...........................................Page........48
6.4 Potential Free Contact alarm output (optional) ................
....... ....................................................................Page........48
6.5 Automated pump re-activation ...................Page........48
7.
Technical data
...........................................................................Page........49
8.
Inspection / Maintenance
8.1
8.2
8.4
8.5
9.
Warranty
...........................................................................Page........51
10. Declaration of Conformity
Inspection....................................................Page........50
Maintenance................................................Page........50
Pump details ...............................................Page........50
Malfunctions................................................Page........50
...........................................................................Page........52
11. Handover Certificate for operator...................................................................Page........53
12. Handover Certificate for installer ...................................................................Page........55
32
2. General
The installation, operation and maintenance manuals for all components of
this systems must be followed.
Intended purpose of control unit:
The control unit is designed to operate the
pump(s) of the Aqualift F system and to display
the current operational status of the system as
well as any malfunctions. Pump activation levels are controlled by the pressure sensor inside the control unit – these settings have been
set at the factory. Changing these settings is
possible – if required please contact KESSEL
Customer Service.
Illustration 2 shows Article Number 28703
Illustration 3 shows Article Number 824821B
Illustration 4 shows Article Number 28451
33
3. Installation / Electrical Connections
3.1 Wall mounting of the control unit
holes should be 168mm apart from another
for the mono system and 254mm apart for
the duo system. Make sure that the holes
are not too close to an adjoining wall or object which may prevent the control unit
cover from being completely opened. A drilling template is supplied with the control unit
The control unit must be installed in a dry
and frost free area – preferably indoors
where any alarms and control unit message
can be seen / heard. The control unit should
not be installed in an area receiving direct
sunlight.
Caution
The batteries in the control unit should
only be connected prior to placing the
control unit into operation.
The control unit does not need to be opened
during mounting. Two 6mm diameter horizontal holes should be drilled into the wall –
x
Ill. 5
X = 168mm for the Mono control unit
X = 254mm for the Duo control unit
34
3. Installation / Electrical Connections
3.2 Cable connections
Notice for cable protection
If the cables are exposed they should be
protected against damage from rodents.
The appropriate protective material is available from KESSEL if required.
The cables for the sensor and the pump
should be placed in a DN 50 conduit pipe.
Also, if being used with the system, the
cables for the remote alarm signalling device and the potential free contact should
also be run in the conduit. Connect to the
control unit the pump cable (illustration 6)
and optical sensor (illustration 7) to the
marked locations (see magnified photos
below) – cables should be inserted and
screwed secure (tighten to a torque of 3
Nm for the pump cable connection and 1
Nm for the optical sensor connection. The
pressure sensor connection should be
hand tightened.
↕
gap
Ill. 8
Pump connection gap – approx 3 to 4 mm
Optical sensor connection gap –
approx 1 to 2 mm
Complete connection illustration
Illustration 6 – Pump connection
➀
➁
➃
➄
➀ power connection
➁ pump connection
➂ pump 2 connection (for Duo systems)
➃ optical sensor connection
➄ pressure sensor connection
Ill. 9
Illustration 7 – Optical sensor connection
35
3. Installation / Electrical Connections
3.3 Electrical Connections
Notice: The information in the table located below as well as the connection plans in
Section 3.4 must be followed. This work should only be handled by a licensed professional.
Mono (single pump) System – follow all safety instructions
Electrical Work
Description
Power cable
• The specified 16 Amp fuse (‘C’ automated type)
(sourced and installed on-site) must not be exceeded.
• The control unit plug has a length of 1.7 meters
Pump cable(s)
• The pump cables are colour coded and should be
connected into the Pump 1 (and Pump 2 for Duo systems) connection jacks (in the proper order).
PE pump wire = PE jack
Blue pump wire (bl) = blue jack
Brown pump wire (br) = brown jack
• The grounding wire is to be connected to the PE jack
on the Pump 1 connection and also on the Pump 2
connection for the Duo system.
Optical sensor cable
• The cable for the optical sensor should be connected to the ‘Sonde’ connection (in the proper order).
Blue (bl) optical sensor wire = blue jack
White (ws) optical sensor wire = white jack
Black (sw) optical sensor wire = black jack
36
3. Installation / Electrical Connections
3.4 Connection plans
3.4.1 Aqualift Mono control unit connection plans
Ill. 10
37
3. Installation / Electrical Connections
3.4.2 Aqualift Duo control unit connection plans
Ill. 11
38
3. Installation / Electrical Connections
3.9 Connection of air hose /
pressure switch
3.5 Remote alarm signal
The remote alarm signal (Article Number
20162) is available as an accessory. This
alarm is connected to the control unit and
then normally installed in a separate room so
that the alarm signal can be heard more easily.
Caution
the air pressure hose should be installed
with a continuous upward slope from the
pumping system up to the control unit.
The hose should not be looped, coiled or
kinked and should have no low spots or
dips. Insert the air hose into the control
unit in the proper location and secure the
hose with the supplied finger nut. The
hose can be easily shortened by simply
cutting it to the desired length. Air pressure hoses over 10 meters in length must
be accompanied by a small compressor
pump to assure that the air pressure remains adequate. The maximum total
length of the air pressure hose is not to exceed 30 meters.
3.6 Potential free contact
Also available as an accessory is a potential free contact (Article Number 80072)
which can also be installed inside the control unit. The potential free contact is used
to transfer malfunction or alarm signals to
a Building Management System (BMS).
3.7 Shortening cables
Caution
in the case that any cables are shortened
the connection jack should look as shown
in Illustration 12.
Notice:
The VDE 0100, VDE 01107, the IEC and all
local and national electrical safety regulations should be followed. The control unit
is not to be installed in an area at risk of
explosion. The 230V / 50 Hz power connection is to be secured with a 16A (‘C’
type) fuse with 30 mA FI protective switch.
Ill.12
When all the electrical work has been
completed the control unit cover should
be closed and secured with the screws.
3.8 Extending cables
In the case that more than the supplied 5
meters of cable is required, 10 meter extensions are available. The 10 meter extension for the optical sensor is Article
Number 80889, for the motor Article Number 80890 and for the pump Article Number 80891.
39
4. Operation
d
b
e
a
f
g
c
a)
b)
c)
d)
e)
f)
g)
h)
Control unit housing
Closure screws
Power cable connection
Green ‘Power’ LED
Red ‘Alarm’ LED
Orange ‘Level’ LED
Orange ‘Pump’ LED
Alarm button
j
k
i)
j)
k)
l)
h
i
l
Pump test button
Pump cable connection
Optical sensor cable connection
Air pressure hose connection
Ill. 13
40
4. Operation
4.1 Commissioning
Inside the control unit, connect the 9 volt
battery cables to the small white connection
jack as seen in illustration 14. Before commissioning the pump, air pressure sensor
and the optical sensor must be properly
connected to the control unit. The power
plug of the control unit can now be connected to power.
The control unit will undergo an automated
initialization which is signaled by a light ap-
prox 8 second after the power or batteries
are connected to power. During initialization
the batteries, mains power, air pressure sensor, optical sensor and motor connection will
be automatically checked. If all connections
have been made properly the green ‘Power’
LED will light for single pump mono units, for
twin pump duo units no LED will light.
The system is now operational.
Ill. 14
4.2 Displays / Operating controls of mono system
LED Display
Normal
LED
Colour
Function
„Power“
green
Power supplied to System
„Alarm“
red
Alarm level reached
„Level“
orange Pump on level reached
„Pump“
orange Pump activated
see Section 5 Trouble Shooting
Malfunctions
Control unit buttons
Button
„Alarm“
„Pump“
the alarm button can be pressed to acknowledge
an audible alarm. This button is also used to select and change settings when in setting mode
the Pump button can be pressed to activate the
pump for testing purposes
41
4. Operation
4.3 Displays / Operating controls of duo system
LED Display
Normal
Function
Colour
LED
Pump on level reached
orange
„Level“
Alarm level reached
red
„Alarm“
Pump 1 on level reached
orange
„Pump I“
Pump 2 on level reached
orange
„Pump II“
see Section 5 Trouble Shooting
Malfunctions
Control unit buttons
„Alarm“
Buttons
„Pump“
the alarm button can be pressed to acknowledge
an audible alarm. This button is also used to select and change settings when in setting mode
the Pump button can be pressed to activate
either of the pumps for testing purposes
4.4 Operating conditions of control unit
The system is activated/switched by the
„off-Level“, „Pump1 On“, Pump 2 On (only
with Aqualift F Duo control units, Art.-Nr.
28745) and the „Alarm level“.
For mono control units
Additional for duo control units
Pump activation:
The Power LED is on (for the Duo system
no LEDs are on). As the wastewater level
inside the chamber increases, the pump
1-on level is reached and the 2 second
pump activation delay begins. After the 2
second delay pump 1 activates and will
run until the pump-off level is reached.
While the pump is running the ‘Level’ LED
and the ‘Pump 1’ LED will light.
4.4.1 Normal operation – pressure sensor and optical sensor in normal
operating condition.
Level sensing / measurement is handled
by two independent methods. The offlevel, pump 1 on-level and the pump 2 onlevel (only for Aqualift F twin pump systems –
Article Number 28745) are measured by the
air pressure control.
The alarm level is measured with the optical probe. In the case that one of the level
sensing systems fails, the system remains
operational due to the back up system. An
optical probe failure or a level measurement failure causes an audible alarm and
an LED alarm on the control unit.
Duo Control unit:
The pumps on a twin pump duo system always
operate alternatingly. If the second pump does
activate the orange ‘Pump 2’ LED will light.
42
4. Operation
4.4.2 Temporary elevated wastewater
level – air pressure sensor and
optical sensor operational
1’ LED will light. After a delay of 2 seconds
Pump 2 will activate. The orange ‘Pump 2’ LED
will light and the red ‘Alarm’ LED will blink.
Both pumps will run simultaneously.
After a 2 second pump activation delay
the red ‘Alarm’ LED will light (Alarm level
exceeded). An audible alarm will sound.
When the wastewater level falls below the
Alarm level the audible alarm will turn off
but the red ‘Alarm’ level will blink. Both
pump will run simultaneously.
30mm over the pump off level Pump 2 will stop
running. The orange ‘Pump 2’ LED will go off.
Pump 1 will continue running until the
Pump off level is reached. The orange
‘Pump 1’ LED and the orange ‘Level’ LED
will turn off. The blinking red ‘Alarm’ LED
shows that Alarm level has been exceeded.
Control unit display – no LEDs lit
If the wastewater level inside the chamber exceeds the Pump 1 on level and the Pump 2 on
level, the 2 second pump activation delay begins. After the 2 second delay Pump 1 will activate. The orange ‘Level’ LED and the orange
‘Pump 1’ LED will light. After a second 2 second delay pump 2 will activate. The orange
‘Pump 2’ LED will light and the red ‘Alarm’ LED
will blink. Both pumps are now running simultaneously. 30mm over the pump off level Pump
2 will stop running. The orange ‘Pump 2’ LED
will go off. Pump 1 will continue running until
the Pump off level is reached. The orange
‘Pump 1’ LED, the orange ‘Level’ LED and the
‘Alarm’ LED will turn off.
Whenever the Pump 2 on level is reached the
second pump will activate after a delay and
will also turn off prior to Pump 1 turning off.
4.4.4 Air pressure sensor malfunction –
optical sensor operational
Control unit display - ‘Power’ LED lit for
single pump models / no LEDs lit for twin
pump models).
If the wastewater level inside the chamber
exceeds the ‘Alarm’ level, the 2 second
pump activation delay begins. The red
‘Alarm’ LED lights and the audible alarm
sounds. Pump 1 activates. The orange
‘Pump 1’ LED lights. After the 2 second
delay Pump 2 will activate. The orange
‘Pump 2’ LED will light. Both pumps run
simultaneously. the wastewater level falls
below the Alarm level the audible alarm
will turn off but the red ‘Alarm’ level will
blink. After 4 seconds Pump 2 will turn off. The
orange ‘Pump 2’ LED turns off. Later Pump 1
4.4.3 Temporary heavily elevated
wastewater level – air pressure
sensor and optical sensor
operational
Control unit display – ‘Power’ LED lit for
single pump models (no LEDs lit for twin
pump models).
If the wastewater level inside the chamber
exceeds the Pump 1 on level, the Pump 2
on level and the Alarm level, the 2 second
pump activation delay begins. After the 2
second delay Pump 1 will activate. The
orange ‘Level’ LED and the orange ‘Pump
43
4. Operation
To activate Pump 2 first Pump 2 must be selected – the orange ‘Pump 2’ LED will blink. Pump
2 will run as long as the button remains pressed but for a minimum of 2 seconds. During the
pump operation the orange ‘Pump 2’ LED will
light.
In the case that a pump is selected but not
activated, the selection will be cancelled
after 10 seconds. In the case that the wastewater level increases to the pump activation level during this 10 seconds the
pump will automatically activate and the
manual operation mode will be cancelled.
will also turn off. The orange ‘Pump 1’ LED
turns off.
4.4.5 Manual operation
During normal operation the „Pump“ button can be pressed to manually test
Pump1 or Pump 2.
The pump will start in two steps, first choosing the pump and then activating it.
When the ‘Pump’ button is quickly pressed the
orange ‘Pump 1’ LED will blink – Pump 1 is now
selected.
When the ‘Pump’ button is pressed for a
longer period of time Pump 1 will activate.
The pump will run as long as the button remains pressed but for a minimum of 2 seconds. During the pump operation the
orange ‘Pump 1’ LED will light.
44
5. Trouble Shooting
The control unit is designed to detect malfunctions and display these on the control unit.
This ability makes problem detection simpler and easier to resolve.
General
Mono Duo
LED display
Power
Alarm
Level
Pump
Constantly on
blinking slowly (every 1s)
fast blinking (every 0.5s)
Off
short blinks (every 2s)
Level
Alarm
Pump I
Pump II
Malfunctions during mains power operation of Mono and Duo systems
Mono Duo
Cause
Remedial action
Notice
Batteries missing, Connect batteries or renot connected or place if low on power. The
low on power
functional operation of the
system will be signaled by
the LED light.
Initialization: the system
can be placed into operation.
Operation: an error will be
signaled within 5 seconds.
The system is still operational; manual pump operation is also possible.
Alarm level exceeded, air pressure switch
failure or optical
probe failure, optical probe dirty
Check amount of wastewater entering pumping
system, check pump,
check pump outlet,
clean optical probe
Alarm level has been exceeded, air pressure sensor
defective – system is operating via the optical probe
Maximum pump
run time exceeded, pumps turning on and off
too frequently,
optical probe
dirty
Check amount of wastewater entering pumping system, check pump, check
pump outlet, periodic
cleaning of optical probe.
A pump has run continuously for 6 minutes or longer
or both pumps have activated more than 20 times
within a 3 minute period.
With certain wastewaters a
film can build up on the optical probe which can lead to
a optical sensor malfunction
45
5. Trouble Shooting
Mono Duo
Cause
Remedial action
Notice
In case of heavy soap /
suds build up, reduce the
amount of shampoo /
soaps being used. Water
softeners may lead to higher foam / sud build up.
initializing:
‘Pump 1’ not connected or improperly connected.
operation:
‘Pump 1’ defective or has overheated. Pump’s
thermal breaker
will automatically
shut off the pump.
Unplug control unit and
disconnect
batteries;
check to make sure power
chord is properly connected. Check pump and replace if necessary. In case
the pump is overheating,
reduce incoming wastewater volume and/or clean
optical sensor or float
switch.
Error detection occurs only
during operations (see Chapter 6 ‘Additional Functions’).
Pump will turn on again after
it has cooled down (approximately 10 minutes) when sufficient wastewater is present.
initialization:
‘Sensor’ not
connected or
improperly
connected
operation:
‘Sensor’
defective
Unplug control unit and dis- - Sensor checks wastewater
connect batteries; check to level every 2 seconds
make sure power chord is - Pumps can be manually actiproperly connected. Check vated using the control unit
to make sure plug is pro- pump check button
- When the wastewater level
perly connected and/or rehas reached the ‘pump on’
place sensor.
level one of the pumps will be
automatically activated
- When the pump turns off the
optical error alarm will change
to an optical sensor error.
Relay error
(relay contact
defective’
Disconnected power chord, The control unit is no longer
take system out of opera- operational
tion
Communication Reconnect system
error or connection plug between both
boards should
be removed.
46
The communication between both boards / panels
is no longer occurring.
5. Trouble Shooting
Power loss:
Mono Duo
Cause
Remedial action
Notice
No power to
system
Check to assure that power Pump(s) cannot pump
is being supplied to system. away wastewater when
power is not being supplied
to system. The alarm warnings remain operational.
Power not being
supplied to
system and
wastewater
activation level
exists
Check to assure that power Pump(s) cannot pump
is being supplied to system away wastewater when
power is not being supplied to system. The alarm
warnings remain operational.
47
6. Additional functions
6.1 Automatic pump operational test
Type
– 9 volt, ANSI 1604
- Duracell Alkaline MN 1604
- Energizer Alkaline 522
- Ultralife U9VLBP
Once a week the pumps will automatically
be checked to make sure they are operating
properly. The pumps will automatically be
started for 2 seconds (not simultaneously
but one after another). An alarm will be
activated in case any error is detected which
then can be diagnosed by following the instructions in Chapter 5.
6.4 Potential Free Contact (optional)
The KESSEL Aqualift F Mono and Duo control units can equipped with an optional potential free contact (Building Management
System – BMS). The optional control unit
(Article Number 80072) can be installed in
the control unit. The potential free contact
relay will activate when the control unit detects errors or during a power loss.
6.2 Checking the control unit’s battery
power
The control unit continuously checks the
batter power. In the case that the combined
battery power is below 12.5 volts when connecting the control unit the system will operate normally but the batteries should still be
replaced. To replace batteries, first disconnect power to the control unit and then replace the batteries. Please dispose of old
batteries properly.
Caution
The potential free contact is only certified for
a power supply of up the 42 volt DC / 0.5
Amp.
6.5 Automatic pump re-activation attempt
6.3 Battery function
During a motor malfunction the system will
attempt to activate the pumps every 2 minutes – this will be attempted up to 30 times.
In the case that one of these activations is
successful the pump error message will
cancel itself. In the case that the attempts
were not successful the error message will
continue to be displayed.
The automatic re-activation attempts for twin
pump systems will occur when one or both
pumps malfunction. With a twin pump system the
second pump remains operational – when the
wastewater level reaches the ‘Pump On’ level the
operational pump will activate and optical alarm
will be displayed.
In the case of a power loss the control
unit’s batteries will still supply sufficient
power so that the optical and audible
alarms will function. The pumps however
will not operate without mains power. In
the case that the batteries are missing, defective, improperly connected or out of
power, no alarms will sound.
Caution
In the case that the control unit is being
thrown away, make sure to remove both
batteries and dispose of them properly!
The KESSEL Aqualift F Mono and Duo
control units require the following batteries:
48
7. Technical Data
Control unit
Mains supply
KESSEL KTP 1000
(Mono and Duo)
KESSEL KTP 500
(Mono and Duo)
Protection „C“ 16A;
Protection „C“ 16A
FI 30 mA
FI 30 mA
Mains supply / Mains frequency
230 V AC / 50 Hz
230 V AC / 50 Hz
Capacity Standby
ca. 5 Watt
ca. 5 Watt
Mains current during operation
5,3 A (1 Motor);
2,3 A (1 Motor);
10,6A (2 Motors)
4,7A (2 Motors)
Einsatztemperatur
0°C bis + 40°C
0°C bis + 40°C
Protection class
IP 54 (control unit)
IP 54 (control unit)
Protection Class
I
I
Switching capacity
230 V AC, min. 0,8 A,
max. 10A, cos phi =1
230 V AC, min. 0,8 A,
max. 10A, cos phi =1
Potential free contact
42 V DC / 0,5 A
42 V DC / 0,5 A
switching capacity
Pump
Rated input (P1)
1080 W
480 W
Nominal current
5,3 A
2,3 A
Duty type
S3 - 30%
S1
Protection class
IP 68 max. 3 m/24 h
IP 68 max. 3 m/24 h
Pump cable
3x1 mm2
3x1 mm2
Sensor cable
3x0,75 mm2
3x0,75 mm2
49
8. Inspection and Maintenance
8.1 Inspection
The entire system should be checked by the
operator on a monthly basis for proper operation which should include observing a
pump start / stop phase.
• drain wastewater into pumping system
• level signal then pump should start
• stop draining wastewater into pumping
system
• level signal should turn off and then pump
should stop.
control unit and then replace the sensor in
the pumping tank.
It is also recommended that the above
maintenance work is done if the system has
sat idle or was in storage for an extended
period of time.
8.3 Control unit recommendations
The control unit’s batteries should be inspected on a yearly basis and replaced if
necessary. Please dispose of used batteries
appropriately. Replacement batteries must
conform to the requirements listed in Section 6.3 of this manual. Repair work may
only be handled by the manufacture.
8.2 Maintenance
Before any maintenance is done on
the system it should be completely
disconnected from power! Inspection and maintenance work must be handled by a qualified professional. Any repair
work must be handled by the manufacturer.
8.4 Pump recommendations
The impeller of the pump should be inspected if the pump begins running louder than
normal or if the pumping performance of the
pump has decreased. The impeller should
be cleaned and cleared of any debris or replaced if required.
Maintenance work should be conducted regularly by a qualified professional. The type
of maintenance work and how often it
should be conducted should be taken out
of the user’s manual of the pump(s). The following work should be done for the Aqualift
F system:
8.5 Malfunctions
Please follow this in exact order to
assure proper function.
- Check all electronic connections and also
check the air pressure tube to assure it is
connected properly and check for any
wear and tear such as cracks, kinks, dirt
or blockages.
- Disconnect the air hose from the control
unit and remove the air pressure sensor
from the pumping tank – clean the sensor.
Re-connect the air pressure hose to the
In the case that non reparable problems
arise please conduct a qualified service professional. KESSEL customer service information and a listing of certified KESSEL
qualified service representatives can be
found at www.kessel.de
50
9. Warranty
In addition to the standard warranty, KESSEL offers an additional 20 year warranty
on the polymer bodies of class I / II fuel
separators, grease separators, inspection
chambers, wastewater treatment systems
and rainwater storage tanks. This additional warranty applies to the watertightness,
usability and structural soundness of the
product.
A requirement of this additional warranty
is that the product is properly installed and
operated in accordance with the valid installation and user's manual as well as the
corresponding norms / regulations.
1. In the case that a KESSEL product is defective, KESSEL has the option of repairing or replacing the product. If the product
remains defective after the second attempt to repair or replace the product or it
is economically unfeasible to repair or replace the product, the customer has the
right to cancel the order / contract or reduce payment accordingly. KESSEL must
be notified immediately in writing of defects in a product. In the case that the defect is not visible or difficult to detect,
KESSEL must be notified immediately in
writing of the defect as soon as it is discovered. If the product is repaired or replaced, the newly repaired or replaced
product shall receive a new warranty identical to that which the original (defective)
product was granted. The term defective
product refers only to the product or part
needing repair or replacement and not necessarily to the entire product or unit.
KESSEL products are warranted for a period of 24 month. This warranty period begins on the day the product is shipped
form KESSEL to its customer. The warranty only applies to newly manufactured
products. Additional information can be
found in section 377 of the HGB.
2. Wear and tear on a product will not be
considered a defect. Problems with products resulting from improper installation,
handling or maintenance will also not be
considered a defect.
Note: Only the manufacturer may open
sealed components or screw connections.
Otherwise, the warranty may become null
and void
01.06.2010
51
10. Declaration of conformity
52
11. Handover Certificate for operator
Separator Type:
Day / Hour
__________________________________
__________________________________
Project description /Building services supervisor
Address / Telephone / Fax
__________________________________
__________________________________
Planner
Address/ Telephone / Fax
__________________________________
__________________________________
Builder
Address / Telephone / Fax
__________________________________
__________________________________
Contracted plumbing company
Address / Telephone / Fax
__________________________________
__________________________________
System operator /owner
Address / Telephone / Fax
__________________________________
__________________________________
Person of delivery
Other remarks
__________________________________
__________________________________
KESSEL-Commissions no.:
__________________________________
User
Address / Telephone / Fax
__________________________________
__________________________________
The system operator, and those responsible, were present during the commissioning of this system.
Place and date
Signature owner
Signature user
✂
53
54
12. Handover Certificate for installer
Handover certificate (copy for the company carrying out the installation)
❏
❏
❏
The initial operation and instruction was carried out in the presence of the person
authorised to perform the acceptance and the system operator.
The system operator/person authorised to perform the acceptance was informed
about the obligation to service the product according to the enclosed operating instructions.
Initial operation and instruction were not carried out.
The client/ person responsible for initial operation was handed the following components
and/or product components
Initial operation and instruction is being carried out by (company, address, contact, phone)
The exact coordination of the dates for initial operation/instruction is being carried out by the
system operator and person responsible for initial operation.
Place, date
Signature of person
authorised to
perform acceptance
Signature of system operator
✂
55
Signature of the company
carrying out the
installation work
K Backwater protection
K Septic Systems
K Drains and shower channels
K Rainwater Management
K Lifting Stations and pumps
K Separators
-Grease Separators
-Oil-/ Fuel-/Coalescence
Separators
-Starch Separators
-Sediment Separators
K Inspection Chambers
Systems
Directives pour la pose, le service et la maintenance
Boîtier de commande KESSEL Aqualift F
avec détecteur de pression
Numéro de commande 28730 (Mono), 28745 (Duo)
Avantages du produit
■ Boîtier de commande étanche aux jets d'eau IP 54
■ Raccordements codés pour
un montage plus facile
■ pour pompes KESSEL
jusqu'à 1,2 kW de capacité
consommée
■ avec système SDS (système d'auto-diagnostic)
■ Capteur de pression pour
un enregistrement sûr des
niveaux de remplissage
■ Installation nécessitant une
maintenance (cf. procèsverbal de réception)
L’installation
La mise en service
Sous réserve de modifications techniques
La figure 1 montre l’article n° 28730
La présentation
de l’installation ont été exécutées par votre revendeur spécialisé :
Nom / Signature
01/2012
Cachet du revendeur spécialisé
No. 010-586
1. Consignes de sécurité
Les consignes de sécurité contenues dans cette notice d'utilisation doivent être respectées pour
la pose, l'exploitation, la maintenance et la réparation de l'agrégat ; elles sont caractérisées avec
les symboles suivants :
Symbole de dangers général selon l'ISO 3864-B-3-1 sur l'identification des risques encourus par les personnes.
Symbole de dangers selon l'ISO 3864-B-3-6 pour avertissement face à une
tension électrique.
Ce mot caractérise des consignes de sécurité dont l'inobservation peut provoquer des dommages à la machine et nuire à son fonctionnement.
Attention
Cher client,
Nous sommes très heureux que vous ayez choisi un produit de KESSEL.
Avant de quitter l'usine, toute l'installation a été soumise à un sévère contrôle de qualité. Veuillez cependant examiner immédiatement si l'installation a été livrée chez vous complète et intacte. En cas de dommage du au transport, veuillez prendre contact avec votre fournisseur.
Avant le montage et la mise en service de la station d'eaux usées de KESSEL Aqualift-F Compact, il faut attentivement cette directive de pose et d'exploitation.
KESSEL AG
Mesures de sécurité générales
Lors de l'installation, de l'exploitation, de la maintenance ou de la réparation de l'installation, il faut respecter les instructions de prévention des accidents, les principales
normes et directives ainsi que les instructions des entreprises d'énergie et d'approvisionnement locales.
Instruction et qualification du personnel
Le personnel chargé du service, de la maintenance, de l'inspection et du montage doit
posséder la qualification correspondante pour ces travaux.
La responsabilité, la compétence et la surveillance du personnel doivent être gérées
avec soin par l'exploitant. Si le personnel ne possède pas les connaissances nécessai
58
1. Consignes de sécurité
res, il doit être formé et instruit. Cela peut, en cas de besoin, sur ordre de l'exploitant de
l'installation, être fait par le fabricant / le fournisseur. L'exploitant doit en outre s'assurer
ultérieurement que le personnel a compris le contenu de la notice d'utilisation dans sa
totalité. Pour ce faire une instruction qui sera consignée doit être menée.
Danger par la tension électrique
Cette installation a des éléments sous tension électrique et commande des parties d'installation mécaniques tournantes. L'inobservation du manuel de l'opérateur, peut entraîner des dommages matériels considérables, des blessures ou des accidents mortels.
Avant tout travail sur l'installation, il faut couper l'alimentation du réseau et / ou la mettre
hors courant. Les interrupteurs principaux et les coupe-circuits doivent être mis hors
circuit, c.-à-d. être hors tension et sécurisés contre toute remise sous tension. Si seuls
des coupe-circuits sont présents, ceux-ci doivent être mis hors circuits et munis d'une
fiche d'instruction afin qu'aucune tierce personne ne mette de nouveau le coupe-circuit
principal sous tension. La VDE 0100 s'applique à tous les travaux électriques exécutés
sur l'installation. L'installation doit être approvisionnée au moyen d'un appareillage de
protection de courant de défaut (RCD) avec un courant de défaut de référence inférieur
à 30 mA.
Le boîtier de commande se trouve sous tension et ne peut pas être ouvert. Seuls des
électriciens spécialistes peuvent exécuter des travaux sur les installations électriques.
La notion d'électricien spécialiste électrique est définie dans le VDE 0105. Il faut s'assurer que les câbles électriques ainsi que toutes les autres parties des installations électriques se trouvent en bon état. En cas de dommage, l'installation ne doit en aucun cas
être mise en service et / ou doit être immédiatement arrêtée.
Risque de brûlure pour les mains et les doigts
Pendant l'exploitation, des parties de l'installation peuvent développer une haute
température.
L'installation forme un composant d'une installation globale. C'est pourquoi il faut
également prendre en compte les manuels de l'opérateur de la totalité de l'installation et des différents composants. Lors de chaque montage, maintenance, inspection et réparation de l'un des composants, il faut toujours mettre hors service
la totalité de l'installation et empêcher toute remise sous tension.
La fiabilité de service de l'installation livrée est garantie seulement en cas d'exploitation conforme aux prescriptions. Les limites des données techniques ne doivent
être dépassées en aucun cas.
Les accessoires agréés par le fabricant participent à la sécurité. L'utilisation d'autres
pièces peut annuler la garantie et les droits en découlant.
L'installation ne doit pas être exploitée dans des zones soumises à un risque d'explosion.
La fiche de secteur, le coupe-circuit et le commutateur de protection de courant
de défaut doivent être facilement accessibles afin de déconnecter l'installation en
cas de panne du réseau
59
Table des matières
1.
Consignes de sécurité
...........................................................................Page 58-59
2.
Généralités
...........................................................................Page........61
3.
Montage/
Raccordement électrique
3.1..Montage mural du boîtier de commande....Page........62
3.2..Raccord de câble .......................................Page........63
3.3..Raccord électrique .....................................Page........64
3.4..Schéma de branchement ...........................Page........65
3.5..Emetteur de signaux extérieur ...................Page........67
3.6..Contact sec ................................................Page........67
3.7..Raccourcissement des câbles ...................Page........67
3.8..Prolongation des câbles .............................Page........67
3.9..Raccordement flexible d’air /
Capteur de pression ...................................Page........67
4.
Exploitation
4.1..Mise en service ..........................................Page........69
4.2..Indicateurs et éléments de service Mono ..Page........69
4.3..Indicateurs et éléments de service Duo .....Page........70
4.4 Etats de service du boîtier de commande .Page........70
5.
Détection de pannes
...........................................................................Page........73
6.
Fonctions auxiliaires
6.1 Tests automatiques de fonctionnement
des pompes ...............................................Page........76
6.2 Contrôles de la tension de batterie ...........Page........76
6.3 Fonctionnement de la batterie ..................Page........76
6.4 Sorties alarme sans potentiel (Option) ........Page........76
6.5 Essais automatiques de réenclenchement
en cas de panne des pompes ....................Page........76
7.
Données techniques
...........................................................................Page........77
8.
Inspection Maintenance
8.1 Inspection ...................................................Page........78
8.2 Maintenance ...............................................Page
78
8.3 Instructions relatives au boîtier de
commande électrique .................................Page........78
8.4 Instructions relatives aux pompes ..............Page........78
8.5 Pannes ........................................................Page........78
9.
Garantie
...........................................................................Page........79
10. Déclaration de conformité
...........................................................................Page........80
11. Procès-verbal de réception pour l'exploitant ................................................Page........81
12. Procès-verbal de réception de l’entreprise effectuant la pose ...................Page........83
60
2. Généralités
Lors de tous les travaux sur l'installation, il faut tenir compte des directives
de pose et d'exploitation de tous les
différents composants..
Domaine d'utilisation des boîtiers de commande
Le boîtier de commande sert à commander les
pompes pour vider les conteneurs et pour l'affichage des états de service.
Les points de commutation sont établis audessus du capteur de pression dans le boîtier
de commande. Les points de commutation
sont pré-réglés en usine.
Un changement des points de commutation
est possible. Veuillez contacter le service
après-vente de KESSEL.
La figure 2 montre l’article n° 28703
La figure 3 montre l’article n° 824821B
La figure 4 montre l’article n° 28451
61
3. Montage / Raccordement électrique
3.1 Montage mural du boîtier de commande
semi-circulaires 4,5 x 35 mm (TX20) jusqu'à
ce que le boîtier de commande puisse bien
tenir au mur. Il faut faire attention à disposer
d'assez de distance à droite avec le mur
pour qu'une ouverture du couvercle soit
possible. Les vis, les chevilles synthétiques
et un gabarit de perçage font partie du volume de la livraison.
Le boîtier de commande doit être installé
dans un endroit sec et à l'abri du gel, de préférence dans la maison, où les éventuels
messages d'alerte peuvent aussi être perçus. Le protéger du rayonnement solaire direct !
Pour le montage, le boîtier de commande ne
doit pas être ouvert. Il faut disposer de deux
trous de forage horizontaux Ø 6 mm, avec
une distance entre-eux de 168 mm (Mono)
ou de 254 mm (Duo). Visser les 2 vis à tête
Attention
Les batteries ne doivent être insérées que
lors de la mise en service.
x
x = 168 mm pour boîtier de commande Mono
x = 254 mm pour boîtier de commande Duo
62
Fig. 5
3. Montage / Raccordement électrique
3.2 Raccord de câble
Tirer les lignes de commande pour la
sonde et le moteur d'entraînement en passant par le tube vide pour câble (DN 50).
S'il y a lieu, placer les lignes pour l'émetteur de signaux extérieur et le contact sec.
Fixer ensuite au boîtier de commande la
prise de moteur (image 6) et la prise de
sonde optique (immage7) (blanche, image
2) correspondant aux marquages (parties
de loupe) puis visser (3 Nm pour le raccord de pompes / 1 Nm pour le raccord
de sonde). Visser fermement à la main le
raccord de pression
maux nuisibles. Il est possible de se procurer une enveloppe de protection appropriée
auprès du service après-vente de KESSEL.
↕
Fente
Fig. 8
Fente prise de pompes : 3-4 mm
Fente sonde optique : 1-2 mm
Représentation complète de raccord
Fig. 6 Prise de pompes
➀
➁
➃
➀ Branchement au secteur
➁ Pompe
➂ Pompe 2 (seulement Duo)
➃ Sonde optique
➄ Capteur de pression
Fig. 7 Prise sonde optique
Remarque portant sur la protection des
câbles
Les câbles de la sonde et du moteur placés
à l'extérieur doivent être protégés des ani
63
➄
Fig. 9
3. Montage / Raccordement électrique
3.3 Raccordement électrique
Remarque : en cas de raccordement direct, il faut prendre en compte les renseignements
du tableau mentionné ci-dessous ainsi que des schémas de raccordement sous le point
3.4. Ces travaux ne peuvent être exécutés que par un électricien spécialiste.
INSTALLATION UNIQUE - Respecter les consignes de sécurité !
Travail à réaliser
Description
Branchement au secteur
• Le fusible de puissance prescrit du côté d'installation
prescrit ne doit pas dépasser 16 A (automate « C »).
• Le branchement au secteur pour toute l'installation
se fait avec une fiche mâle de sécurité avec 1,7 m de
ligne de raccordement.
Alimentations des
pompes
• Les alimentations de pompes doivent être connectées, conformément à la couleur des fils, aux bornes
correspondantes des plaques à bornes de la
«pompe 1 » et de la « pompe 2 » (faire attention à
l'ordre).
Pompe fil PE = borne PE ;
Pompe fil bleu (bl) = borne bleue
Pompe fil brun (br) = borne grise
• Le conducteur de protection doit être, à chaque fois,
connecté à la plaque à bornes de la « pompe 1 » et
de la « pompe 2 »
Entrées de niveau
sonde optique
• La conduite de sonde doit être connectée conformément au dessin, sonde optique _ marque des fils
- aux bornes de la plaque à bornes.
Raire attention à l'ordre.
Sonde fil bleu (bl) = borne bleue
Sonde fil blanc (ws) = borne blanche
Sonde fil noir (sw) = borne noire
64
3. Montage / Raccordement électrique
3.4 Schéma de branchement
3.4.1 Schéma de branchement boîtier de commande Aqualift Mono
Fig. 10
65
3. Montage / Raccordement électrique
3.4.2 Schéma de branchement Boîtier de commande Aqualift Duo
Fig. 11
66
3. Montage / Raccordement électrique
3.5 Emetteur de signaux extérieur
3.9 Raccordement flexible d’air /
Capteur de pression
Si nécessaire, il est possible de connecter
l'émetteur de signaux extérieur (n° de commande 20162) pour la transmission de
l'avertisseur acoustique vers d'autres locaux
Attention
Ne pas laisser en permanence le tuyau flexible plié, ne pas le rouler, ne pas le tirer.
Insérer le tuyau flexible du capteur de
pression dans le vissage du boîtier de
commande et visser l'écrou à chapeau.
S'il y a lieu, le raccourcir.
Si les longueurs de la conduite à pression
sont supérieures à 10 m, il faut travailler
avec un petit compresseur pour conserver
la pression.
La longueur maximale de 30 m de la conduite à pression ne doit pas être dépassée.
3.6 Contact sec
Il est possible, en option, de connecter
une carte-mère supplémentaire avec un
contact sec (réf. 80072). Il est ainsi possible de transmettre un message d'alarme
ou de panne collectif au système de gestion technique du bâtiment subordonné.
3.7 Raccourcissement des câbles
Attention
Après le tronçonnage du câble, nouvelle
mise en place des fils selon la projection
mentionnée ci-dessous.
Instruction :
Il faut tenir compte des instructions de la
VDE 0100, VDE 01107, IEC et/ou des entreprises d'approvisionnement d'énergie.
Le boîtier de commande ne doit pas être
installé dans des locaux soumis à un risque d'explosion. Le branchement au secteur doit être réalisé avec 230 V AC
/50 Hz avec protection par fusibles au maximum «C» 16A (disjoncteur différentiel 30
mA).
Fin des travaux électriques
Une fois le raccordement électrique terminé, il faut refermer correctement le couvercle du boîtier de commande
Fig.12
3.8 Prolongation des câbles
S'il est nécessaire de disposer de plus de
5 m de longueur de câble, il existe pour
cela des prolongations de 10 m (réf.
80889 pour sonde, réf. 80890 pour moteur). Il ne faut pas dépasser une longueur
maximale de ligne de 30 m.
67
4. Exploitation
d
b
e
a
f
g
c
a)
b)
c)
d)
e)
f)
g)
h)
j
Boîtier de commande
Vis de fermeture
Branchement au secteur
Voyant DEL vert « puissance »
Voyant DEL rouge « alarme »
Voyant DEL orange « NIVEAU »
Voyant DEL orange « POMPE»
Touche d'alarme
k
i)
j)
k)
l)
h
i
l
Touche « TEST » « POMPE»
Raccord pompe
Raccord sonde optique
Raccord système de pression
Fig. 13
68
4. Exploitation
4.1 Mise en service
Insérer la prise de batterie dans la platine (ill.
14), fermer le couvercle du boîtier et verrouiller. Avant la mise en service, les pompes, le
capteur de pression et la sonde optique doivent être installés solidement et être connectés. Contrôler le raccordement des lignes
puis les les brancher au secteur.
Le boîtier de commande exécute un test principal de fonctionnement, dénommé initialisation : il se produit un défilement lumineux
d'environ 8 secondes après avoir connecté la
batterie et/ou la fiche de secteur. Lors de l'initialisation, la batterie, le réseau, le capteur de
pression, les raccordements optiques des
sondes et du moteur sont contrôlés.
Si le raccordement du boîtier de commande
est correctement réalisé, nous avons alors :
- le voyant DEL vert PUISSANCE allumé en
cas de boîtiers de commande Mono
- Aucun voyant DEL en cas de boîtiers de
commande Duo.
L'installation est maintenant prête à fonctionner.
Fig. 14
4.2 Description des éléments de service et d’affichage
du boîtier de commande Mono
Eléments d'affichage
Voyant DEL
Coleur
Fonction
Exploitation normale
„Puissance“
vert
Alimentation en courant en ordre de marche
(informations des-
„Alarme“
rouge
Niveau d'alarme dépassé, etc.
tinées à l´opérateur)
„Niveau“
orange
Niveau de marche dépassé
„Pompe“
orange
Sortie de pompes activée
Pannes
Voir 5. Détection des pannes
Eléments de service
Touche
„Alarme“
Mise
hors
tension
de
l'alarme
acoustique,
acquittement des avertissements et des pannes,
appel et modification des réglages
„Pompe“
Service manuel pompe
69
4. Exploitation
4.3 Description des éléments de service et d’affichage
du boîtier de commande Duo
Eléments d'affichage
Exploitation normale
(informations destidestinées à
l'opérateur)
Pannes
Eléments de service
Touche
Voyant DEL Mono/Duo Fonction
Niveau de marche dépassé
orange
„Niveau“
Niveau d’alarme dépassé, etc.
rouge
„Alarme“
Sortie des pompes I activée
„Pompe I“ orange
Sortie des pompes II activée
„Pompe II“ orange
Voir 5. Détection des pannes
„Alarme“
„Pompe“
Mise hors tension de l'alarme acoustique, acquittement des avertissements et des pannes,
appel et modification des réglages
Service manuel pompe I et Pompe II
4.4 Etats de service du boîtier de commande Pour boîtier de commande
Mono en plus pour boîtier de commande
Duo
L'installation est commutée via le ARRETNIVEAU, NIVEAU MARCHE 1, NIVEAU
MARCHE 2 (seulement pour boîtier de commande Aqualift F Duo, numéro d'art. 28745) et
le niveau ALARME
Etat initial :
Voyant DEL Puissance allumé / aucun
voyant DEL allumé
Si avec le niveau augmente dans le conteneur et que le NIVEAU MARCHE1 est
dépassé, le retard à l'enclenchement de 2
secondes démarre. La pompe I est allumée et fonctionne jusqu'à ce que l'ARRET-NIVEAU repasse en dessous de la
limite. Pendant le fonctionnement de la
pompe lumineux le voyant DEL orange
«NIVEAU» et le voyant DEL orange
«POMPE I» sont allumés.
Pour le boîtier de commande Duo :
En cas de dépassement du MARCHE1-NIVEAU,
les pompes sont mises en marcher, toujours à
tour de rôle. Une seule pompe fonctionne. Si la
2ème pompe fonctionne, le voyant DEL orange
« POMPE II » s'allume.
4.4.1 Exploitation normale - Capteur de
pression et sonde optique en état
de fonctionnement
La mesure du niveau se fait au moyen de
deux procédés indépendants l'un de l'autre. Les ARRET-NIVEAU, NIVEAU MARCHE
1 NIVEAU MARCHE 2 (seulement pour boîtier de
commande Aqualift F Duo, article n° 28745)
sont mesurés au moyen d'un capteur de
pression.
Le niveau ALARME est mesuré au moyen
d’une sonde optique.
Si un procédé de mesurage tombe en
panne, l'installation reste tout de même
capable de fonctionner via l'autre procédé
de mesurage.
La panne de sonde ou la panne de niveau
est affichée sur le boîtier de commande,
par signal optique et acoustique.
70
4. Exploitation
4.4.2 Augmentation du niveau pendant
une courte durée - Capteur de
pression et sonde optique en
état de fonctionnement
CHE2-NIVEAU et ALARME-NIVEAU est dépassé, le retard à l'enclenchement de 2
secondes démarre. La pompe I se met en
marche. Le voyant DEL orange «NIVEAU»
et le voyant DEL orange «POMPE I » s'allument. Après un autre retard à l'enclenchement de 2 secondes, la pompe II se met en
marche. Le voyant DEL orange « POMPE II »
s'allume et le voyant DEL rouge «ALARME»
clignote. Les deux pompes fonctionnent simultanément.
Après un retard à l'enclenchement de 2
secondes le voyant DEL rouge «ALARME»
s'allume (niveau d'alarme dépassé).
L'alarme acoustique retentit. Si le
ALARME-NIVEAU repasse sous la limite,
l'alarme acoustique s'éteint et le voyant
DEL rouge «ALARME» clignote. Les deux
pompes fonctionnent simultanément.
30 mm au dessus de ARRET-NIVEAU, la POMPE
II est arrêtée prématurément. Le voyant DEL
orange « POMPE II » s'éteint.
La pompe I continue de fonctionner jusqu'à le niveau ARRET-NIVEAU soit dépassé négativement. La temporisation en
marche à vide prend fin. Le voyant DEL
orange «POMPE I» et le voyant DEL
orange « NIVEAU » s’éteignent. Le voyant
DEL «ALARME» clignote et indique que
le ALARME-NIVEAU a été dépassé,
même pendant une courte durée.
Etat initial : aucun voyant DEL allumé
Si avec l'augmentation du niveau dans le conteneur le MARCHE1-NIVEAU et MARCHE2-NIVEAU est dépassé, le retard à l'enclenchement
de 2 secondes démarre. La pompe I se met en
marche. Le voyant DEL orange « NIVEAU » et le
voyant DEL orange « POMPE I » s'allument.
Après un autre retard à l'enclenchement de 2
secondes, la pompe II se met en marche. Le
voyant DEL orange « POMPE II » s'allume et le
voyant DEL rouge « ALARME » clignote. Les
deux pompes fonctionnent simultanément.
30 mm au dessus de ARRET-NIVEAU, la POMPE
II est arrêtée prématurément. Le voyant DEL «
POMPE II » s'éteint.
La pompe I continue de fonctionner jusqu'à le
niveau ARRET-NIVEAU soit dépassé négativement ; la pompe s'arrête alors. Le voyant DEL
orange « POMPE I » s'éteint, le voyant DEL
orange « NIVEAU » et le voyant DEL rouge «
ALARME » s'éteignent.
Lorsque le MARCHE2-NIVEAU est dépassé, la
deuxième pompe est toujours mise en marche
plus tard que la premier et arrêtée avant.
4.4.3 Augmentation brutale du niveau
pendant une courte durée - Capteur de pression et sonde optique en état de fonctionnement
Etat initial :
Voyant DEL Puissance allumé / aucun voyant DEL allumé.
Si avec l'augmentation du niveau dans le
conteneur le MARCHE1-NIVEAU et, MAR-
4.4.4 Panne du système de pression,
sonde optique en état de fonctionnement
Etat initial :
Voyant DEL Puissance allumé / aucun voyant DEL allumé.
Si avec l'augmentation du niveau dans le
71
4. Exploitation
conteneur le ALARME-NIVEAU est dépassé, le retard à l'enclenchement de 2
secondes démarre. Le voyant DEL rouge
« ALARME » s’allume et l’alarme acoustique retentit. La pompe I se met en marche. Le voyant DEL orange « POMPE I »
s'allume. Après un autre retard à l'enclenchement de 2 secondes, la pompe II se met en
marche. Le voyant DEL orange « POMPE II »
s'allume. Les deux pompes fonctionnent simultanément. Si le ALARME-NIVEAU repasse
sous la limite, l'alarme acoustique s'éteint
et le voyant DEL rouge «ALARME» clignote.
Après quatre secondes, la POMPE II est déconnectée prématurément.
La pompe I sera déconnectée prématurément. Le voyant DEL orange « POMPE I »
s’éteint.
DEL orange «POMPE I» est allumé.
Pour la mise en marche de la pompe II, il faut
d’abord appeler la pompe II. Le voyant DEL
orange « POMPE II » clignote.
La pompe II fonctionne tant que la touche est
pressée, mais au moins pendant 2 secondes
Pendant le fonctionnement de la pompe le voyant DEL orange « POMPE II » est allumé.
Si une pompe a été appelée, mais n’a pas
été mise en marche, le service manuel
sera automatiquement quitté au bout de
10 secondes.
Si pendant un intervalle de 10 secondes
le niveau est reconnu, le service manuel
quittera immédiatement et la(les)
pompe(s) sera(seront) automatiquement
mise(s) en marche.
4.4.5 Service manuel
Si l'installation est en exploitation normale,
on peut mettre en marche la pompe I ou
pompe II avec la touche «POMPE ».
La mise sous tension de la pompe se fait
en deux étapes, il faut d'abord appeler la
pompe puis la mettre en marche.
Si l’on appuie brièvement sur la touche «
POMPE », le voyant DEL orange « POMPE I » clignote. La pompe I est appelée.
Si on appuie encore une fois sur la touche
«POMPE», c’est la pompe II qui est choisie.
La pompe I est mise en marcher par une
pression plus longue. La pompe I fonctionne tant que la touche est pressée, mais
au moins pendant 2 secondes. Pendant le
fonctionnement de la pompe le voyant
72
5. Détection de pannes
Avec le boîtier de commande de KESSEL, les pannes peuvent être détectées lors de la
mise en service ainsi que pendant l'exploitation et être ainsi facilement traitées.
Généralités
Mono Duo
Explication des signes.
Power
Alarm
Niveau
Pumpe
Allumage interrompu
Clignotement lent (1s)
Clignotement rapide (0,5s)
Arrête
Bref éclair lumineux toutes 2s
Niveau
Alarm
Pumpe I
Pumpe II
Pannes lors du fonctionnement sur secteur Mono et duo
Mono Duo
Origine
Mesure d’arrêt
Consignes
Les batteries
manquent ou
sont défectueuses
Connecter les deux batteries, si nécessaire, les remplacer par de nouvelles
batteries.
La disponibilité fonctionnelle de l'appareil est indiquée par un nouveau
défilement lumineux.
Initialisation : l'installation
peut être mise en service,
c.-à-d. qu'elle est capable
de fonctionner.
Exploitation : le message
d'erreur est affiché au plus
tard 5 minutes après. L'installation est prête à fonctionner ; le service manuel
est possible. L'échange / la
connexion des batteries est
affichée au plus tard 5 minutes après par aucun voyant DEL lumineux.
Niveau d'alarme
dépassé
Panne de niveau/Panne de
sonde. Sonde
optique sale
Contrôler le débit d'entrée,
pompe,
Contrôler le système de
pression
Nettoyer la pompe.
Le niveau alarme a été dépassé pendant une courte
durée.
Capteur de pression défectueux ; il est commuté avec
la sonde optique.
Durée limite de
marche fréquence de périodicité de
démarrage
Sonde sale
Contrôler le débit d'entrée,
Contrôler la pompe,
Contrôler le système de
pression
Nettoyage de la sonde à intervalles réguliers
Une pompe a fonctionné
pendant plus de 6 minutes
en une seule fois ou les deux
pompes ont démarré ensemble plus de 20 fois durant une période de 3
minutes.
Avec certaines eaux usées,
un film peut se former sur la
sonde, ce qui déclenche le
contact de la sonde.
73
5. Détection de pannes
Mono Duo
Origine
Mesure d’arrêt
Initialisation:
«Pompe I» non
connectée, inversion de polarité,
cassée
Durant l'exploitation : «PompeI»
défectueuse ou
«pompe» en surchauffe, la protection du moteur
arrête la pompe.
Retirer la fiche de secteur,
débrancher la batterie ;
vérifier le bon raccordement des lignes de commande, leur bonne fixation
et/ou passage, si nécessaire, changer la pompe.
En cas de surchauffe, réduire le débit d'entrée; si
nécessaire, nettoyer les
sondes / le flotteur.
Initialisation: «
onde» non connectée, inversion
de polarité, cassée
Durant l'exploitation : «Sonde I»
défectueuse
Retirer la fiche de secteur,
débrancher la batterie ;
vérifier le bon raccordement des lignes de commande, leur bonne fixation
et/ou passage, si nécessaire, changer la fiche de
secteur ou la sonde.
Consignes
En cas de formation excessive de mousse, réduire le
dosage (lave-linge, douche).
Les installations d'adoucissement d'eau donnent une
eau plus douce et parfois
une formation de mousse
plus importante.
La détection de pannes ne se
fait que pendant l'exploitation (voir à ce sujet le chapitre
6 « Fonctions auxiliaires »).
La pompe se remet automatiquement en marche après
refroidissement (environ 10
min), lorsque le niveau est
correct.
- L'interrogation de la sonde
se fait toutes les 2 secondes
- Les pompes peuvent être
actionnées à la main.
- Si un niveau est dépassé,
une pompe est mise en marche automatiquement.
- Si la pompe est arrêtée, l'affichage passe de nouveau
en panne de sonde
Panne de relais Retirer la fiche de secteur,
(contact du relais mettre l'installation hors
service
défectueux)
Le boîtier de commande
n'est plus en état de fonctionner.
Panne de communication ou
fiche de connexion retirée
entre les deux
platines
Il n’y a pas d’échange de
données entre les deux
platines
Rétablir la connexion
74
5. Détection de pannes
Panne de réseau:
Mono Duo
Origine
Mesure d’arrêt
Consignes
Il n’y a pas de
tension de réseau
Contrôler la tension de ré- Sans tension de réseau, les
seau et éventuellement, la pompes ne peuvent pas élirétablir.
miner les eaux usées ! Le
message d'alarme reste
actif.
Il n’y a pas de
tension de réseau et le niveau
est présent
Contrôler la tension de ré- Sans tension de réseau, les
seau et éventuellement, la pompes ne peuvent pas
éliminer les eaux usées ! Le
rétablir.
message d'alarme reste
actif.
75
6. Fonctions auxiliaires
6.1 Test automatique de fonctionnement
des pompes
Une fois par semaine, le fonctionnement des
pompes est automatiquement contrôlé.
Pour ce faire, la(les) pompe(s) sont actionnées l'une après l'autre pendant 2 secondes.
Les pannes détectées sont affichées avec le
message correspondant et peuvent alors
être éliminées, tel que décrit dans le chapitre
5.
Mono et Duo KESSEL, il faut utiliser les
types de batterie suivants
Type:
Dimensions 9V, ANSI 1604
• Duracell Alcaline MN 1604
• Energizer Alcaline 522
• Ultralife U9VLBP
6.4 Sorties alarme sans potentiel (Option)
Les boîtiers de commande KESSEL Aqualift
Mono et Duo peuvent être modifiés / mis au
standard avec un raccord afin de disposer
d'un contact sec.
Pour ce faire la carte-mère supplémentaire
(réf. 80072) sera insérée dans le boîtier de
commande et la ligne de commande souhaitée connectée aux bornes de raccordement.
Le relais se relâche en cas de refoulement
ainsi que pour tous les messages de pannes.
.
Attention
Le raccord sans potentiel n'est admis que
jusqu'à 42 V DC/0,5 A
6.2 Contrôle de la tension de batterie
La commande contrôle en permanence la
tension de la batterie. Si, lors de la pose,
celle-ci est déjà en dessous de 12,5 V, l'installation peut, malgré tout, être mise en service.
Dans ce cas, il faut remplacer les batteries.
Pour ce faire, déconnectez d'abord le boîtier
de commande du réseau. Après l'ouverture
du couvercle de boîtier de commande, il faut
déconnecter les deux lignes de raccordement des batteries, échanger les batteries et
brancher les nouvelles batteries. Ensuite, il
faut refermer le couvercle et enficher la fiche
de secteur. Les batteries utilisées doivent
être éliminées en se conformant à la réglementation !
6.5 Essais automatiques de réenclenchement en cas de panne des pompes
En cas de panne moteur, le boîtier de commande essaie d'allumer jusqu'à 30 fois la
pompe dans une période de 2 minutes. Si
l'essai de réenclenchement automatique est
couronné de succès, la panne de la pompe
s'acquitte automatiquement. Si les essais
de réenclenchement automatiques demeurent infructueux, la panne de pompes sera
affichée.
Pour les installations Duo, les essais de réenclenchement automatiques sont exécutés en cas
d'une et de deux pannes de moteur. En cas d'une
panne moteur, l'installation est capable de fonctionner avec la deuxième pompe, c.-à-d. que si le
niveau convient est pompé, l'affichage changera.
6.3 Fonctionnement de la batterie
Les batteries annoncent la panne de réseau
par signal acoustique et optique Les pompes ne peuvent pas être actionnées avec les
batteries (c.-à-d. en cas de panne de réseau). Sans batteries ou si les batteries sont
défectueuses, vous n'avez aucun message
relatif à une panne de réseau.
Attention
Lors de la mise aux déchets du boîtier de
commande, il faut également retirer les batteries et les éliminer de façon conforme !
Avec les boîtiers de commande Aqualift F
76
7. Données techniques
Boîtier de commande
KESSEL KTP 1000
(Mono et Duo)
KESSEL KTP 500
(Mono et Duo)
Branchement au secteur
Protection par fusibles
Protection par fusibles
« C » 16 A; FI 30 mA
« C » 16 A; FI 30 mA
Tension réseau/Fréquence secteur
230 V AC / 50 Hz
230 V AC / 50 Hz
Puissance Standby
Environ 5 watts
Environ 5 watts
Courant de réseau en service
5,3 A (1 Moteur);
2,3 A (1 Moteur);
10,6A (2 Moteur)
4,7A (2 Moteur)
Température d'engagement
0°C jusqu'à + 40°C
0°C jusqu'à + 40°C
Type de protection
IP 54 (boîtier commande) IP 54
Classe de protection
I
Puissance de coupure
230 V AC, au min. 0,8 A, 230 V AC, min. 0,8 A,
au max. 10A, cos phi =1 max. 10A, cos phi =1
Puissance de coupure
42 V DC / 0,5 A
I
42 V DC / 0,5 A
Contact sec (Option)
Pompe
Capacité consommée (P1
1080 watts
480 watts
Courant nominal
5,3 A
2,3 A
Régime d'exploitation
S3 - 30%
S1
Type de protection
IP 68 max. 3 m/24 h
IP 68 max. 3 m/24 h
2
Ligne de commande pompe
3x1 mm
3x1 mm2
Ligne de commande sonde
3x0,75 mm2
3x0,75 mm2
(avertisseur)
77
8. Inspection et maintenance
8.1 Inspection
Par l'observation de différentes manoeuvres,
l’exploitant contrôlera, une fois par mois, l'aptitude au fonctionnement et l’étanchéité de la
totalité de l’installation :
• Vérifier l'entrée d'eaux usées
• Attendre la connexion du signal de niveau
et de la pompe
• Couper l'entrée d'eaux usées
• Attendre la déconnexion du signal de niveau et de la pompe
• Dévisser le flexible d'air du boîtier de commande, retirer le tube de Pitot, nettoyer et
souffler de l'air. Reconnecter ensuite le flexible d'air au boîtier de commande puis
réintroduire le tube de Pitot.
Nous recommandons d'effectuer ces travaux également après un arrêt prolongé ou
un stockage intermédiaire
8.3 Instructions relatives au boîtier de
commande électrique
Les batteries sont des pièces d'usure et doivent être contrôlées dans le cadre de la
maintenance (ou au minimum, une fois 1 x
par an) et s'il y a lieu être changées. En cas
de changement, l'élimination des déchets
doit être faite de manière écologique. Le
remplacement ne peut se faire que par des
types donnés (6.3).
Les réparations ne peuvent être exécutées
que par le fabricant.
8.2 Maintenance
Pour toutes les opérations de maintenance, veillez à ce que l'installation soit sans courant ! Respectez
les consignes de sécurité ! Tous les travaux
d'inspection et de maintenance décrits par
la suite ne peuvent être exécutés que par de
la main d'oeuvre spécialisée autorisée. Les
réparations ne peuvent être exécutées que
par le fabricant.
Les opérations de maintenance doivent être
exécutées à intervalles réguliers par du personnel spécialisé autorisé.
Vous trouverez les détails des cycles de
maintenance et de leur volume dans le manuel de l'opérateur des composant de l'installation que contient(contiennent) la(les)
pompe(s).
Avec le boîtier de commande Aqualift F, il
faut exécuter les tâches suivantes
Veuillez impérativement respecter
cet ordre afin que le fonctionnement
soit garanti.
• Contrôle des lignes de raccordement électriques ainsi que du tube de Pitot et du flexible d'air pour détecter les dommages
mécaniques et l'usure, par exemple des
déchirures, fissures, pollutions, dépôts.
8.4 Instructions relatives aux pompes
Indépendamment des cycles de maintenance, le rotor et le corps de pompe doivent
être contrôlés, en écoutant le bruit de leur
fonctionnement ou en constatant des oscillations dans le système de canalisations,
afin de détecter des impuretés incrustées
ou des traces d'usure
8.5 Pannes
Si certaines pannes ne peuvent pas être résolues, veuillez vous adresser, en cas de
doute, à votre revendeur spécialisé (voir le
cachet sur la couverture) qui a aussi exécuté
l'installation. Vous trouvez nos partenaires
de service après-vente sous : www. kessel.
de
78
9. Garantie
stations d'épuration et les citernes d'eau de
pluie. Ceci concerne l'étanchéité, l’aptitude
à l'emploi et la sécurité statique. Il faut, pour
cela que le montage ait été effectué selon
les règles de l´art par une entreprise professionnelle et que l’exploitation se déroule
conformément aux directives de montage et
de service ainsi qu’aux normes actuellement
en vigueur.
2. KESSEL rappelle que l'usure n'est pas un
défaut pris en compte par la garantie. Il en
est de même pour les défauts dus à une
maintenance défectueuse.
1. Si une livraison ou une prestation est défectueuse, KESSEL s’engage, selon votre
choix, à éliminer, par réparation, le manque
constaté ou à livrer un article sans défaut.
Si la réparation échoue par deux fois ou si
elle n’est pas rentable financièrement,
l'acheteur / le client a le droit de résilier le
contrat ou de diminuer en conséquence le
paiement dû. La constatation de manques
évidents doit faire l’objet d’un compte-rendu
immédiat; en cas de manques non reconnaissables ou cachés, ce compte-rendu
écrit sera envoyé dès que ces manques auront été constatés. KESSEL est responsable
des réparations et livraisons postérieures
dans les mêmes conditions que celles de
l'objet du contrat originel. En cas de nouvelles livraisons, le délai de garantie reprend, mais seulement en ce qui concerne
le volume d'une nouvelle livraison.
Une garantie ne peut être transmise qu’aux
objets nouvellement fabriqués. La durée de
garantie est de 24 mois après livraison par
notre revendeur.
En se basant sur la réglementation légale,
KESSEL AG augmente et accorde un délai
de garantie de 20 ans s’appliquant au cuve
décanteur, séparateur, les puits, les micros
Note: L'ouverture des composants scellés ou
des éléments vissés ne peut être exécutée que par le fabricant. Dans le cas
contraire, les droits à garantie peuvent
être exclus. "
En date du 01.06.2010
79
10. Declaration de conformité
80
11. Procès-verbal de réception pour l'exploitant
Marque et NS :
Jour / heure
______________________________________________
______________________________________________
Description du projet
Adresse
Téléphone / télécopie
______________________________________________
______________________________________________
______________________________________________
Architecte
Adresse
Téléphone / télécopie
______________________________________________
______________________________________________
______________________________________________
Propriétaire
Adresse
Téléphone / télécopie
Installateur e
Adresse
Téléphone / télécopie
______________________________________________
______________________________________________
______________________________________________
______________________________________________
______________________________________________
______________________________________________
N° de commission KESSEL
Personne autorisée à réceptionner ________________________________________
Adresse
Téléphone / télécopie
______________________________________________
______________________________________________
Exploitant de l´installation
______________________________________________
Responsable du transfert
______________________________________________
Adresse
Téléphone / télécopie
Autres assistants / divers
______________________________________________
______________________________________________
______________________________________________
La mise en service mentionnée et l’instruction ont été exécutées en présence de la
personne autorisée à réceptionner et de l'exploitant de l´installation. Veuillez faire envoyer une copie à l'usine
Lieu, date
Signature de la personne
réceptionniste de l´installations
✂
81
Signature l'exploitant
des installations
82
12. Procès verbal de remise pour l´entreprise chargée de la pose
❏
❏
❏
La mise en service et les instructions ont été effectué en présence de la personne chargée de la réception ainsi que de l´éxploitant d´installation.
La personne chargée de la réception ainsi que l´exploitant d´installation ont été informés
sur leur devoir de service de maintenance selon le mode d´emploi joint.
La mise en service ainsi que les instructions n´ont pas été effectuées
Le client a reçu les pièces de montage suivantes:
________________________________________________________________________________
________________________________________________________________________________
________________________________________________________________________________
________________________________________________________________________________
________________________________________________________________________________
La mise en service et les instructions ont été effectuées par (entreprise, adresse, contact, tél):
________________________________________________________________________________
________________________________________________________________________________
________________________________________________________________________________
________________________________________________________________________________
e rendez-vous exact pour la mise en service et les instructions a été realisé par l´exploitant d´installation et par la personne chargée de la mise en service
Lieu, date
Signature de la pour
personne chargée
de la réception
✂
83
Signature de
l´exploitant
d´installtion
Istruzioni per l’installazione, l’uso e la manutenzione
Centralina Aqualift F KESSEL
con sensore di pressione
N. ordine 28730 (Mono), 28745 (Duo)
Vantaggi del prodotto
■ Centralina protetta con gli
spruzzi d’acqua IP 54
■ Collegamenti a spina
codificati per un montaggio
semplicissimo
■ Per pompe KESSEL con
una potenza assorbita
fino a 1,2 kW
■ Con sistema SDS (sistema
di autodiagnosi)
■ Sensore di pressione per
il rilevamento sicuro dei
livelli di riempimento
■ Impianto con obbligo di
manutenzione (vedi
verbale di consegna)
Installazione
Messa in funzione
Con riserva di modifiche tecniche
L’ill. 1 mostra l’art. n. 28730
L’addestramento
relativo all’impianto è stato eseguito dal rivenditore specializzato
preposto:
Nome/Firma
01/2012
Timbro rivenditore specializzato
No. 010-586
1. Avvertenze sulla sicurezza
Le avvertenze sulla sicurezza riportate in queste istruzioni per l’uso che devono essere rispettate
per l’installazione, l’uso, la manutenzione e riparazione del gruppo, sono contrassegnate con il
seguente simbolo:
Simbolo di pericolo generale conf. ISO 3864-B-3-1 per contrassegnare pericoli
per persone.
Simbolo di pericolo conf. ISO 3864-B-3-6 per segnalare la presenza di tensione
elettrica.
Attenzione
Questo termine contrassegna avvertenze sulla sicurezza la cui inosservanza
può essere fonte di pericoli per la macchina e il suo funzionamento.
Queste istruzioni per l’uso devono essere sempre conservate presso l’impianto
Gentile cliente,
siamo lieti che abbia optato per un prodotto della KESSEL.
Prima di lasciare la fabbrica, l’intero impianto è stato sottoposto a un severo controllo della
qualità. Verifichi tuttavia immediatamente se l’impianto Le è stato consegnato completo e non
danneggiato. In caso di danni causati dal trasporto, contatti il Suo fornitore.
Prima del montaggio e della messa in funzione della stazione delle acque reflue Aqualift F
Compact KESSEL, leggere attentamente le istruzioni per il montaggio e l’uso.
KESSEL AG
Misure generali di sicurezza
Per l’installazione, il funzionamento, la manutenzione o riparazione dell’impianto, rispettare le norme antinfortunistiche, le norme e direttive pertinenti nonché le disposizioni
delle imprese di approvvigionamento e fornitrici di energia locali
Qualifica e formazione del personale
Il personale addetto all’uso, manutenzione, ispezione e montaggio deve disporre
dell’adeguata qualifica per questi lavori.
86
1. Avvertenze sulla sicurezza1. Avvertenze sulla sicurezza
L’ambito di responsabilità, la competenza e la sorveglianza del personale devono essere
stabiliti esattamente dall’utente. Se il personale non dispone delle conoscenze necessarie, deve essere addestrato e istruito. Se necessario, a questo può provvedere il produttore/fornitore su incarico dell’utente dell’impianto. L’utente deve inoltre assicurarsi
che il personale abbia letto e compreso l’intero contenuto delle istruzioni per l’uso. A tal
fine si deve effettuare un addestramento documentato.
Pericolo derivante da tensione elettrica
Questo impianto contiene tensioni elettriche e comanda elementi meccanici rotanti.
L’inosservanza delle istruzioni per l’uso può causare notevoli danni materiali, lesioni personali e persino incidenti mortali. Prima di tutti i lavori sull’impianto, staccarlo dalla rete.
L’interruttore principale e i fusibili devono essere disinseriti, cioè la corrente deve essere
scollegata e assicurata contro reinserimenti accidentali. Se esistono solo dispositivi di
protezione, essi devono essere disinseriti e dotati di un’indicazione per evitare che persone terze reinseriscano il dispositivo di protezione principale. Per tutti i lavori elettrici
sull’impianto trova applicazione la VDE 0100. L’impianto deve essere alimentato tramite
un dispositivo di sicurezza per correnti di guasto (RCD) con una corrente di guasto nominale di ≤ 30mA.
La centralina è sotto tensione e non deve essere aperta. I lavori sull’impianto elettrico
devono essere eseguiti solo da elettricisti specializzati. Il termine “Elettricista specializzato” è specificato nella VDE 0105. Assicurarsi che i cavi elettrici e tutte le altre parti
elettriche dell’impianto siano in perfetto stato. In caso di danni, l’impianto non deve assolutamente essere messo in funzione e deve essere spento immediatamente. Posare
le linee elettriche in modo da evitare pieghe e assicurare l’eliminazione della trazione.
Pericolo di ustioni di mani e dita
Durante il funzionamento, parti dell’impianto possono sviluppare temperature elevate.
L’impianto è un componente di un impianto globale. Rispettare quindi anche le istruzioni per l’uso dell’impianto globale e dei singoli componenti. Durante ogni montaggio, manutenzione, ispezione e riparazione di uno dei componenti, mettere fuori
servizio l’intero impianto e assicurarlo contro reinserimenti.
La sicurezza di funzionamento dell’impianto fornito è garantita solo in caso di utilizzo
conforme alla destinazione. I valori limite dei dati tecnici non devono essere assolutamente superati.
Gli accessori omologati dal produttore contribuiscono alla sicurezza. L’uso di altri
pezzi può far decadere la garanzia per i danni da ciò derivanti.
L’impianto non deve essere fatto funzionare in zone a rischio di esplosioni.
La spina elettrica, il fusibile e l’interruttore di protezione per correnti di guasto devono
essere liberamente accessibili per poter staccare l’impianto dalla rete in caso di guasti.
87
Indice
1.
Avvertenze sulla sicurezza
.......................................................................Pagina 86-87
2.
In generale
......................................................................Pagina .....89
3.
Montaggio/
Allacciamento elettrico
3.1 Montaggio a parete della centralina ...............Pagina .....90
3.2 Collegamento dei cavi ....................................Pagina .....91
3.3 Allacciamento elettrico ...................................Pagina .....92
3.4 Schemi delle connessioni ...............................Pagina .....93
3.5 Generatore di segnali esterno.........................Pagina .....95
3.6 Generatore di segnali a Potenziale zero ........Pagina .....95
3.7 Accorciamento dei cavi ..................................Pagina .....95
3.8 Allungamento dei cavi.....................................Pagina .....95
3.9 Collegamento tubo dell’aria/
Sensore di pressione .....................................Pagina .....95
4.
Funzionamento
4.1 Messa in funzione ..........................................Pagina .....97
4.2 Indicatori/elementi di comando Mono ............Pagina .....97
4.3 Indicatori/elementi di comando Duo ..............Pagina .....98
4.4 Condizioni di esercizio della centralina..........Pagina .....98
5.
Riconoscimento di errori
..............................................................................Pagina
101
6.
Funzioni addizionali
6.1
6.2
6.3
6.4
6.5
Test automatico funzionamento pompa ........Pagina
Controllo tensione batterie ...........................Pagina
Funzioni batterie ............................................Pagina
Output di allarme potenziale zero (opzione) ..Pagina
Tentativi automatici di riavvio in
caso di guasto della pompa ..........................Pagina
104
104
104
104
..............................................................................Pagina
105
7.
Dati tecnici
8.
Ispezione e manutenzione 8.1
8.2
8.3
8.4
8.5
9.
Garanzia
104
Ispezione .......................................................Pagina
Manutenzione ...............................................Pagina
Indicazioni sulla centralina elettrica ...............Pagina
Indicazioni sulle pompe .................................Pagina
Anomalie........................................................Pagina
106
106
106
106
106
..............................................................................Pagina
107
10. Dichiarazione di conformità .............................................................................Pagina
108
11. Verbale di consegna per l’utente ....................................................................Pagina
109
12. Verbale di consegna per l’azienda installatrice.............................................Pagina
111
88
2. In generale
Per tutti i lavori sull’impianto si devono
rispettare le istruzioni per il montaggio
e l’uso di tutti i singoli componenti.
Uso previsto delle centraline:
La centralina serve per il comando delle
pompe, lo svuotamento di cisterne e l’indicazione delle condizioni d’esercizio.
I punti di commutazione vengono rilevati attraverso il sensore di pressione nella centralina e
sono preimpostati dalla fabbrica. E’ possibile
modificare i punti di commutazione. Contattare
il servizio assistenza KESSEL.
.
L’ill. 2 mostra 28703
L’ill. 3 mostra 824821B
L’ill. 4 mostra 28451
89
3. Montaggio / allacciamento elettrico
3.1 Montaggio a parete della centralina
centralina possa essere agganciata a filo
della parete, assicurando a destra una distanza sufficiente da consentire l’apertura
del coperchio. Il volume della fornitura comprende le viti, i tasselli di plastica e una maschera per foratura.
La centralina deve essere installata in un
luogo asciutto e protetto dal gelo, preferibilmente in casa, dove eventuali segnalazioni
di allarme possono essere percepite. Proteggere dall’irradiazione solare diretta!
Per il montaggio, non è necessario aprire la
centralina. Praticare due fori orizzontali Ø 6
mm alla distanza di 168 mm (Mono) o di 254
mm (Duo). Avvitare le due viti a testa cilindrica 4,5 x 35 mm (TX20) in modo che la
Attenzione
Le batterie devono essere collegate solo
all’atto della messa in funzione
x
Ill. 5
x = 168 mm per la centralina Mono
x = 254 mm per la centralina Duo
90
3. Montaggio / allacciamento elettrico
3.2 Collegamento dei cavi
Indicazioni per la protezione dei cavi
Se i cavi di sonde e pompe non vengono interrati, proteggerli contro morsi e insetti
dannosi. Un relativo rivestimento isolante è
disponibile presso il servizio assistenza
KESSEL.
Far passare le linee di controllo per sonda
e pompa attraverso il tubo vuoto per cavi
(DN 50). Posare eventualmente le linee per
il trasduttore di segnali esterno e il contatto a potenziale zero. In seguito fissare
alla centralina il connettore della pompa
(ill. 6) e quello della sonda ottica (ill. 7) secondo i contrassegni (particolari zoomati)
e avvitare (3 Nm per il collegamento della
pompa / 1 Nm per il collegamento della
sonda).
Stringere a mano il raccordo a vite dell’attacco di mandata.
↕
Fesura
Ill. 8
Fessura connettore pompe: 3 – 4 mm
Fessura sonda ottica:
1 – 2 mm
Raffigurazione completa delle connessioni
Ill. 6 Pompa spina
➀
➁
➃
➀ connessione alla rete
➁ pompa
➂ pompa 2 (solo Duo)
➃ sonda ottica
➄ sensore di pressione
Ill. 7 Spina sonda ottica
91
➄
Ill. 9
3. Montaggio / allacciamento elettrico
3.3 Allacciamento elettrico
Avvertenza: in caso di allacciamento diretto si devono rispettare le informazioni della
tabella sottostante e gli schemi delle connessioni al punto 3.4.
I lavori devono essere eseguiti solo da un elettricista specializzato.
IMPIANTO SINGOLO Rispettare le avvertenze sulla sicurezza !
Lavori da eseguire
Descrizione
Connessione alla rete
• La protezione a monte prescritta da prevedersi in fase di
installazione non deve superare 16° (interruttore automatico “C”).
• La connessione alla rete per l’intero impianto è una spina
con messa a terra con 1,7 di cavo di collegamento.
Linee di alimentazione
Pompa
• Le linee di alimentazione delle pompe devono essere
collegate ai relativi morsetti delle morsettiere
„Pompa 1” e “Pompa 2” conformemente al colore
dei fili (rispettare la sequenza).
Pompa filo PE = morsetto PE
Pompa filo blu (bl) = morsetto blu
Pompa filo marrone (mr) = morsetto grigio
• Il conduttore di terra deve essere collegato ogni
volta al morsetto PE della morsettiera “Pompa 1” e
“Pompa 2”.
Ingressi dei livelli
sonda ottica
• La linea della sonda deve essere collegata ai morsetti della morsettiera “Sonda” conformemente al
contrassegno dei fili della sonda ottica.
Rispettare la sequenza.
Sonda filo blu (bl) = morsetto blu
Sonda filo bianco (bi) = morsetto bianco
Sonda filo nero (ne) = morsetto nero
92
3. Montaggio / allacciamento elettrico
3.4 Schemi delle connessioni
3.4.1 Schema delle connessioni centralina Aqualift Mono
Rete
Pompa Sonda ottica
Sensore di
presssione
Generatore
die segnali
Contatto a potenziale zero
Ill. 10
93
3. Montaggio / allacciamento elettrico
3.4.2 Schema delle connessioni centralina Aqualift Duo
Rete
Pompa I II
Sonda ottica
Sensore di
presssione
Generatore
die segnali
Contatto a potenziale zero
Ill. 11
94
3. Montaggio / allacciamento elettrico
3.9 Collegamento tubo dell’aria /
sensore di pressione
3.5 Generatore di segnali esterno
Il generatore di segnali esterno (n. ord. 20162)
per la trasmissione del segnale sonoro in altri
locali, se necessario può essere collegato. .
Attenzione
Posare il tubo con un’inclinazione continua, non piegare o arrotolare.
Inserire il tubo del sensore di pressione nel
raccordo a vite della centralina e avvitare
il dado per raccordi.
Eventualmente accorciare.
In caso di tubi di mandata lunghi oltre 10
m, per mantenere la pressione si deve lavorare con un piccolo compressore.
Non superare la lunghezza massima del
tubo di mandata di 30 m.
3.6 Contatto a potenziale zero
Optional può essere collegata una scheda
supplementare con contatto a potenziale
zero (n. ord. 80072). Questo consente la
trasmissione di un messaggio di guasto
cumulativo o allarme cumulativo alla tecnica di controllo centralizzata dell’edificio.
3.7 Accorciamento dei cavi
Attenzione
Nota:
Rispettare le disposizioni della VDE 0100,
VDE 01107, IEC e delle imprese erogatrici
di energia elettrica locali.
La centralina non deve essere installata in
ambienti a rischio di esplosioni. La connessione alla rete deve essere prevista di
230V AC / 50 Hz con protezione max. “C”
16A ritardata (interruttore di sicurezza corrente di guasto 30 mA).
Dopo il taglio a misura del cavo, nuova applicazione dei fili secondo l’illustrazione
sottostante.
Ill.12
Conclusione dei lavori elettrici
Al termine del collegamento elettrico il coperchio della centralina deve essere richiuso correttamente.
3.8 Allungamento dei fili
Se occorrono cavi lunghi più di 5 m, esistono prolunghe di 10 m (n. art. 80889
sonda, n. art. 80890 motore e n. art. 80891
pompa). La lunghezza massima della linea
non deve superare 30 m.
95
4. Funzionamento
d
b
e
a
f
g
c
a) Scatola della centralina
b) Tappo filettato
c) Connessione alla rete
d) LED verde “Power”
e) LED rosso “Allarme”
f) LED arancione “Livello”
g) LED arancione “Pompa”
h) Tasto allarme
j
k
h
i
l
i) Tasto “TEST” “POMPA”
j) Collegamento pompa
k) Collegamento sonda ottica
l) Collegamento sistema a pressione
Ill. 13
96
4. Funzionamento
4.1 Messa in funzione
Inserire la spina delle batterie nella scheda (ill.
14), chiudere e bloccare il coperchio della scatola. Prima della messa in funzione, pompe,
sensore di pressione e sonda ottica devono
essere installati correttamente e collegati.
Controllare la saldezza delle linee di collegamento, poi stabilire la connessione con la rete.
La centralina esegue un test di funzionamento
base, la cosiddetta inizializzazione. Questa
viene indicata da una luce di scorrimento per
ca. 8 secondi dopo il collegamento delle batterie e/o della spina elettrica. Durante l’inizializzazione, batterie, rete, sensore di pressione,
collegamenti della sonda ottica e del motore
vengono controllati.
Se la centralina è stata collegata correttamente, si illumina poi
- il LED verde POWER in caso di centraline
Mono
- nessun LED in caso di centraline Duo.
Ora l’impianto è pronto per l’uso.
Ill. 14
4.2 Descrizione degli indicatori ed elementi di comando centralina Mono
Indicatori
Funzionamento normale (per informazione per l’utente)
LED
Colore
Funzione
„Power“
Verde
Alimentazione di tensione in ordine
„Allarme“
Rosso
Livello allarme superato ecc.
„Livello“
Arrancione Livello On superato
„Pompa“
Arrancione Uscita pompe attivata
Anomalie
vedi 5. Riconoscimento errori
Elementi di comando
Tasto
„Allarme“
Disattivazione dell’allarme acustico, conferma di
avvertimento ed errori, selezione e modifica di impostazioni
„Pompa“
Funzionamento manuale pompa
97
4. Funzionamento
4.3 Descrizioni degli indicatori ed elementi di comando centralina Duo
Mono/Duo Funzione
LED
Livello ON superato
Arrancione
„Livello“
Livello allarme superato ecc.
Rosso
„Allarme“
Uscita pompa I attivata
„Pumpe I“ Arrancione
Uscita pompa II attivata
„Pumpe II“ Arrancione
vedi 5. Riconoscimento errori
Anomalie
Elementi di comando
Disattivazione dell’allarme acustico, conferma di
„Allarme“
Tasto
avvertimento ed errori, selezione e modifica di
impostazioni
Funzionamento manuale pompa I e pompa II
„Pompa“
Indicatori
Funzionamento normale (per informazione per l’utente)
4.4 Condizioni d’esercizio centralina
L’impianto viene comandato attraverso il
LIVELLO OFF, LIVELLO ON1, LIVELLO ON2
(solo per centralina Aqualift F Duo, n. art.
28745) e LIVELLO ALLARME.
Per centralina Mono
inoltre per centralina Duo
Condizioni iniziali:
LED Power illuminato / nessun LED illuminato.
Se con l’aumento del livello nel serbatoio
viene superato il LIVELLO ON1, si attiva il
ritardo d’inserzione di 2 secondi. La
pompa I viene accesa e funziona fino a
quando si ridiscende sotto il LIVELLO
OFF. Durante il funzionamento della
pompa si illuminano il LED arancione
“LIVELLO” e il LED arancione “POMPA I”.
4.4.1 Funzionamento normale – sensore di pressione e sonda ottica
funzionali
La misurazione del livello avviene con due
metodi indipendenti tra loro. Il LIVELLO
OFF, LIVELLO ON1 e LIVELLO ON2 (solo per
centralina Aqualift F Duo, n. art. 28745) vengono misurati attraverso un sensore di
pressione.
Il LIVELLO ALLARME viene misurato con
una sonda ottica.
Se un metodo di misurazione è guasto,
l’impianto rimane tuttavia funzionale grazie all’altro metodo di misurazione.
Sulla centralina, un’anomalia della sonda
o del livello viene indicata otticamente e
acusticamente.
Per centralina Duo:
con il superamento del LIVELLO ON1, le pompe
vengono sempre accese alternativamente. Funziona solo una pompa. Se funziona la seconda
pompa, si illumina il LED arancione “POMPA II”.
98
4. Funzionamento
4.4.2 Breve superamento del livello
Sensore di pressione e sonda
ottica funzionali
si illuminano. Dopo un altro ritardo d’inserzione di 2 secondi, viene accesa anche la
pompa II. Il LED arancione “POMPA II” si illumina e il LED rosso “ALLARME” lampeggia. Entrambe le pompe funzionano
contemporaneamente.
Dopo un ritardo d’inserzione di 2 secondi
si illumina il LED rosso “ALLARME” (livello
ALLARME superato). Risuona l’allarme
acustico. Quando si ridiscende sotto il
livello ALLARME, l’allarme acustico si
spegne e il LED rosso “ALLARME” lampeggia. Entrambe le pompe funzionano contemporaneamente.
30 mm sopra il LIVELLO OFF, la POMPA II viene
spenta anticipatamente. Il LED arancione
“POMPA II” si spegne.
La Pompa I continua a funzionare finché
si scende sotto il LIVELLO OFF e il tempo
di coda è trascorso. Il LED arancione
“POMPA I” e il LED arancione “LIVELLO”
si spengono.
Il LED “ALLARME” lampeggiante indica
che il LIVELLO ALLARME è stato superato, anche se per breve tempo.
Condizioni iniziali: nessun LED illuminato
Se con l’aumento del livello nel serbatoio viene
superato il LIVELLO ON1 e il LIVELLO ON2, si attiva il ritardo d’inserzione di 2 secondi. La
pompa I viene accesa. Il LED arancione
“LIVELLO” e il LED arancione “POMPA I” si illuminano. Dopo un altro ritardo d’inserzione di
2 secondi, viene accesa anche la pompa II. Il
LED arancione “POMPA II” si illumina e il LED
rosso “ALLARME” lampeggia. Entrambe le
pompe funzionano contemporaneamente.
30 mm sopra il LIVELLO OFF, la POMPA II viene
spenta anticipatamente. Il LED arancione
“POMPA II” si spegne. La Pompa I continua a
funzionare finché si scende sotto il LIVELLO
OFF e poi viene spenta. Il LED arancione
“POMPA I”, il LED arancione “LIVELLO” e il LED
rosso “ALLARME” si spengono.
Con il superamento del LIVELLO ON2, la seconda pompa viene sempre accesa ritardata
rispetto alla prima e spenta anticipatamente.
4.4.3 Breve e forte superamento del
livello Sensore di pressione e
sonda ottica funzionali
4.4.4 Guasto sistema a pressione,
sonda ottica funzionale
Condizioni iniziali:
LED Power illuminato / nessun LED illuminato.
Se con l’aumento del livello nel serbatoio
viene superato il LIVELLO ALLARME si attiva il ritardo d’inserzione di 2 secondi. Il
LED rosso “ALLARME” si illumina e risuona l’allarme acustico. La pompa I
viene accesa. Il LED arancione “POMPA
I” si illumina. Dopo un ritardo d’inserzione di
Condizioni iniziali:
LED Power illuminato / nessun LED illuminato
Se con l’aumento del livello nel serbatoio
viene superato il LIVELLO ON1, il LIVELLO
ON2 e il LIVELLO ALLARME, si attiva il
ritardo d’inserzione di 2 secondi. La
pompa I viene accesa. Il LED arancione
“LIVELLO” e il LED arancione “POMPA I”
99
4. Funzionamento
2 secondi viene accesa anche la pompa II. Il
LED arancione “POMPA II” si illumina. Entrambe
le pompe funzionano contemporaneamente.
Quando si ridiscende sotto il LIVELLO ALLARME, l’allarme acustico si spegne e il
LED rosso “ALLARME” lampeggia.
. Dopo 4 secondi, la POMPA II viene spenta anticipatamente. Il LED arancione “POMPA II” si
spegne.
Successivamente viene spenta la pompa
I. Il LED arancione “POMPA I” si spegne
4.4.5 Funzionamento manuale
Quando l’impianto si trova nel funzionamento normale, con il tasto “POMPA” è
possibile accendere la pompa I o II. L’accensione della pompa avviene in 2 fasi,
prima selezionare la pompa e quindi accenderla.
Se il tasto “POMPA” viene premuto brevemente,
il LED arancione “POMPA I” lampeggia. E’ selezionata la pompa I.
Se il tasto “POMPA” viene premuto di nuovo,
viene selezionata la pompa II.
Una pressione prolungata, attiva la pompa
I che continua a funzionare finché viene
premuto il tasto, ma almeno per 2 secondi.
Durante il funzionamento della pompa, il
LED arancione “POMPA I” è illuminato.
Per accendere la pompa II, si deve prima selezionare pompa II. Il LED arancione “POMPA II”
lampeggia.
La pompa II continua a funzionare finché viene
premuto il tasto, ma almeno per 2 secondi. Durante il funzionamento della pompa, il LED
arancione “POMPA II” è illuminato.
100
Se una pompa viene selezionata ma non
accesa, si esce automaticamente dal funzionamento manuale dopo 10 secondi. Se
entro i 10 secondi viene riconosciuto
livello, si esce immediatamente dal funzionamento manuale e la/e pompa/e
viene/vengono accesa/e automaticamente.
5. Riconoscimento errori
Con la centralina KESSEL si possono riconoscere errori all’atto della messa in funzione e
durante il funzionamento e quindi eliminarli facilmente.
In generale
Mono Duo
Spiegazione dei simboli
Power
Allarme
Livello
Pompa
Livello
Allarme
Pompa I
Pompa II
Anomalie durante il funzionamento a rete Mono e Duo
Mono Duo
Illuminazione permanente
Lampeggio lento (1s)
Lampeggio veloce (0,5s)
OFF
Breve accensione ogni 2 sec.
Causa
Rimedio
Note
Batterie mancanti o difettose
Collegare entrambe le
batterie, eventualmente
sostituirle con nuove.
La disponibilità all’uso
dell’apparecchio viene
segnalata con un’ulteriore
luce a scorrimento.
Inizializzazione: l’impianto
può essere messo in funzione, cioè è funzionale.
Funzionamento: il messaggio di errore viene visualizzato al più tardi dopo 5
min. L’impianto è pronto
per l’uso; è possibile il funzionamento manuale.
La sostituzione / collegamento delle batterie viene
indicato al più tardi dopo 5
min. dalla mancata illuminazione dei LED.
Livello allarme
superato
Errore di livello /
anomalia sonda.
Sonda ottica
sporca.
Controllare l’afflusso,
controllare pompa,
sistema a pressione
Il livello allarme è stato superato per breve tempo.
Sensore di pressione difettoso; si commuta con la
sonda ottica.
Durata limite
frequenza
ciclo di commutazione
Sonda sporca
Controllare l’afflusso
Controllare la pompa
Controllare il sistema a
pressione
Pulizia regolare della sonda
Pulire la sonda
101
Una pompa ha funzionato
continuamente per più di 6
minuti o entrambe le pompe
hanno insieme più di 20 cicli
di commutazione in 3 minuti.
Determinate acque reflue
possono causare la formazione di una pellicola sulla
sonda che ne attiva il contatto.
5. Riconoscimento errori
Mono Duo
Causa
Rimedio
Note
In caso di una formazione eccessiva di schiuma, ridurre la
dosatura (lavatrice, doccia).
Impianti per l’addolcimento
dell’acqua producono acque
più dolci e possono causare
una formazione maggiore di
schiuma.
Inizializzazione: Staccare la spina, disconnettere la batteria;
“Pompa” I non
collegata, poli in- controllare se le linee di
controllo sono collegate
vertiti, rotta.
Durante il funzio- correttamente e saldamente
namento: “Pompa e non presentano interruzioni, evtlm. sostituire la
I” difettosa o
“Pompa” surriscal- pompa.
data, il salvamo- In caso di surriscaldamento limitare l’alimentazione; evtlm.
tore spegne la
pulire sonde/ galleggianti.
pompa.
Il riconoscimento degli errori
avviene solo durante il funzionamento (al riguardo vedi
cap. 6 “Funzioni addizionali”).
Dopo il raffreddamento (ca.
10 min.), in presenza di livello
la pompa si riaccende automaticamente.
Inizializzazione:
“Sonda” non collegata, poli invertiti o rotta.
Durante il funzionamento:
“Sonda” difettosa.
Staccare la spina, disconnettere la batteria;
controllare se le linee di
controllo sono collegate
correttamente e saldamente e non presentano interruzioni, evtlm. fissare la
spina o sostituire la sonda.
- Interrogazione sonda ogni 2
secondi
- Le pompe possono essere
azionate a mano.
- Se il livello ON viene superato, viene attivata automaticamente una pompa.
- Se la pompa è spenta, l’indicazione ottica passa di
nuovo ad anomalia sonda
Anomalia relè
(contatto relè
difettoso)
Staccare la spina, mettere La centralina non è più funzionale.
fuori servizio l’impianto.
Errore di comunicazione o
spina di raccordo tra le due
schede rimossa.
Ristabilire il collegamento. Tra le due schede non avvengono scambi di dati.
102
5. Riconoscimento errori
Guasto alla rete:
Mono Duo
Causa
Rimedio
Note
Mancanza di ten- Controllare la tensione di Senza tensione di rete, le
sione di rete..
rete, evtlm. Ripristinare.
pompe non possono smaltire le acque reflue! Il messaggio di allarme rimane
attivo.
Mancanza di
tensione di rete
e presenza
livello.
Controllare la tensione di Senza tensione di rete, le
pompe non possono smalrete, evtlm. ripristinare.
tire le acque reflue! Il messaggio di allarme rimane
attivo.
103
6. Funzioni addizionali
6.1 Test automatico funzionamento pompe
Tipo:
Size 9V, ANSI 1604
Le pompe vengono sottoposte settimanalmente a un controllo automatico del loro
funzionamento. A tale fine la/e pompa/e
viene/vengono azionata/e per 2 sec. (non insieme). Le anomalie rilevate vengono indicate con il relativo messaggio e possono
essere eliminate come descritto nel cap. 5.
• Duracell Alcaline MN 1604
• Energizer Alcaline 522
• Ultralife U9VLBP
6.4 Output di allarme a potenziale zero
(opzione)
Le centraline Aqualift Mono e Duo KESSEL
possono essere dotate, anche in un secondo tempo, di un collegamento per un
contatto a potenziale zero.
A tal fine, alla centralina viene solo collegata
la scheda addizionale (n. ord. 80072) e ai
morsetti viene allacciata la linea di controllo
desiderata. In caso di messaggi di errore e
guasti alla rete, il relè si diseccita.
6.2 Controllo tensione batterie
Il comando controlla costantemente la tensione delle batterie. Se durante l’installazione è già inferiore a 12,5 V, l’impianto può
essere comunque messo in funzione. In
questo caso sostituire le batterie.
A tal fine, staccare dapprima la centralina
dalla rete. Dopo l’apertura del coperchio
della centralina, staccare dalle batterie le
due linee di collegamento, sostituire le batterie e ricollegare quelle nuove. In seguito richiudere il coperchio e reinserire la spina. Le
batterie scariche devono essere smaltite
correttamente!
Attenzione
Il collegamento a potenziale zero è ammesso solo fino a 42 V DC / 0,5 A.
6.5 Tentativi automatici di riavvio in caso
di guasto della pompa
6.3 Funzione delle batterie
In caso di un anomalia del motore, a intervalli di 2 minuti la centralina cerca fino a 30
volta di accendere la pompa. Se il tentativo
di riavvio automatico è riuscito, l’anomalia
della pompa si conferma automaticamente.
Se i tentativi di riavvio automatici sono falliti,
l’anomalia della pompa continua ad essere
visualizzata.
Negli impianti Duo, i tentativi di riavvio automatici
avvengono per anomalie di uno e due motori. In
caso di guasto a un motore, l’impianto rimane
funzionale grazie alla seconda pompa, cioè in
presenza di livello viene pompato e l’indicazione
ottica cambia.
Le batterie segnalano guasti alla rete acusticamente e otticamente. Le pompe non
possono essere fatte funzionare con le batterie (cioè in caso di guasto alla rete). Senza
batterie o con batterie difettose, i guasti alla
rete non vengono segnalati.
Attenzione
In caso di smaltimento della centralina, togliere le batterie e smaltirle correttamente!
Per le centraline Aqualift F Mono e Duo
KESSEL usare i seguenti tipi di batterie:
104
7. Dati tecnici
Centralina
KESSEL KTP 1000
(Mono e Duo)
KESSEL KTP 500
(Mono e Duo)
Connessione alla rete
Protezione “C” 16A;
Protezione “C” 16A;
corr. di guasto 30 mA
corr. di guasto 30 mA
Tensione di rete / frequenza di rete
230 V AC / 50 Hz
230 V AC / 50 Hz
Potenza standby
ca. 5 Watt
ca. 5 Watt
Corrente di rete
5,3 A (1 Motore);
2,3 A (1 Motore);
durante il funzionamento
10,6A (2 Motore)
4,7A (2 Motore)
Temperatura d’impiego
0°C a + 40°C
0°C a + 40°C
Tipo di protezione
IP 54 (centralina)
IP 54 (centralina)
Classe di protezione
I
I
Potere di apertura
230 V AC, min. 0,8 A,
max. 10A, cos phi =1
230 V AC, min. 0,8 A,
max. 10A, cos phi =1
Potere di apertura del contatto a
42 V DC / 0,5 A
42 V DC / 0,5 A
potenziale zero (opzione)
Pompa
Potenza assorbita (P1)
1080 W
480 W
Corrente nominale
5,3 A
2,3 A
Modo operativo
S3 - 30%
S1
Tipo di protezione
IP 68 max. 3 m/24 h
IP 68 max. 3 m/24 h
Linea di comando pompa
3x1 mm2
3x1 mm2
Linea di comando sonda
3x0,75 mm2
3x0,75 mm2
(trasmettitore di allarme)
105
8. Ispezione e manutenzione
8.1 Ispezione
L’utente deve sottoporre mensilmente l’intero
impianto a un controllo della funzionalità e
della tenuta mediante cicli di commutazione:
• Assicurare l’alimentazione delle acque reflue
• Attendere l’attivazione del segnale del livello
e della pompa
• Chiudere l’alimentazione delle acque reflue
• Attendere la disattivazione del segnale del
livello e della pompa.
8.2 Manutenzione
Durante tutti i lavori di manutenzione, staccare l’impianto dalla rete!
Osservare le avvertenze sulla sicurezza! Tutti
i lavori di ispezione e manutenzione descritti
qui di seguito devono essere eseguiti solo
da personale specializzato autorizzato. Le riparazioni devono essere eseguite solo dal
produttore.
• Svitare il tubo dell’aria dalla centralina, togliere il tubo pressostatico, pulire e stasare. Infine ricollegare dapprima il tubo
dell’aria alla centralina e poi reinserire il
tubo pressostatico.
Consigliamo questi lavori anche dopo un
periodo di fermo prolungato o stoccaggi
temporanei.
8.3 Indicazioni sulla centralina
elettrica
Le batterie sono particolari soggetti a usura
e nell’ambito della manutenzione (o almeno
1 volta l’anno) devono essere controllate ed
evtlm. sostituite. In caso di sostituzione
provvedere a uno smaltimento corretto. La
sostituzione deve avvenire solo con i tipi indicati (6.3).
Le riparazioni devono essere eseguite esclusivamente dal produttore.
8.4 Indicazioni sulle pompe
I lavori di manutenzione devono essere eseguiti regolarmente da personale specializzato autorizzato. I cicli e l’entità della
manutenzione sono riportati nelle istruzioni
per l’installazione e l’uso dei componenti
dell’impianto che contiene la/e pompa/e.
Per la centralina Aqualift F effettuare i seguenti lavori:
Indipendentemente dai cicli di manutenzione, in caso di aumento dei rumori di funzionamento, calo della portata o vibrazioni
nel sistema delle tubazioni, controllare se il
girante e il corpo della pompa presentano
depositi di sporco o usura.
8.5 Anomalie
Per garantire il funzionamento, rispettare assolutamente questa sequenza.
• controllare se le linee di collegamento elettriche, il tubo pressostatico e quello
dell’aria presentano danni meccanici e
usura, p.es. strappi, pieghe, imbrattamenti, depositi.
Se si verificassero anomalie non eliminabili,
in caso di dubbi rivenditore (vedi timbro sulla
copertina) che ha eseguito l’installazione. I
nostri partner del servizio assistenza sono
indicati sotto:
www.kessel.de
106
9. Garanzia
1. Se la merce consegnata è difettosa,
l`azienda KESSEL è tenuta, secondo
espressa scelta del committente, a
provvedere eseguendo la dovuta riparazione del bene contestato ovvero alla
sua sostituzione. Se la riparazione/sostitu-zione non andasse a buon fine per
due occasioni consecutive o non fosse
economicamente sostenibile, l`acquirente/ ordinate ha il dritto di recesso dal
contratto o ad un`adeguata riduzione
dell`obbligazione sorta dal relativo contratto di compravendita. La constatazione di vizi evidenti deve essere
comunicata tempestivamente in forma
scritta; in caso di presenza di difetti difficilmente visibili o impossibili di immediato
accertamento,
la
relativa
declamazione va effettuata al momento
del loro conoscimento. In caso di sostituzioni o riparazioni di prodotti difettosi,
la ditta KESSEL si impegna a rispondere per la merce riparata/sostituita oggetto del contratto originario. La
consegna di nuovi prodotti da parte
della ditta KESSEL in conto sostituzione, provoca la nascita di un nuovo
periodo di garanzia, subentrando
quindi al precedente, se e solo se si
tratta di articoli di produzione ex novo.
La garanzia ha una validità di 24 mesi.
Quest`ultima produce diritti a partire dal
giorno di consegna della merce destinata ai clienti KESSEL, controparte del
contratto di fornitura. Informazioni aggiuntive sono disposte e consultabili
nei commi 377 del HGB (= Handelsgesetzbuch trad. Codice Commerciale tedesco).
Oltre al regime legale, la KESSEL AG ha
prolungato ad anni 20 il periodo di garanzia
per
i
separatori
a
coalescenza/olio/ benzina, separatore
di grassi, pozzetti, fosse biologiche e
serbatoi di acqua piovana in merito al
solo serbatoio. Questo si riferisce alla
compattezza, alla`idoneità all`uso e alla
sicurezza statica. Pre-supposto per
questo è un assemblaggio di esperti
come pure l`attivo del prodotto proprio
secondo gli istruzioni di montaggio e
manutenzione in corso e le relative
norme valide
2. La ditta KESSEL non riconosce l`usura
come un difetto o un malfunzionamento
valido ai fini della contestazione per sostituzione o riparazione. Motivo di non
sostituibilità (o riparazione) è relativo
anche per guasti conseguenti a negligenze o inefficienze nelle operazioni di
manutenzione.
Avvertenza: l’apertura di componenti
sigillati o di chiusure e collegamenti a
vite può essere effettuata soltanto dal
produttore. L’inosservanza di tale avvertenza può comportare l’esclusione
di diritti di garanzia.
01.06.2010
107
10. Dichiarazione di conformità
108
11. Verbale di consegna per l’utente
Denominazione
Giorno / Ora
__________________________________________________________
Denominazione dell’immobile __________________________________________________________
Indirizzo / Telefono / Fax
__________________________________________________________
Committente della costruzione ________________________________________________________
Indirizzo / Telefono / Fax
__________________________________________________________
Progettista
Indirizzo / Telefono / Fax
__________________________________________________________
__________________________________________________________
Ditta specializzata incaricata __________________________________________________________
Indirizzo / Telefono / Fax
__________________________________________________________
N. commessa KESSEL
__________________________________________________________
Persona autorizzata alla presa in consegna ______________________________________________
Indirizzo / Telefono / Fax
__________________________________________________________
Utente dell’impianto
Indirizzo / Telefono / Fax
__________________________________________________________
__________________________________________________________
Persona addetta alla consegna ________________________________________________________
Altri presenti / Varie
__________________________________________________________
La messa in funzione e l’addestramento indicati sono stati eseguiti in presenza della persona
autorizzata alla presa in consegna e dell’utente dell’impianto. Inviare copia alla fabbrica!
Luogo, data
Firma
Persona autorizzata
alla presa in consegna
Firma
Utente dell’impianto
✂
109
Firma
Azienda installatrice
110
12. Verbale di consegna per l’azienda installatrice
❏
La messa in funzione e l’addestramento sono stati eseguiti in presenza della persona
autorizzata alla presa in consegna e dell’utente dell’impianto.
❏
All’utente dell’impianto/persona autorizzata alla presa in consegna è stato fatto presente l’obbligo di manutenzione del prodotto conformemente alle istruzioni per l’uso
allegate.
❏
La messa in funzione e l’addestramento non sono stati effettuati.
Al committente / addetto alla messa in funzione sono stati consegnati i seguenti elementi
e/o componenti del prodotto:
________________________________________________________________________________
________________________________________________________________________________
________________________________________________________________________________
________________________________________________________________________________
La messa in funzione e l’addestramento vengono eseguiti da (ditta, indirizzo, interlocutore,
tel.):
________________________________________________________________________________
________________________________________________________________________________
________________________________________________________________________________
________________________________________________________________________________
La fissazione della data esatta della messa in funzione/addestramento è di pertinenza
dell’utente dell’impianto e dell’addetto alla messa in funzione.
Luogo, data
Firma
Persona autorizzata
alla presa in consegna
Firma
Utente dell’impianto
✂
111
Firma
Azienda installatrice
K Protezione antiriflusso
K Stazioni di sollevamento
K Scarichi
K Separatori
-Separatori di grassi
-Separatori di coalescenza,
olii e benzine
-Separatori di amidi
-Separatori di sedimenti
K Trattamento delle
acque reflue
K Pozzetti di ispezione
K Sistemi di recupero delle
acque piovane
Handleiding voor montage, bediening en onderhoud
KESSEL Schakeltoestel Aqualift F
met druksensor
Bestelnr. 28730 (mono), 28745 (duo)
Productvoordelen
■ Schakeltoestel tegen spatwater beschermd IP 54
■ gecodeerde stekkerverbindingen voor doodgemakkelijke montage
■ voor KESSEL pompen tot
1,2 kW opgenomen
vermogen
■ met SDS systeem
(zelfdiagnosesysteem)
■ Druksensor voor de veilige
opname van vulstanden
■ Onderhoudsplichtige
installatie
(zie overgaveprotocol)
Installatie
Inbedrijfstelling
Techn. wijzigingen voorbehouden
Afb. 1 toont art.-nr. 28730
Inwerking
van de installatie wird uitgevoerd door uw vakbedrijf:
Naam/Handtekening
01/2012
Stempel vakbedrijf
010-586
1. Veiligheidsinstructies
De in deze gebruiksaanwijzing voorhanden veiligheidsinstructies, die voor montage, werking, onderhoud en reparatie van het agregaat in acht genomen dienen te worden, zijn met de volgende
symbolen gekenmerkt:
Algemeen gevarensymbool volgens ISO 3864-B-3-1 voor kenmerking van gevaar voor personen.
Gevarensymbool volgens ISO 3864-B-3-6 voor waarschuwing voor elektrische
spanning.
Dit woord kenmerkt veiligheidsinstructies, waarbij niet-inachtneming gevaren
voor machine en functie ervan kan veroorzaken.
Attentie
Deze bedieningshandleiding dient continu aan de installatie ter beschikking te staan.
Geachte klant,
Wij verheugen ons, dat u een product van KESSEL heeft gekozen.
De complete installatie wird voor het verlaten van de fabriek aan een strenge kwaliteitscontrole
onderworpen. Gelieve niettemin onmiddellijk te controleren, of de installatie volledig en onbeschadigd bij u werd afgeleverd. Gelieve in geval van transportschade contact op te nemen
met uw leverancier.
Voor montage en inbedrijfstelling van het KESSEL afvalwaterstation Aqualift-F Compact dient
deze montage- en bedieningshandleiding zorgvuldig te worden gelezen.
KESSEL AG
Algemene veiligheidsvoorzorgen
Bij installatie, werking, onderhoud of reparatie van de installatie dienen de ongevallenpreventievoorschriften, de rele-vante normen en richtlijnen alsook de voorschriften van
de plaatselijke energie-bedrijven en verzorgingsondernemingen in acht te worden genomen.
Personeelskwalificatie en -scholing
Het personeel voor bediening, onderhoud, inspectie en montage moet de overeenkomstige kwalificatie voor deze werkzaamheden bezitten.
Verantwoordelijkheidsbereik, bevoegdheid en controle van het personeel moeten door
de exploitant nauwgezet geregeld zijn. Als het personeel niet over voldoende kennis beschikt dient het geschoold en opgeleid te worden. Dit kan, indien nodig, in opdracht van
114
1. Veiligheidsinstructies
de exploitant van de installatie door de fabrikant/leverancier gebeuren. Bovendien dient
de exploitant ervoor te zorgen, dat de inhoud van de gebruiksaanwijzing door het personeel volledig wordt begrepen. Hiervoor dient een gedocumenteerde instructie te gebeuren.
Gevaar door elektrische spanning
Deze installatie bevat elektrische spanningen en bestuurt draaiende, mechanische installatiedelen. Bij niet-inachtneming van de bedieningshandleiding kunnen aanzienlijke
materiële schade, lichamelijke letsels of dodelijke ongevallen het gevolg zijn. Voor alle
werkzaamheden aan de installatie dient deze veilig van het net te worden afgekoppeld.
Hoofdschakelaar en zekeringen moeten uitgeschakeld, d.w.z. spanningsvrij geschakeld
en tegen opnieuw inschakelen worden beveiligd. Als er slechts zekeringen voorhanden
zijn, moeten deze uitgeschakeld worden en met een bordje voorzien worden, zodat derden de hoofdzekering niet opnieuw kunnen inschakelen. Voor alle elektrische werkzaamheden aan de installatie geldt de VDE 0100. De installatie moet via een
lekstroomveiligheidsvoorziening (RCD) met een lekstroombeveiliging van ≤ 30mA verzorgd worden. Het schakeltoestel staat onder spanning en mag niet geopend worden.
Alleen elektriciens mogen werkzaamheden aan de elektrische voorzieningen uitvoeren.
Het begrip elektricien is in VDE 0105 gedefinieerd. Er moet voor gezorgd worden, dat
de elektrische kabels alsook alle andere elektrische installatiedelen in onberispelijke toestand verkeren. Bij beschadiging mag de installatie in geen geval in werking gesteld
worden resp. moet onmiddellijk worden uitgeschakeld. Elektrische kabels zodanig leggen, dat deze niet geknikt worden en er geen trekkracht op wordt uitgeoefend.
Verbrandingsgevaar voor handen en vingers
Delen van de installatie kunnen tijdens de werking een hoge temperatuur ontwikkelen.
De installatie is een component van een grote installatie. Neem daarom ook de gebruiksaanwijzingen van de algemene installatie en afzonderlijke componenten in
acht. Bij iedere montage, onderhoud, inspectie en reparatie aan één van de componenten moet steeds de gehele installatie buiten werking gesteld en tegen opnieuw
inschakelen te worden beveiligd.
De bedrijfsveiligheid van de geleverde installatie is alleen bij gebruik conform de
voorschriften gevrijwaard. De grenswaarden van de technische gegevens mogen in
geen geval overschreden worden.
Door de fabrikant goedgekeurd toebehoren dient voor de veiligheid. Het gebruik van
andere delen kan de aansprakelijkheid voor daaruit ontstane gevolgen doen vervallen.
De installatie mag niet in explosiegevaarlijke zones gebruikt worden.
De netstekker, de zekering en de lekstroomschakelaar moeten vrij toegankelijk zijn,
om de installatie in geval van storing van het net af te koppelen.
115
Inhoudsopgave
1.
Veiligheidsinstructies
..................................................................Pagina 114-115
2.
Algemeen
..................................................................Pagina 1717117
3.
Montage/
Elektrische aansluiting
3.1
3.2
3.3
3.4
3.5
3.6
3.7
3.8
3.9
Wandmontage van het schakeltoestel......Pagina
Kabelaansluiting........................................Pagina
Elektrische aansluiting ..............................Pagina
Aansluitschema‘s......................................Pagina
Externe signaalgever ...............................Pagina
Potentiaalvrij contact ...............................Pagina
Kabels inkorten .........................................Pagina
Kabels verlengen ......................................Pagina
Aansluiting luchtslang/druksensor ...........Pagina
118
119
120
121
123
123
123
123
123
4.
Werking
4.1
4.2
4.3
4.4
Ingebruikname .........................................Pagina
Indicatie-/bedieningselementen mono .....Pagina
Indicatie-/bedieningselementen duo ......Pagina
Bedrijfstoestanden van het schakeltoestelPagina
125
125
126
126
5.
Foutherkenning
..................................................................Pagina
129
6.
Extra functies
Automatische functietest van de pomp ...Pagina
Controle van de batterijspanning .............Pagina
Batterijfunctie ...........................................Pagina
Potentiaalvrije alarmuitgang (optie) ..........Pagina
Automatische opnieuw inschakelpogingen
bij pompfout .............................................Pagina
132
132
132
132
..................................................................Pagina
133
8.1 Inspectie...................................................Pagina
8.2 Onderhoud ...............................................Pagina
8.3 Instructies bij het elektrisch schakeltoestel
..................................................................Pagina
8.4 Instructies bij de pompen.........................Pagina
8.5 Storingen..................................................Pagina
134
134
..................................................................Pagina
135
..................................................................Pagina
136
11. Overgaveprotocol voor de exploitant ........................................................Pagina
137
12. Overgaveprotocol voor de monterende onderneming .............................Pagina
139
7.
Technische gegevens
8.
Inspectie en onderhoud
9.
Vrijwaring
10. Conformiteitsverklaring
6.1
6.2
6.3
6.4
6.5
116
132
134
134
134
2. Algemeen
Bij alle werkzaamheden aan de installatie moeten de montage- en bedieningshandleidingen van alle afzonderlijke componenten in acht worden genomen.
Gebruiksdoel van schakeltoestellen:
Het schakeltoestel dient voor de pompaansturing voor het ledigen van tanks en indicatie van
bedrijfstoestanden.
Via de druksensor in het schakeltoestel worden de schakelpunten vastgesteld. De schakelpunten zijn in de fabriek vooringesteld.
Een wijziging van schakelpunten is mogelijk.
Gelieve bij de KESSEL fabrieksklantenservice
na te vragen.
Afb.2 toont 28703
Afb. 3 toont 824821B
Afb. 4 toont 28451
117
3. Montage / Elektrische aansluiting
3.1 Wandmontage van het
schakeltoestel
gen. De 2 halve rondkopschroeven (TX20)
4,5 x 35 mm zover inschroeven, dat het
schakeltoestel aan de wand aansluitend
kan worden ingehangen. Hierbij op voldoende wandafstand naar rechts letten, zodat
het deksel kan worden geopend. Schroeven, kunststofpluggen en boorsjabloon zijn
in de leveringsomvang inbegrepen.
Het schakeltoestel moet droog en vorstvrij
geïnstalleerd worden, bij voorkeur binnenshuis, waar voorkomende alarmmeldingen
ook waargenomen kunnen worden. Tegen
dirtecte zonnestraling beschermen!
Voor de montage moet het schakeltoestel
niet geopend worden. Twee horizontale
boorgaten Ø 6 mm, op een afstand van 168
mm (mono) resp. 254 mm (duo) aanbren-
Attentie
De batterijen mogen eerst bij ingebruikname geplaatst worden.
x
Afb. 5
x = 168 mm bij mono schakeltoestel
x = 254 mm bij duo schakeltoestel
118
3. Montage / Elektrische aansluiting
3.2 Kabelaansluiting
De stuurkabels voor sonde en pomp door
het lege kabelkanaal (DN 50) trekken.
Eventueel de kabels voor de externe signaalgever en het potentiaalvrij contact
leggen. Aansluitend op het schakeltoestel
pompstekker (afb. 6) en stekker optische
sonde (afb. 7)
overeenkomstig de markeringen (loepdetails) opsteken en vastschroeven (3 Nm
voor pompaansluiting / 1 Nm voor sondeaansluiting).
Schroefverbinding voor drukaansluiting
handvast aanhalen.
Instructie voor kabelbescherming
Bij vrij gelegde sonde- en pompkabels dienen deze tegen ongedierte te worden beschermd.
Een
overeenkomstige
beschermende ommanteling is verkrijgbaar
via de KESSEL klantenservice.
Spleet
Afb. 8
Spleet pompstekker: 3-4 mm
Spleet optische sonde: 1-2 mm
Complete afbeelding van de aansluiting
Afb. 6 Pomp plug
➀
Afb. 7 Optische plug-sonde
➁
➀ Netaansluiting
➁ Pomp
➂ Pomp 2 (alleen duo)
➃ Optische sonde
➄ Druksensor
119
➃
➄
Afb. 9
3. Montage / Elektrische aansluiting
3.3 Elektrische aansluiting
Instructie: Bij directe aansluiting moet de informatie uit onderstaande tabel alsook de
aansluitschema’s onder punt 3.4 in acht worden genomen.
Deze werkzaamheden mogen alleen door een elektricien worden uitgevoerd.
ENKELE INSTALLATIE Veiligheidsinstructies in acht nemen!
Uit te voeren werk
Beschrijving
Netaansluiting
• De voorgeschreven voorzekering aan de installatiezijde mag 16A („C“-automaat) niet overschrijden.
• De netaansluiting voor de complete installatie is een
veiligheidscontactstekker met 1,7 m aansluitkabel.
Pomptoevoerkabels
• De pomptoevoerkabels moeten overeen-komstig de
draadkleur op de overeenkom-stige klemmen van
klemmenblokken „Pomp 1“ en „Pomp 2“ worden
aangesloten (volgorde in acht nemen).
Pomp draad PE
= Klem PE;
Pomp draad blauw (bl) = Klem blauw
Pomp draad bruin (br) = Klem grijs
• De aardleider moet eveneens op klem PE van het
klemmenblok „Pomp 1“ en „Pomp 2“ aangesloten
worden.
Niveau-ingangen
optische Sonde
• De sondekabel moet overeenkomstig de draadkleur optische sonde tekening op de klemmen van
het klemmenblok „Sonde“ worden aangesloten.
De volgorde in acht nemen.
Sonde draad blauw (bl) = Klem blauw
Sonde draad wit (ws) = Klem wit
Sonde draad zwart (sw) = Klem zwart
120
3. Montage / Elektrische aansluiting
3.4 Aansluitschema‘s
3.4.1 Aansluitschema schakeltoestel Aqualift Mono
Net/Power
Pomp Optische sonde Druksensor Signaalgever Potentiaalvrij contact
Afb. 10
121
3. Montage / Elektrische aansluiting
3.4.2 Aansluitschema schakeltoestel Aqualift Duo
Net/Power Pomp I II
Optische sonde Druksensor Signaalgever
Potentiaalvrij
contact
Afb. 11
122
3. Montage / Elektrische aansluiting
3.5 Externe signaalgever
3.9 Aansluiting luchtslang /
druksensor
De externe signaalgever (bestelnr. 20162)
voor overdracht van het waarschuwingssignaal in andere ruimtes kan indien vereist
worden aangesloten.
3.6 Potentiaalvrij contact
Optioneel kan een extra printplaat met een
potentiaalvrij contact (bestelnr. 80072)
aangesloten worden. Op deze wijze kan
een verzamelstoring- of verzamelalarmmelding aan superieure gebouwtechniek
worden overgedragen.
3.7 Kabels inkorten
Attentie
Na inkorten van de kabel, nieuw ontmantelen van de draden volgens onderstaande afbeelding.
Abb.12
Attentie
De slang continu stijgend leggen, niet
knikken of rollen.
De slang van de druksensor in de schroefverbinding aan het schakeltoestel steken en de wartelmoer vastschroeven.
Eventueel moet zij ingekort worden.
Bij drukleidinglengtes van meer dan 10 m
moet er met een kleine compressor voor
drukbehoud worden gewerkt.
De maximale drukleidinglengte van 30 m
mag niet overschreden worden.
Instructie:
De voorschriften van VDE 0100, VDE
01107, IEC, resp. de plaatseliujke energiebedrijven moeten in acht worden genomen.
Het schakeltoestel mag niet in explosiegevaarlijke ruimtes geïnstalleerd worden. De
netaansluiting is 230 V AC / 50 Hz met
max. zekering „C“ 16A traag te voorzien
met (lekstroomschakelaar 30 mA).
Einde van de werkzaamheden
Na de volledige elektrische aansluiting
dient het deksel van het schakeltoestel
weer zoals het hoort te worden gesloten.
3.8 Kabels verlengen
Als meer dan 5 m kabellengte vereist is,
dan bestaan hiervoor 10 m verlengkabels
(art.-nr. 80889 sonde, art.-nr. 80890
motor en art. nr. 80891 pomp). De maximale kabellengte van 30 m mag niet
overschreden worden.
123
4. Werking
d
b
e
a
f
g
c
a)
b)
c)
d)
e)
f)
g)
h)
Kast schakeltoestel
Sluitschroef
Netaansluiting
Groene LED „Power“
Rode LED „Alarm“
Oranje LED “NIVEAU”
Oranje LED “POMP”
Alarmtoets
j
k
i)
j)
k)
l)
h
i
l
„TEST“ toets “POMP”
Aansluiting pomp
Aansluiting optische sonde
Aansluiting druksysteem
Afb. 13
124
4. Werking
4.1 Ingebruikname
De batterijstekker op de printplaat aansluiten (afb. 14) het kastdeksel sluiten en vergrendelen. Voor de ingebruikname moeten
pompen, druksensor en optische sonde vast
ingebouwd en aangesloten zijn.
Controle van de aansluitkabels op vaste zitting, dan netaansluiting tot stand brengen.
Het schakeltoestel voert een basisfunctietest, de zog. initialisatie uit. Dit wordt door
een lopend licht ca. 8 sec na het aansluiten
van de batterij, resp. de netstekker aangetoond. Bij de initialisatie worden batterij, net,
druksensor, optische sonde- en motoraansluitingen gecontroleerd.
Bij correcte aansluiting van het schakeltoestel licht aansluitend op:
- de groene POWER LED bij mono schakeltoestellen
- geen LED bij duo schakeltoestellen.
De installatie is nu bedrijfsklaar.
Afb. 14
4.2 Beschrijving van indicatie- en bedieningselementen schakeltoestel mono
Indicatie-elementen
Normale werking
(ter informatie voor
de operator)
LED
Kleur
Functie
„Power“
Groen
Spanningsverzorging in orde
„Alarm“
Rood
Alarmniveau overschreden enz.
„Niveau“
Oranje
Aan niveau overschreden
„Pomp“
Oranje
Pompuitgang geactiveerd
Storingen
zie 5. Foutherkenning
Bedieningselementen
Toets
„Alarm“
Uitschakelen van het akoestisch alarm, bevestigen van waarschuwingen en fouten, selecteren
en wijzigen van instellingen
„Pomp“
Handmatige modus pomp
125
4. Werking
4.3 Beschrijving van indicatie- en bedieningselementen schakeltoestel duo
Mono/Duo Functie
LED
Aan niveau overschreden
oranje
„Niveau“
Alarmniveau overschreden enz.
rood
„Alarm“
Pompuitgang I geactiveerd
oranje
„Pomp I“
Pompuitgang II geactiveerd
oranje
„Pomp II“
zie 5. Foutherkenning
Storingen
Bedieningselementen
Uitschakelen van het akoestisch alarm, bevesti„Alarm“
Toets
gen van waarschuwingen en fouten, selecteren
en wijzigen van instellingen
Handmatige modus pomp I en pomp II
„Pomp“
Indicatie-elementen
Normale werking
(ter informatie voor
de operator)
4.4 Bedrijfstoestanden van het
schakeltoestel
voor mono schakeltoestel
extra voor duo schakeltoestel
De installatie wordt via het UIT NIVEAU,
AAN1-NIVEAU, AAN2-NIVEAU (alleen bij
schakeltoestel Aqualift F Duo, art.-nr. 28745)
en ALARMNIVEAU geschakeld.
4.4.1 Normale werking - druksensor en
optische sonde functioneel.
Uitgangstoestand:
Power LED licht op / geen LED licht op
Als met stijgend niveau in de tank het
AAN1-NIVEAU wordt overschreden, start
de inschakelvertraging van 2 seconden.
PompI wordt ingeschakeld en loopt tot het
UIT-NIVEAU weer wordt onderschreden.
Gedurende de pomploop lichten de oranje
LED „NIVEAU“ en de oranje LED „POMP
I“ op.
De niveaumeting gebeurt door twee van
elkaar onafhankelijke procedures. Het UIT
NIVEAU, AAN1-NIVEAU en AAN2-NIVEAU
(alleen bij schakeltoestel Aqualift F Duo, art.nr. 28745) worden door een druksensor gemeten.
Het ALARMNIVEAU wordt met een optische sonde gemeten.
Als er een meetprocédé uitvalt, blijft de installatie niettemin via het andere meetprocédé functioneel.
Aan het schakeltoestel wordt de sondefout resp. niveaufout optisch en akoestisch aangetoond.
Bij duo schakeltoestel:
Met het overschrijden van het AAN1-NIVEAU
worden de pompen steeds afwisselend ingeschakeld. Er loopt slechts één pomp. Als de 2de
pomp loopt licht de oranje LED „POMP II“ op.
126
4. Werking
4.4.2 Kortstondig verhoogd niveau druksensor en optische sonde
functioneel
I“ lichten op. Na een inschakelvertraging van
2 seconden wordt pomp II mee ingeschakeld.
De oranje LED „POMP II“ licht op en de rode
LED „ALARM“ knippert. Beide pompen
lopen met elkaar samen.
Na een inschakelvertraging van 2 seconden licht de rode LED „ALARM“ (ALARMniveau overschreden). Het akoestisch
alarm weerklinkt. Wanneer het ALARMNIVEAU weer wordt onderschreden, dooft
het akoestisch alarm uit en de rode LED
„ALARM“ knippert. Beide pompen lopen met
elkaar samen.
30mm boven het UIT-NIVEAU wordt POMP II
vroegtijdig uitgeschakeld. De oranje „POMP IILED“ dooft uit.
Pomp I loopt nog verder tot het UIT-NIVEAU is onderschreden en de nalooptijd
verstreken is.
De oranje LED „POMP I“ en de oranje
LED „NIVEAU“ doven uit.
De knipperende LED „ALARM“ toont aan,
dat het ALARMNIVEAU, ook slechts kortstondig, was overschreden.
Uitgangstoestand: Geen LED licht op
Als met stijgend niveau in de tank het AAN1NIVEAU en AAN2-NIVEAU wordt overschreden,
start de inschakelvertraging van 2 seconden.
Pomp I wordt ingeschakeld. De oranje LED „NIVEAU“ en de oranje LED „POMP I“ lichten op.
Na een verdere inschakelvertraging van 2 seconden wordt pomp II mee ingeschakeld. De
oranje LED „POMP II“ licht op en de rode LED
„ALARM“ knippert. Beide pompen lopen gelijktijdig.
30mm boven het UIT-NIVEAU wordt POMP II
vroegtijdig uitgeschakeld. De oranje „POMP II“
-LED dooft uit.
Pomp I loopt nog verder tot het UIT-NIVEAU onderschreden is en wordt dan uitgeschakeld.
De oranje LED „POMP I“, de oranje LED „NIVEAU“ en de rode LED „ALARM“ doven uit.
Met het overschrijden van het AAN2-NIVEAU
wordt de tweede pomp altijd in tijd vertraagd
na de eerste ingeschakeld en vroegtijdig uitgeschakeld.
4.4.4 Uitval druksysteem,
sonde functioneel
4.4.3 Kortstondig sterk verhoogd niveau - druksensor en optische
sonde functioneel
optische
Uitgangstoestand:
Power LED licht op / geen LED licht op.
Als met stijgend niveau in de tank het
ALARMNIVEAU wordt overschreden, start
de inschakelvertraging van 2 seconden.
De rode LED „ALARM“ licht op en het
akoestisch alarm weerklinkt. Pomp I
wordt ingeschakeld. De oranje LED
„POMP I“ licht op. Na een inschakelvertraging van 2 seconden wordt pomp II mee ingeschakeld. De oranje LED „POMP II“ licht op.
Uitgangstoestand:
Power LED licht op / geen LED licht op.
Als met stijgend niveau in de tank AAN1NIVEAU, AAN2-NIVEAU en ALARM-NIVEAU wordt overschreden, start de
inschakelvertraging van 2 seconden.
Pomp I wordt ingeschakeld. De oranje
LED „NIVEAU“ en de oranje LED „POMP
127
4. Werking
Beide pompen lopen met elkaar samen.
Wanneer het ALARMNIVEAU weer wordt
onderschreden, dooft het akoestisch
alarm en de rode LED „ALARM“ knippert.
Na vier seconden wordt POMP II vroegtijdig uitgeschakeld. De oranje „POMP II-LED“ dooft uit.
Later wordt pomp I uitgeschakeld.
De oranje LED „POMP I“ dooft uit.
4.4.5 Handmatige modus
Als de installatie in normale modus is, kan
met toets„POMP“ pomp I of pomp II worden ingeschakeld.
Het inschakelen van de pomp gebeurt in
twee stappen, eerst de pomp kiezen en dan
inschakelen.
Wanneer toets „POMP“ kort wordt ingedrukt,
knippert de oranje LED „POMP I“. De pomp is
geselecteerd.
Als de toets „PUMPE“ nogmaals wordt ingedrukt, dam wordt pomp II geselecteerd.
Door langer drukken wordt pomp I ingeschakeld. De pomp loopt zolang er op de
toets wordt gedrukt, minimum echter gedurende 2 seconden. Gedurende de pomploop licht de oranje LED „POMP I“ op.
Voor het inschakelen van pomp II moet pomp
II eerst geselecteerd worden. De oranje LED
„POMP II“ knippert.
Pomp II loopt zolang er op de toets wordt gedrukt, minimum echter gedurende 2 seconden.
Gedurende de po,ploop licht de oranje LED
„POMP II“ op.
128
Als er een pomp werd geselecteerd maar
niet ingeschakeld, zal de handmatige
modus na 10 seconden automatisch verlaten worden.
Als er binnen 10 seconden niveau wordt
herkend, dan wordt de handmatige
modus onmiddellijk verlaten en de
pomp(en) automatisch ingeschakeld.
5. Foutherkenning
Met het KESSEL schakeltoestel kunnen fouten bij de ingebruikname alsook gedurende
de werking worden herkend en daardoor makkelijker worden verholpen.
Algemeen
Mono Duo
Verklaring van de tekens
Power
Alarm
Niveau
Pomp
Continu oplichten
Langzaam knipperen (1sec)
Snel knipperen (0,5sec)
Uit
Kort knipperen, alle 2 sec.
Niveau
Alarm
Pomp I
Pomp II
Storingen bij werking op net mono en duo
Mono Duo
Oorzaak
Uitschakelmaatregel
Instructies
Batterijen ontbt- Beide batterijen aansluiten,
reken of zijn de- evt. door nieuwe batterijen
vervangen.
fect
De functionaliteit van het
toestel wordt door een
nieuw lopend licht aangetoond.
Initialisatie: De installatie
kan in werking worden gesteld, d.w.z. zij is functioneel.
Werking: De foutmelding
wordt ten laatste na 5 min
aangetoond. De installatie
is functioneel, handmatige
modus is mogelijk. Het uitwisselen/aansluiten
van
batterijen wordt ten laatste
na 5 min door geen oplichtende LED aangetoond.
Alarm niveau
overschreden
Niveaufout/
Sondefout.
Optische sonde
vervuild.
Toevoerhoeveelheid controleren, pomp,
druksysteem controleren,
sonde reinigen.
Alarmniveau was kortstondig overschreden.
Druksensor defect;er wordt
met de optische sonde geschakeld.
Grenslooptijd
geluidsdrukfrequentie
Toevoerhoeveelheid controleren
Pomp controleren
Druksysteem controleren
Regelmatige reiniging van
de sonde.
Een pomp is meer dan 6 min
gelopen of beide pompen
hebben samen meer dan 20
schakelcyclussen in 3 minuten.
Bij bepaalde afvalwateren
kan er een film op de sonde
gevormd worden, die het
contact van de sonde activeert.
Sonde vervuild
129
5. Foutherkenning
Mono Duo
Oorzaak
Uitschakelmaatregel
Instructies
Bij overmatige schuimvorming de dosering (wasmachine, douche) reduceren.
Wateronthardingsinstallaties leiden tot zachter water
en evt. hogere schuimvorming.
Initialisatie:
„Pomp I“ niet
aangesloten, verkeerd gepoold,
gebroken.
In bedrijf: „Pomp
I“ defect of
“Pomp” oververhit, motorveiligheid schakelt
pomp uit.
Netstekker
uittrekken,
batterij afkoppelen; stuurleidingen op correcte
aansluiting, vaste zitting
resp. doorgang controleren, evt. pomp uitwisselen.
Bij oververhitting toevoer
beperken; evt. sonde/vlotters reinigen.
Initialisatie:
„Sonde“ niet
aangesloten, verkeerd gepoold of
gebroken
In bedrijf:
„Sonde“ defect
Netstekker uittrekken, bat- - De opvraag van de sonde
terij afkoppelen; stuur- gebeurt alle 2 sec.
leidingen op correcte - Pompen kunnen handmatig
aansluiting, vaste zitting bediend worden.
resp. doorgang controle- - Als het Aan-niveau overren, evt. stekker aanhalen schreden is, wordt een
pomp automatisch ingeof sonde uitwisselen.
schakeld.
- Als de pomp uitgeschakeld
is wisselt de optische indicatie weer naar sondefout.
Foutherkenning gebeurt alleen in werking (zie daarvoor
hoofdstuk 6 „Extra functies“).
Pomp schakelt na afkoeling
(ca. 10 min) automatisch
weer in, als er niveau aanwezig is.
Relaisfout (relaiscontact defect)
Netstekker uittrekken, installatie buiten
werking stellen.
Communicatiefout of verbindingsstekker
tussen beide
printplaten verwijderd.
Verbinding weer tot stand Tussen beide printplaten
brengen.
vindt geen gegevensuitwisseling plaats.
130
Het schakeltoestel is niet
meer functioneel.
5. Foutherkenning
Netuitval:
Mono Duo
Oorzaak
Uitschakelmaatregel
Instructies
Netspanning
ontbreekt.
Netspanning controleren,
evt. weer tot stand brengen.
Netspanning
ontbreekt en
niveau voorhanden.
Netspanning controleren, De pompen kunnen zonder
evt. weer tot stand brengen. netspanning geen afvalwater verwijderen! De alarmmelding blijft actief.
131
De pompen kunnen zonder
netspanning geen afvalwater verwijderen! De alarmmelding blijft actief.
6. Extra functies
6.1 Automatische pompfunctietest
Voor de KESSEL schakeltoestellen Aqualift
F Mono en Duo dienen volgende batterijtypes te worden gebruikt:
Type:
Size 9V, ANSI 1604
• Duracell Alcaline MN 1604
• Energizer Alcaline 522
• Ultralife U9VLBP
Eenmaal wekelijks worden de pompen automatisch op functie gecontroleerd. Daarvoor worden de pomp(en) gedurende 2 sec.
na elkaar aangestuurd.
Herkende fouten worden met overeenkomstige melding aangetoond en kunnen dan
zoals in hoofdstuk 5 beschreven worden
verholpen.
6.4 Potentiaalvrije alarmuitgang (optie)
6.2 Controle van de batterijspanning
De KESSEL schakeltoestellen Aqualift Mono
en Duo kunnen met een aansluiting voor een
potentiaalvrij contact uit-, resp. toegerust
worden.
Daarvoor wordt alleen de extra printplaat
(bestelnr. 80072) in het schakeltoestel aangesloten en de gewenste stuurleiding aan de
aansluitklemmen aangesloten. Het relais
wordt stroomloos bij foutmeldingen en netuitval.
De besturing controleert constant de batterijspanning. Als deze bij de inbouw reeds
onder 12,5 V ligt, kan de installatie niettemin
in gebruik worden genomen.
In dit geval moeten de batterijen vernieuwd
worden. Daarvoor koppelt u eerst het schakeltoestel van het net af. Na het openen van
het deksel van het schakeltoestel worden
beide aansluitkabels van de batterijen afgekoppeld, de batterijen vernieuwd en de
nieuwe batterijen aangesloten. Daarna moet
het deksel weer gesloten en de netstekker
ingestoken worden. De gebruikte batterijen
moeten deskundig worden verwijderd!
Attentie
De potentiaalvrije aansluiting is alleen tot 42
V DC / 0,5 A goedgekeurd.
6.5 Automatische opnieuw inschakelpogingen bij pompfouten
Bij een motorfout probeert het schakeltoestel met een tussentijd van 2 minuten tot 30
maal toe, om de pomp in te schakelen. Als
de automatische inschakelpoging succesvol
is, dan wordt de pompfout zelfstandig bevestigd. Als de automatische inschakelpogingen geen succes hadden, wordt de
pompfout verder aangetoond.
Bij duo-installaties gebeuren de automatische inschakelpogingen bij een en twee motorfouten. De
installatie is bij een motorfout door de 2de pomp
functioneel, d.w.z. als er niveau voorhanden is
wordt er afgepompt en de optische indicatie wisselt
6.3 Functie van de batterijen
De batterijen melden netuitval akoestisch en
optisch. De pompen kunnen niet met de
batterijen (d.w.z. bij netuitval) worden bedreven. Zonder batterijen of met defecte batterijen heeft u geen melding over een netuitval.
Attentie
Bij verwijdering van een schakeltoestel
moeten de batterijen eveneens uitgenomen
worden en overeenkomstig deskundig worden verwijderd!
132
7. Technische gegevens
Schakeltoestel
KESSEL KTP 1000
(Mono en Duo)
KESSEL KTP 500
(Mono en Duo)
Netaansluiting
Zekering „C“ 16A;
Zekering „C“ 16A
FI 30 mA
FI 30 mA
Netspanning / Netfrequentie
230 V AC / 50 Hz
230 V AC / 50 Hz
Vermogen standby
ca. 5 Watt
ca. 5 Watt
Netzstrom in Betrieb
5,3 A (1 Motor);
2,3 A (1 Motor);
10,6A (2 Motoren)
4,7A (2 Motoren)
Gebruikstemperatuur
0°C tot + 40°C
0°C tot + 40°C
Afdichtingsnorm
IP 54 (schakeltoestel)
IP 54 (schakeltoestel)
Veiligheidsklasse
I
I
Schakelvermogen
230 V AC, min. 0,8 A,
max. 10A, cos phi =1
230 V AC, min. 0,8 A,
max. 10A, cos phi =1
Schakelvermogen van het
42 V DC / 0,5 A
42 V DC / 0,5 A
potentiaalvrij contact (optie)
Pomp
Vermogensopname (P1)
1080 W
480 W
Nominale stroomsterkte
5,3 A
2,3 A
Bedrijfsmodus
S3 - 30%
S1
Afdichtingsnorm
IP 68 max. 3 m/24 h
IP 68 max. 3 m/24 h
Stuurkabel pomp
3x1 mm2
3x1 mm2
Stuurkabel sonde (alarmgever)
3x0,75 mm2
3x0,75 mm2
133
8. Inspectie en onderhoud
8.1 Inspectie
De complete installatie dient maandelijks
door de exploitant door observatie van een
schakelcyclus op functionaliteit en dichtheid
te worden gecontroleerd:
• Afvalwatertoevoer tot stand brengen
• Inschakelen niveausignaal en pomp afwachten
• Afvalwatertoevoer uitschakelen
• Uitschakelen niveausignaal en pomp afwachten
8.3 Instructies voor het elektrisch
schakeltoestel
8.2 Onderhoud
Bij alle onderhoudswerkzaamheden
de installatie van het net afkoppelen!
Veiligheidsinstructies in acht nemen!
Alle onderstaand beschreven inspectie- en
onderhoudswerkzaamheden mogen alleen
door geautoriseerd vakpersoneel uitgevoerd
worden. Reparaties mogen alleen door de
fabrikant uitgevoerd worden.
De batterijen zijn slijtagedelen en moeten in
het kader van het onderhoud (of min. 1 x
jaarlijks) gecontroleerd en eventueel gewisseld worden. Bij het wisselen dient er op milieuvriendelijke verwijdering te worden gelet.
Vervanging mag alleen door de opgegeven
types gebeuren (6.3).
Reparaties mogen alleen door de fabrikant
gebeuren.
Onderhoudswerkzamheden dienen regelmatig door geautoriseerd vakpersoneel te
worden uitgevoerd. Onderhoudscyclussen
en omvang staat vermeld in de inbouw- en
bedieningshandleiding van de installatiecomponent, die de pomp(en) bevat.
Bij het schakeltoestel Aqualift F moeten volgende werkzaamheden uitgevoerd worden:
8.4 Instructies voor de pompen
Gelieve de volgorde absoluut na te
komen, zodat de functie gevrijwaard
is.
• Controle van de elektrische aansluitkabels, alsook de stuwbuis en de luchtslang
op mechanische beschadigingen en
slijtage, bv. barsten, knikken, vervuiling, afzettingen.
8.5 Storingen
134
• De luchtslang van het schakeltoestel afschroeven, de stuwbuis uitnemen, reinigen en doorblazen. Aansluitend eerst de
luchtslang aan het schakeltoestel weer
aansluiten en daarna de stuwbuis terugplaatsen. Deze werkzaamheden raden wij
ook aan na langdurige stilstand of tussenopslag.
Onafhankelijk van de onderhoudscyclussen
dient bij toenemende bedrijfsgeluiden, afnemende transportcapaciteit of trillingen in het
buissysteem het loopwiel en de pompkast
op vastzittende verontreinigingen of slijtage
te worden gecontroleerd.
Als er nie toplosbare storingen optreden,
dan gelieve u in geval van twijfel aan uw
vakbedrijf (zie stempel op de voorpagina) te
wenden, dato ok de installatie heeft uitgevoerd. Onze klantenservicepartner vindt u
op: www.kessel.de
9. Garantie
1. Indien een levering of een dienst problemen
vertoont, zal KESSEL volgens u keuze het
probleem verhelpen door een bijkomende
levering of door de levering van een toestel
zonder schade. Indien de bijkomende levering twee maal ontoereikend is om het probleem op te lossen of indien het probleem
niet opgelost kan worden, heeft de klant /
de opdrachtgever het recht zich aan het
contract te onttrekken of zijn betaling overeenkomstig te vertragen. Het vaststellen van
duidelijke schade moet meteen gebeuren,
bij niet meteen zichtbare schade moet dit
meteen na het ontdekken van de schade
schriftelijk gemeld worden. Voor bijkomend
herstel of bijkomende leveringen staat KESSEL in dezelfde mate borg als voor het oorspronkelijke voorwerp van het contract. Voor
nieuwe leveringen begint de garantietermijn
opnieuw te lopen, maar dit enkel voor de
omvang van de nieuwe levering.
Voor pas herstelde voorwerpen biedt KESSEL een garantie.
De garantietermijn bedraagt 24 maanden
vanaf de levering aan onze partner. § 377
van het Duitse Handelswetboek zijn verder
van toepassing.
Naast de wettelijk verplichte garantie garandeert KESSEL AG bij olie/benzineafscheiders,
vetafscheiders,
schachten,
IBA-systemen en regenwaterreservoirs de
dichtheid, statische belastbaarheid en toepasbaarheid voor een periode van 20 jaar.
Deze garantie geldt uitsluitend wanneer
montage door vakkundig personeel is uitgevoerd volgens de geldende normvoorschriften en inbouwinstructies, en dat daarbij
voldoende rekening is gehouden met de
grondwatersituatie terplaatse.
Daarnaast geldt de voorwaarde dat het gebruik van de systemen en het onderhoud
ervan wordt uitgevoerd volgens de KESSEL
voorschriften.
2. KESSEL wil met nadruk stellen dat slijtage
geen tekortkoming van het product is. Hetzelfde geldt voor fouten die optreden door
foutief onderhoud.
Instructie: Het openen van verzegelde
componenten of schroefverbindingen mag
alleen door de fabrikant gebeuren. Anders
kunnen vrijwaringsclaims uitgesloten zijn.
01.06.2010
135
10. Conformiteitsverklaring
136
11. Overgaveprotocol voor de exploitant
Benaming
Dag / Uur
__________________________________________________________
__________________________________________________________
Objectbenaming
Adres / Telefoon / Telefax
__________________________________________________________
__________________________________________________________
Bouwheer
Adres / Telefoon / Telefax
__________________________________________________________
__________________________________________________________
Planner
Adres / Telefoon / Telefax
__________________________________________________________
__________________________________________________________
Uitvoerende vakfirma
Adres / Telefoon / Telefax
__________________________________________________________
__________________________________________________________
KESSEL commissienummer __________________________________________________________
Opleveringsgemachtigde
Adres / Telefoon / Telefax
__________________________________________________________
__________________________________________________________
Installatie-exploitant
Adres / Telefoon / Telefax
__________________________________________________________
__________________________________________________________
Overgavepersoon
__________________________________________________________
Andere aanwezigen / Diversen ________________________________________________________
De beschreven ingebruikname en instructie werd in het bijzijn van de voor de keuring bevoegde persoon en de exploitant van de installatie uitgevoerd. Gelieve de doorslag naar de fabriek te sturen!
Plaats, datum
Handtekening
Voor de keuring gemachtigde persoon
Handtekening
Handtekening
Installatie-exploitant Monterende onderneming
✂
137
138
12. Overgaveprotocol voor de monterende onderneming
❏
❏
❏
De ingebruikname en instructie werd in het bijzijn van de voor de keuring gemachtigde persoon en de installatie-exploitant uitgevoerd.
De installatie-exploitant/voor de keuring gemachtigde persoon wird op de onderhoudsplicht van het product volgens de bijgevoegde bedieningshandleiding gewezen.
De ingebruikname en instructie werd niet uitgevoerd
Aan de opdrachtgever/in gebruik nemer werden volgende bouwdelen en/of productcomponenten overhandigd:
________________________________________________________________________________
________________________________________________________________________________
________________________________________________________________________________
________________________________________________________________________________
________________________________________________________________________________
De ingebruikname en instructie wordt uitgevoerd door (firma, adres, aanspreekpartner, tel.):
________________________________________________________________________________
________________________________________________________________________________
________________________________________________________________________________
________________________________________________________________________________
_______________________________________________________________________________
De nauwkeurige termijnbepaling voor de ingebruikname/instructie wordt door de installatie-exploitant en de in gebruik nemer uitgevoerd.
Plaats, datum
Handtekening
Voor de keuring gemachtigde persoon
Handtekening
Handtekening
Installatie-exploitant Monterende onderneming
✂
139
K Terugstroombeveiligingen
K Waterzuivering
K Afvoerputten
K Regenwatersystemen
K Opvoerinstallaties, Pompen
K Afscheiderinstallaties
-Vetafscheiders
-Olie- en benzineafscheiders
-Zetmeelafscheiders
-Bezinkselafscheiders
K Schachtsystemen
INStrUKCja ZabUDoWy, obSłUgI I KoNSErWaCjI
Urządzenie sterownicze KESSEL Aqualift F
z czujnikiem ciśnieniowym
Nr kat. 28730 (Mono), 28745 (Duo)
Zalety produktu
■ Urządzenie sterownicze
z ochroną przeciwbryzgową IP 54
■ Kodowane przyłącza
wtykowe gwarantujące
niezwykle łatwy montaż
■ Do pomp KESSEL
o poborze prądu maks.
1,2 kW
■ Z systemem samodiagnozy SDS
■ Czujnik ciśnieniowy do
niezawodnego określania stanu napełnienia
■ Urządzenie wymaga
konserwacji (patrz
protokół przekazania)
Instalację
Uruchomienie
Nazwisko/podpis
Data
przeprowadził zakład specjalistyczny:
Stan 01/2012
Instruktaż
Miejscowość
Pieczęć firmy specjalistycznej
Zmiany techniczne zastrzeżone
Rys. 1 przedstawia art. nr 28730
Nr 010-586
1. Wskazówki dotyczące bezpieczeństwa
Zawarte w niniejszej instrukcji obsługi obowiązujące wskazówki bezpieczeństwa dotyczące
zabudowy, eksploatacji, konserwacji i uruchomienia agregatu oznakowane są
następującymi symbolami:
Ogólny symbol zagrożenia według ISO 3864-B-3-1 do oznaczania
zagrożenia dla ludzi.
Symbol zagrożenia według ISO 3864-B-3-6 w celu ostrzegania przez
napięciem elektrycznym.
Uwaga!
To słowo oznacza wskazówki bezpieczeństwa, których nieprzestrzeganie
może być Źródłem zagrożenia dla maszyny i jej działania.
Niniejsza instrukcja obsługi musi być stale dostępna w pobliżu urządzenia.
Szanowny Kliencie,
cieszymy się z wyboru naszego produktu.
Całkowite urządzenie przed opuszczeniem fabryki zostało poddane surowej kontroli jakości.
Prosimy jednak natychmiast skontrolować, czy urządzenie zostało dostarczone w stanie
kompletnym i nieuszkodzonym. W razie zauważenia szkód transportowych prosimy
skontaktować się z dostawcą.
Przed montażem i uruchomieniem przepompowni KESSEL Aqualift-F Compact należy
dokładnie przeczytać niniejszą instrukcję obsługi.
KESSEL AG
ogólne wskazówki dotyczące bezpieczeństwa
Podczas montażu, obsługi, konserwacji i napraw urządzenia należy
przestrzegać odpowiednich przepisów BHP, norm i dyrektyw, jak również
lokalnych przepisów dotyczących zasilania w energię elektryczną.
Kwalifikacje i szkolenia personelu
Personel obsługujący, wykonujący prace konserwacyjne, inspekcyjne i
montażowe musi dysponować odpowiednimi kwalifikacjami do wykonywania
tych prac.
142
1. Wskazówki dotyczące bezpieczeństwa
Użytkownik urządzenia musi uregulować kwestie odpowiedzialności, kompetencji i
nadzoru personelu. Jeśli personel nie posiada koniecznych umiejętności, należy go
przeszkolić i poinstruować. Może to się odbywać w razie potrzeby na zlecenie
użytkownika urządzenia przez producenta / dostawcę. Poza tym użytkownik musi
zagwarantować, aby treść instrukcji obsługi została zrozumiana przez personel. Musi
się przy tym odbyć udokumentowane szkolenie.
Zagrożenie porażeniem wysokim napięciem
Urządzenie to wykazuje napięcia elektryczne i steruje obracającymi się, mechanicznymi
częściami. W wypadku niezachowania ostrożności może dojść do poważnych szkód
materialnych, obrażeń ciała lub nawet do wypadków śmiertelnych. Przed rozpoczęciem
wykonywania wszelkich prac na urządzeniu należy je odłączyć od sieci! Wyłącznik
główny i bezpieczniki muszą być wyłącznone, czyli odłączone od napięcia i
zabezpieczone przed ponownym załączeniem. Jeśli są tylko bezpieczniki, wówczas
należy je odłączyć i umieścić na nich wskazówkę, aby żadna osoba trzecia ponownie
nie włączyła bezpiecznika głównego. Do wszystkich prac elektrycznych na urządzeniu
odnoszą się przepisy VDE 0100. Urządzenie należy wyposażyć w zabezpieczenie
różnicowo-prądowe (RCD) o natężeniu nominalnym nie większym niż 30mA.
Urządzenie sterownicze jest pod napięciem i nie można go otwierać. Prace na instalacji
elektrycznej mogą być przeprowadzane wyłącznie przez wykwalifikowanych elektryków.
Pojęcie wykwalifikowanego elektryka zdefiniowane jest w VDE 0105. Należy upewnić
się, że kabel elektryczny jak również elementy elektryczne urządzenia znajdują się w
nienagannym stanie. W razie stwierdzenia ich uszkodzenia, urządzenia nie wolno
włączać lub, jeśli pracuje, trzeba je natychmiast wyłączyć. Przewody elektryczne
układać w taki sposób, aby nie zostały zagięte i nie były narażone na ciągnięcie.
Niebezpieczeństwo poparzenie rąk i palców
Części urządzenia mogą podczas pracy powodować powstanie wysokich temperatur.
Urządzenie jest komponentem innej instalacji. Należy więc przestrzegać instrukcji
obsługi całej instalacji oraz jej poszczególnych komponentów. Podczas montażu,
konserwacji, inspekcji i napraw jednego z komponentów należy zawsze wyłączyć całe
urządzenie i zabezpieczyć je przed ponownym włączeniem.
Bezpieczeństwo pracy tego urządzenia gwarantujemy tylko przy użytkowaniu zgodnym
z przeznaczeniem. W żadnym razie nie wolno przekraczać wartości granicznych
podanych w danych technicznych.
Tylko osprzęt autoryzowany przez producenta zapewnia bezpieczeństwo. Stosowanie
innych części wyklucza odpowiedzialność za powstałe w wyniku tego szkody.
Urządzenie można ustawiać tylko w miejscach nienarażonych na eksplozje.
Wtyczka sieciowa, bezpiecznik i wyłącznik różnicowo-prądowy muszą być dobrze
dostępne, aby możliwe było szybkie odłączenie urządzenia od sieci w sytuacji
awaryjnej.
143
Spis treści
1. Wskazówki dotyczące bezpieczeństwa....................................................................strona 142-143
2. Informacje ogólne
3.
Montaż/
podłączenie do prądu
4. Eksploatacja
5.
6.
rozpoznawanie błędów
Funkcje dodatkowe
7. Dane techniczne
8.
Inspekcja i konserwacja
..............................................................................strona
145
4.1 ..Uruchomienie ................................................strona
4.2 ..Elementy wskazań i obsługi Mono ................strona
4.3 ..Elementy wskazań i obsługi Duo...................strona
4.4 Stany robocze urządzenia sterowniczego......strona
153
153
154
154
6.1
6.2
6.3
6.4
6.5
160
160
160
160
3.1 ..Montaż urządzenia na ścianie.......................strona 4614146
3.2 ..Podłączenie kabla .........................................strona
147
148
3.3 ..Przyłącze elektryczne....................................strona
3.4 ..Schematy połączeń .......................................strona
149
3.5 ..Zewnętrzny podajnik sygnału ........................strona
151
151
3.6 ..Kontakt bezpotencjałowy...............................strona
3.7 ..Skracanie kabli ..............................................strona
151
151
3.8 ..Przedłużanie kabli .........................................strona
3.9 ..Podłączenie węża powietrza/czujnika ciśn....strona
151
..............................................................................strona
Automatyczny test funkcji pompy ...................strona
Kontrola napięcia baterii ................................strona
Funkcja baterii................................................strona
Kontakt bezpotencjałowy (opcja) ...................strona
Automatyczne próby ponownego włączenia
w razie błędu pompy ......................................strona
..............................................................................strona
157
160
161
8.1 Inspekcja.........................................................strona
8.2 Konserwacja ...................................................strona
8.3 Wskazówki dotyczące elektrycznego urządzenia
sterowniczego ................................................strona
8.4 Wskazówki dotyczące pomp ..........................strona
8.5 Zakłócenia .....................................................strona
162
162
162
..............................................................................strona
164
12. Protokół przekazania dla firmy wykonującej zabudowę.......................................strona
167
9.
gwarancja
10. Deklaracja zgodności
..............................................................................strona
11. Protokół przekazania dla użytkowanika .................................................................strona
144
162
162
163
165
2. Informacje ogólne
Podczas
wszelkich
prac
przy
urządzeniu
należy
przestrzegać
instrukcji obsługi i zabudowy wszystkich
poszczególnych komponentów.
Przeznaczenie urządzenia sterowniczego
Urządzenie sterownicze służy do sterowania
pompą opróżniającą zbiorniki i do wskazywania
stanów roboczych.
Za pomocą czujnika ciśnieniowego w
urządzeniu sterowniczym ustalane są punkty
przełączania.
Punkty
przełączania
są
ustawione fabrycznie.
Zmiana punktów przełączania jest możliwa.
W tym celu prosimy skontaktować się z działem
obsługi klienta KESSEL.
Rys. 2 przedstawia 28703
Rys. 3 przedstawia 824821B
Rys. 4 przedstawia 28451
145
3. Montaż/podłączenie do instalacji elektrycznej
3.1 Montaż urządzenia sterowniczego na
ścianie
lub 254 mm (Duo). Dwie śruby z łbem
półokrągłym (TX20) 4,5 x 35 mm wkręcić tak
daleko, aby urządzenie sterownicze przylegało
ciasno do ściany. Należy przy tym zwrócić
uwagę na odpowiednią odległość do ściany,
aby możliwe było otwarcie pokrywy. Śruby, kołki
plastikowe oraz szablon na-wierceń wchodzą w
skład kompletu.
Szafka sterownicza musi zostać zainstalowana w miejscu suchym i zabezpieczonym przed mrozem, najlepiej w budynku, gdzie słyszalne będą ewentualne
alarmy. Chronić przed bezpośrednim działaniem promieni słonecznych!
Uwaga!
Urządzenia sterowniczego nie trzeba otwierać
w celu montażu. Należy wykonać dwa poziome
otwory Ø 6 mm w odległości 168 mm (Mono)
Baterie należy włożyć do urządzenia przy
rozruchu.
x
Rys. 5
x = 168 mm urządzenie sterownicze Mono
x = 254 mm urządzenie sterownicze Duo
146
3. Montaż/podłączenie do instalacji elektrycznej
3.2 Podłączenie kabla
Przewody sterowania sondy i pompy przeciągnąć przez rurę ochronną na kable (DN 50).
W razie potrzeby ułożyć przewody dla
zewnętrznego podajnika sygnału i kontaktu
bezpotencjałowego. Następnie do urządzenia
sterowniczego podłączyć wtyczkę pompy (rys.
6) i wtyczkę sondy optycznej (rys. 7) zgodnie z
oznaczeniami (powiększone wycinki) i dokręcić ręcznie (3 Nm dla przyłącza pompy / 1 Nm
dla przyłacza sondy).
Połączenie skręcana przyłącza ciśnieniowego
dokręcić ręcznie.
Wskazówka dotycząca ochrony kabla
W przypadku swobodnie ułożonych kabli sondy
i pompy należy zapewnić ochronę przed
pogryzieniem przez szkodniki. Dostępny jest
ochronny płaszcz kablowy KESSEL.
szczelina
Rys. 8
Szczelina wtyczki pompy: 3-4 mm
Szczelina sondy optycznej: 1-2 mm
Kompletny rysunek przyłączy
Rys. 6 wtyczka pompy
1.
Rys. 7 wtyczka sondy optycznej
2.
1. Przyłącze sieciowe
2. Pompa
3. Pompa 2 (tylko Duo)
4. sonda optyczna
5. Czujnik ciśnieniowy
147
4.
5
Rys. 9
3. Montaż/podłączenie do instalacji elektrycznej
3.3 Podłączenie do instalacji elektrycznej
Wskazówka: W przypadku podłączenia bezpośredniego należy przestrzegać informacji podanych
w poniższej tabeli oraz schematów połączeń w punkcie 3.4.
Prace wykonywać może wyłączenie wykwalifikowany elektryk.
UrZĄDZENIE jEDNoPoMPoWE - przestrzegać wskazówek bezpieczeństwa!
Prace do wykonania
opis
Podłączenie do sieci
• Przewidziany bezpiecznik w instalacji nie może mieć wartości
większej niż 16 A („C“- automat).
• Podłączenie do prądu całego urządzenia za pomocą wtyczki
z zestykiem ochronnym z kablem 1,7 m.
Przewody zasil. pompy
• Przewody zasilajace pompy należy podłaczyć odpowiednio
do koloru żył na danych zaciskach bloku zacisków „Pompa
1“ i „Pompa 2“ (zwrócić uwagę na kolejność).
Pompa żyła PE = zacisk PE;
Pompa żyła niebieska (bl) = zacisk niebieski
Pompa żyła brązowa (br) = zacisk szary
• Przewód ochronny należy podłączyć na zacisku PE bloku
zacisków „Pompa 1“ „Pompa 2“.
Wejścia poziomów
sonda optyczna
• Przewód sondy podłączyć odpowiednio do oznaczenia
na zaciskach bloku zacisków “Sonda”.
Przestrzegać kolejności.
Sonda żyła niebieska (bl) = zacisk niebieski
Sonda żyła biała (ws) = zacisk biały
Sonda żyła czarna (sw) = zacisk czarny
148
3. Montaż/podłączenie do instalacji elektrycznej
3.4 Schematy połączeń
3.4.1 Schemat połączenie urządzenia sterowniczego aqualift Mono
Sieć
Pompa
Sonda
optyczna
Czujnik
ciśnieniowy
Podajnik
sygnał u
Kontakt
bezpotencja owy
Rys. 10
149
3. Montaż/podłączenie do instalacji elektrycznej
3.4.2 Schemat połączenie urządzenia sterowniczego aqualift Duo
Sieć
Pompa I Pompa II
Sonda
optyczna
Czujnik
ciśnieniowy
Podajnik
sygnał u
Kontakt
bezpotencjał owy
Rys. 11
150
3. Montaż/podłączenie do instalacji elektrycznej
3.5 Zewnętrzny podajnik sygnału
W razie potrzeby może być podłączony
zewnętrzny podajnik sygnału (nr kat. 20162) do
przenoszenia sygnału ostrzegawczego do
innych pomieszczeń.
3.6 Kontakt bezpotencjałowy
Oopcjonalnie można podłączyć płytkę dodatkową z kontaktem bezpotencjłowym (nr kat.
80072). W ten sposób można przenosić komunikaty zbiorcze zakłóceń i alarmu do techniki
sterowania budynkiem.
3.7 Skracanie kabli
Uwaga!
Po skróceniu kabli, żyły podłączyć zgodnie z
poniższym rysunkiem.
3.8 Przedłużanie kabli
Rys.12
Jeśli potrzebna jest długość kabla większa niż
5 m, możliwe jest jego przedłużenie do długości
10 m (nr art. 80889 sonda, nr art. 80890 silnik
i nr art. 80891 pompa). Maksymalna długość
przewodu nie może przekroczyć 30 m.
3.9 Podłączenie węża powietrza/czujnika
ciśnienia
Uwaga!
Wąż układać zawsze wzosząco, nie zaginać go
ani nie zwijać.
Wąż czujnika ciśnieniowego włożyć w gwint na
urządzeniu sterowniczym i nakręcić na-krętkę.
W razie potrzeby można go skrócić.
W przypadku długości przewodów ciśnieniowych ponad 10 m należy pracować z
użyciem małego kompresora w celu
zachowania ciśnienia.
Maksymalna długość przewodu nie może
przekroczyć 30 m.
Wskazówka:
Należy przestrzegać przepisów VDE 0100,
VDE 01107, IEC oraz lokalnych przepisów
dotyczących zasilania w energię elektryczną
(dostawcy energii).
Urządzenie sterownicze można ustawiać
tylko w miejscach nienarażonych na eksplozje.
Należy przewidzieć przyłącze do sieci 230 V AC
/ 50 Hz z maks. bezpiecznikiem „C“ 16A
zwłocznym
(zabezpieczenie
różnicowoprądowe FI 30 mA).
Zakończenie elektrycznych prac
przyłączeniowych
Po wykonania podłączenia urządzenia do prądu
należy starannie zamknąć pokrywę urządzenia
sterowniczego.
151
4. Eksploatacja
d
b
e
a
f
g
h
i
c
k
a)
b)
c)
d)
e)
f)
g)
h)
m
l
i)
k)
l)
m)
Obudowa Urządzenie sterujące
Śruba zamykająca
Przyłącze sieciowe
zielona LED „Power“
czerwona LED „Alarm“
pomarańczowa LED„Poziom”
pomarańczowa LED „POMPA“
Przycisk Alarm
Przycisk „TEST“ “PUMPE”
Przyłacze pompy
Przyłącze sondy optycznej
Przyłącze systemu hydraulicznego
Rys. 13
152
4. Eksploatacja
4.1 Uruchomienie
Wtyczkę baterii wetknąć na płytkę (rys. 14),
pokrywę obudowy zamknąć i zablokować.
Przed uruchomieniem, pompy, czujnik
ciśnieniowy i sonda optyczna muszą być
zabudowane i podłączone.
Sprawdzić przewody przyłączeniowe, czy są
dobrze podłączone, następnie włączyć dopływ
prądu.
Urządzenie sterownicze przeprowadza test
funkcji podstawowych, tak zwaną inicjalizację.
Jest to sygnalizowane za pomocą światła
ciągłego przez ok. 8 sekund po włożeniu baterii
lub podłączeniu wtyczki do gniazda. Podczas
inicjalizacji przeprowadzana jest kontrola
podłaczenia
baterii,
sieci,
czujnika
ciśnieniowego, przyłącza sondy i silnika.
Jeśli podłączenie jest poprawne święcą
następujące kontrolki:
- zielona POWER LED na urządzeniu Mono
- żadna LED na urządzeniu Duo.
Urządzenie jest teraz gotowe do pracy.
Rys. 14
4.2 opis elementów wskazujących i elementów obsługi urządzenia sterowniczego Mono
Elementy wskazujące
Tryb normalny
(informacja
dla obsługującego)
LED
Kolor
„Power“
zielony
„Poziom”
pomarańcz.
„Alarm”
„Pompa”
Funkcja
Zasilanie elektryczne w porządku
czerwony
Poziom alarmowy przekroczony itp.
pomarańcz.
Wyjście pompy aktywowane
Poziom włączania przekroczony
Zakłócenia
patrz 5. Rozpoznawanie błędów
Przycisk
„Alarm“
Elementy obsługi
„Pompa”
Wyłączanie alarmu akustycznego,
kasowanie ostrzeżeń i błędów,
wybieranie i zmiana ustawień
Tryb ręczny pompy
153
4. Eksploatacja
4.3 opis elementów wskazujących i elementów obsługi urządzenia sterowniczego Duo
Elementy wskazujące
LED
(informacja
„Alarm”
Tryb normalny
dla obsługującego)
Zakłócenia
Elementy obsługi
Przycisk
Funkcja
„Poziom”
pomarańczowy Poziom włączania przekroczony
„Pumpa I“
pomarańczowy Wyjście pompy I aktywowane
„Pompa II“
czerwony
Poziom alarmowy przekroczony itp.
pomarańczowy Wyjście pompy II aktywowane
patrz 5. Rozpoznawanie błędów
Wyłączanie alarmu akustycznego,
„Alarm“
kasowanie ostrzeżeń i błędów,
„Pompa”
4.4
Stany
sterowniczego
Mono/Duo
robocze
wybieranie i zmiana ustawień
Tryb ręczny pompa I i pompa II
urządzenia
Urządzenie sterownicze Mono
dodatkowo urządzenie sterownicze Duo
4.4.1 tryb normalny - czujnik ciśnieniowy
i sonda optyczna działają.
Pomiar poziomów odbywa się za pomocą
dwóch niezależnych procesów. Poziom
WYŁĄCZONY, WŁĄCZONY 1 i WŁĄCZONY 2
(tylko w przypadku urządzenia sterowniczego
Aqualift F Duo, nr art. 28745) mierzone są za
pomocą czujnika ciśnieniowego.
Poziom ALARM jest mierzony za pomocą sondy
optycznej.
Jeśli mierzenie nie zadziała, wówczas urządzenie pracuje z zastosowaniem innego procesu pomiaru.
Urządzenie sterownicze pokazuje błąd sondy
lub błąd poziomu w sposób akustyczny i optyczny.
Urządzenie jest sterowane przez poziom
WYŁĄCZONY, WŁĄCZONY 1 i WŁĄCZONY 2
(tylko w przypadku urządzenia sterowniczego
Aqualift F Duo, nr art. 28745) i ALARM.
Stan wyjściowy
Kontrolka LED świeci / kontrolka LED nie świeci
Jeśli wraz ze wzrostem poziomu w zbiorniku
pozim WŁĄCZONY 1 zostanie przekroczony,
wówczas włącza się opóźnienie włączania
wynoszące 2 sekundy. Pompa I jest włączana i
pracuje nieprzerwanie do momentu osiągnięcia
poziomu niższego niż poziom WYŁĄCZONY.
Podczas pracy pompy świecą pomarańczowe
diody LED „POZIOM“ i „POMPA I“.
Urządzenie sterownicze Duo:
Wraz z przekroczeniem poziomu WŁĄCZONY 1
pompy są włączane zawsze na zmianę. Pracuje
tylko jedna pompa. Jeśli pompa 2 pracuje, świeci
pomarańczowa dioda LED „POMPA II“.
154
4. Eksploatacja
4.4.2 Poziom podwyższony na krótko czujnik ciśnieniowy i sonda optyczna
działają.
Po czasie opóźnienia włączania wynoszącym 2
sekundy włączana jest pompa II. Pomarańczowa
dioda LED „POMPA II“ świeci i mruga czerwona
dioda LED „ALARM“. Obie pompy pracują
równocześnie.
Po czasie opóźnienia wynoszącym 2 sekundy
świeci czerwona dioda LED “ALARM” (poziom
ALARM przekroczony). Rozlega się alarm
akustyczny. Jeśli stan będzie niższy niż poziom
ALARM, gaśnie alarm akustyczny i miga
czerwona dioda LED „ALARM“. Obie pompy
pracują równocześnie.
POMPA II zostaje wyłączona 30 mm ponad
poziomem WYŁĄCZONY. Gaśnie pomarańczowa dioda LED “POMPA II”.
Pompa I pracuje jeszcze do momentu
osiągnięcia poziomu niższego niż poziom
WYŁĄCZ. I czas wybiegu minął.
Gasną pomarańczowe diody LED „POMPA I“ i
„POZIOM“.
Migająca dioda LED „ALARM“ pokazuje, że
poziom alarmowy, nawet na krótki czas, został
przekroczony.
Stan wyjściowy: żadna kontrolka LED nie świeci
Jeśli wraz ze wzrostem poziomu w zbiorniku
wartość poziomu WŁĄCZONY 1 i poziomu
WŁĄCZONY 2 zostaną przekroczone, wówczas
włącza się opóźnienie włączania wynoszące 2 sekundy. Pompa I zostaje włączona. Świecą pomarańczowe diody LED „POZIOM“ i „POMPA I“.
Po dalszym czasie opóźnienia wynoszącym 2
sekundy włączana jest pompa II. Pomarańczowa
dioda LED „POMPA II“ świeci i mruga czerwona
dioda LED „ALARM“. Obie pompy pracują
równocześnie.
Pompa II zostaje wyłączona 30 mm ponad
poziomem WYŁĄCZONY. Gaśnie pomarańczowa
dioda LED “POMPA II”.
Pompa I pracuje jeszcze do momentu osiągnięcia poziomu niższego niż poziom
WYŁĄCZONY i dopiero potem jest wyłączana.
Pomarańczowa dioda LED „POMPA I“,
pomarańczowa dioda LED „POZIOM“ i czerwona
dioda LED „ALARM“ gasną.
Przy przekroczeniu poziomu WŁĄCZ 2 druga
pompa jest zawsze włączana z opóźnieniem
czasowym po pierwszej i wcześniej wyłączana.
4.4.4 brak systemu ciśnieniowego - sonda
optyczna działa
Stan wyjściowy:
Kontrolka LED świeci / żadna kontrolka LED nie
świeci
Jeśli wraz ze wzrostem poziomu w zbiorniku
wartość poziomu ALARM zostanie przekroczona, wówczas włącza się opóźnienie
włączania wynoszący 2 sekundy. Świeci
czerwona dioda LED „ALARM“ i rozlega się
alarm akustyczny. Pompa I zostaje włączona.
Pomarańczowa dioda LED „POMPA I“ świeci.
Po czasie opóźnienia wynoszącym 2 sekundy
4.4.3 Poziom mocno podwyższony na
krótko - czujnik ciśnieniowy i sonda
optyczna działają.
Stan wyjściowy:
Kontrolka LED świeci / żadna kontrolka LED nie
świeci
Jeśli wraz ze wzrostem poziomu w zbiorniku
wartość POZIOM WŁACZONY 1 I POZIOM
WŁĄCZONY 2 oraz POZIOM ALARM, zostaną
przekroczone, wówczas włącza się opóźnienie
włączania wynoszące 2 sekundy. Pompa I
zostaje włączona. Świecą pomarańczowe
diody LED „POZIOM“ i „POMPA I“.
włączana jest pompa II. Pomarańczowa dioda
LED „POMPA II“ świeci. Obie pompy pracują
równocześnie.
Jeśli stan będzie niższy niż poziom ALARM,
gaśnie alarm akustyczny i miga czerwona dioda
LED „ALARM“.
155
4. Eksploatacja
Po czterech sekundach wyłączana jest wcześniej
POMPA II. Gaśnie pomarańczowa dioda LED
“POMPA II”.
Pompa I zostaje wyłączona.
Pomarańczowa dioda LED „POMPA I“ gaśnie.
4.4.5 tryb ręczny
Jeśli urządzenie znajduje się w trybie
normalnym, wówczas za pomocą przycisku
„POMPA“ można włączyć pompę I lub pompę II.
Włączanie pompy odbywa się w dwóch
krokach. Najpierw wybiera się pompę a potem
się ją włącza.
Jeśli na krótko zostanie wciśnięty przycisk
“POMPA”, miga pomarańczowa dioda LED
„POMPA I“. Pompa I została wybrana.
Jeśli przycisk “POMPA” zostanie jeszcze raz
wciśnięty, wybrana zostaje pompa II.
Dłuższe wciśnięcie włącza pompę I. Pompa I
pracuje wówczas tak długo, jak jest wciśnięty
przycisk, nie mniej jednak niż 2 sekundy.
Podczas
pracy
pompy
pracy
miga
pomarańczowa dioda LED „POMPA“.
W celu włączenia pompy II należy najpierw
wybrać pompę II. Pomarańczowa dioda LED
„POMPA II“ miga.
Pompa II pracuje wówczas tak długo, jak jest
wciśnięty przycisk, nie mniej jednak niż 2
sekundy. Podczas pracy pompy pracy miga
pomarańczowa dioda LED „PUMPE II“.
Jeśli któraś z pomp została wybrana, ale nie
włączona, wówczas urządzenie po 10
sekundach wychodzi automatycznie z trybu
ręcznego.
Jeśli w ciągu 10 sekund zostanie rozpoznany
poziom, wówczas urządzenie natychmiast
wyjdzie z trybu ręcznego i pompa (pompy)
włączy się (włączą się) automatycznie.
156
5. rozpoznawanie błędów
Za pomocą urządzenia sterowniczego KESSEL można rozpoznać i usunąć awarie przy uruchomieniu i
podczas pracy urządzenia.
Informacje ogólne
Mono Duo
Objaśnienie oznaczeń
Power
Alarm
Poziom
Pompa
Poziom
Alarm
Pompa I
Pompa II
Zakłócenia przy zasilaniu sieciowym Mono i Duo
Mono
Duo
Przyczyna
Działanie
uszkodzone
potrzeby wymienić na nowe.
Brak baterii lub
świecenie ciągłe
miganiepowolne (1 s)
miganie szybkie (0.5 s)
włączanie
krótkie mignięcie co 2 s
Podłączyć baterie, w razie
Gotowość do pracy jest
pokazywana przez ponowne
światło ciągłe.
Poziom alarmu
przekroczony
błąd poziomu/
błąd sondy.
Sonda optyczna
zanieczyszczona
Maksymalny czas
pracy.
Częstotliwość
przełączania
Sonda zanieczyszczona
Sprawdzić ilość doprowadzanych ścieków,
sprawdzić pompę, czujnik
ciśnieniowy.
Wyczyścić sondę.
Wskazówki
Inicjalizacja: Urządzenia nie
można uruchomić, tzn. nie jest
ono gotowe do pracy
Praca: Zgłoszenie błędu jest
pokazywane naj-później po 5
min. Urządzenie jest gotowe
do pracy, możliwy jest tryb
ręczny. Wymiana /
podłączenie baterii jest
pokazywane najpóźniej 5
minut przez brak świecenia
kontrolek LED.
Poziom alarmowy był na
krótko przekroczony
Czyjnik ciśnieniowy
uszkodzony; przełączenie
odbyło sie za pomocą sondy
optycznej
Jedna pompa pracowała ciągle
przez ponad 6 minut lub obie
pompy wykonały ponad 20 cykli
Sprawdzić pompę
przełączania w ciągu 3 minut.
Sprawdzić system ciśnieniowy W przypadku określonych
regularne czyszczenie sondy. ścieków na sondzie może
powstać osad, który powoduje
kontakt sondy.
Sprawdzić ilość
doprowadzanych ścieków
157
5. rozpoznawanie błędów
Mono
Duo
Przyczyna
Działanie
Wskazówki
Inicjalizacja:
„Pompa I” niepodłączona, zamieniono bieguny lub
uszkodzona.
Podczas pracy:
„Pompa I“ uszkodzona lub “Pompa”
przegrzana,
ochrona silnika
wyłącza pompę.
Wyciągnąć wtyczkę sieciową,
odłączyć baterie; przewody
sterowania sprawdzić pod
kątem prawidłowego
przyłączenia, sprawdzić
osadzenie i drożność, w razie
potrzeby wymienić pompę.
Przy przegrzaniu ograniczyć
ilość doprowadzanych
ścieków, w razie potrzeby
wyczyścić sondy/pływak.
Rozpoznawanie błędów ma
miejsce tylko podczas pracy
(patrz w tym celu rozdz. 6
“Funkcje dodatkowe”).
Pompa włącza się
automatycznie po ochłodzeniu
(ok. 10 minut), jeśli jest
odpowiedni poziom.
Błąd przekaźnika
(styk przekaźnika uszkodzony)
Wyciągnąć wtyczkę z
gniazda sieciowego,
Wyłączyć urządzenie.
Urządzenie sterownicze nie
może być dalej używane.
Błąd komunikacji
lub wtyczka
łącząca pomiędzy
obydwoma
płytkami jest
usunięta.
Ponownie ustalić połączenie.
Pomiędzy obydwoma
płytkami brak
jest wymiany danych.
Inicjalizacja:
“Sonda” nie jest
podłączona,
zamieniono
bieguny lub
uszkodzona
Podczas pracy:
„Sonda”
uszkodzona
Przy nadmiernym tworzeniu
się piany (pralka, prysznic)
zmniejszyć dozowanie
środków do mycia lub prania.
Instalacje do zmiękczania
wody powodują większe
tworzenie piany.
Wyciągnąć wtyczkę sieciową, - Sprawdzanie sondy
następuje co 2 sek.
odłączyć baterie; przewody
- Pompa może być
sterowania sprawdzić pod
uruchamiana ręcznie.
kątem prawidłowego
- Jeśli poziom włączony został
przyłączenia, sprawdzić
przekroczony, wówczas
osadzenie i drożność, w razie
pompa zostaje
potrzeby docisnąć wtyczkę
automatycznie włączona.
lub wymienić sondę
- Jeśli pompa jest wyłączona,
wskaźnik optyczny ponownie
przełącza się na błąd sondy.
158
brak zasilania
Mono
Duo
5. rozpoznawanie błędów
Przyczyna
Brak napięci w
sieci.
Brak zasilania z
sieci i poziom
osiągnięty.
Działanie
Skontrolować napięcie
sieciowe względnie je
przywrócić w razie braku.
Skontrolować napięcie
sieciowe względnie je
przywrócić w razie braku.
159
Wskazówki
Pompy nie mogą
odprowadzać ścieków bez
napięcia w sieci! Komunikat
alarmu pozostaje aktywny.
Pompy nie mogą
odprowadzać ścieków bez
napięcia w sieci! Komunikat
alarmu pozostaje aktywny.
6. Funkcje dodatkowe
6.1 automatyczny test działania pomp
Raz w tygodniu wykonywane jest automatyczne sprawdzanie działania pomp.
W tym celu pompy są włączane po kolei
automatycznie na 2 sekundy.
Rozpoznane błędy pokazywane są na
odpowiednim komunikacie i można je usunąć
jak podano w rozdziale 5.
6.4 Kontakt bezpotencjałowy wyjścia
alarmu (opcja)
Urządzenia
sterownicze
KESSEL
dla
urządzenia Aqualift Mono i Duo mogą być
wyposażone w przyłącze dla kontaktu
bezpotencjałowego fabrycznie lub w terminie
późniejszym.
W tym celu wtykana jest w urządzeniu
sterowniczym dodatkowa płytka (nr art. 80072)
i przyłączany jest odpowiedni przewód
sterowania do zacisków przyłączeniowych.
Przekaźnik działa w przypadku komunikatu
błędu i braku prądu w sieci.
6.2 Kontrola napięcia baterii
Sterowanie stale sprawdza napięcie baterii.
Jeśli już podczas zabudowy wynosi ono mniej
niż 12,5 V, urządzenie można mimo to uruchomić.
W takim przypadku należy wymienić baterie na
nowe. W tym celu należy najpierw wyłączyć
urządzenia sterownicze. Po otwarciu pokrywy
urządzenia sterowniczego należy odłączyć oba
przewody przyłączeniowe od baterii, baterie
wymienić i podłączyć nowe baterie. Następnie
zamknąć pokrywę i włożyć wtyczkę do gniazda.
Zużyte baterie należy fachowo zutylizować!
Uwaga!
Kontakt bezpotencjałowy nadaje się wyłącznie
do podłączenia do 42 V DC / 0,5 A.
6.5 automatyczne próby ponownego
włączenia w razie błędu pompy
W przypadku zakłócenia działania silnika
urządzenie sterownicze próbuje 30 razy
włączyć pompę w odstępach dwuminutowych.
Jeśli
automatyczne
próby
włączenia
zakończyły się powodzeniem, wówczas błąd
pompy jest kasowany samoczynnie. Jeśli
automatyczne próby włączenia nie zakończyły
się powodzeniem, błąd pompy nadal pozostaje
aktywny.
W przypadku urządzeń Duo automatyczne
próby ponownego włączenia odbywają się
przy jednym lub dwóch błędach silnika.
Urządzenie przy jednym błędzie silnika nie
działa za pomocą drugiej pompy, czyli jeśli
poziom został osiągnięty odbywa się
odpompowywanie i zmienia się wskaŹnik
optyczny.
6.3 Funkcja baterii
Baterie zgłaszają akustycznie i optycznie brak
prądu w sieci. Pompy nie mogą być napędzane
bateriami (czyli w razie braku prądu w sieci).
Bez baterii lub z niesprawnymi bateriami nie
pojawiają się komunikaty o braku prądu w sieci.
Uwaga!
Przy złomowaniu urządzenia baterie należy
wyjąć i fachowo je zutylizować! W przypadku
urządzeń sterowniczych Aqualift F Mono i Duo
należy stosować następujące typy baterii:
Typ:
Size 9V, ANSI 1604
• Duracell Alcaline MN 1604
• Energizer Alcaline 522
• Ultralife U9VLBP
160
Urządzenie sterownicze
7. Dane techniczne
KESSEL KtP 1000
(Mono i Duo)
KESSEL KtP 500
(Mono i Duo)
Przyłącze sieciowe
bezpiecznik „C“ 16A;
bezpiecznik „C“ 16A
Napięcie / częstotliwość prądu w sieci
230 V AC / 50 Hz
230 V AC / 50 Hz
Prąd podczas pracy
5,3 A (1 silnik);
2,3 A (1 silnik);
Temperatura podczas pracy
0°C do + 40°C
0°C do + 40°C
I
I
Moc standby
Rodzaj ochrony
Klasa bezpieczeństwa
Moc załączalna
Moc przełączalna
kontaktu bezpotencjałowego (opcja)
Pompa
Pobór mocy (P1)
FI 30 mA
ok. 5 W
10,6A (2 silniki)
IP 54 (urządz.sterow.)
230 V AC, min. 0,8 A,
max. 10A, cos phi =1
42 V DC / 0,5 A
IP 54 (urządz.sterow.)
230 V AC, min. 0,8 A,
max. 10A, cos phi =1
42 V DC / 0,5 A
S3 - 30%
S1
3x1 mm2
3x1 mm2
Rodzaj ochrony
IP 68 max. 3 m/24 h
Przewód ster. sondy (podajnik alarmu)
4,7A (2 silniki)
480 W
5,3 A
Przewód sterowania pompy
ok. 5 W
1080 W
Prąd znamionowy
Tryb pracy
FI 30 mA
3x0,75 mm2
161
2,3 A
IP 68 max. 3 m/24 h
3x0,75 mm2
8. Inspekcja i konserwacja
8.1 Inspekcja
Urządzenie całkowite musi być co miesiąc
kontrolowane przez użytkownika pod kątem
przełączania, gotowości do pracy i szczelności:
• zapewnienie dopływu ścieków
• odczekanie na wyłączenie sygnału poziomu i
pompy
• zamknięcie dopływu ścieków
• odczekanie na wyłączenie sygnału poziomu i
pompy
8.2 Konserwacja
Przed wykonywaniem wszelkich prac
konserwacyjnych urządzenie należy
odłączyć od sieci!
Przestrzegać wskazówek dotyczących
bezpieczeństwa! Wszystkie opisane prace
inspekcyjne i konserwacyjne może przeprowadzać wyłącznie autoryzowany personel
fachowy. Naprawy może przeprowadzić tylko
producent.
Prace
konserwacyjne
powinny
być
przeprowadzane regularnie przez autoryzowany personel.
Cykle konserwacji i zakres prac konserwacyjnych opisane w instrukcji zabudowy i
obsługi komponentów urządzenia, które
zawarte są w pompie/pompach.
W przypadku urządzenia sterowniczego
Aqualift F snależy przeprowadzić następujące
czynności:
Koniecznie należy zachować kolejność
w celu zapewnienia poprawnego
działania.
• Kontrola
elektrycznych
przewodów
przyłączeniowych oraz rury a także węża
powietrza pod kątem uszkodzeń i zużycia, np.
czy nie ma na niej rys, zagięć,
zanieczyszczeń, osadów.
162
• Odkręcić przy tym wąż powietrza z urządzenia, wyjąć rurę, wyczyścić ją i przedmuchać. Następnie ponownie przyłączyć
wąż powietrza do urządzenia sterowniczego i
ponownie włożyć rurę.
Zalecamy wykonanie tych prac także po
dłuższym przestoju lub magazynowaniu
urządzenia.
8.3 Wskazówki dotyczące elektrycznego
urządzenia sterowniczego
Baterie są elementami eksploatacyjnymi i
muszą być sprawdzane w ramach konserwacji
(lub przynajmniej 1 raz w roku) i w razie
konieczności muszą zostać wymienione. Przy
wymianie zwrócić uwagę na ekologiczną
utylizację. Wymiana tylko na taki sam typ
urządzenia. (patrz rozdział 6.3).
Naprawy może przeprowadzić tylko producent.
8.4 Wskazówki dotyczące pomp
W przypadku coraz większych hałasów
urządzenia przy pracy, spadku wydajności
tłoczenia lub drgań w systemie przewodów
tłocznych, obudowa pompy i wirnik muszą
zostać sprawdzone, czy nie są zużyte lub
zatkane przez zanieczyszczenia.
8.5 Zakłócenia
W razie wystąpienia usterek niemożliwych do
usunięcia prosimy w przypadku wątpliwości
zwrócić się do fachowego zakładu, który
przeprowadził instalację (patrz pieczęć na
stronie tytułowej). Dane kontaktowe naszych
partnerów serwisowych znaleźć można pod
adresem: www.kessel.pl.
9. gwarancja
,F30 +69:(8*?656 <(+30<> :6<(8 -084( ,99,3 4( 78(<6 <>)68; 97696); 769:D76<(50( *?> ;9:,82( ?69:(50, ;9;50D:( 5( *?> :,H <(+30<> 786+;2:
?69:(50, <>40,5065>
,F30 76 +<@*/ 5(78(<(*/ <(+( 5(+(3 50, ?69:(50, ;9;50D:( 2;7;1C*> ?3,*(1C*> 4( 78(<6 +6 6+9:C70,50( ;46<> 3;) HC+(50( 6)50H,50( *,5>
(2: 9:<0,8+?,50( 1(<5>*/ <(+ 5(3,H> ?.A690B 50,?<A6*?50, 5( 70F40, < 78?>7(+2; <(+ ;28>:>*/ -(2: :,5 5(3,H> ?.A690B 50,?<A6*?50, 76 0*/
9:<0,8+?,50;
&( 5(78(<> 0 +69:(8*?65, < :,84050, 7@G50,19?>4 *?DF*0 -084( ,99,3 6+76<0(+( < :(204 9(4>4 9:6750; 1(2 < 78?>7(+2; ;46<> 70,8<6:5,1 %
8(?0, +69:(8*?,50( 56<>*/ *?DF*0 .<(8(5*1( 6)6<0C?;1, 6+ 76*?C:2; (3, :>326 < ?(28,90, 56<,1 +69:(8*?65,1 *?DF*0
<(8(5*1( 6),14;1, 1,+>50, 78?,+406:> 56<,
28,9 .<(8(5*10 <>5690
40,90C*, 30*?C* 6+ <>+(50( 7(8:5,86<0 ;46<>
084(
,99,3
<>+A;H( 628,9 .<(8(5*10 < 78?>7(+2; 9,7(8(:68@< *0,*?> 3,220*/ 9,7(8(:68@< :A;9?*?; 9:;+?0,5,2 78?>+646<>*/ 6*?>9?*?(350 F*0,2@< 0
*>9:,85 5( <6+D +,9?*?6<C +6
3(: 5( ?)0685020
+5690 90D :6 +6 9?*?,356F*0 ?+6356F*0 +6 ;H>:26<(50( 0 ),?70,*?,E9:<( 9:(:>*?5,.6
%(8;520,4 <(H56F*0 .<(8(5*10 1,9:
-(*/6<> 465:(H <>265(5> ?.6+50, ? ?(3,*,50(40 ?(<(8:>40 < 62;4,5:(*10 :,*/50*?56 8;*/6<,1 0 6)6<0C?;1C*>40 5684(40
,29736(:(*1( ?.6+5( ? 78?,?5(*?,50,4 ;8?C+?,50(
;8;*/640,50, ?,86<, 76+709(5, 78?,? 696)D ;76<(H5065C 78?,? -084D ,99,3
8,.;3(85, 78?,786<(+?(50, 2659,8<(*10 <. <92(?@<,2 ?(<(8:>*/ < 62;4,5:(*10 :,*/50*?56 8;*/6<,1
;+62;4,5:6<(5, 78?,.3C+> 628,96<, < 76+(5>*/ 7650H,1 6+9:D7(*/ *?(9;
%7;9:> 70<50*?5,
&(<68> ?<86:5, 23(76<, +6 F*0,2@<
50,-,2(35>*/ 0 -,2(35>*/ #:(;-0= !;47-0=
40,90D*>
64 40,9?2(35> 1,+5686+?055>
40,90D*>
64 40,9?2(35> <0,3686+?055>
40,90C*,
;+>520 ;H>:,*?56F*0 7;)30*?5,1 0 78?,4>9A6<,1
40,90C*,
64 40,9?2(35> 1,+5686+?055>
!8?,76476<50, F*0,2@< -,8(35>*/ 0
50,-,2(35>*/ 1,+56 0 +<;76476<,
64 40,9?2(35> <0,3686+?055>
;+>520 ;H>:,*?56F*0 7;)30*?5,1 0 78?,4>9A6<,1
59:(3(*1, <6+> +,9?*?6<,1
40,90D*>
!6+?,976A> ,3,2:864,*/(50*?5,
9,7(8(:68@<
7647> ?(<68> 6+*05(1C*,
40,90D*>
*?>9?*?(350, F*0,2@<
##
40,90C*,
40,90D*>
#,7(8(:68> ?)068502
084(
40,90D*>
40,90D*>
40,90D*>
<>8(G50, 05-684;1, H, ?;H>*0, 50, 1,9: <(+C $6 9(46 +6:>*?> )AD+@< 2:@8, 76<9:(5C < <>502; <(+30<,1 2659:8;2*10
% 978(<0, ;8;*/640,E 0 78?,.3C+@< 628,96<>*/ 786904> 6 265:(2: ? 9,8<09,4 9,8<09 2,99,3 73 3;) :,3
<(8(5*1( 6)6<0C?;1, 5( :,8,50, "?,*?7697630:,1 !63920,1
#:(5 ? +50(
163
10. Deklaracja zgodności
164
11. Protokół przekazania dla użytkownika
Oznaczenie
__________________________________________________________
Oznaczenie obiektu
__________________________________________________________
Inwestor
__________________________________________________________
Projektant
__________________________________________________________
Data/godzina
Adres / telefon / faks
__________________________________________________________
Adres / telefon / faks
__________________________________________________________
Adres / telefon / faks
__________________________________________________________
Firma wykonująca
__________________________________________________________
Adres / telefon / faks
__________________________________________________________
Nr kom. KESSEL:
__________________________________________________________
Uprawniony do odbioru
__________________________________________________________
Użytkownik urządzenia
__________________________________________________________
Osoba przekazująca
__________________________________________________________
Adres / telefon / faks
Adres / telefon / faks
Inne osoby obecne / inne uwagi
__________________________________________________________
__________________________________________________________
__________________________________________________________
Wymienione uruchomienie i poinstruowanie przeprowadzono w obecności osoby upoważnionej do odbioru i
użytkownika urządzenia. Kopię prosimy wysłać do fabryki!
Miejscowość, data
Podpis
Uprawniony do odbioru
Podpis
Podpis
Użytkownik urządzenia Firma wykonująca zabudowę
✃
165
166
12. Protokół przekazania dla firmy wykonującej zabudowę
o
o
o
Wymienione uruchomienie i poinstruowanie przeprowadzono w obecności osoby upoważnionej
do odbioru i użytkownika urządzenia.
Użytkownik urządzenia/osoba upoważniona do odbioru została poinstruowana odnośnie
obowiązku konserwacji produktu zgodnie z załączoną instrukcją obsługi.
Rozruchu i poinstruowania nie dokonano
Zleceniodawcy / wykonawcy rozruchu zostały przekazane następujące podzespoły i/lub komponenety
produktu:
_________________________________________________________________________________
_________________________________________________________________________________
______________________________________________________
_________________________________________________________________________________
_________________________________________________________________________________
______________________________________________________
Uruchomienie i poinstruowanie zostały przeprowadzone przez firmę (firma, adres, osoba kontaktowa,
telefon)
________________________________________________________________________
________________________________________________________________________
________________________________________________________________________
________________________________________________________________________
Dokładny termin rozruchu/poinstruowania zostanie ustalony przez użytkownika i firmę
przeprowadzającą rozruch.
Miejscowość, data
Podpis
Uprawniony do odbioru
Podpis
Podpis
Użytkownik urządzenia Firma wykonująca zabudowę
✃
167
K Zawory zwrotne
K Przepompownie
K Wpusty / odpływy liniowe
K Separatory
-tłuszczu
-ropopochodne /
koalescencyjne
-skrobi
-zawiesin
K Przydomowe oczyszczalnie ścieków
K Studzienki kanalizacyjne
K Urządzenia do wykorzy-
stywania wody deszczowej