1
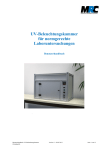
Bedienungsanleitung CabUVIS
CabUVIS+, 230 V (110 V),
Analysenlampe mit Durchlicht
DESAGA Nr. 13 13 05 (13 13 06)
Dokumentationsaufsatz zur CabUVIS
DESAGA Nr. 13 13 12
DESAGA
SARSTEDT-GRUPPE
DESAGA
Bedienungsanleitung CabUVIS
SARSTEDT-GRUPPE
Grundlegende Hinweise!
storungsfreien Betrieb des Gerates ist die Kenntnis der grundlegenden
Sicherheitshinweise und der Sicherheitsvorschriften.
- Die vorliegende Bedienungsanleitung enthalt die wichtigsten Hinweise und
Vorschriften, um das Gerat sicherheitsgerecht einzusetzen und zu bedienen.
Urheberrecht
Das Urheberrecht der vorliegenden Bedienungsanleitung hat die Firma DESAGA
GmbH. Die Bedienungsanleitung ist nur fiir das bedienende Personal und f&den
Kaufer des Gerates bestimmt.
Die vollstiindige Anleitung oder Teile aus dieser Bedienungsanleitung diirfen nur
mit schrifilichem Einverstiindnis der Firma DESAGA GmbH kopiert, verbreitet
oder anderweitig mitgeteilt werden.
Zuwiderhandlungen konnen strafrechtliche Folgen haben.
Fiir kiinftige Vemendungen ist diese Bedienungsanleitung aufzubewahren!
Wiesloch im Mai 1996
DESAGA GmbH
Hersteller- u.
Kundendienstadresse:
Geratedaten
(vom Kunden auszufiillen)
DESAGA GmbH
TYP:
In den Ziegelwiesen 1-7
69 168 Wiesloch
Telefon 06222 I 9 2 88 0
Telefax 06222 1 92 88 92
Serien Nr.:
Aufstellungsort:
Aufstellungsdatum:
Inventar Nr. :
[ ]
[ ]
[ ]
Seite 2
CabUVIS, 230 V, Analysenlampe
CabUVIS+, 230 V, Analysenlampe
mit Durchlicht
Dokumentationsaufsatz zur CabUVIS
1996
Bedienungsanleitung CabUVIS
.
Seite
Inhaltsverzeichnis:
1.1
1.2
1.3
1.4
DESAGA
SARSTEDT-GRUPPE
Grundlegende Sicherheitshinweise ..........................................................................................
4
Symbol- und Hinweiserklhngen ............................................................................................
5
Gefhlichkeit des Gerates .......................................................................................................
6
Konformitiitserklhng .............................................................................................................
7
2 Allgerneine Beschreibung
...................................................................................................................
8
2.1 Beschreibung ............................................................................................................................
8
2.2 Technische Daten .....................................................................................................................
9
2.3 Auspacken ..............................................................................................................................
10
2.4 Lieferumfang ..........................................................................................................................
10
2.5 Aufstellen 1 Installation der CabUVIS(+) Analysenlampe .................................................11
2.5.1 Montage des Dokumentationsaufsatzes ..........................................................................
12
2.5.2 Montieren der CCD-Kameras an den Kamera-Haltewinkel ...........................................14
3 Bedienung der CabUVIS(+)
............................................................................................................
16
3.1 Bedienungselemente der CabUVIS(+) mit der Plexiglas Abdeckplatte .................................16
3.2 Betrachten eines Objektes mit Auflicht (Tageslicht. 366 nm oder 254 nm) .......................... 17
3.3 Betrachten eines Objektes mit Durchlichtbeleuchtung (Tageslicht) ......................................17
4 Bedienungselernente des Dokurnentationsaufsatzes zur CabUVIS..............................................
18
5 Service und Wartung ........................................................................................................................
19
5.1
5.2
5.3
5.4
Reinigen ................................................................................................................................. 19
Wechseln der Rohren. Starter oder der Filter ................................................................... 20
Schaltplan ............................................................................................................................... 22
Sewiceadresse ........................................................................................................................ 23
6 Bestellinformationen .........................................................................................................................23
7 Aunerbetriebnahme 1 Entsorgung ...................................................................................................24
1996
Seite 3
DESAGA
Bedienungsanleitung CabUVIS
SARSTEDT-GRUPPE
1 Einleitung
1.1 Grundlegende Sicherheitshinweise
[A]
Achtung !
Hinweise in der Bedienungsanleitung beachten!
- Grundvoraussetmg ftir den sicherheitsgerechten Umgang und den
storungsfreien Betrieb des Gerates ist die Kemtnis der grundlegenden
Sicherheitshinweise und der Sicherheitsvorschriften.
- Die vorliegende Bedienungsanleitung enthalt die wichtigsten Hinweise und
Vorschriften, um das Gerat sicherheitsgerecht einzusetzen und zu bedienen.
- AIle Personen die mit diesem Gerat arbeiten, miissen diese
Bedienungsanleitung genau lesen.
- Beachten Sie dariiber hinaus die geltenden Regeln, sowie die Vorschriften zur
Unfallverhiitung (VBG).
Verpflichtung des Betreibers
Der Betreiber des Gerates verpflichtet sich, nur Personen mit Arbeiten an dem
Gerat zu beauftragen, die diese Bedienungsanleitung gelesen und verstanden
haben. Dies sollte durch ihre Unterschrift bestatigt werden.
Das sicherheitsbewuRte Arbeiten des Personals md3 in regelmaigen Abstsjlden
iiberpriift werden.
Verpflichtung des Personals
Personen die mit dem Gerat arbeiten, verpflichten sich:
- vor Arbeitsbegim diese Bedienungsanleitung durchzulesen.
- die geltenden Regeln und die Vorschriften zur Unfallverhiitung zu beachten.
Beides sollte durch die Unterschrift bestatigt werden.
Seite 4
1996
Bedienungsanleitung CabUVIS
DESAGA
SARSTEDT-GRUPPE
1.2 Symbol- und Hinweiserklarungen
Diese Bedienungsanleitung enthalt folgende wichtige Symbole urn auf Gefahren und Bedienungsfehler
hinzuweisen.
Achtung !
Dieses "Achtung-Zeichen" bedeutet, daB in dem Abschnitt:
- wichtige Hinweise gegeben werden.
- eine unmittelbar oder moglichenveise drohende Gefahr fiir das Leben und die
Gesundheit von Personen beschrieben ist.
- ein Hinweis auf gefhliche Situationen zu finden ist.
Das Nichtbeachten dieses Symbols kann zu leichten bis schweren
lebensgefhlichen Verletzungen, gesundheitsschadlichen Auswirkungen oder zu
Sachbeschadigung fiihren.
Dieses "Info-Symbol" gibt einen Hinweis auf Informationen zum sachgerechten
Umgang mit dem Gerat, oder auf allgemeine Informationen zum besseren
Verstandnis.
Ein Nichtbeachten der Hinweise kann dazu fihren, daB das Gerat fehlerhaft
bedient, oder sogar beschadigt wird.
Bei diesern "Tip-Symbol" erhalten Sie Tips zur Anwendung oder besonders
niitzliche Informationen zur optimalen Nutzung des Gerates.
Weiter Symbole enthalten (zum Teil auch wichtige) Hinweise zu dem im Symbol dargestellten Thema
(zum Beispiel auf Unfallverhiitungsvorschriften, Spannungsversorgung, Telefonnummem und so
weiter).
1996
Seite 5
1.3 Gefahrlichkeit des Gerates
[a]
SICHERHEITSHINWEISE:
- Lesen Sie bitte diese Betriebsanleitung bevor Sie mit dem Gerat arbeiten.
Achtung!
- In das Gerat darf kein Wasser oder andere Fliissigkeiten eindringen.
- Das Gerat wird mit einer lebensgef?ihrlichen Spannung von 230 V, 50-60 Hz
betrieben.
- Ziehen Sie den Stecker aus der Steckdose, wenn das Gerat lbgere Zeit nicht
benutzt wird oder wenn es gereinigt werden soll.
- Beim AnschluB des Gerats an das Netz darf nur die mitgelieferte
NetzanschluBleitung, oder eine Leitung vom selben Typ venvendet werden.
- Das Gerat darf nur an eine geerdete Schutzkontaktsteckdose (Steckdose mit
Schutzkontakt) angeschlossen werden.
- ~berpriifenSie ob die vorliegende Netzspannung mit der Angabe auf dem
Typenschild iibereinstimmt.
- ~berpriifenSie die Anschlunleitung vor der Inbetriebnahme auf Schaden.
Beschadigte Leitungen diirfen auf keinen Fall venvendet werden.
- ~ b e r ~ r i i f eSie
n das Gerat vor der Inbetriebnahme auf auBere Schaden!
Arbeiten Sie nie mit einem schadhaften Gerat.
- Das Gerat darf nur von einer Elektrofachkraft (nach UVV / VBG 4 § 2
"Begriffe" 111) geoffnet werden.
Achtune UV-C Strahlung.
Die 366 nm Niederdruckrohren emittieren UV-B Strahlung.
Die 254 nm Niederdruckrohren emittieren UV-C Strahlung.
Beachten Sie, das UV-C Strahlung Augenentziindungen hervorruft!
- Benutzen Sie beim Arbeiten unbedingt die mitgelieferte Schutzbrille.
Bei ernpfindlichen Personen kann die UV-C Strahlung auch zu
Hautreizungen fuhren!
- Schiitzen Sie sich mit Gesichts- und Handschutz.
- Achten Sie bei der Aufstellung des Gerates darauf, daB keine Personen die in
der Nahe des Gerats arbeiten unbeabsichtigt bestrahlt werden.
- Vermeiden Sie das Offnen der CabUVIS Frontklappe bei eingeschalteter 254
nm - oder 366 nm Niederdruckrohre.
- Wenn Sie zum Einsetzen und Ausrichten des Objektes bei eingeschalteter 254
nrn - oder 366 nm Niederdruckrohre in das Gerat greifen miissen, schiitzen Sie
sich mit Hand- und Hautschutz (Handschuhen und lang2rmige Kleidung).
- Verwenden Sie die mitgelieferte Schutzbrille, wenn Sie zum Plazieren durch die
geoffnete Frontklappe in das Gerat schauen miissen (zum Beispiel bei
Verwendung des Dokumentationsaufsatzes).
Seite 6
1996
DESAGA
SARSTEDT-GRUPPE
Bedienungsanleitung CabUVIS
.-
~
1.4 Konformitatserklarung
EG-Konformitatserklirung im Sinne der EG Richtlinie 8913361EWG
Hiermit erkliiren wir, dal3 die:
CabUVIS(+), 230 V Analysenlampe
DESAGA Nr. 13 13 00 und 13 13 05
(ab der Seriemummer 95 100)
der Firma DESAGA bei bestimmungsgemil3er Verwendung, sowie in der von uns
in Verkeh gebrachten Ausfiihrung, die Anforderungen der EG Richtlinie
891336lEWG iiber die elektromagnetische Vertraglichkeit und des EMV-Gesetzes
vom 9.1 1.1992 erfillt.
Zur Beurteilung des Gerats hinsichtlich elektrornagnetischer Vertraglichkeit
wurden folgende Normen herangezogen:
- Storaussendung nach: EN 5501 1 103.91 (DIN VDE 0875-1 1 / 07.92)
- Storfestigkeit nach: EN 50082-1 101.92 (DIN VDE 0839 Teil82-1 103.93)
Darnit besteht die Voraussetzung zur Ausstellung einer KonformitiitserklSirung
und zur Anbringung des CE-Zeichens.
Die CabUVIS(+), 230 V Analysenlampe ist in Ubereinstimmung mit der
internationalen Norm CEIAEC 1010-1:1990 + A l , modified
'3aj2ty requirementsfor electrical equipment for measurement, control and
laboratory use"
entwickelt und hergestellt worden. Diese internationale Norm ist identisch mit der
Europaischen Norm EN 61010-1:1993 und mit der DIN VDE 0411 Teil 1
'Sicherheitsbestimmungenfur elektrische Me&, Steuer-, Regel- und Laborgrate".
Es entspricht den deutschen Sicherheitsanforderungen.
Diese Erklarung wird verantwortlich fur die:
DESAGA GmbH
In den Ziegelwiesen
69168 Wiesloch
abgegeben durch:
A
Heidelberg, Dezember 1995 ................
Dr. M. Reinelt 1 Geschaftsfihrer
1996
Seite 7
DESAGA
Bedienungsanleitung CabUVIS
SARSTEDT-GRUPPE
2 Allgemeine Beschreibung
In der Diinnschicht-Chromatographie gehoren die UV-Nachweismethoden zu den empfindlichsten
Detektionsmoglichkeiten. Bei 366 nm, dem langwelligen UV-Licht, fluoreszieren Substanzen hell auf
dem dunklen Hintergrund der DC-Platten. Auf DC-Platten, die einen Fluoreszenzindikator enthalten,
erscheinen die Substanzflecken bei einer Beleuchtung mit 254 nm dunkel auf hell fluoreszierendem
Grund. Zur Erhohung des Kontrastes ist es wichtig, daR mit einem Spezialfilter die sichtbaren
Lichtanteile aus dem Spektrum der UV-Rohren herausgefiltert werden.
Zwei Tageslichtrohren, zwei 8 Watt Hg-Niederdruckrohren fiir 254 nm und vier 8 Watt HgNiederdruckrohren fiir 366 nm sind f
& die verschiedenen Auflichtanwendungen syrnrnetrisch in der
"CabUVIS, 230 V Analysenlampe " und "CabW I S + , 230 V, Analysenlampe" (DESAGA Nr. 13 13 00 /
13 13 01 und 13 13 05 / 06) untergebracht. Die sichtbaren Lichtanteile der 245 nm und 366 nm
Niederdruckrijhren werden von speziellen UV-Filtem zuriickhalten.
Fiir Durchlichtanwendungen ist im Gehause der "CabUVIS+,
230 V, Analysenlampe mit Durchlicht" (DESAGA Nr.
13 13 05) 1 spezielle Tageslicht-Leuchtrohre mit einer Leistung
von 8 Watt eingebaut. Sie ist mit einer matten Plexiglasscheibe
der GroRe 20 cm x 20 cm abgedeckt und erlaubt das
Ausleuchten von DC-Platten bis zum Standardformat 20 cm x
20 cm.
Die Abmessungen und elektrischen Daten s b t l i c h e r Rohren
sind identisch.
W
Das Grundgerat ist mit einer durchsichtigen Plexiglas
Abdeckplatte ausgerustet. Diese ermoglicht es im Laborbetrieb
DC-Platten, Gele oder andere Objekte in der CabUVIS zu
betrachten, ohne daR schadliche UV-Strahlung aus dem
Betrachtungskasten austreten kann.
Fiir beide Ausfuhrungen der CabUVIS ist ein Dokumentationsaufsatz (siehe Abbildung rechts) erhaltlich. Dieser Aufsatz
kann an Stelle der Plexiglas Abdeckplatte auf die
Schaukastenoffnung der CabUVIS(+) montiert werden.
I
,
1:iI
.-
-
---
3
-
Der Dokumentationsaufsatz besteht aus einer Abdeckplatte mit Schaft und einem optischen Balg.
Am oberen Ende des Balges kann ein speziell zum Dokumentationsaufsatz passender KameraHaltewinkel befestigt werden.
Somit ist eine Schnittstelle zu einem CCD-Kamerasystem (DESAGA Video-Dokumentations System
oder DESAGA Videodensitometer) geschaffen.
Seite 8
1996
-
DESAGA
SARSTEDT-GRUPPE
Bedienungsanleitung CabUVIS
-
2.2 Technische Daten
-
Herstellerdaten:
Geriit:
CabUVIS. 230V (1 10 V),
~nal~senlam~e
DESAGANr. 13 13 00 (13 13 01)
DESAGA GmbH
In den Ziegelwiesen 1 - 7
69168 Wiesloch
'
Bestellnurnrner:
Hersteller:
Anschrift
Geratedaten:
Lampen filr Auflicht:
- Tageslicht:
- 366 nm:
- 254 nm:
Lampen fiir Durchlicht:
Tageslicht:
StreuschirmgroRe:
Versorgung:
Versorgungsspannung:
Max. Leistungsaufnahme:
Sicherungen:
I Umgebungsbedingungen:
1 Zul. Umgebungstemperatur:
I Max. m l Rel. ~euchte:
1 Abmessungen:
' Breite:
Tiefe:
Hohe:
Gewicht:
-
2 x 1 Taeeslichtrohre
2 x 2 Hg-Niederdruckrtihren
2 x 1 Hg-Niederdruckrdhre
-
1
Herstellerdaten:
Geriit:
Hersteller:
Anschrift:
Gerltedaten:
Funktion:
Abmessungen:
Breite:
Tiefe:
I Hohe:
Gewicht:
I CabUVIS+, 230V (1 10 V), Analysenlampe mit
1 Durchlicht
I DESAGA Nr. 13 13 05 (13 13 06)
DESAGA GmbH
In den Ziegelwiesen 1 - 7
69 168 Wiesloch
12 x 1 Tageslichtrtihre
2 x 2 ~~;~iederdruckriihren
2 x 1 Hg-Niederdruckrohre
entfallt
I Tageslichtrohre
200 X 200 mrn
230 V / 50-60 Hz (I 10 V / 50-60 Hz)
90 W
1,6 AT (3,15 AT)
230 V / 50-60 HZ (1 10 V / 50-60 HZ)
llOW
1,6 AT (3,15 AT)
I
3 9 5 mrn
390 mm
2 8 0 rnrn
395 mm
390 rnm
220 mm
I Dokumentationsaufsatz m r CabUVIS
DESAGA Nr. 13 13 10
DESAGA GmbH
In den Ziegelwiesen
69168 Wiesloch
Schatl mit Balg und Kopplungsvorrichtung fur DESAGA CCD-Kameras
250 mm
385 mm
450 mm bis 810 mm
3 2 kg
Technische Daten der Leuchtohren:
Lampenmane:
Beleuchtungsstarke im Abstand von 10 cm:
0 15 mrn; Lange 285 rnm
254 nm: I mw/cm2
366 nm: 1,2 mw/cm2
Die Tageslichtrohre in dem Durchlichtkasten der CabUVIS+ ist eine Sonderanfertigung. (Siehe Bestellinformationen)
1996
Seite 9
DESAGA
Bedienungsanleitung CabUVIS
SARSTEDT-GRUPPE
2.3 Auspacken
Das Grundgerat CabUVIS(+), 230 V (1 10 V) oder der Dokumentationsaufsatz zur CabUVIS sind mit
dem kompletten Zubehor jeweils in einem Karton verpackt.
- PNfen Sie die Unversehrtheit des Verpackungskartons und des Gerates.
- Bei Transportschaden wenden Sie sich sofort an den Spediteur! Beachten Sie
die Meldefrist der einzelnen Transportunternehmen (Bahn, Post, Paket Dienste
oder Spedition). Sie betragt unter Urnstaden nur 24 Stunden.
- Miingel und Schaden sind sofort an die DESAGA GmbH in Wiesloch zu
melden!
- PNfen Sie den Lieferumfang anhand der Liste im nachsten Kapitel.
2.4 Lieferumfang
CabUVIS, 230 V (110 V), Analysenlampe
DESAGA Nr. 13 13 00 (13 13 01)
- 1 Grundgerat CabUVIS
ohne Durchlichtkasten
- 1 Schutzbrille zum Schutz gegen UV-Strahlen
- 1 NetzanschluRleitung
- 1 Bedienungsanleitung
- 1 Plexiglas Abdeckplatte fur das Grundgerat
CabUVIS+, 230 V (110 V), Analysenlampe mit
Durchlicht
DESAGA Nr. 13 13 05 (13 13 06)
- 1 Grundgerat CabUVIS+
mit Durchlichtkasten
- 1 Schutzbrille zum Schutz gegen UV-Strahlen
- 1 NetzanschluBleitung
- 1 Bedienungsanleitung
- 1 Plexiglas Abdeckplatte fiir das Grundgerat
Beide CabUVIS Ausfiihrungen durfen nur mit der montierten Plexiglas Abdeckplatte oder mit dem
Dokumentationsaufsatz betrieben werden.
Die Plexiglas Abdeckplatte oder der Dokumentationsaufsatz bietet einen ausreichenden Schutz gegen
die UV-C Strahlung, die in der Beleuchtungskammer der CabUVIS(+) entsteht. Die UV-B Strahlung
der 366 nm Rohre wird nicht komplett absorbiert. Die austretenden Strahlungsmenge ist ungefahrlich.
Wir empfehlen bei der Verwendung der Plexiglas Abdeckplatte die mitgelieferte Schutzbrille zu
venvenden. Ein Hautschutz ist nicht notwendig.
Dokumentationsaufsatz zur CabUVIS
DESAGA Nr. 13 13 10
- 1 x Aufsatz fkr CabUVIS(+) mit Balg und Kopplungsvorrichtung f i r einen DESAGA CCD-KameraI-laltewinkel.
- 1 x CCD-Kamera-Haltewinkel fkr die DESAGA Standard CCD-Kameras (S/W oder Farbe) und f
&
die DESAGA S/W CCD-Kamera f& Langzeitbelichtungen, passend zu dem DESAGA Reprostativ
(DESAGA Nr. 13 11 60).
Seite 10
1996
Bedienungsanleitung CabUVIS
DESAGA
SARSTEDT-GRUPPE
2.5 Aufstellen 1 Installation der CabUVIS(+) Analysenlampe
- Das Grundgerat darf nur betrieben werden, wenn die Plexiglas Abdeckplatte
oder der Dokumentationsaufsatz montiert ist.
Achtung !
- Stellen Sie das Gerat auf eine feste, erschiitterungsfreie und ebene Flache.
- Zu anderen Gegensthden und Gergten muR 5-10 cm Abstand gehalten werden.
- Beachten Sie weiterhin die zulassigen Umgebungsbedingungen f i r das Gerat. Sie
finden diese Angaben in den technischen Daten.
230V / 50-60Hz
Das Gerat darf nur mit einer 230 V, 50160 Hz - Netzsteckdose mit
Schubkontakt verbunden werden.
- Uberpriifen Sie die Angabe der Spannungsversorgung auf dem Typenschild.
- Uberpriifen Sie in regelmaigen Abstaden die NetzanschluRleitung auf
schadhafie Stellen.
- Schadhafte AnschluDleitungen diirfen auf keinen Fall eingesetzt werden.
- Nachdem Sie die CabUVIS(+) mit der Spannungsversorgung verbunden haben, ist
das Gerat betriebsbereit.
Die 366 nm Niederdruckrohre emittiert UV-B Strahlung.
Die 254 nm Niederdruckrohre emittiert UV-C Strahlung.
Beachten Sie, das UV-C Strahlung Augenentziindungen heworruft!
- Benutzen Sie beim Arbeiten unbedingt die mitgelieferte Schutzbrille.
Bei empfindlichen Personen kann die UV-C Strahlung auch zu Hautreizungen
fiihren!
- Achten Sie bei der Aufstellung des Gerates darauf, dal3 keine Personen die in der
Nahe des Gerats arbeiten unbeabsichtigt bestrahlt werden.
- Dies kann nur der Fall sein, wenn das Gerat geoffnet ist. Aus dem geschlossenen
Gerat konnen keine schadlichen Strahlungen austreten.
1996
Seite 11
DESAGA
Bedienungsanleitung CabUVIS
SARSTEDT-GRUPPE
2.5.1 Montage des Dokumentationsaufsatzes
+
Wenn Sie den Dokumentationsaufsatz auf die
CabWIS(+) montieren machten, miissen Sie
zuerst die Plexiglas Abdeckplatte entfernen.
- An der Abdeckplatte sind zwei DrehSchnellverschliisse angebracht.
- Zum Abbauen des Aufsatzes losen Sie die
beiden Schnellverschliisse des Aufsatzes.
- Drehen Sie dazu die beiden Schnellverschliisse
eine viertel Drehung entgegen dem
Uhrzeigersinn.
- Heben Sie die Plexiglas Abdeckplatte ab.
Abbildung: Plexiglas Abdeckplatte auf der
Cab UVIS
Schrauben zum
Fixieren der
$eitenw&de:
Nachdem Sie die Plexiglas Abdeckplatte
entfernt haben sehen Sie an dem oberen Rahrnen
des Gmndgerates zwei Schrauben und vier
Fiihrungslocher.
- Mit den zwei Schrauben sind die abnehmbaren
Seitenteile der CabUVIS(+) befestigt.
locher fiir die
- Die vier Fiihrungslocher dienen zur Aufnahrne
der an den Aufsatzen angebrachten
Fiihrungsstiften.
- Setzen Sie den Dokumentationsaufsatz auf das
Abbildung: Grundgerat von oben betrachtet.
Grundgerat. Verschieben Sie den Aufsatz
vorsichtig, bis alle vier Fiihrungsstifte in die
Locher des Grundgerats einrasten.
- Der Dokumentationsaufsatz ist symmetrisch.
Er kann daher auch um 180" gedreht
aufgesetzt werden.
Seite 12
1996
Bedienungsanleitung CabUVIS
DESAGA
SARSTEDT-GRUPPE
An der Abdeckplatte des
Dokumentationsaufsatzes sind wie bei
der Plexiglas Abdeckplatte zwei DrehSchnellverschlusse angebracht.
in der Balg-
- Driicken Sie die Schnellverschlusse
nach unten und drehen Sie sie eine
viertel Drehung im Uhrzeigersinn.
- Venvenden Sie dafiir einen groi3en
Schraubendreher oder eine Munze.
Balgs (von oben
gesehen).
- Zum Abbauen des Aufsatzes losen
Sie die beiden Schnellverschlusse.
- Drehen Sie dazu die beiden
Abbildung: Gesamtansicht des Dokumentationsaufsatzes
Schnellverschliisse eine viertel
Drehung entgegen dem
Uhrzeigersinn.
- Danach konnen Sie den
Dokumentationsaufsatz nach oben
abheben.
- Montieren Sie unbedingt die Plexiglas
Abdeckplatte bevor Sie das Gerat
einschalten.
-
00
-
A bbildung: Cab UVIS Grundgeraf mil
Dokumentationsaufsatz (angedeutel).
1996
Seite 13
DESAGA
Bedienungsanleitung CabUVIS
SARSTEDT-GRUPPE
2.5.2 Montieren der CCD-Kameras an den Kamera-Haltewinkel
Der Kamera-Haltewinkel ist im Lieferumfang des Dokumentationsaufsatzes enthalten. Er k a m an
das DESAGA Reprostativ (DESAGA Nr. 13 11 60) montiert, oder gegen einen bereits vorhandenen
Standard Kamera-Haltewinkel getauscht werden.
- Der gelieferte Haltewinkel besitzt eine Kopplungsvorrichtung passend zum Balg des
Dokumentationsaufsatzes. Somit ist eine Schnittstelle zwischen der CabUVIS(+) und einem
Kamerasystem geschaffen.
- An den Haltewinkel komen Sie die Standard S/W CCD-Kamera, die Standard Farbkamera oder die
Kamera fiir Langzeitbelichtungen der Firma DESAGA montieren.
- Schrauben Sie den Kamera-Haltewinkel an das Reprostativ.
Ofhen Sie dazu die Schraube mit dem Knauf (1).
- Entfernen Sie einen eventuell vorhandenen Standard Haltewinkel, indem Sie diesen nach vorne
abziehen.
- Stecken Sie den Haltebolzen des mitgelieferten Haltewinkels in die Offnung der Stativfiihrung und
ziehen Sie die Schraube mit dem Knauf (1) fest.
Achten Sie darauf, daJ3 der Haltewinkel horizontal genau ausgerichtet ist.
1: Knauf zum Festschrauben des Haltewinkels am Stativ
2 (a): Montageposition fiir die DESAGA Farbkamera
mit manueller Bedienung (oder andere CCD-Kameras)
3: Montageposition f i r die DESAGA S/W-Kamera
Standard oder fiir Langzeitbelichtungen
12 (b): Montageposition fiir die DESAGA Farbkamera
mit software-gesteuerter Bedienung
14: Druckknopf des Schnellverbinders
I
5: bffhung zurn Durchfiihren des Objektivs
Abbildung: Montage des Kamera-Haltewinkels zur Kopplung an den Dokumentationsaufsatz
- Montieren Sie Ihre Kamera an die dafur vorgesehene Position.
(Montageposition 2 (a): DESAGA Farbkamera mit manueller Bedienung;
Montageposition 2 (b): bei Software gesteuerter Bedienung;
Montageposition (3): S/W-CCD-Kamera bzw. die S/W-Kamera fur Langzeitbelichtungen).
- Bei allen Kameras reicht das Objektiv durch die Offnung im Winkel (5).
- Alle Kameratypen werden von der Riickseite des Winkels mit einer Schraube befestigt.
Seite 14
1996
Bedienungsanleitung CabUVIS
DESAGA
SARSTEDT-GRUPPE
- Setzten Sie die CabUVIS mit dem montierten Dokumentationsaufsatz auf die Grundplatte des
Reprostativs.
- Richten Sie das Gerat sorgfaltig zurn Stativ aus.
- Der Kamera-Haltewinkel kann mit zwei Dmck-Schnellverbindern (Nr. 4 der Abbildung auf der
vorherigen Seite) mit dem Balg fest verbunden und jederzeit wieder gelost werden.
- Beide Verschliisse miissen nun Koppeln und zum Losen gleichzeitig betiitigt werden, da sonst die
Balgabdeckung gegen den Karnera-Haltewinkel verkanntet.
Abbildung: Verbinden des Kamera-Haltewinkels mit der Balgabdeckung
(Beispiel rnit Objektiv der S/W CCD-Kamera)
-
1996
Seite 15
DESAGA
Bedienungsanleitung CabUVIS
SARSTEDT-GRUPPE
-
3 Bedienung der CabUVIS(+)
3.1 Bedienungselemente der CabUVIS(+) mit der Plexiglas Abdeckplatte
Ein- 1Ausschalter
der Tageslicht~uflic~t~eleqchtpn~
1
Kasten fiir die
Durchlichtbeleuchtung.
(Nur bei der CabUV1S-k)
?ageslichtr8hren fiir die
Durchlichtbeleuchtung
Abbildung: Bedienungselemente der CabUVIS+ rnit Durchlicht und Plexiglas Abdeckplatte.
Der Netzstecker und die Sicherung bejinden sich auf der Riickseite des Gerates.
Seite 16
1996
DESAGA
SARSTEDT-GRUPPE
Bedienungsanleitung CabUVIS
3.2 Betrachten eines Objektes mit Auflicht (Tageslicht, 366 nm oder 254 nrn)
- Offnen Sie die Frontklappe der CabUVIS(+).
- Legen Sie dasobjekt (DC-Platte, Gel oder Sonstiges) in die Mitte der Beleuchtungskarnmer.
- SchlieBen Sie die Klappe der CabUVIS(+) um Fremdlichteinfliisse zu vermeiden und um das
Austreten von UV-Strahlung zu verhindem.
- Schalten Sie rnit den Schaltem der CabUVIS die gewiinschte Auflichtbeleuchtung ein. Sie komen
auch mehrere Lichtarten (Tageslicht, UV-Licht 254 nm und UV-Licht 366 nm) gleichzeitig
einschalten.
/ Schalterbeschriftung
1 VIS
254 nm
366 nm
( Auflicht Beleuchtungseinrichtung
I Tageslicht Rohre
254 nm Hg-Niederdruckriihre
2
1
- Wenn Sie das Objekt bei eingeschalteter 254 nm - oder 366 nm Hg-Niederdruckrohre plazieren
miissen, schiitzen Sie sich mit Handschuhen und langhniger Kleidung.
- Schalten Sie nach dem Betrachten des Objekts die Lampen aus.
- 0ffnen Sie die Beleuchtungskammer der CabUVIS(+) und entnehmen Sie das Objekt.
- Schalten Sie die UV-Rohren (254 nm und 366 nm) wenn moglich nur zum Betrachten - und nur bei
geschlossener Frontklappe - ein und danach sofort wieder aus.
- Die UV-Strahlung IaBt unter Umstbden ihr fluoreszierendes Objekt schnell erblassen.
3.3 Betrachten eines Objektes mit Durchlichtbeleuchtung (Tageslicht)
Die Betrachtung von Objekten mit Durchlichtbeleuchtung ist nur rnit der CabUVIS+, 230 V
Analysenlampe (DESAGA Nr. 13 13 05) rnoglich.
- Offnen Sie die Frontklappe der CabUVIS+, 230 V Analysenlampe.
- Legen Sie das Objekt (DC-Platte, Gel oder Sonstiges) auf die Mitte der Milchglasplatte in der
Beleuchtungskamrner.
- SchlieBen Sie die Klappe urn Frerndlichteinflusse zu vermeiden.
- Schalten Sie die Tageslichtrohre fiir die Durchlichtbeleuchtung an dem untersten Schalter (mit der
Bezeichnung:" ,:. ") ein und aus.
1996
Seite 17
DESAGA
Bedienungsanleitung CabUVIS
SARSTEDT-GRUPPE
4 Bedienungselemente des Dokumentationsaufsatzes zur CabUVIS
Befestigungsvorrichtung-fir
Langzeitbelichtungen)
I
.
I
1i-
-.
.
-i7
--
-
Riickwand der CabWIS
4 x Fiihrungslocher fiir den Karnera-Haltewinkel
Schnellverschlul3aufnahrne der Verbindung B d g Kamera-Haltewinkel
Objektivofhung
Abdeckplatte des Balgs
Abbildung: Der Dokumentationsaufsatz fur die CabUVIS
Seite 18
1996
Bedienungsanleitung CabUVIS
-
DESAGA
SARSTEDT-GRUPPE
5 Service und Wartung
5.1 Reinigen
Beachten Sie unbedingt die Vorschriften zum Reinigen des Gerates.
Unachtsames Reinigen oder nicht Beachten der Vorschriften kiinnen zu
Funktionsstorungen fiihren.
Achtung !
- Trennen Sie das Gerat zum Reinigen von der Spannungsversorgung (Stecker
aus der Steckdose ziehen).
- Das Gerat wird mit einer lebensgef&lichen Spannung betrieben. Beim
Reinigen darf keine Fliissigkeit in das Gerat eindringen.
- In der Beleuchtungskammer darf nur die Bodenplatte und die Frontklappe
gereinigt werden.
- Um die Innenseite der Plexiglas Abdeckplatte zu reinigen muR diese vom
Grundgerat entfemt werden.
- Reinigen Sie die zughglichen Gehauseteile - ausgenommen im Bereich der
Lampen und Filter - mit einem leicht angefeuchteten Tuch. Sie konnen dazu
Seifenlosung venvenden.
- Benutzen Sie auf keinen Fall Scheuermittel, aggressive Reiniger oder
Losungsmittel.
- Zur Desinfektion konnen Sie das folgende waJ3rige Gemisch verwenden:
100 g dieses wanrigen Gemisches enthalten:
25 g Ethanol 96%
35 g 1-Propano1
0,l g Glyoxal
- Lassen Sie dieses wal3rige Gemisch 5 bis 30 min einwirken und reinigen Sie
das Gerat mit einem Tuch nach, das Sie mit Wasser und Seife leicht
angefeuchtet haben.
1996
Seite 19
DESAGA
Bedienungsanleitung CabUVIS
SARSTEDT-GRUPPE
5.2 Wechseln der Rohren, Starter oder der Filter
[A]
Rohren, Starter und Filter sind Verbrauchsmaterial, und mussen von Zeit zu
Zeit ausgetauscht werden.
Achtung !
Lampen, Starter und Filter diirfen nur von einer Elektrofachkraft nach
VBG 4 (5 2 "Begriffe" III) getauscht werden.
Die Filter werden durch die UV-Strahlung, aber auch durch Feuchtigkeit, nach mehreren hundert
Betriebsstunden an der Oberflache matt. In diesem Fall mussen beide Filter ausgetauscht werden.
Die Lebensdauer der Rohren liegt bei 5000 bis 7500 Stunden. Diese Lebensdauer kann durch haufiges
Ein- und Ausschalten jedoch verkiirzt werden.
- Trennen Sie das Gerat von der Netzversorgung.
- Zum Wechseln der Rohren, der Starter oder der Filter
f?ir die Auflichtbeleuchtung mussen Sie den Aufsatz
bzw. die Plexiglas Abdeckplatte der CabUVIS(+)
demontieren.
- Losen Sie dazu die beiden Schnellverschlusse an dem
Aufsatz.
- Verwenden Sie einen groBen Schraubendreher oder
eine Miinze.
- Drehen Sie die Schnellverschlusse eine viertel
Drehung entgegen dem Uhrzeigersinn und heben Sie
Aufsatz ab.
Die Seitenteile sind mit jeweils einer Schraube in der
Mitte des Rahmens der CabUVIS befestigt.
- Losen Sie die Schrauben heben Sie die Seitenteile
vorsichtig aus ihrer Verankerung und klappen Sie die
Seitenteile nach rechts bzw. nach links weg.
- Achten Sie darauf, dal3 die Verbindungsleitungen
nicht gelost werden. Eventuell mussen Sie die
Fixierung der Leitungen am Kunststoffrahmen Iosen.
- Legen Sie die Seitenteile mit den Rohren, Starter und
Filter nur direkt neben dem Gerat ab.
- Auf der Innenseite des aufgeklappten Seitenteils finden Sie die vier Starter.
- Unter dem schwarzen Verkleidungsblech - welches durch Losen von 4 Schrauben abgenommen
werden kann - liegen der Filter und die Rohren (siehe Abbildung auf der nachsten Seite).
- Den Filter entnehmen Sie danach, indem Sie ihn etwas verschieben, die federnden Haltebleche
vorsichtig zur Seite biegen und den Filter herausheben.
Achten Sie darauf, das die einzusetzenden Filter und Rohren sauber sind. Verwenden Sie zum
Einsetzen am besten ein sauberes Tuch. Verumeinigungen (zum Beispiel von Fingerabdrucken)
konnen einbremen und die Lebensdauer der Rohren oder Filter verkiirzen.
Seite 20
1996
I-.F
,
is
s -,
Bedienungsanleitung
DESAGA
CabUVIS
SARSTEDT-GRUPPE
Verbindungsleitungen fiir die Rohren.
7
4 x Starter: Die Starter sind so angeordnet,
dal3 sie jeweils mit der darunterliegenden
Rohre verbunden sind. Entnehmen Sie die
Starter, indem Sie sie eine viertel Drehung
entgegen dem Uhrzeigersinn drehen und
nach oben herausziehen.
Spezial Tageslichtfilter. Unter diesem
Filter liegen die 366 nm und 254 nm
Rohren. Entnehmen Sie das Filter und die
Rohren, indem Sie das Abdeckblech mit
den vier Schrauben abschrauben.
Erdungskontakt. Alle metallenen
Gehauseteile sind mit dem Schutzkontakt (gelb-griine Leitung) verbunden.
Abdeckblech
-A
Tageslichtrohre. Entnehrnen Sie die
Rohren indem Sie das Abdeckblech und
den Filter abbauen. Drehen Sie die Rohren
um eine viertel Drehung (die Richtung
spielt keine Rolle) und ziehen Sie sie nach
oben aus der Fassung.
Bei der CabUVIS+ kann zusatzlich die Rohre und der Starter fiir die Durchlichtbeleuchtung
gewechselt werden.
Verfahren Sie dazu wie folgt:
- Trennen Sie auch fur diese Arbeiten das Gerat vom Versorgungsnetz.
- Drehen Sie die CabUVIS+, so dal3 Sie auf die Ruckwand blicken.
- Entfernen Sie die beiden Schrauben an der
Riickwand des Bodenfachs.
- Sie konnen das Bodenfach wie eine Schublade
herausziehen.
- In dem Bodenfach erkennen Sie einen Starter und
die Rohre fur die Durchlichtbeleuchtung.
- Beachten Sie, daB Sie eine Rohre mit
aufgedrucktem Reflektorstreifen benotigen (Siehe
Bestellinformationen).Nach den1 Einsetzen der
Rohre muB dieser Reflektorstreifen wieder nach
oben zeigen.
des Bodenfachs
-
1996
Seite 21
DESAGA
Bedienungsanleitung CabUVIS
SARSTEDT-GRUPPE
Die Seitenteile der CabUVIS sowie das Schubfach der CabUVIS+ diirfen
nur von einer Elektrofachkraft nach VBG 4 (4 2 "Begriffe" 111) geoffnet
werden.
- Trennen Sie das GerPt vor dem 0ffnen vom Versorgungsnetz.
- Wahrend der Garantiezeit darf das GerPt nur von der Firma DESAGA
repariert werden.
- Bei unsachgemaRer Handhabung oder Reparatur erlischt jeglicher
Anspruch auf Gewahrleistung.
-.
Option: CabUVIS+
SARSTEDT.GRUPPE
Abbildung: Schaltplan der CabUVIS+, 230 V , mit Durchlicht
Seite 22
1996
DESAGA
SARSTEDT-GRUPPE
Bedienungsanleitung CabUVIS
5.4 Serviceadresse
Sollten Sie Fragen oder Probleme mit dern Gerat haben, setzen Sie sich rnit der Service Abteilung der
Firma DESAGA in Wiesloch in Verbindung.
Geben Sie unbedingt die Seriennummer ihres Geriites an.
[m]
Service!
DESAGA GmbH
Sewice Abteilung
In den Ziegelwiesen 1 7
-
06222 / 92 88-0
Tel.:
Telefax: 06222 / 92 88 92
69168 Wiesloch
6 Bestellinformationen
Gerat / Zubehor / Verbrauchsmaterial
CabUVIS+, 230 V, Analysenlampe rnit Durchlicht
CabUVIS+, 110 V, Analysenlampe mit Durchlicht
Dokumentationsaufsatz zur CabUVIS
DESAGA Nr.
13 13 05
13 13 06
13 13 12
Hg-Niederdruckrohre 254 nrn, 8 W
Tageslicht-Leuchtrijhre Auflicht:
Tageslicht-Leuchtrohre, 8 W
Tageslicht-LeuchtrCihre Durchlicht:
Tageslicht-LeuchtrBhre 8 W, Durchlicht f i r CabUVIS
-UV-Filter 254 nm f i r CabUVIS
Weitere UV-Analysenlampen von DESAGA:
.Gerat
.
I-IP-UVIS, UV-Cabinet, 230 V
MinUVIS Analysenlampe, 230 V
DESAGA Nr.
13 1220
13 12 00
Sollten Sie Fragen zu weiteren DESAGA Analysenlampen, oder zu dem DESAGA Lieferprogramm
haben, setzen Sie sich bitte mit der DESAGA Vertrieb 1 Marketing Abteilung in Wiesloch in
Verbindung.
1996
Seite 23
DESAGA
Bedienungsanleitung CabUVIS
SARSTEDT-GRUPPE
7 Aunerbetriebnahme / Entsorgung
B
Information!
Wichtig:
Urn Urnweltverschmutzungen vorzubeugen, setzen Sie sich zur Entsorgung des
Gerates rnit einern zugelassenen Fachunternehmen oder dern ortlichen
Miillentsorgungsunternehmen in Verbindung.
Die Substanzen, die Sie im Zusammenhang mit der CabUVIS(+), 230V,
Analysenlampe verwenden b m . einsetzen sind unbedingt fach- und
sachgerecht zu handhaben und zu entsorgen.
Diese Bedienungsanleitung besteht aus:
Binderiicken und Deckfolie: PVC
Der Rest besteht aus Papier, und kann durch abziehen des Binderiickens getrennt
werden.
Seite 24
1996
DESAGA
Operating Instructions CabUVIS
SARSTEDT-GRUPPE
Operating Instructions
CabUVIS+, 230 V (110 V), UV-Analyzing Lamp
with Daylight Transmission
DESAGA No. 13 13 05 (13 13 06)
Documentation top for CabUVIS
DESAGA No. 13 13 12
DESAGA
SARSTEDT-GRUPPE
cc
DESAGA
Operating Instructions CabUVIS
SARSTEDT-GRUPPE
General Directions for use!
knowledge of the safety requirements and the description of the handling.
- These Operating Instructions contain the important hints and requirements for
the safety and correct use of the instrument.
- Pay also attention to the requirements for accident prevention in your
No parts of these Operating Instructions may be copied or reproduced in any form
or by any means without the prior written consent of DESAGA GmbH.
These Operating Instructions are only for the user and for the owner of the
instnunent.
It is illegal to give a copy to another person.
Contravention can make liable for damages and will be prosecuted.
Retain these Operating Instructions for your records!
Wiesloch, May 1996
DESAGA GmbH
Manufacturers
DESAGA GmbH
In den Ziegelwiesen 1 - 7
D-69168 Wiesloch
Germany
Supplier and customer.
Service address:
Phone:
Fax:
+49 6222 / 92 88-0
+49 6222 / 92 88-92
Instrument Data
(to be filled by the customer)
[ ] CabUVIS, 230 V, UV-Analyzing Lamp
Type:
[ ] CabUVIS+, 230 V, UV-Analyzing
Lamp with daylight transmission
[ ] Documentation top for CabUVIS
Phone: (
Fax: (
Telex:
Page 26
)
)
Serial no.:
Installation:
- Location:
- Date:
Inventory no. :
1996
Operating Instructions CabUVIS
-
DESAGA
SARSTEDT-GRUPPE
-
Page
Table of contents
1.1
1.2
1.3
1.4
Basic and important safety requirements ..............................................................................28
Explanation of the symbols and hints ....................................................................................
29
Dangerous nature of the instrument ......................................................................................
30
Declaration of Conformity ...................................................................................................
31
2 General Information
.........................................................................................................................
32
. .
2.1 Descrlptlon ........................,................ . . . . . . . .. . . .. .. . . .. ......... ... .. . . .. ....... 32
2.2 Technical Data .......................................................................................................................
33
2.3 Unpacking ........................................................,...................................................................,.34
2.4 Range of delivery ..........................................................................................................34
35
2.5 Installation of the Instrument ...............................................................................................
2.5.1 Mounting the Documentation Top on the CabUVIS(+) ................................................ 36
2.5.2 Mounting the CCD-cameras on the camera holder ......................................................38
3 Operating the CabUVIS(+)
............................................................................................................40
3.1 Operating elements of the CabUVIS(+) with Plexiglas cover plate ....................................... 40
3.2 View an object with vertical illumination (Daylight, 366 nrn or 254 nm).............................41
41
3.3 View an object with transillumination (Daylight) ..................................................................
4 Operating elements of the Documentation Top
5 Service and maintenance
5.1
5.2
5.3
5.4
.............................................................................
42
.................................................................................................................
43
Cleaning the instrument ..............................................................
. .................................... 43
Exchanging the tubes, the starter and the filters ..................................................................... 44
. . . .
Electrlc clrcult dlagram ........... ...................... ................. ................................... ......... ............ 46
Service address ....................................................................................................................... 47
6 Ordering information ....................................................................................................................47
7 Put out of action 1 Waste disposal
1996
..................................................................................................48
Page 27
DESAGA
Operating Instructions CabUVIS
SARSTEDT-GRUPPE
1 Introduction
1.1 Basic and important safety requirements
Attention!
Pay attention to the hints in these Operating Instructions!
- The basic condition for the safety and correct use of the instrument is the
knowledge of the safety requirements and the description of the handling.
- These Operating Instructions contain the important hints and requirements for
the safety and correct use of the instrument.
- All persons must read these Operating Instructions before working or using this
instrument.
- Pay also attention to the requirements for accident prevention in your country.
Commitment of the owner
The owner of the instrument is committed to assign a task with this instrument
only to someone who has read and understood these Operating Instructions.
This should be confirmed by signature.
The proper use of the instrument by the user (also the conscientious work of the
user) must be checked in regular intervals.
Commitment of the user
The person which are working with this instrument is committed:
- to read these Operating Instructions before starting to work with this
instrument.
- to pay attention to the local and actual requirements for accident prevention.
This should be confirmed by signature.
Operating Instructions CabUVIS
DESAGA
SARSTEDT-GRUPPE
1.2 Explanation of the symbols and hints
In these Operating Instructions you will find the following important symbols and hints for danger and
mistake in use:
Attention!
The "Attention-symbol" marks chapters / sections in which you find:
- important hints.
- hints for imminent danger for the health or life of the user or other persons.
- hints for dangerous situations.
If you do not pay attention to these chapters / sections slight to heavy injurious,
damage to health or to property may occur.
This "Info-Symbol" gives you a hint to information for the proper use of the
instrument or to understand the technology.
If you do not pay attention to these chapters / sections faulty use or damage to
property may occur.
At this "Tip-Symbol'' you get general information for the optimum use of the
instrument.
Other symbols (sometimes with important hints) in this manual are showing a icon analogue to the
topic of the chapter / section. For example requirements for accident prevention, service address or
telephone numbers, power supply and so on.
-
1996
Page 29
DESAGA
Operating Instructions CabUVIS
SARSTEDT-GRUPPE
1.3 Dangerous nature of the instrument
Safety requirements:
Attention!
- Read these Operating Instructions before working with this instrument.
- To reduce the risk of electrical shock, do not immerse the instrument in water
or liquids. No water or other liquids must came in the instrument!
- You run the instrument with a dangerous high voltage (230 V / 50-60 Hz).
- Disconnect the instruments from the mains if you do not work with the
instrument for a longer time or if you want to clean the instrument.
- Use only the three-prong (earth grounded) power cord which is supplied to your
instrument or an analogue one that matches your AC power requirements.
- Connect the instrument only to a mains socket with earthing contact.
- Compare the data for the mains voltage at the type plate of the instrument with
your local mains voltage. Never connect the instrument to a power supply
which is different to the data at the instrument's type plate.
Check the instrument and the power cord for damages!
- Do not operate after the equipment malfunctions, or has been damaged in any
manner. Return the instrument to the local dealer or to DESAGA Wiesloch for
examination, repair, electrical or mechanical adjustment.
Do not use equipment except as intended.
- Only DESAGA or the service department of your local dealer may repair the
instrument during the time of guarantee.
- Only persons with special electric knowledge may open the housing to repair
the instrument (after the time of warranty). Disconnect the instrument from the
mains before you open the instrument.
Attention UV-C radiation:
The 366 nm low pressure tube sends UV-B radiation.
The 254 nm low pressure tube sends UV-C radiation.
Note: UV-C radiation damages the eyes!
-Use the supplied protective goggles!
At sensitive persons the UV-C radiation can irritate the skin!
-Use a protection for your face and for your hands.
-Use a place for the installation that the device will not irradiate other person
which are working near the instrument.
Avoid to open the front lid of the CabUVIS if you have switched on the 254
nm or the 366 nm Hg low-pressure tube.
- If you must open the front door to move the object into the correct position
while the 254 nm or 366 nm tube is switched-on you must use the supplied
protective goggles and you must also protect your hands (face).
Page 30
1996
Operating Instructions C a b U V I S
DESAGA
SARSTEDT-GRUPPE
1.4 Declaration of Conformity
f
1
CE
Declaration of conformity according to the EMC-Directive 8913361EEC:
Herewith we declare that the:
CabUVIS(+), 230 V, UV-Analyzing Lamp
DESAGA no. 13 13 00 and 13 13 05
(from serial number 95 100)
complies with basic security requirements of the EMC-Directive 89/336/EEC and
the German "EMV-Gesetz vom 9.1 1.1992". This compliance refers to the product
as it is delivered to the customer.
To judge the instrument with regard to the electromagnetic compatibility the
following standards were used.
- Electromagnetic emission:
- EN 5501 1 / 03.91 (DIN VDE 0875-11 / 07.92)
- Electromagnetic immunity:
- EN 50082-1 / 01.92 (DIN VDE 0839 Teil82-1 / 03.93)
The instrument complies with all relevant standards and is qualified for the CE
sign.
The CabUVIS(+), 230 V, Analyzing Lamp (DESAGA no. 13 13 00 and 13 13 05)
has been designed and manufactured in accordance with the International
Standard CEInEC 1010-1:1990 + A l , modified:
"Safety requirements for electrical equipment for measurement, control, and
laboratory use".
It complies with German safety standards.
This declaration is issued for
DESAGA GmbH
In den Ziegelwiesen 1 - 7
69 168 Wiesloch
Heidelberg, December 1995 .......... .. ....... ............ ...... ..................... ,...... ..,........
Dr. M. Reinelt / Managing Director
1996
Page 3 1
DESAGA
Operating Instructions CabUVIS
SARSTEDT-GRUPPE
2 General Information
2.1 Description
In thin layer chromatography (TLC) detecting methods using ultraviolet light belong to the most
sensitive ones. Using 366 nm, the long wavelength light, fluorescing substances show as bright spots
against a dark background of the TLC-plates. Using 254 nm, the short wavelength light, on TLC-plates
containing a fluorescent indicator substances show as dark spots on a bright fluorescing background.
To enhance the contrast blocking of any visible light by a special filter is important.
Two daylight tubes, two 8 Watt Hg low-pressure tubes for 254 nm and four 8 Watt Hg low-pressure
tubes for 366 nm are placed symmetrically in the CabUVIS and CabUVIS+, 230 V (DESAGA no.:
13 13 00 1 01 and 13 13 05 1 06) for vertical illumination. The visible range of the 366 nm and 254
nm tube's spectra is blocked by special UV-filters.
For applications with transmitted daylight you will find one
special 8 Watt daylight tube only in the CabUVIS+, 230 V
(DESAGA no.: 13 13 05 106). This special tube is covered by a
200 mm x 200 mm white and diffuse Plexiglas-plate. It allows
you the transillumitation of standard size TLC-plates.
The standard instruments CabUVIS and CabUVIS+ consist
of a transparent Plexiglas cover plate. It allows to look on a TLCplate (on a gel or on other object) without being disturbed by
light from the side. The UV-C radiation can not transmit through
the window.
For both basic instruments of the CabUVIS(+) you can get a
Documentation Top (see picture on the left side). You can
mount or exchange both tops to one of the basic instruments.
The Documentation Top consists of a cover plate, a shaft and an
optical bellow. At the end of the bellow you find a cover plate to
contact the DESAGA CCD-camera holder. So you have an
interface to connect a CCD-camera system (like the DESAGA
Video-Documentation System or a DESAGA VideoDensitometer) to the CabUVIS(+).
Page 32
(5)
I
L
-
\:@
-3
1996
DESAGA
Operating Instructions CabUVIS
-
SARSTEDT-GRUPPE
2.2 Technical Data
Manufacturer's data:
Instrument:
Ordering number:
Manufacturer:
Address:
Instrument's data:
Lamps for vertical illumination:
- Daylight:
- 366 nm:
- 254 nm:
Lamp for transillumination:
- Daylight:
Ambient conditions:
- Ambient temperature:
- Max. rel. humidity:
Cover plate:
Dimension 1 diffusing screen:
Power supply:
Voltage:
Power consumption:
Fuse:
Dimension:
Width:
Depth:
Height:
Weight:
Manufacturer's data
Instrument
Ordering number
Manufacturer
Address
Instrument data
Features
Dimensions
Width
Depth
Height
Weight
Technical data of the tubes:
Dimensions:
Illumination in 10 cm distance:
CabUVIS, 230V (1 10 V), UVAnalyzing Lamp
DESAGAno.131300(131301)
DESAGA GmbH
In den Ziegelwiesen I - 7
D-69 168 Wiesloch
Germany
CabUVIS+, 230V (1 10 V), UV-Analyzing
lamp with daylight transillumination
DESAGAno.131305(131306)
DESAGA GmbH
In den Ziegelwiesen 1 - 7
D-69168 Wiesloch
Germany
2 x l Daylight-tube
2 x 2 Hg low-pressure tube
2 x 1 Hg low-pressure tube
2 x 1 Daylight-tube
2 x 2 Hg low-pressure tube
2 x I Hg low-pressure tube
no
1 Daylight-tube
+ 10°C- +40°C
80 %
Plexiglas cover plate
no
+ 10°C-+40°C
80 %
Plexiglas cover plate
200 X 200 mm
230 V / 50-60 Hz (1 I0 V 1 50-60 Hz)
90 W
1.6 AT(3.15 AT)
230 V 1 50-60 Hz (I 10 V / 50-60 Hz)
llOW
I .6 AT (3.15 AT)
395 mm
390 mm
280 mm
9 kg
395 mm
390 mrn
220 mm
11.3 kg
Documentation Top for CabUVlS
DESAGA no. 13 13 10
DESAGA GmbH
In den Ziegelwiesen I - 7
D-69168 Wiesloch
Germany
Shaft with bellow and connection unit for DESAGA CCD-cameras
240 mm
385 mm
450 mm to 810 mm
3.2 kg
0 15 mm; length 285 rnm
254 nm: I m ~ l c m *
366 nm: 1.2 m ~ l c m '
The daylight tube for the transillumination of the CabUVIS+ is a special one. (See ordering information)
1996
Page 33
DESAGA
Operating Instructions CabUVIS
SARSTEDT-GRUPPE
2.3 Unpacking
The CabUVIS(+), 230 V, UV-Analyzing Lamp, with or without daylight transmission or the
Documentation Top for the CabUVIS comes packed in a cardboard box with all accessories.
- Check the integrity of the box and the apparatus.
- In case of transport damages contact your shipping agent immediately! Pay
attention to the deadline for claiming damages. At some agencies this period
is only 24h.
- Report faults and damages as soon as possible to your dealer or to DESAGA!
- Check the range of delivery against the list in the next chapter.
2.4 Range of delivery
CabUVIS, 230 V (110 V), UV-Analyzing lamp CabUVIS+, 230 V (110 V), Analyzing lamp with
daylight transillumination
DESAGA no. 13 13 05 (13 13 06)
DESAGA no. 13 13 00 (13'13 01)
- 1 Basic instrument CabUVIS without daylight - 1 Basic instrument CabUVIS+ with daylight
transillumination
transillumination
- 1 Plexiglas cover plate
- 1 Plexiglas cover plate
- 1 protection goggles against UV-radiation
- 1 protection goggles against UV-radiation
- 1 Mains connection
- 1 Mains connection
- 1 Operating Instructions
- 1 Operating Instructions
You must run both CabUVIS instruments with the Documentation Top or with the Plexiglas cover
plate.
The Plexiglas of the cover plate (and also the Documentation Top) is a protection against the UV-C
radiation in the CabUVIS. The UV-B radiation of the 366 nm tube will not be adsorbed completely by
the Plexiglas cover plates. The transmitted rate of radiation is not dangerous. We recommend to use the
delivered protection goggles when you are working with the Plexiglas cover plate. If the front door is
closed you do not need protection for the skin.
Documentation Top for CabUVIS
DESAGA no. 13 13 10
- 1 Top for CabUVIS(+) with bellow and interface for DESAGA CCD-cameras holder.
- 1 CCD-camera holder to mount the DESAGA Standard B/W CCD-camera, the B/W CCD-camera for
longer integration time or the colour CCD-camera on the Repro Stand (DESAGA no.: 13 1 1 60)
Page 34
1996
Operating Instructions CabUVIS
-
DESAGA
SARSTEDT-GRUPPE
2.5 Installation of the Instrument
- Run the CabUVIS only with the mounted Plexiglas cover plate or with the
Documentation top.
Attention!
- Place the instrument on a stable surface free of vibration.
- Hold a distance of 10 cm to other objects or instruments.
- If -you position the instrument observe the ambient conditions of the instrument.
A
You will find these conditions in the chapter with the technical data.
- Use only the three-prong (earth grounded) power cord which is supplied to your
instrument or an analogue one that matches your AC power requirements.
- Connect the instrument only to a mains socket with earthing contact.
- Compare the data for the mains voltage at the type plate of the instrument with
your local mains voltage. Never connect the instrument to a power supply
which is different to the data at the instrument's type plate.
Check the instrument and the power cord for damages!
- Do not operate after the equipment malfunctions, or has been damaged in any
manner. Return the instrument to the local dealer or to DESAGA Wiesloch for
examination, repair, electrical or mechanical adjustment.
- After you have connect the device with the mains plug the lamp is ready for
use.
The 366 nm low pressure tube sends UV-B radiation.
The 254 nm low pressure tube sends UV-C radiation.
Note: UV-C radiation damages the eyes!
- Use the supplied protective goggles!
At sensitive persons the UV-C radiation can irritate the skin!
- Use a place for the installation that the device will not irradiate other person
which are working near the instrument. If the instrument is closed (Front lid
and cover plate or Documentation Top) no dangerous UV radiation can come
out of the instrument.
-
1996
Page 35
DESAGA
Operating Instructions CabWIS
SARSTEDT-GRUPPE
2.5.1 Mounting the Documentation Top on the CabUVIS(+)
If you want to mount the Documentation Top
onto the CabUVIS(+) basic instrument you must
first remove the Plexiglas cover plate.
At the Plexiglas cover plate you find two twist
quick locks.
To disassemble the top you must release the two
twist quick locks.
- Press the two twist quick locks down and turn
them 90 degrees counter-clockwise.
- Use a big screw driver or a coin.
- Then you can pull up the top.
Picture: Plexiglas cover plate on the CabUVIS
At the upper
side of the basic instrument you see
..
two screws and four guide holes.
- With the two screws the detachable lateral
the detachable
parts of the CabUVIS (+)'s housing are fixed.
- The four guide holes are be used to hold the
guide leader pins of the tops.
for the guide
leader pins of
the tops.
Picture: Basic instrument view$-omthe top.
Page 36
- Set the Documentation Top on the basic
instrument. Shift the top careful that all the
guide leader pins sit in the guide holes.
- The Documentation Top has a symmetric
design. So it is not important which of the two
short sides are looking to the front.
1996
Operating Instructions CabUVIS
DESAGA
SARSTEDT-GRUPPE
At the cover plate of the
Documentation Top you find two twist
quick locks (analogue to the Plexiglas
cover plate) to fix the top with the basic
instrument.
Four guide holes
at theover-plate
- Press the two twist quick locks down
and turn them 90 degrees clockwise.
- Use a big screw driver or a coin.
- If you want to disassemble the
Documentation Top you must release
the two twist quick locks.
- Turn the two twist quick locks
counter-clockwise.
- Then you can pull up the
Documentation Top.
Picture: CabUVIS+ with Documentation Top and stand.
- Mount the Plexiglas cover plate
before you switch on the instrument.
:.
..
-
&
''
DESAGA
Picture: CabUVIS + basic instrument with
Documentation Top (hinted).
1996
Page 37
DESAGA
Operating Instructions CabUVIS
SARSTEDT-GRUPPE
2.5.2 Mounting the CCD-cameras on the camera holder
In the range of delivery of the Documentation Top is a special CCD-camera holder. You can connect
this camera holder to the cover plate of the Documentation Top's bellow.
You can also mount this CCD-camera holder on the DESAGA Repro Stand (DESAGA no.: 13 1 1 60).
So you have an interface between the CabUVIS and a CCD-camera system (like the DESAGA Video
Documentation Systems or the DESAGA Video Densitometer).
Mount the CCD-camera holder on the Repro Stand.
- Loose the screw to fix the holder with the knob (1). If there is a standard holder mounted to the stand
remove the holder by pulling to the front.
- Insert the holding bolt of the delivered angle into the guide hole and fix the CCD-camera holder with
the knob (1).
- Pay attention to a correct horizontal adjustment of the holder.
1: Knob to ,fix
. ..the camera holder at the stand.
i
2ya): M$&ting position for a DESAGA CCD colour
camera I$@@~controlled (or other CCD-cameras)
3: Mounting $sition for a DESAGA CCD BIW camera
(standard cd@m-or with longer integration time)
%
.
(4: Push-button of the quick connector to f~ the camera
lholderto the cover of the bellow.
15: hole for the end of the camera's lens
1
I
I
Picture: Mounting the CCD-camera holder
- Mount the CCD camera to the assigned position
(2 (a) = mounting position for DESAGA's CCD colour camera manual controlled;
2 (b) = mounting position for DESAGA's CCD colour camera software controlled;
3 = mounting position for DESAGA's B/W CCD camera and B/W CCD camera with longer
integration time).
- In all cases the lens must look through the hole in the angle.
- Fix all cameras from the backside of the angle by using a screw.
Page 3 8
1996
Operating Instructions CabUVIS
DESAGA
SARSTEDT-GRUPPE
- Place the CabUVIS(+) with the Documentation Top on the basic plate of the Repro Stand.
- Adjust the CabUVIS(+) to the correct position below the camera holder.
- You can fix the camera holder to the cover plate of the bellow by using the two quick connectors
(no. 4 at the picture on the page before) at the angle.
- Operate both quick connectors at the same time otherwise the cover plate can tilt. In this case you can
not loose the connection or you destroy the quick connector.
Picture: Operate the quick connector to fithe camera holder with the bellow.
Example with the lens of the B/W camera.
1996
Page 39
DESAGA
Operating Instructions CabUVIS
SARSTEDT-GRUPPE
3 Operating the CabUVIS(+)
3.1 Operating elements of the CabUVIS(+) with Plexiglas cover plate
the upside 254 nm
illumination.
the upside 366 nm
illumination.
Picture: Operating elements of the CabUVIS + with transillumination and Visualisation Top.
The mains connector and the fuse are at the backside of the instrument.
Page 40
1996
Operating Instructions CabUVIS
-
DESAGA
SARSTEDT-GRUPPE
3.2 View an object with vertical illumination (Daylight, 366 nm or 254 nm)
- Open the front door of the CabUVIS(+).
- Place the object you want to view (TLC-plate, gel or somethng else) in the middle position of the
illumination chamber.
- Close the front door of the CabUVIS(+) to prevent the emission of W - C and UV-B radiation and to
prevent a disturbing by external light.
- Then switch on the vertical illumination you need. It is possible to switch on more than only one type
of light (daylight, UV-light 254 nm and UV-light 366 nm) at the same time.
Mark at the switch
VIS
254 nm
366 nm
Type of vertical illumination
Daylight tube
254 nm Hg- low pressure tube
366 nrn Hg- low pressure tube
- If you must adjust the object into the correct position and the 254 nm- or 366 nm Kg- low pressure
tubes are switched on you must protect your skin. Use clothes with long sleeves and gloves.
- Switch off the lamps after viewing the object. Open the front door of the instrument and take the
object out of the CabWIS.
- If possible switch on the 254 nm and 366 nm tubes only for the time of viewing and only when the
front door is been closed. The UV radiation may fade the objects.
3.3 View an object with transillumination (Daylight)
Only with the CabUVIS+ (DESAGA No. 13 13 05) you can view objects with transillumination.
- Open the front door of the CabUVIS+.
- Place the object you want to view (TLC-plate, gel or something else) in the middle position of the
diffusing screen.
- Close the front door of the CabUVIS (+) to prevent a disturbing by external light.
- Switch the daylight transillumination tube on and also off by using the switch with the mark: " .i "
1996
Page 41
DESAGA
Operating Instructions CabUVIS
SARSTEDT-GRUPPE
4 Operating elements of the Documentation Top
cover platedftbqbelloi
.;.A
,
Bellow
I
-e
L-
fi
3
j$+
. " b e
I
L
li=
-1,
4
Back side of the CabWIS
4 x Guide holes for the camera holding angle
Quick-connector guide for the connection camera
angle I bellow
Lens's hole
Cover plate of the bellow
Picture: The Documentation Top of the CabUVIS
Page 42
1996
DESAGA
SARSTEDT-GRUPPE
Operating Instructions CabUVIS
5 Service and maintenance
-
5.1
Cleaning the instrument
Strictly observe these rules for cleaning the instrument. Careless cleaning or
not keeping to the rules may cause malfunctions.
Attention!
- Unplug the instrument!
- Never place equipment in water or other liquids.
- Clean all accessible parts of the housing with a not too wet cloth. You may use
a soap solution.
- In the illumination chamber do only clean the bottom plate and the lid. Do not
try to clean the instrument in the area of the lamps and filters.
- Remove the Plexiglas cover plate if you want to clean it at the inner side.
- Never use abrasive media, aggressive cleaning agents or acetone or other
organic liquids, except alcohol. In extreme cases mild alcohol may be used.
Rinse and dry thoroughly.
For disinfecting you may use the following watery mixture:
100 g of this mixture contain in water:
25 g Ethanol 96%
35 g I-Propanol
0,l g Glyoxale.
Let this mixture act for 5 to 30 minutes. Clean with a cloth moistened with water
and soap.
-
1996
Page 43
DESAGA
Operating Instructions CabUVIS
SARSTEDTGRUPPE
5.2 Exchanging the tubes, the starter and the filters
The tubes, starters and filters are working parts. If they are defect you must exchange them.
Only persons with special knowledge shall open the instrument to
exchange the filters, the lamps or the starter.
Pay attention to the current regulations in your country.
Attention!
After some hundred operating hours the filters become a dim surface. It depends on the UV-radiation
and on the humidity. If the filter's surface is dim you must exchange the filter.
The live time of the tubes is 5000 to 7500 hours. If you switch on and off the tubes very often, the live
time may decrease.
- Disconnect the instrument from the mains.
- If you want to exchange the tubes, starter or the filters
for the vertical illumination you must disassemble the
Documentation Top or the Plexiglas cover plate.
- Open the two twist quick locks at the top
Turn the two twist quick locks clockwise and pull up
the top. Use a big screw driver or a coin.
- The lateral parts of the housing are fixed to the cabinet
with screws one screw for each housing's side.
- Remove the screws lift and swing out the lateral parts
to the left or right side.
- Put down the lateral parts of the housing beside the
instrument.
- Sometimes you must loose the fixed connection wires
at the black plastic parts.
At the inner side of the lateral housing's parts you find
the four starter. Under the black cover plate - you can
remove it by loosing four screws - sits the filter and the
tubes (see picture on the next side).
- If you move the filter a little bit and then press apart the holding metal sheet carefully you can take
out the filter.
Note: The new filters and tubes you want to set in must be clean. Use a cloth to set in the parts.
Pollution (for example from fingerprints) can bum-in and decrease the live time of the tubes and filters.
Page 44
1996
DESAGA
SARSTEDT-GRUPPE
Operating Instructions CabUVIS
Connection wire for the tubes.
7
4 x Starter: Each starter and the tube under
this starter are one unit.
Took-out the starter by turning clockwise
and pulling up.
Special filter. Under this filter you find the
366 nm- and the 254 nm tubes. You can
take-out the filter and the tube after you
have removed the four screws of the cover
plate and the cover plate.
Daylight tube. Remove the cover plate by
removing the four screws at the cover
plate. Took-out the filter. Then you can
turn the tubes a quarter turn. Remove the
tubes by pulling up the tubes.
Ground connection. All metal parts of
the housing are connected with
ground by yellow-green wires.
A
Cover plate.
The CabUVIS+ has - additional to the tubes, starter and filters of the vertical illumination units one tube and one starter for the transillurnination.
The following procedure allows to exchange these parts:
- Disconnect the instrument from the mains.
- Turn the CabUVIS + that you look at the back side of the housing.
- Remove the both screws at the lower range of the
/screws to fix the drawer
1
u --
back side of the instrument.
- You can pull-out the bottom compartment like a
drawer.
- In this drawer you find the starter and the tube for
the transillumination.
Note: The tube for the transillumination is a
special one with a reflector line (see ordering
information).
- Insert the new tube and turn it 90 degree.
The reflector line at the tube must show into the
upper direction after you have inserted and fixed
the tube,
1996
Page 45
DESAGA
Operating Instructions CabUVIS
SARSTEDT-GRUPPE
5.3 Electric circuit diagram
- Only persons with special electric knowledge shall open the lateral parts
[A]
of the housing and the drawer at the back side.
- Disconnect the instrument from the mains before you start to open the
Attention!
instrument.
- Only DESAGA or the service department of your local dealer may
repair the instrument in the time of guarantee.
- In case of improper management or improper reparation the guarantee
for the instruments ends.
Option: CabUVIS+
Nek: 230V-
Picture: Electric diagram of the CabUVIS+, 230 V, with transillumination
Page 46
1996
DESAGA
SARSTEDT-GRUPPE
Operating Instructions CabUVIS
- -~
5.4 Service address
If you have problems with the device or technical questions or if the instrument is not working
correctly call the Service Department of your local dealer or DESAGA in Wiesloch.
If you call for spare parts or service questions we need the type and the serial number of the
instrument.
[a]
Service!
DESAGA GmbH
Service Department
In den Ziegelwiesen 1 - 7
Tel.:
Telefax:
+ 49 (0) 6222 I 92 88-0
+ 49 (0) 6222 192 88 92
69168 Wiesloch
Germany
6 Ordering information
Device 1 Accessories
CabUVIS +, 230 V, UV- Analyzing lamp with daylight transmission
CabUVIS +, 110 V, UV- Analyzing lamp with daylight transmission
Documentation Top for CabWIS
Hg low-pressure tube 366 nm, 8 W
Hg low-pressure tube 254 nm, 8 W
Daylight-tube for vertical illumination:
Daylight-tube, 8 W
Day light-tube for day light transmission:
Daylight-tube, 8 W transmission for CabUVIS
W-Filter 254 nrn for CabUVIS
DESAGA no.
13 13 05
13 13 06
I3 13 12
13 11 21
13 11 22
13 11 20
13 11 23
13 11 44
Other W-lamps from DESAGA:
Part I Device
Analyzing Lamp MinUVIS, 230V
HP-UVIS, UV-Cabinet, 230V
DESAGA no.
13 12 00
13 12 20
If you have any questions to other DESAGA UV-lamps, or to the complete DESAGA program please
contact your local dealer or the Export Department of DESAGA in Wiesloch (Germany).
1996
Page 47
DESAGA
Operating Instructions CabUVIS
SARSTEDT-GRUPPE
7 Put out of action / Waste disposal
Important:
To prevent environmental pollution please contact a firm with specialised
knowledge or your local refuse collection (refuse service).
Handle all substances and materials you use with the CabUVIS, 230 V
professionally and properly.
These Operating Instructions are made of:
- Paper.
- The coverfoil and the back (bookback) is made of PVC.
- Separate the paper part from the PVC part by stripping the bookback.
Page 48
1996