1
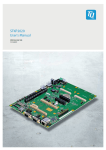
MVME2500
Installation and Use
P/N: 6806800L01L
April 2015
©
Copyright 2015 Artesyn Embedded Technologies, Inc.
All rights reserved.
Trademarks
Artesyn Embedded Technologies, Artesyn and the Artesyn Embedded Technologies logo are trademarks and service marks of
Artesyn Embedded Technologies, Inc.© 2015 Artesyn Embedded Technologies, Inc. All other product or service names are the
property of their respective owners.
Intel® is a trademark or registered trademark of Intel Corporation or its subsidiaries in the United States and other countries.
Java™ and all other Java-based marks are trademarks or registered trademarks of Oracle America, Inc. in the U.S. and other countries.
Microsoft®, Windows® and Windows Me® are registered trademarks of Microsoft Corporation; and Windows XP™ is a trademark of
Microsoft Corporation.
PICMG®, CompactPCI®, AdvancedTCA™ and the PICMG, CompactPCI and AdvancedTCA logos are registered trademarks of the PCI
Industrial Computer Manufacturers Group.
UNIX® is a registered trademark of The Open Group in the United States and other countries.
Notice
While reasonable efforts have been made to assure the accuracy of this document, Artesyn assumes no liability resulting from any
omissions in this document, or from the use of the information obtained therein. Artesyn reserves the right to revise this document
and to make changes from time to time in the content hereof without obligation of Artesyn to notify any person of such revision or
changes.
Electronic versions of this material may be read online, downloaded for personal use, or referenced in another document as a URL to
an Artesyn website. The text itself may not be published commercially in print or electronic form, edited, translated, or otherwise
altered without the permission of Artesyn.
It is possible that this publication may contain reference to or information about Artesyn products (machines and programs),
programming, or services that are not available in your country. Such references or information must not be construed to mean that
Artesyn intends to announce such Artesyn products, programming, or services in your country.
Limited and Restricted Rights Legend
If the documentation contained herein is supplied, directly or indirectly, to the U.S. Government, the following notice shall apply
unless otherwise agreed to in writing by Artesyn.
Use, duplication, or disclosure by the Government is subject to restrictions as set forth in subparagraph (b)(3) of the Rights in
Technical Data clause at DFARS 252.227-7013 (Nov. 1995) and of the Rights in Noncommercial Computer Software and
Documentation clause at DFARS 252.227-7014 (Jun. 1995).
Contact Address
Artesyn Embedded Technologies
Artesyn Embedded Technologies
Marketing Communications
Lilienthalstr. 17-19
2900 S. Diablo Way, Suite 190
85579 Neubiberg/Munich
Tempe, Arizona 85282
Germany
Contents
About this Manual . . . . . . . . . . . . . . . . . . . . . . . . . . . . . . . . . . . . . . . . . . . . . . . . . . . . . . . . . . . . . . . . . . . . . . . 13
Safety Notes . . . . . . . . . . . . . . . . . . . . . . . . . . . . . . . . . . . . . . . . . . . . . . . . . . . . . . . . . . . . . . . . . . . . . . . . . . . . . 19
Sicherheitshinweise . . . . . . . . . . . . . . . . . . . . . . . . . . . . . . . . . . . . . . . . . . . . . . . . . . . . . . . . . . . . . . . . . . . . . . 23
1
Introduction . . . . . . . . . . . . . . . . . . . . . . . . . . . . . . . . . . . . . . . . . . . . . . . . . . . . . . . . . . . . . . . . . . . . . . . . . 29
1.1
1.2
1.3
1.4
1.5
2
Hardware Preparation and Installation . . . . . . . . . . . . . . . . . . . . . . . . . . . . . . . . . . . . . . . . . . . . . . . . . 37
2.1
2.2
2.3
2.4
2.5
2.6
2.7
3
Overview . . . . . . . . . . . . . . . . . . . . . . . . . . . . . . . . . . . . . . . . . . . . . . . . . . . . . . . . . . . . . . . . . . . . . . . . . . 29
Standard Compliances . . . . . . . . . . . . . . . . . . . . . . . . . . . . . . . . . . . . . . . . . . . . . . . . . . . . . . . . . . . . . . 31
Mechanical Data . . . . . . . . . . . . . . . . . . . . . . . . . . . . . . . . . . . . . . . . . . . . . . . . . . . . . . . . . . . . . . . . . . . 33
Ordering Information . . . . . . . . . . . . . . . . . . . . . . . . . . . . . . . . . . . . . . . . . . . . . . . . . . . . . . . . . . . . . . . 33
Product Identification . . . . . . . . . . . . . . . . . . . . . . . . . . . . . . . . . . . . . . . . . . . . . . . . . . . . . . . . . . . . . . . 35
Overview . . . . . . . . . . . . . . . . . . . . . . . . . . . . . . . . . . . . . . . . . . . . . . . . . . . . . . . . . . . . . . . . . . . . . . . . . . 37
Unpacking and Inspecting the Board . . . . . . . . . . . . . . . . . . . . . . . . . . . . . . . . . . . . . . . . . . . . . . . . . . 38
Requirements . . . . . . . . . . . . . . . . . . . . . . . . . . . . . . . . . . . . . . . . . . . . . . . . . . . . . . . . . . . . . . . . . . . . . . 39
2.3.1 Environmental Requirements. . . . . . . . . . . . . . . . . . . . . . . . . . . . . . . . . . . . . . . . . . . . . . . . . . 39
2.3.2 Power Requirements . . . . . . . . . . . . . . . . . . . . . . . . . . . . . . . . . . . . . . . . . . . . . . . . . . . . . . . . . 40
2.3.3 Equipment Requirements . . . . . . . . . . . . . . . . . . . . . . . . . . . . . . . . . . . . . . . . . . . . . . . . . . . . . 42
Configuring the Board . . . . . . . . . . . . . . . . . . . . . . . . . . . . . . . . . . . . . . . . . . . . . . . . . . . . . . . . . . . . . . 42
Installing Accessories . . . . . . . . . . . . . . . . . . . . . . . . . . . . . . . . . . . . . . . . . . . . . . . . . . . . . . . . . . . . . . . 43
2.5.1 Rear Transition Module . . . . . . . . . . . . . . . . . . . . . . . . . . . . . . . . . . . . . . . . . . . . . . . . . . . . . . . 43
2.5.2 PMC/XMC Support . . . . . . . . . . . . . . . . . . . . . . . . . . . . . . . . . . . . . . . . . . . . . . . . . . . . . . . . . . . 45
Installing and Removing the Board . . . . . . . . . . . . . . . . . . . . . . . . . . . . . . . . . . . . . . . . . . . . . . . . . . . . 46
Completing the Installation . . . . . . . . . . . . . . . . . . . . . . . . . . . . . . . . . . . . . . . . . . . . . . . . . . . . . . . . . . 48
Controls, LEDs, and Connectors . . . . . . . . . . . . . . . . . . . . . . . . . . . . . . . . . . . . . . . . . . . . . . . . . . . . . . . . 49
3.1
3.2
3.3
Board Layout . . . . . . . . . . . . . . . . . . . . . . . . . . . . . . . . . . . . . . . . . . . . . . . . . . . . . . . . . . . . . . . . . . . . . . . 49
Front Panel . . . . . . . . . . . . . . . . . . . . . . . . . . . . . . . . . . . . . . . . . . . . . . . . . . . . . . . . . . . . . . . . . . . . . . . . 50
3.2.1 Reset Switch. . . . . . . . . . . . . . . . . . . . . . . . . . . . . . . . . . . . . . . . . . . . . . . . . . . . . . . . . . . . . . . . . 51
LEDs . . . . . . . . . . . . . . . . . . . . . . . . . . . . . . . . . . . . . . . . . . . . . . . . . . . . . . . . . . . . . . . . . . . . . . . . . . . . . . 51
3.3.1 Front Panel LEDs . . . . . . . . . . . . . . . . . . . . . . . . . . . . . . . . . . . . . . . . . . . . . . . . . . . . . . . . . . . . . 51
MVME2500 Installation and Use (6806800L01L)
3
Contents
Contents
3.4
3.5
4
Functional Description . . . . . . . . . . . . . . . . . . . . . . . . . . . . . . . . . . . . . . . . . . . . . . . . . . . . . . . . . . . . . . . . 77
4.1
4.2
4
3.3.2 On-board LEDs. . . . . . . . . . . . . . . . . . . . . . . . . . . . . . . . . . . . . . . . . . . . . . . . . . . . . . . . . . . . . . . 53
Connectors . . . . . . . . . . . . . . . . . . . . . . . . . . . . . . . . . . . . . . . . . . . . . . . . . . . . . . . . . . . . . . . . . . . . . . . . 53
3.4.1 Front Panel Connectors . . . . . . . . . . . . . . . . . . . . . . . . . . . . . . . . . . . . . . . . . . . . . . . . . . . . . . . 54
3.4.1.1 RJ45 with Integrated Magnetics (J1) . . . . . . . . . . . . . . . . . . . . . . . . . . . . . . . . . . . 54
3.4.1.2 Front Panel Serial Port (J4) . . . . . . . . . . . . . . . . . . . . . . . . . . . . . . . . . . . . . . . . . . . 55
3.4.1.3 USB Connector (J5) . . . . . . . . . . . . . . . . . . . . . . . . . . . . . . . . . . . . . . . . . . . . . . . . . . 56
3.4.1.4 VMEBus P1 Connector . . . . . . . . . . . . . . . . . . . . . . . . . . . . . . . . . . . . . . . . . . . . . . . 56
3.4.1.5 VMEBus P2 Connector . . . . . . . . . . . . . . . . . . . . . . . . . . . . . . . . . . . . . . . . . . . . . . . 58
3.4.2 On-board Connectors . . . . . . . . . . . . . . . . . . . . . . . . . . . . . . . . . . . . . . . . . . . . . . . . . . . . . . . . 59
3.4.2.1 Flash Program Connector (P7) . . . . . . . . . . . . . . . . . . . . . . . . . . . . . . . . . . . . . . . . 59
3.4.2.2 SATA Connector (J3) . . . . . . . . . . . . . . . . . . . . . . . . . . . . . . . . . . . . . . . . . . . . . . . . 60
3.4.2.3 PMC Connectors . . . . . . . . . . . . . . . . . . . . . . . . . . . . . . . . . . . . . . . . . . . . . . . . . . . . 61
3.4.2.4 JTAG Connector (P6) . . . . . . . . . . . . . . . . . . . . . . . . . . . . . . . . . . . . . . . . . . . . . . . . 66
3.4.2.5 COP Connector (P50) . . . . . . . . . . . . . . . . . . . . . . . . . . . . . . . . . . . . . . . . . . . . . . . . 68
3.4.2.6 SD Connector (J2) . . . . . . . . . . . . . . . . . . . . . . . . . . . . . . . . . . . . . . . . . . . . . . . . . . . 69
3.4.2.7 XMC Connector (XJ2) . . . . . . . . . . . . . . . . . . . . . . . . . . . . . . . . . . . . . . . . . . . . . . . . 69
3.4.2.8 Miscellaneous P2020 Debug Connectors . . . . . . . . . . . . . . . . . . . . . . . . . . . . . . 70
Switches . . . . . . . . . . . . . . . . . . . . . . . . . . . . . . . . . . . . . . . . . . . . . . . . . . . . . . . . . . . . . . . . . . . . . . . . . . 71
3.5.1 Geographical Address Switch (S1) . . . . . . . . . . . . . . . . . . . . . . . . . . . . . . . . . . . . . . . . . . . . . . 71
3.5.2 SMT Configuration Switch (S2). . . . . . . . . . . . . . . . . . . . . . . . . . . . . . . . . . . . . . . . . . . . . . . . . 73
Block Diagram . . . . . . . . . . . . . . . . . . . . . . . . . . . . . . . . . . . . . . . . . . . . . . . . . . . . . . . . . . . . . . . . . . . . . 77
Chipset . . . . . . . . . . . . . . . . . . . . . . . . . . . . . . . . . . . . . . . . . . . . . . . . . . . . . . . . . . . . . . . . . . . . . . . . . . . . 78
4.2.1 e500 Processor Core. . . . . . . . . . . . . . . . . . . . . . . . . . . . . . . . . . . . . . . . . . . . . . . . . . . . . . . . . . 78
4.2.2 Integrated Memory Controller . . . . . . . . . . . . . . . . . . . . . . . . . . . . . . . . . . . . . . . . . . . . . . . . . 79
4.2.3 PCI Express Interface . . . . . . . . . . . . . . . . . . . . . . . . . . . . . . . . . . . . . . . . . . . . . . . . . . . . . . . . . 79
4.2.4 Local Bus Controller (LBC) . . . . . . . . . . . . . . . . . . . . . . . . . . . . . . . . . . . . . . . . . . . . . . . . . . . . . 80
4.2.5 Secure Digital Hub Controller (SDHC). . . . . . . . . . . . . . . . . . . . . . . . . . . . . . . . . . . . . . . . . . . 80
4.2.6 I2C Interface. . . . . . . . . . . . . . . . . . . . . . . . . . . . . . . . . . . . . . . . . . . . . . . . . . . . . . . . . . . . . . . . . 80
4.2.7 USB Interface . . . . . . . . . . . . . . . . . . . . . . . . . . . . . . . . . . . . . . . . . . . . . . . . . . . . . . . . . . . . . . . . 80
4.2.8 DUART. . . . . . . . . . . . . . . . . . . . . . . . . . . . . . . . . . . . . . . . . . . . . . . . . . . . . . . . . . . . . . . . . . . . . . 80
4.2.9 DMA Controller . . . . . . . . . . . . . . . . . . . . . . . . . . . . . . . . . . . . . . . . . . . . . . . . . . . . . . . . . . . . . . 81
4.2.10 Enhanced Three-Speed Ethernet Controller (eTSEC) . . . . . . . . . . . . . . . . . . . . . . . . . . . . . . 81
4.2.11 General Purpose I/O (GPIO). . . . . . . . . . . . . . . . . . . . . . . . . . . . . . . . . . . . . . . . . . . . . . . . . . . . 81
MVME2500 Installation and Use (6806800L01L)
Contents
4.3
4.4
4.5
4.6
4.7
4.8
4.9
4.10
4.11
4.12
4.13
4.14
4.15
4.16
4.17
4.18
4.19
4.20
4.2.12 Security Engine (SEC) 3.1. . . . . . . . . . . . . . . . . . . . . . . . . . . . . . . . . . . . . . . . . . . . . . . . . . . . . . 81
4.2.13 Common On-Chip Processor (COP). . . . . . . . . . . . . . . . . . . . . . . . . . . . . . . . . . . . . . . . . . . . . 82
4.2.14 P20x0 Hardware Configuration Pins . . . . . . . . . . . . . . . . . . . . . . . . . . . . . . . . . . . . . . . . . . . . 82
System Memory . . . . . . . . . . . . . . . . . . . . . . . . . . . . . . . . . . . . . . . . . . . . . . . . . . . . . . . . . . . . . . . . . . . . 82
Timers . . . . . . . . . . . . . . . . . . . . . . . . . . . . . . . . . . . . . . . . . . . . . . . . . . . . . . . . . . . . . . . . . . . . . . . . . . . . 82
4.4.1 Real Time Clock . . . . . . . . . . . . . . . . . . . . . . . . . . . . . . . . . . . . . . . . . . . . . . . . . . . . . . . . . . . . . . 82
4.4.2 Internal Timer . . . . . . . . . . . . . . . . . . . . . . . . . . . . . . . . . . . . . . . . . . . . . . . . . . . . . . . . . . . . . . . 83
4.4.3 Watchdog Timer . . . . . . . . . . . . . . . . . . . . . . . . . . . . . . . . . . . . . . . . . . . . . . . . . . . . . . . . . . . . . 83
4.4.4 FPGA Tick Timer . . . . . . . . . . . . . . . . . . . . . . . . . . . . . . . . . . . . . . . . . . . . . . . . . . . . . . . . . . . . . 83
Ethernet Interfaces . . . . . . . . . . . . . . . . . . . . . . . . . . . . . . . . . . . . . . . . . . . . . . . . . . . . . . . . . . . . . . . . . 83
SPI Bus Interface . . . . . . . . . . . . . . . . . . . . . . . . . . . . . . . . . . . . . . . . . . . . . . . . . . . . . . . . . . . . . . . . . . . . 84
4.6.1 SPI Flash Memory . . . . . . . . . . . . . . . . . . . . . . . . . . . . . . . . . . . . . . . . . . . . . . . . . . . . . . . . . . . . 84
4.6.2 SPI Flash Programming . . . . . . . . . . . . . . . . . . . . . . . . . . . . . . . . . . . . . . . . . . . . . . . . . . . . . . . 84
4.6.3 Firmware Redundancy . . . . . . . . . . . . . . . . . . . . . . . . . . . . . . . . . . . . . . . . . . . . . . . . . . . . . . . . 85
4.6.4 Crisis Recovery. . . . . . . . . . . . . . . . . . . . . . . . . . . . . . . . . . . . . . . . . . . . . . . . . . . . . . . . . . . . . . . 87
Front UART Control . . . . . . . . . . . . . . . . . . . . . . . . . . . . . . . . . . . . . . . . . . . . . . . . . . . . . . . . . . . . . . . . . 87
Rear UART Control . . . . . . . . . . . . . . . . . . . . . . . . . . . . . . . . . . . . . . . . . . . . . . . . . . . . . . . . . . . . . . . . . . 88
PMC/XMC Sites . . . . . . . . . . . . . . . . . . . . . . . . . . . . . . . . . . . . . . . . . . . . . . . . . . . . . . . . . . . . . . . . . . . . . 88
4.9.1 PMC Add-on Card . . . . . . . . . . . . . . . . . . . . . . . . . . . . . . . . . . . . . . . . . . . . . . . . . . . . . . . . . . . . 89
4.9.2 XMC Add-on Card . . . . . . . . . . . . . . . . . . . . . . . . . . . . . . . . . . . . . . . . . . . . . . . . . . . . . . . . . . . . 89
SATA Interface . . . . . . . . . . . . . . . . . . . . . . . . . . . . . . . . . . . . . . . . . . . . . . . . . . . . . . . . . . . . . . . . . . . . . 90
VME Support . . . . . . . . . . . . . . . . . . . . . . . . . . . . . . . . . . . . . . . . . . . . . . . . . . . . . . . . . . . . . . . . . . . . . . . 90
4.11.1 Tsi148 VME Controller . . . . . . . . . . . . . . . . . . . . . . . . . . . . . . . . . . . . . . . . . . . . . . . . . . . . . . . . 90
USB . . . . . . . . . . . . . . . . . . . . . . . . . . . . . . . . . . . . . . . . . . . . . . . . . . . . . . . . . . . . . . . . . . . . . . . . . . . . . . . 90
I2C Devices . . . . . . . . . . . . . . . . . . . . . . . . . . . . . . . . . . . . . . . . . . . . . . . . . . . . . . . . . . . . . . . . . . . . . . . . 91
Reset/Control FPGA . . . . . . . . . . . . . . . . . . . . . . . . . . . . . . . . . . . . . . . . . . . . . . . . . . . . . . . . . . . . . . . . . 91
Power Management . . . . . . . . . . . . . . . . . . . . . . . . . . . . . . . . . . . . . . . . . . . . . . . . . . . . . . . . . . . . . . . . 91
4.15.1 On-board Voltage Supply Requirement . . . . . . . . . . . . . . . . . . . . . . . . . . . . . . . . . . . . . . . . . 92
4.15.2 Power Up Sequencing Requirements . . . . . . . . . . . . . . . . . . . . . . . . . . . . . . . . . . . . . . . . . . . 92
Clock Structure . . . . . . . . . . . . . . . . . . . . . . . . . . . . . . . . . . . . . . . . . . . . . . . . . . . . . . . . . . . . . . . . . . . . . 94
Reset Structure . . . . . . . . . . . . . . . . . . . . . . . . . . . . . . . . . . . . . . . . . . . . . . . . . . . . . . . . . . . . . . . . . . . . . 94
4.17.1 Reset Sequence . . . . . . . . . . . . . . . . . . . . . . . . . . . . . . . . . . . . . . . . . . . . . . . . . . . . . . . . . . . . . . 95
Thermal Management . . . . . . . . . . . . . . . . . . . . . . . . . . . . . . . . . . . . . . . . . . . . . . . . . . . . . . . . . . . . . . 97
Real-Time Clock Battery . . . . . . . . . . . . . . . . . . . . . . . . . . . . . . . . . . . . . . . . . . . . . . . . . . . . . . . . . . . . . 97
Debugging Support . . . . . . . . . . . . . . . . . . . . . . . . . . . . . . . . . . . . . . . . . . . . . . . . . . . . . . . . . . . . . . . . . 97
4.20.1 POST Code Indicator. . . . . . . . . . . . . . . . . . . . . . . . . . . . . . . . . . . . . . . . . . . . . . . . . . . . . . . . . . 98
MVME2500 Installation and Use (6806800L01L)
5
Contents
Contents
4.20.2 JTAG Chain and Board . . . . . . . . . . . . . . . . . . . . . . . . . . . . . . . . . . . . . . . . . . . . . . . . . . . . . . . . 98
4.20.3 Custom Debugging . . . . . . . . . . . . . . . . . . . . . . . . . . . . . . . . . . . . . . . . . . . . . . . . . . . . . . . . . . 99
4.21 Rear Transition Module (RTM) . . . . . . . . . . . . . . . . . . . . . . . . . . . . . . . . . . . . . . . . . . . . . . . . . . . . . . . . 99
5
Memory Maps and Registers. . . . . . . . . . . . . . . . . . . . . . . . . . . . . . . . . . . . . . . . . . . . . . . . . . . . . . . . . . 101
5.1
5.2
5.3
5.4
5.5
5.6
6
Overview . . . . . . . . . . . . . . . . . . . . . . . . . . . . . . . . . . . . . . . . . . . . . . . . . . . . . . . . . . . . . . . . . . . . . . . . . 101
Memory Map . . . . . . . . . . . . . . . . . . . . . . . . . . . . . . . . . . . . . . . . . . . . . . . . . . . . . . . . . . . . . . . . . . . . . 101
Flash Memory Map . . . . . . . . . . . . . . . . . . . . . . . . . . . . . . . . . . . . . . . . . . . . . . . . . . . . . . . . . . . . . . . . 102
Linux Devices Memory Map . . . . . . . . . . . . . . . . . . . . . . . . . . . . . . . . . . . . . . . . . . . . . . . . . . . . . . . . . 102
Programmable Logic Device (PLD) Registers . . . . . . . . . . . . . . . . . . . . . . . . . . . . . . . . . . . . . . . . . . 104
5.5.1 PLD Revision Register . . . . . . . . . . . . . . . . . . . . . . . . . . . . . . . . . . . . . . . . . . . . . . . . . . . . . . . . 104
5.5.2 PLD Year Register . . . . . . . . . . . . . . . . . . . . . . . . . . . . . . . . . . . . . . . . . . . . . . . . . . . . . . . . . . . 104
5.5.3 PLD Month Register . . . . . . . . . . . . . . . . . . . . . . . . . . . . . . . . . . . . . . . . . . . . . . . . . . . . . . . . . 105
5.5.4 PLD Day Register . . . . . . . . . . . . . . . . . . . . . . . . . . . . . . . . . . . . . . . . . . . . . . . . . . . . . . . . . . . . 105
5.5.5 PLD Sequence Register . . . . . . . . . . . . . . . . . . . . . . . . . . . . . . . . . . . . . . . . . . . . . . . . . . . . . . 105
5.5.6 PLD Power Good Monitor Register . . . . . . . . . . . . . . . . . . . . . . . . . . . . . . . . . . . . . . . . . . . . 106
5.5.7 PLD LED Control Register. . . . . . . . . . . . . . . . . . . . . . . . . . . . . . . . . . . . . . . . . . . . . . . . . . . . . 107
5.5.8 PLD PCI/PMC/XMC Monitor Register. . . . . . . . . . . . . . . . . . . . . . . . . . . . . . . . . . . . . . . . . . . 108
5.5.9 PLD U-Boot and TSI Monitor Register . . . . . . . . . . . . . . . . . . . . . . . . . . . . . . . . . . . . . . . . . . 109
5.5.10 PLD Boot Bank Register . . . . . . . . . . . . . . . . . . . . . . . . . . . . . . . . . . . . . . . . . . . . . . . . . . . . . . 109
5.5.11 PLD Write Protect and I2C Debug Register . . . . . . . . . . . . . . . . . . . . . . . . . . . . . . . . . . . . . 110
5.5.12 PLD Test Register 1 . . . . . . . . . . . . . . . . . . . . . . . . . . . . . . . . . . . . . . . . . . . . . . . . . . . . . . . . . . 112
5.5.13 PLD Test Register 2 . . . . . . . . . . . . . . . . . . . . . . . . . . . . . . . . . . . . . . . . . . . . . . . . . . . . . . . . . . 112
5.5.14 PLD GPIO2 Interrupt Register . . . . . . . . . . . . . . . . . . . . . . . . . . . . . . . . . . . . . . . . . . . . . . . . . 113
5.5.15 PLD Shutdown and Reset Control and Reset Reason Register . . . . . . . . . . . . . . . . . . . . . 114
5.5.16 PLD Watchdog Timer Refresh Register . . . . . . . . . . . . . . . . . . . . . . . . . . . . . . . . . . . . . . . . . 115
5.5.17 PLD Watchdog Control Register. . . . . . . . . . . . . . . . . . . . . . . . . . . . . . . . . . . . . . . . . . . . . . . 116
5.5.18 PLD Watchdog Timer Count Register . . . . . . . . . . . . . . . . . . . . . . . . . . . . . . . . . . . . . . . . . . 116
External Timer Registers . . . . . . . . . . . . . . . . . . . . . . . . . . . . . . . . . . . . . . . . . . . . . . . . . . . . . . . . . . . . 117
5.6.1 Prescaler Register . . . . . . . . . . . . . . . . . . . . . . . . . . . . . . . . . . . . . . . . . . . . . . . . . . . . . . . . . . . 117
5.6.2 Control Registers. . . . . . . . . . . . . . . . . . . . . . . . . . . . . . . . . . . . . . . . . . . . . . . . . . . . . . . . . . . . 118
5.6.3 Compare High and Low Word Registers . . . . . . . . . . . . . . . . . . . . . . . . . . . . . . . . . . . . . . . . 119
5.6.4 Counter High and Low Word Registers . . . . . . . . . . . . . . . . . . . . . . . . . . . . . . . . . . . . . . . . . 120
MVME2500 Installation and Use (6806800L01L)
Contents
6
Boot System . . . . . . . . . . . . . . . . . . . . . . . . . . . . . . . . . . . . . . . . . . . . . . . . . . . . . . . . . . . . . . . . . . . . . . . . 121
6.1
6.2
6.3
6.4
6.5
6.6
7
Programming Model. . . . . . . . . . . . . . . . . . . . . . . . . . . . . . . . . . . . . . . . . . . . . . . . . . . . . . . . . . . . . . . . . 131
7.1
7.2
7.3
7.4
7.5
7.6
7.7
A
Overview . . . . . . . . . . . . . . . . . . . . . . . . . . . . . . . . . . . . . . . . . . . . . . . . . . . . . . . . . . . . . . . . . . . . . . . . . 121
Accessing U-Boot . . . . . . . . . . . . . . . . . . . . . . . . . . . . . . . . . . . . . . . . . . . . . . . . . . . . . . . . . . . . . . . . . . 121
Boot Options . . . . . . . . . . . . . . . . . . . . . . . . . . . . . . . . . . . . . . . . . . . . . . . . . . . . . . . . . . . . . . . . . . . . . . 122
6.3.1 Booting from a Network . . . . . . . . . . . . . . . . . . . . . . . . . . . . . . . . . . . . . . . . . . . . . . . . . . . . . 122
6.3.2 Booting from an Optional SATA Drive. . . . . . . . . . . . . . . . . . . . . . . . . . . . . . . . . . . . . . . . . . 123
6.3.3 Booting from a USB Drive . . . . . . . . . . . . . . . . . . . . . . . . . . . . . . . . . . . . . . . . . . . . . . . . . . . . 123
6.3.4 Booting from an SD Card . . . . . . . . . . . . . . . . . . . . . . . . . . . . . . . . . . . . . . . . . . . . . . . . . . . . . 124
6.3.5 Booting VxWorks Through the Network. . . . . . . . . . . . . . . . . . . . . . . . . . . . . . . . . . . . . . . . 124
Using the Persistent Memory Feature . . . . . . . . . . . . . . . . . . . . . . . . . . . . . . . . . . . . . . . . . . . . . . . . 125
MVME2500 Specific U-Boot Commands . . . . . . . . . . . . . . . . . . . . . . . . . . . . . . . . . . . . . . . . . . . . . . 126
Updating U-Boot . . . . . . . . . . . . . . . . . . . . . . . . . . . . . . . . . . . . . . . . . . . . . . . . . . . . . . . . . . . . . . . . . . 128
Overview . . . . . . . . . . . . . . . . . . . . . . . . . . . . . . . . . . . . . . . . . . . . . . . . . . . . . . . . . . . . . . . . . . . . . . . . . 131
Reset Configuration . . . . . . . . . . . . . . . . . . . . . . . . . . . . . . . . . . . . . . . . . . . . . . . . . . . . . . . . . . . . . . . 131
Interrupt Controller . . . . . . . . . . . . . . . . . . . . . . . . . . . . . . . . . . . . . . . . . . . . . . . . . . . . . . . . . . . . . . . . 135
I2C Bus Device Addressing . . . . . . . . . . . . . . . . . . . . . . . . . . . . . . . . . . . . . . . . . . . . . . . . . . . . . . . . . . 136
Ethernet PHY Address . . . . . . . . . . . . . . . . . . . . . . . . . . . . . . . . . . . . . . . . . . . . . . . . . . . . . . . . . . . . . . 136
Other Software Considerations . . . . . . . . . . . . . . . . . . . . . . . . . . . . . . . . . . . . . . . . . . . . . . . . . . . . . . 137
7.6.1 MRAM . . . . . . . . . . . . . . . . . . . . . . . . . . . . . . . . . . . . . . . . . . . . . . . . . . . . . . . . . . . . . . . . . . . . . 137
7.6.2 Real Time Clock . . . . . . . . . . . . . . . . . . . . . . . . . . . . . . . . . . . . . . . . . . . . . . . . . . . . . . . . . . . . . 137
7.6.3 Quad UART. . . . . . . . . . . . . . . . . . . . . . . . . . . . . . . . . . . . . . . . . . . . . . . . . . . . . . . . . . . . . . . . . 138
7.6.4 LBC Timing Parameters . . . . . . . . . . . . . . . . . . . . . . . . . . . . . . . . . . . . . . . . . . . . . . . . . . . . . . 138
Clock Distribution . . . . . . . . . . . . . . . . . . . . . . . . . . . . . . . . . . . . . . . . . . . . . . . . . . . . . . . . . . . . . . . . . 139
7.7.1 System Clock . . . . . . . . . . . . . . . . . . . . . . . . . . . . . . . . . . . . . . . . . . . . . . . . . . . . . . . . . . . . . . . 140
7.7.2 Real Time Clock Input. . . . . . . . . . . . . . . . . . . . . . . . . . . . . . . . . . . . . . . . . . . . . . . . . . . . . . . . 141
7.7.3 Local Bus Controller Clock Divisor . . . . . . . . . . . . . . . . . . . . . . . . . . . . . . . . . . . . . . . . . . . . . 141
Replacing the Battery . . . . . . . . . . . . . . . . . . . . . . . . . . . . . . . . . . . . . . . . . . . . . . . . . . . . . . . . . . . . . . . . 143
A.1
Replacing the Battery . . . . . . . . . . . . . . . . . . . . . . . . . . . . . . . . . . . . . . . . . . . . . . . . . . . . . . . . . . . . . . 143
MVME2500 Installation and Use (6806800L01L)
7
Contents
Contents
B
Related Documentation . . . . . . . . . . . . . . . . . . . . . . . . . . . . . . . . . . . . . . . . . . . . . . . . . . . . . . . . . . . . . . 147
B.1
B.2
B.3
8
Artesyn Embedded Technologies - Embedded Computing Documentation . . . . . . . . . . . . . . . 147
Manufacturers’ Documents . . . . . . . . . . . . . . . . . . . . . . . . . . . . . . . . . . . . . . . . . . . . . . . . . . . . . . . . . 148
Related Specifications . . . . . . . . . . . . . . . . . . . . . . . . . . . . . . . . . . . . . . . . . . . . . . . . . . . . . . . . . . . . . . 148
MVME2500 Installation and Use (6806800L01L)
List of Tables
Table 1-1
Table 1-2
Table 1-3
Table 1-4
Table 2-1
Table 2-2
Table 3-1
Table 3-2
Table 3-3
Table 3-4
Table 3-5
Table 3-6
Table 3-7
Table 3-8
Table 3-9
Table 3-10
Table 3-11
Table 3-12
Table 3-13
Table 3-14
Table 3-15
Table 3-16
Table 3-17
Table 3-18
Table 3-19
Table 3-20
Table 4-1
Table 4-2
Table 4-3
Table 4-4
Table 5-1
Table 5-2
Table 5-3
Table 5-4
Table 5-5
Table 5-6
Board Standard Compliances . . . . . . . . . . . . . . . . . . . . . . . . . . . . . . . . . . . . . . . . . . . . . . . . . . . . 31
Mechanical Data . . . . . . . . . . . . . . . . . . . . . . . . . . . . . . . . . . . . . . . . . . . . . . . . . . . . . . . . . . . . . . . 33
Available Board Variants . . . . . . . . . . . . . . . . . . . . . . . . . . . . . . . . . . . . . . . . . . . . . . . . . . . . . . . . 33
Available Board Accessories . . . . . . . . . . . . . . . . . . . . . . . . . . . . . . . . . . . . . . . . . . . . . . . . . . . . 34
Environmental Requirements . . . . . . . . . . . . . . . . . . . . . . . . . . . . . . . . . . . . . . . . . . . . . . . . . . . . 39
Power Requirements . . . . . . . . . . . . . . . . . . . . . . . . . . . . . . . . . . . . . . . . . . . . . . . . . . . . . . . . . . . 41
Front Panel LEDs . . . . . . . . . . . . . . . . . . . . . . . . . . . . . . . . . . . . . . . . . . . . . . . . . . . . . . . . . . . . . . . 52
On-board LEDs Status . . . . . . . . . . . . . . . . . . . . . . . . . . . . . . . . . . . . . . . . . . . . . . . . . . . . . . . . . . 53
Front Panel Tri-Speed Ethernet Connector (J1) . . . . . . . . . . . . . . . . . . . . . . . . . . . . . . . . . . . . . 54
Front Panel Serial Port (J4) . . . . . . . . . . . . . . . . . . . . . . . . . . . . . . . . . . . . . . . . . . . . . . . . . . . . . . . 55
USB Connector (J5) . . . . . . . . . . . . . . . . . . . . . . . . . . . . . . . . . . . . . . . . . . . . . . . . . . . . . . . . . . . . . 56
VMEbus P1 Connector . . . . . . . . . . . . . . . . . . . . . . . . . . . . . . . . . . . . . . . . . . . . . . . . . . . . . . . . . . 56
VMEbus P2 Connector . . . . . . . . . . . . . . . . . . . . . . . . . . . . . . . . . . . . . . . . . . . . . . . . . . . . . . . . . . 58
Flash Programming Header (P7) . . . . . . . . . . . . . . . . . . . . . . . . . . . . . . . . . . . . . . . . . . . . . . . . . 59
Custom SATA Connector (J3) . . . . . . . . . . . . . . . . . . . . . . . . . . . . . . . . . . . . . . . . . . . . . . . . . . . . 60
PMC J11 Connector . . . . . . . . . . . . . . . . . . . . . . . . . . . . . . . . . . . . . . . . . . . . . . . . . . . . . . . . . . . . 61
PMC J12 Connector . . . . . . . . . . . . . . . . . . . . . . . . . . . . . . . . . . . . . . . . . . . . . . . . . . . . . . . . . . . . 62
PMC J13 Connector . . . . . . . . . . . . . . . . . . . . . . . . . . . . . . . . . . . . . . . . . . . . . . . . . . . . . . . . . . . . 64
PMC J14 Connector . . . . . . . . . . . . . . . . . . . . . . . . . . . . . . . . . . . . . . . . . . . . . . . . . . . . . . . . . . . . 65
JTAG Connector (P6) . . . . . . . . . . . . . . . . . . . . . . . . . . . . . . . . . . . . . . . . . . . . . . . . . . . . . . . . . . . . 66
COP Header (P50) . . . . . . . . . . . . . . . . . . . . . . . . . . . . . . . . . . . . . . . . . . . . . . . . . . . . . . . . . . . . . . 68
SD Connector (J2) . . . . . . . . . . . . . . . . . . . . . . . . . . . . . . . . . . . . . . . . . . . . . . . . . . . . . . . . . . . . . . 69
XMC Connector (XJ2) Pinout . . . . . . . . . . . . . . . . . . . . . . . . . . . . . . . . . . . . . . . . . . . . . . . . . . . . 69
P20x0 Debug Header . . . . . . . . . . . . . . . . . . . . . . . . . . . . . . . . . . . . . . . . . . . . . . . . . . . . . . . . . . . 70
Geographical Address Switch . . . . . . . . . . . . . . . . . . . . . . . . . . . . . . . . . . . . . . . . . . . . . . . . . . . . 72
Geographical Address Switch Settings . . . . . . . . . . . . . . . . . . . . . . . . . . . . . . . . . . . . . . . . . . . . 73
Voltage Supply Requirement . . . . . . . . . . . . . . . . . . . . . . . . . . . . . . . . . . . . . . . . . . . . . . . . . . . . 92
Thermal Interrupt Threshold . . . . . . . . . . . . . . . . . . . . . . . . . . . . . . . . . . . . . . . . . . . . . . . . . . . . . 97
POST Code Indicator on the LED . . . . . . . . . . . . . . . . . . . . . . . . . . . . . . . . . . . . . . . . . . . . . . . . . 98
Transition Module Features . . . . . . . . . . . . . . . . . . . . . . . . . . . . . . . . . . . . . . . . . . . . . . . . . . . . . . 99
Physical Address Map . . . . . . . . . . . . . . . . . . . . . . . . . . . . . . . . . . . . . . . . . . . . . . . . . . . . . . . . . . 101
Flash Memory Map . . . . . . . . . . . . . . . . . . . . . . . . . . . . . . . . . . . . . . . . . . . . . . . . . . . . . . . . . . . . 102
Linux Devices Memory Map . . . . . . . . . . . . . . . . . . . . . . . . . . . . . . . . . . . . . . . . . . . . . . . . . . . . 102
PLD Revision Register . . . . . . . . . . . . . . . . . . . . . . . . . . . . . . . . . . . . . . . . . . . . . . . . . . . . . . . . . . 104
PLD Year Register . . . . . . . . . . . . . . . . . . . . . . . . . . . . . . . . . . . . . . . . . . . . . . . . . . . . . . . . . . . . . 104
PLD Month Register . . . . . . . . . . . . . . . . . . . . . . . . . . . . . . . . . . . . . . . . . . . . . . . . . . . . . . . . . . . 105
MVME2500 Installation and Use (6806800L01L)
9
List of Tables
Table 5-7
Table 5-8
Table 5-9
Table 5-10
Table 5-11
Table 5-12
Table 5-13
Table 5-14
Table 5-15
Table 5-16
Table 5-17
Table 5-18
Table 5-19
Table 5-20
Table 5-21
Table 5-22
Table 5-23
Table 5-24
Table 5-25
Table 5-26
Table 5-27
Table 6-1
Table 7-1
Table 7-2
Table 7-3
Table 7-4
Table 7-5
Table 7-6
Table 7-7
Table B-1
Table B-2
Table B-3
10
PLD Day Register . . . . . . . . . . . . . . . . . . . . . . . . . . . . . . . . . . . . . . . . . . . . . . . . . . . . . . . . . . . . . .105
PLD Sequence Register . . . . . . . . . . . . . . . . . . . . . . . . . . . . . . . . . . . . . . . . . . . . . . . . . . . . . . . . .105
PLD Power Good Monitor Register . . . . . . . . . . . . . . . . . . . . . . . . . . . . . . . . . . . . . . . . . . . . . . .106
PLD LED Control Register . . . . . . . . . . . . . . . . . . . . . . . . . . . . . . . . . . . . . . . . . . . . . . . . . . . . . . .107
PLD PCI/PMC/XMC Monitor Register . . . . . . . . . . . . . . . . . . . . . . . . . . . . . . . . . . . . . . . . . . . . .108
PLD U-Boot and TSI Monitor Register . . . . . . . . . . . . . . . . . . . . . . . . . . . . . . . . . . . . . . . . . . . .109
PLD Boot Bank Register . . . . . . . . . . . . . . . . . . . . . . . . . . . . . . . . . . . . . . . . . . . . . . . . . . . . . . . .109
PLD Write Protect and I2C Debug Register . . . . . . . . . . . . . . . . . . . . . . . . . . . . . . . . . . . . . . . .110
PLD Test Register 1 . . . . . . . . . . . . . . . . . . . . . . . . . . . . . . . . . . . . . . . . . . . . . . . . . . . . . . . . . . . .112
PLD Test Register 2 . . . . . . . . . . . . . . . . . . . . . . . . . . . . . . . . . . . . . . . . . . . . . . . . . . . . . . . . . . . .112
PLD GPIO2 Interrupt Register . . . . . . . . . . . . . . . . . . . . . . . . . . . . . . . . . . . . . . . . . . . . . . . . . . .113
PLD Shutdown and Reset Control and Reset Reason Register . . . . . . . . . . . . . . . . . . . . . . . .114
PLD Watchdog Timer Refresh Register . . . . . . . . . . . . . . . . . . . . . . . . . . . . . . . . . . . . . . . . . . .115
PLD Watchdog Control Register . . . . . . . . . . . . . . . . . . . . . . . . . . . . . . . . . . . . . . . . . . . . . . . . .116
PLD Watchdog Timer Count Register . . . . . . . . . . . . . . . . . . . . . . . . . . . . . . . . . . . . . . . . . . . .116
Prescaler Register . . . . . . . . . . . . . . . . . . . . . . . . . . . . . . . . . . . . . . . . . . . . . . . . . . . . . . . . . . . . .117
Control Registers . . . . . . . . . . . . . . . . . . . . . . . . . . . . . . . . . . . . . . . . . . . . . . . . . . . . . . . . . . . . . .118
Compare High Word Registers . . . . . . . . . . . . . . . . . . . . . . . . . . . . . . . . . . . . . . . . . . . . . . . . . .119
Compare Low Word Registers . . . . . . . . . . . . . . . . . . . . . . . . . . . . . . . . . . . . . . . . . . . . . . . . . . .119
Counter High Word Registers . . . . . . . . . . . . . . . . . . . . . . . . . . . . . . . . . . . . . . . . . . . . . . . . . . .120
Counter Low Word Registers . . . . . . . . . . . . . . . . . . . . . . . . . . . . . . . . . . . . . . . . . . . . . . . . . . . .120
MVME2500 Specific U-Boot Commands . . . . . . . . . . . . . . . . . . . . . . . . . . . . . . . . . . . . . . . . .126
POR Configuration Settings . . . . . . . . . . . . . . . . . . . . . . . . . . . . . . . . . . . . . . . . . . . . . . . . . . . .131
MVME2500 Interrupt List . . . . . . . . . . . . . . . . . . . . . . . . . . . . . . . . . . . . . . . . . . . . . . . . . . . . . . .135
I2C Bus Device Addressing . . . . . . . . . . . . . . . . . . . . . . . . . . . . . . . . . . . . . . . . . . . . . . . . . . . . . .136
PHY Types and MII Management Bus Address . . . . . . . . . . . . . . . . . . . . . . . . . . . . . . . . . . . . .136
LBC Timing Parameters . . . . . . . . . . . . . . . . . . . . . . . . . . . . . . . . . . . . . . . . . . . . . . . . . . . . . . . .138
Clock Distribution . . . . . . . . . . . . . . . . . . . . . . . . . . . . . . . . . . . . . . . . . . . . . . . . . . . . . . . . . . . . .139
System Clock . . . . . . . . . . . . . . . . . . . . . . . . . . . . . . . . . . . . . . . . . . . . . . . . . . . . . . . . . . . . . . . . .140
Artesyn Embedded Technologies - Embedded Computing Publications . . . . . . . . . . . . . .147
Manufacturers’ Publications . . . . . . . . . . . . . . . . . . . . . . . . . . . . . . . . . . . . . . . . . . . . . . . . . . . .148
Related Specifications . . . . . . . . . . . . . . . . . . . . . . . . . . . . . . . . . . . . . . . . . . . . . . . . . . . . . . . . .148
MVME2500 Installation and Use (6806800L01L)
List of Figures
Figure 1-1
Figure 1-2
Figure 3-1
Figure 3-2
Figure 3-3
Figure 3-4
Figure 3-5
Figure 3-6
Figure 4-1
Figure 4-2
Figure 4-3
Figure 4-4
Figure 4-5
Figure A-1
MVME2500 Declaration of Conformity . . . . . . . . . . . . . . . . . . . . . . . . . . . . . . . . . . . . . 32
Serial Number Location . . . . . . . . . . . . . . . . . . . . . . . . . . . . . . . . . . . . . . . . . . . . . . . . . . 35
Component Layout . . . . . . . . . . . . . . . . . . . . . . . . . . . . . . . . . . . . . . . . . . . . . . . . . . . . . . 49
Front Panel LEDs, Connectors and Switches . . . . . . . . . . . . . . . . . . . . . . . . . . . . . . . . . 50
Front Panel LEDs . . . . . . . . . . . . . . . . . . . . . . . . . . . . . . . . . . . . . . . . . . . . . . . . . . . . . . . . 51
On-board LEDs . . . . . . . . . . . . . . . . . . . . . . . . . . . . . . . . . . . . . . . . . . . . . . . . . . . . . . . . . . 53
Geographical Address Switch . . . . . . . . . . . . . . . . . . . . . . . . . . . . . . . . . . . . . . . . . . . . . 72
SMT Configuration Switch Position . . . . . . . . . . . . . . . . . . . . . . . . . . . . . . . . . . . . . . . . 73
Block Diagram . . . . . . . . . . . . . . . . . . . . . . . . . . . . . . . . . . . . . . . . . . . . . . . . . . . . . . . . . . 77
SPI Device Multiplexing Logic . . . . . . . . . . . . . . . . . . . . . . . . . . . . . . . . . . . . . . . . . . . . . 86
Power Up Sequence . . . . . . . . . . . . . . . . . . . . . . . . . . . . . . . . . . . . . . . . . . . . . . . . . . . . . 93
Clock Distribution Diagram . . . . . . . . . . . . . . . . . . . . . . . . . . . . . . . . . . . . . . . . . . . . . . . 94
Reset Sequence . . . . . . . . . . . . . . . . . . . . . . . . . . . . . . . . . . . . . . . . . . . . . . . . . . . . . . . . . 96
Battery Location . . . . . . . . . . . . . . . . . . . . . . . . . . . . . . . . . . . . . . . . . . . . . . . . . . . . . . . 143
MVME2500 Installation and Use (6806800L01L)
11
List of Figures
12
MVME2500 Installation and Use (6806800L01L)
About this Manual
Overview of Contents
This manual is intended for users who install and configure MVME2500 product. It is assumed
that the user is familiar with the standard cabling procedures, configuration of operating
systems, U-Boot system and MVME Chassis.
The purpose of this manual is to describe MVME2500 product and the services it provides. This
manual includes description of MVME2500 product hardware, firmware and also information
about operating system.
This manual is divided into the following chapters and appendices.
About this Manual lists all conventions and abbreviations used in this manual and outlines
the revision history.
Safety Notes summarizes the safety instructions in the manual.
Sicherheitshinweise is a German translation of the Safety Notes chapter.
Introduction gives an overview of the features of the product, standard compliances,
mechanical data, and ordering information.
Hardware Preparation and Installation outlines the installation requirements, hardware
accessories, switch settings, and installation procedures.
Controls, LEDs, and Connectors describes external interfaces of the board. This includes
connectors and LEDs.
Functional Description includes a block diagram and functional description of major
components of the product.
Memory Maps and Registers contains information on system resources including system
control and status registers and external timers.
Boot System describes the boot loader software.
Programming Model contains additional programming information for the board.
Replacing the Battery contains the procedures for replacing the battery.
Related Documentation provides a listing of related product documentation,
manufacturer’s documents, and industry standard specifications.
MVME2500 Installation and Use (6806800L01L)
13
About this Manual
About this Manual
Abbreviations
This document uses the following abbreviations:
14
Term
Definition
COP
Common-On-Chip Processor
CPLD
Complex Programmable Logic Device
DDR3
Double Data Rate 3
DUART
Dual UART
ECC
Error Checking Correction
EEPROM
Erasable Programmable Read-Only Memory
FCC
Federal Communications Commission
FPGA
Field Programmable Gate Array
GPIO
General Purpose Input/Output
IEEE
Institute of Electrical and Electronics Engineers
HDD
Hard Disk Drive
LBC
Local Bus Controller
MCP
Multi-Chip Package
MRAM
Magneto-resistive Random Access Memory
PCI
Peripheral Component Interconnect
PCI-E
PCI Express
PCI-X
Peripheral Component Interconnect extended
PIM
PCI Mezzanine Card Input/Output Module
PLD
Programmable Logic Device
PMC
PCI Mezzanine Card (IEEE P1386.1)
PrPMC
Processor PCI Mezzanine Card
RTC
Real-Time Clock
RTM
Rear Transition Module
SATA
Serial AT Attachment
SDHC
Secure Digital Host Controller
MVME2500 Installation and Use (6806800L01L)
About this Manual
Term
Definition
SMT
Surface Mounted Technology
UART
Universal Asynchronous Receiver-Transmitter
VITA
VMEbus International Trade Association
VME
Versa Module Eurocard
XMC
PCI Express Mezzanine Card
Conventions
The following table describes the conventions used throughout this manual.
Notation
Description
0x00000000
Typical notation for hexadecimal numbers (digits are
0 through F), for example used for addresses and
offsets
0b0000
Same for binary numbers (digits are 0 and 1)
bold
Used to emphasize a word
Screen
Used for on-screen output and code-related elements
or commands in body text
Courier + Bold
Used to characterize user input and to separate it
from system output
Reference
Used for references and for table and figure
descriptions
File > Exit
Notation for selecting a submenu
<text>
Notation for variables and keys
[text]
Notation for software buttons to click on the screen
and parameter description
...
Repeated item for example node 1, node 2, ..., node
12
.
Omission of information from example/command
that is not necessary at the time being
.
.
MVME2500 Installation and Use (6806800L01L)
15
About this Manual
About this Manual
Notation
Description
..
Ranges, for example: 0..4 means one of the integers
0,1,2,3, and 4 (used in registers)
|
Logical OR
Indicates a hazardous situation which, if not avoided,
could result in death or serious injury
Indicates a hazardous situation which, if not avoided,
may result in minor or moderate injury
Indicates a property damage message
No danger encountered. Pay attention to important
information
16
MVME2500 Installation and Use (6806800L01L)
About this Manual
Summary of Changes
This manual has been revised and replaces all prior editions.
Part Number
Publication Date
Description
6806800L01A
June 2010
First edition
6806800L01B
October 2010
This version includes updates and revisions
for the EA release of the MVME2500.
Table 1.3. Added mechanical data.
Table 4-3. Removed the following
commands: brd_reset, irqinfo, mac. Added
soft_reset.
Table 4-1. Removed: L2 SRAM, L1 for stack
and Boot Page entries.
Changed all instances of "via" to “through”.
Implemented editorial changes.
Updated Chapter 3, Controls, LEDs, and
Connectors by adding the following.
6806800L01C
6806800L01D
6806800L01E
May 2011
May 2011
July 2011
MVME2500 Installation and Use (6806800L01L)
–
Chapter 3, Board Layout
–
Chapter 3, Front Panel Connectors
–
Chapter 3, On-board Connectors
Added Chapter 4, Functional Description
Applied editorial edits
Edited Memory Maps and Registers
Edited Programming Model
Edited Figure “Component Layout”
Edited Figure “On-board LEDs”
Added Front Panel Serial Port (J4)
Updated Table “Available Board Variants".
Updated Appendix B, Related Documentation
17
About this Manual
About this Manual
Part Number
Publication Date
Description
6806800L01F
August 2011
Changed title of Section 3.4.1 to Front Panel
Connectors.
Edited Front Panel Serial Port (J4).
Updated Figure “Component Layout” to
include proper label for XMC connectors.
Updated Safety Notes and
Sicherheitshinweise.
6806800L01G
January 2013
Updated Standard Compliances on page 21.
6806800L01H
January 2014
Added Flash Memory Map and updated SPI Flash
Memory.
6806800L01J
February 2014
Re-branded to Artesyn template.
Added Declaration of Conformity.
6806800L01K
March 2015
Added Figure "Power Up Sequence" on page 93 and
Figure "Reset Sequence" on page 96.
Updated Boot Options on page 122, Real Time
Clock on page 137 and Crisis Recovery on page 87.
6806800L01L
18
April 2015
Replaced MVME7216 and its variants with
MVME721X.
MVME2500 Installation and Use (6806800L01L)
Safety Notes
This section provides warnings that precede potentially dangerous procedures throughout
this manual. Instructions contained in the warnings must be followed during all phases of
operation, service, and repair of this equipment. You should also employ all other safety
precautions necessary for the operation of the equipment in your operating environment.
Failure to comply with these precautions or with specific warnings elsewhere in this manual
could result in personal injury or damage to the equipment.
Artesyn Embedded Technologies intends to provide all necessary information to install and
handle the product in this manual. Because of the complexity of this product and its various
uses, we do not guarantee that the given information is complete. If you need additional
information, ask your Artesyn representative.
This product is a Safety Extra Low Voltage (SELV) device designed to meet the EN60950-1
requirements for Information Technology Equipment. The use of the product in any other
application may require safety evaluation specific to that application.
Only personnel trained by Artesyn or persons qualified in electronics or electrical engineering
are authorized to install, remove or maintain the product.
The information given in this manual is meant to complete the knowledge of a specialist and
must not be used as replacement for qualified personnel.
Keep away from live circuits inside the equipment. Operating personnel must not remove
equipment covers. Only Factory Authorized Service Personnel or other qualified service
personnel may remove equipment covers for internal subassembly or component replacement
or any internal adjustment.
Do not install substitute parts or perform any unauthorized modification of the equipment or
the warranty may be voided. Contact your local Artesyn representative for service and repair
to make sure that all safety features are maintained.
EMC (Results pending testing)
This equipment has been tested and found to comply with the limits for a Class A digital device,
pursuant to Part 15 of the FCC Rules. These limits are designed to provide reasonable
protection against harmful interference when the equipment is operated in a commercial
environment. This equipment generates, uses, and can radiate radio frequency energy and, if
not installed and used in accordance with the instruction manual, may cause harmful
interference to radio communications.
MVME2500 Installation and Use (6806800L01L)
19
Safety Notes
Operation of this equipment in a residential area is likely to cause harmful interference in which
case the user will be required to correct the interference at his own expense. Changes or
modifications not expressly approved by Artesyn could void the user's authority to operate the
equipment. Board products are tested in a representative system to show compliance with the
above mentioned requirements. A proper installation in a compliant system will maintain the
required performance. Use only shielded cables when connecting peripherals to assure that
appropriate radio frequency emissions compliance is maintained.
Operation
Product Damage
High humidity and condensation on the board surface causes short circuits.
Do not operate the board outside the specified environmental limits.
Make sure the board is completely dry and there is no moisture on any surface before applying
power.
Damage of Circuits
Electrostatic discharge and incorrect installation and removal can damage circuits or shorten
its life.
Before touching the board or electronic components, make sure that you are working in an
ESD-safe environment.
Board Malfunction
Switches marked as “reserved” might carry production-related functions and can cause the
board to malfunction if their setting is changed.
Do not change settings of switches marked as “reserved”. The setting of switches which are
not marked as “reserved” has to be checked and changed before board installation.
Installation
Data Loss
Powering down or removing a board before the operating system or other software running
on the board has been properly shut down may cause corruption of data or file systems.
20
MVME2500 Installation and Use (6806800L01L)
Safety Notes
Make sure all software is completely shut down before removing power from the board or
removing the board from the chassis.
Product Damage
Only use injector handles for board insertion to avoid damage to the front panel and/or PCB.
Deformation of the front panel can cause an electrical short or other board malfunction.
Product Damage
Inserting or removing modules with power applied may result in damage to module
components.
Before installing or removing additional devices or modules, read the documentation that
came with the product.
Cabling and Connectors
Product Damage
RJ-45 connectors on modules are either twisted-pair Ethernet (TPE) or E1/T1/J1 network
interfaces. Connecting an E1/T1/J1 line to an Ethernet connector may damage your system.
Make sure that TPE connectors near your working area are clearly marked as network
connectors.
Verify that the length of an electric cable connected to a TPE bushing does not exceed 100
meters.
Make sure the TPE bushing of the system is connected only to safety extra low voltage
circuits (SELV circuits).
If in doubt, ask your system administrator.
MVME2500 Installation and Use (6806800L01L)
21
Safety Notes
Battery
Board/System Damage
Incorrect exchange of lithium batteries can result in a hazardous explosion.
When exchanging the on-board lithium battery, make sure that the new and the old
battery are exactly the same battery models.
If the respective battery model is not available, contact your local Artesyn sales
representative for the availability of alternative, officially approved battery models.
Data Loss
Exchanging the battery can result in loss of time settings. Backup power prevents the loss of
data during exchange.
Quickly replacing the battery may save time settings.
Data Loss
If the battery has low or insufficient power the RTC is initialized.
Exchange the battery before seven years of actual battery use have elapsed.
PCB and Battery Holder Damage
Removing the battery with a screw driver may damage the PCB or the battery holder. To
prevent damage, do not use a screw driver to remove the battery from its holder.
22
MVME2500 Installation and Use (6806800L01L)
Sicherheitshinweise
Dieses Kapitel enthält Hinweise, die potentiell gefährlichen Prozeduren innerhalb dieses
Handbuchs vorrangestellt sind. Beachten Sie unbedingt in allen Phasen des Betriebs, der
Wartung und der Reparatur des Systems die Anweisungen, die diesen Hinweisen enthalten
sind. Sie sollten außerdem alle anderen Vorsichtsmaßnahmen treffen, die für den Betrieb des
Produktes innerhalb Ihrer Betriebsumgebung notwendig sind. Wenn Sie diese
Vorsichtsmaßnahmen oder Sicherheitshinweise, die an anderer Stelle diese Handbuchs
enthalten sind, nicht beachten, kann das Verletzungen oder Schäden am Produkt zur Folge
haben.
Artesyn Embedded Technologies ist darauf bedacht, alle notwendigen Informationen zum
Einbau und zum Umgang mit dem Produkt in diesem Handbuch bereit zu stellen. Da es sich
jedoch um ein komplexes Produkt mit vielfältigen Einsatzmöglichkeiten handelt, können wir
die Vollständigkeit der im Handbuch enthaltenen Informationen nicht garantieren. Falls Sie
weitere Informationen benötigen sollten, wenden Sie sich bitte an die für Sie zuständige
Geschäftsstelle von Artesyn.
Das Produkt wurde entwickelt, um die Sicherheitsanforderungen für SELV Geräte nach der
Norm EN 60950-1 für informationstechnische Einrichtungen zu erfüllen. Die Verwendung des
Produkts in einer anderen Anwendung erfordert eine Sicherheitsüberprüfung für diese
spezifische Anwendung.
Einbau, Wartung und Betrieb dürfen nur von durch Artesyn ausgebildetem oder im Bereich
Elektronik oder Elektrotechnik qualifiziertem Personal durchgeführt werden. Die in diesem
Handbuch enthaltenen Informationen dienen ausschließlich dazu, das Wissen von
Fachpersonal zu ergänzen, können dieses jedoch nicht ersetzen.
Halten Sie sich von stromführenden Leitungen innerhalb des Produktes fern. Entfernen Sie auf
keinen Fall Abdeckungen am Produkt. Nur werksseitig zugelassenes Wartungspersonal oder
anderweitig qualifiziertes Wartungspersonal darf Abdeckungen entfernen, um Komponenten
zu ersetzen oder andere Anpassungen vorzunehmen.
Installieren Sie keine Ersatzteile oder führen Sie keine unerlaubten Veränderungen am Produkt
durch, sonst verfällt die Garantie. Wenden Sie sich für Wartung oder Reparatur bitte an die für
Sie zuständige Geschäftsstelle von Artesyn. So stellen Sie sicher, dass alle
sicherheitsrelevanten Aspekte beachtet werden.
MVME2500 Installation and Use (6806800L01L)
23
Sicherheitshinweise
EMV
Das Produkt wurde in einem Artesyn Standardsystem getestet. Es erfüllt die für digitale Geräte
der Klasse A gültigen Grenzwerte in einem solchen System gemäß den FCC-Richtlinien
Abschnitt 15 bzw. EN 55022 Klasse A. Diese Grenzwerte sollen einen angemessenen Schutz
vor Störstrahlung beim Betrieb des Produktes in Gewerbe- sowie Industriegebieten
gewährleisten.
Das Produkt arbeitet im Hochfrequenzbereich und erzeugt Störstrahlung. Bei
unsachgemäßem Einbau und anderem als in diesem Handbuch beschriebenen Betrieb können
Störungen im Hochfrequenzbereich auftreten.
Wird das Produkt in einem Wohngebiet betrieben, so kann dies mit grosser Wahrscheinlichkeit
zu starken Störungen führen, welche dann auf Kosten des Produktanwenders beseitigt werden
müssen. Änderungen oder Modifikationen am Produkt, welche ohne ausdrückliche
Genehmigung von Artesyn durchgeführt werden, können dazu führen, dass der Anwender die
Genehmigung zum Betrieb des Produktes verliert. Boardprodukte werden in einem
repräsentativen System getestet, um zu zeigen, dass das Board den oben aufgeführten EMVRichtlinien entspricht. Eine ordnungsgemässe Installation in einem System, welches die EMVRichtlinien erfüllt, stellt sicher, dass das Produkt gemäss den EMV-Richtlinien betrieben wird.
Verwenden Sie nur abgeschirmte Kabel zum Anschluss von Zusatzmodulen. So ist
sichergestellt, dass sich die Aussendung von Hochfrequenzstrahlung im Rahmen der erlaubten
Grenzwerte bewegt.
Warnung! Dies ist eine Einrichtung der Klasse A. Diese Einrichtung kann im Wohnbereich
Funkstörungen verursachen. In diesem Fall kann vom Betreiber verlangt werden,
angemessene Maßnahmen durchzuführen.
Betrieb
1 Beschädigung des Produktes
Hohe Luftfeuchtigkeit und Kondensat auf der Oberfläche des Produktes können zu
Kurzschlüssen führen.
Betreiben Sie das Produkt nur innerhalb der angegebenen Grenzwerte für die
relative Luftfeuchtigkeit und Temperatur. Stellen Sie vor dem Einschalten des
Stroms sicher, dass sich auf dem Produkt kein Kondensat befindet.
24
MVME2500 Installation and Use (6806800L01L)
Sicherheitshinweise
Beschädigung von Schaltkreisen
Elektrostatische Entladung und unsachgemäßer Ein- und Ausbau des Produktes kann
Schaltkreise beschädigen oder ihre Lebensdauer verkürzen.
Bevor Sie das Produkt oder elektronische Komponenten berühren, vergewissern Sie
sich, daß Sie in einem ESD-geschützten Bereich arbeiten.
Fehlfunktion des Produktes
Schalter, die mit 'Reserved' gekennzeichnet sind, können mit produktionsrelevanten
Funktionen belegt sein. Das Ändern dieser Schalter kann im normalen Betrieb Störungen
auslösen.
Verstellen Sie nur solche Schalter, die nicht mit 'Reserved' gekennzeichnet sind.
Prüfen und ggf. ändern Sie die Einstellungen der nicht mit 'Reserved'
gekennzeichneten Schalter, bevor Sie das Produkt installieren.
Installation
Datenverlust
Das Herunterfahren oder die Deinstallation eines Boards bevor das Betriebssystem oder
andere auf dem Board laufende Software ordnungsmemäss beendet wurde, kann zu
partiellem Datenverlust sowie zu Schäden am Filesystem führen.
Stellen Sie sicher, dass sämtliche Software auf dem Board ordnungsgemäss
beendet wurde, bevor Sie das Board herunterfahren oder das Board aus dem
Chassis entfernen.
Beschädigung des Produktes
Fehlerhafte Installation des Produktes kann zu einer Beschädigung des Produktes führen.
Verwenden Sie die Handles, um das Produkt zu installieren/deinstallieren. Auf diese
Weise vermeiden Sie, dass das faceplate oder die Platine deformiert oder zerstört
wird.
Beschädigung des Produktes und von Zusatzmodulen
Fehlerhafte Installation von Zusatzmodulen, kann zur Beschädigung des Produktes und der
Zusatzmodule führen.
Lesen Sie daher vor der Installation von Zusatzmodulen die zugehörige
Dokumentation.
MVME2500 Installation and Use (6806800L01L)
25
Sicherheitshinweise
Kabel und Stecker
Beschädigung des Produktes
Bei den RJ-45-Steckern, die sich an dem Produkt befinden, handelt es sich entweder um
Twisted-Pair-Ethernet (TPE) oder um E1/T1/J1-Stecker. Beachten Sie, dass ein versehentliches
Anschließen einer E1/T1/J1-Leitung an einen TPE-Stecker das Produkt zerstören kann.
Kennzeichnen Sie deshalb TPE-Anschlüsse in der Nähe Ihres Arbeitsplatzes deutlich als
Netzwerkanschlüsse.
Stellen Sie sicher, dass die Länge eines mit Ihrem Produkt verbundenen TPE-Kabels 100 m
nicht überschreitet.
Das Produkt darf über die TPE-Stecker nur mit einem Sicherheits-KleinspannungsStromkreis (SELV) verbunden werden.
Bei Fragen wenden Sie sich an Ihren Systemverwalter.
Batterie
Beschädigung des Blades
Ein unsachgemäßer Einbau der Batterie kann gefährliche Explosionen und
Beschädigungen des Blades zur Folge haben.
Verwenden Sie deshalb nur den Batterietyp, der auch bereits eingesetzt wurde und
befolgen Sie die Installationsanleitung.
Datenverlust
Wenn Sie die Batterie austauschen, können die Zeiteinstellungen verloren gehen. Eine
Backupversorgung verhindert den Datenverlust während des Austauschs.
Wenn Sie die Batterie schnell austauschen, bleiben die Zeiteinstellungen möglicherweise
erhalten.
26
MVME2500 Installation and Use (6806800L01L)
Sicherheitshinweise
Datenverlust
Wenn die Batterie wenig oder unzureichend mit Spannung versorgt wird, wird der RTC
initialisiert.
Tauschen Sie die Batterie aus, bevor sieben Jahre tatsächlicher Nutzung vergangen sind.
Schäden an der Platine oder dem Batteriehalter
Wenn Sie die Batterie mit einem Schraubendreher entfernen, können die Platine oder der
Batteriehalter beschädigt werden.
Um Schäden zu vermeiden, sollten Sie keinen Schraubendreher zum Ausbau der Batterie
verwenden.
Umweltschutz
Entsorgen Sie alte Batterien und/oder Blades/Systemkomponenten/RTMs stets gemäß der in
Ihrem Land gültigen Gesetzgebung, wenn möglich immer umweltfreundlich.
MVME2500 Installation and Use (6806800L01L)
27
Sicherheitshinweise
28
MVME2500 Installation and Use (6806800L01L)
Chapter 1
Introduction
1.1
Overview
The MVME2500 is a VME form-factor single-board computer based on the Freescale QorIQ™
P2010 single core or P2020 dual core processors. A e500 v2 core QorIQ processor uses 45
nanometer technology which delivers an excellent performance to power ratio.The
MVME2500 is ideal for automation, medical, and military applications such as railway control,
semiconductor processing, test and measurement, image processing, and radar/sonar.
The main features of the MVME2502 board are as follows:
Freescale QorIQ P2010 (single-core) or P2020 (dual-core)
–
800 MHz Freescale P2010 single-core processor
–
1.2 GHz Freescale P2020 dual-core processor
–
512 KB L2 shared cache
–
Integrated, on-chip controllers for DDR2/3
–
SPI flash
–
I2C and security acceleration
–
PCI Express
–
USB 2.0
–
DUART
–
10/100/1000 Ethernet
–
DMA
–
SDHC
–
Eight 32-bit timers
1 GB or 2 GB DDR3-800, soldered down
Single channel 800MB/s
User Flash/NVRAM Memory
–
512 KB MRAM (NVRAM)
–
SDHC socket
MVME2500 Installation and Use (6806800L01L)
29
Introduction
–
16 MB SPI flash
–
Support crisis recovery
Boot Firmware: U-Boot-based firmware image in 16 MB SPI Flash. This flash is split into two
8 MB chips.
Operating Systems:
30
Boot Flash Memory
–
Based from BSP provided by Freescale which is based from standard Linux version
2.6.32-rc3
Development tool is ltib 9.1.1 (Linux Target Image Builder) from Freescale
–
VxWorks
MVME721X Transition Module I/O:
–
Two GbE interfaces
–
Four RS-232 serial ports
–
I2C
–
PMC I/O
Software: U-Boot firmware
One PMC/XMC site
SATA port for optional on-board hard drive
Extended temperature and rugged variants
The front panel I/O configuration consists of two RJ45 10/100/1000BASE-T Ethernet ports,
a USB 2.0 port, a Micro DB9 RS-232 serial console port, and a reset/abort switch. It also has
an LED to signal board failure and another LED that can be configured in the LED register.
The rear I/O includes support for VMEbus (Legacy VME, VME 64, VME64x, and 2eSST), rear
PMC/XMC I/O, RTM I/O (through VME P2), two 10/100/1000BASE-T Ethernet, four UART,
and RTM I2C/Presence/Power.
I2C devices:
–
Real-Time Clock
–
Board Temperature Sensor
MVME2500 Installation and Use (6806800L01L)
Introduction
1.2
–
8 KB VPD EEPROM
–
Two 64 KB User EEPROM
VMEbus Interface Controller: Tsi148 PCI-X to VMEbus bridge with support for VME64 and
2eSST protocols
CPLD: Watchdog, timers, and registers
Standard Compliances
The product is designed to meet the following standards:
Table 1-1 Board Standard Compliances
Standard
Description
EN 60950-1/A11:2009
Safety Requirements (legal)
IEC 60950-1:2005 2nd Edition
CAN/CSA C22.2 No 60950-1
FCC Part 15, Subpart B, Class A (nonresidential)
ICES-003, Class A (non-residential)
EMC requirements (legal) on system level
(predefined Artesyn Embedded Technologies
system)
EMC Directive 89/336/EEC
EN55022 Class B
EN55024
AS/NZS CISPR 22, Class A
EN300386
ETSI EN 300 019 series
Environmental Requirements
Directive 2011/65/EU
Directive on the restriction of the use of certain
hazardous substances in electrical and electronic
equipment (RoHS)
MVME2500 Installation and Use (6806800L01L)
31
Introduction
Figure 1-1
MVME2500 Declaration of Conformity
EC Declaration of Conformity
According to EN 17050-1:2004
Manufacturer’s Name:
Artesyn Embedded Technologies
Manufacturer’s Address:
Zhongshan General Carton Box Factory Co. Ltd. No 62, Qi
Guan Road West, Shiqi District, 528400 Zhongshan City
Guangdong, PRC
Declares that the following product, in accordance with the requirements of 2004/108/EC, 2006/95/EC,
2011/65/EU and their amending directives,
Product:
MVME2500 Series Single-Board Computers
Model Name/Number:
MVME2500-01080101E, MVME2500-01080101S, MVME25000161, MVME2500-0163,MVME2500-0171, MVME2500-0173,
MVME2500-02100202E, MVME2500-02100202S, MVME250002120201E, MVME2500-02120201S, MVME2500-021CC,
MVME2500ET-0161, MVME2500ET-0163, MVME2500ET-0171,
MVME2500ET-0173
has been designed and manufactured to the following specifications:
EN55022:2006 Class A
EN55024: (A1: 2001 + A2: 2003): 1998
2011/65/EU RoHS Directive
As manufacturer we hereby declare that the product named above has been designed to comply with the relevant sections of the above referenced specifications. This product complies with the essential health and safety
requirements of the above specified directives. We have an internal production control system that ensures
compliance between the manufactured products and the technical documentation.
32
___________________________________________________
___03/11/2014______
Tom Tuttle, Manager, Product Testing Services
Date (MM/DD/YYYY)
MVME2500 Installation and Use (6806800L01L)
Introduction
1.3
Mechanical Data
The following table provides the dimensions and the weight of the board.
Table 1-2 Mechanical Data
1.4
Feature
Value
Height
233.44 mm (9.2 inches)
Depth
160.0 mm (6.3 inches)
Front Panel Height
261.8 mm (10.3 inches)
Width
19.8 mm (0.8 inches)
Max. Component Height
14.8 mm (0.58 inches)
Weight
400 grams (standard variant), 700 grams (ET variants)
Ordering Information
As of the printing date of this manual, this guide supports the models listed below.
Table 1-3 Available Board Variants
Order Number
Processor
Speed
Memory
Ejector
MVME2500-0163
QorIQ P2010 (single-core)
800 MHz
1 GB
IEEE
MVME2500-0161
QorIQ P2010 (single-core)
800 MHz
1 GB
SCANBE
MVME2500-0173
QorIQ P2020 (dual-core)
1.2 GHz
2 GB
IEEE
MVME2500-0171
QorIQ P2020 (dual-core)
1.2 GHz
2 GB
SCANBE
MVME2500ET-0173
QorIQ P2020 (dual-core)
1 GHz
2 GB
IEEE ENP2
MVME2500ET-0171
QorIQ P2020 (dual-core)
1 GHz
2 GB
SCANBE ENP2
MVME2500 Installation and Use (6806800L01L)
33
Introduction
As of the printing date of this manual, the following board accessories are available.
Table 1-4 Available Board Accessories
34
Order Number
Description
VME-HDMNTKIT
Used on ENP1 board
VME-HDMNTKIT2
Used on ENP2 board
VME-64GBSSDKIT
VME 64 GB SSD and mounting kit
MVME7216E-101
VME RTM (IEEE handle)
MVME7216E-102
VME RTM (SCANBE Handle)
MVME721ET-101
VME RTM Extended Temperature (IEEE handle)
MVME721ET-102
VME RTM Extended Temperature (SCANBE Handle)
SERIAL-MINI-D (30W2400E01A)
Female - to -male micro-mini DB-9 to DB9 adapter cable
ACC/CABLE/SER/DTE/
6E
9-pin micro-DSUB to 9-pin DSUB cross connected serial
console cable
MVME2500 Installation and Use (6806800L01L)
Introduction
1.5
Product Identification
The following figure shows the location of the serial number label.
Figure 1-2
Serial Number Location
MVME2500 Installation and Use (6806800L01L)
35
Introduction
36
MVME2500 Installation and Use (6806800L01L)
Chapter 2
Hardware Preparation and Installation
2.1
Overview
This chapter provides unpacking instructions, hardware preparation, installation procedures
of the board. Installation instructions for the optional PMC/XMC modules and transitions
modules are also included.
A fully implemented MVME2500 consists of the base board and the following modules:
PCI Mezzanine Card (PMC) or PCI-E Mezzanine Card (XMC) for added versatility
Rear transition module
SATA kit
The following are the steps to be performed before using the board. Be sure to read the entire
chapter, including all caution and warning notes, before you begin.
1. Unpack the hardware. Refer to Unpacking and Inspecting the Board on page 38
2. Configure the hardware by setting jumpers on the board and the RTM. Refer to Configuring
the Board on page 42
3. Install the rear transition module in the chassis. Refer to Rear Transition Module on page 43.
4. Install PMC module (if required). Refer to PMC/XMC Support on page 45.
5. Install XMC span module (if required). Refer to PMC/XMC Support on page 45.
6. Install the board in the chassis. Refer to Installing and Removing the Board on page 46.
7. Attach cables and apply power. Refer to Completing the Installation on page 48.
MVME2500 Installation and Use (6806800L01L)
37
Hardware Preparation and Installation
2.2
Unpacking and Inspecting the Board
Read all notices and cautions prior to unpacking the product.
Damage of Circuits
Electrostatic discharge and incorrect installation and removal can damage circuits or
shorten its life.
Before touching the board or electronic components, make sure that you are working
in an ESD-safe environment.
Shipment Inspection
To inspect the shipment, perform the following steps:
1. Verify that you have received all items of your shipment.
MVME2500 board
Quick Start Guide
Safety Notes Summary
Any optional items ordered
2. Check for damage and report any damage or differences to customer service.
3. Remove the desiccant bag shipped together with the board and dispose of it according to
your country’s legislation.
The product is thoroughly inspected before shipment. If any damage occurred during
transportation or any items are missing, contact customer service immediately.
38
MVME2500 Installation and Use (6806800L01L)
Hardware Preparation and Installation
2.3
Requirements
Make sure that the board meets the following requirements when operated in your particular
system configuration.
2.3.1
Environmental Requirements
Operating temperatures refer to the temperature of the air circulating around the board and
not to the component temperature.
Table 2-1 Environmental Requirements
Characteristics
Applicable Variants
Commercial Versions
Extended Temperature Versions
MVME2500-0163
MVME2500ET-0173
MVME2500-0161
MVME2500ET-0171
MVME2500-0173
MVME2500-0171
Cooling Method
Forced Air 7 CFM1
Forced Air 7 CFM1
Operating
Temperature
0°C to +55°C
-40°C to +71°C
Storage
-40°C to +85°C
-50°C to +100°C
Vibration Sine
(10min/axis)
2 G, 5 to 2000 Hz
10 G, 15 to 2000 Hz
Vibration Random
(1hr/axis)
0.01g2/Hz, 15 to 2000 Hz
0.04g2/Hz, 15 to 2000 Hz (8
GRMS)2
Shock
20g/11 mS
30g/11 mS
Humidity
to 95% RH (non-condensing)
to 100% RH (non-condensing)
1. ft3/min
2. Flat 15-1000Hz, -6db/octave 1000Hz - 2000Hz [MIL-STD 810F Figure 514.5C-17]
MVME2500 Installation and Use (6806800L01L)
39
Hardware Preparation and Installation
Product Damage
2.3.2
High humidity and condensation on the board surface causes short circuits.
Do not operate the board outside the specified environmental limits.
Make sure the board is completely dry and there is no moisture on any surface before
applying power.
Power Requirements
The board uses +5.0 V from the VMEbus backplane. On-board power supply generates
required voltages for various ICs. The MVME2500 connects the +12 V and -12 V supplies from
the backplane to the PMC sites, while the +3.3 V power supplied to the PMC sites comes from
the +5.0 V backplane power. A maximum of 10 A of +3.3 V power is available to the PMC sites,
however the 90 W +5.0 V limit must be observed as well as any cooling limitations.
40
MVME2500 Installation and Use (6806800L01L)
Hardware Preparation and Installation
The following table provides an estimate of the typical and maximum power required.
Table 2-2 Power Requirements
Board Variant
Maximum
(Calculated)
Typical
(Measured
Operating)
MVME2500-0163
18.5 W
14.8 W
MVME2500-0161
18.5 W
14.8 W
MVME2500-0173
23.5 W
16.6 W
MVME2500-0171
23.5 W
16.6 W
MVME2500ET-0173
23.5 W
16.6 W
MVME2500ET-0171
23.5 W
16.6 W
The power is measured when the board is in standby (Linux prompt) mode. Power will
significantly increase when adding hard drives or a XMC/PMC card.
The following table shows the power available when the MVME2500 is installed in either a
three row or five row chassis and when PMCs are present.
Chassis Type
Available Power
Power With PMCs
Three Row
70 W maximum
below 70 W
Five Row
90 W maximum
below 90 W
Keep below power limit. Cooling limitations must be considered.
MVME2500 Installation and Use (6806800L01L)
41
Hardware Preparation and Installation
2.3.3
Equipment Requirements
The following are recommended to complete a MVME2500 system:
2.4
VMEbus system enclosure
System console terminal
Operating system (and/or application software)
Transition module and connecting cables
Configuring the Board
The board provides software control over most options. Settings can be modified to fit the
user's specifications. To configure, set the bits in the control register after installing the board
in a system. Make sure that all user-defined switches are properly set before installing a
PMC/XMC module. For more information, see Switches on page 71.
42
MVME2500 Installation and Use (6806800L01L)
Hardware Preparation and Installation
2.5
Installing Accessories
2.5.1
Rear Transition Module
The MVME2500 does not support hot swap. Remove power to the rear slot or system before
installing the module. A PCMI/O Module (PIM) needs to be manually configured and installed
before placing the transition module.
Damage of Circuits
Electrostatic discharge and incorrect installation and removal can damage circuits or
shorten its life.
Before touching the board or electronic components, make sure that you are working
in an ESD-safe environment.
Product Damage
Only use injector handles for board insertion to avoid damage to the front panel and/or
PCB. Deformation of the front panel can cause an electrical short or other board
malfunction.
Board Malfunction
Switches marked as “reserved” might carry production-related functions and can cause
the board to malfunction if their setting is changed.
Do not change settings of switches marked as “reserved”. The setting of switches which
are not marked as “reserved” has to be checked and changed before board installation.
Installation Procedure
1. Turn OFF all equipment and disconnect the power cable from the AC power source.
2. Remove the chassis cover.
3. Remove the filler panel(s) from the appropriate card slot(s) at the rear of the chassis (if the
chassis has a rear card cage).
MVME2500 Installation and Use (6806800L01L)
43
Hardware Preparation and Installation
4. Install the top and bottom edge of the transition module into the rear guides of the chassis.
5. Ensure that the levers of the two injector/ejectors are in the outward position.
6. Slide the transition module into the chassis until resistance is felt.
7. Move the injector/ejector levers in an inward direction.
8. Verify that the transition module is properly seated and secure it to the chassis using two
screws adjacent to the injector/ejector levers.
9. Connect the cables to the transition module.
To remove the transition module from the chassis, reverse the procedure and press the red
locking tabs (IEEE handles only) to extract the board.
Removal Procedure
1. Turn off the power.
2. Disconnect all the cables.
3. Press the red locking tabs (IEEE handles only) to eject the board.
4. Loosen and remove the screws adjacent to the injector/ejector levers that securing the
module to the chassis.
5. Move the injector/ejector levers in outward direction.
6. Slide the module from the chassis and make sure that no damage is caused to the pins.
7. Remove the transition module from the chassis and insert the filler panels.
44
MVME2500 Installation and Use (6806800L01L)
Hardware Preparation and Installation
2.5.2
PMC/XMC Support
Installation Procedure
Read all notices and follow these steps to install a PMC on the baseboard.
Damage of Circuits
Electrostatic discharge and incorrect installation and removal can damage circuits or
shorten its life.
Before touching the board or electronic components, make sure that you are working
in an ESD-safe environment.
Product Damage
Inserting or removing modules with power applied may result in damage to module
components.
Before installing or removing additional devices or modules, read the documentation
that came with the product.
1. Attach an ESD strap to your wrist. Attach the other end of the strap to the chassis as a
ground. Make sure that it is securely fastened throughout the procedure.
2. Remove the PMC/XMC filler plate from the front panel cut-out.
3. Slide the front bezel of the PMC/XMC into the front panel cut-out from backside. The front
bezel of the PMC/XMC module will be placed with the board when the connectors on the
module align with the connectors on the board.
4. Align the mating connectors properly and apply minimal pressure to the PMC/XMC until it
is seated to the board.
5. Insert the four PMC/XMC mounting screws through the mounting holes on the bottom side
of the board, and then thread the four mount points on the PMC/XMC. Fasten the screws.
MVME2500 Installation and Use (6806800L01L)
45
Hardware Preparation and Installation
6. Install the board into the appropriate card slot. Make sure that the board is well seated into
the backplane connectors. Do not damage or bend connector pins.
7. Replace the chassis or system cover.
8. Reconnect the system to the power source and then turn on the system.
When removing the PMC/XMC, hold it by its long side and exert minimal force when pulling
it from the baseboard to prevent pin damage.
2.6
Installing and Removing the Board
This section describes the recommended procedure for installing the board in a chassis. Read
all warnings and instructions before installing the board.
The MVME2500 does not support hot swap. Power off the slot or system and make sure that
the serial ports and switches are properly configured.
Damage of Circuits
Electrostatic discharge and incorrect installation and removal can damage circuits or
shorten its life.
Before touching the board or electronic components, make sure that you are working
in an ESD-safe environment.
Product Damage
46
Only use injector handles for board insertion to avoid damage to the front panel and/or
PCB. Deformation of the front panel can cause an electrical short or other board
malfunction.
MVME2500 Installation and Use (6806800L01L)
Hardware Preparation and Installation
Installation Procedure
1. Attach an ESD strap to your wrist. Attach the other end of the strap to an electrical ground.
Make sure that it is securely fastened throughout the procedure.
2. Remove VME filler panels from the VME enclosures, as appropriate.
3. Install the top and bottom edge of the board into the guides of the chassis.
4. Ensure that the levers of the two injector/ejectors are in the outward position.
5. Slide the board into the chassis until resistance is felt.
6. Simultaneously move the injector/ejector levers in an inward direction.
7. Verify that the board is properly seated and secure it to the chassis using the two screws
located adjacent to the injector/ejector levers.
8. Connect the appropriate cables to the board.
Removal Procedure
1. Turn off the power.
2. Disconnect all the cables.
3. Press the red locking tabs (IEEE handles only) to extract the board.
4. Loosen and remove the screws located adjacent to the injector/ejector levers that securing
board to the chassis.
5. Move the injector/ejector levers in outward direction.
6. Hold top and bottom edges of the board and exert minimal force when pulling the board
from the chassis to prevent pin damage.
7. Carefully remove the board from the chassis and store the board in anti-static envelope.
MVME2500 Installation and Use (6806800L01L)
47
Hardware Preparation and Installation
2.7
Completing the Installation
The board is designed to operate as an application-specific computer blade or an intelligent I/O
board/carrier. It can be used in any slot in a VME chassis. Once the board is installed, you are
ready to connect peripherals and apply power to the board.
Product Damage
RJ-45 connectors on modules are either twisted-pair Ethernet (TPE) or E1/T1/J1
network interfaces. Connecting an E1/T1/J1 line to an Ethernet connector may damage
your system.
Make sure that TPE connectors near your working area are clearly marked as network
connectors.
Verify that the length of an electric cable connected to a TPE bushing does not exceed
100 meters.
Make sure the TPE bushing of the system is connected only to safety extra low voltage
circuits (SELV circuits).
If in doubt, ask your system administrator.
The console settings for the MVME2500 are:
Eight bits per character
One stop bit per character
Parity disabled (no parity)
Baud rate of 9600 baud
Verify that hardware is installed and the power/peripheral cables connected are appropriate
for your system configuration.
Replace the chassis or system cover, reconnect the chassis to power source, and turn the
equipment power on.
48
MVME2500 Installation and Use (6806800L01L)
Chapter 3
Controls, LEDs, and Connectors
3.1
Board Layout
The following figure shows the components and the connectors on the MVME2500 board.
Figure 3-1
Component Layout
MVME2500 Installation and Use (6806800L01L)
49
Controls, LEDs, and Connectors
3.2
Front Panel
The following components are found on the MVME2500 front panel.
Figure 3-2
50
Front Panel LEDs, Connectors and Switches
MVME2500 Installation and Use (6806800L01L)
Controls, LEDs, and Connectors
3.2.1
Reset Switch
The MVME2500 has a single push button switch that has both “abort” and “reset” functions.
Pressing the switch for less than three seconds generates an abort interrupt to the P20x0 QorIQ
PIC. Holding it down for more than three seconds will generate a hard reset. The VME SYSRESET
is generated if the MVME2500 is the VMEbus system controller.
3.3
LEDs
The MVME2500 utilizes light emitting diodes (LEDs) to provide a visible status indicator on the
front panel. These LEDs show power failures, power-up status, Ethernet link/speed, Ethernet
activity, SATA link and activity and PCI-E valid lane status. There are also a few user configurable
LEDs. Each LED description is necessary for troubleshooting and debugging.
3.3.1
Front Panel LEDs
The front panel LEDs are listed below.
Figure 3-3
Front Panel LEDs
MVME2500 Installation and Use (6806800L01L)
51
Controls, LEDs, and Connectors
Table 3-1 Front Panel LEDs
Label
Function
Location
Color
Description
USER 1
User Defined
Front panel
Off
By default
Yellow
User Software Controllable. Refer to
the “User LED Register.”
Red
User Software Controllable. Refer to
the “User LED Register.”
Off
Normal operation after successful
firmware boot.
Red
One or more on-board power rails
has failed and the board has to
shutdown to protect the hardware.
Normal during power up, during
hardware reset (such as a front panel
reset). May be asserted by the BDFAIL
bit in the Tsi148 VSTAT register.
Front panel
Integrated
RJ45 LED
Off
No link
Amber
10/100BASE-T operation
Green
1000 BASE-T operation
FAIL
GENET1
SPEED
TSEC1
Link/Speed
Front panel
GENET1
ACT
TSEC1
Activity
Front panel
Integrated
RJ45 LED
Off
No activity
Blinking Green
Activity proportional to bandwidth
utilization
GENET2
SPEED
TSEC2
Link/Speed
Front panel
Integrated
RJ45 LED
(Left)
Off
No link
Amber
10/100BASE-T operation
Green
1000BASE-T operation
Front panel
Integrated
RJ45 LED
Off
No activity
Blinking Green
Activity proportional to bandwidth
utilization
GENET2
ACT
52
Board Fail
TSEC2
Activity
MVME2500 Installation and Use (6806800L01L)
Controls, LEDs, and Connectors
3.3.2
On-board LEDs
The on-board LEDs are listed below. To view its location on the board, see Figure 3-1 on page
49.
Figure 3-4
On-board LEDs
Table 3-2 On-board LEDs Status
3.4
Label
Function
Color
Description
D9
Power Fail
Red
This indicator is illuminated when one or more of the onboard voltage rails fails.
D33
User Defined
Amber
Controlled by the FPGA. Used for boot-up sequence
indicator.
D34
User Defined
Amber
Controlled by the FPGA. Used for boot-up sequence
indicator.
D35
User Defined
Amber
Controlled by the FPGA. Used for boot-up sequence
indicator.
D36
Early Power Fail
Amber
This indicator is lit when the early 3.3V power supply fails.
D37
User Defined
Amber
Controlled by the FPGA
D38
User Defined
Amber
Controlled by the FPGA
Connectors
This section describes the pin assignments and signals for the connectors on the MVME2500.
MVME2500 Installation and Use (6806800L01L)
53
Controls, LEDs, and Connectors
3.4.1
Front Panel Connectors
The following connectors are found on the outside of the MVME2500 board. These connectors
are divided between the front panel connectors and the backplane connectors. The front panel
connectors include the J1 and the J5 connectors. The backplane connectors include the P1 and
the P2 connectors.
3.4.1.1
RJ45 with Integrated Magnetics (J1)
The MVME2500 uses an X2 RJ45.
Table 3-3 Front Panel Tri-Speed Ethernet Connector (J1)
54
Pin Name
Signal Description
1A
GND
2A
NC
3A
Port A TRD3 -
4A
Port A TRD3 +
5A
Port A TRD2 -
6A
Port A TRD2 +
7A
Port A TRD1 -
8A
Port A TRD1 +
9A
Port A TRD0 -
10A
Port A TRD0 +
D1A
Port A Green LED1 Anode/ Yellow LED1 Cathode
D2A
Port A Yellow LED1 Anode/ Green LED1 Cathode
D3A
Port A Green LED2 Anode/ Yellow LED2 Cathode
D4A
Port A Yellow LED2 Anode/ Green LED2 Cathode
1B
GND
2B
NC
3B
Port B TRD3 -
4B
Port B TRD3 +
5B
Port B TRD2 MVME2500 Installation and Use (6806800L01L)
Controls, LEDs, and Connectors
Table 3-3 Front Panel Tri-Speed Ethernet Connector (J1) (continued)
3.4.1.2
Pin Name
Signal Description
6B
Port B TRD2 +
7B
Port B TRD1 -
8B
Port B TRD1 +
9B
Port B TRD0 -
10B
Port B TRD0 +
D1B
Port B Green LED1Anode/ Yellow LED1 Cathode
D2B
Port B Yellow LED1 Anode/ Green LED1 Cathode
D3B
Port B Green LED2Anode/ Yellow LED2 Cathode
D4B
Port B Yellow LED2 Anode/ Green LED2 Cathode
Front Panel Serial Port (J4)
There is one front access asynchronous serial port interface that is routed to the micro mini DB9 front panel connector. A male-to-male micro-mini DB9 adapter cable is available under
Artesyn part number SERIAL-MINI-D (30-W2400E01A) and ACC/CABLE/SER/DTE/6E 9-pin
micro-DSUB to 9-pin DSUB cross connected serial console cable. The pin assignments for these
connectors are as follows:
Table 3-4 Front Panel Serial Port (J4)
Pin
Signal Description
1
NC
2
RX
3
TX
4
NC
5
GND
6
NC
7
RTS
8
CTS
9
NC
MVME2500 Installation and Use (6806800L01L)
55
Controls, LEDs, and Connectors
3.4.1.3
USB Connector (J5)
The MVME2500 uses upright USB receptacle mounted in the front panel.
Table 3-5 USB Connector (J5)
3.4.1.4
Pin Name
Signal Description
1
+5 V
2
Data -
3
Data +
4
GND
MTG
Mounting Ground
MTG
Mounting Ground
MTG
Mounting Ground
MTG
Mounting Ground
VMEBus P1 Connector
The VME P1 connector is a 160-pin DIN. The P1 connector provides power and VME signals for
24-bit address and 16-bit data. The pin assignments for the P1 connector are as follows:
Table 3-6 VMEbus P1 Connector
56
Pin
Row A
Row B
Row C
Row D
Row Z
1
DATA 0
BBSY
DATA 8
+5V
NC
2
DATA 1
BCLR
DATA 9
GND
GND
3
DATA 2
ACFAIL
DATA 10
NC
NC
4
DATA 3
BGIN0
DATA 11
NC
GND
5
DATA 4
BGOUT0
DATA 12
NC
NC
6
DATA 5
BGIN1
DATA 13
NC
GND
7
DATA 6
BGOUT1
DATA 14
NC
NC
8
DATA 7
BGIN2
DATA 15
NC
GND
9
GND
BGOUT2
GND
GAP
NC
MVME2500 Installation and Use (6806800L01L)
Controls, LEDs, and Connectors
Table 3-6 VMEbus P1 Connector (continued)
Pin
Row A
Row B
Row C
Row D
Row Z
10
SYSCLK
BGIN3
SYSFAIL
GA0
GND
11
GND
BGOUT3
BERR
GA1
NC
12
DS1
BR0
SYSRESET
+3.3V
(not used)
GND
13
DS0
BR1
LWORD
GA2
NC
14
WRITE
BR2
AM 5
+3.3V
(not used)
GND
15
GND
BR3
ADD 23
GA3
NC
16
DTACK
AM 0
ADD 24
+3.3V
(not used)
GND
17
GND
AM 1
ADD 25
GA4
NC
18
AS
AM 2
ADD 26
+3.3V
(not used)
GND
19
GND
AM 3
ADD 27
NC
NC
20
IACK
GND
ADD 28
+3.3V
(not used)
GND
21
IACKIN
NC
ADD 29
NC
NC
22
IACKOUT
NC
ADD 30
+3.3V
(not used)
GND
23
AM 4
GND
ADD 31
NC
NC
24
ADD 7
IRQ7
ADD 32
+3.3V
(not used)
GND
25
ADD 6
IRQ6
ADD 33
NC
NC
26
ADD 5
IRQ5
ADD 34
+3.3V
(not used)
GND
27
ADD 4
IRQ4
ADD 35
NC
NC
28
ADD 3
IRQ3
ADD 36
+3.3V
(not used)
GND
29
ADD 2
IRQ2
ADD 37
NC
NC
30
ADD 1
IRQ1
ADD 38
+3.3V
(not used)
GND
MVME2500 Installation and Use (6806800L01L)
57
Controls, LEDs, and Connectors
Table 3-6 VMEbus P1 Connector (continued)
3.4.1.5
Pin
Row A
Row B
Row C
Row D
31
-12V
NC
+12V
+12V
32
+5V
+5V
+5V
+5V
Row Z
VMEBus P2 Connector
The VME P2 connector is a 160-pin DIN. Row B of the P2 connector provides power to the
MVME2500 board and to the upper eight VMEbus address lines and additional 16 VMEbus data
lines. The Z, A, C, and D pin assignments for the P2 connector are same for both the
MVME2500 and the MVME7216E/ MVME721E, and are as follows:
Table 3-7 VMEbus P2 Connector
58
Pin
Row A
Row B
Row C
Row D
Row Z
1
PMC IO 2
+5V
PMC IO 1
GE3_0 +
Serial 1 RX
2
PMC IO 4
GND
PMC IO 3
GE3_0 -
GND
3
PMC IO 6
RETRY
PMC IO 5
GND
Serial 1 TX
4
PMC IO 8
ADDRESS 24
PMC IO 7
GE3_1 +
GND
5
PMC IO 10
ADDRESS 25
PMC IO 9
GE3_1 -
Serial 1 CTS
6
PMC IO 12
ADDRESS 26
PMC IO 11
GND
GND
7
PMC IO 14
ADDRESS 27
PMC IO 13
GE3_2 +
Serial 1 RTS
8
PMC IO 16
ADDRESS 28
PMC IO 15
GE3_2 -
GND
9
PMC IO 18
ADDRESS 29
PMC IO 17
GND
Serial 2 RX
10
PMC IO 20
ADDRESS 30
PMC IO 19
GE3_3 +
GND
11
PMC IO 22
ADDRESS 31
PMC IO 21
GE3_3 -
Serial 2 TX
12
PMC IO 24
GND
PMC IO 23
GND
GND
13
PMC IO 26
+5V
PMC IO 25
I2C DATA
Serial 2 CTS
14
PMC IO 28
DATA 16
PMC IO 27
I2C CLK
GND
15
PMC IO 30
DATA 17
PMC IO 29
GE3_LINK_ LED
Serial 2 RTS
16
PMC IO 32
DATA 18
PMC IO 31
GE3_ACT_LED
GND
17
PMC IO 34
DATA 19
PMC IO 33
GE4_LINK_LED
Serial 3 RX
MVME2500 Installation and Use (6806800L01L)
Controls, LEDs, and Connectors
Table 3-7 VMEbus P2 Connector (continued)
Pin
Row A
Row B
Row C
Row D
Row Z
18
PMC IO 36
DATA 20
PMC IO 35
GE4_A_LED
GND
19
PMC IO 38
DATA 21
PMC IO 37
GND
Serial 3 TX
20
PMC IO 40
DATA 22
PMC IO 39
GE4_3 -
GND
21
PMC IO 42
DATA 23
PMC IO 41
GE4_3 +
Serial 3 CTS
22
PMC IO 44
GND
PMC IO 43
GND
GND
23
PMC IO 46
DATA 24
PMC IO 45
GE4_2 -
Serial 3 RTS
24
PMC IO 48
DATA 25
PMC IO 47
GE4_2+
GND
25
PMC IO 50
DATA 26
PMC IO 49
GND
Serial 4 RX
26
PMC IO 52
DATA 27
PMC IO 51
GE4_1 -
GND
27
PMC IO 54
DATA 28
PMC IO 53
GE4_1 +
Serial 4 TX
28
PMC IO 56
DATA 29
PMC IO 55
GND
GND
29
PMC IO 58
DATA 30
PMC IO 57
GE4_0 -
Serial 4 CTS
30
PMC IO 60
DATA 31
PMC IO 59
GE4_0 +
GND
31
PMC IO 62
GND
PMC IO 61
GND
Serial 4 RTS
32
PMC IO 64
+5V
PMC IO 63
+5V
GND
3.4.2
On-board Connectors
3.4.2.1
Flash Program Connector (P7)
The Flash Program Connector is depopulated in the production version of the MVME2500.
However, each pin is exposed for the 60-pin header connector for the JTAG boundary scan.
Table 3-8 Flash Programming Header (P7)
Pin
Signal Description
1
HOLD 1
2
Chip Select 1
3
Chip Select 0
MVME2500 Installation and Use (6806800L01L)
59
Controls, LEDs, and Connectors
Table 3-8 Flash Programming Header (P7) (continued)
Pin
Signal Description
4
Programmer's VCC
5
Master In Slave OUT
(MISO)
6
HOLD 0
7
Keying
8
CLOCK
GND
10
3.4.2.2
Master OUT Slave IN
(MOSI)
SATA Connector (J3)
The on-board customized SATA connector is compatible with the SATA kit, namely VME64GBSSDKIT and IVME7210-MNTKIT.
Table 3-9 Custom SATA Connector (J3)
60
Pin
Signal Description
Pin
Signal Description
1
GND
21
GND
2
GND
22
SATA POWER ENABLE
3
NC
23
NC
4
SATA TX +
24
SATA DETECT
5
NC
25
NC
6
SATA TX -
26
GND
7
GND
27
NC
8
GND
28
GND
9
GND
29
GND
10
GND
30
GND
11
NC
31
+3.3V
12
SATA RX -
32
+5V
MVME2500 Installation and Use (6806800L01L)
Controls, LEDs, and Connectors
Table 3-9 Custom SATA Connector (J3) (continued)
3.4.2.3
Pin
Signal Description
Pin
Signal Description
13
NC
33
+3.3V
14
SATA RX +
34
+5V
15
GND
35
+3.3V
16
GND
36
+5V
17
NC
37
+3.3V
18
GND
38
+5V
19
NC
39
+3.3V
20
GND
40
+5V
PMC Connectors
The MVME2500 supports only one PMC site. It utilizes J14 to support PMC I/O that goes to the
RTM PMC. The tables below show the pinout detail of J11, J12, J13 and J14. See Figure 3-1 for
the location of the PMC connectors.
Table 3-10 PMC J11 Connector
Pin
Signal Description
Pin
Signal Description
1
JTAG TCK
33
FRAME
2
-12V
34
GND
3
GND
35
GND
4
INT A
36
IRDY
5
INT B
37
DEVSEL
6
INT C
38
+5V
7
PRESENT SIGNAL
39
PCIXCAP
8
+5V
40
LOCK
9
INT D
41
NC
10
NC
42
NC
11
GND
43
PAR
MVME2500 Installation and Use (6806800L01L)
61
Controls, LEDs, and Connectors
Table 3-10 PMC J11 Connector (continued)
Pin
Signal Description
Pin
Signal Description
12
NC
44
GND
13
PCI CLK
45
+3.3V
14
GND
46
AD 15
15
GND
47
AD 12
16
GNT A
48
AD 11
17
REQ A
49
AD 9
18
+5V
50
+5V
19
+3.3V
51
GND
20
AD 31
52
CBE0
21
AD 28
53
AD 6
22
AD 27
54
AD 5
23
AD 25
55
AD 4
24
GND
56
GND
25
GND
57
+3.3V
26
CBE3
58
AD 3
27
AD 22
59
AD 2
28
AD 21
60
AD 1
29
AD 19
61
AD 0
30
+5V
62
+5V
31
+3.3V
63
GND
32
AD 17
64
REQ64
Table 3-11 PMC J12 Connector
62
Pin
Signal Description
Pin
Signal Description
1
+12V
33
GND
2
JTAG TRST
34
IDSELB
3
JTAG TMS
35
TRDY
MVME2500 Installation and Use (6806800L01L)
Controls, LEDs, and Connectors
Table 3-11 PMC J12 Connector (continued)
Pin
Signal Description
Pin
Signal Description
4
JTAG TDO
36
+3.3V
5
JTAG TDI
37
GND
6
GND
38
STOP
7
GND
39
PERR
8
NC
40
GND
9
NC
41
+3.3V
10
NC
42
SERR
11
BUSMODE2 (Pulled
UP)
43
CBE1
12
+3.3V
44
GND
13
PCI RESET
45
AD 14
14
BUSMODE3 (PULLED
DWN)
46
AD 13
15
+3.3V
47
M66EN
16
BUSMODE4 (PULLED
DWN)
48
AD 10
17
NC
49
AD 8
18
GND
50
+3.3V
19
AD 30
51
AD 7
20
AD 29
52
REQB
21
GND
53
+3.3V
22
AD 26
54
GNTB
23
AD 24
55
NC
24
+3.3V
56
GND
25
IDSEL
57
NC
26
AD 23
58
EREADY
27
+3.3V
59
GND
28
AD 28
60
RSTOUT
MVME2500 Installation and Use (6806800L01L)
63
Controls, LEDs, and Connectors
Table 3-11 PMC J12 Connector (continued)
Pin
Signal Description
Pin
Signal Description
29
AD 18
61
ACK64
30
GND
62
+3.3V
31
AD 16
63
GND
32
CBE2
64
NC
Table 3-12 PMC J13 Connector
64
Pin
Signal Description
Pin
Signal Description
1
NC
33
GND
2
GND
34
AD48
3
GND
35
AD 47
4
CBE7
36
AD 52
5
CBE6
37
AD 45
6
CBE5
38
GND
7
CBE4
39
+3.3V
8
GND
40
AD 40
9
+3.3V
41
AD 43
10
PAR64
42
AD 42
11
+3.3V
43
AD 41
12
AD 62
44
GND
13
AD 61
45
GND
14
GND
46
AD 40
15
GND
47
AD 39
16
AD 60
48
AD 38
17
AD 59
49
AD 37
18
AD 58
50
GND
19
AD 57
51
GND
20
GND
52
AD 36
MVME2500 Installation and Use (6806800L01L)
Controls, LEDs, and Connectors
Table 3-12 PMC J13 Connector (continued)
Pin
Signal Description
Pin
Signal Description
21
+3.3V
53
AD 35
22
AD 56
54
AD 34
23
AD 55
55
AD 33
24
AD 54
56
GND
25
AD 53
57
+3.3V
26
GND
58
AD 32
27
GND
59
NC
28
GND
60
NC
29
AD 51
61
NC
30
AD 50
62
GND
31
AD 49
63
GND
32
GND
64
NC
Table 3-13 PMC J14 Connector
Pin
Signal Description
Pin
Signal Description
1
PMC IO 1
33
PMC IO 33
2
PMC IO 2
34
PMC IO 34
3
PMC IO 3
35
PMC IO 35
4
PMC IO 4
36
PMC IO 36
5
PMC IO 5
37
PMC IO 37
6
PMC IO 6
38
PMC IO 38
7
PMC IO 7
39
PMC IO 39
8
PMC IO 8
40
PMC IO 40
9
PMC IO 9
41
PMC IO 41
10
PMC IO 10
42
PMC IO 42
11
PMC IO 11
43
PMC IO 43
12
PMC IO 12
44
PMC IO 44
MVME2500 Installation and Use (6806800L01L)
65
Controls, LEDs, and Connectors
Table 3-13 PMC J14 Connector (continued)
3.4.2.4
Pin
Signal Description
Pin
Signal Description
13
PMC IO 13
45
PMC IO 45
14
PMC IO 14
46
PMC IO 46
15
PMC IO 15
47
PMC IO 47
16
PMC IO 16
48
PMC IO 48
17
PMC IO 17
49
PMC IO 49
18
PMC IO 18
50
PMC IO 50
19
PMC IO 19
51
PMC IO 51
20
PMC IO 20
52
PMC IO 52
21
PMC IO 21
53
PMC IO 53
22
PMC IO 22
54
PMC IO 54
23
PMC IO 23
55
PMC IO 55
24
PMC IO 24
56
PMC IO 56
25
PMC IO 25
57
PMC IO 57
26
PMC IO 26
58
PMC IO 58
27
PMC IO 27
59
PMC IO 59
28
PMC IO 28
60
PMC IO 60
29
PMC IO 29
61
PMC IO 61
30
PMC IO 30
62
PMC IO 62
31
PMC IO 31
63
PMC IO 63
32
PMC IO 32
64
PMC IO 64
JTAG Connector (P6)
The JTAG Connector can be used in conjunction with the JTAG board and ASSET hardware.
Table 3-14 JTAG Connector (P6)
66
Pin
Signal Description
Pin
Signal Description
1
NC
2
+3.3V FROM +5V
MVME2500 Installation and Use (6806800L01L)
Controls, LEDs, and Connectors
Table 3-14 JTAG Connector (P6) (continued)
Pin
Signal Description
Pin
Signal Description
3
SPI HOLD 0
4
SPI CS 0
5
SPI CLK
6
SPI CS 1
7
SPI HOLD 1
8
SPI MOSI
9
SPI MISO
10
GND
11
SPI VCC
12
SCAN 1 TCK
13
SCAN 1 TDI
14
GND
15
SCAN 1 TRST
16
SCAN 1 TDO
17
SCAN 1 TMS
18
+3.3V
19
GPO0
20
NC
21
NC
22
SCAN 2 TMS
23
NC
24
SCAN 2 TDO
25
SCAN 2 TCK
26
+3.3V FROM +5V
27
GND
28
SCAN 2 TDI
29
NC
30
NC
31
SCAN 3 TMS
32
SCAN 3 TCK1
33
SCAN 3 TDO
34
SCAN 3 TCK 2
35
+2.5V
36
SCAN 3 TCK 3
37
SCAN 3 TDI
38
GND
39
SCAN 3 TRST
40
SCAN 3 TCK3
41
SCAN 4 TCK 1
42
SCAN 4 TMS
43
GND
44
SCAN 4 TDO
45
SCAN 4 TCK 2
46
+3.3V
47
GND
48
SCAN 4 TDI
49
SCAN 4 TCK 3
50
SCAN 4 TRST
51
SCAN 5 TMS
52
SCAN 5
53
SCAN 5 TDO
54
GND
55
+3.3V
56
SCAN5 TCK2
MVME2500 Installation and Use (6806800L01L)
67
Controls, LEDs, and Connectors
Table 3-14 JTAG Connector (P6) (continued)
3.4.2.5
Pin
Signal Description
Pin
Signal Description
57
SCAN 5 TDI
58
GND
59
SCAN 5 TRST
60
NC
COP Connector (P50)
The COP header is used for the CPU debug. The pin assignment is dictated by Freescale and is
compatible with the processor’s debugging tool.
Table 3-15 COP Header (P50)
68
Pin
Signal Description
1
JTAG TDI
2
COP QACK
3
JTAG TDO
4
COP TRST
5
COP RUNSTOP (Pulled UP)
6
COP VDD SENSE
7
JTAG TCK
8
COP CHECK STOP IN
9
JTAG TMS
10
NC
11
P2020 SW RESET
12
COP PRESENT
13
COP HARD RESET
14
KEYING
15
COP CHECK STOP OUT
16
GND
MVME2500 Installation and Use (6806800L01L)
Controls, LEDs, and Connectors
3.4.2.6
SD Connector (J2)
Table 3-16 SD Connector (J2)
3.4.2.7
Pin
Signal Description
1
DATA 3
2
COMMAND
3
GND
4
VCC (+3.3V)
5
CLOCK
6
GND
7
DATA 0
8
DATA 1
9
DATA 2
10
WRITE PROTECT
11
CARD DETECT
12
GND
XMC Connector (XJ2)
The MVME2500 has one XMC connector (XJ2) that supports XMC cards with J15 connector. It
can also support XMC cards with J16 connector without encountering any mechanical
interference.
Table 3-17 XMC Connector (XJ2) Pinout
Pin
Row A
Row B
Row C
Row D
Row E
Row F
1
RX0 +
RX0 -
+3.3V
RX1+
RX1 -
+3.3V
2
GND
GND
JTAG TRST
GND
GND
HRESET
3
NC
NC
+3.3V
NC
NC
+3.3V
4
GND
GND
JTAG TCK
GND
GND
MRSTO
(PULLED UP)
MVME2500 Installation and Use (6806800L01L)
69
Controls, LEDs, and Connectors
Table 3-17 XMC Connector (XJ2) Pinout (continued)
3.4.2.8
Pin
Row A
Row B
Row C
Row D
Row E
Row F
5
NC
NC
+3.3V
NC
NC
+3.3V
6
GND
GND
JTAG TMS
GND
GND
+12V
7
NC
NC
+3.3V
NC
NC
+3.3V
8
GND
GND
JTAG TMS
GND
GND
-12V
9
NC
NC
NC
NC
NC
+3.3V
10
GND
GND
JTAG TDO
GND
GND
GA 0
11
TX0
TX0 -
BIST
(PULLED
UP)
TX1 +
TX1 -
+3.3V
12
GND
GND
GA 1
GND
GND
PRESENT
13
NC
NC
NC
NC
NC
+3.3V
14
GND
GND
GA 2
GND
GND
I2C DATA
15
NC
NC
NC
NC
NC
+3.3V
16
GND
GND
MVMRO
(PULLED
DOWN)
GND
GND
I2C CLOCK
17
NC
NC
NC
NC
NC
NC
18
GND
GND
NC
GND
GND
NC
19
CLK +
CLK -
NC
NC
ROOT0
(PULLED
UP)
NC
Miscellaneous P2020 Debug Connectors
Table 3-18 P20x0 Debug Header
70
Pin
Signal Description
1
MSRCDI0
2
GND
MVME2500 Installation and Use (6806800L01L)
Controls, LEDs, and Connectors
Table 3-18 P20x0 Debug Header (continued)
3.5
Pin
Signal Description
3
MSRCDI1
4
MDVAL
5
MSRCDI2
6
TRIG_OUT
7
MSRCDI3
8
TRIG_IN
9
MSRCID4
10
GND
Switches
These switches control the configuration of the MVME2500.
Board Malfunction
3.5.1
Switches marked as “reserved” might carry production-related functions and can cause
the board to malfunction if their settings are changed.
Do not change settings of switches marked as “reserved”. The setting of switches which
are not marked as “reserved” has to be checked and changed before board installation.
Geographical Address Switch (S1)
The Tsi148 VMEbus Status Register provides the VMEbus geographical address of the
MVM2500. The switch reflects the inverted states of the geographical address signals.
Applications not using the five row backplane can use the geographical address switch to
assign a geographical address based on the following diagram.
MVME2500 Installation and Use (6806800L01L)
71
Controls, LEDs, and Connectors
Note that this switch is wired in parallel with the geographical address pins on the 5-row
connector. These switches must be in the "OFF" position when installed in a 5-row chassis in
order to get the correct address from the P1 connector. This switch also includes the SCON
control switches.
Figure 3-5
Geographical Address Switch
Table 3-19 Geographical Address Switch
Position
Function
Default
S1-1
VME SCON Auto1
2
Auto-SCON
Non-SCON
S1-2
VME SCON SEL
S1-3
GAP
1
S1-4
GAP4
1
S1-5
GAP3
1
S1-6
GAP2
1
S1-7
GAP1
1
S1-8
GAP0
1
1. The VME SCON MAN switch is "OFF" to select Auto-SCON mode. The switch is "ON" to
select manual SCON mode which works in conjunction with the VME SCON SEL switch.
2. The VME SCON SEL switch is OFF to select non-SCON mode. The switch is ON to
select always SCON mode. This switch is only effective when the VME SCON MAN
switch is "ON".
72
MVME2500 Installation and Use (6806800L01L)
Controls, LEDs, and Connectors
3.5.2
SMT Configuration Switch (S2)
This eight position SMT configuration switch controls the flash bank write-protect, selects the
flash boot image, and controls the safe start ENV settings. The default setting on all switch
positions is "OFF" and is indicated by brackets in Table 3-20.
Figure 3-6
SMT Configuration Switch Position
Table 3-20 Geographical Address Switch Settings
SW2
DEFAULT
Signal Name
Description
1
OFF (Normal Env)
NORMAL_ENV
Safe Start ("ON"= Use
normal ENV, "OFF"= Use
safe ENV)
MVME2500 Installation and Use (6806800L01L)
Notes
73
Controls, LEDs, and Connectors
Table 3-20 Geographical Address Switch Settings (continued)
SW2
DEFAULT
Signal Name
Description
Notes
2
OFF (Flash Block A)
BOOT_BLOCK_A
Boot Block B Select
The MVME2500 supports
dual boot.
User can select either Flash
A or Flash B to boot the
board. If the selected flash is
corrupted, the board will
automatically switch over to
the next flash.
If both flash banks are
corrupted, the board should
be sent for repair.
ON: Flash Block B
OFF: Flash Block A
3
OFF (WP Disabled)
FLASH_WP_N
SPI Flash Write-Protect
ON: WP Enabled
OFF: WP Disabled
4
OFF (PMC)
PMC_XMC_SEL
XMC or PMC selection
switch
Hardware via S2-3 writeprotects the flash.
To disable the writeprotect, S2-3 should be OFF.
You need to set the U-Boot
configuration to
successfully write on the
flash. For details, see
Programming Model.
Will select if XMC card or
PMC card is used
ON: XMC
OFF: PMC
5
OFF (133 MHz)
PMC_133
PCI frequency selection
ON: 100 MHz
OFF: 133 MHz
74
This option can only be used
if the PMC supports PCI-X
interface. The board will
automatically detect the
frequency of operation of
the PMC and will execute
accordingly. If the PMC
supports PCI-X speed, this
switch can be configured to
run either 100 MHz or 133
MHz frequency.
MVME2500 Installation and Use (6806800L01L)
Controls, LEDs, and Connectors
Table 3-20 Geographical Address Switch Settings (continued)
SW2
DEFAULT
Signal Name
Description
Notes
6
OFF (WP Enabled)
MASTER_WP_DISA
BLED
Write-Protect Disable
switch
For I2C write-protect only.
Switching it "ON" will disable
the write-protect.
ON: WP disabled
OFF: WP enabled
7
OFF (Front)
GBE_MUX_SEL
User Defined switch that
will select if the GBE PHY
will function on the front
panel or on the backplane
ON: RTM Genet
OFF: Front Panel
8
OFF (CPU Reset
Deasserted)
CPU Reset
MVME2500 Installation and Use (6806800L01L)
Two GbE ports cannot be
used at the same time. The
front panel GENET 2 and
RTM GENET 2 shares same
controller and PHY. When
the S2-7 can be set to select
the Ethernet will be routed
either to the front panel or
to the RTM.
Should be "OFF" for normal
operation.
75
Controls, LEDs, and Connectors
76
MVME2500 Installation and Use (6806800L01L)
Chapter 4
Functional Description
4.1
Block Diagram
The MVME2500 block diagram is illustrated in Figure 4-1. All variants provide front panel
access to one serial port via a micro-mini DB-9 connector, two 10/100/1000 Ethernet port
(one is configurable to be routed to the front panel or to the rear panel) through a ganged RJ45
connector and one Type A USB port. It includes board-fail LED indicator, user-defined LED
indicator and an ABORT/RESET switch.
Figure 4-1
Block Diagram
MVME2500 Installation and Use (6806800L01L)
77
Functional Description
4.2
Chipset
The MVME2500 utilizes the QorIQ P20x0 integrated processor. It offers an excellent
combination of protocol and interface support which includes the following components:
4.2.1
The QorIQ P20x0 integrated processor or e500v2 processor core (P2020) and a single
e500v2 processor core (P2010).
PCI Express interface
Local Bus Controller
Secure Digital Host Controller
I2C interface
USB interface
DUART
DMA controller
Enhanced three speed Ethernet controller
General Purpose I/O (GPIO)
Integrated Security Engine
Common On-chip Processor
P20x0 Strapping pins
e500 Processor Core
The QorIQ integrated processors offer dual high performance e500v2 core (P2020) and a
single e500v2 core (P2010). It operates from 800 MHz up to 1.2 GHz core frequency. The e500
processor core is a low-power implementation of the family of reduced instruction set
computing (RISC) embedded processor that implement the Book E definition of the PowerPC
architecture. The e500 is a 32-bit implementation of the Book E architecture using the lower
words of 64-bit general-purpose registers (GPRs) while E500v2 uses 36-bit physical
addressing.
78
MVME2500 Installation and Use (6806800L01L)
Functional Description
4.2.2
Integrated Memory Controller
A fully programmable DDR SDRAM controller supports most JEDEC standard DDR2 and DDR3
memories available. Unbuffered registered DIMMs are also supported. A built-in error checking
and correction (ECC) ensures very low bit-error rates for reliable high-frequency operation.
Though ECC is not implemented on MVME2500, the board includes a place holder for
additional chips for ECC whenever it is needed in the future.
The memory controller supports the following:
4.2.3
16 GB of memory
Asynchronous clocking from platform clock, with programmable settings that meets all
the SDRAM timing parameters.
Up to four physical banks; each bank can be independently addressed to 64 Mb to 4 Gb
memory devices (depending on the internal device configuration with x8/x16/x32 data
ports).
Chip set interleaving and partial array self-refresh.
Data mask signal and read-modify-write for sub-double-word writes when ECC is enabled.
Double-bit error detection and single-bit error correction ECC, 8-bit check work across 64bit data.
Address parity for registered DIMMs.
Automatic DRAM initialization sequence or software-controlled initialization sequence
and automatic DRAM data initialization.
Write leveling for DDR3 memories and supports up to eight posted refreshes.
PCI Express Interface
The PCI Express interface is compatible with the PCI Express Base Specification Rev. 1.0a. The
PCI Express controller connects the internal platform to a 2.5 GHz serial interface. The P20x0
has options for up to three PCI-E interfaces with up to x4 link width. The PCI-E controller is
configured to operate as either PCI-E root complex (RC) or as an endpoint (EP) device.
MVME2500 Installation and Use (6806800L01L)
79
Functional Description
4.2.4
Local Bus Controller (LBC)
The main component of the enhanced LBC is the memory controller that provides a 16-bit
interface to various types of memory devices and peripherals. The memory controller is
responsible for controlling eight memory banks shared by the following: a general purpose
chip select machine (GPCM); a flash controller machine (FCM), and user programmable
machines (UPMs).
4.2.5
Secure Digital Hub Controller (SDHC)
The SDHC/eSDHC provides an interface between the host system and the memory cards such
as the MMC and the SD. It is compatible with the SD Host Controller Standard Specification Ver.
2.0 and supports the following: SD, miniSD, SD Combo, MMC+, and RS-MMC card.
4.2.6
I2C Interface
The MVME2500 uses only one of the two independent I2C buses on the processor. For more
information, see I2C Devices, on page 91.
4.2.7
USB Interface
The P20x0 implements a USB 2.0 compliant serial interface engine. For more information, see
USB, on page 90.
4.2.8
DUART
The chipset provides two universal asynchronous receiver/transmitter (UART), each of which
acts independently of the other. Each UART is clocked by the CCB clock and is compatible with
PC16522D. As a full-duplex interface, it provides a 16-byte FIFO for both transmitter and
receiver mode.
80
MVME2500 Installation and Use (6806800L01L)
Functional Description
4.2.9
DMA Controller
The DMA controller transfers blocks of data between the various interfaces and functional
blocks of P20x0 that are independent of the e500 cores. The P20x0 DMA controller has three
high-speed DMA channels, all of which capable of complex data movement and advanced
transaction chaining.
4.2.10 Enhanced Three-Speed Ethernet Controller (eTSEC)
The eTSEC controller of the device communicates to the 10 Mbps, 100 Mbps, and 1 Gbps
Ethernet/IEE 802.3 networks, as well as to devices with generic 8 to 16-bit FIFO ports. The
MVME2500 uses the eTSEC using the RGMII interface.
4.2.11 General Purpose I/O (GPIO)
The P20x0 has a total of sixteen I/O ports. Four of these ports are used alternately as external
input interrupt. All sixteen ports have open drain capabilities.
The P20x0 processor provides a Serial Rapid I/O interface. However, this interface is not
utilized by the MVME2500.
4.2.12 Security Engine (SEC) 3.1
The integrated security engine of the P20x0 is designed to off-load intensive security functions
like key generation and exchange, authentication and bulk encryption from the processor core.
It includes eight different execution units where data flows in and out of an EU.
MVME2500 Installation and Use (6806800L01L)
81
Functional Description
4.2.13 Common On-Chip Processor (COP)
The COP is the debug interface of the QorIQ P20x0 processor. It allows a remote computer
system to access and control the internal operation of the processor. The COP interface
connects primarily through the JTAG and has additional status monitoring signals. The COP has
additional features like breakpoints, watch points, register and memory
examination/modification and other standard debugging features.
4.2.14 P20x0 Hardware Configuration Pins
A series of strapping pins are required to initialize the P20x0. These pins are samples during the
assertion of HRESET and return to their assigned function after HRESET is deasserted.
4.3
System Memory
The processors integrated memory controller supports both DDR2 and DDR3 memory
devices. It has one channel and can be configured up to four memory banks with x8, x16 and
x32 devices. Using 4 GB devices allows support of up to 16 GB of memory.
The MVME2500 has total of eight board variants, half of which has soldered 2 GB memory,
while the remaining half has 16 GB memory. The x8 or 1 Gbit device forms 2 GB and 1 GB
memory capacity. A total of 16 devices for 2 GB and eight devices are used to form 16 GB.
MVME2500 supports ENP1 and ENP2 operating environment. The ENP1 environment uses
Samsung for all variants including the commercial grade devices, while the ENP2 variants use
Micron.
4.4
Timers
There are various timer functions implemented on the MVME2500 platform:
4.4.1
Real Time Clock
This operates on 3.3 V supply monitoring and battery control function (MAX6364PUT29), a
32.768 KHz clock generator (DS32KHZS), and an RTC with alarm (DS1375T).
82
MVME2500 Installation and Use (6806800L01L)
Functional Description
See Real-Time Clock Battery, on page 97 for more information on the real time clock back-up
battery.
4.4.2
Internal Timer
The processor's internal timer is composed of eight global timers divided into two groups of
four timers each. Each timer has four individual configuration registers and they cannot be
cascaded together.
4.4.3
Watchdog Timer
The on-board FPGA provides programmable 16-bit watchdog timers. It has a 1 ms resolution
and generates a board reset when the counter expires. Interrupt is generated to the processor
when this occurs. Default value is 60 seconds.
4.4.4
FPGA Tick Timer
The MVME2500 supports three independent 32-bit timers that are implemented on the FPGA
to provide fully programmable registers for the timers.
4.5
Ethernet Interfaces
The MVME2500 has three eTSEC controllers. Each one supports RGII, GMII, and SGMII interface
to the external PHY. All controllers can only be utilized when using the RGMII interface. Using
the GMII allows only up to two usable controllers.
MVME2500 provides two 10/100/1000 Ethernet interfaces on the front panel and another two
are routed to the RTM through the backplane connector. Due to controller limitations, one
controller is designed to be routed to the front panel or to the RTM. This setting is possible by
using a third party gigabit Ethernet LAN switch with a single enable switch such as PERICOM’s
P13L301D. The routing direction can be configured through the on-board dip switch.
Each Ethernet controller has a single dedicated Broadcom BCM54616S with integrated MAC
and PHY. The registers of the PHY can be accessed through the processor’s two-wire Ethernet
management interface.The front panel RJ45 connector has integrated speed and activity
status indicator LEDs. Isolation transformers are provided on-board for each port.
MVME2500 Installation and Use (6806800L01L)
83
Functional Description
4.6
SPI Bus Interface
The enhanced serial peripheral interface (eSPI) allows the device to exchange data with
peripheral devices such as EEPROMs, RTC, Flash and the like. The eSPI is a full-duplex
synchronous, character-oriented channel that supports a simple interface such as receive,
transmit, clock and chip selects. The eSPI receiver and transmitter each have a FIFO of 32 Bytes.
The P20x0 supports up to four chip selects and RapidS full clock cycle operation. It can operate
both full-duplex and half duplex. It works with a range of 4-bit to 16-bit data characters and is
a single-master environment. The MVME2500 is configured such that the eSPI can operate up
to 200 MHz clock rate and can support booting process.The firmware boot flash resides in the
P20x0 eSPI bus interface.
4.6.1
SPI Flash Memory
The MVME2500 has two 8 MB on-board serial flash. Both contain the ENV variables and the UBoot firmware image, which is about 513 KB in size. Both SPI flash contain the same
programming for firmware redundancy and crisis recovery. The SPI flash is programmed
through the JTAG interface or through an on-board SPI flash programming header.
For information on U-boot and ENV Variables location see, Flash Memory Map, Table 5-2 on
page 102.
4.6.2
SPI Flash Programming
The MVME2500 has three headers: a 10-pin header for SPI Flash programming, an 80-pin
header for the JTAG connectivity, and a 20-pin JTAG header for ASSET hardware connectivity.
The following options are used to program the on-board flash:
84
Using on-board SPI header - The MVME2500 uses the 10-pin header with a dual SPI Flash
in-circuit programming configuration. The pin connection is compatible with DediProg
SPI Universal Pin Header.
Using 60-pin external JTAG header - An external JTAG board with a JTAG multiplexer is
compatible with the MVME2500 and is attached using an external cable. It is used to
update the boot loader in the field. Using this method, programming is done through the
JTAG interface or by using the dedicated SPI Flash programming header on the JTAG board.
MVME2500 Installation and Use (6806800L01L)
Functional Description
Factory Pre-Programming the SPI Flash usually takes a while. Ideally, the SPI Flash should
be pre-programmed in the factory before shipment.
ICT Programming - This programming is done on exposed test points using a bed of nails
tester.
The board power should be switched on before programming. The switch S2-8 should also be
powered on to successfully detect the SPI Flash chip.
4.6.3
Firmware Redundancy
The MVME2500 uses two physically separate boot devices to provide boot firmware
redundancy. Although the P20x0 provides four SPI Bus chip selects, the P20x0 is only capable
of booting from the SPI Device controlled by Chip Select 0. External SPI multiplexing logic is
implemented on the MVME2500 to accommodate this chipset limitation.
MVME2500 Installation and Use (6806800L01L)
85
Functional Description
The MVME2500 FPGA controls the chip select to SPI devices A and B. The FPGA chip select
control is based on the Switch Bank (S2-2).
Figure 4-2
SPI Device Multiplexing Logic
At power-up, the selection of the SPI boot device is strictly based upon the Switch Bank (S2-2)
setting. Depending on the S2-2 setting, SPI_SEL0 is routed to one of two SPI devices. The
selected SPI device must contain a boot image. Once the boot image is copied into memory
and executed, the FPGA will wait and once the P20x0 will write on one bit of the FPGA
watchdog register, the FPGA will then pass through the SPI chip select from the P20x0 to SPI
device chip selects. The software can now perform read/write processes on any SPI device,
including copying from one SPI device to another.
With this flexible approach to firmware redundancy, one should always be able to recover from
a corrupt active firmware image, as long as a healthy firmware image is maintained in single
bootable SPI Device.
86
MVME2500 Installation and Use (6806800L01L)
Functional Description
The MVME2500 supports automatic switch over. If booting one device is not successful, the
watchdog will trigger the board reset and it will automatically boot on the other device.
4.6.4
Crisis Recovery
The MVME2500 provides an independent boot firmware recovery mechanism for the
operating system. The firmware recovery can be performed without leaving the firmware
environment.
During crisis recovery, the healthy boot image contained in SPI Device B is copied to SPI Device
A, replacing the corrupt boot image contained in SPI Device A.
Crisis recovery is performed as follows:
1. Power off the board.
2. Set Switch S2-2 to "ON" to point to SPI Device B (crisis image).
3. Power on the board.
4. Press <h> key on the keyboard to go to the U-Boot prompt.
5. Type "moninit fru" to copy the crisis image to SPI Device A.
6. Once the U-Boot prompt is visible, power off the board.
7. Set the S2-2 back to "OFF" to point to the SPI Device A.
8. Power on the board to boot from the newly recovered image on the SPI Device A.
The board will automatically switch over if one of the devices is corrupted.
4.7
Front UART Control
The MVME2500 utilizes one of the two UART functions provided in the male micro-mini DB-9
front panel. A male-to-male micro-mini DB-9 to DB9 adapter cable is available under Artesyn
Part Number SERIAL-MINI-D (30-W2400E01A) and is approximately 12 inches in length.
MVME2500 Installation and Use (6806800L01L)
87
Functional Description
Only 115200 bps and 9600 bps are supported. The default baud rate on the front panel serial
is 9600 kbps.
4.8
Rear UART Control
The MVME2500 utilizes the Exar ST16C554 quad UART (QUART) to provide four additional
ports to the RTM. These devices feature 16 bytes of transmit and receive first-in first-out (FIFO)
with selectable receive FIFO trigger levels and data rates of up to 1.5 Mbps. Each UART has a set
of registers that provide the user with operating status and control. The QUART are 8-bit
devices connected to the processor through the local bus controller using LBC chipset CS1,
CS2, CS3 and CS4.
These four serial interfaces are routed to P2 I/O for RTM accessibility. There are a total of five
serial ports available on the MVME2500.
4.9
PMC/XMC Sites
The MVME2500 hosts only one PMC/XMC site and accepts either a PMC or an XMC add-on
card. Only an XMC or a PMC may be populated at any given time as both occupy the same
physical space on the PCB. Combination PMC/XM cards are not supported by the MVME2500.
The site provides a rear PMC I/O.
The PMC site is fully compliant with the following:
1. VITA 39 –PCI-X for PMC
2. VITA 35-2000 for PMC P4 to VME P2 Connection
3. PCI Rev 2.2 for PCI Local Bus Specification.
4. PCI-X PT 2.0 for PCI-X Protocol Addendum to the PCI Local Bus Specs.
5. IEEE Standard P1386-2001 for Standard for Common Mezzanine Card Family
6. IEEE Standard P1386.1-2001 for Standard Physical and Environmental Layer for PCI
Mezzanine Card.
7. VITA 42 for XMC
8. VITA 42.3, PCIe for XMC
88
MVME2500 Installation and Use (6806800L01L)
Functional Description
PMC/XMC sites are keyed for 3.3V PMC signaling. The PMC and the XMC add-on cards must
have a hole in the 3.3 V PMC keying position in order to be populated on the MVME2500. The
XMC specification accommodates this since it is expected that carrier cards will host both XMC
and PMC capable add-on cards.
The MVME2500 have a keying pin at the 3.3V location at the PMC site. The MVME2500 boards
are not 5 volt PMC IO compatible. The MVME2500 also has a 5 volt keying pin location at the
PMC site used to mount the SATA adapter card.
The MVME2500 utilizes the P20x0 x2 link PCI Express interface. It is designed such that the
same PCI-E interface is used for either PMC or XMC through Pericom’s PI2PCIE2412. It is PCI-E
Gen2 compliant with four differential channel input and 2:1 MUX switch with single enable. The
enable pin is controlled by FPGA through on-board switch.
The on-board switch S2-4 determines the direction of the PCI-E MUX switch. The default
setting "OFF" routes the differential lines to the PMC. Otherwise, it is routed to the XMC
connector.
4.9.1
PMC Add-on Card
The MVME2500 PMC interface utilizes IDT’s TSI384 as the PCie/PCI-X bridge. It can support up
to 8.5 Gbps (64 bits x 133 MHz). The on-board switch S2-5 configures the TSI384 to run on
either 100 MHz or 133 MHz, with 133 MHz as default.
The MVME2500 supports multi-function PMCs and processor PMCs (PrPMCs). The PMC site
has two IDSELs, two REQ/GNT pairs, and EREADY to support PrPMC as defined by VITA39.
4.9.2
XMC Add-on Card
The x2 links the PCI-E Gen 1 and is directly routed to the P15 XM connector through Pericom
MUX Switch. The on-board switch S2-4 should be set to "ON".
The XMC add-on cards are required to operate at +5V or +12V (from carrier to XMC). The
MVME2500 provides +5V to the XMC VPWR (Variable Power) pins. The MVME2500 does not
provide +12V to the XMC VPWR pins. Voltage tolerances for VPWR and all carrier supplied
voltage (+3.3 V, +12 V, -12 V) are defined by the base XMC standard.
MVME2500 Installation and Use (6806800L01L)
89
Functional Description
4.10
SATA Interface
The MVME2500 supports an optional 2.5" SATA HDD. The connector interface is compatible
with the SATAMNKIT, which contains the following: one SSD/HDD, one SATA board, screws and
a mounting guide. The SATA connector can support a horizontal mounted SSD/HDD.
The MVME2500 uses Marvell's 88SE6121B2-NAA2C000 SATA controller and supports up to 1.5
Gbps (SATA Gen 1). For status indicators, it has an on-board green LED, D12 and D13 for SATA
link and SATA activity status respectively.
4.11
VME Support
The MVME2500 can operate in either System Controller (SCON) mode or non-SCON mode, as
determined by the switch setting of S1-1 and S1-2.
The P20x0 x1 link is used for the VME backplane connectivity through the Tsi384 (PCI-E/PCI-X)
and Tsi148 (PCI-X/VMEBus) bridges.
See VMEBus P1 Connector, on page 56 and VMEBus P2 Connector, on page 58 for more
information.
4.11.1 Tsi148 VME Controller
The VMEbus interface for the MVME2500 is provided by the Tsi148 VMEbus controller. The
Tsi148 provides the required VME, VME extensions, and 2eSST functions. TI
SN74VMEH22501transceivers are used to buffer the VME signals between the Tsi148 and the
VME backplane. Refer to the Tsi148 user's manual, for additional details and/or programming
information.
4.12
USB
The MVME2500 processor implements a dual-role (DR) USB 2.0 compliant serial interface
engine. DC power to the front panel USB port is supplied using a USB power switch which
provides soft-start, current limiting, over current detection, and power enable for port 1.
90
MVME2500 Installation and Use (6806800L01L)
Functional Description
4.13
I2C Devices
The MVME2500 utilizes one of the two I2C ports provided by the board's processor. The I2C bus
is a two-wire, serial data (SDA) and serial clock (SCL), synchronous, multi-master bi-directional
serial bus that allows data exchange between this device and other devices such as VPD, SPD,
EEPROM, RTC, temperature sensor, RTM, XMC, and IDT clocking.
The RTM I2C address can be configured by the user and should not contain duplicate addresses
to avoid conflict. For more information, see I2C Bus Device Addressing, on page 136.
4.14
Reset/Control FPGA
The FPGA provides the following functions:
4.15
Power control and fault detection
Reset sequence and reset management
Status and control registers
Miscellaneous control logic
Watchdog timer
32-bit Tick Timer
Clock generator
Switch decoder and LED controller
Power Management
The MVME2500 backplane is utilized to derive +3.3V, +2.5V, +1.8V, +1.5V, +1.2V, +1.05V
voltage rail. Each voltage rail is controlled by the FPGA through an enable pin of the regulator,
while the output is monitored through power good signal. If a voltage rail fails. the FPGA will
disable each supply. To restart the system, the chassis power switch must be power-cycled.
MVME2500 Installation and Use (6806800L01L)
91
Functional Description
4.15.1 On-board Voltage Supply Requirement
The on-board power supply is considered to be out of regulation if the output voltage level is
below the minimum required power or goes beyond the maximum.
Table 4-1 Voltage Supply Requirement
Voltage Rail Requirement
Voltage Rail
Minimum
Maximum
+3.3 V
3.15 V
3.45 V
+2.5 V
2.375 V
2.625 V
+1.8 V
1.7 V
1.9 V
+1.5 V
1.425 V
1.575 V
+1.2 V
1.14 V
1.26 V
+1.2 V_SW
1.14 V
1.26 V
+1.05 V
1.0 V
1.1 V
4.15.2 Power Up Sequencing Requirements
The power up sequence describes the voltage rail power up timing, which is designed to
support all the chip supply voltage sequencing requirement.
The backplane contains three power supplies, +12 V, -12 V and +5 V. The +12 V is assigned to
PMC/XMC sites only, while the +5 V and below are assigned to different voltage levels to
support all the voltage requirements on the board. Each voltage rail is controlled by FPGA and
sequenced to provide correct voltage sequencing requirements.
When the 1.5 V is Good, it means that all the DC-DC power is Good.
92
MVME2500 Installation and Use (6806800L01L)
Functional Description
The figure below describes the detailed power up sequence of the board from +5V (main source from backplane) up to the 1.5 V
Power Good.
Figure 4-3
Power Up Sequence
A
B
C
D
1
1
2
2
3
3
4
4
POWER SEQUENCE DIAGRAM
REV
DOCUMENT NUMBER
6306822HA.cpm
A
PAGE 83 OF 87
A
MVME2500 Installation and Use (6806800L01L)
B
C
D
93
Functional Description
4.16
Clock Structure
A total of three IDT chips, a discrete oscillator, and crystal supports all the clock requirements
of MVME2500.
Figure 4-4
4.17
Clock Distribution Diagram
Reset Structure
The MVME2500 reset will initiate after the power up sequence if the 1.5 V power supply is
“GOOD”. When the board is at “ready” state, the reset logic will monitor the reset sources and
implement the necessary reset function.
94
MVME2500 Installation and Use (6806800L01L)
Functional Description
4.17.1 Reset Sequence
The timing of the reset sequence supports each chip reset requirements with respect to the
power supply.
All the resets are controlled by the FPGA with a power supply of +3.3 V from+5 V. All the resets
are asserted until +1.5 V power is Good. Initially peripherals resets are released to
corresponding sequence, then later the CPU reset is released. Once the CPU reset is released,
the CPU starts boot up sequence.
Below is the SW event sequence from the release of CPU reset to boot up.
1. Copying of U-boot from SPI to CPU cache.
2. Initialization of Serial Console.
3. Initialization of DDR using SPD parameters in cache.
4. Execution relocation to RAM.
5. Initialization of PCI.
6. POST routine.
7. Additional SW routines.
8. U-boot terminal visibility, ready to load OS image.
MVME2500 Installation and Use (6806800L01L)
95
Functional Description
The figure below describes the reset sequence from the +5 V Power Good to the release of the CPU reset.
Figure 4-5
Reset Sequence
A
B
C
D
1
1
2
2
3
3
4
4
RESET SEQUENCE
REV
DOCUMENT NUMBER
6306822HA.cpm
A
PAGE 84 OF 87
A
96
B
C
D
MVME2500 Installation and Use (6806800L01L)
Functional Description
4.18
Thermal Management
The MVME2500 utilizes two on-board temperature sensors: one for the board and the other for
the CPU temperature sensor. The board temperature sensor is located near the dual RJ45
connector near the front panel. The CPU temperature sensor is located near the P2020 CPU.
The MVME2500 thermal management support will interrupt the process only to show the
current board and CPU temperature. This interrupt is routed directly to one of the processor’s
IRQ4.
The table below shows the low and high threshold temperature in order for the interrupt to be
asserted.
Table 4-2 Thermal Interrupt Threshold
4.19
Board
Temperature Limit
CPU Temperature
Limit
Board Variant
Board Temperature Limit
Low
High
Low
High
Standard Variant
0°C to +55°C
0°C
70°C
0°C
90°C
Extended Temperature
Variant
-55°C to +71°C
-40°C
90°C
-40°C
100°C
Real-Time Clock Battery
A back-up battery based on the CR2325 specification is provided. It helps support the RTC
hold-up requirements that maintain the correct date and time. It provides backup power for
the on-board RTC when primary power is unavailable.
4.20
Debugging Support
The following information shows the details of Artesyn debugging support as applied to the
MVME2500.
MVME2500 Installation and Use (6806800L01L)
97
Functional Description
4.20.1 POST Code Indicator
The following table shows the LED status of the POST Codes. For the location of the POST Code
LEDs, see On-board LEDs, on page 53.
Logic 1 = LED is “ON”, Logic 0 = LED is “OFF”
Table 4-3 POST Code Indicator on the LED
Sequence
D33
D34
D35
Description
1
0
0
0
U-boot has been copied from SPI flash to CPU cache.
2
0
1
0
Serial console has been initialized, some text is visible
on the terminal.
3
0
1
1
DDR has been initialized using SPD parameters,
Execution is still in the cache.
4
1
0
0
Execution has been relocated to RAM.
5
1
0
1
PCI has been initialized.
6
1
1
0
POST routines are finished.
7
1
1
1
Additional SW routines are finished.
8
0
0
0
U-boot prompt is visible on the terminal, can start
loading OS image from USB, Ethernet, SATA SSD, SD.
4.20.2 JTAG Chain and Board
The MVME2500 is designed to work with separate JTAG board rather than with an on-board
JTAG multiplexer. The chip can support up to a 6-scan port and the board’s boundary scan
requires the following to function: ASSET hardware, JTAG board, and JTAG cable. The
MVME2500 provides a 60-pin header that can connect to the JTAG board using a custom cable.
The JTAG board provides three different connectors for the ASSET hardware, flash
programming and the MVME2500 JTAG connector. The board is equipped with TTL buffers to
help improve the signal quality as it traverses over the wires.
98
MVME2500 Installation and Use (6806800L01L)
Functional Description
4.20.3 Custom Debugging
Custom debugging makes use of the common on-chip processor. Refer to Common On-Chip
Processor (COP), on page 82 for details.
4.21
Rear Transition Module (RTM)
The MVME2500 is compatible with the MVME721x RTM.
The MVME721X RTM is for I/O routing through the rear of a compact VMEbus chassis. It
connects directly to the VME backplane in chassis with an 80 mm deep rear transition area. The
MVME721X RTM is designed for use with the MVME7100, MVME2500, iVME7210, and MVME
4100. It has the following features:
Table 4-4 Transition Module Features
Function
Features
I/O
One five-row P2 backplane connector for serial and Ethernet I/O passed from the
SBC
Four RJ-45 connectors for rear panel I/O: four asynchronous serial channels
Two RJ-45 connectors with integrated LEDs for rear panel I/O: two 10/100/1000
Ethernet channels
One PIM site with rear panel I/O
For more information, refer to the MVME721x RTM Installation and Use. See Appendix B,
Related Documentation, on page 147 for details on how to obtain and download the document.
MVME2500 Installation and Use (6806800L01L)
99
Functional Description
100
MVME2500 Installation and Use (6806800L01L)
Chapter 5
Memory Maps and Registers
5.1
Overview
System resources including system control and status registers, external timers, and the
QUART are mapped into 16 MB address range accessible from the MVME2500 local bus
through the P20x0 QorIQ LBC.
5.2
Memory Map
The following table shows the physical address map of the MVME2500.
Table 5-1 Physical Address Map
Device Name
Start Address
End Address
Size
DDR
0x0000_0000
0x7fff_ffff
2 GB
PCIE 3 Mem
0x8000_0000
0x9fff_ffff
512 MB
PCIE 2 Mem
0xa000_0000
0xbfff_ffff
512 MB
PCIE 1 Mem
0xc000_0000
0xdfff_ffff
512 MB
PCIE 3 IO
0xffc0_0000
0xffc0_ffff
64 KB
PCIE 2 IO
0xffc1_0000
0xffc1_ffff
64 KB
PCIE 1 IO
0xffc2_0000
0xffc2_ffff
64 KB
UART0
0xffc4_0000
0xffc4_ffff
64 KB
UART1
0xffc5_0000
0xffc5_ffff
64 KB
UART2
0xffc6_0000
0xffc6_ffff
64 KB
UART3
0xffc7_0000
0xffc7_ffff
64 KB
Timer
0xffc8_0000
0xffc8_ffff
64 KB
FPGA
0xffdf_0000
0xffdf_0fff
4 KB
CCSR
0xffe0_0000
0xffef_ffff
1 MB
MRAM
0xfff0_0000
0xfff7_ffff
512 KB
MVME2500 Installation and Use (6806800L01L)
101
Memory Maps and Registers
5.3
Flash Memory Map
The table below lists the memory range designated to U-boot and ENV variables.
Table 5-2 Flash Memory Map
5.4
Description
Memory Area
U-boot
0x00000000 0x0008ffff
Reserved
0x00090000 0x0009ffff
ENV Variables
0x00100000 0x0011ffff
Available Flash
0x00120000 0x007fffff
Linux Devices Memory Map
The table below lists the memory ranges designated to different devices in Linux.
Table 5-3 Linux Devices Memory Map
102
Device Memory Range
Memory Area
Size
Ram Mem
0x00000000 0x7fffffff
2 GB
PCIE3 Mem
0x80000000 0x9fffffff
512 MB
PCIE2 Mem
0xa0000000 0xbfffffff
512 MB
PCIE1 Mem
0xc0000000 0xdfffffff
512 MB
MRAM
0xfff00000 0xfff7ffff
512 KB
PCIE3 IO
0xffc00000 0xffc0fff
64 KB
PCIE2 IO
0xffc10000 0xffc1ffff
64 KB
PCIE1 IO
0xffc20000 0xffc2ffff
64 KB
QUART0
0xffc40000 0xffc4ffff
64 KB
QUART1
0xffc50000 0xffc5ffff
64 KB
QUART2
0xffc60000 0xffc6ffff
64 KB
QUART3
0xffc70000 0xffc7ffff
64 KB
Timer
0xffc80000 0xffc8ffff
64 KB
MVME2500 Installation and Use (6806800L01L)
Memory Maps and Registers
Table 5-3 Linux Devices Memory Map (continued)
Device Memory Range
Memory Area
Size
FPGA
0xffdf0000 0xffdf0fff
4 KB
ecm local access window CCSR
0xffe00000 0xffe00ffff
4 KB
ecm (Error Correction Module) CCSR
0xffe01000 0xffe01fff
4 KB
Memory Controller CCSR
0xffe02000 0xffe02fff
4 KB
I2C1 CCSR
0xffe03000 0xffe030ff
256 B
I2C2 CCSR
0xffe03100 0xffe031ff
256 B
UART0 CCSR
0xffe04500 0xffe045ff
256 B
UART1CCSR
0xffe04600 0xffe046ff
256 B
ELBC CCSR
0xffe05000 0xffe05fff
4 KB
SPI CCSR
0xffe07000 0xffe07fff
4 KB
PCIE3 CCSR
0xffe08000 0xffe08fff
4 KB
PCIE2 CCSR
0xffe09000 0xffe09fff
4 KB
PCIE1CCSR
0xffe0a000 0xffe0afff
4 KB
DMA2 CCSR
0xffe0c100 0xffe0c303
516 B
GPIO CCSR
0xffe0fc00 0xffe0fcff
256 B
L2 Cache CCSR
0xffe20000 0xffe20fff
4 KB
DMA1 CCSR
0xffe21100 0xffe21303
516 B
USB CCSR
0xffe22000 0xffe22fff
4 KB
ETSEC1 CCSR
0xffe24000 0xffe24fff
4 KB
ETSEC2 CCSR
0xffe25000 0xffe25fff
4 KB
ETSEC3 CCSR
0xffe26000 0xffe26fff
4 KB
SDHCI CCSR
0xffe2e000 0xffe2efff
4 KB
Crypto CCSR
0xffe30000 0xffe3ffff
64 KB
msi CCSR
0xffe41600 0xffe4167f
128 B
mpic CCSR
0xffe40000 0xffe7ffff
256 KB
Global Utilities CCSR
0xffee0000 0xffee0fff
4 KB
L2 Cache Mem
0xf0f80000 0xf0ffffff
512 KB
MVME2500 Installation and Use (6806800L01L)
103
Memory Maps and Registers
5.5
Programmable Logic Device (PLD) Registers
5.5.1
PLD Revision Register
The MVME2500 provides a PLD revision register that is read by the system software to
determine the current version of the timers/registers PLD.
Table 5-4 PLD Revision Register
REG
PLD Revision Register - 0xFFDF0000
Bit
7
Field
PLD Rev
OPER
R
RESET
03
6
5
4
3
2
1
0
Field Description
PLD_REV
5.5.2
8-bit field containing the current timer/register PLD revision. The
revision number starts at 01.
PLD Year Register
The MVME2500 PLD provides an 8-bit register which contains the build year of the
timers/registers PLD.
Table 5-5 PLD Year Register
104
REG
PLD Year Register - 0xFFDF0004
Bit
7
Field
PLD Rev
OPER
R
RESET
0A
6
5
4
3
2
1
0
MVME2500 Installation and Use (6806800L01L)
Memory Maps and Registers
5.5.3
PLD Month Register
The MVME2500 PLD provides an 8-bit register which contains the build month of the
timers/registers PLD.
Table 5-6 PLD Month Register
5.5.4
REG
PLD Year Register - 0xFFDF0005
Bit
7
Field
PLD Rev
OPER
R
RESET
0A
6
5
4
3
2
1
0
PLD Day Register
MVME2500 PLD provides an 8-bit register which contains the build day of the timers/registers
PLD.
Table 5-7 PLD Day Register
5.5.5
REG
PLD Revision Register - 0xFFDF0006
Bit
7
Field
PLD Rev
OPER
R
RESET
0E
6
5
4
3
2
1
0
PLD Sequence Register
The MVME2500 PLD provides an 8-bit register which contains the sequence of the PLD which
is in synchrony with the PCB version.
Table 5-8 PLD Sequence Register
REG
PLD Revision Register - 0xFFDF0007
Bit
7
6
5
MVME2500 Installation and Use (6806800L01L)
4
3
2
1
0
105
Memory Maps and Registers
Table 5-8 PLD Sequence Register
5.5.6
REG
PLD Revision Register - 0xFFDF0007
Bit
7
Field
PLD Rev
OPER
R
RESET
02
6
5
4
3
2
1
0
PLD Power Good Monitor Register
The MVME2500 PLD provides an 8-bit register which indicates the instantaneous status of the
supply’s power good signals.
Table 5-9 PLD Power Good Monitor Register
REG
PLD PWRDG_MNTR - 0xFFDF0012
Bit
7
6
5
4
3
2
1
0
Field
RSVD
PWR_V
1P05_P
WRGD
PWR_V
1P2_PW
RGD
PWR_V
1P8_PW
RGD
PWR_V
3P3_PW
RGD
PWR_V
2P5_PW
RGD
PWR_V
1P2_SW
_PWRG
D
PWR_V
1P5_PW
RGD
OPER
R
RESET
0
0
0
0
0
0
0
0
Field Description
106
PWR_V1P05_PWRGD
1.05V Core supply power good indicator
PWR_V1P2_PWRGD
1.2V Supply power good indicator
PWR_V1P8_PWRGD
1.8V Supply power good indicator
MVME2500 Installation and Use (6806800L01L)
Memory Maps and Registers
5.5.7
PWR_V3P3_PWRGD
3.3V Supply power good indicator
PWR_V2P5_PWRGD
2.5V Supply power good indicator
PWR_V1P2_SW_PWRG
D
1.2V SW Supply power good indicator
PWR_V1P5_PWRGD
1.5V Supply power good indicator
1 - Supply Good and Stable
0 - Otherwise
PLD LED Control Register
The MVME2500 PLD provides an 8-bit register which controls the eight LEDs.
Table 5-10 PLD LED Control Register
REG
PLD LED_CTRL - 0xFFDF001C
Bit
7
6
5
4
3
2
1
0
Field
D1
D35
D34
D33
D38
D37
D2 Red
D2
Yellow
OPER
R/W
RESET
1
0
0
0
0
0
0
0
1 - LED on
0 - LED off
For more information on LEDs, refer to Table "Front Panel LEDs" on page 52 and Table "On-board
LEDs Status" on page 53.
MVME2500 Installation and Use (6806800L01L)
107
Memory Maps and Registers
5.5.8
PLD PCI/PMC/XMC Monitor Register
The MVME2500 PLD provides an 8-bit register which indicates the status of the PCI/PMC/XMC
interface signals.
Table 5-11 PLD PCI/PMC/XMC Monitor Register
REG
PLD PCI_PMC_XMC_MNTR - 0xFFDF001D
Bit
7
6
5
4
3
2
1
0
Field
RSVD
RSVD
RSVD
PMC_X
MC_SEL
PMC1_E
READY
PMC1P_
N
XMCP1_
N
PCI1_PC
IXCAP
OPER
R
RESET
0
0
0
X
X
X
X
X
Field Description
108
PMC_XMC_SEL
XMC or PMC Selection Switch
1 - PMC
0 - XMC
PMC1_EREADY
Indicates that the PrPMC module is installed in PMC
site.
1 - PrPMC is ready for enumeration or no PrPMC is
installed.
0 - PrPMC is not ready for enumeration.
PMC1P_N
PMC Presence Indicator
1 - PMC is not present
0 - PMC is present
XMCP1_N
XMC Presence Indicator
1 - XMC is not present
0 - XMC is present
PCI1_PCIXCAP
PCI Capability Indicator
1 - PCI-X capable
0 - PCI capable
MVME2500 Installation and Use (6806800L01L)
Memory Maps and Registers
5.5.9
PLD U-Boot and TSI Monitor Register
The MVME2500 PLD provides an 8-bit register which indicates the status of the U-Boot's
normal environment switch and TSI interface signals.
Table 5-12 PLD U-Boot and TSI Monitor Register
REG
PLD PCI_PMC_XMC_MNTR - 0xFFDF001F
Bit
7
6
5
4
3
2
1
0
Field
RSVD
RSVD
RSVD
RSVD
RSVD
BDFAIL_N
NORMAL_ENV
SCON
OPER
R
RESET
0
0
0
0
0
X
X
X
Field Description
BDFAIL_N
TSI148 BDFAIL_N Pin out
1 - No TSI Fail
0 - TSI Fail
NORMAL_ENV
Normal Environment Switch Indicator
1 - Use safe ENV
0 - Use normal ENV
SCON
System Controller Indicator
1 - System Controller
0 - Non-system Controller
5.5.10 PLD Boot Bank Register
The MVME2500 PLD provides an 8-bit register which is used to declare successful U-Boot
loading, indicating the SPI boot bank priority and actual SPI bank it booted from.
Table 5-13 PLD Boot Bank Register
REG
PLD Boot Bank - 0xFFDF0050
Bit
7
6
MVME2500 Installation and Use (6806800L01L)
5
4
3
2
1
0
109
Memory Maps and Registers
Table 5-13 PLD Boot Bank Register
REG
PLD Boot Bank - 0xFFDF0050
Field
SPI_GOODReg
(write 0xA4 into this reg to indicate successful loading of the UBoot.
OPER
R/W
RESET
0
0
0
0
0
0
BOOT_B
LOCK_A
BOOT_S
PI
R
R
X
0
Field Description
BOOT_BLOCK_A
Boot Block Manual Selector Switch
1 - SPI0
0 - SPI1
BOOT_SPI
Actual Boot Bank
1 - SP1
0 - SPI0
5.5.11 PLD Write Protect and I2C Debug Register
The MVME2500 PLD provides an 8-bit register which is used to indicate the status of I2C and
SPI write-protect manual switches and is used to control the SPI write-enable.The I2C debug
ports are also provided in this register which is used in controlling the bus’ status.
Table 5-14 PLD Write Protect and I2C Debug Register
110
REG
PLD Write Protect I2C Debug- 0xFFDF0054
Bit
7
6
5
4
3
2
1
0
Field
RSVD
MASTER
_WP_DI
SABLED
FLASH_
WP_N
I2C_DEB
UG_EN
SERIAL_
FLASH_
WP
RSVD
I2C_1_
D
I2C_1_C
OPER
R
R
R
R/W
R/W
R
R/W
R/W
RESET
0
1
0
0
1
0
1
1
MVME2500 Installation and Use (6806800L01L)
Memory Maps and Registers
Field Description
MASTER_WP_DISABLED
I2C devices manual switch write-protect status
1 - Write-protect enabled
0 - Write-protect disabled
FLASH_WP_N
SPI devices manual switch write-protect status
1 - Write-protect disabled
0 - Write-protect enabled
I2C_DEBUG_EN
I2C debug ports (I2C_1_D and I2C_1_C) enable
1 - Drive Enabled
0 - Drive Disabled
SERIAL_FLASH_WP
SPI devices write-protect register
1 - Write-protect enabled
0 - Write-protect disabled
I2C_1_D
I2C debug port-Data
I2C_DEBUG_EN=0
HiZ - Tri-Stated
I2C_DEBUG_EN-1
1 - Driven High
0 - Driven Low
I2C_1_C
I2C debug port-Clock
I2C_DEBUG_EN=0
HiZ - Tri-Stated
I2C_DEBUG_EN-1
1 - Driven High
0 - Driven Low
When SERIAL_FLASH_WP is set to “Low”, this port will automatically read as low due to
“AND” connection between the two ports.
MVME2500 Installation and Use (6806800L01L)
111
Memory Maps and Registers
5.5.12 PLD Test Register 1
The MVME2500 PLD provides an 8-bit general purpose read/write register which is used by the
software for PLD testing or general status bit storage.
Table 5-15 PLD Test Register 1
REG
PLD Test Register 1- 0xFFDF0080
Bit
7
Field
TEST_REG1
OPER
R/W
RESET
00
6
5
4
3
2
1
0
Field Description
TEST_REG1
General purpose 8-bit R/W field
5.5.13 PLD Test Register 2
The MVME2500 PLD provides an 8-bit general purpose read/write register which is used by the
software for PLD testing or general status bit storage.
Table 5-16 PLD Test Register 2
REG
PLD Test Register 2- 0xFFDF0081
Bit
7
Field
TEST_REG2
OPER
R/W
RESET
00
6
5
4
3
2
1
0
Field Description
TEST_REG2
112
General purpose 8-bit R/W field
MVME2500 Installation and Use (6806800L01L)
Memory Maps and Registers
5.5.14 PLD GPIO2 Interrupt Register
The Abort switch, Tick Timer 0, 1 and 2 interrupts are ORed together. The MVME2500 provides
an interrupt register that the system software reads to determine which device the interrupt
originated from. GPIO2 will be driven "low" if any of the interrupts asserts.
Table 5-17 PLD GPIO2 Interrupt Register
REG
PLD Write Protect I2C Debug- 0xFFDF0095
Bit
7
6
5
4
3
2
1
0
Field
RSVD
RSVD
RSVD
RSVD
NMI
TICK0_INT
TICK1_INT
TICK2_INT
OPER
R
RESET
0
0
0
0
0
0
0
0
Field Description
NMI
Abort switch interrupt if pressed less than three seconds.
1 - Interrupt enabled
0 - No Interrupt
TICK0_INT
Tick Timer 0 interrupt
1 - Interrupt enabled
0 - No Interrupt
TICK1_INT
Tick Timer 1 interrupt
1 - Interrupt enabled
0 - No Interrupt
TICK2_INT
Tick Timer 2 interrupt
1 - Interrupt enabled
0 - No Interrupt
MVME2500 Installation and Use (6806800L01L)
113
Memory Maps and Registers
5.5.15 PLD Shutdown and Reset Control and Reset Reason Register
The MVME2500 provides an 8-bit register to execute the shutdown and reset commands. The
board's reset reason is also included in this register.
Table 5-18 PLD Shutdown and Reset Control and Reset Reason Register
REG
PLD Shutdown and Reset Reason- 0xFFDF00FF
Bit
7
6
5
4
3
2
1
0
Field
AUTO_SH
DN_MASK
RSVD
Soft_RST
Clear_Cause
CPU_RESET
WD_TIME
OUT
LRSTO
Sft_RST
OPER
R/W
W
W
W
R
RESET
0
0
0
0
X
X
X
X
Note: Changing a Reserved Register setting may cause damage to the board or malfunction.
Reserved register settings should not be changed.
Field Description
AUTO_SHDN_MASK
Automatic Shutdown Mask
1 - Auto Shutdown Mask Enable
0 - Auto Shutdown Mask Disable
Note: Automatic shutdown is generated after 1 second whenever a power good signal deasserts.
RSVD
Reserved
Note: This bit is reserved and cannot be used.
114
Soft_RST
Board Soft Reset (self clearing)
1 - Execute soft reset
0 - No reset
Clear_Cause
Clear Reset Reason (self clearing)
1 - Clear Reason
0 - None
MVME2500 Installation and Use (6806800L01L)
Memory Maps and Registers
CPU_RESET
CPU_HRESET_REQ_L Reset Reason
1 - Reset is due to CPU_HRESET_REQ_L signal
0 -None
WD_TIMEOUT
Watchdog Timeout Reset Reason
1 - Reset is due to watchdog timing out
0 - None
LRSTO
TSI LRSTO Reset Reason
1 - Reset is due to LRSTO signal
0 - None
Sft_RST
Soft Reset - Reset Reason
1 - Reset is due to Soft_RST register being set, or the front
panel switch being pressed more than three
0 - None
5.5.16 PLD Watchdog Timer Refresh Register
The MVME2500 provides a watchdog timer refresh register.
Table 5-19 PLD Watchdog Timer Refresh Register
REG
PLD Watch Dog Timer Load - 0xFFC80600
Bit
15
14
13
12
11
10
9
8
7
Field
RSVD
RSVD
RSVD
RSVD
RSVD
RSVD
RSVD
RSVD
Refresh
OPER
R
RESET
0000
6
5
4
3
2
1
0
Field Description
Refresh
Counter Refresh. When the pattern 0x00DB is written, the watchdog counter
will be reset to zero.
MVME2500 Installation and Use (6806800L01L)
115
Memory Maps and Registers
5.5.17 PLD Watchdog Control Register
The MVME2500 provides a watchdog control register.
Table 5-20 PLD Watchdog Control Register
REG
PLD Watch Dog Timer Load - 0xFFC80604
Bit
15
14
13
12
11
10
9
8
7
6
5
4
3
2
1
0
Field
Watchdog_EN
RSVD
RSVD
RSVD
RSVD
RSVD
RSVD
RSVD
RSVD
RSVD
RSVD
RSVD
RSVD
RSVD
RSVD
RSVD
OPER
R/W
R
RESET
0000
Field Description
EN
Enable. If cleared, the watchdog timer is disabled. If set, the watchdog timer is
enabled.
5.5.18 PLD Watchdog Timer Count Register
The MVME2500 provides a watchdog timer count register.
Table 5-21 PLD Watchdog Timer Count Register
116
REG
PLD Watchdog Timer Count - 0xffc80606
Bit
15:0
Field
Count
OPER
R/W
RESET
0xEA60 (60secs)
MVME2500 Installation and Use (6806800L01L)
Memory Maps and Registers
Field Description
Count
5.6
Count. These bits define the watchdog timer count value. When the
watchdog counter is enabled, it will count up from zero (reset value) with a 1
ms resolution until it reaches the COUNT value set by this register. Watchdog
will generate a soft reset signal if it bites.
Setting this register to 0xEA60 or 60,000 counts will provide a watchdog
timeout of 60 seconds.
External Timer Registers
The MVME2500 provides a set of tick timer registers to access the three external timers
implemented in the timers/registers PLD. These registers are 32-bit and are word writable. The
following sections describe the timer prescaler and control registers:
5.6.1
Prescaler Register
The prescaler adjust value is determined by this formula:
Prescaler Adjust = 256-(CLKIN/CLKOUT)
CLKIN is the input clock source in MHz, and CLKOUT is the desired output clock reference in
MHz.
Table 5-22 Prescaler Register
REG
Prescaler Register - 0xFFC80100
Bit
15
14
13
12
11
10
9
8
7
Field
RSVD
RSVD
RSVD
RSVD
RSVD
RSVD
RSVD
RSVD
Prescaler Register (8-bits)
OPER
R/W
RESET
0x00e7
6
5
4
3
2
1
0
The prescaler provides the clock required by each of the three times. The tick timers require a
1 MHz clock input. The input clock to the prescaler is 25 MHz. The default value is set for
0x00E7, which gives a 1 MHz reference clock for a 25 MHz input clock source.
MVME2500 Installation and Use (6806800L01L)
117
Memory Maps and Registers
5.6.2
Control Registers
Table 5-23 Control Registers
Tick Timer 0 Control Register - 0xFFC80202
Tick Timer 1 Control Register - 0xFFC80302
REG
Tick Timer 2 Control Register - 0xFFC80402
Bit
15
14
13
12
11
10
9
8
7
Field
RSVD
RSVD
RSVD
RSVD
RSVD
INTS
CINT
ENINT
OVF
OPER
R/W
RESET
0x0000
6
5
4
3
2
1
0
RSVD
COVF
COC
ENC
Field Description
118
ENC
Enable counter. When the bit is set, the counter increments. When the bit is
cleared, the counter does not increment.
COC
Clear Counter on Compare. When the bit is set, the counter is reset to 0 when
it compares with the compare register. When the bit is cleared the counter is
not reset.
COVF
Clear Overflow Bits. The overflow counter is cleared when a 1 is written to this
bit.
OVF
Overflow Bits are the output of the overflow counter. It increments each time
the tick timer sends an interrupt to the local bus interrupter. The overflow
counter is cleared by writing a 1 to the COVF bit.
ENINT
Enable Interrupt. When the bit is set, the interrupt is enabled. When the bit is
cleared, the interrupt is not enabled.
CINT
Clear Interrupt.
INTS
Interrupt Status.
RSVD
Reserved for future implementation.
MVME2500 Installation and Use (6806800L01L)
Memory Maps and Registers
5.6.3
Compare High and Low Word Registers
The tick timer counter is compared to the Compare Register. When the values are equal, the
tick timer interrupt is asserted and the overflow counter increments. If the clear-on-compare
mode is enable, the counter is also cleared. For periodic interrupts, this equation should be
used to calculate the compare value for a specific period (T):
Compare register value=T (us)
When programming the tick timer for periodic interrupt, the counter should be cleared to zero
by software and then enabled. If the counter does not initially start at zero, the time to the first
interrupt may be longer or shorter than expected. Note that the rollover time for the counter is
71.6 minutes.
Since the processor is 16-bits and the tick timer is 32-bits, the compare register was split in half.
Accessing the whole register will require two transactions.
Table 5-24 Compare High Word Registers
Tick Timer 0 Compare Value High Word - 0xFFC80204
Tick Timer 1 Compare Value High Word - 0xFFC80304
REG
Tick Timer 2 Compare Value High Word - 0xFFC80404
Bit
15
Field
TickTimer Compare Value High Word (16-bits)
OPER
R/W
RESET
0x0000
14
13
12
11
10
9
8
7
6
5
4
3
2
1
0
6
5
4
3
2
1
0
Table 5-25 Compare Low Word Registers
Tick Timer 0 Compare Value Low Word - 0xFFC80206
Tick Timer 1 Compare Value Low Word - 0xFFC80306
REG
Tick Timer 2 Compare Value Low Word - 0xFFC80406
Bit
15
Field
TickTimer Compare Value Low Word (16-bits)
OPER
R/W
RESET
0x0000
14
13
12
11
10
MVME2500 Installation and Use (6806800L01L)
9
8
7
119
Memory Maps and Registers
5.6.4
Counter High and Low Word Registers
When enabled, the tick timer counter register increments every microsecond. Software may
read or write the counter at any time.
Table 5-26 Counter High Word Registers
Tick Timer 0 Counter Value High Word - 0xFFC80208
Tick Timer 1 Counter Value High Word - 0xFFC80308
REG
Tick Timer 2 Counter Value High Word - 0xFFC80408
Bit
15
Field
TickTimer Counter Value High Word (16-bits)
OPER
R/W
RESET
0x0000
14
13
12
11
10
9
8
7
6
5
4
3
2
1
0
6
5
4
3
2
1
0
Table 5-27 Counter Low Word Registers
Tick Timer 0 Counter Value Low Word - 0xFFC8020A
Tick Timer 1 Counter Value Low Word - 0xFFC8030A
REG
Tick Timer 2 Counter Value Low Word - 0xFFC8040A
Bit
15
Field
TickTimer Counter Value Low Word (16-bits)
OPER
R/W
RESET
0x0000
120
14
13
12
11
10
9
8
7
MVME2500 Installation and Use (6806800L01L)
Chapter 6
Boot System
6.1
Overview
The MVME2500 uses Das U-Boot, a boot loader software based on the GNU Public License. It
boots the blade and is the first software to be executed after the system is powered on.
Its main functions are:
Initialize the hardware
Pass boot parameters to the Linux kernel
Start the Linux kernel
Update Linux kernel and U-Boot images
This section describes U-Boot features and procedures that are specific to the MVME2500. For
general information on U-Boot, see http://www.denx.de/wiki/U-Boot/WebHome.
6.2
Accessing U-Boot
1. Connect the board to a computer with a serial interface connector and a terminal emulation
software running on it. The serial connector of the board is found on the faceplate.
2. Configure the terminal software to use the access parameters that are specified in U-Boot.
By default, the access parameters are as follows:
Baud rate: 9600
PC ANSI
8 data bits
No parity
1 stop bit
These serial access parameters are the default values. These values can be changed within the
U-Boot. For details, refer to the U-Boot documentation.
3. Boot the MVME2500.
4. When prompted, press the <h> key.
MVME2500 Installation and Use (6806800L01L)
121
Boot System
U-Boot aborts the boot sequence and enters into a command line interface mode.
Enter the command setenv bootdelay -1; saveenv to disable the U-Boot auto-boot
feature and let the U-Boot directly enter the command line interface after the next
reboot/power up.
6.3
Boot Options
6.3.1
Booting from a Network
In this mode, U-Boot downloads and boots the Linux kernel from an external TFTP server and
mounts a root file system located on a network server.
1. Make sure that the kernel, dtb, and ramdisk are accessible to the board from the
TFTP server.
2. Configure U-Boot environment variables:
setenv ipaddr <IP address of MVME2500>
setenv serverip <IP address of TFTP server>
setenv gatewayip <gateway IP>
setenv netmask <netmask>
setenv bootargs 'root=/dev/ram rw console=ttyS0,9600n8
ramdisk_size=700000 cache-sram-size=0x10000'
saveenv
3. Transfer the files through the TFTP from the server to the local memory.
tftp 1000000 <kernel_image>
tftp 2000000 <ramdisk>
tftp C00000 <kernel dtb>
4. Boot the Linux from the memory.
bootm 1000000 2000000 c00000
122
MVME2500 Installation and Use (6806800L01L)
Boot System
6.3.2
Booting from an Optional SATA Drive
1. Make sure that the kernel, dtb, and ramdisk are saved in the SATA drive with ext2
partition.
2. Configure U-Boot environment variable:
setenv File_uImage <kernel_image>
setenv File_dtb <kernel dtb>
setenv File_ramdisk <ramdisk>
saveenv
3. Copy the files from the SATA drive to the memory:
# option: scsi - interface, 0:1 - device 0 partition 1
ext2load scsi 0:1 1000000 $File_uImage
ext2load scsi 0:1 2000000 $File_ramdisk
ext2load scsi 0:1 c00000 $File_dtb
4. Boot the Linux in memory.
bootm 1000000 2000000 c00000
6.3.3
Booting from a USB Drive
1. Make sure that the kernel, dtb, and ramdisk are saved in the USB drive with FAT
partition.
2. Configure the U-Boot environment variable:
setenv File_uImage <kernel_image>
setenv File_dtb <kernel dtb>
setenv File_ramdisk <ramdisk>
saveenv
3. Initialize USB drive:
usb start
4. Load the files from the USB drive to the memory:
# option: usb - interface, 0:1 - device 0 partition 1
fatload usb 0:1 1000000 $File_uImage
fatload usb 0:1 2000000 $File_ramdisk
fatload usb 0:1 c00000 $File_dtb
5. Boot the Linux in memory:
bootm 1000000 2000000 c00000
MVME2500 Installation and Use (6806800L01L)
123
Boot System
6.3.4
Booting from an SD Card
1. Make sure that the kernel, dtb, and ramdisk are saved in the SD card with FAT
partition.
2. Configure the U-Boot environment variable:
setenv File_uImage <kernel_image>
setenv File_dtb <kernel dtb>
setenv File_ramdisk <ramdisk>
saveenv
3. Initialize SD card:
mmcinfo
4. Load the files from the SD card to the memory:
# option: mmc - interface, 0:1 - device 0 partition 1
fatload mmc 0:1 1000000 $File_uImage
fatload mmc 0:1 2000000 $File_ramdisk
fatload mmc 0:1 c00000 $File_dtb
5. Boot the Linux in memory:
bootm 1000000 2000000 c00000
6.3.5
Booting VxWorks Through the Network
In this mode, the U-Boot downloads and boots VxWorks from an external TFTP server.
1. Make sure that the VxWorks image is accessible by the board from the TFTP server.
2. Configure U-Boot environment variables:
setenv ipaddr <IP address of MVME2500>
setenv serverip <IP address of TFTP server>
setenv gatewayip <gateway IP>
setenv netmask <netmask>
setenv vxboot 'tftpboot $vxbootfile && setenv bootargs
$vxbootargs && bootvx'
setenv vxbootfile <VxWorks_image>
setenv vxbootargs 'motetsec(0,0)<IP address of TFTP
server>:VxWorks h=<IP address of TFTP server> e=<IP address of
MVME2500>:ffffff00 b=<unused IP> u=vxworks pw=vxworks f=0x80'
saveenv
124
MVME2500 Installation and Use (6806800L01L)
Boot System
3. TFTP the files from the server to local memory, then boot:
run vxboot
6.4
Using the Persistent Memory Feature
The persistent memory means that the RAM's memory is not deleted during a reset. Power
cycling, or by temporarily removing the power and then powering up the blade again, will
delete the memory content. Persistent memory feature is enabled by default.
This feature can be useful in many situations, including:
Analyzing kernel logs after a Linux kernel panic
Defining a particular memory region for the persistent storage of application specific data
Analyzing Kernel Log Files after a Kernel Panic
When a board that is running the Linux OS indicates a kernel panic, issue a reset (through the
faceplate button, for example) to analyze the cause, then subsequently analyze kernel log files.
The persistent memory feature keeps the log files available in the memory.
To analyze the kernel log files:
1. Issue a reset.
2. Connect to U-Boot. For more information, see Accessing U-Boot on page 121.
3. Enter the following command to obtain memory addresses of the kernel log
files:.locate_kernel_log (1)
The memory addresses of any found kernel log files will be displayed.
4. Enter the following command to display the kernel logfile at any of these memory
addresses: .printf (<memory address>)
The persistent memory is useful in application-specific data storage. The standard U-Boot
variable pram can be used to reserve a memory region at the end of the physical memory to
prevent it from being overwritten. U-Boot reports less memory to the Linux kernel through the
mem parameter, indicating that the operating system should not use it either.
For more information, see the U-Boot documentation.
MVME2500 Installation and Use (6806800L01L)
125
Boot System
6.5
MVME2500 Specific U-Boot Commands
Table 6-1 MVME2500 Specific U-Boot Commands
126
Command
Description
base
Print or set address offset
bdinfo
Print board info structure
boot
Boot default, i.e., run 'bootcmd'
bootd
Boot default, i.e., run 'bootcmd'
bootelf
Boot from an ELF image in memory
bootm
Boot application image from memory
bootp
Boot image through network using BOOTP/TFTP protocol
bootvx
Boot VxWorks from an ELF image
cmp
Memory compare
coninfo
Print console devices and information
cp
Memory copy
cpu
Multiprocessor CPU boot manipulation and release
crc32
Checksum calculation
date
Get/set/reset date & time
diags
Runs POST diags
echo
Echo args to console
exit
Exit script
ext2load
Load binary file from a Ext2 file system
ext2ls
List files in a directory (default /)
fatinfo
Print information about file system
fatload
Load binary file from a DOS file system
fatls
List files in a directory (default /)
fdt
Flattened device tree utility commands
go
Start application at address 'addr'
MVME2500 Installation and Use (6806800L01L)
Boot System
Table 6-1 MVME2500 Specific U-Boot Commands (continued)
Command
Description
help
Print online help
i2c
I2C sub-system
iminfo
Print header information for application image
imxtract
Extract a part of a multi-image
interrupts
Enable or disable interrupts
itest
Return true/false on integer compare
loadb
Load binary file over serial line (kermit mode)
loads
Load S-Record file over serial line
loady
Load binary file over serial line (ymodem mode)
loop
Infinite loop on address range
md
Memory display
memmap
Displays memory map
mii
MII utility commands
mm
Memory modify (auto-incrementing address)
mmc
MMC sub system
mmcinfo
Display MMC info
moninit
Reset nvram, serial#, and write monitor to SPI flash
mtest
Simple RAM read/write test
mw
Memory write (fill)
nfs
Boot image through network using NFS protocol
nm
Memory modify (constant address)
pci
List and access PCI Configuration Space
pci_info
Show information about devices on PCI bus
ping
Send ICMP ECHO_REQUEST to network host
printenv
Print environment variables
rarpboot
Boot image through network using RARP/TFTP protocol
reset
Perform RESET of the CPU
MVME2500 Installation and Use (6806800L01L)
127
Boot System
Table 6-1 MVME2500 Specific U-Boot Commands (continued)
6.6
Command
Description
run
Run commands in an environment variable
saveenv
Save environment variables to persistent storage
script
Run a ';' delimited, ';;' terminated list of commands
scsi
SCSI sub-system
scsiboot
Boot from SCSI device
setenv
Set environment variables
setexpr
Set environment variable as the result of eval expression
sf
SPI flash sub-system
showvar
Print local hushshell variables
sleep
Delay execution for some time
soft_reset
Soft reset the board
source
Run script from memory
test
Minimal test like /bin/sh
tftpboot
Boot image through network using TFTP protocol
tsi148
Initialize and configure Tundra Tsi148
usb
USB sub-system
usbboot
Boot from USB device
version
Print monitor version
Updating U-Boot
To update the U-Boot, place the image in the RAM (address 0x1000000 in this example) before
copying it to the SPI flash.
The following procedure will replace the image in SPI bank 0:
1. Disable SPI write-protect in FPGA register Chapter 5, PLD Write Protect and I2C Debug
Register.
2. Ensure FLASH_WP_N in SMT Configuration Switch (S2) is in the "OFF" position.
128
MVME2500 Installation and Use (6806800L01L)
Boot System
3. Select SPI flash # 0:
sf probe 0
4. Erase 0x90000 bytes starting at SPI address 0:
sf erase 0 0x90000
5. Write 0x90000 bytes from RAM address 0x1000000 starting at SPI address 0:
sf write 0x1000000 0 0x90000
To replace the image in SPI bank 1, replace step 2 with Select SPI flash # 1:
sf probe 1
MVME2500 Installation and Use (6806800L01L)
129
Boot System
130
MVME2500 Installation and Use (6806800L01L)
Chapter 7
Programming Model
7.1
Overview
This chapter includes additional programming information for the MVME2500.
7.2
Reset Configuration
The MVME2500 supports the power-on reset (POR) pin sampling method for processor reset
configuration. Each option and the corresponding default setting are described in the
following table.
Table 7-1 POR Configuration Settings
CONFIG
CONFIG PINS
CONFIG
SELECTION
1
CCB Config
LA[29:31]
000
41: CCB CLOCK-400 MHz
2
DDR PLL Config
TSEC_1588_CLK_O
UT
001
8:1 DDR PLL-800 MHz
DDR rate is twice the
value of the DDR
controller frequency,
which is then divided by
two through the
software.
110
3:1 CORE CLOCK PLL
(1200 MHz)
For 1200 MHz board
configuration
100
2:1 CORE CLOCK PLL (800
MHz)
For 800 MHz board
configuration
110
3:1 CORE CLOCK PLL
(1200 MHz)
For 1200 MHz board
configuration
100
2:1 CORE CLOCK PLL (800
MHz)
For 800 MHz board
configuration
10
e500 core 0 is allowed to
boot without waiting for
configuration by an
external master, while
e500 core 1 is prevented
from booting until
configured by an external
master or the other core.
TSEC_1588_PULSE_
OUT1
TSEC_1588_PULSE_
OUT2
3
Core 0 PLL
LBCTL, LALE
LGPL2/LOE/LFRE
4
5
Core 1 PLL
CPU Boot
Config
LWE0, UART_SOUT1
LA27, LA16
MVME2500 Installation and Use (6806800L01L)
REMARKS
131
Programming Model
Table 7-1 POR Configuration Settings (continued)
CONFIG
CONFIG PINS
CONFIG
SELECTION
6
Boot Sequence
LGPL3/LFWP, LGPL5
11
CFG_BOOT_SEQ[1:0] =
BOOT SEQUENCE
DISABLED
7
Memory Debug
Config
DMA2_DACK0
1
Debug information from
the DDR SDRAM
controller is driven on the
MSPCID and MDVAL signs
(default)
8
DDR Debug
Config
DMA2_DDONE0
1
Debug information is not
driven on ECC pins. ECC
function in their normal
mode (default).
9
ELBCECC Enable
Config
MSRCID0
0
Default operation: eLBC
ECC checking is disabled
10
Platform Speed
LA23
1
CFG_PLAT_SPEED:1=CCB
CLOCK > = 333 MHz
11
CORE 0 Speed
LA24
1
CFG_CORE0_SPEED:1=C
ORE FREQ>= 1000 MHz
For 1200 MHz board
configuration
0
CFG_CORE0_SPEED:0=C
ORE FREQ<=1000 MHz
For 800 MHz board
configuration
1
CFG_CORE1_SPEED:1=C
ORE FREQ>=1000 MHz
For 1200 MHz board
configuration
0
CFG_CORE1_SPEED:0=C
ORE FREQ<=1000 MHz
For 800 MHz board
configuration
12
13
CORE 1 Speed
LA26
14
15
DDR Controller
Speed
LA26
1
CFG_DDR_SPEED:1=DDR
FREQ>= 500 MHz
16
Engineering use
LA[22:20]
UART_SOUT[0],
TRIG_OUT,
MSRCID[1],
MSRCID[4],
DMA1_DDONE_B[0]
111111
11
Default (for future use)
17
SerDes Ref
Clock Config
TSEC_1588_ALARM
_OUT1
1
SerDes expects a 100
MHz reference clock
frequency (default).
132
REMARKS
MVME2500 Installation and Use (6806800L01L)
Programming Model
Table 7-1 POR Configuration Settings (continued)
CONFIG
CONFIG PINS
CONFIG
SELECTION
18
ETSEC2 SGMII
Mode
LGPL1
1
eTSEC2 Ethernet
interface operates in
standard parallel
interface mode and uses
the TSEC_2’pins
(default).
19
ETSEC3 SGMMI
Mode
TSEC_1588_ALARM
_OUT2
1
eTSEC3 Ethernet
interface operates in
standard parallel
interface mode and uses
the TSEC_3’pins
(default).
20
ETSEC1 and
ETSEC2 Width
EC_MDC
0
eTSEC1 and eTSEC2
Ethernet interfaces
operate in reduced pin
mode (either RTBI, RGMI,
RMII or 8-bit FIFO mode).
21
ETSEC1
Protocol
TSEC1_TXD0,
TSEC1_TXD7
10
The eTSEC2 controller
operates using the GMII
protocol (or RGMII, if
configured in reduced
mode) if its not
configured to operate in
SGMII mode.
22
ETSEC2
Protocol
TSEC2_TXD0,
TSEC2_TXD7
10
The eTSEC2 controller
operates using the GMII
protocol (or RGMII, if
configured in reduced
mode) if its not
configured to operate in
SGMII mode.
23
ETSEC3
Protocol
UART_RTS0,
UART_RTS1
10
The eTSEC3 controller
operates using the RGMII
protocol if not configured
to operate in SGMII
mode.
MVME2500 Installation and Use (6806800L01L)
REMARKS
133
Programming Model
Table 7-1 POR Configuration Settings (continued)
CONFIG
CONFIG PINS
CONFIG
SELECTION
24
BOOT ROM
Location
TSEC1_TXD[6:4],
TSEC1_TX_ER
011X
On-chip boot ROM-SPI
configuration (x=0),
SDHC (x=1)
25
Host/Agent
Config
LWE1/LBS1,
LA[18:19]
111
The processor acts as the
host/root complex for all
PCI-E/Serial Rapid IO
interfaces (default).
26
I/O Port Select
TSEC1_TXD[3:1],
TSEC2_TX_ER
0010
PCI-E 1 (x1) (2.5 Gbps) SerDes lane 0
REMARKS
PCI-E 2 (x1) (2.5 Gbps) SerDes lane 2
PCI-E 3 (x2) (2.5 Gbps) SerDes lane 2-3
27
DDR SDRAM
TYPE
TSEC2_TXD1
1
DDR31.5 V. CKE low at
reset (default)
28
SerDes PLL Time
Out Enable
TRIG_OUT
1
Disable PLL lock time-out
counter. The power-onreset sequence waits
indefinitely for the SerDes
PLL to lock (default).
29
System Speed
LA[28]
1
SYSCLOCK is above 66
MHz
30
SDHC Card
Detect Polarity
TSEC2_TXD_5
1
Not Inverted
31
RAPID System
Size
134
Default
RapidIO is not used
MVME2500 Installation and Use (6806800L01L)
Programming Model
7.3
Interrupt Controller
The MVME2500 uses the MPC8548E integrated programmable interrupt controller (PIC) to
manage locally generated interrupts. Currently defined external interrupting devices and
interrupt assignments, along with corresponding edge/levels and polarities, are shown in the
following table.
Table 7-2 MVME2500 Interrupt List
Interrupt Line
Interrupt Usage
(Schematic)
IRQ0
None
IRQ1
QUART_IRQ1
LBC
RTB Quart Interrupt
IRQ2
QUART_IRQ2
LBC
RTB Quart Interrupt
IRQ3
QUART_IRQ3
LBC
RTB Quart Interrupt
IRQ4
Temperature
Interrupt
I2C
Two on-board Thermal Sensors:
one is for CPU temp and the
other is for board temp
IRQ5
Ethernet 1
Management I2C
Ethernet interrupt is handled by
PHY/ Connected for flexibility
IRQ6
Ethernet 3
Management I2C
Ethernet interrupt is handled by
PHY/ Connected for flexibility
IRQ7/ GPIO0
Ethernet 2
Management I2C
Ethernet interrupt is handled by
PHY/ Connected for flexibility
IRQ8/ GPIO1
RTC (Real Time
Clock)
12C
IRQ9/ GPIO2
FPGA Interrupt
LBC
NMI and 3 Tick Timer Interrupts
IRQ10// GPIO3
FPGA Interrupt
LBC
Power Interruption
IRQ11// GPIO4
QUART_IRQ0
LBC
RTB Quart Interrupt
MVME2500 Installation and Use (6806800L01L)
Interface to CPU
Description
Reserved for VME interrupt
135
Programming Model
7.4
I2C Bus Device Addressing
The following table contains the I2C devices used for the MVME2500 and its assigned device
address.
Table 7-3 I2C Bus Device Addressing
I2C Bus Address
Device Function
Size
Notes
0x50
SPD
256 x 8
0x4C
ADT 7461 Temperature Sensor
N/A
0x68
DS 1375 real-time clock
N/A
0x54
VPD
8192 x 8
1
0x52
User configuration
65536 x 8
1
0x53
User configuration
65536 x 8
1
0x55
RTM EEPROM
8192 X 8
1, 2
0x56
XMC EEPROM
N/A
3
1. This is a dual address serial EEPROM.
2. The RTM Bus address can be manually changed through the S1 Switch on RTM. The default
switch configuration will set the address to 0x55. Make sure that the address is unique to
the RTM Bus address when setting the switch.
3. The address of the XMC EEPROM is configured through Geographic Address resistor onboard.
7.5
Ethernet PHY Address
The assigned Ethernet PHY on the MII management bus is shown in the following table.
Table 7-4 PHY Types and MII Management Bus Address
136
Ethernet Port
Function / Location
PHY Types
PHY MIIM
Address
TSEC1
Gigabit Ethernet port routed to front panel
BCM54616
1
MVME2500 Installation and Use (6806800L01L)
Programming Model
Table 7-4 PHY Types and MII Management Bus Address (continued)
7.6
Ethernet Port
Function / Location
PHY Types
PHY MIIM
Address
TSEC2
Gigabit Ethernet port routed to front or back panel,
set by GBE_MUX_SEL in S2
BCM54616
7
TSEC3
Gigabit Ethernet port routed to back panel
BCM54616
3
Other Software Considerations
This section provides programming information in relation to various board components.
7.6.1
MRAM
The MVME2500 provides 512 K bytes of fast, non-volatile storage in the form of
Magnetoresistive Random Access Memory (MRAM). The MRAM is directly accessible by
software using processor load and store instructions similar to the DRAM. The difference is that
the MRAM retains its contents even if the board is power cycled. The MRAM is accessed through
the LBC.
7.6.2
Real Time Clock
The MVME2500 provides a battery back-up DS1375 Real Time Clock (RTC) chip. The RTC chip
provides time keeping and alarm interrupts. It is an I2C device and is accessed through the I2C
bus address at 0x68.
If the RTC is stopped or started by default, the following commands are necessary to start RTC
in u-boot.
date - get/set/reset date & time
Usage: date [MMDDhhmm[[CC]YY][.ss]]
date reset
- without arguments: print date & time
- with numeric argument: set the system date & time
- with 'reset' argument: reset the RTC
MVME2500 Installation and Use (6806800L01L)
137
Programming Model
7.6.3
Quad UART
The MVME2500 console RS232 port is driven by the UART built into the P20x0 QorIQ chip.
Additionally, the MVME2500 has a Quad UART chip which provides four 16550 compatible
UART. These additional UARTs are internally accessed through the LBC bus. The Quad UART
chip clock input (which is internally divided to generate the baud rate) is 1.8432 MHz. The four
UART physically connect to RS232 DB9 serial ports through the RTM.
7.6.4
LBC Timing Parameters
The following table defines the timing parameters for the devices on the local bus.
Table 7-5 LBC Timing Parameters
0
1
2
3
4
5
6
MRAM
UART 0
UART 1
UART 2
UART 3
FPGA
Timers
BCTLD
0
0
0
0
0
0
0
CSNT
1
1
1
1
1
1
1
ACS
10
10
10
10
10
10
10
XACS
0
0
0
0
0
0
0
SCY
0011
0011
0011
0011
0011
0011
0011
SETA
0
0
0
0
0
0
0
TRLX
0
0
0
0
0
0
0
EHTR
0
0
0
0
0
0
0
EAD
0
0
0
0
0
0
0
Field Description
BCTLD
Buffer control disable.
0 - LBCTL is asserted upon access to the current memory bank.
CSNT
Chip Select negation time.
1 - LCSn and LWE are negated one quarter of the bus clock cycle earlier
ACS
Address to chip-select setup.
10 - LCSn is outputted one quarter bus clock cycle after the address lines.
138
MVME2500 Installation and Use (6806800L01L)
Programming Model
XACS
Extra Address to chip-select setup
0 - Address to chip-select setup is determined by ORx[ACS]
SCY
Cycle length in bus clocks
0011 - Three bus clock cycle wait state
SETA
External address termination
0 - Access is terminated internally by the memory controller unless the
external device asserts LGTA earlier to terminate the access.
TRLX
Timing Relaxed
0 - Normal timing is generated by the GPCM.
EHTR
Extended hold time on read accesses.
0 - The memory controller generates normal timing. No additional cycles
are inserted
EAD
External address latch delay
0 - No additional bus clock cycles (LALE asserted for one bus clock cycle
only)
7.7
Clock Distribution
The clock function generates and distributes all of the clocks required for system operation.
The ICS9FG108 is used to generate all the required PCI-E clocks. The 25 MHz clocks for the
Ethernet PHY and SATA bridge are supplied by ICS83905 device. Most of the QorIQ P2020
clocks are generated by ICS840S07I device. Additional clocks required by individual devices are
generated near the devices using individual oscillators. The following table lists the clocks
required on the MVME2500 along with the frequency and source.
Table 7-6 Clock Distribution
Device
Clock Signal
Frequency
Clock Tree Source
VIO
QorIQ P20x0
CPU_SYSCLK
100MHz
ICS840S07I
+3.3V
QorIQ P20x0
CPU_DDR_CLK
100MHz
ICS840S07I
+3.3V
QorIQ P20x0
CLK_PCI_BR3
133Mhz
ICS840S07I
+3.3V
QorIQ P20x0
EC_GTX_CLK125
125Mhz
ICS840S07I
+3.3V
ICS840S07I
CLK_25MHZ_ICS840S07
25Mhz
ICS83905AGILF
+3.3V
88SE6121
CLK_88SE6121_25MHZ
25Mhz
ICS83905AGILF
+3.3V
MVME2500 Installation and Use (6806800L01L)
139
Programming Model
Table 7-6 Clock Distribution (continued)
Device
Clock Signal
Frequency
Clock Tree Source
VIO
ICS9FG108
CLK_25MHZ_ICS9FG108
25Mhz
ICS83905AGILF
+3.3V
BCM54616S
BP_PHY_25MHZ_CLK
25Mhz
ICS83905AGILF
+3.3V
BCM54616S
FP_PHY_25MHZ_CLK
25Mhz
ICS83905AGILF
+3.3V
BCM54616S
SW_25MHZ_CLK
25Mhz
ICS83905AGILF
+3.3V
XMC
CLK_XMC1
100MHz
ICS9FG108
DIFF
QorIQ P20x0
SD_REF_CLK
100MHz
ICS9FG109
DIFF
TSI384
CLK_PCIEC1
100MHz
ICS9FG110
DIFF
TSI384
CLK_PCIEC3
100MHz
ICS9FG111
DIFF
88SE6121
CLK_88SE6121_PCIE_100MH
Z
100MHz
ICS9FG112
DIFF
FPGA
CLK_CPLD
1.8432MHz
Oscillator
+3.3V
USB
CLK_USB_1_24MHZ
24MHz
Oscillator
+3.3V
QorIQ P20x0
CPU_RTC
1MHz
FPGA
+3.3V
PMC
CLK_PMC1
33/66/100/133M
hz
TSI384
+3.3V
TSI148
CLK_PCI_BR3
133Mhz
ICS840S07I
+3.3V
RTC
CLK_32K
32.768KHz
DS32KHz
+3.3V
FPGA
CPU_LCK0
25MHz
QorIQ P20x0
+3.3V
QUART
CLK_QUART
1.8432MHz
FPGA
+3.3V
ICS83905
CLK_25MHZ_ICS9FG108
25Mhz
ICS83905AGILF
+3.3V
7.7.1
System Clock
The system and DDR clock is driven by ICS840S07I device. The following table defines the clock
frequency.
Table 7-7 System Clock
140
SYSCLK
CORE
CCB Clock (Platform)
DDR3
LBC
100MHz
800/1200 MHz
400 MHz
400MHz
25MHz
MVME2500 Installation and Use (6806800L01L)
Programming Model
7.7.2
Real Time Clock Input
The RTC clock input is driven by a 1 MHz clock generated by the FPGA. This provides a fixed
clock reference for the QorIQ P20x0 PIC timers which the software can use as a known time
reference.
7.7.3
Local Bus Controller Clock Divisor
The local bus controller (LBC) clock output is connected to the FPGA for LBC bus transaction. It
is also the source of 1 MHz (CPU_RTC) and FPGA tick timers.
MVME2500 Installation and Use (6806800L01L)
141
Programming Model
142
MVME2500 Installation and Use (6806800L01L)
Appendix A
A
Replacing the Battery
A.1
Replacing the Battery
The figure below shows the location of the board battery.
Figure A-1
Battery Location
MVME2500 Installation and Use (6806800L01L)
143
Replacing the Battery
The battery provides seven years of data retention, summing up all periods of actual data use.
Artesyn therefore assumes that there is usually no need to replace the battery except, for
example, in case of long-term spare part handling.
Board/System Damage
Incorrect replacement of lithium batteries can result in a hazardous explosion.
When replacing the on-board lithium battery, make sure that the new and the old
battery are exactly the same battery models.
If the respective battery model is not available, contact your local Artesyn sales
representative for the availability of alternative, officially approved battery models.
Data Loss
Replacing the battery can result in loss of time settings. Backup power prevents the loss
of data during replacement.
Quickly replacing the battery may save time settings.
Data Loss
If the battery has low or insufficient power the RTC is initialized.
Replace the battery before seven years of actual battery use have elapsed.
PCB and Battery Holder Damage
144
Removing the battery with a screw driver may damage the PCB or the battery holder. To
prevent damage, do not use a screw driver to remove the battery from its holder.
MVME2500 Installation and Use (6806800L01L)
Replacing the Battery
Replacement Procedure
To replace the battery, proceed as follows:
1. Remove the old battery.
2. Install the new battery with the plus sign (+) facing up.
3. Dispose of the old battery according to your country’s legislation and in an environmentally
safe way.
MVME2500 Installation and Use (6806800L01L)
145
Replacing the Battery
146
MVME2500 Installation and Use (6806800L01L)
Appendix B
B
Related Documentation
B.1
Artesyn Embedded Technologies - Embedded
Computing Documentation
The publications listed below are referenced in this manual. You can obtain electronic copies of
Artesyn Embedded Technologies - Embedded Computing publications by contacting your
local Artesyn sales office. For released products, you can also visit our Web site for the latest
copies of our product documentation.
1. Go to www.artesyn.com/computing/support/product/technical-documentation.php.
2. Under FILTER OPTIONS, click the Document types drop-down list box to select the type of
document you are looking for.
3. In the Search text box, type the product name and click GO.
Table B-1 Artesyn Embedded Technologies - Embedded Computing Publications
Document Title
Publication Number
MVME2500 Release Notes
6806800L02
MVME2500 Quick Start Guide
6806800L03
MVME2500 Safety Notes
6806800L13
MVME721X RTM Installation and Use
6806800M42
MVME721X RTM Quick Start Guide
6806800M53
MVME721X RTM Safety Notes
6806800M54
MVME2500 Installation and Use (6806800L01L)
147
Related Documentation
B.2
Manufacturers’ Documents
For additional information, refer to the following table for manufacturers’ data sheets or user
manuals. As an additional help, a source for the listed document is provided. Please note that
while these sources have been verified, the information is subject to change without notice.
Table B-2 Manufacturers’ Publications
B.3
Company
Document
Freescale
Freescale Semiconductor, QorIQ™ P2020 Integrated Processor Reference
Manual, Rev. 0
Tundra
Semiconductor
Corporation
Tsi148™ PCI/X-to-VME Bus Bridge User Manual, March 2009
Related Specifications
For additional information, refer to the following table for related specifications. As an
additional help, a source for the listed document is provided. Please note that, while these
sources have been verified, the information is subject to change without notice.
Table B-3 Related Specifications
Organization
Document
American National
Standards Institute
ANSI/VITA 1.0-1994 (R2002), VME64 Standard
(ANSI)
VITA Standards
Organization
ANSI/VITA 1.1-1997 (R2003), VME64x Extensions
ANSI/VITA 1.5-2003, VME 2eSST
ANSI/VITA 35-2000, Pin Assignments for PMC P4 Connector
ANSI/VITA 39-2003, PCI-X for PMC and Processor PMC
VITA Standards
Organization
XMC - High Speed, Switched Interconnect Protocols on PMC VITA 42.0 2005
XMC General Purpose I/O Standard VITA 42.10
XMC PCI Express Protocol Layer Standard VITA 42.3 - 2006
148
MVME2500 Installation and Use (6806800L01L)
Related Documentation
Table B-3 Related Specifications (continued)
Organization
Document
IEEE
IEEE 802.3 LAN/MAN CSMA/CD Access Method IEEE 802.3-2005
IEEE Standard for a Common Mezzanine Card (CMC) Family IEEE Std
1386-2001
IEEE Standard Physical and Environmental Layers for PCI Mezzanine Cards
(PMC) IEEE Std 1386.1-2001
IEEE Standard Test Access Port and Boundary-Scan Architecture IEEE Std
1149.1-2001
Low Pin Count Interface Specification (LPC) Revision 1.1
Peripheral Component
Interconnect Special
Interest Group
PCI Express Base Specification Revision 2.0
(PCI-SIG)
PCI-X Electrical and Mechanical Addendum to the PCI Local Bus
Specification (PCI-X EM) Revision 2.0a
PCI Local Bus Specification PCI Rev 3.0
PCI-X Protocol Addendum to the PCI Local Bus Specification (PCI-X PT)
Revision 2.0a
Serial ATA International
Organization
(SATA-IO)
Serial ATA (SATA) Specification Revision 2.6
Serial ATA II: Extensions to Serial ATA 1.0 Revision 1.0
Trusted Computing
Group (TCG)
TPM Specification 1.2, Level 2 Revision 103 Version 1.2
USB Implementers
Forum (USB-IF)
Universal Serial Bus Specification (USB) Revision 2.0
MVME2500 Installation and Use (6806800L01L)
149
Related Documentation
150
MVME2500 Installation and Use (6806800L01L)
Artesyn Embedded Technologies, Artesyn and the Artesyn Embedded Technologies logo are trademarks and service marks of Artesyn Embedded Technologies, Inc.
All other product or service names are the property of their respective owners.
©
2015 Artesyn Embedded Technologies, Inc.