1
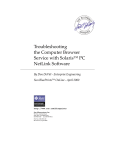
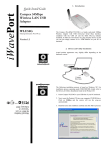
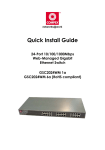
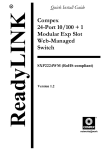
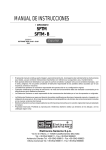
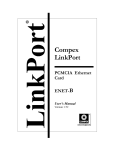
HOMEPNA “Quick Install Guide” Compex Home Phoneline 10Mbps Network Adapter HP10 Version 1.1C ADDENDUM Please note the following addendum is for Compex HP10 Network Adapter Quick Install Guide M-0246-V1.1C: v Product Description: ♦ Compex Home Phoneline 10Mbps Network Adapter, HP10 v Please note that ACPI function is not available for revision A Cards. Addendum RN0246-V1.1C, version 1.1C, August 2000 1 Contents Diagrams Front Flap Hardware Installation: Inserting the Compex HP10 Card To install a HP10 network card into another computer How to set up and connect Compex HP10 to your home phone cabling system Software Installation: How to install the Compex HP10 Home Phone Network Adapter System Requirements TCP/IP Installation And Addressing Windows 95 Configuration Windows 98 Configuration TCP/IP Configuration Enabling Sharing Configuration Technical Support Page 1 Page 1 Page 2 Page 3 Page 5 Page 5 Page 5 Page 5 Page 7 Page 9 Page 13 Page 16 Last Page PDS C 2000 HP10 Figure 1: Compex HP10 Adapter Link Act LED Indicators Description of Function Link (Green) Steady light when properly connected to another PC. ACT (Green) Flashes when data is transmitted to/from this computer. Figure 2: Compex HP10 connector and LEDs “Quick Install Guide” Compex HP10 Network Adapter Hardware Installation Installing the Compex HP10 Card Inserting the HP10 Network Card 1. 2. Turn off and unplug the power cord from the computer. Open the case. Note: Your computer may differ from the one pictured below. If you have any problem removing the case, refer to the documentation provided by the manufacturer. 3. 4. Touch an unpainted metal surface on the computer to discharge static electricity that may build up in your body. Locate an empty PCI slot, and remove the slot cover. Keep the slot cover screw handy. You will need it later. Note: Most Pentium computers have two types of expansion slots: ISA and PCI. ISA slots are black, and PCI slots are smaller and white. Make sure you choose a PCI slot. PCI slot (White) English Compex HP10 Network Adapter 1 5. Carefully insert the HP10 network card in the open PCI slot. Hold the card by its edges, and align the connector pins at the bottom of the card. Press it gently but firmly straight into the slot. If the card would not “snap” into the slot, pull it out and try again. 6. 7. 8. Replace the slot cover screw to secure the card in place. Close the case. Plug in the power cord to the computer. To install a HP10 network card into another computer: Take your network card to the next computer and repeat the installation steps. Then connect your phone cables as described below before starting the computer. 2 Compex HP10 Network Adapter English How to setup and connect Compex HP10 to your home phone cabling system. A) If your home has several phone extension points. 1. Normally your telephone is connected to the wall socket. Unplug the phone line from the wall socket and plugs to the bottom socket of the Compex HP10 network card. Using another phone cable and plugs to the top socket of Compex HP10 network card and the other end to the wall socket. 2. Do the same as in step (1) for the next PC in the next room and so on. 3. Your PCs are now ready to install the network card software to complete the installation. Refer to the respective section of the Windows version that you have installed in your PC. LINK ACT Wall socket 1 2 3 4 5 6 7 8 9 0 # Phone cable English Compex HP10 Network Adapter 3 B) If your home has only one phone point. You will need to purchase a long phone cable that runs from one PC to another in the next room. This is ordinary phone cable also sometimes called extension phone cable. You will also need to buy 1-in-2-way-out phone jack adapter (see fig). The phone cable and adapter socket can be easily purchases from any supermarkets and hardware shops. You will need one cable for each PC to network. 1. Unplug the phone cable from the wall socket. Insert the 1-in-2-wayout phone socket adapter in the wall socket. 2. Plug the phone line to one of the 2-way socket. The other end is connected to a telephone. Using another phone cable plugs in the second socket and plugs the other end of the cable to the top socket of the Compex HP10 network card in the first PC. 3. To link another cable to the second PC use yet another cable plugs to the bottom socket of the first PC and plugs the other end of the cable to top socket of the Compex HP10 network card in the second PC. 4. Repeat step (3) for the third PC and so on until all the PCs you want to network are linked up with cables. 5. Your PCs are now ready to install the network card software to complete the installation. Refer to the respective section of the Windows version you have installed in your PC. . ** Hint:The maximum length to connect the Compex HP10 network from the first PC to the last PC must not exceed 1000 feet or 300 meters. Wall socket Phone Cables Phone cable LINK ACT LINK ACT LINK ACT 1 2 3 4 5 6 7 8 9 0 # 4 Compex HP10 Network Adapter English Software Installation How to install the Compex HP10 Home Phone Network Adapter System Requirements: • Software (supports the following operating systems): ü Either Windows 95, Gold or OSR2 or Windows 98, Gold or Second Edition • Hardware: ü Minimum configuration: Pentium 200 MHz, 32 MB RAM ü Compex HP10 Network Adapter ü Normal home telephone cable TCP/IP Installation and Addressing: Before proceeding you will need to understand what Microsoft Windows requires for networking to work and what are their installation defaults. ** Hint: If you are not sure just follow the procedure as explained in "Installation on Windows 95 using TCP/IP protocol" for all your PCs that you want to be networked. Windows 95 by default install NetBEUI network protocol. Windows 98 by default install TCP/IP network protocol. For networking to work, all PCs must communicate with the same network protocol. So for PC running Windows 98 to network with PC running Windows 95, one of the PC must add the required network protocol running on the other PC. Example: Either Windows 95 adds the TCP/IP protocol or Windows 98 adds the NetBEUI protocol. English Compex HP10 Network Adapter 5 Scenarios that do not need to add additional networking protocol. a) If your home PCs are not currently networked and all PCs are running Windows 95, the same Microsoft Windows version operating system e.g. all Windows 95 or all Windows 98 or all Windows 2000. b) If your PC are running Windows 2000 and Windows 95 only. If you are planning to run TCP/IP protocol for your home network then follow the guide as below or you may refer to the section of “TCP/IP configuration” 1. If you are installing a new network at home, we recommend using this private IP address range, 192.168.168.xxx where xxx is a number from 1 to 254. 2. Each PC must be assigned a unique IP address. The first PC will use IP address 192.168.168.1. The second PC will use IP address 192.168.168.2 and so on. 3. During the installation you will be prompt to enter an IP address. Enter the address for each PC you install. 6 Compex HP10 Network Adapter English Windows 95 Configuration: NOTE: During the installation process, some files might need to be copied from the Windows 95 CD. Make sure you have it ready before you proceed. 1. When Windows 95 starts it automatically detect the Compex HP10 Network Adapter card. The "New Hardware Wizard" appears and identify the card as a "PCI Network Controller" 2. Insert the Compex HP10 PCI Network Adapter driver disk in drive A of the PC. 3. Click "Next" to proceed with the installation. Windows then read the floppy disk to locate the adapter driver. * Hint:If you have not inserted the Compex HP10 driver disk after you have click NEXT, insert the Compex HP10 driver disk now and click BACK button to back step to the previous screen. Then click NEXT button again to continue. English Compex HP10 Network Adapter 7 4. Windows will display the following: Click NEXT icon to start copying the driver. 5. Windows will continue to copy all related files from Windows 95 CDROM. When completed, it will display the following screen: Click Finished and the windows will prompt to restart the PC. 8 Compex HP10 Network Adapter English 6. At this stage NetBIEU networking protocol is installed and you already can network your PCs with this protocol. To use this protocol then answer Yes to restart the PC. When Windows restarts the Compex HP10 network adapter is ready to service the network. Note: 1. If you want to share your PC resources to other PCs in the network, refer to the section of "Enabling Sharing”. 2. If you want to run TCP/IP protocol, you should answer “NO” in (6) and refer to the section of “TCP/IP Configuration”. If you have click “YES”, do not worry. Let the PC restart and continue to proceed to the “TCP/IP configuration”. Windows 98 and Windows 2000 Configuration: NOTE: During the installation process, some files might need to be copied from the Windows 98 or 2000CD. 1. When Windows starts, it will automatically detect the Compex HP10 Network Adapter card. The "New Hardware Wizard" will appears and identify the card as a "PCI Network Controller" 2. Insert the Compex HP10 PCI Network Adapter driver disk in drive A of the PC. English Compex HP10 Network Adapter 9 3. Click "Next" to proceed with the installation. 4. Windows will then display the following options to locate the adapter driver. Add a check at "Search for the best driver for your device" and click NEXT. 5. Windows then ask which preferred read device to use. Add a check at "Floppy Disk Drive" and click NEXT, 10 Compex HP10 Network Adapter English * Hint:If you have not inserted the Compex HP10 driver disk after you have click NEXT, insert the Compex HP10 driver disk now and click BACK button to back step to the previous screen. Then click NEXT button again to continue. 6. Windows will display the following: Click NEXT icon to start copying the driver. English Compex HP10 Network Adapter 11 7. Windows will continue to copy all related files from Windows CDROM. When completed, it will display the following screen: Click Finished and the windows will prompt to restart the PC. At this point you should answer NO and proceed to the section of "TCP/IP Configuration”. If you have click “YES”, do not worry. Let the PC restart and continue to proceed to the “TCP/IP configuration”. However, if you already have a network running IP protocol and also have a DHCP server. Click YES and restarts the Windows. The DHCP server will automatically update the PC TCP/IP properties like assigning a unique IP address for this PC. In this case the networking installation have complete at this stage. 12 Compex HP10 Network Adapter English TCP/IP Configuration Step 1 From the Win95/98 Start Button, select Settings, and then Control Panel. The Win95/98 Control Panel displays. Step 2 Double-click on the Network icon as below, and you will see the diagram as below. Installed components Look for TCP/IP Add button Step 3 English Check your list of Network Components in the Network window Configuration tab. If TCP is not installed, install it now. Select the Add button and you will see below figure. If TCP/IP is installed, go to Step 8. Compex HP10 Network Adapter 13 14 Step 4 Select “Protocol” and click “Add..” button. Then you will see the figure as below. Step 5 Select “Manufacturers” as “Microsoft” and “Network Protocols” as “TCP/IP” (as shown on above diagram) and click “OK”. You may need your Win95/98 CD to complete the installation. Step 6 After you install TCP/IP, go back to the Network window. Select TCP/IP in the list of Network Components. Step 7 Click Properties, and check the settings in each of the TCP/IP Properties window Compex HP10 Network Adapter English TCP/IP Properties Tabs (IP Address Tab Shown) Step 8 Click on the “IP Address” Tab and select “specify an IP address” Step 9 Enter the following for the first PC: IP Address: 192. 168.168.1 Subnet Mask: 255.255.255.0 The second PC will use IP address 192.168.168.2 and so on. The IP address for each PC must be unique. Step 10 Click on the “Gateway” Tab and make sure all fields are blank. Step 11 Click “OK” to return to the Network Box. From here you can choose to enable sharing of your PC resources like harddisk and printer. Refer to the section of the “Enabling Sharing Configuration” if you want to share. Otherwise, click OK to save the configurations and Windows will prompt to restart the PC. Then click Yes for PC to restart. The network adapter is now ready to service the network. For details, please refer to Windows manual on how to share the hard disk and printer. English Compex HP10 Network Adapter 15 Enabling Sharing Configuration Step 1 From the Win95/98 Start Button, select Settings, and then Control Panel. The Win95/98 Control Panel displays. Step 2 Double-click on the Network icon as below, and you will see the diagram as below. Click here Step 3 16 Click File and Print Sharing icon once and you will see the next digram, Compex HP10 Network Adapter English Step 3 Click OK to save the configurations and Windows will prompt to restart the PC. Then click Yes for PC to restart. The network adapter is now ready to service the network. For details, please refer to Windows manual on how to share the hard disk and printer. English Compex HP10 Network Adapter 17 FCC Part 68 Registration This high speed Compex HomePNA HP10 Network Adapter complies with FCC Part 68 rules, and the use of this modem is subject to the following restrictions: 1. The FCC has established rules which permit this device to be directly connected to the telephone network. Standardized jacks are used for these connections. This equipment should not be used on party lines or coin phones. 2. If this device is malfunctioning, it may also be causing harm to the telephone network; this device should be disconnected until the source of the problem can be determined and until repair has been made. If this is not done, the telephone company may temporarily disconnect service. 3. The telephone company may make changes in it's facilities, equipment, operation and procedures; if such changes affect the compatibility or use of this device, the telephone company is required to give adequate notice of the situation with the FCC. 4. If the telephone company requests information on what equipment is connected to their lines, inform them of: a. The telephone number to which this unit is connected. b. The Ringer Equivalence Number (REN). c. The USOC jack required. d. The FCC Registration number. Items (b) and (d) are indicated on the label. The Ringer Equivalence Number (REN) is used to determine how many devices can be connected to your telephone line. In most areas, the sum of the REN's of all the devices on any one line should not exceed 5.0. If too many devices are attached, they may not ring properly. 18 Compex HP10 Network Adapter English Disclaimer: Compex, Inc. provides this guide without warranty of any kind, either expressed or implied, including but not limited to the implied warranties of merchantability and fitness for a particular purpose. Compex, Inc. .may make improvements and/or changes to the product and/or specifications of the product described in this guide, without prior notice. Compex, Inc will not be liable for any technical inaccuracies or typographical errors found in this guide. Changes are periodically made to the information contained herein and will be incorporated into later versions of the guide. The information contained is subject to change without prior notice. Trademark Information: Compex® , ReadyLINK® and MicroHub® are registered trademarks of Compex, Inc. All brand and product names are trademarks or registered trademarks of their respective owners. Notice: Copyright © 2000 by Compex, Inc. All rights reserved. Reproduction, adaptation, or translation without prior permission of Compex, Inc.is prohibited, except as allowed under the copyright laws. Manual Revision by Jerlin Ng. Manual Number: M-0246-V1.1C Version 1.1C, June 2000 Printed in Singapore FCC NOTICE: This device has been tested and found to comply with the limits for a Class A digital device, pursuant to Part 15 of the FCC Rules. These limits are designed to provide reasonable protection against harmful interference in a residential installation. This device generates, uses and can radiate radio frequency energy and, if not installed and used in accordance with the instructions, may cause harmful interference to radio communications. However, there is no guarantee that interference will not occur in a particular installation. If this device does cause harmful interference to radio or television reception, the user is encouraged to try to correct the interference by one or more of the following measures: Reorient or relocate the receiving antenna. Increase the separation between the g g Connect the computer into an outlet on a computer and receiver. g circuit different from that to which the Consult the dealer or an experienced g receiver is connected. radio/TV technician for help. Caution: Any changes or modifications not expressly approved by the grantee of this device could void the user's authority to operate the equipment. FCC Compliance Statement: This device complies with Part 15 of the FCC Rules. Operation is subject to the following two conditions: (1) This device may not cause harmful interference, and (2) This device must accept any interference received, including interference that may cause undesired operation. DECLARATION OF CONFORMITY: Compex, Inc. declares that the product: Product Name: Compex HomePNA HP10 Network Adapter Model Number: HP10 conforms to the following Product Standards: Radiated Emission Standards: EN55022A, FCC Part 15 Class A; Conducted Emission Standards: EN60555Pt2 conducted emission; EN55022A conducted emission, FCC Part 15 Class A; Immunity Standards: IEC 801-2; IEC 801-3; IEC 801-4; Low Voltage Directive: EN60950. Therefore, this product is in conformity with the following regional standards: FCC Class A following the provisions of FCC Part 15 directive; CE Mark following the provisions of the EC directive. Manufacturer’s Name: Compex, Inc. Singapore, June 28th, 2000 Address: 4051 E. La Palma, Unit A, Anaheim, CA 92807, USA European Contact: ReadyLINK Networktechnology GmbH, Technical Support _________________ Albert Einstein Straβe 34 / M21, Mr Shi Jia Xiang 63322 Rödermark, Germany Manager, Product Engineering [Fax: +49 (60) 749-0668] English Compex HP10 Network Adapter 19 “Installationsanleitung” Compex HP10 Netzwerkadapter Hardware Installation Installation der Compex HP10-Karte Einsetzen der HP10-Netzwerkkarte 1. 2. Schalten Sie den PC aus und stecken Sie das Netzkabel aus. Öffnen Sie das Gehäuse. Anmerkung: Ihr PC kann sich von dem unten abgebildeten PC unterscheiden. Wenn Sie Probleme mit der Entfernung des Gehäuses haben, finden Sie Einzelheiten dazu in der Dokumentation des Herstellers. 3. 4. Berühren Sie eine blanke Metalloberfläche am Computer, um eventuelle statische Elektrizität zu entladen, die sich in Ihrem Körper aufbauen könnte. Suchen Sie einen leeren PCI-Steckplatz und entfernen Sie die Abdeckung des Steckplatzes. Bewahren Sie die Schraube der Abdeckung auf. Sie werden sie später noch benötigen. Anmerkung: Die meisten Pentium-Computer haben zwei Arten von Erweiterungssteckplätzen: ISA und PCI. ISA-Steckplätze sind schwarz, und PCI-Steckplätze sind kleiner und weiß. Versichern Sie sich, dass Sie einen PCI-Steckplatz wählen. PCI-Steckplatz German Compex HP10 Network Adapter 1 5. Setzen Sie die HP10-Netzwerkkarte behutsam in den offenen PCI-Steckplatz ein. Halten Sie die Karte an ihren Rändern und richten Sie die Verbindungsstifte unten an der Karte aus. Drücken Sie sie vorsichtig aber fest in den Steckplatz. Wenn die Karte nicht in den Steckplatz „einschnappt“, ziehen Sie sie heraus und versuchen Sie es nochmals. 6. Befestigen Sie die Karte an ihrem Platz mit der Schraube der Steckplatzabdeckung. Schließen Sie das Gehäuse. Verbinden Sie das Netzkabel mit dem Computer. 7. 8. Installation einer HP10-Netzwerkkarte in einen anderen Computer: Wiederholen Sie die Schritte zur Installation der Netzwerkkarte am nächsten Computer. Schließen Sie dann Ihre Telefonkabel wie beschrieben an, bevor Sie den Computer starten. 2 Compex HP10 Network Adapter German Einrichten und Verbinden des Compex HP10 mit Ihrem FernsprechVerkabelungssystem. A) Wenn Sie mehrere Telefonnebenstellen haben. 1. Normalerweise ist Ihr Telefon an die Anschlußdose angeschlossen. Trennen Sie die Telefonleitung von der Anschlußdose und stecken Sie sie in den unteren Steckplatz der Compex HP10-Netzwerkkarte. Verwenden Sie ein anderes Telefonkabel und andere Stecker für den oberen Steckplatz der Compex HP10-Netzwerkkarte und dem anderen Ende zur Anschlußdose. 2. Verfahren Sie gemäß Schritt (1) für den nächsten Computer im nächsten Raum usw. 3. Ihre PCs sind nun bereit für die Installation der Software der Netzwerkkarte, um die Installation fertigzustellen. Einzelheiten finden Sie im entsprechenden Abschnitt der Windowsversion, die Sie auf Ihrem PC installiert haben. LINK ACT 1 2 3 4 5 6 7 8 9 0 # German Compex HP10 Network Adapter 3 B) Wenn Sie nur einen Anschluß haben. In diesem Fall müssen Sie ein langes Telefonkabel kaufen, das von einem PC zu einem anderen PC im nächsten Raum reicht. Dies ist ein normales Telefonkabel, manchmal auch Telefonverlängerungskabel genannt. Sie müssen ebenfalls einen 1–2 –Weg Telefonausgang-Steckerbuchsenadapter kaufen (siehe Abbildung). Das Telefonkabel und die Adapterbuchse können in jedem Supermarkt und Haushaltswarenladen gekauft werden. Sie benötigen ein Kabel für jeden PC, um ein Netzwerk zu betreiben. 1. Trennen Sie das Telefonkabel von der Anschlußdose. Stecken Sie den 1–2 – Weg Telefonausgang-Steckerbuchsenadapter in die Anschlußdose. 2. Stecken Sie die Telefonleitung in eine der 2-Weg Buchsen. Das andere Ende wird mit einem Telefon verbunden. Verwenden Sie eine andere Telefonleitung für das Einstecken der zweite Buchse und dem anderen Ende zur oberen Buchse der Compex HP10-Netzwerkkarte im ersten PC. 3. Um ein weiteres Kabel an den zweiten PC anzuschließen, verwenden Sie einen weiteren Kabelstecker, der in die untere Buchse des ersten PC eingesteckt wird und stecken Sie das andere Ende des Kabels in die obere Buchse der Compex HP10-Netzwerkkarte im zweiten PC. 4. Wiederholen Sie Schritt (3) für den dritten PC usw., bis alle PCs im Netzwerk durch Kabel miteinander verbunden sind. 5. Ihre PCs sind nun bereit für die Installation der Software der Netzwerkkarte, um die Installation fertigzustellen. Einzelheiten finden Sie im Abschnitt der Windowsversion, die Sie auf Ihrem PC installiert haben. ** Hinweis:Die maximale Länge zur Verbindung des Compex HP10 Netzwerks vom ersten PC bis zum letzten PC darf höchstens 100 Meter betragen. Telefonkabel LINK ACT LINK ACT Anschlußdose Telefonkabel LINK ACT 1 2 3 4 5 6 7 8 9 0 # 4 Compex HP10 Network Adapter German Software Installation Installation des Compex HP10 Fernsprech-Netzwerkadapters Systemanforderungen: • Software (unterstützt folgende Betriebssysteme): ü Entweder Windows 95, Gold oder OSR2 oder Windows 98, Gold oder Second Edition • Hardware: ü Min. Konfiguration: Pentium 200 MHz, 32 MB RAM ü Compex HP10 Netzwerkadapter ü Normales Fernsprech-Telefonkabel TCP/IP Installation und Addressierung: Bevor Sie fortfahren, sollten Sie wissen, was Microsoft Windows für einen reibungslosen Ablauf eines Netzwerkbetriebs erfordert und was die Standardeinstellungen sind. ** Hinweis: Wenn Sie sich über irgendetwas nicht im klaren sind, befolgen Sie einfach das Verfahren gemäß „Installation auf Windows 95 unter Verwendung des TCP/IP-Protokolls“ für alle PCs, die im Netzwerk betrieben werden sollen. Windows 95 installiert standardmäßig das NetBEUI-Netzwerkprotokoll. Windows 98 installiert standardmäßig das TCP/IP-Netzwerkprotokoll. Für den Betrieb eines Netzwerks müssen alle PCs mit demselben Netzwerkprotokoll kommunizieren. Wenn also PCs mit Windows 98 mit PCs mit Windows 95 in einem Netzwerk zusammenarbeiten sollen, muss einem der PCs das erforderliche Netzwerkprotokoll des anderen PC hinzugefügt werden. Beispiel: Entweder Windows 95 fügt das TCP/IP-Protokoll hinzu oder Windows 98 fügt das NetBEUI-Protokoll hinzu. German Compex HP10 Network Adapter 5 Szenarios, bei denen keine zusätzlichen Netzwerkprotokolle hinzugefügt werden müssen. a) Wenn Ihre PCs nicht vernetzt sind und alle unter Windows 95 laufen; wenn alle PCs unter derselben Microsoft Windowsversion laufen, z.B. alle PCs unter Windows 95, Windows 98 oder Windows 2000. b) Wenn Ihre PCs nur unter Windows 2000 und Windows 95 laufen. Wenn Sie ein TCP/IP-Protokoll für Ihr Netzwerk planen, befolgen Sie die nachfolgenden Richtlinien oder beziehen Sie sich auf den Abschnitt „TCP/ITKonfiguration“. 1. Wenn Sie ein neues Netzwerk installieren, empfehlen wir, den privaten IPAdressbereich 192.168.168.xxx zu verwenden, wobei xxx eine Zahl von 0 bis 254 ist. 2. Jedem PC muss eine eindeutige IP-Adresse zugeordnet werden. Der erste PC verwendet die IP-Adresse 192.168.168.1. Der zweite PC verwendet die Adresse 192.168.168.2 usw. 3. Während der Installation werden Sie dazu aufgefordert, eine IP-Adresse einzugeben. Geben Sie die Adresse für jeden PC ein, der installiert wird. 6 Compex HP10 Network Adapter German Windows 95 Konfiguration: ANMERKUNG: Während der Installation müssen möglicherweise einige Dateien von der Windows 95 CD kopiert werden. Stellen Sie sicher, dass Sie diese CD zur Hand haben. 1. Beim Start von Windows 95 wird die Compex HP10 Netzwerk-Adapterkarte automatisch erkannt. Der „Neue Hardware Assistent“ erscheint und identifiziert die Karte als „PCI-Netzwerksteuerung“. 2. Legen Sie die Treiberdiskette des Compex HP10 Netzwerkadapters in Laufwerk A ein. 3. Klicken Sie auf „Weiter“, um mit der Installation fortzufahren. Windows liest dann die Diskette, um den Adaptertreiber zu suchen. * Hinweis:Wenn die Compex HP 10 Treiberdiskette nicht eingelegt wurde, nachdem auf WEITER geklickt wurde, muss die Compex HP10 Treiberdiskette nun eingelegt und die Schaltfläche ZURÜCK gedrückt werden, um zum vorherigen Bildschirm zurückzukehren. Klicken Sie dann nochmals auf WEITER, um fortzufahren. German Compex HP10 Network Adapter 7 4. Der folgende Bildschirm wird angezeigt: Klicken Sie auf WEITER, um mit dem Kopieren des Treibers zu beginnen. 5. Windows kopiert alle relevanten Dateien von der Windows 95 CD-ROM. Nach der Fertigstellung erscheint der folgende Bildschirm: Klicken Sie auf „Fertigstellen“ und es erfolgt eine Aufforderung zum Neustart des PC. 8 Compex HP10 Network Adapter German 6. Nun ist das NetBIEU-Netzwerkprotokoll installiert und Sie können Ihre PCs mit diesem Protokoll vernetzen. Um dieses Protokoll zu verwenden, antworten Sie mit „Ja“, um den PC neu zu starten. Beim Neustart von Windows ist der Compex HP10 Netzwerkadapter bereit, das Netzwerk zu verwalten. Anmerkung: 1. Wenn Sie Ihre PC-Ressourcen für andere PCs im Netzwerk freigeben wollen, finden Sie Einzelheiten im Abschnitt „Aktivierung der Freigabe“. 2. Wenn Sie mit dem TCP/IP-Protokoll arbeiten wollen, sollten Sie bei (6) mit „NEIN“ antworten. Einzelheiten finden Sie im Abschnitt „TCP/IPKonfiguration“. Wenn Sie auf „JA“ geklickt haben, ist das nicht weiter schlimm. Starten Sie den PC neu und fahren Sie fort mit der „TCP/IPKonfiguration“. Windows 98 und Windows 2000 Konfiguration: ANMERKUNG: Während der Installation müssen möglicherweise einige Dateien von der Windows 98 oder 2000 CD kopiert werden. 1. Beim Start von Windows wird die Compex HP10 Netzwerk-Adapterkarte automatisch erkannt. Der „Neue Hardware Assistent“ erscheint und identifiziert die Karte als „PCI-Netzwerksteuerung“. 2. Legen Sie die Treiberdiskette des Compex HP10 Netzwerkadapters in Laufwerk A ein. German Compex HP10 Network Adapter 9 3. Klicken Sie auf “Weiter”, um mit der Installation fortzufahren. 4. Windows zeigt dann die folgenden Optionen, um den Adaptertreiber zu lokalisieren. Markieren Sie „Durchsuchen nach dem besten Treiber für Ihr Gerät“ und klicken Sie auf „Weiter“. 5. Windows fragt dann, welches Lesegerät verwendet werden soll. 10 Compex HP10 Network Adapter German Markieren Sie „Diskettenlaufwerk“ und klicken Sie auf WEITER. * Hinweis:Wenn Sie die Compex HP10 Treiberdiskette nicht eingelegt haben, nachdem Sie auf WEITER geklickt haben, legen Sie die COMPEX HP10 Treiberdiskette ein und klicken Sie auf ZURÜCK, um zum vorherigen Bildschirm zurückzukehren. Klicken Sie dann auf WEITER, um fortzufahren. 6. Windows zeigt den folgenden Bildschirm: Klicken Sie auf WEITER, um mit dem Kopieren des Treibers zu beginnen. German Compex HP10 Network Adapter 11 7. Windows kopiert alle relevanten Dateien von der Windows CD-ROM. Nach der Fertigstellung erscheint folgender Bildschirm: Klicken Sie auf FERTIGSTELLEN und das Fenster fordert zum Neustart des PC auf.. Nun sollten Sie mit NEIN antworten und mit dem Abschnitt „TCP/IPKonfiguration“ fortfahren. Wenn Sie auf JA geklickt haben, ist das nicht weiter schlimm. Starten Sie den PC neu und machen Sie mit der „TCP/IPKonfiguration“ weiter. Wenn Sie jedoch bereits ein Netzwerk mit dem IP-Protokoll in Betrieb haben und auch einen DHCP-Server haben, klicken Sie auf JA und starten Sie Windows neu. Der DHCP-Server aktualisiert dann automatisch die PC TCP/IP-Eigenschaften, z.B. die Zuordnung einer eindeutigen IP-Adresse für diesen PC. In diesem Fall ist die Installation des Netzwerks dann fertiggestellt. 12 Compex HP10 Network Adapter German TCP/IP-Konfiguration Step 1 Wählen Sie Einstellungen aus der Win95/98-Schaltfläche Start und dann Systemsteuerung. Die Win95/98 Systemsteuerung wird angezeigt. Step 2 Doppelklicken Sie auf das Symbol Netzwerk (siehe unten) und der folgende Bildschirm wird angezeigt. Installierte Komponenten Suchen nach TCP/IP Schaltfläche hinzufügen Schritt 3 Überprüfen Sie Ihre Liste der Netzwerkkomponenten in der Registerkarte „Konfiguration“ des Netzwerk-Bildschirms. Wenn TCP nicht installiert ist, installieren Sie es jetzt. Wählen Sie die Schaltfläche Hinzufügen und der folgende Bildschirm wird angezeigt. Wenn TCP/IP installiert ist, gehen Sie zu Schritt 8. German Compex HP10 Network Adapter 13 Schritt 4 Wählen Sie „Protokoll“ und klicken Sie auf die Schaltfläche „Hinzufügen“. Der folgende Bildschirm wird angezeigt.. Schritt 5 Wählen Sie „Microsoft“ als „Hersteller“ und „TCP/IP“ als „Netzwerkprotokoll“ (siehe obige Abbildung) und klicken Sie auf „OK“. Möglicherweise benötigen Sie Ihre Win95/98 CD, um die Installation fertigzustellen. Schritt 6 Nach der Installation von TCP/IP gehen Sie zurück zum Netzwerk-Bildschirm. Wählen Sie TCP/IP aus der Liste der Netzwerkkomponenten. Schritt 7 Klicken Sie auf „Eigenschaften“ und überprüfen Sie die Einstellungen in jedem Fenster der TCP/IP-Eigenschaften. 14 Compex HP10 Network Adapter German Registerkarten “Eigenschaften von TCP/IP” (Registerkarte “IPAdresse” ist angezeigt) Schritt 8 Klicken Sie auf die Registerkarte „IP-Adresse“ und wählen Sie „IP-Adresse festlegen“. Schritt 9 Geben Sie folgendes für den ersten PC ein: IP-Adresse: 192. 168.168.1 Subnet Mask: 255.255.255.0 Der zweite PC verwendet dann die IP-Adresse 192.168.168.2 usw. Die IP-Adresse für jeden PC muss eindeutig sein. Schritt 10Klicken Sie auf die Registerkarte „Gateway“ und stellen Sie sicher, dass alle Felder leer sind. Schritt 11Klicken sie auf „OK“, um zum Feld „Netzwerk“ zurückzukehren. Hier können Sie die Aktivierung der Freigabe Ihrer PC-Ressourcen, z.B. Festplatte oder Drucker, auswählen. Einzelheiten finden Sie im Abschnitt „Aktivierung der Konfiguration zur Freigabe“. Ansonsten klicken Sie auf „OK“, um die Konfigurationen zu speichern, und Windows fordert zum Neustart des PC auf. Klicken Sie dann auf „JA“, um den PC neu zu starten. Der Netzwerkadapter ist nun bereit, das Netzwerk zu verwalten. German Compex HP10 Network Adapter 15 Einzelheiten über die Freigabe von Festplatte und Drucker finden Sie im Windows-Handbuch. Aktivierung der Konfiguration zur Freigabe Schritt 1 Wählen Sie Einstellungen aus der Win95/98 Schaltfläche Start und dann Systemsteuerung. Die Win95/98 Systemsteuerung wird angezeigt. Schritt 2 Doppelklicken Sie auf das Symbol Netzwerk und der folgende Bildschirm wird angezeigt: Klicken Sie hier Schritt 3 Klicken Sie einmal auf das Symbol „Datei/Druckerfreigabe“ und der folgende Bildschirm erscheint: 16 Compex HP10 Network Adapter German Schritt 4 Klicken sie auf „OK“, um die Konfiguration zu speichern, und Windows fordert zum Neustart des PC ein. Klicken Sie dann auf „Ja“, um den PC neu zu starten. Der Netzwerkadapter ist nun bereit, das Netzwerk zu verwalten. Einzelheiten für die Freigabe von Festplatte und Drucker finden Sie im Windows-Handbuch. German Compex HP10 Network Adapter 17 FCC Part 68 Registrierung Dieser Hochgeschwindigkeits-Netzwerkadapter Compex Home PNA HP10 entspricht den FCC Part 68 Regeln, und die Verwendung des adapter unterliegt folgenden Beschränkungen: 1. Der FCC stellte Regeln auf, die erlauben, dass dieses Gerät direkt mit dem Telefonnetz verbunden werden kann. Für diese Verbindungen werden standardisierte Steckerbuchsen verwendet. Diese Geräte sollten nicht bei Gemeinschaftsleitungen oder Münztelefonen verwendet werden. 2. Wenn das Gerät eine Funktionsstörung hat, kann es dem Telefonnetz Schaden zufügen; das Gerät sollte von der Verbindung getrennt werden, bis die Fehlerquelle gefunden und der Fehler behoben wurde. Wenn dies nicht getan wird, kann die Telefongesellschaft ihre Dienstleistungen vorübergehend einstellen. 3. Die Telefongesellschaft kann Veränderungen an ihren Anlagen, ihrer Ausrüstung, ihrem Betrieb und ihrer Vorgehensweise vornehmen; wenn solche Veränderungen die Kompatibilität oder Verwendung des Geräts beeinflussen, muss die Telefongesellschaft der FCC eine angemessene Mitteilung zukommen lassen. 4. Wenn die Telefongesellschaft Informationen über die Geräte anfordert, die an ihre Leitungen angeschlossen sind, informieren Sie sie über:: a. Die Telefonnummer, an die die Einheit angeschlossen ist. b. Die Ruforgan-Äquivalenznummer (REN). c. Die erforderliche USOC-Steckerbuchse. d. Die FCC-Registrierungsnummer. Die Punkte (b) und (d) sind auf dem Etikett aufgeführt. Die RuforganÄquivalenz nummer (REN) wird dazu verwendet, um festzulegen, wieviele Geräte an Ihre Telefonleitung angeschlossen werden können. In den meisten Gebieten sollte die Summe der REN von allen Geräten auf einer Leitung nicht höher als 5 sein. Wenn zuviel Geräte angeschlossen sind, besteht die Möglichkeit, dass sie nicht mehr ordnungsgemäß verbunden sind. 18 Compex HP10 Network Adapter German Hinweis: Die Compex Inc. stellt diesen Leitfaden ohne Gewährleistung jeglicher Art zur Verfügung uneingeschränkt eingeschlossen sind dabei insbesondere die Gewährleistung für die Vermarktbarkeit und die Eignung für einen bestimmten Zweck. Außerdem behält sich die Compex Inc. das Recht vor, jederzeit das hier beschriebene Produkt und/oder die hier aufgeführten Produktspezifikationen ohne vorherige Mitteilung zu verändern oder zu verbessern. Die Compex Inc. übernimmt keine Verantwortung für die Folgen von technischen Ungenauigkeiten oder Schreibfehlern in diesem Leitfaden. Die in dieser Unterlage enthaltenen Angaben werden periodisch überarbeitet und notwendige Änderungen werden in späteren Versionen dieses Leitfadens aufgenommen. Auch die Informationen in diesem Leitfaden können ohne vorherige Benachrichtigung geändert werden. Warenzeichen: Compex , ReadyLINK und MicroHub sind eingetragene Warenzeichen der Compex Inc. Alle Marken- und Produktnamen sind Warenzeichen oder eingetragene Warenzeichen ihrer jeweiligen Besitzer. Copyright: © 2000 Compex Inc. Alle Rechte vorbehalten. Ohne vorherige schriftliche Erlaubnis der Compex Inc. ist die Vervielfältigung, Übertragung, Anpassung oder Übersetzung dieser Unterlage nur in dem durch das Urheberrecht ausdrücklich erlaubtem Umfang gestattet. Überarbeitung des Handbuchs durch Jean Tan Nummer des Handbuchs: M-0264-V1.1G Version: 1.1G – August 2000 Gedruckt in Singapur Hinweis der FCC: Dieses Gerät wurde geprüft und hält die Grenzwerte eines Digitalgerätes der Class A nach den FCC-Richtlinen Part 15 ein. Diese Grenzwerte sind so bemessen, daß sie einen ausreichenden Schutz gegen unerwünschte Störsignale bei der Installation im Wohnbereich gewährleisten. Dieses Gerät erzeugt und verwendet Hochfrequenzsignale und kann, falls es nicht streng nach den Herstelleranweisungen installiert und betrieben wird, Störungen beim Radio- und Fernsehempfang und im Funkverkehr hervorrufen. Dessenungeachtet kann nicht ausgeschlossen werden, daß ein installiertes Gerät auch bei ordnungsgemäßer Verwendung keine Störungen verursacht. Sollten durch dieses Gerät Störungen beim Radio- und Fernsehempfang auftreten, so versuchen Sie bitte, die Störung durch eine oder mehrere der nachfolgend aufgeführten Maßnahmen zu beseitigen: Empfangsantenne neu ausrichten oder Computer an eine Steckdose anschließen, die nicht g g an einem anderen Ort aufstellen. im Schaltkreis der Steckdose des Empfängers liegt. Abstand zwischen dem Computer und Wenden Sie sich an Ihren Händler oder einen g g dem Empfänger vergrößern. erfahrenen Radio- oder Fernsehtechniker. Vorsicht! Durch jede Veränderung oder Modifikation des Geräts, die nicht ausdrücklich durch den Hersteller dieses Geräts gebilligt wird, kann der Benutzer die Erlaubnis für den Betrieb des Geräts verlieren. Übereinstimmung mit den FCC-Richtlinien: Dieses Gerät entspricht den Vorschriften in Part 15 der FCCRichtlinien. Der Betrieb des Geräts ist an folgende Bedingungen gebunden: (1) Dieses Gerät darf keine nachteiligen Störungen hervorrufen. (2) Dieses Gerät darf nicht gegen den Empfang von Störsignalen abgeschirmt sein – uneingeschränkt eingeschlossen sind dabei alle Störungen, die zu einem unerwünschten Gerätebetrieb führen können. KONFORMITÄTSERKLÄRUNG: Compex Inc. erklärt hiermit, daß das folgende Produkt Bezeichnung: Compex HomePNA HP10 Network Adapter Modellnummer: HP10 den nachstehenden Produktstandards entspricht: Vorschriften zur Strahlenemission: EN55022A, FCC Part 15 Class A; Vorschriften zur leitungsgebundenen Störstrahlung: EN6055PT2; EN55022A; FCC Part 15 Class A; Vorschriften zur Störsicherheit: IEC 801-2; IEC 801-3; IEC 801-4; Low Voltage Direktive: E60950. Aufgrund dieser Übereinstimmung entspricht dieses Produkt auch den folgenden regional geltenden Vorschriften: FCC Class A gemäß den Anforderungen der FCC-Richtlinien Part 15; CE-Zertifizierung - gemäß der EU-Direktive. Singapur, , August 24th 2000 Hersteller: Compex, Inc. Anschrift: 4051 E. La Palma, Unit A, Anaheim, CA 92807, USA Kontaktadresse für Europa: ReadyLINK Networktechnology GmbH, Technical Support Albert Einstein Straße 42 D-63322 Rödermark Deutschland Fax: ++49 (0) 6074 - 90668 German ___________________ Mr Shi Jia Xiang Deputy R & D Manager Compex HP10 Network Adapter 19 “Guide d’installation rapide” Adaptateur réseau Compex HP10 Installation du matériel Installation de la carte Compex HP10 Insertion de la carte réseau HP10 1. 2. Eteignez l’appareil et débranchez le fil d’alimentation de l’ordinateur. Ouvrez le boîtier. Note : il est possible que votre ordinateur ne ressemble pas exactement à celui représenté ci-dessous. Si vous avez des problèmes pour retirer le boîtier, référez-vous à la documentation fournie par le fabricant. 3. 4. Touchez une surface métallique non peinte de l’ordinateur pour vous décharger de l’éventuelle électricité statique de votre corps. Localisez un emplacement d’extension PCI vide et enlevez le couvercle à l’arrière de l’emplacement d’extension. Gardez la vis du couvercle à portée de main. Vous en aurez besoin par la suite. Note : la plupart des ordinateurs Pentium possèdent deux types d’emplacement d’extension : ISA et PCI. Les emplacements d’extension ISA sont noirs tandis que les emplacements d’extension PCI sont plus petits et blancs. Assurez-vous que vous avez bien choisi un emplacement d’extension PCI. PCI slot (White) French Compex HP10 Network Adapter 1 “Guide d’installation rapide” Adaptateur réseau Compex HP10 Installation du matériel Installation de la carte Compex HP10 Insertion de la carte réseau HP10 1. 2. Eteignez l’appareil et débranchez le fil d’alimentation de l’ordinateur. Ouvrez le boîtier. Note : il est possible que votre ordinateur ne ressemble pas exactement à celui représenté ci-dessous. Si vous avez des problèmes pour retirer le boîtier, référez-vous à la documentation fournie par le fabricant. 3. 4. Touchez une surface métallique non peinte de l’ordinateur pour vous décharger de l’éventuelle électricité statique de votre corps. Localisez un emplacement d’extension PCI vide et enlevez le couvercle à l’arrière de l’emplacement d’extension. Gardez la vis du couvercle à portée de main. Vous en aurez besoin par la suite. Note : la plupart des ordinateurs Pentium possèdent deux types d’emplacement d’extension : ISA et PCI. Les emplacements d’extension ISA sont noirs tandis que les emplacements d’extension PCI sont plus petits et blancs. Assurez-vous que vous avez bien choisi un emplacement d’extension PCI. PCI slot (White) French Compex HP10 Network Adapter 1 5. Insérez délicatement la carte réseau HP10 dans l’emplacement d’extension PCI ouvert. Tenez la carte au niveau de ses bords et alignez les fiches du connecteur avec le bas de la carte. Appuyez dessus doucement mais fermement, et ce directement dans l’emplacement d’extension. Si la carte ne s’insère pas dans l’emplacement d’extension tout en émettant un petit clic caractéristique, retirez-la et réessayez. 6. Replacez la vis du couvercle de l’emplacement d’extension afin de bien maintenir en place la carte. Fermez le boîtier. Branchez le fil d’alimentation à l’ordinateur. 7. 8. Pour installer une carte réseau HP10 sur un autre ordinateur : Prenez votre carte réseau et répétez les étapes de l’installation avec l’ordinateur suivant. Connectez ensuite vos câbles téléphoniques avant de démarrer l’ordinateur, comme décrit ci-dessous. 2 Compex HP10 Network Adapter French Comment installer et connecter la carte réseau Compex HP10 au système de câblage de votre téléphone personnel. A) Si votre maison dispose de plusieurs points d’extension téléphonique. 1. Votre téléphone est généralement connecté à une prise murale. Débranchez la ligne téléphonique de la prise murale et branchez-y la prise inférieure de la carte réseau Compex HP10. Prenez un autre câble téléphonique pour brancher la prise supérieure de la carte réseau Compex HP10 et branchez l’autre bout à la prise murale. 2. Répétez l’étape (1) avec le PC suivant qui se trouve dans l’autre pièce, etc. 3. Vos PC sont maintenant prêts à recevoir le logiciel de la carte réseau, permettant de compléter l’installation. Référez-vous à la partie correspondant à la version de Windows que vous avez installée sur vos PC. LINK ACT 1 2 3 4 5 6 7 8 9 0 # French Compex HP10 Network Adapter 3 B) Si votre maison dispose d’un seul point téléphonique. Vous devrez acheter un long câble téléphonique allant d’un PC à celui se trouvant dans la pièce voisine. Il s’agit d’un câble téléphonique ordinaire, parfois aussi appelé extension de câble téléphonique. Vous aurez aussi besoin de vous procurer un adaptateur de prise téléphonique sortie 1 en 2 (voir l’image). Le câble téléphonique et la prise de l’adaptateur sont disponibles dans tous les supermarchés et magasins spécialisés. Pour le réseau, vous aurez besoin d’un câble pour chaque PC. 1. Débranchez le câble téléphonique de la prise murale. Insérez dans la prise murale l’adaptateur de prise téléphonique sortie 1 en 2. 2. Branchez la ligne téléphonique dans une des deux prises de sortie. L’autre bout est connecté à un téléphone. Prenez un autre câble téléphonique, branchez-le dans la seconde prise et branchez l’autre bout du câble dans la prise supérieure de la carte réseau Compex HP10 du premier PC. 3. Pour relier un autre câble au second PC, utilisez encore une autre prise câble avec la prise inférieure du premier PC et branchez l’autre bout du câble dans 4. la prise supérieure de la carte réseau Compex HP10 du second PC. 5. Répétez l’étape (3) avec le troisième PC, etc., jusqu’à ce que tous les PC que vous voulez utiliser dans votre réseau soient reliés par des câbles. 6. Vos PC sont maintenant prêts à recevoir le logiciel de la carte réseau, permettant de compléter l’installation. Référez-vous à la partie correspondant à la version de Windows que vous avez installée sur vos PC. ** Conseil :La longueur maximale pour connecter le réseau Compex HP10 du premier PC au dernier PC ne doit pas excéder 1000 pieds, soit 300 mètres. Câbles téléphoniques LINK ACT LINK ACT prise murale Câbles téléphonique LINK ACT 1 2 3 4 5 6 7 8 9 0 # 4 Compex HP10 Network Adapter French Installation du logiciel Comment installer l’adaptateur réseau téléphone personnel Compex HP10 Exigences système : • Logiciel (supportant les systèmes d’exploitation suivants) : ü Soit Windows 95, Gold ou OSR2 ou Windows 98, Gold ou Seconde Edition • Matériel : ü Configuration minimale : Pentium 200 MHz, 32 Mo de RAM ü Adaptateur réseau Compex HP10 ü Câble téléphonique personnel classique Installation et adressage TCP/IP : Avant de continuer, vous devez, pour pouvoir travailler en réseau, comprendre les exigences de Microsoft Windows ainsi que les éléments installés par défaut. ** Conseil : Si vous n’êtes pas sûrs, suivez simplement la procédure expliquée dans l’Installation du protocole TCP/IP sous Windows 95, et ce pour tous les PC que vous voulez mettre en réseau. Windows 95 installe par défaut le protocole réseau NetBEUI. Windows 98 installe par défaut le protocole réseau TCP/IP. Pour travailler en réseau, tous les PC doivent communiquer avec le même protocole réseau. Ainsi, pour qu’un PC fonctionnant avec Windows 98 puisse travailler en réseau avec un PC fonctionnant avec Windows 95, un des PC doit ajouter le protocole réseau requis utilisé sur l’autre PC. Exemple : Soit Windows 95 ajoute le protocole TCP/IP, soit Windows 98 ajoute le protocole NetBEUI. French Compex HP10 Network Adapter 5 B) Si votre maison dispose d’un seul point téléphonique. Vous devrez acheter un long câble téléphonique allant d’un PC à celui se trouvant dans la pièce voisine. Il s’agit d’un câble téléphonique ordinaire, parfois aussi appelé extension de câble téléphonique. Vous aurez aussi besoin de vous procurer un adaptateur de prise téléphonique sortie 1 en 2 (voir l’image). Le câble téléphonique et la prise de l’adaptateur sont disponibles dans tous les supermarchés et magasins spécialisés. Pour le réseau, vous aurez besoin d’un câble pour chaque PC. 1. Débranchez le câble téléphonique de la prise murale. Insérez dans la prise murale l’adaptateur de prise téléphonique sortie 1 en 2. 2. Branchez la ligne téléphonique dans une des deux prises de sortie. L’autre bout est connecté à un téléphone. Prenez un autre câble téléphonique, branchez-le dans la seconde prise et branchez l’autre bout du câble dans la prise supérieure de la carte réseau Compex HP10 du premier PC. 3. Pour relier un autre câble au second PC, utilisez encore une autre prise câble avec la prise inférieure du premier PC et branchez l’autre bout du câble dans 4. la prise supérieure de la carte réseau Compex HP10 du second PC. 5. Répétez l’étape (3) avec le troisième PC, etc., jusqu’à ce que tous les PC que vous voulez utiliser dans votre réseau soient reliés par des câbles. 6. Vos PC sont maintenant prêts à recevoir le logiciel de la carte réseau, permettant de compléter l’installation. Référez-vous à la partie correspondant à la version de Windows que vous avez installée sur vos PC. ** Conseil :La longueur maximale pour connecter le réseau Compex HP10 du premier PC au dernier PC ne doit pas excéder 1000 pieds, soit 300 mètres. Câbles téléphoniques LINK ACT LINK ACT prise murale Câbles téléphonique LINK ACT 1 2 3 4 5 6 7 8 9 0 # 4 Compex HP10 Network Adapter French Installation du logiciel Comment installer l’adaptateur réseau téléphone personnel Compex HP10 Exigences système : • Logiciel (supportant les systèmes d’exploitation suivants) : ü Soit Windows 95, Gold ou OSR2 ou Windows 98, Gold ou Seconde Edition • Matériel : ü Configuration minimale : Pentium 200 MHz, 32 Mo de RAM ü Adaptateur réseau Compex HP10 ü Câble téléphonique personnel classique Installation et adressage TCP/IP : Avant de continuer, vous devez, pour pouvoir travailler en réseau, comprendre les exigences de Microsoft Windows ainsi que les éléments installés par défaut. ** Conseil : Si vous n’êtes pas sûrs, suivez simplement la procédure expliquée dans l’Installation du protocole TCP/IP sous Windows 95, et ce pour tous les PC que vous voulez mettre en réseau. Windows 95 installe par défaut le protocole réseau NetBEUI. Windows 98 installe par défaut le protocole réseau TCP/IP. Pour travailler en réseau, tous les PC doivent communiquer avec le même protocole réseau. Ainsi, pour qu’un PC fonctionnant avec Windows 98 puisse travailler en réseau avec un PC fonctionnant avec Windows 95, un des PC doit ajouter le protocole réseau requis utilisé sur l’autre PC. Exemple : Soit Windows 95 ajoute le protocole TCP/IP, soit Windows 98 ajoute le protocole NetBEUI. French Compex HP10 Network Adapter 5 Scénarios pour lesquels il n’est pas nécessaire d’ajouter un protocole de gestion de réseau supplémentaire. a) Si vos PC personnels ne sont pas en réseau actuellement et que tous les PC utilisent Windows 95, la même version du système d’exploitation Microsoft Windows. Par exemple, si tous les PC utilisent Windows 95, ou alors Windows 98, ou encore Windows 2000. b) Si vos PC utilisent uniquement Windows 2000 et Windows 95. Si vous projetez d’utiliser le protocole TCP/IP pour votre réseau personnel, suivez alors le guide ci-dessous ou référez-vous à la partie “Configuration TCP/IP” 1. Si vous installez un nouveau réseau chez vous, nous vous recommandons d’utiliser cette série d’adresses IP privée 192.168.168.xxx, xxx correspondant à un nombre de 1 à 254. 2. Une adresse IP unique doit être assignée à chaque PC. Le premier PC utilisera l’adresse IP 192.168.168.1. Le deuxième PC utilisera l’adresse IP 192.168.168.2, etc. 3. Il vous sera demandé de saisir une adresse IP au cours de l’installation. Tapez l’adresse pour chaque PC que vous installez. 6 Compex HP10 Network Adapter French Configuration Windows 95 : NOTE : Au cours du processus d’installation, il se peut que certains fichiers du CD Windows 95 doivent être copiés. Avant de continuer, assurez-vous de l’avoir à disposition. 1. Lorsque Windows 95 démarre, il détecte automatiquement la carte de l’adaptateur réseau Compex HP10. L’assistant "Nouveau périphérique" apparaît et identifie la carte comme étant un "Contrôleur réseau PCI" 2. Insérez la disquette du pilote de l’adaptateur réseau Compex HP10 dans le lecteur A du PC. 3. Cliquez sur "Suivant" pour procéder à l’installation. Windows lit ensuite la disquette afin de localiser le pilote de l’adaptateur. * Conseil :Si vous n’avez pas inséré la disquette du pilote Compex HP10 après avoir cliqué sur SUIVANT, insérez maintenant la disquette du pilote Compex HP10 et cliquez sur le bouton PRECEDENT afin de retourner au précédent écran. Puis, cliquez à nouveau sur le bouton SUIVANT pour continuer. French Compex HP10 Network Adapter 7 4. Windows affiche ceci : Cliquez sur l’icône SUIVANT pour démarrer la copie du pilote. 5. Windows continue à copier tous les fichiers associés du CD-ROM de Windows 95. Une fois qu’il a terminé, il affiche l’écran suivant : Cliquez sur Terminer et une boîte de dialogue vous demande si le PC peut être redémarré. 8 Compex HP10 Network Adapter French 6. A cette phase de la procédure, le protocole de gestion de réseau NetBEUI est installé et vous pouvez déjà utiliser votre PC en réseau avec ce protocole. Pour utiliser ce protocole, répondez Oui afin de relancer le PC. Lorsque Windows redémarre, l’adaptateur réseau Compex HP10 est prêt à servir le réseau. Note : 1. Si vous voulez partager les ressources de votre PC avec les autres PC du réseau, référez-vous à la partie "Autoriser le partage”. 2. Si vous voulez utiliser le protocole TCP/IP, vous devez alors répondre “NON” à l’étape (6) et vous référer à la partie “Configuration TCP/IP”. Si vous avez cliqué sur “OUI”, ne vous inquiétez pas. Laissez redémarrer le PC et poursuivez avec la “configuration TCP/IP”... Configuration Windows 98 et Windows 2000 : NOTE : Au cours du processus d’installation, il se peut que certains fichiers du CD de Windows 98 ou 2000 doivent être copiés. 1. Lorsque Windows démarre, il détecte automatiquement la carte de l’adaptateur réseau Compex HP10. L’assistant "Nouveau périphérique" apparaît et identifie la carte comme étant un "Contrôleur réseau PCI" 2. Insérez la disquette du pilote de l’adaptateur réseau Compex HP10 dans le lecteur A du PC. French Compex HP10 Network Adapter 9 3. Cliquez sur le bouton "Suivant" pour poursuivre l’installation. 4. Windows affiche ensuite les options suivantes afin de localiser le pilote de l’adaptateur. Activez le bouton radio "Rechercher le meilleur pilote pour votre périphérique" et cliquez sur SUIVANT. 5. Windows demande alors quel est le périphérique que vous voulez utiliser pour charger les pilotes. Activez la case à cocher "Lecteurs de disquette" et cliquez sur SUIVANT. 10 Compex HP10 Network Adapter French * Conseil :Si vous n’avez pas inséré la disquette du pilote Compex HP10 après avoir cliqué sur SUIVANT, insérez maintenant la disquette du pilote Compex HP10 et cliquez sur le bouton PRECEDENT afin de retourner au précédent écran. Puis, cliquez à nouveau sur le bouton SUIVANT pour continuer . 6. Windows affiche l’écran suivant : Cliquez sur l’icône SUIVANT pour démarrer la copie du pilote. French Compex HP10 Network Adapter 11 7. Windows continue à copier tous les fichiers associés du CD-ROM de Windows. Une fois qu’il a terminé, il affiche l’écran suivant: Cliquez sur Terminer et une boîte de dialogue vous demande si le PC peut être redémarré. A cette phase de la procédure, répondez NON et référerez-vous à la partie “Configuration TCP/IP”. Si vous avez cliqué sur “OUI”, ne vous inquiétez pas. Laissez redémarrer le PC et poursuivez avec la “configuration TCP/IP”.. Toutefois, si vous disposez déjà d’un réseau fonctionnant avec un protocole IP et que vous avez donc un serveur DHCP, cliquez sur OUI et redémarrez Windows. Le serveur DHCP met automatiquement à jour les propriétés TCP/IP du PC, en assignant par exemple une adresse IP unique à ce PC. Dans ce cas, l’installation de la gestion de réseau est achevée à ce niveau de la procédure. 12 Compex HP10 Network Adapter French Configuration TCP/IP Etape 1 : à partir du bouton Démarrer de Win95/98, sélectionnez Paramètres puis Panneau de configuration. Le panneau de configuration de Win95/98 s’affiche. Etape 2 : double-cliquez sur l’icône Réseau suivante : et la boîte de dialogue ci-dessous apparaît. Composants installés Rechercher TCP/IP Bouton Ajouter Etape 3 : Contrôlez votre liste de composants réseau dans l’onglet Configuration du réseau. Si TCP n’est pas installé, installez-le maintenant. Sélectionnez le bouton Ajouter et vous voyez apparaître la figure ci-dessous. Si TCP/IP est installé, passez à l’étape 8. French Compex HP10 Network Adapter 13 Etape 4 : sélectionnez “Protocole” et cliquez sur le bouton “Ajouter..”. Vous voyez ensuite apparaître la figure ci-dessous. Etape 5 : sélectionnez “Microsoft” dans la rubrique “Constructeurs”, “TCP/IP” dans la rubrique “Protocoles réseau” (comme indiqué sur l’image ci-dessus) et cliquez sur “OK”. Il est possible que vous ayez besoin du CD Win95/98 pour terminer l’installation. Etape 6 : une fois que vous avez installé TCP/IP, retournez dans la fenêtre Réseau. Sélectionnez TCP/IP dans la liste des composants réseau. Etape 7 : cliquez sur Propriétés et vérifiez les paramètres TCP/IP dans chacune des fenêtres 14 Compex HP10 Network Adapter French Onglets des propriétés TCP/IP (l’onglet Adresse IP est affiché) Etape 8 : cliquez sur l’onglet “Adresse IP” et sélectionnez “Spécifier une adresse IP” Etape 9 : saisissez la ligne suivante pour l’adresse du premier PC : Adresse IP : 192. 168.168.1 Masque de sous-réseau : 255.255.255.0 Le deuxième PC utilisera l’adresse IP 192.168.168.2, etc. L’adresse IP de chaque PC doit être unique. Etape 10 : cliquez sur l’onglet “Passerelle” et assurez-vous que tous les champs sont vierges. Etape 11 : cliquez sur “OK” pour retourner dans la fenêtre Réseau. A partir de là, vous pouvez choisir d’autoriser le partage des ressources de votre PC telles que le disque dur et l’imprimante. Si vous voulez effectuer un partage, référez-vous à la partie “Configuration de l’autorisation du partage ”. Sinon, cliquez sur OK pour enregistrer les configurations et Windows vous demande s’il peut redémarrer le PC. Cliquez ensuite sur Oui pour le redémarrer. L’adaptateur réseau est maintenant prêt à se servir du réseau Pour obtenir davantage de détails concernant la manière de partager le disque dur et l’imprimante, veuillez vous référer au manuel de Windows. French Compex HP10 Network Adapter 15 Configuration de l’autorisation du partage Etape 1 : à partir du bouton Démarrer de Win95/98, sélectionnez Paramètres puis Panneau de configuration. Le panneau de configuration de Win95/98 s’affiche. Etape 2 : double-cliquez sur l’icône Réseau suivante : et la boîte de dialogue ci-après apparaît. Cliquez ici Etape 3 : cliquez sur l’icône Partage de fichiers et d’imprimante, et la boîte de dialogue suivante s’affiche : 16 Compex HP10 Network Adapter French Etape 4 : cliquez sur OK pour enregistrer les configurations, et Windows vous demande s’il peut redémarrer le PC. Cliquez ensuite sur Oui pour le redémarrer. L’adaptateur réseau est maintenant prêt à servir le réseau. Pour obtenir davantage de détails concernant la manière de partager le disque dur et l’imprimante, veuillez vous référer au manuel de Windows. French Compex HP10 Network Adapter 17 Enregistrement FCC Part 68 Cet adaptateur réseau Compex HomePNA HP10 haute vitesse obéit aux règles de FCC Part 68, et l’utilisation de ce vitesse est soumis aux restrictions suivantes : 1. Le FCC a établi des règles qui permettent à ce dispositif d’être connecté directement au réseau téléphonique. Des prises standardisées sont utilisées pour ces connexions. Cet équipement ne doit pas être utilisé sur des lignes téléphoniques communes ou avec des téléphones à pièces. 2. Si le dispositif ne fonctionne pas correctement, cela peut nuire au réseau téléphonique ; cet appareil doit alors être déconnecté jusqu’à ce que la source du problème soit fixée et que les réparations aient été effectuées. Si cela n’est pas fait, la compagnie téléphonique peut déconnecter temporairement le service. 3. La compagnie téléphonique peut effectuer des changements au niveau de ses installations, équipements, fonctionnements et procédures; si de tels changements devaient affecter la compatibilité ou l’utilisation de cet appareil, la compagnie téléphonique est alors tenue de fournir avec le FCC une notification adéquate de la situation. 4. Si la compagnie téléphonique devait demander des informations sur le type de matériel connecté sur ses lignes, fournissez-lui les indications suivantes : a. Le numéro de téléphone auquel cette unité est connectée. b. Le numéro de l’équivalence de la sonnerie (REN). c. La prise USOC requise. d. Le numéro d’enregistrement FCC. Les éléments (b) et (d) sont indiqués sur l’étiquette. Le numéro de l’équivalence de la sonnerie (REN) est utilisé pour déterminer le nombre d’appareils pouvant être connectés à votre ligne téléphonique. Dans la plupart des régions, la somme des REN de tous les appareils d’une ligne ne doit pas excéder 5.0. Si trop d’appareils sont reliés, ils ne sonneront alors pas correctement. 18 Compex HP10 Network Adapter French Clause de non-responsabilité: La société Compex, Inc. décline toute responsabilité quant aux informations contenues dans ce guide fourni sans garantie d'aucune sorte, ni implicite ni formulée explicitement, en particulier pour tout ce qui concerne sa commerciabilité ou son utilisation dans un but spécifique. La société Compex, Inc. se réserve le droit d'apporter à tout moment des changements et/ou améliorations au produit et/ou aux spécifications techniques du produit indiquées dans le guide. La société Compex Inc. ne peut être tenue pour responsable des erreurs techniques ou fautes de frappe contenues dans ce guide. Les informations fournies dans le guide sont révisées régulièrement et les corrections sont intégrées aux versions ultérieures du manuel. Ces informations peuvent être modifiées à tout moment sans avis préalable. Compex® , ReadyLINK® et MicroHub® sont des marques déposées de la société Compex, Inc. Tous les noms et appellations des produits sont des marques déposées sous licence par les propriétaires respectifs. Notice: Copyright © 1999 Compex, Inc. Tous droits réservés. La reproduction, adaptation ou traduction de ce guide sans accord préalable de la société Compex, Inc. est formellement interdite, en dehors du cadre prévu par la législation sur le copyright. Révision du manuel: Jean Tan. Numéro du manuel: M-0246-V1.1F Version 1.1F, August 2000 Imprimé à Singapour NOTICE FCC: Les test effectués avec cet appareil ont montré qu'il était conforme aux normes FCC, paragraphe 15 concernant les appareils numériques de classe A. Ces normes sont destinées à garantir un niveau de protection acceptable contre les interférences avec d'autres appareils dans le cadre d'une utilisation domestique. L'appareil contrôlé génère, utilise et peut émettre des fréquences radio; s'il n'est pas installé et utilisé conformément aux instructions du constructeur, ces énergies peuvent entraîner des interférences graves avec les communications par radio. D'une manière générale, il n'est pas exclu que l'usage de cet appareil puisse entraîner des interférences et des perturbations dans certains types d'installation. Si l'appareil perturbe la réception d'un appareil radio ou d'une télévision, l'utilisateur est invité à essayer de remédier à ces interférences en appliquant les mesures suivantes: g Changer l'orientation ou l'emplacement de Eloigner l'ordinateur du récepteur concerné. g l'antenne. S'adresser au revendeur ou à un technicien g g Brancher l'ordinateur à une prise de courant spécialisé. reliée à un autre circuit que celui du récepteur concerné par les interférences. Attention: Tout changement ou modification non mentionné explicitement dans la garantie de cet appareil peut entraîner pour l'usager l'annulation du droit à utiliser cette installation. Certificat d'homologation FCC: Cet appareil est conforme aux normes exposées dans le paragraphe 15 des directives FCC. L'homologation par la FCC est soumise aux deux conditions suivantes: (1) L'appareil ne doit pas générer d'interférence pouvant perturber gravement le fonctionnement d'autres appareils, et (2) L'appareil doit pouvoir supporter tout type d'interférence avec d'autres appareils, y compris des interférences susceptibles d'influer sur le fonctionnement de l'installation. DECLARATION DE CONFORMITE: La société Compex, Inc. déclare que le produit: Nom du produit: Répéteur Compex HomePNA HP10 Network Adapter Numéro du modèle: HP10 est conforme aux normes suivantes: Normes d'émission par rayonnement: EN55022A, FCC Paragraphe 15 Classe A; Normes d'émission par conduction: EN60555Pt2 émission par conduction; EN55022A émission par conduction, FCC Paragraphe 15 Classe A; Normes de sécurité: IEC 801-2; IEC 801-3; IEC 801-4; Norme de basse tension: EN60950. Par conséquent, ce produit est conforme aux normes régionales suivantes: FCC Classe A conformément aux principes indiqués dans le paragraphe 15 des directives FCC; Normes C.E. conformément aux directives de la Commission Européenne. Nom du constructeur: Compex, Inc. Singapour, August 24th, 2000 Adresse: 4051 E. La Palma, Unit A, Anaheim, CA 92807, USA Représentant en Europe: ReadyLINK Networktechnology GmbH, Service technique _________________ Albert Einstein Straβe 34 / M21, Mr Shi Jia Xiang 63322 Rödermark, Allemagne Deputy R & D Manager [Fax: +49 (60) 749-0668] French Compex HP10 Network Adapter 19 Technical Support Centers Contact the technical support center that services your location. U.S.A., Canada, Latin America and South America * Write Compex, Inc. ( Call 4051 E. La Palma, Unit A Anaheim, CA 92807, USA (714) 630-7302 (8 a.m.-5 p.m. Pacific time) Tel: (714) 630-6521 Fax: BBS: (714) 630-2570 (24-hour access) Fax Europe * Write ReadyLINK Networktechnology GmbH ( Call Albert Einstein Straβe 34 /M21 63322 Rödermark, Germany ++49 (0) 6074 - 98017 (8 a.m.-5 p.m. local time) Tel: ++49 (0) 6074 - 90668 Fax: BBS: ++49 (0) 6074 - 93974 (24-hour access) Fax Asia, Australia, New Zealand, Middle East and the rest of the World * Write Compex Systems Pte Ltd ( Call 135, Joo Seng Road #08-01, PM Industrial Building Singapore 368363 Tel: (65) 286-1805 (8 a.m.-5 p.m. local time) Fax: (65) 283-8337 BBS: (65) 282-8854 (24-hour access) Fax Internet access/ Website: [email protected] ftp.compex.com.sg http://www.cpx.com or http://www.compex.com.sg E-mail: FTPsite: Compex Technical Support NOTES “Quick Install Guide” Compex, Inc. 4051 E. La Palma, Unit A Anaheim, CA 92807 USA (714) 630-7302 2000 by Compex, Inc. All rights reserved. Printed in Singapore Compex HP10 10Mbps Network Adapter Manual Number: M-0246-V1.1C Version 1.1C June 2000