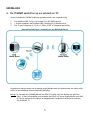
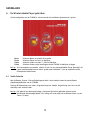
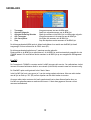
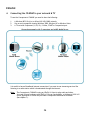
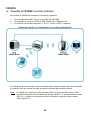
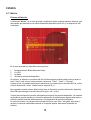
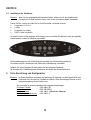
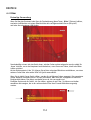
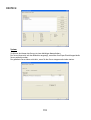
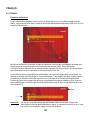
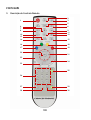
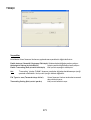
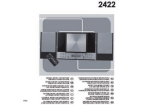
1
NEDERLANDS Conceptronic C54WMP Snelstart handleiding Hartelijk gefeliciteerd met de aanschaf van uw Conceptronic Wireless Media Player. In de bijgaande Snelstart handleiding wordt stap voor stap uitgelegd hoe u de Conceptronic Conceptronic Wireless Media Player kunt instellen en gebruiken. In geval van problemen adviseren wij u onze support-site te bezoeken (ga naar: www.conceptronic.net en klik op ‘Support’). Hier vindt u een database met veelgestelde vragen waar u hoogstwaarschijnlijk de oplossing voor uw probleem kunt vinden. Heeft u andere vragen over uw product die u niet op de website kunt vinden, neem dan contact met ons op via e-mail: [email protected]. Voor meer informatie over Conceptronic producten kunt u terecht op de Conceptronic website: www.conceptronic.net. De software configuratie beschreven in deze handleiding kan afwijken op uw computer. Dit is afhankelijk van het besturingssysteem dat u gebruikt. 1. Pakket Inhoud De volgende onderdelen dienen aanwezig te zijn in de verpakking van de Conceptronic Wireless Media Player: • • • • • • • • Conceptronic C54WMP Wireless Media Player Productstandaard voor C54WMP Spanningsadapter, 5v DC, 2A Afstandsbediening 2x AAA Batterijen voor de afstandsbediening RCA A/V Kabel (1x RCA composiet, 2x RCA Audio) Scart Adapter (3x RCA naar SCART) Component conversie kabel (3x RCA Female voor Component kabel) 1 NEDERLANDS 2. Mogelijkheden • • • • • • • Video afspeelmogelijkheid met MPEG 1/2/4 ondersteuning. Draadloze netwerktoegang 802.11b/g. Ethernet aansluiting (10/100 Base-T). UPnP A/V Cliënt ondersteuning (UPnP 1.0 gecertificeerd). Werkt met de DLNA standaard. Eenvoudig menu voor configuratie en setup. USB Host aansluiting voor het upgraden van de Firmware en voor het aansluiten van opslagapparatuur zoals een externe Hard Disk of USB Flash Drive. Om multimediabestanden te kunnen afspelen via de C54WMP dient het apparaat verbonden te zijn met een netwerk die voorzien is van een Media server. De Conceptronic C54WMP ondersteund de volgende media bestandsformaten: • • • • • • • MPEG 1, 2, 4 gecomprimeerde audio & video bestanden. SRT, SSA en SUB ondertiteling bestanden. JPEG & GIF gecomprimeerde foto’s. BMP en TIFF foto’s. MP3 tot 320Kbps of VBR. WMA tot 192Kbps of VBR. WAV geluidsbestanden. Andere bestandsformaten kunnen afgespeeld worden door het gebruik van een Media Server met “Transcoding” mogelijkheid. Met behulp van een PC wordt de media real-time gecodeerd in een formaat wat afspeelbaar is door de Conceptronic C54WMP. 2 NEDERLANDS 3. Uitleg van de afstandsbediening 2 1 3 5 6 4 7 8 9 11 12 10 13 14 15 16 18 17 19 20 21 22 24 23 25 26 27 29 28 30 3 NEDERLANDS No. 1 2 3 4 KEYPAD POWER MUTE HOME REW 5 PLAY / PAUSE 6 7 FF STOP 8 PREV 9 NEXT 10 REPEAT 11 12 13 OUTPUT ZOOM SLOW 14 BACK 15 DISPLAY 16 17 18 19 MUSIC VIDEO PICTURES iRADIO 20 OK Bedieningsknoppen 21 Omhoog, Links, Rechts, Omlaag 22 SUB 23 24 25 26 27 28 29 30 LANG CH VOL+ VOL BGM NUMBER 1-9 A-B 0 :/ SETUP SORT CH + FUNCTIE BESCHRIJVING Zet het apparaat in stand-by of activeer het apparaat. Onderdruk het geluid. Ga terug naar het hoofdmenu. Versneld terugspoelen tijdens het afspelen van bestanden. 1. Speel / pauzeer muziek. 2. Start een foto slideshow. Versneld vooruit spoelen tijdens het afspelen van bestanden. Stop het afspelen. 1. Tijdens het bladeren : Ga terug naar de vorige pagina. 2. Tijdens het afspelen : Ga naar het vorige bestand. 1. Tijdens het bladeren : Ga naar de volgende pagina. 2. Tijdens het afspelen : Ga naar het volgende bestand. 1. Selecteer een Repeat mode tijdens het afspelen van Video en Muziek. 2. Herhaal de achtergrondmuziek tijdens een foto diaweergave. Wijzig het uitgangssignaal (S-VideoÆYPbPrÆYUV). Zoom in op de video’s of foto’s. Speel de mediabestanden langzaam af. 1. Ga terug naar de vorige map of configuratie pagina. 2. Sla de draadloze instellingen op in de configuratie pagina’s. 1. Toon de bestandsnaam & media type tijdens het afspelen van video’s. 2. Toon de bestandsnaam & resolutie tijdens het bekijken van foto’s. Activeer MUSIC mode. Activeer VIDEO mode. Activeer PHOTO mode. Activeer Internet Radio mode. 1. Activeer het geselecteerde bestand. 2. Start “rotatie” mode tijdens het bekijken van foto’s. 1. Druk op “LINKS” om te stoppen en terug te gaan naar het vorige scherm; Druk op “RECHTS” om een map of server te selecteren. 2. Video Mode: Druk op “OMHOOG” of “OMLAAG” om een ander bestand te kiezen. 3. Photo Mode: Schuif de foto in “Zoom” mode of draai de foto in “rotatie” mode. 4. Music Mode: Druk op “OMHOOG” voor het vorige nummer of druk op “OMLAAG” voor het volgende nummer. Selecteer de ondertiteling tijdens het afspelen van video / Volgende kanaal. Selecteer de taal tijdens het afspelen van video’s / Vorige kanaal. Verhoog het volume. Verlaag het volume. Verwijder/Voeg achtergrond muziek toe. Numerieke toetsen 1-9. Configureer A-B repeat mode. Numerieke toets 0 Sneltoets voor iRADIO URL invoer. Open het Setup Menu van de C54WMP. Sorteer de bestandslijst. 4 NEDERLANDS 4. De C54WMP aansluiten op uw netwerk en TV Om de Conceptronic C54WMP te kunnen gebruiken heeft u het volgende nodig: 1. 2. 3. Een draadloos (802.11b/g/n) of bedraad (10/100/1000) netwerk. 1 of meer computers met Windows 2000, Windows XP of Windows Vista. Een TV met Component (Y, Pb, Pr), S-Video, SCART of Composiet aansluiting. Netwerkvoorbeeld met 2 computers en een NAS Media Server Om gebruik te kunnen maken van streaming mogelijkheden zoals het luisteren naar een online radio station is een breedband internet verbinding benodigd. Let op: De Conceptronic C54WMP gebruikt een UPnP A/V cliënt voor het afspelen van geluid en video. U dient te beschikken over hardware met UPnP A/V Server mogelijkheden, een UPnP A/V Server applicatie of installeer de meegeleverde Conceptronic Media Server software. (Zie hoofdstuk 7). 5 NEDERLANDS 4.1 Hardware Installatie Let op: Als u een bedraad netwerk heeft dient u een Ethernet kabel te gebruiken om de Conceptronic C54WMP aan te sluiten op uw router of switch. Bepaal de aansluiting die u wilt gebruiken voor de aansluiting op de TV: Component (Y, Pb, Pr). S-Video (Alleen beeld). Composiet. SCART (Beeld en geluid). • • • • Voor het weergeven van geluid kunt u de analoge RCA uitgangen gebruiken (Rood en Wit) of de digitale coaxiale uitgang (Oranje). De afstandsbediening werkt op 2x AAA batterijren (meegeleverd). De afstandsbediening is benodigd om het apparaat aan en uit te zetten. Zet uw TV aan en selecteer het juiste AV kanaal. De Conceptronic C54WMP zal tijdens het starten het Conceptronic Startscherm weergeven. 5. Setup & configuratie bij het 1e gebruik Let op: In deze handleiding zullen vaste IP adressen gebruikt worden om diverse functies van de Conceptronic C54WMP uit te leggen. Deze instellingen kunnen in uw netwerkomgeving variëren. De volgende instellingen zullen gebruikt worden in de handleiding: IP adres C54WMP : 192.168.1.50 : 255.255.255.0 Subnet masker Gateway adres : 192.168.1.1 (router als gateway) : 192.168.1.1 DNS (Dynamic Name Server) 6 NEDERLANDS Wanneer u de Conceptronic C54WMP voor de eerste keer aanzet dient u deze te configureren. De onderstaande melding, getoond op uw TV, zal uw vragen om een taal te kiezen voor het apparaat. Na de taalselectie zal de C54WMP het netwerk initialiseren. De Netwerkconfiguratie zal automatisch gestart worden. U kunt deze optie ook benaderen via het Setup Menu (Kies voor “Netwerk Wizard”). Selecteer de connectie die u wilt gebruiken: ‘Bedraad’ of ‘Draadloos’. Let op: Als u streams gebruikt met een hoge bandbreedte adviseren wij om gebruik te maken van de bedrade verbinding. De signaal kwaliteit van een draadloze verbinding kan invloed hebben op de doorvoer en prestaties van de C54WMP. Gebruik de Omhoog / Omlaag toetsen (21) om een bedraad of draadloos netwerk te selecteren. 7 NEDERLANDS 5.1 Bedrade configuratie Selecteer ‘Bedraad’ en druk op ‘OK’ om de instelling toe te passen. Druk op ‘OK’ om ‘Voltooien’ te kiezen. De bedrade configuratie is nu gereed voor gebruik. Ga verder bij ‘Hoofdstuk 6’ voor het gebruik van de C54WMP Media Speler. Let op: De C54WMP zal standaard op zoek gaan naar een DHCP server. Als de C54WMP correct is ingesteld zal het IP adres onderin beeld getoond worden. Als het scherm: IP: 0.0.0.0 toont kan het apparaat geen DHCP server vinden. U dient in dit geval de C54WMP van een vast IP adres te voorzien (Zie hoofdstuk 5.4). 5.2 Draadloze configuratie De C54WMP heeft Wirelesss LAN (802.11b/g) ondersteuning: • • • • • • ESSID: Automatische detectie of handmatig in te voeren als ESSID Broadcast uit staat op uw AP. Infrastructure of Ad-hoc Mode. Authenticatie: Auto, Shared Key, Open system. Sleutel Formaat: Uit, WEP64, WEP64Hex, WEP128, WEP128Hex, WPA-PSK, WPA2 AES. Sleutel Waarde: In te stellen via het Sleutel Formaat. Kanaal: Automatisch detectie. Selecteer ‘Draadloos’ en druk op ‘OK’ om de instelling toe te passen. De C54WMP zal automatisch zoeken naar beschikbare accesspoints. Als uw accesspoint zijn naam uitzend kunt u deze uit de lijst selecteren. De signaal sterkte wordt weergegeven door middel van 3 kleuren: Rood, Geel en Groen. Bij een groene indicatie is de signaalsterkte optimaal. Geel is acceptabel voor normaal gebruik. Bij een rode indicatie adviseren wij om de C54WMP of uw accesspoint op een andere positie te plaatsen. Let op: Wij adviseren om geen streams die een hoge bandbreedte vereisen af te spelen via een draadloze verbinding met een gele of rode signaal indicatie. Selecteer het accesspoint van uw keuze en druk op ‘OK’ op uw afstandsbediening. Selecteer ‘Volgende’ en druk op ‘OK’. Als u gebruik maakt van encryptie op uw draadloze netwerk dient u deze instellingen in te voeren in de C54WMP configuratie. 8 NEDERLANDS De C54WMP zal automatisch detecteren wat voor encryptie benodigd is voor uw accesspoint. Als uw netwerk is beveiligd met WPA zal het apparaat dit detecteren; u dient alleen de PSK sleutel in te voeren. Als uw netwerk niet is beveiligd met encryptie kunt u kiezen voor ‘Volgende’ om de instellingen op te slaan. Druk op ‘OK’ om ‘Voltooien’ te kiezen en de configuratie af te ronden. De draadloze verbinding is nu geconfigureerd. Ga verder bij ‘Hoofdstuk 6’ voor het gebruik van de C54WMP Media Speler. De instellingen voor de draadloze verbinding kunnen aangepast worden via ‘Setup’ – ‘Draadloos Netwerk Configureren’. Let op: De C54WMP zal standaard op zoek gaan naar een DHCP server. Als de C54WMP correct is ingesteld zal het IP adres onderin beeld getoond worden. Als het scherm: IP: 0.0.0.0 toont kan het apparaat geen DHCP server vinden. U dient in dit geval de C54WMP van een vast IP adres te voorzien (Zie hoofdstuk 5.4). 5.3 Windows Connect Now 2.0 gebruiken met de Conceptronic C54WMP Microsoft® Windows® Connect Now (WCN) technologie maakt het makkelijker om apparaten zoals de Conceptronic C54WMP toe te voegen aan uw bestaande draadloze netwerk. Een veilig draadloos netwerk creëren en de juiste instellingen toepassen op draadloze apparaten kan veel moeite kosten. WCN helpt u met de configuratie van de draadloze apparaten op een simpele en veilige methode. Windows Connect Now is onderdeel van Windows XP Service Pack 2 (SP2) en latere versies van Windows. U kunt WCN gebruiken om vanaf een PC draaiend op Windows XP SP2 of later de draadloze instellingen over te zetten op een draadbare USB Flash Drive. (niet meegeleverd). Wij adviseren WCN te gebruiken vanaf een computer die al een draadloze verbinding heeft met het netwerk. 9 NEDERLANDS Windows XP Vanuit Microsoft Windows XP kunt u de C54WMP via WCN configureren op de volgende manier: Klik op ‘Start’, ‘Mijn Netwerklocaties’. De Netwerkomgeving zal getoond worden. Selecteer de optie ‘Draadloos netwerk voor…’ aan de linkerkant van het scherm. De Wizard ‘Draadloos Netwerk Instellen’ zal getoond worden. Klik op ‘Volgende’ om door te gaan. Voer de naam in van uw draadloze netwerk (SSID) en kies de optie ‘Handmatig een netwerksleutel toewijzen’. Let op: Als uw netwerk is beveiligd met WPA encryptie dient u de checkbox onderaan het scherm te selecteren. Als uw netwerk is beveiligd met WEP encryptie kunt u deze checkbox leeglaten. Klik op ‘Volgende’ om door te gaan. Voer uw netwerksleutel in op het scherm in de daarvoor bedoelde vakken. Om het invoeren makkelijker te maken kunt u de optie ‘Tekens verbergen…’ uitschakelen zodat u kunt zien wat u invoert. Klik op ‘Volgende’ om door te gaan. Selecteer de optie ‘Een USB-flash station gebruiken’. Klik op ‘Volgende’ om door te gaan. Sluit de USB Flash Drive aan op uw computer en selecteer de corresponderende stationsletter. Klik op ‘Volgende’ om door te gaan. Als de configuratie is opgeslagen kunt u de USB Flash Drive ontkoppelen van uw computer. Let op: Sluit de wizard op uw computer niet af! Schakel de C54WMP in en ga naar ‘Setup’, ‘Draadloos Netwerk Configureren’. Plaats de USB Flash Drive in de USB poort van de C54WMP. De C54WMP zal de WCN instellingen automatisch detecteren en vragen of u deze wilt toepassen. Bevestig deze vraag. De instellingen worden opgeslagen. Verwijder de USB Flash Drive. De juiste instellingen zijn nu ingesteld. Wij adviseren om het apparaat opnieuw in te schakelen zodat de juiste instellingen worden gebruikt. Plaats de USB Flash Drive opnieuw in uw computer en klik op ‘Volgende’. Er wordt een lijst getoond met geconfigureerde apparaten. U kunt de instellingen uitprinten met de knop ‘Netwerkinstellingen afdrukken’. Klik op ‘Voltooien’ om de Wizard ‘Draadloos Netwerk Instellen’ te sluiten. Let op: De WCN instellingen worden standaard verwijderd van de USB Flash Drive als u op ‘Voltooien’ klikt. Als u de instellingen wilt bewaren voor configuratie van meer apparaten/computers kunt u deze optie uitzetten. Echter, wij adviseren om de instellingen te verwijderen van de USB Flash Drive. 10 NEDERLANDS Windows Vista Vanuit Microsoft Windows Vista kunt u de C54WMP via WCN configureren op de volgende manier Klik op ‘Start’, ‘Netwerk’. Klik op ‘Apparaat aan het draadloos netwerk toevoegen’ aan de bovenkant van het scherm. Kies de optie ‘Ik wil met behulp van een USB-Flashstation een draadloos apparaat of computer toevoegen die niet in de lijst staat’. Selecteer de optie ‘Het apparaat of de computer met behulp van een USB-Flashstation toevoegen’. Voer de naam van het draadloze netwerk in bij ‘Netwerknaam (SSID)’ of kies een beschikbaar draadloos netwerk uit de lijst (als uw computer al draadloos is verbonden met het netwerk). Klik op ‘Volgende’ om door te gaan. Voer de encryptie code voor uw netwerk in. Let op: Windows Vista gebruikt standaard WPA encryptie. Als u WEP encryptie wilt gebruiken klikt u op ‘Geavanceerde netwerkbeveiligingsopties weergeven’. Klik op ‘Volgende’ om door te gaan. Controleer of de USB Flash Drive is geplaatst en selecteer de juiste stationsletter om de instellingen op te slaan. Als de instellingen zijn opgeslagen kunt u op ‘Sluiten’ klikken en de USB Flash Drive uit uw computer halen. Schakel de C54WMP in en ga naar ‘Setup’, ‘Draadloos Netwerk Configureren’. Plaats de USB Flash Drive in de USB poort van de C54WMP. De C54WMP zal de WCN instellingen automatisch detecteren en vragen of u deze wilt toepassen. Bevestig deze vraag. De instellingen worden opgeslagen. Verwijder de USB Flash Drive. De juiste instellingen zijn nu ingesteld. Wij adviseren om het apparaat opnieuw in te schakelen zodat de juiste instellingen worden gebruikt. 5.4 Handmatig een IP Adres instellen op de C54WMP Als er geen DHCP server in uw netwerk beschikbaar is dient u handmatig een IP adres in te stellen op de C54WMP. Druk op ‘Setup’ (29) op uw afstandsbediening of kies het Setup icon in het hoofdmenu op uw scherm. Kies de optie: Netwerk Configureren en druk op ‘OK’. Kies uw voorkeursnetwerk: “Bedraad” of “Draadloos”. Selecteer de DHCP optie, druk op ‘OK’ om te kunnen wijzigen en gebruik de links / rechts toetsen (21) om de optie te wijzigen. Druk nogmaals op ‘OK’ om de wijziging te bewaren. Om handmatig een IP adres in te voeren dient u de DHCP optie uit te schakelen. 11 NEDERLANDS Als de DHCP functie is uitgeschakeld worden de standaard instellingen getoond. IP adres C54WMP Subnet masker Gateway adres DNS (Dynamic Name Server) : 192.168.1.50 : 255.255.255.0 : 192.168.1.1 (router als gateway) : 192.168.1.1 U kunt deze instellingen wijzigen naar uw eigen netwerkinstellingen door de opties te selecteren. Voor het wijzigen van het IP adres, subnet masker, gateway of DNS adres kunt u de numerieke toetsen (26) op uw afstandsbediening gebruiken. U kunt het volgende veld selecteren met de links/rechts toetsen (21). U hoeft geen “.” (punt) in te voeren. Druk op ‘OK’ en gebruik de links/rechts toetsen om een veld te kunnen wijzigen. Druk nogmaals op ‘OK’ om de instelling vast te houden. U kunt nu het volgende veld kiezen. Om de instellingen op te slaan drukt u op de links knop (21). Selecteer ‘Opslaan’ om te instellingen te bewaren. 12 NEDERLANDS 6. De Wireless Media Player gebruiken Als de configuratie van de C54WMP is voltooid wordt het hoofdmenu getoond met 4 opties: - Music Photo Video Setup Selecteer Music om muziek af te spelen. Selecteer Photo om foto’s te bekijken. Selecteer Video om video’s / films te bekijken. Selecteer Setup om de instellingen van de C54WMP te bekijken/wijzigen. Let op: Voor het afspelen van muziek, video’s of foto’s is een werkende Media Server benodigd. Als u geen werkende Media Server heeft, ga dan naar Hoofdstuk 7 voor de installatie van de Conceptronic Media Server. 6.1 Snelle Selectie Met de Blauwe, Groene, Gele en Rode knoppen kunt u snel wisselen tussen de verschillende afspeelmogelijkheden van de C54WMP. Druk op de blauwe knop voor video, de groene knop voor muziek, de gele knop voor foto’s en de rode knop voor internet radio. Let op: Het gebruik van deze optie brengt u terug naar het laatst gebruikte scherm van de betreffende afspeelmogelijkheid. Als u terug wilt keren naar het hoofdmenu drukt u op de ‘Home’ (3) knop. 13 NEDERLANDS 6.2 Video De Conceptronic C54WMP ondersteund MPEG1, MPEG2 & MPEG4, VOB, AVI en andere video formaten. Met gebruik van de Media Server Software kan ‘transcoding’ gebruikt worden. De computer zal het geselecteerde videobestand realtime omzetten in een formaat wat door de Conceptronic C54WMP afgespeeld kan worden. 1e gebruik: Als de optie ‘Video’ via het hoofdmenu of op de afstandsbediening (blauwe knop) is geselecteerd krijgt u een overzicht te zien van de beschikbare Media Servers (UPnP/AV) en/of de aangesloten USB apparaten. Het apparaat onthoud standaard welke map het laatst is bezocht wanneer terug gegaan wordt naar het hoofdmenu via de ‘Home’ knop. Druk op de ‘links’ toets (21) om naar het vorige scherm te gaan of om een andere UPnP/AV bron te selecteren. Als u een Media Server selecteert krijgt u diverse map-opties te zien. Deze map-opties worden aangeboden door de geselecteerde Media Server. In sommige situaties kunnen niet alle weergegeven mappen gebruikt worden. Dit hangt af van de gekozen Media Server. De ‘Video’ optie en de mapopties werken als een filter. U kunt alleen de mappen selecteren die overeenkomen met de weergegeven media in de rechterbovenhoek van uw TV. 14 NEDERLANDS Gebruik de bedieningsknoppen (21) om door de films te bladeren en druk op de ‘Play’ (5) knop om het weergeven te starten. De C54WMP zal de film laden voor het afspelen begint. Dit kan enkele seconden duren en wordt aangegeven met een ‘Loading’ bericht. Let op: De laadtijd kan variëren afhankelijk van de kwaliteit van het netwerk en de Media Server. Let op: Zorg dat de inhoud van uw Media Server is vernieuwd voor u deze selecteert via het menu. De inhoud wordt geïndexeerd en zonder een vernieuwing zullen nieuwe bestanden niet getoond worden. Als een videobestand of codec niet wordt ondersteund ziet u de volgende melding op het scherm: Video Afspeelfuncties De volgende functies kunnen tijdens het afspelen van video’s gebruikt worden: 1. 2. 3. 4. 5. 6. Mute: Druk op ‘Mute’ (2) om het geluid te onderdrukken of weer te geven. Volume : Druk op ‘+ / -‘ (24) om het volume te verhogen of te verlagen. Repeat: Druk 1x op de ‘Repeat’ knop (10) om het huidige bestand te blijven herhalen. Druk 2x op de ‘Repeat’ knop (10) om alle videobestanden in de huidige map te herhalen. Druk 3x op de ‘Repeat’ knop (10) om de repeat functie uit te schakelen. Pauze: Druk tijdens het afspelen op de ‘Play’ (5) knop om het afspelen te pauzeren. Druk nogmaals op ‘Play’ (5) om het afspelen te hervatten. Druk op ‘Stop’ (5) om het afspelen te stoppen. Druk op ‘Rew’ (4) om terug te spoelen; druk op ‘FF’ (6) om vooruit te spoelen. Let op: Tijdens vooruit of achteruit spelen kan het beeld stilstaan. De C54WMP spoelt ondertussen op de achtergrond terug. Druk op ‘Play’ (5)om het afspelen te hervatten. 7. 8. Druk op ‘Prev’ (7) om het voorgaande videobestand af te spelen. Druk op ‘Next’ (8) om het volgende videobestand af te spelen. Als een map een grote hoeveelheid videobestanden bevat kunt u door de pagina’s met bestanden bladeren door op de ‘Prev’ (8) of ‘Next’ (9) knoppen te drukken. 15 NEDERLANDS 9. Gebruik de Omhoog/Omlaag knoppen (21) om de lijst met videobestanden als onscreen tekst te laten zien. Druk op ‘OK’ (20) om het nieuw geselecteerde bestand af te spelen of druk op ‘Back’ (14) om de onscreen lijst te verbergen. 10. 11. 12. Druk op de Links toets (21) kom terug te gaan naar het selectiemenu. Zoom: Druk op ‘Zoom’ (12) om het in of uit te zoomen. Ondertiteling en taal: Druk op de ‘Sub/Lang’ knoppen (22 & 23) om te wisselen tussen de beschikbare ondertitels / talen van de VOB bestanden, of om ondertitels van MPEG4 bestanden te kiezen. A-B mode: Druk op de ‘A-B’ (27) knop om een beginpunt in te stellen. Druk nogmaals op de ‘AB’ knop om een eindpunt in te stellen en herhaald af te spelen. Om A-B mode te stoppen drukt u nogmaals op de ‘A-B’ knop. 13. 16 NEDERLANDS 6.3 Music 1e gebruik: Als de optie ‘Music’ via het hoofdmenu of op de afstandsbediening (groene knop) is geselecteerd krijgt u een overzicht te zien van de beschikbare Media Servers (UPnP/AV) en/of de aangesloten USB apparaten. In het menu zijn diverse opties beschikbaar: 1. 2. 3. 4. Achtergrondmuziek (BGM). Live 365. Mijn Radio. De beschikbare Media Servers. Het apparaat onthoud standaard welke map het laatst is bezocht wanneer terug gegaan wordt naar het hoofdmenu via de ‘Home’ knop. Druk op de ‘links’ toets (21) om naar het vorige scherm te gaan of om een andere UPnP/AV bron te selecteren. Om muziek af te kunnen spelen dient u een Media apparaat (Media Server, USB flash drive) met muziekbestanden (mp3/ wav / wma) te selecteren. Als u een Media Server selecteert krijgt u diverse map-opties te zien. Deze map-opties worden aangeboden door de geselecteerde Media Server. In sommige situaties kunnen niet alle weergegeven mappen gebruikt worden. Dit hangt af van de gekozen Media Server. De ‘Music’ optie en de mapopties werken als een filter. U kunt alleen de mappen selecteren die overeenkomen met de weergegeven media in de rechterbovenhoek van uw TV. 17 NEDERLANDS De aangeboden muziekmappen kunnen variëren. Dit is afhankelijk van de geselecteerde Media Server. De meeste Media Servers bieden de volgende opties: Album, Artiest, Genre, Alle muziekbestanden. Selecteer de optie die u wilt gebruiken. Let op: Zorg dat de inhoud van uw Media Server is vernieuwd voor u deze selecteert via het menu. De inhoud wordt geïndexeerd en zonder een vernieuwing zullen nieuwe bestanden niet getoond worden. Als een muziekbestand niet wordt ondersteund zal de volgende melding getoond worden: Om muziek af te spelen drukt u op de ‘Play /Pauze’ (5) knop. Om het afspelen te stoppen drukt u op de ‘Stop’ (7) knop. Om een nummer te selecteren drukt u op de ‘Omhoog/Omlaag’ (21) knoppen. Music Afspeelfuncties 1. 2. 3. 4. 5. 6. 7. Mute: Druk op ‘Mute’ (2) om het geluid te onderdrukken of weer te geven. Volume : Druk op ‘+ / -‘ (24) om het volume te verhogen of te verlagen. Repeat: Druk 1x op de ‘Repeat’ knop (10) om het huidige bestand te blijven herhalen. Druk 2x op de ‘Repeat’ knop (10) om alle videobestanden in de huidige map te herhalen. Druk 3x op de ‘Repeat’ knop (10) om de repeat functie uit te schakelen. Pauze: Druk tijdens het afspelen op de ‘Play’ (5) knop om het afspelen te pauzeren. Druk nogmaals op ‘Play’ (5) om het afspelen te hervatten. Druk op ‘Rew’ (4) om terug te spoelen; druk op ‘FF’ (6) om vooruit te spoelen. Druk op ‘Prev’ (7) voor het voorgaande muziekbestand. Druk op ’Next’ (8) voor het volgende muziekbestand. Als de beschikbare muziek op uw scherm getoond wordt kunt u op de ‘BGM’ toets (25) drukken voor de volgende mogelijkheden: 18 NEDERLANDS 1. 2. 3. 4. 5. 6. Toevoegen Afspelen/Volgende Afspelen/Onderling Wisselen Alle Toevoegen Alle Verwijderen Stop Voeg een nummer toe aan de BGM optie. Speel het volgende nummer van de BGM lijst. Speel de nummers uit de BGM lijst in willekeurige volgorde. Voeg alle nummers uit de map toe aan de BGM lijst. Verwijder alle nummers uit de BGM lijst. Stop het afspelen van de nummers uit de BGM lijst. De Achtergrondmuziek (BGM) optie is alleen beschikbaar als u muziek aan de BGM lijst heeft toegevoegd. Dit kunt u doen met de ‘BGM’ toets (25). De Achtergrondmuziek optie kan op 2 manieren worden gebruikt: Plaats muziek in de BGM lijst en speel deze af, of de BGM lijst wordt automatisch gespeeld als u de C54WMP aanzet. Dit werkt alleen als de nummers in de BGM lijst op een aangesloten USB apparaat staan. Live365 De Conceptronic C54WMP is voorzien van de Live365 internet radio service. Om radiostations via het internet te kunnen beluisteren heeft u een netwerk (LAN/WLAN) connectie naar het internet nodig. De ‘Live365’ optie wordt getoond in het ‘Music’ Menu. In de Live365 lijst kunt u een genre (of 1 van de overige opties) selecteren. Kies een radio station van de lijst en druk op ‘OK’ (20) om het afspelen van dit radio station te starten. Als u een radio station met een slot heeft geselecteerd kunt u deze alleen afspelen als u uw Live365.com gebruikersnaam en wachtwoord invoert. U kunt deze gegevens invoeren via het onscreen toetsenboard. 19 NEDERLANDS Let op: U kunt een gratis Live365 account aanmaken op www.live365.com. Selecteer het keuzevakje om de ingevoerde gegevens te onthouden. Door deze gegevens op te slaan hoeft u deze niet meer in te voeren bij het beluisteren van een ander radio station. Er kunnen maximaal 99 favoriete radio stations toegevoegd worden aan de optie ‘Mijn Radio’ door op de ‘BGM’ toets (25) te drukken en te kiezen voor ‘Toevoegen’. Vanuit het ‘Music’ menu kunt u de optie ‘Mijn Radio’ kiezen om uw favoriete radio stations te kunnen beluisteren. Mijn Radio Selecteer de optie ‘Mijn Radio’ via het ‘Music’ menu of druk op de ‘iRadio’ knop (19) om de favoriete radio stations weer te geven: U kunt ook uw eigen favoriete radio station toevoegen. Om een eigen favoriete radio station toe te voegen dient u over de URL te beschikken waar het station op uitgezonden wordt. Zorg ervoor dat deze URL correct wordt overgenomen. Wij adviseren om gebruik te maken van de SHOUTcast website voor het toevoegen van extra radio stations. (http://www.shoutcast.com). Er is geen directe SHOUTcast optie mogelijk via het ‘iRadio’ menu. De C54WMP heeft alleen directe toegang tot Live365.com. 20 NEDERLANDS Let op: De Conceptronic C54WMP beschikt over een Onscreen toetsenboard welke gebruikt kan worden voor het invoeren van URL’s of de namen van radio stations. Het Onscreen toetsenbord ondersteund alleen de standaard Latijnse karakters. Speciale karakters zoals áäñß worden niet ondersteund. 21 NEDERLANDS 6.4 Pictures 1e gebruik: Als de optie ‘Photo’ via het hoofdmenu of op de afstandsbediening (gele knop) is geselecteerd krijgt u een overzicht te zien van de beschikbare Media Servers (UPnP/AV) en/of de aangesloten USB apparaten. Het apparaat onthoud standaard welke map het laatst is bezocht wanneer terug gegaan wordt naar het hoofdmenu via de ‘Home’ knop. Druk op de ‘links’ toets (21) om naar het vorige scherm te gaan of om een andere UPnP/AV bron te selecteren. Als u een Media Server selecteert krijgt u diverse map-opties te zien. Deze map-opties worden aangeboden door de geselecteerde Media Server. In sommige situaties kunnen niet alle weergegeven mappen gebruikt worden. Dit hangt af van de gekozen Media Server. De ‘Pictures’ optie en de mapopties werken als een filter. U kunt alleen de mappen selecteren die overeenkomen met de weergegeven media in de rechterbovenhoek van uw TV. Let op: Zorg dat de inhoud van uw Media Server is vernieuwd voor u deze selecteert via het menu. De inhoud wordt geïndexeerd en zonder een vernieuwing zullen nieuwe bestanden niet getoond worden. 22 NEDERLANDS Foto’s weergeven Om foto’s weer te geven selecteert u eerst een Media Server, vervolgens het juiste submenu en uiteindelijk de foto’s die u wilt weergeven. Om een enkele foto te tonen, druk op de ‘OK’ (20) knop. Om meerder foto’s in dezelfde map te tonen, druk op de ‘Play’ (5) knop. Als een fotobestand niet ondersteund wordt, wordt de volgende melding op het scherm getoond: Om de foto’s in een andere volgorde weer te geven dient u de ‘Sort’ (30) knop te gebruiken. Muziek & Foto’s Bij het bekijken van foto’s in een diaweergave kan muziek op de achtergrond afgespeeld worden. De muziek kan op 2 manieren afgespeeld worden: 7. 1. Druk op de ‘Home’ (3) toets om in het hoofdmenu te komen en selecteer de ‘Music’ optie of druk op de ‘Music’ knop op uw afstandsbediening. Selecteer de gewenste muziek of radio station en start het afspelen. Druk vervolgens op de ‘Pictures’ knop op uw afstandsbediening, selecteer uw foto’s en druk op ‘Play’ om de diaweergave te starten. 2. Tijdens de diaweergave, druk op de ‘BGM’ (25) toets en kies ‘Afspelen’. Alle nummers in de BGM lijst zullen worden afgespeeld tijdens de diaweergave. Deze optie werkt alleen als er muziek aan de BGM optie is toegevoegd (Zie hoofdstuk 5.3). Conceptronic Media (UPnP A/V) Server Installatie Voor u gebruik kunt maken van de Conceptronic C54WMP heeft u een UPnP A/V compatible Media Server nodig zoals de Conceptronic CH3SNAS, de CH3WNAS of een ander UPnP A/V apparaat. De meegeleverde CD-ROM bevat de Conceptronic Media Server software. Als u geen hardware UPnP A/V Media Server heeft kunt u uw PC in een Media Server veranderen door middel van de Conceptronic Media Server software. 23 NEDERLANDS A. Plaats de CD-ROM in uw CD-ROM speler. Het Autorun Menu zal automatisch verschijnen. Als het Autorun Menu niet getoond word, ga dan naar “Mijn Computer” en dubbelklik op de CD-ROM speler om het Autorun Menu te starten. B. C. D. E. Selecteer de optie “Install Media Server Software” in het Autorun Menu. Kies uw voorkeurstaal en klik op “OK”. De Setup Wizard zal getoond worden. Klik op “Volgende” om door te gaan. Voer uw naam en organisatie in of behoudt de standaard instellingen. Kies wie de applicatie mag gebruiken (alle gebruikers of alleen de huidige gebruiker). Klik op “Volgende” om door te gaan. Wijzig de installatiemap met de “Wijzigen” knop of behoudt de standaard instellingen. Klik op “Volgende” om door te gaan. Klik op “Volgende” om te beginnen met de installatie van de software. Als de installatie gereed is kunt u de optie “Launch Conceptronic DMS” kiezen om de software direct te starten. Klik op “Voltooien” om het installatieprogramma af te sluiten. F. G. H. I. De Conceptronic Media Software is nu op uw computer geïnstalleerd en kan gestart worden vanuit de Conceptronic map in de ‘Programma’s’ sectie van het Start Menu. 8. Conceptronic Media Server Configuratie Media Bestanden Als u mediabestanden heeft geïmporteerd in de Media Server Database vindt u onder ‘Media Bestanden’ een overzicht met de gevonden bestanden. 24 NEDERLANDS Media Importeren In dit menu kunt u: • De Media Server starten. • De Media Server stoppen. • Een map met mediabestanden toevoegen. • Een of meerdere mappen verversen. • Een of meer gedeelde mappen verwijderen. Als er een nieuwe map met mediabestanden wordt toegevoegd zal deze automatisch doorzocht worden op afspeelbare mediabestanden. 25 NEDERLANDS Systeem U kunt de Server Naam wijzigen in een eigen naam. De Server Naam zal getoond worden op de TV als de C54WMP zoekt naar Media Servers. De gewijzigde naam zal actief worden als de server gestopt en gestart is. 26 NEDERLANDS Opties In dit menu kunt u de opties van de Media Server Software wijzigen: Autorun Activeren Geminimaliseerd opstarten Transcoding inschakelen Let op: Door middel van ‘transcoding’ is het mogelijk om mediabestanden die niet direct ondersteund worden door de C54WMP toch af te spelen. De kwaliteit van de gecodeerde media kan variëren. Scannen op de volgende... Transcoding Setting 9. Start de software als Windows gestart wordt. Start de software geminimaliseerd op. Schakel de Transcoding optie in. Selecteer op welke bestandstypen u wilt scannen. Selecteer de Transcoding instelling. Alternatieve Media Servers De Conceptronic C54WMP is ook te gebruiken met een alternatieve Media Server, mits deze compatible is met de UPnP A/V 1.0 standaard. Microsoft Windows XP en Windows Vista Microsoft Windows XP en Windows Vista beschikken beide over een Media Server met behulp van Windows Media Player. 27 NEDERLANDS Start Windows Media Player, kies voor ‘Extra’, ‘Opties’, en ‘Mediabibliotheek’ en configureer uw gedeelde bestanden. U kunt de Conceptronic C54WMP toestaan en instellen. Via de optie ‘In mappen zoeken’ kunt u mediabestanden toevoegen of verwijderen uit de gedeelde lijst. Let op: Bij Windows XP is Windows Media Player 11 vereist voor deze optie. Andere alternatieve Software Andere alternatieve Software is: TVersity : www.tversity.com TwonkyVision Media Server : www.twonkymedia.com ORB : www.orb.com Let op: Als een Media Server apparaat of software pakket niet gedetecteerd wordt door de Conceptronic C54WMP, controleer dan de mogelijkheden en configuratie van het betreffende apparaat/softwarepakket. Als het apparaat compatible is en correct geconfigureerd zal de C54WMP het apparaat tonen als beschikbare Media Server op uw TV. 28 NEDERLANDS 10. Systeem Configuratie Via de Systeem Configuratie kunt u de volgende instellingen wijzigen: Taal: OSD Taal (On Screen Display). Beschikbare talen : Engels, Spaans, Duits, Nederlands, Turks, Portugees, Italiaans, Frans. TV Mode Instellingen Selecteer de gewenste videoinstellingen TV Systeem : PAL of NTSC. Video Uitgangs-signaal : P-Scan: YPbPr, S-Video, Interlace YUV. Video Schaal : 4:3 PS, 4:3 LB, 16:9. Kies de juiste instellingen voor uw TV systeem. Geluidsinstellingen Selecteer de gewenste geluidsinstellingen Audio Uitgangs-signaal : SPDIF/AC3, SPDIF/PCM, SPDIF/Uit. Down Sample : 48k, 96k. AutoPlay Optie : Uit, Mijn Radio eerst, BGM eerst. Achtergrond Muziek : Uit, Een Herhalen, Alle Herhalen. Let op: Het is mogelijk om automatisch muziek te laten afspelen als het apparaat wordt ingeschakeld. Als u een streaming radio station heeft ingesteld of een USB apparaat met muziek heeft geconfigureerd kunt u deze instellen om automatisch te starten. 29 NEDERLANDS Beeldinstellingen Wijzig de TV instellingen. Helderheid, Contrast, Tint en Verzadiging instellingen. Photo Display Setup Selecteer de gewenste foto instellingen. Schermbeveiliging : Uit/Aan. Foto-weergave : Lijst/Voorbeeld. Slide Show Tijd : 2 tot 30 seconden, 1 minuut en 2 minuten. Schaal : Originele grootte, Aanpassen op schermformaat. Versie Selecteer en bekijk product informatie. Fabriekswaarden Herstellen. Firmware Upgrade (Via USB). Versie (firmware versie). MAC adres informatie voor LAN * WLAN. 30 Declaration of CE Conformity The manufacturer 2L International BV Address Databankweg 7 3821 AL Amersfoort, the Netherlands Hereby declares that the product Type 54MBPS WIRELESS MEDIA PLAYER/DMA Product C08-126 Complies with following directives: 1999/5/EEC R&TTE directive: Telecommunications Terminal Equipment and Satellite Earth Station Equipment 2004/108/EEC EMC directive: Electromagnetic Compatibility 73/23/EEC Low Voltage Directive: Electrical equipment designed for use within certain voltage limits The following standards were consulted to assess conformity: ETSI 300 328-2/2000, EN 301 489-17-2000, EN 301 489-1-2000, EN55022/9.98 Class B, EN 61000-3-2/3/4/1995, EN 50082-1/1994, EN 60950/1995 This product is for indoor use only. The purpose of this product is to send and receive data through the ether. This is a class 2 product and the transmitted output power is less than 100mW. The CE symbol confirms that this product conforms to the above named standards and regulations. This product is suitable for all EU countries. For France, the output power is restricted if used outdoor and in the range 2454 to 2483,5 MHz. For Italy, depending on the usage, a general authorization may be required. Pour tous les pays de I'UE. Pour la France, pour une utilisationen extérieur, la puissance de sortie est limitée dans la bande 2454 to 2483,5 MHz.Pertutti i paesi ell'EU. Per I'Italia, secondo I'uso, un 'autorizzazione generale puô essere richiesta. th Place and date of issue: Amersfoort, October 25 , 2007 Herman Looijen, Product Marketing Manager 31 ENGLISH Conceptronic C54WMP Quick Installation Guide Congratulations on the purchase of your Conceptronic Wireless Media Player. The enclosed Hardware Installation Guide gives you a step-by-step explanation of how to install the Conceptronic Wireless Media Player. When problems occur, we advise you to go to our support-site (go to www.conceptronic.net and click ‘Support’. Here you will find the Frequently Asked Questions Database. When you have other questions about your product and you cannot find it at our website, then contact us by e-mail: [email protected] For more information about Conceptronic products, please visit the Conceptronic Web Site: www.conceptronic.net The Software installation as described below may be slightly different from the installation on your computer. This depends on the Windows version you are using. 1. Package Contents The following items are present in the package of the Conceptronic Wireless Media Player: • • • • • • • • Conceptronic C54WMP Wireless Media Player Standard for C54WMP Power supply, 5v DC, 2A Remote Control 2x AAA Batteries for remote control RCA A/V Cable (1x RCA composite, 2x RCA Audio) Scart Adapter (3x RCA to SCART) Component converter cable (3x RCA Female for component cable) 32 ENGLISH 2. Features • • • • • • • Video playback with MPEG 1/2/4 features. Wireless networking 802.11b/g. Wired Ethernet support (10/100 Base-T). UPnP A/V Client support (UPnP 1.0 Certified). DLNA Compliant. Simple menu for setup and configuration. USB Host Connector for Firmware upgrades & expanding the usability of the device with Hard disk or USB Memory dongle. To play media the C54WMP must be connected to a network with a media server. The Conceptronic C54WMP supports the following media file formats: • • • • • • • MPEG 1, 2, 4 compressed audio & video files. SRT, SSA and SUB subtitle files. JPEG & GIF compressed images files. BMP and TIFF image files. MP3 up to 320Kbps or VBR. WMA up to 192Kbps or VBR. WAV audio files. Other files can be played when using a media server with ‘transcoding’ features. With help of your PC the file will be real-time decoded to a format usable by the Conceptronic C54WMP. 33 ENGLISH 3. The Remote Control Explained 2 1 3 5 6 4 7 8 9 11 12 10 13 14 15 16 18 17 19 20 21 22 24 23 25 26 27 29 28 30 34 ENGLISH No. 1 2 3 4 KEYPAD POWER MUTE HOME REW 5 PLAY / PAUSE 6 7 FF STOP 8 PREV 9 NEXT 10 REPEAT 11 12 13 OUTPUT ZOOM SLOW 14 BACK 15 DISPLAY 16 17 18 19 MUSIC VIDEO PICTURES iRADIO 20 OK 21 DIRECTION KEYS Up, Down Left, Right 22 23 24 25 26 27 28 29 30 SUB CH + LANG CH VOL+ VOL BGM NUMBER 1-9 A-B 0 :/ SETUP SORT FUNCTION DESCRIPTION Activate/Exit the Standby Mode of the Wireless Media Player. Mute Audio. Return to Main Menu. Fast rewind the media file during playback. 1. Play or Pause music file 2. Start Photo slideshow Fast forward the media file during playback. Stop the current playback. 1. Return to the previous page when browsing media files. 2. Return to the previous file during playback. 1. Go to the next page when browsing media files. 2. Go to the next file during playback. 1. Select repeat mode during Video & Music Playback. 2. Repeat Background music during Photo Playback. Switch the video output with S-VideoÆYPbPrÆYUV sequence. Zoom video or photo during playback. Slow forward the media during playback. 1. Return to the previous folder or setup page. 2. Save/cancel the wireless setting in the wireless setup page. 1. Display filename and media type during Video Playback. 2. Display filename and resolution during Photo Playback. Activate MUSIC mode. Activate VIDEO mode. Activate PHOTO mode. Activate Internet Radio mode. 1. Activate the selected item. 2. Enter “rotation” mode during Photo Playback. 1. Press “LEFT” to stop current mode and return to former layer; Press “RIGHT” to enter a selected folder or server. 2. Video Mode: Press “UP” or “DOWN” to choose other file 3. Photo Mode: Move picture in “zoom” mode or rotate picture in “rotate” mode 4. Music Mode: Press “UP” to skip to previous music file or press “DOWN” to skip to next music file. Select subtitle during Video Playback / Next Channel. Select language during Video Playback / Previous Channel. Increase the volume. Decrease the volume. Add/Remove a music file as background music. Numeric selection keys 1-9. Set/Cancel A-B repeat mode. Numeric selection key 0 Hotkey for iRADIO URL input. Open the Wireless Media Player Setup Menu. Sort the file list. 35 ENGLISH 4. Connecting the C54WMP to your network & TV To use the Conceptronic C54WMP you need to have the following: 1. 2. 3. A Wireless (802.11b/g/n) or Wired (10/100/1000) network. One or more computers running Windows 2000, Windows XP or Windows Vista. A TV set with Component (Y, Pb, Pr), S-Video, SCART or Composite input. Connection example with 2 computers and a NAS Media Server It is useful to have a Broadband Internet connection if you want to use streaming services like listening to a radio station which is broadcasted through the Internet. Note: The Conceptronic C54WMP is using an UPnP A/V client to play audio and video. You need to have hardware with UPnP A/V Server functionality, a third party UPnP A/V Server application or install the provided Conceptronic Media Server software. (See chapter 7). 36 ENGLISH 4.1 Hardware Installation Note: If you have a wired LAN network you need to use an Ethernet cable to connect the Conceptronic C54WMP to your router or switch. Determine which type of cable you can use for your TV: Component (Y, Pb, Pr). S-Video. Composite (Video Only). SCART (Video & Audio). • • • • For audio you can use the analogue RCA output (red and white RCA jacks) or the digital coaxial output (orange RCA jack). The remote control is using 2x AAA batteries (provided with the package). You need to use the remote control to turn on/off the device. Turn on your TV and select the correct Video Channel. Your Conceptronic C54WMP will show the Conceptronic start-up screen when turning on the device. 5. First time setup & configuration Note: In our manual we will use certain IP addresses to explain the features and functionalities of the Conceptronic C54WMP. These settings can be different in your network environment. We use following settings in our manual IP address C54WMP : 192.168.1.50 : 255.255.255.0 Netmask Gateway address : 192.168.1.1 (router as gateway) : 192.168.1.1 DNS (Dynamic Name Server) 37 ENGLISH When you turn on the Conceptronic C54WMP (Digital Media Player) you need to configure it. The message displayed on your TV is asking in which language you want to use the device. After the language selection the C54WMP Adapter will initialize the network. The network configuration wizard will start automatically. You can also access this menu through the setup menu (choose ‘Network Wizard’). Select the preferred Connection Type: ‘Wired’ or ‘Wireless’. Note: When using high-bandwidth streams we suggest you to use the wired connection, as for WLAN the quality of the signal can affect the data throughput and performance. Use the Up / Down direction keys (21) to select the Wired or Wireless Network connection. 38 ENGLISH 5.1 Wired configuration Select ‘Wired’ and press ‘OK’ to apply the configuration setting. Press ‘OK’ to select ‘Done’. The Wired configuration is now complete. Please continue to ‘Chapter 6’ for the use of the Media Player. Note: By default the C54WMP will search for a DHCP server. If the C54WMP is configured correctly you will find an IP address on the bottom of the screen. If the screen is showing: IP: 0.0.0.0 the device could not find an IP address and you have to configure the C54WMP IP Network settings manually (Chapter 5.4). 5.2 Wireless configuration The C54WMP does support Wireless LAN (802.11b/g): • • • • • • ESSID: Auto detection or manually entered when ESSID broadcast is off. Infrastructure or Ad-hoc Mode. Authentication: Auto, Shared Key, Open system. Key Format: Off, WEP64, WEP64Hex, WEP128, WEP128Hex, WPA-PSK, WPA2 AES. Key value: Configurable through the KeyFormat. Channel: auto detect. Select ‘Wireless’ and press ‘OK’ to apply the configuration setting. The C54WMP will search for available access points. When your access points is broadcasting its SSID you can select it. The signal strength indicator can have 3 colours: red, yellow and green. If the indicator is green you have the best possible connection between C54WMP and your access point. Yellow is acceptable for normal usage and when your access point signal strength is red indicated we advise you to change the position of your C54WMP or access point. Note: We do not advise high stream bandwidth movies to be played with red or yellow signal indicator. Select the access point and press OK on the remote control. Select ‘Next’ and press ‘OK’. If you have made encryption settings in your access point you have to enter the same settings into the C54WMP as you have configured into your access point. 39 ENGLISH The Wireless part of the C54WMP will automatically detect what kind of configuration is necessary for connecting towards an access point. If the access points is encrypted with WPA, the device will detect this and you only have to enter the private shared key (PSK). When your access point is not protected by a WEP or WPA encryption key, you can select ‘Next’ to finish the configuration. The Wireless configuration is now complete. Please continue to ‘Chapter 6’ for the use of the Media Player. You can manually change wireless settings through the Wireless Setup menu. Note: By default the C54WMP will search for a DHCP server. If the C54WMP is configured correctly you will find an IP address on the bottom of the screen. If the screen is showing: IP: 0.0.0.0 the device could not find an IP address and you have to configure the C54WMP IP Network settings manually (Chapter 5.4). 5.3 Use Windows Connect Now 2.0 with Conceptronic C54WMP Microsoft® Windows® Connect Now (WCN) technology makes it easier for you to add devices like the Conceptronic C54WMP to your existing wireless network. Creating a secure wireless network and delivering the necessary wireless settings to wireless devices can be difficult. WCN can help you to configure through a simple and secure method of configuring wireless networking devices. Windows Connect Now is included with XP Service Pack 2 (SP2) and later versions of Windows. You can use WCN on your PC running Windows XP SP2 or later to transfer your wireless settings to a portable USB flash drive (not delivered with this package). It is advised to have a working wireless connection on your computer to configure WCN through a USB flash drive. 40 ENGLISH Windows XP Under Microsoft Windows XP you can configure the C54WMP through WCN as follows Click ‘Start’, ‘My Network Places’. The Network Neighbourhood will be shown. Select the option ‘Set up a wireless network…’ at the left side of the window. The Wireless Network Setup Wizard will be shown. Click ‘Next’ to continue. Enter the name of your wireless network (SSID) and select the option ‘Manually assign a network key’. Note: If your network is encrypted with WPA encryption, check the checkbox on the bottom of the window. If your network is encrypted with WEP encryption, leave the checkbox unchecked. Click ‘Next’ to continue. Enter the encryption key for your network in both fields shown on your screen. To make entering the key easier, you can uncheck the option ‘Hide characters…’ so you can see what you enter. Click ‘Next’ to continue. Select the option ‘Use a USB flash drive’. Click ‘Next’ to continue. Connect the USB flash drive to your computer and select the corresponding drive letter. Click ‘Next’ to continue. When the configuration is saved, you can remove the USB flash drive. Note: Don’t close the wizard on your computer! Turn on the C54WMP and go to ‘Setup’, ‘Wireless Setup’. Insert the USB flash drive in the USB port of the C54WMP. The C54WMP will auto detect the available WCN configuration files and will ask you if you want to apply the settings. Please confirm. The settings will be saved to the configuration. Remove the USB flash drive. The correct settings are now used. We suggest you to restart the device to make sure the correct wireless settings are used. Re-insert the USB flash drive in your computer and click ‘Next’. You will see a list of configured devices. You can print your network settings with the button ‘Print Network Settings’. Click ‘Finish’ to close the Wireless Network Setup Wizard. Note: By default, the WCN settings will be removed from the USB flash drive when you click ‘Finish’. If you want to configure more devices/computers in your network, you can uncheck this box and keep the settings on the USB flash drive, but it is recommended to remove the settings. 41 ENGLISH Windows Vista Under Microsoft Windows Vista you can configure the C54WMP through WCN as follows: Click ‘Start’, ‘Network’. Click the ‘Add a Wireless Device’ button on the top of the window. Select the option ‘I want to add a wireless device or computer that is not on the list, using a USB flash drive’. Select the option ‘Add the device or computer using a USB flash drive’. Enter the name of your Wireless network in the ‘Network Name (SSID)’ field or select an available wireless network from the list (if your computer is wireless connected to the network). Click ‘Next’ to continue. Enter the encryption code for your wireless network. Note: Windows Vista uses WPA by default. If you need to use WEP encryption, click ‘Show advanced network security options’. Click ‘Next’ to continue. Make sure the USB Flash drive is inserted and save the settings to the correct drive letter. When the settings are saved, click ‘Close’ and remove the USB flash drive from your computer. Turn on the C54WMP and go to ‘Setup’, ‘Wireless Setup’. Insert the USB flash drive in the USB port of the C54WMP. The C54WMP will auto detect the available WCN configuration files and will ask you if you want to apply the settings. Please confirm. The settings will be saved to the configuration. Remove the USB flash drive. The correct settings are now used. We suggest you to restart the device to make sure the correct wireless settings are used. 5.4 Manual IP Address Setup for the C54WMP You need to setup the IP address of the C54WMP manually when there is no DHCP server in your network available. Press Setup (29) on the remote control or select the setup icon in the main menu on your screen. Select the function: Network setup and press OK to enter the IP configuration. Select the desired network type: “Wired” or “Wireless”. Select the DHCP Functionality, press OK to enter the settings and use the left or right direction key (21) to modify it. You have to press OK again to leave this option. You have to disable DHCP to enter the IP address manually. 42 ENGLISH When this function is disabled the standard default settings will be displayed. IP address C54WMP Netmask Gateway address DNS (Dynamic Name Server) : 192.168.1.50 : 255.255.255.0 : 192.168.1.1 (router as gateway) : 192.168.1.1 You can select the desired setting and modify it to the settings of your own network. When modifying the IP address, subnet mask, gateway or DNS address you can use the numeric keys on the remote control (26). To go to the next field you can use the direction key (21) (left / right). There is no need to enter a: “.” (Point). To modify press ‘OK’, use the left or right direction key (21) to modify the setting and press ‘OK’ again to go to the next field. To save the settings in the memory of the C54WMP you have to press the left direction key (21) and you will be asked to save the changes or cancel the changes. Select ‘Save’. 43 ENGLISH 6. Using the Wireless Media Player When the configuration of the Wireless Media Player is finished, you will enter the default menu with 4 functionalities: Note: Music Photo Video Setup Select Music if you want to play music through the Media Player. Select Photo if you want to see images through the Media Player. Select Video if you want to see movies / videos. Select Setup if you want to configure / change settings of the C54WMP. Before you can play Music, Video or Photos, make sure you have a Media Server running. If you don’t have a Media Server running, please proceed to Chapter 7 for the Conceptronic Media Server Installation. 6.1 Quick Selecting With the Blue, Green, Yellow and Red buttons of your remote control it is easy to switch fast between the various playback options of the C54WMP. Press the blue button for video, the green button for music, the yellow button for pictures and the red button for internet radio. Note: using this feature will bring you back to the last used screen. If you need to go back to the main menu press the home (3) button. 44 ENGLISH 6.2 Video The Conceptronic C54WMP is supporting MPEG1, MPEG2 & MPEG4, video formats as well as VOB, AVI and other formats. With the Media Server Software it’s possible to use ‘transcoding’. This means that your computer will decode the video format in a format which can be used with the Conceptronic C54WMP. First time usage: If you select ‘Video’ through the start menu or from your remote control (blue button) you will see a screen with an overview of available Media Servers (UPnP/AV) and/or the connected USB device. By default the device will remember what is the last visited folder when pressing home for returning to the main menu when selecting Video, Music or Pictures again. You have to use the back button (left arrow key (21)) to return to the previous screen to select another folder or another UPnP AV/Source. If you select a Media Server device it will show you available folders. The folders shown are provided by the Media Server. It is possible that in some situations not all offered folders have functionality. This depends on the used Media Server. The video option and the folders you select work as a filter. You can only select and display media which is written in the upper right corner of your TV screen. 45 ENGLISH Use the direction keys (21) to browse through the movies and press the play (5) button to start the movie. After starting the movie, the Conceptronic C54WMP will load the movie. This can take a few seconds and is indicated with a loading message. Note: The loading time depends on the connection quality and media server. Note: Make sure you have refreshed the content of the media server when selecting the Media Server through the menu. Content will be indexed and without a refresh new videos will not be shown. If a video file or codec is not supported you will see the following message on your screen: Video Playback functions Other functions to be used when playing video files: 1. 2. 3. 4. 5. 6. Note: 7. 8. Mute: Press Mute (2) to enable or disable audio playback. Volume Control: Press + / - (24) to increase or decrease the volume level. Repeat: Press the repeat button (10) once to repeat the current playing video file (repeat one). Press the repeat button (10) twice to repeat all video files in current folder (repeat all). Press the repeat button (10) for three times to disable the repeat mode (repeat off). Pause: during playback press the play (5) button to pause the video. Press play (5) again to resume playing the video file again. Use Stop (5) to stop the playback. Use Rew (4) for rewind, FF for fast forward (6). during “rew” or “ff” the playback can freeze. The C54WMP will rewind or fast forward the content in the background. Press “play” (5) to resume playback. Use Prev (7) for selecting previous video file. Use Next (8) for selecting next video file. If a folder contains many video files you can browse through the pages by using the Prev (8) or Next (9) buttons. 46 ENGLISH 9. Use the Up / Down key (21) to display the video files as onscreen display. Press OK (20) to play the selected video file, or press “back” (14) button the close the file list. 10. 11. 12. Press the Left (21) key for going back to the file selection menu. Zoom: use Zoom (12) to enlarge or shrink the screen. Subtitle & language: Press the Subtitle / Language buttons (22 & 23) to switch between the available languages of the VOB files. And to switch the subtitles for MPEG4 files A-B mode: Press the A-B (27) button to start the repeat section. Press the button again to finish the repeat section. To cancel the repeat A-B mode, press the A-B button again. 13. 6.3 Music First time usage: If you select ‘Music’ through the start menu or from your remote control (green button) you will see a screen with an overview of available Media-Servers (UPnP/AV) and/or the connected USB device. 47 ENGLISH In the main menu there are several options available: 1. 2. 3. 4. Background Music (BGM). Live 365. My Radio. Available Media Servers. By default the device will remember what is the last folder visited when pressing home for returning to the main menu when selecting Video, Music or Pictures again. You have to use the back button (left arrow key (21)) to return to the previous screen to select another folder or another UPnP AV/Source. To play music you first have to select the media device (media server, USB flash drive) with Music files (mp3/ wav / wma). If you select a Media Server device it will show you available folders. The folders shown are provided by the Media Server. It is possible that in some situations not all offered folders have functionality. This depends on the used Media Server. The music option and the folders you select work as a filter. You can only select and display media what is written in the upper right corner of your TV screen. The offered folder for selecting and playing music depends on the type, brand or software version of your Media Server. 48 ENGLISH Some Media Servers offer: Album, Artists, Genre, all-tracks selections. Please select the feature you prefer. Note: Make sure you have refreshed the content of the media server when selecting the Media Server through the menu. Content will be indexed and without a refresh new music will not be shown. If a music file is not supported you will see the following message on your screen: To play and pause the music press the Play/Pause (5) button. To stop the music press the Stop (7) button. To select a song from the list press the Up or Down (21) button. Music Playback Functions 1. 2. 3. 4. 5. 6. 7. Mute: Press Mute (2) to enable or disable audio playback. Volume Control: Press + / - (24) to increase or decrease the volume level. Repeat: Press the repeat button (10) once to repeat the current playing music file (repeat one). Press the repeat button (10) twice to repeat all music files in current folder (repeat all). Press the repeat button (10) for three times to disable the repeat mode (repeat off). Pause: during playback press the play (5) button to pause the music. Press play (5) again to resume playing the music file again. Use Rew (4) for rewind, FF for fast Forward (6). Use Prev (7) for selecting previous music file. Use Next (8) for selecting next music file. If you have an overview of available music you can press the BGM key (25) on your remote control to do the following: 1. 2. 3. 4. 5. 6. Add Play/Next Play Shuffle Add All Remove All Stop Add the song to the BGM feature. Play the next song from the BGM list. Play/Shuffle the files from the BGM list. Add all songs in the folder into the BGM list. Remove all songs from the BGM list. Stop playing songs from the BGM list. 49 ENGLISH The background music option is only available if you add music into this special selection. You can do this by pressing the BGM key (25). There are 2 purposes for the background music: Put music in the BGM list and play it, or the Background music can auto start when turning on the C54WMP. This is only working when you select background music from a USB drive. Live365 We have added the Live365.com internet radio music service into the Conceptronic C54WMP. To play radio stations from the internet you must have a network (LAN/WLAN) connection which can connect to the internet. Through the Music main page you can select the ‘Live365’ option. You can select a genre from the list or select any of the other available options. You can select a radio station from the list and press the OK (20) button on the remote button to play this radio station. If you choose a station with the lock icon, you can only play this station if you enter your live365.com username and password. You can enter the username and password through the onscreen software keyboard function. Note: You can create a live365 account on www.live365.com for free. You can select the check-box to remember your personal information. This way you do not have to enter your username and password again the next time you use this feature. 50 ENGLISH You can add up to 99 favourite stations to ‘My Radio’ by pressing the BGM key (25) and select ‘Add’. From the Music main menu you can select the ‘My Radio’ functionality to quick select the favourite radio stations. My Radio When you select ‘My Radio’ through the menu or with the iRadio button (19) at your remote control you can find here your selected radio stations. It is possible to add your favourite radio station. To add your favourite radio station you have to enter the URL where the station is broadcasting at. The only thing you have to do is make sure you enter the correct URL for the radio station. We suggest you to use the SHOUTCast directory. (http://www.shoutcast.com). There is no direct access to the SHOUTcast directory available through our iRadio menu. Only direct access to Live365.com is possible. Note: The Conceptronic C54WMP has a built in On Screen Keyboard which can be used to enter the URL’s and names of radio stations. Only basic Latin characters are supported. Special characters from Latin Extended character sheets like áäñß are not supported. 51 ENGLISH 6.4 Pictures First time usage: If you select ‘Pictures’ through the start menu or from your remote control (yellow button) you will see a screen with an overview of available Media-Servers (UPnP/AV) and/or the connected USB device. By default the device will remember what is the last folder visited when pressing home for returning to the main menu when selecting Video, Music or Pictures again. You have to use the back button (left arrow key (21)) to return to the previous screen to select another folder or another UPnP AV/Source. 52 ENGLISH If you select a Media Server device it will show you available folders. The folders shown are provided by the Media Server. It is possible that in some situations not all offered folders have functionality. This depends on the used Media Server. The pictures option and the folders you select work as a filter. You can only select and display media what is written in the upper right corner of your TV screen. Note: Make sure you have refreshed the content of the media server when selecting the Media Server through the menu. Content will be indexed and without a refresh new images will not be shown. Display Images To display images: select a media server, make sure you select the pictures submenu and than select an image. To display a single image you can press the OK (20) button. To display all images from a folder press the Play (5) button. If an image file is not supported you will see the following message on your screen: To display the images in another order you have to use the sort (30) button. Music & Images You can play music when you display pictures in a slideshow. There are two ways of playing music when displaying pictures. 53 ENGLISH 7. 1. Select the Music functionality through the main menu, by using the home (3) button or by selecting the Music button. Than select the correct folder and song you want to be played during the slideshow or start listening to a radio broadcast. Return to the ‘Pictures’ menu, select your first photo and press the Play (5) button. 2. During the Slideshow, Press the BGM (25) button and press Play. All songs from this list will be played during the slideshow. This feature only works if music is added as BGM music (Described in Chapter 5.3) Conceptronic Media (UPnP A/V) Server installation Before you can use the Conceptronic C54WMP you need to install an UPnP A/V compatible Server such as the Conceptronic CH3SNAS or CH3WNAS hard disk enclosures or any other UPnP A/V device. The delivered CD-ROM contains the Conceptronic Media Server software program. If you do not have a hardware UPnP A/V Server you can turn your PC into a media stream server by installing the Conceptronic Media Server software. A. Insert the CD-ROM in your CD-ROM Drive. The Autorun should appear automatically. If the Autorun menu does not appear, navigate to “My Computer” and double-click on the CD-ROM drive to start the Autorun menu. B. C. D. E. Select the option “Install Media Server Software” in the Autorun Menu. A language selection will appear. Select your preferred language and click “OK”. The Setup Wizard will appear. Click “Next” to continue. Enter your username and organization or keep the default settings. Select who can use the application (allow all users or allow only the current user). Click “Next” to continue. Change the installation directory with the “Change” button, or keep the default settings. Click “Next” to continue. F. 54 ENGLISH G. H. I. Click “Next” to start the installation of the application. You will be notified when the installation is finished. If you want to launch the Conceptronic Media Server directly after installation, check the checkbox “Launch Conceptronic DMS”. Click “Finish” to exit the installation program. The Conceptronic Media Software is now installed on your computer. You can access it through the Conceptronic folder in the Programs section of your Start Menu. 8. Conceptronic Media Server Configuration Media Files Section After importing files into the Media Server database you will find an overview of all scanned files. Media Import In this part you can: • Start the Media Server. • Stop the Media Server. • Add a Folder. • Refresh a folder or all folders. • Delete a shared folder or delete all folders. When adding a folder with media content, the folder will be scanned for content automatically. 55 ENGLISH System You can change the Server Name into a server name you desire. The server name will be shown on your screen when detecting Media Servers through your player setup. The changed server name will be active when you stop the server and start it again. 56 ENGLISH Options In this part you can change the configuration options of the Media Server Software: Enable Autorun Minimized at Startup Enable Transcoding Note: Through ‘transcoding’ it is possible to play content which is not direct supported by the hardware of your C54WMP. The quality of the transcoded content can vary. File Types to scan Transcoding Setting 9. Start the software when windows is starting Run the software minimized at startup. Enable the Transcoding option. Select which file types will be scanned by the Media Server Software. Select the transcoding quality. Alternative Media Servers You can use alternative media servers with the Conceptronic C54WMP if the server is UPnP A/V 1.0 compatible. Microsoft Windows XP and Windows Vista Microsoft Windows XP and Windows Vista offer a Media Server through the Windows Media Player. Start the Media Player, select Tools, and library than configure Sharing. You can allow and customize the settings for the Conceptronic C54WMP. Through the option Monitor Folders you can add or remove content you want to share. 57 ENGLISH Note: For Windows XP, you need at least Media Player 11 for this option. Other alternative Software Other alternative Software is: TVersity : www.tversity.com TwonkyVision Media Server : www.twonkymedia.com ORB : www.orb.com Note: If a Media Server device or software package cannot be detected by the Conceptronic C54WMP, please check the capabilities and setup of that particular device/software package. When the device is compatible and setup correctly our C54WMP will show the device as selectable device on your TV system. 58 ENGLISH 10. System Setup Through the system setup menu you can change: Language: OSD Language (On Screen Display). Available languages : English, Spanish, German, Dutch, Turkish, Portuguese, Italian, French. TV Mode Setup Select the desired video setup TV System TV Output Video Scale : PAL or NTSC. : P-Scan: YPbPr, S-Video, Interlace YUV. : 4:3 PS, 4:3 LB, 16:9. Select the appropriate setting for your TV system. Audio Setup Select the desired Audio Setup Audio Output Down Sample AutoPlay Option BG Music Note: : SPDIF/AC3, SPDIF/PCM, SPDIF/OFF. : 48k, 96k. : Off, My Radio First, BGM First. : Off, Repeat One, repeat All. It is possible to auto start music when turning on the device. If you configure a streaming radio broadcast or use a USB device with music you can select the desired function to be started first. 59 ENGLISH Video Setup Adjust the desired TV screen display. Brightness, Contrast, Hue & Saturation settings. Photo Display Setup Select the desired Photo properties. Screen saver Photo display setup Slide Show Time Background music (BGM) Scale : On/Off. : List/Thumbnail. : 2 to 30 seconds, 1 minute and 2 minutes. : Off, Repeat one, Repeat all. : Original Size, Fit to Screen. Version Select and view product information. Reset to Default. Firmware Upgrade (through USB). Version (firmware version). MAC address information for LAN * WLAN. 60 Declaration of CE Conformity The manufacturer 2L International BV Address Databankweg 7 3821 AL Amersfoort, the Netherlands Hereby declares that the product Type 54MBPS WIRELESS MEDIA PLAYER/DMA Product C08-126 Complies with following directives: 1999/5/EEC R&TTE directive: Telecommunications Terminal Equipment and Satellite Earth Station Equipment 2004/108/EEC EMC directive: Electromagnetic Compatibility 73/23/EEC Low Voltage Directive: Electrical equipment designed for use within certain voltage limits The following standards were consulted to assess conformity: ETSI 300 328-2/2000, EN 301 489-17-2000, EN 301 489-1-2000, EN55022/9.98 Class B, EN 61000-3-2/3/4/1995, EN 50082-1/1994, EN 60950/1995 This product is for indoor use only. The purpose of this product is to send and receive data through the ether. This is a class 2 product and the transmitted output power is less than 100mW. The CE symbol confirms that this product conforms to the above named standards and regulations. This product is suitable for all EU countries. For France, the output power is restricted if used outdoor and in the range 2454 to 2483,5 MHz. For Italy, depending on the usage, a general authorization may be required. Pour tous les pays de I'UE. Pour la France, pour une utilisationen extérieur, la puissance de sortie est limitée dans la bande 2454 to 2483,5 MHz.Pertutti i paesi ell'EU. Per I'Italia, secondo I'uso, un 'autorizzazione generale puô essere richiesta. th Place and date of issue: Amersfoort, October 25 , 2007 Herman Looijen, Product Marketing Manager 61 ESPAÑOL C54WMP de Conceptronic Guía de instalación rápida Felicidades por la compra de su Reproductor multimedia inalámbrico de Conceptronic. Esta guía de instalación le orientará paso a paso sobre cómo instalar el Reproductor multimedia inalámbrico de Conceptronic. En caso de surgir cualquier problema, visite nuestra página web de asistencia técnica (haga clic en el apartado “Soporte” de www.conceptronic.net). Aquí encontrará la base de datos de las preguntas más frecuentes o FAQ. Si tiene otras preguntas sobre el producto que no figuran en nuestro sitio web, póngase en contacto con nosotros por correo electrónico: [email protected] Si desea información adicional sobre los productos de Conceptronic, visite nuestro sitio web: www.conceptronic.net 1. Contenido del paquete El paquete del Reproductor multimedia inalámbrico de Conceptronic contiene los elementos siguientes: • • • • • • • • Reproductor multimedia inalámbrico C54WMP de Conceptronic. Estándar para C54WMP. Fuente de alimentación, 5v DC, 2A. Mando a distancia. 2 pilas AAA para el mando a distancia. Cables RCA A/V (1 cable RCA Composite, 2 cables RCA audio). Adaptadores SCART (3 adaptadores de RCA a SCART). Cable convertidor Component (3 hembras RCA para cable Component). 62 ESPAÑOL 2. Características • • • • • • • Reproductor de vídeo MPEG-1/2/4. Función inalámbrica 802.11b/g. Opción de Ethernet por cable (10/100 Base-T). Soporta cliente A/V UpnP (UPnP 1.0 Certificado). Compatible con la norma DLNA. Sencillo menú para su instalación y configuración. Conector Host USB para poder actualizar el firmware y expandir las posibilidades del equipo con un disco duro o una memoria USB. Para reproducir contenidos multimedia debe conectar el C54WMP a una red con un servidor multimedia. El C54WMP de Conceptronic es compatible con los siguientes formatos multimedia: • • • • • • • Archivos de audio y vídeo comprimidos MPEG 1, 2 y 4. Archivos de subtítulo SRT, SSA y SUB. Archivos de imagen comprimida JPEG y GIF. Archivos de imagen BMP y TIFF. MP3 de hasta 320Kbps o VBR. WMA de hasta 192Kbps o VBR. Archivos de audio WAV. Se podrán reproducir otros tipos de archivos si se utiliza un servidor multimedia con característica “transcoding”. Con la ayuda de su PC, los archivos se decodificarán a tiempo real hacia un formato que su C54WMP de Conceptronic pueda utilizar. 63 ESPAÑOL 3. Descripción del mando a distancia 2 1 3 5 6 4 7 8 9 11 12 10 13 14 15 16 18 17 19 20 21 22 24 23 25 26 27 29 28 30 64 ESPAÑOL Núm 1 2 3 4 TECLA POWER MUTE HOME REW 5 PLAY / PAUSE 6 7 FF STOP 8 PREV 9 NEXT 10 REPEAT 11 OUTPUT 12 13 ZOOM SLOW 14 BACK 15 DISPLAY 16 17 18 19 MUSIC VIDEO PICTURES iRADIO 20 OK 21 TECLAS DE DIRECCIÓN Up, Down Left, Right 22 23 24 25 26 27 SUB CH + LANG CH VOL + VOL BGM NÚMEROS 1-9 A-B 28 0 29 SETUP 30 SORT :/ DESCRIPCIÓN DE SU FUNCIÓN Activa o sale del modo Standby del reproductor inalámbrico multimedia. Función de silencio. Vuelve al menú principal. Rebobinado rápido del archivo durante su reproducción. 1. Reproduce o pausa un archivo de música 2. Inicia la presentación de fotografías Avance rápido del archivo durante su reproducción. Detiene la reproducción en curso. 1. Vuelve a la página anterior (cuando se está navegando para buscar archivos multimedia). 2. Vuelve al archivo anterior durante una reproducción. 1. Va a la página siguiente (cuando se está navegando para buscar archivos multimedia). 2. Va al archivo siguiente durante una reproducción. 1. Selecciona el modo “repetición” durante la reproducción de vídeo o música. 2. Repite música de fondo durante una presentación de fotografías. Selecciona la salida de vídeo siguiendo la secuencia S-VideoÆYPbPrÆYUV. Acerca la imagen durante una reproducción de vídeo o fotos. Reproducción lenta del archivo multimedia. 1. Vuelve a la carpeta anterior o a la página de configuración. 2. Guarda o cancela la configuración inalámbrica en la página de configuración inalámbrica. 1. Muestra el nombre y tipo de archivo durante una reproducción de vídeo. 2. Muestra el nombre y la resolución de los archivos en una presentación de fotografías. Activa el modo MÚSICA. Activa el modo VÍDEO. Activa el modo FOTO. Activa el modo de Radio por Internet. 1. Activa el elemento seleccionado. 2. Activa el modo “rotación” durante una presentación de fotografías. 1. Pulse la tecla “IZQUIERDA” para salir del modo actual y volver a la pantalla anterior; Pulse la tecla “DERECHA” para acceder a la carpeta o servidor seleccionado. 2. Modo Vídeo: Pulse la tecla “ARRIBA” o “ABAJO” para seleccionar otro archivo. 3. Modo Foto: En modo “zoom” acercará o alejará la foto, y en modo “rotación” podrá girar la foto. 4. Modo Música: Pulse “ARRIBA” para ir al archivo de música anterior o “ABAJO” para ir al siguiente. Activa los subtítulos durante una reproducción de vídeo / Va al canal siguiente. Selecciona un idioma durante una reproducción de vídeo / Va al canal anterior. Sube el volumen. Baja el volumen. Añade o quita un archivo de música como música de fondo. Teclas numéricas del 1 al 9. Activa o cancela el modo de repetición A-B. Tela de acceso directo a la URL de Tecla numérica 0 entrada de iRADIO. Accede al menú de instalación y configuración del Reproductor multimedia inalámbrico. Clasifica la lista de archivos. 65 ESPAÑOL 4. Conectar el C54WMP a su red y televisor Para utilizar el C54WMP de Conceptronic necesitará lo siguiente: 1. 2. 3. Una red inalámbrica (802.11b/g/n) o por cable (10/100/1000). Un ordenador (o varios) con Windows 2000, Windows XP o Windows Vista. Un televisor con entrada Component (Y, Pb, Pr), S-Video, SCART o Composite. Ejemplo de conexión con 2 ordenadores y un servidor multimedia NAS Es útil disponer de una conexión a Internet de banda ancha si desea acceder a servicios multimedia por Internet como por ejemplo escuchar una emisora de radio que emita por Internet. Nota: El C54WMP de Conceptronic utiliza un cliente UPnP A/V para reproducir audio y vídeo. Se necesita hardware con funcionalidad de servidor UPnP A/V, o una aplicación de servidor UPnP A/V, o instalar el software de servidor multimedia Conceptronic proporcionado. (Vea el capítulo 7). 66 ESPAÑOL 4.1 Instalación del hardware Nota: Si dispone de una red LAN por cable, necesitará utilizar un cable Ethernet para conectar el C54WMP de Conceptronic a su router o conmutador. Determine qué tipo de cable puede utilizar con su televisor: • Component (Y, Pb, Pr). • S-Video. • Composite (Sólo vídeo). • SCART (Vídeo y audio). Para audio puede utilizar la salida analógica RCA (conectores RCA rojo y blanco) o la salida digital coaxial (conector RCA naranja). El mando a distancia utiliza dos pilas AAA (incluidas con el producto). Necesitará utilizar el mando a distancia para encender o apagar el dispositivo. Encienda su televisor y seleccione el canal de video adecuado. Cuando encienda su C54WMP de Conceptronic se mostrará la pantalla de inicio. 5. Instalación y primera configuración Nota: En este manual utilizamos algunas direcciones IP para explicar las características y funcionalidades del C54WMP de Conceptronic, aunque éstas pueden ser diferentes en su entorno de red. En este manual utilizaremos la siguiente configuración: Dirección IP del C54WMP : 192.168.1.50 Máscara de red : 255.255.255.0 Dirección de puerta de enlace : 192.168.1.1 (router como puerta de enlace) DNS (Dynamic Name Server) : 192.168.1.1 Cuando encienda el C54WMP de Conceptronic (reproductor digital multimedia), deberá configurarlo. El mensaje que aparecerá en su televisor le pedirá seleccionar el idioma con el que quiere utilizar su dispositivo. 67 ESPAÑOL Después de haber seleccionado el idioma, el adaptador del C54WMP inicializará la red. Automáticamente aparecerá el asistente para la configuración de red. También puede acceder a este menú desde el menú de configuración seleccionando “Asistente de red” Seleccione el tipo de conexión que utilizará: “Wired” (con cable) o “Wireless” (inalámbrico). Nota: Cuando se conecte a canales multimedia de Internet con banda ancha le recomendamos utilizar una conexión por cable, ya que con una conexión LAN inalámbrica la calidad de la señal puede afectar la reproducción de archivos y el rendimiento general. Para seleccionar el tipo de conexión utilice las teclas de dirección “Arriba” y “Abajo” (21). 68 ESPAÑOL 5.1 Configuración de la conexión con cable Seleccione “Wired” (con cable) y pulse “OK” para hacer efectiva la selección. Pulse “OK” para seleccionar “Done” (finalizado). Se ha completado la configuración de la conexión con cable. Para la utilización del Reproductor multimedia, siga las instrucciones del Capítulo 6. Nota: El C54WMP por defecto buscará un servidor DHCP. Si el C54WMP está configurado correctamente, verá una dirección IP en la parte inferior de la pantalla. Si la pantalla muestra: IP: 0.0.0.0, significa que el dispositivo no pudo encontrar ninguna dirección IP y deberá configurar la IP del C54WMP manualmente (Capítulo 5.4). 5.2 Configuración de la conexión inalámbrica El C54WMP es compatible con LAN inalámbrica (802.11b/g): • • • • • • ESSID: Autodetección o introducción manual cuando la emisión ESSID está desconectada. Modo “Infraestructura” o modo “Ad-hoc”. Autentificación: Auto (Automática), Shared Key (Clave compartida) y Open system (Sistema abierto). Key Format (Formato de la clave): Off (desactivada), WEP64, WEP64Hex, WEP128, WEP128Hex, WPA-PSK y WPA2 AES. Key Value (Valor de la clave): configurable mediante Key Format (Formato de la clave). Channel (Canal): autodetección. Seleccione “Wireless” (inalámbrico) y pulse “OK” para hacer efectiva la selección. El C54WMP buscará puntos de acceso disponibles. Podrá seleccionar un punto de acceso cuando esté emitiendo su SSID. El indicador de potencia de la señal tiene 3 colores: rojo, amarillo y verde. Si el indicador está en verde, significa que dispone de la mejor conexión posible entre el C54WMP y su punto de acceso. El amarillo significa aceptable para un uso normal, y el rojo significa que debe cambiar la orientación del C54WMP o de su punto de acceso. Nota: Se recomienda no reproducir películas mediante flujo de banda ancha cuando el indicador esté en color amarillo o rojo. Seleccione el punto de acceso y pulse la tecla “OK” del mando a distancia. Seleccione “Next” (siguiente) y pulse “OK”. Si ha configurado algún cifrado en su punto de acceso, deberá introducir esta misma configuración en el C54WMP. 69 ESPAÑOL La funcionalidad inalámbrica del C54WMP detectará automáticamente qué tipo de configuración es necesaria para conectarse a un punto de acceso. Si el punto de acceso está cifrado con WPA, el dispositivo lo detectará y usted sólo tendrá que introducir la clave compartida privada (PSK). Si su punto de acceso no está protegido por una clave cifrada WEP o WPA, seleccione “Next” (siguiente) para finalizar la configuración. Se ha completado la configuración de la conexión inalámbrica. Para la utilización del Reproductor multimedia, siga las instrucciones del Capítulo 6. Puede cambiar manualmente la configuración inalámbrica mediante el menú de configuración de conexión inalámbrica. Nota: El C54WMP por defecto buscará un servidor DHCP. Si el C54WMP está configurado correctamente, verá una dirección IP en la parte inferior de la pantalla. Si la pantalla muestra: IP: 0.0.0.0, significa que el dispositivo no pudo encontrar ninguna dirección IP y deberá configurar la IP del C54WMP manualmente (Capítulo 5.4). 5.3 Uso de Windows Connect Now 2.0 con el C54WMP de Conceptronic La tecnología Microsoft® Windows® Connect Now (WCN) hace más fácil añadir dispositivos como el C54WMP de Conceptronic a su red inalámbrica. Crear una red inalámbrica segura y configurar todos los dispositivos inalámbricos con los datos necesarios puede resultar difícil. WCN le puede ayudar mediante un método simple y seguro de configuración de dispositivos inalámbricos. Windows Connect Now está incluido en el XP Service Pack 2 (SP2) y versiones posteriores de Windows. 70 ESPAÑOL Puede utilizar el WCN en su ordenador si dispone de Windows XP SP2 o posterior para transferir su configuración inalámbrica a un dispositivo flash USB portátil (no suministrado con este dispositivo). Se recomienda disponer de una conexión inalámbrica activa en su ordenador para configurar el WCN mediante un dispositivo flash USB. Windows XP Con Microsoft Windows XP puede configurar el C54WMP mediante el WCN de la siguiente manera: Vaya a “Inicio” y luego a “Mis sitios de red”. Se mostrarán las redes disponibles. Seleccione la opción “Configurar una red inalámbrica...” en la parte izquierda de la ventana. Se mostrará el asistente de configuración de redes inalámbricas. Haga clic en “Siguiente” para continuar. Introduzca el nombre de su red inalámbrica (SSID) y seleccione la opción “Asignar manualmente una clave de red”. Nota: Si su red utiliza cifrado WPA, active la casilla de la parte inferior de la pantalla. Si utiliza cifrado WEP, deje la casilla desactivada. Haga clic en “Siguiente” para continuar. Introduzca la clave de cifrado correspondiente a su red en los dos campos de la pantalla. Para poderlas introducir más fácilmente, desactive la casilla con la opción “Ocultar caracteres...” para que pueda ver los caracteres que introduce. Haga clic en “Siguiente” para continuar. Seleccione la opción “Utilizar dispositivo flash USB”. Haga clic en “Siguiente” para continuar. Conecte el dispositivo flash USB a su ordenador y seleccione la letra correspondiente al dispositivo. Haga clic en “Siguiente” para continuar. Cuando haya guardado la configuración, podrá retirar el dispositivo flash USB. Nota: ¡No cierre todavía el asistente! Encienda el C54WMP y vaya a “Setup” (configuración) y luego a “Wireless Setup” (configuración inalámbrica). Introduzca el dispositivo flash USB en el puerto USB del C54WMP. El C54WMP detectará automáticamente los archivos de configuración WCN disponibles y le preguntará si quiere aplicar esa configuración. Confirme esta opción y se guardará la configuración. Retire el dispositivo flash USB. La configuración correcta está lista para ser utilizada pero le recomendamos reiniciar el dispositivo para asegurarse de que se utilizará la configuración inalámbrica correcta. Vuelva a conectar el dispositivo flash USB a su ordenador y haga clic en “Siguiente”. Verá una lista de dispositivos configurados. Si lo desea puede imprimir su configuración de red pulsando el botón “Imprimir configuración de red”. Haga clic en “Finalizar” para cerrar el asistente de configuración de red inalámbrica. 71 ESPAÑOL Nota: Por defecto, la configuración WCN del dispositivo flash USB se borrará al hacer clic en “Finalizar”. Si desea configurar más dispositivos u ordenadores de su red, desactive la casilla con esta opción para mantener guardada la configuración en el flash USB, pero se recomienda borrarlos una vez finalizado el proceso. Windows Vista Con Microsoft Windows Vista puede configurar el C54WMP mediante WCN de la siguiente manera: Vaya a “Inicio” y a continuación a “Red”. Haga clic en el botón “Añadir dispositivo inalámbrico” situado en la parte superior de la ventana. Seleccione la opción “Deseo añadir un dispositivo inalámbrico u ordenador que no está en la lista, utilizando un dispositivo flash USB”. Seleccione la opción “Añadir el dispositivo u ordenador utilizando un dispositivo flash USB”. Introduzca el nombre de su red inalámbrica en el campo “Nombre de red (SSID)” o seleccione una red inalámbrica disponible de la lista (si su ordenador está conectado de forma inalámbrica a la red). Haga clic en “Siguiente” para continuar. Introduzca el código cifrado de su red inalámbrica. Nota: Windows Vista utiliza WPA por defecto. Si necesita utilizar cifrado WEP, haga clic en “Mostrar opciones avanzadas de seguridad”. Haga clic en “Siguiente” para continuar. Asegúrese de que ha conectado el dispositivo flash USB y guarde la configuración en el dispositivo correcto (letra correcta de dispositivo). Cuando haya guardado la configuración, haga clic en “Cerrar” y retire el dispositivo flash USB del ordenador. Encienda el C54WMP y vaya a “Setup” (configuración) y a continuación a “Wireless Setup” (configuración inalámbrica). Introduzca el dispositivo flash USB en el puerto USB del C54WMP. El C54WMP detectará automáticamente los archivos de configuración WCN y le preguntará si quiere aplicar esta configuración. Confirme esta opción y se guardará la configuración. Retire el dispositivo flash USB. La configuración correcta está lista para ser utilizada pero le recomendamos reiniciar el dispositivo para asegurarse de que se utilizará la configuración inalámbrica correcta. 5.4 Configuración manual de la dirección IP del C54WMP Necesitará configurar manualmente la dirección IP del C54WMP cuando no haya ningún servidor DHCP disponible en la red. Pulse el botón “Setup” (29) del mando a distancia o seleccione el icono de instalación en el menú principal de la pantalla. Seleccione la función “Network setup” (configuración de la red) y pulse “OK” para introducir la configuración de la IP. Seleccione el tipo de conexión que utilizará: “Wired” (con cable) o “Wireless” (inalámbrica) 72 ESPAÑOL Seleccione la funcionalidad DHCP, pulse “OK” para introducir la configuración y utilice las teclas de dirección (21) para modificarla. Para salir, pulse de nuevo “OK”. En DHCP debe seleccionar “Disable” (desactivar) para introducir la dirección IP manualmente. Cuando desactive esta funcionalidad, se mostrará la configuración por defecto: Dirección IP del C54WMP Máscara de red Dirección de puerta de enlace DNS (Dynamic Name Server) : 192.168.1.50 : 255.255.255.0 : 192.168.1.1 (router como puerta de enlace) : 192.168.1.1 Modifique cada uno de estos campos para adecuarlo a la configuración correcta de su red. Para modificar cualquiera de los campos, utilice las teclas numéricas del mando a distancia (26). Para ir de un campo a otro, utilice las teclas de dirección “izquierda” o “derecha” (21). No necesitará introducir los puntos. Para modificar un campo pulse “OK”, utilice las teclas de dirección “izquierda” o “derecha” (21) para desplazarse dentro de él. Para acceder al siguiente campo, pulse “OK”. Para guardar la configuración en la memoria del C54WMP debe pulsar la tecla de dirección “izquierda” (21) y se le preguntará si quiere guardar o cancelar los cambios. Seleccione “Save” (guardar). 73 ESPAÑOL 6. Utilización del Reproductor multimedia inalámbrico Cuando haya terminado de configurar el Reproductor multimedia inalámbrico, accederá al menú principal, en el cual encontrará 4 funcionalidades: Nota: Music Photo Video Setup Seleccione “Music” si desea reproducir música. Seleccione “Photo” si desea ver imágenes. Seleccione “Video” si desea ver películas o vídeos. Seleccione “Setup” si desea configurar o cambiar alguna configuración del C54WMP. Antes de poder reproducir música, vídeo o ver fotos, deberá tener un servidor multimedia activo. Si no tiene un servidor multimedia activo, vea el Capítulo 7 para instalar el servidor multimedia de Conceptronic. 6.1 Selección rápida Con los botones azul, verde, amarillo y rojo del mando a distancia podrá seleccionar fácilmente cada una de las opciones de reproducción del C54WMP. Pulse el botón azul para vídeo, el botón verde para música, el amarillo para imágenes y el rojo para radio por Internet. Nota: Si utiliza esta opción, volverá a la última pantalla utilizada. Si desea volver al menú principal pulse la tecla “Home” (3). 74 ESPAÑOL 6.2 Vídeo El C54WMP de Conceptronic es compatible con los formatos de vídeo MPEG1, MPEG2 y MPEG4, VOB, AVI y otros formatos. Con el software de servidor multimedia podrá utilizar la característica “transcoding”. Esto significa que su PC decodificará el formato de vídeo hacia un formato que su C54WMP de Conceptronic pueda utilizar. Primera utilización: Si selecciona “Video” en el menú principal o mediante el botón azul del mando a distancia, verá una pantalla que mostrará los servidores multimedia (UPnP/AV) disponibles y los dispositivos USB conectados. Por defecto, el dispositivo recordará cuál fue la última carpeta visitada cuando vuelva a pulsar la tecla “Home” para volver al menú principal o seleccione “Video”, “Music” o “Pictures”. Si desea volver a la pantalla anterior para seleccionar otra carpeta u otra entrada UPnP/AV, utilice el botón de dirección “Atrás” (flecha hacia la izquierda (21)). Si selecciona un dispositivo servidor multimedia se mostrarán las carpetas disponibles. Las carpetas mostradas son proporcionadas por el servidor multimedia. Es posible que en algunas situaciones no todas las carpetas ofrecidas estén operativas. Eso dependerá del servidor multimedia. La opción de vídeo y las carpetas seleccionadas funcionan como filtro. Sólo podrá seleccionar y mostrar el contenido multimedia mostrado en la esquina superior derecha de la pantalla del televisor. 75 ESPAÑOL Utilice las teclas de dirección (21) para seleccionar una película y pulse el botón “Play” (5) para su reproducción. Espere unos segundos mientras el C54WMP de Conceptronic carga la película. El proceso puede tardar unos segundos, y será indicado mediante el siguiente mensaje: Nota: El tiempo de carga depende de la calidad de la conexión y del servidor multimedia. Nota: Asegúrese de haber actualizado el contenido del servidor multimedia cuando seleccione el servidor mediante el menú, ya que se mostraría el contenido pero no los nuevos vídeos. Si un archivo de vídeo o códec no está en un formato compatible, aparecerá el siguiente mensaje en la pantalla: Funciones de reproducción de vídeo Otras funciones de la reproducción de vídeo: 1. 2. 3. 4. 5. 6. Nota: Mute: pulse “Mute” (2) para activar o desactivar el sonido. Control de volumen: pulse + o - (24) para subir o bajar el volumen. Repetición: Pulse una vez el botón “Repeat” (10) para repetir el archivo de vídeo que esté viendo en ese momento (repetir uno). Pulse dos veces el botón “Repeat” (10) para repetir todos los archivos de vídeo de la carpeta actual (repetirlos todos). Pulse tres veces el botón “Repeat” (10) para desactivar el modo repetición (desactivar repetición). Pausa: para pausar una reproducción, pulse el botón “Play” (5) en el curso de la reproducción. Para continuar la reproducción, vuelva a pulsar el botón “Play” (5). Para detener una reproducción, pulse “Stop” (7). Para rebobinar pulse “Rew” (4), y para avance rápido pulse “FF” (6). Durante las funciones “Rew” o “FF”, la imagen puede congelarse, aunque el C54WMP seguirá realizando estas funciones internamente. Pulse “Play” (5) para continuar con la reproducción. 76 ESPAÑOL 7. 8. Utilice “Prev” (8) para seleccionar el archivo de vídeo anterior. Utilice “Next” (9) para seleccionar el archivo de vídeo siguiente. Si una carpeta contiene muchos archivos de vídeo, puede ir de una página a otra utilizando las teclas “Prev” (8) o “Next” (9). 9. Utilice las teclas “Arriba” o “Abajo” (21) para mostrar los archivos de vídeo en la pantalla. Pulse “OK” (20) para reproducir el archivo seleccionado, o pulse “Back” (14) para ocultar la lista de archivos. 10. 11. 12. Pulse la tecla “Izquierda” (21) para volver al menú de selección de archivos. Zoom: utilice “Zoom” (12) para ampliar o reducir la imagen de pantalla. Subtítulos e idioma: pulse los botones “Subtitle” (subtítulos) o “Language” (idioma) (22 y 23) para seleccionar uno de los idiomas disponibles de los archivos VOB, o cambiar los subtítulos de los archivos MPEG4. Modo A-B: Pulse la tecla “A-B” (27) para iniciar el modo de repetición A-B, y vuelva a pulsarlo para finalizar. Para cancelar el modo A-B, vuelva a pulsar la tecla “A-B”. 13. 77 ESPAÑOL 6.3 Música Primera utilización: Si selecciona “Música” en el menú principal o mediante el botón verde del mando a distancia, verá una pantalla que mostrará los servidores multimedia disponibles (UPnP/AV) y los dispositivos USB conectados. En el menú principal hay disponibles varias opciones: 1. 2. 3. 4. Background Music (BGM) (Música de fondo). Live 365. My Radio. Servidores multimedia disponibles. Por defecto, el dispositivo recordará cuál fue la última carpeta visitada cuando vuelva a pulsar la tecla “Home” para volver al menú principal o seleccione “Video”, “Music” o “Pictures”. Si desea volver a la pantalla anterior para seleccionar otra carpeta u otra entrada UPnP/AV, utilice el botón de dirección “Atrás” (flecha hacia la izquierda (21)). Para reproducir música primero deberá seleccionar el dispositivo (servidor multimedia, dispositivo flash USB) que contenga los archivos de música (mp3/ wav / wma). Si selecciona un dispositivo servidor multimedia se mostrarán las carpetas disponibles. Las carpetas mostradas son proporcionadas por el servidor multimedia. Es posible que en algunas situaciones no todas las carpetas ofrecidas estén operativas. Esto dependerá del servidor multimedia. La opción de música y las carpetas seleccionadas funcionan como filtro. Sólo podrá seleccionar y mostrar el contenido multimedia mostrado en la esquina superior derecha de la pantalla del televisor. 78 ESPAÑOL Las carpetas disponibles para seleccionar y reproducir música depende del tipo, marca y versión del software del servidor multimedia. Algunos servidores multimedia ofrecen: álbum, artista, género, selección de todas las pistas... Seleccione la característica deseada. Nota: Asegúrese de haber actualizado el contenido del servidor multimedia cuando seleccione el servidor mediante el menú, ya que se mostraría el contenido pero no los nuevos archivos de música. Si un archivo de música no está en un formato compatible, aparecerá el siguiente mensaje en la pantalla: Para reproducir o pausar un archivo de música, pulse el botón “Play/Pause” (5). Para detener una reproducción, pulse “Stop” (7). Para seleccionar una canción de la lista, utilice las teclas “Arriba” o “Abajo” (21). Funciones de reproducción de música 1. 2. 3. 4. 5. 6. 7. Mute: pulse “Mute” (2) para activar o desactivar el sonido. Control de volumen: pulse + o - (24) para subir o bajar el volumen. Repetición: Pulse una vez el botón “Repeat” (10) para repetir el archivo de música que esté escuchando en ese momento (repetir uno). Pulse dos veces el botón “Repeat” (10) para repetir todos los archivos de música de la carpeta actual (repetirlos todos). Pulse tres veces el botón “Repeat” (10) para desactivar el modo repetición (desactivar repetición). Pausa: para pausar una reproducción, pulse el botón “Play” (5) en el curso de la reproducción. Para continuar la reproducción, vuelva a pulsar el botón “Play” (5). Para rebobinar pulse “Rew” (4), y para avance rápido pulse “FF” (6). Pulse “Prev” (8) para seleccionar el archivo de música anterior. Pulse “Next” (9) para seleccionar el archivo de música siguiente. Si tiene una lista de música disponible, puede pulsar la tecla “BGM” (Música de fondo) (25) del mando a distancia para realizar las siguientes funciones: 79 ESPAÑOL 1. 2. 3. 4. 5. 6. Add Play/Next Play Shuffle Add All Remove All Stop Añadir la canción a la función música de fondo. Reproducir la siguiente canción de la lista de música de fondo. Reproducción aleatoria de los archivos de la lista de música de fondo. Añadir todas las canciones de la carpeta a la lista de música de fondo. Borrar todas las canciones de la lista de música de fondo. Detener la reproducción de las canciones de la lista de música de fondo. La opción de música de fondo sólo estará disponible si añade música a esta selección especial. Puede hacerlo pulsando la tecla “BGM” (25). Puede utilizar la música de fondo de dos formas: poner música en la lista de música de fondo y simplemente reproducirla, o hacer que la música de fondo se reproduzca automáticamente al encender el C54WMP. Esta característica sólo funcionará si selecciona música de fondo de un dispositivo USB. Live365 Hemos añadido el servicio Live365.com de radio y música por Internet al C54WMP de Conceptronic. Para reproducir emisoras de radio de Internet deberá disponer de una conexión de red (LAN/WLAN) para poder conectarse a Internet. Puede seleccionar la opción “Live365” en la página principal del modo Música. Puede seleccionar un género musical de la lista o seleccionar cualquiera de las otras opciones disponibles. Puede seleccionar una emisora de radio de la lista y pulsar la tecla “OK” (20) del mando a distancia para reproducirla. Si selecciona una emisora con el icono de un candado, sólo podrá reproducir esa emisora si introduce su nombre de usuario y contraseña de live365.com. Puede introducir el nombre de usuario y la contraseña utilizando la utilidad de “teclado en pantalla” del software. Nota: Puede crear una cuenta live365 de forma gratuita en www.live365.com. 80 ESPAÑOL Puede activar la casilla “Remember my password” (recordar contraseña) para que se le recuerde su información personal, de forma que no tenga que introducir de nuevo su nombre de usuario y contraseña la próxima vez que utilice esta característica. Puede añadir hasta 99 emisoras de radio favoritas en “My Radio” pulsando la tecla “BGM” (25) y seleccionando “Add” (añadir). Desde el menú principal del modo Música puede seleccionar la funcionalidad “My Radio” para seleccionar fácilmente sus emisoras de radio preferidas. My Radio Cuando selecciona “My Radio” mediante el menú o con el botón “iRadio” (19) del mando a distancia, encontrará aquí sus emisoras de radio seleccionadas. Puede añadir aquí una nueva emisora de radio favorita. Para añadir una nueva emisora, introduzca la dirección URL de Internet donde se encuentra la emisora de radio. Sólo tiene que asegurarse de que introduce correctamente la dirección URL de la emisora de radio. Le recomendamos utilizar el directorio SHOUTCast (http://www.shoutcast.com). No se puede acceder directamente al directorio SHOUTCast desde nuestro menú de iRadio, sólo a Live365.com. 81 ESPAÑOL Nota: El C54WMP de Conceptronic incorpora una utilidad de “teclado en pantalla” para poder introducir las direcciones URL y los nombres de las emisoras de radio. Sólo incorpora los caracteres Latin básicos; los caracteres especiales de Latin Extended como áäñß no están incluidos. 82 ESPAÑOL 6.4 Imágenes Primera utilización: Si selecciona “Pictures” (Imágenes) en el menú principal o mediante el botón amarillo del mando a distancia, verá una pantalla que mostrará los servidores multimedia disponibles (UPnP/AV) y los dispositivos USB conectados. Por defecto, el dispositivo recordará cuál fue la última carpeta visitada cuando vuelva a pulsar la tecla “Home” para volver al menú principal o seleccione “Video”, “Music” o “Pictures”. Si desea volver a la pantalla anterior para seleccionar otra carpeta u otra entrada UPnP/AV, utilice el botón de dirección “Atrás” (flecha hacia la izquierda (21)). Si selecciona un dispositivo servidor multimedia se mostrarán las carpetas disponibles. Las carpetas mostradas son proporcionadas por el servidor multimedia. Es posible que en algunas situaciones no todas las carpetas ofrecidas estén operativas. Esto dependerá del servidor multimedia. La opción de imágenes y las carpetas seleccionadas funcionan como filtro. Sólo podrá seleccionar y mostrar el contenido multimedia mostrado en la esquina superior derecha de la pantalla del televisor. Nota: Asegúrese de haber actualizado el contenido del servidor multimedia cuando seleccione el servidor mediante el menú, ya que se mostraría el contenido pero no los nuevos archivos de imagen. 83 ESPAÑOL Mostrar imágenes Para mostrar imágenes, seleccione un servidor multimedia, asegúrese de que selecciona el submenú de imágenes y luego seleccione una imagen. Para mostrar una sola imagen, pulse la tecla “OK” (20). Para mostrar todas las imágenes de una carpeta, pulse la tecla ”Play” (5). Si un archivo de imagen no está en un formato compatible, aparecerá el siguiente mensaje en la pantalla: Para mostrar las imágenes en otro orden, utilice la tecla “Sort” (ordenar) (30). Música e imágenes Puede reproducir música mientras se realiza una presentación de imágenes. Puede hacerlo de dos maneras: 7. 1. Seleccione el modo Música mediante el menú principal utilizando la tecla “Home” o seleccionando el botón “Música”. Luego busque y seleccione la canción que desee reproducir durante la presentación, o inicie la reproducción de una emisora de radio por Internet. Vuelva al menú “Imágenes”, seleccione la primera foto y pulse el botón “Play” (5). 2. Durante la presentación, pulse el botón “BGM” (25) y después “Play”. Se reproducirán todas las canciones de la lista de BGM (música de fondo). Esta característica sólo funciona si hay música en la lista de BGM (Consulte el capítulo 5.3). Instalación del servidor multimedia (UPnP A/V) de Conceptronic Antes de poder utilizar el C54WMP de Conceptronic necesitará instalar un servidor UPnP A/V compatible como los discos duros externos CH3SNAS o CH3WNAS o cualquier otro dispositivo UPnP A/V. El CD-ROM suministrado contiene el software del servidor multimedia de Conceptronic. Si no dispone de un dispositivo servidor UPnP A/V, puede convertir su ordenador en un servidor multimedia mediante el software de servidor multimedia de Conceptronic. 84 ESPAÑOL A. Introduzca el CD-ROM en el lector de CD-ROM. El menú autoejecutable debería aparecer automáticamente. En caso contrario, vaya a “Mi PC” y haga doble clic en el icono de la unidad de CD-ROM. B. Seleccione la opción “Install Media Server Software” (instalar el software del servidor multimedia) del menú autoejecutable. Aparecerá una sección para seleccionar el idioma. Seleccione el idioma deseado y haga clic en “OK”. Aparecerá el asistente de instalación. Haga clic en “Siguiente” para continuar. Introduzca su nombre de usuario y empresa o deje la información por defecto. Seleccione quién puede utilizar la aplicación (autorice a todos los usuarios o sólo al usuario actual). Haga clic en “Siguiente” para continuar. Cambie el directorio de instalación mediante el botón “Cambiar”, o utilice la información por defecto. Haga clic en “Siguiente” para continuar. Haga clic en “Siguiente” para iniciar la instalación de la aplicación. Se notificará cuando haya finalizado la instalación. Si quiere que se inicie automáticamente el servidor multimedia de Conceptronic después de su instalación, active la casilla “Iniciar el DMS Conceptronic”. Haga clic en “Finalizar” para salir del programa de instalación. C. D. E. F. G. H. I. El software multimedia de Conceptronic está instalado en su ordenador. Puede acceder a él a través de la carpeta Conceptronic en la sección Programas del Menú Inicio. 85 ESPAÑOL 8. Configuración del servidor multimedia de Conceptronic Sección “Media files” Después de importar archivos a la base de datos del servidor multimedia, aquí verá la lista de todos los archivos detectados. Sección “Media Import” En esta sección podrá: • Iniciar el servidor multimedia. • Detener el servidor multimedia. • Añadir una carpeta. • Actualizar una carpeta o todas las carpetas. • Borrar una carpeta compartida o borrar todas las carpetas. Cuando añada una nueva carpeta con contenido multimedia, automáticamente se analizará para encontrar su contenido. 86 ESPAÑOL Sección “System” Puede cambiar el nombre del servidor por el nombre que usted desee. El nombre del servidor aparecerá en pantalla cuando se estén detectando servidores multimedia desde un reproductor. El nuevo nombre del servidor será activo una vez haya detenido e iniciado de nuevo el servidor. Opciones En esta sección puede cambiar las opciones de configuración del software del servidor multimedia. 87 ESPAÑOL Enable Autorun Minimized at Startup Enable Transcoding Nota: Mediante la opción “transcoding” es posible reproducir contenido que no sea directamente compatible con el C54WMP. La calidad del contenido decodificado puede variar. File Types to scan Transcoding Setting 9. Inicia el software cuando se inicia Windows Ejecuta el software minimizado al inicio. Activa la opción “transcoding”. Selecciona qué tipos de archivos serán detectados por el software del servidor multimedia. Selecciona la calidad de la decodificación. Otros servidores multimedia Puede utilizar otros servidores multimedia, siempre y cuando sean compatibles con el UPnP A/V 1.0 Windows XP y Windows Vista de Microsoft Windows XP y Windows Vista de Microsoft proporcionan un servidor multimedia mediante el Reproductor de Windows Media. Inicie el Reproductor de Windows Media, seleccione “Herramientas”, “Biblioteca Multimedia” y “Configurar compartir”. Aquí puede permitir el acceso y personalizar la configuración del C54WMP de Conceptronic. Mediante la opción “Supervisar carpetas” podrá agregar o quitar contenido que quiera compartir. 88 ESPAÑOL Nota: Si utiliza Windows XP, necesitará al menos la versión 11 del Reproductor de Windows Media para poder utilizar esta opción. Otro software Puede utilizar otro software como: TVersity : www.tversity.com TwonkyVision Media Server : www.twonkymedia.com ORB : www.orb.com Nota: Si el C54WMP de Conceptronic no puede detectar un servidor multimedia o un paquete de software determinado, compruebe las compatibilidades y la correcta instalación de ese dispositivo o software. Cuando el dispositivo es compatible y está correctamente instalado, el C54WMP mostrará el dispositivo como disponible en su pantalla de televisor. 89 ESPAÑOL 10. Configuración del sistema Mediante el menú de configuración del sistema podrá cambiar los siguientes elementos: Language (Idioma): OSD Language (Idioma OSD) (Visualización en pantalla). Idiomas disponibles: Inglés, español, alemán, neerlandés, turco, portugués, italiano, francés. TV Mode Setup (Configuración del modo de TV) Seleccione la configuración de vídeo deseada. TV System (Sistema de TV): TV Output (Salida de TV): Video Scale (Escala de vídeo): PAL o NTSC. P-Scan: YPbPr, S-Video, Interlace YUV. 4:3 PS, 4:3 LB, 16:9. Seleccione la configuración adecuada a su TV. Audio Setup (Configuración de audio) Seleccione la configuración de audio deseada. Audio Output (Salida de audio): SPDIF/AC3, SPDIF/PCM, SPDIF/OFF. Down Sample: 48k, 96k. AutoPlay Option (Opción de autorreproducción): Desactivado, prioridad a My Radio, prioridad a BGM. BG Music (Música de fondo): Desactivado, repetir uno, repetirlos todos. Note: Es posible hacer que se inicie automáticamente la reproducción de música al encender el dispositivo. Si configura una emisora de radio o utiliza un dispositivo USB con música, puede seleccionar a cuál de ellas dar prioridad. 90 ESPAÑOL Configuración de vídeo Ajuste cómo desea ver la imagen en pantalla. Brightness (brillo), Contrast (contraste), Hue (color) y Saturation (saturación). Configuración de presentación de fotos Seleccione las propiedades de imagen deseadas. Screen saver (Protector de pantalla): Photo display setup (vista de imágenes): Slide Show Time (Tiempo de exposición): Background music (BGM) (Música de fondo): Scale (Escala): Activado / desactivado. Lista / Mosaico. de 2 a 30 segundos, 1 minuto y 2 minutos. Desactivado, repetir uno, repetirlos todos. Tamaño original, ajustar a ventana. Versión Seleccione y visualice la información del producto. Reset to Default (Reestablecer a predeterminado). Firmware Upgrade (Actualización del firmware (mediante USB)). Version (Versión del firmware). MAC address information for LAN * WLAN (Dirección de información de MAC para LAN o WLAN). 91 Declaración de Conformidad El fabricante Dirección: 2L International BV Databankweg 7 3821 AL Amersfoort, Países Bajos, tel. +31 (0)33 4549401 CIF/NIF NL801729877B01 Declara mediante este documento que el producto Tipo 54MBPS WIRELESS MEDIA PLAYER/DMA Producto C08-126 Marca Conceptronic Cumple con las siguientes directivas: Directiva 1999/5/EEC R&TTE (transpuesta a la legislación española mediante RD 1890/2000): Equipos terminales de telecomunicación y equipos de estaciones terrestres de comunicaciones por satélite Directiva EMC 2004/108/CE EMC Directiva 2004/108/EEC EMC (transpuesta a la legislación española mediante RD 1580/2006: Compatibilidad electromagnética. Directiva 73/23/EEC española Directiva sobre bajo voltaje ((transpuesta a la legislación mediante RD 7/1998): Material eléctrico destinado a utilizarse con determinados límites de tensión El producto cumple asimismo con las siguientes normas: EN 300 328-2/2000, EN 301 489-17-2000, EN 301 489-1-2000, EN55022/9.98 Clase B, EN 61000-3-2/3/4/1995, EN 50082-1/1994, EN 60950/1995 Este producto ha sido diseñado para su uso sólo en interiores. La función de este producto es enviar y recibir datos a través del aire. Producto clase 2. La potencia de salida transmitida es inferior a los 100mW. La marca CE certifica que este producto se adecua a las especificaciones y regulaciones arriba mencionadas. Este producto es adecuado para todos los países de la UE. Lugar y fecha de emisión: Amersfoort, 25 de Octubre de 2007 Herman Looijen, Director de marketing 92 DEUTSCH Conceptronic C54WMP Schnellinstallationsanleitung Wir gratulieren Ihnen zum Kauf Ihres Conceptronic Wireless Media Players. In beiliegender Hardware-Installationsanleitung wird Ihnen Schritt für Schritt gezeigt, wie der Conceptronic Wireless Media Player installiert werden muss. Sollten irgendwelche Probleme auftreten, empfehlen wir ihnen, auf unsere Support-Seite im Internet zu gehen (www.conceptronic.net) und auf 'Support’ zu klicken. Dort werden sie die "Frequently Asked Questions" Datenbank finden. Falls sie andere Fragen zu ihrem Produkt haben und sie diese nicht auf unserer Website finden können, kontaktieren sie uns bitte per E-Mail: [email protected] Weitere Informationen zu den Conceptronic Produkte finden Sie auf der Website von Conceptronic: www.conceptronic.net 1. Packungsinhalt In der Verpackung des Conceptronic Wireless Media Players ist Folgendes enthalten: • • • • • • • • Conceptronic C54WMP Wireless Media Player Standard für C54WMP Netzteil 5V DC, 2A Fernbedienung 2x AAA-Batterien für Fernbedienung RCA A/V-Kabel (1x RCA-Composite, 2x RCA-Audio) Scart Adapter (3x RCA-zu-SCART) Component-Konverter (3x RCA-Anschlussbuchsen für Component-Kabel) 93 DEUTSCH 2. Eigenschaften • • • • • • • Videowiedergabe mit MPEG 1/2/4-Funktionen Für drahtlose Netzwerke 802.11b/g Unterstützt verdrahtetes Ethernet (10/100 Base-T) Unterstützt UPnP A/V Client (UPnP 1.0 zertifiziert). DLNA-kompatibel Einfaches Menü für Einrichtung und Konfiguration USB-Host-Anschluss für Firmware-Upgrades und den Ausbau der Gerätfunktionen mit Festplatten- oder USB-Speicher-Dongle Für die Wiedergabe von Media-Dateien muss der C54WMP über ein Netzwerk mit einem Media-Server verbunden sein. Der Conceptronic C54WMP unterstützt die folgenden Media-Dateiformate: • • • • • • • MPEG 1-, 2-, 4-komprimierte Audio- und Video-Dateien SRT-, SSA- und SUB-Untertiteldateien Komprimierte JPEG- und GIF-Bilddateien BMP- und TIFF-Bilddateien MP3 bis zu 320Kbps oder VBR WMA bis zu 192Kbps oder VBR WAV-Audiodateien Wenn ein Media-Server mit ‚Transcodierungs’-Funktionen verwendet wird, können auch andere Dateiarten wiedergegeben werden. Mithilfe des PCs wird die Datei in ein Format, das vom Conceptronic C54WMP verwendet werden kann, in Echtzeit decodiert. 94 DEUTSCH 3. Erläuterungen zur Fernbedienung 2 1 3 5 6 4 7 8 9 11 12 10 13 14 15 16 18 17 19 20 21 22 24 23 25 26 27 29 28 30 95 DEUTSCH Nr. 1 2 3 4 TASTE POWER MUTE HOME REW 5 PLAY / PAUSE 6 7 FF STOP 8 PREV 9 NEXT 10 REPEAT 11 12 13 OUTPUT ZOOM SLOW 14 BACK 15 DISPLAY 16 17 18 19 MUSIC VIDEO PICTURES iRADIO 20 OK 21 RICHTUNGSTASTEN Auf, ab Links, rechts 22 23 24 25 26 27 28 29 30 SUB CH+ LANG CHVOL + VOLBGM ZAHLEN 1-9 A-B 0 :/ SETUP SORT FUNKTIONSBESCHREIBUNG Aktivieren/Beenden des Standy-Modus des Wireless Media Players Stummschalten von Audio Zurückkehren ins Hauptmenü Schnellrücklauf von Media-Dateien während der Wiedergabe 1. Wiedergabe / Anhalten einer Musik-Datei 2. Starten von Diashows Schnellvorlauf von Media-Dateien während der Wiedergabe Anhalten der gegenwärtigen Wiedergabe 1. Zurückkehren zur vorherigen Seite beim Browsen durch Media-Dateien 2. Zurückkehren zur vorherigen Datei während der Wiedergabe 1. Weiter zur nächsten Seite beim Browsen durch Media-Dateien 2. Weiter zur nächsten Datei während der Wiedergabe 1. Auswahl des Wiederholmodus während der Video- und Musikwiedergabe 2. Wiederholen der Hintergrundmusik während der Wiedergabe von Fotos Umschalten der Videoausgabe mit -VideoÆYPbPrÆYUV-Sequenz Zoomen von Videos oder Fotos während der Wiedergabe Langsamer Vorlauf von Media-Dateien während der Wiedergabe 1. Zurückkehren zum vorherigen Ordner oder zur vorherigen Einstellungsseite 2. Speichern/Löschen der Wireless-Einstellungen auf der Seite für WirelessEinstellungen 1. Anzeige von Dateinamen und Mediatypen während der Wiedergabe von Videos 2. Anzeige von Dateinamen und Auflösung während der Wiedergabe von Fotos Aktivieren des MUSIK-Modus Aktivieren des VIDEO-Modus Aktivieren des FOTO-Modus Aktivieren des Internet-Radio-Modus 1. Aktivieren der ausgewählten Option 2. Eingabe des „Dreh“-Modus während der Wiedergabe von Fotos 1. Betätigen der “LINKS”-Taste stoppt den gegenwärtigen Modus und kehrt zur vorherigen Ebene zurück Betätigen der “RECHTS”—Taste öffnet einen gewählten Ordner oder Server 2. Im Videomodus: Betätigen der “AUF”- oder "AB"-Taste zum Auswählen anderer Dateien 3. Foto-Modus: Bewegen von Bildern im “Zoom”-Modus oder Drehen von Bildern im “Dreh“-Modus 4. Musik-Modus: Betätigen der „AUF“-Taste zum Springen auf die vorherige Musikdatei oder betätigen der „AB“-Taste zum Springen auf die nächste MusikDatei Untertitelauswahl während der Video-Wiedergabe / nächster Kanal Sprachauswahl während der Video-Wiedergabe / vorheriger Kanal Lautstärke erhöhen Lautstärke reduzieren Hinzufügen/Entfernen einer Musikdatei als Hintergrundmusik Numerische Auswahltasten 1-9 Einstellen/Aufheben des A-B-Wiederhol-Modus Numerische Auswahltaste 0 Hotkey für URL-Eingabe von iRADIO Öffnen des Einstellungsmenüs des Wireless Media Players Sortieren der Dateiliste 96 DEUTSCH 4. Verbindung des C54WMP mit einem Netzwerk und einem Fernseher Für die Verwendung des C54WMP von Conceptronic benötigen Sie Folgendes: 1. 2. 3. Ein drahtloses (802.11b/g/n) oder verdrahtetes (10/100/1000)-Netzwerk Einen oder mehrere Computer mit dem Betriebssystem Windows 2000, Windows XP oder Windows Vista Ein Fernsehgerät mit Component- (Y, Pb, Pr), S-Video-, SCART- oder Composite-Eingang Verbindungsbeispiel mit 2 Computern und einem NAS Media Server Wenn Sie Streaming-Dienste nutzen und z.B. Radiosender hören möchten, die über das Internet ausgestrahlt werden, ist es vorteilhaft, wenn Sie eine Breitband-Internetverbindung haben. Hinweis: Der C54WMP von Conceptronic verwendet einen UPnP A/V-Client für die Wiedergabe von Audio und Video. Sie benötigen Hardware mit UPnP A/V-Server-Funktion oder eine UPnP A/V-Server Anwendung von einem anderen Unternehmen oder müssen die im Lieferumfang enthaltene Conceptronic Media Server-Software installieren. (siehe Kapitel 7). 97 DEUTSCH 4.1 Installation der Hardware Hinweis: Wenn Sie ein verdrahtetes LAN-Netzwerk haben, müssen Sie für den Anschluss des Conceptronic C54WMP an Ihren Router oder Switch ein Ethernet-Kabel verwenden. Stellen Sie fest, welche Art Kabel Sie für Ihren Fernseher verwenden können: • Component (Y, Pb, Pr). • S-Video • Composite (nur Video) • SCART (Video und Audio) Für Audio können Sie den analogen RCA-Ausgang (rote und weiße RCA-Buchsen) oder den digitalen Koaxialausgang (orange RCA-Buchse) verwenden. Die Fernbedienung wird mit 2 AAA Batterien betrieben (im Lieferumfang enthalten). Sie müssen zum Ein-/Ausschalten des Geräts die Fernbedienung verwenden. Schalten Sie Ihren Fernseher ein und wählen Sie den richtigen Videokanal. Ihr Conceptronic C54WMP zeigt nach Einschalten des Geräts den Startbildschirm an. 5. Erste Einrichtung und Konfiguration Hinweis: In diesem Handbuch verwenden wir bestimmte IP-Adressen, um die Eigenschaften und Funktionen des Conceptronic C54WMP zu erklären. Diese Einstellungen können in Ihrer Netzwerkumgebung unterschiedlich sein. Wir verwenden in unserem Handbuch die folgenden Einstellungen: IP-Adresse C54WMP : 192.168.1.50 Netzmaske : 255.255.255.0 Gateway-Adresse : 192.168.1.1 (Router als Gateway) DNS (Dynamic Name Server) : 192.168.1.1 98 DEUTSCH Nach dem Einschalten des Conceptronic C54WMP (Digital Media Player) müssen Sie das Gerät konfigurieren. Auf dem Bildschirm Ihres Fernsehers erscheint eine Meldung mit der Frage, in welcher Sprache Sie das Gerät verwenden möchten. Nachdem Sie die Sprache ausgewählt haben, initialisiert der C54WMP Adapter das Netzwerk. Der Netzwerk-Einrichtungsassistent startet automatisch. Sie können auf diesen auch über das Einstellungsmenü [Setup] zugreifen (wählen Sie ‚Netzwerkassistent [Network Wizard]’. Wählen Sie die gewünschte Verbindungsart: ‘Verdrahtet’ [Wired] oder ‘Drahtlos’ [Wireless]. Hinweis: Wenn Sie hohe Bandbreitenströme verwenden, empfehlen wir Ihnen, die verdrahtete Verbindung zu wählen, da für WLAN die Qualität des Signals den Datendurchsatz und die Leistung beeinträchtigen kann. Wählen Sie über die Richtungstasten Auf / Ab (21) die verdrahtete oder drahtlose Netzwerkverbindung. 99 DEUTSCH 5.1 Konfiguration für verdrahtetes Netzwerk Wählen Sie ‘Verdrahtet’ [Wired] und drücken Sie ‘OK’, um die Konfigurationseinstellung zu übernehmen. Drücken Sie ‚OK’, um ‚Fertiggestellt’ [Done] zu wählen. Damit ist die Konfiguration für das verdrahtete Netzwerk abgeschlossen. Gehen Sie bitte weiter zu ‚Kapitel 6’, in dem die Verwendung des Media Players beschrieben wird. Hinweis: Standardmäßig sucht der C54WMP nach einem DHCP-Server. Wenn der C54WMP korrekt konfiguriert ist, erscheint eine IP-Adresse unten im Bildschirm. Wenn IP: 0.0.0.0 angezeigt wird, konnte das Gerät keine IP-Adresse finden und Sie müssen die IPNetzwerkeinstellungen des C54WMP manuell konfigurieren (Kapitel 5.4). 5.2 Konfiguration für drahtloses Netzwerk Der C54WMP unterstützt Wireless LAN (802.11b/g): • • • • • • ESSID: Automatische Erkennung oder manuelle Eingabe, wenn ESSID Broadcast abgeschaltet ist. Infrastruktur- oder Adhoc-Modus. Authentifizierung: Auto, Shared Key, Open System. Schlüsselformat: Off, WEP64, WEP64Hex, WEP128, WEP128Hex, WPA-PSK, WPA2 AES. Schlüsselwert: Konfigurierbar über das Schlüsselformat. Kanal: Automatische Erkennung. Wählen Sie ‘Drahtlos’ [Wireless] und drücken Sie ‘OK’, um die Konfigurationseinstellung zu übernehmen. Der C54WMP such nach verfügbaren Access Points. Wenn Ihr Access Point seine SSID ausstrahlt, können Sie diese wählen. Die Signalstärkeanzeige kann 3 Farben aufweisen: rot, gelb und grün. Ist die Anzeige grün, haben Sie die bestmögliche Verbindung zwischen dem C54WMP und Ihrem Access Point. Gelb ist akzeptabel für die normale Verwendung. Wenn die Signalstärke des Access Points rot ist, ist es vorteilhaft, die Position des C54WMP oder des Access Points zu ändern. Hinweis: Es ist nicht empfehlenswert, Filme mit hohen Bandbreitenströmen wiederzugeben, wenn die Anzeige auf rot oder gelb steht. Wählen Sie den Access Point und drücken Sie OK auf der Fernbedienung. Wählen Sie ‚Weiter’ [Next], und drücken Sie ‚OK’. 100 DEUTSCH Wenn Sie in Ihrem Access Point Verschlüsselungseinstellungen vorgenommen haben, müssen Sie für den C54WMP dieselben Einstellungen, mit denen Sie Ihren Access Point konfiguriert haben, verwenden. Der C54WMP erkennt automatisch, welche Wireless-Konfiguration für die Verbindung mit einem Access Point erforderlich ist. Wenn der Access Point mit WPA verschlüsselt ist, erkennt das Gerät dies und Sie müssen lediglich den Private Shared Key (PSK) eingeben. Wenn Ihr Access Point nicht mit WEP- oder WPA-Verschlüsselung geschützt ist, können Sie ‚Weiter’ [Next] wählen, um die Konfiguration abzuschließen. Damit ist die Konfiguration für das drahtlose Netzwerk abgeschlossen. Gehen Sie bitte weiter zu ‚Kapitel 6’, in dem die Verwendung des Media Players beschrieben wird. Sie können die Wireless-Einstellungen über das Wireless-Einstellungsmenü manuell ändern. Hinweis: Standardmäßig sucht der C54WMP nach einem DHCP-Server. Wenn der C54WMP korrekt konfiguriert ist, erscheint eine IP-Adresse unten im Bildschirm. Wenn IP: 0.0.0.0 angezeigt wird, konnte das Gerät keine IP-Adresse finden und Sie müssen die IPNetzwerkeinstellungen des C54WMP manuell konfigurieren (Kapitel 5.4). 5.3 Verwendung von Windows Connect Now 2.0 mit dem Conceptronic C54WMP Die Microsoft® Windows® Connect Now (WCN)-Technologie vereinfacht das Hinzufügen von Geräten wie dem Conceptronic C54WMP zu einem bestehenden drahtlosen Netzwerk. Das Erstellen eines sicheren drahtlosen Netzwerks und das Einrichten der drahtlosen Geräte mit den erforderlichen Wireless-Einstellungen kann schwierig sein. WCN bietet eine einfache und sichere Methode für die Konfiguration drahtloser Netzwerkgeräte. 101 DEUTSCH Windows Connect Now ist im XP Service Pack 2 (SP2) und späteren Versionen von Windows enthalten. Sie können WCN auf Ihrem PC mit Windows XP SP2 oder späteren Versionen für die Übertragung Ihrer Wireless-Einstellungen auf ein tragbares USB-Flashlaufwerk (nicht im Lieferumfang enthalten) verwenden. Vorzugsweise ist für die Konfiguration von WCN über ein USB-Flashlaufwerk eine funktionierende drahtlose Verbindung auf Ihrem Computer vorhanden. Windows XP Unter Microsoft Windows XP können Sie den C54WMP über WCN wie folgt konfigurieren: Klicken Sie auf ‚Start’, ‚Netzwerkumgebung’. Daraufhin wird Ihre Netzwerkumgebung angezeigt. Wählen Sie auf der linken Seite im Fenster die Option ‚Drahtlosnetzwerk für Heim- bzw. Kleines Firmennetzwerk einrichten’. Der Drahtlosnetzwerkinstallations-Assistent wird angezeigt. Klicken Sie auf ‚Weiter’. Geben Sie den Namen Ihres Drahtlosnetzwerks (SSID) ein und wählen Sie die Option ‚Netzwerkschlüssel manuell zuweisen’. Hinweis: Wenn Ihr Netzwerk mit WPA-Verschlüsselung geschützt ist, aktivieren Sie das Kästchen unten im Fenster. Wenn Ihr Netzwerk mit WEP-Verschlüsselung geschützt ist, aktivieren Sie dieses Kästchen nicht. Klicken Sie auf ‚Weiter’. Geben Sie den Netzwerkschlüssel für Ihr Netzwerk in beiden Feldern in diesem Fenster ein. Damit die Eingabe des Schlüssels einfacher ist, können Sie die Option ‚Zeichen bei der Eingabe ausblenden’ deaktivieren, damit Sie sehen können, was Sie eingeben. Klicken Sie auf ‚Weiter’. Wählen Sie die Option ‚USB-Flashlaufwerk verwenden’. Klicken Sie auf ‚Weiter’. Schließen Sie das USB-Flashlaufwerk an Ihren Computer an und wählen Sie den entsprechenden Laufwerksbuchstaben. Klicken Sie auf ‚Weiter’. Wenn die Konfiguration gespeichert ist, können Sie das USB-Flashlaufwerk entfernen. Hinweis: Schließen Sie den Assistenten nicht! Schalten Sie den C54WMP ein und gehen Sie zu ‘Einstellungen’ [Setup], ‚Wireless-Einstellungen’ [Wireless Setup]. Geben Sie das USB-Flashlaufwerk in den USB-Port des C54WMP ein. Der C54WMP erkennt automatisch die verfügbaren WCN-Konfigurationsdateien und fragt Sie, ob Sie die Einstellungen übernehmen wollen. Bestätigen Sie dies. Die Einstellungen werden für die Konfiguration gespeichert. Entfernen Sie das USB-Flashlaufwerk. Damit werden die korrekten Einstellungen verwendet. Wir empfehlen Ihnen, das Gerät neu zu starten, um sicher zu stellen, dass die korrekten Wireless-Einstellungen verwendet werden. 102 DEUTSCH Führen Sie das USB-Flashlaufwerk wieder im Computer ein und klicken Sie auf ‚Weiter’. Es erscheint eine Liste der konfigurierten Geräte. Sie können über die Schaltfläche ‚Netzwerkeinstellungen drucken’ die vorgenommenen Einstellungen ausdrucken. Klicken Sie auf ‚Fertigstellen’, um den Drahtlosnetzwerkinstallations-Assistenten zu schließen. Hinweis: Standardmäßig werden die WCN-Einstellungen vom USB-Flashlaufwerk entfernt, wenn Sie auf ‚Fertigstellen’ klicken. Wenn Sie mehrere Geräte/Computer in Ihrem Netzwerk konfigurieren möchten, können Sie dieses Kästchen deaktivieren, um die Einstellungen auf dem USB-Flashlaufwerk beizubehalten. Wir empfehlen jedoch, die Einstellungen zu entfernen. Windows Vista Unter Microsoft Windows Vista können Sie den C54WMP über WCN wie folgt konfigurieren: Klicken Sie auf ‚Start’, ‚Netzwerk’. Klicken Sie oben im Fenster auf ‚Add a Wireless Device’ [Drahtlosgerät hinzufügen]. Wählen Sie die Option ‚I want to add a wireless device or computer that is not on the list, using a USB flash drive’ [Ich möchte mit einem USB-Flashlaufwerk ein Drahtlosgerät oder einen Computer hinzufügen, das/der sich nicht auf der Liste befindet]. Wählen Sie die Option ‚Add the device or computer using a USB flash drive’ [Gerät oder Computer mit einem USB-Flashlaufwerk hinzufügen]. Geben Sie den Namen Ihres Drahtlosnetzwerks in das Feld ‘Network Name (SSID)’ [Netzwerkname (SSID)] ein oder wählen Sie ein verfügbares Drahtlosnetzwerk aus der Liste (wenn Ihr Computer drahtlos mit dem Netzwerk verbunden ist). Klicken Sie auf ‚Next’ [Weiter]. Geben Sie den Verschlüsselungscode für Ihr Drahtlosnetzwerk ein. Hinweis: Windows Vista verwendet standardmäßig WPA. Wenn Sie die WEP-Verschlüsselung verwenden möchten, klicken Sie auf ‚Show advanced network security options’ [Erweiterte Netzwerksicherheitsoptionen anzeigen]. Klicken Sie auf ‚Next’ [Weiter]. Stellen Sie sicher, dass das USB-Flashlaufwerk eingeführt ist und speichern Sie die Einstellungen auf den korrekten Laufwerksbuchstaben. Nachdem die Einstellungen gespeichert sind, klicken Sie auf ‚Close’ [Schließen] und entfernen Sie das USB-Flashlaufwerk vom Computer. Schalten Sie den C54WMP ein und gehen Sie zu ‘Setup’ [Einstellungen], ‚Wireless Setup [WirelessEinstellungen]. Führen Sie das USB-Flashlaufwerk in den USB-Port des C54WMP ein. Der C54WMP erkennt automatisch die verfügbaren WCN-Konfigurationsdateien und fragt Sie, ob Sie die Einstellungen übernehmen wollen. Bestätigen Sie dies. Die Einstellungen werden für die Konfiguration gespeichert. Entfernen Sie das USB-Flashlaufwerk. Damit werden die korrekten Einstellungen verwendet. Wir empfehlen Ihnen, das Gerät neu zu starten, um sicher zu stellen, dass die korrekten Wireless-Einstellungen verwendet werden. 103 DEUTSCH 5.4 Manuelle Einstellung der IP-Adresse für den C54WMP Sie müssen die IP-Adresse des C54WMP manuell einstellen, wenn in Ihrem Netzwerk kein DHCPServer vorhanden ist. Drücken Sie Setup (29) auf der Fernbedienung oder wählen Sie das Setup-Symbol im Hauptmenü auf dem Bildschirm. Wählen Sie die Funktion: Netzwerkeinstellungen [Network setup] und klicken Sie auf OK, um die IPKonfiguration einzugeben. Wählen Sie den gewünschten Netzwerktyp: ‘Verdrahtet’ [Wired] oder ‘Drahtlos’ [Wireless]. Wählen Sie die DHCP-Funktionalität, drücken Sie OK, um die Einstellungen einzugeben und nehmen Sie mit der Richtungstaste ‚Links' oder ‚Rechts' (21) Änderungen vor. Um diese Option zu schließen, müssen Sie erneut auf OK drücken. Sie müssen DHCP deaktivieren, um die IP-Adresse manuell einzugeben. Wenn diese Funktion deaktiviert ist, werden die Standardeinstellungen angezeigt. IP-Adresse C54WMP : 192.168.1.50 Netzmaske : 255.255.255.0 Gateway-Adresse : 192.168.1.1 (Router als Gateway) DNS (Dynamic Name Server) : 192.168.1.1 Sie können die gewünschten Einstellungen wählen und den Einstellungen Ihres eigenen Netzwerks anpassen. Zum Ändern der IP-Adresse, Subnetzmaske und der Gateway- oder DNS-Adresse können Sie die Zifferntasten (26) auf der Fernbedienung verwenden. Mithilfe der Richtungstasten (21) (links / rechts) können Sie zum nächsten Feld gehen. Es muss kein „.“ (Punkt) eingegeben werden. 104 DEUTSCH Drücken Sie ‘OK’, um die Änderungen vorzunehmen, ändern Sie mit den Richtungstasten (21) (links / rechts) die Einstellungen und drücken Sie erneut ‚OK’, um zum nächsten Feld zu gehen. Sie müssen die Richtungstaste 'Links' (21) drücken, um die Einstellungen auf dem C54WMP zu speichern. Sie werden gefragt, ob Sie die Änderungen speichern oder löschen möchten. Wählen Sie ‚Speichern’ [Save]. 6. Verwendung des Wireless Media Players Sobald die Konfiguration des Wireless Media Players abgeschlossen ist, öffnet sich das Standardmenü mit 4 Optionen: - Musik - Wählen Sie ‚Musik’ [Music], wenn Sie über den Media Player Musik hören möchten. Foto Wählen Sie ‚Foto’ [Photo], wenn Sie über den Media Player Fotos anschauen möchten. Video Wählen Sie Video, wenn Sie Filme / Videos anschauen möchten. Einstellungen Wählen Sie Einstellungen [Setup], wenn Sie die Einstellungen des C54WMP konfigurieren / ändern möchten. - Hinweis: Bevor Sie Musik hören oder Videos sowie Fotos anschauen können, müssen Sie sicherstellen, dass ein Media Server installiert ist. Wenn kein Media Server installiert ist, gehen Sie bitte weiter zu Kapitel 7, in dem die Installation des Conceptronic Media Servers beschrieben ist. 6.1 Schnellauswahl Über die blaue, grüne, gelbe und rote Taste auf Ihrer Fernbedienung können Sie schnell zwischen den verschiedenen Wiedergabeoptionen des C54WMP umschalten. 105 DEUTSCH Drücken Sie die blaue Taste für Video, die grüne für Musik, die gelbe für Fotos und die rote für das Internetradio. Hinweis: Wenn Sie diese Funktion verwenden, kehren Sie auf den zuletzt verwendeten Bildschirm zurück. Wenn Sie zum Hauptmenü zurückkehren möchten, drücken Sie die Taste Home (3). 6.2 Video Der Conceptronic C54WMP unterstützt MPEG1, MPEG2 und MPEG4, Videoformate und VOB, AVI sowie andere Formate. Mit der Media Server Software können Sie die ‚Transcodierungs’-Funktion verwenden. Das bedeutet, dass Ihr Computer die Videoformate in ein Format decodiert, das der Conceptronic C54WMP lesen kann. Erstmalige Verwendung: Wenn Sie über das Startmenü oder über die Fernbedienung (blaue Taste) ‚Video’ wählen, erscheint ein Bildschirm mit einem Überblick über alle verfügbaren Media Server (UPnp/AV) und/oder die verbundenen USB-Geräte. Standardmäßig erinnert sich das Gerät daran, welcher Ordner zuletzt aufgerufen wurde, sobald Sie ‚Home’ drücken, um in das Hauptmenü zurückzukehren, wenn Sie erneut Videos, Musik oder Bilder wählen möchten. Mit der Richtungstaste ‚Links' (21) können Sie auf den vorherigen Bildschirm zurückkehren, um einen anderen Ordner oder eine andere UPnP AV-Quelle auszuwählen. Wenn Sie ein Media Server-Gerät wählen, werden die verfügbaren Ordner angezeigt. Die angezeigten Ordner stammen vom Media Server. Es kann vorkommen, dass nicht alle verfügbaren Ordner eine Funktionalität haben. Dies hängt vom Media Server ab, der verwendet wird. 106 DEUTSCH Die Video-Option und die Ordner, die Sie wählen, agieren als ein Filter. Sie können nur Medien auswählen und anzeigen, die in der rechten oberen Ecke Ihres Fernseh-Bildschirms angezeigt werden. Durchsuchen Sie mithilfe der Richtungstasten (21) die Filme und drücken Sie die Taste Play (5), um den gewünschten Film zu starten. Nachdem Sie den Film gestartet haben, lädt der Conceptronic C54WMP diesen. Dies kann einige Sekunden dauern und es erscheint eine entsprechende Meldung. Hinweis: Die Ladezeit hängt von der Verbindungsqualität und dem Media Server ab. Hinweis: Stellen Sie sicher, dass Sie den Inhalt des Media Servers aktualisiert haben, wenn Sie den Media Server über das Menü auswählen. Die Inhalte werden indiziert und falls keine Neuanzeige (Aktualisierung) durchgeführt wurde, werden neue Videos nicht angezeigt. Wenn eine Video-Datei oder ein Codec nicht unterstützt werden, erscheint die folgende Meldung auf Ihrem Bildschirm: Videowiedergabefunktionen Weitere Funktionen für die Wiedergabe von Videodateien: 1. 2. 3. 4. 5. 6. Mute: Drücken der Taste Mute [Stummschaltung] (2) aktiviert oder deaktiviert die Audiowiedergabe. Lautstärkeregelung: Drücken der Tasten + / - erhöht oder reduziert die Lautstärke. Repeat: Einmal Drücken der Repeat-Taste (10) wiederholt die gegenwärtig wiedergegebene Videodatei (eine wiederholen). Zweimal Drücken der Repeat-Taste (10) wiederholt alle Videodateien im aktuellen Ordner (alle wiederholen). Dreimal Drücken der Repeat-Taste (10) deaktiviert den Wiederhol-Modus (wiederholen aus). Pause: Um das Video während der Wiedergabe anzuhalten, drücken Sie die Taste Play (5). Drücken Sie die Taste Play (5) erneut, um mit der Wiedergabe fortzufahren. Mit der Taste Stop (5) wird die Wiedergabe gestoppt. Die Taste Rew (4) startet den Rücklauf des Videos und die Taste FF (6) den Schnellvorlauf. 107 DEUTSCH Hinweis: 7. 8. Wenn die Taste ‘Rew’ oder ‘FF’ gedrückt wird, hält möglicherweise das Bild an. Der C54WMP führt den Rücklauf oder Schnellvorlauf des Videos im Hintergrund durch. Drücken Sie die Taste ‚Play’ (5), um die Wiedergabe wieder aufzunehmen. Drücken Sie die Taste ‚Prev’ (7), um die vorherige Videodatei auszuwählen. Drücken Sie die Taste ‚Next’ (8), um die nächste Videodatei auszuwählen. Wenn ein Ordner viele Videodateien enthält, können Sie die Seiten durchblättern, indem Sie die Tasten ‚Prev’ (8) oder ‚Next’ (9) verwenden. 9. Mithilfe der Richtungstasten 'Auf' / 'Ab' (21) können Sie die Videodateien auf dem Bildschirm anzeigen. Drücken Sie die Taste ‚OK’ (20), um die ausgewählte Videodatei wiederzugeben oder drücken Sie die Taste ‚Back’ (14), um die Dateiliste zu schließen. 10. 11. Drücken Sie die Richtungstaste ‚Links’ (21), um zum Dateiauswahlmenü zurückzukehren. Zoom: Verwenden Sie die Taste ‚Zoom’ (12), um die Anzeige zu vergrößern oder zu verkleinern. Untertitel und Sprache: Drücken Sie die Tasten ‚Subtitle’ / ‚Language’ (22 und 23), um zwischen den verfügbaren Sprachen der VOB-Dateien zu wechseln und um die Untertitel für MPEG4-Dateien auszuwählen. A-B-Modus: Drücken Sie die Taste ‚A-B’ (27), um den Anfangspunkt des Abschnitts festzulegen. Drücken Sie die Taste erneut, um den Endpunkt des Abschnitts festzulegen. Um den A-BWiederholmodus zu beenden, drücken Sie die Taste ‚A-B’ erneut. 12. 13. 108 DEUTSCH 6.3 Musik Erstmalige Verwendung: Wenn Sie über das Startmenü oder über die Fernbedienung (grüne Taste) ‚Music’ wählen, erscheint ein Bildschirm mit einem Überblick über alle verfügbaren Media Server (UPnp/AV) und/oder die verbundenen USB-Geräte. Im Hauptmenü stehen verschiedenen Optionen zur Verfügung: 1. 2. 3. 4. Hintergrundmusik (BGM). Live 365. Radio. Verfügbare Media Server. Standardmäßig erinnert sich das Gerät daran, welcher Ordner zuletzt aufgerufen wurde, sobald Sie ‚Home’ drücken, um in das Hauptmenü zurückzukehren, wenn Sie erneut Videos, Musik oder Bilder wählen möchten. Mit der Richtungstaste ‚Links' (21) können Sie auf den vorherigen Bildschirm zurückkehren, um einen anderen Ordner oder eine andere UPnP AV-Quelle auszuwählen. Um die Musik wiederzugeben, müssen Sie zuerst das Media-Gerät (Media Server, USB-Flashlaufwerk) mit Musikdateien (mp3 / wav / wma) wählen. Wenn Sie ein Media Server-Gerät wählen, werden die verfügbaren Ordner angezeigt. Die angezeigten Ordner stammen vom Media Server. Es kann vorkommen, dass nicht alle verfügbaren Ordner eine Funktionalität haben. Dies hängt vom Media Server ab, der verwendet wird. Die Musik-Option und die Ordner, die Sie wählen, agieren als ein Filter. Sie können nur Medien auswählen und anzeigen, die in der rechten oberen Ecke Ihres Fernseh-Bildschirms angezeigt werden. 109 DEUTSCH Welcher Ordner für die Auswahl und Wiedergabe von Musik verfügbar ist, hängt von der Art, Marke und Software-Version Ihres Media Servers ab. Einige Media Server bieten die Optionen Album, Interpret, Genre, alle Titel. Wählen Sie die gewünschte Option. Hinweis: Stellen Sie sicher, dass Sie den Inhalt des Media Servers aktualisiert haben, wenn Sie den Media Server über das Menü auswählen. Die Inhalte werden indiziert und falls keine Neuanzeige (Aktualisierung) durchgeführt wurde, werden neue Musikdateien nicht angezeigt. Wenn eine Musik-Datei nicht unterstützt wird, erscheint die folgende Meldung auf Ihrem Bildschirm: Um die Musik wiederzugeben und anzuhalten, drücken Sie die Taste ‚Play/Pause’ (5). Um die Musik zu stoppen, drücken Sie die Taste ‚Stop’ (7). Um einen Titel aus der Liste auszuwählen, drücken Sie die Richtungstaste ‚Auf' oder ‚Ab' (21). Musikwiedergabefunktionen 1. 2. 3. 4. 5. 6. 7. Mute: Drücken der Taste Mute [Stummschaltung] (2) aktiviert oder deaktiviert die Audiowiedergabe. Lautstärkeregelung: Drücken der Tasten + / - erhöht oder reduziert die Lautstärke. Repeat: Einmal Drücken der Repeat-Taste (10) wiederholt die gegenwärtig wiedergegebene Musikdatei (einen wiederholen). Zweimal Drücken der Repeat-Taste (10) wiederholt alle Musikdateien im aktuellen Ordner (alle wiederholen). Dreimal Drücken der Repeat-Taste (10) deaktiviert den Wiederhol-Modus (wiederholen aus). Pause: Um die Musik während der Wiedergabe anzuhalten, drücken Sie die Taste Play (5). Drücken Sie die Taste Play (5) erneut, um mit der Wiedergabe der Musikdatei fortzufahren. Die Taste Rew (4) startet den Rücklauf und die Taste FF (6) den Schnellvorlauf. Drücken Sie die Taste ‚Prev’ (7), um die vorherige Musikdatei auszuwählen. Drücken Sie die Taste ‚Next’ (8), um die nächste Musikdatei auszuwählen. 110 DEUTSCH Wenn ein Überblick über die verfügbaren Musikdateien angezeigt wird, können Sie die Taste ‚BGM’ (25) auf der Fernbedienung drücken, um Folgendes auszuführen: 1. 2. 3. Hinzufügen [Add] Abspielen/Nächster [Play/Next] Abspielen Zufallswahl [Play Shuffle] 4. 5. 6. Alle hinzufügen [Add All] Alle entfernen [Remove All] Stop Den Titel der Hintergrundmusik hinzufügen. Den nächsten Titel aus der HGM-Liste wiedergeben. Mit Zufallswahl den nächsten Titel aus der HGM-Liste wiedergeben. Alle Titel im Ordner der HGM-Liste hinzufügen. Alle Titel aus der HGM-Liste entfernen. Die Wiedergabe der Titel aus der HGM-Liste stoppen. Die Hintergrundmusikoption ist nur verfügbar, wenn Sie Titel zu dieser Funktion hinzufügen. Sie können dies tun, indem Sie die Taste ‚BGM’ (25) drücken. Es gibt zwei Optionen für die Hintergrundmusik: Sie können Musiktitel der HGM-Liste hinzufügen und diese wiedergeben, oder die Hintergrundmusik kann automatisch gestartet werden, wenn der C54WMP eingeschaltet wird. Dies funktioniert nur dann, wenn Sie Hintergrundmusik aus einem USB-Laufwerk wählen. Live365 Wir haben die Option Internetradio Live365.com dem Conceptronic C54WMP hinzugefügt. Um Radiosender über das Internet zu hören, müssen Sie eine Netzwerkverbindung (LAN/WLAN) haben, über die Sie sich mit dem Internet verbinden können. Sie können die Option ‚Live365’ über die Hauptseite der Musik-Option auswählen. Sie können aus der Liste ein Genre oder eine der anderen verfügbaren Optionen wählen. Sie können einen Radiosender aus der Liste wählen und dann die Taste ‚OK’ (20) auf der Fernbedienung drücken, um diesen Sender zu hören. Wenn der gewählte Sender ein Schloss-Symbol hat, können Sie diesen nur hören, wenn Sie Ihren Benutzernamen und Ihr Passwort für live365.com-eingeben. Sie können über die Softwarefunktion der Onscreen-Tastatur den Benutzernamen und das Passwort eingeben. Hinweis: Sie können kostenlos unter www.live365.com ein live365-Konto erstellen. 111 DEUTSCH Sie können das Kästchen aktivieren, damit Ihre Informationen für zukünftige Anwendungen gespeichert werden. So müssen Sie nicht jedes Mal Ihren Benutzernamen und Ihr Passwort erneut eingeben, wenn Sie diese Funktion verwenden möchten. Sie können bis zu 99 Sender unter ‚Radio’ [My Radio] hinzufügen, indem Sie die Taste ‚BGM’ (25) drücken und ‚Hinzufügen’ [Add] auswählen. Sie können die Option ‚Radio’ [My Radio] aus dem Hauptmenü der Musikoption auswählen, um einen schnellen Zugriff auf Ihre bevorzugten Radiosender zu haben. Radio [My Radio] Wenn Sie über das Menü oder mit der Taste iRadio (19) auf Ihrer Fernbedienung ‚Radio’ [My Radio] auswählen, finden Sie hier ihre ausgewählten Radiosender. Sie können Radiosender hinzufügen. Um Radiosender hinzuzufügen, müssen Sie die URL eingeben, auf der der Sender ausgestrahlt wird. Sie müssen lediglich sicherstellen, dass Sie die korrekte URL für den gewünschten Radiosender eingeben. Wir empfehlen Ihnen das SHOUTcast-Verzeichnis zu verwenden. (http://www.shoutcast.com). Sie können nicht über Ihr iRadio-Menü direkt auf das SHOUTcastVerzeichnis zugreifen. Der direkte Zugriff ist nur über Live365.com möglich. 112 DEUTSCH Hinweis: Der Conceptronic C54WMP hat eine integrierte Onscreen-Tastatur, über die Sie die URLs und Namen der Radiosender eingeben können. Es werden nur lateinische Grundbuchstaben unterstützt. Sonderzeichen aus den erweiterten lateinischen Buchstaben wie áäñß werden nicht unterstützt. 113 DEUTSCH 4.4 Bilder Erstmalige Verwendung: Wenn Sie über das Startmenü oder über die Fernbedienung (blaue Taste) ‚Bilder’ [Pictures] wählen, erscheint ein Bildschirm mit einem Überblick über alle verfügbaren Media Server (UPnp/AV) und/oder die verbundenen USB-Geräte. Standardmäßig erinnert sich das Gerät daran, welcher Ordner zuletzt aufgerufen wurde, sobald Sie ‚Home’ drücken, um in das Hauptmenü zurückzukehren, wenn Sie erneut Videos, Musik oder Bilder wählen möchten. Mit der Richtungstaste ‚Links' (21) können Sie auf den vorherigen Bildschirm zurückkehren, um einen anderen Ordner oder eine andere UPnP AV-Quelle auszuwählen. Wenn Sie ein Media Server-Gerät wählen, werden die verfügbaren Ordner angezeigt. Die angezeigten Ordner stammen vom Media Server. Es kann vorkommen, dass nicht alle verfügbaren Ordner eine Funktionalität haben. Dies hängt vom Media Server ab, der verwendet wird. Die Bilder-Option und die Ordner, die Sie wählen, agieren als ein Filter. Sie können nur Medien auswählen und anzeigen, die in der rechten oberen Ecke Ihres Fernseh-Bildschirms angezeigt werden. 114 DEUTSCH Hinweis: Stellen Sie sicher, dass Sie den Inhalt des Media Servers aktualisiert haben, wenn Sie den Media Server über das Menü auswählen. Die Inhalte werden indiziert und falls keine Neuanzeige (Aktualisierung) durchgeführt wurde, werden neue Bilder nicht angezeigt. Bilder anzeigen Um Bilder anzuzeigen: Wählen Sie einen Media Server, wählen Sie das Bilder-Untermenü und dann ein Bild. Um ein einziges Bild anzuzeigen, können Sie die Taste ‘OK’ (20) drücken. Um alle Bilder aus einem Ordner anzuzeigen, drücken Sie die Taste Play (5). Wenn eine Bild-Datei nicht unterstützt wird, erscheint die folgende Meldung auf Ihrem Bildschirm: Um die Bilder in einer anderen Reihenfolge anzuzeigen, müssen Sie die Taste ‚Sort’ (30) drücken. Musik und Bilder Sie können während der Anzeige von Bildern in einer Diashow Musik wiedergeben. Es gibt zwei Möglichkeiten der Musikwiedergabe während der Anzeige von Bildern. 1. Wählen Sie die Musik-Option über das Hauptmenü, indem Sie die Taste ‘Home’ (3) oder die Taste ‚Music’ drücken. Wählen Sie dann den gewünschten Ordner und den Titel, den Sie während der Diashow wiedergeben möchten, oder starten Sie die Wiedergabe eines Radiosenders. Kehren Sie zum Menü ‚Bilder’ [Pictures] zurück, wählen Sie das erste Bild und drücken Sie die Taste Play (5). 2. Drücken Sie während der Diashow die Taste 'BGM’ (25) und danach die Taste ‚Play’. Es werden während der Diashow alle Titel aus dieser Liste wiedergegeben. Diese Funktion steht nur dann zur Verfügung, wenn Musiktitel als Hintergrundmusik hinzugefügt wurden (siehe Kapitel 5.3). 115 DEUTSCH 7. Installation des Conceptronic Media (UPnP A/V) Servers Bevor Sie den Conceptronic C54WMP verwenden können, müssen Sie einen UPnP A/V-kompatiblen Server wie die Conceptronic Festplattengehäuse CH3SNAS oder CH3WNAS oder ein anderes UPnP A/V-Gerät installieren. Die im Lieferumfang enthaltene CD-ROM enthält das Media Server Software-Programm von Conceptronic. Wenn Sie keinen UPnP A/V Server in Form von Hardware haben, können Sie Ihren PC in einen Media Stream Server verwandeln, indem Sie die Conceptronic Media Server Software installieren. A. Legen Sie die CD-ROM in Ihr CD-ROM-Laufwerk ein. Das Autorun-Menü sollte automatisch starten. Wenn das Menü nicht erscheint, gehen Sie zu Ihrem „Arbeitsplatz“ und doppelklicken Sie auf das CD-ROM-Laufwerk, um das Autorun-Menü zu starten. B. Wählen Sie die Option „Install Media Server Software [Media Server-Software installieren]“ im Autorun-Menü. Es erscheint ein Dialogfeld zur Auswahl der Sprache. Wählen Sie die gewünschte Sprache und klicken Sie auf „OK”. Es erscheint der Einrichtungsassistent. Klicken Sie auf „Weiter“. Geben Sie Ihren Benutzernamen und Ihr Unternehmen ein oder behalten Sie die Standardeinstellungen bei. Wählen Sie, wer die Anwendung verwenden kann (gestatten Sie dies allen Anwendern oder nur dem gegenwärtigen Anwender). Klicken Sie auf „Weiter“. Wenn Sie den Zielordner für die Installation ändern möchten, klicken Sie auf die Schaltfläche „Ändern“. Anderenfalls wird der Treiber im vorgegebenen Zielordner gespeichert. Klicken Sie auf „Weiter“. Klicken Sie auf „Weiter’, um die Installation der Anwendung zu starten. C. D. E. F. G. 116 DEUTSCH H. I. Es erscheint eine entsprechende Meldung, sobald die Installation fertig gestellt wurde. Wenn Sie den Conceptronic Media Server direkt nach dessen Installation starten möchten, aktivieren Sie das Kästchen „Conceptronic DMS starten“. Klicken Sie auf „Fertigstellen“, um das Installationsprogramm zu schließen. Damit ist die Conceptronic Media Software auf Ihrem Computer installiert. Sie können auf diese über den Conceptronic-Ordner unter Programme im Startmenü zugreifen. 8. Konfiguration des Conceptronic Media Servers Media-Datei-Seite Nachdem Sie Dateien auf die Datenbank des Media Servers importiert haben, können Sie einen Überblick über alle betreffenden Dateien anzeigen. Media-Import Hier können Sie: • Den Media Server starten. • Den Media Server stoppen. • Einen Ordner hinzufügen. • Einen Ordner oder alle Ordner neu anzeigen. • Einen freigegebenen Ordner löschen oder alle Ordner löschen. Wenn ein Ordner mit Media-Inhalten hinzugefügt wird, wird dieser automatisch nach Inhalt durchsucht. 117 DEUTSCH System Sie können den Namen des Servers in einen beliebigen Namen ändern. Der Server-Name wird auf dem Bildschirm angezeigt, wenn über Ihre Player-Einstellungen Media Server entdeckt werden. Der geänderte Server-Name wird aktiv, wenn Sie den Server stoppen und wieder starten. 118 DEUTSCH Optionen Hier können Sie die Konfigurationsoptionen der Media Server Software ändern: Enable Autorun [Autorun aktivieren] Starten der Software, wenn Windows gestartet wird Minimized at Startup [Minimieren beim Starten] Die Software beim Starten minimieren. Enable Transcoding [Transcodierung aktivieren] Die Transcodierungs-Option aktivieren. Hinweis: Über ‘Transcodierung’ können Sie Inhalte wiedergeben, die nicht direkt von der Hardware des C54WMP unterstützt werden. Die Qualität transcodierter Inhalte ist unterschiedlich. File Types to scan [zu durchsuchende Dateitypen] Transcoding Setting [Transcodierungs-Einstellungen] 9. Auswahl der Dateitypen, die von der Media Server Software durchsucht werden. Auswahl der Transcodierungs-Qualität. Alternative Media Server Sie können mit dem Conceptronic C54WMP auch andere Media Server verwenden, vorausgesetzt, diese sind UPnP A/V 1.0-kompatibel. Microsoft Windows XP und Windows Vista Microsoft Windows XP und Windows Vista bieten einen Media Server über den Windows Media Player. Starten Sie den Media Player, wählen Sie Extras und Medienbibliothek, um die Freigabe zu konfigurieren. Sie können die Einstellungen für den Conceptronic C54WMP zulassen und Ihren Bedürfnissen anpassen. 119 DEUTSCH Über die Option ‚Ordner überwachen’ können Sie Inhalte, die Sie freigeben möchten, hinzufügen oder entfernen. Hinweis: Bei Windows XP benötigen Sie zumindest die Version Media Player 11 für diese Option. Weitere Software-Alternativen Weitere Software-Alternativen sind: TVersity : www.tversity.com TwonkyVision Media Server : www.twonkymedia.com ORB : www.orb.com Hinweis: Wenn ein Media Server-Gerät oder Softwarepaket vom Conceptronic C54WMP nicht erkannt wird, überprüfen Sie bitte die Kapazitäten und Einstellungen des betreffenden Geräts/Softwarepakets. Wenn das Gerät kompatibel und korrekt eingestellt ist, zeigt der Conceptronic C54WMP das Gerät als auswählbares Gerät auf Ihrem Fernsehbildschirm an. 120 DEUTSCH 10. Systemeinstellungen Über das Systemeinstellungsmenü können Sie Folgendes ändern: Sprache: Auf dem Bildschirm angezeigte Sprache (Onscreen-Display). Verfügbare Sprachen : Englisch, Spanisch, Deutsch, Niederländisch, Türkisch, Portugiesisch, Italienisch, Französisch. Einstellungen TV-Modus Wählen Sie die gewünschten Video-Einstellungen. TV-System : PAL oder NTSC. TV-Ausgang : P-Scan: YPbPr, S-Video, Interlace YUV. Videoskalierung : 4:3 PS, 4:3 LB, 16:9. Wählen Sie die korrekten Einstellungen für Ihr Fernsehsystem. Audio-Einstellungen Wählen Sie die gewünschten Audio-Einstellungen. Audioausgabe Audio-Samplingrate reduzieren Option für automatische Wiedergabe HG-Musik Hinweis: : SPDIF/AC3, SPDIF/PCM, SPDIF/OFF. : 48k, 96k. : Aus, zuerst Radio, zuerst HGM. : Aus, einen wiederholen, alle wiederholen. Sie können das Gerät so einstellen, dass die Musik automatisch startet, wenn Sie das Gerät einschalten. Wenn Sie die Übertragung eines gestreamten Radiosenders konfigurieren oder ein USBGerät mit Musik verwenden, können Sie wählen, welche Funktion zuerst gestartet werden soll. 121 DEUTSCH Video-Einstellungen Einstellen der gewünschten TV-Bildschirmanzeige. Helligkeits-, Kontrast-, Farbton- und Sättigungseinstellungen. Einstellungen Fotoanzeige Auswahl der gewünschten Fotoeigenschaften. Bildschirmschoner : Ein/Aus. Einstellungen Fotoanzeige : Liste/Minibilder. Zeit Diashow : 2 bis 30 Sekunden, 1 Minute und 2 Minuten. Hintergrundmusik (HGM). : Aus, einen wiederholen, alle wiederholen. Skalieren : Originalgröße, an Fenstergröße angepasst. Version Auswahl und Anzeige der Produktinformationen. Rücksetzen auf Standard. Firmware-Upgrade (über USB). Version (Firmware-Version). MAC-Adressen-Information für LAN * WLAN. 122 CE - Konformitätserklärung Der Hersteller Adresse 2L International BV Databankweg 7 3821 AL Amersfoort, Niederlande erklärt hiermit, dass das Produkt Typ 54MBPS WIRELESS MEDIA PLAYER/DMA Produkt C08-126 den folgenden Richtlinien entspricht: 1999/5/EWG R&TTE-Direktive: Telekommunikations-Endgerät und Satellitenbodenstation 2004/108/EWG EMV-Richtlinie: Elektromagnetische Verträglichkeit 73/23/EWG Niederspannungs-Richtlinie Elektrische Betriebsmittel zur Verwendung innerhalb bestimmter Spannungsgrenzen Für die Beurteilung der Einhaltung der Konformität angewandte Normen: ETSI 300 328-2/2000, EN 301 489-17-2000, EN 301 489-1-2000, EN 55022/9.98 Klasse B, EN 61000-3-2/3/4/1995, EN 50082-1/1994, EN 60950/1995 Dieses Produkt ist ausschließlich für den Gebrauch in Innenräumen bestimmt. Der Zweck dieses Produkts ist das Senden und Empfangen von Daten über den Äther. Es ist ein Produkt der Klasse 2 und die Übertragungsausgangsleistung liegt unter 100mW. Das CE-Zeichen bestätigt, dass dieses Produkt oben aufgeführte Normen und Bestimmungen erfüllt. Dieses Produkt ist geeignet für die Verwendung in allen EU-Ländern. Für Frankreich ist bei der Verwendung im Freien die Ausgangsleistung beschränkt und liegt im Bereich zwischen 2454 und 2483,5 MHz. Für Italien kann je nach Verwendung eine allgemeine Genehmigung erforderlich sein. Pour tous les pays de I'UE. Pour la France, pour une utilisationen extérieur, la puissance de sortie est limitée dans la bande 2454 to 2483,5 MHz.Pertutti i paesi ell'EU. Per I'Italia, secondo I'uso, un 'autorizzazione generale puô essere richiesta. Ort und Datum der Ausstellung: Amersfoort, 25 Oktober 2007 Herman Looijen, Product Marketing Manager 123 FRANÇAIS C54WMP de Conceptronic Guide d'installation rapide Nous vous félicitons d'avoir acheté votre Lecteur Multimédia Sans Fils de Conceptronic. Vous trouverez dans le Guide d'Installation du Hardware fourni avec le produit une explication détaillée de l'installation du Lecteur Multimédia Sans Fils de Conceptronic. En cas de doute, nous vous conseillons de vous reporter à notre site de support technique (sur www.conceptronic.net en cliquant sur « Support ». Vous y trouverez la base de donnée de la Foire aux Questions (FAQ, Frequently Asked Questions). Pour toute autre question sur nos produits dont la réponse ne figure pas sur notre site, vous pouvez nous contacter par mail à : [email protected] Pour toute autre information sur les produits Conceptronic, vous avez à votre disposition le site web de Conceptronic : www.conceptronic.net 1. Contenu du Coffret Les éléments suivants sont fournis dans le paquet avec le Lecteur Multimédia Sans Fils de Conceptronic : • • • • • • • • Lecteur Multimédia Sans Fils C54WMP de Conceptronic. Standard pour C54WMP. Alimentation électrique, 5v, DC, 2A Télécommande 2 Piles AAA pour la télécommande Câble RCA A/V (1 RCA Composite, 2 RCA Audio) Adaptateur Péritel (3 RCA à Péritel) Câble de convertisseur de composant (3 RCA femelles pour câble composant). 124 FRANÇAIS 2. Caractéristiques • • • • • • • Lecture vidéo avec fonctions MPEG 1/2/4. Mise en réseau sans fils 802.11b/g. Support Ethernet Câblé (10/100 Base-T). Support Client UPnP A/V (UPnP 1.0 Certifié). Conforme DLNA. Menu simple pour la configuration et le réglage. Connecteur USB hôte pour mises à jour de microprogramme et élargissement de la possibilité d'utilisation du dispositif avec un disque dur ou un dongle de mémoire USB. Pour lire les fichiers multimédias le C54WMP doit être connecté à un réseau avec un serveur multimédia. Le C54WMP de Conceptronic supporte les formats de fichiers multimédias suivants : • • • • • • • Fichiers audio & vidéo comprimés MPEG 1, 2, 4 Fichiers de sous-titres SRT, SSA et SUb. Fichiers d'images comprimés JPEG & GIF. Fichiers d'image BMP et TIFF. MP3 jusqu'à 320 Kbps ou VBR. WMA jusqu'à 192 Kbps ou VBR. fichiers audio WAV. D'autres fichiers peuvent être lus avec un serveur multimédia avec des fonctions de transcodage. Avec l'aide de votre PC le fichier sera décodé en temps réel sur un format utilisable par le C54WMP de Conceptronic. 125 FRANÇAIS 3. Explication de la télécommande 2 1 3 5 6 4 7 8 9 11 12 10 13 14 15 16 18 17 19 20 21 22 24 23 25 26 27 29 28 30 126 FRANÇAIS No. 1 2 3 4 CLAVIER POWER MUTE HOME REW 5 PLAY / PAUSE 6 7 FF STOP 8 PREV 9 NEXT 10 REPEAT 11 12 13 OUTPUT ZOOM SLOW 14 BACK 15 DISPLAY 16 17 18 19 MUSIC VIDEO PICTURES iRADIO 20 OK 21 TOUCHES DE DIRECTION Vers le haut / Vers le bas Vers la gauche / Vers la droite : 22 23 24 25 26 27 SUB CH + LANG CH VOL+ VOLBGM NUMÉRO 1-9 A-B 28 0 29 30 Configuration SORT :/ DESCRIPTION DE LA FONCTION Activer/Sortir du mode Veille du Lecteur Multimédia Sans Fils. Mettre le son en mode muet. Revenir au Menu Principal. Rembobinage rapide du fichier multimédia pendant la lecture. 1. Lecture ou Pause du fichier de musique. 2. Affichage des Photos en Mode Diapositives. Avance rapide du fichier multimédia pendant la lecture. Arrêt de la lecture actuelle. 1. Revenir à la page précédente lors de la navigation dans les fichiers multimédias. 2. Revenir au fichier précédent pendant la lecture. 1. Aller à la page suivante lors de la navigation dans les fichiers multimédias. 2. Aller au fichier suivant pendant la lecture. 1. Sélectionner le mode répétition pendant la Lecture de Vidéo & de Musique. 2. Répétez la musique de fond pendant la Lecture des Photos. Passer de la sortie vidéo à la séquence S-VidéoÆYPbPrÆYUV. Zoom sur la vidéo ou la photo pendant la lecture. Avance lente du fichier multimédia pendant la lecture. 1. Revenir au répertoire précédent ou à la page de configuration. 2. Enregistrer / annuler le réglage sans fils dans la page de configurations sans fils. 1. Affichage du nom de fichier et du type multimédia pendant la Lecture de Vidéo. 2. Affichage du nom de fichier et de la résolution pendant la Lecture de Photos. Activer le mode MUSIQUE. Activer le mode VIDÉO. Activer le mode PHOTO. Activer le mode Radio Internet. 1. Activer l'élément sélectionné. 2. Entrer en mode "rotation" pendant la Lecture des Photos. 1. Appuyez sur "LEFT" (gauche) pour arrêter le mode en cours et revenir au titre précédent ; Appuyez sur "RIGHT"(droit) pour entrer dans un répertoire ou serveur sélectionné. 2. Mode Vidéo : Appuyez sur "UP" (haut) ou "DOWN" (bas) pour choisir un autre fichier 3. Mode Photo : Déplacer l'image en mode "zoom" ou faire tourner l'image en mode "rotation" 4. Mode Musique : Appuyez sur "UP" pour passer au fichier de musique précédent ou appuyez sur "DOWN" pour passer au fichier de musique suivant. Sélectionner un sous-titre pendant la Lecture de Vidéo / Chaîne Suivante. Sélectionner une langue pendant la Lecture de Vidéo / Chaîne Précédente Augmenter le volume. Diminuer le volume. Ajouter/Éliminer un fichier de musique comme musique de fond. Touches de sélection numérique 1-9. Définir/Annuler un mode de répétition A-B Touche de raccourci pour entrer dans Touche de sélection numérique 0 l'URL iRADIO Ouvrir le Menu de Configuration du Lecteur Multimédias Sans Fils. Trier la liste de fichiers. 127 FRANÇAIS 4. Connexion du C54WMP sur votre réseau et votre TV Pour utiliser le C54WMP de Conceptronic, vous devez disposer des éléments suivants : 1. 2. 3. Un réseau Sans Fils (802.11b/g/n) ou Câblé (10/100/1000). Un ou plusieurs ordinateurs fonctionnant sous Windows 2000, Windows XP ou Windows Vista. Un poste de TV avec sortie Composant (Y, Pb, Pr), S-Video, Péritel ou Composite. Exemple de connexion avec 2 ordinateurs et un Serveur Multimédia NAS. Router = Routeur Wireless Media Player = Lecteur Multimédia Sans Fils Il est utile de disposer d'une connexion à Internet sur Bande Large si vous souhaitez utiliser des services en-ligne comme écouter une station de radio diffusée sur Internet. Remarque: Le C54WMP de Conceptronic utilise un client A/V UPnP pour lire les fichiers audio et vidéo. Vous devez disposer des hardwares avec une fonction Serveur A/V UpnP, une application de Serveur A/V tiers UPnP ou installer le logiciel Media Server de Conceptronic. (Voir chapitre 7). 128 FRANÇAIS 4.1 Installation du Hardware Remarque: Si vous disposez d'un réseau LAN sans fils, vous devez utiliser un câble Ethernet pour connecter le C54WMP de Conceptronic à votre routeur ou votre commutateur. Déterminez quel type de câble vous pouvez utiliser pour votre TV : • Composant (Y, Pb, Pr). • S-Video. • Composite (Vidéo uniquement). • Péritel (Vidéo et Audio). Pour l'audio, vous pouvez utiliser la sortie RCA analogique (avec des prises RCA rouges et blanches), ou la sortie coaxiale numérique (prise RCA orange). La télécommande utiliser 2 piles AAA (fournies). Vous devez utiliser la télécommande pour allumer/éteindre l'appareil. Allumez votre poste de TV et sélectionnez la Chaîne Vidéo. Votre C54WMP de Conceptronic affiche un écran de démarrage de Conceptronic lorsque vous allumez l'appareil. 5. Premier réglage & configuration Remarque: Dans notre manuel nous utiliserons une certaine adresse IP pour expliquer les fonctions du C54WMP de Conceptronic. Ces paramètres peuvent être différents dans votre environnement de réseau. Nous utiliserons les paramètres suivants dans notre manuel IP address C54WMP [Adresse IP]: 192.168.1.50 Netmask [Masque de réseau] : 255.255.255.0 Gateway address [Adresse de passerelle] : 192.168.1.1 (routeur comme passerelle) DNS (Dynamic Name Server) [Nom Dynamique de Serveur]: 192.168.1.1 Au lancement du C54WMP (Lecteur Média Numérique) de Conceptronic, vous devrez procéder à sa configuration. Le message affiché sur votre téléviseur vous demande dans quelle langue vous souhaitez utiliser le dispositif. 129 FRANÇAIS Après sélection de la langue, l’Adaptateur du C54WMP initialisera le réseau. Le gestionnaire de configuration du réseau se lancera alors automatiquement. Vous pouvez également accéder à ce menu via le menu d’installation (sélectionnez ‘Network Wizard’(‘Gestionnaire de Réseau’)). Sélectionnez le Type de Connexion préférée : "Wired’[Câblée] ou "Wireless’. [Sans Fils] Remarque: Lorsque vous utilisez des transmissions de données sur bande large, nous vous conseillons d'utiliser la connexion câble, puisque pour le WLAN la qualité du signal peut avoir un impact négatif sur la transmission des données et la performance. Utilisez les touches de direction up/down (21) pour sélectionner la connexion de réseau "Wired" [câblée] ou "Wireless" [Sans fils]. 130 FRANÇAIS 5.1 Configuration Câblée Sélectionnez "Wired" et appuyez sur "OK" pour appliquer la nouvelle configuration. Appuyez sur "OK" pour sélectionner "Done"[Terminé]. La configuration câblée est à présent terminée. Poursuivez au "Chapitre 6" pour savoir comment utiliser le Lecteur Multimédia. Remarque: Par défaut le C54WMP recherchera un serveur DHCP. Si le C54WMP est configuré correctement, vous trouverez une adresse IP en bas de l'écran. Si l'écran affiche : IP: 0.0.0.0, le dispositif n'a pas pu trouver d'adresse IP et vous devez configurer les paramètres de IP de Réseau du C54WMP manuellement (Chapitre 5.4). 5.2 Configuration Sans fils Le C54WMP supporte le réseau LAN sans fils (802.11b/g) : • • • • • • ESSID: Détection automatique ou par entrée manuelle lorsque la diffusion ESSID est désactivée. Mode “Infrastructure” ou “Ad-hoc”. Authentification : Auto, Shared Key, Open system. [Auto, Clé partagée, Système ouvert] Key Format [Format de clé] Off, WEP64, WEP64Hex, WEP128, WEP128Hex, WPA-PSK, WPA2 AES. Key value : [Valeur de clé] Configurable avec le KeyFormat. Channel : [Canal] détection automatique. Sélectionnez "Wireless" et appuyez sur "OK" pour appliquer la nouvelle configuration. Le C54WMP recherche les points d'accès disponibles. Lorsque votre point d'accès diffuse son SSID, vous pouvez le sélectionner. L'indicateur de force du signal peut avoir 3 couleurs : rouge, jaune et vert. Si l'indicateur est vert, vous avez la meilleure connexion possible entre le C54WMP et votre point d'accès. Un indicateur jaune est acceptable pour une utilisation normale et lorsque la force du signal du point d'accès est rouge, cela signifie que vous devez changer la position de votre C54WMP ou de votre point d'accès. Remarque: Nous ne vous conseillons pas de lire de films diffusés sur bande large lorsque l'indicateur est rouge ou jaune. Sélectionnez le point d'accès et appuyez sur OK sur la télécommande. Sélectionnez "Next’ et appuyez sur "OK’. Si vous avez paramétré le cryptage dans votre point d'accès, vous devez entrer les mêmes paramètres dans le C54WMP que ceux configurés dans votre point d'accès. 131 FRANÇAIS La partie sans fils du C54WMP détecte automatiquement quel type de configuration est nécessaire pour se connecter vers un point d'accès. Si les points d'accès sont cryptés avec WPA, l'appareil le détecte et vous n'avez qu'à entrer la clé partagée privée (PSK). Lorsque votre point d'accès n'est pas protégé par un code de cryptage WEP ou WPA, vous pouvez sélectionner "Next " pour terminer la configuration. La configuration sans fils est à présent terminée. Poursuivez au "Chapitre 6" pour savoir comment utiliser le Lecteur Multimédia. Vous pourrez changer manuellement les paramètres sans fils dans le menu de configuration sans fils. Remarque: Par défaut le C54WMP recherchera un serveur DHCP. Si le C54WMP est configuré correctement, vous trouverez une adresse IP en bas de l'écran. Si l'écran affiche: IP: 0.0.0.0, le dispositif n'a pas pu trouver d'adresse IP et vous devez configurer les paramètres de IP de Réseau du C54WMP manuellement (Chapitre 5.4). 5.3 Utiliser Windows Connect Now 2.0 avec C54WMP de Conceptronic La technologie de Microsoft(R) Windows(R) Connect Now (WCN) vous permet d'ajouter facilement des dispositifs comme le C54WMP sur votre réseau sans fils existant. Il peut être très compliqué de créer un réseau sans fils sûr et d'attribuer les paramètres sans fils nécessaires aux dispositifs sans fils. WCN peut vous aider à le configurer grâce à une méthode simple et sûre pour configurer les dispositifs de réseau sans fils. Windows Connect Now est livré avec le XP Service Pack 2 (SP2) et les versions ultérieures de Windows. 132 FRANÇAIS Vous pouvez utiliser WCN dans un PC fonctionnant sous Windows XP SP2 ou ultérieur pour transférer vos paramètres sans fils à une clé USB portable (non fournie). Nous vous recommandons de disposer d'une connexion sans fils en fonctionnement sur votre ordinateur pour configurer WCN par une clé USB. Windows XP Sous Microsoft Windows XP, vous pouvez configurer le C54WMP par WCN comme suit Cliquez sur "Démarrer’, "Mes Favoris Réseaux’. L'Environnement de Réseau est affiché. Sélectionnez l'option "Configurer un réseau sans fils..." sur la partie gauche de la fenêtre. L'Assistant de Configuration de Réseau Sans Fils s'affiche. Cliquez sur «" Suivant» pour continuer. Entrez le nom de votre réseau sans fils (SSID) et sélectionnez l'option "Attribuer manuellement une clé de réseau". Remarque: Si votre réseau est crypté avec un cryptage WPA, cochez la case dans la partie inférieure de la fenêtre. Si votre réseau est crypté avec le cryptage WEP, laissez la case non cochée. Cliquez sur "Suivant" pour continuer. Entrez la clé de cryptage de votre réseau dans les deux champs présents à l'écran. Pour entrer plus facilement la clé, vous pouvez éliminer la croix de l'option "Occulter les caractères..." pour que vous puissiez voir ce que vous saisissez. Cliquez sur "Suivant" pour continuer. Sélectionnez l'option "Utiliser une clé USB". Cliquez sur «" Suivant» pour continuer. Connectez la clé USB sur votre ordinateur et sélectionnez la lettre du lecteur correspondant. Cliquez sur «" Suivant» pour continuer. Lorsque la configuration est enregistrée, vous pouvez éliminer la clé USB. Remarque: Ne fermez pas l'assistant sur votre ordinateur ! Allumez le C54WMP et allez dans "Configuration", "Configuration Sans Fils". Insérez la clé USB dans le port USB du C54WMP. Le C54WMP détectera automatiquement les fichiers de configuration WCN et vous demandera si vous voulez appliquer les paramètres. Veuillez confirmer. Les paramètres seront enregistrés dans la configuration. Enlevez la clé USB. Les paramètres corrects sont à présent utilisés. Nous vous conseillons de redémarrer le dispositif pour vous assurer que les bons paramètres sans fils sont utilisés. Réinsérez la clé USB dans votre ordinateur et cliquez sur "Suivant". Vous verrez une liste des appareils configurés. Vous pouvez imprimer vos paramètres de réseau avec le bouton "Impression des Paramètres de Réseau" . Cliquez sur "Terminer" pour refermer l'Assistant de Configuration de Réseau Sans Fils. 133 FRANÇAIS Remarque: Par défaut, les paramètres WCN seront effacés de votre clé USB lorsque vous cliquerez sur "Terminer". Si vous voulez configurer plus d'appareils / plus d'ordinateurs dans votre réseau, vous pouvez enlevez la croix placée dans cette case et conserver les paramètres sur la clé USB, mais nous vous conseillons d'éliminer les paramètres. Windows Vista Sous Microsoft Windows Vista, vous pouvez configurer le C54WMP par WCN comme suit Cliquez sur "Démarrer’, "Réseau’. Cliquez sur le bouton "Ajouter un Dispositif Sans fils" en haut de la fenêtre. Sélectionnez l'option "Je veux ajouter un dispositif sans fils ou un ordinateur qui n'est pas dans la liste, avec une clé USB". Sélectionnez l'option "Ajouter le dispositif ou l'ordinateur en utilisant une clé USB". Entrez le nom de votre réseau Sans Fils dans le champ "Nom de Réseau (SSID)" ou sélectionnez un réseau sans fils disponible dans la liste (si votre ordinateur est connecté sans fils au réseau). Cliquez sur «" Suivant» pour continuer. Entrez le code de cryptage de votre réseau sans fils. Remarque: Windows Vista utilise WPA par défaut. Si vous avez besoin d'utiliser le cryptage WEP, cliquez sur "Afficher les options de sécurité de réseau avancées". Cliquez sur "Suivant" pour continuer. Vérifiez que la clé USB est bien insérée et enregistrez les paramètres sur la lettre de lecteur correcte. Lorsque les paramètres sont enregistrés, cliquez sur "Fermer" et enlevez la clé USB de votre ordinateur. Allumez le C54WMP et allez dans "Configuration", "Configuration Sans Fils". Insérez la clé USB dans le port USB du C54WMP. Le C54WMP détectera automatiquement les fichiers de configuration WCN et vous demandera si vous voulez appliquer les paramètres. Veuillez confirmer. Les paramètres seront enregistrés dans la configuration. Enlevez la clé USB. Les paramètres corrects sont à présent utilisés. Nous vous conseillons de redémarrer le dispositif pour vous assurer que les bons paramètres sans fils sont utilisés. 5.4 Configuration de l'Adresse IP manuelle pour le C54WMP Vous devez configurer l'adresse IP du C54WMP manuellement lorsque aucun serveur DHCP n'est disponible dans votre réseau. Appuyez sur Setup (29) sur la télécommande ou sélectionnez l'icône de configuration dans le menu principal de votre écran. 134 FRANÇAIS Sélectionnez la fonction : Configuration de réseau et appuyez sur OK pour entrer dans la configuration IP. Sélectionnez le type de réseau souhaité : “Câblé” ou “Sans Fils” . Sélectionnez la fonctionnalité DHCP, appuyez sur OK pour entrer les configurations et utilisez les touches de direction gauche ou droite (21) pour les modifier. Vous devez appuyer sur OK de nouveau pour quitter cette option. Vous devez désactiver DHCP pour entrer manuellement l'adresse IP. Lorsque cette fonction est désactivée, les paramètres standards par défaut seront affichés. IP address C54WMP [Adresse IP] : 192.168.1.50 : 255.255.255.0 Netmask [Masque de réseau] Gateway address [Adresse de passerelle] : 192.168.1.1 (routeur comme passerelle) DNS (Dynamic Name Server) Nom Dynamique de Serveur] : 192.168.1.1 Vous pouvez sélectionner le paramètre souhaité et le modifier comme les paramètres de votre propre réseau. Lorsque vous voulez modifier l'adresse IP, le masque de réseau, la passerelle ou l'adresse DNS, vous pouvez utiliser les touches numériques de la télécommande (26). Pour aller dans le champ suivant, vous pouvez utiliser la touche de direction (21) (Gauche/droite). Il n'est pas nécessaire d'entrer un : “.” (Point). Pour modifier, appuyez sur "OK", utilisez la touche de direction gauche ou droite (21) pour modifier ce paramètre et appuyez de nouveau sur "OK" pour aller au champ suivant. Pour enregistrer les paramètres dans la mémoire du C54WMP, vous devez appuyer sur la touche de direction gauche (21) ; le système vous demande alors d'enregistrer les modifications ou de les annuler. Sélectionnez "Save" [Enregistrer]. 135 FRANÇAIS 6. Utilisation du Lecteur Multimédia Sans Fils Lorsque vous avez terminé de configurer le Lecteur Multimédia Sans Fils, vous devez entrer dans le menu par défaut qui a 4 fonctions: - Music - Photo Video Setup Remarque: Sélectionnez Music si vous voulez écouter de la musique avec le Lecteur Multimédia. Sélectionnez Photo si vous voulez voir des images avec le Lecteur Multimédia. Sélectionnez Video si vous voulez voir des films / vidéos. Sélectionnez Setup si vous voulez configurer / modifier les paramètres du C54WMP. Avant de lire de la Musique, de la Vidéo ou des Photos, vérifiez que le Serveur Multimédia fonctionne bien. Si votre Serveur Multimédia ne fonctionne pas, procédez comme indiqué au Chapitre 7 pour installer le Serveur Multimédia de Conceptronic. 6.1 Sélection Rapide Avec les touches bleue, verte, jaune et rouge de votre télécommande vous pouvez facilement passer d'une option de lecture à une autre sur le C54WMP. Appuyez sur la touche bleue pour la vidéo, sur la touche verte pour la musique, sur la jaune pour les photos et sur la rouge pour la radio sur Internet. Remarque: Cette fonction vous ramène vers le dernier écran utilisé. Si vous voulez revenir au menu principal, appuyez sur la touche Home (3). 136 FRANÇAIS 6.2 Vidéo Le C54WMP de Conceptronic supporte les formats MPEG1, MPEG2 et MPEG4 ainsi que VOB, AVI et d'autres formats. Avec le Software du Serveur Multimédia, il est possible d'utiliser le "transcodage". Ceci signifie que votre ordinateur décodera le format vidéo dans un format qui pourra être utilisé avec le C54WMP de Conceptronic. Première utilisation : Si vous sélectionnez "Video", dans le menu de démarrage ou sur votre télécommande (touche bleue), vous voyez un écran avec un aperçu des Serveurs Multimédias disponibles (UPnP/AV) et/ou le dispositif USB connecté. Par défaut le dispositif se souvient du dernier répertoire consulté lorsque vous appuyez sur home pour revenir au menu principal ou lorsque vous sélectionnez de nouveau Video, Music ou Pictures. Vous devez utiliser le bouton retour (touche fléchée à gauche (21)) pour revenir à l'écran précédent pour sélectionner un autre répertoire ou une autre Source UPnP AV. Si vous sélectionnez un dispositif Serveur Multimédia, les répertoires disponibles sont affichés. Les répertoires affichés sont fournis par le Serveur Multimédia. Il est possible que dans certains cas tous les répertoires présentés n'aient pas cette fonction. Cela dépend du Serveur Multimédia utilisé. L'option de vidéo et les répertoires que vous sélectionnez fonctionnent comme un filtre. Vous ne pouvez sélectionner et afficher que les fichiers multimédias inscrits dans le coin supérieur droit de votre écran de TV. 137 FRANÇAIS Utilisez les touches de direction (21) pour naviguer dans les films et appuyez sur la touche Play (5) pour faire démarrer le film. Lorsque le film a démarré, le C54WMP de Conceptronic charge le film. Cela peut prendre quelques secondes, la durée est indiquée par un avis de chargement en cours. Remarque: Le temps de chargement dépend de la qualité de la connexion et du serveur multimédia. Remarque: Vérifiez que le contenu du serveur multimédia a bien été rafraîchi lorsque vous sélectionnez le Serveur Multimédia dans le menu. Le contenu est mis à jour et s'il n'est pas rafraîchi, les nouvelles vidéos ne sont pas affichées. Si un fichier vidéo ou un codec n'est pas supporté, vous verrez le message suivant à l'écran : Fonctions de Lecture Vidéo D'autres fonctions à utiliser lorsque vous lisez les fichiers vidéo : 1. 2. 3. 4. 5. 6. Mute : Appuyez sur Mute (2) pour activer ou désactiver la lecture audio. Volume Control : Appuyez sur + / - (24) pour augmenter ou réduire le niveau sonore. Repeat : Appuyez sur la touche Repeat (10) une fois pour répéter le fichier de vidéo actuellement en cours de lecture (répétition d'un fichier). Appuyez sur la touche Repeat (10) deux fois pour répéter tous les fichiers de vidéo dans le répertoire actuel (répétition de tous les fichiers). Appuyez sur la touche Repeat (10) trois fois pour désactiver le mode répétition (répétition désactivée). Pause : en cours de lecture appuyez sur la touche Play (5) pour interrompre la vidéo. Appuyez de nouveau sur la touche Play (5) pour reprendre la lecture du fichier vidéo. Utilisez la touche Stop (5) pour arrêter la lecture. Utilisez Rew (4) pour rembobiner, FF pour avancer rapidement (6). Remarque: pendant "rew" ou "ff", la lecture peut être gelée. Le C54WMP rembobine ou avance plus rapidement le contenu en arrière-plan. Appuyez sur "play" (5) pour reprendre la lecture. 138 FRANÇAIS 7. 8. Utilisez Prev (7) pour sélectionner le fichier vidéo précédent. Utilisez Next (8) pour sélectionner le fichier vidéo suivant. Si un répertoire contient plusieurs fichiers vidéo, vous pouvez naviguer dans les pages en utilisant les touches Prev (8) ou Next (9). 9. Utilisez la touche Up/Down (21) pour afficher les fichiers vidéo comme affichage à l'écran. Appuyez sur OK (20) pour lire le fichier de vidéo sélectionné, ou appuyez sur la touche "back" (14) pour refermer la liste de fichiers. 10. 11. 12. Appuyez sur la touche Gauche (21) pour revenir au menu de sélection de fichier. Zoom : utilisez Zoom (12) pour agrandir ou rétrécir l'écran. Subtitle & language : Appuyez sur les touches Subtitle / Language (22 & 23) pour passer d'une langue disponible à l'autre des fichiers VOB. Et pour passer aux sous-titres pour les fichiers MPEG4. Mode A-B : Appuyez sur la touche A-B (27) pour démarrer la section de répétition. Appuyez de nouveau sur la touche pour terminer la section de répétition. Pour annuler le mode de répétition A-B, appuyez de nouveau sur le bouton A-B. 13. 6.3 Musique Première utilisation : Si vous sélectionnez"Music", dans le menu de démarrage ou sur votre télécommande (touche verte), vous voyez un écran avec un aperçu des Serveurs Multimédias disponibles (UPnP/AV) et/ou le dispositif USB connecté. 139 FRANÇAIS Dans le menu principal plusieurs options sont disponibles : 1. 2. 3. 4. Musique de Fond (BGM). Live 365. My Radio. Serveurs Multimédias Disponibles. Par défaut le dispositif se souvient du dernier répertoire visité lorsque vous appuyez sur home pour revenir au menu principal ou lorsque vous sélectionnez de nouveau Video, Music ou Pictures. Vous devez utiliser le bouton retour (touche fléchée à gauche (21)) pour revenir à l'écran précédent pour sélectionner un autre répertoire ou une autre Source UPnP AV. Pour lire la musique, vous devez sélectionner d'abord le dispositif multimédia (serveur multimédia, clé USB) avec des fichiers de musique (mp3, wav, wma). Si vous sélectionnez un dispositif Serveur Multimédia, les répertoires disponibles sont affichés. Les répertoires affichés sont fournis par le Serveur Multimédia. Il est possible que dans certains cas tous les répertoires présentés n'aient pas cette fonction. Cela dépend du Serveur Multimédia utilisé. L'option de musique et les répertoires que vous sélectionnez fonctionnent comme un filtre. Vous ne pouvez sélectionner et afficher que les fichiers multimédias inscrits dans le coin supérieur droit de votre écran de TV. 140 FRANÇAIS Le répertoire affiché pour sélectionner et lire de la musique dépend du type, de la marque ou de la version du software de votre Serveur Multimédia. Certains Serveurs Multimédias proposent : les sélections Album, Artistes, Genre, toutes pistes. Veuillez sélectionner la fonction que vous préférez. Remarque: Vérifiez que le contenu du serveur multimédia a bien été rafraîchi lorsque vous sélectionnez le Serveur Multimédia dans le menu. Le contenu est mis à jour et s'il n'est pas rafraîchi, les nouvelles pistes de musique ne sont pas affichées. Si un fichier de musique n'est pas supporté, vous verrez le message suivant à l'écran : Pour lire et mettre en veille la musique, appuyez sur la touche Play/Pause (5). Pour arrêter la musique, appuyez sur la touche Stop (7). Pour sélectionner une chanson dans la liste, appuyez sur la touche Up ou Down (21). Fonctions de Lecture de Musique 1. 2. 3. 4. 5. 6. 7. Mute : Appuyez sur Mute (2) pour activer ou désactiver la lecture audio. Volume Control : Appuyez sur + / - (24) pour augmenter ou réduire le niveau sonore. Repeat : Appuyez sur la touche Repeat (10) une fois pour répéter le fichier de musique actuellement en cours de lecture (répétition d'un fichier). Appuyez sur la touche Repeat (10) deux fois pour répéter tous les fichiers de musique dans le répertoire actuel (répétition de tous les fichiers). Appuyez sur la touche Repeat (10) trois fois pour désactiver le mode répétition (répétition désactivée). Pause : en cours de lecture appuyez sur la touche Play (5) pour interrompre la musique. Appuyez de nouveau sur la touche Play (5) pour reprendre la lecture du fichier de musique. Utilisez Rew (4) pour rembobiner, FF pour avancer rapidement (6). Utilisez Prev (7) pour sélectionner le fichier de musique précédent. Utilisez Next (8) pour sélectionner le fichier de musique suivant. Si vous avez un aperçu de la musique disponible, vous pouvez appuyer sur la touche BGM (25) de votre télécommande pour procéder comme suit : 141 FRANÇAIS 1. 2. 3. 4. 5. 6. Add Play/Next Play Shuffle Add All Remove All Stop Ajouter la chanson sur la fonction BGM. Lire la chanson suivante dans la liste BGM. Lire/Lecture aléatoire de la chanson suivante dans la liste BGM. Ajouter toutes les chansons dans le répertoire dans la liste BGM. Élimine toutes les chansons de la liste BGM. Arrête la lecture de chansons de la liste BGM. L'option de musique de fond n'est disponible que si vous ajoutez de la musique dans cette sélection spéciale. Vous pouvez le faire en appuyant sur la touche BGM (25). Il y a deux options de musique de fond : Placez la musique dans la liste BGM et lisez-la, ou la musique de fond peut démarrer automatiquement lorsque vous allumez le C54WMP. Ceci ne fonctionne que lorsque vous sélectionnez la musique de fond à partir d'un lecteur USB. Live365 Nous avons ajouté le service de musique par radio sur Internet Live365.com dans le C54WMP de Conceptronic. Pour lire des stations de radio d'Internet, vous devez disposer d'une connexion de réseau (LAN/WLAN) qui peut se connecter à Internet. Dans la page de Musique principale, vous pouvez sélectionner l'option "Live365" . Vous pouvez sélectionner un genre dans la liste ou sélectionner l'une des autres options disponibles. Vous pouvez sélectionner une station de radio dans la liste et appuyer sur la touche OK (20) de la télécommande pour lire cette station de radio. Si vous choisissez une station avec l'icône de cadenas, vous ne pouvez lire cette station que si vous entrez votre nom d'utilisateur et votre mot de passe dans le site live365.com. Vous pouvez entrer le nom d'utilisateur et le mot de passe par la fonction de clavier de software à l'écran. Remarque: Vous pouvez créer gratuitement un compte de live365 sur www.live365.com. 142 FRANÇAIS Vous pouvez sélectionner la case à cocher pour rappeler vos informations personnelles. De cette manière vous n'aurez plus à entrer votre nom d'utilisateur et votre mot de passe la prochaine fois que vous utiliserez ce site. Vous pouvez ajouter jusqu'à 99 stations préférées sur "My RAdio" en appuyant sur la touche BGM (25); puis sélectionnez "Add". Dans le menu principal de Musique, vous pouvez sélectionner la fonction "My Radio" pour sélectionner rapidement les stations de radio préférées. My Radio Lorsque vous sélectionnez "My Radio" dans le menu ou avec la touche iRadio (19) sur votre télécommande, vous pouvez trouver ici vos stations de radio sélectionnées. Il est possible d'ajouter votre station de radio préférée. Pour ajouter votre station de radio préférée, vous devez entrer l'URL où la station diffuse. La seule chose que vous avez à faire est d'être sûr que vous entrez bien la bonne URL de la station de radio. Nous vous suggérons d'utiliser le répertoire SHOUTCast. (http://www.shoutcast.com). Aucun accès direct au répertoire SHOUTCast n'est disponible dans notre menu iRadio. Seul l'accès direct à Live365.com est possible. 143 FRANÇAIS Remarque: Le C54WMP de Conceptronic a un Clavier à l'Écran intégré qui peut être utilisé pour entrer les URL et les noms des stations de radio. Seuls les caractères latins basiques sont supportés. Les caractères spéciaux des feuilles de caractères Latin Extended comme áäñß ne sont pas supportés. 144 FRANÇAIS 6.4 Photos Première utilisation: Si vous sélectionnez "Pictures", dans le menu de démarrage ou sur votre télécommande (touche jaune), vous voyez un écran avec un aperçu des Serveurs Multimédias disponibles (UPnP/AV) et/ou le dispositif USB connecté. Par défaut le dispositif se souvient du dernier répertoire visité lorsque vous appuyez sur home pour revenir au menu principal lorsque vous sélectionnez de nouveau Video, Music ou Pictures. Vous devez utiliser le bouton retour (touche fléchée à gauche (21)) pour revenir à l'écran précédent pour sélectionner un autre répertoire ou une autre Source UPnP AV. Si vous sélectionnez un dispositif Serveur Multimédia, les répertoires disponibles sont affichés. Les répertoires affichés sont fournis par le Serveur Multimédia. Il est possible que dans certains cas tous les répertoires présentés n'aient pas cette fonction. Cela dépend du Serveur Multimédia utilisé. L'option de photos et les répertoires que vous sélectionnez fonctionnent comme un filtre. Vous ne pouvez sélectionner et afficher que les fichiers multimédias inscrits dans le coin supérieur droit de votre écran de TV. Remarque: Vérifiez que le contenu du serveur multimédia a bien été rafraîchi lorsque vous sélectionnez le Serveur Multimédia dans le menu. Le contenu est mis à jour et s'il n'est pas rafraîchi, les nouvelles images ne sont pas affichées. 145 FRANÇAIS Afficher des Images Pour afficher les images : sélectionnez un serveur multimédia, vérifiez que vous avez bien sélectionné le sous-menu de photos puis sélectionnez une image. Pour afficher une image unique, vous pouvez appuyer sur la touche OK (20). Pour afficher toutes les images dans un répertoire, appuyez sur la touche Play (5). Si un fichier de photos n'est pas supporté, vous verrez le message suivant à l'écran : Pour afficher les images dans un autre répertoire, vous devez utiliser le bouton Sort (30). Musique & Images Vous pouvez lire la musique lorsque vous afficher des images en mode de diapositive. Il y a deux manières de lire de la musique lorsque vous affichez des images. 7. 1. Sélectionnez la fonction Music dans le menu principal, en utilisant la touche Home (3) ou en sélectionnant la touche Music. Puis sélectionnez le répertoire correct et la chanson que vous voulez lire pendant la présentation de diapositives ou lorsque vous voulez écouter une station de radio. Revenez au menu "Pictures", sélectionnez la première photo et appuyez sur la touche Play (5). 2. Pendant la présentation de diapositives, appuyez sur la touche BGM (25) et appuyez sur Play. Toutes les chansons de la liste seront lues pendant la présentation de diapositives. Cette fonction ne marche que si de la musique est ajoutée comme musique BGM (Voir chapitre 5.3). Installation du Serveur Multimédia de Conceptronic (UPnP A/V) Avant d'utiliser le C54WMP de Conceptronic, vous devez installer un Serveur UPnP A/V compatible tels que les boîtiers de disque dur CH3SNAS ou CH3WNAS ou un autre dispositif UPnP A/V. Le Cd-Rom fourni contient le programme de Serveur Multimédia de Conceptronic. Si vous n'avez pas de programme de Serveur UPnP A/V, vous pouvez transformer votre Pc en serveur de diffusion multimédia en installant le programme Serveur Multimédia de Conceptronic. 146 FRANÇAIS A. Placez le CD-ROM dans votre lecteur de CD-ROM. Le Menu à Lancement Automatique doit apparaître automatiquement. Si le Menu à Lancement Automatique n'apparaît pas, naviguer dans "Mon Ordinateur" et cliquez deux fois sur le lecteur de Cd-Rom pour lancer le menu à lancement automatique. B. C. Sélectionnez l'option "Install Media Server Software" dans le Menu à Exécution automatique. Une boîte de dialogue de choix de la langue apparaît. Sélectionnez la langue de votre choix et appuyez sur "OK". L'Assistant de Configuration apparaît. Cliquez sur « Next » pour continuer. Entrez votre nom d'utilisateur et votre entreprise, ou conservez les paramètres par défaut. Sélectionnez qui peut utiliser l'application (permettre à tous les utilisateurs ou seulement à l'utilisateur actuel). Cliquez sur « Next » pour continuer. Modifiez le répertoire de destination de l'installation avec le bouton "Change" ou laissez le répertoire par défaut. Cliquez sur « Next » pour continuer. Cliquez sur "Next" pour lancer l'installation de l'application. Le système vous indiquera quand l'installation sera terminée. Si vous voulez lancer le Serveur Multimédia de Conceptronic directement après l'installation, cochez la case "Launch Conceptronic DMS". Cliquez sur “Finish” pour quitter le programme d'installation. D. E. F. G. H. I. Le Software Multimédia de Conceptronic est à présent installé sur votre ordinateur. Vous pouvez y accéder par le répertoire de Conceptronic dans la section Programmes de votre Menu de Démarrage. 147 FRANÇAIS 8. Configuration du Serveur Multimédia de Conceptronic Section de Fichiers Multimédias Après avoir importé des fichiers dans la base de données de Serveur Multimédia, vous verrez un aperçu de tous les fichiers scannés. Importation Multimédia Dans cette partie vous pouvez : • Lancer le Serveur Multimédia. • Arrêter le Serveur Multimédia. • Ajouter un Répertoire. • Rafraîchir un répertoire ou tous les répertoires. • Effacer un répertoire partagé ou effacer tous les répertoires. Lorsque vous ajoutez un répertoire avec un contenu multimédia, le contenu du répertoire est scanné automatiquement. 148 FRANÇAIS Système Vous pouvez modifier le Nom du Serveur dans un nom de serveur que vous souhaitez. Le nom du serveur sera affiché à l'écran lorsque vous détectez les Serveurs Multimédias dans la configuration du lecteur. Le nom du serveur modifié sera actif lorsque vous arrêtez le serveur et le relancez. 149 FRANÇAIS Options Ce chapitre vous indique comment modifier les options de configuration du Software de Serveur Multimédia : Enable Autorun Minimized at Startup Enable Transcoding Remarque: Par le" transcodage, il est possible de lire un contenu qui n'est pas directement supporté par le hardware de votre C54WMP. La qualité du contenu transcodé peut varier. File Types to scan Transcoding Setting 9. Lancer le software lorsque Windows démarre Lance le software sous la forme minimisée lors du démarrage. Permet l'option de Transcodage Sélectionne les types de fichiers qui seront scannés par le Software de Serveur Multimédia. Sélectionne la qualité du transcodage. Serveurs Multimédia Alternatifs Vous pouvez utiliser des serveurs multimédias alternatifs avec le C54WMP de Conceptronic si le serveur est compatible UPnP A/V 1.0. 150 FRANÇAIS Microsoft Windows XP et Windows Vista Microsoft Windows XP et Windows Vista offrent un Serveur Multimédia avec le Windows Media Player. Lancez le Lecteur Multimédia, sélectionnez Outils et la bibliothèque, puis configurez le Partage. Vous pouvez permettre et paramétrer les réglages du C54WMP de Conceptronic. Dans l'option Contrôle des Répertoires, vous pouvez ajouter ou enlever le contenu que vous voulez partager. Remarque: Pour Windows XP, vous aurez au moins besoin de Lecteur Multimédia 11 pour cette option. Autres Softwares alternatifs Vous pouvez utiliser un autre Software comme : TVersity : www.tversity.com TwonkyVision Media Server : www.twonkymedia.com ORB : www.orb.com Remarque: Si un dispositif de Serveur Multimédia ou un package de software ne peut pas être détecté par le C54WMP de Conceptronic, veuillez vérifier les capacités et la configuration de ce dispositif / package de software. Si le dispositif est compatible et correctement configuré, votre C54WMP affiche le dispositif comme un dispositif qui peut être sélectionné dans votre TV. 151 FRANÇAIS 10. Réglages du Système Dans le menu de configuration du système vous pouvez modifier : Langue: OSD Language (Langue de l'affichage à l'écran). Langues disponibles : Anglais, espagnol, allemand, hollandais, turc, portugais, italien, français. Réglage du mode TV Sélectionnez le réglage de vidéo souhaité. Système de TV : PAL ou NTSC. Sortie TV : P-Scan : YPbPr, S-Video, Interlace YUV. Échelle Vidéo : 4:3 PS, 4:3 LB, 16:9. Sélectionnez le réglage correspondant à votre système TV. Configuration Audio Sélectionnez le réglage Audio souhaité. Sortie Audio : SPDIF/AC3, SPDIF/PCM, SPDIF/OFF. Échantillonnage : 48k, 96k. Option AutoPlay : Off, My Radio First, BGM First. Musique BG : Off, Repeat One (en répéter une), repeat All (tout répéter). Remarque: Il est possible de faire démarrer automatiquement la musique lorsque l'appareil est allumé. Si vous configurez une station de radio en-ligne ou si vous utilisez un dispositif USB avec de la musique, vous pouvez sélectionner la fonction que vous souhaitez lancer en premier. 152 FRANÇAIS Réglage Vidéo Réglez l'affichage souhaité sur l'écran TV. Paramètres de Clarté, Contraste, Teinte & Saturation. Réglage de l'Affichage des Photos Sélectionnez les propriétés des photos souhaitées. Économiseur d’Écran Réglage de l'Affichage des Photos Durée de la Présentation de Diapositives Musique de Fond (BGM). Échelle Version. : On/Off. : Liste/Vignettes. : 2 à 30 secondes, 1 minute et 2 minutes. : Off, Repeat one, Repeat all [Désactivé, Répéter une piste, Répéter toutes les pistes] : Original Size, Fit to Screen [Taille originale, Adaptée à l'écran]. Sélectionner et voir des informations sur le produit. Réinitialiser aux paramètres par Défaut. Mise à jour du Microprogramme (par USB). Version (Version du microprogramme). Information sur l'adresse MAC pour LAN*WLAN. 153 Déclaration de Conformité CE Le fabricant Adresse 2L International BV Databankweg 7 3821 AL Amersfoort, the Netherlands (Pays-Bas) Atteste, par la présente, que le produit Type 54MBPS WIRELESS MEDIA PLAYER/DMA Produit C08-126 Observe les directives suivantes: 1999/5/EEC Directive R&TTE relative aux: Équipements Terminaux de Télécommunications et Équipements Radioélectriques (Telecommunications Terminal Equipment and Satellite Earth Station Equipment) 2004/108/EEC Directive EMC relative à la: Compatibilité Électromagnétique (Electromagnetic Compatibility) 73/23/EEC Directive Basse Tension (Low Voltage Directive) relative aux: Équipements Électriques conçus pour un usage dans certaines limites de tension Les normes suivantes ont été considérées pour en déterminer la bonne conformité: ETSI 300 328-2/2000, EN 301 489-17-2000, EN 301 489-1-2000, EN55022/9.98 Catégorie B, EN 61000-3-2/3/4/1995, EN 50082-1/1994, EN 60950/1995 Ce produit est uniquement destiné à un usage en intérieur. L’objet de ce produit est d’envoyer et de recevoir des données au travers des ondes. Il s’agit d’un produit de catégorie 2 et la puissance de sortie transmise est inférieure à 100mW. L’apposition du marquage CE garantit la conformité de ce produit aux normes et à la réglementation susmentionnées. Ce produit convient à l’ensemble des pays de l’UE. Pour la France, la puissance de sortie est limitée dans le cas d’un usage en extérieur et dans la bande de fréquence 2454 à 2483,5 MHz. Pour l’Italie, en fonction de son usage, une autorisation générale peut s’avérer nécessaire. Lieu et date de publication: Amersfoort, le 25 octobre 2007 Herman Looijen, Responsable Marketing Produit 154 ITALIANO C54WMP di Conceptronic Guida d’installazione rapida Vi ringraziamo per aver acquistato questo Wireless Media Player di Conceptronic. La presente Guida per l’installazione dell’hardware spiega passo a passo come installare il Wireless Media Player di Conceptronic. In caso di problemi, si consiglia di consultare il sito di supporto (collegandosi con la pagina www.conceptronic.net e facendo clic sull’opzione “Support”, in cui è contenuto il banco dati delle FAQ (Domande più frequenti). In caso di quesiti di altro tipo in merito al prodotto acquistato, per i quali il sito web non è in grado di offrire risposta, potete mettervi in contatto con noi via e-mail all’indirizzo: [email protected] Per maggiori informazioni sui prodotti Conceptronic potete consultare la pagina web di Conceptronic: www.conceptronic.net 1. Contenuto della confezione La confezione contenente il Wireless Media Player di Conceptronic è composta dai seguenti elementi: • • • • • • • • Wireless Media Player C54WMP di Conceptronic Standard per C54WMP Alimentatore di corrente, 5v DC, 2A Telecomando Due batterie tipo AAA per telecomando Cavo RCA A/V (1 cavo composito RCA, 2 cavi audio RCA) Adattatore Scart (3 RCA a Scart) Convertitore componente (3 RCA femmina per cavo componente) 155 ITALIANO 2. Caratteristiche • • • • • • • Riproduzione video con funzioni MPEG 1/2/4. Rete senza fili 802.11b/g. Supporto via cavo mediante Ethernet (10/100 Base-T). Supporto UPnP A/V Client (certificato UPnP 1.0). Compatibile con DLNA. Menu di facile uso per impostazione e configurazione. Connettore USB Host per aggiornamenti del firmware e per espansione delle funzionalità del dispositivo con un disco rigido o con un dongle USB Per riprodurre file media, il C54WMP deve essere collegato a una rete con un media server. Il C54WMP di Conceptronic supporta i seguenti formati di file media: • • • • • • • File audio e video compressi MPEG 1, 2, 4. File di sottotitoli SRT, SSA e SUB. File di immagini compressi JPEG e GIF. File di immagini BMP e TIFF. MP3 fino a un massimo di 320 Kbps o VBR. WMA fino a un massimo di 192 Kbps o VBR. File audio WAV. Ê possibile riprodurre anche altri tipi di file se si fa uso di un Media Server con funzione di “transcodifica”. Con l’aiuto del PC il file potrà essere decodificato in tempo reale, riversandolo in un formato utilizzabile dal C54WMP di Conceptronic. 156 ITALIANO 3. Spiegazione del telecomando 1 2 3 4 7 8 5 6 10 13 9 11 12 14 15 16 18 17 19 20 22 21 23 24 25 26 27 29 28 30 157 ITALIANO N. 1 2 3 4 TASTI ACCESO/SPENTO MUTE HOME REW 5 PLAY / PAUSE 6 7 FF STOP 8 PREV 9 NEXT 10 REPEAT 11 12 13 OUTPUT ZOOM SLOW 14 BACK 15 DISPLAY 16 17 18 19 MUSIC VIDEO PICTURES iRADIO 20 OK 21 TASTI DI DIREZIONE Su, Giù, Sinistra, Destra 22 23 24 25 26 27 SUB CH + LANG CH VOL+ VOL BGM NUMERI 1-9 A-B 28 0 29 30 SETUP SORT :/ DESCRIZIONE DELLA FUNZIONE Attiva o esce dalla modalità Standby del Wireless Media Player. Silenzia l’audio. Torna al Menu principale. Riavvolgimento veloce del media file durante la riproduzione. 1. Riproduce o mette in pausa il file musicale 2. Avvia la presentazione fotografica Avanzamento veloce del media file durante la riproduzione. Interrompe la riproduzione in corso. 1. Ritorna alla pagina precedente quando vengono sfogliati i media file. 2. Ritorna al file precedente durante la riproduzione. 1. Va alla pagina successiva quando vengono sfogliati i media file. 2. Va al file successivo durante la riproduzione. 1. Seleziona la modalità di ripetizione durante la riproduzione di video o di musica. 2. Ripete la musica di fondo durante la riproduzione delle immagini. Cambia di uscita video, in base alla sequenza S-VideoÆYPbPrÆYUV. Zoom video o foto durante la riproduzione. Avanzamento lento del media durante la riproduzione. 1. Ritorna alla cartella precedente o configura la pagina. 2. Salva / Cancella i parametri di configurazione wireless nella pagina di impostazione wireless. 1. Mostra il nome del file e il tipo di media durante la riproduzione video. 2. Mostra il nome del file e la risoluzione durante la riproduzione delle immagini. Attiva la modalità MUSICA. Attiva la modalità VIDEO. Attiva la modalità FOTO. Attiva la modalità Radio Internet. 1. Attiva l’elemento selezionato. 2. Entra in modalità “rotazione” durante la riproduzione delle immagini. 1. Premendo il tasto “SINISTRO” viene interrotta la modalità in uso e si torna allo strato precedente; Premendo il tasto “DESTRO” si accede a una cartella o a un server selezionati. 2. Modalità video: premere “SU” o “GIÙ” per scegliere un altro file 3. Modalità Foto: sposta la foto alla modalità “zoom” o ruota la foto in modalità “rotazione” 4. Modalità musica: premere “SU” per tornare al brano musicale precedente o “GIÙ” per passare al brano successivo. Seleziona i sottotitoli durante la riproduzione video / Canale successivo. Seleziona una lingua durante la riproduzione video / Canale precedente. Alza il volume. Abbassa il volume. Aggiunge / Elimina un file musicale come musica di fondo. Tasti per selezione numerica dall’1 al 9. Imposta / Cancella la modalità di ripetizione A-B. Scorciatoia per accesso alla URL Tasto selezione numerica 0 iRADIO. Apre il Menu di configurazione del Wireless Media Player. Ordina l’elenco dei file. 158 ITALIANO 4. Come collegare il C54WMP a una rete o a una TV Per poter usare il C54WMP di Conceptronic è necessario disporre di quanto segue: 1. 2. 3. Una rete senza fili (802.11b/g/n) o cablata (10/100/1000). Uno o più computer con installato Windows 2000, Windows XP o Windows Vista. Una TV con uscita Componente (Y, Pb, Pr), S-Video, Scart o Composita. Esempio di connessione con due computer e un media server NAS È consigliabile disporre di una connessione a Internet a banda larga se si desiderano usare i servizi streaming come ascoltare una stazione radio trasmessa attraverso Internet. 159 ITALIANO Nota: il C54WMP di Conceptronic utilizza un UPnP A/V client per la riproduzione audio e video. È necessario disporre di un hardware con la funzionalità di UPnP A/V Server, una terza applicazione con UPnP A/V Server o installare il software Media Server Conceptronic in dotazione. (Vedi capitolo 7). 4.1 Installazione dell’hardware Nota: se si fa uso di una rete cablata LAN sarà necessario utilizzare un cavo Ethernet per collegare il C54WMP di Conceptronic al router o al switch. Determinare qual è il tipo di cavo che si può usare per la TV: • Componente (Y, Pb, Pr). • S-Video. • Composito (solo video). • Scart (video e audio). Per l’audio si può usare l’uscita analoga RCA (prese jack RCA rosse e bianche) o l’uscita digitale coassiale (presa jack RCA arancione). Il telecomando utilizza due batterie di tipo AAA (comprese nella confezione). È necessario usare il telecomando per accendere e spegnere il dispositivo. Accendere la TV e selezionare il canale video corretto. Il C54WMP di Conceptronic mostrerà la videata di inizio di Conceptronic non appena verrà acceso il dispositivo. 5. Configurazione la prima volta che viene usato Nota: in questo manuale verranno usati alcuni indirizzi IP per spiegare determinate caratteristiche e funzionalità del C54WMP di Conceptronic. Tali parametri di configurazione potrebbero essere diversi nell’ambiente di rete in cui si opera. In questo manuale vengono usati i seguenti parametri Indirizzo IP C54WMP : 192.168.1.50 Maschera di rete : 255.255.255.0 : 192.168.1.1 (router come gateway) Indirizzo gateway DNS (Dynamic Name Server) : 192.168.1.1 160 ITALIANO Quando verrà acceso il C54WMP (Media Player Digitale) di Conceptronic sarà necessario configurarlo. Il messaggio che apparirà sullo schermo televisivo chiederà in quale lingua si desidera usare il dispositivo. Dopo aver selezionato la lingua, l’Adattatore del C54WMP inizializzerà la rete. Il programma per la configurazione assistita della rete si aprirà automaticamente. È anche possibile accedere al menu attraverso il Menu di configurazione (selezionando ‘Network Wizard’). Selezionare il tipo di connessione preferita: ‘Wired’ (Cablata) o ‘Wireless’ (Senza fili). Nota: quando si usano streaming con una grande larghezza di banda, si consiglia di usare una connessione cablata, poiché con la WLAN la qualità del segnale potrebbe influire sul trasferimento dei dati e sul rendimento. Usare i tasti di direzione Su e Giù (21) per selezionare una connessione di rete cablata (Wired) o senza fili (Wireless). 161 ITALIANO 5.1 Configurazione per rete cablata Selezionare l’opzione ‘Wired’ (Cablata) e premere ‘OK’ per applicare i parametri di configurazione. Premere ‘OK’ per selezionare ‘Done’ (Fatto). La configurazione cablata è già pronta. Procedere al ‘Capitolo 6’ per sapere come usare il Media Player. Nota: per default il C54WMP cercherà un server DHCP. Se il C54WMP è configurato correttamente, apparirà un indirizzo IP nella parte inferiore dello schermo. Se lo schermo mostra: IP: 0.0.0.0 ciò significa che il dispositivo non avrà rilevato nessun indirizzo IP e sarà necessario configurare manualmente i parametri della rete IP del C54WMP (Capitolo 5.4). 5.2 Configurazione per rete senza fili Il C54WMP supporta LAN wireless (802.11b/g): • • • • • • ESSID: rilevamento automatico o introdotto manualmente quando l’ESSID Broadcast viene disattivato. Modalità Infrastructure o Ad-hoc. Autentica: Auto, Codice condiviso, Sistema aperto. Formato codice: Off, WEP64, WEP64Hex, WEP128, WEP128Hex, WPA-PSK, WPA2 AES. Valore codice: configurabile mediante il Formato codice. Canale: rilevamento automatico. Selezionare ‘Wireless’ (Senza fili) e premere ‘OK’ per applicare i parametri di configurazione. Il C54WMP cercherà gli Access Point disponibili. Quando l’Access Point sta inviando il proprio SSID, lo si può selezionare. L’indicatore della potenza del segnale può essere di tre colori: rosso, giallo o verde. Se è verde ciò vuol dire che si sta utilizzando la miglior connessione possibile fra il C54WMP e l’Access Point. Il giallo significa che è un segnale accettabile per un uso normale e quando la potenza del segnale dell’Access Point è sul rosso, è consigliabile cambiare la posizione del C54WMP o dell’Access Point. Nota: è sconsigliabile riprodurre film con streaming con una grande larghezza di banda quando l’indicatore è sul giallo o sul rosso. Selezionare l’Access Point e premere OK sul telecomando. Selezionare ‘Next’ (Avanti) e premere ‘OK’. Nel caso in cui siano stati introdotti alcuni parametri di codifica nell’Access Point, sarà necessario introdurre le stesse informazioni nel C54WMP esattamente come nel caso dell’Access Point. 162 ITALIANO L’impianto senza fili del C54WMP rileverà automaticamente il tipo di configurazione necessaria per collegarsi a un Access Point. Nel caso in cui gli Access Point siano protetti mediante codifica WPA, il dispositivo lo rileverà e sarà solo necessario introdurre il codice, detto PSK (Private Shared Key). Se invece l’Access Point non è protetto mediante codifica WEP o WPA, si potrà selezionare ‘Next’ (Avanti) per portare a termine la configurazione. La configurazione senza fili è stata completata. Procedere al ‘Capitolo 6’ per sapere come usare il Media Player. I parametri di configurazione wireless possono essere modificati manualmente entrando nel Menu di configurazione senza fili. Nota: per default il C54WMP cercherà un server DHCP. Se il C54WMP è configurato correttamente, apparirà un indirizzo IP nella parte inferiore dello schermo. Se lo schermo mostra: IP: 0.0.0.0 ciò significa che il dispositivo non avrà rilevato nessun indirizzo IP e sarà necessario configurare manualmente i parametri della rete IP del C54WMP (Capitolo 5.4). 163 ITALIANO 5.3 Usare Windows Connect Now 2.0 con il C54WMP di Conceptronic Grazie alla tecnologia di Microsoft® Windows® Connect Now (WCN) è facilissimo aggregare dispositivi come il C54WMP di Conceptronic alla rete senza fili esistente. Creare una rete senza fili protetta e introdurre per i dispositivi senza fili i parametri di configurazione wireless necessari potrebbe rivelarsi un’operazione complicata. WCN è un utile aiuto per realizzare tale impostazione grazie a un sistema facile e sicuro di configurazione dei dispositivi senza fili in rete. Windows Connect Now è compreso nel Service Pack 2 (SP2) di XP e nelle versioni successive di Windows. WCN si può usare con PC che utilizzano Windows XP SP2 o versioni successive, per trasferire i parametri di configurazione senza fili a un’unità flash USB portatile (non inclusa in questo pack). Si consiglia di disporre di un computer con una connessione senza fili funzionante per configurare WCN mediante un’unità flash USB. Windows XP Qui di seguito si mostra come configurare il C54WMP attraverso WCN nel caso di Microsoft Windows XP Fare clic su ‘Start’, ‘My Network Places’ (Risorse di rete). Verranno mostrate le risorse di rete. Selezionare l’opzione ‘Set up a wireless network…’ (Configurazione di rete senza fili) che si trova sulla sinistra della finestra. Apparirà l’assistente alla configurazione di reti senza fili. Fare clic su ‘Next’ (Avanti) per continuare. Introdurre il nome della rete senza fili (SSID) e selezionare l’opzione ‘Manually assign a network key’ (Introdurre manualmente una chiave di rete). Nota: se la rete è protetta mediante codifica WPA, selezionare la casella posta nella parte in basso della finestra. Se invece è protetta mediante codifica WEP, non selezionare tale casella. Fare clic su ‘Next’ (Avanti) per continuare. Introdurre la chiave di codifica della rete in tutti e due i campi che appaiono sullo schermo. Per poter rendere più facile l’introduzione della chiave, è possibile deselezionare l’opzione ‘Hide characters…’ (Nascondi caratteri) per poter così visualizzare ciò che si sta scrivendo. Fare clic su ‘Next’ (Avanti) per continuare. Selezionare l’opzione ‘Use a USB flash drive’ (Usa un’unità flash USB). Fare clic su ‘Next’ (Avanti) per continuare. Collegare l’unità flash USB al computer e selezionare la lettera dell’unità corrispondente. Fare clic su ‘Next’ (Avanti) per continuare. Una volta memorizzata la configurazione, è possibile estrarre l’unità flash USB. Nota: non chiudere l’assistente per l’installazione nel computer! Accendere il C54WMP e aprire ‘Setup’, (Configurazione) ‘Wireless Setup’ (Configurazione senza fili). 164 ITALIANO Introdurre l’unità flash USB nella porta USB del C54WMP. Il C54WMP rileverà automaticamente i file di configurazione WCN disponibili e chiederà all’utente se desidera applicare tali parametri. Accettare. I parametri verranno così memorizzati nella configurazione. Estrarre l’unità flash USB. Ora i parametri corretti sono quelli utilizzati. Si consiglia di riavviare il dispositivo per assicurarsi che siano utilizzati i parametri wireless appropriati. Inserire di nuovo l’unità flash USB nel computer e fare clic su ‘Next’ (Avanti). Apparirà un elenco di dispositivi configurati. È possibile stampare su carta i parametri di configurazione della rete premendo il pulsante ‘Print Network Settings’ (Stampa parametri di rete). Fare clic su ‘Finish’ (Fine) per chiudere l’assistente alla configurazione della rete senza fili. Nota: per default, i parametri di configurazione di WCN verranno eliminati dall’unità flash USB facendo clic su ‘Finish’ (Fine). Se si desidera configurare più di un dispositivo o di un computer nella rete, è possibile deselezionare questa casella a fare sì che i parametri vengano conservati nell’unità flash USB, sebbene sia consigliabile eliminarli. Windows Vista Con Windows Vista di Microsoft è possibile configurare il C54WMP mediante WCN nel modo seguente: Fare clic su ‘Start’, ‘Network’ (Rete). Fare clic sul pulsante ‘Add a Wireless Device’ (Aggiungi un dispositivo senza fili) che si trova nella parte superiore della finestra. Selezionare l’opzione ‘I want to add a wireless device or computer that is not on the list, using a USB flash drive’ (Desidero aggiungere un dispositivo senza fili che non è nell’elenco, usando un’unità flash USB). Selezionare l’opzione ‘Add the device or computer using a USB flash drive’ (Aggiungi il dispositivo o il computer usando un’unità flash USB). Introdurre il nome della rete senza fili nel campo ‘Network Name (SSID)’ o selezionare una rete senza fili disponibile dall’elenco (se il computer è collegato senza fili alla rete). Fare clic su ‘Next’ (Avanti) per continuare. Introdurre il codice di codifica della rete senza fili. Nota: Windows Vista usa WPA per default. Se è necessario usare la codifica WEP, fare clic su ‘Show advanced network security options’ (Mostra opzioni di sicurezza di rete avanzate). Fare clic su ‘Next’ (Avanti) per continuare. Assicurarsi che l’unità flash USB sia stata inserita e memorizzare la configurazione nella lettera dell’unità appropriata. Una volta salvata la configurazione, fare clic su ‘Close’ (Chiudi) ed estrarre l’unità flash USB dal computer. Accendere il C54WMP e aprire ‘Setup’ (Configurazione), ‘Wireless Setup’ (Configurazione senza fili). Introdurre l’unità flash USB nella porta USB del C54WMP. Il C54WMP rileverà automaticamente i file di configurazione WCN disponibili e chiederà all’utente se desidera applicare tali parametri. Accettare. I parametri verranno così memorizzati nella configurazione. Estrarre l’unità flash USB. 165 ITALIANO Ora i parametri corretti sono quelli utilizzati. Si consiglia di riavviare il dispositivo per assicurarsi che siano utilizzati i parametri wireless appropriati. 5.4 Configurazione manuale dell’indirizzo IP per il C54WMP Quando non esiste nessun server DHCP disponibile nella rete in uso, è necessario realizzare manualmente la configurazione dell’indirizzo IP del C54WMP. Premere Setup (29) sul telecomando o selezionare l’icona di configurazione nel menu principale che appare sullo schermo. Selezionare la funzione Network setup (Configurazione di rete) e premere OK per accedere alla configurazione IP. Selezionare il tipo di rete desiderato: “Wired” (Cablato) o “Wireless” (Senza fili). Selezionare la funzione DHCP, premere OK per introdurre i parametri e usare i tasti di direzione sinistra e destra (21) per modificarli. Premendo di nuovo OK questa opzione resta come sta. È necessario disattivare DHCP per introdurre manualmente l’indirizzo IP. Una volta disattivata tale funzione, appariranno i parametri standard di default. Indirizzo IP C54WMP : 192.168.1.50 Maschera di rete : 255.255.255.0 : 192.168.1.1 (router come gateway) Indirizzo gateway DNS (Dynamic Name Server) : 192.168.1.1 È possibile selezionare i parametri di configurazione desiderati e modificarli in base a quelli della rete in uso. 166 ITALIANO Quando vengono modificati l’indirizzo IP, la maschera di sottorete, il gateway o l’indirizzo DNS è possibile usare i tasti numerici del telecomando (26). Per passare al campo successivo è possibile usare il tasto di direzione (21) (sinistra / destra). Non è necessario introdurre i puntini: “.”. Per realizzare modifiche premere ‘OK’, usare i tasti di direzione sinistra e destra (21) per modificare i parametri e premere di nuovo ‘OK’ per accedere al campo successivo. Per salvare la configurazione nella memoria del C54WMP si dovrà premere il tasto di direzione sinistra (21) e verrà chiesto se si desidera salvare i cambiamenti o eliminarli. Selezionare ‘Save’ (Salva). 6. Come usare il Wireless Media Player Una volta portata a termine la configurazione del Wireless Media Player sarà possibile accedere al menu di default con quattro funzioni: Nota: Music Photo Video Setup Selezionare Music se si desidera riprodurre musica mediante il Media Player. Selezionare Photo se si desidera visualizzare immagini mediante il Media Player. Selezionare Video se si desidera vedere film o video. Selezionare Setup se si desidera configurare o modificare la configurazione del C54WMP. prima di poter riprodurre musica, vedere film o visualizzare immagini, assicurarsi che il Media Server sia operativo. Se quest’ultimo non funziona, passare al Capitolo 7 per consultare l’installazione del Media Server di Conceptronic. 6.1 Selezione rapida Con i pulsanti blu, verde, giallo e rosso del telecomando è facile passare velocemente da un’opzione di riproduzione del C54WMP all’altra. 167 ITALIANO Premere il pulsante blu per l’opzione video, quello verde per la musica, quello giallo per le immagini e quello rosso per la radio via Internet. Nota: utilizzando questa funzione, si tornerà all’ultima videata utilizzata. Se si desidera tornare al Menu principale, premere il pulsante Home (3). 6.2 Video Il C54WMP di Conceptronic supporta i formati video MPEG1, MPEG2 e MPEG4, oltre a quelli VOB, AVI e altri ancora. Grazie la software del Media Server è possibile usare l’opzione di ‘transcodifica’. Ciò vuol dire che il computer decodificherà il formato video riversandolo in un formato che può essere usato con il C54WMP di Conceptronic. La prima volta che viene usato: Quando si seleziona ‘Video’ sul menu di avvio del telecomando (pulsante blu) apparirà una videata con un’anteprima dei Media Server disponibili (UPnP/AV) e/o del dispositivo USB connesso. Per default il dispositivo memorizza l’ultima cartella visitata, ogni volta che verrà premuto Home per tornare al menu principale, quando verrà premuta di nuovo l’opzione Video, Musica o Immagini. Si deve usare il pulsante di indietro (tasto freccia sinistra (21)) per tornare alla videata precedente, per poter selezionare un’altra cartella o un’altra sorgente UPnP A/V. Se si seleziona un dispositivo del Media Server verranno visualizzate tutte le cartelle disponibili. Le cartelle mostrate vengono fornite dal Media Server. In alcune occasioni potrebbe darsi il caso che non tutte le cartelle presentate dispongano di funzioni. Ciò dipenderà dal Media Server utilizzato. L’opzione video e le cartelle selezionate fungono da filtro. È unicamente possibile selezionare e visualizzare i media che appartengono all’opzione che appare nell’angolo in alto a destra dello schermo televisivo. 168 ITALIANO Usare i tasti di direzione (21) per sfogliare i film e premere il pulsante Play (5) per iniziarne la riproduzione. Dopo aver selezionato il film, il C54WMP di Conceptronic lo caricherà. Si tratta di un processo che potrebbe durare alcuni secondi, ed è indicato dal messaggio di caricamento in corso. Nota: il tempo di caricamento dipenderà dalla qualità della connessione e dal media server. Nota: assicurarsi di aver aggiornato il contenuto del Media Server quando viene selezionata l’opzione Media Server nel menu. Il contenuto verrà indicizzato e se non verrà aggiornato, non sarà possibile mostrare i nuovi video. Se un file video o un codec non sono supportati, apparirà il seguente messaggio sullo schermo: Funzioni di riproduzione video Ecco qui di seguito altre funzioni che si possono usare durante la riproduzione di file video: 1. 2. 3. 4. 5. 6. Nota: 7. 8. Mute: premere Mute (2) per attivare o disattivare l’audio della riproduzione. Volume Control: premere + / - (24) per alzare o abbassare il volume. Repeat: Premere il pulsante di ripetizione (10) una sola volta per ripetere il file video in corso (repeat one). Premere il pulsante di ripetizione (10) due volte per ripetere tutti i file video nella cartella aperta (repeat all). Premere il pulsante di ripetizione (10) tre volte per disattivare la modalità di ripetizione (repeat off). Pausa: durante la riproduzione premere il pulsante Play (5) per mettere in pausa il video. Premere di nuovo Play (5) per riavviare la riproduzione del file video. Usare Stop (5) per interrompere la riproduzione. Usare Rew (4) per riavvolgimento, FF per avanzamento veloce (6). quando si usano le opzioni “Rew” or “FF” la riproduzione potrebbe restare su un fermo immagine. Il C54WMP riavvolgerà o avanzerà il contenuto comunque. Premere “Play” (5) per riavviare la riproduzione. Usare Prev (7) per selezionare il file video precedente. Usare Next (8) per selezionare il file video successivo. 169 ITALIANO Se una cartella contiene molti file video, è possibile sfogliarli di pagina in pagina usando i pulsanti Prev (8) e Next (9). 9. Usare i tasti Su e Giù (21) per visualizzare i file video come immagini da schermo. Premere OK (20) per riprodurre il file video selezionato, o premere “Back” (14) per chiudere l’elenco dei file. 10. 11. 12. Premere il tasto Sinistra (21) per tornare indietro al menu di selezione dei file. Zoom: usare lo zoom (12) per ingrandire o ridurre lo schermo. Subtitle e Language: premere i pulsanti di Subtitle / Language (22 e 23) per cambiare da una lingua all’altra, fra quelle disponibili nei file VOB, e per passare da un sottotitolo all’altro, fra i file MPEG4 disponibili. Modalità A-B: premere il pulsante A-B (27) per avviare la sezione da ripetere. Premere di nuovo lo stesso pulsante per finire la sezione da ripetere. Per cancellare la modalità di ripetizione AB, premere di nuovo il pulsante A-B. 13. 170 ITALIANO 6.3 Musica La prima volta che viene usato: Quando si seleziona ‘Musica’ sul menu di avvio del telecomando (pulsante verde) apparirà una videata con un’anteprima dei Media Server disponibili (UPnP/AV) e/o del dispositivo USB connesso. Nel menu principale appaiono diverse opzioni disponibili: 1. 2. 3. 4. Background Music (BGM). Live 365. My Radio. Available Media Servers. Per default il dispositivo memorizza l’ultima cartella visitata, ogni volta che verrà premuto Home per tornare al menu principale, quando verrà premuta di nuovo l’opzione Video, Musica o Immagini. Si deve usare il pulsante di indietro (tasto freccia sinistra (21)) per tornare alla videata precedente, per poter selezionare un’altra cartella o un’altra sorgente UPnP AV. Per riprodurre musica, prima di tutto si deve selezionare il dispositivo media (media server, unità flash USB) con i file musicali (mp3/ wav / wma). Se si seleziona un dispositivo del Media Server verranno visualizzate tutte le cartelle disponibili. Le cartelle mostrate vengono fornite dal Media Server. In alcune occasioni potrebbe darsi il caso che non tutte le cartelle presentate dispongano di funzioni. Ciò dipenderà dal Media Server utilizzato. L’opzione musica e le cartelle selezionate fungono da filtro. È unicamente possibile selezionare e visualizzare i media che appartengono all’opzione che appare nell’angolo in alto a destra dello schermo televisivo. 171 ITALIANO La cartella offerta per selezionare e riprodurre musica dipenderà dal tipo, dalla marca o dalla versione del software del Media Server in uso. Alcuni Media Server offrono: Album, Artista, Genere, Seleziona tutte le tracce. Selezionare la funzione desiderata. Nota: assicurarsi di aver aggiornato il contenuto del Media Server quando viene selezionata l’opzione Media Server nel menu. Il contenuto verrà indicizzato e se non verrà aggiornato, non sarà possibile mostrare i nuovi brani musicali. Se un file musicale non viene supportato, apparirà il seguente messaggio sullo schermo: Per riprodurre o per mettere in pausa il brano musicale, premere il pulsante Play/Pause (5). Per interrompere il brano musicale premere il pulsante Stop (7). Per selezionare una canzone da un elenco premere i pulsanti Su e Giù (21). Funzioni di riproduzione audio 1. 2. 3. 4. 5. 6. 7. Mute: premere Mute (2) per attivare o disattivare l’audio della riproduzione. Volume Control: premere + / - (24) per alzare o abbassare il volume. Repeat: Premere il pulsante di ripetizione (10) una sola volta per ripetere il file audio in corso (repeat one). Premere il pulsante di ripetizione (10) due volte per ripetere tutti i file audio nella cartella aperta (repeat all). Premere il pulsante di ripetizione (10) tre volte per disattivare la modalità di ripetizione (repeat off). Pausa: durante la riproduzione premere il pulsante Play (5) per mettere in pausa il brano musicale. Premere di nuovo Play (5) per riavviare la riproduzione del file audio. Usare Rew (4) per riavvolgimento, FF per avanzamento veloce (6). Usare Prev (7) per selezionare il file audio precedente. Usare Next (8) per selezionare il file audio successivo Se esiste un’anteprima della musica disponibile, è possibile premere il tasto BGM (25) del telecomando per visualizzare quanto segue: 172 ITALIANO 1. 2. 3. 4. 5. 6. Add Play/Next Play Shuffle Add All Remove All Stop serve per aggiungere un brano musicale alla funzione BGM. serve per riprodurre la canzone successiva dell’elenco BGM. serve per riprodurre in modo aleatorio i file dell’elenco BGM. serve per aggiungere tutti i brani contenuti nella cartella all’elenco BGM. serve per eliminare tutti i brani musicali dall’elenco BGM. serve per interrompere la riproduzione dei brani dell’elenco BGM. L’opzione di musica di fondo è disponibile solo se viene aggiunta musica in questa selezione specifica. Per fare ciò basta premere il tasto BGM (25). La musica di fondo si può usare per due motivi: Inserire musica nell’elenco BGM e riprodurla, o la musica di fondo può iniziare automaticamente ogni volta che si accenderà il C54WMP. Questa opzione è operativa esclusivamente quando viene selezionata musica di fondo da un’unità USB. Live365 Il C54WMP di Conceptronic è dotato di un servizio di musica radio via Internet Live365.com. Per ascoltare le stazioni radio via Internet è necessario disporre di una connessione di rete (LAN/WLAN) per potersi collegare a Internet. Nella videata principale di Musica si può selezionare l’opzione ‘Live365’. È possibile selezionare un genere dall’elenco o scegliere una qualsiasi delle altre opzioni disponibili. Si può selezionare una stazione radio dall’elenco e premere il pulsante OK (20) del telecomando per ascoltare tale stazione. Se viene prescelta una stazione con il simbolo del lucchetto, sarà possibile ascoltarla solo introducendo il nome utente e la password di live365.com. Per introdurre la password e il nome utente, si deve accedere alla funzione di tastiera su schermo. Nota: è possibile creare gratuitamente un account live365 collegandosi con www.live365.com. 173 ITALIANO Si può selezionare la casella per memorizzare le informazioni personali. In questo modo non sarà necessario introdurre nome utente e password ogni volta che verrà usata questa funzione. È possibile aggiungere fino a un massimo di 99 stazioni radio preferite a ‘My Radio’ (La mia radio) premendo il pulsante BGM (25) e selezionando ‘Add’ (Aggiungi). Dal Menu principale della musica si può accedere alla funzione ‘My Radio’ per poter selezionare velocemente le stazioni radio preferite. My Radio Quando viene selezionata l’opzione ‘My Radio’ (La mia radio) nel menu o con il pulsante iRadio (19) del telecomando appariranno tutte le stazioni radio selezionate. È possibile aggiungere la stazione radio preferita. Per aggiungere la stazione radio preferita è necessario introdurre la URL verso la quale sta trasmettendo la radio. L’unica cosa che si deve fare è assicurarsi di introdurre la URL corretta della stazione radio. Si consiglia di utilizzare la directory SHOUTCast (http://www.shoutcast.com). Non esiste nessun accesso diretto alla directory SHOUTcast disponibile nel menu iRadio. È possibile esclusivamente un accesso diretto a Live365.com. 174 ITALIANO Nota: il C54WMP di Conceptronic dispone di una tastiera a video incorporata che si può usare per introdurre le URL e i nomi delle stazioni radio. Sono supportati solo i caratteri principali dell’alfabeto latino. I caratteri speciali dell’alfabeto latino come áäñß non sono supportati. 175 ITALIANO 6.4 Immagini La prima volta che viene usato: Quando si seleziona ‘Pictures’ sul menu di avvio del telecomando (pulsante giallo) apparirà una videata con un’anteprima dei Media Server disponibili (UPnP/AV) e/o del dispositivo USB connesso. Per default il dispositivo memorizza l’ultima cartella visitata, ogni volta che verrà premuto Home per tornare al menu principale, quando verrà premuta di nuovo l’opzione Video, Musica o Immagini. Si deve usare il pulsante di indietro (tasto freccia sinistra (21)) per tornare alla videata precedente, per poter selezionare un’altra cartella o un’altra sorgente UPnP AV. Se si seleziona un dispositivo del Media Server verranno visualizzate tutte le cartelle disponibili. Le cartelle mostrate vengono fornite dal Media Server. In alcune occasioni potrebbe darsi il caso che non tutte le cartelle presentate dispongano di funzioni. Ciò dipenderà dal Media Server utilizzato. L’opzione immagini e le cartelle selezionate fungono da filtro. È unicamente possibile selezionare e visualizzare i media che appartengono all’opzione che appare nell’angolo in alto a destra dello schermo televisivo. Nota: assicurarsi di aver aggiornato il contenuto del Media Server quando viene selezionata l’opzione Media Server nel menu. Il contenuto verrà indicizzato e se non verrà aggiornato, non sarà possibile mostrare le nuove immagini. 176 ITALIANO Visualizzazione delle immagini Per visualizzare le immagini: selezionare un Media Server, accertarsi di selezionare il sottomenu delle immagini, dopo di che scegliere un’immagine. Per mostrare una sola immagine basta premere il pulsante di OK (20). Per mostrare tutte le immagini contenute in una cartella premere il pulsante Play (5). Se un file immagine non è supportato, apparirà il seguente messaggio sullo schermo: Per visualizzare le immagini in un ordine diverso, usare il pulsante Sort (30). Musica e immagini Durante la visualizzazione delle immagini in modalità presentazione, è possibile ascoltare musica di fondo. Esistono due maniere di riprodurre musica mentre vengono visualizzate le immagini: 7. 1. Selezionare la funzione Music dal menu principale, usando il pulsante Home (3) o selezionando il pulsante Music. Poi selezionare la cartella corretta e la canzone che si desidera riprodurre durante la presentazione o la stazione radio che si vuole ascoltare. Tornare al menu ‘Pictures’, selezionare la prima foto desiderata e premere Play (5). 2. Durante la presentazione, premere il pulsante BGM (25) e Play. Tutte le canzoni contenute nell’elenco verranno riprodotte durante la presentazione. Questa funzione è operativa esclusivamente se la musica viene aggiunta come musica BGM (musica di fondo) (come descritto nel Capitolo 5.3) Installazione del Media (UPnP A/V) Server di Conceptronic Prima di poter usare il C54WMP di Conceptronic è necessario installare un Server compatibile con UPnP A/V come i box per hard disk CH3SNAS o CH3WNAS di Conceptronic o qualsiasi altro dispositivo UPnP A/V. Il CD-ROM in dotazione contiene il software del Media Server di Conceptronic. Nel caso in cui non si disponga di un Server UPnP A/V, è possibile utilizzare il PC come streaming server di media installando il software del Media Server di Conceptronic. 177 ITALIANO A. Introdurre il CD-ROM nell’apposita unità. Dovrebbe aprirsi automaticamente il menu di avvio automatico. In caso contrario, aprire “Risorse del computer” e fare doppio clic sull’unità del CD-ROM per aprire così il menu di avvio automatico. B. Selezionare l’opzione “Install Media Server Software” (Installa software Media Server) nel menu di avvio automatico. Apparirà una serie di lingue. Selezionare quella desiderata dopo di che fare clic su “OK”. Apparirà l’assistente all’installazione. Fare clic su “Next” (Avanti) per continuare. Introdurre il nome dell’utente e dell’organizzazione o mantenere i parametri di default. Selezionare gli utenti che possono usare l’applicazione (permesso per qualsiasi utente o solo per l’utente attuale). Fare clic su “Next” (Avanti) per continuare. Modificare la directory di installazione con il pulsante “Change” (Cambia), o mantenere i parametri di default. Fare clic su “Next” (Avanti) per continuare. Fare clic su “Next” (Avanti) per iniziare l’installazione dell’applicazione. Una volta terminato il processo, il programma ne informerà l’utente. Se si desidera aprire il Media Server di Conceptronic subito dopo l’installazione, selezionare la casella “Launch Conceptronic DMS” (Aprir DMS di Conceptronic). Fare clic su “Finish” (Fine) per uscire dal programma di installazione. C. D. E. F. G. H. I. Il Media Software di Conceptronic è stato installato sul computer. È possibile accedervi mediante la cartella di Conceptronic nella sezione Programmi del menu Start. 178 ITALIANO 8. Configurazione del Media Server di Conceptronic Sezione relativa ai file media Dopo aver importato i file nella banca dati del Media Server apparirà un elenco dei file scannerizzati. Importazione media In questa sezione è possibile: • Aprire il Media Server. • Interrompere il Media Server. • Aggiungere una cartella. • Aggiornare una cartella o tutte le cartelle. • Eliminare una cartella condivisa o eliminare tutte le cartelle. Quando viene aggiunta una cartella contenente file media, il suo contenuto verrà automaticamente scannerizzato. 179 ITALIANO Sistema È possibile dare al Server il nome che si preferisce. Il nome del Server apparirà sullo schermo ogni volta che rileverà dei Media Server attraverso la configurazione del lettore. Il nome del Server modificato sarà attivo solo dopo aver chiuso e riaperto il Server. 180 ITALIANO Opzioni In questa sezione è possibile modificare le opzioni di configurazione del Software del Media Server: Enable Autorun Minimized at Startup Enable Transcoding Nota: con la ‘transcodifica’ è possibile riprodurre il contenuto di file non supportati direttamente dall’hardware del C54WMP. La qualità del materiale transcodificato potrebbe variare. File Types to scan Transcoding Setting 9. apre il software ogni volta che viene aperto Windows apre il software minimizzato all’avvio. attiva l’opzione di transcodifica. selezionare quali sono i tipi di file che deve scannerizzare il Media Server. selezionare la qualità di transcodifica. Media Server alternativi È possibile usare Media Server alternativi con il C54WMP di Conceptronic, sempre e quando essi siano compatibili con il sistema UPnP A/V 1.0. Microsoft Windows XP e Windows Vista Microsoft Windows XP e Windows Vista offrono un Media Server attraverso il Windows Media Player. Aprire il Media Player, selezionare l’opzione Strumenti, poi Biblioteca, poi Configure Sharing (Configura condivisione). È possibile attivare e personalizzare i parametri per il C54WMP di Conceptronic. Mediante l’opzione Monitor Folders (Vedi cartelle) è possibile aggiungere o eliminare il contenuto che si desidera condividere. 181 ITALIANO Nota: nel caso di Windows XP, sarà necessario almeno il Media Player 11 per questa opzione. Altri software alternativi Altri software alternativi si possono trovare in: TVersity : www.tversity.com TwonkyVision Media Server : www.twonkymedia.com ORB : www.orb.com Nota: se il C54WMP di Conceptronic non è in grado di rilevare un dispositivo di Media Server o un pacchetto di software, verificare le capacità e i parametri di configurazione del dispositivo/pacchetto di software in questione. Quando il dispositivo è compatibile e la configurazione è corretta, il C54WMP mostrerà il dispositivo come periferica selezionabile sulla TV. 182 ITALIANO 10. Configurazione del sistema Grazie al menu relativo alla configurazione del sistema è possibile modificare: Language (Lingua): OSD Language (On Screen Display) (Lingua OSD (Menu a video)). Lingue disponibili : inglese, spagnolo, tedesco, olandese, turco, portoghese, italiano ,francese. TV Mode Setup (Configurazione modalità TV) Selezionare l’impostazione video desiderata TV System (Sistema TV) : PAL o NTSC. TV Output (Uscita TV) : P-Scan: YPbPr, S-Video, Interlace YUV. Video Scale (Dimensioni video) : 4:3 PS, 4:3 LB, 16:9. Selezionare la configurazione appropriata per la TV in uso. Audio Setup (Configurazione audio) Selezionare la configurazione audio desiderata Audio Output (Uscita audio) : SPDIF/AC3, SPDIF/PCM, SPDIF/OFF. Down Sample : 48k, 96k. AutoPlay Option (Opzione riprod. Automatica): Off, My Radio First, BGM First. BG Music : Off, Repeat One, repeat All. Nota: è possibile avviare automaticamente la musica ogni volta che viene acceso il dispositivo. Se si configura una trasmissione radio o viene usato un dispositivo USB contenente musica, sarà possibile selezionare la funzione che si desidera venga aperta per prima. 183 ITALIANO Video Setup (Configurazione video) Regolare il sistema di visualizzazione dello schermo TV Luminosità, Contrasto Tonalità e saturazione Photo Display Setup (Configurazione visualizzazione foto) Selezionare le proprietà immagini desiderate. Screen saver (Salvaschermo) Photo display setup (Conf. visual. foto) Slide Show Time (Tempo presentazione) Background music (BGM) (Musica di fondo) Scale (Dimensioni) : acceso/spento. : List/Thumbnail. : da 2 a 30 secondi, 1 minuto e 2 minuti. : spenta, ripeti una, ripeti tutte. : dimensioni originali, adatta allo schermo. Version (Versione) Selezionare e visualizzare le informazioni relative al prodotto. Riporta sui parametri di default. Aggiornamento firmware (via USB). Versione (versione firmware). Informazioni indirizzo MAC per LAN * WLAN. 184 Dichiarazione di conformità CE Il fabbricante 2L International BV Indirizzo Databankweg 7 3821 AL Amersfoort, Paesi Bassi dichiara qui di seguito che il prodotto Tipo 54MBPS WIRELESS MEDIA PLAYER/DMA Prodotto C08-126 risulta in conformità a quanto previsto dalle seguenti direttive comunitarie: 1999/5/CE: Direttiva R&TTE Apparecchiature terminali di telecomunicazione e apparecchiature di stazioni terrestri di comunicazione via satellite 2004/108/CE Direttiva CEM: Compatibilità elettromagnetica 73/23/CE Direttiva Bassa Tensione: Materiale elettrico destinato ad essere adoperato entro taluni di tensione limiti Sono stati applicati i seguenti standard per assicurarne la conformità: ETSI 300 328-2/2000, EN 301 489-17-2000, EN 301 489-1-2000, EN55022/9.98 Class B, EN 61000-3-2/3/4/1995, EN 50082-1/1994, EN 60950/1995 Questo prodotto è ad esclusivo uso interno. Lo scopo di questo prodotto è di inviare e ricevere dati attraverso l’etere. Questo è un prodotto Classe 2 e la potenza in uscita trasmessa corrisponde a meno di 100 mW. Il simbolo CE conferma che questo prodotto è conforme ai suddetti standard e regolamentazioni. Questo prodotto è adatto a tutti i paesi UE. Per la Francia, l’alimentazione in uscita in ambiente esterno è limitata entro una banda di frequenza di 2454 - 2483,5 MHz. Per l’Italia, a seconda dell’uso, potrebbe essere necessaria un’autorizzazione generale. Luogo e data di rilascio: Amersfoort, 25 octobro 2007 Herman Looijen, Product Marketing Manager 185 PORTUGUÊS Conceptronic C54WMP Guia Rápido de Instalação Parabéns por ter adquirido o Reprodutor Multimédia sem Fios da Conceptronic. O guia de instalação do hardware incluído explica passo-a-passo como instalar o Reprodutor Multimédia sem Fios da Conceptronic. Se tiver algum problema, aconselhamos consultar o nosso site de assistência (vá a www.conceptronic.net e clique em ‘assistência’ Aqui pode encontrar a Base de Dados das Perguntas Mais Frequentes. Se tiver outras questões relativas ao nosso produto e não as conseguir encontrar no nosso webiste, pode-nos contactar através do e-mail: [email protected] Para mais informações sobre produtos de Conceptronic, por favor visite o Web Site da Conceptronic: www.conceptronic.net 1. Conteúdo da embalagem A embalagem do Reprodutor Multimédia sem Fios da Conceptronic contém os seguintes elementos: • • • • • • • • Reprodutor Multimédia sem Fios C54WMP da Conceptronic Norma do produto C54WMP Fonte de alimentação, 5 V DC, 2 A Controlo remoto 2 pilhas AAA para o controlo remoto Cabo A/V RCA (1 RCA composto, 2 RCA Áudio) Adaptador SCART (3 RCA para SCART) Cabo componente conversor (3 RCA fêmea para cabo componente) 186 PORTUGUÊS 2. Características • • • • • • • Reprodução de vídeo MPEG 1/2/4. Rede sem fios 802.11b/g. Suporta Ethernet com fios (10/100 Base-T). Suporta UPnP A/V Cliente (Certificado UPnP 1.0). Compatível com DLNA. Menu simples para a configuração. Conector host USB para actualizações de Firmware e para ampliar a utilidade do dispositivo com um disco rígido ou um dongle de memória USB. Para reproduzir ficheiros multimédia o C54WMP precisa de estar ligado a uma rede com um servidor multimédia. O C54WMP da Conceptronic suporta os seguintes formatos de ficheiros: • • • • • • • MPEG 1, 2, 4 – ficheiros comprimidos de áudio e vídeo. SRT, SSA e SUB – ficheiros de legendas. JPEG e GIF – ficheiros comprimidos de imagens. BMP e TIFF – ficheiros de imagens. MP3 até 320 Kbps ou VBR. WMA até 192 Kbps ou VBR. WAV - ficheiros de áudio. Outros ficheiros podem ser reproduzidos com a utilização de um servidor multimédia com funções de “transcodificação”. Mediante o PC, os ficheiros serão descodificados em tempo real para um formato compatível com o C54WMP da Conceptronic. 187 PORTUGUÊS 3. Descrição do Controlo Remoto 2 1 3 5 6 4 7 8 9 11 12 10 13 14 15 16 18 17 19 20 21 22 24 23 25 26 27 29 28 30 188 PORTUGUÊS Nº 1 2 3 4 TECLA POWER MUTE HOME REW 5 PLAY / PAUSE 6 7 FF STOP 8 PREV 9 NEXT 10 REPEAT 11 12 13 OUTPUT ZOOM SLOW 14 BACK 15 DISPLAY 16 17 18 19 MUSIC VIDEO PICTURES iRADIO 20 OK 21 TECLAS DE DIRECÇÃO Para Cima, Para Baixo, Esquerda, Direita 22 23 24 25 26 27 SUB LANG VOL+ BGM NÚMEROS A-B 28 0 29 30 SETUP SORT CH + CH VOL 1-9 :/ DESCRIÇÃO DA FUNÇÃO Activar/Desactivar o Modo de Espera do Reprodutor Multimédia sem Fios. Desactivar Áudio. Regressar ao Menu Principal. Retornar rapidamente nos ficheiros durante a reprodução. 1. Reproduzir ou Interromper momentaneamente a reprodução de ficheiros de música. 2. Iniciar a apresentação de diapositivos Avançar rapidamente nos ficheiros durante a reprodução. Parar a reprodução actual. 1. Retornar para a página anterior ao procurar ficheiros. 2. Retornar ao ficheiro anterior durante a reprodução. 1. Ir para a página seguinte ao procurar ficheiros. 2. Ir ao ficheiro seguinte durante a reprodução. 1. Seleccionar o modo de repetição durante a reprodução de Vídeo e Música. 2. Repetir a música de fundo durante a reprodução de Fotos. Mudar a saída de vídeo na seguinte sequência: S-VideoÆYPbPrÆYUV. Fazer zoom no vídeo ou na foto durante a reprodução. Avançar lentamente nos ficheiros durante a reprodução. 1. Retornar para a pasta ou página de configuração anteriores. 2. Salvar/cancelar os parâmetros estabelecidos na página de configuração sem fios. 1. Mostrar o nome e o tipo do ficheiro durante a reprodução de Vídeo. 2. Mostrar o nome e a resolução do ficheiro durante a reprodução de Fotos. Activar o modo MÚSICA. Activar o modo VÍDEO. Activar o modo FOTO . Activar o modo Rádio por Internet. 1. Activar o elemento seleccionado. 2. Introduzir o modo “rotação” durante a reprodução de Fotos. 1. Premir “ESQUERDA” para sair do modo em que estiver e regressar para o nível anterior. Premir “DIREITA” para introduzir uma pasta ou servidor seleccionados. 2. Modo Vídeo: Premir “PARA CIMA” ou “PARA BAIXO” para escolher outro ficheiro. 3. Modo Foto: Mover a imagem no modo “zoom” ou rodar a imagem no modo “rotação” 4. Modo Música: Premir “PARA CIMA” para ir ao ficheiro de música anterior ou premir “PARA BAIXO” para passar ao seguinte ficheiro de música. Seleccionar legendas durante a reprodução de Vídeo / Próximo Canal. Seleccionar idioma durante a reprodução de Vídeo / Canal Anterior. Aumentar o volume. Baixar o volume. Incluir/Eliminar um ficheiro de música como música de fundo. Teclas de selecção numérica 1-9. Activar/Desactivar o modo de repetição A-B. Tecla de atalho para a entrada de Tecla de selecção numérica tecla 0 URL de iRADIO. Abrir o Menu de Configuração do Reprodutor Multimédia sem Fios. Ordenar a lista de ficheiros. 189 PORTUGUÊS 4. Ligação do C54WMP à Rede e ao Televisor Para utilizar o C54WMP da Conceptronic é necessário o seguinte: 1. 2. 3. Uma rede sem fios (802.11b/g/n) ou com fios (10/100/1000). Um ou mais computadores com Windows 2000, Windows XP ou Windows Vista. Um televisor com Component (Y, Pb, Pr), S-Video, SCART ou entrada Composta. Exemplo de ligação com dois computadores e um Servidor Multimédia NAS É aconselhável ter uma ligação à Internet de banda larga para poder utilizar serviços de streaming, como ouvir uma estação de rádio difundida através da Internet. Nota: O C54WMP da Conceptronic utiliza UPnP A/V cliente para reproduzir áudio e vídeo. É preciso ter um equipamento com a funcionalidade UPnP A/V Servidor, uma aplicação UPnP A/V Servidor de uma terceira parte ou instalar o software do Servidor Multimédia da Conceptronic, fornecido (ver capítulo 7). 190 PORTUGUÊS 4.1 Instalação do hardware Nota: Se tiver uma rede LAN com fios deverá utilizar um cabo Ethernet para ligar o C54WMP da Conceptronic ao router ou switch. Verifique que tipo de cabo pode utilizar para o seu televisor: • Component (Y, Pb, Pr). • S-Video. • Composto (apenas Vídeo). • SCART (Vídeo e Áudio). Para áudio pode utilizar a saída RCA analógica (conectores RCA vermelho e branco) ou a saída coaxial digital (conector RCA laranja). O controlo remoto funciona com duas pilhas AAA (incluídas). O controlo remoto é necessário para ligar e desligar o dispositivo. Ligue o televisor e seleccione o canal de Vídeo. O C54WMP da Conceptronic exibirá o ecrã de início da Conceptronic quando o dispositivo for ligado. 5. Configuração Inicial Nota: Neste manual utilizamos certos endereços IP para explicar as características e funcionalidades do C54WMP da Conceptronic. Estes endereços podem ser diferentes no seu ambiente de rede. Os endereços utilizados neste manual são os seguintes: Endereço IP C54WMP: 192.168.1.50 Máscara de rede: 255.255.255.0 Porta de ligação: 192.168.1.1 (router como porta) Servidor DNS: 192.168.1.1 Quando ligar o Conceptronic C54WMP (Digital Media Player) tem de configurá-lo. A mensagem que aparece na sua televisão pergunta-lhe em que idioma quer usar o dispositivo. 191 PORTUGUÊS Depois de ter seleccionado o idioma, o Adaptador C54WMP vai iniciar a rede. O assistente de configuração da rede arranca automaticamente. Também pode aceder a este menu através do menu de configuração (seleccione ‘Network Wizard’ (Assistente de Rede)). Seleccione o tipo de ligação que preferir: “Com fios” ou “Sem fios”. Nota: Quando se usa streamings com uma grande largura de banda é recomendável utilizar ligação com fios, uma vez que com WLAN a qualidade do sinal pode afectar o ritmo de transferência e o desempenho. Use as teclas de direcção Para cima e Para baixo (21) para seleccionar a ligação de rede Com fios ou Sem fios. 192 PORTUGUÊS 5.1 Configuração com fios Seleccione “Com fios” e prima “OK” para aplicar a configuração. Prima “OK” para seleccionar “Concluir”. A configuração com fios já está completa. Veja no Capítulo 6 como utilizar o Reprodutor Multimédia. Nota: De modo predeterminado o C54WMP procurará um servidor DHCP. Se o C54WMP estiver configurado correctamente, aparecerá um endereço IP na parte inferior do ecrã. Se aparecer no ecrã “IP: 0.0.0.0”, significa que o dispositivo não consegue encontrar um endereço IP. Neste caso, será preciso configurar manualmente os parâmetros IP da rede do C54WMP (ver 5.4). 5.2 Configuração sem fios O C54WMP suporta LAN sem fios (802.11b/g): • ESSID - Auto detecção ou entrada manual quando o ESSID está desactivado. • Infra-estrutura ou Modo Ad-hoc . • Autenticação - Automática, Chave Partilhada, Sistema Aberto. • Formato da chave - Desactivado, WEP64, WEP64Hex, WEP128, WEP128Hex, WPA-PSK, WPA2 AES. • Valor da chave - Configurável mediante KeyFormat. • Canal - Autodetecção. Seleccione “Sem fios” e prima “OK” para aplicar a configuração. O C54WMP procurará pontos de acesso disponíveis. Se o seu ponto de acesso transmitir o seu SSID poderá ser seleccionado. O indicador de intensidade do sinal pode ter três cores: vermelho, amarelo e verde. Se o indicador está verde, significa que a ligação entre o C54WMP e o seu ponto de acesso é a melhor possível; se está amarelo, significa que é aceitável para um uso normal; e se o indicador de intensidade do sinal do seu ponto de acesso, está vermelho é recomendável mudar a posição do C54WMP ou do ponto de acesso. Nota: Não é aconselhável reproduzir filmes com streaming com uma grande largura de banda se o indicador do sinal estiver vermelho ou amarelo. Seleccione o ponto de acesso e prima OK no controlo remoto. Seleccione “Seguinte” e prima “OK”. 193 PORTUGUÊS Se tiver estabelecido parâmetros de encriptação no seu ponto de acesso terá de introduzir os mesmos parâmetros no C54WMP. A parte Sem fios do C54WMP detectará automaticamente o tipo de configuração necessária para a ligação com um ponto de acesso. Se o ponto de acesso estiver encriptado com WPA, o dispositivo detectará esse facto e será preciso introduzir a chave partilhada privada (PSK). Se o seu ponto de acesso não estiver protegido por uma chave de encriptação WEP ou WPA, poderá seleccionar “Seguinte” para concluir a configuração. A configuração sem fios já está completa. Veja no Capítulo 6 como utilizar o Reprodutor Multimédia. A configuração sem fios pode ser modificada manualmente através do menu de Configuração Sem fios. Nota: De modo predeterminado o C54WMP procurará um servidor DHCP. Se o C54WMP estiver configurado correctamente, aparecerá um endereço IP na parte inferior do ecrã. Se aparecer no ecrã “IP: 0.0.0.0”, significa que o dispositivo não consegue encontrar um endereço IP. Neste caso, será preciso configurar manualmente os parâmetros IP da rede do C54WMP (ver 5.4). 5.3 Uso do Windows Connect Now 2.0 com o C54WMP da Conceptronic A tecnologia Microsoft® Windows® Connect Now (WCN) torna mais fácil incluir dispositivos como o C54WMP da Conceptronic na sua rede sem fios já instalada. Criar uma rede sem fios segura e realizar a configuração necessária para dispositivos sem fios pode ser difícil. O WCN ajuda a configurar, mediante um método simples e seguro, dispositivos de redes sem fios. 194 PORTUGUÊS O Windows Connect Now está incluído no Service Pack 2 (SP2) do Windows XP e nas versões mais recentes do Windows. O WCN pode ser usado no PC executando Windows XP SP2 ou posteriormente para transferir a configuração sem fios para uma drive USB flash portátil (não fornecida com o dispositivo). É aconselhável ter uma ligação sem fios em funcionamento no computador para configurar o WCN através da drive USB flash. Windows XP Com Microsoft Windows XP, configura-se o C54WMP através do WCN da forma descrita a seguir. Clique em “Iniciar”, “Meus Locais de Rede”. Será exibida a Vizinhança de Rede. Seleccione a opção “Configurar uma rede sem fios…” à esquerda da janela. Aparecerá o Assistente para Configuração de Rede sem Fios. Clique em “Seguinte” para continuar. Introduza o nome da sua rede sem fios (SSID) e seleccione a opção “Estabelecer manualmente a chave da rede”. Nota: Se a sua rede estiver encriptada com encriptação WPA, marque a caixa situada na parte inferior da janela. Se a sua rede estiver encriptada com encriptação WEP, deixe a caixa sem marcar. Clique em “Seguinte” para continuar. Introduza a chave de encriptação para a sua rede nos dois campos que aparecem no ecrã. Para introduzir a chave mais facilmente, desmarque a opção “Ocultar caracteres…”. Desta forma poderá ver o que digita. Clique em “Seguinte” para continuar. Seleccione a opção “Usar uma drive USB flash”. Clique em “Seguinte” para continuar. Ligue a drive USB flash ao computador e seleccione a letra correspondente a essa drive. Clique em “Seguinte” para continuar. Depois que a configuração tiver sido guardada poderá retirar a drive USB flash. Nota: Não feche o assistente no computador. Ligue o C54WMP e vá a “Configuração”, “Configuração Sem fios”. Insira a drive USB flash na porta USB do C54WMP. O C54WMP detectará automaticamente os ficheiros de configuração WCN disponíveis e perguntará se deseja aplicar os parâmetros. Confirme. Os parâmetros de configuração serão guardados. Retire a drive USB flash. Agora serão utilizados os parâmetros correctos. Sugerimos que reinicie o dispositivo para estar seguro de que serão utilizados os parâmetros para rede sem fios correctos. Insira novamente a drive USB flash no computador e clique em “Seguinte”. Aparecerá uma lista de dispositivos configurados. Pode imprimir os parâmetros da rede mediante o botão “Imprimir Parâmetros de Rede”. Clique em “Concluir” para fechar o Assistente para Configuração de Rede Sem Fios. 195 PORTUGUÊS Nota: De modo predeterminado os parâmetros WCN são copiados da drive USB flash quando se prime “Concluir”. Se desejar configurar outros dispositivos/computadores da sua rede pode desmarcar esta caixa e guardar os parâmetros na drive USB flash, mas é recomendável remover os parâmetros. Windows Vista Com Microsoft Windows Vista configura-se o C54WMP através do WCN da forma descrita a seguir. Clique em “Iniciar”, “Rede”. Clique no botão “Adicionar um Dispositivo Sem fios”, situado na parte superior da janela. Seleccione a opção “Desejo adicionar um dispositivo sem fios ou computador que não está na lista mediante uma drive USB flash”. Seleccione a opção “Adicionar o dispositivo ou computador mediante uma drive USB flash”. Introduza o nome da sua Rede sem Fios no campo “Nome da Rede (SSID)” ou seleccione uma rede sem fios disponível na lista (se o computador estiver ligado à rede sem fios). Clique em “Seguinte” para continuar. Introduza o código de encriptação da sua rede sem fios. Nota: Windows Vista usa WPA de forma predeterminada. Se desejar usar encriptação WEP, clique “Exibir opções avançadas de segurança da rede”. Clique em “Seguinte” para continuar. Assegure-se de que a drive USB flash está inserida e salve os parâmetros na letra correspondente à drive correcta. Depois de salvar os parâmetros, clique em “Fechar” e retire a drive USB flash do computador. Ligue o C54WMP e vá a “Configuração”, “Configuração Sem fios”. Insira a drive USB flash na porta USB do C54WMP. O C54WMP detectará automaticamente os ficheiros de configuração WCN disponíveis e perguntará se deseja aplicar os parâmetros. Confirme. Os parâmetros de configuração serão guardados. Retire a drive USB flash. Agora serão utilizados os parâmetros correctos. Sugerimos que reinicie o dispositivo para estar seguro de que serão utilizados os parâmetros para rede sem fios correctos. 5.4 Configuração manual do endereço IP para o C54WMP Se não houver nenhum servidor DHCP disponível na sua rede será preciso configurar manualmente o endereço IP do C54WMP. Prima a tecla Setup (29) do controlo remoto ou seleccione o ícone de configuração no menu principal, no ecrã. Seleccione a função Configuração de Rede e prima OK para introduzir a configuração IP. Seleccione o tipo de rede desejado: “Com fios” ou “Sem fios”. 196 PORTUGUÊS Seleccione a Funcionalidade DHCP. Prima OK para introduzir os parâmetros e use as teclas de direcção Esquerda ou Direita (21) para realizar modificações. Prima OK novamente para sair desta opção. É preciso desactivar DHCP para introduzir o endereço IP manualmente. Quando esta função estiver desactivada serão exibidos os parâmetros predeterminados. Endereço IP C54WMP: 192.168.1.50 Máscara de rede: 255.255.255.0 Porta de ligação: 192.168.1.1 (router como porta) Servidor DNS: 192.168.1.1 Pode seleccionar e modificar o parâmetro desejado de acordo com os da sua rede. Para modificar o endereço IP, a máscara de sub-red, a porta de ligação ou o endereço DNS pode utilizar as teclas numéricas do controlo remoto (26). Para passar ao campo seguinte pode utilizar as teclas de direcção (21) (Esquerda / Direita). Não é necessário escrever os pontos (“.”) . Para realizar modificações prima “OK”, use as teclas de direcção Esquerda ou Direita (21) para modificar o parâmetro e prima “OK” novamente para passar ao campo seguinte. Para guardar os valores na memória do C54WMP prima a tecla de direcção Esquerda (21). Ser-lhe-á perguntado se deseja salvar o cancelar as modificações. Seleccione “Salvar”. 197 PORTUGUÊS 6. Uso do Reprodutor Multimédia sem Fios Quando a configuração do Reprodutor Multimédia sem Fios estiver finalizada, aparecerá o menu inicial com quatro funcionalidades: - Música - Foto - Vídeo - Configuração Nota: Seleccione Música se desejar reproduzir música com o Reprodutor Multimédia. Seleccione Foto se desejar ver imagens com o Reprodutor Multimédia. Seleccione Vídeo se desejar ver filmes / vídeos. Seleccione Configuração se desejar configurar / modificar parâmetros do C54WMP. Antes reproduzir Música, Vídeo ou Fotos, assegure-se de ter um Servidor Multimédia activo. Se não tiver, consulte no Capítulo 7 como realizar a instalação do Servidor Multimédia da Conceptronic. 6.1 Selecção rápida Com os botões Azul, Verde, Amarelo e Vermelho do controlo remoto é fácil passar rapidamente de uma a outra das várias opções de reprodução do C54WMP. Prima o botão azul para vídeo, o verde para música, o amarelo para fotos e o vermelho para rádio por Internet. Nota: Ao usar esta característica aparecerá o último ecrã utilizado. Se desejar voltar ao menu principal, prima o botão Home (3). 198 PORTUGUÊS 6.2 Vídeo O C54WMP da Conceptronic suporta os formatos de vídeo MPEG1, MPEG2, MPEG4, VOB e AVI, entre outros. Com o Software do Servidor Multimédia é possível utilizar “transcodificação”. Isto significa que o computador descodificará o formato de vídeo, passando-o a um formato que possa ser utilizado com o C54WMP da Conceptronic. Uso pela primeira vez Se seleccionar “Vídeo” através do menu iniciar ou mediante o controlo remoto (botão azul) aparecerá um ecrã com uma visão geral dos Servidores Multimédia disponíveis (UPnP A/V) e/ou do dispositivo USB ligado. De modo predeterminado, o dispositivo recordará qual foi a última pasta visitada ao pressionar a tecla Home para retornar ao menu principal ao seleccionar Vídeo, Música ou Foto novamente. Utilize o botão para trás (tecla Esquerda (21)) para retornar ao ecrã anterior e seleccionar outra pasta ou outra Fonte UPnP A/V. Se seleccionar um Servidor Multimédia, o dispositivo exibirá as pastas disponíveis. As pastas exibidas são fornecidas pelo Servidor Multimédia. É possível que em determinadas situações nem todas as pastas tenham funcionalidade. Isto depende do Servidor Multimédia utilizado. A opção Vídeo e as pastas seleccionadas funcionam como um filtro. Só é possível seleccionar e exibir os meios que aparecem no canto superior direito do ecrã do televisor. 199 PORTUGUÊS Use as teclas de direcção (21) para ir de um filme a outro e prima o botão Play (5) para dar início à reprodução do filme desejado. Antes de ser reproduzido, o filme será carregado pelo C54WMP da Conceptronic. Isto pode tardar alguns segundos e será indicado mediante a mensagem “a carregar”. Nota: O tempo necessário para esta operação dependerá da qualidade da ligação e do servidor multimédia. Nota: Assegure-se de ter actualizado o conteúdo do servidor multimédia quando seleccionar o Servidor Multimédia através do menu. O conteúdo estará indexado e sem uma actualização os novos vídeos não aparecerão. Se algum ficheiro de vídeo ou codec não for suportado, aparecerá no ecrã a seguinte mensagem: Funções de reprodução de vídeo Outra funções que podem ser utilizadas ao reproduzir ficheiros de vídeo: 1. 2. 3. 4. 5. 6. Nota: Silêncio - Prima o botão Mute (2) para activar ou desactivar a reprodução de áudio. Controlo de volume - Prima + / - (24) para, respectivamente, aumentar e reduzir o nível de volume. Repetição Prima o botão Repeat (10) uma vez para repetir o ficheiro de vídeo que estiver a ser reproduzido (repetir um). Prima o botão Repeat (10) duas vezes para repetir todos os ficheiros de vídeo da pasta em que se encontra o vídeo que estiver a ser reproduzido (repetir todos). Prima o botão Repeat (10) três vezes para desactivar o modo de repetição (repetição desactivada). Pausa - Durante reprodução prima o botão Play/Pause (5) para interromper momentaneamente a reprodução do vídeo. Prima novamente o botão Play/Pause (5) para reiniciar a reprodução do ficheiro de vídeo. Parar – prima o botão Stop (5) para parar a reprodução. Retrocesso / Avanço rápidos - Use o botão Rew (4) para retroceder e o botão FF para avançar (6). durante o retrocesso ou avanço rápidos a imagem pode ficar “congelada”. O C54WMP retrocederá ou avançará rapidamente o conteúdo no fundo. Prima Play (5) para reiniciar a reprodução. 200 PORTUGUÊS 7. 8. Anterior – Prima o botão Prev (7) para seleccionar o ficheiro de vídeo anterior. Seguinte – Prima o botão Next (8) para seleccionar o próximo ficheiro de vídeo. Se a pasta contiver muitos ficheiros de vídeo poderá mover-se de uma página à outra mediante os botões Prev (8) e Next (9). 9. Use as teclas Para cima / Para baixo (21) para ver no ecrã os ficheiros de vídeo. Prima OK (20) para reproduzir o ficheiro de vídeo seleccionado, ou prima o botão Back (14) para fechar a lista de ficheiros. 10. 11. 12. Prima a tecla Esquerda (21) para retornar ao menu de selecção de ficheiros. Zoom - Use Zoom (12) para aumentar ou diminuir o ecrã. Legendas e idioma - Prima os botões Sub / Lang (22 e 23) para ir de um a outro dos idiomas disponíveis dos ficheiros VOB e para ir de uma legenda a outra dos ficheiros MPEG4, respectivamente. Modo A-B - Prima o botão A-B (27) para iniciar a sessão de repetição. Prima o botão novamente para finalizar a sessão de repetição. Para cancelar o modo de repetição A-B prima o botão A-B novamente. 13. 201 PORTUGUÊS 6.3 Música Uso pela primeira vez Se seleccionar “Música” através do menu inicial ou mediante o controlo remoto (botão verde) aparecerá um ecrã com uma visão geral dos Servidores Multimédia disponíveis (UPnP A/V) e/ou do dispositivo USB ligado. No menu principal estão disponíveis várias opções: 1. 2. 3. 4. Música de fundo (BGM) Live 365 Meu Rádio. Servidores Multimédia disponíveis. De modo predeterminado, o dispositivo recordará qual foi a última pasta visitada ao pressionar a tecla Home para retornar ao menu principal ao seleccionar Vídeo, Música ou Foto novamente. Utilize o botão para trás (tecla Esquerda (21)) para retornar ao ecrã anterior e seleccionar outra pasta ou outra Fonte UPnP A/V. Para reproduzir música primeiro é preciso seleccionar o dispositivo multimédia (servidor multimédia, drive USB flash) com ficheiros de Música (mp3 / wav / wma). Se seleccionar um Servidor Multimédia, o dispositivo exibirá as pastas disponíveis. As pastas exibidas são fornecidas pelo Servidor Multimédia. É possível que em determinadas situações nem todas as pastas tenham funcionalidade. Isto depende do Servidor Multimédia utilizado. A opção Música e as pastas seleccionadas funcionam como um filtro. Só é possível seleccionar e exibir os meios que aparecem no canto superior direito do ecrã do televisor. 202 PORTUGUÊS A pasta apresentada para seleccionar e reproduzir música depende do tipo, marca ou versão de software do seu Servidor Multimédia. Alguns Servidores Multimédia apresentam: Álbum, Artistas, Género, selecção de todas as pistas. Seleccione o que preferir. Nota: Assegure-se de ter actualizado o conteúdo do servidor multimédia quando seleccionar o Servidor Multimédia através do menu. O conteúdo estará indexado e sem uma actualização as novas músicas não aparecerão. Se algum ficheiro de música não for suportado, aparecerá no ecrã a seguinte mensagem: Para reproduzir e interromper momentaneamente a reprodução de música prima o botão Play/Pause (5). Para parar a reprodução de música prima o botão Stop (7). Para seleccionar uma canção da lista prima os botões Para cima e Para baixo (21). Funções de reprodução de música 1. 2. 3. 4. 5. 6. 7. Silêncio - Prima a tecla Mute (2) para activar ou desactivar a reprodução de áudio. Controlo de volume - Prima + / - (24) para, respectivamente, aumentar e reduzir o nível de volume. Repetição Prima o botão Repeat (10) uma vez para repetir o ficheiro de música que estiver a ser reproduzido (repetir um). Prima o botão Repeat (10) duas vezes para repetir todos os ficheiros de música da pasta em que se encontra o ficheiro de música que estiver a ser reproduzido (repetir todos). Prima o botão Repeat (10) três vezes para desactivar o modo de repetição (repetição desactivada). Pausa - Durante reprodução prima o botão Play (5) para interromper momentaneamente a música. Prima novamente o botão Play (5) para reiniciar a reprodução do ficheiro de música. Retrocesso / Avanço rápidos - Use o botão Rew (4) para retroceder e o botão FF para avançar (6). Anterior – Prima o botão Prev (7) para seleccionar o ficheiro de música anterior. Seguinte – Prima o botão Next (8) para seleccionar o próximo ficheiro de música. Se tiver uma visão geral da música disponível, pode premir a tecla BGM (25) do controlo remoto para fazer o seguinte: 203 PORTUGUÊS 1. 2. 3. 4. 5. 6. Adicionar Reproduzir/Seguinte Ordem aleatória Adicionar todas Eliminar todas Parar Adicionar a canção à funcionalidade de música de fundo. Reproduzir a seguinte canção da lista de música de fundo. Reproduzir em ordem aleatória os ficheiros da lista de música de fundo. Adicionar à lista de música de fundo todas as canções da pasta. Eliminar todas as canções da lista de música de fundo. Parar de reproduzir canções da lista de música de fundo. A opção de música de fundo só estará disponível se forem adicionados ficheiros de música a esta selecção especial. Isto pode ser feito premindo a tecla BGM (25). A opção música de fundo tem duas finalidades: pôr música na lista de música de fundo e reproduzir esses ficheiros; ou iniciar automaticamente a reprodução de música de fundo ao ligar o C54WMP. Isto só funcionará se a música de fundo for seleccionada de uma drive USB. Live365 O serviço de música através de rádio por Internet Live365.com foi incluído no C54WMP da Conceptronic. Para ouvir estações de rádio por Internet é preciso ter uma rede (LAN/WLAN) que permita a ligação à Internet. Através a página principal de Música é possível seleccionar a opção “Live365”. Pode-se seleccionar um género da lista ou seleccionar qualquer das outras opções disponíveis. Para ouvir uma determinada estação de rádio da lista seleccione-a e prima o botão OK (20) do controlo remoto. Se escolher uma estação com o ícone do cadeado, só poderá ouvir essa estação se introduzir o seu nome de utilizador e password de live365.com. Poderá introduzir o nome de utilizador e password através da função de teclado no ecrã. Nota: Pode-se criar gratuitamente uma conta de live365 em www.live365.com. 204 PORTUGUÊS Pode marcar a caixa correspondente para que seja recordada a sua informação pessoal. Fazendo isso, não será preciso digitar o seu nome de utilizador e password novamente nas próximas vezes que usar esta funcionalidade. Pode adicionar até 99 estações favoritas em “Meu Rádio”, premindo a tecla BGM (25) e seleccionando “Adicionar”. A partir do menu principal de Música pode seleccionar a funcionalidade “Meu Rádio” para poder seleccionar rapidamente as suas estações de rádio preferidas. Meu Rádio Seleccione “Meu Rádio” através do menu ou do botão iRadio (19) do controlo remoto. Aqui encontrará as estações de rádio que tiver adicionado. Poderá acrescentar outras estações de rádio preferidas. Para adicionar uma estação de rádio introduza o URL em que a estação transmite. A única coisa que tem de fazer é assegurar-se de introduzir o URL correcto da estação de rádio. Sugerimos que utilize o directório SHOUTCast. (http://www.shoutcast.com). Não há um acesso directo ao directório SHOUTcast através do menu iRadio. O único acesso directo disponível é a Live365.com. 205 PORTUGUÊS Nota: O C54WMP da Conceptronic inclui um teclado no ecrã que pode ser utilizado para introduzir os URL e os nomes das estações de rádio. São suportados apenas caracteres latim básico. Não são suportados caracteres especiais latim estendido, como áäñß. 206 PORTUGUÊS 5.5 Fotos Uso pela primeira vez Se seleccionar “Foto” através do menu iniciar ou mediante o controlo remoto (botão amarelo) aparecerá um ecrã com uma visão geral dos Servidores Multimédia disponíveis (UPnP A/V) e/ou do dispositivo USB ligado. De modo predeterminado, o dispositivo recordará qual foi a última pasta visitada ao pressionar a tecla Home para retornar ao menu principal ao seleccionar Vídeo, Música ou Foto novamente. Utilize o botão para trás (tecla esquerda (21)) para retornar ao ecrã anterior e seleccionar outra pasta ou outra Fonte UPnP A/V. Se seleccionar um Servidor Multimédia, o dispositivo exibirá as pastas disponíveis. As pastas exibidas são fornecidas pelo Servidor Multimédia. É possível que em determinadas situações nem todas as pastas tenham funcionalidade. Isto depende do Servidor Multimédia utilizado. A opção Foto e as pastas seleccionadas funcionam como um filtro. Só é possível seleccionar e exibir os meios que aparecem no canto superior direito do ecrã do televisor. Nota: Assegure-se de ter actualizado o conteúdo do servidor multimédia quando seleccionar o Servidor Multimédia através do menu. O conteúdo estará indexado e sem uma actualização as novas imagens não aparecerão. 207 PORTUGUÊS Exibir Imagens Para exibir imagens seleccione a servidor multimédia, seleccione o submenu Foto e seleccione uma imagem. Para exibir apenas uma imagem prima o botão OK (20). Para exibir todas as imagens de uma pasta prima o botão Play (5). Se algum ficheiro de imagem não for suportado, aparecerá no ecrã a seguinte mensagem: Para exibir as imagens em outra ordem use o botão Sort (30). Música e Imagens Pode-se reproduzir música ao exibir imagens numa apresentação de diapositivos. Há dois procedimentos para reproduzir música ao exibir imagens. 7. 1. Seleccione a funcionalidade Música através do menu principal, utilizando o botão Home (3), ou do botão Música do controlo remoto. A seguir, seleccione a pasta e a canção que deseja reproduzir durante a apresentação de diapositivos ou inicie uma rádio. Volte para o menu “Foto”, seleccione a primeira foto e prima o botão Play (5). 2. Durante a apresentação de diapositivos, prima o botão BGM (25) e prima Play. Todas as canções da lista serão reproduzidas durante a apresentação de diapositivos. Esta característica só funciona se a música for adicionada como música de fundo (ver Capítulo 5.3) Instalação do Servidor Multimédia (UPnP A/V) da Conceptronic Antes de poder utilizar o C54WMP da Conceptronic é preciso instalar um servidor compatível UPnP A/V, como o CH3SNAS ou o CH3WNAS da Conceptronic, ou qualquer outro dispositivo UPnP A/V. O CD-ROM fornecido contém o software do Servidor Multimédia da Conceptronic. Se não tiver um Servidor UPnP A/V (hardware), pode transformar o PC num servidor streaming multimédia instalando o software do Servidor Multimédia da Conceptronic. 208 PORTUGUÊS A. Insira o CD-ROM na respectiva drive. A execução automática (AutoRun) costuma ser activada. Se isso não acontecer, vá a “Meu Computador” e faça duplo clique na drive do CD-ROM para ver o menu de execução automática. B. C. Seleccione a opção “Instalar Software do Servidor Multimédia”. Aparecerá uma lista para a selecção do idioma. Seleccione o idioma que preferir e clique em “OK”. Aparecerá, então, o Assistente de Configuração. Clique em “Seguinte” para continuar. Introduza o seu nome de utilizador e o da organização ou aceite os parâmetros predeterminados. Seleccione quem poderá utilizar a aplicação (permitir a todos os utilizadores ou permitir apenas ao utilizador actual). Clique em “Seguinte” para continuar. Mude o directório de instalação com o botão “mudar" ou aceite os parâmetros predeterminados. Clique em “Seguinte” para continuar. Clique em “Seguinte” para iniciar a instalação da aplicação. Quando a instalação estiver concluída isto será informado. Se desejar executar o Servidor Multimédia da Conceptronic directamente após a instalação, marque a caixa “Executar DMS da Conceptronic”. Clique em “Concluir” para sair do programa de instalação. D. E. F. G. H. I. O software do Servidor Multimédia da Conceptronic já está instalado no seu computador. Poderá aceder ao mesmo através da pasta Conceptronic dos Programas do Menu Iniciar. 209 PORTUGUÊS 8. Configuração do Servidor Multimédia da Conceptronic Secção de Ficheiros Multimédia Depois de importar ficheiros para a base de dados do Servidor Multimédia poderá ter uma visão geral de todos os ficheiros encontrados. Importar ficheiros multimédia Neste ecrã poderá: • Iniciar o Servidor Multimédia. • Parar o Servidor Multimédia. • Adicionar uma pasta. • Actualizar uma ou todas as pastas. • Eliminar uma pasta partilhada ou todas as pastas. Ao adicionar uma pasta com conteúdo multimédia, o seu conteúdo será examinado automaticamente. 210 PORTUGUÊS Sistema O Nome do Servidor poderá ser mudado por outro nome que preferir. O nome do servidor aparecerá no ecrã ao serem detectados Servidores Multimédia através da configuração do reprodutor. O nome modificado do servidor estará activo quando o servidor for iniciado novamente depois de ter sido parado. 211 PORTUGUÊS Opções Aqui poderá modificar as opções de configuração do software do Servidor Multimédia. Habilitar Execução Automática Minimizar ao Iniciar Habilitar Transcodificação Nota: Iniciar o software ao iniciar o Windows. Executar o software minimizado ao iniciar. Habilitar a opção de Transcodificação. Mediante “transcodificação” é possível reproduzir conteúdos que não são suportados directamente pelo hardware do C54WMP. A qualidade do conteúdo transcodificado pode variar. Tipo de ficheiros a serem procurados Seleccione que tipo de ficheiros o software do Servidor Multimédia deve procurar. Parâmetros de Transcodificação Seleccione a qualidade da transcodificação. 9. Servidores Multimédia Alternativos Podem ser usados servidores multimédia alternativos com o C54WMP da Conceptronic se tais servidores forem compatíveis com UPnP A/V 1.0. 212 PORTUGUÊS Microsoft Windows XP e Windows Vista Microsoft Windows XP e Windows Vista proporcionam um Servidor Multimédia através do Windows Media Player. Inicie o Windows Media Player, seleccione Ferramentas e depois Biblioteca. A seguir, Configurar Partilhar. Pode, então, permitir e adaptar a configuração ao C54WMP da Conceptronic. Através da opção Monitorar Pastas pode adicionar ou remover os conteúdos a serem partilhados. Nota: Com Windows XP, é preciso pelo menos a versão Media Player 11 para ter esta opção. Outros softwares alternativos Outros softwares alternativos são: TVersity : www.tversity.com TwonkyVision Media Server : www.twonkymedia.com ORB : www.orb.com Nota: Se um dispositivo Servidor Multimédia ou um pacote de software não puder ser detectado pelo C54WMP da Conceptronic, verifique a compatibilidade e a configuração desse dispositivo ou pacote de software em particular. Se o dispositivo for compatível e a configuração for correcta, o C54WMP indicará no televisor que tal dispositivo pode ser seleccionado. 213 PORTUGUÊS 10. Configuração do Sistema Através do menu de configuração do sistema pode-se modificar: Idioma Idioma OSD (On Screen Display). Idiomas disponíveis: inglês, espanhol, alemão, holandês, turco, português, italiano, francês. Configuração Modo TV Seleccione a configuração de vídeo pretendida Sistema de TV: PAL ou NTSC. Saída de TV: P-Scan: YPbPr, S-Video, Interlace YUV. Escala de vídeo: 4:3 PS, 4:3 LB, 16:9. Seleccione a configuração apropriada para o seu sistema de TV. Configuração de Áudio Seleccione a configuração de áudio pretendida Saída de Áudio: SPDIF/AC3, SPDIF/PCM, SPDIF/OFF. Downsample: 48 k, 96 k. Opção AutoPlay: Desactivada, Meu Rádio Primeiro, Música de fundo (BGM) Primeiro. Música de fundo: Desactivada, Repetir Uma, Repetir Todas. Nota: É possível iniciar Música automaticamente ao ligar o dispositivo. Se configurar uma rádio em streaming ou usar um dispositivo USB com música, poderá seleccionar a função que desejar para iniciar primeiro. 214 PORTUGUÊS Configuração de Vídeo Ajuste os parâmetros do ecrã do televisor. Ajustes de Brilho, Contraste, Tom e Saturação. Configuração de Exibição de Fotos Seleccione as propriedades desejadas para Foto. Protector de Ecrã: Configuração de exibição de fotos: Tempo de Apresentação de diapositivos: Música de fundo (BGM) : Escala: Activado/Desactivado. Lista/Miniaturas. 2 a 30 segundos, 1 minuto e 2 minutos. Desactivada, Repetir Uma, Repetir Todas. Tamanho Original, Ajustado ao Ecrã. Versão Seleccione e veja informação sobre o produto. Restabelecimento dos parâmetros predeterminados. Actualização do Firmware (através de USB). Versão (versão do firmware). Informação sobre endereço MAC para LAN * WLAN. 215 Declaração de Conformidade CE O fabricante Morada 2L International BV Databankweg 7 3821 AL Amersfoort, Países Baixos Declara que o produto Tipo 54MBPS WIRELESS MEDIA PLAYER/DMA Produto C08-126 Cumpre as seguintes directivas: 1999/5/EEC Directiva R&TTE: Equipamento Terminal de Telecomunicações e Equipamento das Estações Terrestres de Comunicações Via Satélite 2004/108/EEC Directiva CEM: Compatibilidade Electromagnética 73/23/EEC Directiva de Baixa Tensão: Equipamento eléctrico desenhado para ser usado dentro de determinados limites de tensão Os seguintes standards foram consultados para avaliar a conformidade: ETSI 300 328-2/2000, EN 301 489-17-2000, EN 301 489-1-2000, EN55022/9.98 Class B, EN 61000-3-2/3/4/1995, EN 50082-1/1994, EN 60950/1995 Este produto destina-se apenas a uma utilização interior. O objectivo deste produto é enviar e receber dados através do éter. Este é um produto de classe 2 e a potência de saída é inferior a 100 mW. O símbolo CE confirma que este produto está conforme os padrões e regulamentações acima referidos. Este produto é adequado para todos os países da UE. Para a França, a potência de saída é restringida se for usada no exterior e numa gama de 2454 a 2483,5 MHz. Para a Itália, dependendo da utilização pode ser necessária uma autorização geral. Pour tous les pays de I'UE. Pour la France, pour une utilisationen extérieur, la puissance de sortie est limitée dans la bande 2454 to 2483,5 MHz.Pertutti i paesi ell'EU. Per I'Italia, secondo I'uso, un 'autorizzazione generale puô essere richiesta. Local e data de emissão: Amersfoort, 25 Outubro de 2007 Herman Looijen, Gestor de Marketing de Produto 216 MAGYAR Conceptronic C54WMP Gyorstelepítési útmutató Köszönjük, hogy a Conceptronic vezeték nélküli médialejátszót választotta. A mellékelt hardvertelepítési útmutató lépésről lépésre elmagyarázzuk, miként tudja a Conceptronic vezeték nélküli médialejátszót telepíteni. Ha problémával szembesül, azt tanácsoljuk, keresse fel terméktámogató webhelyünket (menjen a www.conceptronic.net webcímhez), majd kattintson a „Support”-ra. Itt pedig keresse meg a gyakran ismétlődő kérdések (GYIK) elnevezésű adatbázist. Ha további kérdése volna a termékkel kapcsolatban és arra választ webhelyünkön nem talál, forduljon hozzánk e-mailben: [email protected] A Conceptronic termékekkel kapcsolatos további tájékozódás végett keresse fel a Conceptronic webhelyét: www.conceptronic.net 1. A csomag tartalma A Conceptronic vezeték nélküli médialejátszót tartalmazó csomagban az alábbiak találhatók: Conceptronic C54WMP vezeték nélküli médialejátszó Szabvány a C54WMP-hez Tápegység, 5 V-os egyenáram, 2 A Távirányító 2x AAA elem a távirányítóhoz RCA A/V kábel (1x RCA összetett, 2x RCA audió) Scart-adapter (3x RCA – SCART) Komponensátalakító kábel (3x RCA dugaszhüvely a komponenskábelhez) 217 MAGYAR 2. Tulajdonságok • • • • • • • Videolejátszás MPEG 1/2/4 tulajdonságokkal. 802.11b/g típusú, vezeték nélküli hálózatépítés. Vezeték nélküli Ethernet támogatása (10/100 Base-T). UPnP A/V ügyféltámogatás (tanúsított UPnP 1.0d). DLNA- kompatibilis. Egyszerű menü a telepítéshez és a kiépítéshez. USB gazdagép-csatlakozó a firmware-frissítésekhez és az eszköz használhatóságának merevlemezzel vagy az USB memóriához szükséges hardverkulccsal történő bővítéséhez. A média lejátszásához a C54WMP-t médiaszerver segítségével kell hálózathoz csatlakoztatni. A Conceptronic C54WMP az alábbi médiafájl-formátumokat támogatja: • • • • • • • Tömörített MPEG 1, 2, 4 audio- és videofájlok. SRT, SSA és SUB feliratfájlok. Tömörített JPEG és GIF képfájlok. BMP és TIFF képfájlok. MP3, akár 320 Kb/s-ig vagy VBR. WMA, akár 192 Kb/s-ig vagy VBR. WAV audiofájlok. A médiaszervernek „transcoding” tulajdonságokkal történő alkalmazása révén további fájlok is lejátszhatók. PC segítségével a fájl valós időben dekódolható egy a Conceptronic C54WMP által használható formátummá. 218 MAGYAR 3. A távirányító jelmagyarázata 2 1 3 5 6 4 7 8 9 11 12 10 13 14 15 16 18 17 19 20 21 22 24 23 25 26 27 29 28 30 219 MAGYAR Sz. 1. 2. 3. 4. KEZELŐBILLENTYŰZET POWER MUTE HOME REW 5. PLAY / PAUSE 6. 7. FF STOP 8. PREV 9. NEXT 10. REPEAT 11. 12. 13. OUTPUT ZOOM SLOW 14. BACK 15. DISPLAY 16. 17. 18. 19. MUSIC VIDEO PICTURES iRADIO 20. OK 21. IRÁNYBILLENTYŰ K Fel, le, balra, jobbra 22. 23. 24. 25. 26. 27. SUB CH + LANG CH VOL+ VOL BGM SZÁMOK 1-től 9-ig A-B 28. 0 29. 30. SETUP SORT :/ A FUNKCIÓ LEÍRÁSA A vezeték nélküli médialejátszó készenléti üzemmódjának be-/kikapcsolása. A hang elnémítása. Vissza a főmenübe. Gyors visszatekerés a médiafájlban, lejátszáskor. 1. Zenei fájl lejátszása vagy megszakítása. 2. Fényképek vetítésének indítása. Gyors előretekerés a médiafájlban, lejátszáskor. Az aktuális lejátszás leállítása. 1. Médiafájlok böngészésekor vissza az előző oldalra. 2. Lejátszáskor vissza az előző fájlhoz. 1. Médiafájlok böngészésekor tovább a következő oldalra. 2. Lejátszáskor tovább a következő fájlhoz. 1. Ismétlési mód kijelölése videofelvétel és zene lejátszásakor. 2. Háttérzene ismétlése fényképek lejátszásakor. A videokimenet átkapcsolása S-VideoÆYPbPrÆYUV sorrend szerint. Videofelvétel vagy fénykép nagyítása lejátszáskor. Lassú előretekerés az adathordozón, lejátszáskor. 1. Vissza az előző mappához vagy a telepítési oldalhoz. 2.A vezeték nélküli beállítások elmentése/törlése a vezeték nélküli beállítás oldalán. 1. Fájlnév és médiatípus megjelenítése vidolejátszáskor. 2. Fájlnév és felbontás megjelenítése fényképek lejátszásakor. MUSIC (zenei) üzemmód bekapcsolása. VIDEO (videó) üzemmód bekapcsolása. PHOTO (fénykép) üzemmód bekapcsolása. Internetes rádió üzemmód bekapcsolása. 1. A kijelölt elem bekapcsolása. 2. Belépés „elforgatás” üzemmódba fényképek lejátszásakor. 1. Az aktuális üzemmód leállításához és az előző réteghez történő visszatérés érdekében nyomja le a „LEFT”-et; Kijelölt mappába vagy szerverbe történő belépéshez nyomja meg a „RIGHT”ot. 2. Videó üzemmód: Másik fájl kiválasztásához nyomja meg az „UP”-ot vagy a „DOWN”-t. 3. Fényképes üzemmód: A kép mozgatása „Zoom” (nagyítás) üzemmódban, vagy a kép elforgatása „rotate” (elforgatás) üzemmódban. 4. Zenei üzemmód: Az előző zenei fájlhoz történő ugrás érdekében nyomja meg az „UP”-ot vagy – a következő zenei fájlhoz történő ugrás érdekében – nyomja meg a „DOWN”-t. Felirat kijelölése videó lejátszásakor/Következő csatorna. Nyelv kijelölése videó lejátszásakor/Előző csatorna. Hangerő növelése. Hangerő csökkentése. Háttérzeneként szolgáló zenei fájl hozzáadása/törlése. Numerikus kijelölőbillentyűk, 1-től 9-ig A-B ismétlés üzemmód beállítása/törlése Gyorsbillentyű az iRADIO URL Numerikus kijelölőbillentyű, 0 bemenethez. A vezeték nélküli médialejátszó telepítőmenüjének megnyitása. A fájllista rendezése. 220 MAGYAR 4. A C54WMP csatlakoztatása hálózathoz és tévéhez A Conceptronic C54WMP akkor használható, ha az alábbiak is rendelkezésre állnak: 1. 2. 3. Vezeték nélküli (802.11b/g/n) vagy vezetékes (10/100/1000) hálózat. Egy vagy több számítógép, amelyen Windows 2000, Windows XP vagy Windows Vista fut. Tévékészülék, komponens- (Y, Pb, Pr), S-video-, SCART- vagy összetett bemenettel. 2 számítógéppel és NAS médiaszerverrel történő csatlakoztatás példája NOTE FROM TRANSLATOR!!! (Legend on figure): NAS Media Store = NAS médiatár; Router = Útválasztó Wireless Media Player = Vezeték nélküli médialejátszó; TV = Tévé A szélessávú internetkapcsolat hasznos, ha folyamszerű adatátvitelt biztosító szolgáltatásokat kívánunk alkalmazni, mint amilyen például egy az interneten keresztül sugárzó rádióállomás hallgatása. Megjegyzés: A Conceptronic C54WMP UPnP A/V ügyfelet alkalmaz az audió és videó lejátszására. Ehhez az UPnP A/V szerver célalkalmasságával rendelkező hardverre, a harmadik fél tulajdonát képező UPnP A/V szerver alkalmazására van szükség, vagy telepítsen az erre a célra szolgáló Conceptronic médiaszerver-szoftvert. (Lásd a 7. fejezetet.) 221 MAGYAR 4.1 A hardver telepítése Megjegyzés: Ha vezetékes LAN-hálózata van, Ethernet kábelre lesz szükség a Conceptronic C54WMP-nek útválasztóhoz vagy kapcsolóhoz történő csatlakoztatása érdekében. Határozza meg, milyen kábeltípus használható a tévéhez: • Komponens (Y, Pb, Pr). • S-videó. • Összetett (csak videó). • SCART (videó és audió). Audióhoz az analóg RCA-kimenetet (piros és fehér RCA-jackdugók) vagy a digitális koaxiális kimenetet (narancssárga RCA-jackdugó) használhatja. A távirányítóhoz 2x AAA elem kell (a csomagnak tartozéka). Az eszköz be-/kikapcsolásához távirányítóra van szükség. Kapcsolja be a tévét és jelölje ki a megfelelő videocsatornát. Az eszköz bekapcsolásakor a Conceptronic C54WMP a Conceptronic indítóképernyőjét jeleníti meg. 5. Első alkalommal történő indítás és a konfiguráció Megjegyzés: Kézikönyvünkben bizonyos IP-címeket alkalmazunk a Conceptronic C54WMP tulajdonságainak és célalkalmasságának elmagyarázása. Ezek a beállítások az adott hálózati környezetben mások is lehetnek. Kézikönyvünkben az alábbi beállításokat használjuk: A C54WMP címe : 192.168.1.50 Hálózati maszk : 255.255.255.0 : 192.168.1.1 (az útválasztó, mint átjáró) Átjáró címe DNS (dinamikus tartománynév-kiszolgáló) : 192.168.1.1 A Conceptronic C54WMP-t (digitális médialejátszó) — annak bekapcsolásakor— konfigurálnia kell. A tévékészülékén megjelenő üzenetben megkérdezik, milyen nyelvet kíván alkalmazni a készülék használatakor. 222 MAGYAR A nyelv kiválasztása után a C54WMP adapter inicializálja a hálózatot. A hálózatbeállító varázsló automatikusan elindul. Ehhez a menühöz a beállítások menüjén keresztül lehet hozzáférni (válassza ki a „Network Wizard”-ot). Jelölje ki az előnyben részesített csatlakozás típusát: „Wired”(vezetékes) vagy „Wireless” (vezeték nélküli). Megjegyzés: Nagy sávszélességű adatfolyam alkalmazásakor javasoljuk a vezetékes kapcsolat használatát, mivel WLAN esetén a jelminőség befolyásolhatja az adatátvitelt és a teljesítményt. A vezetékes vagy vezeték nélküli hálózat csatlakoztatásának kijelöléséhez használja a fel/le iránybillentyűt (21). 223 MAGYAR 5.1 Vezetékes konfiguráció Jelölje ki a „Wired”-ot, majd nyomja le az „OK”-t a konfigurációs beállítás alkalmazásához. A „Done” kijelöléséhez nyomja le az „OK”-t. Ezzel a vezetékes konfigurálás befejeződött. A médialejátszó alkalmazásával kapcsolatban lapozzon a „6. fejezet”-hez. Megjegyzés: Alapértelmezettként a C54WMP egy DHCP-szervert keres. Ha a C54WMP megfelelően lett konfigurálva, a képernyő alján IP-cím látható. Ha a képernyő a következőket mutatja: IP: 0.0.0.0, az eszköz IP-címet nem talált, és a C54WMP IP-hálózati beállításait kézzel kell konfigurálni (5.4. fejezet). 5.2 Vezeték nélküli konfiguráció A C54WMP a vezeték nélküli LAN-t (802.11b/g) támogatja: • • • • ESSID: automatikus érzékelés vagy kézi bevitel, ha az ESSID-sugárzás ki van kapcsolva. Infrastruktúra vagy ad hoc üzemmód. Hitelesítés: Auto (auto), Shared Key (megosztott billentyű), Open system (nyitott rendszer). Kulcsformátum: Off, WEP64, WEP64Hex, WEP128, WEP128Hex, WPA-PSK, WPA2 AES. • • Kulcsérték: a kulcsformátum segítségével konfigurálható. Csatorna: automatikus érzékelés. Jelölje ki a „Wireless”-t, majd nyomja le az „OK”-t a konfigurációs beállítás alkalmazásához. A C54WMP elérhető elérési pontokat keres. Ha az elérési pontok SSID-t sugároznak, akkor kijelölhetők. A jelerősség-indikátornak 3 színe lehet: piros, sárga vagy zöld. Ha az indikátor zöld, akkor a lehető legjobb a kapcsolat a C54WMP és az elérési pont között. A sárga a megszokott alkalmazás szempontjából elfogadható jelerősséget jelent, és ha az elérési pont jelerőssége piros, akkor azt javasoljuk, hogy változtasson a C54WMP vagy az elérési pont pozícióján. Megjegyzés: Nem javasoljuk nagy adatfolyam-sávszélességű filmeknek az indikátoron piros vagy sárga jel mellett történő lejátszását. 224 MAGYAR Jelölje ki az elérési pontot, majd nyomja meg az OK-t a távirányítón. Jelölje ki a „Next”-et és nyomja meg az „OK”-t. Ha az elérési pontnál titkosítás-beállításokat eszközölt, ugyanezeket a beállításokat ugyanúgy kell bevinnie a C54WMP-be, ahogyan azt az elérési pontnál konfigurálta. A C54WMP vezeték nélküli része automatikusan érzékeli, milyen konfiguráció szükséges az adott elérési ponthoz történő csatlakoztatás érdekében. Ha az elérési pont WPA-val lett titkosítva, az eszköz ezt érzékeli, ezért kizárólag a saját megosztott kulcsot (PSK) kell beírni. Ha az adott elérési pontot nem védi sem WEP, sem pedig WPA titkosítási kulcs, a konfigurálás befejezéséhez kijelölheti a „Next”-et. A vezeték nélküli konfiguráció ezzel teljes. A médialejátszó használatával kapcsolatban lapozzon a „6. fejezet”-hez. A vezeték nélküli megoldás telepítésére szolgáló menü segítségével kézzel megváltoztathatók a vezeték nélküli beállítások. Megjegyzés: Alapértelmezésben a C54WMP egy DHCP-szervert keres. Ha a C54WMP megfelelően lett konfigurálva, a képernyő alján IP-cím látható. Ha a képernyőn IP: 0.0.0.0 látható, az eszköz képtelen volt IP-címet találni és a C54WMP IP-hálózati beállításait kézzel kell konfigurálni (5.4. fejezet). 225 MAGYAR 5.3 A Windows Connect Now 2.0-nak a Conceptronic C54WMP-vel együtt történő alkalmazása A Microsoft® Windows® Connect Now (WCN) technológiája megkönnyíti, hogy a meglévő, vezeték nélküli hálózatot például olyan eszközökkel bővítse, mint amilyen a Conceptronic C54WMP. Biztonságos, vezeték nélküli hálózat előállítása és a vezeték nélküli eszközökön a szükséges, vezeték nélküli beállítások biztosítása nehéz feladatnak bizonyulhat. A WCN – a vezeték nélküli hálózati eszközök konfigurálásának egyszerű és biztonságos módszere segítségével – segíthet a konfiguráláskor. A Windows Connect Now része a Windows XP Service Pack 2-nek (SP2) és az újabb verzióknak is. A WCN a Windows XP SP2-t vagy annál újabbat futtató PC-n arra is felhasználható, hogy a vezeték nélküli beállításokat egy hordozható USB flash-meghajtóra (nem része ennek a csomagnak) átvigyék. A WCN-nek USB flash-meghajtó segítségével történő konfigurálásakor tanácsos működőképes, vezeték nélküli csatlakozásról gondoskodni a számítógépen. Windows XP A Microsoft Windows XP alatt – a WCN segítségével – a C54WMP az alábbiak szerint konfigurálható: Kattintson a „Start”-ra, majd a „My Network Places”-re. A hálózati szomszédság jelenik meg. Jelölje ki a „Set up a wireless network…” opciót az ablak bal oldalán. A vezeték nélküli hálózattelepítő varázslója jelenik meg. A folytatáshoz kattintson a „‘Next”-re. Írja be a vezeték nélküli hálózat nevét (SSID), majd jelölje ki a „Manually assign a network key” opciót. Megjegyzés: Ha a hálózat WPA-titkosítással titkosított, ellenőrizze a jelölőnégyzetet az ablak alján. Ha a hálózat WEP-titkosítással lett titkosítva, hagyja a jelölőnégyzetet kipipálatlanul. A folytatáshoz kattintson a „Next”-re. A képernyőn megjelenő mindkét mezőbe írja be a hálózathoz tartozó titkosítási kulcsot. A kulcs bevitelének megkönnyítése érdekében ki is emelheti a pipát a „Hide characters…” opció mellől, tehát láthatja, mit ír be. A folytatáshoz kattintson a „Next”-re. Jelölje ki a „Use a USB flash drive” opciót. A folytatáshoz kattintson a „Next”-re. Csatlakoztassa számítógépéhez az USB flash-meghajtót, majd jelölje ki a megfelelő meghajtóbetűjelet. A folytatáshoz kattintson a „Next”-re. Amikor a konfigurációt elmentette, az USB flash-meghajtót eltávolíthatja. Megjegyzés: Ne zárja be a varázslót a számítógépen! Kapcsolja be a C54WMP-t, majd menjen a „Setup”-hoz, utána pedig a „Wireless Setup”-hoz. Helyezze be az USB flash-meghajtót a C54WMP USB-portjába. A C54WMP automatikusan érzékeli a WCN elérhető konfigurációs fájljait és megkérdezi, vajon alkalmazni kívánják-e a beállításokat. Erősítse meg az előbbieket. A beállítások a konfigurációhoz mentődnek el. Távolítsa el az USB flashmeghajtót. 226 MAGYAR Ezután már a megfelelő beállítások használatosak. Annak biztosítása érdekében javasoljuk az eszközt újraindítani, hogy a megfelelő, vezeték nélküli beállítások használatosak. Helyezze vissza az USB flash-meghajtót a számítógépbe, majd kattintson a „Next”-re. A konfigurált eszközök listája jelenik meg. A hálózati beállítások a „Print Network Settings” gomb segítségével kinyomtathatók. A vezeték nélküli hálózatot telepítő varázsló bezáráshoz kattintson a „Finish”-re. Megjegyzés: Alapértelmezettként a WCN-beállítások törlődnek az USB flash-meghajtóról, amikor rákattint a „Finish”-re. Ha több eszközt/számítógépet kíván a hálózaton belül konfigurálni, kiemelheti a pipát ebből a jelölőnégyzetből és megtarthatja a beállításokat az USB flash-meghajtón, de javasoljuk, hogy a beállításokat inkább törölje. Windows Vista A Microsoft Windows Vista alatt – a WCN segítségével – a C54WMP az alábbiak szerint konfigurálható: Kattintson a „Start”-ra, majd a „Network”-re. Kattintson az ablak tetején az „Add a Wireless Device” gombra. Jelölje ki az „I want to add a wireless device or computer that is not on the list, using a USB flash drive” opciót. Jelölje ki az „Add the device or computer using a USB flash drive”’ opciót. Írja be a vezeték nélküli hálózat nevét a „Network Name (SSID)” mezőbe vagy jelöljön ki elérhető, vezeték nélküli hálózatot a listán (ha számítógépe vezeték nélkül csatlakozik a hálózathoz). A folytatáshoz kattintson a „Next”-re. Írja be a vezeték nélküli hálózat titkosítási kódját. Megjegyzés: A Windows Vista alapértelmezettként a WPA-t használja. Ha WEP titkosítást kell alkalmaznia, kattintson a „Show advanced network security options”-ra. A folytatáshoz kattintson a „Next”-re. Ügyeljen arra, hogy az USB flash-meghajtó csatlakoztatva legyen, majd mentse el a beállításokat a megfelelő meghajtóbetűjelhez. A beállítások elmentése után kattintson a „Close”-ra, majd távolítsa el az USB flash-meghajtót a számítógépről. Kapcsolja be a C54WMP-t, majd lépjen a „Setup”-hoz, utána pedig a „Wireless Setup”-hoz. Csatlakoztassa az USB flash-meghajtót a C54WMP-nek az USB-portjához. A C54WMP automatikusan érzékeli a WCN elérhető konfigurációs fájljait és megkérdezi, vajon alkalmazni kívánják-e a beállításokat. Erősítse meg az említetteket. A beállítások a konfigurációhoz mentődnek el. Távolítsa el az USB flash-meghajtót. Ezután már a megfelelő beállítások használatosak. Annak biztosítása érdekében javasoljuk az eszközt újraindítani, hogy a megfelelő, vezeték nélküli beállítások használatosak. 227 MAGYAR 5.4 IP-cím kézi beállítása a C54WMP-nél A C54WMP IP-címét olyankor kell kézzel beállítani, ha nincs szabad DHCP-szerver a hálózaton. Nyomja meg a Setup-ot (29) a távirányítón, vagy jelölje ki a képernyőn megjelenő főmenün a telepítőikont. Jelölje ki a következő funkciót: Network Setup, majd nyomja le az OK-t, ha be kívánja lépni az IPkonfigurációba. Jelölje ki a kívánt hálózattípust:„Wired” (vezetékes) vagy „Wireless” (vezeték nélküli). Jelölje ki a DHCP célalkalmasságát, nyomja meg az OK-t a beállítások beviteléhez, annak módosítására pedig a balra vagy jobbra mutató iránybillentyűt (21) használja. Ha ebből az opcióból ki kíván lépni, ismét az OK-t kell lenyomnia. Az IP-cím kézzel történő beviteléhez le kell tiltania a DHCP-t. Ha ez a funkció le lett tiltva, a standard alapértelmezett beállítások jelennek meg. A C54WMP IP-címe Hálózati maszk Átjárócím DNS (dinamikus tartománynév-szerver) : 192.168.1.50 : 255.255.255.0 : 192.168.1.1 (az útválasztó, mint átjáró) : 192.168.1.1 A kívánt beállítás kijelölhető, egyszersmind az adott hálózat beállításaira is módosítható. Az IP-cím, az alhálózati maszk, az átjáró vagy a DNS-cím módosítására a távirányító numerikus billentyűi (26) használhatók. Ha tovább kíván lépni a következő mezőre, az iránybillentyűt (21) használja (bal/jobb). Nincs szükség „.” (pont) bevitelére. 228 MAGYAR Módosításkor nyomja meg az „OK”-t, a beállítás módosításához pedig használja a balra vagy jobbra mutató iránybillentyűt (21), majd ismét nyomja meg az „OK”-t, ha a következő mezőre kíván továbblépni. A beállításoknak a C54WMP memóriájába történő elmentéséhez a balra mutató iránybillentyűt (21) kell megnyomnia, mire a berendezés majd megkérdezi, hogy a változtatásokat el kívánják-e menteni vagy pedig törölni szeretnék-e. Jelölje ki a „Save”-et. 6. A vezeték nélküli médialejátszó használata. Amikor a vezeték nélküli médialejátszó konfigurálásával végeztek, a négy célalkalmasságot tartalmazó, alapértelmezett menü jelenik meg: - Music Photo Video Setup Jelölje ki a Music-ot (zene), ha zenét kíván a médialejátszó segítségével lejátszani. Jelölje ki a Photo-t (fénykép), ha képeket kíván megtekinteni a médialejátszón. Jelölje ki a Video-t (videó), ha filmet/videofelvételeket kíván megtekinteni. Jelölje ki a Setup-ot (beállítások), ha a C54WMP beállításait konfigurálni kívánja/meg akarja változtatni. Megjegyzés: Zene, videofelvétel vagy fényképek lejátszása előtt ügyeljen arra, hogy valamilyen médiaszerver fusson. Ha éppen nincs futó médiaszerver, a Conceptronic médiaszerverének telepítésével kapcsolatban lapozzon a 7. fejezethez. 6.1 Gyors kijelölés A távirányító kék, zöld, sárga és piros gombja segítségével könnyen és gyorsan váltogathatja a C54WMP különböző lejátszási opcióit. Videóhoz nyomja le a kék gombot, zenéhez a zöldet, képekhez a sárgát, az internetrádióhoz pedig a pirosat. 229 MAGYAR Megjegyzés: E tulajdonság alkalmazásával visszatérhet az utoljára használt képernyőhöz. Ha a főmenühöz kíván visszajutni, nyomja meg a home (kezdőlap) (3) gombot. 6.2 Videó A Conceptronic C54WMP az MPEG1, MPEG2 és MPEG4 videoformátumot, valamint a VOB, AVI és egyéb formátumokat támogatja. A médiaszerver programja segítségével lehetőség nyílik a „transcoding” alkalmazására. Mindez azt jelenti, hogy a számítógép a videoformátumot abban a formátumban fogja dekódolni, amely a Conceptronic C54WMP-nél alkalmazható. Első alkalommal történő használatkor: Ha a „Video”-t a start menüről vagy a távirányítóról (kék gomb) jelöli ki, olyan képernyő jelenik meg, amelyen az elérhető médiaszerverek (UPnP/AV) és/vagy a csatlakoztatott USB-eszköz egyaránt áttekinthető. Amikor a Video, Music vagy Pictures újbóli kijelölésekor a főmenübe történő visszatérés érdekében megnyomja a home-ot (kezdőlap), az eszköz alapértelmezésben emlékezni fog, melyik volt az utoljára felkeresett mappa. A másik mappa vagy másik UPnP AV/Source (forrás) kijelölése érdekében az előző képernyőre történő visszatéréshez a vissza gombot (balra mutató nyílbillentyű (2)) kell alkalmaznia. Ha médiaszerver eszközt jelölt ki, az elérhető mappák jelennek meg. A megjelenő mappákat a médiaszerver kínálja fel. Lehet, hogy – bizonyos helyzetekben – nem minden felkínált mappának van célalkalmassága. Mindez a használt médiaszervertől függ. A videoopció és a kijelölt mappák szűrőként működnek. Csak kijelölni és megjeleníteni lehet azt az adathordozót, amely a tévéképernyő jobb felső sarkában látható. 230 MAGYAR Az iránybillentyűk (21) segítségével böngészhet a filmek között, majd nyomja le a lejátszás (5) gombot, ha a filmet el is kívánja indítani. A film elindítása után a Conceptronic C54WMP betölti a filmet. Mindez csupán néhány másodpercet vesz igénybe, egyszersmind az alábbi betöltési üzenet jelenik meg. Megjegyzés: A betöltési idő a csatlakozás minőségétől és a médiaszervertől függ. Megjegyzés: Ügyeljen arra, hogy a médiaszerver tartalma – a médiaszervernek a menü segítségével történő kijelölésekor – frissítve legyen. A tartalom indexelt és – frissítés nélkül – az új videofelvételek nem fognak megjelenni. Ha egy videofájl vagy kódoló-dekódoló nincs támogatva, a képernyőn az alábbi üzenet jelenik meg: Videolejátszási funkciók Egyéb, a videofájlok lejátszásakor alkalmazandó funkciók: 1. 2. 3. 4. 5. 6. Mute (némítás): Az audiolejátszás be-, illetve kikapcsolásához nyomja meg a mute-ot (2). Volume Control (hangerő-szabályozás): A hangerő növeléséhez, illetve csökkentéséhez nyomja meg a + / - -t (24). Repeat (ismétlés): Az éppen lejátszott videofájl ismétléséhez nyomja meg egyszer az ismétlőgombot (10) (egy fájl ismétlése). Az aktuális mappa összes videofájljának ismétléséhez nyomja meg kétszer az ismétlőgombot (10) (az összes ismétlése). Az ismétlés üzemmód kikapcsolásához nyomja meg háromszor az ismétlőgombot (10) (ismétlés kikapcsolva). Pause (szünet): Lejátszáskor a videofelvétel megállításához nyomja meg a lejátszás (5) gombot. A videofájl eljátszásának folytatásához ismét nyomja meg a lejátszás (5) gombot. A lejátszás leállításához használja a stop (5) gombot. Visszatekeréshez használja a Rew (4), gyors előretekeréshez pedig az FF (6) gombot. Megjegyzés: „rew” vagy „ff” alatt a lejátszott kép kimerevedhet. A C54WMP – a háttérben – visszavagy gyors előretekerést hajt végre a tartalomban. A lejátszás folytatásához nyomja meg a play (5) gombot. 231 MAGYAR 7. 8. Az előző videofájl kijelöléséhez használja a Prev-et (7). A következő videofájl kijelöléséhez használja a Next-et (8). Ha egy mappa sok videofájlt tartalmaz, az oldalakon a Prev (8) vagy Next (9) gomb segítségével böngészhet. 9. Ha a videofájlokat ugyanúgy kívánja megjeleníteni, mint ahogyan a képernyőn megjelennek, használja az Up/Down (fel/le) billentyűt (21). A kijelölt videofájl lejátszásához nyomja meg az OK-t (20), vagy – a fájllista bezárásához – nyomja meg a „back” (vissza) (14) gombot. 10. 11. 12. Ha vissza kíván térni a fájlkijelölő menübe, nyomja meg a Left (bal) (21) gombot. Nagyítás: A képernyő nagyításához vagy kicsinyítéséhez használja a Zoom-ot (12). Feliratozás és nyelv: A VOB-fájlokhoz rendelkezésre álló nyelvek és az MPEG4 fájloknál alkalmazható feliratozás megváltoztatásához nyomja meg a Subtitle/Language (felirat/nyelv) gombot (22 és 23). A-B üzemmód: Az ismétlendő rész indításához nyomja meg az A-B (27) gombot. Az ismétlendő rész befejezéséhez ismét nyomja meg a gombot. Az A-B ismétlés üzemmód törléséhez pedig ismét nyomja meg az A-B gombot. 13. 232 MAGYAR 6.3 Zene Első alkalommal történő használatkor: Ha a „Music”-ot a start menün vagy a távirányítón (zöld gomb) segítségével jelöli ki, a képernyőn az elérhető médiaszerverek (UPnP/AV) és/vagy a csatlakoztatott USB-eszköz áttekintése látható. A főmenün több opció is rendelkezésre áll: 1. 2. 3. 4. Háttérzene (BGM). Live 365. My Radio (saját rádió). Elérhető médiaszerverek. Amikor a Video, a Music vagy a Pictures ismételt kijelölésekor a főmenübe történő visszatérés érdekében lenyomja a home-ot (kezdőlap), az eszköz alapértelmezésben emlékezni fog, melyik volt az utoljára felkeresett mappa. Ha az egy másik mappának vagy másik UPnP-AV/forrásnak a kijelöléséhez vissza kíván térni az előző képernyőhöz, a fekete gombot (balra mutató nyílbillentyű (21)) kell használnia. Zene lejátszásához előbb ki kell jelölnie a zenei fájlokat (mp3/wav/wma) tartalmazó médiaeszközt (médiaszerver, USB flash-meghajtó). Ha kijelölt már egy médiaszerver-eszközt, annak segítségével megtekinthetők az elérhető mappák. A megjelenített mappákat a médiaszerver kínálja fel. Lehet, hogy – bizonyos helyzetekben – nem minden felkínált mappa rendelkezik a szükséges célalkalmassággal. Mindez az éppen használt médiaszervertől függ. A zenei opció és a kijelölt mappák szűrőként működnek. Csak kijelölni és megjeleníteni lehet azt az adathordozót, amely a tévéképernyő jobb felső sarkában látható. 233 MAGYAR A zene kijelölésére és lejátszására felkínált mappa az adott médiaszerver típusától, márkájától vagy szoftververziójától függ. Bizonyos médiaszerverek az alábbiakat kínálják: Album (album), Artists (előadók), Genre (műfaj), all-tracks (összes zeneszám) kijelölése. A kívánt tulajdonságot jelölje ki. Megjegyzés: Ügyeljen arra, hogy a médiaszervernek a menü segítségével történő kijelölésekor a médiaszerver tartalma frissítődjön. A tartalom indexelt és – frissítés híján – az új zene nem fog megjelenni. Ha a zenei fájl nincs támogatva, a képernyőn az alábbi üzenet látható: A zene lejátszásához és megszakításához nyomja meg a Play/Pause (5) gombot. A zene leállításához nyomja meg a Stop (7) gombot. A listáról egy dal kijelöléséhez nyomja meg az Up vagy a Down (21) gombot. Zenelejátszás funkciói 1. 2. 3. 4. 5. 6. 7. Mute (némítás): Az audiolejátszás be-, illetve kikapcsolásához nyomja meg a mute-ot (2). Volume Control (hangerő-szabályozás): A hangerő növeléséhez, illetve csökkentéséhez nyomja meg a + / - -t (24). Repeat (ismétlés): Az éppen lejátszott zenei fájl ismétléséhez nyomja meg egyszer az ismétlőgombot (10) (egy fájl ismétlése). Az aktuális mappa összes zenei fájljának ismétléséhez nyomja meg kétszer az ismétlőgombot (10) (az összes ismétlése). Az ismétlés üzemmód kikapcsolásához nyomja meg háromszor az ismétlőgombot (10) (ismétlés kikapcsolva). Pause (szünet): Lejátszás közben a zenei felvétel megállításához nyomja meg a lejátszás (5) gombot. A zenei fájl lejátszásának folytatásához ismét nyomja meg a lejátszás (5) gombot. Visszatekeréshez használja a Rew (4), gyors előretekeréshez pedig az FF (6) gombot. Az előző zenei fájl kijelöléséhez használja a Prev-et (7). A következő zenei fájl kijelöléséhez használja a Next-et (8). Ha az elérhető zenéről áttekintést kíván kapni, az alábbiak végrehajtása céljából lenyomhatja a táviránító BGM-billentyűjét (25): 234 MAGYAR 1. 2. 3. 4. 5. 6. Add Play/Next Play Shuffle Add All Remove All Stop Dal hozzáadása a BGM tulajdonsághoz. A következő dal lejátszása a BGM-listáról. Fájlok lejátszása/véletlen sorrendű lejátszása a BGM-listáról. A mappa összes dalának hozzáadása a BGM-listához. Az összes dal törlése a BGM-listáról. A BGM-listán szereplő dalok lejátszásának leállítása. A háttérzene opciója csak olyankor elérhető, amikor zenét adnak hozzá ehhez a különleges válogatáshoz. Mindezt a BGM-billentyű (25) megnyomásával lehet végrehajtani. A háttérzenének kettős célja van: Zene elhelyezni a BGM-listán, majd annak lejátszása, illetve a háttérzene automatikus indítása a C54WMP bekapcsolásakor. Ez csak olyankor működik, amikor a háttérzenét USB-meghajtóról jelölik ki. Live365 A Conceptronic C54WMP-t a Live365.com internetes rádió zenei szolgáltatásával egészítettük ki. Ahhoz, hogy az internetről rádióállomásokat lehessen lejátszani, olyan hálózati (LAN/WLAN) csatlakozással kell rendelkeznie, amely az internethez csatlakozhat. A zenei főoldal segítségével kijelölhető a „Live365” opció. A listáról kijelölhető egy adott műfaj, illetve a többi elérhető opció bármelyike is. Kijelölhet egy rádióállomás a listán, majd – az állomás műsorának a vételéhez – megnyomhatja a távirányító OK (20) gombját. Ha olyan állomást választ, amelynek blokkoló ikonja van, ez az állomás csak akkor fogható, ha beírják a live365.com-hoz tartozó felhasználónevet és jelszót. A felhasználónév és a jelszó a képernyőn a szoftver segítségével elhelyezett billentyűzet – mint funkció – segítségével vihető be. Megjegyzés: A live365-nél fiók – a www.live365.com webhelyen – ingyenesen előállítható. 235 MAGYAR Ha személyes adatainkat meg kívánjuk jegyeztetni, kijelölhetjük a jelölőnégyzetet. Így nem kell a felhasználónevet és a jelszót ismét beírnunk, amikor ezt a tulajdonságot alkalmazzuk. A BGM-billentyű (25) megnyomásával akár 99 kedvenc állomás is hozzáadható a „My Radio”-hoz, majd kijelölhető az „Add”. A zenei (music) főmenün kijelölhető a „My Radio” célalkalmasság, ha a kedvenc rádióadókat gyorsan kívánjuk kijelölni. My Radio Ha a „My Radio”-t a menü révén vagy a távirányító iRadio gombjával (19) jelöltük ki, a kijelölt rádióállomások itt megtalálhatók. Kedvenc rádióállomás hozzáadása is lehetséges. Kedven rádióadó hozzáadásához előbb be kell írni azt az URL-t, ahol az adott állomás sugároz. Semmi mást nem kell tenni, csupán ügyelni arra, hogy az adott rádióadó megfelelő URL-jét írják be. Javasoljuk, hogy erre a célra használják a SHOUTCast könyvtárat. (http://www.shoutcast.com). Az iRADIO menü segítségével a SHOUTcast könyvtár közvetlenül nem elérhető. Kizárólag a Live365.com érhető el közvetlenül. 236 MAGYAR Megjegyzés: A Conceptronic C54WMP-nek beépített billentyűzete van a képernyőn, amely csak a rádióadók URL-jének és nevének beírására használható. Csak az alapvető latin karakterek támogatottak. A bővített latin karaktertáblázatokból származó különleges karakterek (pl. áäñß) nem támogatottak. 237 MAGYAR 6.4 Képek Első alkalommal történő használatkor: Ha a start menü segítségével vagy a távirányítóval (sárga gomb) a „Pictures”-t választja, a képernyőn az elérhető médiaszerverek (UPnP/AV) és/vagy a csatlakoztatott USB-eszköz áttekintése látható. A Video, Music vagy Pictures ismételt kijelölésekor a főmenübe történő visszatérés érdekében a home (kezdőlap) megnyomásával az eszköz alapértelmezésben emlékezni fog, melyik volt az utoljára felkeresett mappa. Ha az egy másik mappához vagy másik UPnP AV/forráshoz történő kijelölés érdekében vissza kíván térni az előző képernyőhöz, a vissza gombot (bal oldali nyílbillentyű (21)) kell használnia. Ha médiaszerver-eszközt jelölt ki, a rendelkezésre álló mappák jelennek meg. A megjelenített mappákat a médiaszerver kínálja fel. Lehet, hogy – bizonyos helyzetekben – nem minden felkínált mappa rendelkezik célalkalmassággal. Mindez az éppen használt médiaszervertől függ. A Pictures (képek) opció és a kijelölt mappák szűrőként működnek. Csak kijelölni és megjeleníteni lehet azt az adathordozót, amely a tévéképernyő jobb felső sarkában látható. Megjegyzés: A médiaszervernek a menü segítségével történő kijelölésekor ügyelni kell arra, hogy a médiaszerver tartalma frissüljön. A tartalom indexelt és – frissítés nélkül – az új képek nem fognak megjelenni. 238 MAGYAR Képek megjelenítése Képek megjelenítéséhez jelöljön ki egy médiaszervert és ügyeljen arra, hogy a Pictures almenüt választja, majd jelöljön ki egy képet. Egyetlen kép megjelenítéséhez megnyomhatja az OK (20) gombot. A mappa összes képének megjelenítéséhez pedig nyomja meg a Play (5) gombot. Ha egy képfájl nem támogatott, a képernyőn az alábbi üzenet látható: A képeknek másik sorrendben történő megjelenítéséhez a sort (30) (rendezés) gombot kell alkalmaznia. Zene és képek Zenét olyankor lehet lejátszani, amikor a képeket vetítés keretében jelenítik meg. Két mód kínálkozik a zenének képek megjelenítésekor történő lejátszására. 7. 1. Jelölje ki a Music célalkalmasságot a főmenü segítségével oly módon, hogy a home (kezdőlap) (3) gombot használja, vagy a Music gombot jelöli ki. Ezután jelölje ki a megfelelő mappát és a vetítés során lejátszani kívánt dalt, vagy kezdjen hallgatni egy rádióműsort. Menjen vissza a Pictures menühöz, jelölje ki az első fotót, majd nyomja meg a Play (5) gombot. 2. Vetítés alatt nyomja meg a BGM (25) gombot, majd nyomja meg a Play-t. A vetítés alatt ennek a listának minden dala lejátszásra kerül. Ez a tulajdonság csak akkor működik, ha a zenét BGMzene formájában adták hozzá (az 5.3. fejezetben ismertetjük). A Conceptronic médiaszerver (UPnP A/V) telepítése Mielőtt a Conceptronic C54WMP-t használná, UPnP A/V-kompatibilis szervert, például Conceptronic CH3SNAS vagy CH3WNAS merevlemezházat vagy valamilyen UPnP A/V eszközt kell telepítenie. A szállított CD-ROM a Conceptronic médiaszerverhez szükséges programot is tartalmazza. Ha – hardver formájában – nincs UPnP A/V szervere, saját PC-jét a Conceptronic médiaszerver programjának telepítésével médiaadatfolyam-szerverré alakíthatja át. 239 MAGYAR A. Helyezze be a CD-ROM-ot a CD-ROM meghajtóba. Az Autorun automatikusan megjelenik. Ha az Autorun menü nem jelenik meg, navigáljon a „My Computer”-hez, majd kattintson kétszer a CD-ROM meghajtóra az Autorun menü indításához. B. C. D. E. Jelölje ki az „Install Media Server Software” opciót az Autorun menün. Nyelvválasztási lehetőség jelenik meg. Jelölje ki a kívánt nyelvet, majd kattintson az „OK”-ra. Telepítővarázsló jelenik meg. A folytatáshoz kattintson a „Next”-re. Írja be felhasználónevét és szervezetét ,vagy tartsa meg az alapértelmezett beállításokat. Jelölje ki, ki használhatja az alkalmazást (az összes felhasználó vagy csupán az aktuális felhasználó engedélyezése). A folytatáshoz kattintson a „Next”-re. A telepítési könyvtárat a „Change” gomb segítségével változtathatja meg, illetve megtarthatja az alapértelmezett beállításokat. A folytatáshoz kattintson a „Next”-re. Az alkalmazás telepítésének elindításához kattintson a „Next”-re. A telepítés befejezése után üzenetet kap. Ha a Conceptronic médiaszervert közvetlenül a telepítése után indítani kívánja, pipálja ki a „Launch Conceptronic DMS” jelölőnégyzetet. A telepítőprogramból történő kilépéshez kattintson a „Finish”-re. F. G. H. I. A Conceptronic médiaszoftver ezután már telepítve van a számítógépre. A start menü Programs (programok) részében található Conceptronic mappa segítségével pedig hozzá is férhető. 240 MAGYAR 8. A Conceptronic médiaszerver konfigurációja Media files (médiafájlok) rész Fájloknak a médiaszerver adatbázisába történő importálása után áttekintést kaphat az összes beolvasott fájlról. Media Import (médiaimportálás) Ebben a részben a következőket teheti: • Elindíthatja a médiaszervert. • Leállíthatja a médiaszervert. • Hozzáadhat egy mappát. • Frissíthet egy mappát vagy minden mappát. • Törölhet egy megosztott mappát vagy törölhet minden mappát. Médiatartalmú mappa hozzáadásakor a mappa tartalma automatikusan beolvasódik. 241 MAGYAR System (rendszer) A szerver nevét megváltoztathatja a kívánt szervernévre. A médiaszervereknek a lejátszó telepítésének segítségével történő érzékelésekor a képernyőn megjelenik a szerver neve. A megváltoztatott szervernév pedig akkor aktív, amikor a szervert leállítják, majd újraindítják. 242 MAGYAR Options (opciók) Ennek a résznek a segítségével a médiaszerver szoftverjének konfigurációs opcióit lehet megváltoztatnia. Enable Autorun Minimized at Startup Enable Transcoding Megjegyzés: A „transcoding” segítségével lehetőség nyílik olyan tartalom lejátszására, amelyet a C54WMP hardverje közvetlenül nem támogat. A transzkódolt tartalom minősége változhat. File Types to scan Transcoding Setting 9. A program elindítása a Windows indításakor. Az indításkor minimalizált program futtatása. A Transcoding opció bekapcsolása. Jelölje ki, hogy a médiaszerver szoftverjének milyen fájltípusokat kell majd beolvasnia. Jelölje ki a transcoding minőségét. Alternatív médiaszerverek Alternatív médiaszervereket a Conceptronic C54WMP-vel együtt olyankor lehet használni, amikor a szerver az UPnP A/V 1.0-val kompatibilis. 243 MAGYAR Microsoft Windows XP és Windows Vista A Microsoft Windows XP és a Windows Vista a Windows Media Player segítségével felkínál egy médiaszervert. Indítsa el a Media Player-t, jelölje ki az eszközöket (Tools) és a könyvtárat, majd jelölje ki a configure Sharing-et (megosztás konfigurálása). Engedélyezheti is, de testre is szabhatja a Conceptronic C54WMP beállításait. A Monitor Folders (mappák figyelése) opció segítségével megosztani kívánt tartalmat adhat hozzá, illetve törölhet. Megjegyzés: Windows XP esetében legalább Media Player 11-re lesz szüksége ehhez az opcióhoz. Egyéb alternatív programok Az egyéb alternatív programok a következők. TVersity : www.tversity.com TwonkyVision Media Server : www.twonkymedia.com ORB : www.orb.com Megjegyzés: Ha a Conceptronic C54WMP nem képes médiaszerver-eszközt vagy programcsomagot érzékelni, akkor ellenőrizni kell annak az adott eszköznek/szoftvercsomagnak a képességeit és a telepítését. Ha az eszköz kompatibilis és megfelelően telepítve is lett, a C54WMP az eszközt a tévérendszerben választható eszközként fogja megjeleníteni. 244 MAGYAR 10. System Setup (rendszer telepítése) A rendszertelepítő menü segítségével a következőket lehet megváltoztatni: Nyelv: OSD nyelv (megjelenítés a képernyőn). Rendelkezésre álló nyelvek : angol, spanyol, német, holland, török, portugál, olasz, francia. Tévé üzemmód beállítása Jelölje ki a kívánt videobeállítást Tévérendszer Tévé kimenete YUV Videó méretezése : PAL vagy NTSC. : P-Scan: YPbPr, S-Video, Interlace (fényképekre bontásos) : 4:3 PS, 4:3 LB, 16:9. Jelölje ki a tévérendszerhez a megfelelő beállítást. Audió beállítása Jelölje ki a kívánt audiobeállítást Audió kimenet Down Sample AutoPlay opció BG Music : SPDIF/AC3, SPDIF/PCM, SPDIF/OFF. : 48 k, 96 k. : Off (ki), My Radio First (előbb My Radio), BGM First (előbb BGM). : Off (ki), Repeat One (egy ismétlése), repeat All (összes ismétlése). 245 MAGYAR Megjegyzés: Az eszköz bekapcsolásakor lehetséges a zene automatikus indítása. Ha folyamszerű rádióadást konfigurál vagy zenét tartalmazó USB-eszközt használ, a kívánt funkciót kijelölheti elsőként indítandónak is. Videó beállítása Állítsa be a tévéképernyő kívánt megjelenítését. Fényerő, kontraszt, árnyalat és telítettség beállítása. Fényképek megjelenítésének beállítása Jelölje ki a fényképtulajdonságokat. Képernyővédő Fényképek megjelenítésének beállítása Vetítés időtartama Háttérzene (BGM) Méretarány : Be/ki (On/Off). : Lista/miniatűr (List/Thumbnail). : 2-30 másodperc, 1 perc és 2 perc. : Off (kikapcsolva), Repeat one (egy ismétlése), Repeat all (összes ismétlése). : Original Size (eredeti méret), Fit to Screen (képernyőhöz igazítás). Verzió Jelölje ki és tekintse meg a termékkel kapcsolatos adatokat. Visszaállítás alapértelmezettre. Firmware frissítése (USB-n keresztül). Verzió (firmware-verzió). Az MAC-címmel kapcsolatos adatok, LAN * WLAN esetén. 246 Declaration of CE Conformity The manufacturer 2L International BV Address Databankweg 7 3821 AL Amersfoort, the Netherlands Hereby declares that the product Type 54MBPS WIRELESS MEDIA PLAYER/DMA Product C08-126 Complies with following directives: 1999/5/EEC R&TTE directive: Telecommunications Terminal Equipment and Satellite Earth Station Equipment 2004/108/EEC EMC directive: Electromagnetic Compatibility 73/23/EEC Low Voltage Directive: Electrical equipment designed for use within certain voltage limits The following standards were consulted to assess conformity: ETSI 300 328-2/2000, EN 301 489-17-2000, EN 301 489-1-2000, EN55022/9.98 Class B, EN 61000-3-2/3/4/1995, EN 50082-1/1994, EN 60950/1995 This product is for indoor use only. The purpose of this product is to send and receive data through the ether. This is a class 2 product and the transmitted output power is less than 100mW. The CE symbol confirms that this product conforms to the above named standards and regulations. This product is suitable for all EU countries. For France, the output power is restricted if used outdoor and in the range 2454 to 2483,5 MHz. For Italy, depending on the usage, a general authorization may be required. Pour tous les pays de I'UE. Pour la France, pour une utilisationen extérieur, la puissance de sortie est limitée dans la bande 2454 to 2483,5 MHz.Pertutti i paesi ell'EU. Per I'Italia, secondo I'uso, un 'autorizzazione generale puô essere richiesta. th Place and date of issue: Amersfoort, October 25 , 2007 Herman Looijen, Product Marketing Manager 247 TÜRKÇE Conceptronic C54WMP Hızlı Kurulum Kılavuzu Conceptronic Kablosuz Media Player’ı (Ortam Oynatıcı) Satın Aldığınız İçin Tebrikler. Ekteki Donanım Kurulum Kılavuzu, Conceptronic Kablosuz Media Player’ın kurulumunun adım adım nasıl yapılacağı konusunda bilgi vermektedir. Problem ortaya çıktığında, destek sitemize gitmenizi (www.conceptronic.net adresine gidin ve ‘Support’ bölümüne tıklayın) tavsiye ederiz. Burada Sıkça Sorulan Sorular Veritabanını bulacaksınız. Ürününüzle ilgili başka sorularınız varsa ve bunların yanıtlarını web sitemizde bulamıyorsanız, bize e-posta ile ulaşın: [email protected] Conceptronic ürünleri ile ilgili daha fazla bilgi için, lütfen Conceptronic Web Sitesini ziyaret edin: www.conceptronic.net Aşağıda açıklanan yazılım yüklemesi bilgisayarınızdaki yüklemeden biraz daha farklı olabilir. Bu durum kullandığınız Windows sürümüne bağlıdır. 1. Paket İçeriği Conceptronic Kablosuz Media Player paketinin içeriği aşağıdaki gibidir: • • • • • • • • Conceptronic C54WMP Kablosuz Media Player C54WMP için standart Güç kaynağı, 5V DC, 2A Uzaktan Kumanda Uzaktan kumanda için 2xAAA pil RCA A/V Kablo (1x RCA kompozit, 2x RCA Ses) Scart Adaptör (3x RCA - SCART) Bileşen dönüştürücü kablo (bileşen kablo için 3x RCA Dişi) 248 TÜRKÇE 2. Özellikler • • • • • • • MPEG 1/2/4 özellikli video oynatımı. 802.11b/g kablosuz ağ. Kablolu Ethernet desteği (10/100 Base-T). UPnP A/V İstemci desteği (UPnP 1.0 Sertifikalı). DLNA Uyumlu. Kurulum ve yapılandırma için kolay menü. Firmware yükseltmeleri ve Sabit Disk ya da USB Bellek ile cihaz kullanılırlığını genişletmek için USB Host Konnektör. Ortam oynatımı için C54WMP’nin bir ortam sunuculu ağa bağlı olması gerekir. Conceptronic C54WMP aşağıdaki ortam ortam formatlarını destekler: • • • • • • • MPEG 1, 2, 4 sıkıştırılmış ses ve video dosyaları. SRT, SSA ve SUB alt yazı dosyaları. JPEG ve GIF sıkıştırılmış resim dosyaları. BMP ve TIFF resim dosyaları. 320Kbps’a kadar MP3 ya da VBR. 192Kbps’a kadar WMA ya da VBR. WAV ses dosyaları. Diğer dosyalar ‘transcoding (kod çevrimi)’ özellikli bir ortam sunucusu kullanıldığında oynatılabilir. Bilgisayarınızın yardımıyla dosya kodu gerçek zamanlı olarak Conceptronic C54WMP tarafından kullanılabilir bir formata çözülecektir. 249 TÜRKÇE 3. Uzaktan Kumanda Açıklaması 2 1 3 5 6 4 7 8 9 11 12 10 13 14 15 16 18 17 19 20 21 22 24 23 25 26 27 29 28 30 250 TÜRKÇE No. 6 7 TUŞ TAKIMI POWER (GÜÇAÇMA/KAPAMA) MUTE (SESSİZ) HOME (ANA mENÜ) REW PLAY / PAUSE (OYNAT / DURAKLAT) FF STOP (DURDUR) 8 PREV (ÖNCEKİ) 9 NEXT (SONRAKİ) 10 REPEAT (TEKRAR) 1 2 3 4 5 11 OUTPUT (ÇIKIŞ) 13 ZOOM (YAKINLAŞTIR) SLOW (YAVAŞ) 14 BACK (GERİ) 12 19 DISPLAY (GÖRÜNTÜLE) MÜZİK VIDEO PICTURES (RESİMLER) iRADIO 20 OK (TAMAM) 21 YÖN TUŞLARI Yukarı, Aşağı Sol, Sağ 15 16 17 18 22 23 24 25 26 27 28 29 30 SUB CH + LANG CH (DİL) VOL+ VOL BGM SAYI 1-9 A-B 0 :/ SETUP (AYARLAR) SORT (SIRALA) FONKSİYON TANIMI Kablosuz Media Player’ı Çalıştırır/Bekleme Modundan Çıkarır. Sesi Kısar. Ana Menüyü getirir. Ortam dosyası oynatılırken hızlı geri sarar. 1. Müzik dosyasını Oynatır ya da Duraklatır 2. Fotoğraf slayt gösterisini başlatır Ortam dosyası oynatılırken hızlı ileri sarar. Oynatma işlemini durdurur. 1. Ortam dosyalarına göz atarken önceki sayfayı getirir. 2. Oynatma işlemi esnasında önceki dosyayı getirir. 1. Ortam dosyalarına göz atarken sonraki sayfayı getirir. 2. Oynatma işlemi esnasında sonraki dosyayı getirir. 1. Video Oynatma ve Müzik Çalma esnasında tekrar modunu seçer. 2. Fotoğraf İzleme esnasında arka plan müziğini tekrarlar. Video çıkışını S-VideoÆYPbPrÆYUV sırasıyla değiştirir. Oynatma esnasında video ya da fotoğrafı yakınlaştır. Ortam dosyası oynatılırken yavaş ileri sarar. 1. Önceki klasör ya da ayar sayfasını getirir. 2. Kablosuz ayar sayfasında kablosuz ayarlarını kaydeder/iptal eder. 1. Video Oynatma esnasında dosya adı ve ortam türünü gösterir. 2. Fotoğraf İzleme esnasında dosya adı ve çözünürlüğü gösterir. MÜZİK modunu etkinleştirir. VİDEO modunu etkinleştirir. FOTOĞRAF modunu etkinleştirir. İnternet Radyo modunu etkinleştirir. 1. Seçili öğeyi etkinleştirir. 2. Fotoğraf İzleme esnasında “döndürme” moduna girer. 1. Geçerli modu durdurmak ve önceki kata dönmek için “LEFT (SOL)”a basın; Seçili bir klasör ya da sunucuya girmek için “RIGHT (SAĞ)”a basın. 2. Video Modu: Diğer dosyayı seçmek için “UP (YUKARI)” ya da “DOWN (AŞAĞI)” tuşuna basın 3. Fotoğraf Modu: Resmi “zoom (yakınlaştır)” modunda taşıyın ya da “rotate (döndür)” modunda döndürün 4. Müzik Modu: Önceki müzik dosyasına atlamak için “UP (YUKARI)”ya ya da sonraki müzik dosyasına atlamak için “DOWN (AŞAĞI)”ya basın. Video Oynatma / Sonraki Kanal esnasında alt yazıyı seçin. Video Oynatma / Önceki Kanal esnasında dil seçin. Sesi artırır. Sesi azaltır. Arka plan müziği olarak bir müzik dosyası ekler/çıkarır. Sayısal seçim tuşları 1-9. A-B tekrar modunu düzenler/iptal eder. Sayısal seçim tuşu 0 iRADIO URL girişi için kısa yol tuşu Kablosuz Media Player Ayar Menüsünü açar. Dosya listesini sıralar. 251 TÜRKÇE 4. C54WMP’nin ağ ve televizyonunuza bağlanması Conceptronic C54WMP’yi kullanmak için: 4. 5. 6. Kablosuz (802.11b/g/n) ya da Kablolu (10/100/1000) ağ, Windows 2000, Windows XP ya da Windows Vista yüklü bir ya da daha fazla bilgisayar, Bileşen (Y, Pb, Pr), S-Video, SCART ya da Kompozit girişli bir TV setine sahip olmalısınız. 2 bilgisayar ve NAS Ortam Sunuculu bir bağlantı örneği İnternetten yayın yapan bir radyo istasyonunu dinlemek gibi canlı yayın hizmetlerini kullanmak isterseniz geniş bant İnternet bağlantısına sahip olmak yararlı olacaktır. Not: Conceptronic C54WMP, ses ve video oynatımı için bir UPnP A/V istemci kullanmaktadır. Bunun için UPnP A/V Sunucu özellikli bir donanıma, üçüncü parti bir UPnP A/V Sunucu uygulamasına ya da birlikte verilen Conceptronic Ortam Sunucu yazılımına ihtiyacınız olacaktır. (Bkz. Bölüm 7). 252 TÜRKÇE 4.1 Donanım Kurulumu Not: Kablolu bir yerel alan ağına sahipseniz, Conceptronic C54WMP’yi router ya da switch’e bağlamak için bir Ethernet kablosu kullanmanız gerekir. Televizyonunuz için ne tür bir kablo kullanabileceğinizi belirleyin: • Bileşen (Y, Pb, Pr). • S-Video. • Kompozit (Sadece Video). • SCART (Video ve Ses). Ses için analog RCA çıkışı (kırmızı ve beyaz RCA jaklar) ya da dijital koaksiyel çıkışı (turuncu RCA jak) kullanabilirsiniz. Uzaktan kumanda (paketle birlikte verilen) 2x AAA pil kullanmaktadır. Cihazı açmak/kapatmak için uzaktan kumandayı kullanmanız gerekir. Televizyonunuzu açın ve doğru Video Kanalını seçin. Cihazı açtığınızda Conceptronic C54WMP tarafından Conceptronic açılış ekranı gösterilecektir. 5. İlk ayarlar ve yapılandırma Not: Bu kılavuzda Conceptronic C54WMP’nin özellikleri ve fonksiyonlarını açıklamak için belirli IP adresleri kullanacağız. Bu ayarlar ağ ortamınızda farklı olabilir. Bu kılavuzda aşağıdaki ayarları kullanacağız: IP adres C54WMP : 192.168.1.50 Ağ maskesi : 255.255.255.0 Ağ geçidi adresi : 192.168.1.1 (ağ geçidi olarak router) DNS (Alan Adı Sunucusu) : 192.168.1.1 Conceptronic C54WMP (Dijital Media Player) cihazını açtığınızda yapılandırmanız gerekmektedir. Televizyon ekranında çıkan mesaj, cihazı hangi dilde kullanmak istediğinizi sorar. 253 TÜRKÇE Dil seçiminden sonra C54WMP Adaptörü ağı başlatır. Ağ yapılandırma sihirbazı otomatik olarak başlayacaktır. Bu menüye ayar menüsünden de erişebilirsiniz (‘Network Wizard (Ağ Sihirbazı)’nı seçin). Tercih edilen Bağlantı Türünü seçin: ‘Wired (Kablolu)’ ya da ‘Wireless (Kablosuz)’. Not: Yüksek bant genişlikli yayınlar kullanırken kablolu bağlantıyı kullanmanızı tavsiye ederiz, WLAN’da sinyal kalitesi veri ve performansı etkileyebilmektedir. Kablolu ya da Kablosuz Ağ bağlantısını seçmek için Yukarı / Aşağı yön tuşlarını (21) kullanın. 5.1 Kablolu yapılandırması Yapılandırma ayarlarını uygulamak için ‘Wired (Kablolu)’yu seçin ve ‘OK (Tamam)’a basın. ‘Done "(Bitti)’yi seçmek için ‘OK (Tamam)’a basın. Kablolu yapılandırma işlemi tamamlanmıştır. Lütfen Media Player’ın kullanımı için ‘Bölüm 6’dan devam edin. 254 TÜRKÇE Not: Varsayılan olarak C54WMP bir DHCP sunucu arayacaktır. C54WMP doğru olarak yapılandırılırsa ekranın altında bir IP adresi bulacaksınız. Ekranda IP: 0.0.0.0 görülüyorsa cihaz bir IP adresi bulamamıştır, bu durumda C54WMP IP Ağ ayarlarını manuel olarak yapılandırmak zorundasınız (Bölüm 5.4). 5.2 Kablosuz yapılandırması C54WMP’nin Kablosuz LAN (802.11b/g) desteği vardır: • • • • • • ESSID: Otomatik algılama ya da ESSID yayını kapalı olduğunda manuel olarak girilir. Altyapı ya da Ad-hoc (Anlık) Modu. Kimlik doğrulama: Otomatik, Paylaşımlı Şifle, Açık sistem. Şifre Formatı: Kapalı, WEP64, WEP64Hex, WEP128, WEP128Hex, WPA-PSK, WPA2 AES. Şifre değeri: Şifre Formatı içinden yapılandırılabilir. Kanal: otomatik algılama. Yapılandırma ayarlarını uygulamak için ‘Wireless (Kablosuz)’u seçin ve ‘OK (Tamam)’a basın. C54WMP kullanılabilir erişim noktalarını arayacaktır. Erişim noktalarınız SSID yayınladığında seçim yapabilirsiniz. Sinyal gücü göstergesinde 3 renk olabilir: kırmızı, sarı ve yeşil. Gösterge yeşil ise C54WMP ve erişim noktanız arasında olası en iyi bağlantıya sahipsiniz demektir. Sarı, normal kullanım için kabul edilebilir. Erişim noktası sinyal gücü kırmızı olduğunda C54WMP ya da erişim noktanızın konumunu değiştirmenizi öneririz. Not: Kırmızı ya da sarı sinyal göstergesi ile yüksek bant genişliğine sahip filmlerin oynatılmasını tavsiye etmemekteyiz. Erişim noktasını seçin ve uzaktan kumanda üzerinde OK tuşuna basın. ‘Next (İleri)’yi seçin ve ‘OK (Tamam)’a basın. Erişim noktanızda şifreleme ayarlarını yaptıysanız C54WMP’ye de erişim noktasına girdiğiniz ayarların aynısını girmeniz gerekir. 255 TÜRKÇE C54WMP’nin kablosuz kısmı, erişim noktasına bağlantı için ne tür yapılandırma gerekli olduğunu otomatik olarak algılayacaktır. Erişim noktaları WPA ile şifrelenirse, cihaz bunu algılayacak ve yapmanız gereken şey özel paylaşımlı şifreyi (PSK) girmek olacaktır. Erişim noktanızın bir WEP ya da WPA şifreleme ile korunmadığı durumlarda yapılandırmayı sonlandırmak için ‘Next (İleri)’yi seçebilirsiniz. Kablosuz yapılandırma işlemi tamamlanmıştır. Lütfen Media Player’ın kullanımı için ‘Bölüm 6’dan devam edin. Kablosuz ayarlarını Kablosuz Ayar menüsü içinden manuel olarak değiştirebilirsiniz. Not: Varsayılan olarak C54WMP bir DHCP sunucu arayacaktır. C54WMP doğru olarak yapılandırılırsa ekranın altında bir IP adresi bulacaksınız. Ekranda IP: 0.0.0.0 görülüyorsa cihaz bir IP adresi bulamamıştır, bu durumda C54WMP IP Ağ ayarlarını manuel olarak yapılandırmak zorundasınız (Bölüm 5.4). 5.3 Conceptronic C54WMP ile Windows Connect Now 2.0’ın kullanımı Microsoft® Windows® Connect Now (WCN) teknolojisi, Conceptronic C54WMP gibi cihazların mevcut kablosuz ağa eklenmesini daha kolay gerçekleştirir. Güvenli bir kablosuz ağ oluşturulması ve kablosuz cihazlara gerekli kablosuz ayarların dağıtılması zor olabilir. WCN, kablosuz ağ cihazlarını kolay ve güvenli bir şekilde yapılandırmanıza yardım edebilir. Windows Connect Now, XP Service Pack 2 (SP2) ve Windows’un son sürümlerine dahil edilmiştir. Kablosuz ayarları taşınabilir USB flash belleğe (bu pakete dahil edilmemiştir) transfer etmek için Windows XP SP2 ya da üzeri çalışan bilgisayarınızda WCN kullanabilirsiniz. USB flash bellek içinden WCN yapılandırması için bilgisayarınızda çalışan bir kablosuz bağlantıya sahip olmanız tavsiye edilir. 256 TÜRKÇE Windows XP Microsoft Windows XP altında WCN içinden C54WMP yapılandırmasını aşağıdaki gibi yapabilirsiniz ‘Start (Başlat)’, ‘My Network Places (Ağ Bağlantılarım)’a tıklayın. Ağ Komşularım gösterilecektir. Pencerenin sol tarafında ‘Set up a wireless network… (Kablosuz ağ kur...)’ seçeneğini seçin. Kablosuz Ağ Kurulum Sihirbazı ekrana gelecektir. Devam etmek için ‘Next (İleri)’ye tıklayın. Kablosuz ağ adını (SSID) girin ve ‘Manually assign a network key (Manuel olarak bir ağ şifresi ata)’ seçeneğini seçin. Not: Ağınız WPA ile şifrelenmişse pencerenin altındaki onay kutusunu işaretleyin. Ağınız WEP ile şifrelenmişse onay kutusunu işaretsiz bırakın. Devam etmek için ‘Next (İleri)’ye tıklayın. Ekranda gösterilen her iki alana ağ için şifre anahtarını girin. Şifreyi daha kolay girmek için ‘Hide characters…(Karakterleri Gizle...)’ seçeneğinin işaretini kaldırabilir, böylece ne girdiğinizi görebilirsiniz. Devam etmek için ‘Next (İleri)’ye tıklayın. ‘Use a USB flash drive (USB flash bellek kullan)’ seçeneğini seçin. Devam etmek için ‘Next (İleri)’ye tıklayın. USB flash belleği bilgisayarınıza takın ve bellek için atanan sürücü harfini seçin. Devam etmek için ‘Next (İleri)’ye tıklayın. Yapılandırma kaydedildiğinde USB flash belleği çıkarabilirsiniz. Not: Bilgisayarınızdaki sihirbazı kapatmayın! C54WMP’yi açın ve ‘Setup (Ayarlar)’, ‘Wireless Setup (Kablosuz Ayarlar)’a gidin. C54WMP’nin USB portuna USB flash sürücüyü yerleştirin. C54WMP kullanılabilir WCN yapılandırma dosyalarını otomatik olarak algılayacak ve ayarları uygulamak isteyip istemediğinizi soracaktır. Lütfen onaylayın. Ayarlar yapılandırmada kaydedilecektir. USB flash sürücüyü çıkarın. Artık doğru ayarlar kullanılacaktır. Doğru kablosuz ayarların kullanıldığından emin olmak için cihazı yeniden başlatmanızı tavsiye ederiz. USB flash belleği tekrar bilgisayarınıza takın ve ‘Next (İleri)’ye tıklayın. Yapılandırılmış cihazlar listesi göreceksiniz. ‘Print Network Settings (Ağ Ayarlarını Yazdır)’ düğmesi ile ağ ayarlarınızı yazdırabilirsiniz. Kablosuz Ağ Kurulum Sihirbazı’nı kapatmak için “Finish (Son)”a tıklayın. Not: Varsayılan olarak, ‘Finish (Son)’a tıkladığınızda USB flash bellekten WCN ayarları silinecektir. Ağınızda başka cihaz/bilgisayar yapılandırmaları yapmak isterseniz bu kutunun işaretini kaldırabilir ve ayarları USB flash bellekte tutabilirsiniz fakat ayarları silmeniz tavsiye edilir. 257 TÜRKÇE Windows Vista Microsoft Windows Vista altında WCN içinden C54WMP yapılandırmasını aşağıdaki gibi yapabilirsiniz: ‘Start (Başlat)’, ‘Network (Ağ)’a tıklayın. Pencerenin üstünde bulunan ‘Add a Wireless Device (Kablosuz Aygıt Ekle)’ düğmesine tıklayın. ‘I want to add a wireless device or computer that is not on the list, using a USB flash drive (USB flash bellek kullanarak listede olmayan kablosuz bir aygıt ya da bilgisayar eklemek istiyorum)’ seçeneğini seçin. ‘Add the device or computer using a USB flash drive (USB flash bellek kullanarak aygıt ya da bilgisayar ekle)’ seçeneğini seçin. ‘Network Name (Ağ Adı) (SSID)’ alanında Kablosuz ağınızın adını girin ya da listeden kullanılabilir bir kablosuz ağ seçin (eğer bilgisayarınız ağa kablosuz olarak bağlı ise). Devam etmek için ‘Next (İleri)’ye tıklayın. Kablosuz ağınızın şifreleme kodunu girin. Not: Windows Vista varsayılan olarak WPA kullanır. WEP şifreleme kullanmak isterseniz ‘Show advanced network security options (Gelişmiş ağ güvenlik seçeneklerini göster)’e tıklayın. Devam etmek için ‘Next (İleri)’ye tıklayın. USB Flash belleğin takılı olduğundan emin olun ve ayarları doğru sürücü harfine kaydedin. Ayarlar kaydedildiğinde ‘Close (Kapat)’a tıklayın ve USB flash belleği bilgisayarınızdan çıkarın. C54WMP’yi açın ve ‘Setup (Ayarlar)’, ‘Wireless Setup (Kablosuz Ayarlar)’a gidin. C54WMP’nin USB portuna USB flash sürücüyü yerleştirin. C54WMP kullanılabilir WCN yapılandırma dosyalarını otomatik olarak algılayacak ve ayarları uygulamak isteyip istemediğinizi soracaktır. Lütfen onaylayın. Ayarlar yapılandırmada kaydedilecektir. USB flash sürücüyü çıkarın. Artık doğru ayarlar kullanılacaktır. Doğru kablosuz ayarların kullanıldığından emin olmak için cihazı yeniden başlatmanızı tavsiye ederiz. 5.4 C54WMP’ye Manuel IP Adresi Girilmesi Ağda kullanılabilir DHCP sunucu olmadığı durumlarda C54WMP’nin IP adresini manuel olarak girmeniz gerekir. Uzaktan kumanda üzerinde Ayarlar (29) tuşuna basın ya da ekranda ana menüde bulunan ayarlar simgesini seçin. Fonksiyonu seçin: Network setup (Ağ ayarları) ve IP yapılandırması için OK (Tamam)’a basın. Arzu edilen ağ türünü seçin: “Wired (Kablolu)” ya da “Wireless (Kablosuz)”. DHCP Özelliğini seçin, ayarları girmek için OK (Tamam)’a basın ve değişiklik yapmak için sol ya da sağ yön tuşunu (21) kullanın. Bu seçeneği bırakmak için tekrar OK (Tamam)’a basmanız gerekir. IP adresini manuel olarak girmek için DHCP’yi devre dışı bırakmalısınız. 258 TÜRKÇE Bu fonksiyon devre dışı bırakıldığında standart varsayılan ayarlar gösterilir. IP adres C54WMP Ağ maskesi Ağ geçidi adresi DNS (Alan Adı Sunucusu) : 192.168.1.50 : 255.255.255.0 : 192.168.1.1 (ağ geçidi olarak router) : 192.168.1.1 Arzu edilen ayarı seçebilir ve kendi ağ ayarlarınıza göre değişiklik yapabilirsiniz. IP adresi, alt ağ maskesi, ağ geçidi ya da DNS adresini değiştirirken uzaktan kumanda üzerindeki sayısal tuşları (26) kullanabilirsiniz. Bir sonraki alana gitmek için yön tuşunu (21) (sol / sağ) kullanabilirsiniz. “.” (Nokta) girmenize gerek yoktur. Değişiklik yapmak için ‘OK (Tamam)’a basın, ayarı değiştirmek için sol ya da sağ yön tuşunu (21) kullanın ve bir sonraki alana gitmek için tekrar ‘OK (Tamam)’a basın. C54WMP’nin belleğindeki ayarları kaydetmek için sol yön tuşuna (21) basmanız gerekir, ardından değişiklikleri kaydetmeniz ya da iptal etmeniz istenecektir. ‘Save (Kaydet)’i seçin. 259 TÜRKÇE 6. Kablosuz Media Player’ın Kullanımı Kablosuz Media Player yapılandırması tamamlandığında 4 fonksiyonlu varsayılan menüye gireceksiniz: Not: Music (Müzik) Media Player içinden müzik çalmak isterseniz Müziği seçin. Photo (Fotoğraf) Media Player içinden resim görüntülemek isterseniz Fotoğrafı seçin. Video Film / video izlemek isterseniz Videoyu seçin. Setup (Ayarlar) C54WMP’nin ayarlarını yapılandırmak / değiştirmek isterseniz Ayarları seçin. Müzik çalmadan, Video ya da Fotoğraf görüntülemeden önce çalışan bir Ortam Sunucusuna sahip olduğunuzdan emin olun. Çalışan bir Ortam Sunucusuna sahip değilseniz lütfen Conceptronic Ortam Sunucusu Kurulumu için Bölüm 7’ye ilerleyin. 6.1 Hızlı Seçim Uzaktan kumandanızın Mavi, Yeşil, Sarı ve Kırmızı düğmeleri ile C54WMP’nin çeşitli oynatma seçenekleri arasında kolayca hızlı geçiş yapabilirsiniz. Video için mavi düğmeye, müzik için yeşil düğmeye, resim için sarı düğmeye ve internet radyosu için kırmızı düğmeye basın. Not: Bu özelliğin kullanımı sizi son kullanılan ekrana geri götürecektir. Ana menüye geri gitmek isterseniz ana menü (3) düğmesine basın. 260 TÜRKÇE 6.2 Video Conceptronic C54WMP MPEG1, MPEG2, MPEG4, video formatlarını olduğu kadar VOB, AVI ve diğer formatları da desteklemektedir. Ortam Sunucusu Yazılımı ile ‘transcoding (kod çevrimi)’ kullanımı mümkündür. Bu, bilgisayarınız, video formatının kodunu Conceptronic C54WMP ile kullanılabilir bir formatta çözecek demektir. İlk kullanım: Başlat menüsünden ya da uzaktan kumandanızın (mavi düğmesinden) ‘Video’yu seçerseniz kullanılabilir Ortam Sunucuları (UPnP/AV) ve/veya bağlı USB aygıtlarının özetini gösteren bir ekran göreceksiniz. Tekrar video, müzik ya da resim seçerken cihaz, varsayılan olarak ana menüye dönmek için ana menü tuşuna bastığınızda son ziyaret edilen klasörü hatırlayacaktır. Başka bir klasör ya da başka bir UPnP AV/Kaynak seçmek amacıyla önceki ekrana dönmek için geri düğmesini (sol ok tuşu (21)) kullanmanız gerekir. Bir Ortam Sunucu cihaz seçerseniz, bu, kullanılabilir klasörleri gösterecektir. Gösterilen klasörler Ortam Sunucusu tarafından sağlanmaktadır. Bazı durumlarda sunulan tüm klasörlerin işlevsel olmaması mümkündür. Bu, kullanılan Ortam Sunucusuna bağlıdır. Video seçeneği ve seçtiğiniz klasörler filtre olarak çalışır. Sadece televizyon ekranınızın sağ üst köşesinde yazan ortamı seçebilir ve görüntüleyebilirsiniz. 261 TÜRKÇE Filmlere göz atmak için yön tuşlarını (21) kullanın ve filmi oynatmaya başlamak için oynat (5) düğmesine basın. Filmi başlattıktan sonra, Conceptronic C54WMP, filmi yükleyecektir. Bu yükleme birkaç saniye sürebilir ve loading (yüklüyor) mesajı ekrana gelir. Not: Yükleme süresi, bağlantı kalitesine ve ortam sunucusuna bağlıdır. Not: Menüden Ortam Sunucusunu seçerken ortam sunucusunun içeriğini tazelediğinizden emin olun. İçerik alfabetik olarak listelenir ve tazeleme olmadan yeni videolar gösterilmez. Bir video dosyası ya da kodlayıcı-kod çözücü (codec) desteklenmiyorsa ekranınızda aşağıdaki mesajı göreceksiniz: Video Oynatımı fonksiyonları Video dosyalarını oynatırken kullanılabilecek diğer fonksiyonlar: 1. 2. 3. 4. 5. 6. Not: Sessize Alma: Ses çalma işlemini etkinleştirmek ya da devre dışı bırakmak için Mute (Sessize Al) (2) tuşuna basın. Ses Kontrolü: Ses seviyesini artırmak ya da azaltmak için + / - (24) tuşlarına basın. Tekrar: Oynatılan video dosyasını (bir kez) tekrarlamak için repeat (tekrar) düğmesine (10) bir kez basın. Geçerli klasörde bulunan tüm video dosyalarını (tümden tekrar) tekrarlamak için repeat (tekrar) düğmesine (10) iki kez basın. Tekrar modunu devre dışı (tekrar kapalı) bırakmak için repeat (tekrar) düğmesine (10) üç kez basın. Duraklat: Video oynatımı esnasında videoyu duraklatmak için oynat (5) düğmesine basın. Videonun kaldığı yerden devam etmesi için oynat (5) düğmesine tekrar basın. Oynatım işlemini durdurmak için Durdur (7) düğmesini kullanın. Geri sarmak için Rew (4), hızlı ileri sarmak için FF (6) düğmelerini kullanın. “rew” ya da “ff” sırasında oynatım işlemi donabilir. C54WMP arka planda içeriği hızlı geri ya da ileri saracaktır. Oynatım işlemine kaldığı yerden devam etmek için “oynat” (5) düğmesine basın. 262 TÜRKÇE 7. 8. Önceki video dosyasını seçmek için Prev (8) düğmesini kullanın. Sonraki video dosyasını seçmek için Next (9) düğmesini kullanın. Klasörde bir çok video dosyası bulunuyorsa Prev (8) ya da Next (9) düğmelerini kullanarak sayfalara göz atabilirsiniz. 9. Video dosyalarını ekran görüntüsü olarak göstermek için Up / Down tuşunu (21) kullanın. Seçilen video dosyasını oynatmak için OK (20) düğmesine ya da dosya listesini kapatmak için back (14) düğmesine basın. 10. Dosya seçim menüsüne dönmek için Left (Sol) (21) tuşuna basın. 11. Yakınlaştırma: Ekranı büyütmek ya da küçültmek için Zoom (Yakınlaştır) (12) tuşunu kullanın. 12. Alt yazı ve dil: VOB dosyaların kullanılabilir dilleri arasında geçiş yapmak için Subtitle / Language (Alt yazı / Dil) (22 ve 23) düğmelerine basın. MPEG4 dosyalarının alt yazıları arasında geçiş yapmak için de bu düğmeleri kullanın. 13. A-B modu: Tekrar bölümünü başlatmak için A-B (27) düğmesine basın. Tekrar bölümünü bitirmek için düğmeye tekrar basın. Tekrar A-B modunu iptal etmek için A-B düğmesine tekrar basın. 6.3 Music (Müzik) İlk kullanım: Başlat menüsünden ya da uzaktan kumandanızın (yeşil düğmesinden) ‘Music (Müzik)’i seçerseniz kullanılabilir Ortam Sunucuları (UPnP/AV) ve/veya bağlı USB aygıtlarının özetini gösteren bir ekran göreceksiniz. 263 TÜRKÇE Ana menüde kullanılabilir birçok seçenek mevcuttur: 1. Arka plan müziği (BGM). 2. Live 365. 3. My Radio (Radyolarım) 4. Kullanılabilir Ortam Sunucuları. Video, müzik ya da resim dosyasını tekrar seçerken, cihaz, varsayılan olarak ana menüye dönmek için ana menü tuşuna bastığınızda son ziyaret edilen klasörü hatırlayacaktır. Başka bir klasör ya da başka bir UPnP AV/Kaynak seçmek amacıyla önceki ekrana dönmek için geri düğmesini (sol ok tuşu (21)) kullanmanız gerekir. Müzik çalmak için önce müzik dosyalarının (mp3/ wav / wma) bulunduğu ortam cihazını (ortam sunucusu, USB flash bellek) seçmeniz gerekir. Bir Ortam Sunucu cihaz seçerseniz kullanılabilir klasörler gösterilecektir. Gösterilen klasörler Ortam Sunucusu tarafından sağlanmaktadır. Bazı durumlarda, sunulan tüm klasörlerin işlevsel olmaması mümkündür. Bu, kullanılan Ortam Sunucusuna bağlıdır. Müzik seçeneği ve seçtiğiniz klasörler filtre olarak çalışır. Sadece televizyon ekranınızın sağ üst köşesinde yazan ortamı seçebilir ve görüntüleyebilirsiniz. Müzik seçme ve çalma için sunulan klasör, Ortam Sunucunuzun türü, markası ya da yazılım sürümüne bağlıdır. Bazı Ortam Sunucuları şunlardır: Albüm, Sanatçı, Tür, tüm-parça seçimleri. Lütfen tercih ettiğiniz özellikleri seçin. 264 TÜRKÇE Not: Menüden Ortam Sunucusunu seçerken ortam sunucusunun içeriğini tazelediğinizden emin olun. İçerik alfabetik olarak listelenir ve tazeleme olmadan yeni müzik dosyaları gösterilmez. Bir müzik dosyası desteklenmiyorsa ekranınızda aşağıdaki mesajı göreceksiniz: Müzik çalmak ve duraklatmak için Oynat/Duraklat (5) düğmesine basın. Müziği durdurmak için Durdur (7) düğmesine basın. Listeden bir şarkı seçmek için Yukarı ya da Aşağı (21) düğmesine basın. Müzik Çalma Fonksiyonları 1. 2. 3. 4. 5. 6. 7. Sessize Alma: Ses çalma işlemini etkinleştirmek ya da devre dışı bırakmak için Mute (Sessize Al) (2) tuşuna basın. Ses Kontrolü: Ses seviyesini artırmak ya da azaltmak için + / - (24) tuşlarına basın. Tekrar: Çalınan müzik dosyasını (bir kez tekrar) tekrarlamak için repeat (tekrar) düğmesine (10) bir kez basın. Geçerli klasörde bulunan tüm müzik dosyalarını (tümden tekrar) tekrarlamak için repeat (tekrar) düğmesine (10) iki kez basın. Tekrar modunu devre dışı (tekrar kapalı) bırakmak için repeat (tekrar) düğmesine (10) üç kez basın. Duraklat: müzik çalma sırasında müziği duraklatmak için oynat (5) düğmesine basın. Müziğin kaldığı yerden çalmaya devam etmesi için oynat (5) düğmesine tekrar basın. Geri sarmak için Rew (4), hızlı ileri sarmak için FF (6) düğmelerini kullanın. Önceki müzik dosyasını seçmek için Prev (8) düğmesini kullanın. Sonraki müzik dosyasını seçmek için Next (9) düğmesini kullanın. Kullanılabilir müziğin bir özetini alırsanız aşağıdakileri yapmak için uzaktan kumandanızdaki BGM tuşuna (25) basabilirsiniz: 1. 2. 3. 4. 5. 6. Add (Ekle) Play/Next (Oynat/Sonraki) Play/Shuffle (Oynat/Karışık Çal) Add All (Tümünü Ekle) Remove All (Tümünü Sil) Stop (Durdur) BGM özelliğine şarkı ekler. BGM listesinden sonraki şarkıyı çalar. BGM listesinden dosyaları oynatır/karışık çalar. Klasördeki tüm şarkıları BGM listesine ekler. BGM listesinden tüm şarkıları siler. BGM listesinden şarkı çalmayı durdurur. 265 TÜRKÇE Arka plan müziği seçeneği sadece bu özel seçime müzik eklerseniz kullanılabilir. Bu işlemi BGM tuşuna (25) basarak yapabilirsiniz. Arka plan müziğinde 2 amaç vardır: BGM listesine müzik ekleyin ve çalın ya da C54WMP’yi açtığınızda arka plan müziği otomatik olarak başlayabilir. Bu, sadece bir USB bellekten arka plan müziği seçtiğinizde çalışmaktadır. Live365 Conceptronic C54WMP’ye Live365.com İnternet radyosu müzik servisini eklemiş bulunmaktayız. İnternetten radyo istasyonlarını dinlemek için internete bağlı bir ağ (LAN/WLAN) bağlantısına sahip olmanız gerekir. Müzik ana sayfasından ‘Live365’ seçeneğini seçebilirsiniz. Listeden bir tür ya da diğer mevcut seçeneklerden birisini seçebilirsiniz. Listeden bir radyo istasyonu seçebilir ve bu radyo istasyonunu dinlemek için uzaktan kumandada OK (20) düğmesine basabilirsiniz. Kilit simgeli bir istasyon seçerseniz, bu istasyonu ancak live365.com kullanıcı adı ve parolanızı girmeniz durumunda dinleyebilirsiniz. Kullanıcı adı ve parolanızı görüntü ekranında yazılım klavyesi fonksiyonu ile girebilirsiniz. Not: http://www.live365.com adresinden ücretsiz olarak bir live365 hesabı oluşturabilirsiniz. Kişisel bilgilerinizi hatırlamak için onay kutusunu (Remember my password) seçebilirsiniz. Böylece bu özelliği tekrar kullandığınızda kullanıcı adı ve parola girmenize gerek kalmayacaktır. BGM tuşuna (25) basarak ve ‘Add (Ekle)’yi seçerek ‘My Radio (Radyolarım)’a en fazla 99 favori istasyon ekleyebilirsiniz. Müzik ana menüsünden favori radyo istasyonlarını hızlı bir şekilde seçmek için ‘My Radio (Radyolarım)’ işlevini seçebilirsiniz. 266 TÜRKÇE My Radio (Radyolarım) Menüden ya da uzaktan kumandada bulunan iRadio (19) düğmesi ile ‘My Radio (Radyolarım)’ı seçtiğinizde, seçmiş olduğunuz radyo istasyonlarını bulacaksınız. Burada favori radyo istasyonunuzu eklemeniz mümkündür. Favori radyo istasyonunuzu eklemek için istasyonun yayın yaptığı URL’yi girmeniz gerekir. Tek yapmanız gereken, radyo istasyonu için doğru URL’yi girdiğinizden emin olmaktır. SHOUTCast dizinini kullanmanızı tavsiye ederiz (http://www.shoutcast.com). iRadio menüsü içinden SHOUTcast dizinine doğrudan erişim yoktur. Sadece Live365.com’a doğrudan erişim mümkündür. Not: Conceptronic C54WMP, radyo istasyonlarının ad ve URL’lerini girmek için kullanılabilen yerleşik bir Ekran Üstü Klavyeye sahiptir. Sadece temel Latince karakterler desteklenir. áäñß gibi Genişletilmiş Latin karakter setlerindeki özel karakterler desteklenmemektedir. 267 TÜRKÇE 6.4 Resimler İlk kullanım: Başlat menüsünden ya da uzaktan kumandanızın (sarı düğmesinden) ‘Pictures (Resimler)’i seçerseniz kullanılabilir Ortam Sunucuları (UPnP/AV) ve/veya bağlı USB aygıtlarının özetini gösteren bir ekran göreceksiniz. Video, müzik ya da resim tekrar seçilirken, cihaz, varsayılan olarak ana menüye dönmek için ana menü tuşuna bastığınızda son ziyaret edilen klasörü hatırlayacaktır. Başka bir klasör ya da başka bir UPnP AV/Kaynak seçmek amacıyla önceki ekrana dönmek için geri düğmesini (sol ok tuşu (21)) kullanmanız gerekir. 268 TÜRKÇE Bir Ortam Sunucu cihaz seçerseniz, bu, kullanılabilir klasörleri gösterecektir. Gösterilen klasörler Ortam Sunucusu tarafından sağlanmaktadır. Bazı durumlarda sunulan tüm klasörlerin işlevsel olmaması mümkündür. Bu, kullanılan Ortam Sunucusuna bağlıdır. Resimler seçeneği ve seçtiğiniz klasörler filtre olarak çalışır. Sadece televizyon ekranınızın sağ üst köşesinde yazan ortamı seçebilir ve görüntüleyebilirsiniz. Not: Menüden Ortam Sunucusunu seçerken ortam sunucusunun içeriğini tazelediğinizden emin olun. İçerik alfabetik olarak listelenir ve tazeleme olmadan yeni resimler gösterilmez. Resim Görüntüleme Resim görüntülemek için: bir ortam sunucusu seçin, resimler alt menüsünü seçtiğinizden emin olun ve bir resim seçin. Tek resim görüntülemek için OK (20) düğmesine basabilirsiniz. Bir klasördeki tüm resimleri görüntülemek için Oynat (5) düğmesine basın. Bir resim dosyası desteklenmiyorsa ekranınızda aşağıdaki mesajı göreceksiniz: Resimleri başka bir sırada görüntülemek için sort (sırala) (30) düğmesini kullanmanız gerekir. Müzik ve Resimler Slayt gösterisi şeklinde resim görüntülerken müzik çalmanız mümkündür. Resim görüntüleme sırasında müzik çalmanın iki yolu vardır. 269 TÜRKÇE 7. 1. Ana menü içinden, ana menü (3) düğmesini kullanarak ya da Music düğmesini seçerek Müzik işlevini seçin. Daha sonra slayt gösterisi sırasında çalmak istediğiniz şarkıya ait doğru klasörü ve şarkıyı seçin ya da radyo yayınını başlatın. ‘Pictures (Resimler)’ menüsüne dönün, ilk fotoğrafınızı seçin ve Play (Oynat) (5) düğmesine basın. 2. Slayt gösterisi sırasında BGM (25) düğmesine ve Play (Oynat)’a basın. Slayt gösterisi sırasında listedeki tüm şarkılar çalacaktır. Bu özellik sadece müziğin BGM müzik olarak eklenmesi durumunda çalışmaktadır (Bölüm 5.3’te açıklanmıştır) Conceptronic Ortam (UPnP A/V) Sunucusu kurulumu Conceptronic C54WMP’yi kullanmadan önce Conceptronic CH3SNAS ya da CH3WNAS sabit disk muhafazaları ya da başka bir UPnP A/V cihazı gibi bir UPnP A/V uyumlu Sunucu kurmanız gerekir. Birlikte verilen CD-ROM, Conceptronic Ortam Sunucusu yazılım programını içermektedir. Donanım UPnP A/V Sunucunuz yoksa Conceptronic Ortam Sunucusu yazılımını kurarak bilgisayarınızı bir ortam sunucusuna dönüştürebilirsiniz. A. CD-ROM’u CD-ROM Sürücüsüne yerleştirin. Otomatik çalıştırma menüsü ekrana gelmelidir. Otomatik çalıştırma menüsü ekrana gelmezse “My Computer (Bilgisayarım)” simgesinden CDROM sürücüye çift tıklayarak Otomatik çalıştırma menüsünü başlatın. B. Otomatik Çalıştırma Menüsünden “Install Media Server Software (Ortam Sunucusu Yazılımını Kur)” seçeneğini seçin. Dil seçimi ekrana gelir. Tercih ettiğiniz dili seçin ve “OK (Tamam)”a tıklayın. Kurulum Sihirbazı ekrana gelir. Devam etmek için “Next (İleri)”ye tıklayın. C. D. 270 TÜRKÇE E. F. G. H. I. Kullanıcı adınızı ve organizasyonunuzu girin ya da varsayılan ayarları saklayın. Uygulamayı kimlerin kullanabileceğini seçin (tüm kullanıcılara ya da sadece geçerli kullanıcıya izin verin). Devam etmek için “Next (İleri)”ye tıklayın. “Change (Değiştir)” düğmesiyle kurulumun yapılacağı dizini değiştirin ya da varsayılan ayarları kullanın. Devam etmek için “Next (İleri)”ye tıklayın. Uygulama kurulumunu başlatmak için “Next (İleri)”ye tıklayın. Kurulum bittiğinde size bildirilecektir. Kurulumdan sonra doğrudan Conceptronic Ortam Sunucusunu çalıştırmak isterseniz, “Launch Conceptronic DMS (Conceptronic DMS’yi Başlat)” onay kutusunu işaretleyin. Kurulum programından çıkmak için “Finish (Son)”a tıklayın. Conceptronic Ortam Yazılımı bilgisayarınıza yüklenmiştir. Yazılıma Başlat - Programlar bölümündeki Conceptronic klasörü içinden erişebilirsiniz. 8. Conceptronic Ortam Sunucusu Yapılandırması Ortam Dosyaları Seçimi Ortam Sunucusu veri tabanına dosya aktardıktan sonra taranan tüm dosyaların bir özetini bulacaksınız. 271 TÜRKÇE Ortam Aktarma Bu bölümde: • Ortam Sunucusunu başlatabilirsiniz. • Ortam Sunucusunu durdurabilirsiniz. • Bir klasör ekleyebilirsiniz. • Bir klasör ya da tüm klasörleri tazeleyebilirsiniz. • Paylaşımlı bir klasörü ya da tüm klasörleri silebilirsiniz. Ortam içerikli bir klasör eklerken klasör içeriği otomatik olarak taranacaktır. Sistem Sunucu Adını arzu ettiğiniz sunucu adıyla değiştirebilirsiniz. Oynatıcı ayarları içinden Ortam Sunucuları algılanırken ekranınızda sunucu adı gösterilecektir. Sunucuyu durdurup tekrar başlattığınızda değiştirilen sunucu adı aktif olacaktır. 272 TÜRKÇE Seçenekler Bu bölümde Ortam Sunucusu Yazılımının yapılandırma seçeneklerini değiştirebilirsiniz: Enable Autorun (Otomatik Çalıştırmayı Etkinleştir) Windows başlatıldığında yazılımı çalıştırır Minimized at Startup (Açılışta Küçült) Açılışta yazılımı küçültülmüş olarak çalıştırır. Enable Transcoding (Kod çevrimini etkinleştir) Kod çevrimi seçeneğini etkinleştirir. Not: ‘Transcoding’ içinden C54WMP’ donanımı tarafından doğrudan desteklenmeyen içeriği oynatmak mümkündür. Kod çevrimli içeriğin kalitesi değişebilir. File Types to scan (Taranacak dosya türleri) Transcoding Setting (Kod çevrimi ayarları) 273 Ortam Sunucusu Yazılımı tarafından taranacak dosya türlerini seçer. Kod çevrimi kalitesini seçer. TÜRKÇE 9. Alternatif Ortam Sunucuları Sunucu UPnP A/V 1.0 uyumlu ise Conceptronic C54WMP’li alternatif ortam sunucuları kullanabilirsiniz. Microsoft Windows XP ve Windows Vista Microsoft Windows XP ve Windows Vista, Windows Media Player içinden bir Ortam Sunucusu sunmaktadır. Media Player’ı başlatın, Tools (Araçlar) ve library (kütüphane)’yi seçin ve Paylaştırmayı yapılandırın. Conceptronic C54WMP ayarlarına izin verebilir ve ayarları özelleştirebilirsiniz. Klasörleri İzle seçeneğinden paylaşmak istediğiniz içeriği ekleyebilir ya da çıkarabilirsiniz. 274 TÜRKÇE Not: Windows XP’de bu seçenek için en az Media Player 11’e ihtiyacınız olacaktır. Diğer alternatif Yazılımlar Diğer alternatif Yazılımlar şunlardır: TVersity : http://www.tversity.com TwonkyVision Media Server : http://www.twonkymedia.com ORB : http://www.orb.com Not: Ortam Sunucu cihazı ya da yazılım paketi Conceptronic C54WMP tarafından algılanamazsa lütfen belirli cihaz/yazılım paketlerinin özellik ve ayarlarını kontrol edin. Cihaz uyumlu olduğunda ve doğru olarak kurulduğunda C54WMP tarafından televizyon sisteminizde seçilebilir cihaz olarak gösterilecektir. 275 TÜRKÇE 10. Sistem Ayarları Sistem ayarları menüsünden değiştirebileceğiniz ayarlar şunlardır: Language (Dil) OSD Dili (Ekran Görüntüsü). Kullanılabilir diller : İngilizce, İspanyolca, Almanca, Hollandaca, Türkçe, Portekizce, İtalyanca, Fransızca. TV Mode Setup (TV Modu Ayarları) Arzu edilen video ayarlarını seçer TV Sistemi TV Çıkışı Video Ölçeği : PAL ya da NTSC. : P-Scan: YPbPr, S-Video, Interlace YUV. : 4:3 PS, 4:3 LB, 16:9. TV sisteminiz için uygun ayarları seçin. Audio Setup (Ses Ayarları) Arzu edilen Ses Ayarlarını seçer Ses Çıkışı Aşağı Örnekleme Otomatik Çalma Seçeneği BG Müzik Not: : SPDIF/AC3, SPDIF/PCM, SPDIF/OFF. : 48k, 96k. : Kapalı, Önce My Radio, Önce BGM. : Kapalı, Bir kez tekrarla, Tümünü tekrarla. Cihazı açtığınızda müziği otomatik olarak başlatmak mümkündür. Bir radyo istasyonu yapılandırırsanız ya da müzik içeren bir USB cihaz kullanırsanız önce başlatılacak arzu edilen fonksiyonu seçebilirsiniz. 276 TÜRKÇE Video Setup (Video Ayarları) Arzu edilen TV ekran görüntüsü ayarlarını yapar. Parlaklık, Kontrast, Renk Tonu ve Doygunluk ayarları. Photo Display Setup (Fotoğraf Görüntü Ayarları) Arzu edilen Fotoğraf özelliklerini seçer. Ekran koruyucu : Açık/Kapalı. Fotoğraf görüntü ayarı : Liste/Minyatür. Slayt Gösterisi Süresi : 2 ila 30 saniye, 1 dakika ve 2 dakika. Arka plan müziği (BGM) : Kapalı, Bir kez tekrarla, Tümünü tekrarla. Ölçek : Orijinal Boyut, Ekrana Uydur. Version (Sürüm) Ürün bilgilerini seçer ve görüntüler. Varsayılan ayarlara sıfırla. Firmware (Ürün Bilgisi) Yükseltme (USB içinden). Sürüm (ürün bilgisi sürümü). LAN * WLAN için MAC adresi bilgisi. 277 Declaration of CE Conformity The manufacturer 2L International BV Address Databankweg 7 3821 AL Amersfoort, the Netherlands Hereby declares that the product Type 54MBPS WIRELESS MEDIA PLAYER/DMA Product C08-126 Complies with following directives: 1999/5/EEC R&TTE directive: Telecommunications Terminal Equipment and Satellite Earth Station Equipment 2004/108/EEC EMC directive: Electromagnetic Compatibility 73/23/EEC Low Voltage Directive: Electrical equipment designed for use within certain voltage limits The following standards were consulted to assess conformity: ETSI 300 328-2/2000, EN 301 489-17-2000, EN 301 489-1-2000, EN55022/9.98 Class B, EN 61000-3-2/3/4/1995, EN 50082-1/1994, EN 60950/1995 This product is for indoor use only. The purpose of this product is to send and receive data through the ether. This is a class 2 product and the transmitted output power is less than 100mW. The CE symbol confirms that this product conforms to the above named standards and regulations. This product is suitable for all EU countries. For France, the output power is restricted if used outdoor and in the range 2454 to 2483,5 MHz. For Italy, depending on the usage, a general authorization may be required. Pour tous les pays de I'UE. Pour la France, pour une utilisationen extérieur, la puissance de sortie est limitée dans la bande 2454 to 2483,5 MHz.Pertutti i paesi ell'EU. Per I'Italia, secondo I'uso, un 'autorizzazione generale puô essere richiesta. th Place and date of issue: Amersfoort, October 25 , 2007 Herman Looijen, Product Marketing Manager 278 LICENCE AGREEMENT Licensing Information This Conceptronic product C54WMP includes copyrighted third-party software licensed under the terms of the GNU General Public License. Please see The GNU General Public License for the exact terms and conditions of this license. Specially, the following parts of this product are subject to the GNU GPL: [Player side] Linux kernel 2.4.21 (GPL) busybox-1.00 (GPL) udhcp-0.9.8 (021031) (GPL) wireless tool- version 26 (GPL) zlib Tiff-3.8.2 (GPL) Jpeg-6b Microwindow: 0.89 pre9 (MPL) Gcc- 3.3.2 (GPL) Bintool-2.14 20030612 (GPL) Glibc-2.3.2 (GPL) Intel UPnP AV (BSD) [Server Site] Jpeg2000 (GPL) ffmpeg version date 20050624(GPL) faac Freeware Advanced Audio codec v1.18 beta (LGPL) faad2 Freeware Advanced Audio (AAC) Decoder includeing SBR decoding (GPL) Lame LAME ain’t an MP3 Encoder 3.97 (LGPL) Libogg 1.1.2(GPL) Libtheora 1.0 alpha 5(GPL) Liboovorbis-1.1.1 (GPL) Xvidcore 1.1.0 beta 2 (GPL) Intel UPnP AV (BSD) 279 LICENCE AGREEMENT All listed software packages are copyright by their respective authors. Please see the source code for detailed information. Availability of source code Conceptronic. has eposed the full source code of the GPL licensed software, including any scripts to control compilation and installation of the object code. All future firmware updates will also be accompanied with their respective source code. For more information on how you can obtain our open source code, please visit our web site. 280 LICENCE AGREEMENT GNU GENERAL PUBLIC LICENSE Version 2, June 1991 Copyright (C) 1989, 1991 Free Software Foundation, Inc. Temple Place, Suite 330, Boston, MA 02111-1307 USA Everyone is permitted to copy and distribute verbatim copies of this license document, but changing it is not allowed. Preamble The licenses for most software are designed to take away your freedom to share and change it. By contrast, the GNU General Public License is intended to guarantee your freedom to share and change free software--to make sure the software is free for all its users. This General Public License applies to most of the Free Software Foundation's software and to any other program whose authors commit to using it. (Some other Free Software Foundation software is covered by the GNU Library General Public License instead.) You can apply it to your programs, too. When we speak of free software, we are referring to freedom, not price. Our General Public Licenses are designed to make sure that you have the freedom to distribute copies of free software (and charge for this service if you wish), that you receive source code or can get it if you want it, that you can change the software or use pieces of it in new free programs; and that you know you can do these things. To protect your rights, we need to make restrictions that forbid anyone to deny you these rights or to ask you to surrender the rights. These restrictions translate to certain responsibilities for you if you distribute copies of the software, or if you modify it. For example, if you distribute copies of such a program, whether gratis or for a fee, you must give the recipients all the rights that you have. You must make sure that they, too, receive or can get the source code. And you must show them these terms so they know their rights. We protect your rights with two steps: (1) copyright the software, and (2) offer you this license which gives you legal permission to copy, distribute and/or modify the software. Also, for each author's protection and ours, we want to make certain that everyone understands that there is no warranty for this free software. If the software is modified by someone else and passed on, we want its recipients to know that what they have is not the original, so that any problems introduced by others will not reflect on the original authors' reputations. Finally, any free program is threatened constantly by software patents. We wish to avoid the danger that redistributors of a free program will individually obtain patent licenses, in effect making the program proprietary. To prevent this, we have made it clear that any patent must be licensed for everyone's free use or not licensed at all. The precise terms and conditions for copying, distribution and modification follow. GNU GENERAL PUBLIC LICENSE TERMS AND CONDITIONS FOR COPYING, DISTRIBUTION AND MODIFICATION 0. This License applies to any program or other work which contains a notice placed by the copyright holder saying it may be distributed under the terms of this General Public License. The "Program", below, refers to any such program or work, and a "work based on the Program" means either the Program or any derivative work under copyright law: that is to say, a work containing the Program or a portion of it, either verbatim or with modifications and/or translated into another language. (Hereinafter, translation is included without limitation in the term "modification".) Each licensee is addressed as "you". Activities other than copying, distribution and modification are not covered by this License; they are outside its scope. The act of running the Program is not restricted, and the output from the Program is covered only if its contents constitute a work based on the Program (independent of having been made by running the Program). Whether that is true depends on what the Program does. 281 LICENCE AGREEMENT 1. You may copy and distribute verbatim copies of the Program's source code as you receive it, in any medium, provided that you conspicuously and appropriately publish on each copy an appropriate copyright notice and disclaimer of warranty; keep intact all the notices that refer to this License and to the absence of any warranty; and give any other recipients of the Program a copy of this License along with the Program. You may charge a fee for the physical act of transferring a copy, and you may at your option offer warranty protection in exchange for a fee. 2. You may modify your copy or copies of the Program or any portion of it, thus forming a work based on the Program, and copy and distribute such modifications or work under the terms of Section 1 above, provided that you also meet all of these conditions: a) You must cause the modified files to carry prominent notices stating that you changed the files and the date of any change. b) You must cause any work that you distribute or publish, that in whole or in part contains or is derived from the Program or any part thereof, to be licensed as a whole at no charge to all third parties under the terms of this License. c) If the modified program normally reads commands interactively when run, you must cause it, when started running for such interactive use in the most ordinary way, to print or display an announcement including an appropriate copyright notice and a notice that there is no warranty (or else, saying that you provide a warranty) and that users may redistribute the program under these conditions, and telling the user how to view a copy of this License. (Exception: if the Program itself is interactive but does not normally print such an announcement, your work based on the Program is not required to print an announcement.) These requirements apply to the modified work as a whole. If identifiable sections of that work are not derived from the Program, and can be reasonably considered independent and separate works in themselves, then this License, and its terms, do not apply to those sections when you distribute them as separate works. But when you distribute the same sections as part of a whole which is a work based on the Program, the distribution of the whole must be on the terms of this License, whose permissions for other licensees extend to the entire whole, and thus to each and every part regardless of who wrote it. Thus, it is not the intent of this section to claim rights or contest your rights to work written entirely by you; rather, the intent is to exercise the right to control the distribution of derivative or collective works based on the Program. In addition, mere aggregation of another work not based on the Program with the Program (or with a work based on the Program) on a volume of a storage or distribution medium does not bring the other work under the scope of this License. 3. You may copy and distribute the Program (or a work based on it, under Section 2) in object code or executable form under the terms of Sections 1 and 2 above provided that you also do one of the following: a) Accompany it with the complete corresponding machine-readable source code, which must be distributed under the terms of Sections 1 and 2 above on a medium customarily used for software interchange; or, b) Accompany it with a written offer, valid for at least three years, to give any third party, for a charge no more than your cost of physically performing source distribution, a complete machine-readable copy of the corresponding source code, to be distributed under the terms of Sections 1 and 2 above on a medium customarily used for software interchange; or, c) Accompany it with the information you received as to the offer to distribute corresponding source code. (This alternative is allowed only for noncommercial distribution and only if you received the program in object code or executable form with such an offer, in accord with Subsection b above.) The source code for a work means the preferred form of the work for making modifications to it. For an executable work, complete source code means all the source code for all modules it contains, plus any associated interface definition files, plus the scripts used to control compilation and installation of the executable. However, as a special exception, the source code distributed need not include anything that is normally distributed (in either source or binary form) with the major components (compiler, kernel, and so on) of the operating system on which the executable runs, unless that component itself accompanies the executable. 282 LICENCE AGREEMENT If distribution of executable or object code is made by offering access to copy from a designated place, then offering equivalent access to copy the source code from the same place counts as distribution of the source code, even though third parties are not compelled to copy the source along with the object code. 4. You may not copy, modify, sublicense, or distribute the Program except as expressly provided under this License. Any attempt otherwise to copy, modify, sublicense or distribute the Program is void, and will automatically terminate your rights under this License. However, parties who have received copies, or rights, from you under this License will not have their licenses terminated so long as such parties remain in full compliance. 5. You are not required to accept this License, since you have not signed it. However, nothing else grants you permission to modify or distribute the Program or its derivative works. These actions are prohibited by law if you do not accept this License. Therefore, by modifying or distributing the Program (or any work based on the Program), you indicate your acceptance of this License to do so, and all its terms and conditions for copying, distributing or modifying the Program or works based on it. 6. Each time you redistribute the Program (or any work based on the Program), the recipient automatically receives a license from the original licensor to copy, distribute or modify the Program subject to these terms and conditions. You may not impose any further restrictions on the recipients' exercise of the rights granted herein. You are not responsible for enforcing compliance by third parties to this License. 7. If, as a consequence of a court judgment or allegation of patent infringement or for any other reason (not limited to patent issues), conditions are imposed on you (whether by court order, agreement or otherwise) that contradict the conditions of this License, they do not excuse you from the conditions of this License. If you cannot distribute so as to satisfy simultaneously your obligations under this License and any other pertinent obligations, then as a consequence you may not distribute the Program at all. For example, if a patent license would not permit royalty-free redistribution of the Program by all those who receive copies directly or indirectly through you, then the only way you could satisfy both it and this License would be to refrain entirely from distribution of the Program. If any portion of this section is held invalid or unenforceable under any particular circumstance, the balance of the section is intended to apply and the section as a whole is intended to apply in other circumstances. It is not the purpose of this section to induce you to infringe any patents or other property right claims or to contest validity of any such claims; this section has the sole purpose of protecting the integrity of the free software distribution system, which is implemented by public license practices. Many people have made generous contributions to the wide range of software distributed through that system in reliance on consistent application of that system; it is up to the author/donor to decide if he or she is willing to distribute software through any other system and a licensee cannot impose that choice. This section is intended to make thoroughly clear what is believed to be a consequence of the rest of this License. 8. If the distribution and/or use of the Program is restricted in certain countries either by patents or by copyrighted interfaces, the original copyright holder who places the Program under this License may add an explicit geographical distribution limitation excluding those countries, so that distribution is permitted only in or among countries not thus excluded. In such case, this License incorporates the limitation as if written in the body of this License. 9. The Free Software Foundation may publish revised and/or new versions of the General Public License from time to time. Such new versions will be similar in spirit to the present version, but may differ in detail to address new problems or concerns. Each version is given a distinguishing version number. If the Program specifies a version number of this License which applies to it and "any later version", you have the option of following the terms and conditions either of that version or of any later version published by the Free Software Foundation. If the Program does not specify a version number of this License, you may choose any version ever published by the Free Software Foundation. 10. If you wish to incorporate parts of the Program into other free programs whose distribution conditions are different, write to the author to ask for permission. For software which is copyrighted by the Free Software Foundation, write to the Free Software Foundation; we sometimes make exceptions for this. Our decision will be guided by the two goals of preserving the free status of all derivatives of our free software and of promoting the sharing and reuse of software generally. 283 LICENCE AGREEMENT NO WARRANTY 11. BECAUSE THE PROGRAM IS LICENSED FREE OF CHARGE, THERE IS NO WARRANTY FOR THE PROGRAM, TO THE EXTENT PERMITTED BY APPLICABLE LAW. EXCEPT WHEN OTHERWISE STATED IN WRITING THE COPYRIGHT HOLDERS AND/OR OTHER PARTIES PROVIDE THE PROGRAM "AS IS" WITHOUT WARRANTY OF ANY KIND, EITHER EXPRESSED OR IMPLIED, INCLUDING, BUT NOT LIMITED TO, THE IMPLIED WARRANTIES OF MERCHANTABILITY AND FITNESS FOR A PARTICULAR PURPOSE. THE ENTIRE RISK AS TO THE QUALITY AND PERFORMANCE OF THE PROGRAM IS WITH YOU. SHOULD THE PROGRAM PROVE DEFECTIVE, YOU ASSUME THE COST OF ALL NECESSARY SERVICING, REPAIR OR CORRECTION. 12. IN NO EVENT UNLESS REQUIRED BY APPLICABLE LAW OR AGREED TO IN WRITING WILL ANY COPYRIGHT HOLDER, OR ANY OTHER PARTY WHO MAY MODIFY AND/OR REDISTRIBUTE THE PROGRAM AS PERMITTED ABOVE, BE LIABLE TO YOU FOR DAMAGES, INCLUDING ANY GENERAL, SPECIAL, INCIDENTAL OR CONSEQUENTIAL DAMAGES ARISING OUT OF THE USE OR INABILITY TO USE THE PROGRAM (INCLUDING BUT NOT LIMITED TO LOSS OF DATA OR DATA BEING RENDERED INACCURATE OR LOSSES SUSTAINED BY YOU OR THIRD PARTIES OR A FAILURE OF THE PROGRAM TO OPERATE WITH ANY OTHER PROGRAMS), EVEN IF SUCH HOLDER OR OTHER PARTY HAS BEEN ADVISED OF THE POSSIBILITY OF SUCH DAMAGES. END OF TERMS AND CONDITIONS How to Apply These Terms to Your New Programs If you develop a new program, and you want it to be of the greatest possible use to the public, the best way to achieve this is to make it free software which everyone can redistribute and change under these terms. To do so, attach the following notices to the program. It is safest to attach them to the start of each source file to most effectively convey the exclusion of warranty; and each file should have at least the "copyright" line and a pointer to where the full notice is found. , 1 April 1989 Ty Coon, President of Vice This General Public License does not permit incorporating your program into proprietary programs. If your program is a subroutine library, you may consider it more useful to permit linking proprietary applications with the lib Copyright (c) 2000 Intel Corporation All rights reserved. Redistribution and use in source and binary forms, with or without modification, are permitted provided that the following conditions are met: * Redistributions of source code must retain the above copyright notice, this list of conditions and the following disclaimer. * Redistributions in binary form must reproduce the above copyright notice, this list of conditions and the following disclaimer in the documentation and/or other materials provided with the distribution. * Neither name of Intel Corporation nor the names of its contributors may be used to endorse or promote products derived from this software without specific prior written permission. THIS SOFTWARE IS PROVIDED BY THE COPYRIGHT HOLDERS AND CONTRIBUTORS "AS IS" AND ANY EXPRESS OR IMPLIED WARRANTIES, INCLUDING, BUT NOT LIMITED TO, THE IMPLIED WARRANTIES OF MERCHANTABILITY AND FITNESS FOR A PARTICULAR PURPOSE ARE DISCLAIMED. IN NO EVENT SHALL INTEL OR CONTRIBUTORS BE LIABLE FOR ANY DIRECT, INDIRECT, INCIDENTAL, SPECIAL, EXEMPLARY, OR CONSEQUENTIAL DAMAGES (INCLUDING, BUT NOT LIMITED TO, PROCUREMENT OF SUBSTITUTE GOODS OR SERVICES; LOSS OF USE, DATA, OR PROFITS; OR BUSINESS INTERRUPTION) HOWEVER CAUSED AND ON ANY THEORY OF LIABILITY, WHETHER IN CONTRACT, STRICT LIABILITY, OR TORT (INCLUDING NEGLIGENCE OR OTHERWISE) ARISING IN ANY WAY OUT OF THE USE OF THIS SOFTWARE, EVEN IF ADVISED OF THE POSSIBILITY OF SUCH DAMAGE. 284 LICENCE AGREEMENT GNU LESSER GENERAL PUBLIC LICENSE Version 2.1, February 1999 Copyright (C) 1991, 1999 Free Software Foundation, Inc. 51 Franklin Street, Fifth Floor, Boston, MA 02110-1301 USA Everyone is permitted to copy and distribute verbatim copies of this license document, but changing it is not allowed. [This is the first released version of the Lesser GPL. It also counts as the successor of the GNU Library Public License, version 2, hence the version number 2.1.] Preamble The licenses for most software are designed to take away your freedom to share and change it. By contrast, the GNU General Public Licenses are intended to guarantee your freedom to share and change free software--to make sure the software is free for all its users. This license, the Lesser General Public License, applies to some specially designated software packages--typically libraries-of the Free Software Foundation and other authors who decide to use it. You can use it too, but we suggest you first think carefully about whether this license or the ordinary General Public License is the better strategy to use in any particular case, based on the explanations below. When we speak of free software, we are referring to freedom of use, not price. Our General Public Licenses are designed to make sure that you have the freedom to distribute copies of free software (and charge for this service if you wish); that you receive source code or can get it if you want it; that you can change the software and use pieces of it in new free programs; and that you are informed that you can do these things. To protect your rights, we need to make restrictions that forbid distributors to deny you these rights or to ask you to surrender these rights. These restrictions translate to certain responsibilities for you if you distribute copies of the library or if you modify it. For example, if you distribute copies of the library, whether gratis or for a fee, you must give the recipients all the rights that we gave you. You must make sure that they, too, receive or can get the source code. If you link other code with the library, you must provide complete object files to the recipients, so that they can relink them with the library after making changes to the library and recompiling it. And you must show them these terms so they know their rights. We protect your rights with a two-step method: (1) we copyright the library, and (2) we offer you this license, which gives you legal permission to copy, distribute and/or modify the library. To protect each distributor, we want to make it very clear that there is no warranty for the free library. Also, if the library is modified by someone else and passed on, the recipients should know that what they have is not the original version, so that the original author's reputation will not be affected by problems that might be introduced by others. Finally, software patents pose a constant threat to the existence of any free program. We wish to make sure that a company cannot effectively restrict the users of a free program by obtaining a restrictive license from a patent holder. Therefore, we insist that any patent license obtained for a version of the library must be consistent with the full freedom of use specified in this license. Most GNU software, including some libraries, is covered by the ordinary GNU General Public License. This license, the GNU Lesser General Public License, applies to certain designated libraries, and is quite different from the ordinary General Public License. We use this license for certain libraries in order to permit linking those libraries into non-free programs. When a program is linked with a library, whether statically or using a shared library, the combination of the two is legally speaking a combined work, a derivative of the original library. The ordinary General Public License therefore permits such linking only if the entire combination fits its criteria of freedom. The Lesser General Public License permits more lax criteria for linking other code with the library. We call this license the "Lesser" General Public License because it does Less to protect the user's freedom than the ordinary General Public License. It also provides other free software developers Less of an advantage over competing non- 285 LICENCE AGREEMENT free programs. These disadvantages are the reason we use the ordinary General Public License for many libraries. However, the Lesser license provides advantages in certain special circumstances. For example, on rare occasions, there may be a special need to encourage the widest possible use of a certain library, so that it becomes a de-facto standard. To achieve this, non-free programs must be allowed to use the library. A more frequent case is that a free library does the same job as widely used non-free libraries. In this case, there is little to gain by limiting the free library to free software only, so we use the Lesser General Public License. In other cases, permission to use a particular library in non-free programs enables a greater number of people to use a large body of free software. For example, permission to use the GNU C Library in non-free programs enables many more people to use the whole GNU operating system, as well as its variant, the GNU/Linux operating system. Although the Lesser General Public License is Less protective of the users' freedom, it does ensure that the user of a program that is linked with the Library has the freedom and the wherewithal to run that program using a modified version of the Library. The precise terms and conditions for copying, distribution and modification follow. Pay close attention to the difference between a "work based on the library" and a "work that uses the library". The former contains code derived from the library, whereas the latter must be combined with the library in order to run. GNU LESSER GENERAL PUBLIC LICENSE TERMS AND CONDITIONS FOR COPYING, DISTRIBUTION AND MODIFICATION 0. This License Agreement applies to any software library or other program which contains a notice placed by the copyright holder or other authorized party saying it may be distributed under the terms of this Lesser General Public License (also called "this License"). Each licensee is addressed as "you". A "library" means a collection of software functions and/or data prepared so as to be conveniently linked with application programs (which use some of those functions and data) to form executables. The "Library", below, refers to any such software library or work which has been distributed under these terms. A "work based on the Library" means either the Library or any derivative work under copyright law: that is to say, a work containing the Library or a portion of it, either verbatim or with modifications and/or translated straightforwardly into another language. (Hereinafter, translation is included without limitation in the term "modification".) "Source code" for a work means the preferred form of the work for making modifications to it. For a library, complete source code means all the source code for all modules it contains, plus any associated interface definition files, plus the scripts used to control compilation and installation of the library. Activities other than copying, distribution and modification are not covered by this License; they are outside its scope. The act of running a program using the Library is not restricted, and output from such a program is covered only if its contents constitute a work based on the Library (independent of the use of the Library in a tool for writing it). Whether that is true depends on what the Library does and what the program that uses the Library does. 1. You may copy and distribute verbatim copies of the Library's complete source code as you receive it, in any medium, provided that you conspicuously and appropriately publish on each copy an appropriate copyright notice and disclaimer of warranty; keep intact all the notices that refer to this License and to the absence of any warranty; and distribute a copy of this License along with the Library. You may charge a fee for the physical act of transferring a copy, and you may at your option offer warranty protection in exchange for a fee. 2. You may modify your copy or copies of the Library or any portion of it, thus forming a work based on the Library, and copy and distribute such modifications or work under the terms of Section 1 above, provided that you also meet all of these conditions: a) The modified work must itself be a software library. 286 LICENCE AGREEMENT b) You must cause the files modified to carry prominent notices stating that you changed the files and the date of any change. c) You must cause the whole of the work to be licensed at no charge to all third parties under the terms of this License. d) If a facility in the modified Library refers to a function or a table of data to be supplied by an application program that uses the facility, other than as an argument passed when the facility is invoked, then you must make a good faith effort to ensure that, in the event an application does not supply such function or table, the facility still operates, and performs whatever part of its purpose remains meaningful. (For example, a function in a library to compute square roots has a purpose that is entirely well-defined independent of the application. Therefore, Subsection 2d requires that any application-supplied function or table used by this function must be optional: if the application does not supply it, the square root function must still compute square roots.) These requirements apply to the modified work as a whole. If identifiable sections of that work are not derived from the Library, and can be reasonably considered independent and separate works in themselves, then this License, and its terms, do not apply to those sections when you distribute them as separate works. But when you distribute the same sections as part of a whole which is a work based on the Library, the distribution of the whole must be on the terms of this License, whose permissions for other licensees extend to the entire whole, and thus to each and every part regardless of who wrote it. Thus, it is not the intent of this section to claim rights or contest your rights to work written entirely by you; rather, the intent is to exercise the right to control the distribution of derivative or collective works based on the Library. In addition, mere aggregation of another work not based on the Library with the Library (or with a work based on the Library) on a volume of a storage or distribution medium does not bring the other work under the scope of this License. 3. You may opt to apply the terms of the ordinary GNU General Public License instead of this License to a given copy of the Library. To do this, you must alter all the notices that refer to this License, so that they refer to the ordinary GNU General Public License, version 2, instead of to this License. (If a newer version than version 2 of the ordinary GNU General Public License has appeared, then you can specify that version instead if you wish.) Do not make any other change in these notices. Once this change is made in a given copy, it is irreversible for that copy, so the ordinary GNU General Public License applies to all subsequent copies and derivative works made from that copy. This option is useful when you wish to copy part of the code of the Library into a program that is not a library. 4. You may copy and distribute the Library (or a portion or derivative of it, under Section 2) in object code or executable form under the terms of Sections 1 and 2 above provided that you accompany it with the complete corresponding machinereadable source code, which must be distributed under the terms of Sections 1 and 2 above on a medium customarily used for software interchange. If distribution of object code is made by offering access to copy from a designated place, then offering equivalent access to copy the source code from the same place satisfies the requirement to distribute the source code, even though third parties are not compelled to copy the source along with the object code. 5. A program that contains no derivative of any portion of the Library, but is designed to work with the Library by being compiled or linked with it, is called a "work that uses the Library". Such a work, in isolation, is not a derivative work of the Library, and therefore falls outside the scope of this License. However, linking a "work that uses the Library" with the Library creates an executable that is a derivative of the Library (because it contains portions of the Library), rather than a "work that uses the library". The executable is therefore covered by this License.Section 6 states terms for distribution of such executables. When a "work that uses the Library" uses material from a header file that is part of the Library, the object code for the work may be a derivative work of the Library even though the source code is not. Whether this is true is especially 287 LICENCE AGREEMENT significant if the work can be linked without the Library, or if the work is itself a library. The threshold for this to be true is not precisely defined by law. If such an object file uses only numerical parameters, data structure layouts and accessors, and small macros and small inline functions (ten lines or less in length), then the use of the object file is unrestricted, regardless of whether it is legally a derivative work. (Executables containing this object code plus portions of the Library will still fall under Section 6.) Otherwise, if the work is a derivative of the Library, you may distribute the object code for the work under the terms of Section 6. Any executables containing that work also fall under Section 6, whether or not they are linked directly with the Library itself. 6. As an exception to the Sections above, you may also combine or link a "work that uses the Library" with the Library to produce a work containing portions of the Library, and distribute that work under terms of your choice, provided that the terms permit modification of the work for the customer's own use and reverse engineering for debugging such modifications. You must give prominent notice with each copy of the work that the Library is used in it and that the Library and its use are covered by this License. You must supply a copy of this License. If the work during execution displays copyright notices, you must include the copyright notice for the Library among them, as well as a reference directing the user to the copy of this License. Also, you must do one of these things: a) Accompany the work with the complete corresponding machine-readable source code for the Library including whatever changes were used in the work (which must be distributed under Sections 1 and 2 above); and, if the work is an executable linked with the Library, with the complete machine-readable "work that uses the Library", as object code and/or source code, so that the user can modify the Library and then relink to produce a modified executable containing the modified Library. (It is understood that the user who changes the contents of definitions files in the Library will not necessarily be able to recompile the application to use the modified definitions.) b) Use a suitable shared library mechanism for linking with the Library. A suitable mechanism is one that (1) uses at run time a copy of the library already present on the user's computer system, rather than copying library functions into the executable, and (2) will operate properly with a modified version of the library, if the user installs one, as long as the modified version is interface-compatible with the version that the work was made with. c) Accompany the work with a written offer, valid for at least three years, to give the same user the materials specified in Subsection 6a, above, for a charge no more than the cost of performing this distribution. d) If distribution of the work is made by offering access to copy from a designated place, offer equivalent access to copy the above specified materials from the same place. e) Verify that the user has already received a copy of these materials or that you have already sent this user a copy. For an executable, the required form of the "work that uses the Library" must include any data and utility programs needed for reproducing the executable from it. However, as a special exception, the materials to be distributed need not include anything that is normally distributed (in either source or binary form) with the major components (compiler, kernel, and so on) of the operating system on which the executable runs, unless that component itself accompanies the executable. It may happen that this requirement contradicts the license restrictions of other proprietary libraries that do not normally accompany the operating system. Such a contradiction means you cannot use both them and the Library together in an executable that you distribute. 7. You may place library facilities that are a work based on the Library side-by-side in a single library together with other library facilities not covered by this License, and distribute such a combined library, provided that the separate distribution of the work based on the Library and of the other library facilities is otherwise permitted, and provided that you do these two things: a) Accompany the combined library with a copy of the same work based on the Library, uncombined with any other library facilities. This must be distributed under the terms of the Sections above. 288 LICENCE AGREEMENT b) Give prominent notice with the combined library of the fact that part of it is a work based on the Library, and explaining where to find the accompanying uncombined form of the same work. 8. You may not copy, modify, sublicense, link with, or distribute the Library except as expressly provided under this License. Any attempt otherwise to copy, modify, sublicense, link with, or distribute the Library is void, and will automatically terminate your rights under this License. However, parties who have received copies, or rights, from you under this License will not have their licenses terminated so long as such parties remain in full compliance. 9. You are not required to accept this License, since you have not signed it. However, nothing else grants you permission to modify or distribute the Library or its derivative works. These actions are prohibited by law if you do not accept this License. Therefore, by modifying or distributing the Library (or any work based on the Library), you indicate your acceptance of this License to do so, and all its terms and conditions for copying, distributing or modifying the Library or works based on it. 10. Each time you redistribute the Library (or any work based on the Library), the recipient automatically receives a license from the original licensor to copy, distribute, link with or modify the Library subject to these terms and conditions. You may not impose any further restrictions on the recipients' exercise of the rights granted herein. You are not responsible for enforcing compliance by third parties with this License. 11. If, as a consequence of a court judgment or allegation of patent infringement or for any other reason (not limited to patent issues), conditions are imposed on you (whether by court order, agreement or otherwise) that contradict the conditions of this License, they do not excuse you from the conditions of this License. If you cannot distribute so as to satisfy simultaneously your obligations under this License and any other pertinent obligations, then as a consequence you may not distribute the Library at all. For example, if a patent license would not permit royalty-free redistribution of the Library by all those who receive copies directly or indirectly through you, then the only way you could satisfy both it and this License would be to refrain entirely from distribution of the Library. If any portion of this section is held invalid or unenforceable under any particular circumstance, the balance of the section is intended to apply, and the section as a whole is intended to apply in other circumstances. It is not the purpose of this section to induce you to infringe any patents or other property right claims or to contest validity of any such claims; this section has the sole purpose of protecting the integrity of the free software distribution system which is implemented by public license practices. Many people have made generous contributions to the wide range of software distributed through that system in reliance on consistent application of that system; it is up to the author/donor to decide if he or she is willing to distribute software through any other system and a licensee cannot impose that choice. This section is intended to make thoroughly clear what is believed to be a consequence of the rest of this License. 12. If the distribution and/or use of the Library is restricted in certain countries either by patents or by copyrighted interfaces, the original copyright holder who places the Library under this License may add an explicit geographical distribution limitation excluding those countries, so that distribution is permitted only in or among countries not thus excluded. In such case, this License incorporates the limitation as if written in the body of this License. 13. The Free Software Foundation may publish revised and/or new versions of the Lesser General Public License from time to time. Such new versions will be similar in spirit to the present version, but may differ in detail to address new problems or concerns. Each version is given a distinguishing version number. If the Library specifies a version number of this License which applies to it and "any later version", you have the option of following the terms and conditions either of that version or of any later version published by the Free Software Foundation. If the Library does not specify a license version number, you may choose any version ever published by the Free Software Foundation. 14. If you wish to incorporate parts of the Library into other free programs whose distribution conditions are incompatible with these, write to the author to ask for permission. For software which is copyrighted by the Free Software Foundation, write to the Free Software Foundation; we sometimes make exceptions for this. Our decision will be guided by the two goals of preserving the free status of all derivatives of our free software and of promoting the sharing and reuse of software generally. 289 LICENCE AGREEMENT NO WARRANTY 15. BECAUSE THE LIBRARY IS LICENSED FREE OF CHARGE, THERE IS NO WARRANTY FOR THE LIBRARY, TO THE EXTENT PERMITTED BY APPLICABLE LAW. EXCEPT WHEN OTHERWISE STATED IN WRITING THE COPYRIGHT HOLDERS AND/OR OTHER PARTIES PROVIDE THE LIBRARY "AS IS" WITHOUT WARRANTY OF ANY KIND, EITHER EXPRESSED OR IMPLIED, INCLUDING, BUT NOT LIMITED TO, THE IMPLIED WARRANTIES OF MERCHANTABILITY AND FITNESS FOR A PARTICULAR PURPOSE. THE ENTIRE RISK AS TO THE QUALITY AND PERFORMANCE OF THE LIBRARY IS WITH YOU. SHOULD THE LIBRARY PROVE DEFECTIVE, YOU ASSUME THE COST OF ALL NECESSARY SERVICING, REPAIR OR CORRECTION. 16. IN NO EVENT UNLESS REQUIRED BY APPLICABLE LAW OR AGREED TO IN WRITING WILL ANY COPYRIGHT HOLDER, OR ANY OTHER PARTY WHO MAY MODIFY AND/OR REDISTRIBUTE THE LIBRARY AS PERMITTED ABOVE, BE LIABLE TO YOU FOR DAMAGES, INCLUDING ANY GENERAL, SPECIAL, INCIDENTAL OR CONSEQUENTIAL DAMAGES ARISING OUT OF THE USE OR INABILITY TO USE THE LIBRARY (INCLUDING BUT NOT LIMITED TO LOSS OF DATA OR DATA BEING RENDERED INACCURATE OR LOSSES SUSTAINED BY YOU OR THIRD PARTIES OR A FAILURE OF THE LIBRARY TO OPERATE WITH ANY OTHER SOFTWARE), EVEN IF SUCH HOLDER OR OTHER PARTY HAS BEEN ADVISED OF THE POSSIBILITY OF SUCH DAMAGES. END OF TERMS AND CONDITIONS 290 DECLARATION OF CE CONFIRMITY The manufacturer Address Conceptronic Databankweg 7 3821 AL Amersfoort, the Netherlands Hereby declares that the product Type 54MBPS WIRELESS MEDIA PLAYER/DMA Product C08-126 Complies with following directives: 1999/5/EEC R&TTE directive: Telecommunications Terminal Equipment and Satellite Earth Station Equipment 89/336/EEC EMC directive: Electromagnetic Compatibility 73/23/EEC Low Voltage Directive: Electrical equipment designed for use within certainvoltage limits The following standards were consulted to assess conformity: ETSI 300 328-2/2000, EN 301 489-17-2000, EN 301 489-1-2000, EN55022/9.98 Class B, EN 61000-32/3/4/1995, EN 50082-1/1994, EN 60950/1995 This product is for indoor use only. The purpose of this product is to send and receive data trough the ether. This is a class 2 product and the transmitted output power is less than 100mW. The CE symbol confirms that this product conforms to the above named standards and regulations. This product is suitable for all EU countries. For France, the output power is restricted if used outdoor and in the range 2454 to 2483,5 MHz. For Italy, depending on the usage, a general authorization may be required. Pour tous les pays de I'UE. Pour la France, pour une utilisationen extérieur, la puissance de sortie est limitée dans la bande 2454 to 2483,5 MHz.Pertutti i paesi ell'EU. Per I'Italia, secondo I'uso, un 'autorizzazione generale puô essere richiesta. Place and date of issue: Amersfoort, December 11 2006 Herman Looijen, Product Marketing Manager 291