1
D811980 00100_01
INSTALLATION MANUAL
TESTING
The MERAK panel controls (checks) the start relays and safety devices (photocells)
before performing each opening and closing cycle.
If there is a malfunction, make sure that the connected devices are working
properly and check the wiring.
2) TECHNICAL SPECIFICATIONS
MOTOR
400
120V 60Hz
Power supply
220-230V 50/60 Hz(*)
Motor
24V
Power input
50W
0,5A (230V~) - 1A
Max. current demand
(110V~)
Pinion module (standard)
4mm (14 teeth)
Leaf speed (standard)
12m/min
Max. leaf weight-standard** 4000N (≈400kg)
Pinion module (fast)
4mm (18 teeth)
Leaf speed (fast)
15.5m/min
Max. leaf weight-fast**
3000N (≈300kg)
Max. torque
20Nm
Electronic torque
Impact reaction
limiter
Lubrication
Lifetime greased
Lever-operated
Manual operation
mechanical release
Type of use
intensive
Buffer batteries (optional Two 12V 1.2Ah batextras)
teries
from -20°C to +55°C
Environmental conditions
Protection rating
Noise level
Operator weight
Dimensions
Low voltage/mains insulation
Operating temperature range
Thermal overload protection
Dielectric rigidity
Accessories power supply
600
120V 60Hz
220-230V 50/60 Hz(*)
24V
70W
0,5A (230V~) - 1A
(110V~)
4mm (14 teeth)
12m/min
6000N (≈600kg)
4mm (18 teeth)
15.5m/min
3600N (≈360kg)
30Nm
Electronic torque
limiter
Lifetime greased
Lever-operated
mechanical release
intensive
Two 12V 1.2Ah batteries
from -20°C to +55°C
IP44
IP44
<70dBA
<70dBA
7kg (≈70N)
7kg (≈70N)
See Fig. I
See Fig. I
CONTROL UNIT
> 2MOhm 500V
-20 / +55°C
Software
mains/LV 3750V~ for 1 minute
24V (demand max. 0,5A)
24V safe
NO 24V powered contact (max.1A)
NO contact (24V~/max.1A)
Fig. G
frequency 433.92MHz
AUX 0
AUX 3
Fuses
Built-in Rolling-Code radio-receiver
Setting of parameters and Universal handheld programmer/LCD display
options
N° of combinations
4 billion
Max. n° of remotes that can 63
be memorized
Usable transmitter versions:
All ROLLING CODE transmitters compatible with
.
3) TUBE ARRANGEMENT Fig.A
Install the electrical system referring to the standards in force for electrical systems
CEI 64-8, IEC 364, harmonization document HD 384 and other national standards.
4) PREPARATION FOR MOTOR MOUNTING FIG.B
Make a hole in the ground to accommodate the concrete pad, with anchors
embedded in the base plate for fastening the gearbox assembly, keeping to the
distances featured in FIG.B.
5) REMOVING THE COVER Fig.C
• Unscrewtherelevanttwofrontscrews(FIG.C-rif.1)
• Pushasillustrated(FIG.C-rif.2-rif.3)toreleasethecoverfromthetworear
blocks (FIG.C - rif.3A e FIG.C - rif.3B).
• Liftthecover(FIG.C-rif.4).
ENGLISH
1) GENERAL INFORMATION
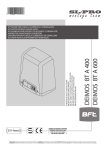
The DEIMOS ULTRA BT A actuator is highly versatile in terms of installation
options due to the extremely low position of the pinion, the actuator’s compact
nature and the height and depth adjustment features it ofers. The adjustable
electronic torque limiter provides anti-crush safety. Manual emergency operation
is extremely easy to perform using just a release lever.
Stopping is controlled by polarized magnetic limit switches.
The MERAK control panel comes with standard factory settings. Any change
must be made using the programmer with built-in display or universal handheld
programmer.
Fully supports EELINK and U-LINK protocols.
Its main features are:
- Control of 1 low-voltage motor
- Obstacle detection
- Separate inputs for safety devices
- Confgurable command inputs
- Built-in radio receiver rolling code with transmitter cloning.
The board has a terminal strip of the removable kind to make maintenance
or replacement easier. It comes with a series of prewired jumpers to make the
installer’s job on site easier. The jumpers concern terminals: 70-71, 70-72, 70-74.
If the above-mentioned terminals are being used, remove the relevant jumpers.
6) MOUNTING THE MOTOR FIG.D
7) MOUNTING DRIVE ACCESSORIES FIG.E-E1
Recommended rack types (FIG.J)
8) RACK CENTRING WITH RESPECT TO PINION FIG.K-L1-M
DANGER - Welding must be performed by a competent person issued
with the necessary personal protective equipment as prescribed by
the safety rules in force FIG.L.
9) FASTENING LIMIT SWITCH BRACKETS FIG.F
Fastening the limit switches:
•AttachthelimitswitchbrackettotherackasillustratedinFIG.Fref.1.
•Fastenthemagneticlimitswitchboxtothelimitswitchbracketwiththenuts
and screws provided, as illustrated in fgure F ref.2 – F ref.3.
•Fastenthelimitswitchbrackettotherackbyscrewinginthetwofrontscrews
provided FIG.F ref.4.
When using racks CVZ and CVZ-S, use spacers as illustrated in FIG.J ref.1
Right-hand limit switch:
•FastentheRight-handmagneticlimitswitchcalled“R”;donotexceedthestated maximum distance between the magnetic limit switch box and the limit
switch assembly, FIG.F.
Left-hand limit switch:
•FastentheLeft-handmagneticlimitswitchcalled“L”;donotexceedthestated
maximum distance between the magnetic limit switch box and the limit
switch assembly, FIG.F.
Warning. Do not swap over the limit switch brackets once you have changed the
opening direction via the relevant logic
10) STOPS FIG.N
DANGER - The gate must be ftted with mechanical stops to halt its
travel both when opening and closing, thus preventing the gate from
coming of the top guide. Said stops must be fastened frmly to the ground,
a few centimetres beyond the electric stop point.
Note: the safety edge N1 must be installed so that it is not triggered by the
mechanical stops.
11) MANUAL RELEASE (See USER GUIDE -FIG.3-).
Warning Do not JERK the gate open and closed, instead push it GENTLY to
the end of its travel.
12) TERMINAL BOARD WIRING Fig. G-P
Once suitable electric cables have been run through the raceways and the automated device’s various components have been fastened at the predetermined
points, the next step is to connect them as directed and illustrated in the diagrams
contained in the relevant instruction manuals. Connect the live, neutral and
earth wire (compulsory). The mains cable must be clamped in the relevant cable
gland (FIG.P-ref.P1) and in the grommet (FIG.P-ref.P2), while the earth wire with
the yellow/green-coloured sheath must be connected in the relevant terminal
(FIG.P-ref.S) and the extra low voltage wires must be run through the relevant
grommet (FIG.P ref.P3).
WARNINGS - When performing wiring and installation, refer to the standards
in force and, whatever the case, apply good practice principles. Wires carrying
diferent voltages must be kept physically separate from each other, or they must
be suitably insulated with at least 1mm of additional insulation.
Wires must be secured with additional fastening near the terminals, using devices such as cable clamps. All connecting cables must be kept far enough away
from dissipaters.
(*) Special supply voltages to order.
** There are no minimum or maximum dimension restrictions for the guided
part that can be used.
DEIMOS ULTRA BT A 400 - DEIMOS ULTRA BT A 600 -
25