1
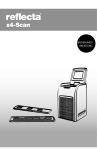
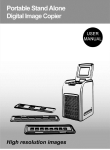
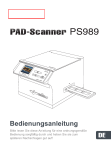
Klarstein Foto- und Diascanner 10004235 www.elektronik-star.de Telefon: 01805-019 180* (Mo-Fr 10-13 und 14-18 Uhr) *Je 0, 14 EUR/Min. Inkl. 19% MwSt. aus dem dt. Festnetz oder max. 0,42 EUR/Min. inkl. 19% MwSt. aus dem Mobilfunknetz. Benutzerhandbuch Lesen Sie für einen korrekten Gebrauch diese Anleitungen sorgfältig durch und bewahren Sie das Handbuch gut auf! Inhalt 1: Sicherheitsvorschriften… ……………………………………… 1 2: Verpackungsinhalt… …………………………………………… 3 3: Installation………………………………………………………… 4 4: Einzelteile………………………………………………………… 6 5: Dias laden………………………………………………………… 7 6: Negative laden…………………………………………………… 8 7: Fotos laden… …………………………………………………… 9 8: Allgemeine Bedienung… ………………………………………12 9: Bilder aufnehmen…………………………………………………13 10: Reinigung & Pflege… …………………………………………18 11: Technische Daten… ……………………………………………19 1.Sicherheitsvorschriften Wichtig: Gerät weder Regen noch Feuchtigkeit aussetzen, um die Gebrauchsdauer des Produkts zu verlängern. Achtung: Gerät nicht auseinandernehmen. Abdeckung nicht abnehmen, um die Gefahr eines Stromschlags zu vermeiden. Belüftung: Hitze: 11 Stellen Sie das Gerät so auf, dass die Belüftung nicht durch den Ort oder die Position behindert wird. Stellen Sie das Gerät z.B. nicht auf Betten, Sofas, Teppiche oder ähnliche Gegenstände, welche die Belüftungsöffnungen blockieren könnten. Gerät nicht in der Nähe von Wärmequellen wie Heizkörpern oder Öfen aufstellen. Reinigung: Wir empfehlen, zur regelmäßigen Reinigung der Glasoberfläche einen sauberen, trockenen, nicht alkoholischen Wattestab zu verwenden, um ein klares Bild zu erzielen. Das USB-Kabel des Geräts vom Computer Nichtgebrauch: trennen, wenn das Gerät über einen längeren Zeitraum nicht verwendet wird. USBÜberlastung: Wartung: Filmhalter: USB-Anschlüsse Ihres Computers nicht überlasten. Wenn zu viele Geräte am Computer angeschlossen sind, wie z.B. schnurlose Maus, Mediaspieler, Handys oder andere USBbetriebene Geräte, steht möglicherweise nicht genügend Strom für die Versorgung des Film- und Fotoscanners zur Verfügung. Gerät nur anhand der in diesem Handbuch vorgegebenen Anleitungen warten. Alle anderen Reparaturarbeiten von Experten durchführen lassen. Das Design des Filmhalters entspricht ISO-Norm. In einigen Fällen passen die Löcher des Films nicht exakt auf den Halter. Dies wird von nicht standardmäßigen Kameras verursacht. In solchen Fällen ist auf dem Bildrand eine kleine schwarze Linie zu sehen,die ganz einfach mit einem Bildbearbeitungsprogramm entfernt werden kann. ISO—Internationale Organisation for Normung 2 2 2: Verpackungsinhalt ◆ ◆ ◆ ◆ ◆ ◆ ◆ 3 Film- & Fotoscanner USB Kable Negativhalter Diahalter 4 in 1 Bilderrahmen ((5”x7” (5R), 4”x6” (4R), 3 ½”x5” (3R) und Visitenkarte) CD-ROM Benutzerhandbuch 3: Installation Installieren Sie vor dem erstmaligen Anschluss an einen Computer die NimoFilm Software. Gehen Sie wie folgt vor: 1.Legen Sie die CD in das CD-ROM Laufwerk ein. 2.Nach dem Einlegen der CD erscheint das Installationsinterface. 3.W ählen Sie die Optionen NimoFilm und Business Card Reader, um die Installation zu starten. Wählen Sie anschließend die Sprache: Chinesisch oder Englisch. Klicken Sie danach auf das Feld „Next step“. Es ist möglich, den Zielordner zum Speichern der Installationsdateien zu ändern. Standardmäßig werden die Dateien unter C:\Program Files\ Mysher gespeichert. 4 4.Klicken Sie weiter auf „Next“, bis die Installation beendet ist. 5 4: Einzelteile Film- & Fotoscanner Diahalter Negativhalter 4-in-1 Bilderrahmen USB-Kabel 6 5: Dias laden Dia: Bei Dias entsprechen Licht, Schatten und Farbe dem Originalbild. Legen Sie das aufrechte Dia mit der glänzenden Seite nach oben in den offenen Diahalter. Hinweis: Behandeln Sie Dias mit Sorgfalt. Staub, Kratzer oder Fingerabdrücke werden auf dem gespeicherten Bild zu sehen sein. Tragen Sie, wenn möglich, Baumwollhandschuhe während der Arbeit mit Dias. Verwenden Sie Druckluft zum Beseitigen von Staub auf den Dias. Solch ein Gerät kann in jedem Fachgeschäft für Büromaterialien oder Elektronik gekauft werden. Schließen Sie den Diahalter und drücken Sie auf die Ränder, bis diese einrasten. Halten Sie den Diahalter so, wie auf dem Film- & Fotoscanner dargestellt. Stecken Sie den Diahalter in den Schlitz an der rechten Seite des Film- & Fotoscanners; siehe Abbildung. 7 6: Negative laden Eigenschaften von Negativen: Bei Negativen sind Licht, Schatten und Farbe im Vergleich zum Originalbild genau umgekehrt. Legen Sie das aufrechte Negativ mit der g l änz enden Sei te nach oben i n den Negativhalter. Richten Sie das Negativ an den Kerben im Halter aus. Hinweis: Behandeln Sie Dias mit Sorgfalt. Staub, Kratzer oder Fingerabdrücke werden auf dem gespeicherten Bild zu sehen sein. Tragen Sie, wenn möglich, Baumwollhandschuhe während der Arbeit mit Dias. Verwenden Sie Druckluft zum Beseitigen von Staub auf den Dias. Solch ein Gerät ist nicht im Lieferumfang des Film- & Fotoscanners enthalten, kann jedoch in jedem Fachgeschäft für Büromaterialien oder Elektronik gekauft werden. Schließen Sie den Negativhalter und drücken Sie auf die Ränder, bis diese einrasten. Halten Sie den Halter so, wie auf dem Film- & Fotoscanner dargestellt. Stecken Sie den Negativhalter in den Schlitz an der rechten Seite des Film- & Fotoscanners; siehe Abbildung. Filmhalter: Das Design des Filmhalters entspricht ISO-Norm. In einigen Fällen passen die Löcher des Films nicht exakt auf den Halter. Dies wird von nicht standardmäßigen Kameras verursacht. In solchen Fällen ist auf dem Bildrand eine kleine schwarze Linie zu sehen, die ganz einfach mit einem Bildbearbeitungsprogramm entfernt werden kann. ISO—Internationale Organisation für Normung 8 7: Fotos laden Bringen Sie die Winkel gemäß den Abstandsmarkierungen an dem Bilderrahmen an. Bei 5x7” Fotos ist es nicht erforderlich, die Winkel am Bilderrahmen anzubringen. Stecken Sie die Winkel in die Schlitze. Sichern Sie die Winkel, indem Sie sie nach unten schieben. Drehen Sie Bilderrahmen um, um zu prüfen, ob die Winkel fest installiert sind. Die Winkel dürfen nicht abfallen. 9 1. Winkel am Bilderrahmen anbringen. 2. Winkel nach unten schieben und sichern. Schieben Sie das Foto in den der Größe entsprechend angepassten Bilderrahmen (5”x7” (5R), 4”x6” (4R), 3 ½”x5” (3R), Visitenkarte). Stecken Sie den Bilderrahmen in den Schlitz an der Oberseite des Film- & Fotoscanners. 10 Hinweis: • Verwenden Sie bitte die OCR-CD zum Verwalten der Visitenkarten. • B e h a n d e l n S i e F o t o s m i t S o r g f a l t . S t a u b , K r a t z e r o d e r Fingerabdrücke werden Ihre gespeicherten Fotos verunstalten. • Visitenkarten werden standardmäßig in einem Format der Größe 91 x 55 mm gespeichert. Auf dem gespeicherten Bild ist um die Visitenkarte herum ein leichter Rahmen zu sehen. 11 8: Allgemeine Bedienung 1: Stecken Sie jeweils das Dia/Negativ in den Dia-/Negativhalter oder ein Foto in den der Größe entsprechend angepassten Bilderrahmen (5”x7” (5R), 4”x6” (4R), 3 ½”x5” (3R) und Visitenkarte). Beachten Sie, dass es bei Bildern der Größe 5x7” nicht erforderlich ist, die Winkel am Bilderrahmen zu befestigen. 2: Stecken Sie den Dia-/Negativhalter in den Schlitz rechts an der Seite oder den Bilderrahmen in den Schlitz an der Oberseite des Geräts. 3:Schalten Sie je nach Anwendung den Filmscanner- oder Fotoscanner-Modus ein. 4: Schließen Sie den Film- & Fotoscanner mit dem USB-Kabel an einen PC an. 5: Verwenden Sie die NimoFilm Software und folgen Sie den Anweisungen auf dem Bildschirm zum Scannen von Dias oder Fotos. 6: Nach dem Scannen wird das Bild im Hauptfenster von NimoFilm angezeigt. Es kann mit den verfügbaren Optionen bearbeitet werden. 12 9: Bilder aufnehmen Hinweis: Wenn Sie die Nimofilm Software nach der erfolgreichen Installation das erste Mal verwenden, müssen Sie den S/N Code eingeben (diesen finden Sie auf der Verpackung der CD-ROM). Klicken Sie anschließend auf "check"; die Software ist dann betriebsbereit. 1.Schließen Sie den Filmscanner an Ihren Computer an. Falls Sie einen Desktop Computer verwenden, schließen Sie den Filmscanner an einen USB-Port des nachgeschalteten Computers an. Die Stromversorgung des USB-Ports eines vorgeschalteten Computers ist möglicherweise für den Betrieb des Scanners nicht ausreichend. Falls der Anschluss fehlschlägt, stellen Sie die Verbindung mit dem USB-Port erneut her oder schließen Sie den Filmscanner an einen anderen USB-Port an. NIMOFILM starten ◆ Wählen Sie im Aufklappmenü die Option „Get image from film scanner“ oder „Get image from Photo Scanner“. Hinweis: Gehen Sie wie folgt vor, um Negative/Dias zu scannen: 1: Stecken Sie den Dia-/Negativhalter in den Schlitz rechts am Gerät. 2: Schieben Sie die beiden Schalter oben auf dem Gerät ganz nach links, bis sie mit dem Pfeil „Negative & Dias“ auf einer Höhe sind (Filmscanner). 3: Wählen Sie „Get image from film scanner“ und den Modus „Film preview“. 13 Gehen Sie wie folgt vor, um Fotos zu scannen: 1: Stellen Sie sicher, dass der Dia-/Negativhalter nicht am Gerät angeschlossen ist. 2: Schieben Sie die beiden Schalter oben am Gerät nach rechts, bis sie mit dem Pfeil „Fotos“ auf einer Höhe sind (Fotoscanner). 3: Wählen Sie „Get image from Photo Scanner“ und den Modus „Photo preview“. Warten Sie einige Sekunden und schließen Sie dann den Bilderrahmen an. Warten Sie erneut einige Sekunden, um die Bildstabilität zu gewährleisten. Das Bild erscheint dann realitätsgetreuer. 14 Nach der Auswahl der Option „Get image from film scanner“ erscheint das folgende Anzeigefenster. ◆Wählen Sie den von Ihnen gescannten Filmtyp. ◆Wählen Sie eine Auflösung: 1800 oder 3600 DPI ◆Das Bild können Sie nur im benutzerdefinierten Modus einstellen. ◆Wählen Sie den Zielordner zum Speichern des gescannten Bildes. Standardmäßig werden Bilder unter „My Documents\My Pictures“ gespeichert. Dies können Sie auch ändern. ◆Klicken Sie im Anzeigefenster auf „Capture“ oder drücken Sie am Gerät die Taste „Scan“. Das gescannte Bild wird automatisch gespeichert. 15 Nach der Auswahl der Option „Get image from Photo Scanner“ erscheint folgendes Anzeigefenster. ◆Wählen Sie das gewünschte Bildformat (5”x7” (5R), 4”x6” (4R), 3 ½”x5” (3R), Visitenkarte). ◆Wählen Sie die Auflösung 1800 oder 3600 dpi. ◆Im benutzerdefinierten Modus können Sie das Bild einstellen. ◆Klicken Sie im Anzeigefenster auf „Capture“ oder drücken Sie am Gerät die Taste „Scan“. Das gescannte Bild wird innerhalb weniger Sekunden automatisch gespeichert. Bilder bearbeiten Wählen Sie im Hauptfenster von NimoFilm ein Bild für die Detailansicht und weitere Bearbeitung (siehe unten) aus. Die Software bietet viele Funktionen für die Bildbearbeitung. 16 1.Foto per Outlook als E-Mail versenden 2.Fotos auf Flickr veröffentlichen 3.Ausgewählte Fotos drucken 4.Alle gescannten Bilder abspielen 5.Bild drehen, zoomen oder verengen 17 10: Reinigung & Pflege Der Film- & Fotoscanner sollte regelmäßig und nach kontinuierlichem Gebrauch gereinigt werden. Verwenden Sie dafür Druckluft, um Staub aus der inneren Kammer zu entfernen. ◆Führen Sie das Ende des Flaschenhalms in die Türklappe an der rechten Seite ein, so dass sich die Klappe öffnet. ◆Blasen Sie den Staub vorsichtig aus dem Inneren des Geräts heraus. Hinweis: Druckluftgeräte sind nicht im Lieferumfang des Geräts enthalten, sind jedoch in Fachgeschäften für Büromaterial und Elektronik erhältlich. S i e k ö n n e n a u c h e i n h e r k ö m m l i c h e s Wa t t e s t ä b c h e n u n d Objektivglasreiniger verwenden. ◆B e f e u c h t e n S i e d a s E n d e d e s Wa t t e s t ä b c h e n s m i t d e r Reinigungsflüssigkeit und führen Sie es rechts am Gerät ein, so dass sich die Türklappe öffnet. Reinigen Sie dann die gesamte Oberfläche des Glases im Inneren des Geräts mit dem Wattestäbchen. Hinweis: Wattestäbchen und Reinigungsflüssigkeit sind nicht im Lieferumfang enthalten, sind jedoch in Fachgeschäften für Büromaterial, Fotozubehör oder Elektronik erhältlich. Trennen Sie den Film- & Fotoscanner während des Nichtgebrauchs vom Computer und bewahren Sie ihn an einem sauberen, trockenen und staubfreien Ort auf. 18 11: Technische Daten ♦ Linse: 3G2P F/NO=4 f=3.93 Negativbereich: 51.5 mm F/NO=3.97 f=4.04 Fotobereich: 170 mm ♦ Sensor: ♦ Belichtung: ♦ Farbabgleich: ♦ Scanauflösung: ♦ Datenumwandlung: ♦ Scanverfahren: ♦ Lichtquelle: 5.1 Megapixel CMOS-Sensor Auto Auto 3.600 DPI Hochauflösung 10 Bit pro Farbkanal Ein Lauf Hintergrundbeleuchtung ♦ Nutzungsdauer LED (Schaltzyklen): ♦ Stromversorgung: ♦ Interface: ♦ Betriebssystem: ♦ Software: ♦ Abmessungen: ♦ Gewicht: 10000 times Über USB USB 2.0 Windows XP/Vista/Window 7 NimoFilm software 220 x 208 x 147mm 850g ♦ Sprachen: Englisch, Chinesisch (Kurzzeichen) 19 User’s Manual For correct usage please read these instructions carefully and keeps in a safe place for future reference! Contents 1: Safety precautions… …………………………………………… 1 2: Package contents… …………………………………………… 2 3: Installation………………………………………………………… 3 4: Description of parts……………………………………………… 5 5: Loading Slides…………………………………………………… 6 6: Loading Negative film…………………………………………… 7 7: Loading photo… ………………………………………………… 8 8: General operations… …………………………………………… 11 9: Capturing images…………………………………………………12 10: Cleaning & Maintenance… ……………………………………17 11: Technical Specifications… ……………………………………18 1: Safety precautions Important: Do not expose this product to water and moisture to preserve the life of your product. Caution: Do not disassemble this unit. To prevent risk of electric shock, do not remove cover. Ventilation: The device should be situated in a location or position that does not interfere with its proper ventilation. For example, the unit should not be situated on a bed, sofa, rug or similar surface that may block the ventilation openings. Heat: The device should be situated away from high heat sources such as radiators or stoves. Cleaning: We strongly suggest using a clean, dry, non-alcohol cotton swab to clean the glass surface periodically to produce clear images. Non use period: The USB cord for the device should be unplugged from the computer when the unit is left unused for a long period of time. USB overloading: Do not overload the USB connections on your computer. If you have too many devices connected to your computer such as a wireless mouse, Media player, mobile phone or other USB powered devices. There may not be enough power for the film & photo scanner to operate properly. Servicing: The user should not attempt to service the device beyond those means described in the operating instructions. All other servicing should be referred to a qualified personal. Film Holder: The design of the film holder follows ISO standard. In some cases the holes on the film will not match exactly to alignment of the holder, as this is caused by using non-standardized film. ISO-- International Organization for Standardization 1 2: Package contents Film & photo scanner USB cable Negative Film Holder Positive Slide Holder 4 in 1 Photo Tray((5”x7” (5R), 4”x6” (4R), 3 ½”x5” (3R) and Namecard ) ◆ CD-ROM ◆ User’s Manual ◆ ◆ ◆ ◆ ◆ 2 3: Installation Before connecting to the computer for the first time, you need to install NimoFilm Software. Please follow as bellowing: 1.Put the CD in the CD-ROM 2.A pop-up installation interface after you put the CD in the CD-ROM 3.Select NimoFilm and Business Card Reader to start installation, then select the setup language: Chinese or English and Click “Next step”. You can change folder where setup will install files, it default save in C:\Program Files\Mysher. 3 4. Continue to click “next step” until finished installation. 4 4: Description of parts Film and Photo Scanner Positive Slide Holder Negative Film Holder Photo/Name card Holder 5 USB cable 5: Loading Slides Slide: the light and shade, color of the slide is exactly the same as original image. With the slide holder laid open, place the slide onto the holder with the glossy side facing up and the image should be upright, Note: Handle slides with care. Any dust scratches or fingerprints will show up on your saved images. You’d better to wear cotton gloves when handling slides. It is recommended to use compressed air to remove any dust on the slides. You can purchase it from an office or electronics supply retailer. Close the slide holder and press the edges so that it locks in place. Hold it in the position as shown in the film & photo scanner. Insert the slide holder into the slot from the right side of the film & photo scanner as shown. 6 6: Loading Negative film Negative film properties: The light and shade, color of the Negative is exactly inverted from the original image. Place the film onto the holder with the glossy side facing up and the image should be upright. Use the tabs in the holder to align the negatives film. Note: Handle negatives with care. Any dust, scratches or fingerprints will show up on your saved images. If possible wear cotton gloves when handling negatives. It is recommended to use compressed air to remove any dust on the negatives. This is not included with the film & photo scanner but can be purchased from an office or electronics supply retailer. Close the negative holder and press the edges so that it locks in place Hold it in the position as shown in the film & photo scanner. Insert the negative holder into the slot on the right side of the film & photo scanner as shown. Film Holder: The design of the film holder follows ISO standard. In some cases the holes on the film will not match exactly to alignment of the holder, as this is caused by using nonstandardized film. ISO-- International Organization for Standardization 7 7: Loading photo Position the brackets according to the marked dimensions on the photo tray. Note that for 5x7” photographs, the brackets do not need to be fitted into the photo tray. Place the brackets into the slots and slide the brackets downwards to secure. Check that they are securely fastened by turning the photo tray upside down. The brackets should not fall off. 8 1. Place brackets in photo tray 2. Slide brackets downwards to secure Insert the photo into appropriately sized photo tray (5”x7” (5R), 4”x6” (4R), 3 ½”x5” (3R), name card) Insert the photo tray into the photo tray slot from the top of the film & photo scanner as shown. 9 Note: • Please use the provided OCR CD to organize the name cards. • Handle photo with care. Any dust scratches or fingerprints will show up on your saved images. • Scanned name cards will capture a standard dimension of 91x55mm. The scanned image will have a slight border around the name card. 10 8: General operations 1: Put slide/negative film onto the slide/negative holder respectively or insert photo into appropriately marked dimensions on the photo tray (5”x7” (5R), 4”x6” (4R), 3 ½”x5” (3R) and Namecard ) Note that for 5x7” photographs, the brackets do not need to be fitted into the photo tray. 2: Insert the slide/negative holder into the slot from the right side of the device or insert photo tray into photo tray slot from the top of the device 3: Switch to Film scanner or Photo scanner mode, depend on your usage. 4: Connect the film & photo scanner to a PC with USB cable 5: Use NimoFilm software and follow the menu on screen for scanning film or photo 6: After finished the scanning, the image will appear in NimoFilm main window and can be edited with the feature provided. 11 9: Capturing images Note: After finished installing software, when you use Nimofilm software for the first time, you should enter the S/N Code (You can find the S/ N Code on the CD-ROM package). Then click “check”, you can use Nimofilm software now. 1.Please connect the film scanner to your computer. If you use desktop computer for scanning, please use the USB port on back-end computer to connect your film scanner. Maybe power supply of the USB port on front-end computer is not enough for the film scanner operating. If it is failed connecting, please try to reconnect the USB port or connect another USB port to the film scanner. Launch NIMOFILM. ◆Choose “Get image from film scanner” or “Get image from Photo Scanner” from the drop down menu Note: If you want to scan the negative film/slide, please follow the steps below: 1: Insert the Slide/Negative holder into the slot from the right side of the device 2: Slide the two switches on top of the devices all the way to the left side until they are in line with the “negatives & slides” arrow. (Film Scanner) 3: Choose “Get image from film scanner”, enter into “Film preview” mode. 12 If you want to scan the photos, please follow the steps below: 1: Make sure the Slide/Negative holder is not in the slot of the device. 2: Slide the two switches on the top of the device to the right side until they are in-line with the” photos” arrow. (Photo Scanner) 3: Choose “Get image from Photo Scanner”, enter into “Photo preview” mode,and waiting for a few seconds, then insert the photo tray, continue wait for about several seconds to make sure the image stability, for get more stable and reality image. 13 When choose “Get image from film scanner”, the following window will appear. ◆Choose the type of film you are scanning ◆Choose the resolution: 1800 or 3600 DPI ◆Only in custom mode, you can adjust the image. ◆You need to select the location of the folder to save the image before you capture. It default to save in “My Documents\My Pictures”, you can change the location too. 14 ◆Click “Capture” on the application window or press “Scan” button on the device, the captured image will be saved automatically. When choose “Get image from Photo Scanner”, the following window will appear ◆Select the desired crop proportion(5”x7” (5R), 4”x6” (4R), 3 ½”x5” (3R)),NameCard ◆Choose the resolution as 1800 or 3600 dpi. ◆Only in custom mode, you can adjust the image. ◆Click “Capture” on the application window or press “Scan” button on the device, the captured image will be saved automatically within few seconds. Edit images From the main window of NimoFilm you choose one image to view it in more detail and edit the image as desired (as below). There are many editing features that can be applied by using the 15 software. 1.Send photo Email by Outlook 2.Share photo on flickr 3.Print selected image 4.Playback all captured images 5.Rotate and zoom or narrow the image 16 10: Cleaning & Maintenance Periodically and after consistent use, the film & photo scanner should be cleaned using compressed air canister to remove the dust out from the internal chamber. ◆Insert the end of straw from the compressed air into door flap on the right side so that it opens. ◆Gently blow out any dust on the inside of the device. Note: Compressed air is not included with the device but can be purchased from an office supply or electronics retailer. For further cleaning you can use an ordinary cotton swab and a bottle of lens cleaning fluid ◆Wet the end of the cotton swab with Lens Cleaning Fluid and insert into the right side of the device so the door flap opens. Then clean the entire surface of the glass on the inside of the device with the cotton swab. Note: Cotton swabs and cleaning fluid are not included with the device but can be purchased from an office supply, photo supply or electronics retailer. When not in use please disconnect the film & photo scanner from the computer and store in a clean, dry and dust-free environment. 17 11: Technical Specifications ♦ Lens : 3G2P F/NO=4 f=3.93 Film Range:51.5mm F/NO=3.97 f=4.04 Photo Range:170mm ♦ Sensor : ♦ Exposure : ♦ Color balance : ♦ Scan high resolution : ♦ Data conversion : ♦ Scan Method : ♦ Light source : 5.1 mega pixels CMOS sensor Auto Auto 3,600 DPI interpolation resolution 10 bits per color channel Single pass Backlight Panel ♦ LED light lifetime for on & off: ♦ Power : ♦ Interface: ♦ Operating System: ♦ Software : ♦ Dimension: ♦ Weight: 10000 times Powered from USB USB 2.0 Windows XP/Vista/Window 7 NimoFilm software 220 x 208 x 147mm 850g ♦ Language: English, Simplify Chinese 18