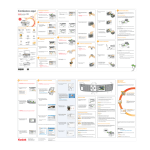
1
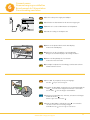
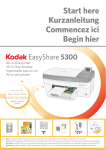
Start here
Kurzanleitung
Commencez ici
Begin hier
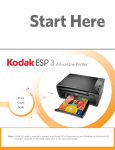
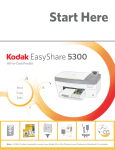
EasyShare 5500
All-in-One printer
All-in-One-Drucker
Imprimante tout-en-un
All-in-one printer
E
EasyShare
All-in-One
5500
OK
Printer
Print
Copy Scan Fax
Drucken
Kopieren Scannen Faxen
Impression Copie
Numérisation Télécopie
Afdrukken Kopiëren
Scannen Faxen
On/Off
Attention
Cancel
Phonebook
abc
def
Rotate
Copy
ghi
pqrs
jkl
Start
mno
Fax
tuv
Menu
Zoom
wxyz
Symbols
Space
Photo
Scan
Transfer
Black Ink Cartridge
Color Ink
Cartridge
10
10
Note: A USB 2.0 cable is required to connect your Kodak All-in-One printer to your Windows or Macintosh OS computer.
Hinweis: Sie benötigen ein USB 2.0-Kabel, um Ihren Kodak All-iOne-Drucker an einen Windows- oder Macintosh-Computer anzuschließen.
Remarque: un câble USB 2.0 est nécessaire pour brancher votre imprimante multifonction Kodak à votre ordinateur Windows ou Macintosh OS.
Opmerking: U hebt een USB 2.0-kabel nodig om uw Kodak All-in-One printer aan te sluiten op uw computer met Windows of Macintosh.
Identify main components
Hauptkomponenten
Identification des principaux composants
Belangrijkste onderdelen
1.
13.
12.
2.
3.
E
EasyShare
5500
11.
OK
All-in-One
Printer
4.
10.
16.
9.
5.
6.
EN
1.
2.
3.
4.
7.
ENGLISH
3. Ausgabefach
4. Papierbreitenführung
1.
2.
3.
4.
1.
2.
3.
4.
2
Main tray
Photo tray
Paper-length guide
Photo tray light
9.
10.
11.
12.
5.
6.
7.
8.
Hauptfach
9. USB/PictBridge-Anschluss
Fotopapierfach
10. Kamerakartensteckplätze
Papierlängenführung 11. Speicherkartenanzeige
Anzeige am
12. Druckerfach
Fotopapierfach
13. Automatischer
Dokumenteneinzug
14. USB-Anschluss
15. Netzanschluss
16. Hinteres Druckerfach
5.
6.
7.
8.
9.
Bac principa
10. Logements de cartes
mémoire
Bac photo
11. Témoin de carte
Guide de longueur
mémoire
Témoin du bac photo
12. Trappe d'accès à
Port USB/PictBridge
l'imprimante
13. Chargeur automatique
14. Port USB
15. Connecteur
d'alimentation
16. Rappe d'accès arrière
5.
6.
7.
8.
Hoofdplateau
9. Poort voor
USB-stick/PictBridge
Fotopapierlade
10.
Camerakaartsleuven
Papierlengtegeleider
11. Geheugenkaartlampje
Lampje van
fotopapierlade
12. Printerklep
13. Automatische
documentinvoer
14. USB-poort
15. Voedingsconnector
16. Klep op achterkant
USB drive/PictBridge port
Memory card slots
Memory card light
Printer access door
13.
14.
15.
16.
Automatic document feeder
USB port
Power connector
Rear access door
FRANÇAIS
Vitre du scanner
Panneau de commandei
Réceptacle
Guide de largeur du
papier
NL
5.
6.
7.
8.
DEUTSCH
1. Scannerscheibe
2. Funktionen des
Bedienfelds
FR
15.
8.
Scanner glass
Control Panel
Output tray
Paper-width guide
DE
14.
NEDERLANDS
Glasplaat van scanner
Bedieningspaneel
Uitvoerlade
Papierbreedtegeleider
www.kodak.com/go/aiosupport
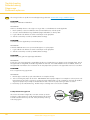
Unpack printer and install control panel
Drucker auspacken und Bedienfeld einsetzen
Déballage de l'imprimante et Mise en place du panneau de commande
De printer uitpakken en Het bedieningspaneel installeren
1
IMPORTANT: Do not connect the USB cable to the printer until instructed during software installation.
WICHTIG: Schließen Sie das USB-Kabel erst während der Software-Installation entsprechend der Anleitung an
den Drucker an.
IMPORTANT: ne connectez pas le câble USB à l'imprimante avant que cela ne vous soit spécifié au cours
de l'installation du logiciel.
BELANGRIJK: Sluit de USB-kabel niet aan op de printer tot u dit wordt gevraagd tijdens de software-installatie.
1
4
On/Off
2
5
a) See box flaps for unpacking instrctions.
Remove all orange shipping tape from the printer.
DE
a) Anweisungen zum Auspacken finden Sie auf den Klappen
der Verpackung. Entfernen Sie sämtliches orangefarbenes
Verpackungsband vom Drucker.
FR
a) Consultez les instructions situées sur les rabats de
l'emballage pour obtenir des instructions sur le déballage.
Débarrassez l'imprimante de toute trace de bande de
transport orange.
NL
a) Raadpleeg de doos voor instructies voor het uitpakken van
de printer. Verwijder alle oranje transporttape van de printer.
EN
b) If not preinstalled, insert the control panel overlay, top end
first.
DE
b) Setzen Sie die Bedienfeldauflage mit der Oberseite zuerst
ein, sofern es noch nicht eingesetzt ist.
FR
b) S'il n'est pas pré-installé, insérez la façade amovible du
panneau de commande, en commençant par le bas.
NL
b) Plaats de overlay van het bedieningspaneel, als dit nog niet
is gebeurd, met de bovenzijde eerst.
EN
c) Press down on all edges of the overlay until it snaps
into position.
DE
c) Drücke alle Ecken der Auflage nach unten, bis sie in ihrer
Position einrastet.
FR
c) S'il n'est pas pré-installé, insérez la façade amovible du
panneau de commande, en commençant par le bas.
NL
c) Druk op alle zijden van de overlay tot deze vastklikt.
EasyShare 5500
3
6
Attention
Cancel
Phonebook
7
ghi
*
pqrs
abc
8
jkl
0
def
9
1
4
ghi
7
pqrs
*
All-in-One Printer
Photo
Zoom
Scan
Transfer
Attention
2
abc
Symbols
Menu
wxyz
Space
Phonebook
OK
Start
#
Fax
tuv
Rotate
Copy
mno
Symbols
On/Off
EN
5
jkl
8
tuv
0
Cancel
EasyShare 5500
3
def
Rotate
Copy
6
Start
mno
9
Fax
Menu
OK
Photo
Zoom
wxyz
#
Space
Scan
Transfer
All-in-One Printer
www.kodak.com/go/aiosupport
3
2
Load paper
Papier einlegen
Chargement du papier
Het papier plaatsen
EN
EasyShare
5500
OK
a) Lift photo tray lid until it remains standing without support.
Insert the photo paper glossy side down.
IMPORTANT: Do not overload the photo tray.
Max 20 sheets.
DE
a) Heben Sie die Abdeckung des Fotopapierfachs an, sodass
sie von alleine offen bleibt.
Legen Sie das Fotopapier mit der Glanzseite nach unten ein.
WICHTIG: Legen Sie nicht zuviel Papier in das
Fotopapierfach ein. Maximal 20 Blätter.
FR
a) Relevez le couvercle du bac photo jusqu'à ce qu'il tienne
ouvert tout seul.
Retirez le papier photo face glacée vers le bas.
IMPORTANT: évitez de surcharger le bac photo.
20 feuilles de papier au maximum.
NL
a) Til het deksel van de fotopapierlade omhoog tot het blijft staan.
Plaats het fotopapier met de glanzende zijde naar beneden.
BELANGRIJK: Plaats niet te veel papier in e
fotopapierlade. Maximaal 20 vellen.
EN
b) Push the photo tray in until it clicks into place.
NOTE: You can only print to the photo tray when the photo
tray is pushed in.
Lower the photo tray lid.
DE
b) Schieben Sie das Fotopapier ein, bis es einrastet.
HINWEIS: Sie können nur mit dem Fotopapierfach drucken,
wenn es eingeschoben ist.
Klappen Sie die Abdeckung des Fotopapierfachs zu.
FR
b) Poussez le bac photo jusqu'à ce qu'il s'enclenche.
REMARQUE : vous ne pouvez imprimer des photos que
lorsque le bac photo est bien poussé et enclenché.
EasyShare
5500
OK
Rabaissez le couvercle du bac photo.
NL
4
b) Druk de fotopapierlade omlaag to deze vastklikt.
OPMERKING: U kunt alleen afdrukken via de fotopapierlade
als u deze hebt vastgeklikt.
Laat het deksel van de fotopapierlade zakken.
www.kodak.com/go/aiosupport
Load paper
Papier einlegen
Chargement du papier
Het papier plaatsen
EasyShare
All-in-One
5500
OK
Printer
EN
c) Load plain white paper into the main tray.
DE
c) Klappen Sie die Abdeckung des Fotopapierfachs zu.
FR
c) Chargez du papier blanc ordinaire dans le bac principal.
DE
NL
c) Plaats normaal wit papier in de hoofdlade.
syShare 5500
All-in-One
OK
Printer
EasyShare
5500
OK
All-in-One
Printer
EasyShare
All-in-One
5500
OK
Printer
www.kodak.com/go/aiosupport
5
3
6
Install printhead
Druckkopf einsetzen
Installation de la tête d'impression
De printkop installeren
EN
IMPORTANT: The printhead is fragile. Handle carefully.
a) Lift the printer access door.
Make sure the orange tape is removed from the carriage.
DE
WICHTIG: Der Druckkopf ist zerbrechlich. Behandeln
Sie ihn mit Sorgfalt.
a) Öffnen Sie das Druckerfach. Stellen Sie sicher, dass das
orangefarbene Klebeband vom Druckerschlitten entfernt
wurde.
FR
IMPORTANT: la tête d'impression est fragile.
Manipulez-la avec précaution.
a) Soulevez la trappe d'accès à l'imprimante. Assurez-vous
que la bande adhésive orange a bien été retirée du chariot.
NL
BELANGRIJK: De printkop is kwetsbaar. Ga er
voorzichtig mee om.
a) Til de printerklep omhoog. Zorg ervoor dat de oranje tape
van de wagen is verwijderd.
EN
b) Remove the printhead from its bag.
IMPORTANT: Insert the printhead immediately upon
opening sealed bag.
DE
b) Entfernen Sie den Druckkopf aus der Verpackung.
WICHTIG: Setzen Sie den Druckkopf sofort nach dem
Öffnen der versiegelten Verpackung ein.
FR
b) Sortez la tête d'impression de son emballage.
IMPORTANT: Sortez la tête d'impression de son
emballage.
DE
NL
b) Haal de printkop uit het zakje.
BELANGRIJK: Plaats de printkop onmiddellijk nadat
u het afgesloten zakje hebt geopend.
EN
c) Pull on the orange tab to remove the protective retainer.
DE
c) Ziehen Sie an der orangefarbenen Lasche, um den
Schutzbügel zu entfernen.
FR
c) Introduisez le taquet orange pour supprimer la protection.
DE
NL
c) Trek aan het oranje lipje om de bescherming te verwijderen.
www.kodak.com/go/aiosupport
Install printhead
Druckkopf einsetzen
Installation de la tête d'impression
De printkop installeren
EN
d) Carefully remove and discard the black plastic shield
and the orange protective cap.
IMPORTANT: Do not touch the copper-coloured contacts.
DE
d) Entfernen und entsorgen Sie vorsichtig die schwarze
Kunststoffhülle und die orngefarbene Kappe.
WICHTIG: Berühren Sie niemals die kupferfarbenen
Kontakte.
FR
d) Retirez avec précaution l'enveloppe en plastique noir et le
capuchon protecteur orange, puis jetez-les.
IMPORTANT: ne touchez pas aux contacts en cuivre
coloré.
FR
NL
d) Verwijder voorzichtig de zwarte plastic beschermhuls en het
oranje beschermkapje en gooi deze weg.
BELANGRIJK: Raak de koperkleurige contactpunten
niet aan.
EN
e) Place the printhead into the carriage. Insert at the angle
shown.
DE
e) Setzen Sie den Druckkopf in den Druckschlitten ein.
FR
e) Insérez la tête d'impression dans le chariot. Respectez
l'angle indiqué.
FR
NL
e) Plaats de printkop in de wagen. Plaats de printkop onder
de afgebeelde hoek.
EN
f) Push firmly against the back wall of the printhead
until it clicks into place
Tip: The printhead requires a firm push and makes an
audible click when locked into place.
DE
f) Setzen Sie den Druckkopf in den Druckschlitten ein.
Tipp: Sie müssen kräftig gegen den Druckkopf drücken.
Er rastet hörbar in seiner Position ein.
FR
f) Appuyez fermement contre la paroi de a tête d'impression
jusqu'à ce qu'elle s'enclenche.
Conseil : vous devez pousser la tête d'impression très
fermement, vous entendez un clic lorsqu'elle s'enclenche.
NL
f) Druk stevig tegen de achterzijde van de printkop tot deze op
zijn plaats vastklikt.
Tip : U moet stevig op de printkop drukken. U hoort een klik
als de printkop vastklikt.
www.kodak.com/go/aiosupport
7
Install ink cartridges
Einsetzen der Tintenpatronen
Installation des cartouches d'encre
De inktcartridges installeren
4
a) Remove the black ink cartridge from its bag.
IMPORTANT: Insert ink cartridges immediately upon
opening sealed bag.
DE
a) Nehmen Sie die schwarze Tintenpatrone aus ihrer
Verpackung.
WICHTIG: Setzten Sie Tintenpatronen immer sofort
nach dem Öffnen der versiegelten Verpackung ein.
FR
a) Retirez la cartouche d'encre noire de son emballage.
IMPORTANT: insérez les cartouches d'encre
immédiatement après avoir ouvert l'emballage scellé.
FR
NL
a) Haal de zwarte-inktcartridge uit het zakje.
BELANGRIJK: Plaats de inktcartridge onmiddellijk nadat
u het afgesloten zakje hebt geopend.
EN
b) Carefully remove and discard the orange cap.
Handle ink cartridges carefully to avoid ink transfer.
DE
b) Entfernen und entsorgen Sie die orangefarbene Kappe
vorsichtig. Gehen Sie sorgsam mit den Tintenpatronen um,
um ein Auslaufen von Tinte zu vermeiden.
FR
b) Retirez délicatement le capuchon orange et jetez-le.
Manipulez les cartouche avec précaution pour éviter tout
transfert d'encre.
NL
b) Verwijder voorzichtig het oranje kapje en gooi het weg.
Houd inktcartridges voorzichtig vast om te voorkomen dat
er inkt wordt gemorst.
EN
c) Insert the black ink cartridge into the printhead.
DE
c) Setzen Sie die schwarze Tintenpatrone in den
Druckkopf ein.
FR
c) Insérez la cartouche d'encre noire dans la tête
d'impression.
NL
c) Plaats de zwarte-inktcartridge in de printkop.
Black Ink Cartridge
EN
10
ck
la
B
k
In
10
10
e
g
id
rtr
a
C
Black Ink Cartridge
8
www.kodak.com/go/aiosupport
Install ink cartridges
Einsetzen der Tintenpatronen
Installation des cartouches d'encre
De inktcartridges installeren
EN
d) Press down on the ink cartridge until you hear
it click into position.
DE
d) Drücken Sie die Patrone fest nach unten, bis sie hörbar
einrastet.
FR
d) Appuyez sur la cartouche d'encre jusqu'à ce que vous
entendiez un « clic » indiquant qu'elle est en place.
NL
d) Druk de inktcartridge naar beneden tot deze vastklikt.
EN
e) Open and uncap the colour ink cartridge.
Insert it into the printhead.
DE
e) Nehmen Sie die Farbtinten-patrone aus der Verpackung, und
entfernen Sie die Kappe. Setzen Sie sie in den Druckkopf ein.
FR
e) Déballez la cartouche d'encre couleur et retirez son opercule.
Insérez-la dans la tête d'impression.
NL
e) Open de kleureninktcartridge en haal het kapje eraf. Plaats
de cartridge in de printkop.
EN
f) Press down firmly on the ink cartridge until you hear it click
into position. It is normal for the printhead to flex when
inserting the cartridge. You will not damage the printer.
10
10
Blac
k In
k Ca
rtrid
ge
C
o
lo
r
In
k
C
a
r
t
r
id
g
e
10
Bla
ck
In
k
Ca
rid
rt
ge
10
rtr
Ca
C
olo
k
In
r
In
k
C
ck
Bla
ar
tr
id
ge
10
ge
id
Close the printer access door.
10
DE
f) Drücken Sie die Patrone fest nach unten, bis sie hörbar
einrastet. Beim Einsetzen der Patrone kann sich der
Druckkopf etwas biegen. Dadurch wird der Drucker nicht
beschädigt.
Schließen Sie das Druckerfach.
FR
f) Appuyez fermement sur la cartouche d'encre jusqu'à ce
qu'elle s'enclenche. Il est normal que la tête d'impression
fléchisse lorsque vous insérez la cartouche.
Cela n'endommage pas l'imprimante.
Fermez la trappe d'accès à l'imprimante.
NL
f) Druk de inktcartridge stevig naar beneden tot deze vastklikt.
Het is normaal dat de printkop meebeweegt wanneer u de
cartridge plaatst. De printer wordt hierdoor niet beschadigd.
Sluit de printerklep.
www.kodak.com/go/aiosupport
9
5
10
Insert two-sided printing accessory
Einsetzen des Zubehörteils für beidseitigen Druck
Insertion de l'accessoire d'impression recto verso
Het accessoire voor dubbelzijdig afdrukken plaatsen
EN
a) Remove the rear access door.
DE
a) Entfernen Sie das hintere Druckerfach.
FR
a) Retirez la trappe d'accès arrière de l'imprimante.
NL
a) Verwijder de printerklep.
EN
b) Insert the two-sided printing accessory by rotating it
towards you and engage the lower guide pins.
DE
b) Legen Sie das Zubehörteil für beidseitigen Druck ein,
indem Sie es zu sich drehen und in die unteren
Führungsstifte einrasten.
FR
b) Insérez l'accessoire d'impression recto verso en le faisant
pivoter vers vous et enclenchez les guides inférieurs.
NL
b) Plaats het accessoire voor dubbelzijdig afdrukken door het
naar u toe te draaien en de geleidepinnen aan de onderzijde
te plaatsen.
EN
c) Press in until you hear the duplexer click into position.
DE
c) Drücken Sie das Teil nach unten, bis sie den Duplexer
einrasten hören.
FR
c) Appuyez jusqu'à ce que le dispositif soit bien enclenché
(vous entendrez un clic).
NL
c) Druk op de duplexeenheid tot u deze hoort vastklikken.
www.kodak.com/go/aiosupport
6
Connect power
Stromversorgung anschließen
Branchement de l'alimentation
De netvoeding aansluiten
EN
a) Connect the power supply and adaptor.
DE
a) Schließen Sie das Netzteil an die Stromversorgung an.
FR
a) Branchez le cordon d’alimentation et l'adaptateur.
FR
NL
a) Sluit de voeding en de adapter aan.
EN
b) Remove the plastic film from the LCD display.
Position the LCD display.
DE
b) Entfernen Sie die Schutzfolie vom LCD-Display.
Bringen Sie das LCD-Display in die richtige Position.
FR
b) Retirez le film plastique de l'écran LCD.
Positionnez de l'écran LCD.
NL
b) Verwijder het plastic beschermlaagje van het LCD-scherm.
Plaats het LCD-scherm.
EN
c) Press ON. If prompted, select your language.
Use the
key to select a region.
DE
c) Drücken Sie ON (EIN). Verwenden Sie zur Sprachauswahl die
Taste , wenn Sie dazu aufgefordert werden. Verwenden
Sie die Taste , um eine Region auszuwählen.
FR
c) Appuyez sur ON (Marche). A l'invite, sélectionnez la langue
à l'aide du bouton .
Choisiss gion avec le bouton .
FR
NL
c) Druk op ON (AAN). Gebruik de toets
om een taal te
selecteren als u hierom wordt gevraagd.
Gebruik de toets om een regio te selecteren.
4952368
EasyShare
5500
All-in-One
OK
Printer
-ON
www.kodak.com/go/aiosupport
11
7
Connect fax line
Fax-Leitung anschließen
Connexion de la ligne 0de télécopie
De netvoeding aansluiten
EN
Use the instructions in this section to connect the fax feature of your printer. More setup configurations can be
found in the User’s Guide.
DE
Beachten Sie die Anweisung in diesem Abschnitt, um die Faxfunktion Ihres Druckers zu aktivieren. Weitere
Setup-Einstellungen finden Sie im Benutzerhandbuch.
FR
Suivez les instructions de cette section pour utiliser la fonction télécopie de votre imprimante. Vous trouverez
d'autres configurations dans le Guide d'utilisation.
FR
NL
Volg de instructies in dit gedeelte om de faxfunctie van uw printer in te schakelen. Meer instellingen van de
configuratie vindt u in de gebruikershandleiding.
EN
1-LINE
2-EXT
SEPARATE FAX LINE:
Connect your printer to the phone line as shown in the illustration
if you have a separate fax line on which you receive no voice calls
and you have no other equipment connected on this phone line.
a) Connect a phone cord to your telephone wall jack and the
port labelled 1-LINE.
b) Set your Rings to Answer setting by following the steps below.
1) Press Menu to display the main menu.
2) Press
until Fax Settings is displayed.
3) Press OK to display the Adjust Fax Settings menu.
4) Press
until Rings to Answer is selected.
5) Press
or
to change the number of rings.
When the phone rings, your printer will answer automatically
after the number of rings you set in the Rings to Answer setting.
It will then send fax reception tones to the sending fax machine
and receive the fax.
1-LINE
2-EXT
SHARED LINE WITH ANSWERING MACHINE:
Connect your Kodak AiO printer to the phone line as shown in
the illustration if you receive both voice calls and fax calls at the
same phone number with an answering machine.
a) Disconnect the phone cord from the wall jack that connects
your modem to the telephone wall jack and plug it into the
port labelled 2-EXT on your All-in-One.
b) Connect the phone cord to your telephone wall jack and the
port labelled 1-LINE.
c) Set Answering Machine Mode on your All-in-One to ON.
d) Set your AiO printer to answer the phone after the answering
machine. The number of rings to answer for the AiO printer
should be greater than the number of rings to answer for the
answering machine. You want the answering machine to
answer before your AiO printer. For more information on
setting the number of rings to answer, see Set Rings to
Answer in the User’s Guide.
12
www.kodak.com/go/aiosupport
Connect fax line
Fax-Leitung anschließen
Connexion de la ligne 0de télécopie
De netvoeding aansluiten
1-LINE
2-EXT
DE
SEPARATE FAXLEITUNG:
Schließen Sie den Drucker wie in der Abbildung dargestellt an,
falls Sie über eine separate Fax-Leitung verfügen, über die Sie
keine Sprachanrufe erhalten und an die keine weiteren Geräte
angeschlossen sind.
a) Verbinden Sie ein Telefonkabel mit der
Telefon-Wandsteckdose und dem Anschluss mit der
Bezeichnung „1-LINE“.
b) Stellen Sie die Klingeltöne bis zur Entgegennahme wie unten
beschrieben ein.
1) Drücken Sie „Menü“, um das Hauptmenü zu öffnen.
2) Drücken Sie , bis „Fax-Einstellungen“ angezeigt wird.
3) Drücken Sie „OK“, um das Menü „Fax-Einstellungen
verändern“ zu öffnen.
4) Drücken Sie , bis „Klingeltöne bis Entgegennahme“
markiert ist.
5) Drücken Sie oder , um die Anzahl der Klingeltöne zu
verändern.
Wenn das Telefon klingelt, antwortet der Drucker automatisch
nach der von Ihnen unter „Klingeltöne bis Entgegennahme“
festgelegten Zeitspanne. Daraufhin übermittelt er akustische
Fax-Empfangssignale an das sendende Faxgerät und empfängt
das Fax.
EMEINSAME TELEFON- UND FAX-LEITUNG:
1-LINE
2-EXT
Verbinden Sie den Kodak All-in-One-Drucker wie in der
Abbildung dargestellt mit der Telefonleitung, wenn Sie sowohl
Sprach- als auch Fax-Anrufe unter derselben Telefonnummer
erhalten und auch ein Anrufbeantworter angeschlossen ist.
a) Ziehen Sie das Telefonkabel, über das das Modem mit der
Telefon-Wandsteckdose verbunden ist, aus der
Wandsteckdose, und stecken Sie es in den mit „2-EXT“
gekennzeichneten Anschluss des All-in-One-Druckers ein.
b) Verbinden Sie das Telefonkabel mit der
Telefon-Wandsteckdose und dem Anschluss mit der
Bezeichnung „1-LINE“.
c) Aktivieren Sie den Anrufbeantwortermodus des
All-in-One-Druckers.
d) Konfigurieren Sie den All-in-One-Drucker so, dass er Anrufe
erst nach dem Anrufbeantworter entgegennimmt. Die Anzahl
der Klingeltöne bis zur Anrufentgegennahme durch den
All-in-One-Drucker muss größer sein als die Anzahl der
Klingeltöne bis zur Anrufentgegennahme durch den
Anrufbeantworter. Schließlich soll der Anrufbeantworter vo
dem All-in-One-Drucker reagieren. Weitere Informationen
zum Festlegen der Anzahl von Klingeltönen bis zur
Anrufentgegennahme finden Sie unter „Festlegen der
Klingeltönbis Anrufentgegennahme“ im Benutzerhandbuch.
www.kodak.com/go/aiosupport
13
Connect fax line
Fax-Leitung anschließen
Connexion de la ligne 0de télécopie
De netvoeding aansluiten
1-LINE
2-EXT
FR
LIGNE DE TELECOPIE SEPAREE :
Connectez votre imprimante à la ligne téléphonique (comme
indiqué dans l'illustration) si vous avez une ligne de télécopie
séparée sur laquelle vous ne recevez aucun appel vocal et
qu'aucun autre appareil n'est connecté à cette ligne téléphonique.
a) Connectez un câble téléphonique à votre prise de téléphone
murale et au port portant la mention 1-LINE.
b) Réglez le paramètre Sonneries avant réponse en en suivant
cette procédure.
1) Appuyez sur Menu pour afficher le menu principal.
2) Appuyez sur
jusqu'à ce que l'option Paramètres de
télécopie soit affichée.
3) Appuyez sur OK pour afficher le menu Ajuster les
paramètres de télécopie.
4) Appuyez sur
jusqu'à ce que l'option Sonneries avant
réponse soit sélectionnée.
5) Appuyez sur
ou
pour changer le nombre de
sonneries.
Lorsque le téléphone sonne, votre imprimante répond
automatiquement après le nombre de sonneries défini par le
paramètre Sonneries avant réponse. Elle émet ensuite une
tonalité de réception de télécopie en direction du télécopieur
expéditeur et reçoit la télécopie.
LIGNE PARTAGEE AVEC UN REPONDEUR AUTOMATIQUE
1-LINE
2-EXT
Connectez l'imprimante multifonction à la ligne téléphonique
(comme indiqué dans l'illustration) si vous recevez des appels
vocaux et de télécopie au même numéro de téléphone et qu'un
répondeur automatique est connecté à cette ligne.
a) Déconnectez le câble du téléphone de la prise reliant votre
modem à la prise du téléphone et branchez-le sur le port
portant la mention 2-EXT de votre imprimante multifonction.
b) Connectez le câble téléphonique à votre prise de téléphone
murale et au port portant la mention 1-LINE.
c) Activez le mode Répondeur automatique sur votre
imprimante multifonction.
d) Réglez l'imprimante multifonction de sorte qu'elle réponde
au téléphone après le répondeur automatique. Le nombre de
sonneries après lesquelles votre imprimante multifonction
EasyShare doit répondre à un appel doit être supérieur à
celui du répondeur automatique. Votre répondeur
automatique doit en effet pouvoir répondre avant
l'imprimante multifonction. Pour plus d'informations sur la
définition du nombre de sonneries avant réponse, consultez
la section Paramétrage des sonneries avant réponse du
guide d'utilisation.
14
www.kodak.com/go/aiosupport
Connect fax line
Fax-Leitung anschließen
Connexion de la ligne 0de télécopie
De netvoeding aansluiten
1-LINE
2-EXT
NL
AFZONDERLIJKE FAXLIJN:
Sluit de printer zoals aangegeven in de afbeelding aan op de
telefoonlijn als u een afzonderlijke faxlijn hebt waarop geen
telefoongesprekken worden gevoerd en er geen andere
apparatuur op de telefoonlijn is aangesloten.
a) Sluit een telefoonkabel aan op het telefoonstopcontact en
de poort 1-LINE.
b) Volg onderstaande stappen om de instelling Aantal
belsignalen alvorens op te nemen in te stellen.
1) Druk op Menu om het hoofdmenu weer te geven.
2) Druk op
totdat Faxinstellingen wordt weergegeven.
3) Druk op OK om het menu Faxinstellingen aanpassen te
openen.
4) Druk op
totdat Aantal belsignalen alvorens op te
nemen is geselecteerd.
5) Druk op
of
om het aantal belsignalen te wijzigen.
Als de telefoon overgaat, antwoordt de printer automatisch na
het aantal keren overgaan dat u hebt ingesteld in de instelling
Aantal belsignalen alvorens op te nemen. De printer verzendt
dan faxontvangsttonen naar het faxapparaat dat de fax verzendt,
en vervolgens wordt de fax ontvangen.
1-LINE
2-EXT
GEDEELD MET EEN ANTWOORDAPPARAAT:
Sluit de Kodak AIO-printer, zoals aangegeven in de afbeelding,
aan op de telefoonlijn als u via hetzelfde telefoonnummer als
het nummer van het antwoordapparaat telefoongesprekken
voert en faxen ontvangt.
a) Trek de telefoonkabel van de modem uit de wandaansluiting
en sluit die kabel aan op de poort 2-EXT op uw All-in-One.
b) Sluit de telefoonkabel aan op het telefoonstopcontact en de
poort 1-LINE.
c) Stel de antwoordapparaatmodus op uw All-in-One in op Aan.
d) Stel uw AiO-printer zodanig in dat deze oproepen aanneemt
na het antwoordapparaat. Het aantal belsignalen voordat een
oproep wordt aangenomen door de AiO-printer moet groter
zijn dan het aantal belsignalen voordat de oproep wordt
aangenomen door het antwoordapparaat. Het
antwoordapparaat moet oproepen aannemen voordat de
AiO-printer dit doet. Zie Aantal belsignalen alvorens op te
nemen in de gebruikershandleiding voor informatie over het
instellen van het aantal belsignalen voordat er wordt
opgenomen.
www.kodak.com/go/aiosupport
15
8
Calibrate printer
Drucker kalibrieren
Etalonner l'imprimante
Printer kalibreren
EasyShare
5500
All-in-One
Printer
OK
EN
IMPORTANT: Make sure that the photo tray is
pushed in. The photo tray light should be lit.
a) Press Start.
Wait two minutes for the calibration sheet to print.
Tip: If the calibration sheet does not print properly, see the
Troubleshooting section in this setup guide.
DE
WICHTIG: Stellen Sie sicher, dass das Fotopapierfach
eingeschoben ist. Die Anzeige am Fotopapierfach sollte
leuchten.
a) Drücken Sie Start. Warten Sie zwei Minuten, bis die
Kalibrierungsseite gedruckt wird.
Tipp: Wenn die Kalibrierungsseite nicht richtig gedruckt wird,
sehen Sie im Abschnitt „Fehlerbehebung“ auf dem
Einrichtungsposter nach, um das Problem zu beheben.
FR
IMPORTANT: assurez-vous que le bac photo est bien
enfoncé. Le témoin du bac photo doit être allumé.
a) Appuyez sur Démarrer. L'impression de la page
d'étalonnage prend en ron deux minutes. Veuillez patienter.
Conseil : Appuyez sur Démarrer. L'impression de la page
d'étalonnage prend environ deux minutes. Veuillez patienter.
FR
NL
BELANGRIJK: De blauwe pijl in de hoek van het
kalibratievel moet zoals aangegeven naar de
registratiemarkeringen wijzen.
a) Druk op Waarschuwig. Wacht tot het kalibratievel is
afgedrukt. Dit duurt ongeveer twee minuten.
Tip: Raadpleeg het gedeelte Problemen oplossen op deze
installatieposter als hezt kalibratievel niet goed wordt
afgedrukt.
EN
b) Remove the calibration sheet from the output tray. Place it
face down and align to the back, left corner of the
scanner glass, as shown.
IMPORTANT: The blue arrow in the corner of the
calibration sheet must point to the registration marks
as shown.
DE
b) Entfernen Sie die Kalibrierungsseite aus dem Ausgabefach.
Legen Sie es mit der bedruckten Seite nach unten auf das
Scannerglas und richten Sie es, wie angezeigt, an der linken
hinteren Ecke aus.
WICHTIG: Der blaue Pfeil in der Ecke der
Kalibrierungsseite muss wie angezeigt auf die Markierungen
zeigen.
16
www.kodak.com/go/aiosupport
Calibrate printer
Drucker kalibrieren
Etalonner l'imprimante
Printer kalibreren
FR
b) Retirez la page d'étalonnage du réceptacle. Placez-la face
contre la vitre et en l'alignant avec l'angle arrière gauche de
la vitre du scanner, comme indiqué.
IMPORTANT: la flèche bleue dans le coin de la page
d'étalonnage doit pointer vers les marques d'enregistrement,
comme indiqué.
FR
NL
b) Verwijder het kalibratievel uit de uitvoerlade. Plaats het met
de bedrukte zijde naar beneden in de linkerhoek aan de
achterzijde van de glasplaat, zoals aangegeven.
BELANGRIJK: De blauwe pijl in de hoek van het
kalibratievel moet zoals aangegeven naar de
registratiemarkeringen wijzen.
EN
c) Lower the scanner lid and press Start. Remove the sheet
from the scanner glass when the calibration is complete.
DE
c) Schließen Sie die Scannerabdeckung, und drücken Sie
„Start“. Entfernen Sie die Seite vom Scannerglas, nachdem
die Kalibrierung abgeschlossen ist.
FR
c) Abaissez le capot du scanner et appuyez sur Start (Démarrer).
Retirez la page de la vitre lorsque l'étalonnage est terminé.
FR
NL
c) Laat de scannerklep zakken en druk op Start (Waarschuwig).
Verwijder het vel van de glasplaat wanneer de kalibratie
is voltooid.
EN
d) Lift the photo tray lid, then slide the photo tray toward you
to return to main tray operation. The photo tray light will
turn off.
DE
d) Heben Sie die Abdeckung des Fotopapierfachs an und
ziehen sie das Fotopapierfach dann zu sich, um zum Betrieb
mit dem Hauptfach zurückzukehren. Die Anzeige des
Fotopapierfachs erlischt.
FR
d) Relevez le couvercle du bac photo, puis tirez le bac photo
vers vous pour retourner au fonctionnement du bac principal
Le témoin du bac photo s'éteint.
FR
NL
d) Til het deksel van de fotopapierlade omhoog en schuif de
fotopapierlade naar u toe om af te drukken via de hoofdlade.
Het lampje van de fotopapierlade gaat uit.
4x6
(10cm x 15cm)
4x6
EasyShare
5500
OK
www.kodak.com/go/aiosupport
17
6 WINDOWS
Install Windows software
Windows-Software installieren
Installation du logiciel Windows
De Windows-software installeren
IMPORTANT: Do not connect the USB cable to the printer until instructed during software installation.
WICHTIG: Verbinden Sie das USB-Kabel erst mit dem Drucker, wenn Sie während der Software-Installation dazu
aufgefordert werden.
IMPORTANT : ne connectez pas le câble USB à l'imprimante avant que cela ne vous soit spécifié au cours
de l'installation du logiciel.
BELANGRIJK: Sluit de USB-kabel niet aan op de printer tot u dit wordt gevraagd tijdens de software-installatie.
WINDOWSWINDOWS
WINDOWSWINDOWS
WINDOWSWINDOWS
WINDOWSWINDOWS
WINDOWSWINDOWS
WINDOWSWINDOWS
WINDOWSWINDOWS
WINDOWSWINDOWS
WINDOWSWINDOWS
WINDOWSWINDOWS
WINDOWSWINDOWS
WINDOWSWINDOWS
WINDOWSWINDOWS
WINDOWSWINDOWS
WINDOWSWINDOWS
WINDOWSWINDOWS
WINDOWSWINDOWS
WINDOWSWINDOWS
WINDOWSWINDOWS
18
EN
a) Load the Kodak AiO Printer software CD into the CD-ROM
drive. Follow the on-screen prompts when the instructions
appear.
If instructions do not appear, click Start, then Run. Select
CD-ROM drive and type setup.exe, then press ENTER.
b) Connect the USB cable to the printer when instructed.
Continue to follow the on-screen prompts until installation
is complete.
DE
a) Legen Sie die Software-CD für die Kodak All-in-OneDruckerstation in das CD-ROM-Laufwerk ein. Befolgen Sie
die Anweisungen auf dem Bildschirm, wenn diese angezeigt
werden.
Falls keine Anweisungen angezeigt werden, klicken Sie auf
"Start" und anschließend auf "Ausführen". Wählen Sie das
CD-ROM-Laufwerk aus, geben Sie "setup.exe" ein, und
drücken Sie dann die Eingabetaste.
b) Schließen Sie das USB-Kabel am Drucker an, wenn Sie
dazu aufgefordert werden. Befolgen Sie die Anweisungen
auf dem Bildschirm, bis die Installation abgeschlossen ist.
FR
a) Chargez le CD du logiciel de l'imprimante multifonction
Kodak dans le lecteur de CD-ROM. Lorsque les instructions
apparaissent, suivez les invites à l'écran.
Si aucune instruction n'apparaît, cliquez sur Démarrer, puis
sur Exécuter. Sélectionnez le lecteur de CD-ROM et tapez
setup.exe, puis appuyez sur ENTREE.
b) Lorsque vous y êtes invité, branchez le câble USB à votre
imprimante. Continuez de suivre les invites à l'écran jusqu'à
la fin de l'installation.
NL
a) Plaats de cd met Kodak AiO-printersoftware in het cdromstation. Volg de aanwijzingen op het scherm.
Klik als de instructies niet worden weergegeven op Start en
vervolgens op Uitvoeren. Selecteer het cd-romstation en typ
setup.exe. Druk vervolgens op ENTER.
b) Sluit de USB-kabel aan op de printer wanneer u hierom
wordt gevraagd. Blijf de aanwijzingen op het scherm volgen
totdat de installatie is voltooid.
www.kodak.com/go/aiosupport
Install Macintosh software
Macintosh-Software installieren
Installation du logiciel pour Macintosh
De Macintosh-software installeren
MACINTOSH
MACINTOSHMACINTOSH
MACINTOSHMACINTOSH
MACINTOSHMACINTOSH
MACINTOSHMACINTOSH
MACINTOSHMACINTOSH
MACINTOSHMACINTOSH
MACINTOSHMACINTOSH
MACINTOSHMACINTOSH
MACINTOSHMACINTOSH
MACINTOSHMACINTOSH
MACINTOSHMACINTOSH
MACINTOSHMACINTOSH
MACINTOSHMACINTOSH
MACINTOSHMACINTOSH
MACINTOSHMACINTOSH
MACINTOSHMACINTOSH
MACINTOSHMACINTOSH
MACINTOSHMACINTOSH
MACINTOSHMACINTOSH
MACINTOSHMACINTOSH
MACINTOSHMACINTOSH
MACINTOSHMACINTOSH
MACINTOSHMACINTOSH
EN
a) Connect the USB cable to the printer and your computer.
DE
a) Verbinden Sie den Drucker über ein USB-Kabel mit dem
Computer.
FR
a) Branchez le câble USB à votre imprimante et à votre
ordinateur.
NL
a) Sluit de USB-kabel aan op de printer en de computer.
EN
b) Load the Kodak AiO Printer software CD into the CD-ROM
drive.
The Kodak AiO Printer software installer window should be
displayed. If not, double-click the Kodak AiO Printer
Software CD icon on the desktop. Follow the on-screen
prompts until installation is complete.
DE
b) Legen Sie die Software-CD für die Kodak All-in-OneDruckerstation in das CD-ROM-Laufwerk ein.
Nun sollte das Fenster zur Installation der Software der
Kodak All-in-One-Druckerstation angezeigt werden. Sollte
dies nicht der Fall sein, doppelklicken Sie auf das Symbol für
die Software-CD für die Kodak All-in-One-Druckerstation
auf dem Desktop. Befolgen Sie die Anweisungen auf dem
Bildschirm, bis die Installation abgeschlossen ist.
FR
b) Chargez le CD du logiciel de l'imprimante multifonction
Kodak dans le lecteur de CD-ROM.
La fenêtre du logiciel d'installation de l'imprimante
multifonction Kodak doit s'afficher. Si ce n'est pas le cas,
double-cliquez sur l'icône du CD du logiciel de l'imprimante
multifonction Kodak sur le bureau. Suivez les invites à
l'écran jusqu'à la fin de l'installation.
NL
b) Plaats de cd met Kodak AiO-printersoftware in het
cd-romstation.
Het installatievenster van de Kodak AiO-printersoftware
wordt weergegeven. Als dit niet het geval is, dubbelklikt u
op het pictogram van de cd met Kodak AiO-printersoftware
op het bureaublad. Volg de aanwijzingen op het scherm
totdat de installatie is voltooid.
www.kodak.com/go/aiosupport
19
Control panel features
Funktionen des Bedienfelds
Fonctions du panneau de commande
Functies van het bedieningspaneel
1.
4.
2.
On/Off
6.
3.
1
Phonebook
Attention
2
abc
4
ghi
7
pqrs
*
Symbols
7.
5.
5
jkl
8
tuv
0
Cancel
EasyShare 5500
3
def
Rotate
Copy
6
Start
mno
9
Fax
Menu
OK
Photo
Zoom
wxyz
#
Scan
Space
Transfer
All-in-One Printer
13.
8.
EN
On/Off
Phonebook
Fax
Copy
5.
6.
7.
8.
Zoom
Rotate
Cancel
Menu
9.
10.
11.
12.
13.
Scan
Photo
Transfer
OK
Start
Ein/Aus
Telefonbuch
Fax
Kopieren
5.
6.
7.
8.
Zoom
Drehen
Abbrechen
Menü
9.
10.
11.
12.
13.
Scannen
Foto
Übertragen
OK
Start
Marche/Arrêt
Répertoire téléphonique
Télécopie
Copie
5.
6.
7.
8.
Zoom
Rotation
Annuler
Menu
9.
10.
11.
12.
13.
Numérisation
Photo
Transfert
OK
Démarrer
5.
6.
7.
8.
Zoomen
Praaien
Annuleren
Menu
9.
10.
11.
12.
13.
Scannen
Foto
Overbrengen
OK
Waarschuwig
NEDERLANDS
1.
2.
3.
4.
20
12.
FRANÇAIS
1.
2.
3.
4.
NL
11.
DEUTSCH
1.
2.
3.
4.
FR
10.
ENGLISH
1.
2.
3.
4.
DE
9.
Aan/uit
Telefoonboek
Faxen
Kopiëren
www.kodak.com/go/aiosupport
Helpful tips
Hilfreiche Tipps
Astuces utiles
Handige tips
All-in-One
All-in-One
OK
Printer
OK
Printer
EN
Pull out the output tray extender to help collect your prints.
DE
Ziehen Sie die Ausgabefach-Verlängerung nach außen, um Ihre
Abzüge im zu sammeln.
FR
Déployez l'extension du plateau de sortie pour récupérer plus
facilement vos impressions.
NL
Trek het verlengstuk van de uitvoerlade uit om uw afdrukken
van eenvoudiger uit de lade te kunnen nemen.
EN
The photo tray light illuminates when the photo tray is pushed
in. To use the main paper tray, disengage the photo tray by
pulling it towards you.
DE
Die Anzeige am Fotopapierfach leuchtet, wenn das
Fotopapierfach eingeschoben ist. Um über das Hauptpapierfach
zu drucken, nehmen Sie das Fotopapierfach heraus, indem Sie
es in Ihre Richtung ziehen.
FR
Le voyant du plateau à papier photo s'allume lorsque le plateau
est en place. Pour utiliser le plateau principal, dégagez le
plateau à papier photo en le tirant vers vous.
NL
Het lampje van de fotopapierlade brandt als u de fotopapierlade
hebt vastgeklikt. Maak de fotopapierlade los door deze naar u
toe te trekken als u de hoofdpapierlade wilt gebruiken.
www.kodak.com/go/aiosupport
21
Getting started
Erste Schritte
Mise en route
Aan de slag
EN
You can access and use the AiO Home Center by double-clicking on the icon on your desktop.
DE
Sie können das All-in-One Home Center mit einem Doppelklick auf das entsprechende Symbol auf Ihrem Desktop
aufrufen und verwenden.
FR
Vous pouvez accéder au logiciel AiO Home Center et l'utiliser en cliquant deux fois sur l'icône placée sur votre bureau.
NL
U kunt het AiO Home Center openen en gebruiken door op het pictogram op uw bureaublad te dubbelklikken.
EN
You can use Kodak Home Centre to browse, print, copy, scan, order supplies and
configure your AiO printer from the computer.
DE
Mit dem Kodak Home Center können Sie Ordner durchsuchen, drucken, kopieren,
scannen, Zubehör bestellen und die Konfiguration Ihres All-in-One-Druckers über
den Computer ausführen.
FR
Utilisez le logiciel Kodak Home Center pour rechercher, imprimer, copier, numériser,
commander des consommables et pour configurer votre imprimante multifonction
depuis votre ordinateur.
NL
Met Kodak Home Center kunt u vanaf de computer door mediabestanden bladeren,
deze afdrukken, kopiëren, foto's scannen, benodigdheden bestellen en uw AiO-printer
configureren.
EN
You can use Kodak EasyShare to transfer, view and work with your digital pictures
and videos, if installed.
DE
Wenn Kodak EasyShare installiert ist, können Sie Ihre Digitalbilder und Videos
übertragen, anzeigen und sie bearbeiten.
FR
S'il est installé, utilisez le logiciel Kodak EasyShare pour transférer, visualiser et
travailler vos photos et vidéos numériques.
NL
Als u Kodak EasyShare hebt geïnstalleerd, kunt u hiermee uw digitale foto's en video's
bekijken, bewerken en overbrengen.
Kodak Home Center
Software
EasyShare Software
22
www.kodak.com/go/aiosupport
Troubleshooting
Fehlerbehebung
Dépannage
Problemen oplossen
EN
If you have additional questions about troubleshooting this device, please visit www.kodak.com/go/5500aiosupport
PROBLEM:
I cannot get a calibration sheet to print.
SOLUTION:
Where necessary, you can force a calibration sheet to print by following these steps:
1. Press Menu, select Calibrate Printer and press OK.
2. Select Print Calibration Page and press OK.
3. When the print comes out, place it at the back, left corner of the scanner glass.
4. Close the scanner lid and press START.
PROBLEM:
My calibration page printed on plain white text paper.
SOLUTION:
Calibration will work successfully on both plain white paper and photo paper.
1. When the print comes out, place it at the back, left corner of the scanner glass.
2. Close the scanner lid and press START.
PROBLEM:
I cannot print to my desired paper type.
SOLUTION:
Check to see if the photo tray is pushed in. You can do this by checking if the green photo tray light is illuminated.
If it is, all prints will be produced from this tray. If you want to print from the main tray, pull out the photo tray by
lifting the photo tray lid and sliding the paper tray towards you.
PROBLEM:
I have a paper jam.
SOLUTION:
1. Press in the tabs on the rear access door to remove the door.
2. Gently pull the paper out of the rollers.
IMPORTANT: If the paper tears while removing it, check inside the printer for torn pieces of paper and remove
them. Additional jams are likely to occur if all of the torn pieces are not removed.
3. Replace the rear access door. Gently push the door forwards until it snaps into place.
Is further troubleshooting required?
If you need further information to help answer your questions,
please contact Technical Support and have your KSN number
ready. Your KSN number can be found on the unit after lifting
the printer access door as shown.
www.kodak.com/go/aiosupport
KODAK SERVICE NUMBER
F330065
23
Troubleshooting
Fehlerbehebung
Dépannage
Problemen oplossen
DE
Weitere Informationen zur Fehlerbehebung bei diesem Gerät finden Sie auf folgender
Website: www.kodak.com/go/5500aiosupport
PROBLEM:
Der Drucker druckt keine Kalibrierungsseite aus.
LÖSUNG:
Falls dies notwendig ist, können Sie mithilfe folgender Schritte den Ausdruck einer Kalibrierungsseite erzwingen:
1. Drücken Sie die Menü-Taste, wählen Sie „Drucker kalibrieren“, und drücken Sie „OK“.
2. Wählen Sie „Kalibrierungsseite drucken“, und drücken Sie „OK“.
3. Wenn der Ausdruck herauskommt, legen Sie ihn in die hintere linke Ecke der Scannerscheibe.
4. Schließen Sie die Scannerabdeckung, und drücken Sie „START“.
PROBLEM:
Die Kalibrierungsseite wird auf weißem Normalpapier gedruckt.
LÖSUNG:
Die Kalibrierung kann sowohl auf weißem Normalpapier als auch auf Fotopapier durchgeführt werden.
1. Wenn der Ausdruck herauskommt, legen Sie ihn in die hintere linke Ecke der Scannerscheibe.
2. Schließen Sie die Scannerabdeckung, und drücken Sie „START“.
PROBLEM:
Ich kann nicht auf dem gewünschten Papiertyp drucken.
LÖSUNG:
Überprüfen Sie, ob das Fotopapierfach eingeschoben ist. Dies erkennen Sie an der grün leuchtenden Anzeige am
Fotopapierfach. Wenn die Anzeige grün leuchtet, werden alle Ausdrucke von diesem Fach aus erstellt. Wenn Sie vom
Hauptpapierfach aus drucken möchten, nehmen Sie das Fotopapierfach heraus, indem Sie die Abdeckung des
Fotopapierfachs anheben und das Papierfach zu sich ziehen.
PROBLEM:
Es ist ein Papierstau aufgetreten.
LÖSUNG:
1. Drücken Sie die Stifte am hinteren Druckerfach ein, um das Fach zu entfernen.
2. Ziehen Sie das Papier vorsichtig aus den Walzen. WICHTIG: Reißt das Papier beim Herausziehen, entfernen Sie
ggf. im Drucker vorhandene Papierreste. Werden die Papierreste nicht komplett entfernt, können weitere
Papierstaus auftreten.
3. Ersetzen Sie das hintere Druckerfach. Drücken Sie die Abdeckung vorsichtig hinein, bis sie einrastet.
Ist eine weitere Fehlerbehebung erforderlich?
Sollten Sie weitere Fragen haben, wenden Sie sich bitte an den
technischen Support, und halten Sie dazu Ihre KSN-Nummer
bereit. Sie finden Ihre KSN-Nummer auf dem Gerät, wenn Sie
das Druckerfach
24
www.kodak.com/go/aiosupport
KODAK SERVICE NUMBER
F330065
Troubleshooting
Fehlerbehebung
Dépannage
Problemen oplossen
FR
Pour toute question supplémentaire sur le dépannage de cet appareil, consultez notre site Internet à l'adresse
suivante : www.kodak.com/go/5500aiosupport
PROBLÈME :
Je ne parviens pas à imprimer une page d'étalonnage.
SOLUTION :
Lorsque cela est nécessaire, vous pouvez forcer l'impression d'une page d'étalonnage en reproduisant la procédure
suivante :
1. Appuyez sur Menu, sélectionnez Etalonner l'imprimante, puis appuyez sur OK.
2. Sélectionnez Imprimer une page d'étalonnage, puis appuyez sur OK.
3. Lorsque le tirage sort de l'imprimante, alignez-le avec l'angle arrière gauche de la vitre du scanner.
4. Fermez le couvercle du scanner et appuyez sur START (DEMARRER).
PROBLÈME :
Ma page d'étalonnage s'imprime sur du papier document blanc ordinaire.
SOLUTION :
L'étalonnage fonctionnera aussi bien sur du papier blanc ordinaire que sur du papier photo.
1. Lorsque le tirage sort de l'imprimante, alignez-le avec l'angle arrière gauche de la vitre du scanner.
2. Fermez le couvercle du scanner et appuyez sur START (DEMARRER).
PROBLÈME :
Je ne parviens pas à imprimer sur le type de papier que j'ai choisi.
SOLUTION :
Vérifiez que le bac photo est bien poussé. Pour ce faire, vérifiez que le témoin vert du bac photo est allumé. S'il est
allumé, toutes les impressions se feront à partir de ce bac. Si vous souhaitez imprimer à partir du bac principal, tirez
sur le bac photo en relevant son couvercle et en tirant le bac photo vers vous.
PROBLÈME :
Un bourrage papier s'est produit.
SOLUTION :
1. Pour retirer la porte d'accès arrière, appuyez sur ses taquets.
2. Dégagez délicatement le papier des rouleaux d'entraînement.
IMPORTANT : si le papier se déchire, vérifiez si des morceaux sont restés dans l'imprimante et, le cas échant,
retirez-les. S'il reste des morceaux de papier dans l'imprimante, d'autres bourrages risquent de se produire.
3. Remettez la trappe d'accès arrière en place. Repoussez délicatement la porte jusqu'à ce qu'elle s'enclenche.
Votre problème persiste ?
Si vous avez besoin de plus d'informations pour vous aider à
répondre à vos questions, veuillez contacter notre Assistance
technique. Conservez votre numéro KSN (numéro assistance
Kodak) à portée de main. Vous trouverez votre numéro KSN
sur l'imprimante, en soulevant la trappe d'accès comme indiqué.
www.kodak.com/go/aiosupport
KODAK SERVICE NUMBER
F330065
25
Troubleshooting
Fehlerbehebung
Dépannage
Problemen oplossen
NL
Als u vragen hebt over problemen met dit apparaat, ga dan naar www.kodak.com/go/5500aiosupport
PROBLEEM:
Ik kan geen kalibratievel afdrukken.
OPLOSSING:
Indien noodzakelijk kunt u er als volgt voor zorgen dat er een kalibratievel wordt afgedrukt:
1. Druk op Menu, selecteer Calibrate Printer (Printer kalibreren) en druk op OK.
2. Selecteer Print Calibration Page (Kalibratiepagina afdrukken) en druk op OK.
3. Leg de afdruk in de linkerhoek aan de achterzijde van de glasplaat.
4. Sluit de scannerklep en druk op START (Waarschuwig).
PROBLEEM:
Het kalibratievel is afgedrukt op normaal wit papier.
OPLOSSING:
U kunt de kalibratie uitvoeren op normaal wit papier en op fotopapier.
1. Leg de afdruk in de linkerhoek aan de achterzijde van de glasplaat.
2. Sluit de scannerklep en druk op START (Waarschuwig).
PROBLEEM:
Ik kan niet op het gewenste papiertype afdrukken.
OPLOSSING:
Controleer of de fotopapierlade is vastgeklikt. Als dit zo is, brandt het groene lampje van de fotopapierlade. Als de
fotopapierlade is vastgeklikt, wordt alles afgedrukt via deze lade. Als u wilt afdrukken via de hoofdlade, trekt u de
fotopapierlade naar buiten door het deksel van de fotopapierlade op te tillen en de papierlade naar u toe te trekken.
PROBLEEM:
Er is een papierstoring opgetreden.
OPLOSSING:
1. Druk de lipjes van de klep op de achterkant in en verwijder de klep.
2. Trek voorzichtig het papier uit de rollen. BELANGRIJK: Als het papier tijdens het verwijderen scheurt, moet u de
binnenkant van de printer controleren op afgescheurde stukken papier en die verwijderen. Als niet alle stukken
afgescheurd papier zijn verwijderd, bestaat de kans dat er zich meer papierstoringen zullen voordoen.
3. Zet de klep op de achterkant terug. Druk de klep voorzichtig naar voren tot deze vastklikt.
Is uw probleem niet opgelost?
KODAK SERVICE NUMBER
Als u meer informatie nodig hebt, neem dan contact op met de
technische ondersteuning en houd uw KSN-nummer bij de hand.
U vindt het KSN-nummer op de unit. Til de printerklep omhoog,
zoals aangegeven.
26
www.kodak.com/go/aiosupport
F330065
More accessories
More options
More convenience
Mehr Zubehör
Mehr Optionen
Mehr Komfort
Plus d'accessoires
Plus d'options
Plus pratique
Meer accessoires
Meer opties
Meer gemak
Wireless
2.0
Bluetooth USB
adaptor
The KODAK EasyShare All-in-One Printer gives you more. Be sure to visit our online store to select from our full line of
supplies and accessories at www.kodak.com/go/AiO
- Kodak's inkjet photo paper Get prints that look great the first time with Kodak's unique backprint technology that
automatically enables optimised prints.
- Value packs Save up to 50% on everything you print and pay as little as 7p per print with our ink and paper value packs.
- Wireless adaptor Go wireless with the Kodak wireless 2.0 USB Bluetooth adaptor.
Note: A USB 2.0 cable is required to connect your Kodak All-in-One printer to your Windows or Macintosh OS computer.
Available in the Kodak online store or see your local retailer.
Mit dem KODAK EasyShare All-in-One-Drucker haben Sie noch mehr Möglichkeiten. Besuchen Sie unbedingt unseren Online
Shop, und wählen Sie aus unserer umfangreichen Palette an Produkten aus: www.kodak.com/go/AiO
- Kodak Inkjet-Fotopapier Holen Sie das Optimale aus Ihren Bildern heraus. Durch die Rückseitenaufdrucke auf den Kodak
Inkjet-Papieren wird die Papierart automatisch erkannt, und der Drucker stellt sich auf das entsprechende Papier ein.
- Vorteilspacks Dank unserer Vorteilspacks aus Tintenpatroneund Papier sparen Sie bis zu 50 % bei jedem Ausdruck und
somit bares Geld.
- Wireless-Adapter Kabellose Technologie mit dem Kodak Wireless 2.0 USB Bluetooth-Adapter.
Hinweis: Sie benötigen ein USB 2.0-Kabel, um Ihren Kodak All-iOne-Drucker an einen Windows- oder Macintosh-Computer
anzuschließen.
L'imprimante multifonction Kodak EasyShare vous offre encore plus. Consultez notre boutique en ligne pour choisir parmi
notre ligne complète d'accessoires et de consommables, sur notre site Internet à l'adresse suivante : www.kodak.com/go/AiO
- Papier photo jet d'encre Kodak Obtenez des tirages réussis premier coup grâce à la technologie unique d'impression au
verso Kodak qui permet des tirages automatiquement optimisés.
- Lots spéciaux Value Packs Economisez jusqu'à 50 % sur tous vos tirages et payez moins de 10 centimes par tirage grâce
à nos lots spéciaux Value Pack encre et papier.
- Adaptateur sans fil Passez au sans fil avec l'adaptateur sans fil Kodak. Adaptateur Bluetooth USB 2.0.
Remarque: un câble USB 2.0 est nécessaire pour brancher votre imprimante multifonction Kodak à votre ordinateur Windows
ou Macintosh OS. Disponible sur la boutique en ligne Kodak o auprès de votre revendeur Kodak le plus proche.
De KODAK EasyShare All-in-One printer biedt u meer. Ga naar onze online shop op www.kodak.com/go/AiO om uw keuze te
maken uit ons volledige assortiment benodigdheden en accessoires.
- Kodak-inkjetfotopapier Afdrukken die er meteen de eerste keer geweldig uitzien dankzij de unieke backprint-technologie
van Kodak die automatisch voor optimale afdrukken zorgt.
- Voordeelpakketten Bespaar tot 50% op al uw afdrukken en betaal slechts 10 cent per afdruk met onze voordeelpakketten
met inkt en papier.
- Draadloze adapter Ga voor draadloos met de draadloze 2.0 USB Bluetooth-adapter van Kodak.
Opmerking: U hebt een USB 2.0-kabel nodig om uw Kodak All-in-One printer aan te sluiten op uw computer met Windows
of Macintosh. Verkrijgbaar in de Kodak Online Shop of raadpleeg uw plaatselijke fotozaak.
www.kodak.com/go/aiosupport
27
Safety statement
Sicherheitsaussage
Déclaration de sûreté
Veiligheidsverklaring
- Read and follow these instructions before using KODAK products.
- Always follow basic safety procedures.
- Follow all warnings and instructions marked on the equipment.
WARNING STATEMENTS
- Do not expose this product to liquid, moisture, or extreme temperatures. KODAK AC adapters are intended for indoor use only. The use
of controls, adjustments, or procedures other than those specified herein may result in exposure to shock and/or electrical or mechanical
hazards.
- Keep ink cartridges out of reach of children. Ink may be harmful if swallowed.
- Do not place your AiO Printer on an unstable cart, stand, bracket, or table. Injury to persons and damage to the equipment may occur.
- The use of an accessory attachment that is not recommended by Kodak, such as an AC adapter, may cause fire, electric shock, or injury.
- Pushing objects through the equipment openings can result in an electric shock or risk of fire.
CAUTIONARY STATEMENTS
- Adjust only those controls covered in the operating instructions.
- Do not disassemble this product; there are no user-serviceable parts inside. Refer servicing to qualified service personnel.
- The AC adapter power supply is equipped with 3-wire grounding type plugs. If you cannot insert the plug into the power outlet, contact
an electrician to check or replace the power outlet.
- Do not plug the AC adapter into a household extension cord.
- If the power cord or plug is frayed or damaged, the equipment gets wet, or the equipment does not operate normally when the operating
instructions are followed, unplug your AiO Printer from the power outlet and contact Kodak qualified service personnel for further
instructions.
- For added protection from damage during a lightning storm, or any time when your AiO Printer and it's associated AC adapter will be left
unused for long periods of time, unplug the AC adapter from the power outlet and any attached fax line from the printer.
- To reduce the risk of fire, use only 26 AWG or larger telecommunication line cord.
- To prevent your AiO printer from overheating do not place it near a heat register, or install it in a cabinet without proper ventilation.
- Do not use your AiO Printer near water or spill liquid on it.
- Unplug the equipment from the wall outlet before cleaning.
- Dropping your AiO Printer may damage the housing and result in extensive damage that will require repair by a qualified technician to
restore normal operation.
- Excessive dust levels may damage internal parts.
For more information, go to www.Kodak.com/go/MSDS
- Avant d'utiliser les produits Kodak, veuillez lire et suivre les instructions suivantes.
- Respectez toujours les mesures de sécurité élémentaires.
- Veuillez lire attentivement et tenir compte de tous les avertissements et autres instructions figurant sur le matériel.
AVERTISSEMENTS
- Ne mettez jamais le produit en contact avec du liquide. Ne l'exposez pas à l'humidité ou à des températures extrêmes. Les adaptateurs
secteur KODAK sont destinés à une utilisation en intérieur uniquement. Les commandes, réglages ou instructions non spécifiés ici sont
susceptibles de provoquer des risques mécaniques, électriques ou d'électrocution.
- Tenez l'imprimante hors de portée des enfants. L'encre est nocive en cas d'ingurgitation.
- Ne placez pas l'imprimante multifonction EasyShare sur une surface instable. Cela pourrait endommager le matériel ou être à l'origine
de blessures corporelles.
- L'utilisation de tout autre accessoire non recommandé par Kodak, tel qu'un adaptateur secteur, pourrait provoquer des risques
d'incendie, d'électrocution ou de blessures.
- N'insérez pas d'objets dans les différentes ouvertures du produit, car vous risqueriez d'être électrocuté ou de provoquer un incendie.
PRECAUTIONS
- N'effectuez aucun autre réglage que ceux mentionnés dans les instructions d'utilisation.
- Ne tentez pas de démonter l'appareil vous-même. Aucune des pièces internes n'est réparable ou remplaçable par l'utilisateur. Faites appel
à des techniciens Kodak qualifiés.
- Le cordon de l'adaptateur secteur est équipé de prises de mise à la terre trifilaires. Si vous ne parvenez pas à brancher l'adaptateur à la
prise murale, contactez un électricien afin d'inspecter cette dernière ou de la remplacer.
- Ne branchez pas l'adaptateur secteur à un câble de rallonge.
- Si le cordon ou la fiche de l'adaptateur est endommagé(e), si le matériel a été en contact avec de l'eau ou s'il ne fonctionne pas
correctement alors que vous avez suivi les instructions d'installation, débranchez l'imprimante de la prise murale et contactez
un technicien Kodak qualifié pour obtenir plus d'instructions.
- Pour protéger l'imprimante multifonction EasyShare et son adaptateur secteur de tout dommage en cas d'orage ou d'inutilisation
prolongée, débranchez l'adaptateur secteur.
- Afin de réduire les risques d'incendie, utilisez un cordon de raccordement d'un calibre supérieur ou égal à 26 AWG (calibre américain).
- Pour empêcher la surchauffe de l'imprimante multifonction EasyShare, abstenez-vous de bloquer ou de couvrir ses différentes rainures
et ouvertures, éloignez-la de toute source de chaleur ou installez-la dans un meuble équipé des fentes de ventilation adéquates.
- Tenez l'imprimante multifonction EasyShare à l'abri des éclaboussures ou de tout contact avec de l'eau.
Als u vragen hebt over problemen met dit apparaat, ga dan naar www.Kodak.com/go/MSDS
28
www.kodak.com/go/aiosupport
Safety statement
Sicherheitsaussage
Déclaration de sûreté
Veiligheidsverklaring
- Lea y siga las precauciones y advertencias a continuación antes de usar cualquier producto Kodak.
- Siempre siga procedimientos de seguridad básicos.
- Siga todas las advertencias e instrucciones indicadas en el equipo.
ADVERTENCIA
- No exponga este producto a líquidos, humedad o temperaturas extremas. Los adaptadores de CA Kodak se han elaborado sólo para usarse
en interiores. El uso de controles, ajustes o procedimientos no incluidos en este documento, podrían dar como resultado la exposición a un
shock eléctrico o peligros mecánicos o eléctricos.
- Mantener fuera del alcance de los niños. La tinta es peligrosa si se ingiere.
- No coloque la impresora EasyShare AiO sobre un carro, soporte, repisa, mesa o superficie que no sea estable. De lo contrario, podría sufrir
lesiones o dañar el equipo.
- El uso de accesorios no recomendados por Kodak, como en el caso de un adaptador de CA, podría causar daños, lesiones, un shock
eléctrico o incluso originar un incendio.
- Insertar objetos por los orificios del equipo puede causar un shock eléctrico o incluso un incendio.
PRECAUCIÓN
- Ajuste sólo los controles que se incluyen en las instrucciones.
- No desmonte este producto. En el interior no hay ninguna pieza que pueda reparar el usuario. Si necesita reparar el equipo, hágalo revisar
por personal de servicio calificado de Kodak.
- El adaptador de CA cuenta con enchufes de 3 hilos de conexión a tierra. Si por algún motivo no puede insertar el enchufe en un
tomacorriente, comuníquese con un electricista para que revise o cambie el tomacorriente.
- No enchufe el adaptador de CA en un cable de extensión.
- Desenchufe la impresora EasyShare AiO. Comuníquese con personal de servicio calificado si detecta que los cables están dañados o
pelados, o si el equipo no opera correctamente aún habiendo seguido las instrucciones pertinentes.
- Para aumentar la protección en la eventualidad de tormentas eléctricas, o cuando no use la impresora EasyShare AiO y el adaptador de
CA por un largo período, desenchufe el adaptador del tomacorriente.
- Para evitar que la impresora EasyShare AiO se recaliente, no bloquee ni cubra las ranuras y orificios del equipo, no coloque la impresora
cerca de fuentes de calor, y no la instale en un gabinete que no cuente con ventilación adecuada.
- No use la impresora EasyShare AiO cerca del agua, ni permita que le salpique cualquier tipo de líquido.
- Desenchufe la impresora del tomacorriente antes de limpiarla.
- Si la impresora EasyShare AiO se cayera, se podría dañar la cubierta externa o las piezas internas de manera tal que un técnico calificado
debería repararla para que vuelva a funcionar normalmente.
- Las piezas internas del equipo se pueden ver dañadas por niveles excesivos de polvo.
Si necesita más información, vaya a www.Kodak.com/go/MSDS
- Lees deze waarschuwingen en volg deze instructies voordat u KODAK-producten gebruikt.
- Houd u altijd aan de fundamentele veiligheidsprocedures.
- Volg alle waarschuwingen en instructies op die op de apparatuur staan aangegeven.
WAARSCHUWING
- Stel dit product niet bloot aan vloeistof, vocht of zeer hoge of lage temperaturen. KODAK-wisselstroomadapters zijn alleen bedoeld voor
gebruik binnenshuis. Het gebruik van knoppen, bijstellingen of procedures anders dan hier aangegeven, kan leiden tot blootstelling aan
schokken en/of elektrische of mechanische gevaren.
- Buiten het bereik van kinderen houden. Inkt mag niet worden ingeslikt; dit is gevaarlijk.
- Plaats uw EasyShare all-in-one printer niet op een onstabiel(e) kar, standaard, rek of tafel. Dit kan leiden tot lichamelijk letsel en schade
aan de apparatuur.
- Het gebruik van extra accessoires die niet worden aanbevolen door Kodak, zoals een wisselstroomadapter, kan leiden tot brand,
elektrische schokken of letsel.
- Het is gevaarlijk objecten door de sleuven van de behuizing te duwen. Dit kan leiden tot brand of elektrische schokken.
LET OP
- Stel alleen die knoppen bij die in de bedieningsinstructies staan vermeld.
- Haal dit product niet uit elkaar; het bevat geen onderdelen die door de gebruiker kunnen worden onderhouden. Laat reparaties uitvoeren
door bevoegd onderhoudspersoneel van Kodak.
- De wisselstroomadapter heeft een geaarde driepolige stekker. Als u de stekker niet in een stopcontact kunt steken, neemt u contact op
met een elektricien om het stopcontact te controleren of te vervangen.
- Gebruik de wisse lstroomadapter niet in combinatie met een verlengsnoer.
- Haal de stekker van uw EasyShare all-in-one printer uit het stopcontact en neem contact op met bevoegd onderhoudspersoneel als het
snoer gerafeld is of de stekker beschadigd, of als de apparatuur nat is geworden of niet naar behoren functioneert, ondanks dat de
bedieningsinstructies zijn gevolgd.
- Haal de wisselstroomadapter uit het stopcontact als het onweert of als u uw EasyShare all-in-one printer en de bijbehorende
wisselstroomadapter langere tijd niet gebruikt. Zo beschermt u het apparaat beter tegen beschadigingen.
- Bescherm uw EasyShare all-in-one printer tegen oververhitting: dek de openingen en sleuven in de apparatuur niet af en plaats de
apparatuur niet vlak naast een verwarming of in een kast zonder voldoende ventilatie.
- Gebruik uw EasyShare all-in-one printer niet in de buurt van water en mors er geen vloeistoffen op.
- Haal de stekker uit het stopcontact als u de apparatuur gaat schoonmaken.
- Als uw EasyShare all-in-one printer valt, kan dat leiden tot beschadiging van de behuizing en aanzienlijke schade die alleen met behulp
van een bevoegde monteur kan worden verholpen.
- Grote hoeveelheden stof kunnen leiden tot beschadiging van interne onderdelen.
Ga voor meer informatie naar www.Kodak.com/go/MSDS
www.kodak.com/go/aiosupport
29
Limited warranty
Garantie limitée
Herstellergarantie
Beperkte garantie
Limited warranty
Kodak warrants Kodak consumer electronic products and accessories ("Products"), excluding batteries, to be free from malfunctions and defects
in both materials and workmanship for one year from the date of purchase. Coverage - Kodak will repair or replace Products if they fail to
function properly during the warranty period, as stated herein. Warranty service will include all labour as well as any necessary adjustments
sand/or replacement parts. If Kodak is unable to repair or replace a Product, Kodak will, at its option, refund the purchase price paid for the
Product provided the Product has been returned to Kodak together with proof of the purchase price paid. If replacement parts are used in making
repairs, those parts may be remanufactured. or may contain remanufactured materials. If it is necessary to replace the entire Product, it may be
replaced with a remanufactured Product. Remanufactured Products, parts and materials are warranted for the remaining warranty term of the
original Product, or 90 days after the date of repair or replacement, whichever is longer. Claiming - You may be requested to send Products, at
your expense, to the authorized service facility for the country where the Products were purchased. Retain the original dated sales receipt. Proof
of the date of purchase will be required with any request for warranty repair. YOUR STATUTORY RIGHTS AS A CONSUMER REMAIN
UNAFFECTED.
Garantie limitée
Kodak -Pathé (26, rue Villiot, 75594 Paris cedex) garantit que les produits électroniques grand public et les accessoires (" Produits "), à
l'exception des piles/batteries, sont exempts de tout défaut de fonctionnement ou vice de fabricatio n pendant un an à compter de la date
d'achat. Conservez l'original daté du reçu à titre de preuve d'achat. Une preuve de la date d'achat sera requise lors de toute demande de
réparation sous garantie. Couverture de la garantie limitée - Kodak réparera ou remplacera les Produits s'ils ne fonctionnent pas correctent
pendant la période de garantie, sous réserve des conditions et/ou limitations énoncées ici. Il pourra vous être demandé d’envoyer, à vos frais, les
Produits au service Kodak concerné du pays dans lequel ceux-ci ont été achetés. La garantie comprend la main-d’œuvre ainsi que les réglages
nécessaires et/ou les pièces de rechange. Si Kodak se trouve dans l'impossibilité de réparer ou de remplacer un Produit, Kodak pourra, à son
initiative, rembourser le prix du Produit sous réserve qu'une preuve d'achat soit fournie lors du renvoi dudit produit à Kodak. La réparation, le
remplacement ou le remboursement du Produit constituent les seuls recours dans le cadre de cette garantie. Les pièces de remplacement
éventuellement utilisées lors des réparations peuvent avoir été remises à neuf ou contenir des matériaux remis à neuf. Si le Produit complet doit
re remplacé, il peut être remplacé par un Produit remis à neuf. Les Produits, pièces ou matériaux remis à neuf sont sous garantie pour la durée
restante de la garantie originale ou pour une période de 90 jours après la réparation quelle que soit la durée la plus longue.
Herstellergarantie
Kodak garantiert, dass Kodak Elektronikprodukte für Endverbraucher ("Produkte"), mit Ausnahme von Batterien, für die Dauer von einem Jahrab
Kaufdatum frei von Funktionsstörungen, Material- und Produktionsfehlern sind. Bewahren Sie den Kaufbeleg auf. Sie benötigen ihn für Anfragen
bezüglich einer Reparatur unter Garantie. Umfang der Herstellergarantie - Kodak repariert oder ersetzt Produkte gemäß den hier angegebenen
Bedingungen, wenn diese Produkte innerhalb des Garantiezeitraums nicht mehr ordnungsgemäß funktionieren. Dazu kann es erforderlich
werden, dass Sie die Produkte auf Ihre Kosten an unseren Service in dem Land schicken müssen, in welchem die Produkte gekauft wurden. Die
Reparatur unter Garantie umfasst alle anfallenden Arbeitskosten sowie eventuell notwendige Korrekturen und/oder Ersatzteile. Kann Kodak nach
eigenem Ermessen ein Produkt nicht reparieren oder ersetzen, erstattet Kodak den gezahlten Kaufpreis für das Produkt, sofern das Produkt
zusammen mit einem Kaufbeleg für den gezahlten Kaufpreis an Kodak zurückgesendet wurde. Weitere Ansprüche neben Reparatur, Ersatz oder
Erstattung des Kaufpreises unter dieser Garantie, insbesondere Schadensersatzansprüche, sind ausgeschlossen, soweit diese nicht gesetzlich
zwingend vorgeschrieben sind. Wenn im Zuge einer Reparatur Ersatzteile verwendet werden, kann es sich bei diesen Teilen um
wiederaufgearbeitete Teile oder um Teile mit wiederaufgearbeiteten Materialien handeln. Wenn das gesamte Produkt ersetzt werden muss, kann
es durch ein wiederaufgearbeitetes Produkt ersetzt werden. Für wiederaufgearbeitete Produkte, Teile und Materialien gilt die Garantie für den
verbleibenden Garantiezeitraum des ursprünglien Produkts oder für 90 Tage nach Reparatur oder Ersatz, je nachdem, welches der längere
Zeitraum ist.
Beperkte garantie
Kodak Nederland B.V., De Kronkels 16A, 3752 LM Bunschoten Nederland, P.O Box 56 3752 GB Bunschoten (“Kodak”) garandeert dat
elektronische consumentenproducten ("Producten") van Kodak, exclusief batterijen, gedurende één jaar vanaf de aankoopdatum vrij zijn van
storingen en materiaal- en fabricagefouten. Bewaar het originele aankoopbewijs. Bij het aanvragen van reparaties onder de garantie dient een
bewijs van de aankoopdatum worden overlegd. Beperkte garantiedekking - De garantieservice is uitsluitend van kracht in het land waarin de
producten zijn gekocht. Kodak zal de Producten repareren of vervangen als deze tijdens de garantieperiode niet naar behoren werken, volgens de
in deze garantieverklaring gespecificeerde voorwaarden en/of beperkingen. Onder deze garantieservice valt al het arbeidsloon en alle eventuele
aanpassingen en/of vervangende onderdelen. Als Kodak een Product niet kan repareren of vervangen, zal Kodak, naar eigen inzicht, het
aankoopbedrag van het Product terugbetalen, mits het Product is teruggestuurd naar Kodak samen met een bewijs van het betaalde
aankoopbedrag. Reparatie, vervanging of terugbetaling van het aankoopbedrag is het enige verhaalsrecht dat u onder deze garantie hebt.
Als er voor de reparaties vervangende onderdelen worden gebruikt, kunnen dit gereviseerde onderdelen zijn of onderdelen die gereviseerde
materialen bevatten. Als het Product in zijn geheel moet worden vervangen, kan het door een gereviseerd Product worden vervangen. Voor
gereviseerde Producten, onderdelen en materialen wordt garantie verleend voor de resterende tijd van de oorspronkelijke garantietermijn of 90
dagen na de reparatie- of vervangingsdatum, afhankelijk van welke termijn langer is. Beperkingen - Deze garantie dekt geen omstandigheden
veroorzaakt door overmacht. Deze garantie vervalt als een defect het gevolg is van transportschade, ongevallen, wijzigingen, reparaties door
onbevoegden, verkeerd gebruik, misbruik, gebruik met niet-compatibele accessoires of toebehoren (zoals inkt of inkttanks van derden), het niet
naleven van de instructies van Kodak voor de bediening, het onderhoud of de herverpakking van dit product, het niet gebruiken van door Kodak
geleverde toebehoren (zoals adapters en kabels), of bij garantieaanspraken die na het verstrijken van deze garantie zijn ingediend.
KODAK GEEFT GEEN ANDERE UITDRUKKELIJKE OF STILZWIJGENDE GARANTIE VOOR DIT PRODUCT EN WIJST STILZWIJGENDE
GARANTIES MET BETREKKING TOT DE VERHANDELBAARHEID EN GESCHIKTHEID VOOR EEN BEPAALD DOEL AF. Als de uitsluiting van een
willekeurige stilzwijgende garantie niet rechtsgeldig is, is de duur van de stilzwijgende garantie één jaar vanaf de aankoopdatum of een langere
periode indien door de wet bepaald. De enige aansprakelijkheid van Kodak bestaat uit het, naar keuze van Kodak, repareren of vervangen van het
product of terugbetaling van het aankoopbedrag. Kodak aanvaardt geen enkele aansprakelijkheid voor enige bijzondere schade, gevolgschade of
incidentele schade die voortvloeit uit de verkoop, aankoop of het gebruik van dit product, ongeacht de oorzaak. Iedere aansprakelijkheid voor
bijzondere schade, gevolgschade of incidentele schade (met inbegrip van, maar niet beperkt tot, derving van inkomsten of winsten, kosten van
uitvaltijd, verlies van het gebruik van apparatuur, kosten van vervangende apparatuur, voorzieningen of diensten, of aanspraken van uw klanten
op dergelijke schade als gevolg van de aankoop, het gebruik of niet werken van dit product), ongeacht de oorzaak of inbreuk op een schriftelijke
of stilzwijgende garantie, wordt uitdrukkelijk verworpen. Uw rechten - In sommige landen of rechtsgebieden is uitsluiting of beperking van
incidentele schade of gevolgschade niet toegestaan, waardoor bovengenoemde beperking of uitsluiting mogelijk niet op u van toepassing is. In
sommige landen of rechtsgebieden is beperking van de duur van stilzwijgende garanties niet toegestaan, waardoor deze beperking mogelijk niet
op u van toepassing is. Deze garantie verleent u bepaalde rechten. U kunt echter ook andere rechten hebben, afhankelijk van het land of het
rechtsgebied waarin u woont. Uw wettelijke rechten worden niet aangetast. Buiten de Verenigde Staten en Canada - In andere landen dan de
Verenigde Staten en Canada, kunnen afwijkende bepalingen en voorwaarden voor deze garantie gelden. Tenzij er aan de koper schriftelijk
specifieke garanties zijn verstrekt door een onderneming van Kodak-, is er geen sprake van enige garantie of aansprakelijkheid buiten de wettelijk
opgelegde minimumvereisten, ook niet ingeval van gebreken, schade of verliezen als gevolg van nalatigheid of andere daden.
Install & register – then enjoy your rewards!
Register when prompted during your software installation or on the web at www.kodak.com/go/register –
and get two rewards:
• An exclusive offer on printer accessories
• Great support with tips, software upgrades, and more
It’s simple, and so rewarding!
Find everything for your printer at www.kodak.uk/go/printingsupplies
Faites l’installation et enregistrez-vous – puis profitez d’avantages exclusifs !
Inscrivez-vous au cours de l’installation du logiciel ou sur Internet et recevez deux cadeaux :
• Une offre exceptionnelle sur les accessoires pour imprimantes
• Une assistance efficace avec des trucs et astuces, des actualisations pour votre logiciel et bien
plus encore…
S’enregistrer c’est simple et plein d’avantages !
Tout ce dont vous avez besoin pour votre imprimante est sur www.kodak.fr/go/fournituresimprimante
Zuerst installieren & registrieren – dann unser Dankeschön genießen!
Führen Sie die Registrierung online oder während der Software-Installation durch, wenn Sie dazu aufgefordert werden, und erhalten Sie zwei Geschenke:
• Exklusives Angebot von Drucker-Accessoires
• Umfassender Support mit Tipps, Software-Upgrades und vielem mehr
Es geht ganz leicht und lohnt sich!
Alles für Ihren Drucker finden Sie auf www.kodak.de/go/druckerzubehoer
Installeer & registreer – én profiteer direct!
Vul tijdens de software-installatie of op internet de registratiekaart in wanneer u hierom wordt gevraagd en
ontvang 2 beloningen:
• Een exclusieve aanbieding van printer accessoires
• On-line support met tips, software upgrades en meer…
Heel simpel en buitengewoon handig en nuttig!
Vind alles voor je printer op www.kodak.nl/go/afdrukbenodigdheden
Any questions? Look here for answers:
www.kodak.com/go/5500aiosupport
User’s Guide - Look here for more detailed information on how to operate your All-in-One printer.
The User’s Guide is installed with your Kodak AiO software and is located:
Windows
Program Files
Kodak
Printer
Centre
Help
Macintosh Library
Documentation
Kodak AiO Printers
Technical Support - For printer support, please call 0870-2430270
Haben Sie Fragen? Antworten finden Sie hier:
www.kodak.com/go/5500aiosupport
Benutzerhandbuch - Genauere Informationen zur Bedienung des All-in-One-Druckers finden Sie hier.
Das Benutzerhandbuch wird zusammen mit der Kodak All-in-One-Software installiert und befindet sich unter:
Windows
Programme
Drucker
Printer
Center
Hilfe
Macintosh Library
Documentation
Kodak AiO Printers
Technischer Support - Den Drucker-Support erreichen Sie montags bis sonntags unter 069-5007-0035
Des questions ? Trouvez les réponses ici : www.kodak.com/go/5500aiosupport
Guide d'utilisation - Vous trouverez ici des informations plus détaillées sur l'utilisation de votre imprimante multifonction.
Le Guide d'utilisation est installé en même temps que le logiciel de votre imprimante multifonction Kodak et se trouve sous :
Windows
Program Files
Kodak
Imprimante
Center
Aide
Macintosh Library
Documentation
Kodak de la bibliothèque
Assistance technique - Pour obtenir de l'aide sur votre imprimante, appelez le 01 55 17 40 77
Hebt u nog vragen? Hier vindt u meer informatie:
www.kodak.com/go/5500aiosupport
Gebruikershandleiding - Hier vindt u meer informatie over de bediening van uw All-in-One printer.
De gebruikershandleiding wordt tegelijk met de Kodak AiO-software geïnstalleerd in de volgende map:
Windows
Program Files
Kodak
Printer
Center
Help
Macintosh Bibliotheek
Documentation
Kodak AiO Printers
Technische ondersteuning - Bel voor ondersteuning voor uw printer met 020-3469372
Printed in the U.S.A.
Windows® is a registered trademark of Microsoft Corporation
Macintosh® is a registered trademark of Apple Computer, Inc.
Gedruckt in den USA.
Windows® ist eine eingetragene Marke der Microsoft Corporation
Macintosh® ist eine eingetragene Marke von Apple Computer, Inc.
Eastman Kodak Company
Rochester, NY 14650, U.S.A
© Eastman Kodak Company, 2007
MC/MR/TM: Kodak, EasyShare.
Imprimé aux Etats-Unis
Windows® est une marque déposée de Microsoft Corporation
Macintosh® est une marque déposée de Apple Computer, Inc.
Gedrukt in de Verenigde Staten.
Windows® is een geregistreerd handelsmerk van Microsoft Corporation.
Macintosh® is een geregistreerd handelsmerk van Apple Computer, Inc.
1K2526
A